first steps in hardware hacking - oficinas turing
TRANSCRIPT
en-1.3
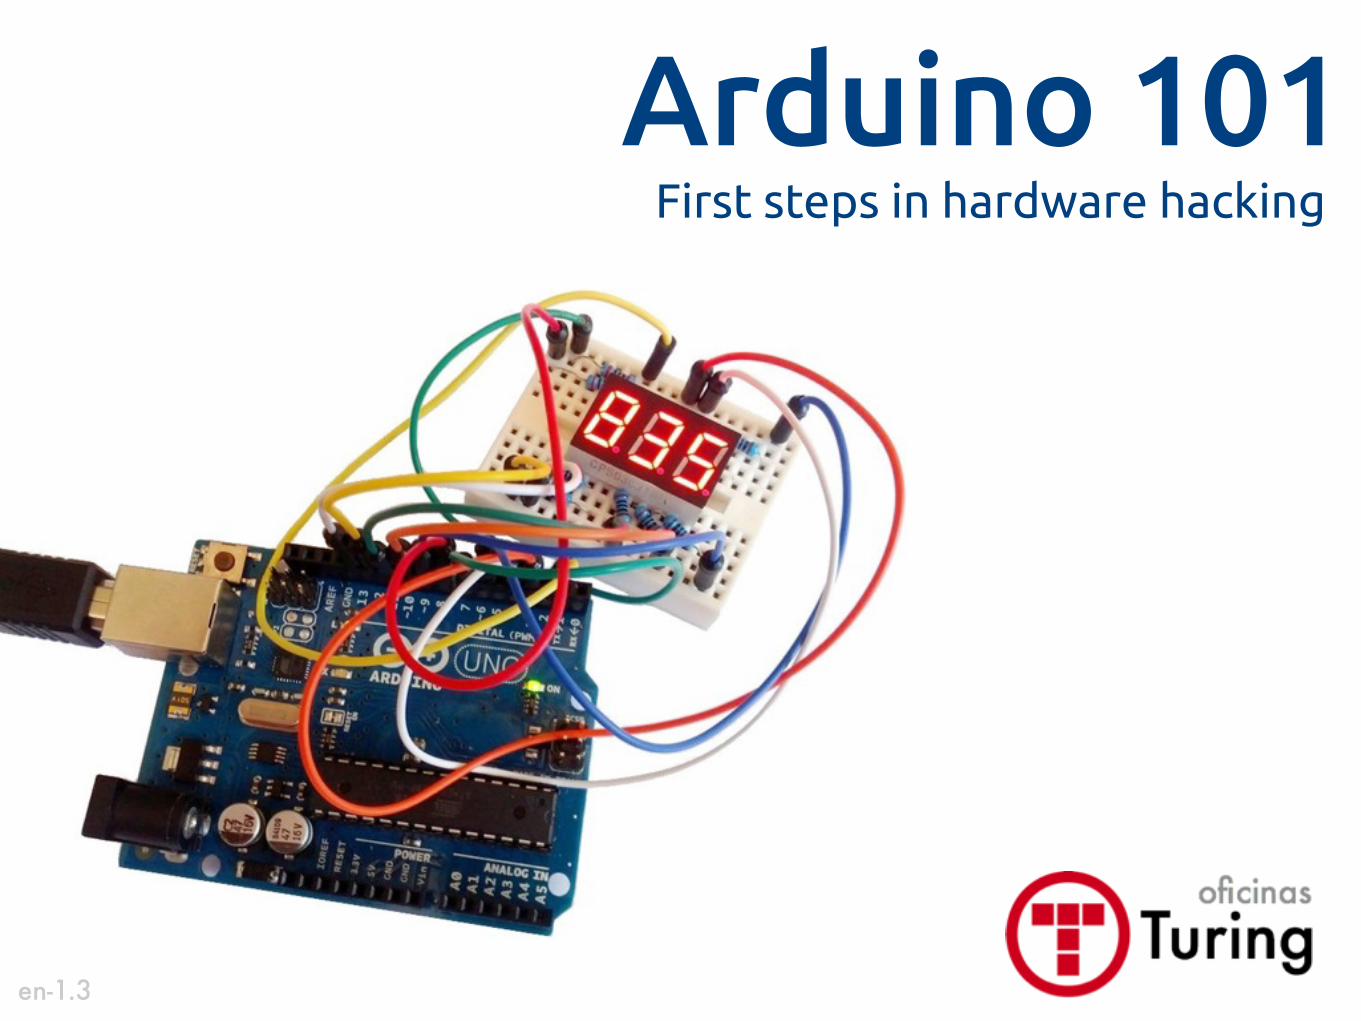
Arduino 101First steps in hardware hacking
Program
• Introductions
• What can you do with Arduinos?
• First circuit: Blink
• Coding Dojo with Arduino
• ABCofE: ABC of Electronics
• Tra!c light circuit
• Wrapping up
2

Introductions
3

Luciano Ramalho
• Consultant, teacher and speaker specializing in the Python language
4

Luciano Ramalho
• Self-taught programmer since 1978
• BASIC, ASM Z-80, Pascal, C, C++, Smalltalk, Perl, Java, Python, JavaScript, Ruby...
• Bachelors degree in Library and Information Sciences from ECA/USP
• Art and Programming Workshop (PSI-2615) at Poli/USP with Prof. Etienne Delacroix
5

Luciano Ramalho
• Owner and teacher of O"cinas Turing
• Partner and instructor at Python.pro.br
• Founding member of Garoa Hacker Clube
Turing.com.broficinas
6
Introduce yourselves
• Find out the name, interests and hobbies of the people near you
• Ask and tell your neighbors:
• Why are you interested in Arduinos?
• Do you have a project in mind?
5 minutes
7
Census
• Who knowsa lot about electronics?
• Who knowssomething about electronics?
• Who knowsa lot about programming?
• Who knowssomething about programming?
8
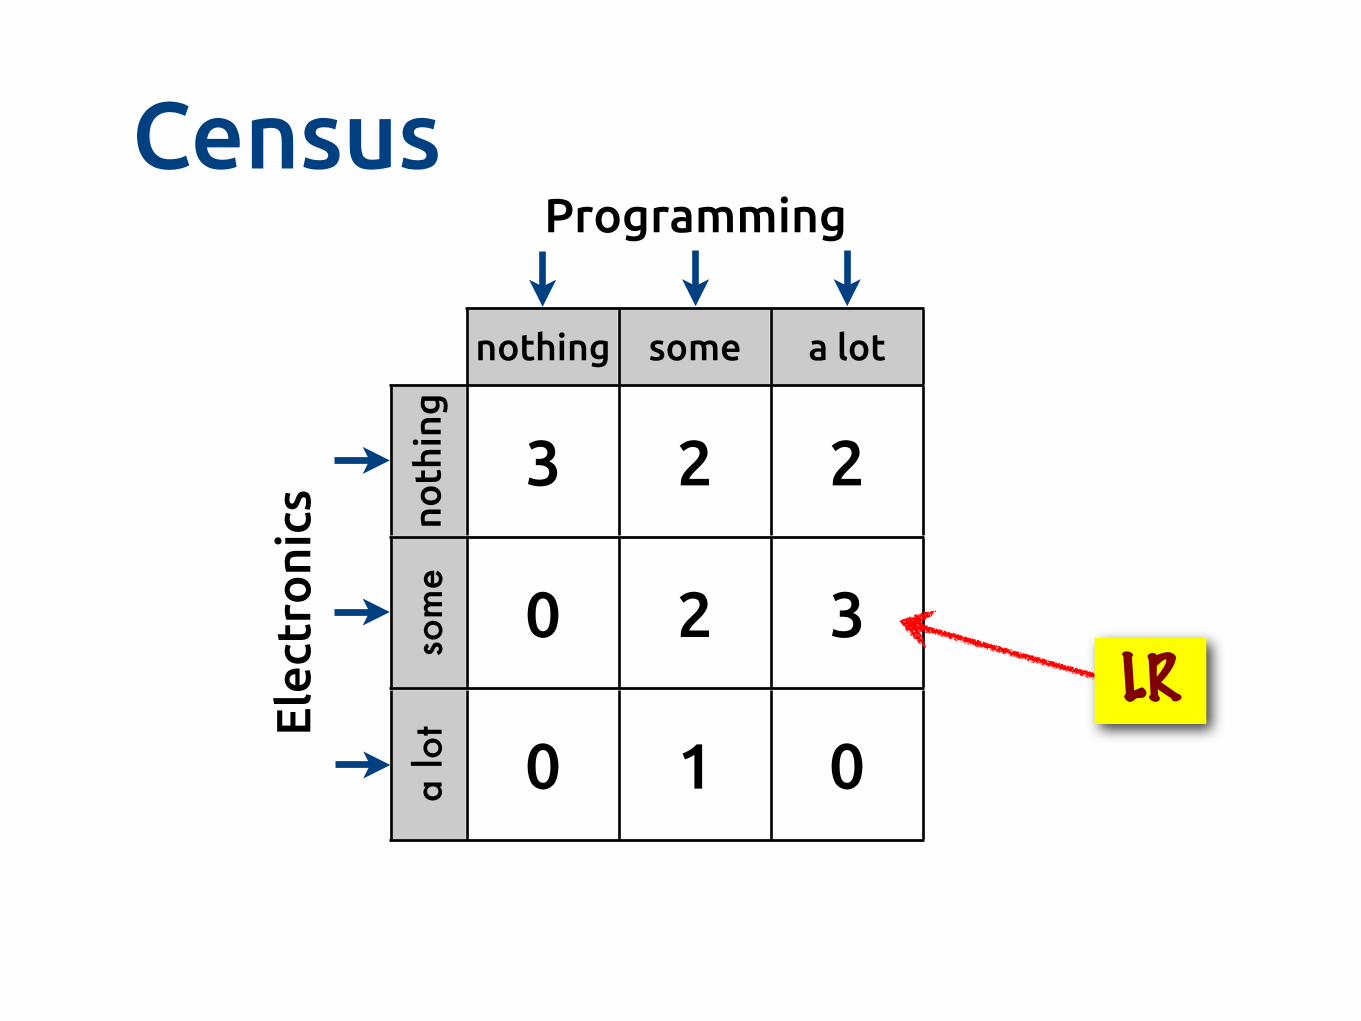
Census
nothing some a lot
3 2 2
0 2 3
0 1 0LR
Elec
tro
nics
Programming
noth
ing
som
ea
lot
9

What can you do with Arduinos?
10
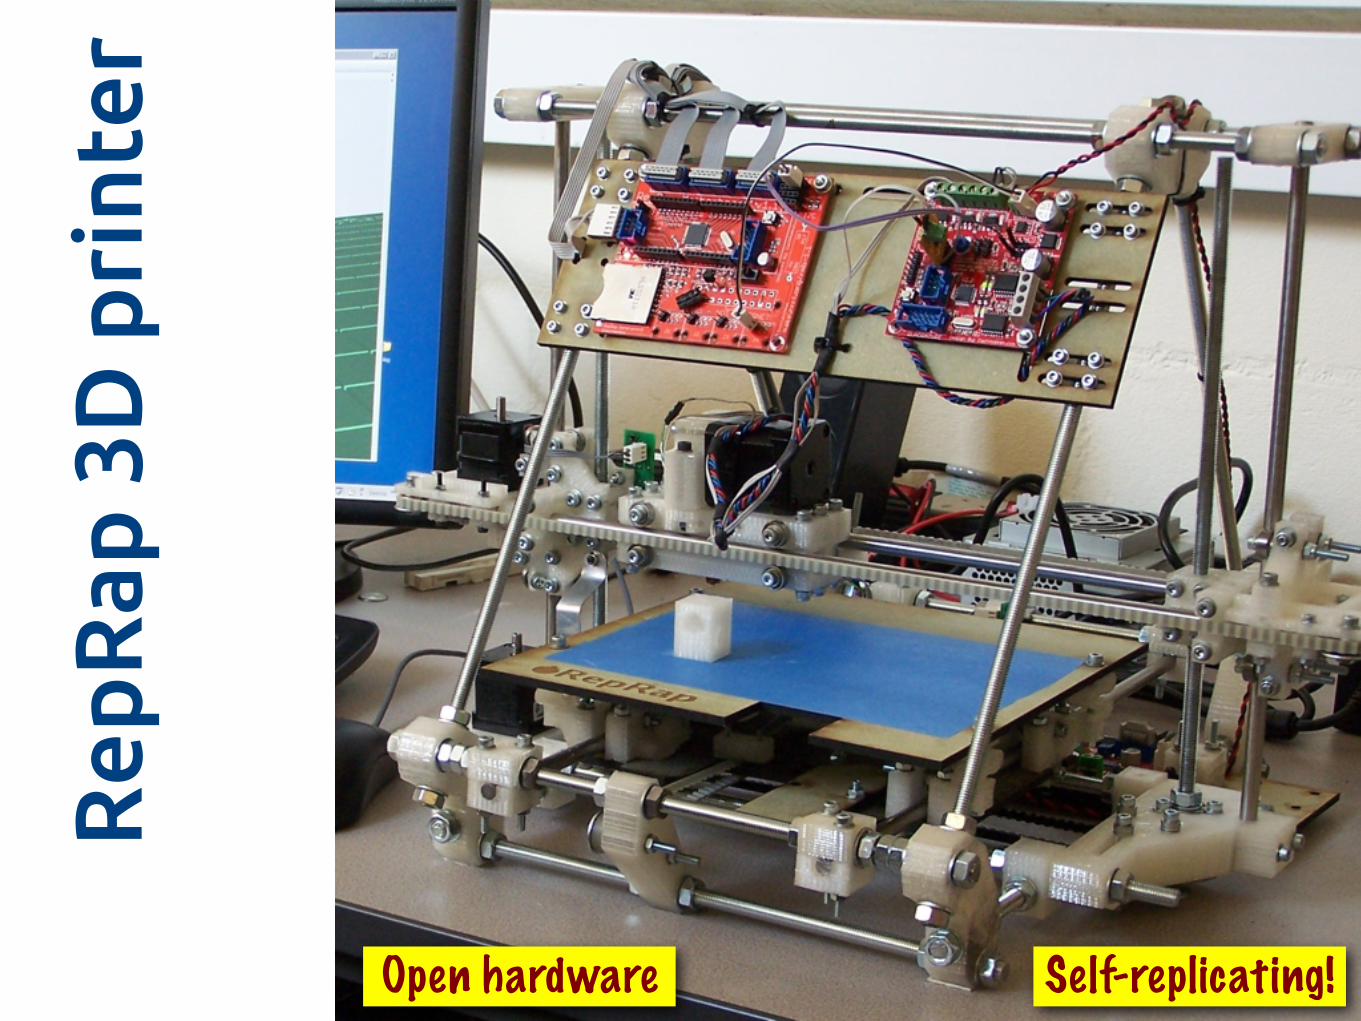
Rep
Rap
3D
pri
nter
Open hardware Self-replicating!
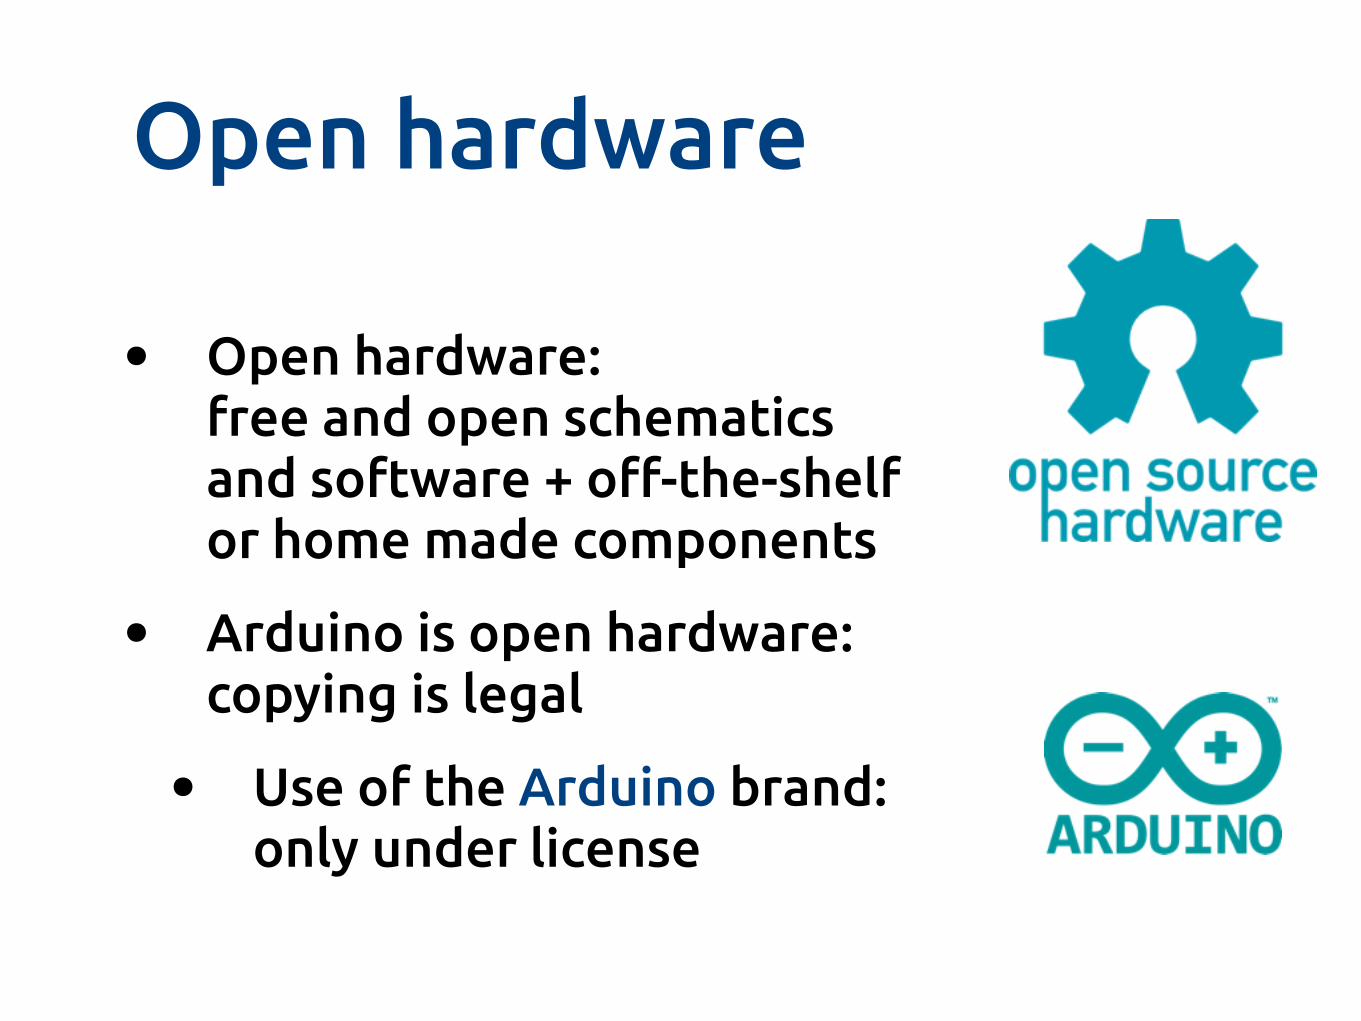
Open hardware
• Open hardware: free and open schematics and software + o#-the-shelf or home made components
• Arduino is open hardware: copying is legal
• Use of the Arduino brand: only under license
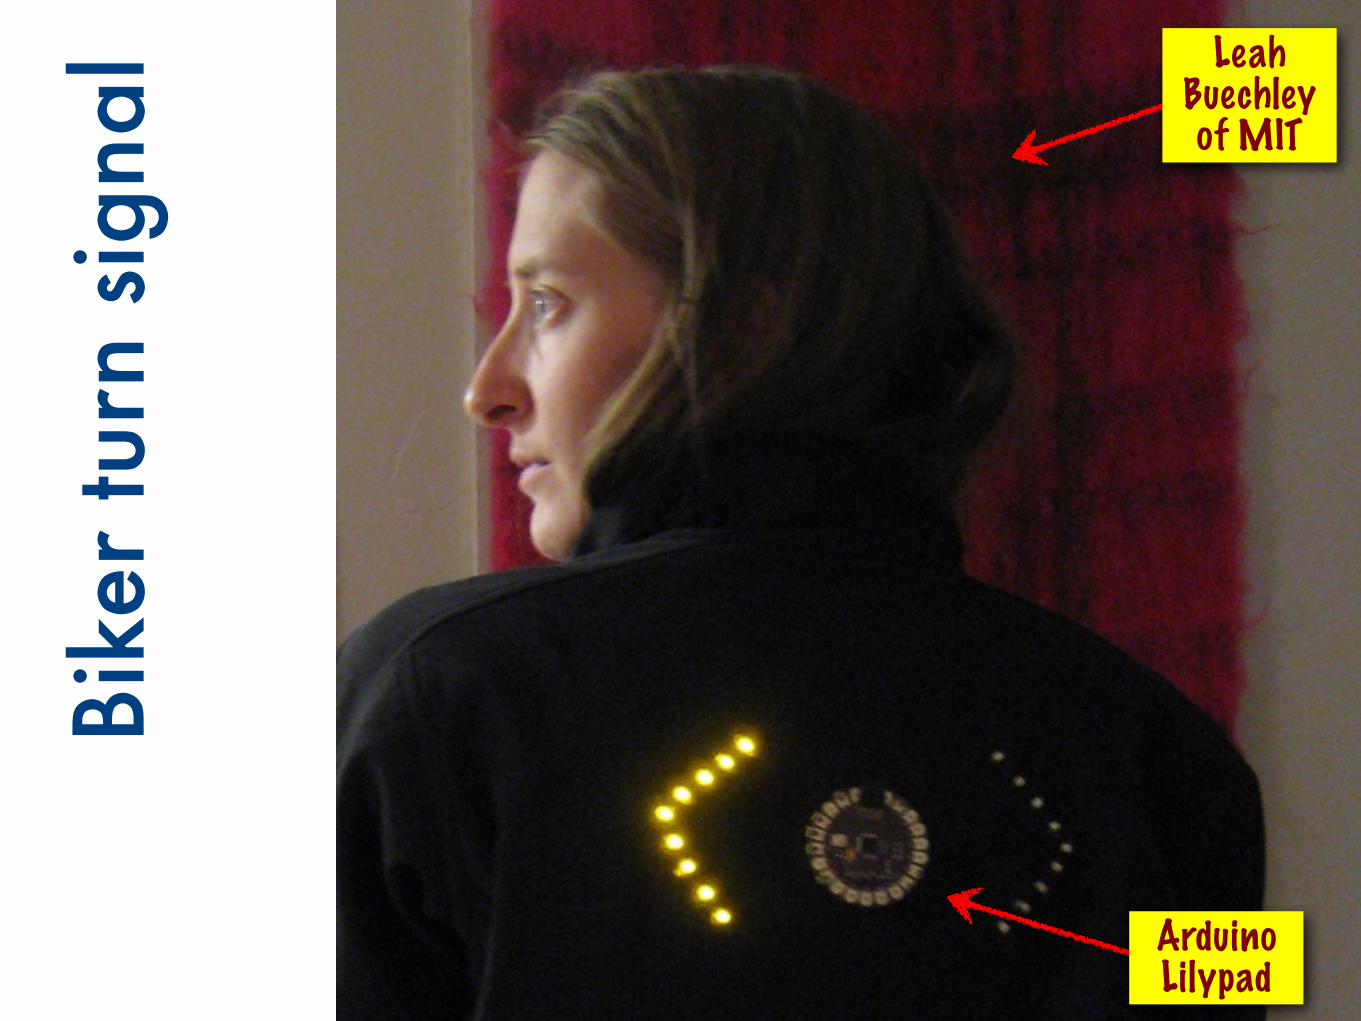
Bike
r tu
rn s
igna
l
ArduinoLilypad
Leah Buechley of MIT
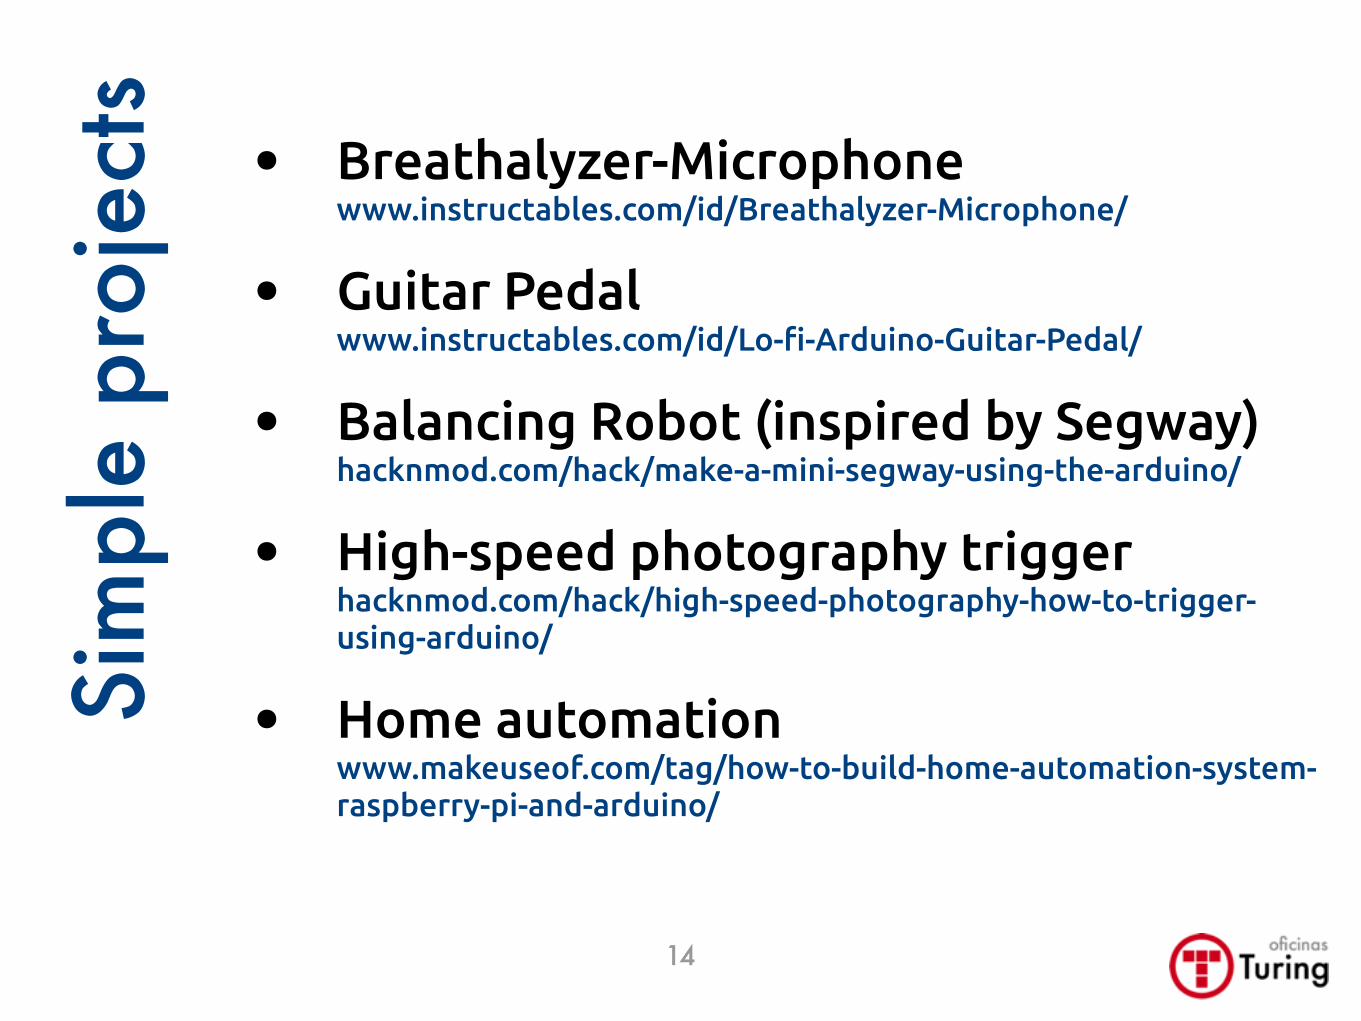
• Breathalyzer-Microphonewww.instructables.com/id/Breathalyzer-Microphone/
• Guitar Pedalwww.instructables.com/id/Lo-"-Arduino-Guitar-Pedal/
• Balancing Robot (inspired by Segway)hacknmod.com/hack/make-a-mini-segway-using-the-arduino/
• High-speed photography triggerhacknmod.com/hack/high-speed-photography-how-to-trigger-using-arduino/
• Home automationwww.makeuseof.com/tag/how-to-build-home-automation-system-raspberry-pi-and-arduino/
Sim
ple
proj
ects
14
15
That’s why the logo is∞

Parts
16
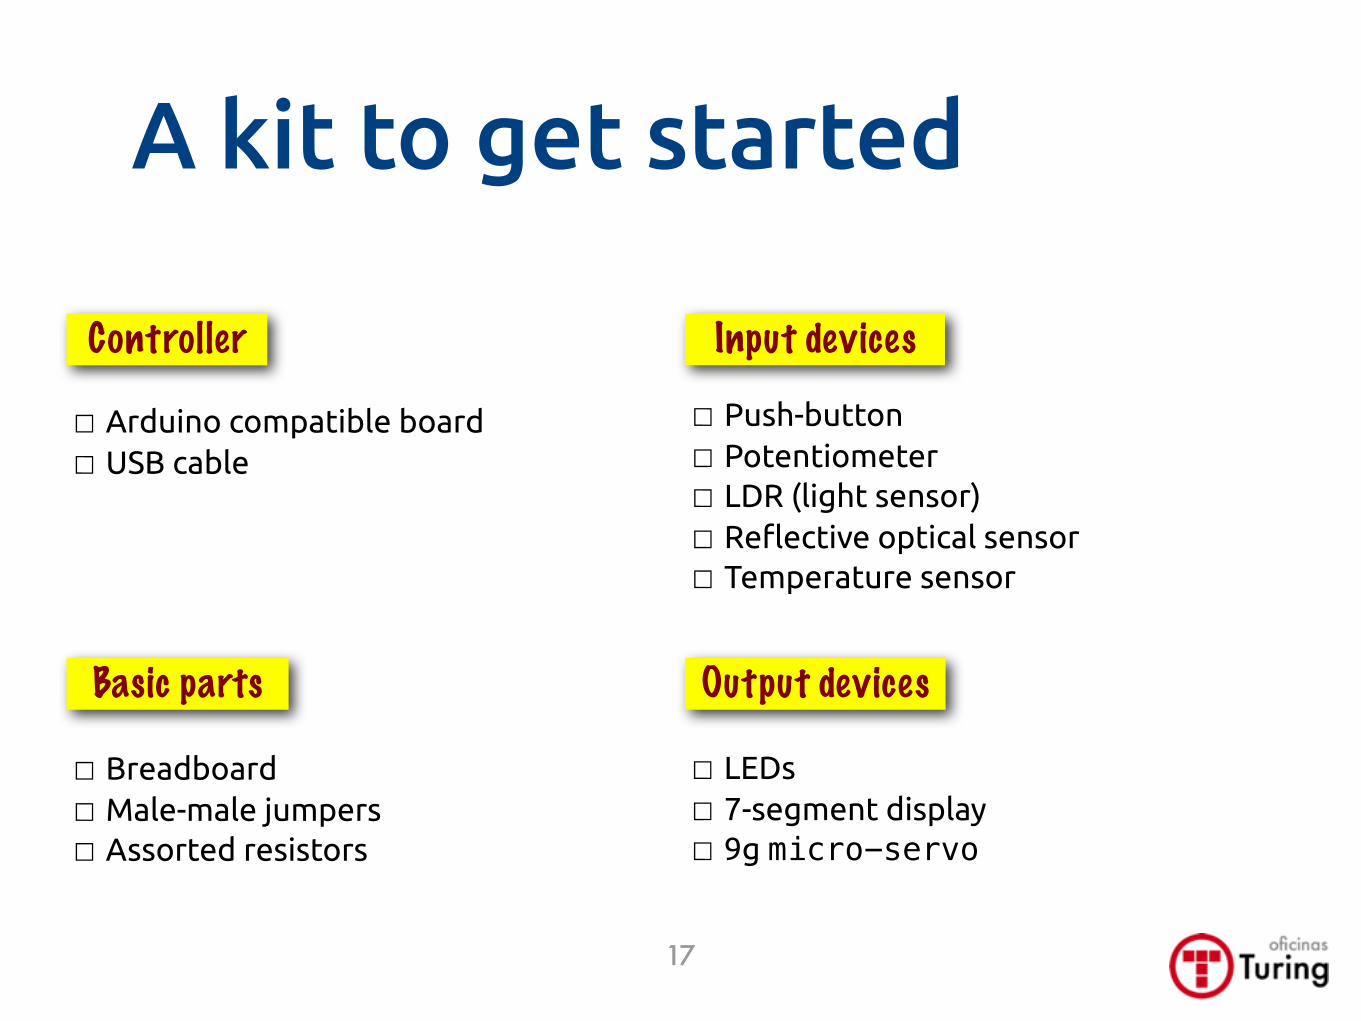
A kit to get started
LEDs 7-segment display 9g micro-servo
Arduino compatible board USB cable
Controller
Breadboard Male-male jumpers Assorted resistors
Push-button Potentiometer LDR (light sensor) Re!ective optical sensor Temperature sensor
Basic parts Output devices
Input devices
17

Arduino Uno R3
• Development board with ATmega328 microcontroller and auxliliary circuits
• Client USB interface (device)
• On-board voltage regulator for 7-12V (recommended)
18
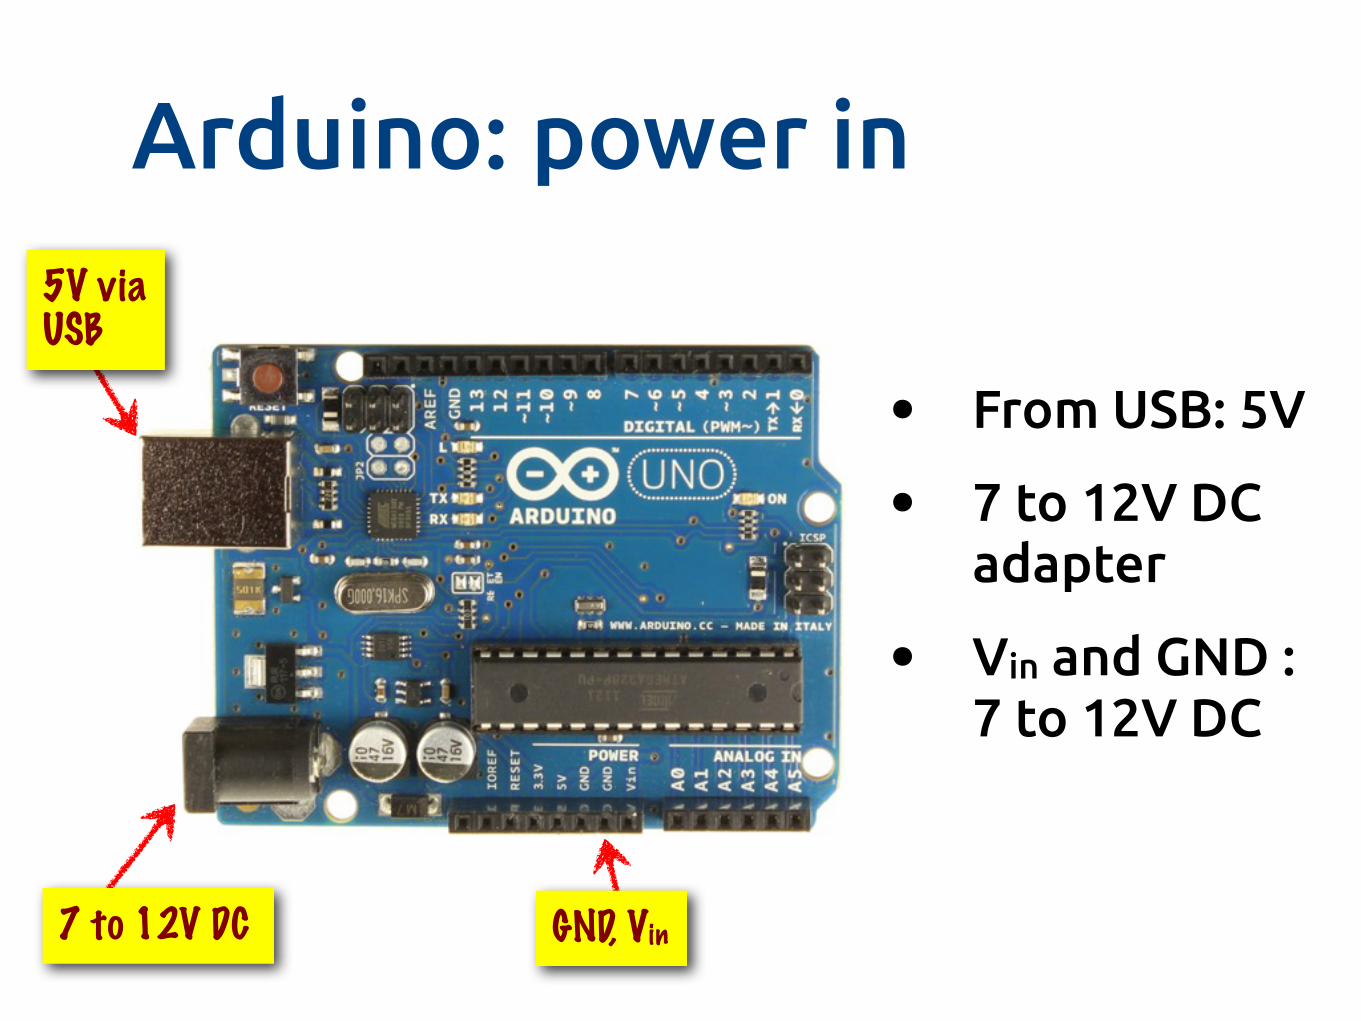
Arduino: power in
• From USB: 5V
• 7 to 12V DC adapter
• Vin and GND : 7 to 12V DC
5V via USB
7 to 12V DC19
GND, Vin
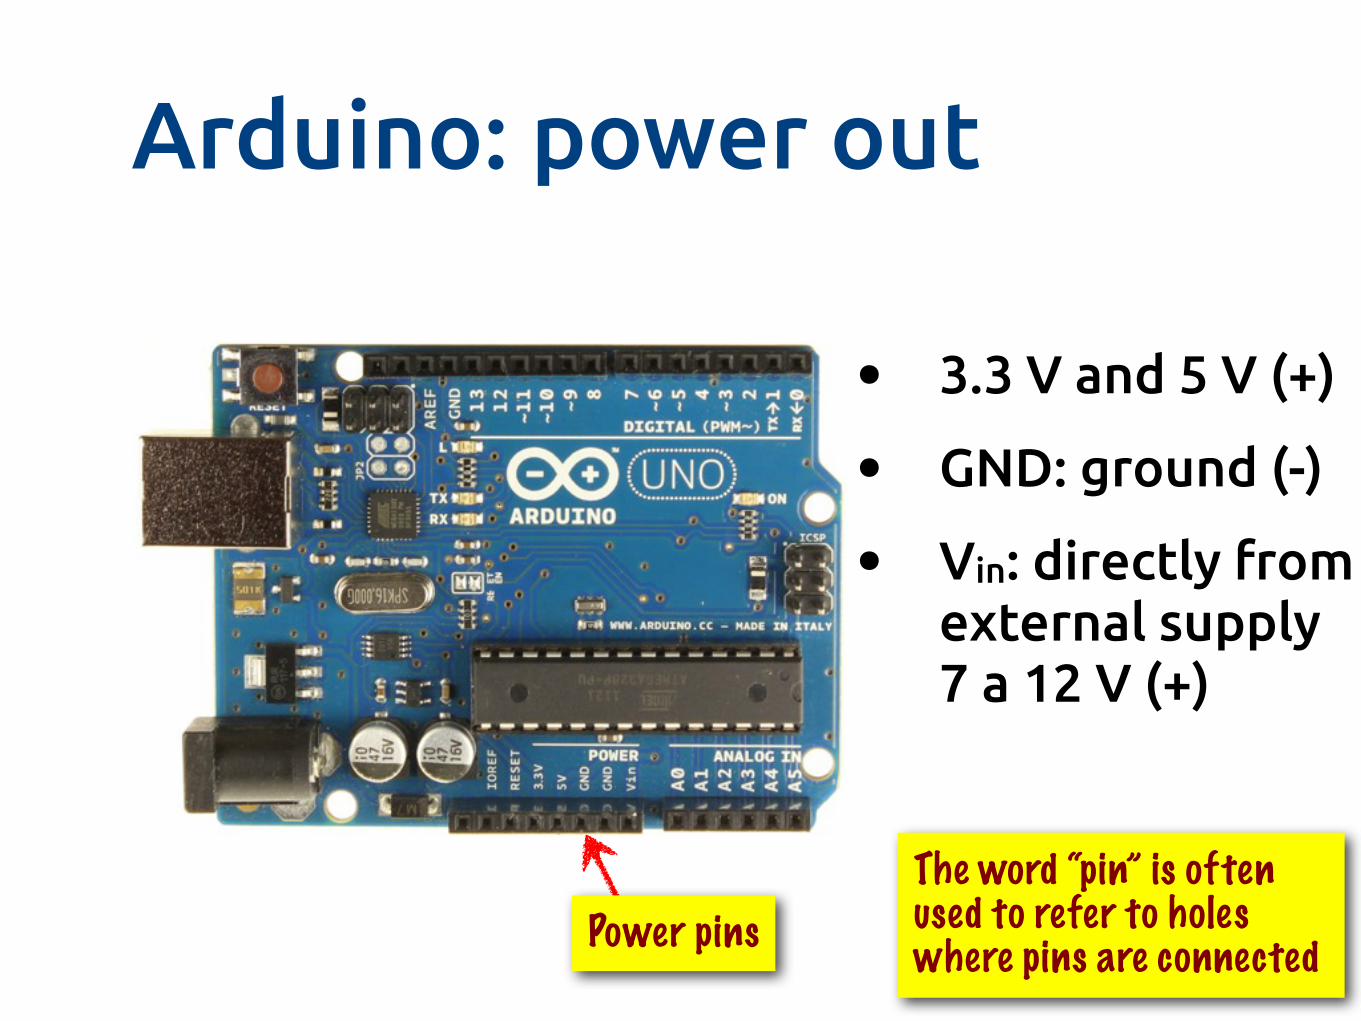
Arduino: power out
• 3.3 V and 5 V (+)
• GND: ground (-)
• Vin: directly from external supply 7 a 12 V (+)
20Power pins
The word “pin” is often used to refer to holes where pins are connected
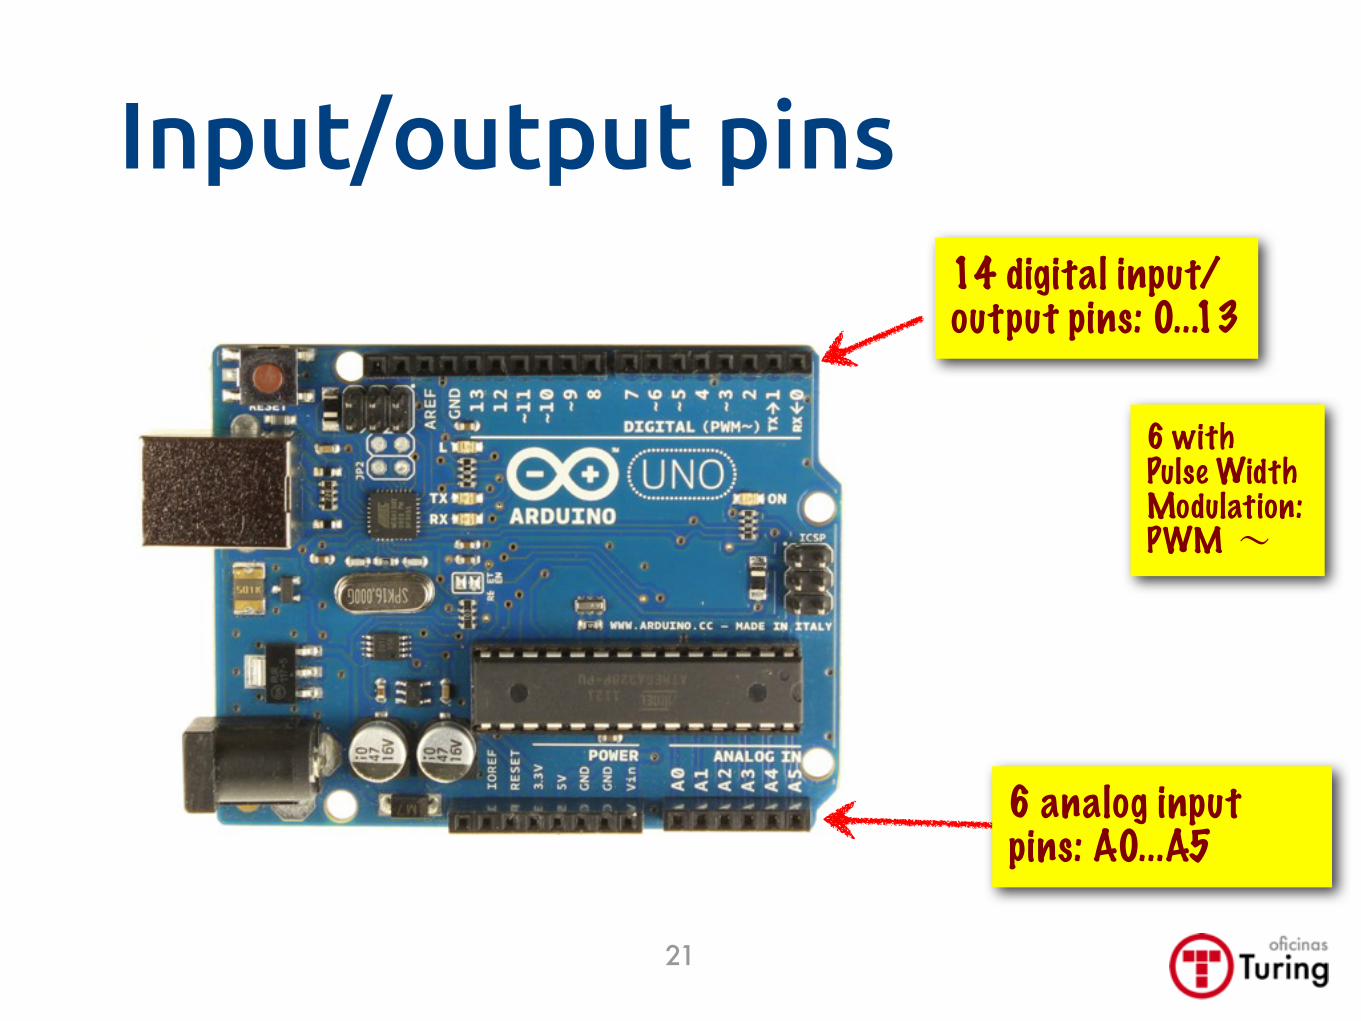
Input/output pins14 digital input/output pins: 0...13
6 analog input pins: A0...A5
6 with Pulse Width Modulation:PWM ~
21
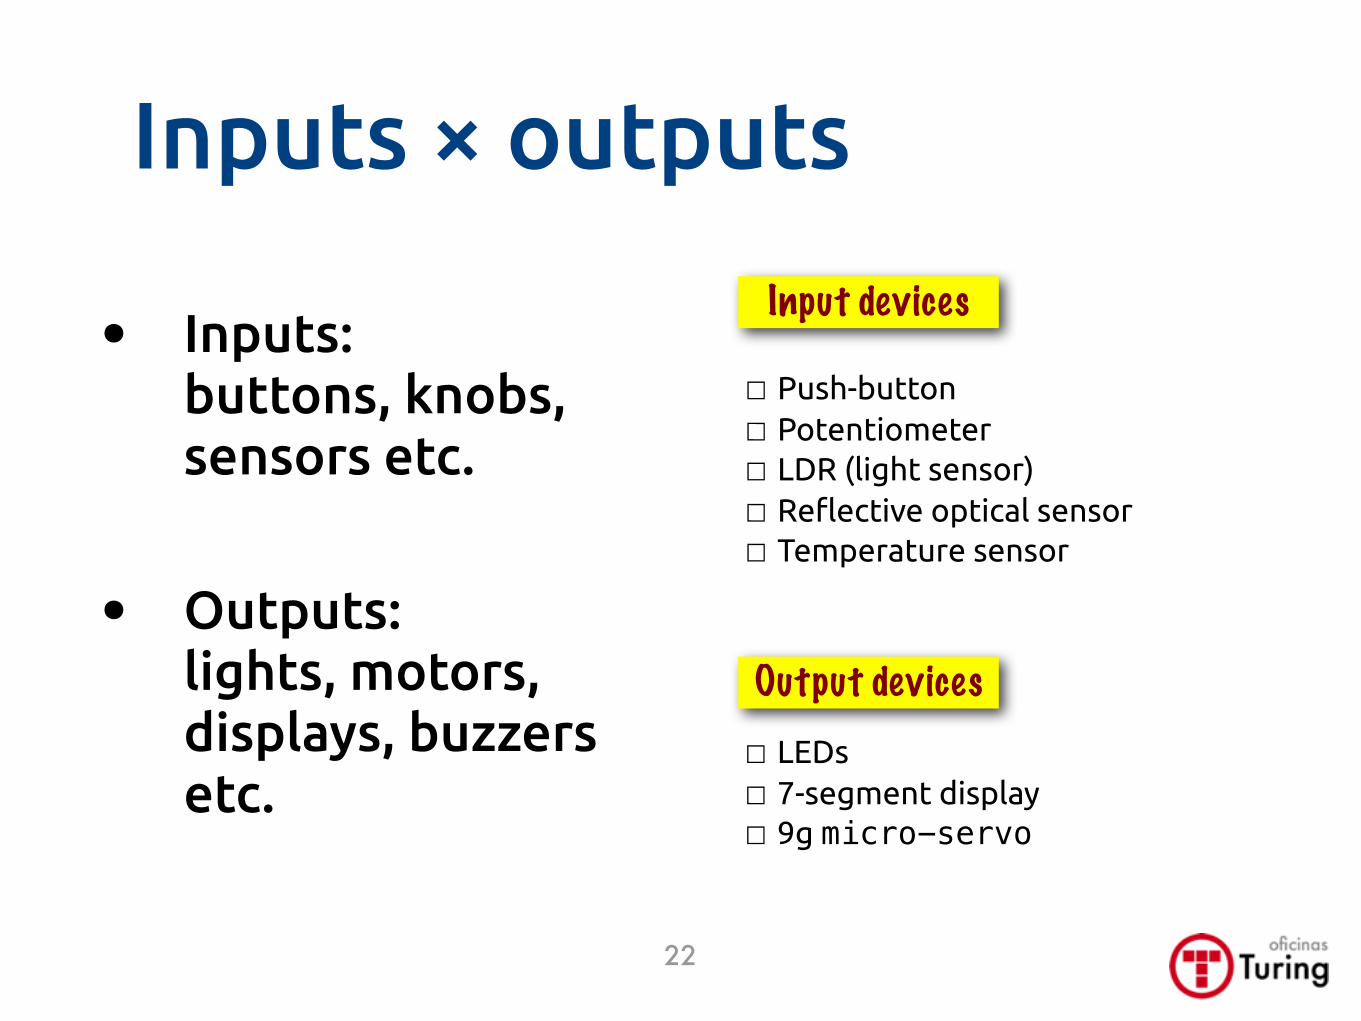
Inputs × outputs
• Inputs:buttons, knobs, sensors etc.
• Outputs:lights, motors, displays, buzzers etc.
22
LEDs 7-segment display 9g micro-servo
Push-button Potentiometer LDR (light sensor) Re!ective optical sensor Temperature sensor
Output devices
Input devices

Breadboard
• Known in Brazil as “protoboard”
• Available in di#erent sizes:
• 830 points
• 400 points
• etc. pictured: 400 points
23
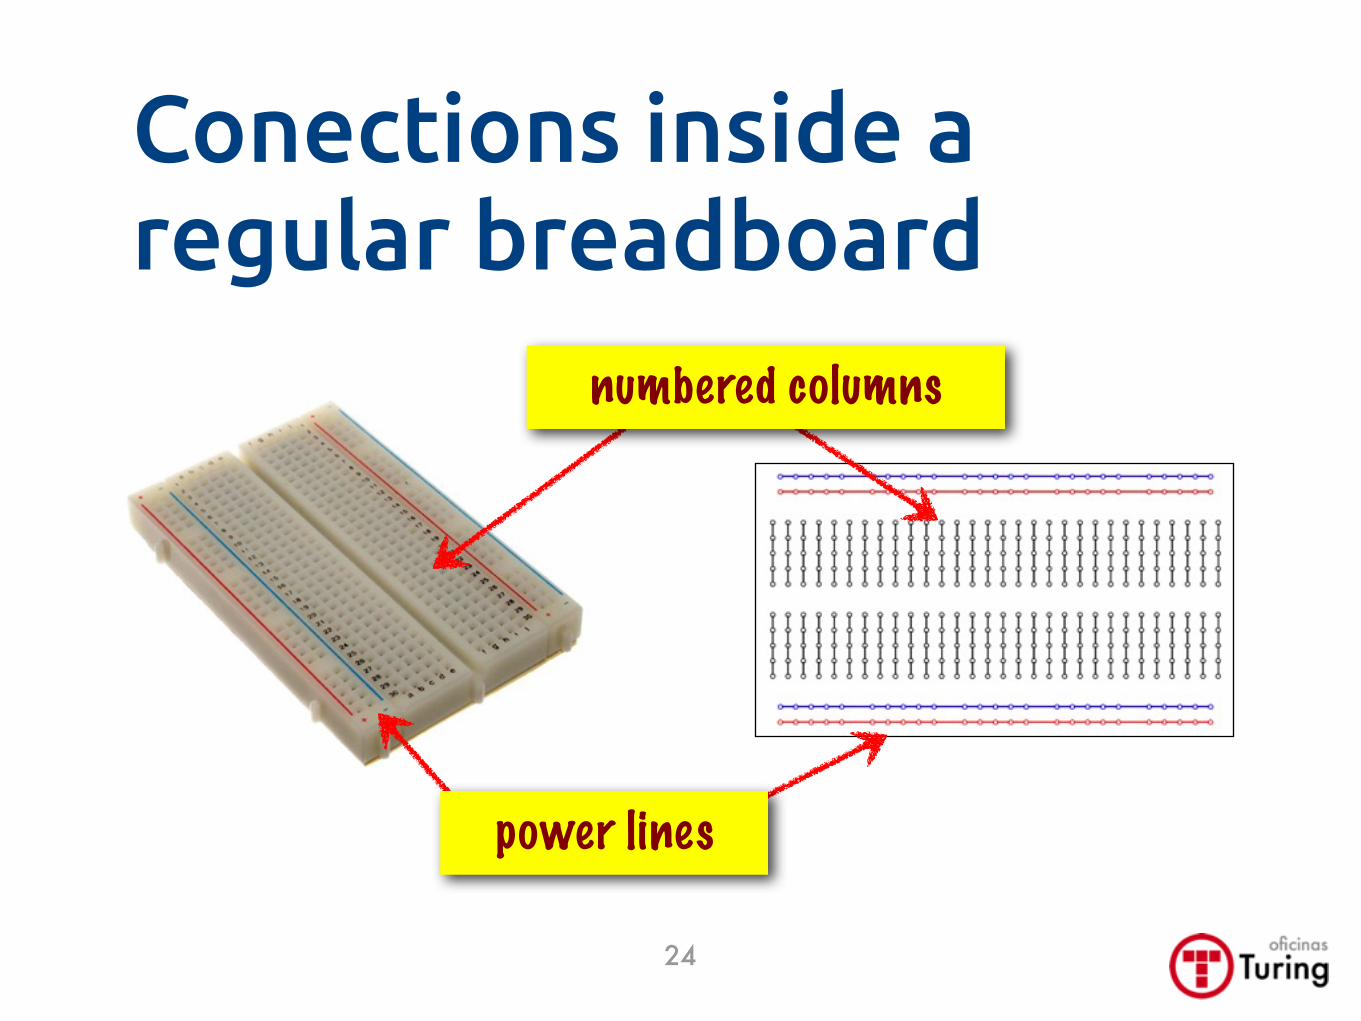
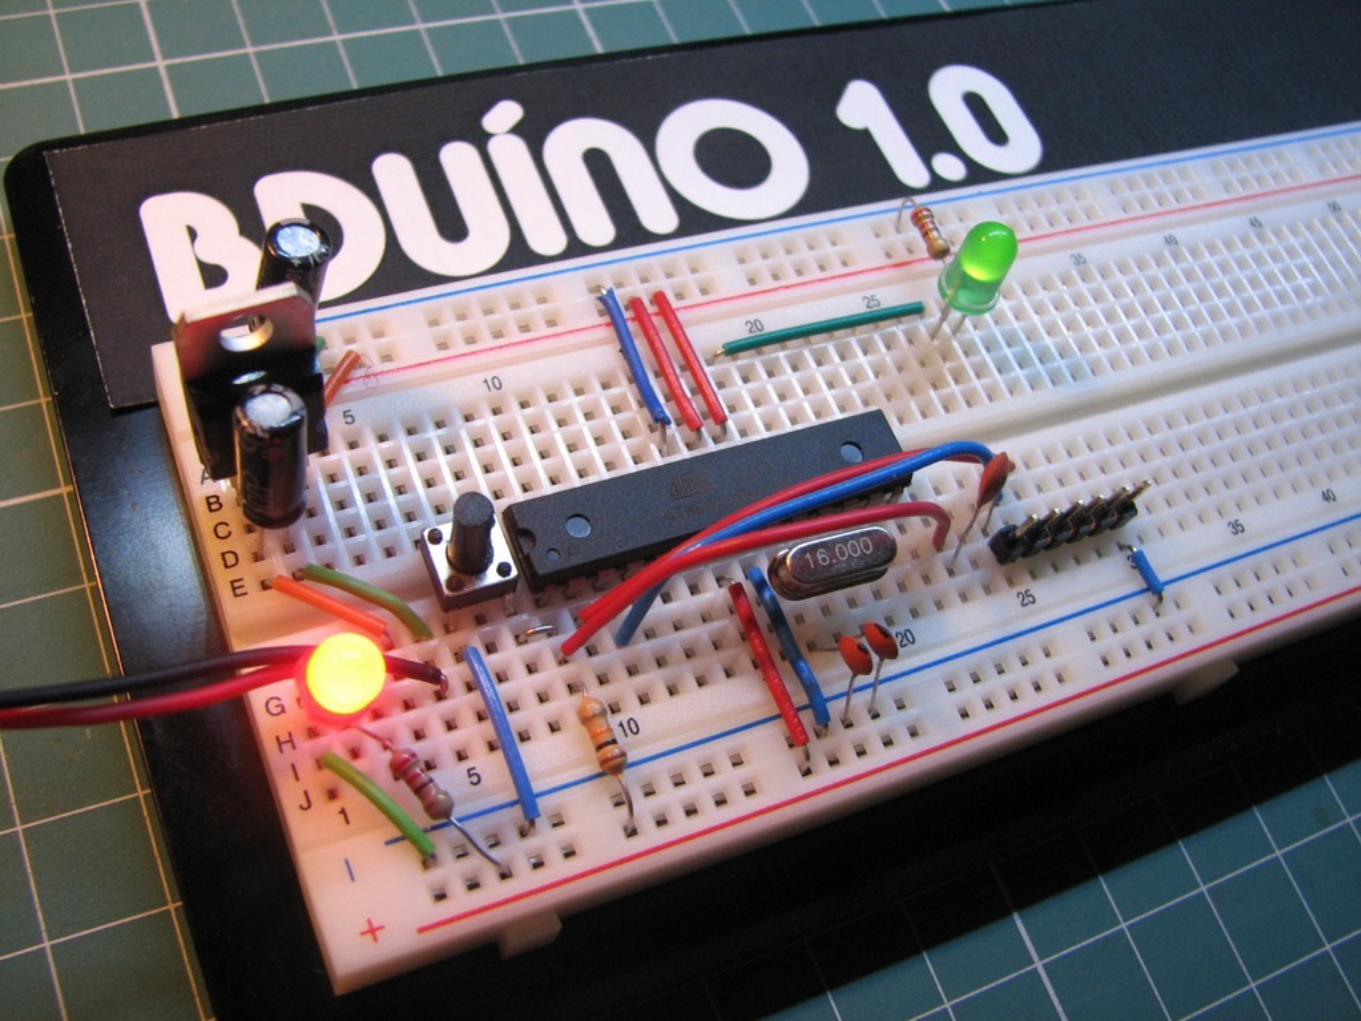
Conections inside a regular breadboard
power lines
numbered columns
24
25
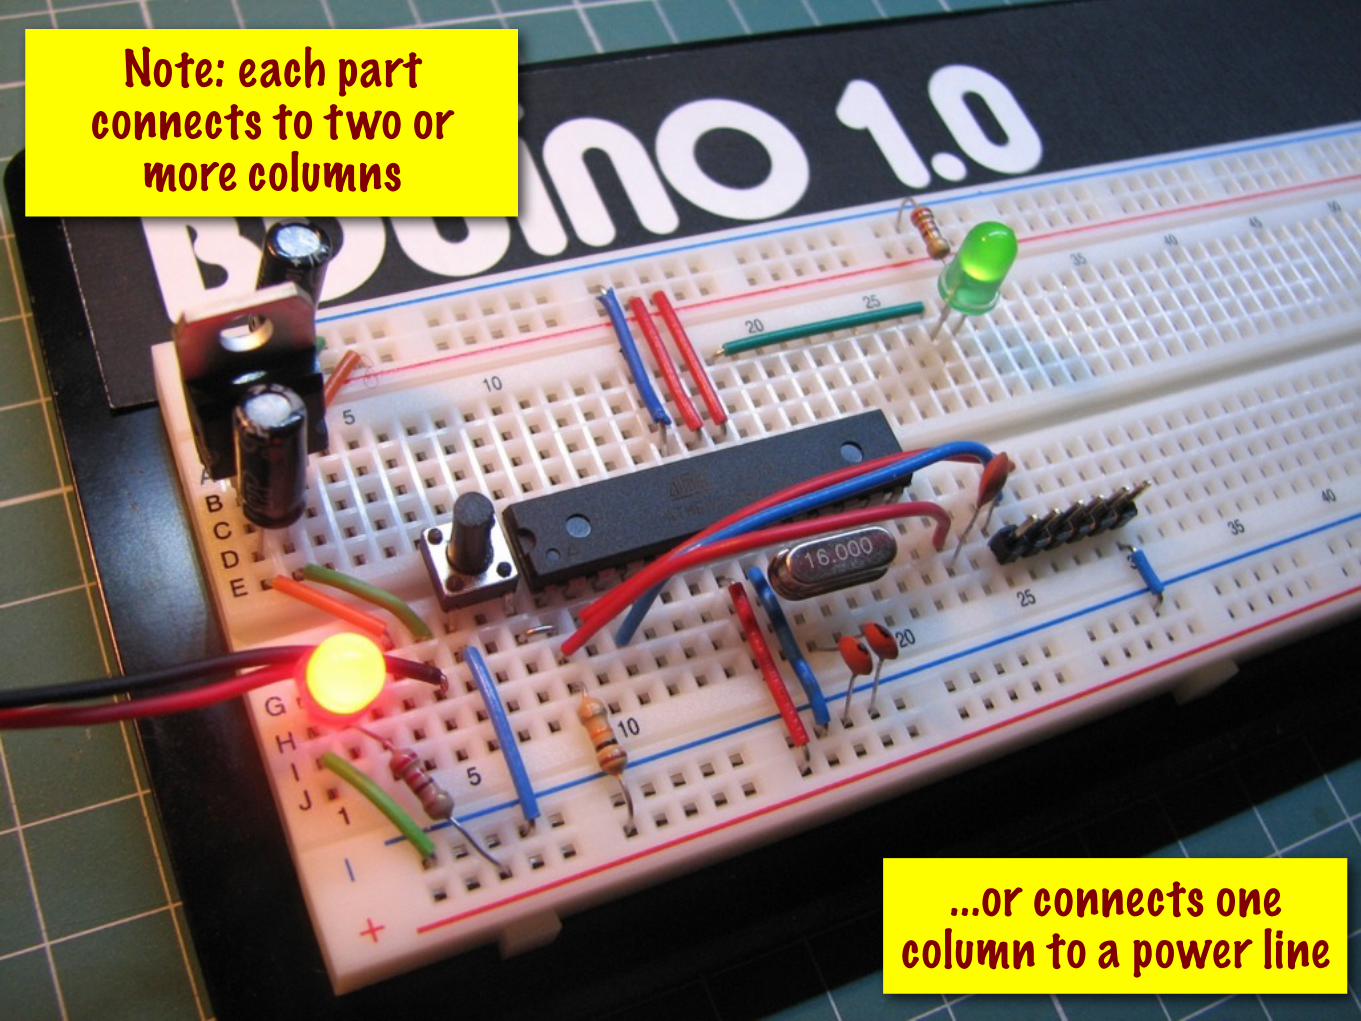
Note: each part connects to two or
more columns
...or connects one column to a power line
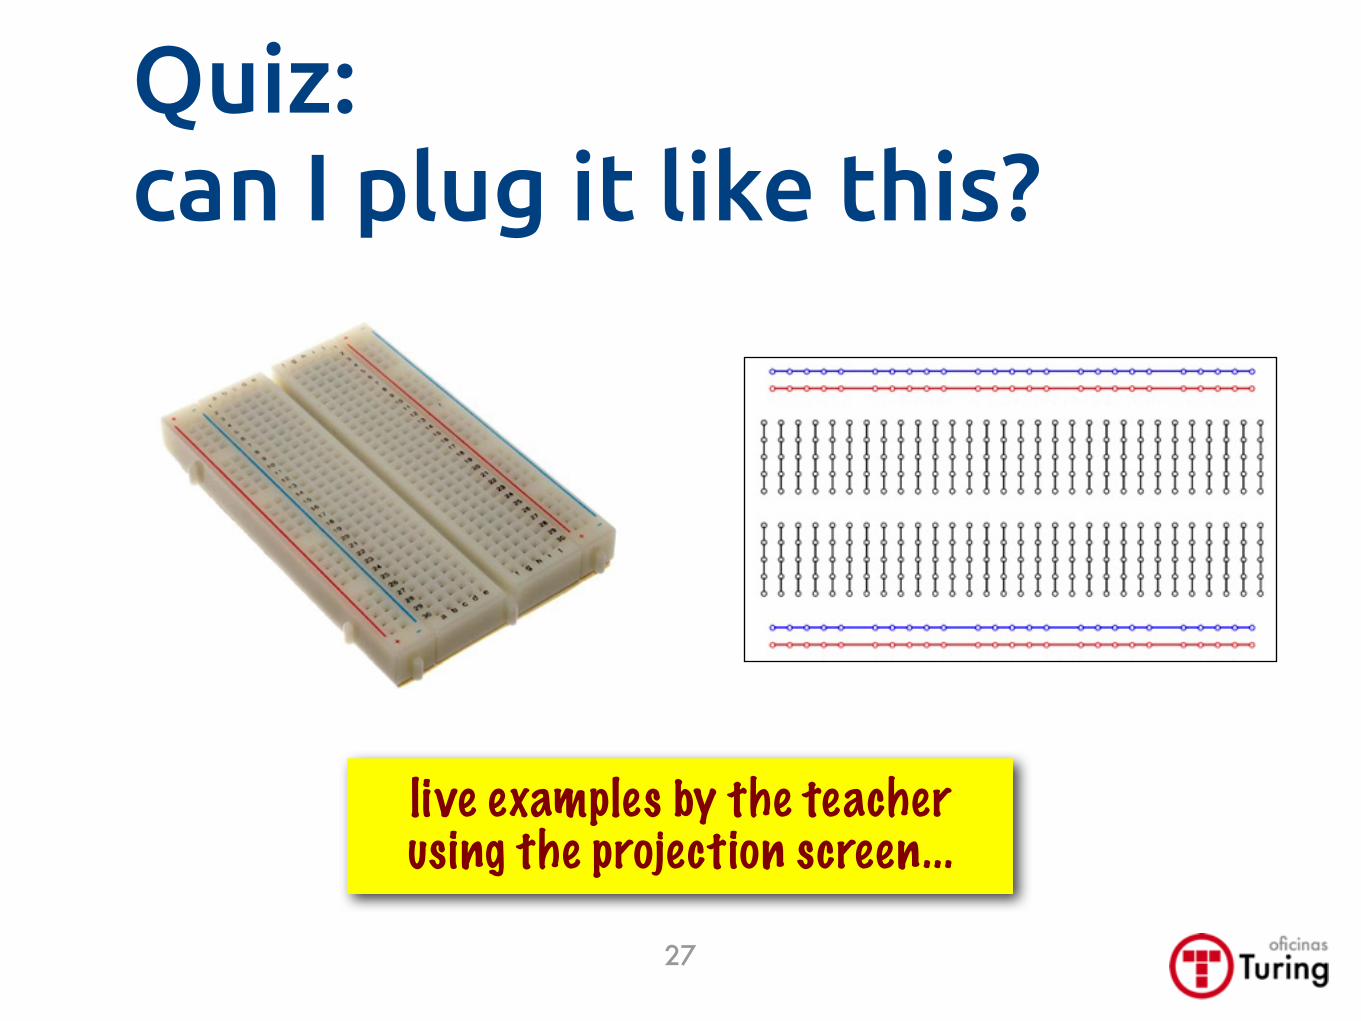
Quiz:can I plug it like this?
live examples by the teacher using the projection screen...
27
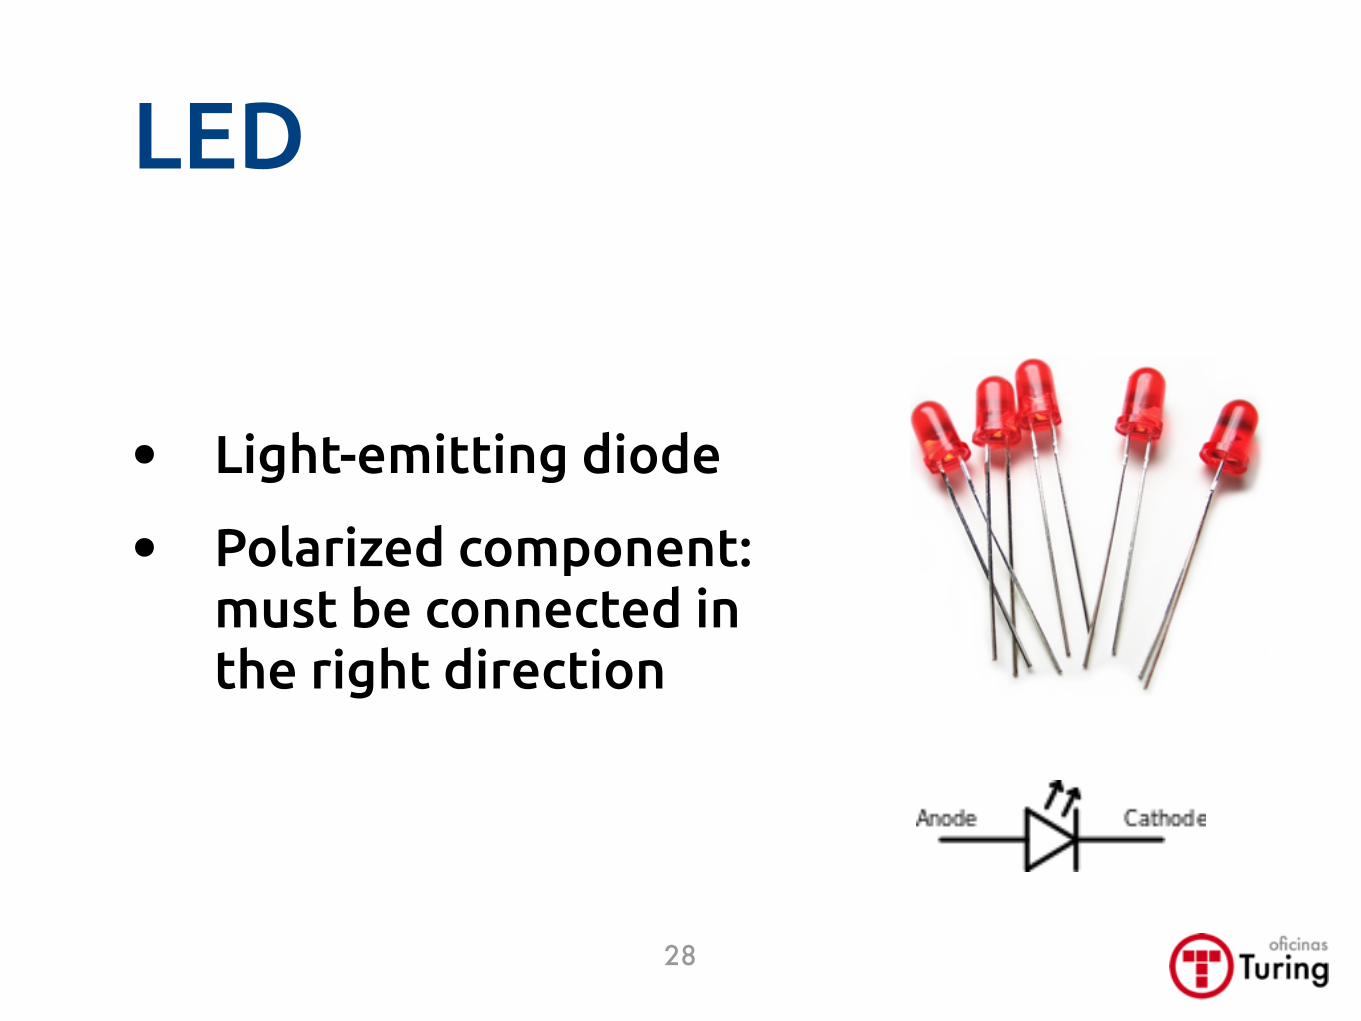
LED
• Light-emitting diode
• Polarized component: must be connected in the right direction
28
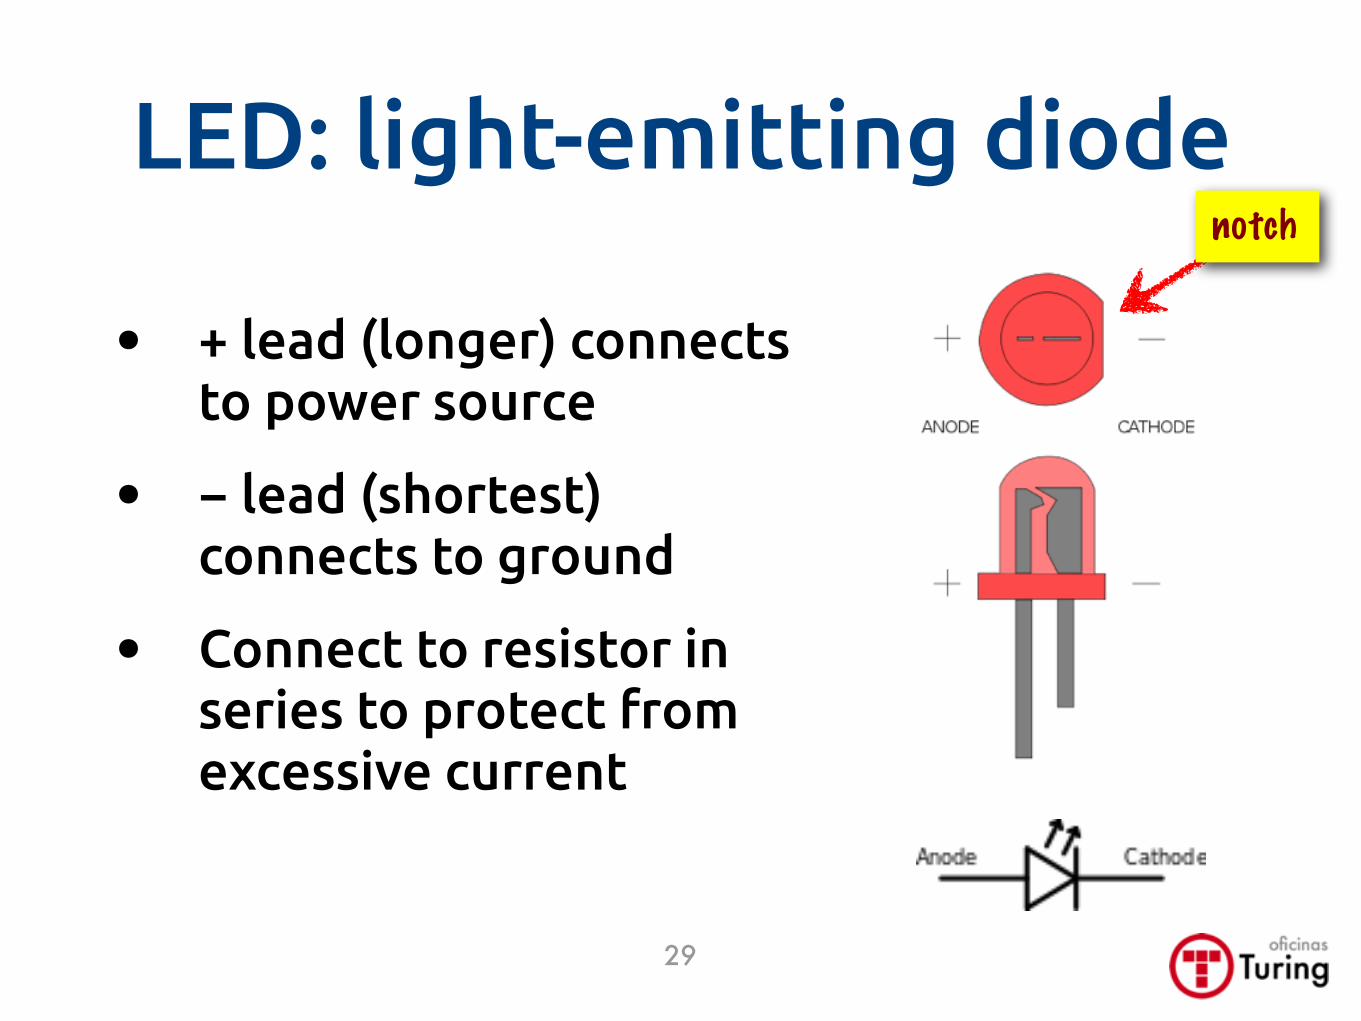
LED: light-emitting diode
• + lead (longer) connects to power source
• − lead (shortest) connects to ground
• Connect to resistor in series to protect from excessive current
notch
29
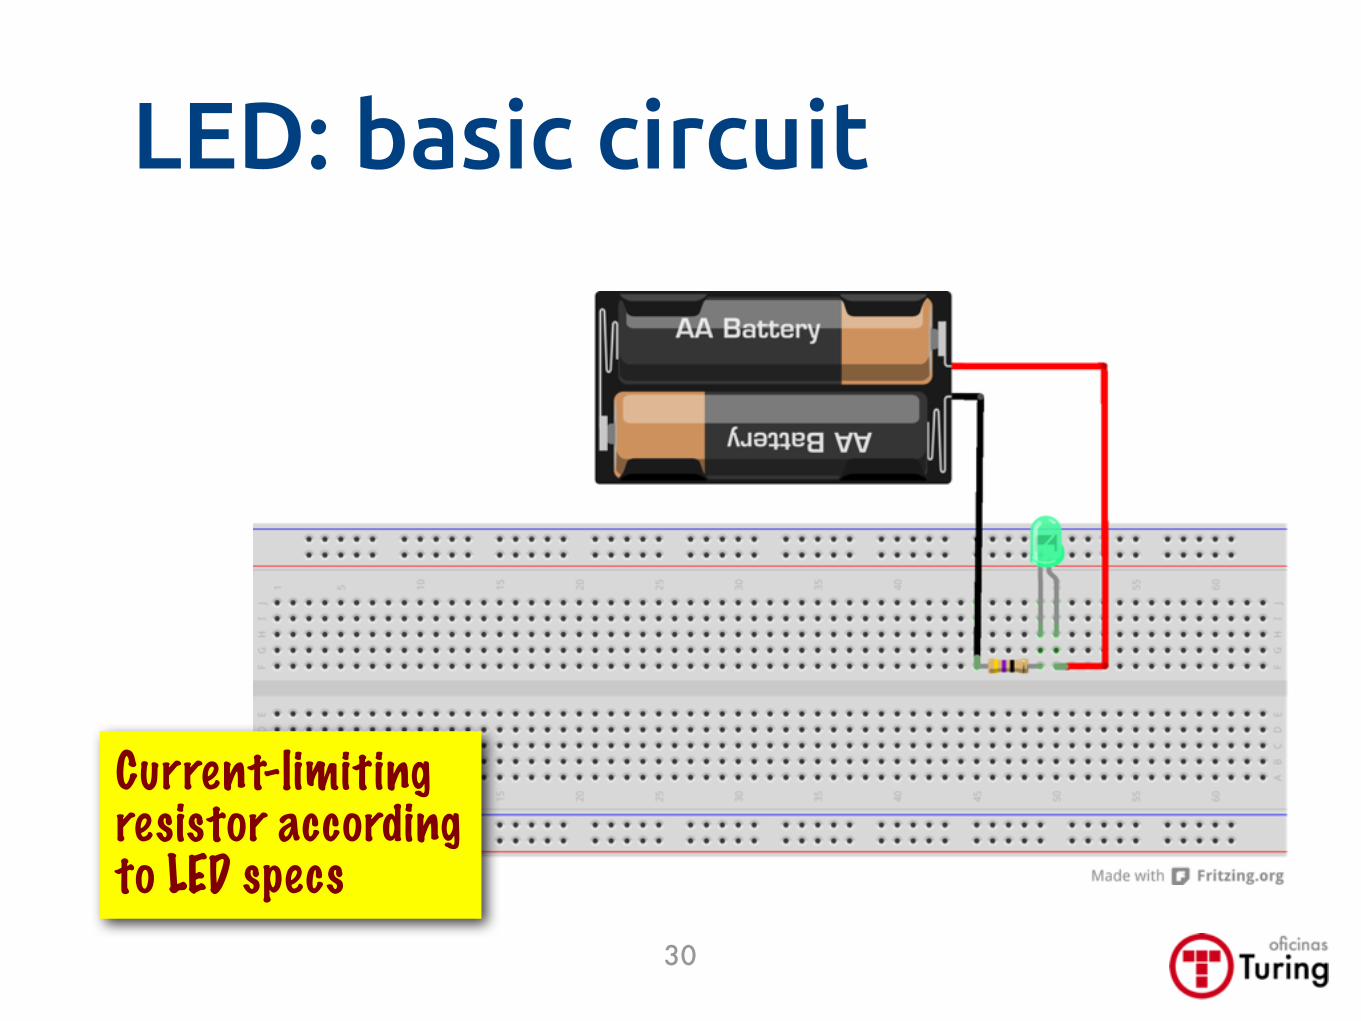
LED: basic circuit
Current-limiting resistor according to LED specs
30
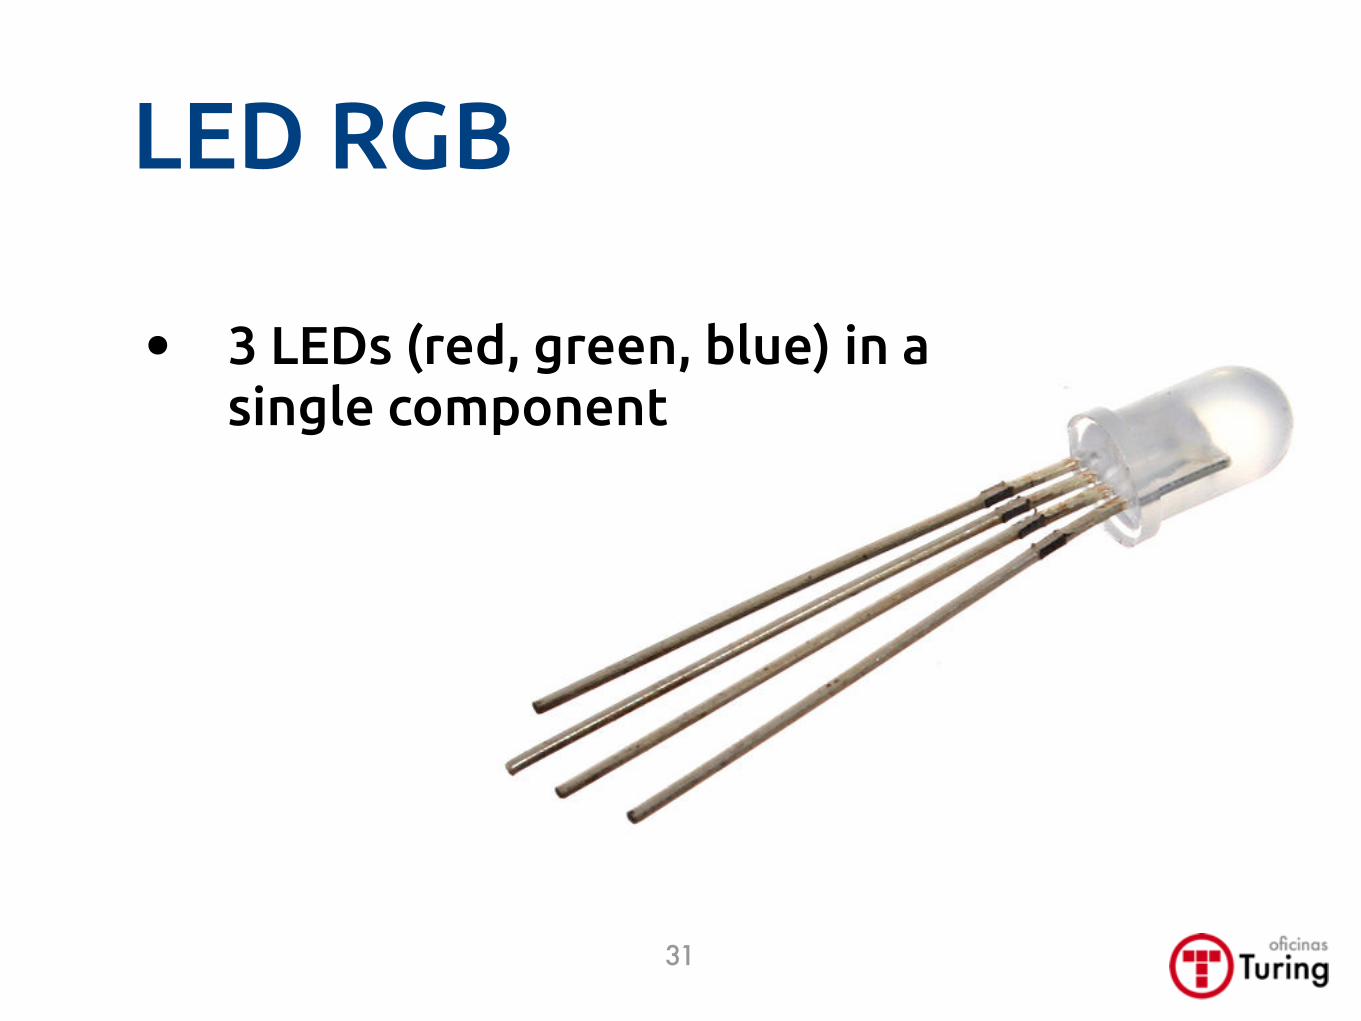
LED RGB
• 3 LEDs (red, green, blue) in a single component
31
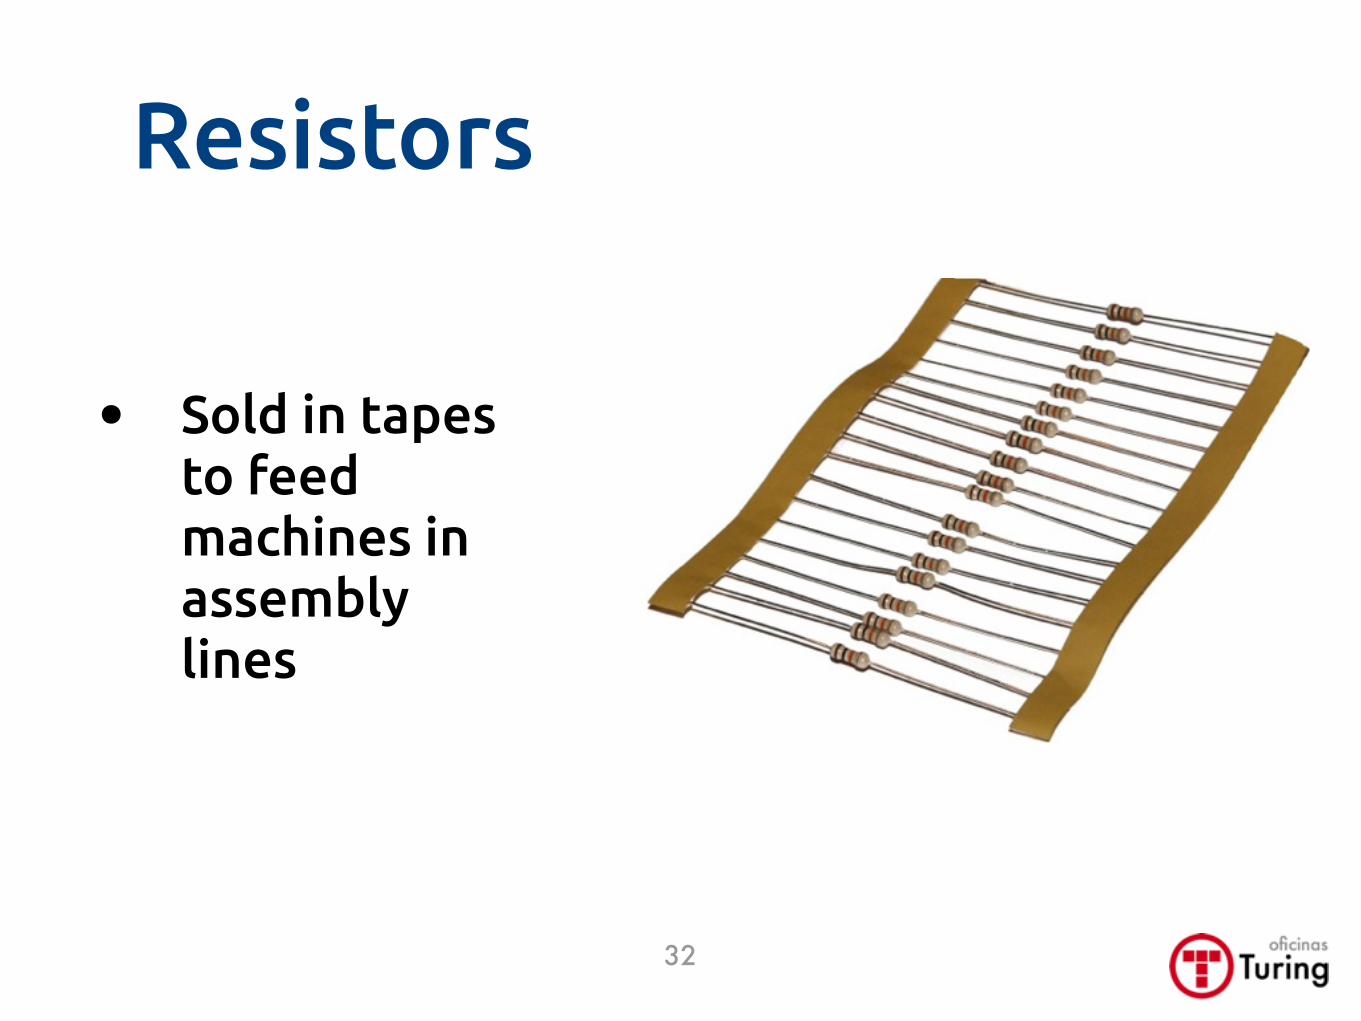
Resistors
• Sold in tapes to feed machines in assembly lines
32
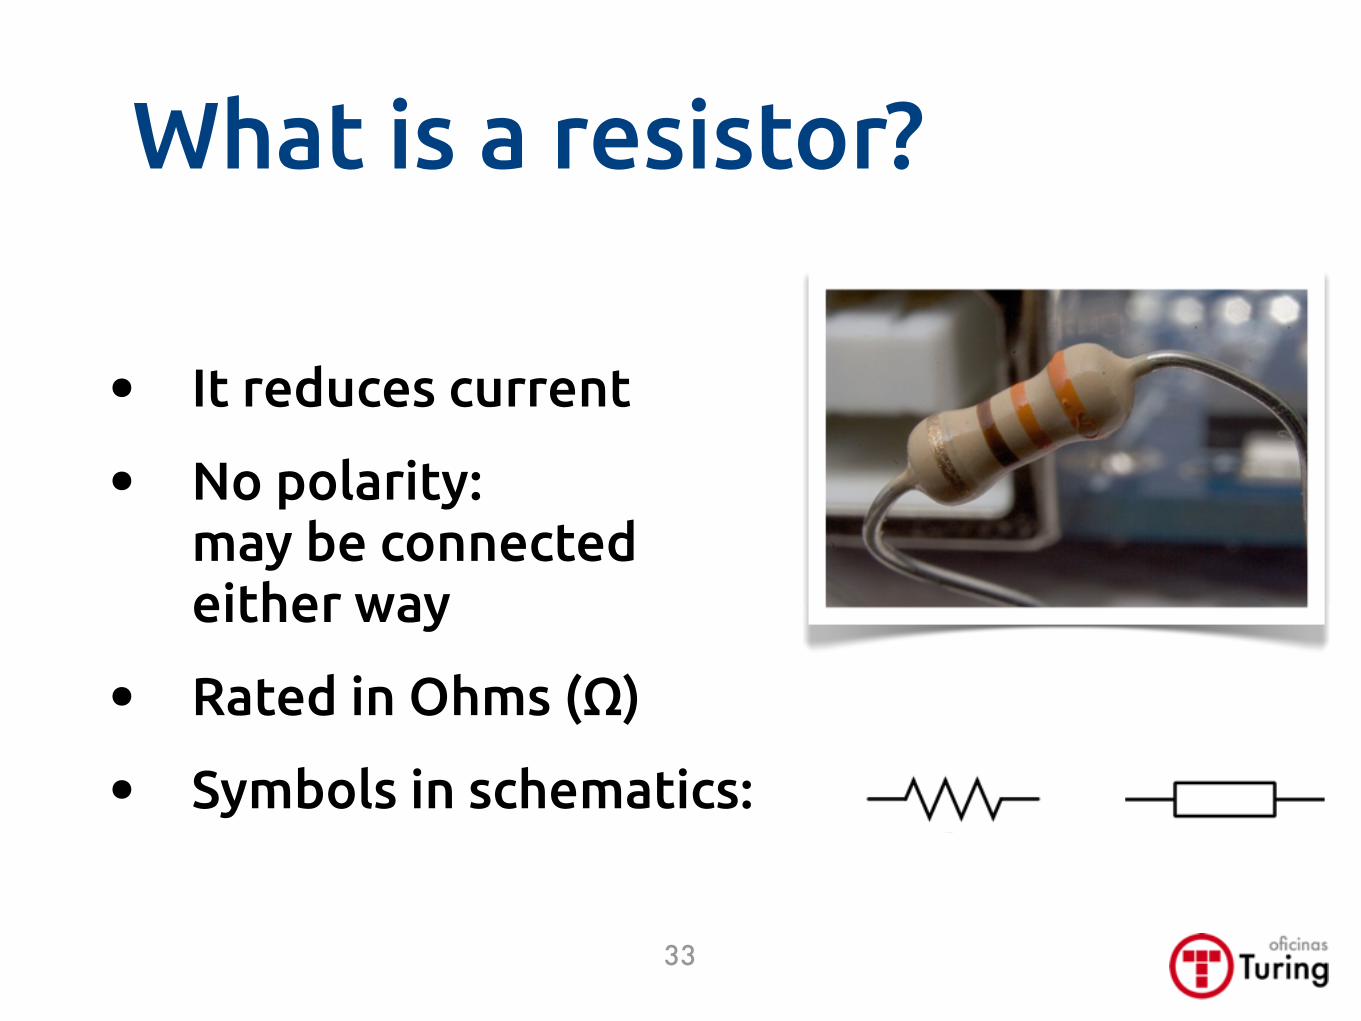
What is a resistor?
• It reduces current
• No polarity: may be connected either way
• Rated in Ohms (Ω)
• Symbols in schematics:
33
A small detour to understand why
we need resistors
34

Voltage, current& resistance
35
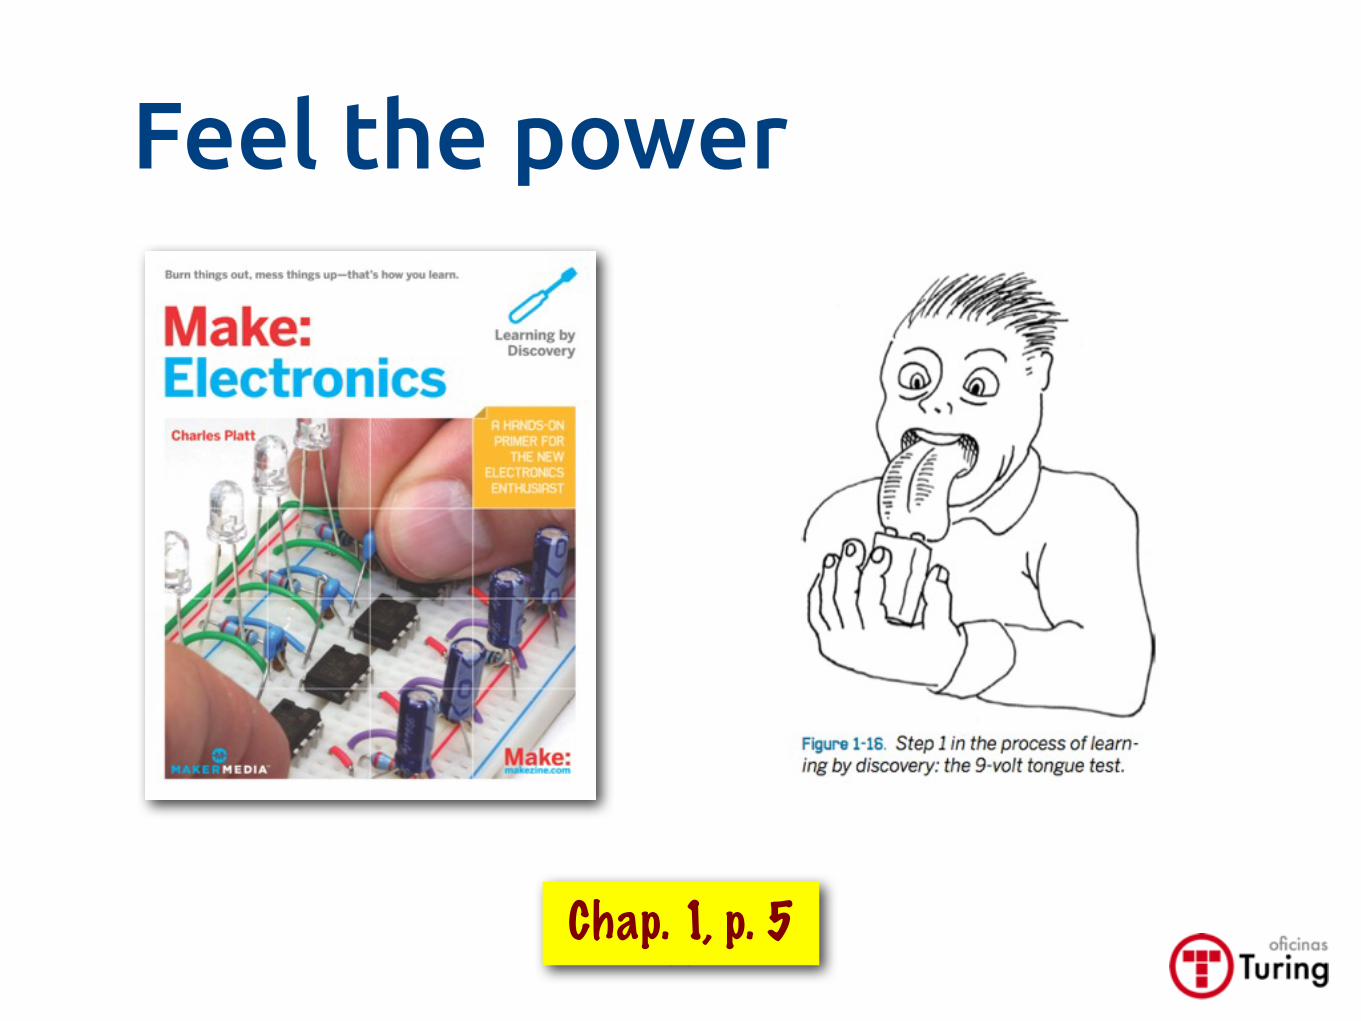
Feel the power
36Chap. 1, p. 5
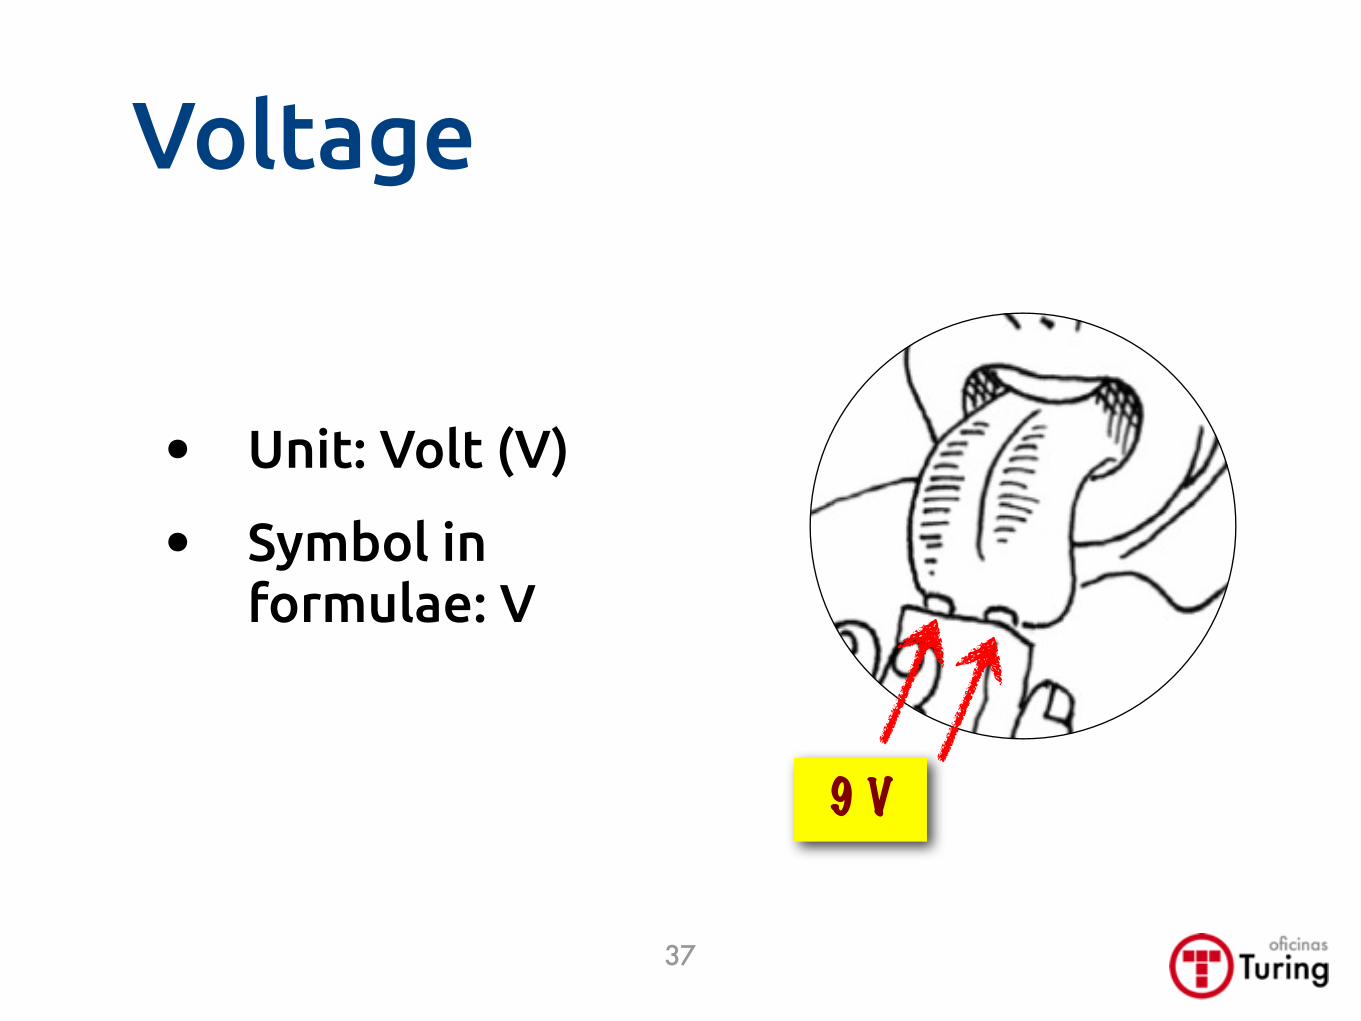
Voltage
• Unit: Volt (V)
• Symbol in formulae: V
9 V
37
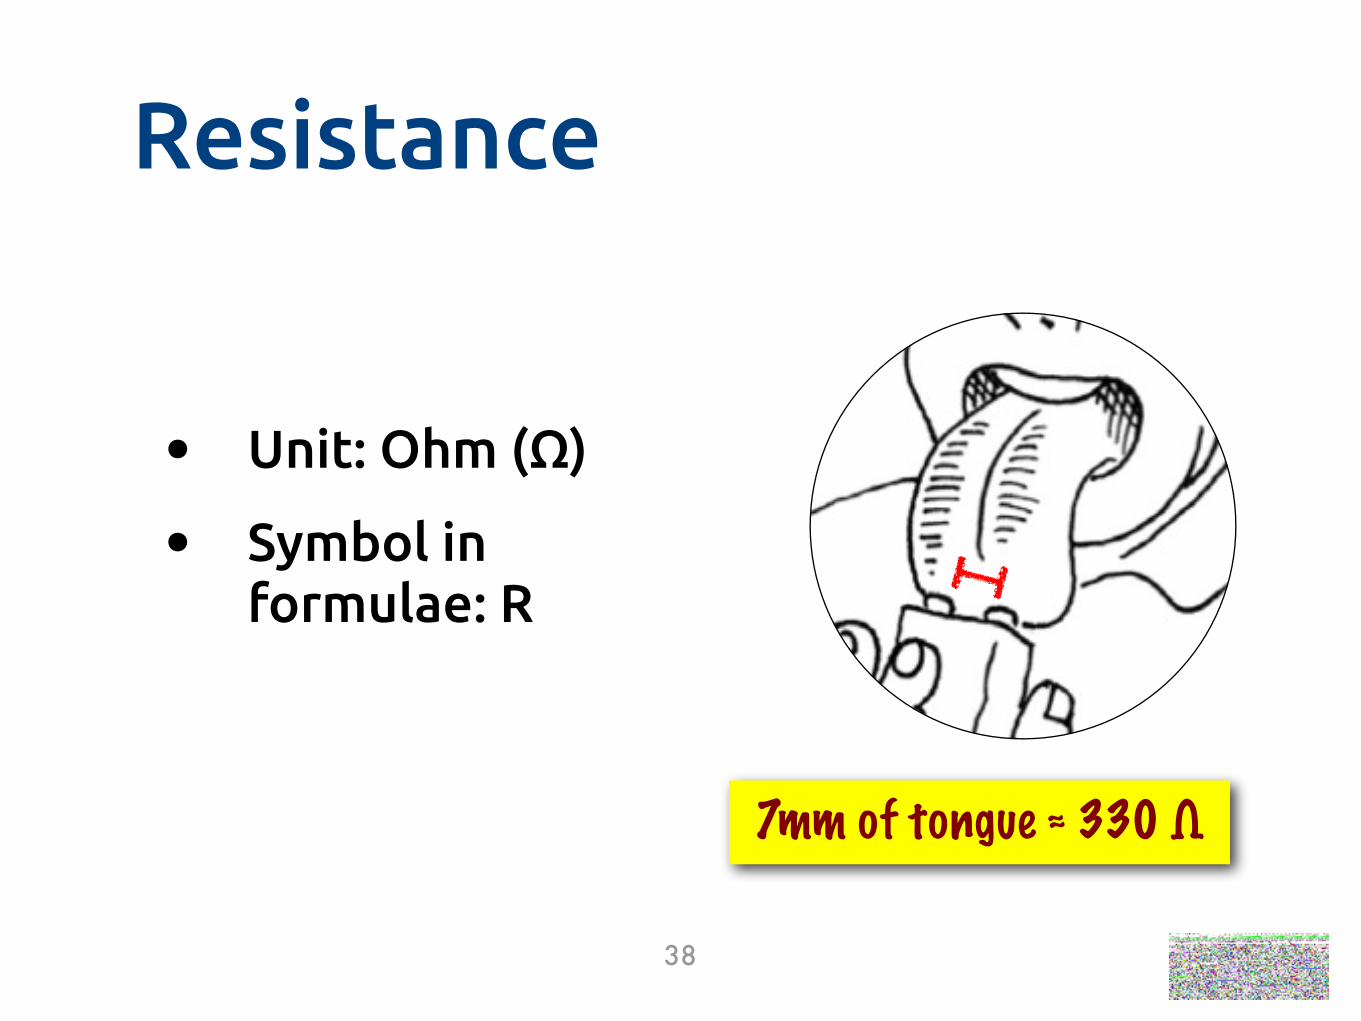
Resistance
• Unit: Ohm (Ω)
• Symbol in formulae: R
7mm of tongue ≈ 330 Ω
38
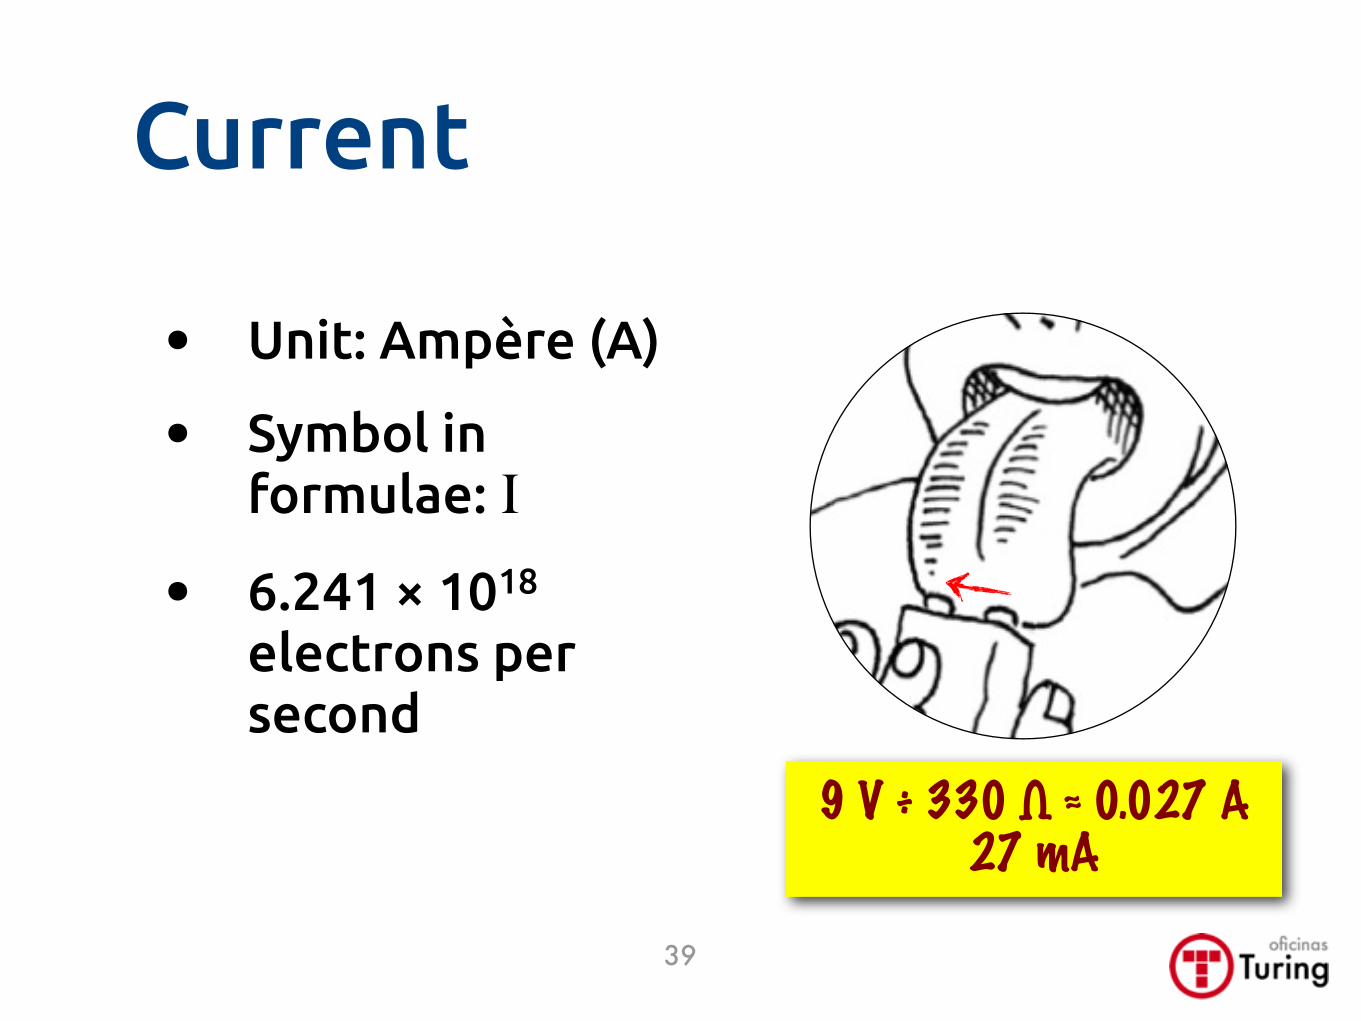
Current
• Unit: Ampère (A)
• Symbol in formulae: I
• 6.241 × 10¹⁸ electrons per second
9 V ÷ 330 Ω ≈ 0.027 A27 mA
39

Examples of current
Hearing aid 0.7 mA 0.0007 A
Cheap cell phone charger 500 mA 0.5 A
Tablet charger 2.1 A 2.1 A
Toaster (@120V) 16 A 16 A
Automobile starter motor 120 A 120 A
40
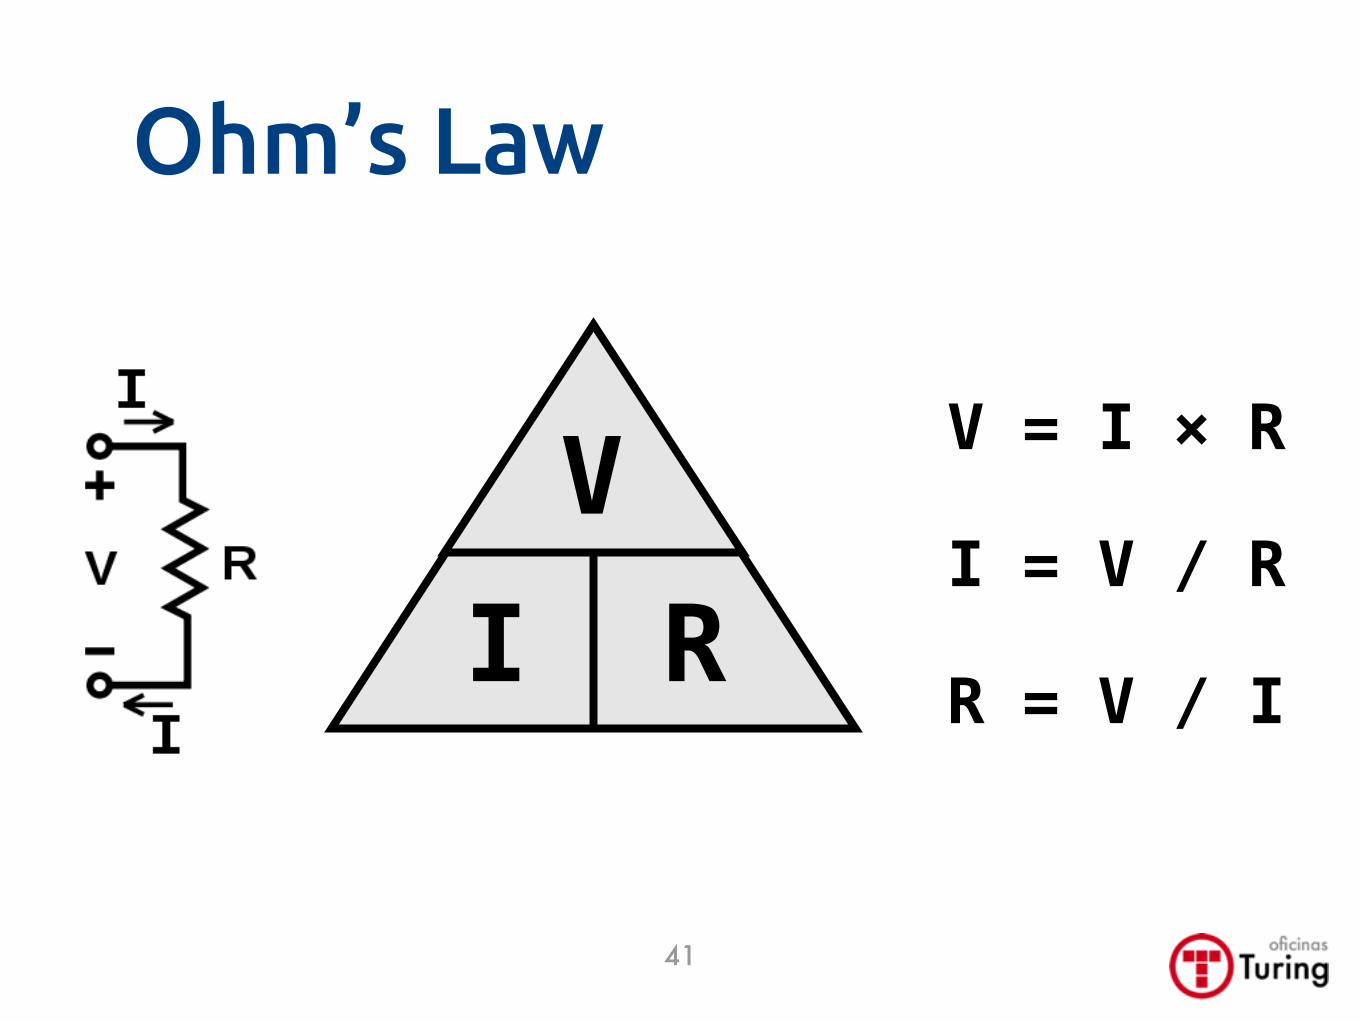
Ohm’s Law
V = I × R
I = V / R
R = V / IIVR
41

Back to the resistor...
42
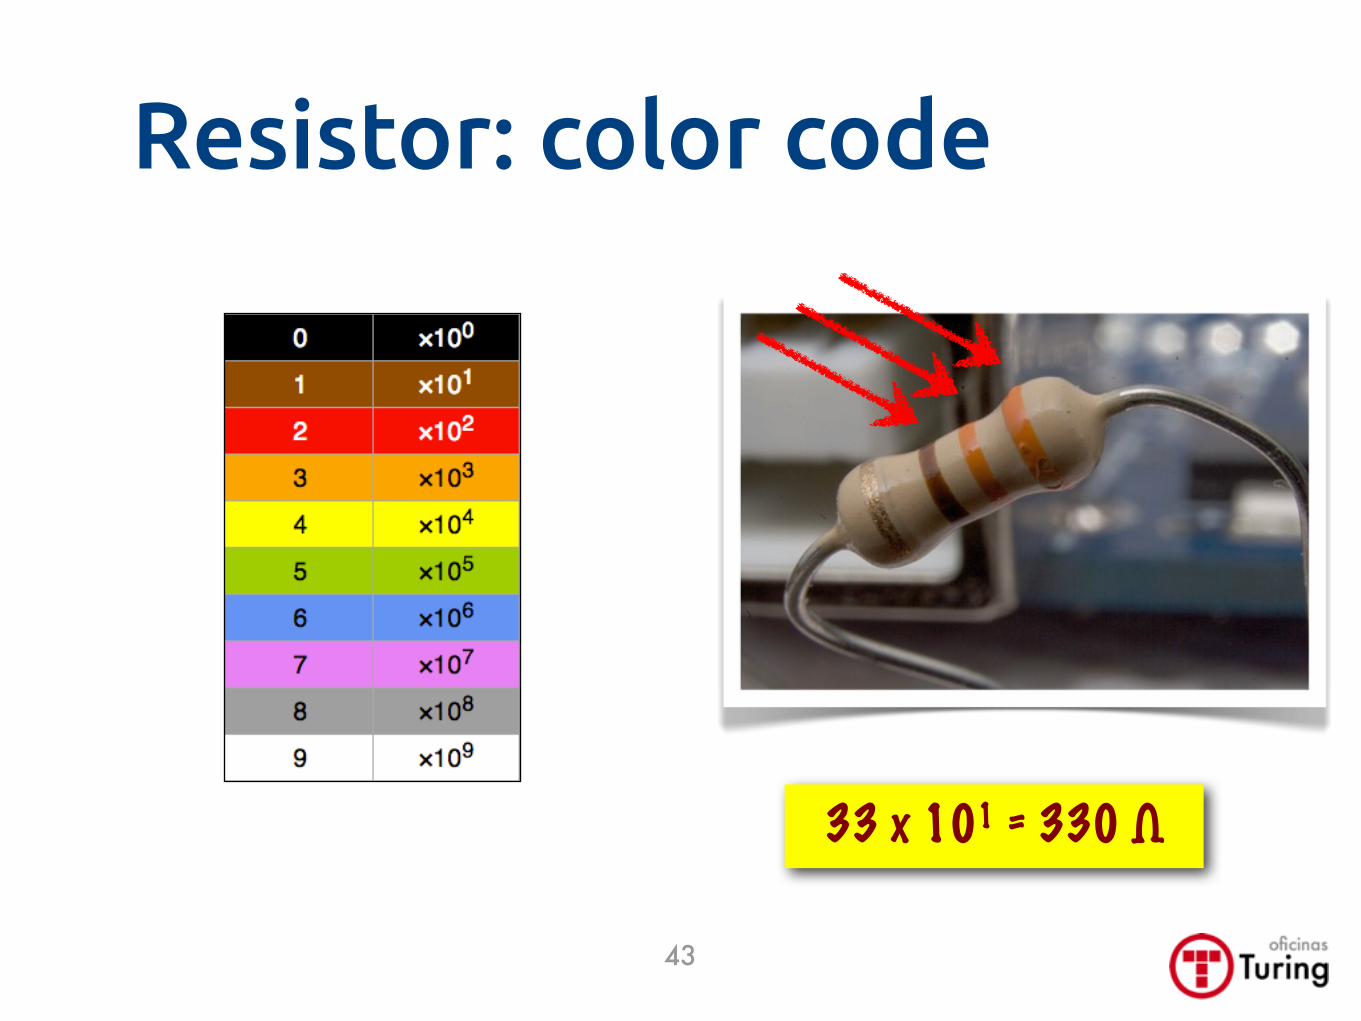
Resistor: color code
33 x 101 = 330 Ω
43
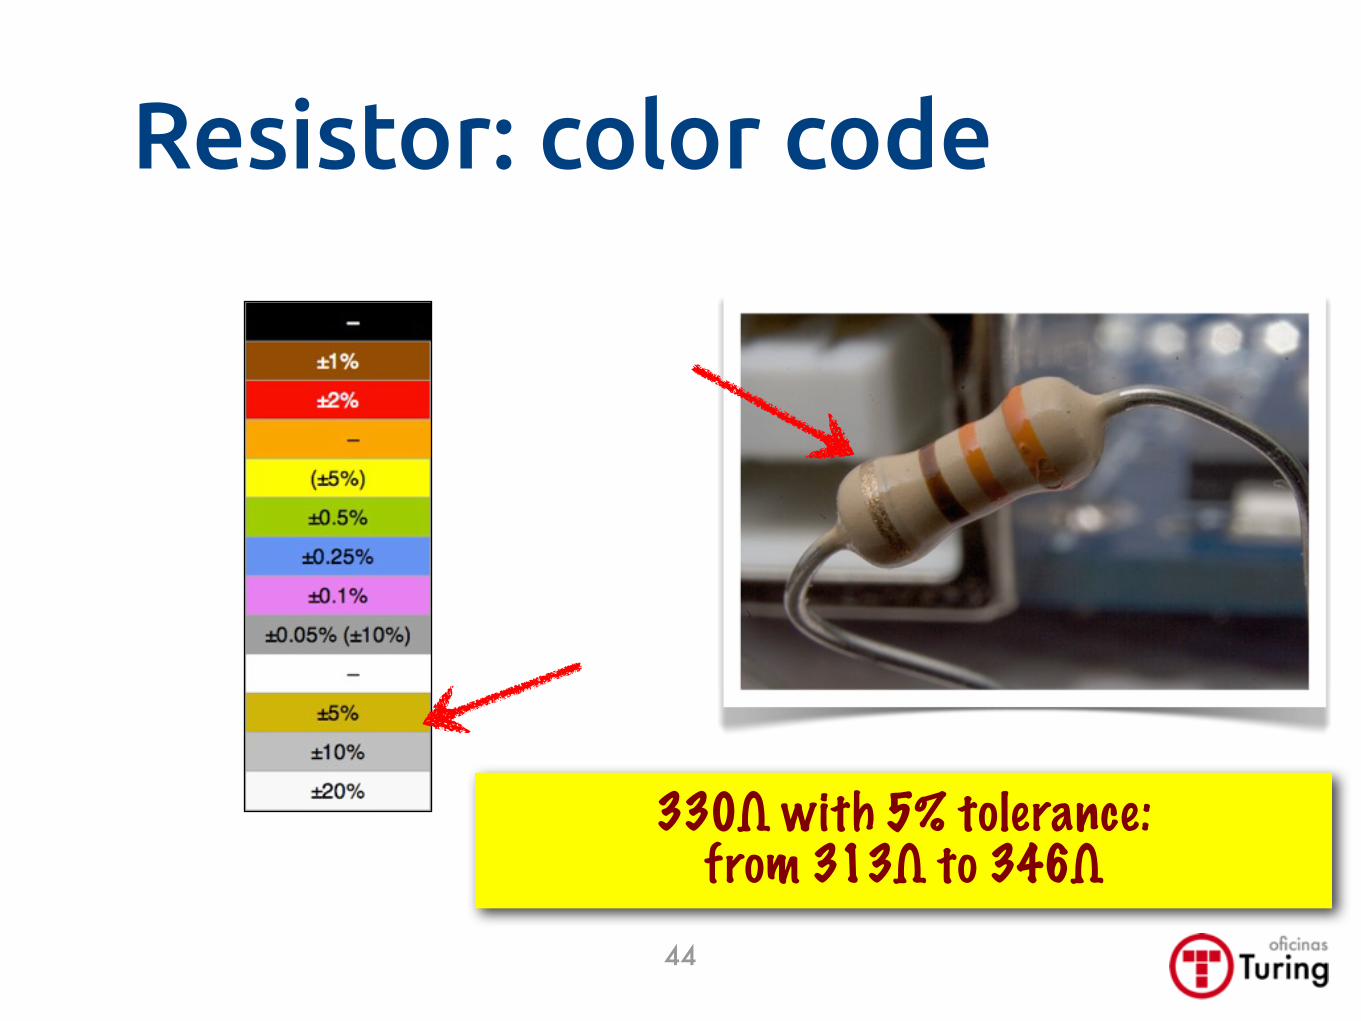
Resistor: color code
330Ω with 5% tolerance:from 313Ω to 346Ω
44
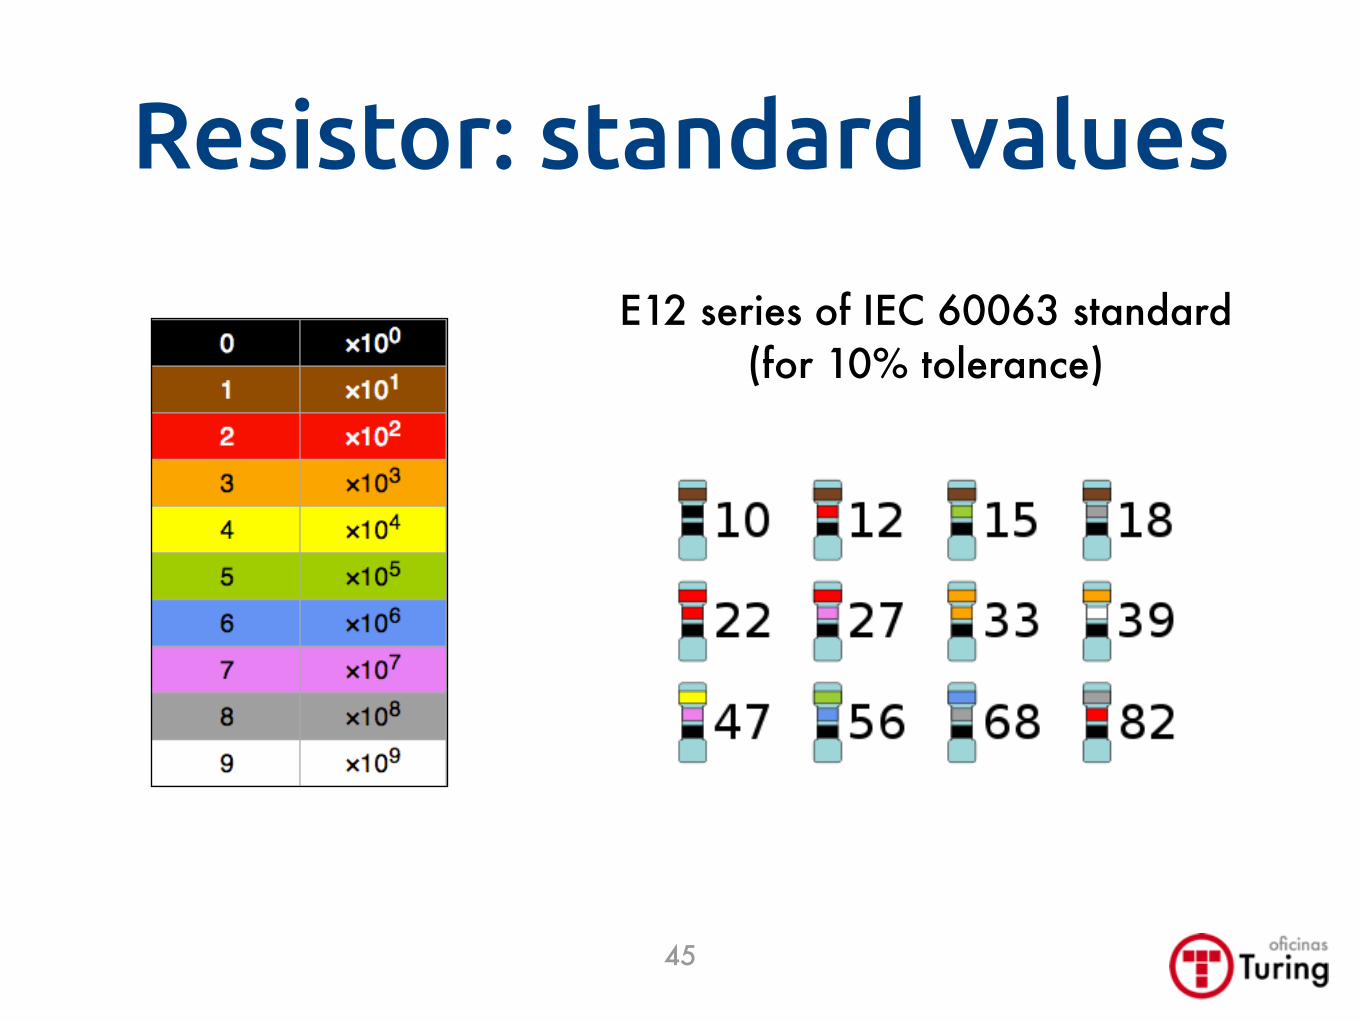
Resistor: standard values
E12 series of IEC 60063 standard(for 10% tolerance)
45
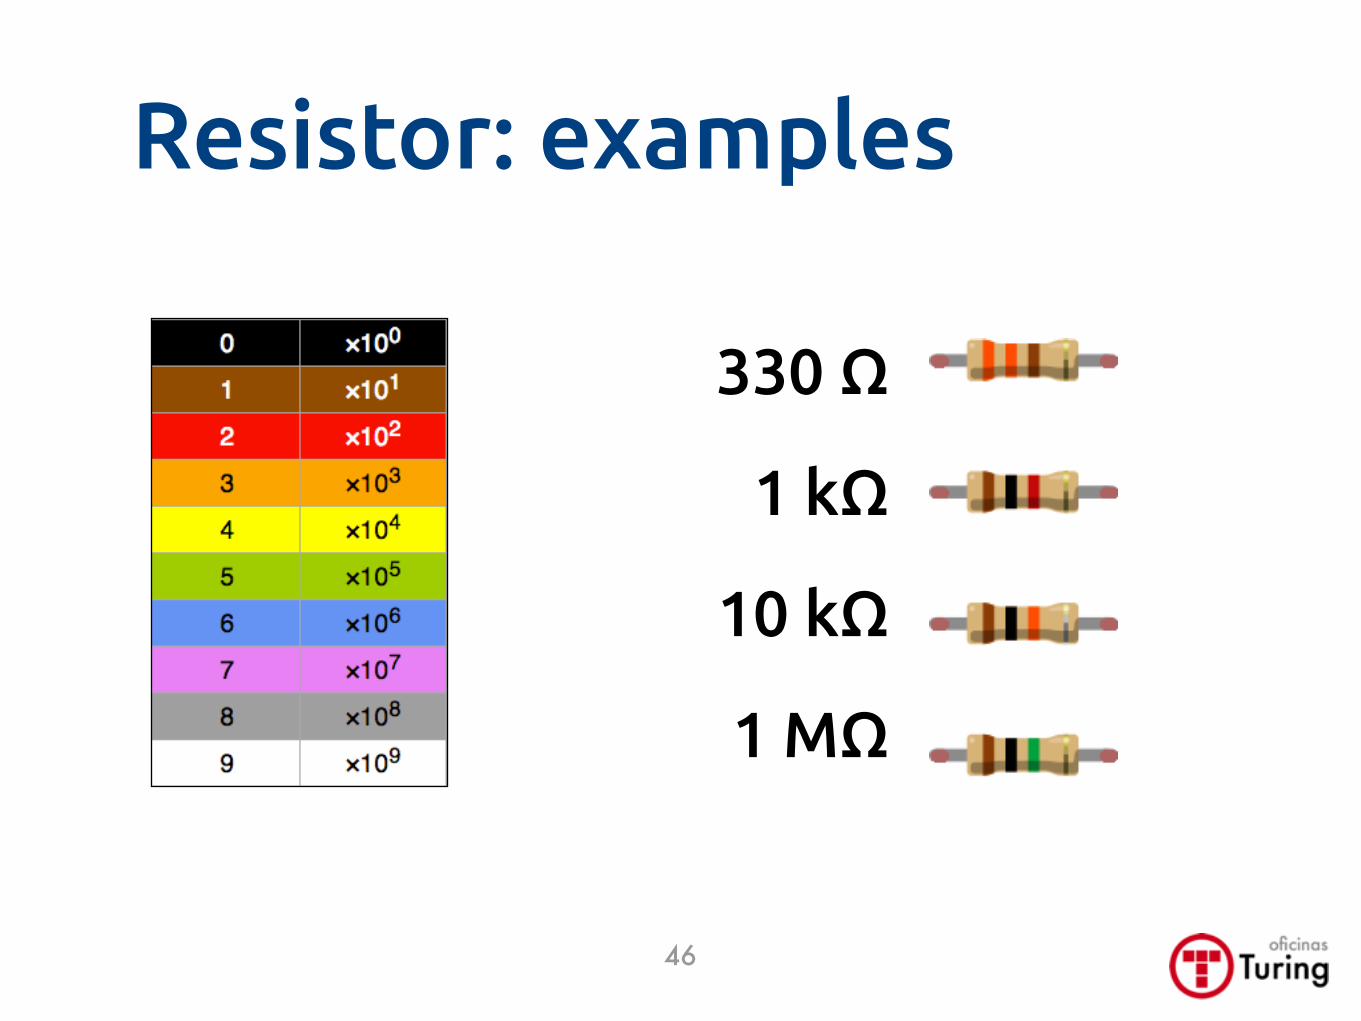
Resistor: examples
330 Ω
1 kΩ
10 kΩ
1 MΩ
46
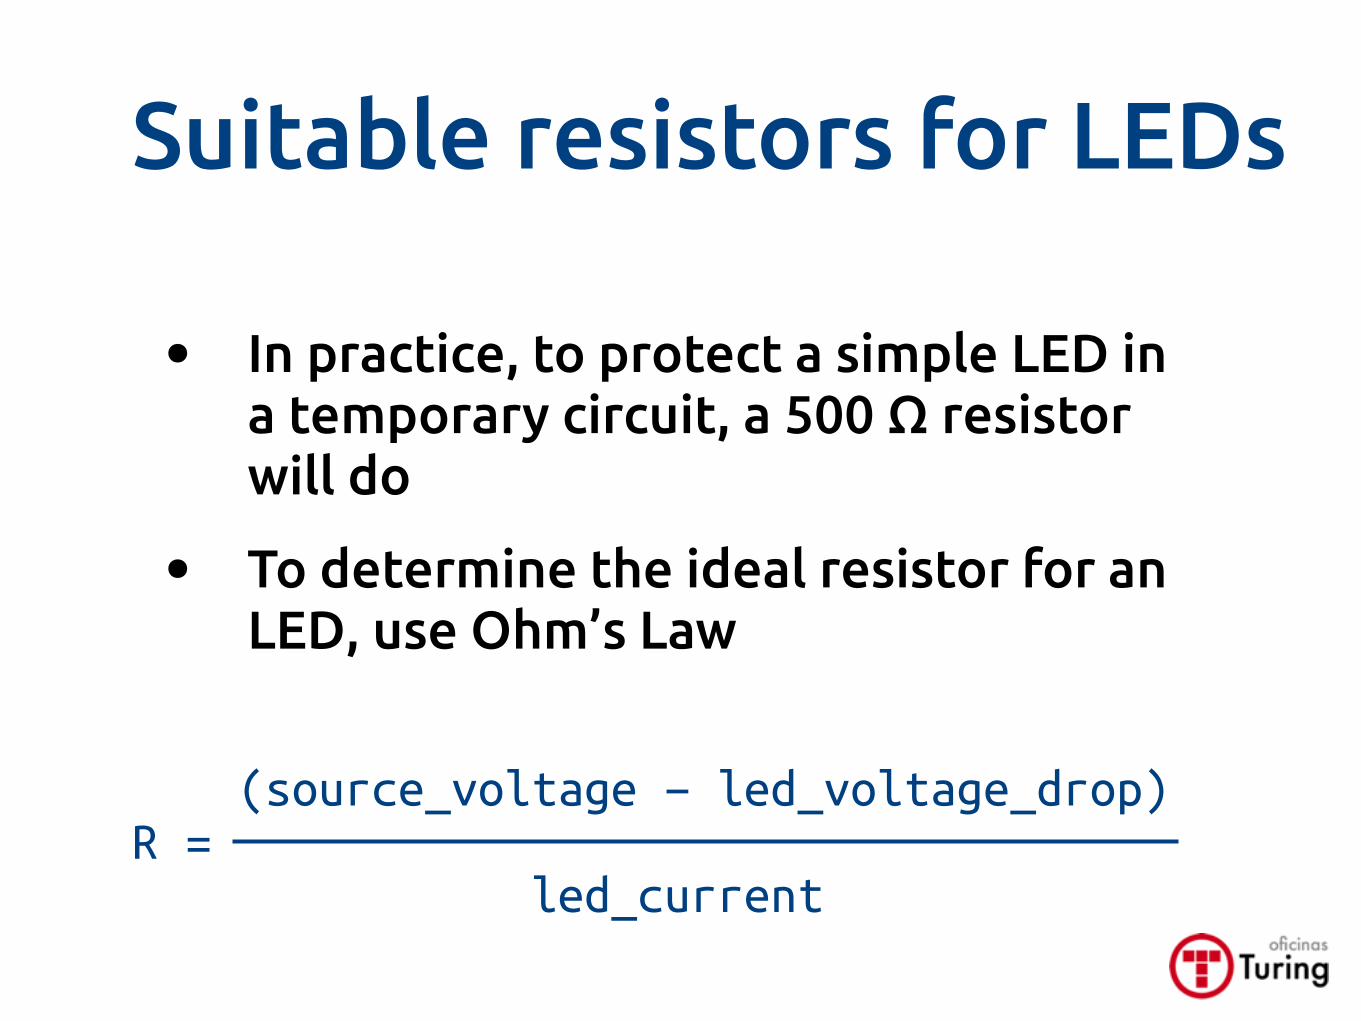
Suitable resistors for LEDs
• In practice, to protect a simple LED in a temporary circuit, a 500 Ω resistor will do
• To determine the ideal resistor for an LED, use Ohm’s Law
(source_voltage − led_voltage_drop)R = led_current
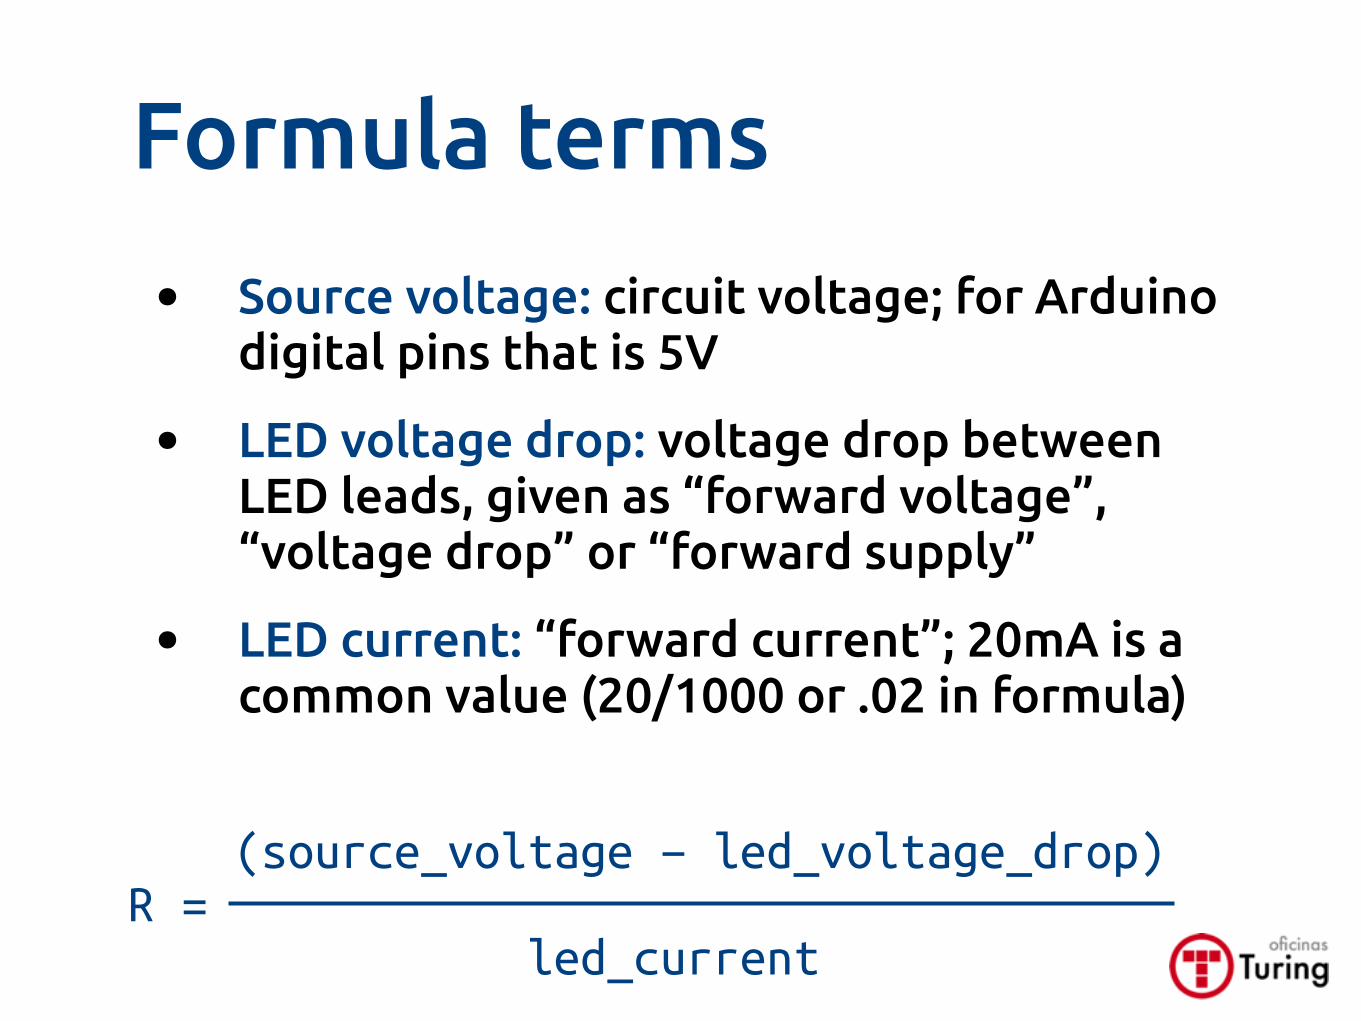
Formula terms
• Source voltage: circuit voltage; for Arduino digital pins that is 5V
• LED voltage drop: voltage drop between LED leads, given as “forward voltage”, “voltage drop” or “forward supply”
• LED current: “forward current”; 20mA is a common value (20/1000 or .02 in formula)
(source_voltage − led_voltage_drop)R = led_current
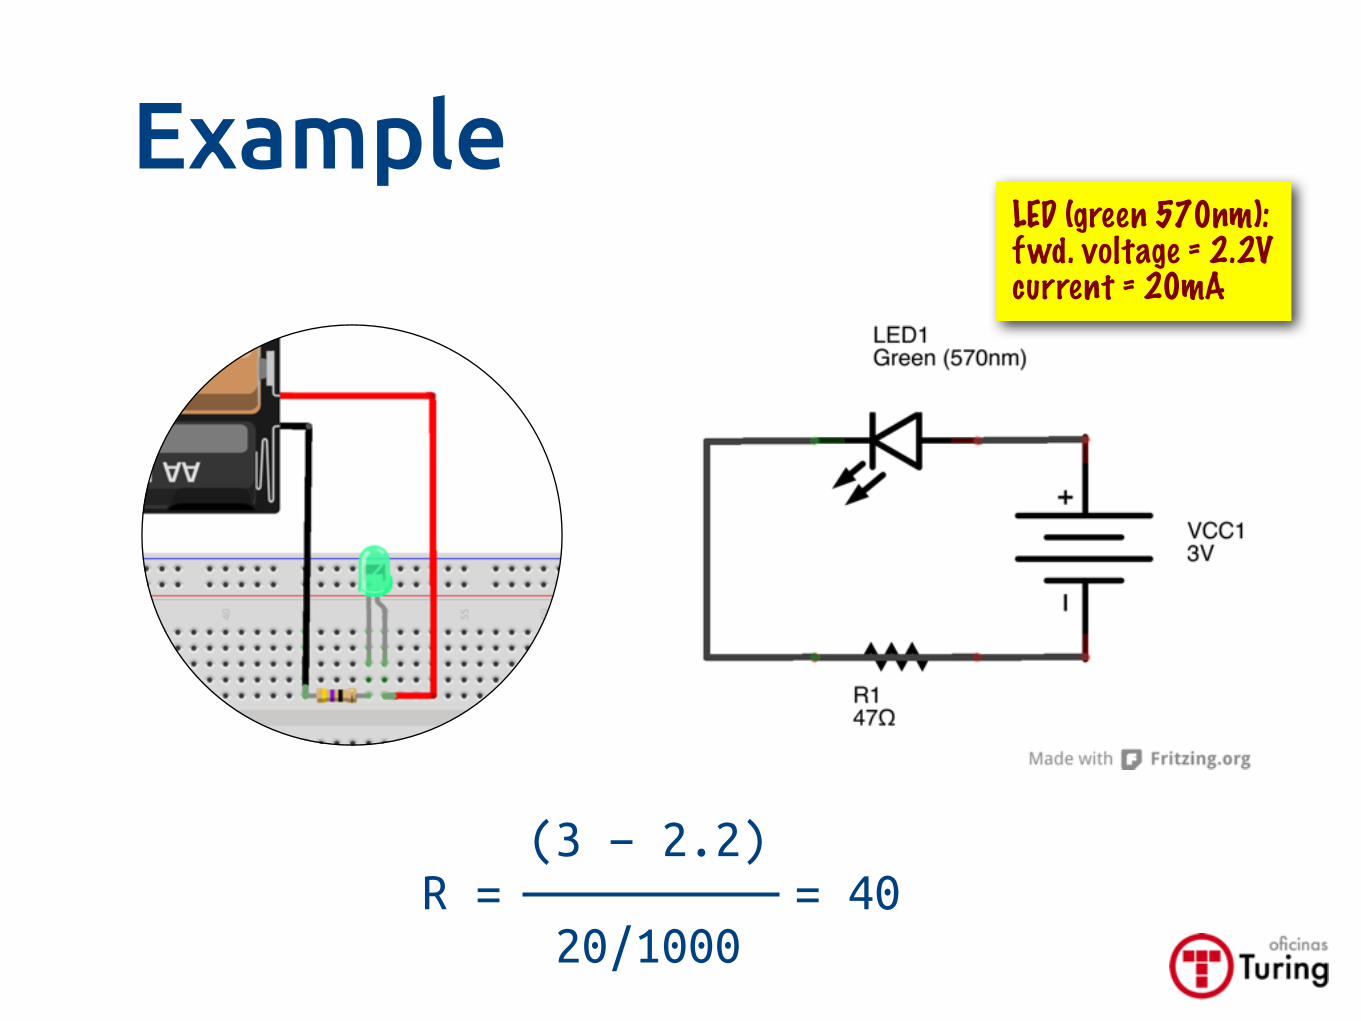
Example
49
(3 − 2.2)R = = 40 20/1000
LED (green 570nm):fwd. voltage = 2.2Vcurrent = 20mA
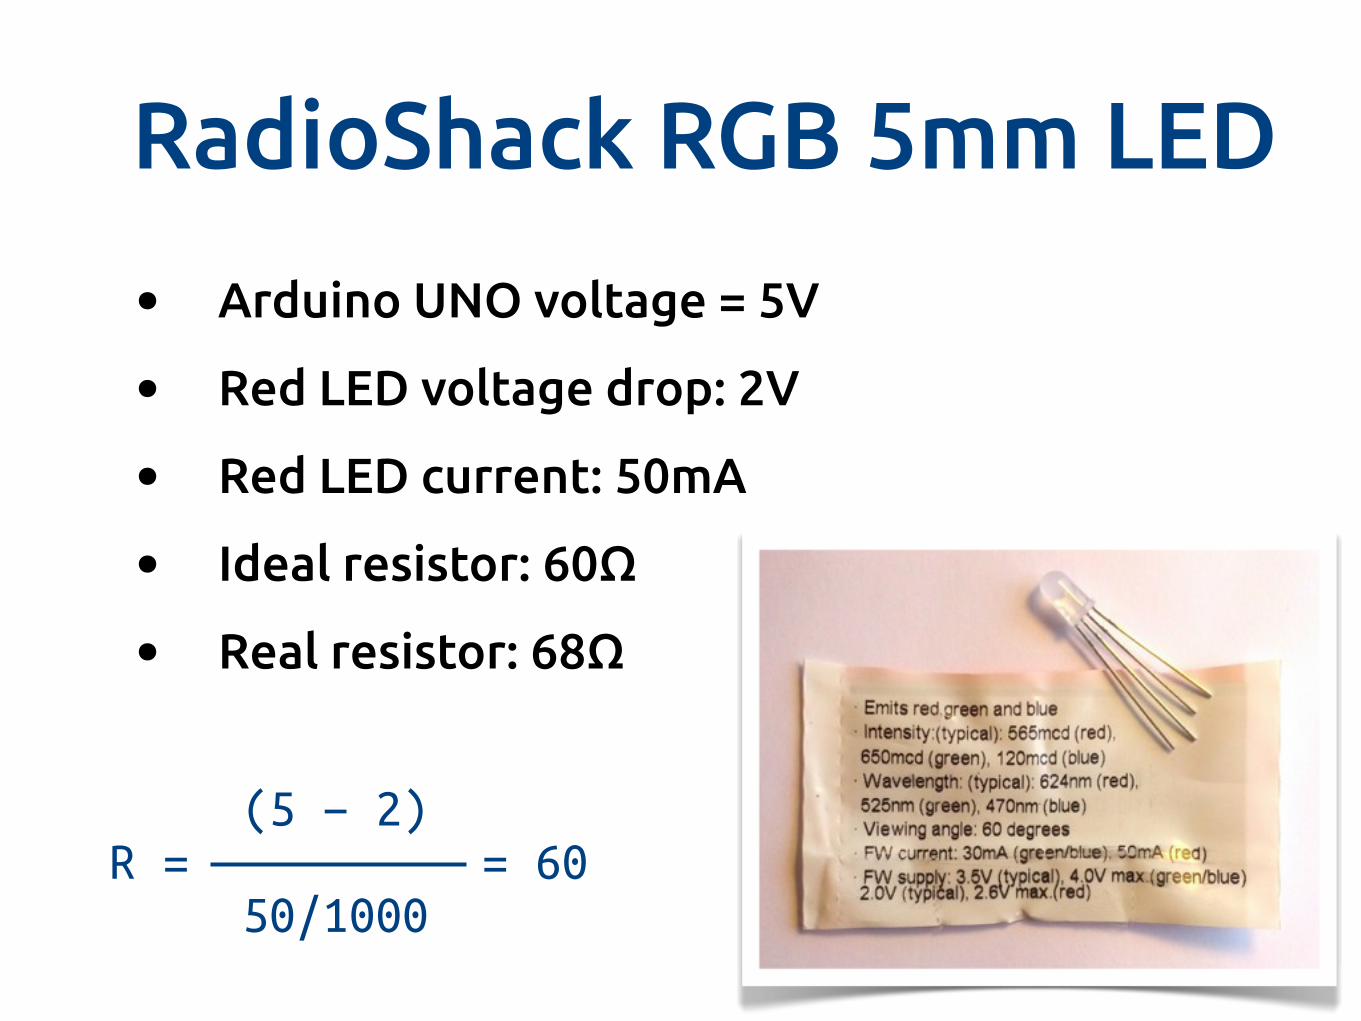
RadioShack RGB 5mm LED
• Arduino UNO voltage = 5V
• Red LED voltage drop: 2V
• Red LED current: 50mA
• Ideal resistor: 60Ω
• Real resistor: 68Ω
50
(5 − 2)R = = 60 50/1000

First circuit
51
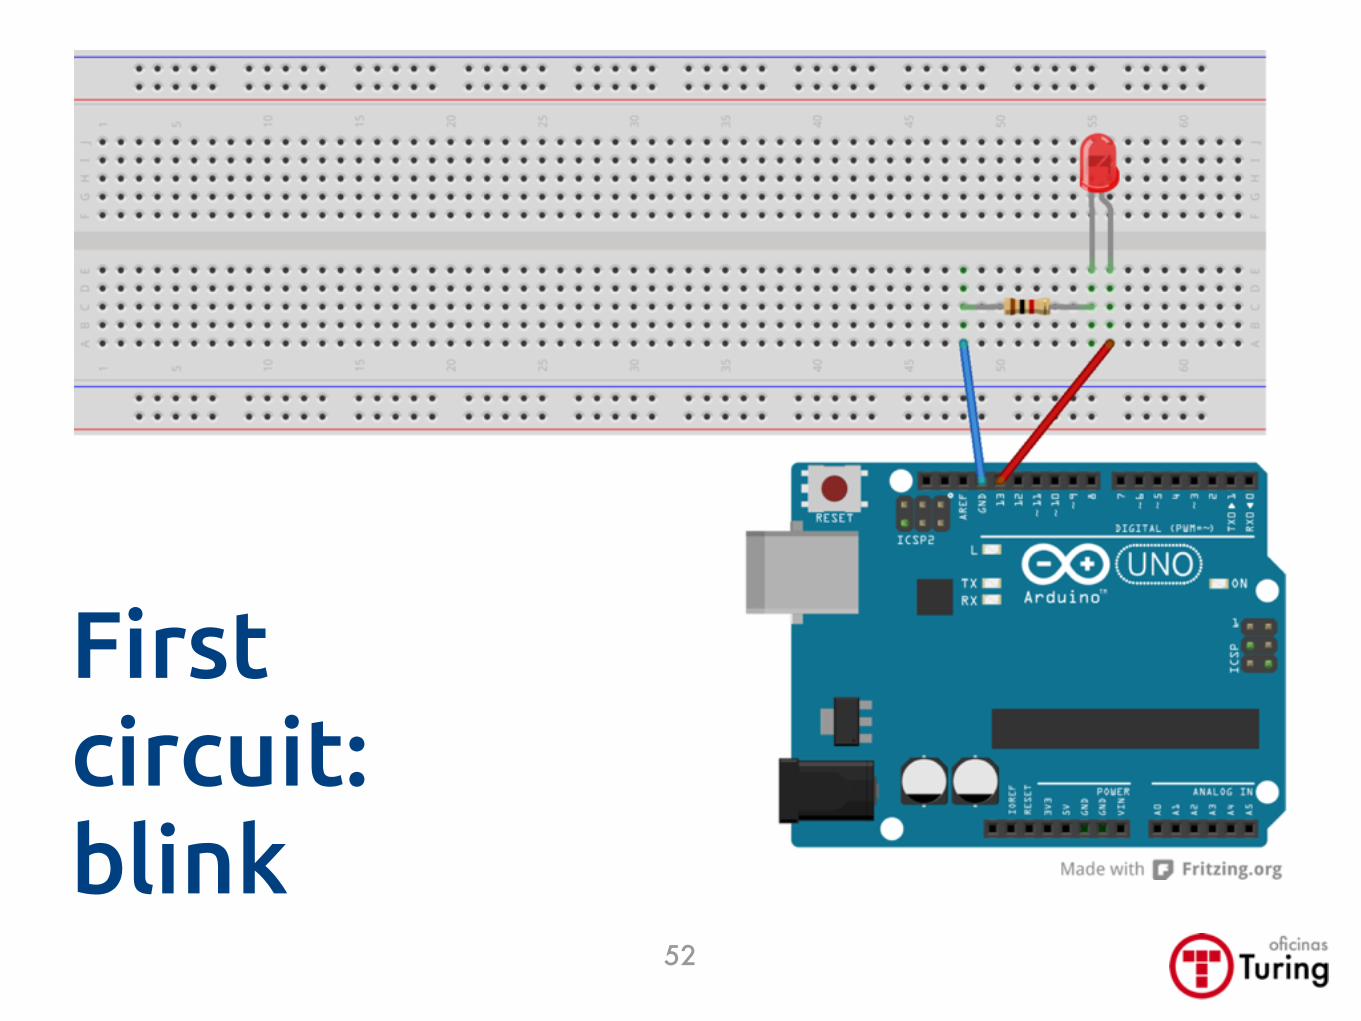
Firstcircuit:blink
52
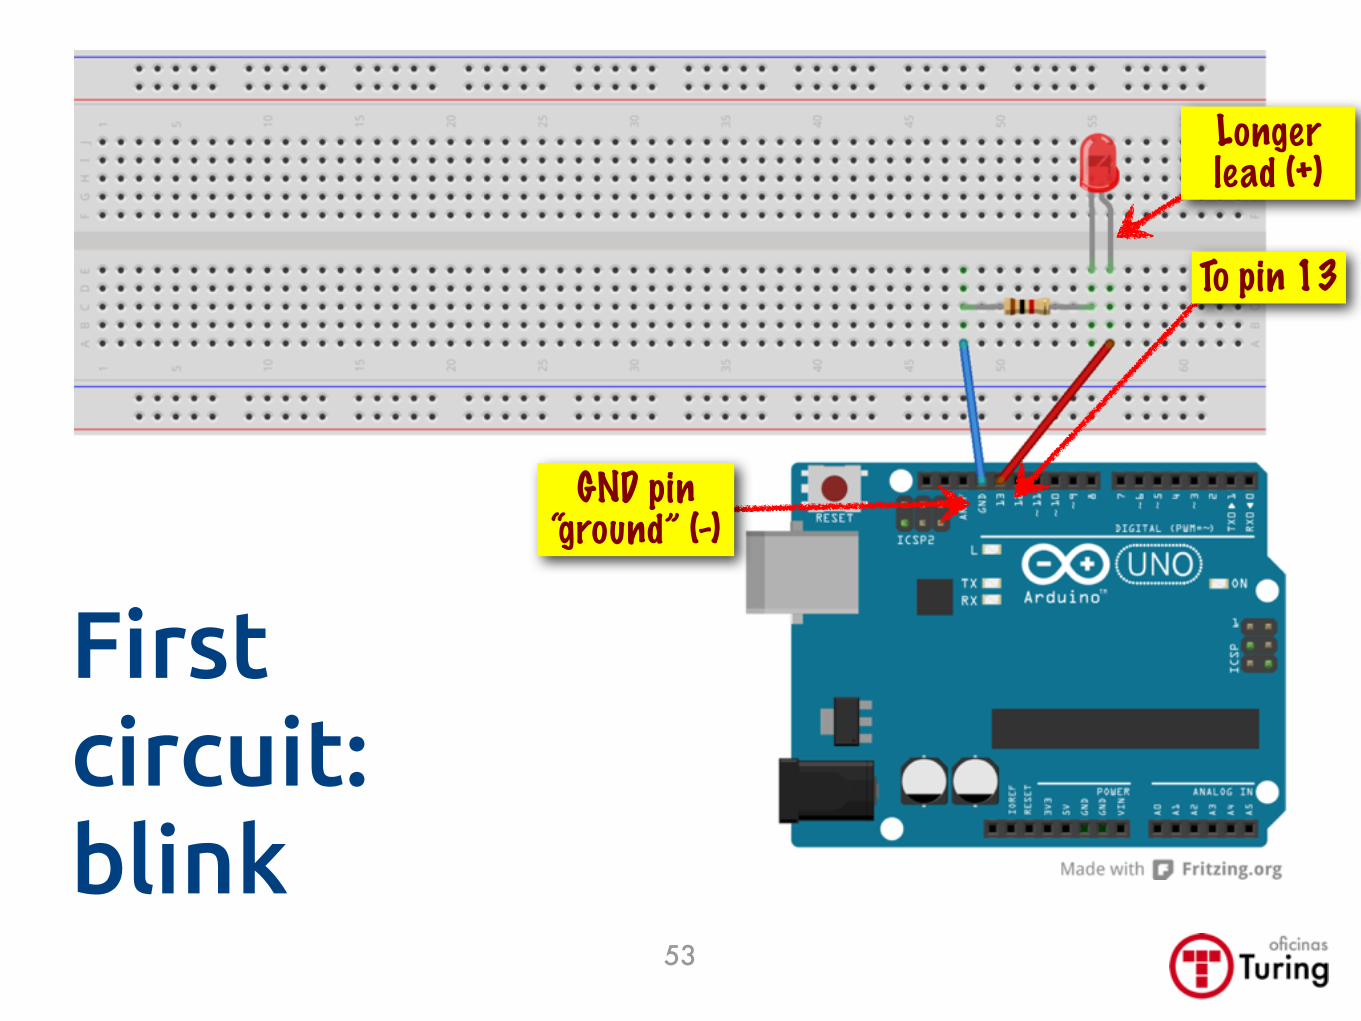
Longer lead (+)
To pin 13
GND pin“ground” (-)
53
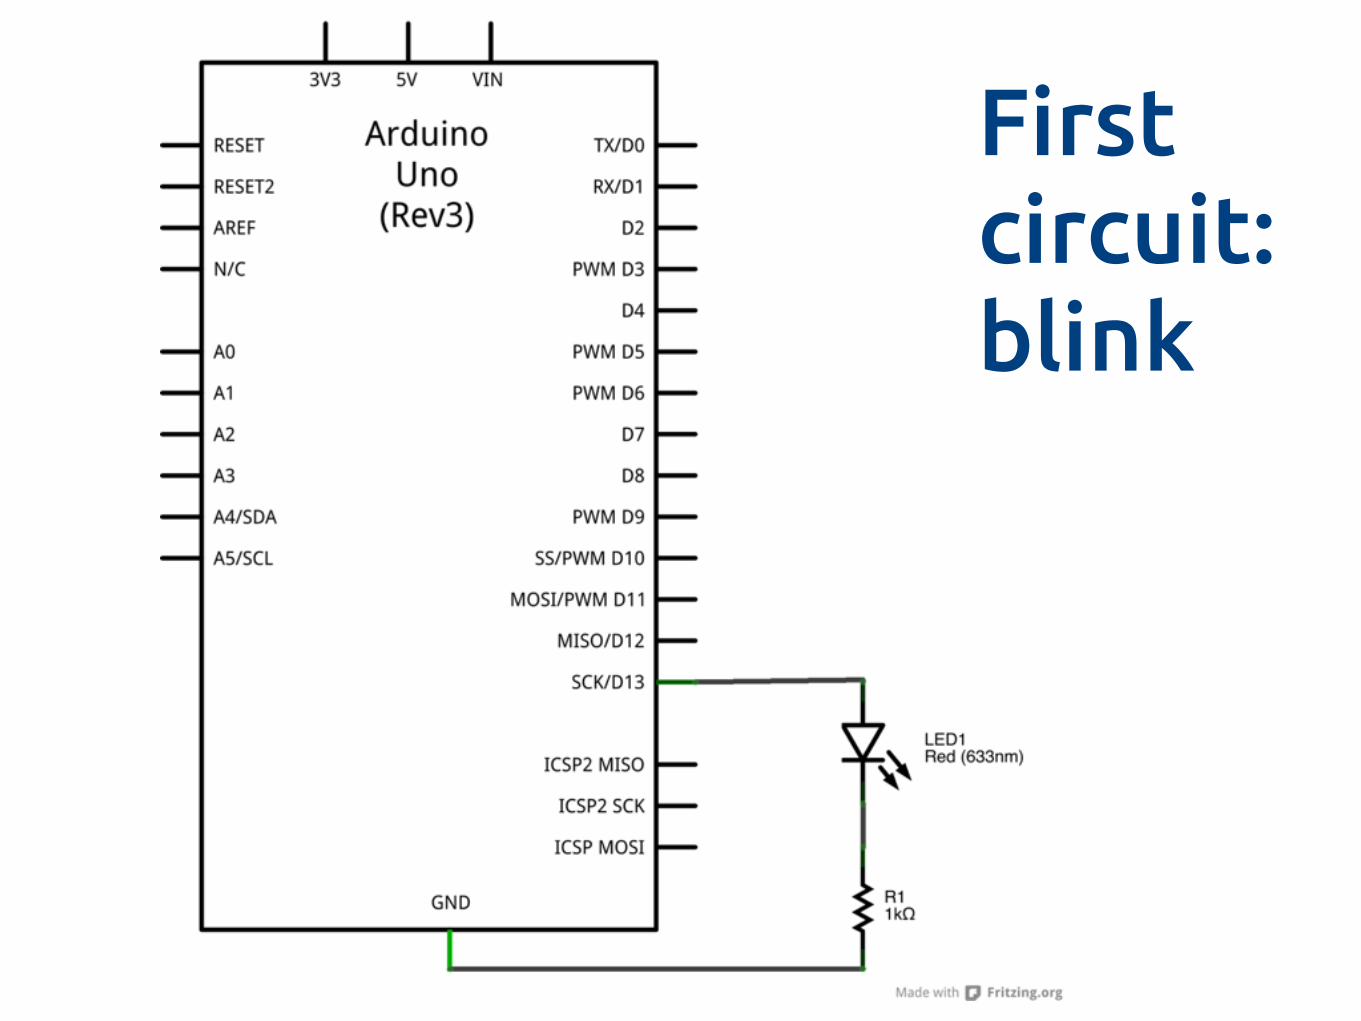
Firstcircuit:blink
Firstcircuit:blink
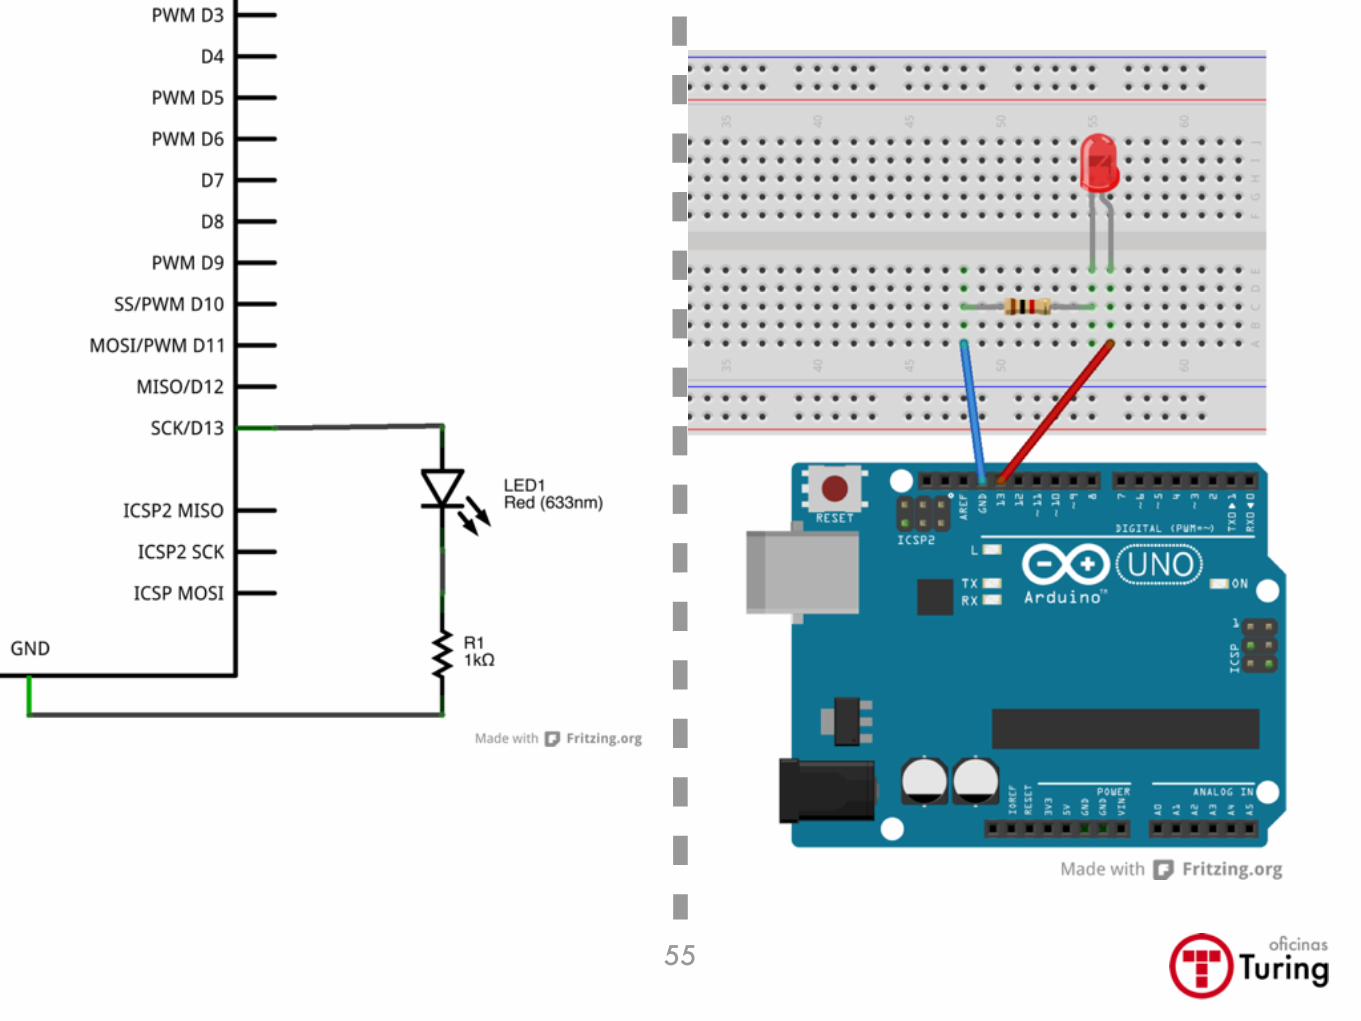
55

Programming
56
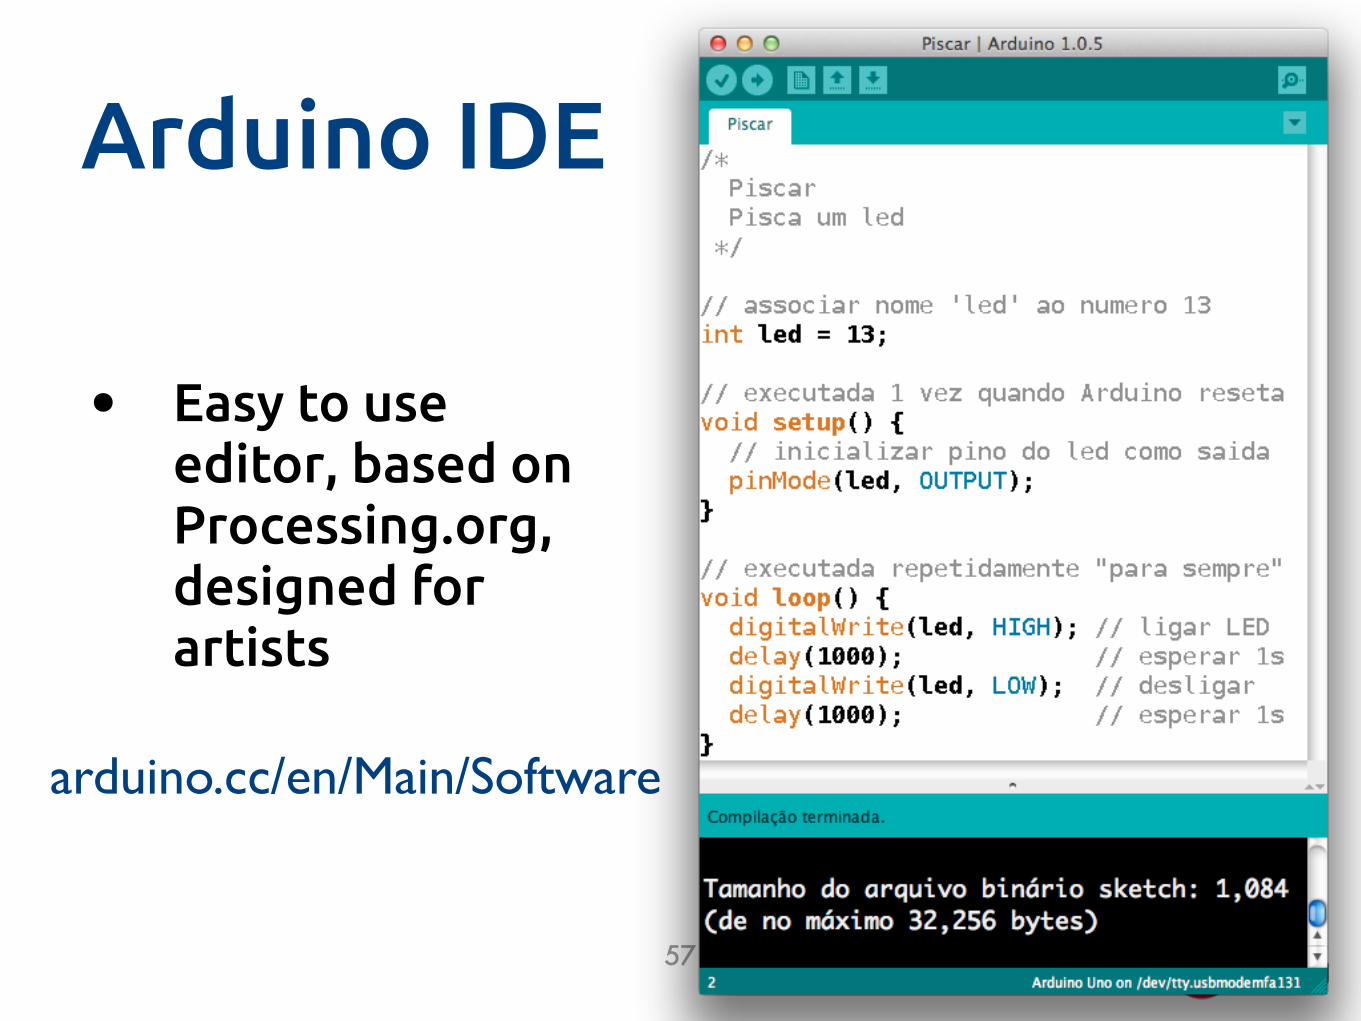
Arduino IDE
• Easy to use editor, based on Processing.org, designed for artists
57
arduino.cc/en/Main/Software
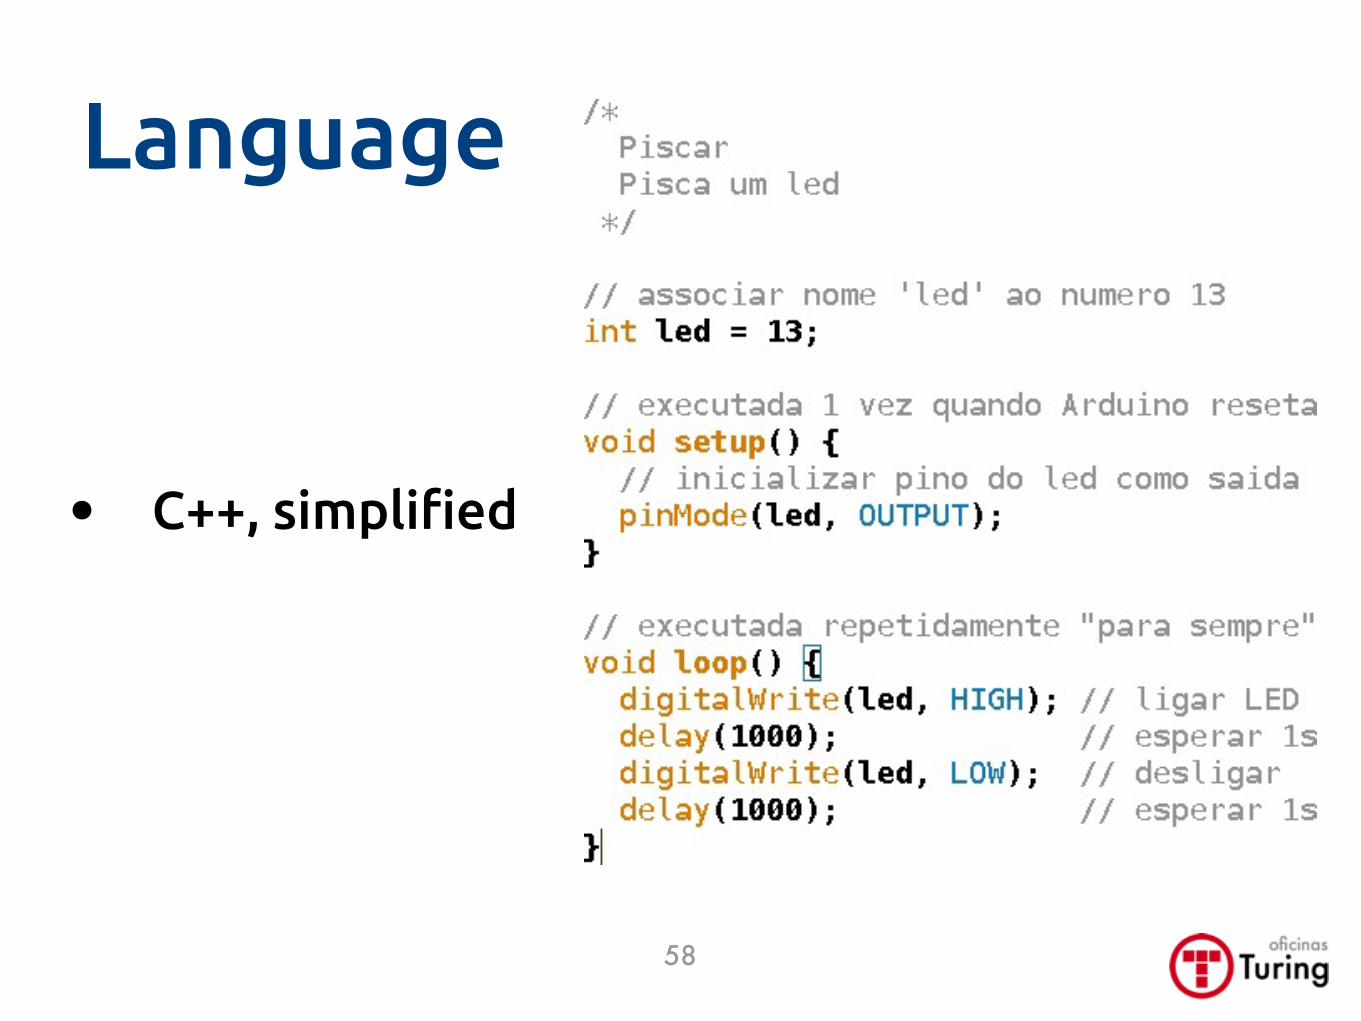
Language
• C++, simpli"ed
58
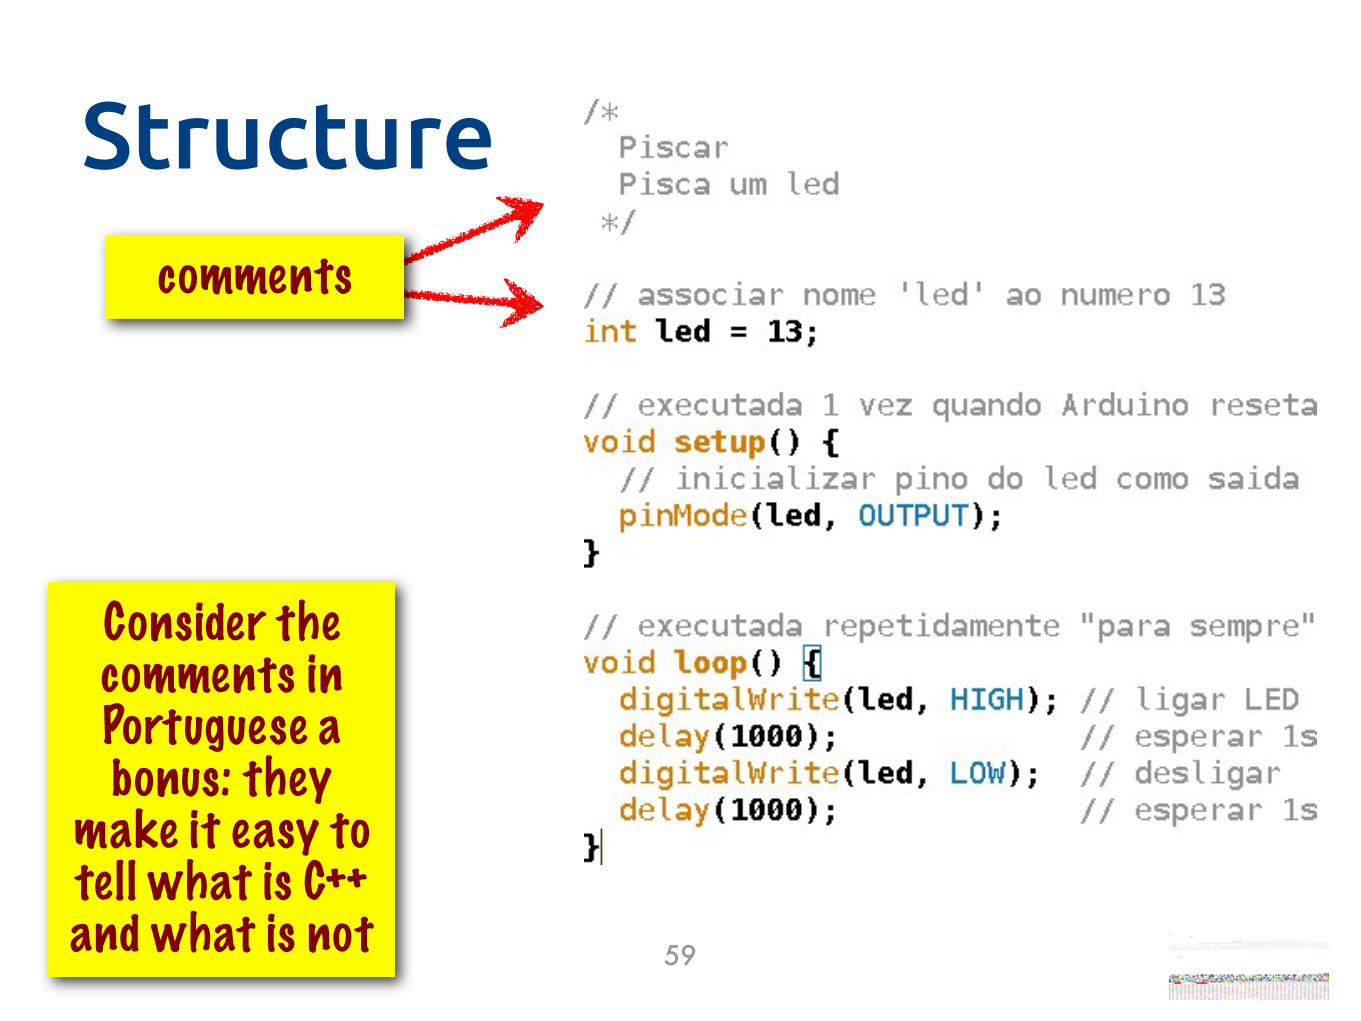
Structurecomments
59
Consider the comments in Portuguese a bonus: they
make it easy to tell what is C++ and what is not
comments
60
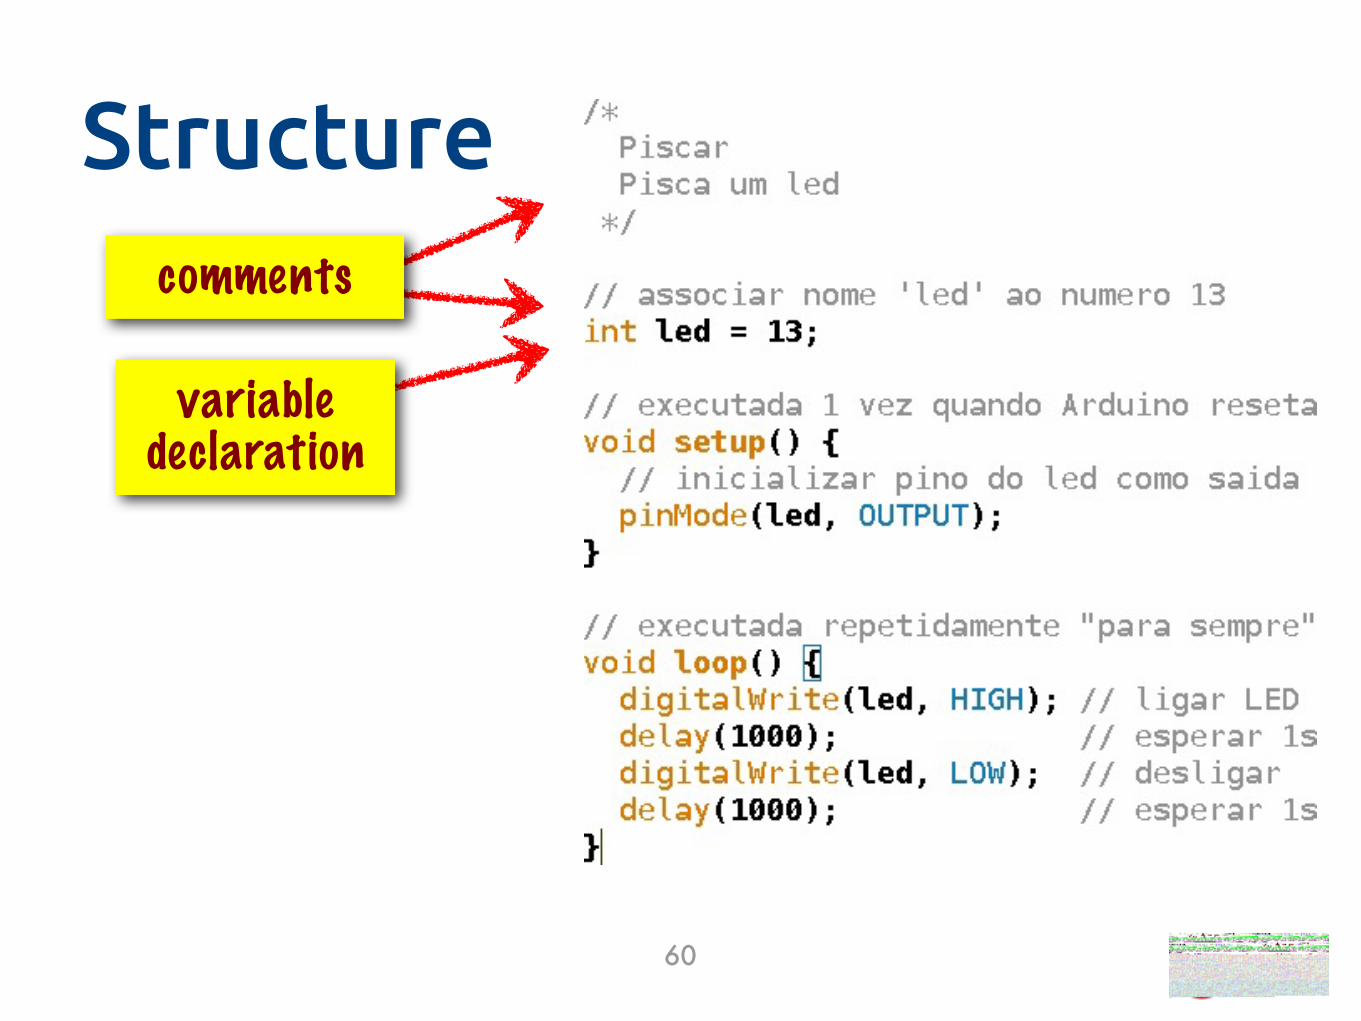
Structure
variable declaration
comments
61
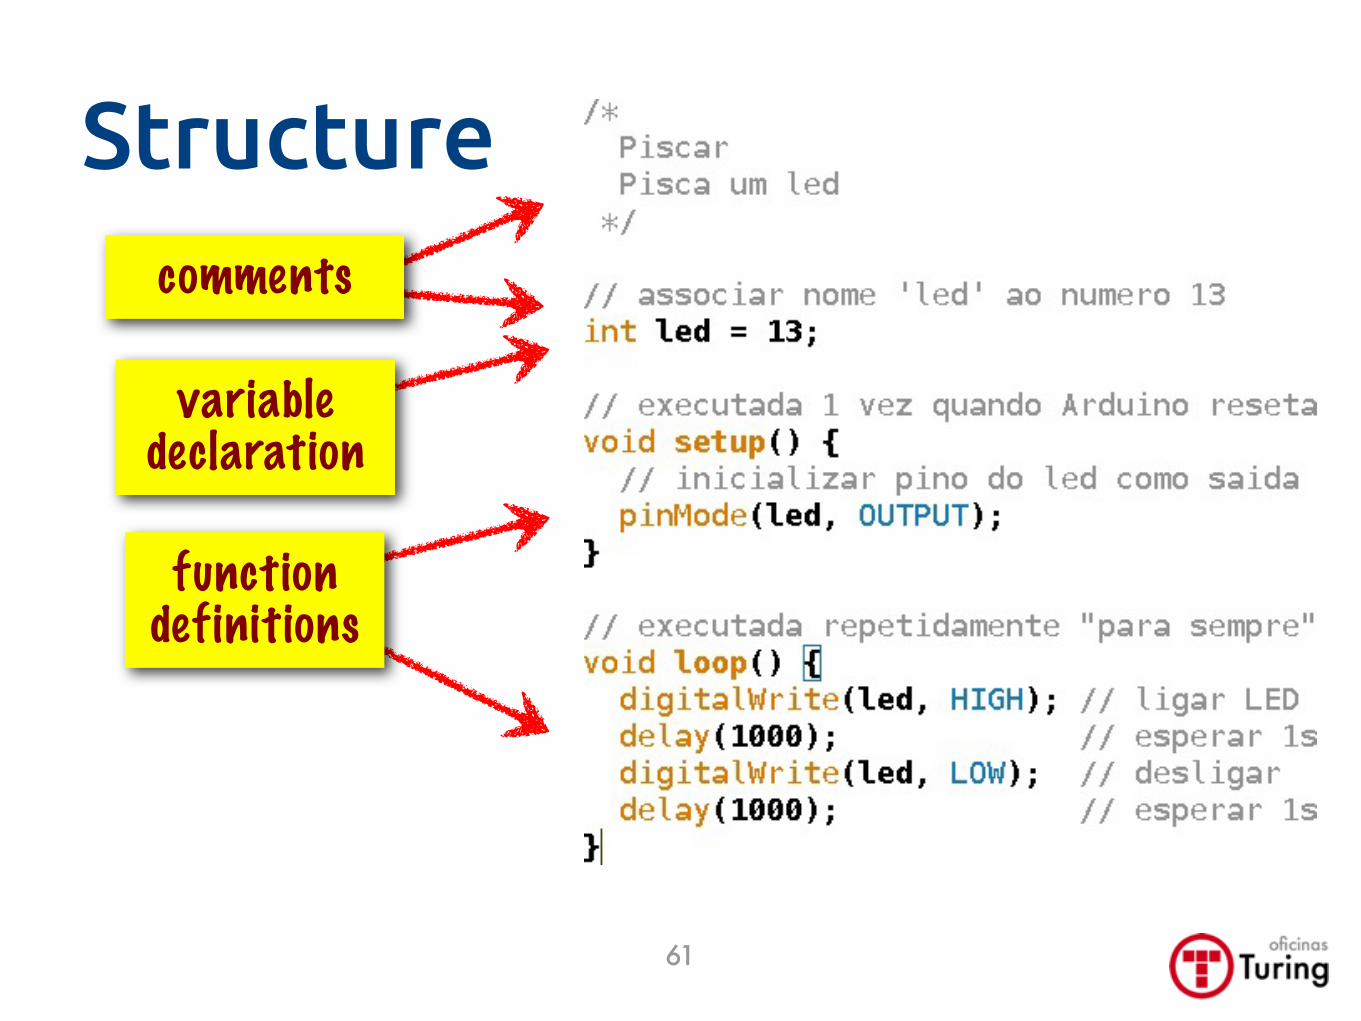
Structure
variable declaration
function definitions
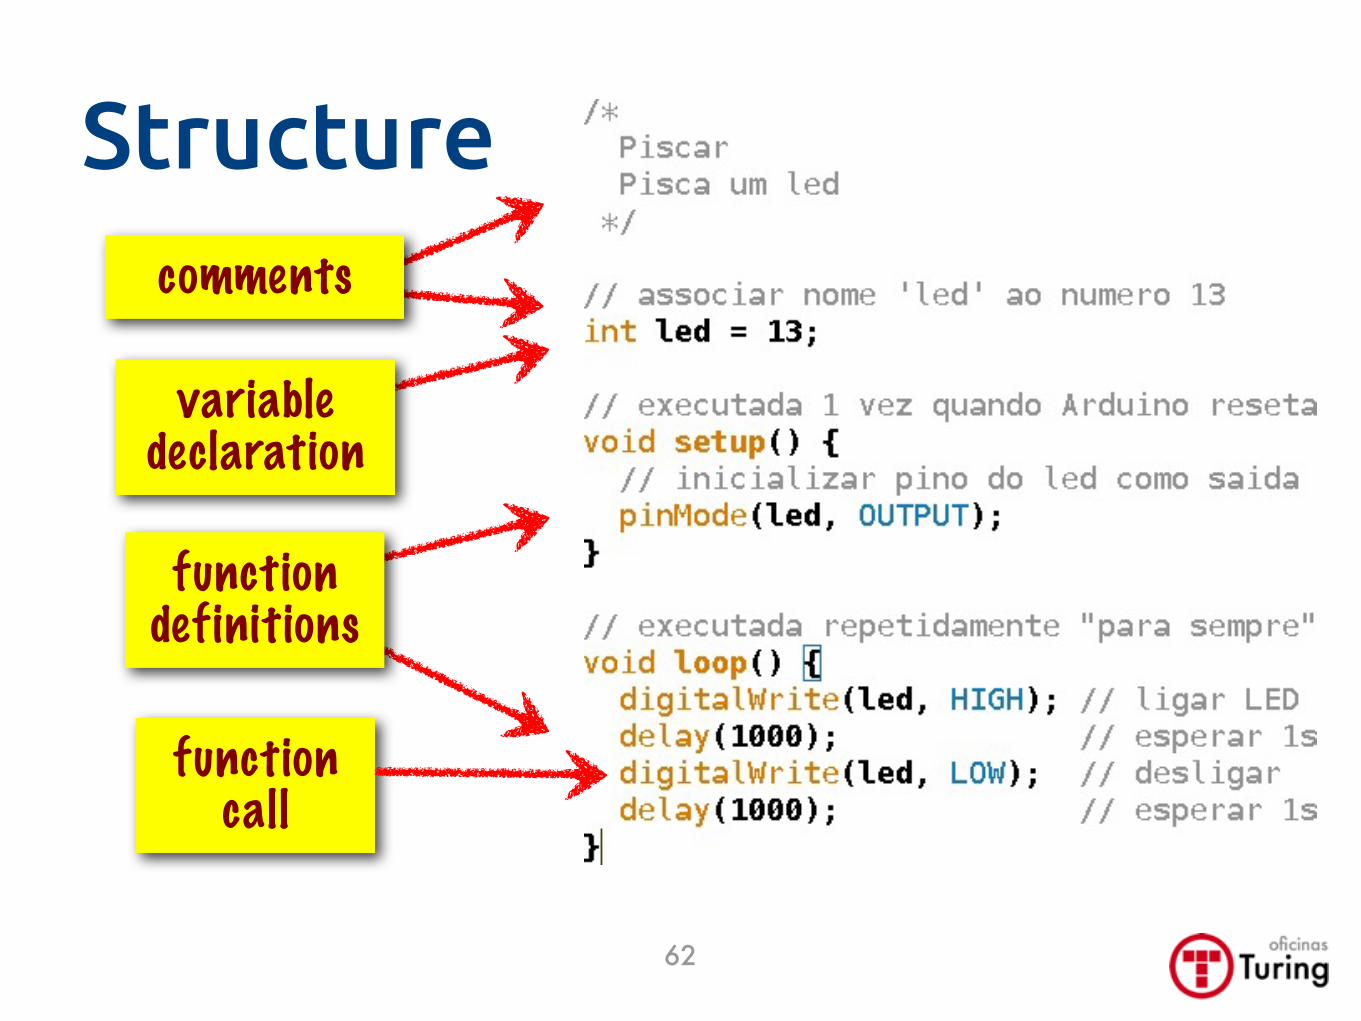
comments
variable declaration
62
function definitions
function call
Structure
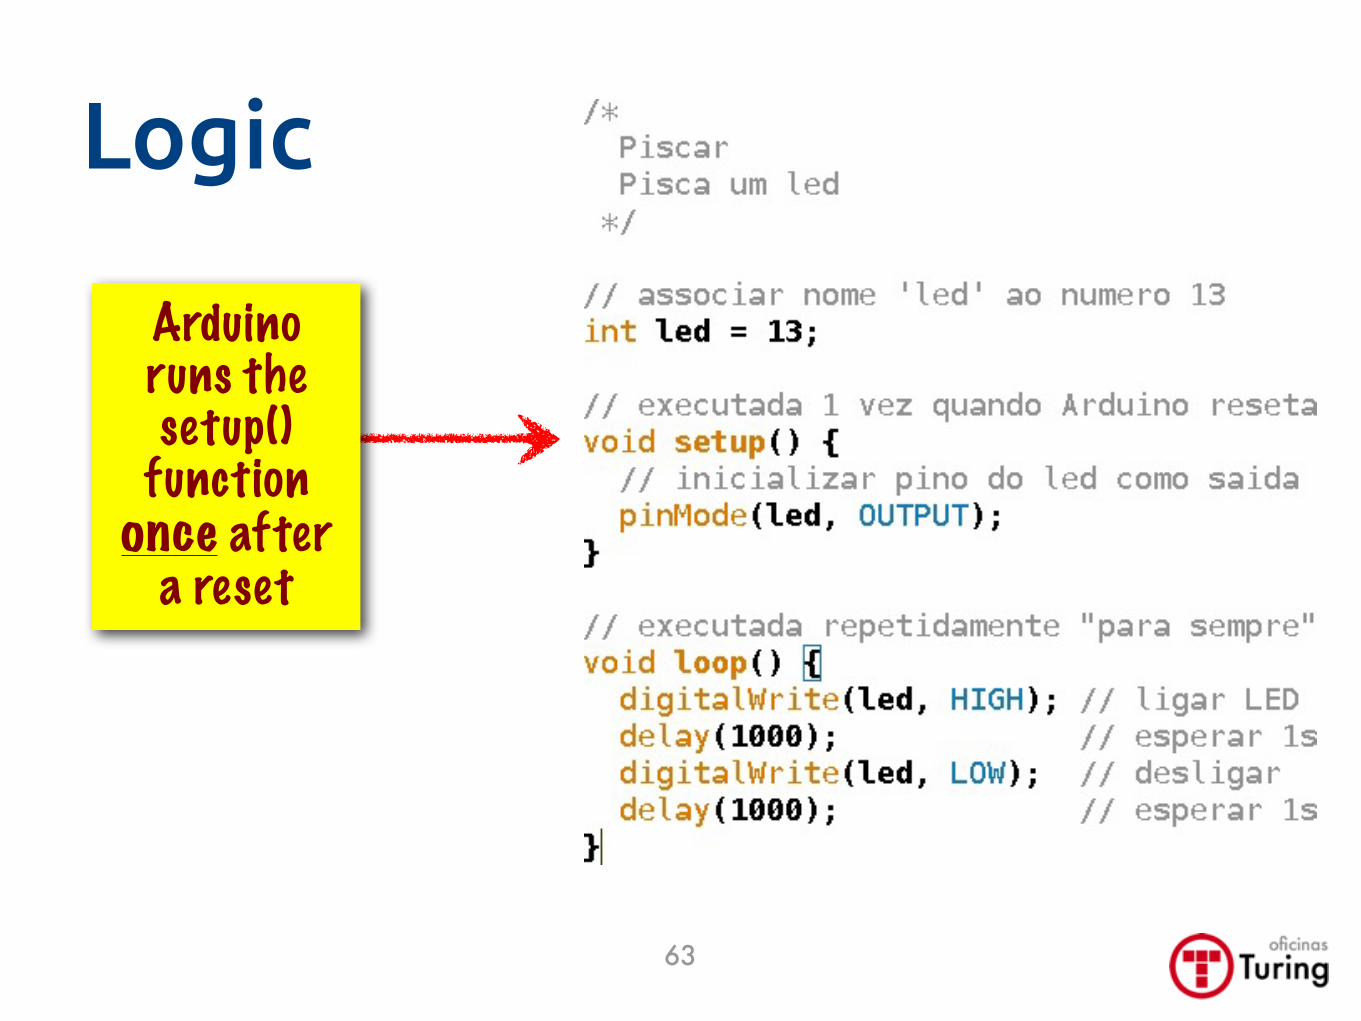
Logic
63
Arduino runs the setup()
function once after
a reset
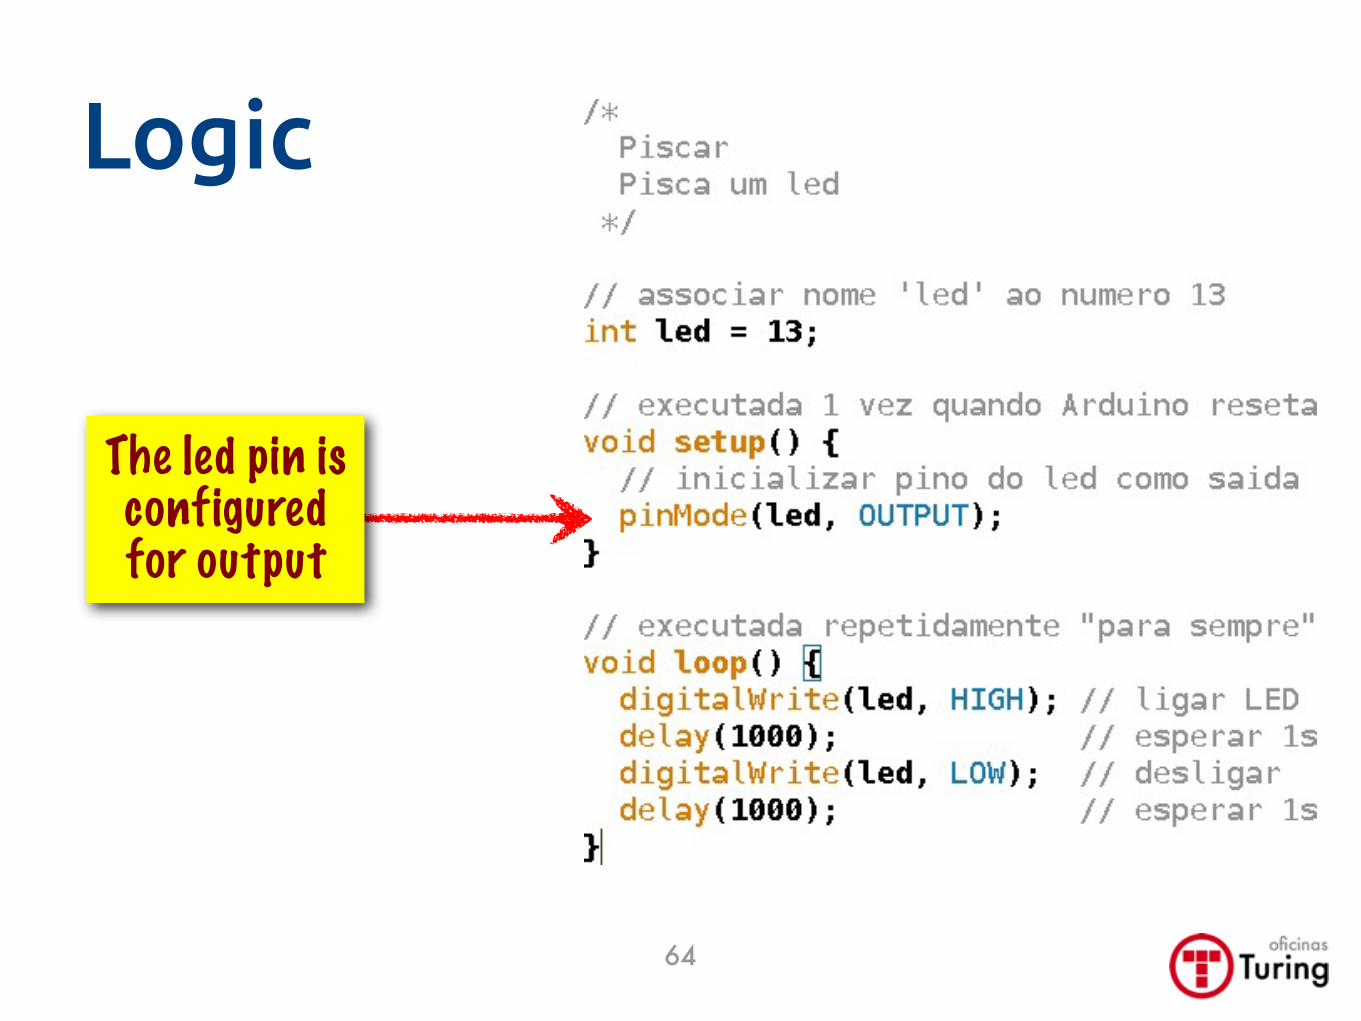
Logic
64
The led pin is configured for output
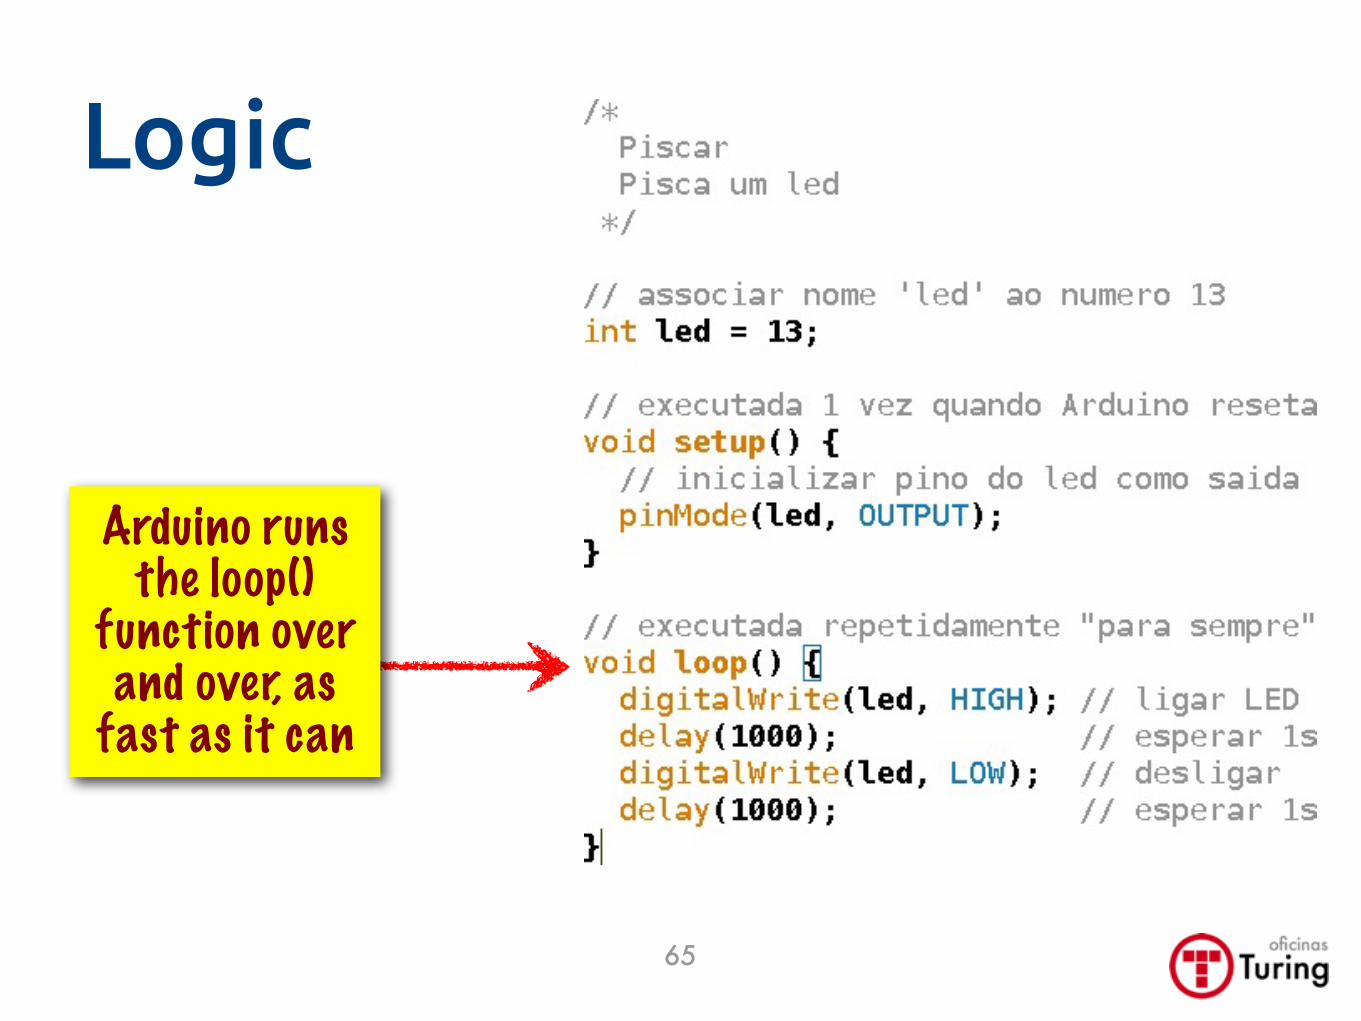
Logic
65
Arduino runs the loop()
function over and over, as
fast as it can
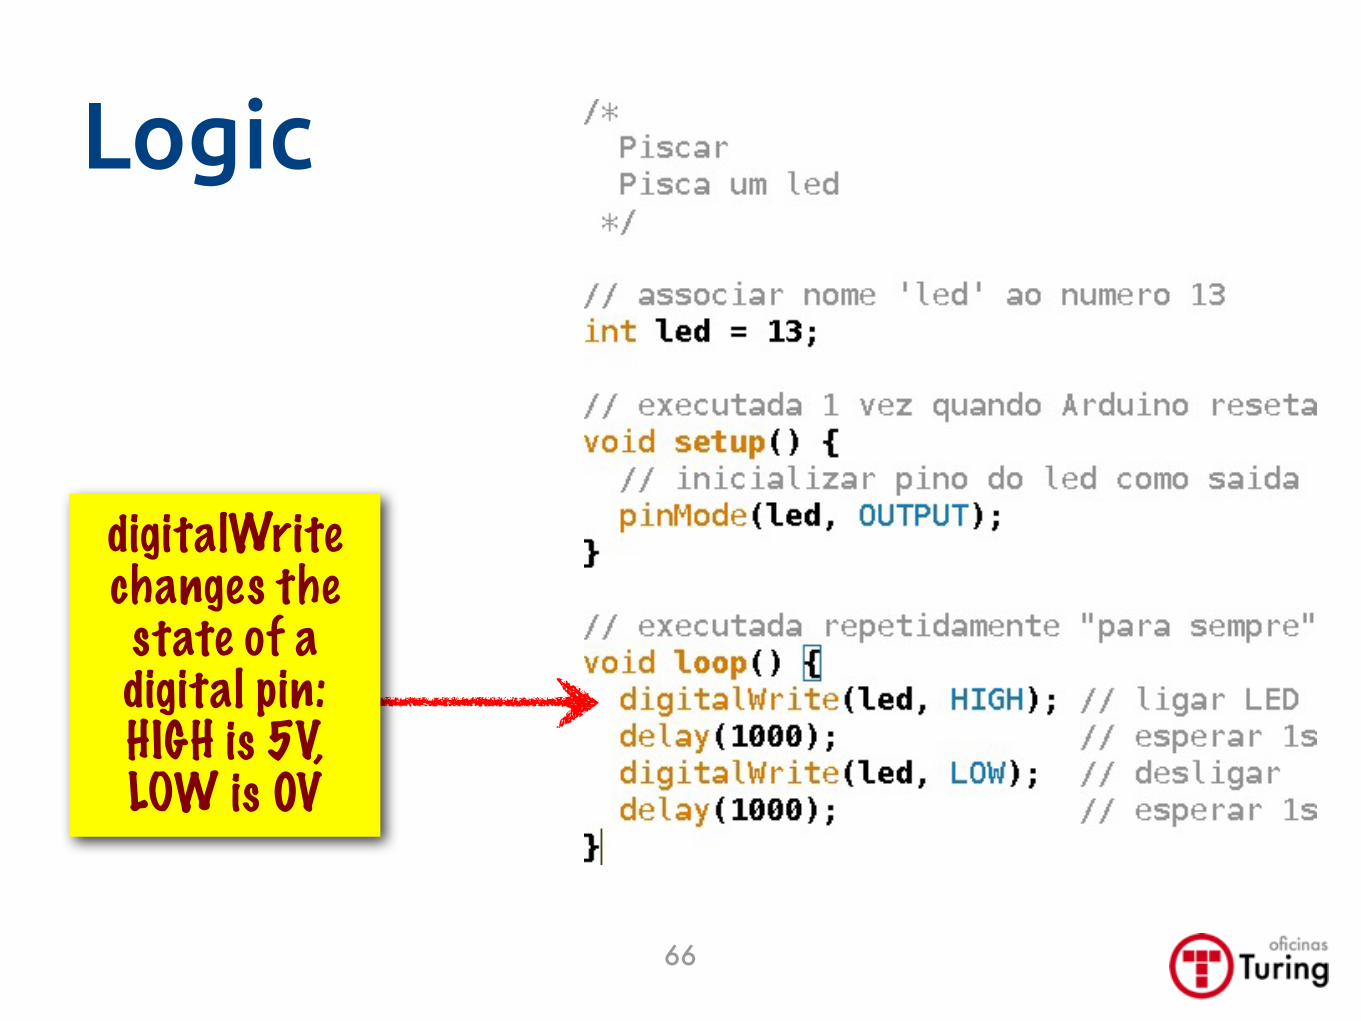
Logic
66
digitalWrite changes the state of a digital pin: HIGH is 5V, LOW is 0V
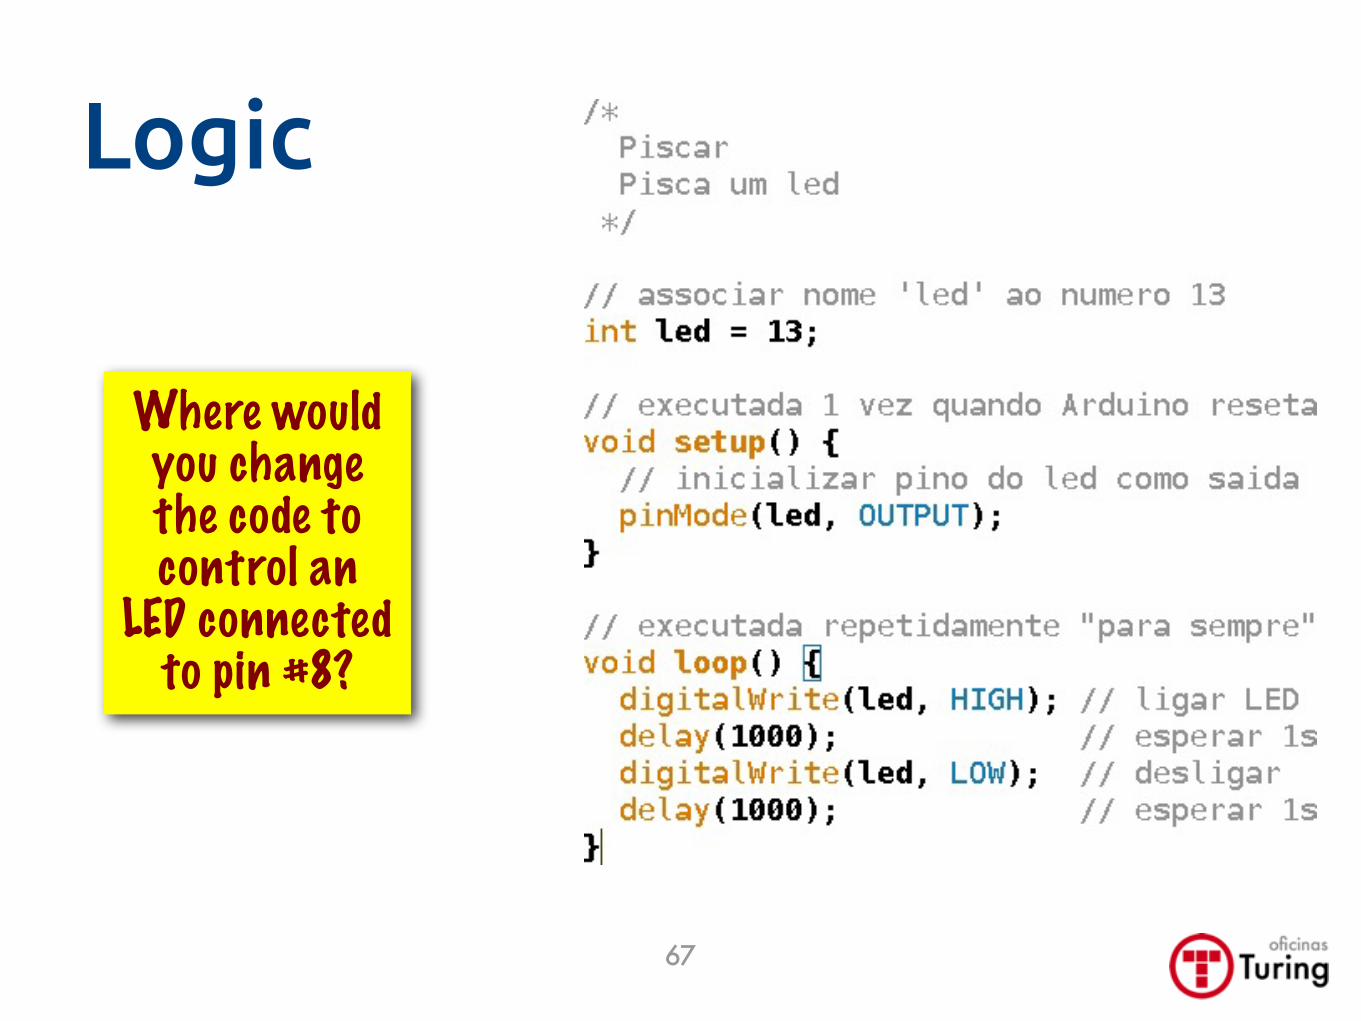
Logic
67
Where would you change the code to control an
LED connected to pin #8?
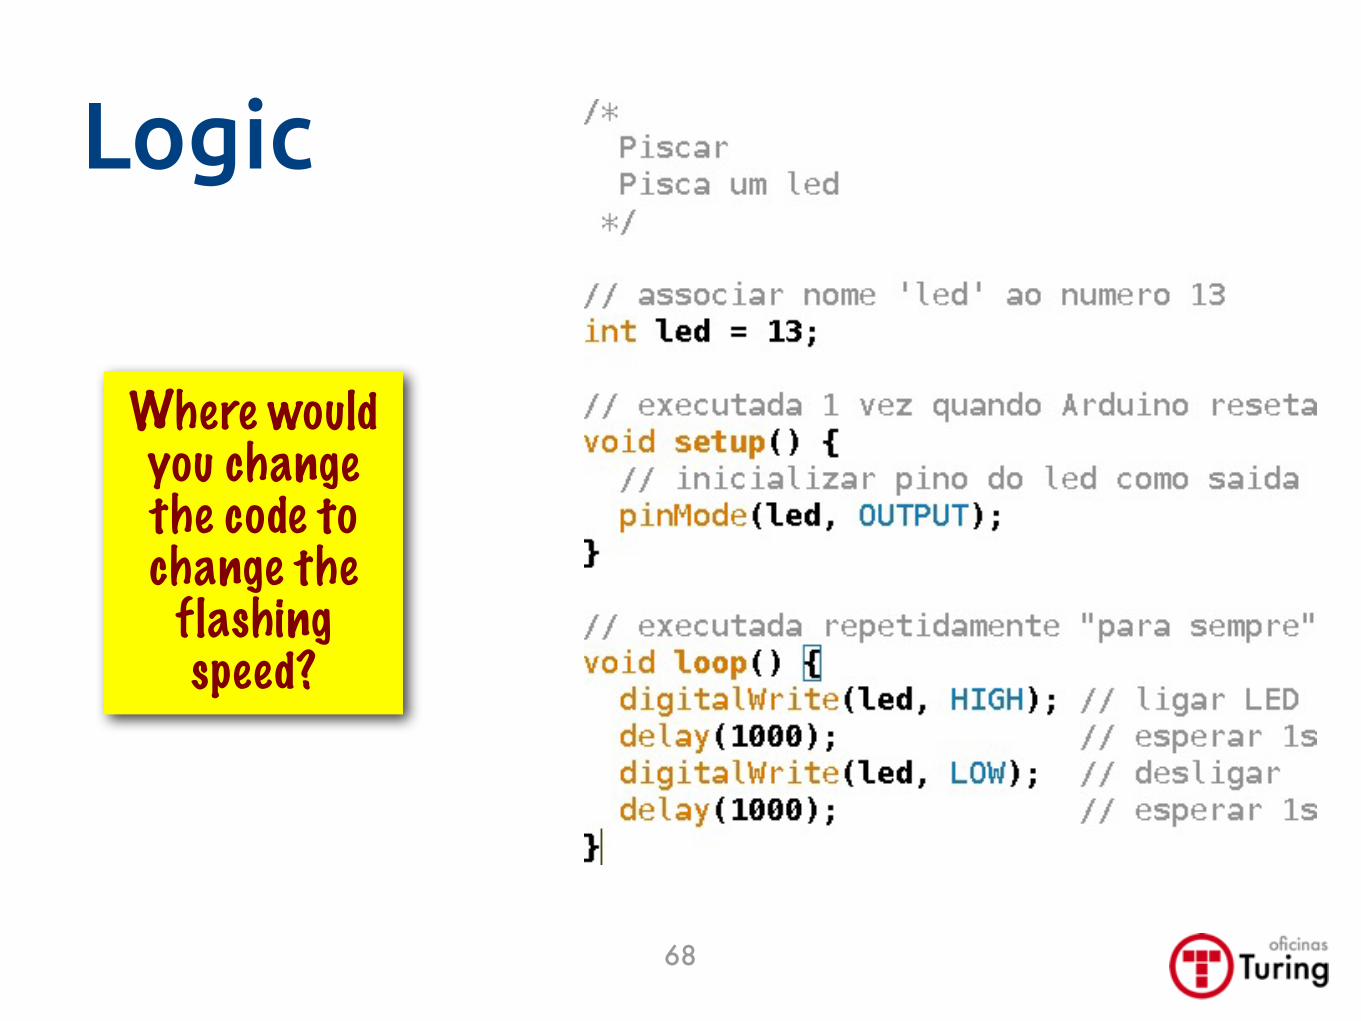
Logic
68
Where would you change the code to change the
flashing speed?
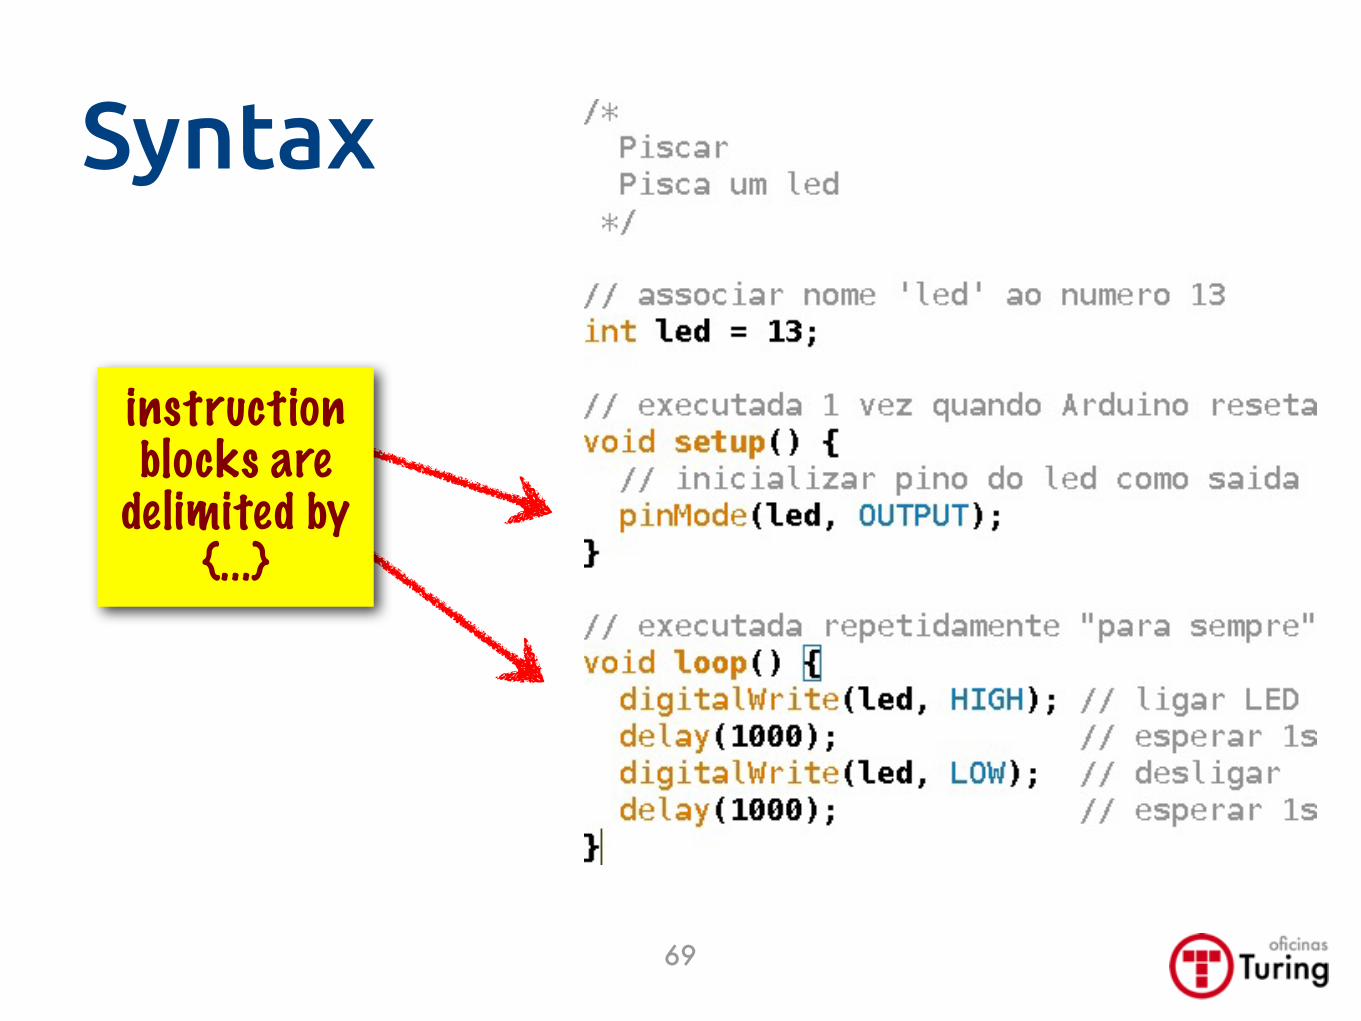
Syntax
69
instruction blocks are
delimited by ...
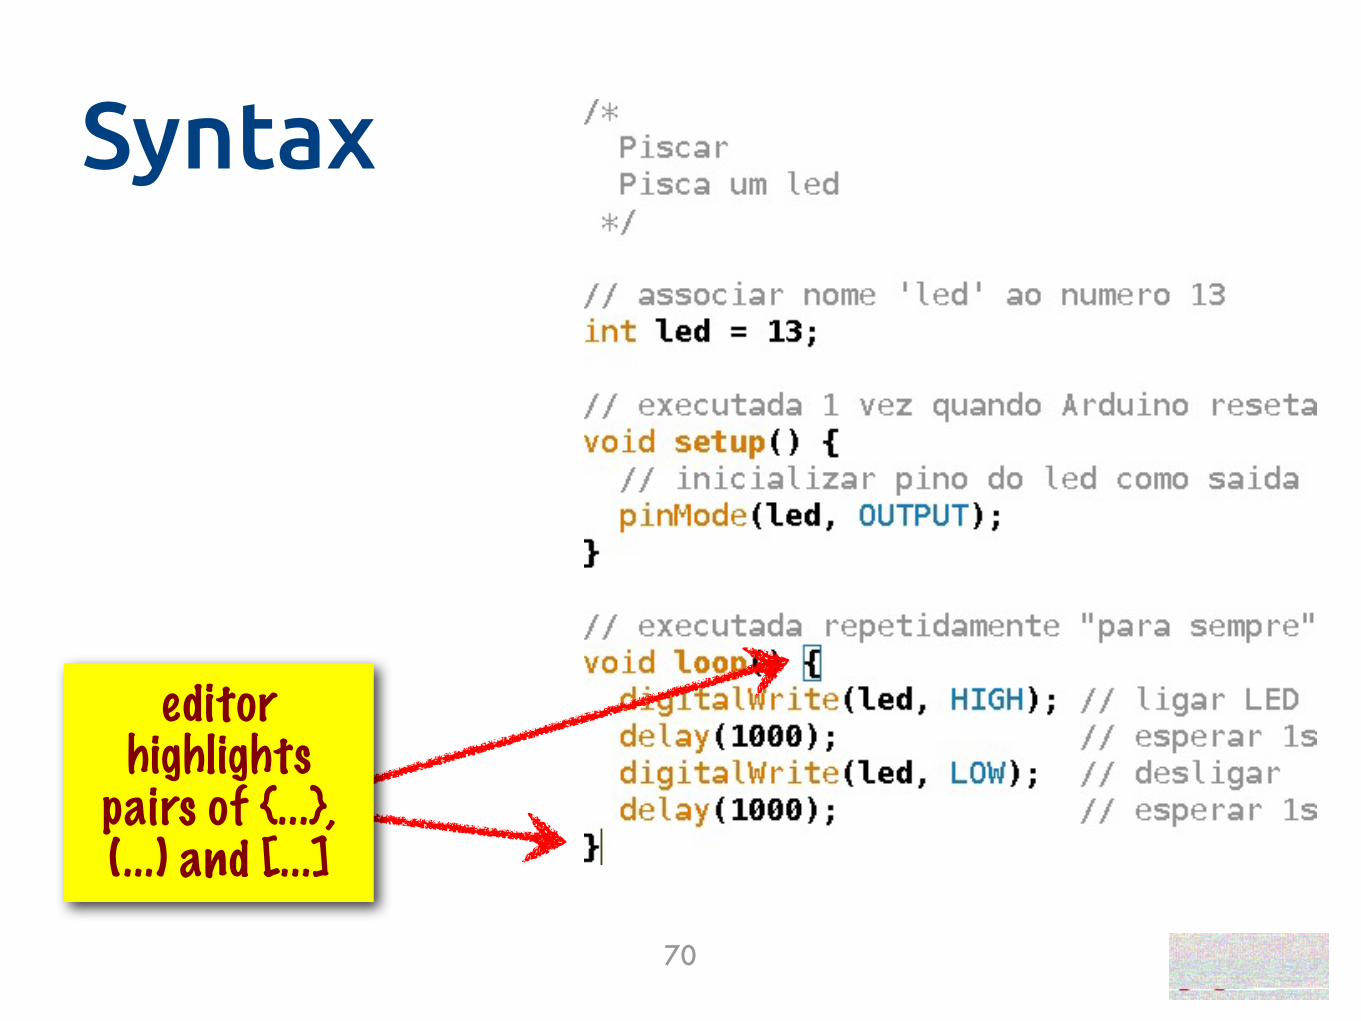
70
editor highlights
pairs of ..., (...) and [...]
Syntax
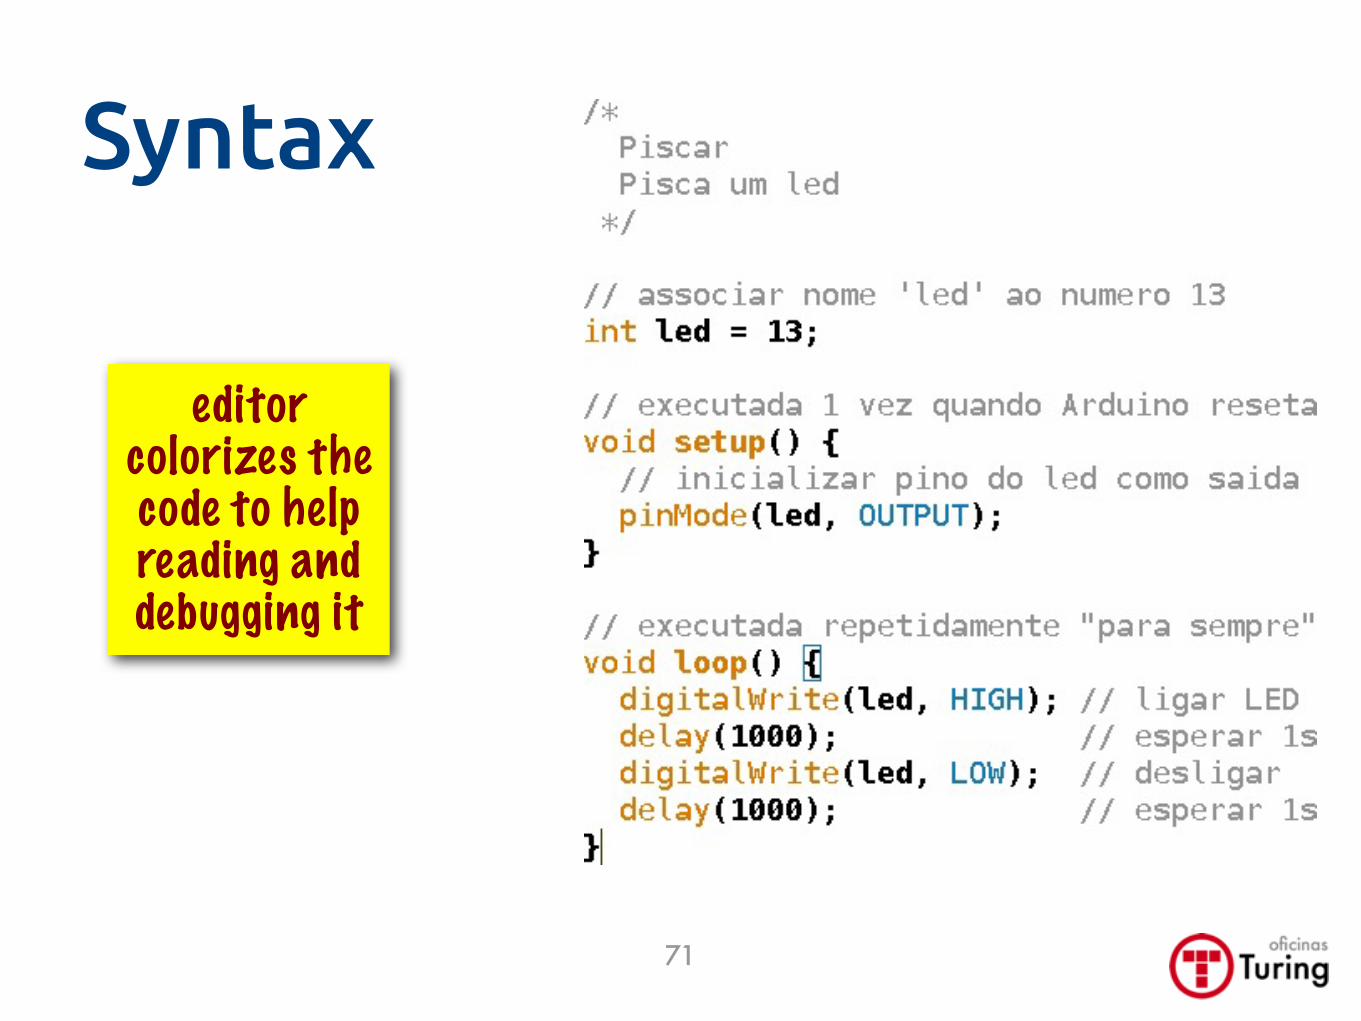
71
editor colorizes the code to help reading and debugging it
Syntax
C++ syntax tips
• Every statement ends with ; (semicolon)
• Each comma and semicolon counts, but spaces and line breaks are ignored
• Upper case ≠ lower case
• ex. Alpha ≠ alpha ≠ ALPHA
72

Coding Dojowith Arduino
Slides at http://bit.ly/dojo-mozilla
73

Arduino & co.
74

Arduino Family
Nano
Uno Mega
etc...
75Lilypad
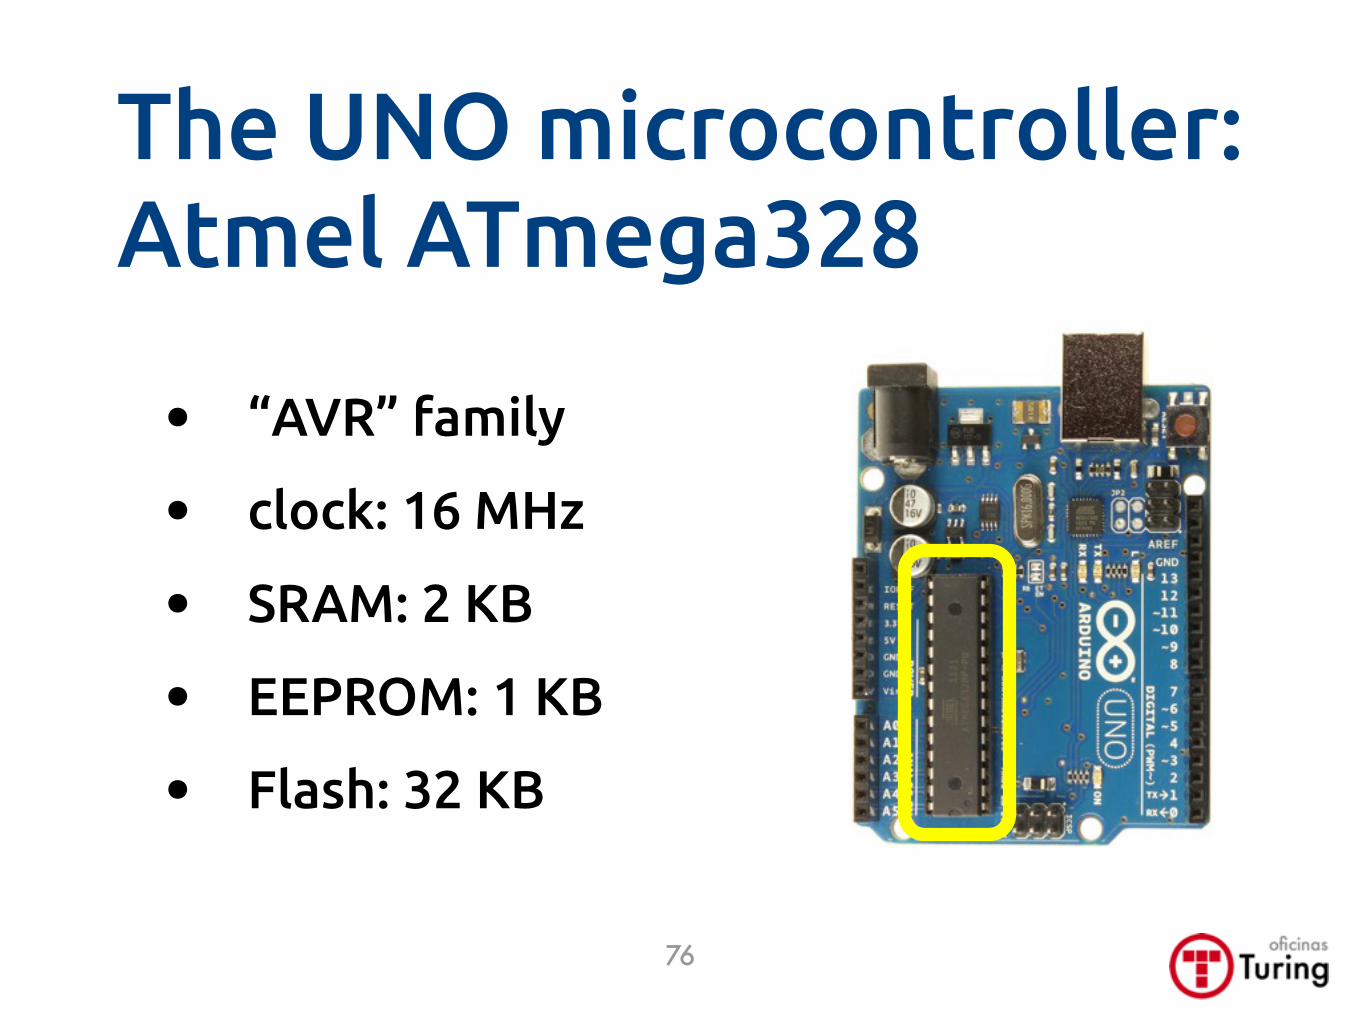
The UNO microcontroller:Atmel ATmega328
• “AVR” family
• clock: 16 MHz
• SRAM: 2 KB
• EEPROM: 1 KB
• Flash: 32 KB
76
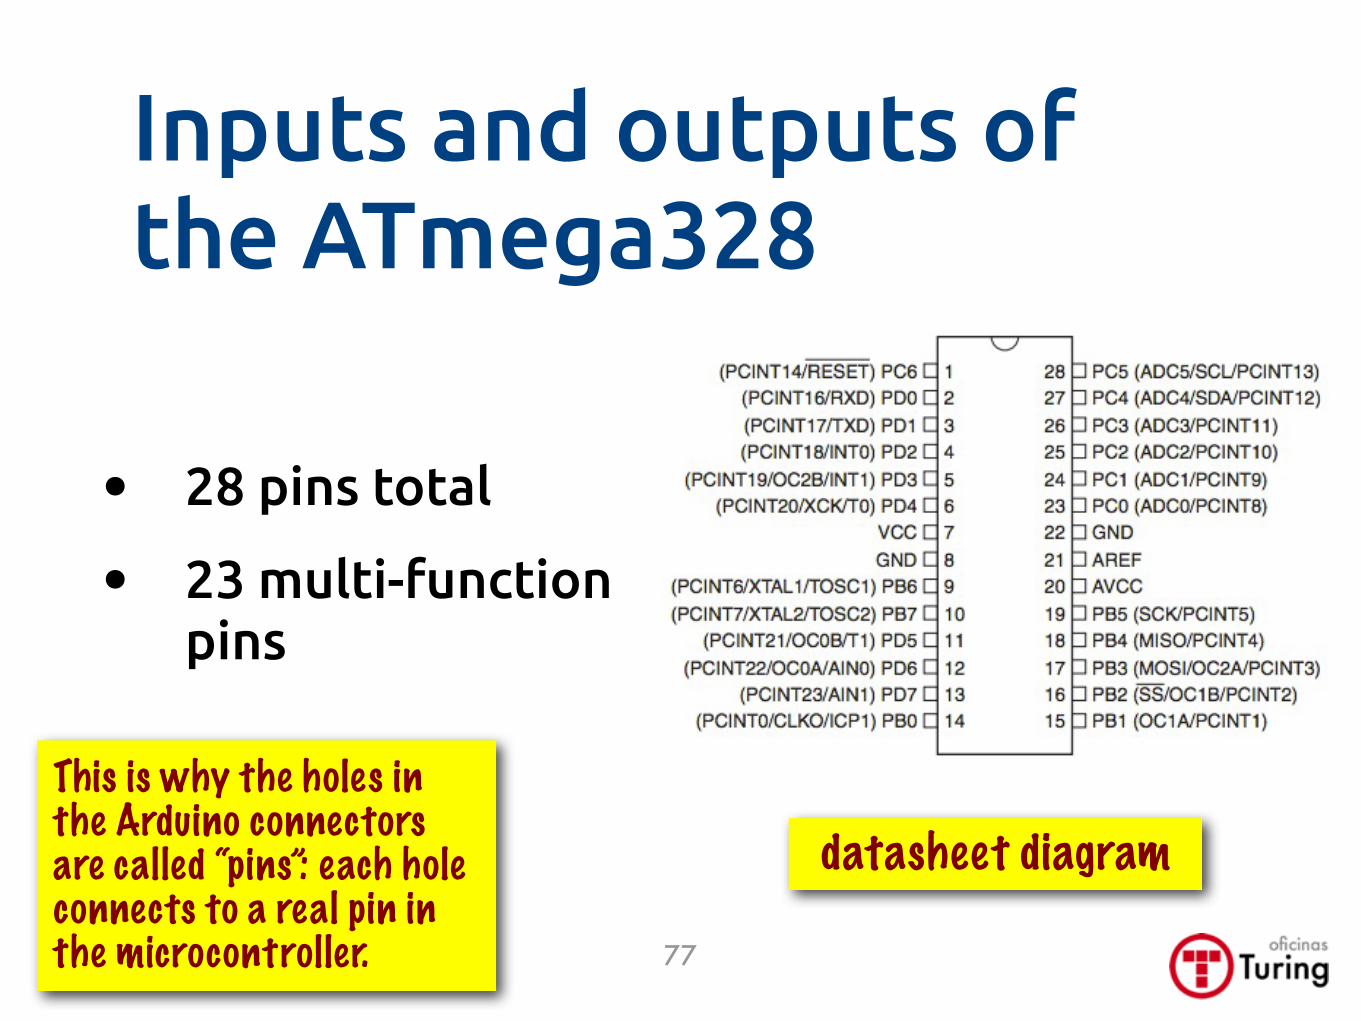
Inputs and outputs of the ATmega328
• 28 pins total
• 23 multi-function pins
77
datasheet diagramThis is why the holes in the Arduino connectors are called “pins”: each hole connects to a real pin in the microcontroller.

• Pin functions: standardized and simpli"ed
• Easier to learn
• Easier to design compatible expansions
78
Inputs and outputs of the Arduino UNO
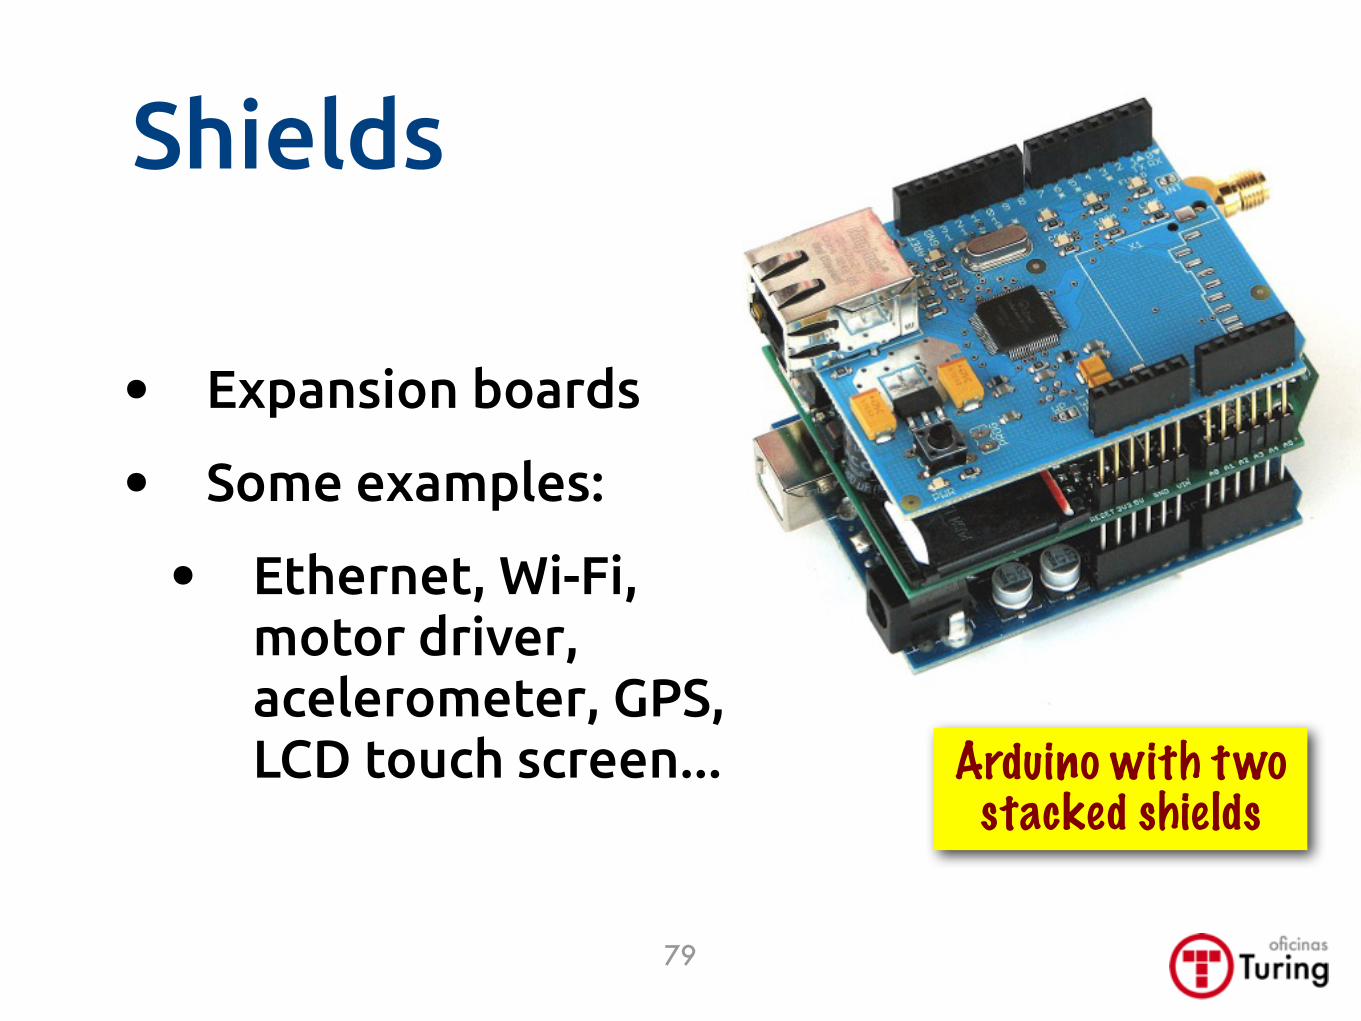
Shields
79
Arduino with two stacked shields
• Expansion boards
• Some examples:
• Ethernet, Wi-Fi, motor driver, acelerometer, GPS, LCD touch screen...
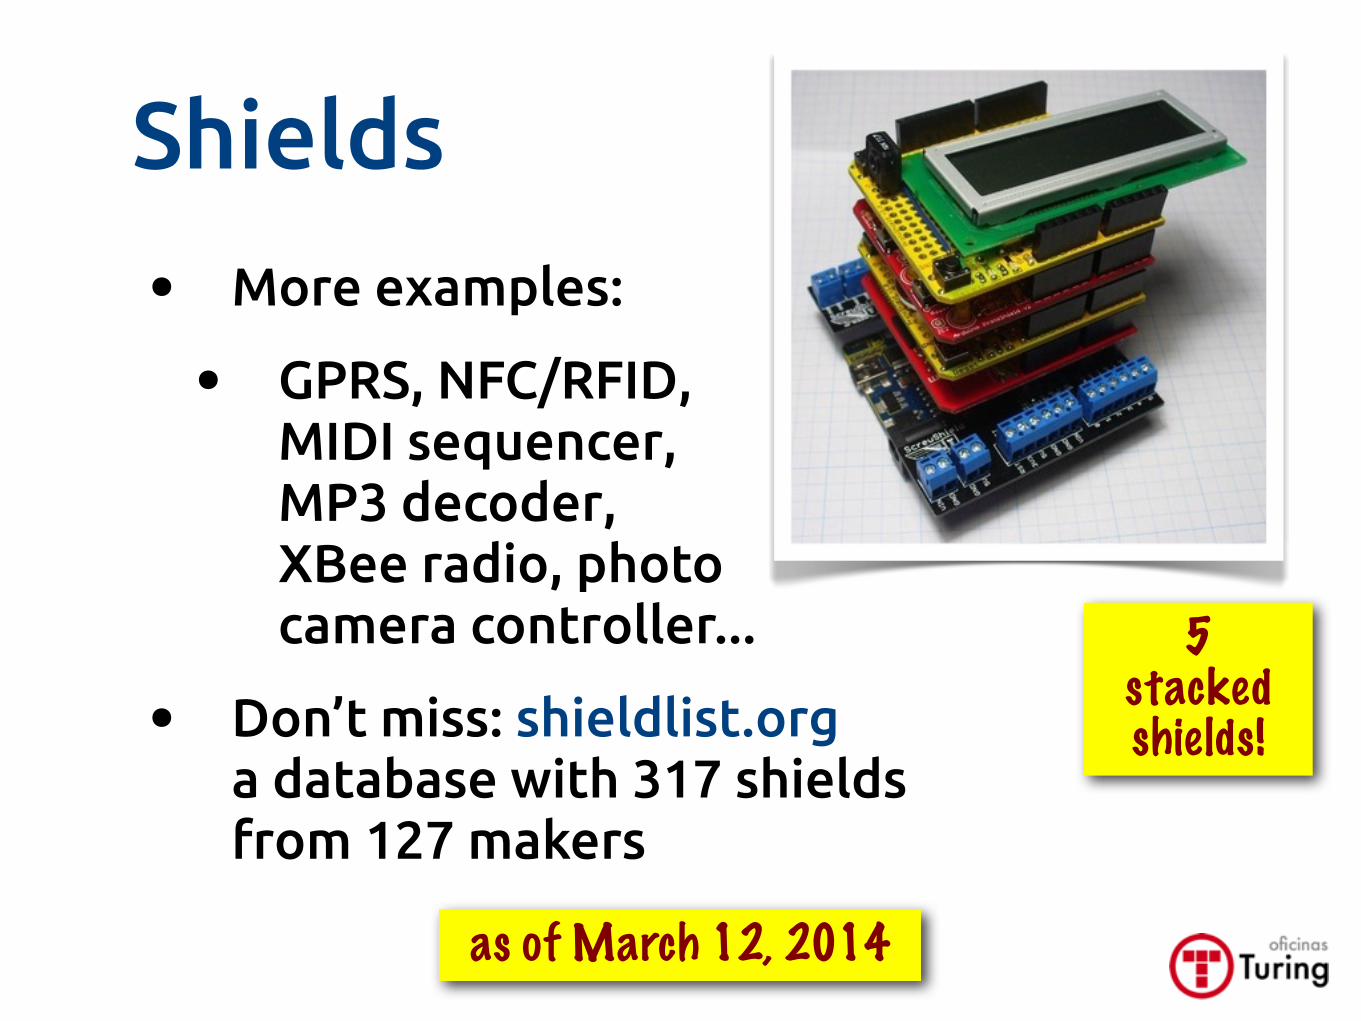
Shields
80
5stacked shields!
• More examples:
• GPRS, NFC/RFID, MIDI sequencer, MP3 decoder, XBee radio, photocamera controller...
• Don’t miss: shieldlist.org a database with 317 shields from 127 makers
as of March 12, 2014

Clones and derivatives
• Some examples:
• Severino
• Garagino
• Sanguino
• Program-ME
Severino
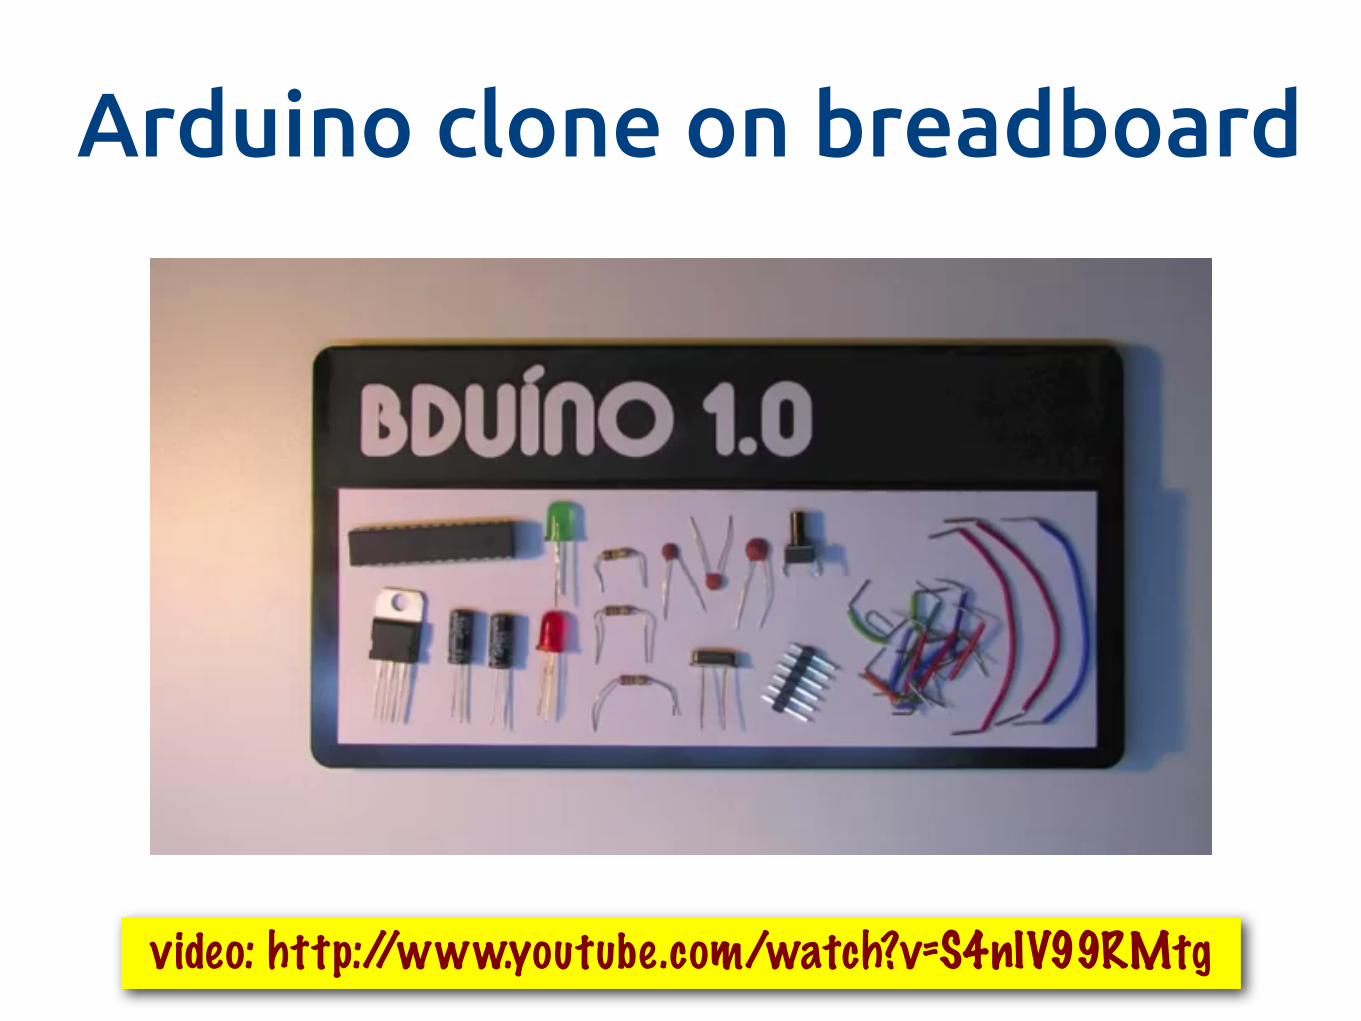
Vídeo: http://www.youtube.com/watch?v=S4nIV99RMtg82
Arduino clone on breadboard
video: http://www.youtube.com/watch?v=S4nIV99RMtg

83
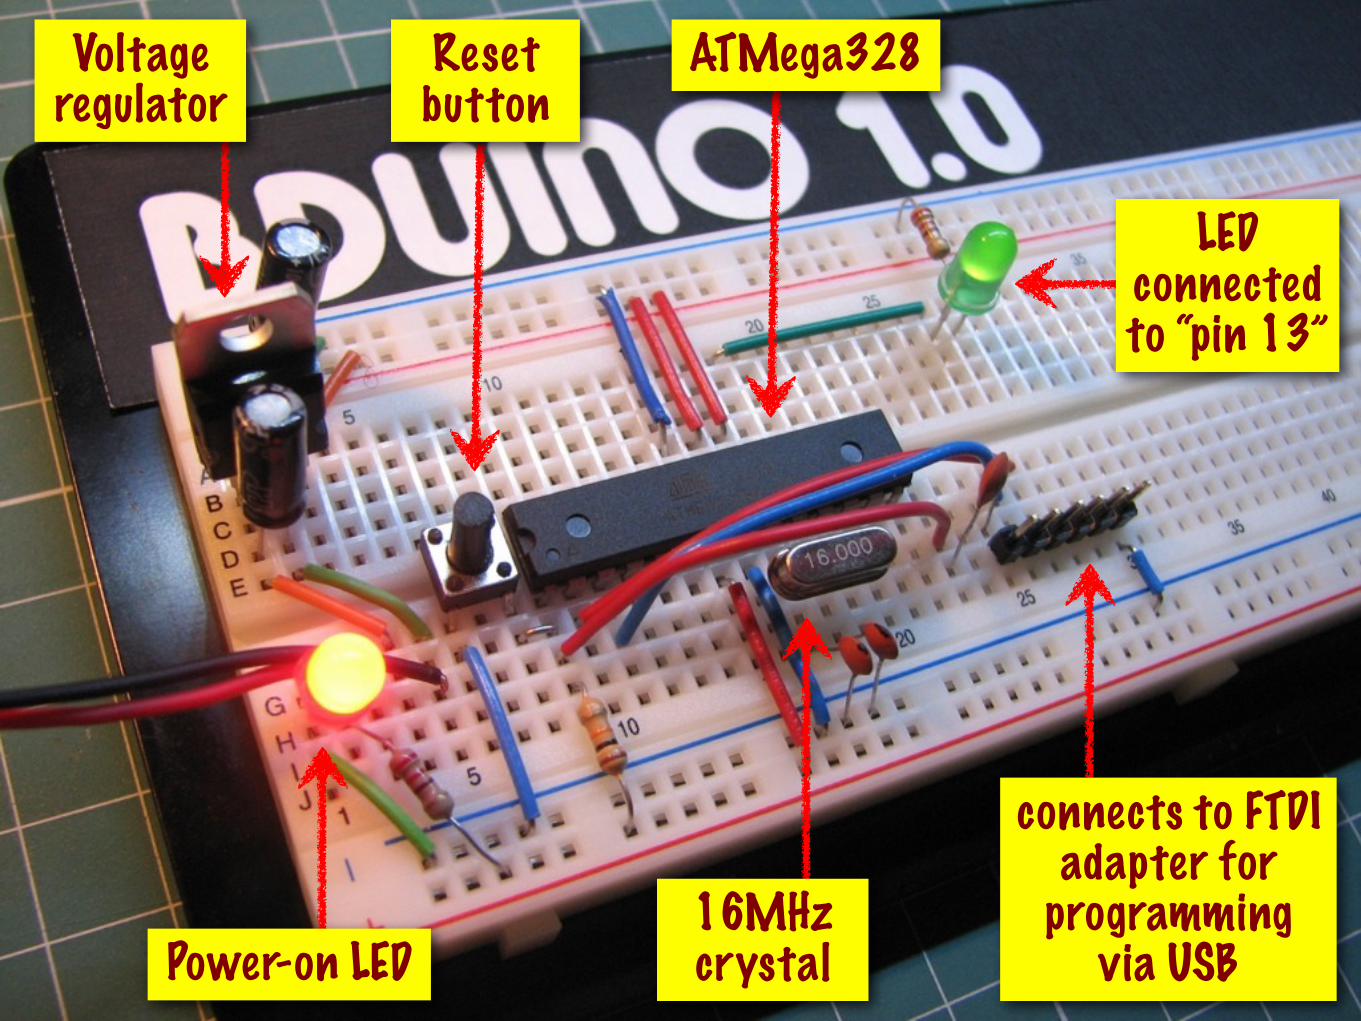
84
Reset button
Voltage regulator
LED connected to “pin 13”
ATMega328
Power-on LED
connects to FTDI adapter for
programmingvia USB
16MHz crystal

More electronic components
85
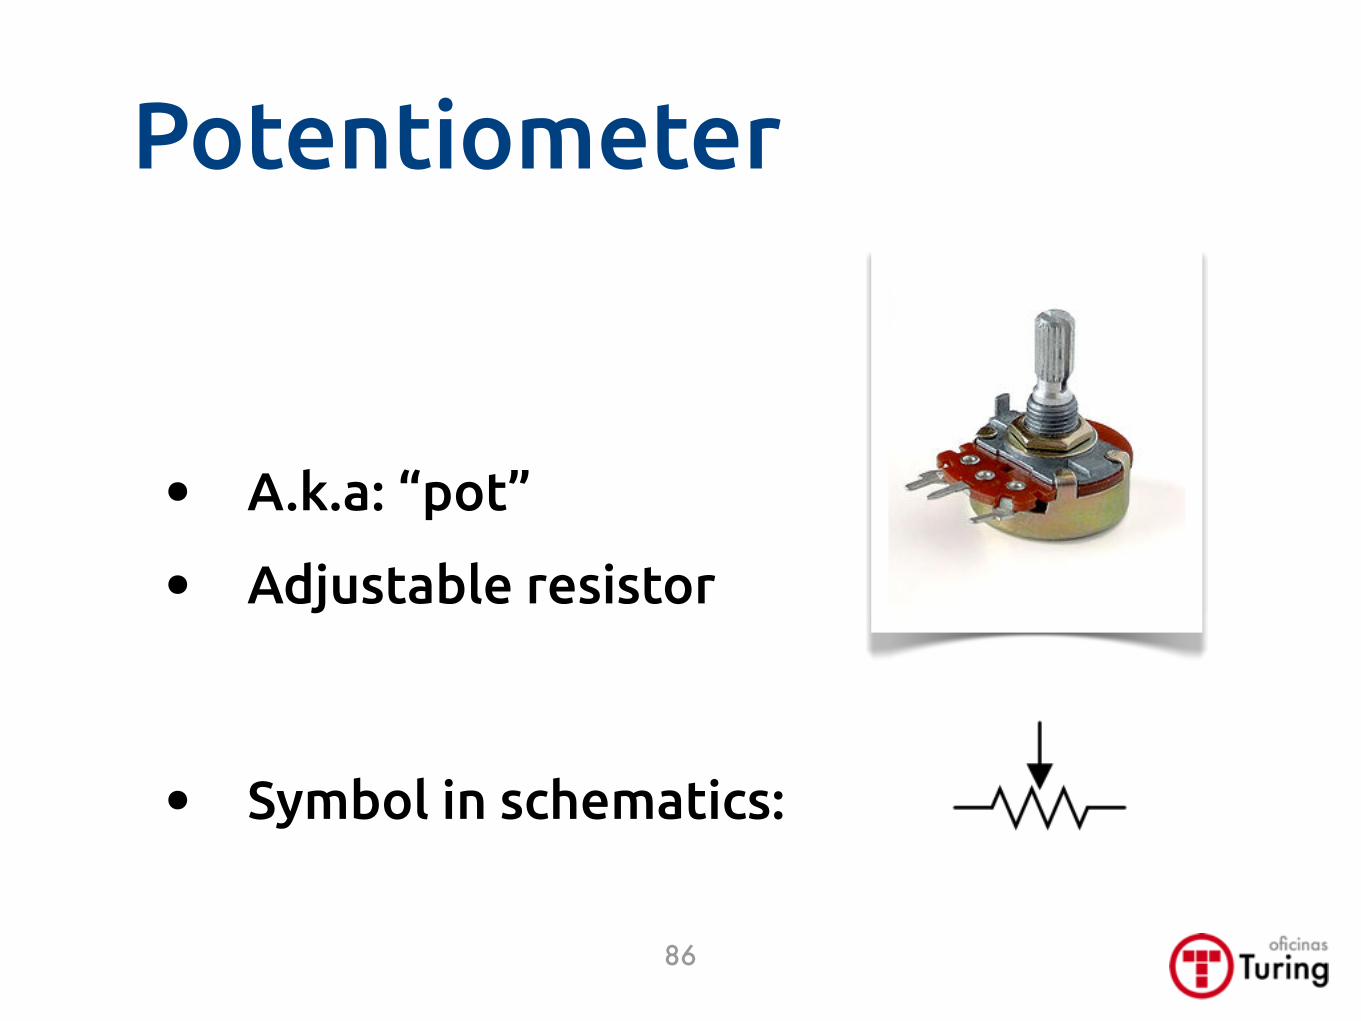
Potentiometer
• A.k.a: “pot”
• Adjustable resistor
• Symbol in schematics:
86
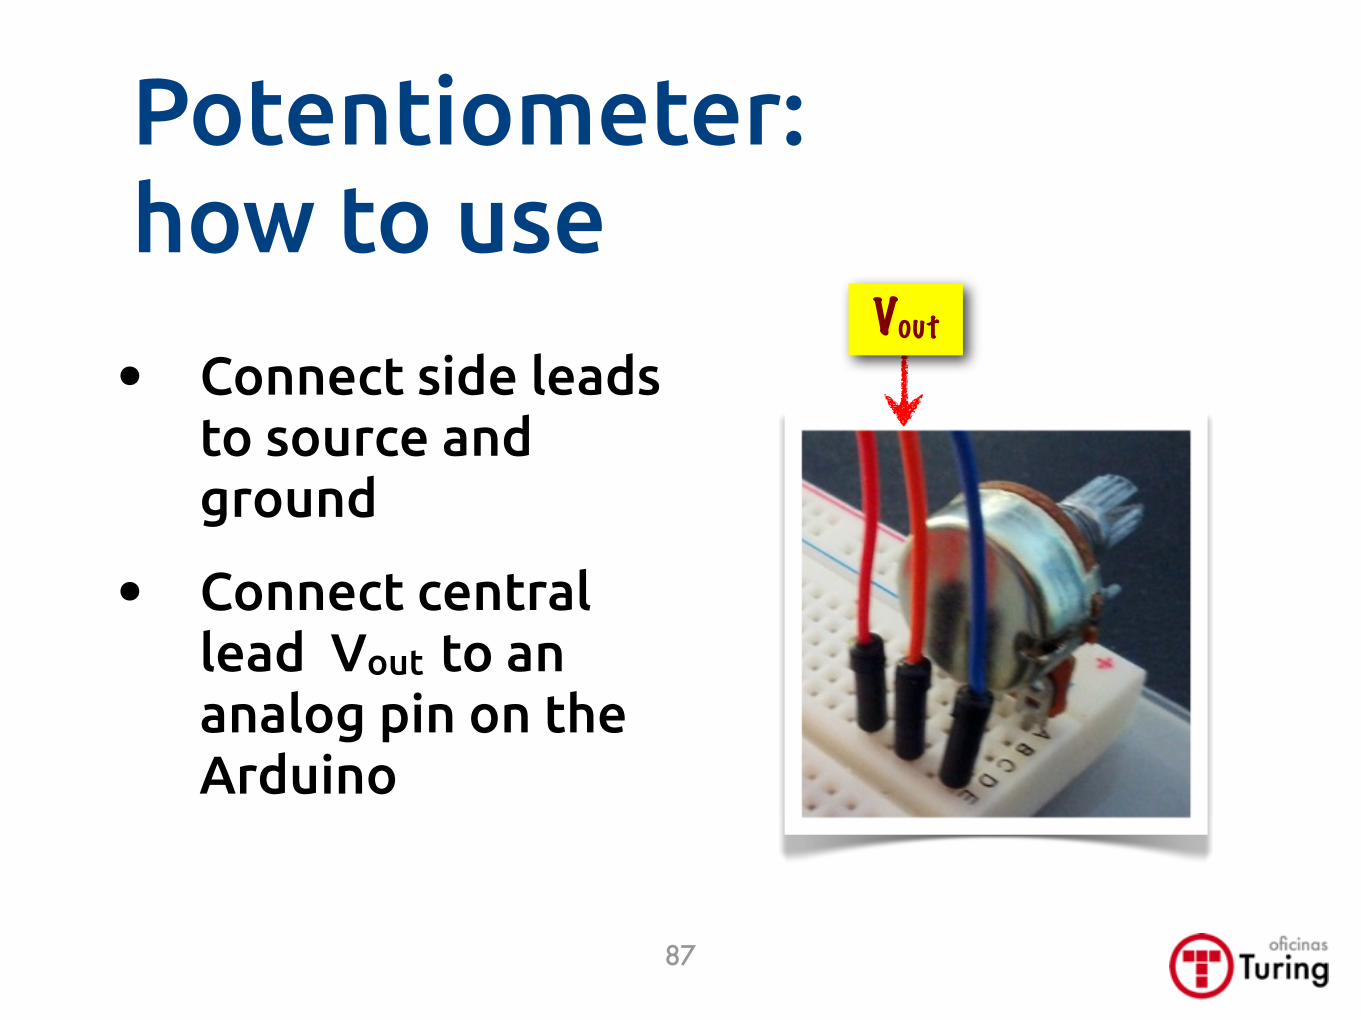
Potentiometer: how to use
87
Vout
• Connect side leads to source and ground
• Connect central lead Vout to an analog pin on the Arduino
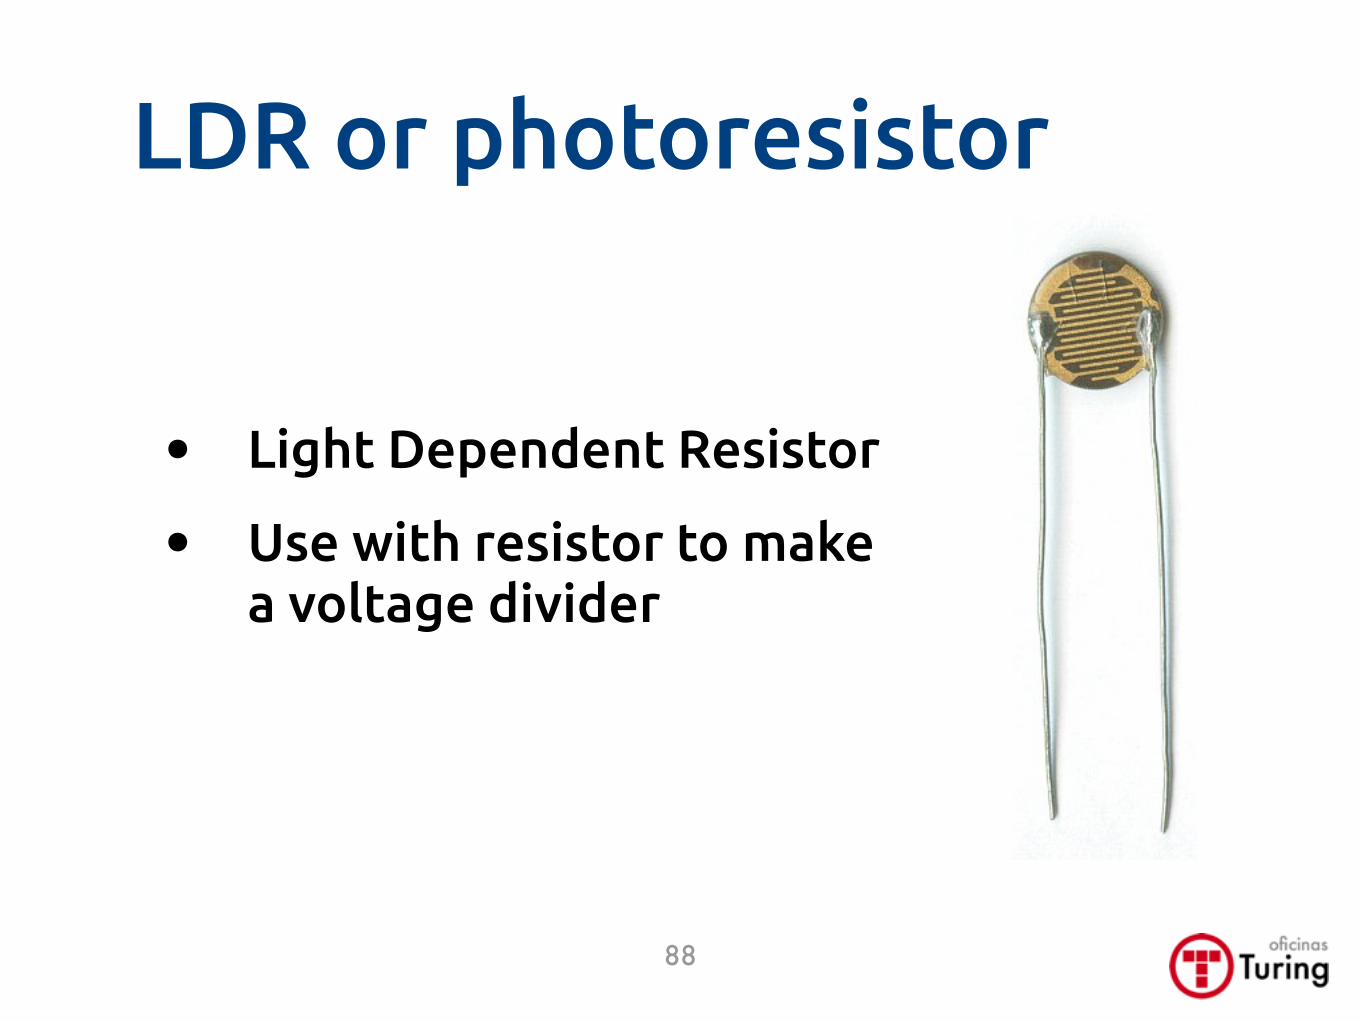
LDR or photoresistor
• Light Dependent Resistor
• Use with resistor to make a voltage divider
88
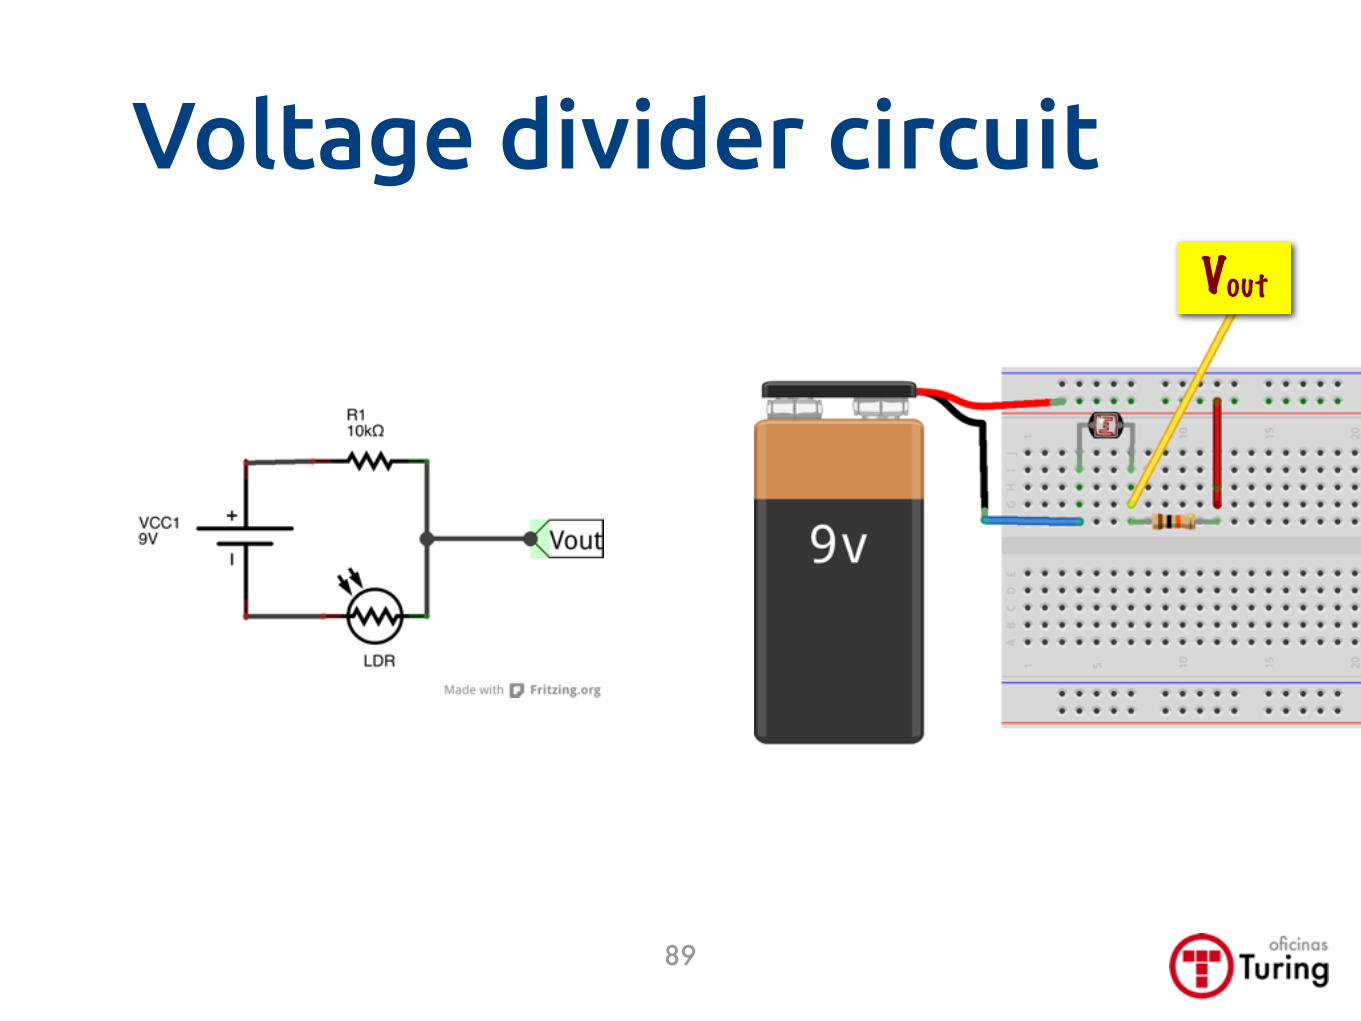
Voltage divider circuit
89
Vout
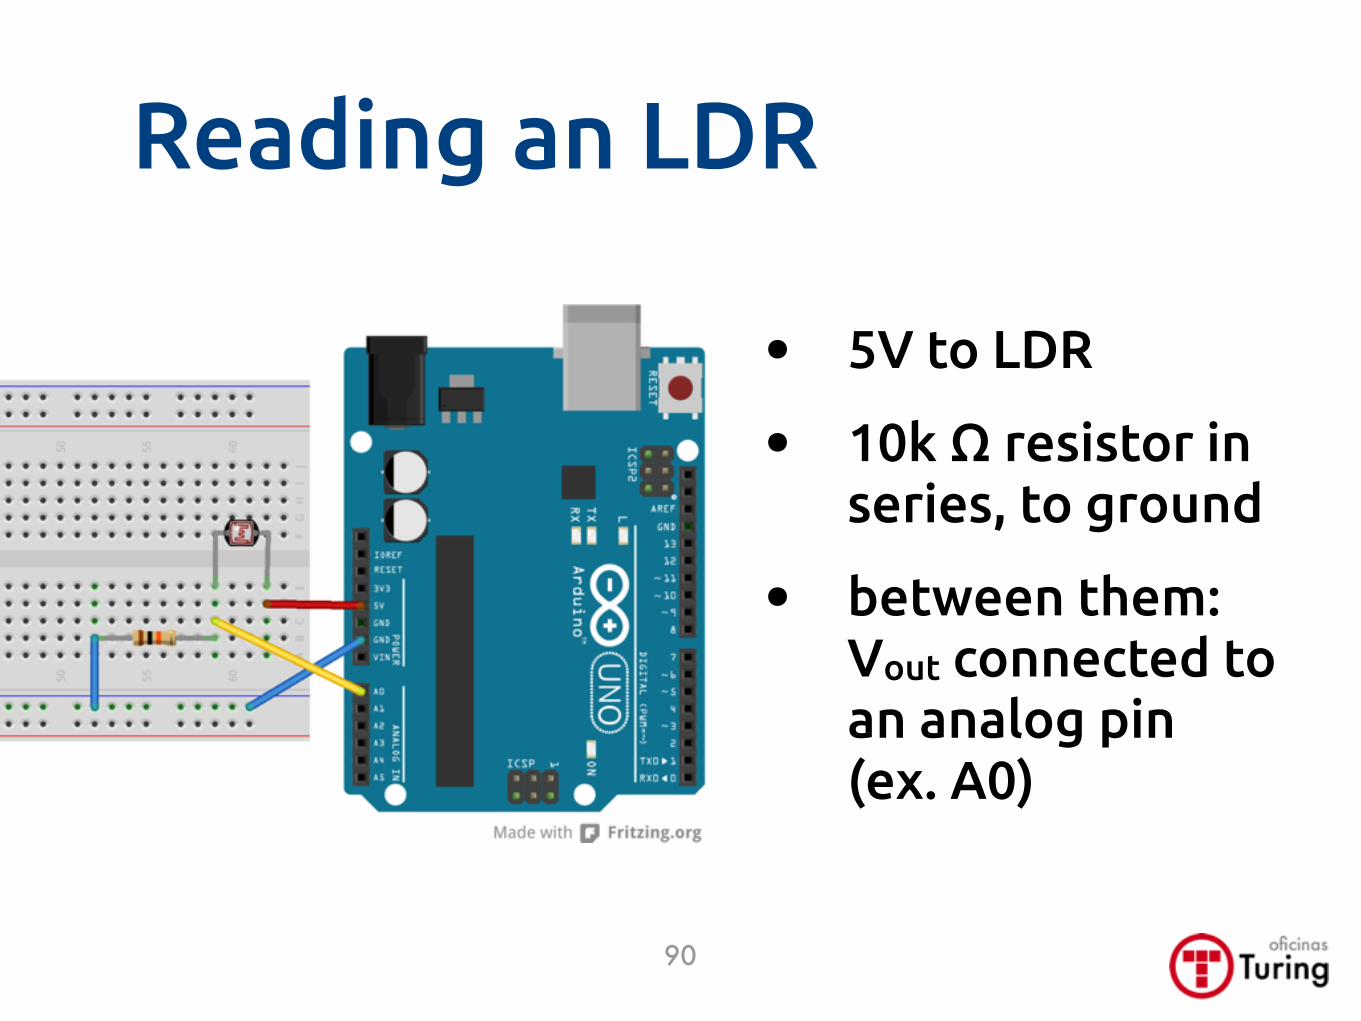
Reading an LDR
• 5V to LDR
• 10k Ω resistor in series, to ground
• between them:Vout connected to an analog pin (ex. A0)
90

Tra!c light 1
91
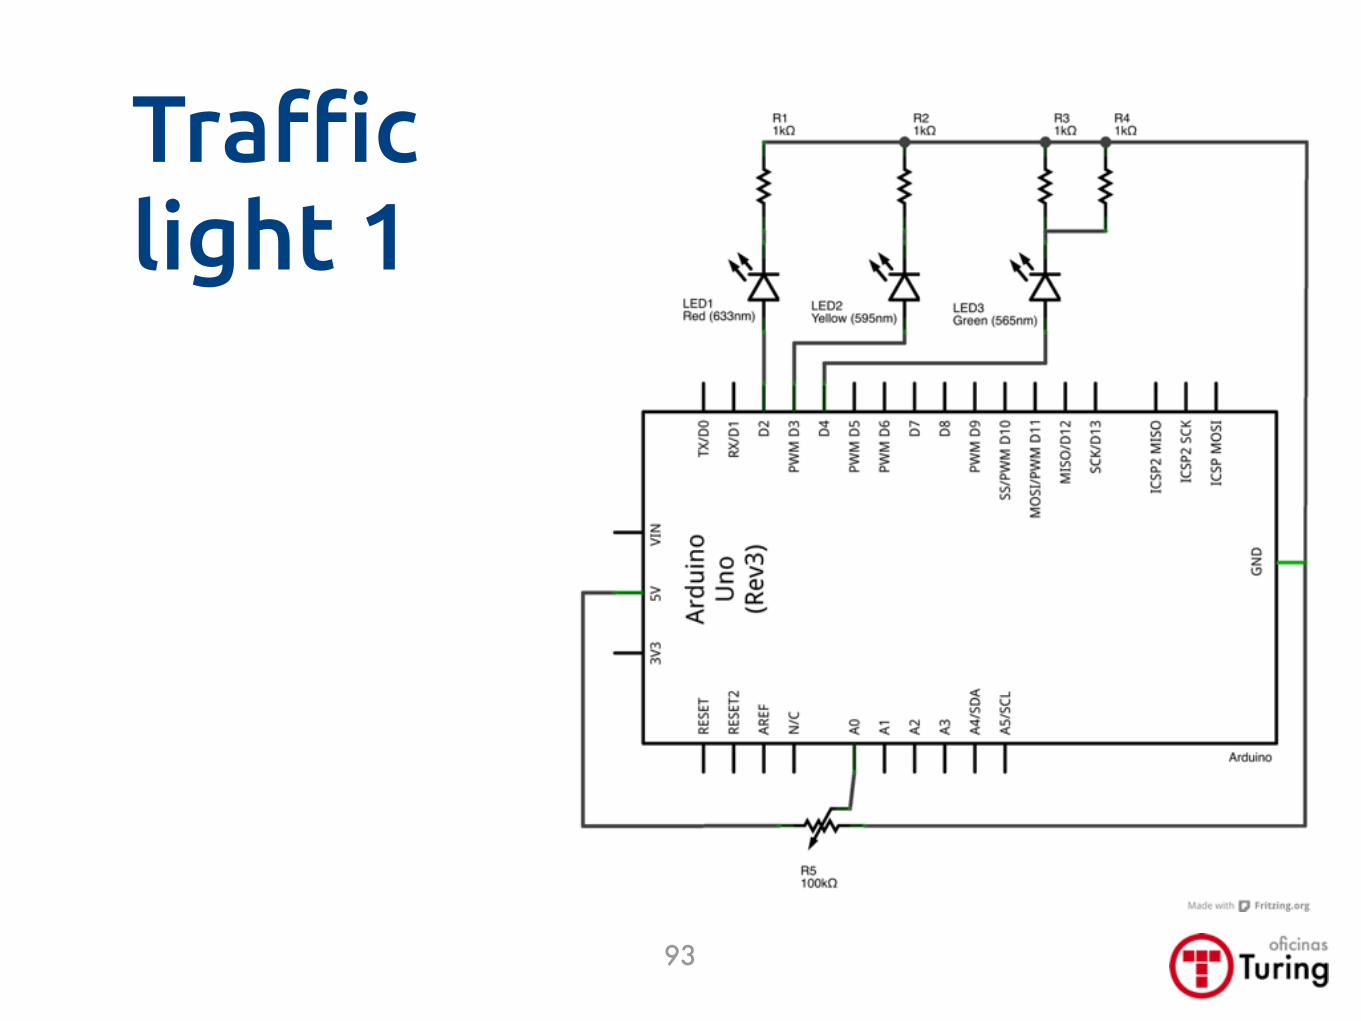
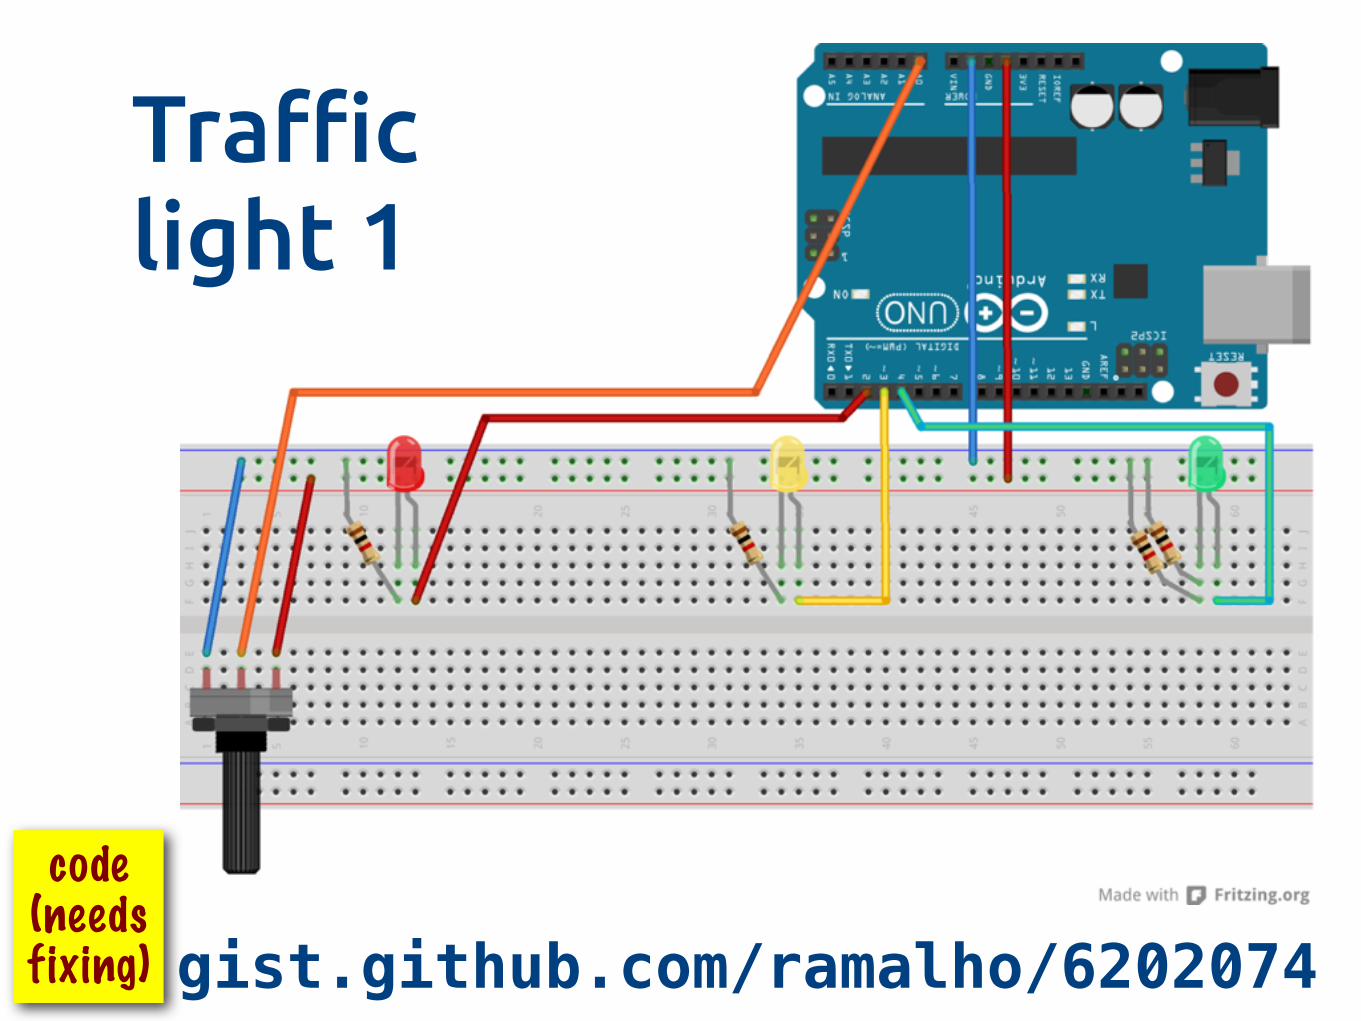
Tra!c light 1
• Parts:
• LEDs: green, yellow, red
• 3 suitable resistors
• 1 potentiometer
• Code: gist.github.com/ramalho/6202074
92
93
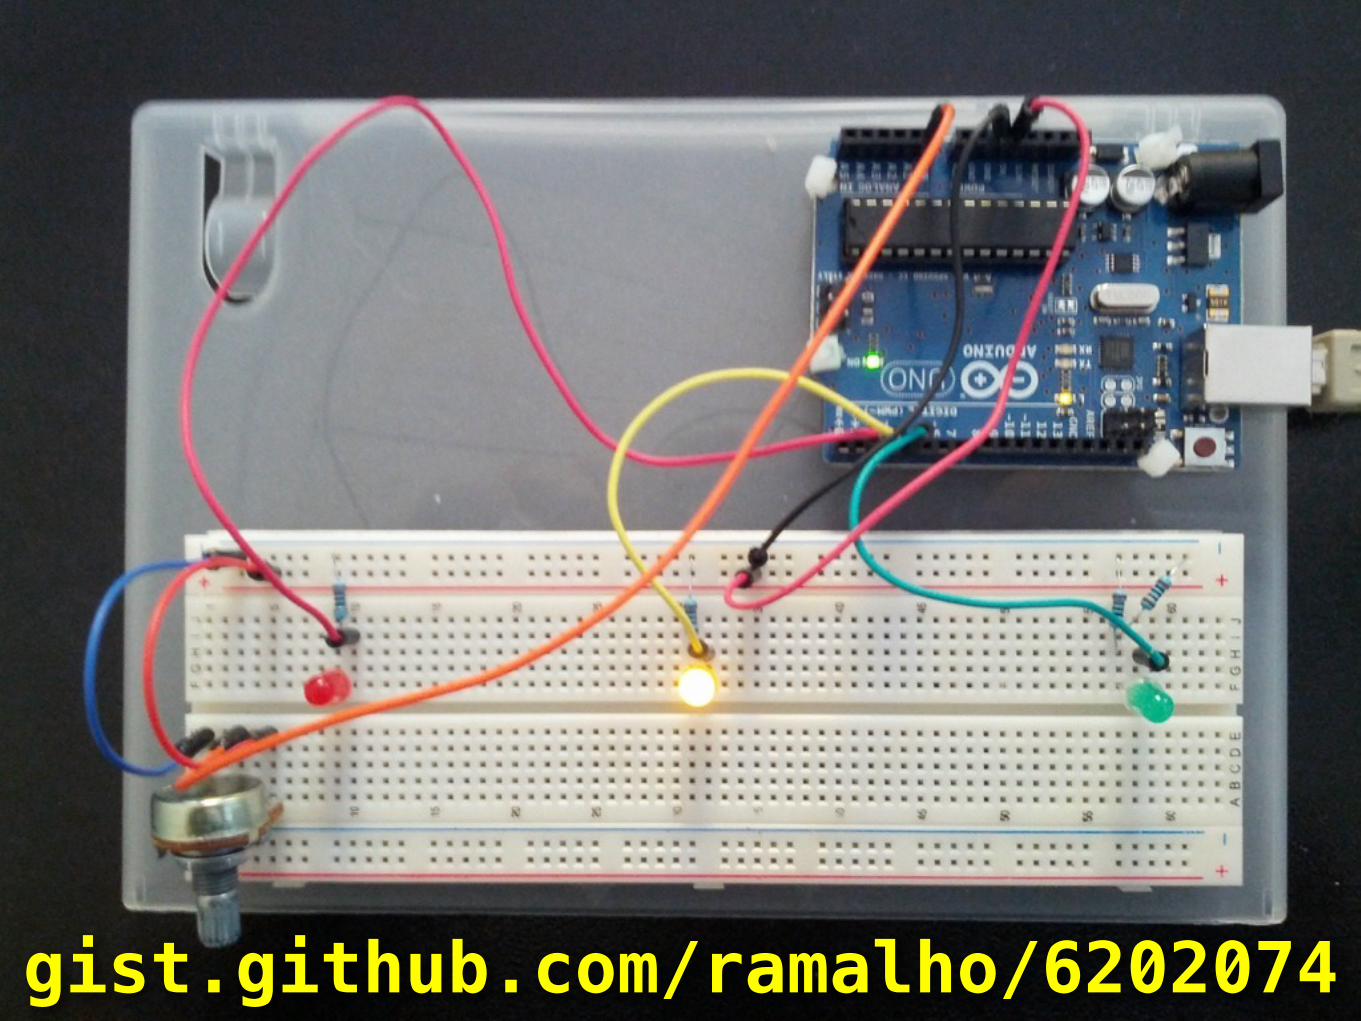
Tra!c light 1
gist.github.com/ramalho/6202074code
(needs fixing)
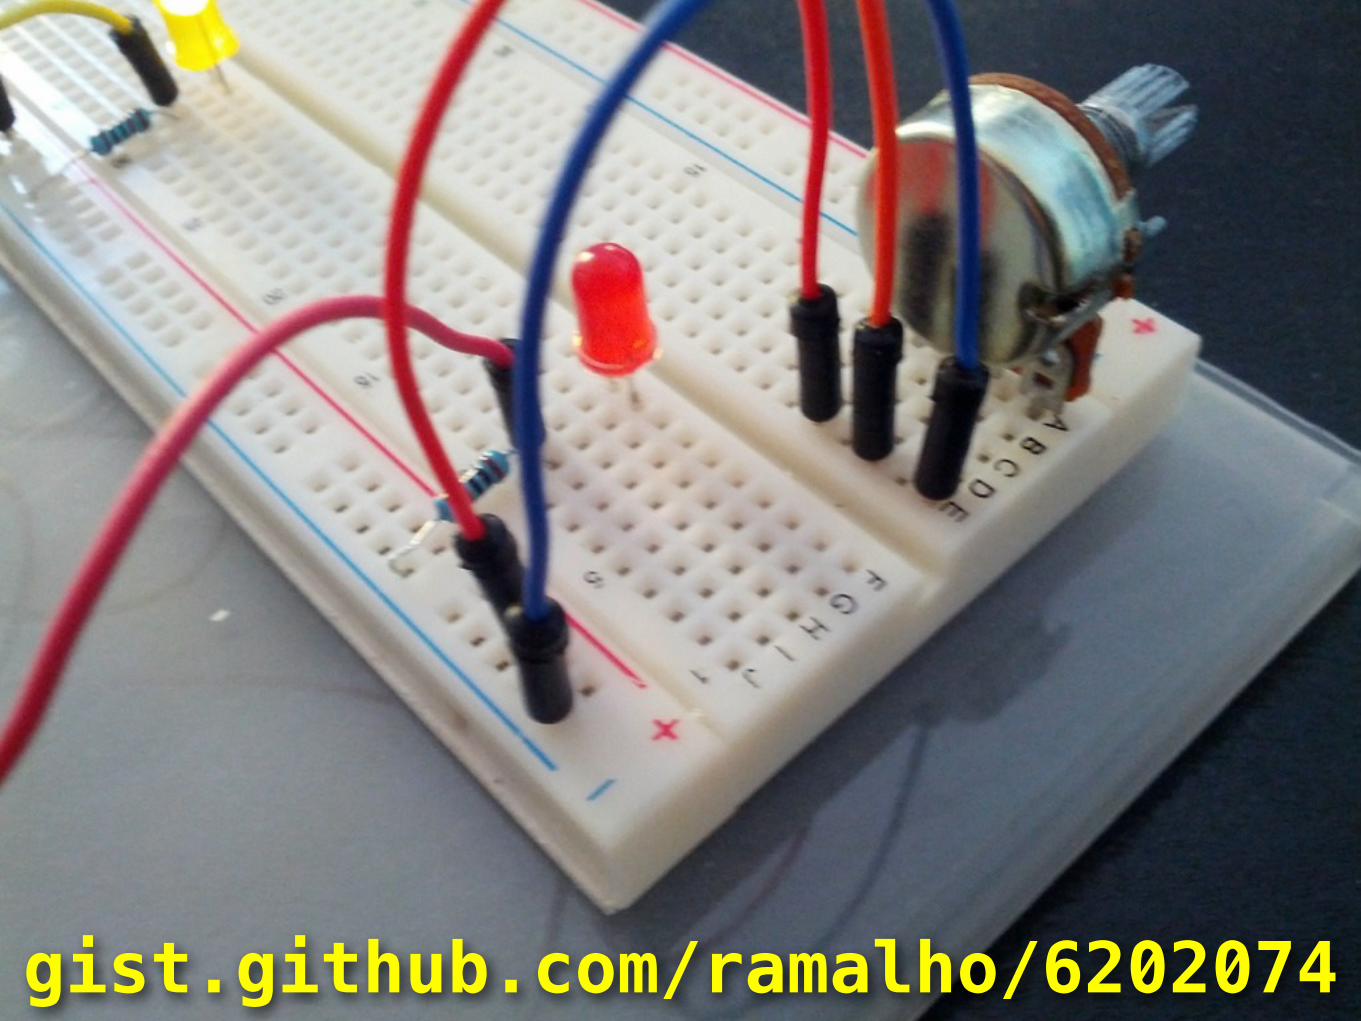
Tra!c light 1
gist.github.com/ramalho/6202074
gist.github.com/ramalho/6202074

Tra!c light 2
97
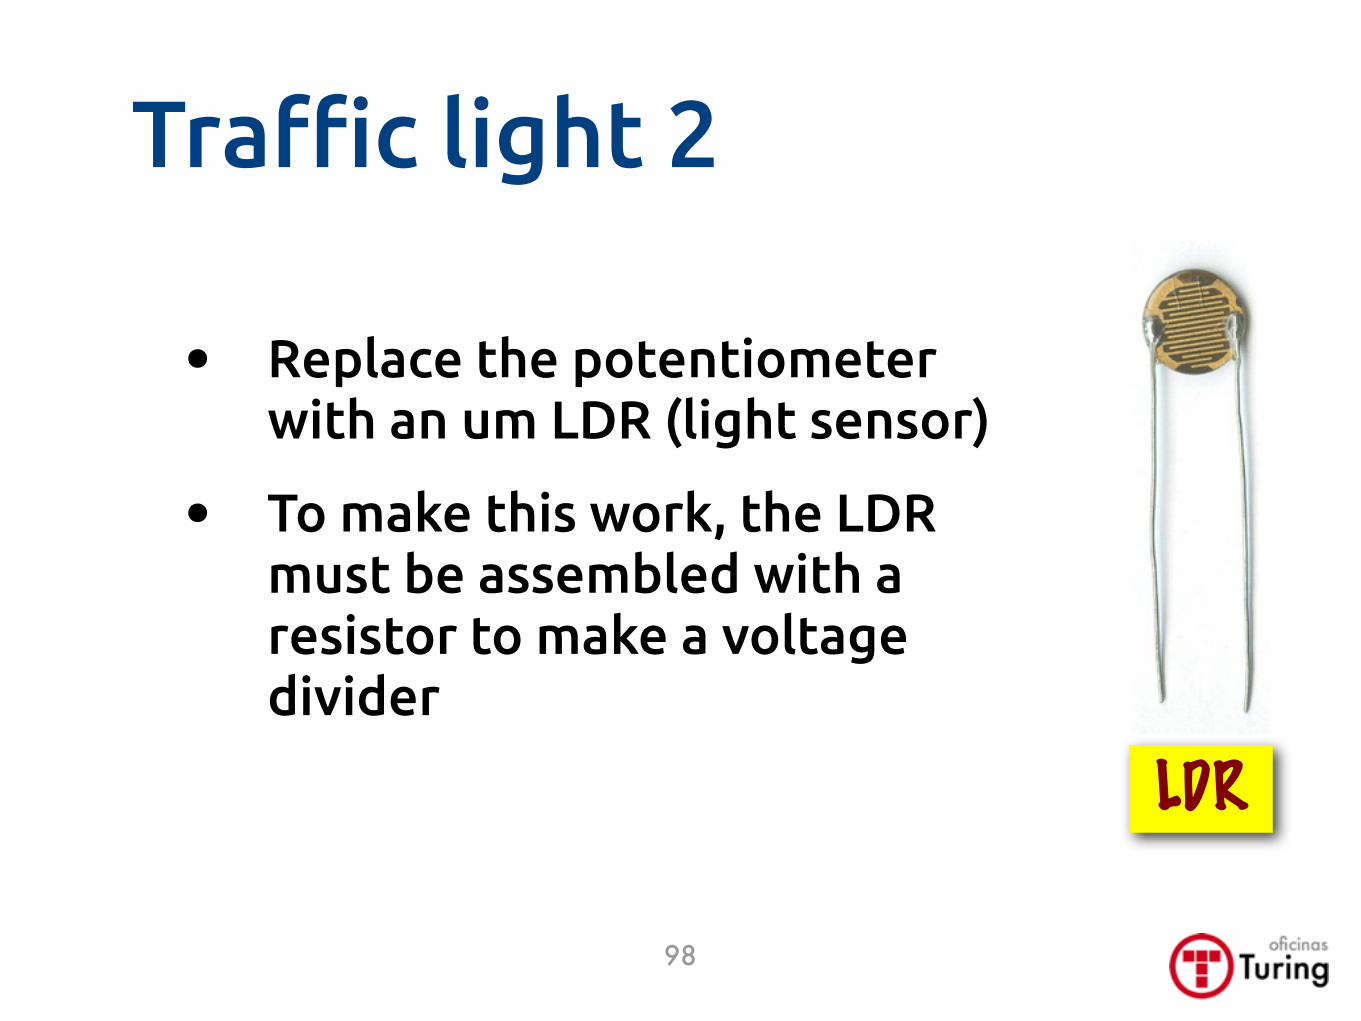
Tra!c light 2
• Replace the potentiometer with an um LDR (light sensor)
• To make this work, the LDR must be assembled with a resistor to make a voltage divider
98
LDR
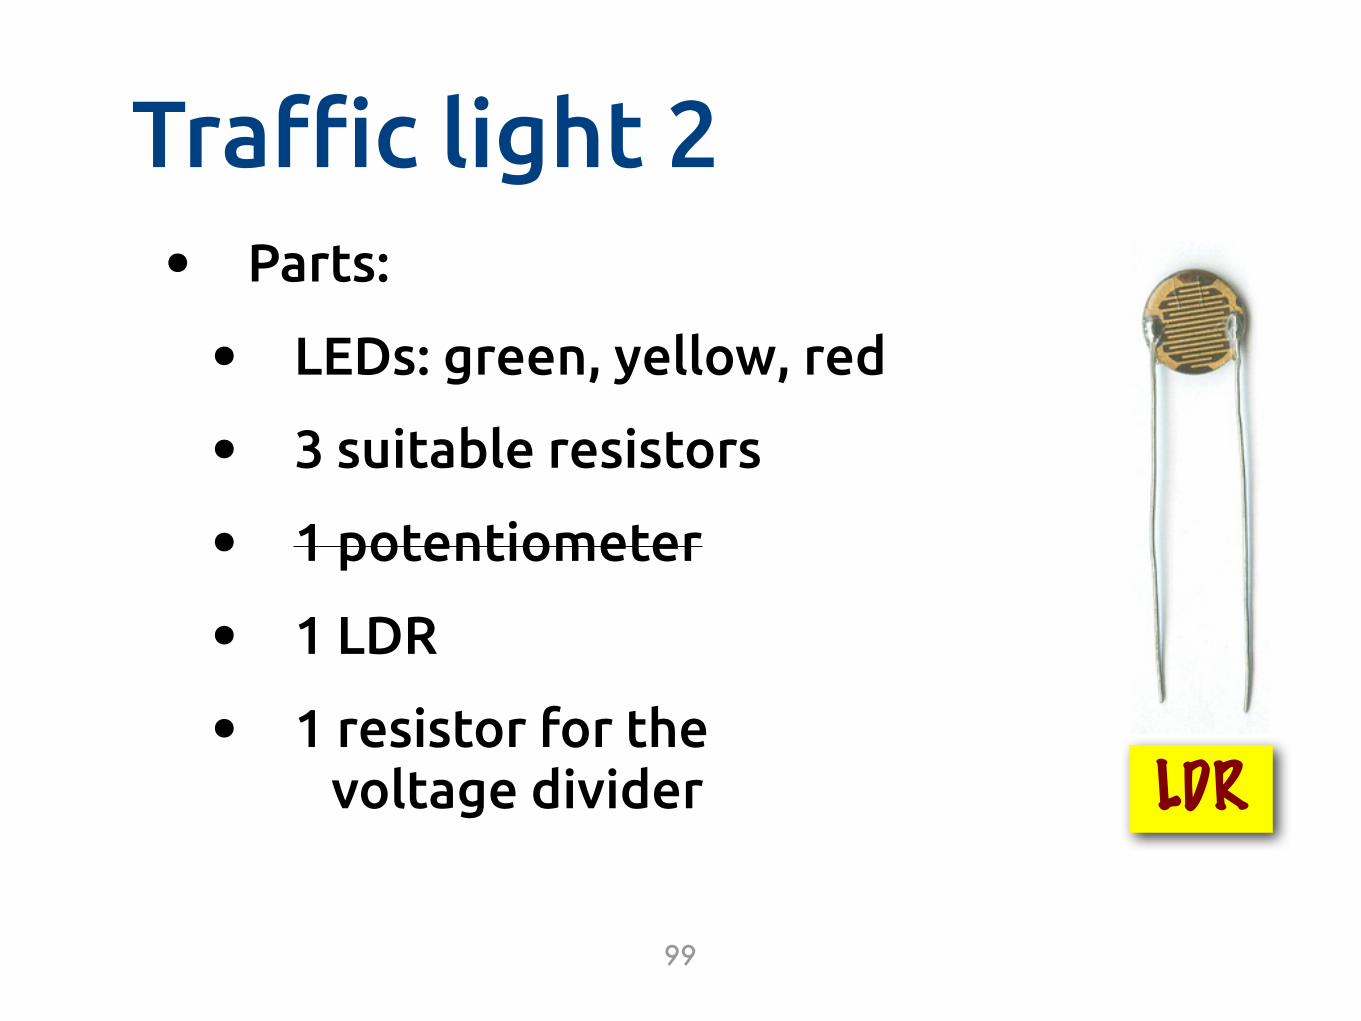
Tra!c light 2• Parts:
• LEDs: green, yellow, red
• 3 suitable resistors
• 1 potentiometer
• 1 LDR
• 1 resistor for the voltage divider
99
LDR

gist.github.com/ramalho/6202074
same code,
changes needed
Tra!c light 1

Additional components
101
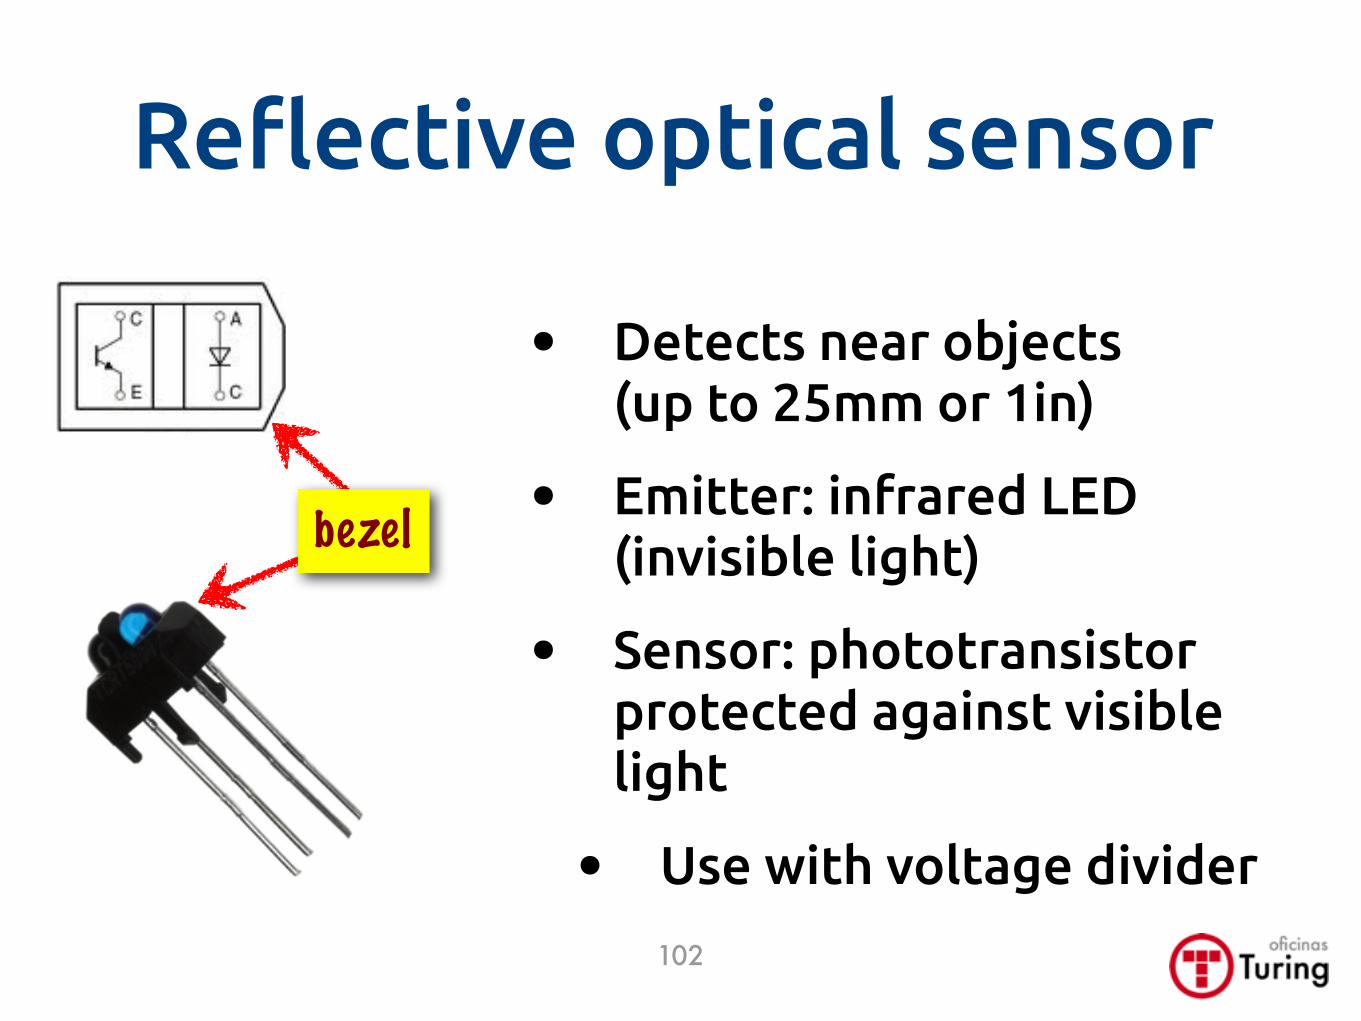
Re)ective optical sensor
• Detects near objects (up to 25mm or 1in)
• Emitter: infrared LED (invisible light)
• Sensor: phototransistor protected against visible light
• Use with voltage divider
bezel
102
voltage divider
103
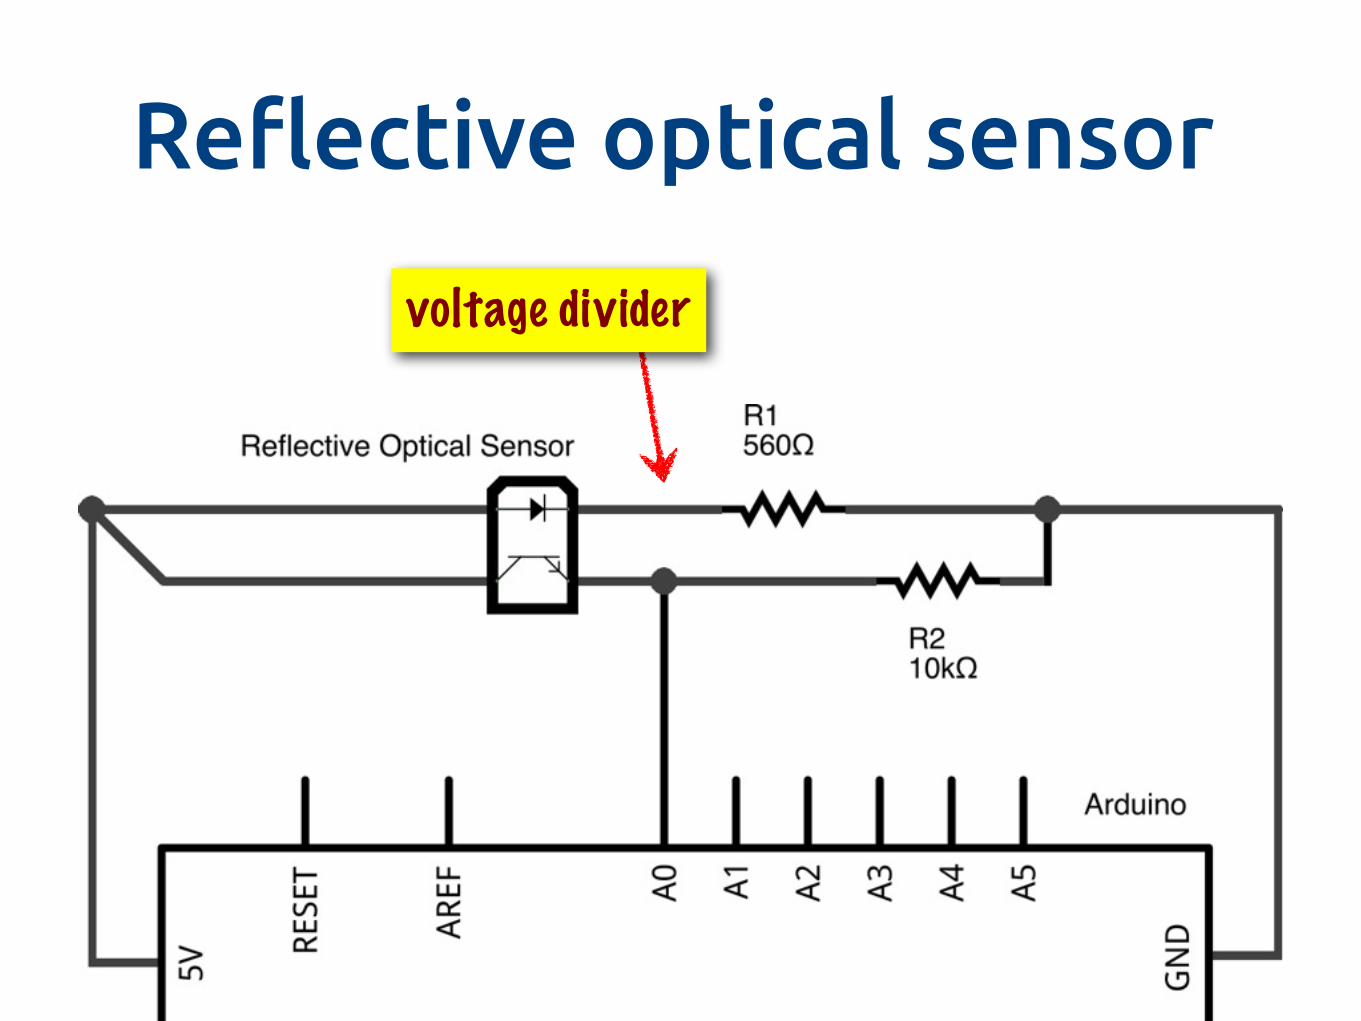
Re)ective optical sensor

104
reflective optical sensor
voltage divider
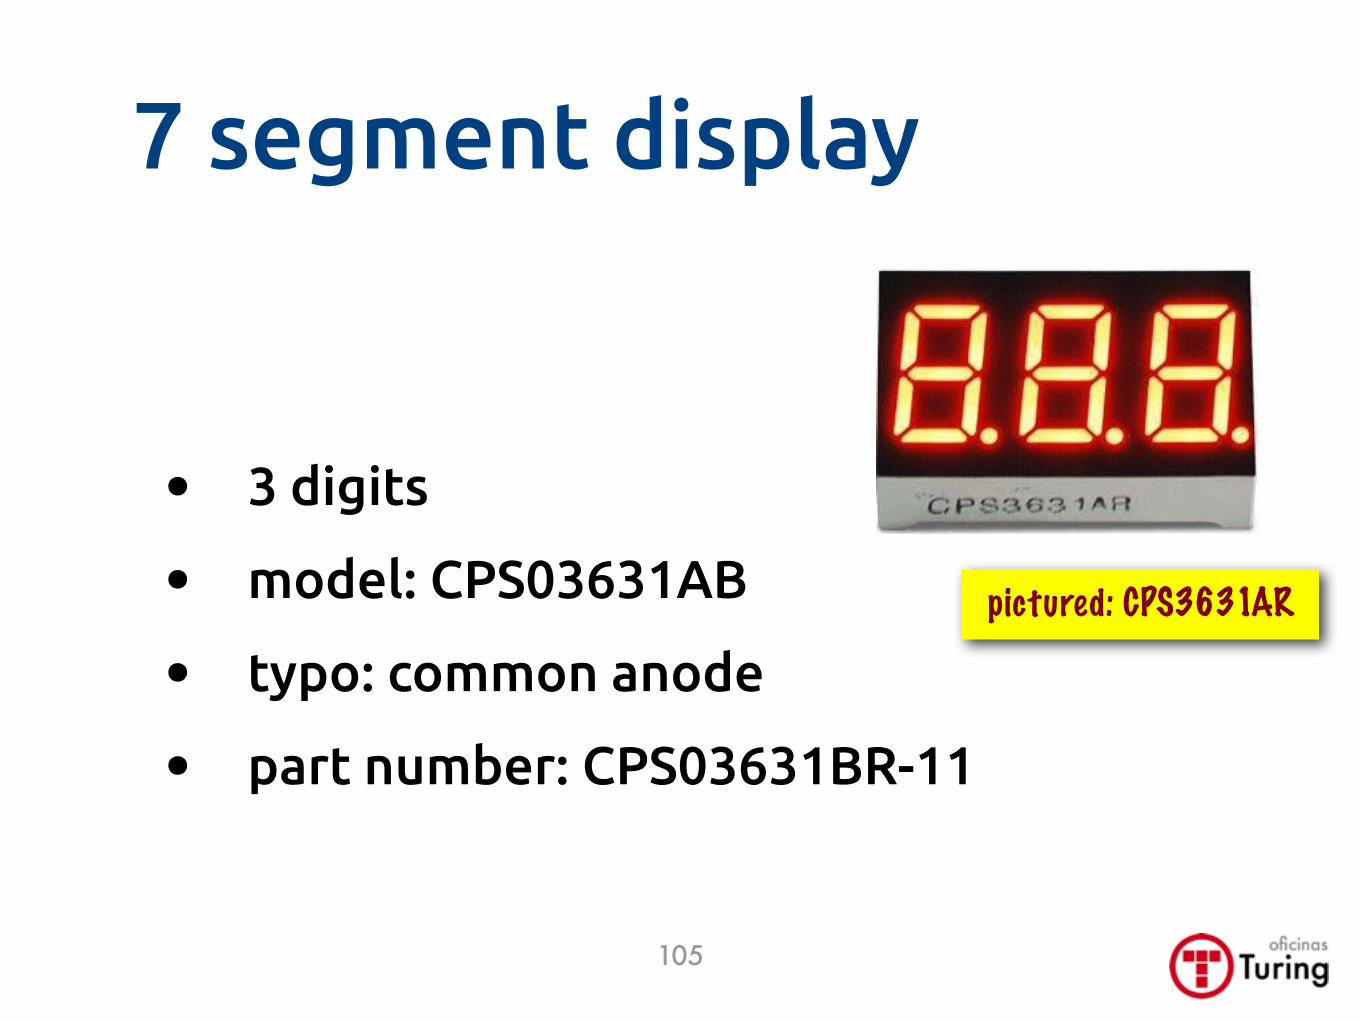
7 segment display
• 3 digits
• model: CPS03631AB
• typo: common anode
• part number: CPS03631BR-11
pictured: CPS3631AR
105
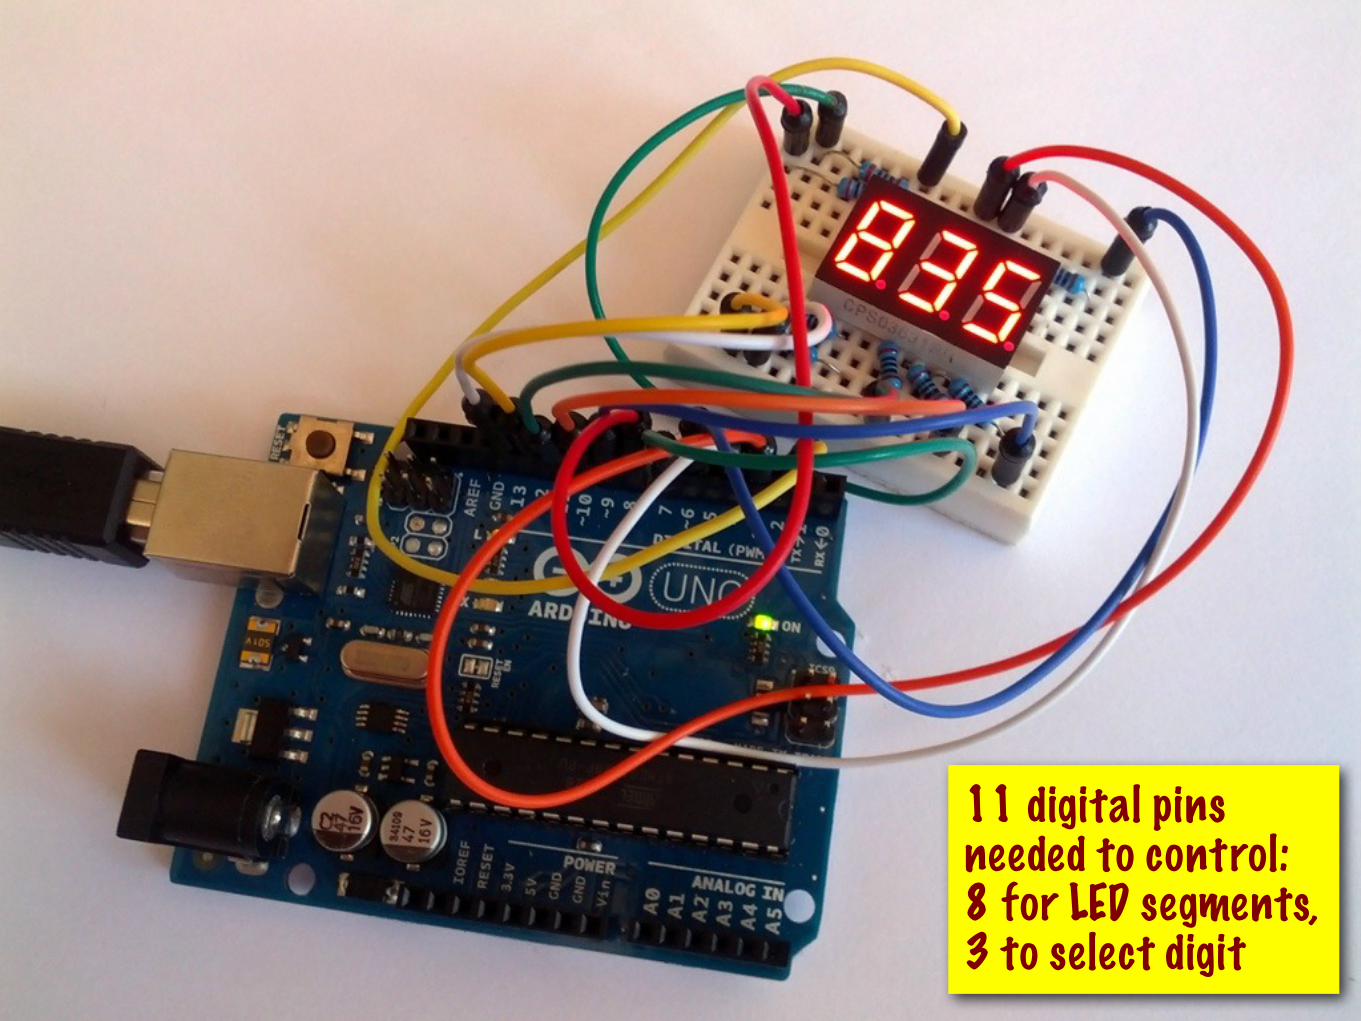
11 digital pins needed to control: 8 for LED segments, 3 to select digit
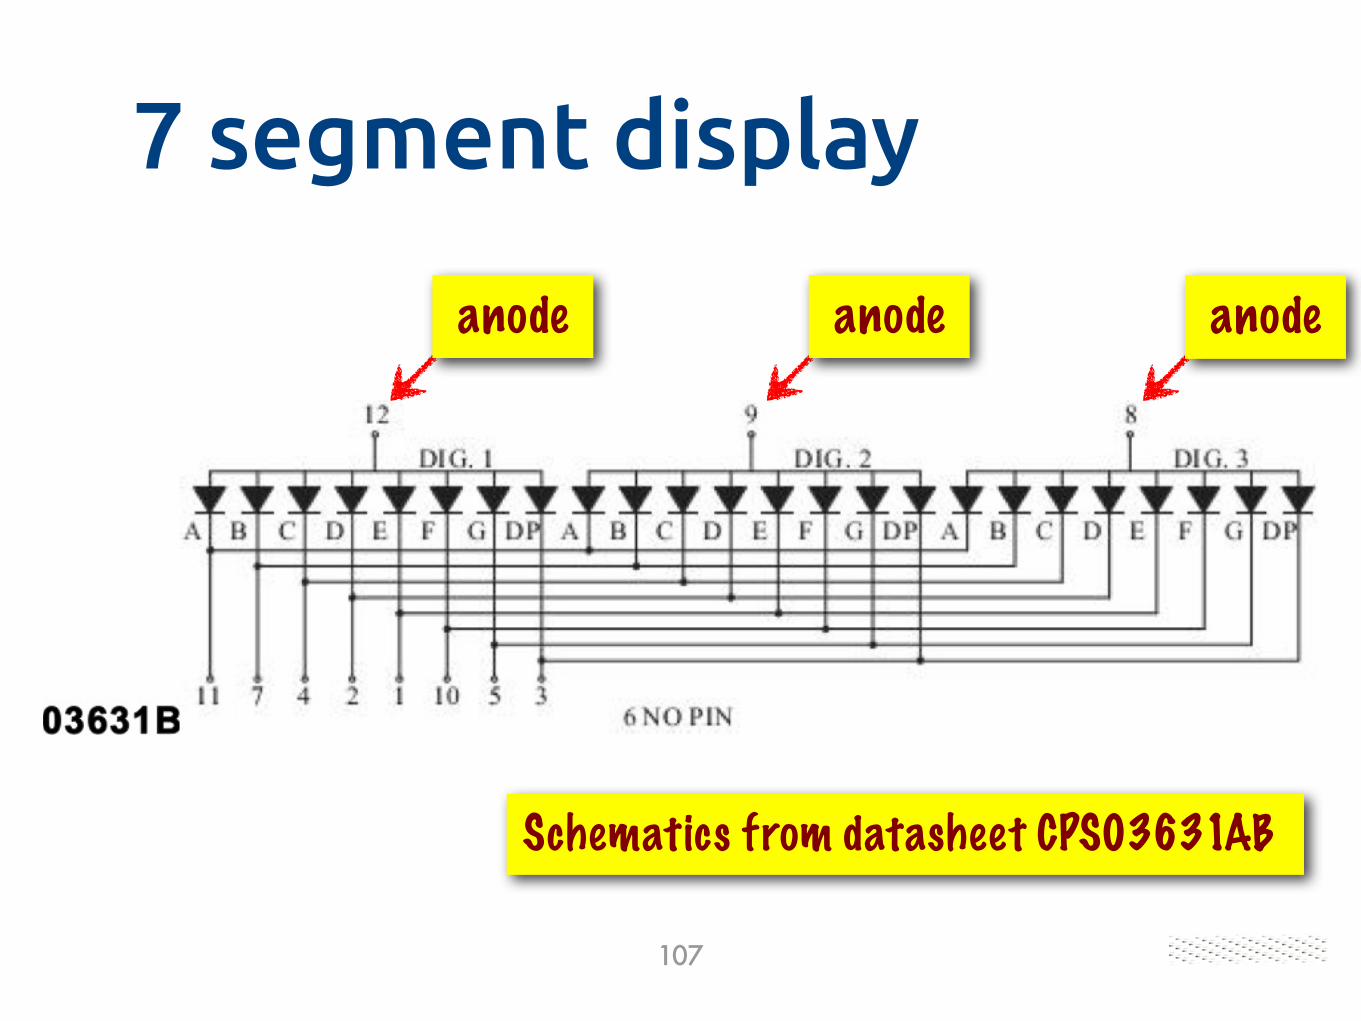
Schematics from datasheet CPS03631AB
107
anodeanodeanode
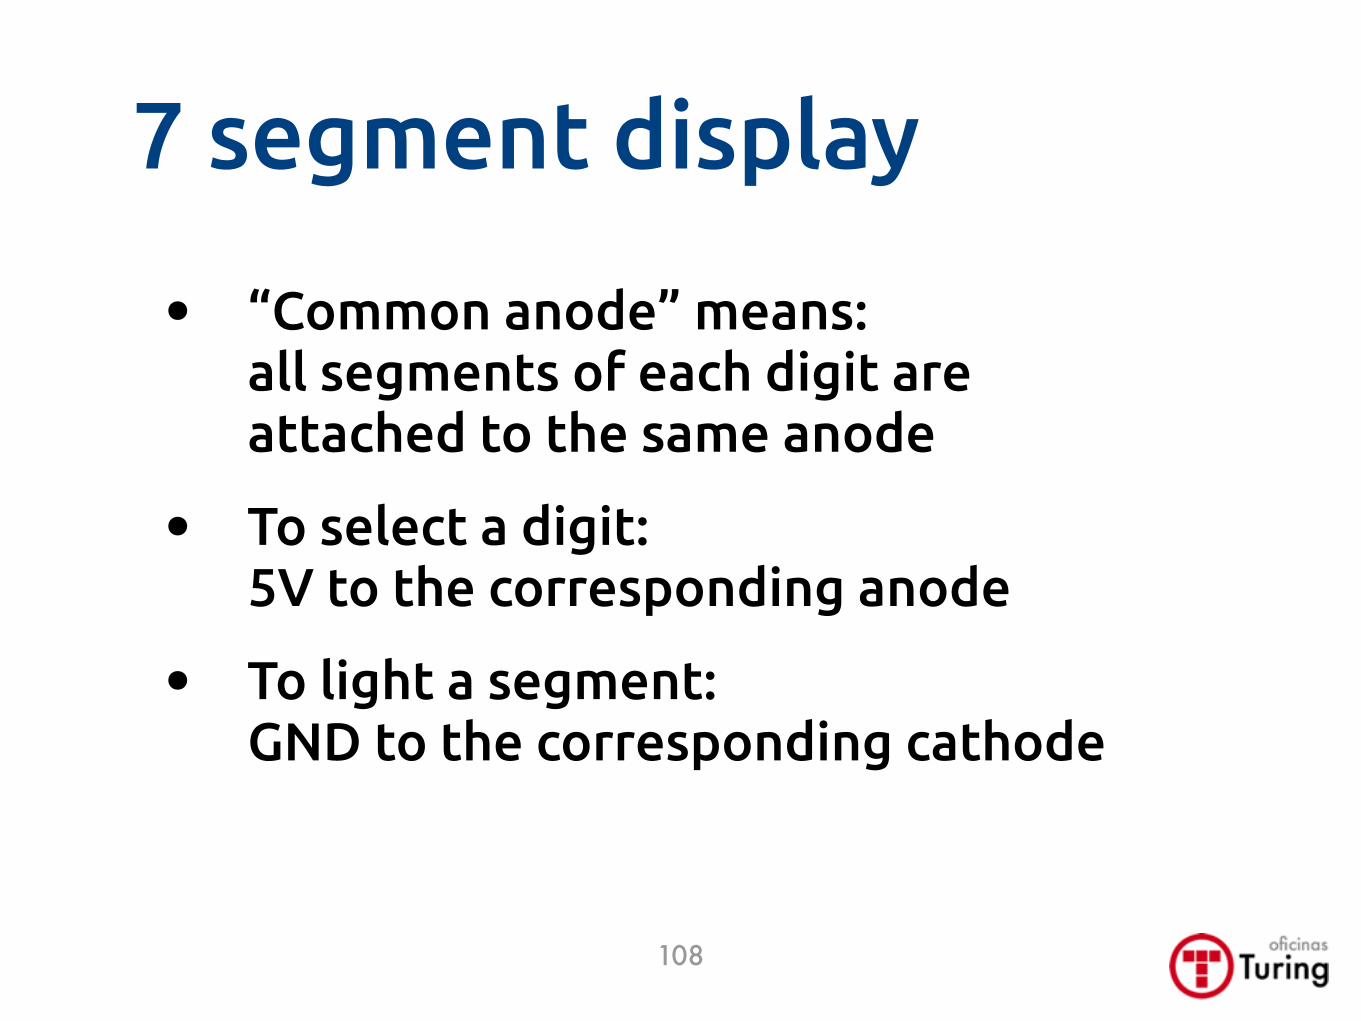
7 segment display
7 segment display
• “Common anode” means:all segments of each digit are attached to the same anode
• To select a digit: 5V to the corresponding anode
• To light a segment: GND to the corresponding cathode
108
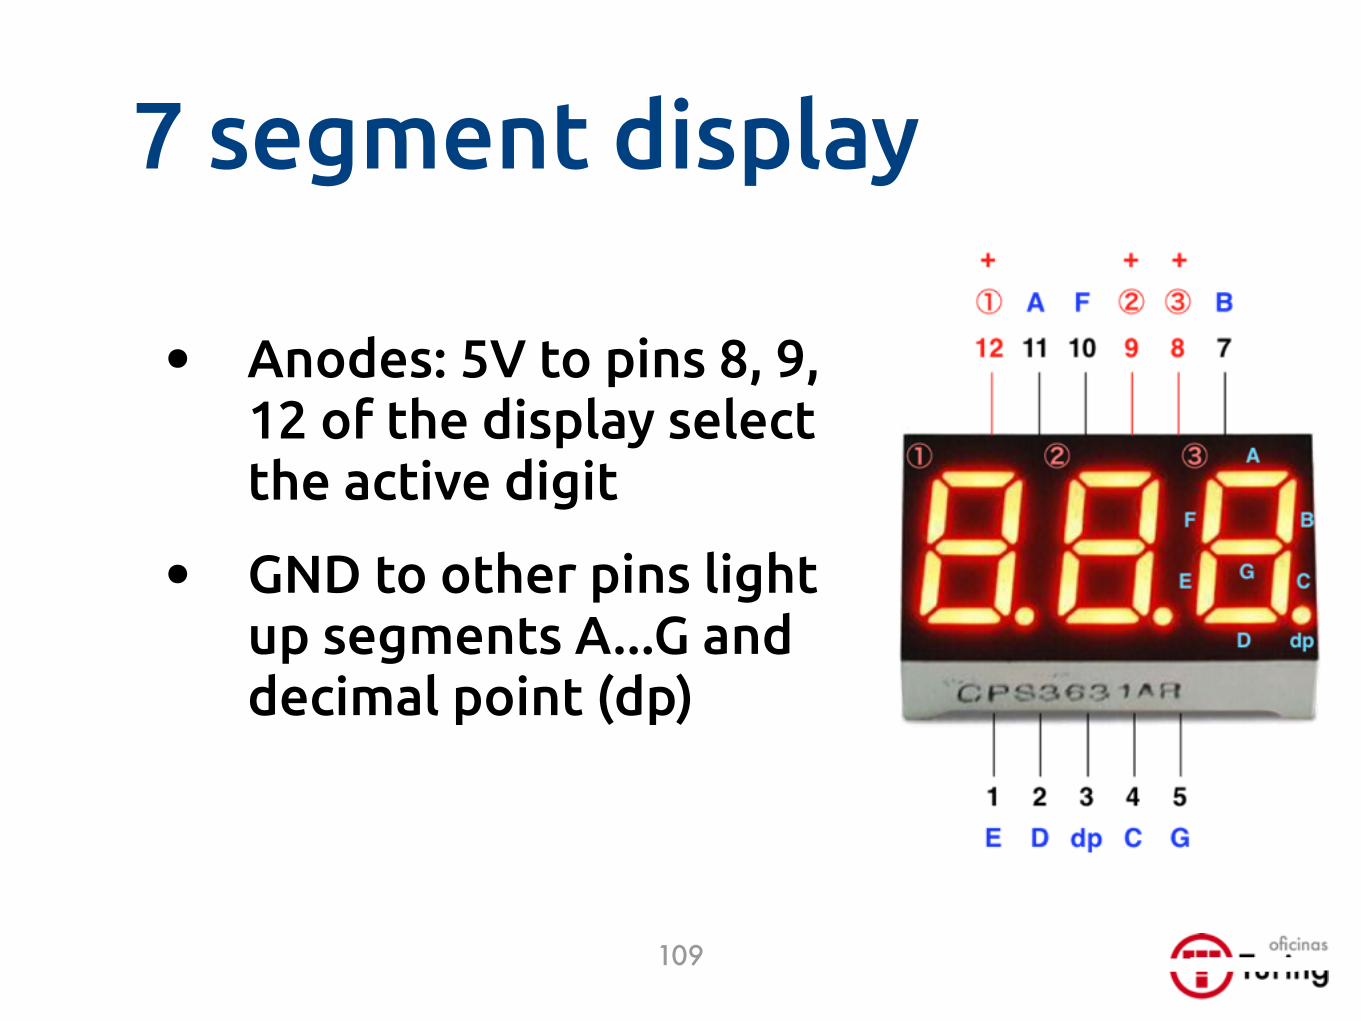
• Anodes: 5V to pins 8, 9, 12 of the display select the active digit
• GND to other pins light up segments A...G and decimal point (dp)
109
7 segment display
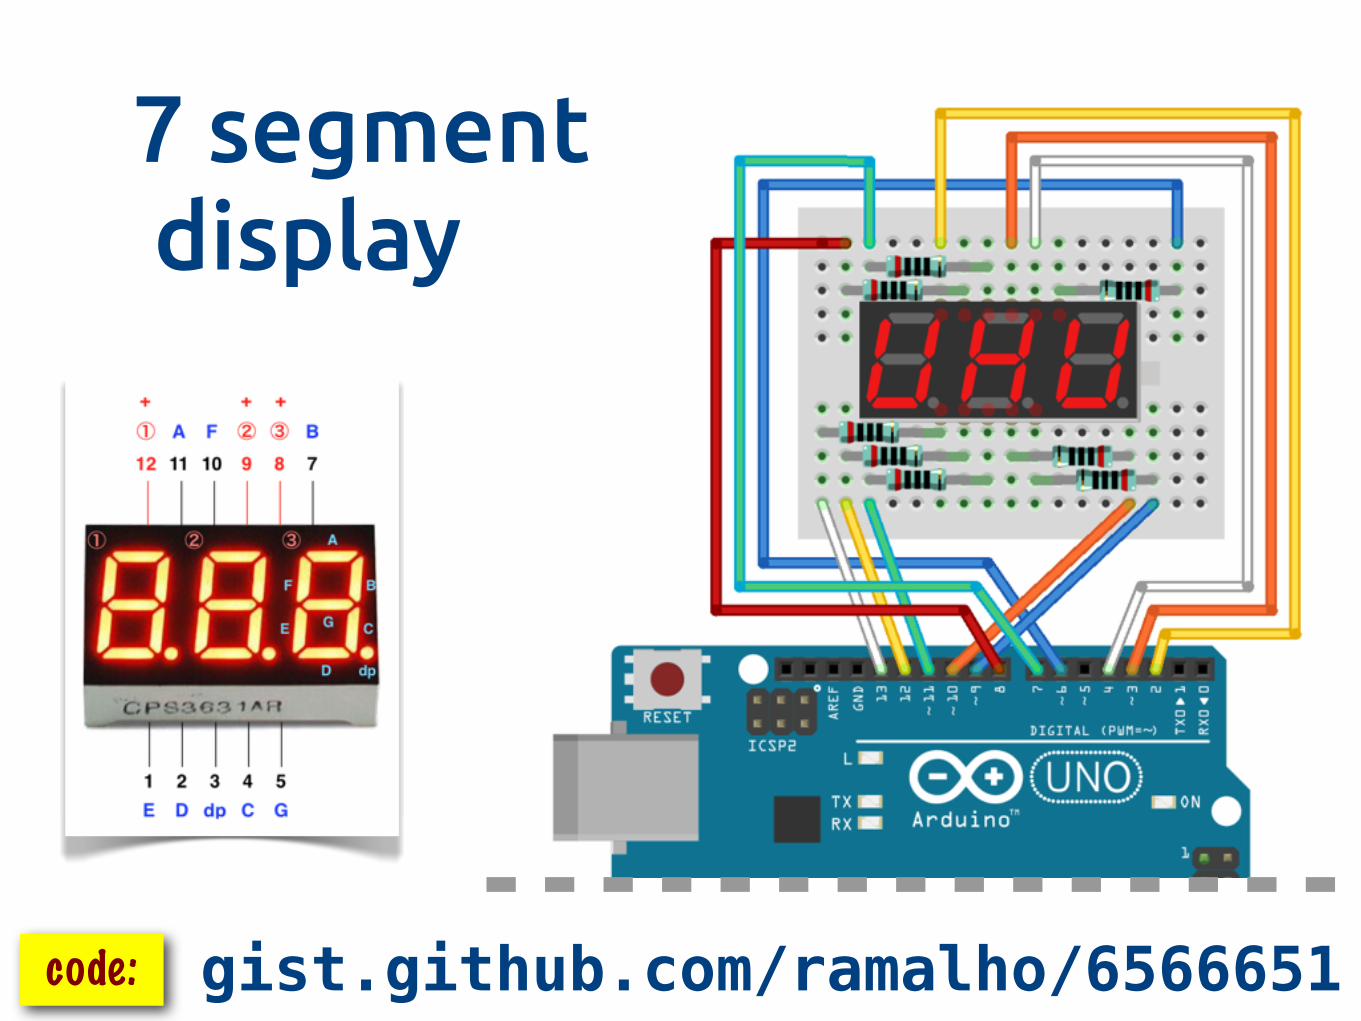
gist.github.com/ramalho/6566651code:
7 segment display
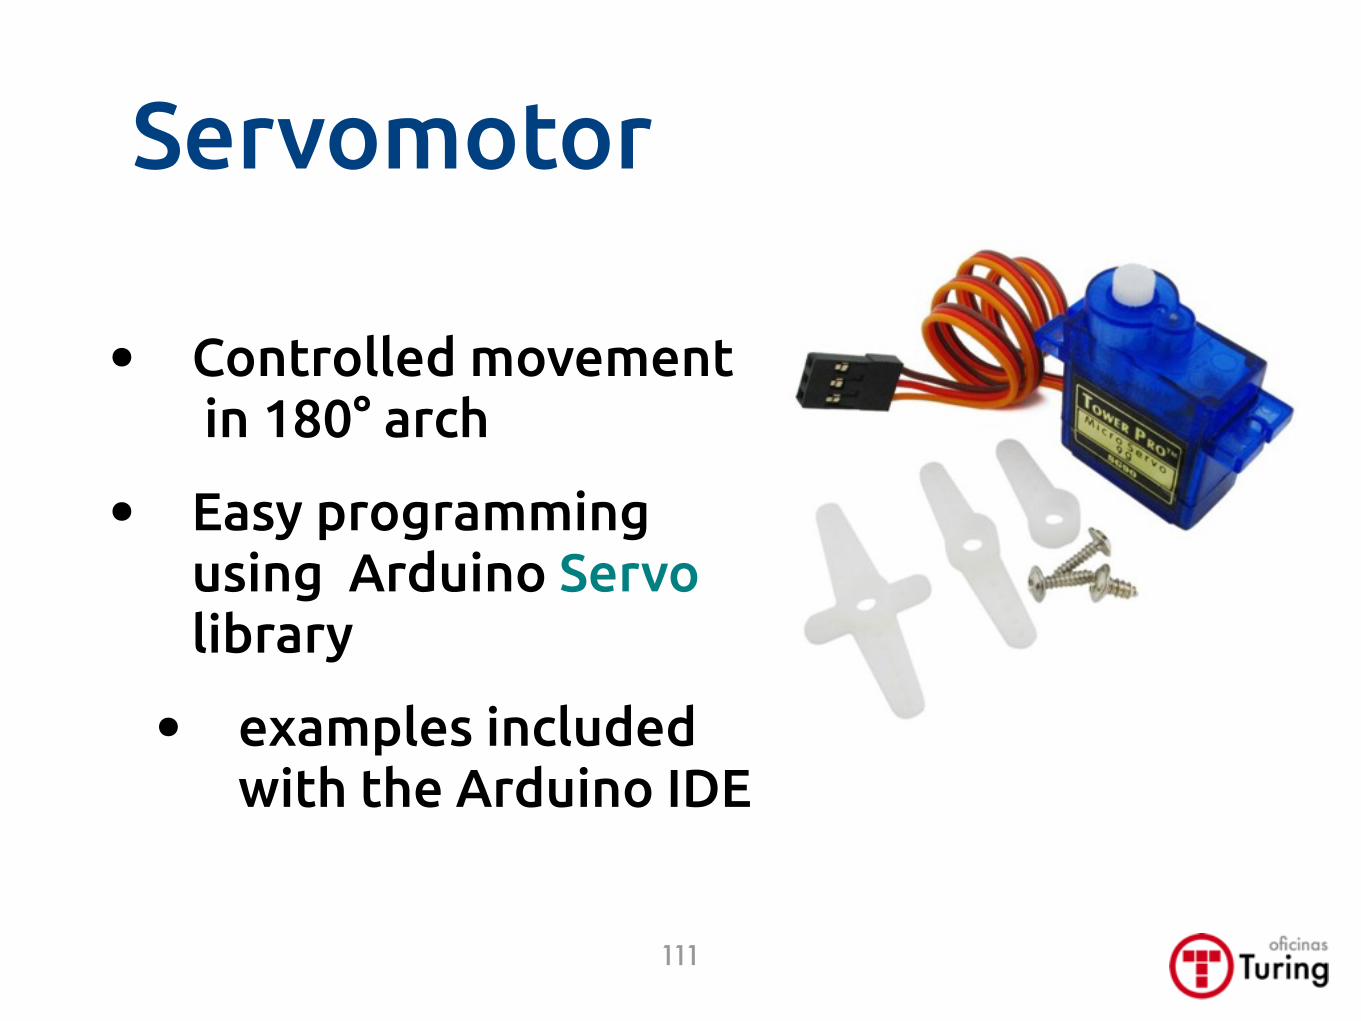
Servomotor
• Controlled movement in 180° arch
• Easy programming using Arduino Servolibrary
• examples included with the Arduino IDE
111
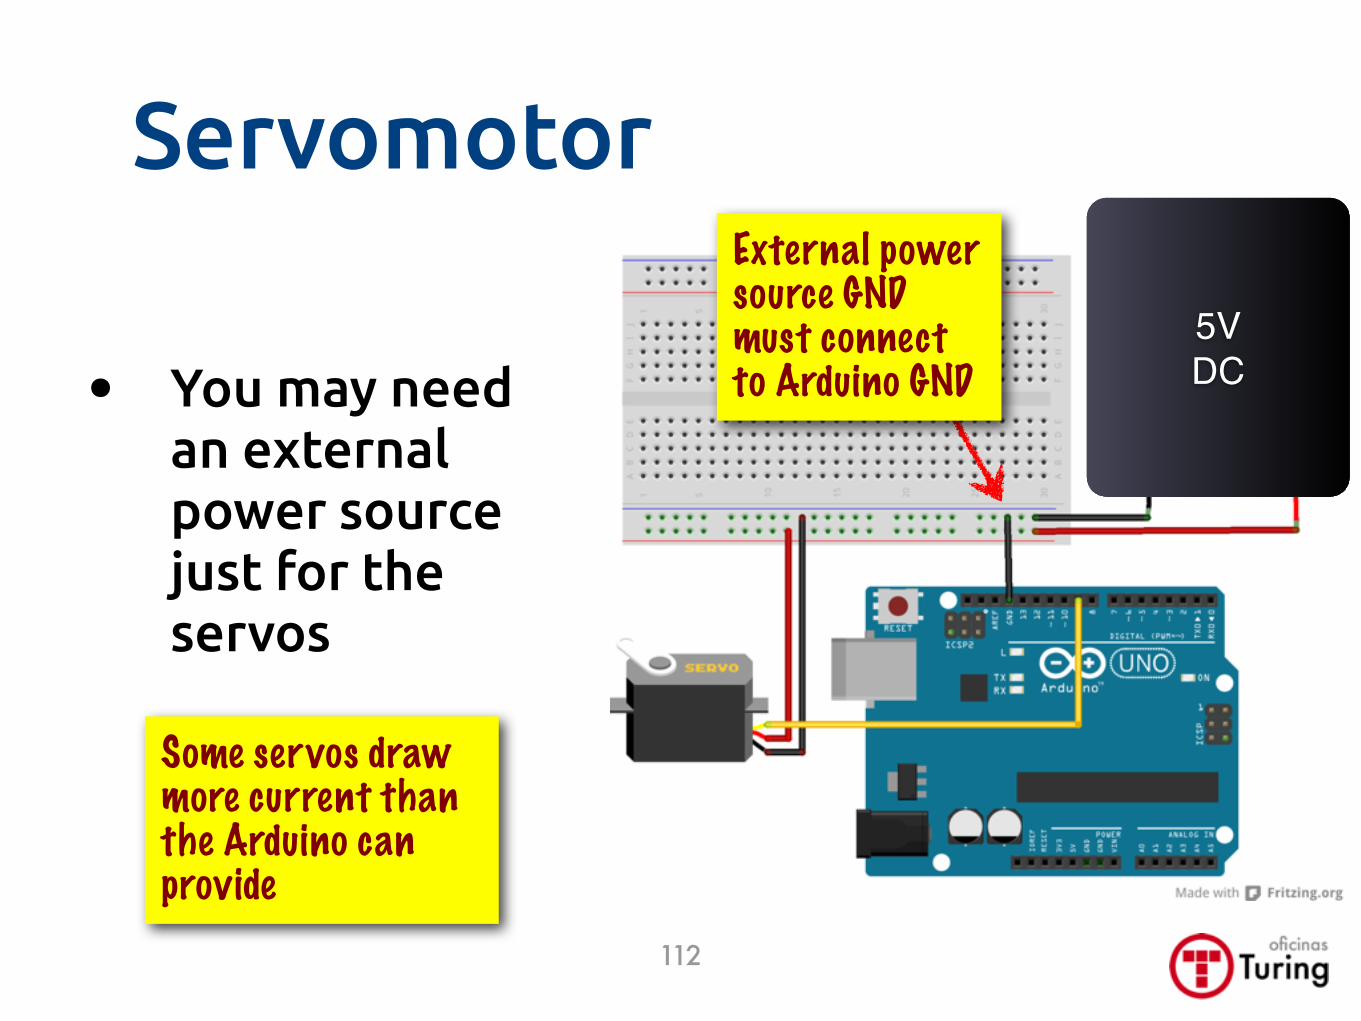
Servomotor
112
• You may need an external power source just for the servos
External power source GND must connect to Arduino GND
5VDC
Some servos draw more current than the Arduino can provide
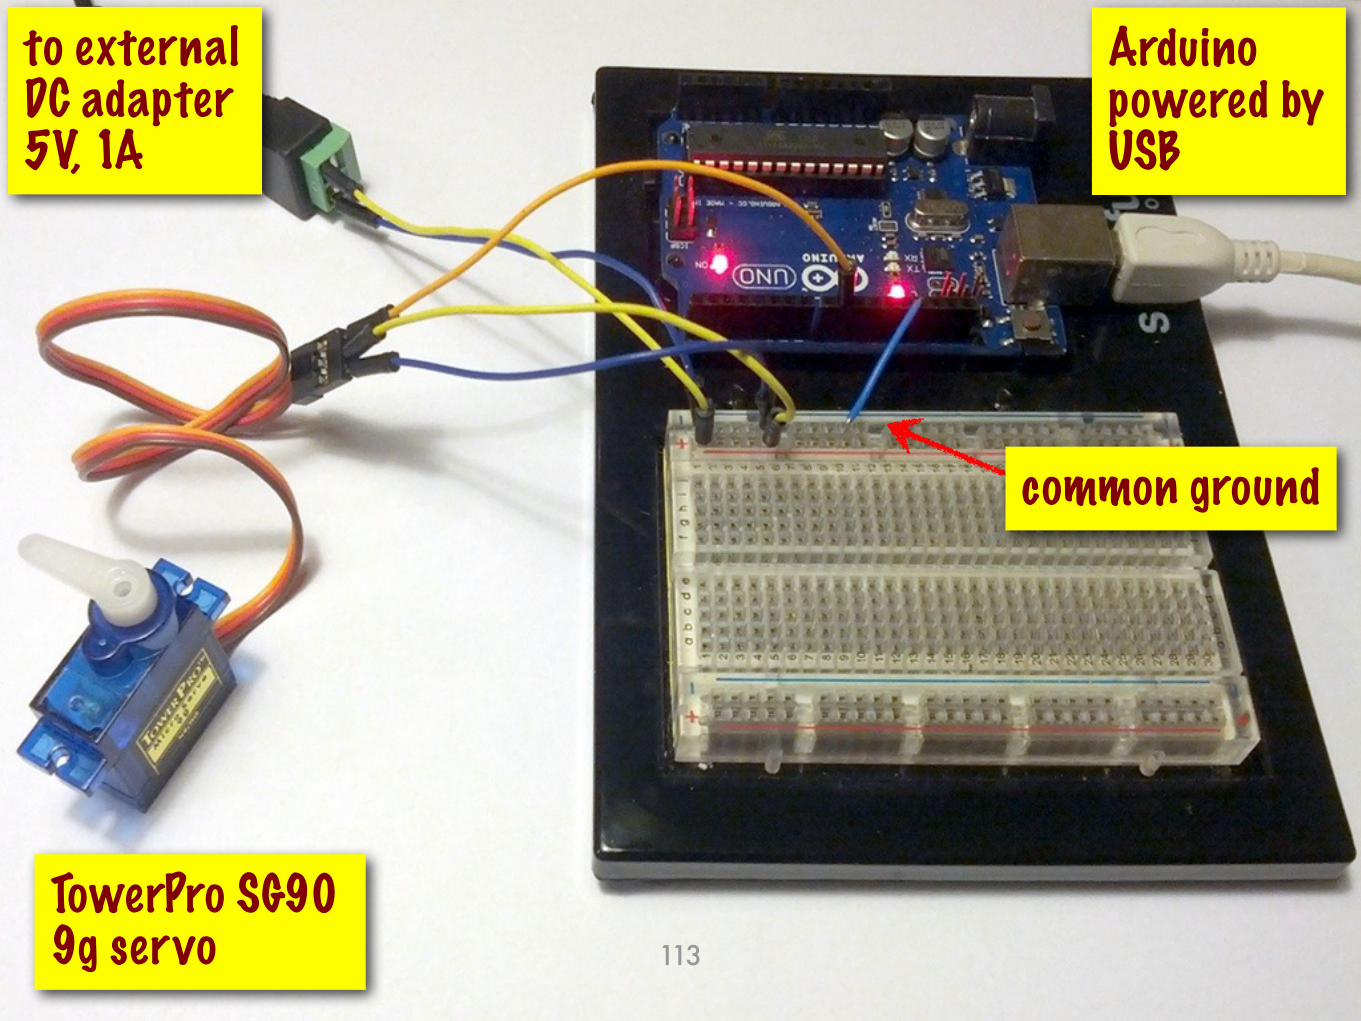
113
TowerPro SG90 9g servo
to external DC adapter 5V, 1A
common ground
Arduino powered by USB

Wrapping up
114
References
• O!cial Arduino site:arduino.cc
• Arduino Experimentation Kit: oomlout.com/a/products/ardx
• Laboratório de garagemlabdegaragem.com
• Web: blogs, videos, wikis, diagrams...
115
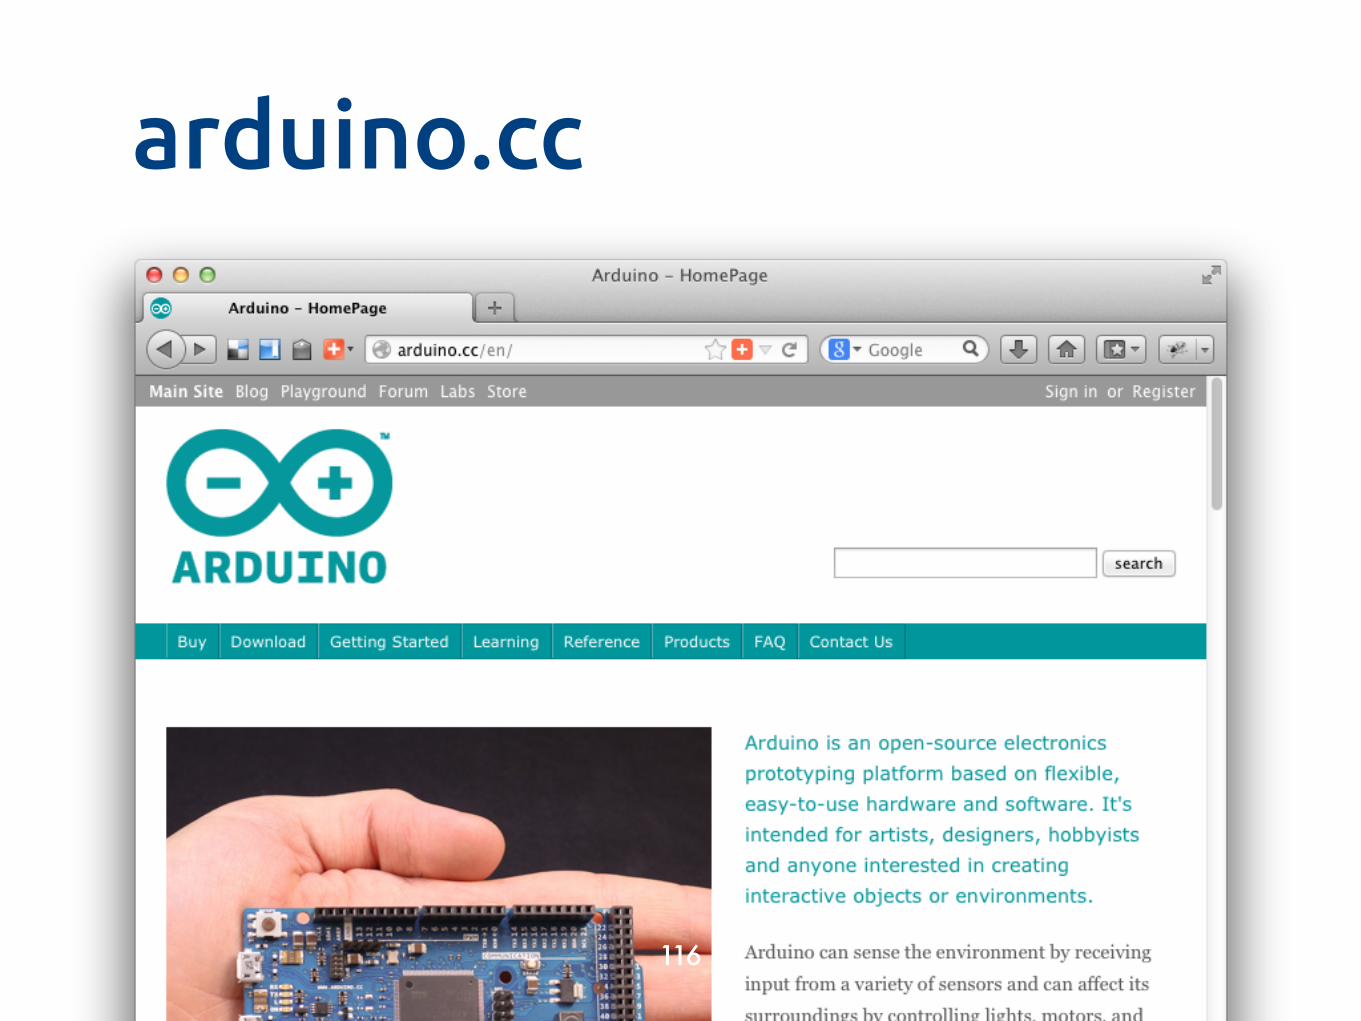
arduino.cc
• Seções do site
116
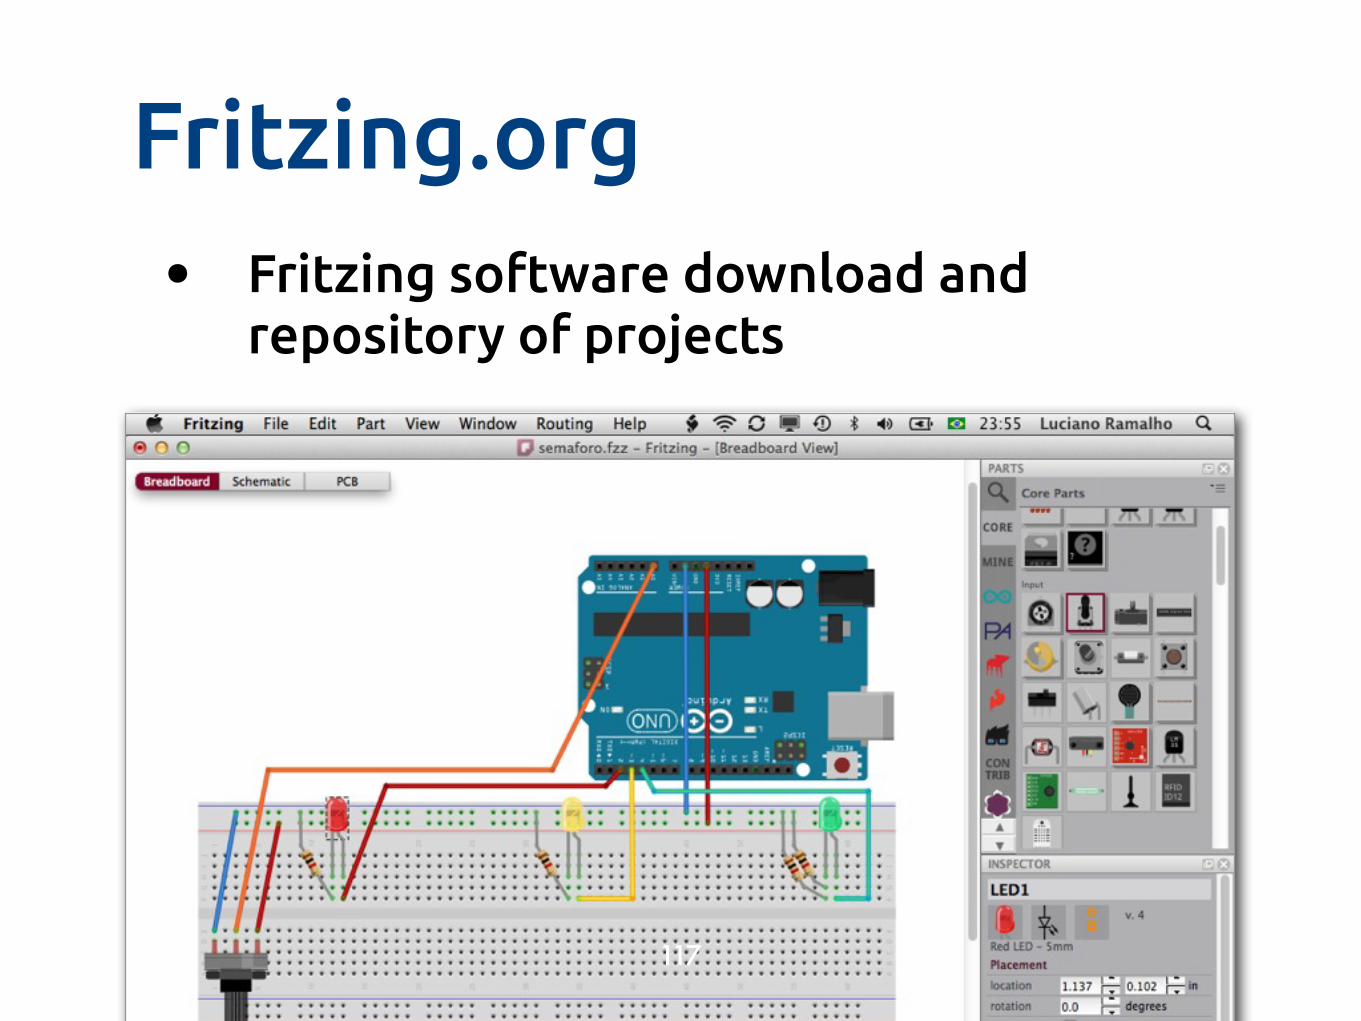
Fritzing.org• Fritzing software download and
repository of projects
117
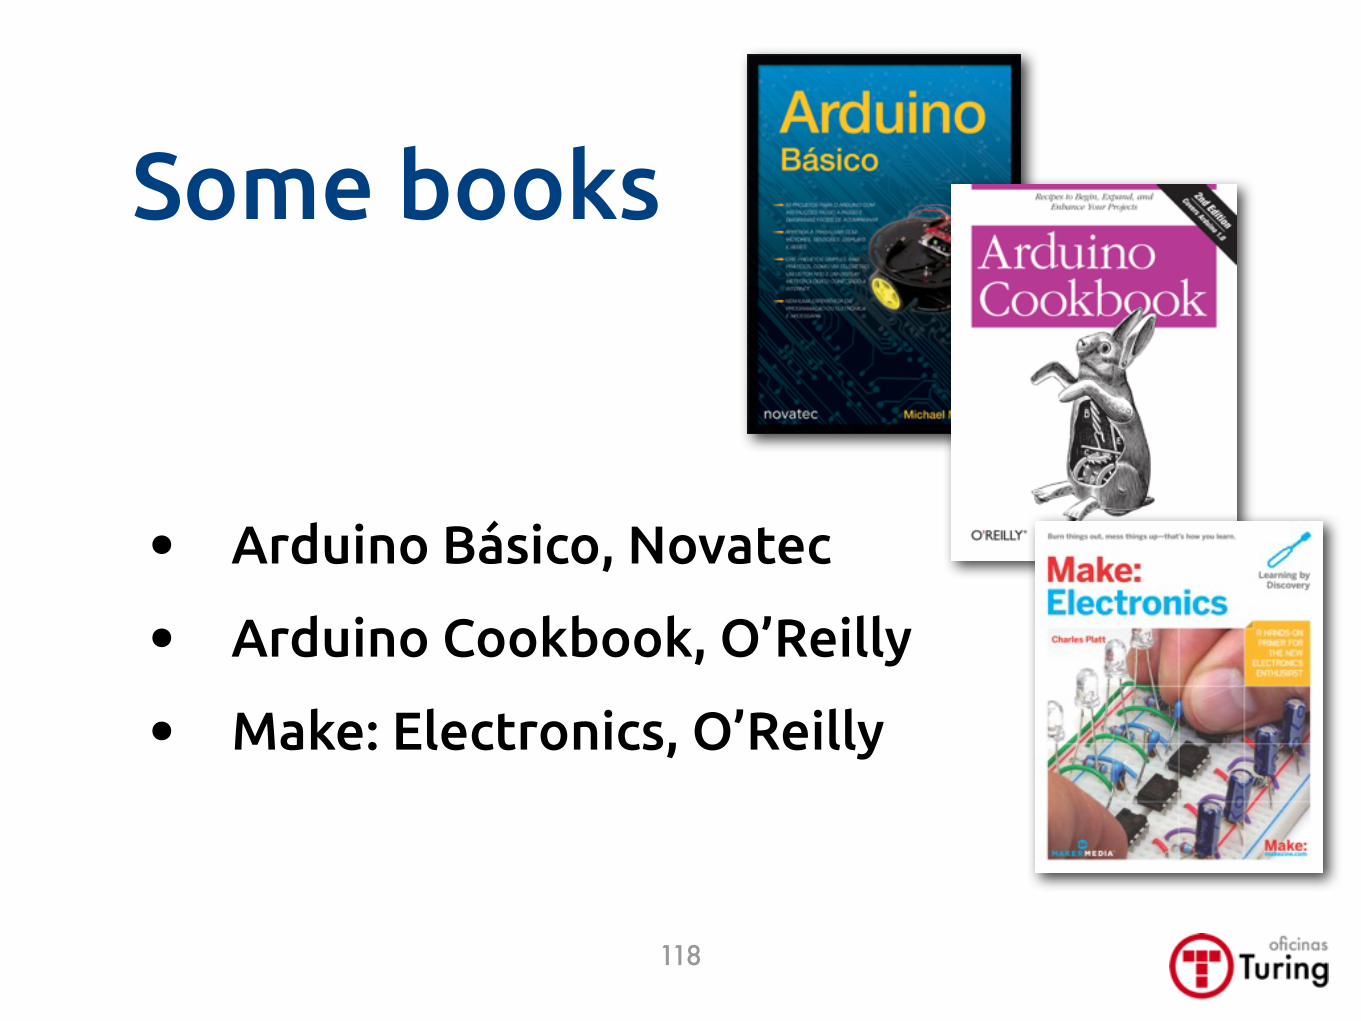
Some books
• Arduino Básico, Novatec
• Arduino Cookbook, O’Reilly
• Make: Electronics, O’Reilly
118
Physical shops inSão Paulo
• Multcomercial, R. dos Timbiras, 257
• Side streets o# and parallel to Santa E"gênia, including junk stores
• Laboratório de Garagem, Rua Berta, 60 (metrô Vila Mariana)
• Neighborhood shops like Eletrônica Pinheiros, Rua Butantã, 133
119
Online shops
• Laboratório de Garagem: labdegaragem.com
• Farnell Newark: farnellnewark.com.br
• Adafruit: adafruit.com
• Sparkfun: sparkfun.com
• Seeedstudio: seeedstudio.com
• Many: dx.com, ebay.com (many sellers)
seeedstudiowith 3 “e”!
120
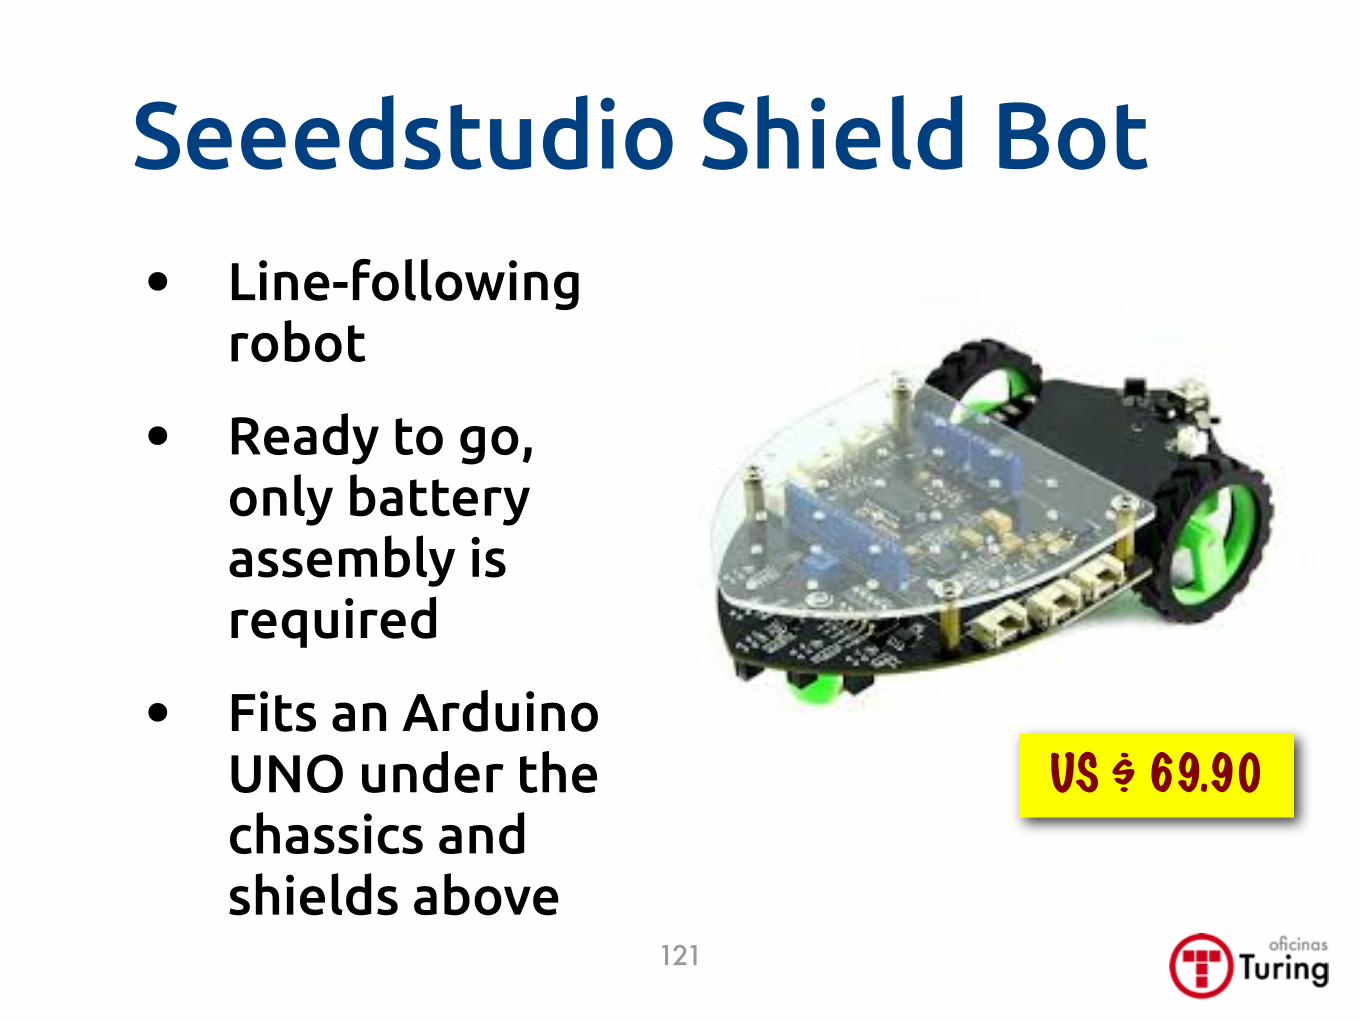
Seeedstudio Shield Bot• Line-following
robot
• Ready to go, only battery assembly is required
• Fits an Arduino UNO under the chassics and shields above
US $ 69.90
121
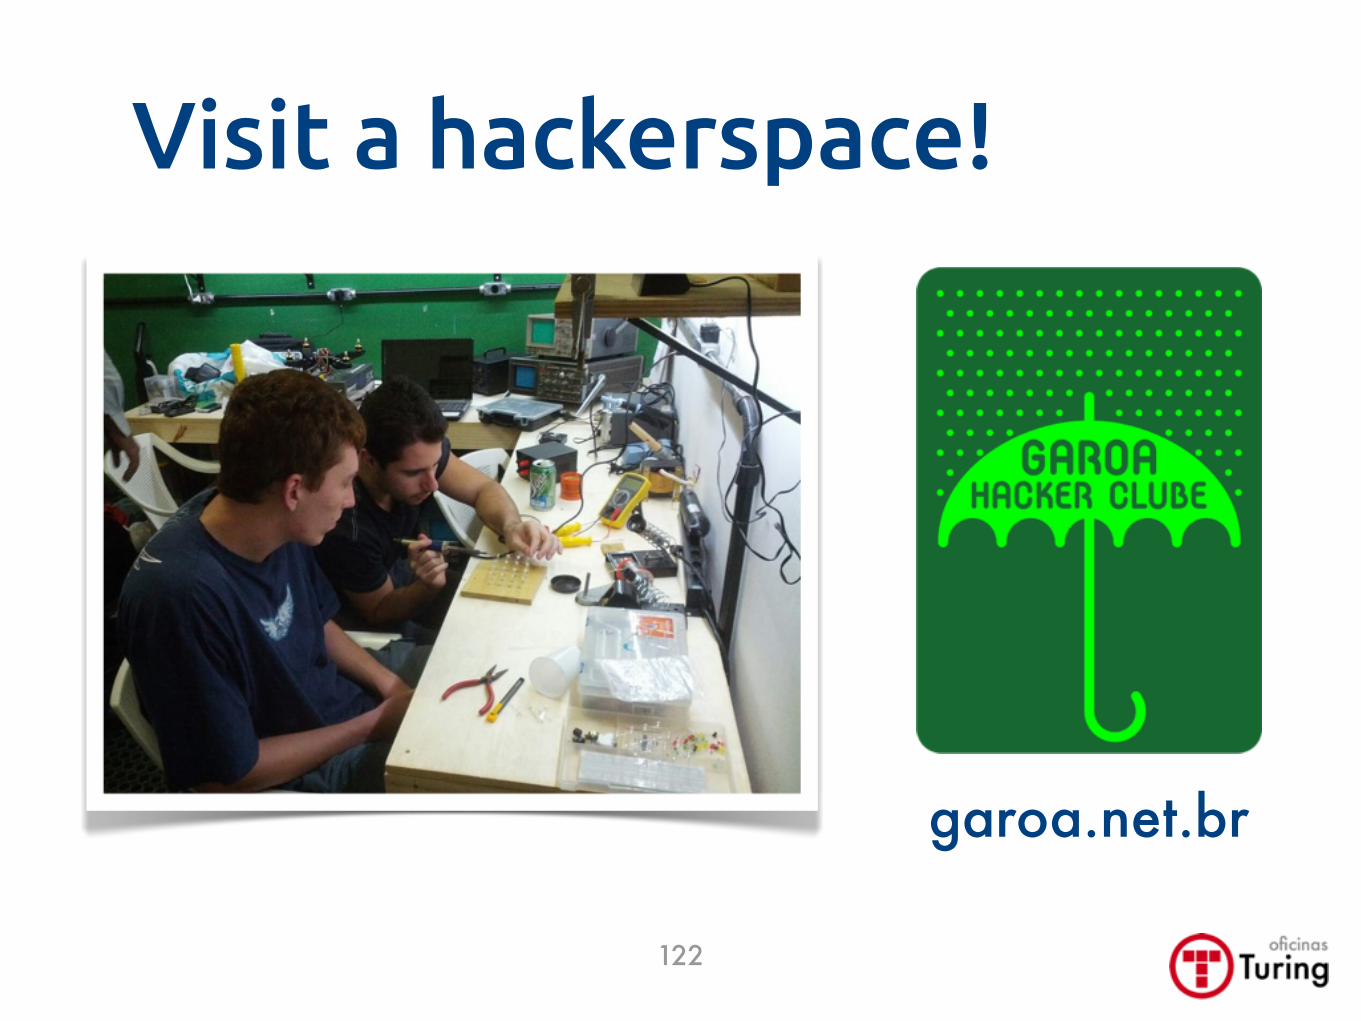
Visit a hackerspace!
garoa.net.br
122
Credits
Turing.com.broficinas
123
• Slides created, compiled and organized by Luciano Ramalho (O"cinas Turing) with the help of many sources
• License for use and copying:Creative Commons BY-SA
• You may copy and use for any purpose as long as attribution is given and you share derivative works under the same terms