do not lie · • whether it’s a small or large flat roof, ... using alternative methods. ... not...
TRANSCRIPT

www.classicbond.co.uk

The Numbers Do Not Lie
• ClassicBond EPDM roofing membranes have a life expectancy of 50 years.
• Manufactured by largest EPDM manufacturer in the world.
• Half century track record of performance and durability.
Unrivalled
• Unmatched weatherability.
• Flexibility.
• Economical.
• Safety – heat free installation.
For You
• Wide variety of sheet widths – to suit each individual project and customer.
• Choice of sheet thickness.
• Seamless – completely reliable.
What Makes ClassicBond EPDM the right choice for you:
• BBA Approved Membrane. Certificate number 11/4853.• 14% thicker than leading competitors’ standard EPDM membranes.• Larger rolls means fewer seams and faster installation.• Membrane widths of 3.05m, 4.57m, 6.1m, 7.63m & 9.15m.• Choice of thicknesses 1.14mm & 1.52mm*.• Economical.• Unmatched weatherability – resistance to ozone, UV radiation
and extremes of temperature.• Highly flexible.• Pressure Sensitive (PS) accessories available for virtually
any penetration or detail.• Little or no maintenance roofing system.• Faster installation reduces labour costs.• Whether it’s a small or large flat roof, a refurbishment or a new build,
ClassicBond is the right choice for you.
ClassicBond EPDM flat roofing system has been awarded the British Board of Agrément certificate, No. 11/4853. The BBA carries out assessment, testing, approval and certification of products and systems for the construction industry against national requirements, internationally recognised standards or other relevant technical specifications.
What does this mean to me?
Companies and individuals using products with Agrément Certificates can do so in the knowledge that they will perform, if installed in accordance with the guidance in the Certificate, exactly as set out in the Certificate. If work is to be inspected by building control, the NHBC or any other industry professionals, the use of approved products should avoid any problems with compliance with Building Regulation or other issues. The BBA works closely with regulatory authorities throughout the UK as well as with housing warranty bodies to ensure Agrément Certificates are accepted nationwide.
Benefits for the distributor are; the distributor is the point of supply for many building products and this carries with it certain responsibilities. Distributors should ensure that the products they supply are fit for purpose and meet regulatory requirements. This is easy to see in Agrément Certificates, perhaps more difficult using alternative methods. This is especially important for products coming from overseas that may have been manufactured with another market in mind. By stocking products with no UK source of production or limited technical backup, the distributor may struggle to obtain the necessary technical information to overcome a problem on site or with acceptance of the product by UK specifiers, purchasers or building control.
*Thickness will change during 2013 to 1.2mm & 1.5mm to conform with forthcoming European CE requirement.

• Large seamless single ply sheets
• Flame free installation
• ClassicBond EPDM will not rot, split or degrade
• Not affected by extremes of temperature
• Life expectancy of 50 years
• Little or no maintenance
• Highly flexible
Performance You Can Count On
The flat roofing market was revolutionised over 50 years ago with the introduction of EPDM membranes, now over 1.4 billion m² have been installed. Originally produced for the commercial flat roofing market, EPDM roofing has now become the perfect solution for domestic as well as commercial flat roofing projects.
ClassicBond EPDM continues to supply the flat roofing market with a range of EPDM membrane sizes and thicknesses and innovative products, but one thing remains the same – the watertight performance, durability and dependability of ClassicBond EPDM membranes.
Manufactured by the largest EPDM manufacturer, no other EPDM membrane can match the strong track record of the ClassicBond EPDM flat roofing system. ClassicBond EPDM’s success is due to its many material characteristics of longevity, weatherability and elasticity.
ClassicBond membranes are strong, lightweight, easily installed and are the perfect solution for flat roof renovation and new flat roof installations.
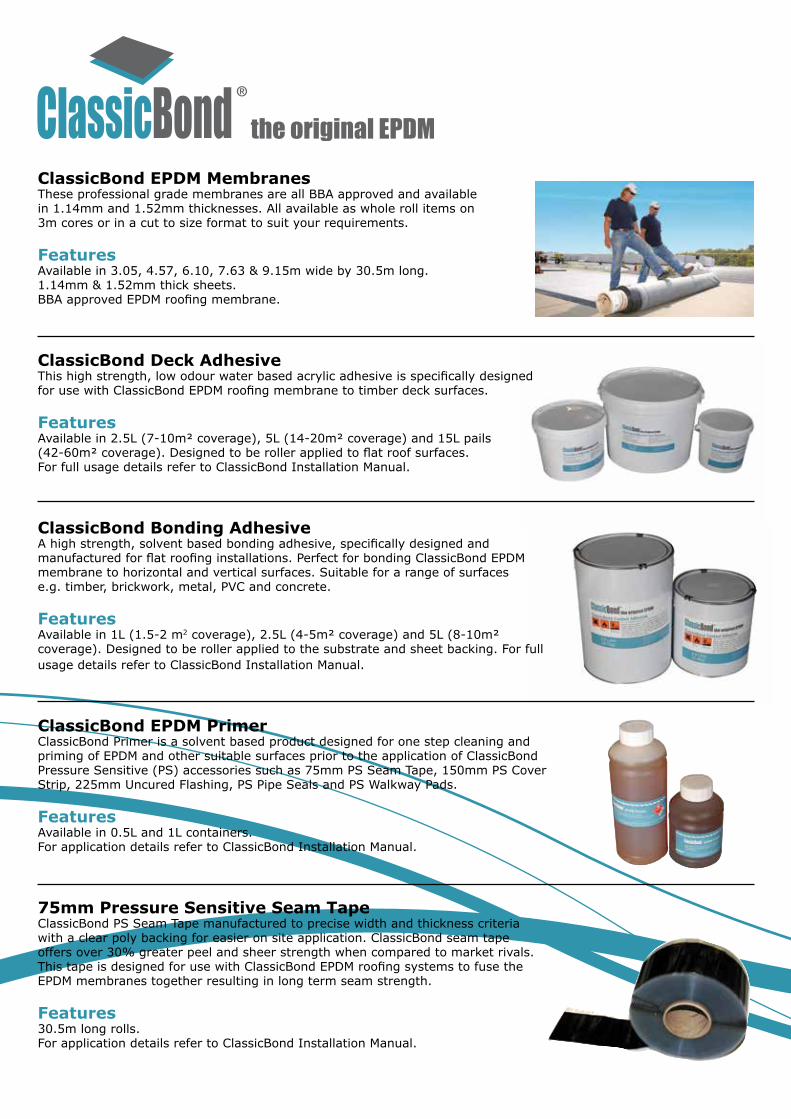
ClassicBond EPDM MembranesThese professional grade membranes are all BBA approved and available in 1.14mm and 1.52mm thicknesses. All available as whole roll items on 3m cores or in a cut to size format to suit your requirements.
FeaturesAvailable in 3.05, 4.57, 6.10, 7.63 & 9.15m wide by 30.5m long.1.14mm & 1.52mm thick sheets.BBA approved EPDM roofing membrane.
ClassicBond Deck AdhesiveThis high strength, low odour water based acrylic adhesive is specifically designed for use with ClassicBond EPDM roofing membrane to timber deck surfaces.
FeaturesAvailable in 2.5L (7-10m² coverage), 5L (14-20m² coverage) and 15L pails (42-60m² coverage). Designed to be roller applied to flat roof surfaces. For full usage details refer to ClassicBond Installation Manual.
ClassicBond Bonding Adhesive A high strength, solvent based bonding adhesive, specifically designed and manufactured for flat roofing installations. Perfect for bonding ClassicBond EPDM membrane to horizontal and vertical surfaces. Suitable for a range of surfaces e.g. timber, brickwork, metal, PVC and concrete.
FeaturesAvailable in 1L (1.5-2 m2 coverage), 2.5L (4-5m² coverage) and 5L (8-10m² coverage). Designed to be roller applied to the substrate and sheet backing. For full usage details refer to ClassicBond Installation Manual.
ClassicBond EPDM Primer ClassicBond Primer is a solvent based product designed for one step cleaning and priming of EPDM and other suitable surfaces prior to the application of ClassicBond Pressure Sensitive (PS) accessories such as 75mm PS Seam Tape, 150mm PS Cover Strip, 225mm Uncured Flashing, PS Pipe Seals and PS Walkway Pads.
FeaturesAvailable in 0.5L and 1L containers.For application details refer to ClassicBond Installation Manual.
75mm Pressure Sensitive Seam Tape ClassicBond PS Seam Tape manufactured to precise width and thickness criteria with a clear poly backing for easier on site application. ClassicBond seam tape offers over 30% greater peel and sheer strength when compared to market rivals. This tape is designed for use with ClassicBond EPDM roofing systems to fuse the EPDM membranes together resulting in long term seam strength.
Features30.5m long rolls.For application details refer to ClassicBond Installation Manual.

150mm Pressure Sensitive Overlayment StripClassicBond 150mm PS Overlayment Strip is used for stripping in metal edging, drip edges, gravel stops and fastening plates. This tape consists of a 1.02mm semi cured EPDM strip laminated to a 0.89mm fully cured synthetic rubber based pressure sensitive adhesive.
Features150mm by 30.5m long rolls.Resists tearing, cracking and abrasion in all weather conditions.Used when seaming with 75mm PS tape is not possible.Must be used with ClassicBond EPDM Primer.For full usage details refer to the ClassicBond Installation Manual.
225mm Pressure Sensitive Elastoform Flashing TapeClassicBond PS Flashing Tape is easily moulded and highly adaptable to irregular shapes and surfaces. This self-curing tape is ideal for flashing and waterproofing of roof details such as pipes, corners, outlets and other penetrations.
Features225mm wide by 15.25m long rolls.Easily adaptable to irregular shapes and surfaces.Easy application with clear poly backing.Must be used with ClassicBond EPDM Primer.For full usage details refer to the ClassicBond Installation Manual.
Pressure Sensitive Pipe Seals ClassicBond EPDM PS Pipe Seals are available in two sizes – small 15-75mm and large 25-150mm in diameter. ClassicBond pipe seals are cured, pre-moulded EPDM flashings for round flat roof penetrations, Pre-applied Seam Tape to the base and a stainless steel clamping ring.
FeaturesPre-applied Seam Tape on the base of the pipe seal gives fast and simple application.Ribbed collar for accurate cutting to pipe size.Stainless steel clamping ring.Must be used with ClassicBond EPDM Primer.For full usage details refer to the ClassicBond Installation Manual.
Pressure Sensitive RUSS Strip In common with most single ply material, EPDM will overtime try and shrink by up to 10% back to the centre. The base tie-in controls the membrane movement and stops the membrane pulling away where the membrane turns up through an angle change. The rest of the movement is accommodated by the ClassicBond membrane and its ability to elongate by over 300%.
ClassicBond PS RUSS (Reinforced Universal Secure Strip) is used to mechanically secure EPDM membranes to the substrate. The strip has tape pre-applied along one edge and can be installed horizontally or vertically in conjunction with Seam Fastening Plates below the EPDM membrane for additional membrane securement.
FeaturesIdeal for additional membrane securement as needed.Ideal for perimeter securement and around penetrations.
Seam Fastening Plates Used with RUSS strip to securely clamp the RUSS to the vertical or horizontal surface. Must be used in conjunction with the appropriate fasteners for the substrate.
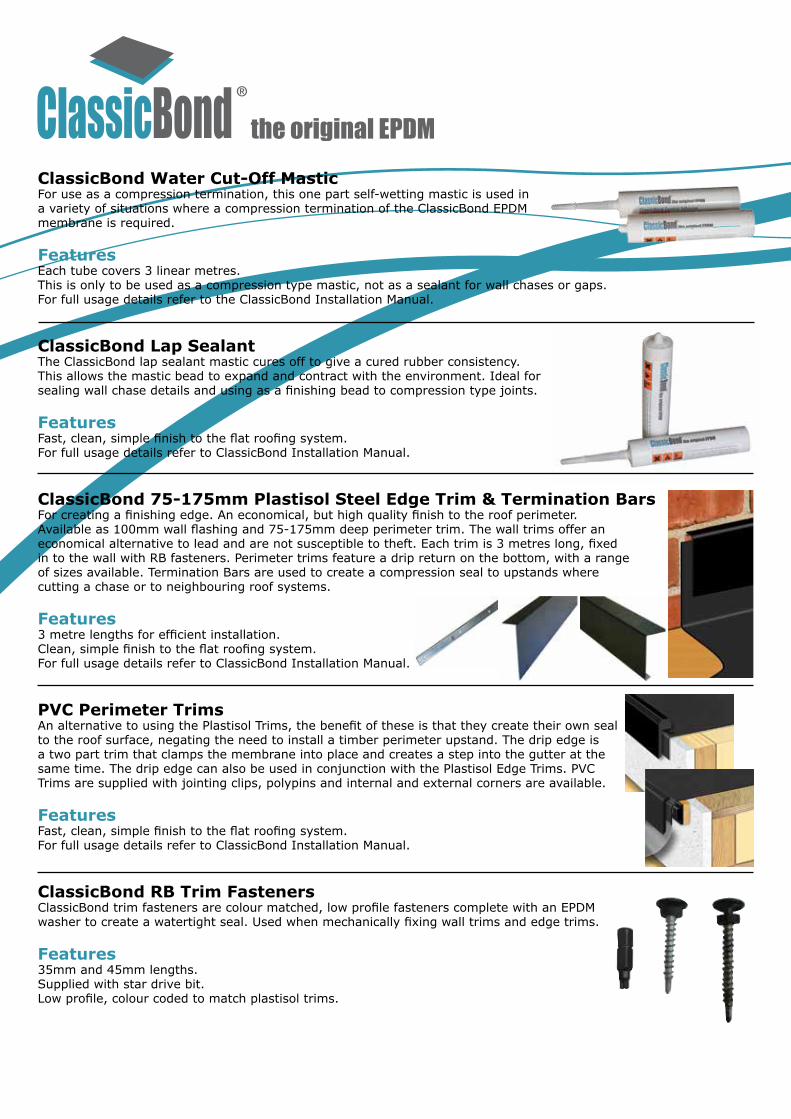
ClassicBond Water Cut-Off Mastic For use as a compression termination, this one part self-wetting mastic is used in a variety of situations where a compression termination of the ClassicBond EPDM membrane is required.
FeaturesEach tube covers 3 linear metres.This is only to be used as a compression type mastic, not as a sealant for wall chases or gaps.For full usage details refer to the ClassicBond Installation Manual.
ClassicBond Lap Sealant The ClassicBond lap sealant mastic cures off to give a cured rubber consistency. This allows the mastic bead to expand and contract with the environment. Ideal for sealing wall chase details and using as a finishing bead to compression type joints.
FeaturesFast, clean, simple finish to the flat roofing system.For full usage details refer to ClassicBond Installation Manual.
ClassicBond 75-175mm Plastisol Steel Edge Trim & Termination Bars For creating a finishing edge. An economical, but high quality finish to the roof perimeter. Available as 100mm wall flashing and 75-175mm deep perimeter trim. The wall trims offer an economical alternative to lead and are not susceptible to theft. Each trim is 3 metres long, fixed in to the wall with RB fasteners. Perimeter trims feature a drip return on the bottom, with a range of sizes available. Termination Bars are used to create a compression seal to upstands where cutting a chase or to neighbouring roof systems.
Features3 metre lengths for efficient installation.Clean, simple finish to the flat roofing system.For full usage details refer to ClassicBond Installation Manual.
PVC Perimeter TrimsAn alternative to using the Plastisol Trims, the benefit of these is that they create their own seal to the roof surface, negating the need to install a timber perimeter upstand. The drip edge is a two part trim that clamps the membrane into place and creates a step into the gutter at the same time. The drip edge can also be used in conjunction with the Plastisol Edge Trims. PVC Trims are supplied with jointing clips, polypins and internal and external corners are available.
FeaturesFast, clean, simple finish to the flat roofing system.For full usage details refer to ClassicBond Installation Manual.
ClassicBond RB Trim Fasteners ClassicBond trim fasteners are colour matched, low profile fasteners complete with an EPDM washer to create a watertight seal. Used when mechanically fixing wall trims and edge trims.
Features35mm and 45mm lengths.Supplied with star drive bit.Low profile, colour coded to match plastisol trims.

The range of ClassicBond outlets provide the installer with a fast, effective method of detailing to flat roof outlets.
ClassicBond 68mm Flat Roof OutletThe pre-formed 68mm outlet is a fast, efficient method of connecting ClassicBond flat roofing systems to existing 68mm internal rainwater pipes on domestic and small commercial roofs.
ClassicBond Horizontal Roof OutletThe horizontal roof outlet is designed as an outlet through parapet walls and pitched roofs as well as the potential to be used as a vertical drain in box gutters.
ClassicBond 110mm Top DrainTop drains give a fast, clean and secure method of joining ClassicBond EPDM membranes to 110mm rainwater pipes for larger flat roofs and commercial properties. The outlet is joined to the EPDM membrane with the integral clamping ring and water cut-off mastic.
Installation GuideEasy, simple and fast installation with the original EPDM membrane and accessories.Full guide available at www.classicbond.co.uk
A) Installing the ClassicBond membrane to the roof deck.Fully adhere the membrane to the roof deck using either ClassicBond Deck Adhesive or ClassicBond Bonding Adhesive. Install ClassicBond RUSS strip where the membrane turns up through an angle change and adhere the membrane to upstands and to horizontal areas around the perimeter by using ClassicBond Bonding Adhesive only.
B) ClassicBond PS RUSS stripPS RUSS (Pressure Sensitive Reinforced Universal Secure Strip) is used with ClassicBond Primer to adhere the membrane to the PS Tape on the RUSS strip where the EPDM membrane turns up through an angle change on the roof.
1) Position the membrane and allow to relax for at least half an hour. Then fold or roll the membrane back up to expose the decking.
2) Apply ClassicBond WBA Deck Adhesive to the roof deck up to the edge of the RUSS strip. If installing with ClassicBond Bonding Adhesive, apply to the substrate and to the underside of the membrane.
3) Lay the membrane into the ClassicBond Deck Adhesive when the adhesive is still wet. If using ClassicBond Bonding Adhesive allow the adhesive to become touch dry before mating the surfaces together.
4) Push the EPDM membrane into the adhesive with a soft broom to remove any trapped air and achieve a complete bond. The membrane should be free of any wrinkles or creases.
1) Fold the membrane back and apply ClassicBond EPDM Primer to the area of EPDM membrane that will mate into the 75mm wide PS tape on the RUSS strip and allow to dry.
2) Once the ClassicBond Primer has cured, remove the protective strip from the PS tape section of the RUSS strip.
3) Lay the primed area of the ClassicBond EPDM membrane onto the exposed PS tape on the RUSS strip.
4) Using a hand roller, roll the membrane into the PS RUSS strip to achieve the full bond.

C) Adhering the membrane to upstands and details
150mm PS Cover Strip
1) Apply ClassicBond Bonding Adhesive to the EPDM membrane and onto the exposed edge of the RUSS strip.
2) Bonding Adhesive must also be applied to the vertical surface. This must be clean, dry and free of any sharp protrusions. Allow the Bonding Adhesive to become touch dry.
3) Test the Bonding Adhesive to ensure it has become touch dry. Next, work the membrane into the right angle and up the upstand.
4) Mate the two surfaces together ensuring there is no trapped air under the membrane. If the membrane and substrate are put together when wet, bubbling will occur.
1) When installing a 150mm Cover Strip as a butt joint, adhere both sheets in the required position. Ensure there is no gap between the sheets.
2) Prime a strip 80-90mm either side of the joint with ClassicBond EPDM Primer and allow the primer to become touch dry.
3) Once the primer has become dry, unpeel a section of the clear poly backing and start adhering the tape to the primed area with a flat hand. Ensure there is no trapped air in the seam.
4) Roll the entire seam with a hand roller, rolling at right angles to the seam not along it, to achieve full seam strength. 225mm PS cover patches must be applied at seam junctions.
D) Seam DetailingMembrane seams are either sealed by installing a 75mm PS seam tape in between the adjoining sheets or installing a 150mm PS Cover strip for butt jointing of membranes or seaming membrane to other materials.
75mm Pressure Sensitive Seam Tape
1) Adhere both sheets fully in position allowing the sheets to overlap by a minimum of 75mm. Apply ClassicBond Primer to both the bottom overlap area and to the underside of the top lap.
2) Once the primer has become dry, unroll a section of tape and position it onto the primed area of the bottom sheet. Continue adhering the tape along the entire seam ensuring there is no trapped air.
3) Once the 75mm tape is bonded to the bottom sheet, fold over the top lap to cover the seam and remove the clear poly backing protective strip and smooth the primed top lap onto the tape.
4) Roll the entire seam with a hand roller, rolling at right angles to the seam, not along it, to achieve full seam strength. 225mm PS cover patches must be applied at seam junctions.

E) Corner DetailingCorner details are all installed by using 225mm PS Elastoform tape, NOT 150mm Cover Strip.
Internal Corners
F) Pipe DetailingPipes are sealed by either pre-formed pipe seals or 225mm PS Elastoform tape. See full installation guide for 225mm Elastoform pipe detail guide.
1) Adhere the membrane to the upstands (see section C) and fold the membrane together to form a triangular flap. Fold the flap back to one side and trim any excess membrane away leaving a flap approx. 75mm wide.
2) Cut a section of 225mm PS Elastoform flashing to give 75mm coverage past the edge of flap and large enough to extend up to the top of the corner. Put the tape in position and mark around it.
3) Apply ClassicBond Primer to the marked area (inside, outside of the flap & upstand) and allow primer to dry.
4) Once dry, remove clear poly backing and adhere tape into position. Roll the internal corner detail with a hand roller to achieve full detail strength.
1) Using a pre-formedClassicBond PS pipe seal, cut the seal at the top to the correct size for the pipe. Always cut above the rib on the pipe seal.
2) Fit the metal clamping ring to the pipe boot. Mark the ClassicBond EPDM membrane around the base of the pipe seal to give a guide for applying the ClassicBond Primer.
3) Apply ClassicBond EPDM primer to the membrane in the marked area and allow to dry become touch dry.
4) Remove the clear poly backing layer and mate the pipe seal onto the membrane. Roll the flat area of the seal to achieve full strength.
External Corners
1) The membrane should be cut from the base of the corner to the top at a 45° angle. Use a section of PS Elastoform flashing to give 75mm coverage round the corner, 50mm past the top of the cut and up to 75mm onto the flat area. Put the tape in position and mark around it.
2) Apply ClassicBond EPDM Primer to the marked area. Primer should only be applied to dry and clean surfaces. You can apply ClassicBond Primer to a range of surfaces such as brick, plastic, timber etc.
3) Once dry remove clear poly backing and adhere tape into position starting from the top of the tape and working down. Roll the tape then repeat the process from the opposite direction.
4) The finished corner will have 2 sections of tape of equal size overlapping each other by 75mm past the corner. Roll the entire corner to achieve full detail strength.

G) Rainwater Outlet Details68mm OutletStandard domestic rainwater pipe size for internal outlets through the deck.
Internal Corners
110mm Top DrainFor commercial sized outlets to connect to 110mm rainwater pipes.
Parapet Wall OutletPreformed outlet for going through walls and false pitched roof perimeter.
1) Cut the head of the outlet back to leave a 50mm flange around the outlet hole and fix into the decking. Cut the membrane around the perimeter of the outlet head.
2) Apply ClassicBond Primer to the head of the outlet, down into the outlet pipe and onto the membrane around the outlet.
3) Allow the primer to dry and adhere a section of 225mm PS Elastoform tape to cover the outlet and seal onto the ClassicBond EPDM membrane by at least 50mm.
4) Cut an opening in the centre of the tape and form the tape into the outlet by 15mm. Ensure the entire flashing has been rolled and install the leaf grate.
1) Install the membrane over the top of the outlet and cut the membrane 25-50mm around the outlet hole. Prime the outlet and the membrane around the outlet with ClassicBond EPDM Primer and allow to dry.
2) Install a section of 225mm PS Elastoform tape to the primed area. Cut a small hole in the tape and form it into the opening.
3) Prime inside the outlet for installing a securing strip of tape. Install a strip of PS Elastoform flashing 75mm wide around the inside of the outlet opening to secure the flashing in place.
4) Roll the entire flashing with the hand roller and install leaf grate.
1) Fix the outlet into the deck and put the protective yellow cap into position. Install the membrane over the top of the outlet. Find the locating pin on the outlet cap, place the cutting guide over the pin and cut away the circle of ClassicBond membrane.
2) Remove the circle of EPDM membrane and remove the protective yellow cap to expose the roof outlet.
3) Put a bead of ClassicBond water cut off mastic inbetween the EPDM membrane and the top of the outlet.
4) Securely screw in the clamping ring. Once the clamping ring is fully tightened, clip the leaf grate into its three locating tabs.

H) Edge DetailsWall and perimeter details can all be finished with pre-formed details.
Wall Trim1) Cut a chase into the mortar line a minimum of 150mm above the flat of
the roof surface, at least 25mm deep.
2) Ensure the membrane is fully bonded up to the chase with ClassicBond bonding adhesive.
3) Insert the wall trim into the chase and fix at max of 500mm spacings with ClassicBond fasteners.
4) Seal the top edge of the trim to the wall with ClassicBond Lap Sealant.
Edge Trim1) Lap the membrane over the roof edge by a minimum of 50mm and
place the trim on the roof edge.
2) Push the trims downs to compress the foam and fix into side of roof with polypins.
3) Install corners and joint clips.
Gutter Trim1) Install the backing plate to the roof edge and ensure membrane
overhangs the front of this by 50mm.
2) Position the front cover strip over the rubber and the backing plate. Fix into position with the polypins through the membrane and the backing plate.
3) Install corners and joint clips.
All the information in this product sheet is based on practical experience and is published in good faith. However, because we have no control over the manner or conditions in which our products are used, or over work undertaken or end product manufactured by the purchaser, we cannot accept liability for results. Responsibility for ascertaining the suitability of products for their purposes rests with the purchaser. All conditions, representations, statements, warranties or guarantees whatsoever, whether express, implied or statutory, in respect of any goods manufactured, sold or supplied by us are hereby expressly excluded and we accept no liability in respect of any claim for damage or consequential loss caused to any property arising directly or indirectly out of the use of our products or goods. Flex-R Ltd. reserves the right to change product specifications without notice.

For more information visit www.classicbond.co.uk or contact your local ClassicBond distributor:
www.classicbond.co.uk