diy drill storage cabinet - kreg tool
TRANSCRIPT
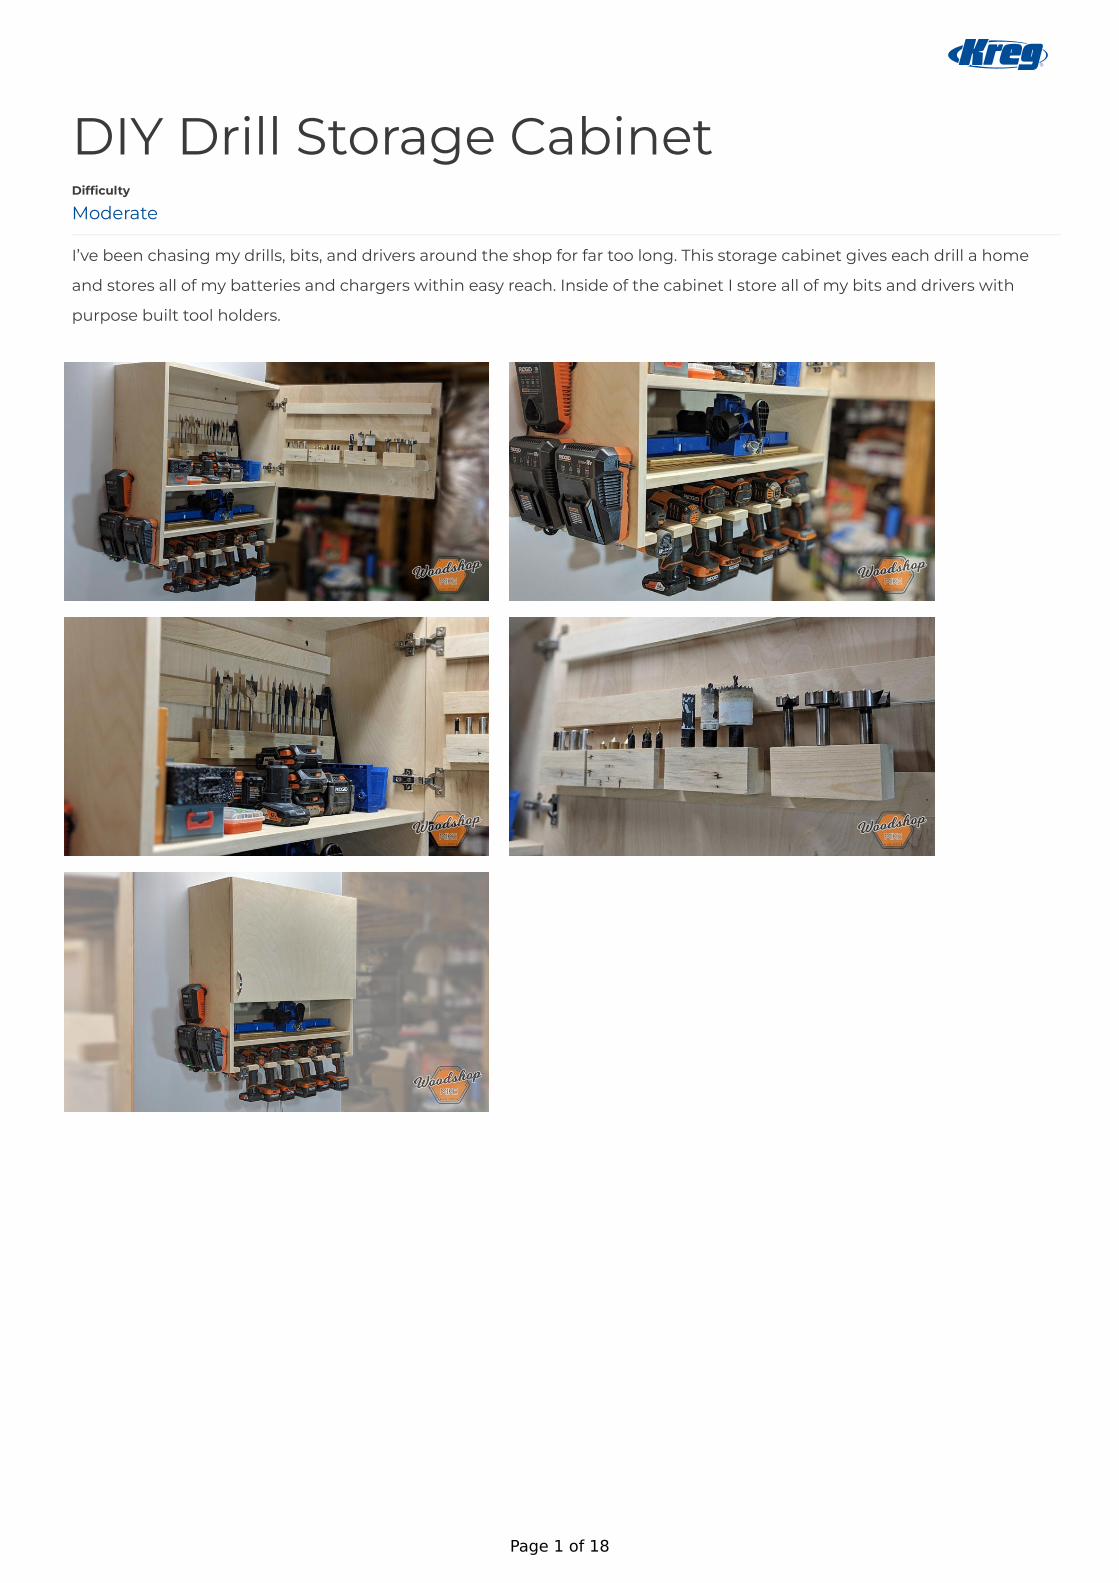
DIY Drill Storage Cabinet
I’ve been chasing my drills, bits, and drivers around the shop for far too long. This storage cabinet gives each drill a home
and stores all of my batteries and chargers within easy reach. Inside of the cabinet I store all of my bits and drivers with
purpose built tool holders.
Difficulty
Moderate
Page 1 of 18
ToolsKreg Tools
Wood Project Clamp - 6"
Kreg Pocket-Hole Jig® 720
Concealed Hinge Jig
Other Tools
Miter Saw
Square
Table Saw
Tape Measure
Bandsaw
Drill (cordless)
Drill Press
Impact Driver
Bar Clamp
Router
Sander
Air Compressor
Shop Vacuum
Workbench
MaterialsWood Products
Plywood , 3/4" Thick , Full Sheet1
Hardware & Supplies
Euro Style Hinge2
1-1/4" Coarse Pocket Hole Screws40
Handle1
220 Grit Disc (Optional)2
Edge Banding 26' (Optional)1
Page 2 of 18
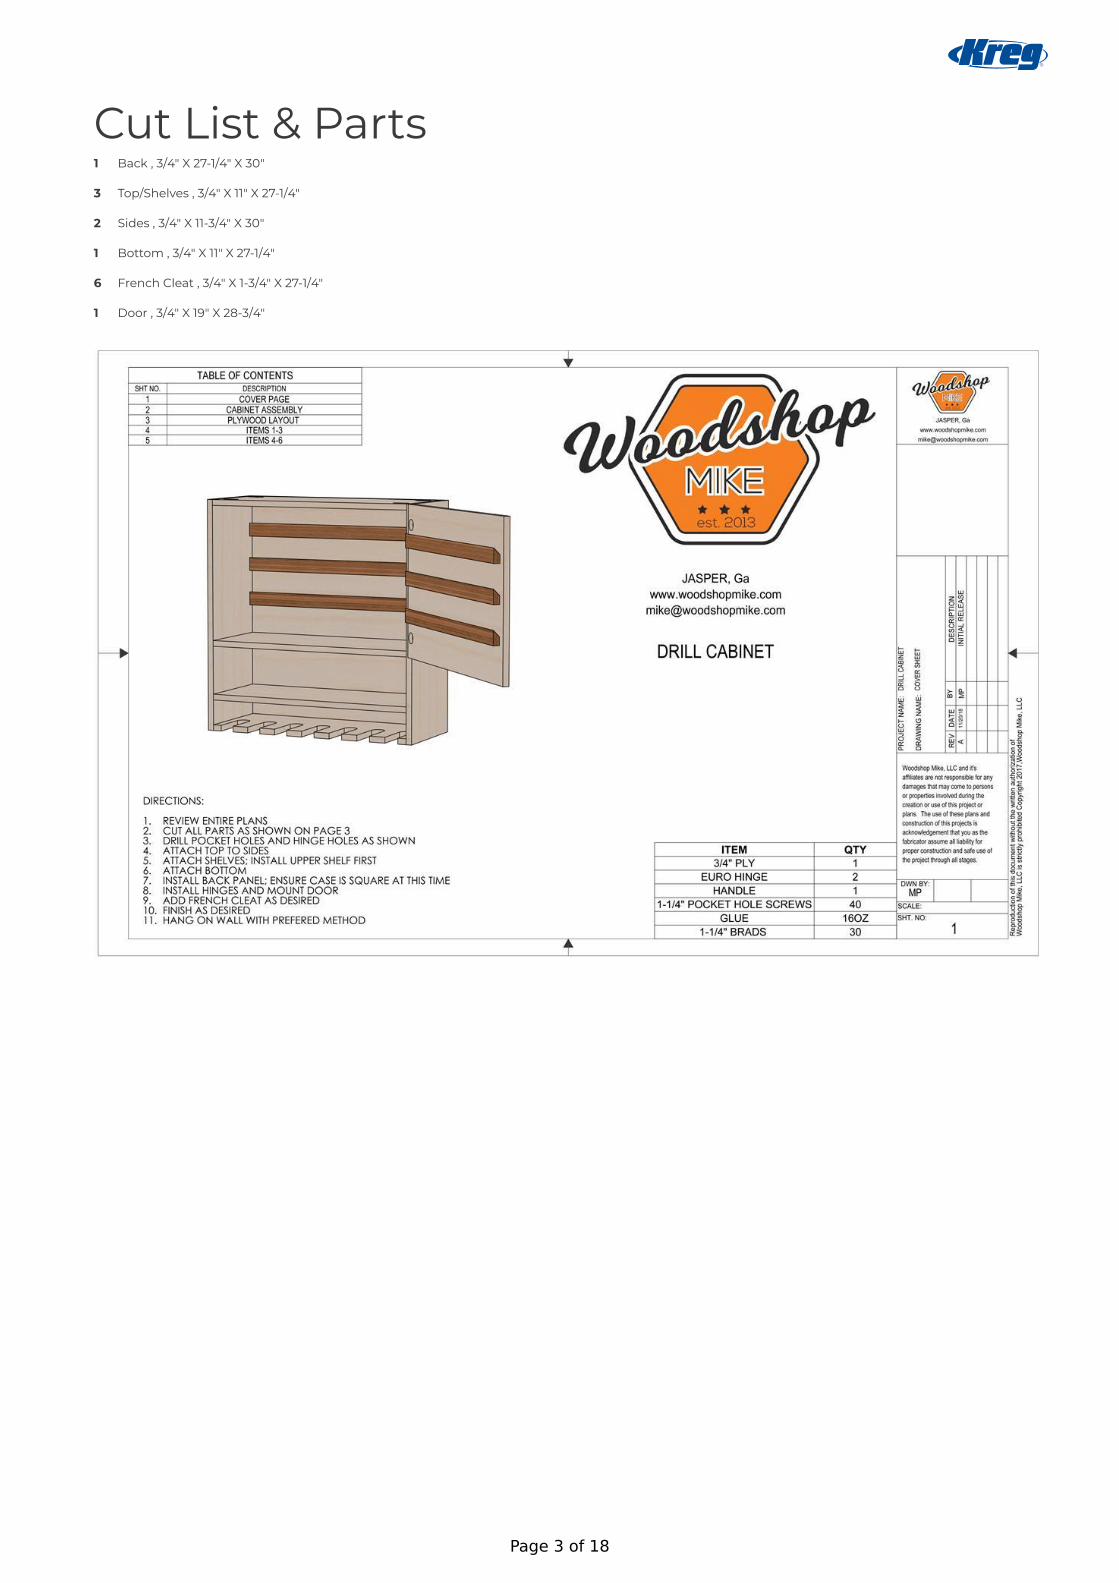
Cut List & PartsBack , 3/4" X 27-1/4" X 30"1
Top/Shelves , 3/4" X 11" X 27-1/4"3
Sides , 3/4" X 11-3/4" X 30"2
Bottom , 3/4" X 11" X 27-1/4"1
French Cleat , 3/4" X 1-3/4" X 27-1/4"6
Door , 3/4" X 19" X 28-3/4"1
Page 3 of 18

Page 4 of 18

Page 5 of 18
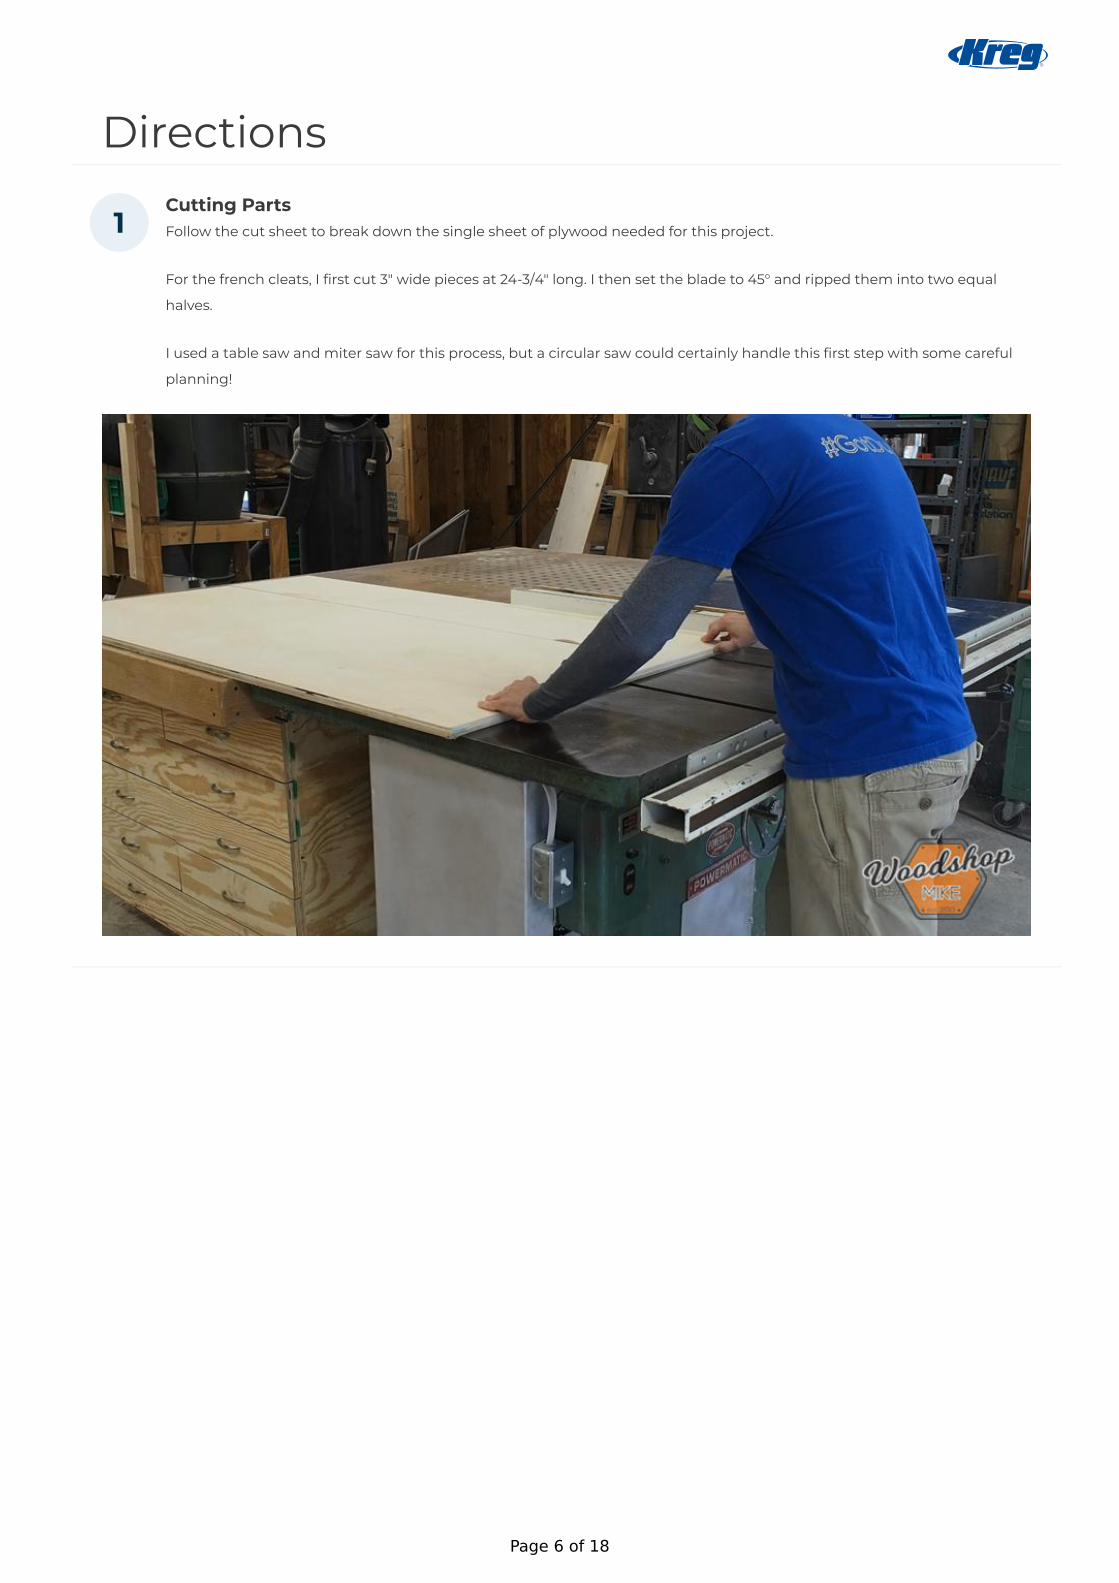
DirectionsCutting PartsFollow the cut sheet to break down the single sheet of plywood needed for this project.
For the french cleats, I first cut 3" wide pieces at 24-3/4" long. I then set the blade to 45° and ripped them into two equal
halves.
I used a table saw and miter saw for this process, but a circular saw could certainly handle this first step with some careful
planning!
1
Page 6 of 18
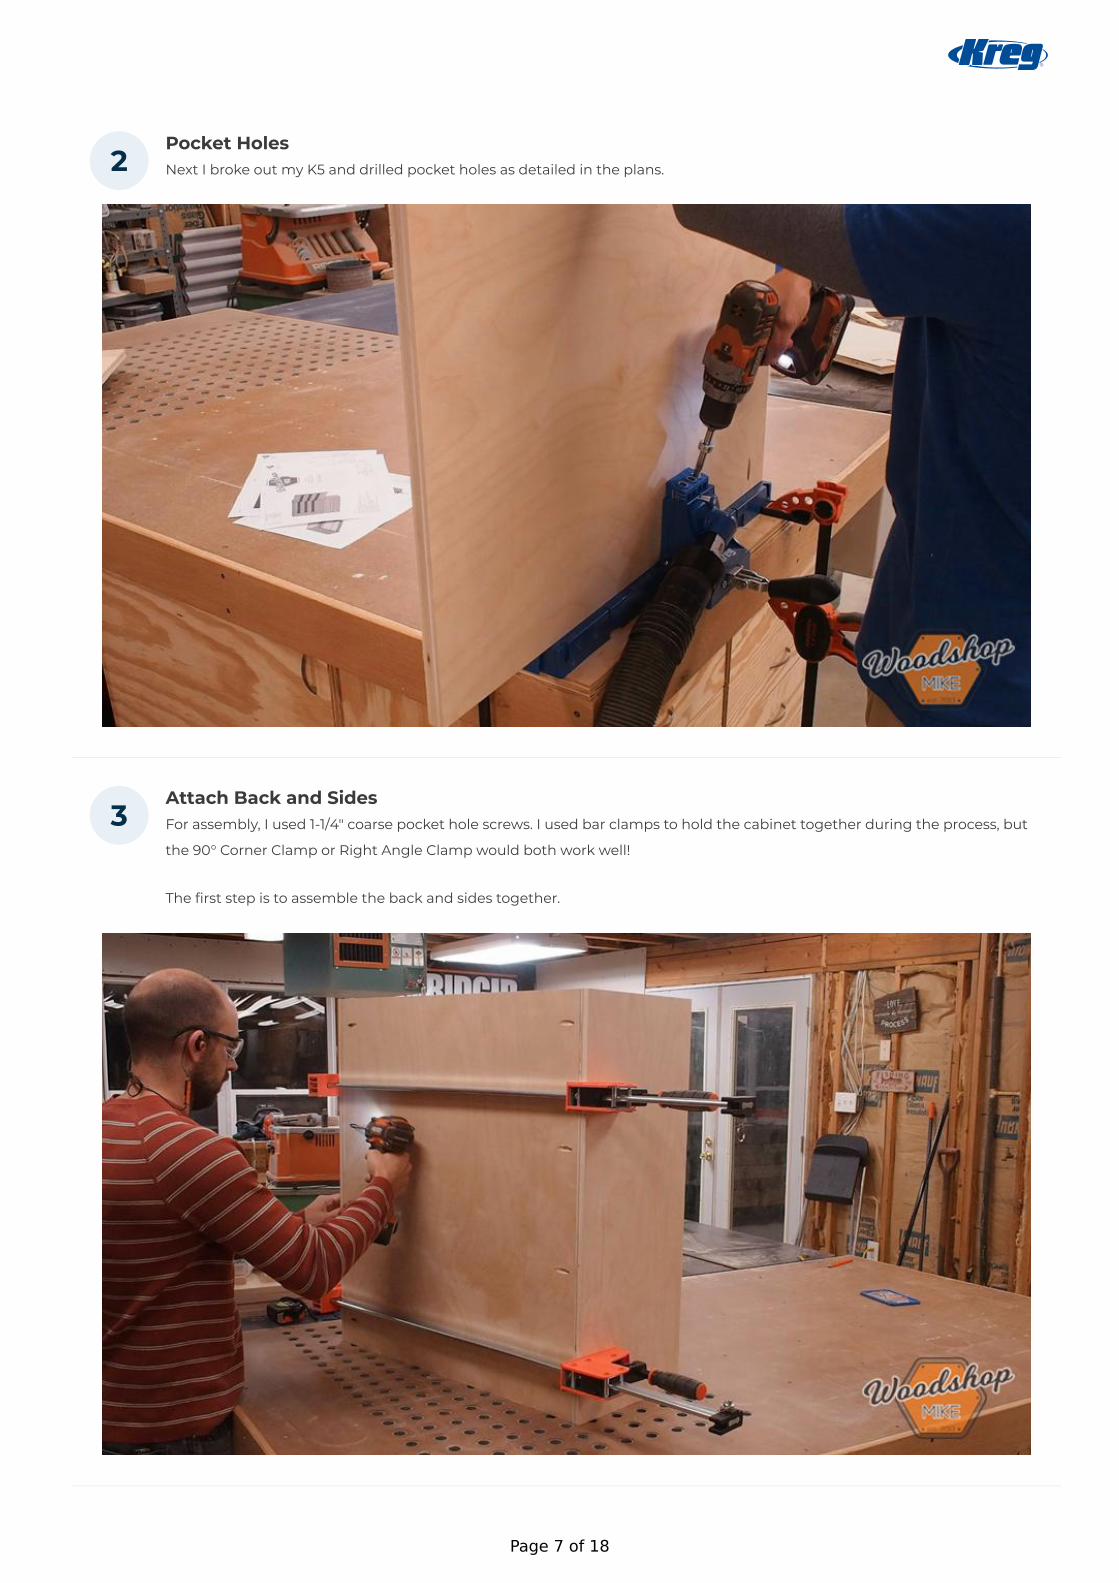
Pocket HolesNext I broke out my K5 and drilled pocket holes as detailed in the plans.
Attach Back and SidesFor assembly, I used 1-1/4" coarse pocket hole screws. I used bar clamps to hold the cabinet together during the process, but
the 90° Corner Clamp or Right Angle Clamp would both work well!
The first step is to assemble the back and sides together.
2
3
Page 7 of 18

Add ShelvesNext I added the shelves as located in the plans.
Assemble Top and Drill HolderNow I'll attach the top with the pocket holes facing up and the drill holder with the pocket holes facing down.
4
5
Page 8 of 18
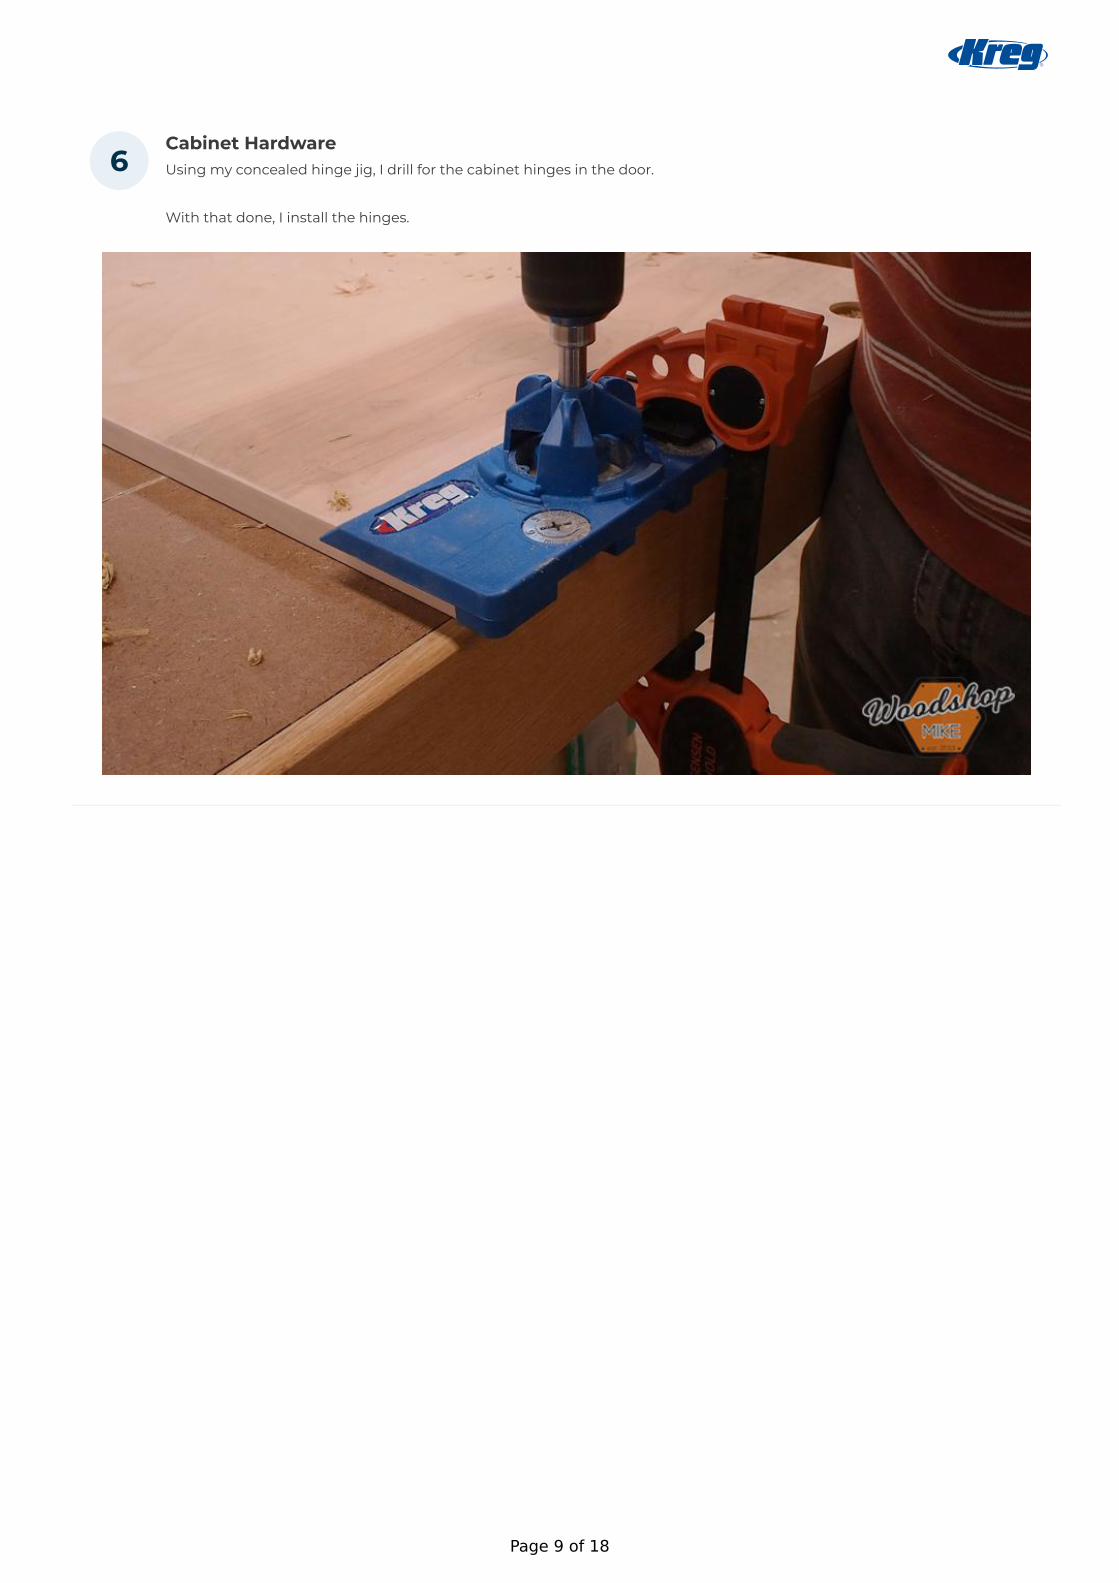
Cabinet HardwareUsing my concealed hinge jig, I drill for the cabinet hinges in the door.
With that done, I install the hinges.
6
Page 9 of 18

Install French CleatsThis is the ideal time to install the french cleats in the cabinet and door.
I like to glue and nail these in place with 1-1/4" brads. The location of these cleats is completely up to you. Just make sure the
door will close before you secure the cleats on the door!
7
Page 10 of 18
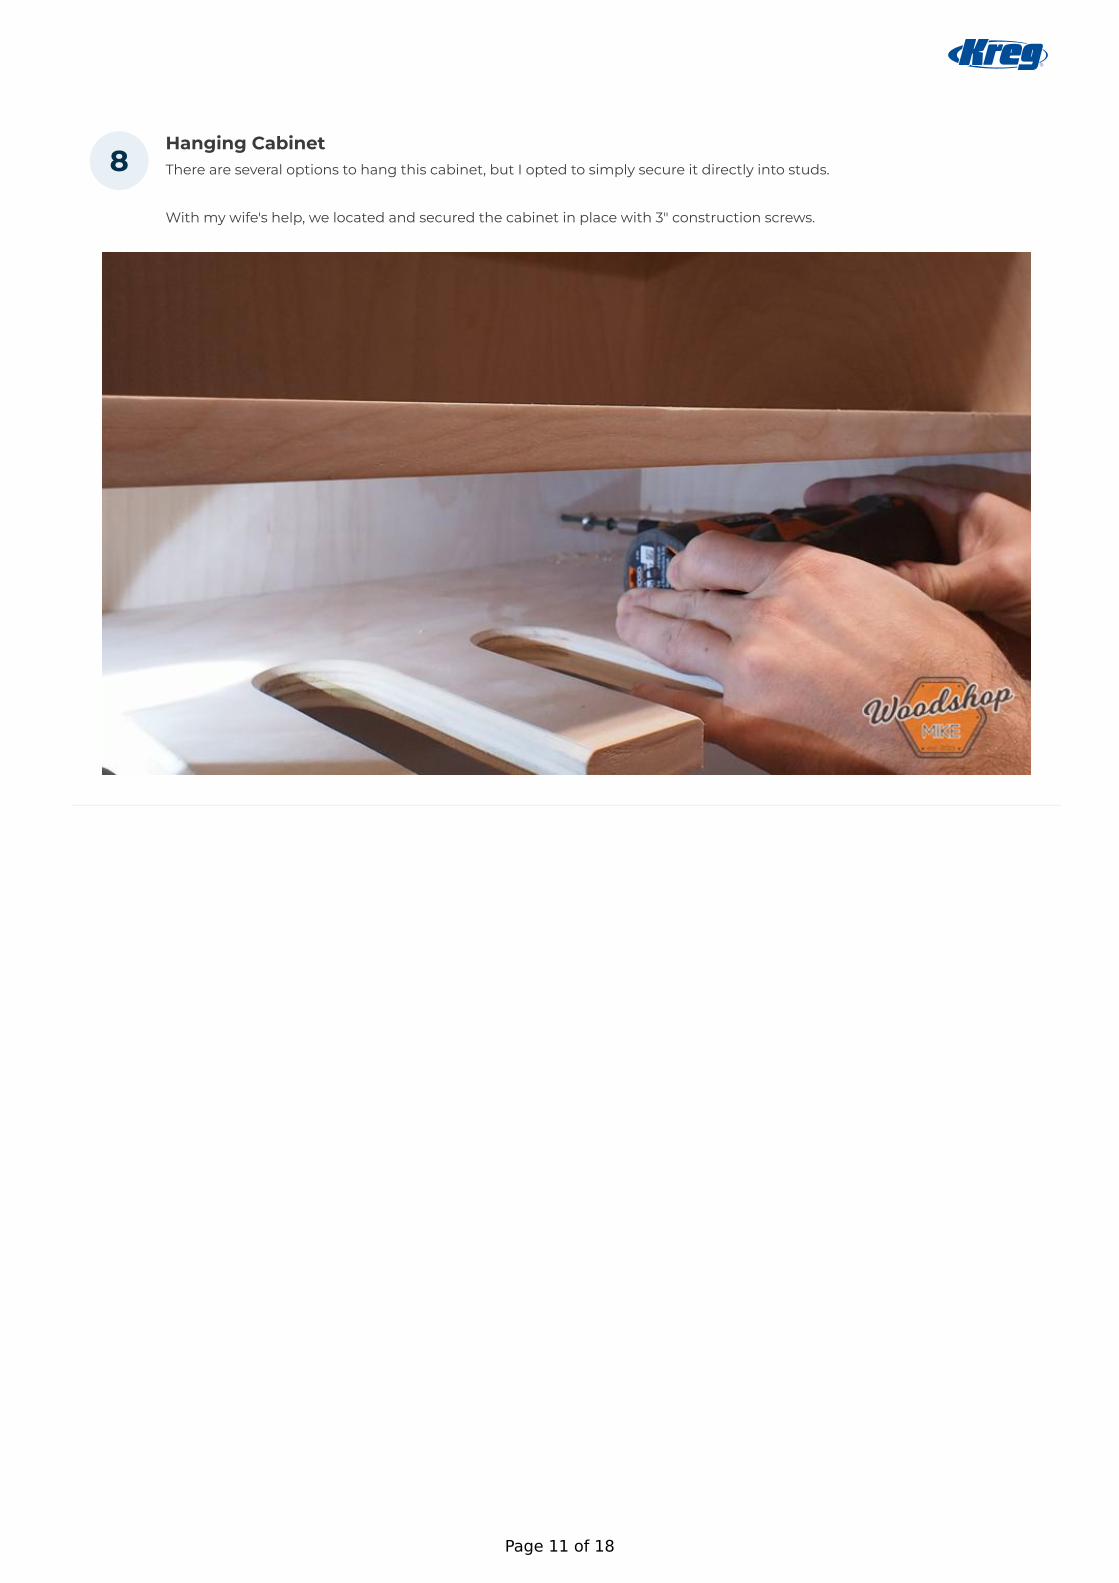
Hanging CabinetThere are several options to hang this cabinet, but I opted to simply secure it directly into studs.
With my wife's help, we located and secured the cabinet in place with 3" construction screws.
8
Page 11 of 18
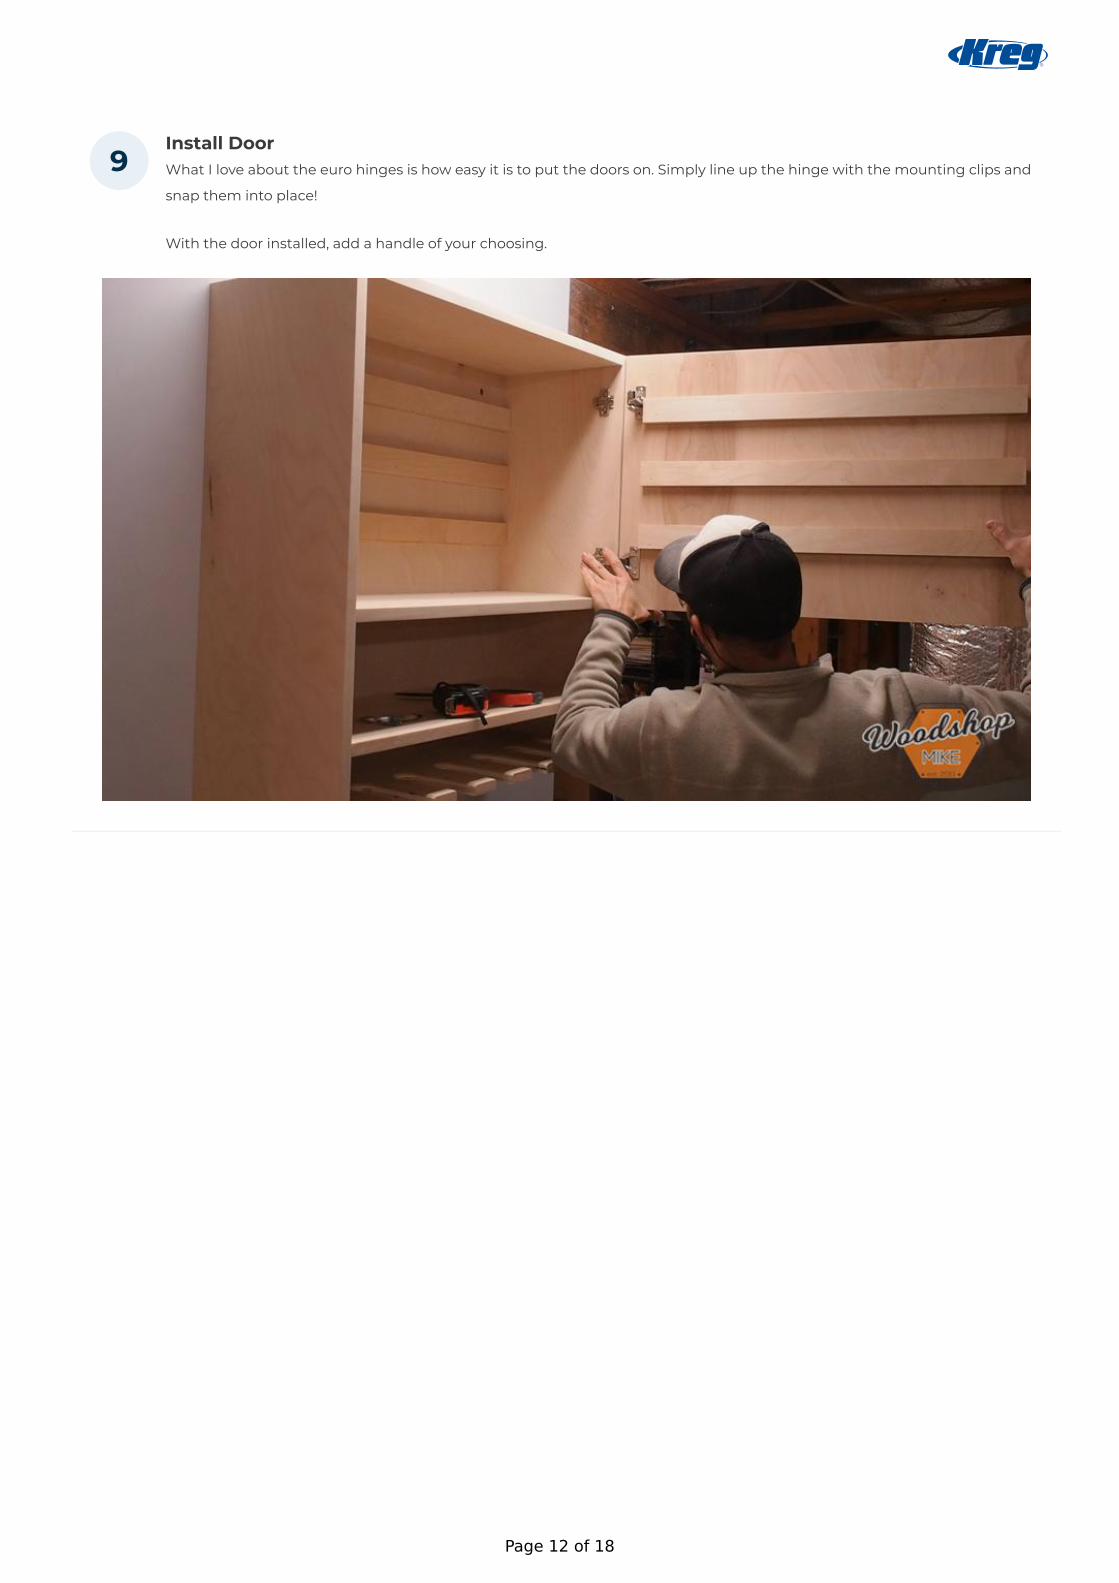
Install DoorWhat I love about the euro hinges is how easy it is to put the doors on. Simply line up the hinge with the mounting clips and
snap them into place!
With the door installed, add a handle of your choosing.
9
Page 12 of 18

Make Tool HoldersThese can be as simple or complex as you like.
The simplest tool holder is a block of wood with holes in it to store things like counter sinks, Forstner bits, or any other
collection of things you need to organize.
I then use glue and 1-1/4" brad nails to secure these blocks to a piece of French cleat.
10
Page 13 of 18
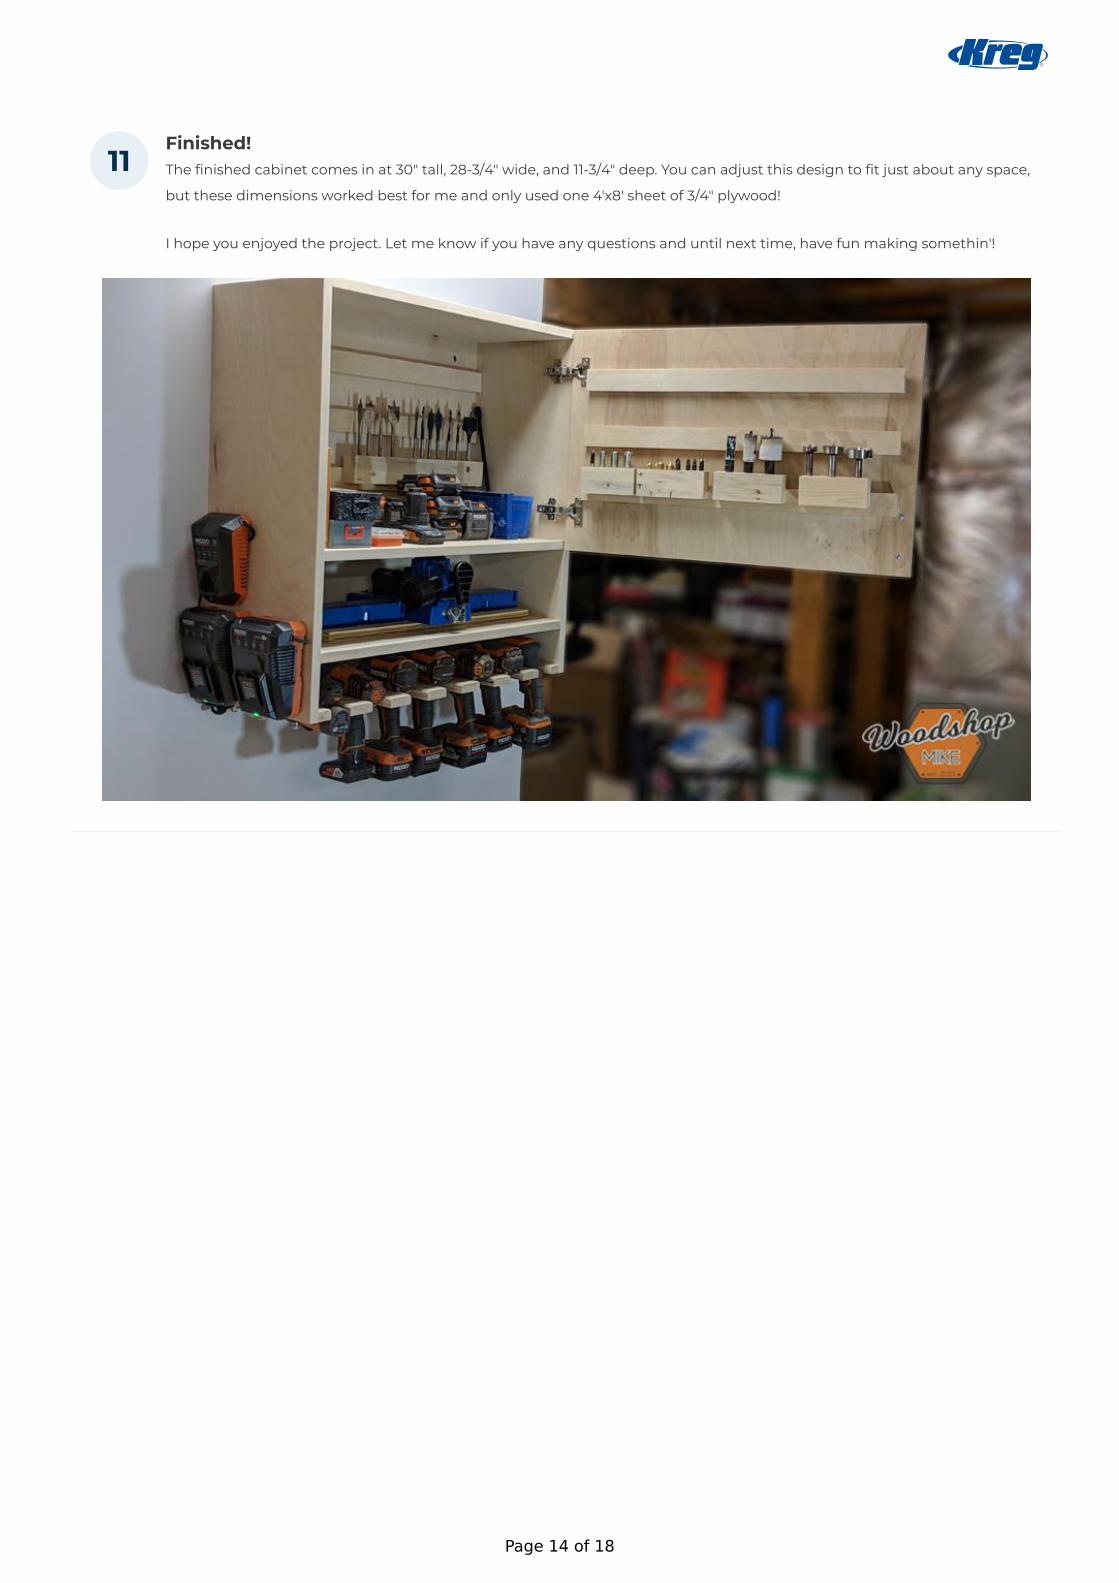
Finished!The finished cabinet comes in at 30" tall, 28-3/4" wide, and 11-3/4" deep. You can adjust this design to fit just about any space,
but these dimensions worked best for me and only used one 4'x8' sheet of 3/4" plywood!
I hope you enjoyed the project. Let me know if you have any questions and until next time, have fun making somethin'!
11
Page 14 of 18

Make Drill HolderI measure out the spacing required for my drills and then drill a 1-3/4" circle at the end of each slot. Next, I make straight cuts
to connect the dots.
Make sure to measure the tools you'll be storing and size appropriately for your cabinet!
12
Page 15 of 18

Hinge Mounting PlateDraw layout lines and transfer the hinge position from the door to inside the cabinet. Then simply run the provided screws
into the mounting plate to secure it.
13
Page 16 of 18

Watch The Video!Check out my YouTube video to show more of this build!
https://www.youtube.com/watch?v=8tjL8GcqcjI&t=50s
14
Page 17 of 18

Visit woodshopmike.comGo checkout this out to see more pictures of this project! https://woodshopmike.com/how-to-make-diy-drill-charging-
cabinet/
15
Page 18 of 18