desktop tools usage guide - tessonics · web viewto ease the migration from our version 3 software,...
TRANSCRIPT

Desktop Tools Usage Guide
Table of ContentsDesktop Tools.............................................................................................................................................................. 1
Connecting to a TDS Server...................................................................................................................................2
Managing Users.......................................................................................................................................................... 2
Creating New Users..............................................................................................................................................2
Editing Users........................................................................................................................................................... 3
Recycling Users...................................................................................................................................................... 4
Creating Part Templates......................................................................................................................................... 4
Groups........................................................................................................................................................................ 4
Parts............................................................................................................................................................................ 5
Adding Measurement Locations................................................................................................................5
Adding Measurements From The Clipboard........................................................................................6
Adding Part Images......................................................................................................................................... 7
Adding Inspection Routes............................................................................................................................ 9
Transfering Templates and Users to The RSWA.......................................................................................10
Creating Template Revisions........................................................................................................................10
Transfering via USB.......................................................................................................................................... 12
Transfering via Wifi.......................................................................................................................................... 14
Sending Only Users............................................................................................................................................14
Importing Inspections from RSWA Units.....................................................................................................15
Importing via USB.............................................................................................................................................. 15
Importing via Wifi.............................................................................................................................................. 15
Importing and Converting Version 3 Inspections...............................................................................15
Desktop ToolsThe desktop tools software allows you to create users and product templates, configure RSWA settings, and import inspections.

Connecting to a TDS ServerThe desktop tools software requires a TDS server to connect to. This can either be a standalone server, hosted on a different computer on your network, or an instance of the desktop server, running locally on your computer. When you first start the desktop tools, it will ask you to specify the location of the server you want to connect to. To change the server you are connected to at any time, click on File, then Data Source.
Managing UsersUsers must log into accounts in order to take inspections, create templates, and transfer data. The set of features that a user has access to is controlled by the type of user account they have. This section describes how to create, modify, and delete user accounts.
Creating New UsersRight click on the users list to bring up the context menu, then click “Create User”.
Bring up the context menu
When creating the user, pay attention to the group membership settings.
• Standard Users can perform inspections on the RSWA units.• Advanced Users can perform inspections on the RSWA units, as well as modify certain
advanced settings on the units.

• Editor Users can make changes to part templates.• Reporter Users can access the reports on the TDS server.• Transfer Users can transfer templates and inspections to and from the RSWA units,
respectively.• Admin Users can perform every feature listed above.
Fill in the user details
Editing UsersClick on the user you wish to edit, then click the “Edit” button on the panel.

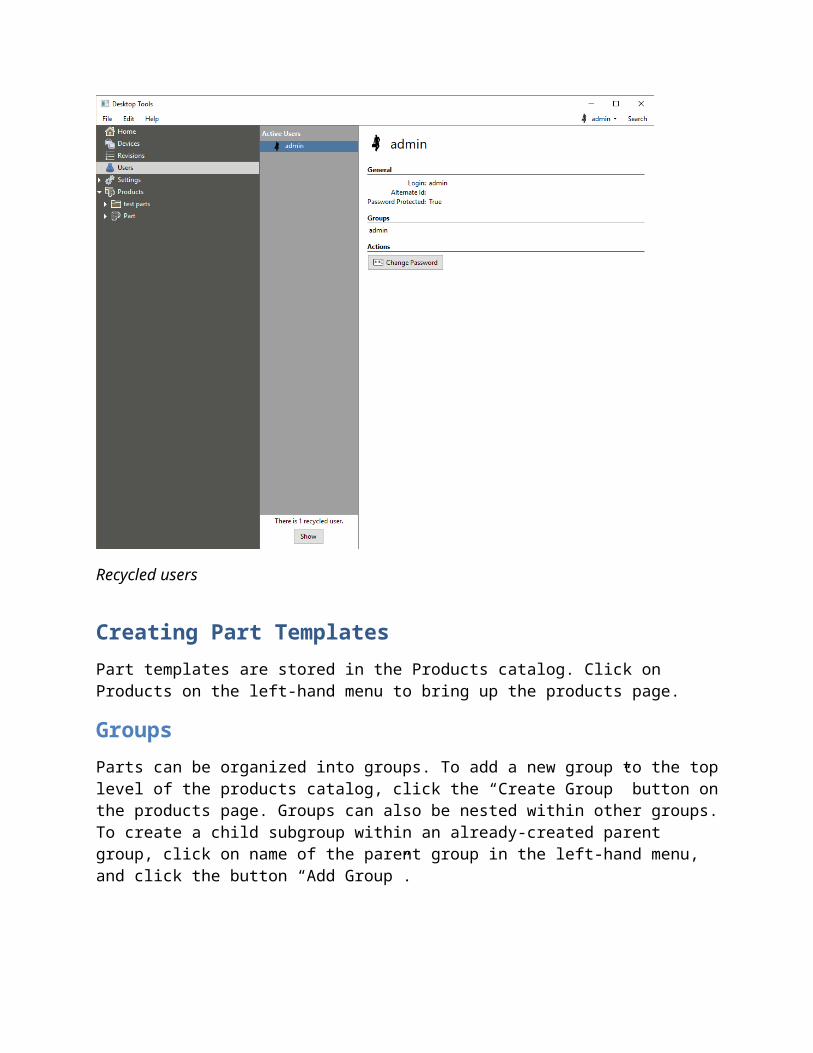
Recycling UsersClick on the user you wish to delete, then click the “Delete” button. Deleted users can be restored at a later date.
Recycled users
Creating Part TemplatesPart templates are stored in the Products catalog. Click on Products on the left-hand menu to bring up the products page.
GroupsParts can be organized into groups. To add a new group to the top level of the products catalog, click the “Create Group” button on the products page. Groups can also be nested within other groups. To create a child subgroup within an already-created parent group, click on name of the parent group in the left-hand menu, and click the button “Add Group”.
PartsParts can either be created within groups, or within the top level of the products catalog. To create a part, click on the group that you want to add it to (or alternatively, navigate to the products page) and click “Create Part”. You will be prompted to enter a part name, and to select a measurement type for the part. The following measurement types are supported:
• Welds (steel)• Welds (aluminum)• Adhesive bonds (steel)• Adhesive bonds (aluminum)
Part names must be unique within the group that they belong to.
Adding Measurement Locations
Once you’ve created your new part, it’s time to add some measurement locations, images, and routes to it. To add measurement locations (welds or bonds) to your part, click on the arrow icon next to your part name, and then click on “Welds” (or “Bonds” if you selected a bond measurement type.) This will take you to the measurements page. Click the “Add” button to add measurements. You can either add a single measurement, many measurements at once, or copy data from the clipboard on your PC.
Once you’ve added your measurements to the grid, you can edit their properties. Click on a measurement to highlight it, and then either edit the property value directly on the grid, or use the controls on the right side of the page under “Properties”. The following properties are editable:
For welds:
• Stack Front• Stack Middle• Stack Back• Diameter Min.• Diameter Target• Indentation Min.• Indentation Max.• Thickness Min.• Thickness Max.• Category• Robot Name• Robot Schedule
For bonds:
• Slots• Width

• Category• Stack Front• Stack Back• Robot Name• Robot Schedule
Adding Measurements From The Clipboard
The desktop tools software allows for bulk-adding measurement information from the Windows clipboard. This allows you to copy and paste data from a Microsoft Excel spreadsheet to quickly import it into your database.
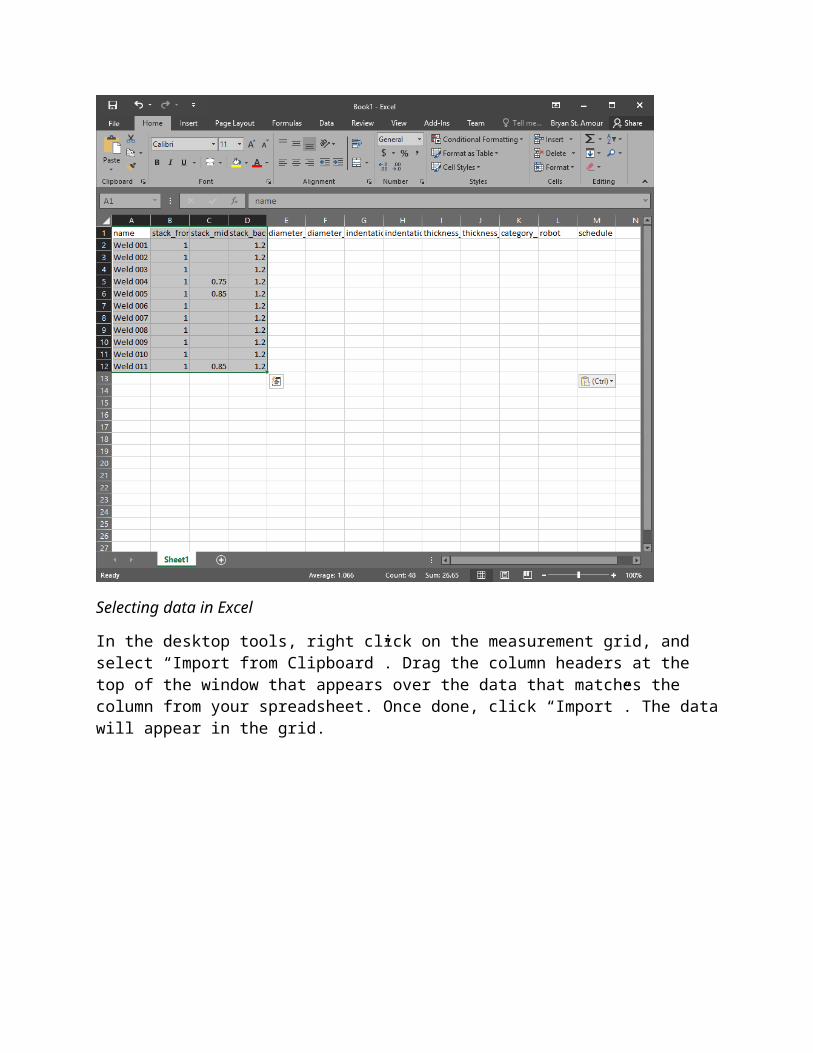
First, open your spreadsheet in Excel, and select the data you wish to import into the database. The right click and select Copy.
Selecting data in Excel
In the desktop tools, right click on the measurement grid, and select “Import from Clipboard”. Drag the column headers at the top of the window that appears over the data

that matches the column from your spreadsheet. Once done, click “Import”. The data will appear in the grid.
Importing from clipboard
Similarily, you can export to the clipboard from the Desktop Tools, and paste the data into an Excel spreadsheet.
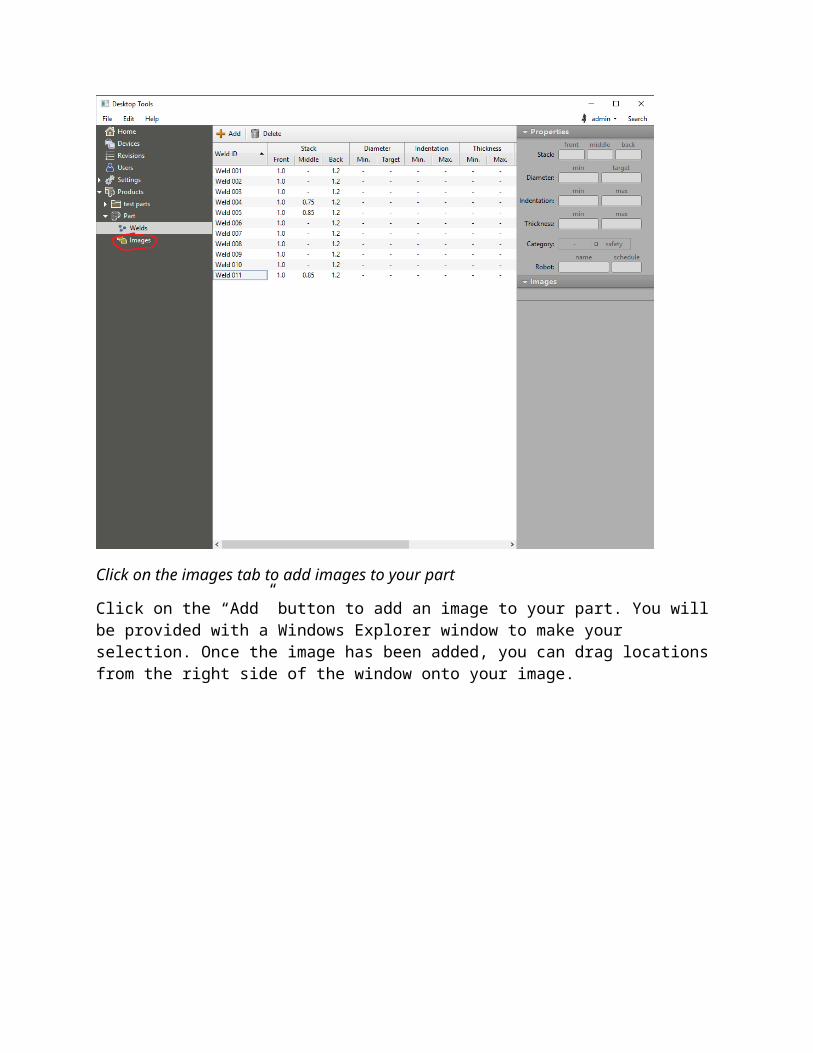
Adding Part Images
Once you have your location data defined, the next step is to add images of your parts to the database. Click on the images tab to get started.
Click on the images tab to add images to your part
Click on the “Add” button to add an image to your part. You will be provided with a Windows Explorer window to make your selection. Once the image has been added, you can drag locations from the right side of the window onto your image.

Dragging locations onto the image
You can add as many images as you want to the part. Once you’ve completed adding your images and dragging the locations onto them, the next step is to set up routes.
Adding Inspection Routes
When inspecting a specific part on the RSWA, you need to provide a route for the inspector to follow. To create a new route, select the part from the products catalog, and click “Create Route”. You will be prompted to provide a route name. You will then be taken to the route editor page.
Editing a new route
To add a location to the route, either double click on the label on the image, or drag the location from the location list to the route list. Locations can be re-ordered in the route by dragging them in the list. Routes can span multiple images.
When you add a new route, it appears in the products catalog under the part which it belongs to. You can add as many routes to a part as you want, and locations can belong to many routes.
Transfering Templates and Users to The RSWAOnce you have created users and filled out your products catalog, it’s time to transfer that data to the RSWA.
Creating Template RevisionsThe first step is to create a template revision. A template revision is a snapshot of your templates and users that will be sent to the RSWA. Click on the Revisions page to get started.

The Template Revisions page
Initially there will be on revisions in your database. Click “Create Revision” to create one. Once the revision has been created, it will appear in the revisions list on the page.

The Template Revisions page with a new revision
Once you have created a revision, you need to transfer it to the RSWA. There are two ways of doing this: via USB Thumb Drive, or over Wifi.
If this is the very first time you are transfering templates onto the RSWA, then you must use the USB method. Afterward, you can use either USB or Wifi to transfer the data.
Click on the Devices page from the main menu. The left pane shows a list of all USB thumb drives currently plugged into your computer, as well as a list of all RSWA’s that are
• detected on the network, and• affiliated with this server
Transfering via USBClick on the USB key that you want to use to transfer the templates.

Selecing the USB key
The right-hand pane will change to show you the various transfer options that are available for this USB key. You will see:
• General information about the USB key• The list of revisions that are currently on the USB key• A drop-down menu for selecing which revision you want to write onto the key• A button to write users only, skipping templates• Actions such as ejecting the key, and importing inspections from it
To transfer a template revision onto the key, select the revision to use (under the Template Data subheading) and click the “Write Revision” button. Once finished, click the “Eject” button under the Actions subheading and insert the key into the RSWA.
See the RSWA manual for how to activate a template revision from a USB key.

USB Key Transfer Options
Transfering via WifiOnce an RSWA has been affiliated with the database, you can write template revisions directly to it via Wifi. First click on the unit you want to upload to in the list of units on the left, then select your revision and click “Upload Revision”. If you are not certain that you have selected the correct RSWA, click “Identify”, and the screen on the corresponding RSWA will flash red for a moment.
In order for Wifi transfer to work, you need to ensure that the RSWA and the PC that the Desktop Tools software is running on are reachable from each other, and that the network supports broadcasting.
Sending Only UsersRegardless of transfering by USB or Wifi, you have the option of only transfering users. This can save you some time when the only change you have made to your database is the user-related, and your products catalog is the same. Click the “Write Users” button under the Template Data subheading to transfer only user data to the RSWA.
Importing Inspections from RSWA UnitsOnce you have taken some inspections on your RSWA, you will want to upload them into the database. There are features on the RSWA to automatically upload inspections directly,

but you always have the option of doing it manually through the Desktop Tools. This section describes how to upload inspections from the Desktop Tools. See the RSWA manual for how to upload inspections automatically via Wifi.
Importing via USBTo import inspections from a USB stick, click on the Devices page, then select the USB stick from which you wish to import from the devices list, then click the button “Import Inspections” under the “Actions” subheading.
Importing via WifiTo import inspections from an RSWA on the network, click the Devices page, then select the RSWA from which you wish to import from the devices list, then click the button “Import Inspections” under the “Templates” subheading.
Importing and Converting Version 3 InspectionsTo ease the migration from our version 3 software, the Desktop Tools supports the ability to import v3 inspections from a USB stick. To do this, click the Devices page, then select the USB stick from which you wish to import the v3 inspections, then click the button “Import v3 Inspections” under the Actions subheading. If you need to change the sync id, click the button “Set V3 Sync ID” under the Template Data subheading. The v3 inspections will be automatically converted into v4 custom inspections.