de götzen easy start guide balancing the scissor arm
DESCRIPTION
De Götzen EASY START GUIDE BALANCING THE SCISSOR ARM. The scissor arm must be adjusted only AFTER the tubehead is assembled To prevent damages to the internal mechanism while performing adjustment and the balancing tests, the scissor arm loading key - PowerPoint PPT PresentationTRANSCRIPT

De Götzen
EASY START GUIDEBALANCING THE SCISSOR ARM

•The scissor arm must be adjusted only AFTER the tubehead is assembled•To prevent damages to the internal mechanism while performing adjustment and the balancing tests, the scissor arm loading key
(see next slide) must not be left in place. •These adjustments are necessary to ensure proper balance of the tube
head and scissor arm.• It may be necessary over time to perform these adjustments if the tube
head does not stay in place when moved
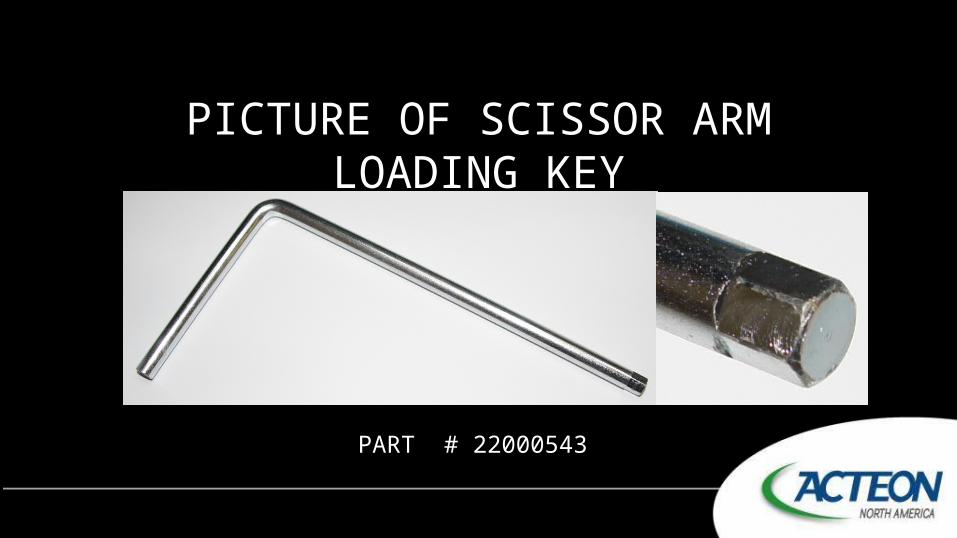
PICTURE OF SCISSOR ARM LOADING KEY
PART # 22000543

1- Remove both tube end side covers from the scissor arm by first loosening the side screws
3- Remove both side covers
This now exposes the screw in the scissor arm that’s used to tighten the spring for balancing the tube head and scissor arm
4- Remove both elbow side covers by removing the relevant screws
2- Using a phillips screwdriver or other such tip push on the unlocking tab to release the side covers
NOTE: Failure to do this will result in breakage of the side covers!!!
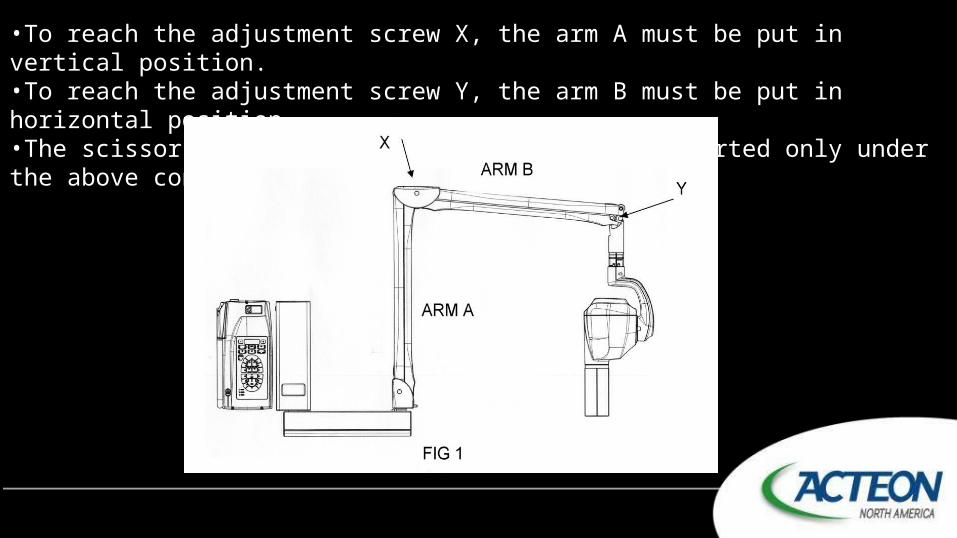
•To reach the adjustment screw X, the arm A must be put in vertical position.•To reach the adjustment screw Y, the arm B must be put in horizontal position.•The scissor arm loading key provided can be inserted only under the above conditions.

BALANCING THE ARM A The scissor arm is supplied with the spring in arm A already tightenedThe spring in arm B is supplied untightened for safety reasons.
BALANCING THE ARM B1. Arm A should be vertical2. Arm B should be horizontal3. Insert the scissor arm loading key in Y4. Tighten the spring clockwise by 22 turns5. Withdraw the key
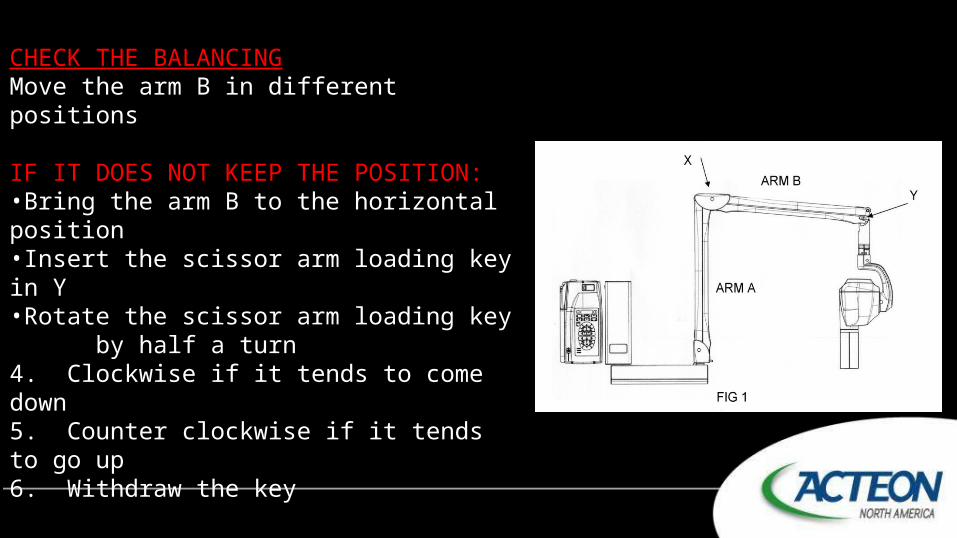
CHECK THE BALANCINGMove the arm B in different positions
IF IT DOES NOT KEEP THE POSITION:•Bring the arm B to the horizontal position•Insert the scissor arm loading key in Y•Rotate the scissor arm loading key by half a turn4. Clockwise if it tends to come down5. Counter clockwise if it tends to go up6. Withdraw the key
NOTE:Repeat the test and adjustment until arm B is steady and stable in all positions, even when arm A is completelyextended.

RE-ADJUSTMENT OF ARM A
1. Bring arm A to the vertical position2. Insert the scissor arm loading key in X3. Rotate the scissor arm loading key by a half turn:4. Clockwise if it tends to come down5. Counter clockwise if it tends to go up6. Withdraw the key
Repeat the test and adjustment until the arm A is steady and stable in all positions, even when the arm B is completelyextended.
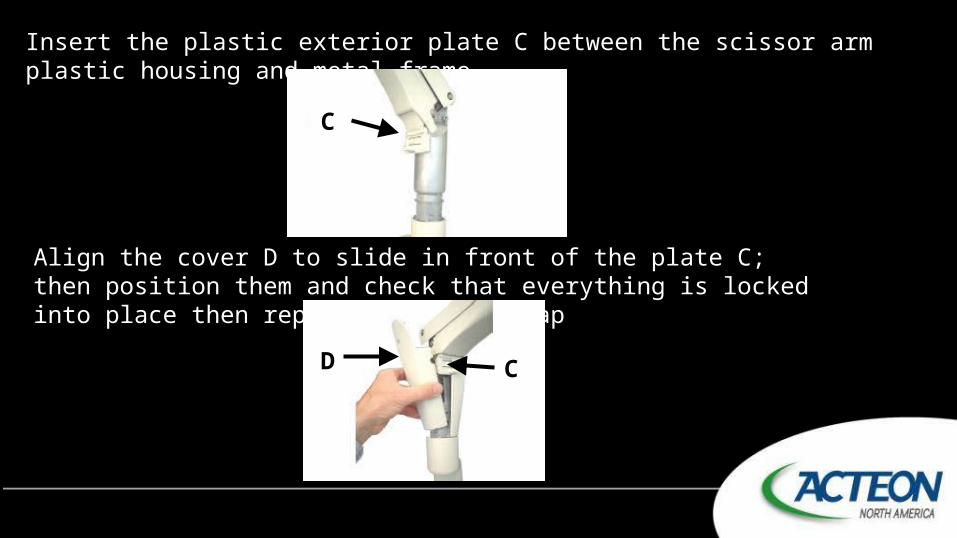
Insert the plastic exterior plate C between the scissor arm plastic housing and metal frame
Align the cover D to slide in front of the plate C; then position them and check that everything is locked into place then replace screw and cap
D
CC
CC
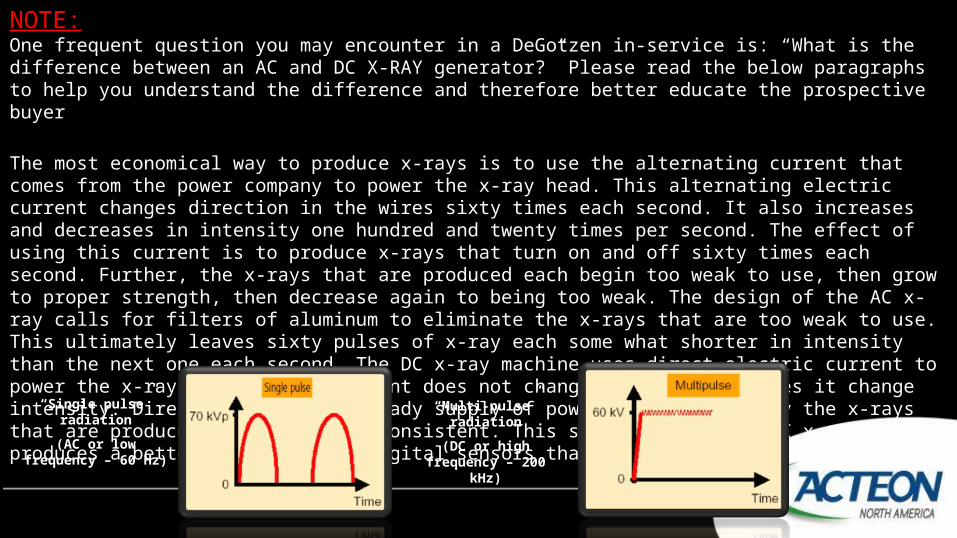
NOTE:One frequent question you may encounter in a DeGotzen in-service is: “What is the difference between an AC and DC X-RAY generator?” Please read the below paragraphs to help you understand the difference and therefore better educate the prospective buyer
The most economical way to produce x-rays is to use the alternating current that comes from the power company to power the x-ray head. This alternating electric current changes direction in the wires sixty times each second. It also increases and decreases in intensity one hundred and twenty times per second. The effect of using this current is to produce x-rays that turn on and off sixty times each second. Further, the x-rays that are produced each begin too weak to use, then grow to proper strength, then decrease again to being too weak. The design of the AC x-ray calls for filters of aluminum to eliminate the x-rays that are too weak to use. This ultimately leaves sixty pulses of x-ray each some what shorter in intensity than the next one each second. The DC x-ray machine uses direct electric current to power the x-ray head. Direct current does not change direction nor does it change intensity. Direct current is a steady supply of power and consequently the x-rays that are produced are smooth and consistent. This smoothness of the DC x-ray machine produces a better effect on the digital sensors than an AC x-ray generator.
“Single pulse” radiation
(AC or low frequency – 60 Hz)
“Multi-pulse” radiation
(DC or high frequency – 200 kHz)

THE END