cytz v1.0 manual - final approach simulationsfinalapproachsim.com/wp-content/uploads/2014/02/... ·...
TRANSCRIPT
1
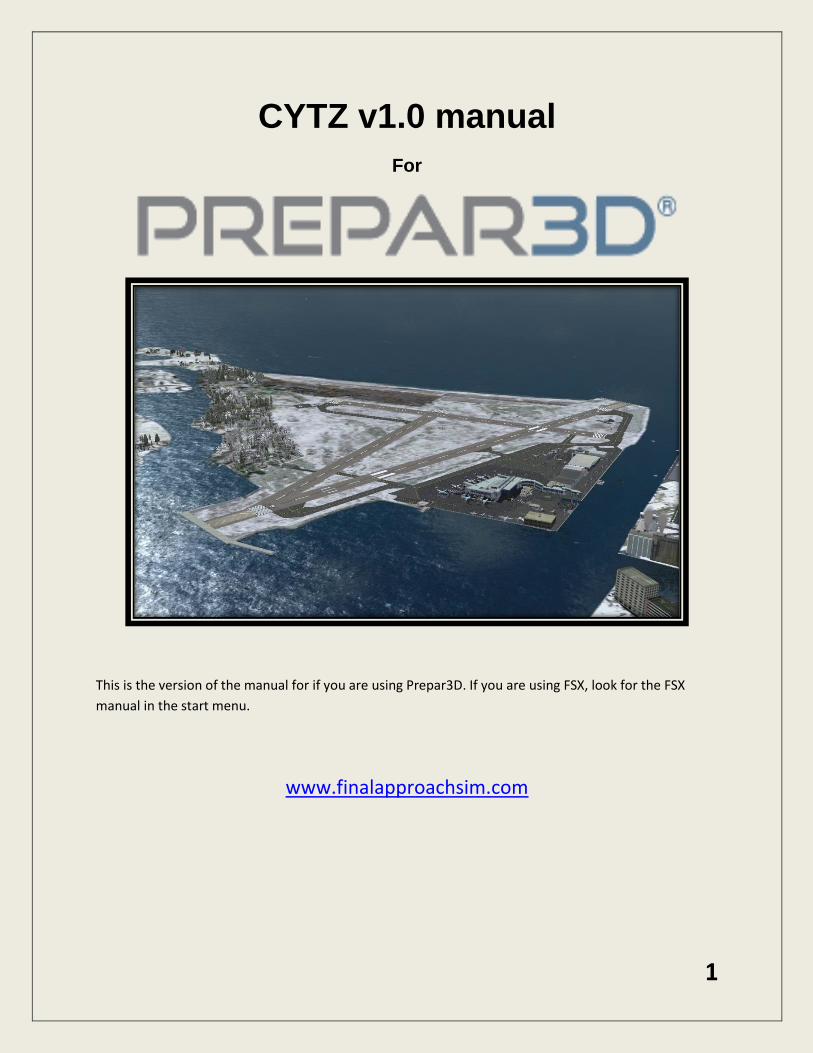
CYTZ v1.0 manual
For
This is the version of the manual for if you are using Prepar3D. If you are using FSX, look for the FSX
manual in the start menu.
www.finalapproachsim.com
2
Table of contents Features……………………………………………………………………Page 3 Installing……………………………………………………………………Page 3 Activating the scenery……………………………………….……………Page 4 Starting your flight……………………………….…..…….………….…..Page 9 Parking Locations……………………………………….……………….Page 10 Water Aerodrome………………………………………………………..Page 11 Static Aircraft………………………………………………...……….…..Page 12 Prepar3D settings……………………………………..……………..…..Page 13 Charts……………..……………………..………………………………..Page 14
Support………………………………………………………………..…..Page 16
3
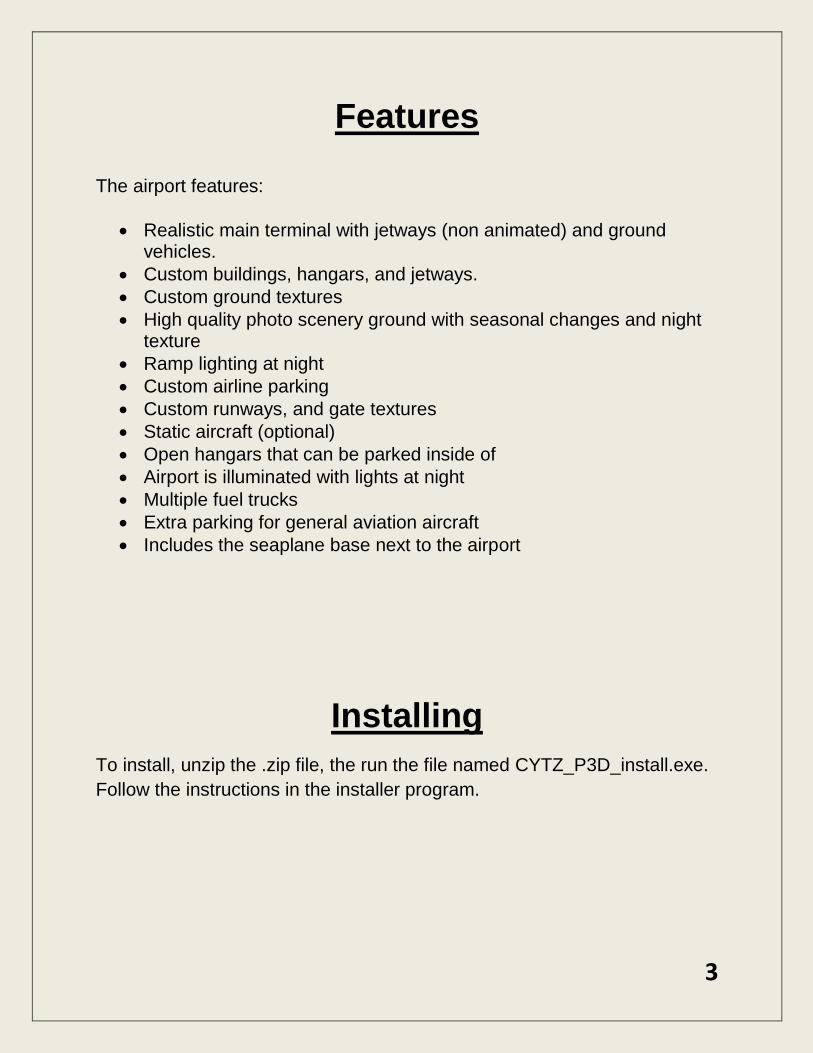
Features The airport features:
Realistic main terminal with jetways (non animated) and ground vehicles.
Custom buildings, hangars, and jetways.
Custom ground textures
High quality photo scenery ground with seasonal changes and night texture
Ramp lighting at night
Custom airline parking
Custom runways, and gate textures
Static aircraft (optional)
Open hangars that can be parked inside of
Airport is illuminated with lights at night
Multiple fuel trucks
Extra parking for general aviation aircraft
Includes the seaplane base next to the airport
Installing
To install, unzip the .zip file, the run the file named CYTZ_P3D_install.exe.
Follow the instructions in the installer program.

4
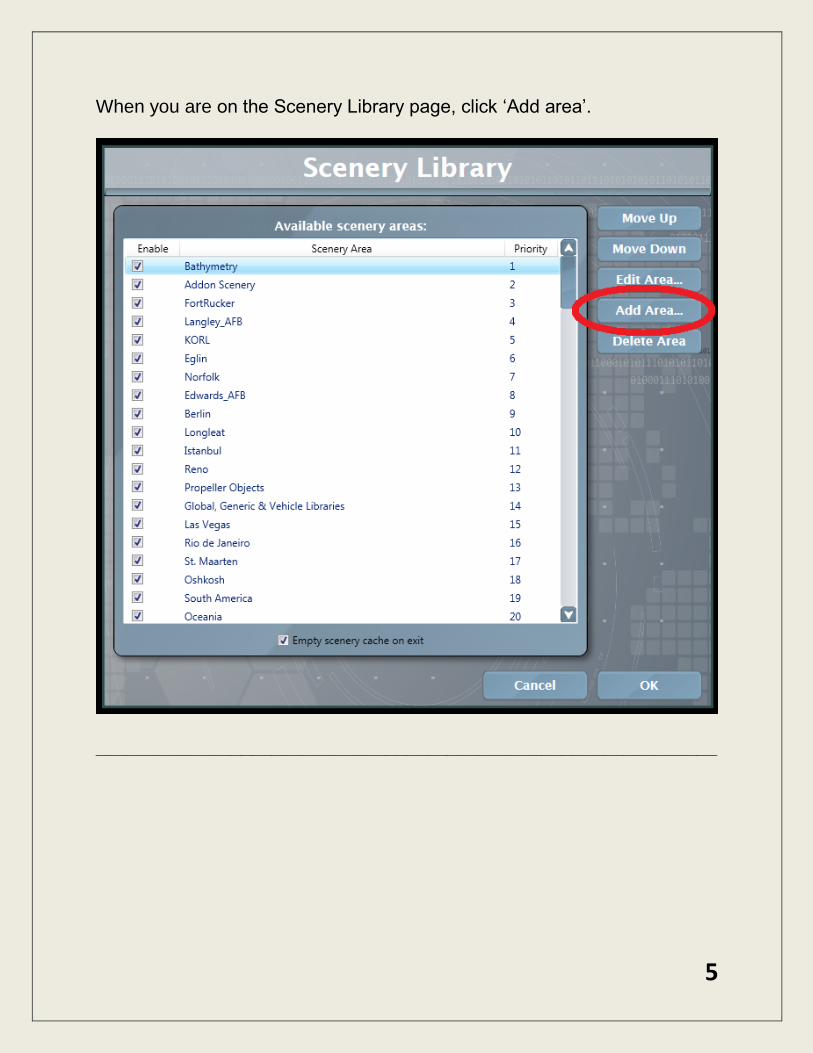
Activating the scenery
After you purchase and install the product, you will need to activate it in the Prepar3D scenery library by following the instructions bellow.
Start Prepar3D, and then go to the World→Scenery Library in the menu bar. Note: if Prepar3D stops working after selecting the scenery library, you will need to go to your main Prepar3D folder, right click on Prepar3D.exe, and run as administrator.
____________________________________________________________
5
When you are on the Scenery Library page, click ‘Add area’.
____________________________________________________________
6
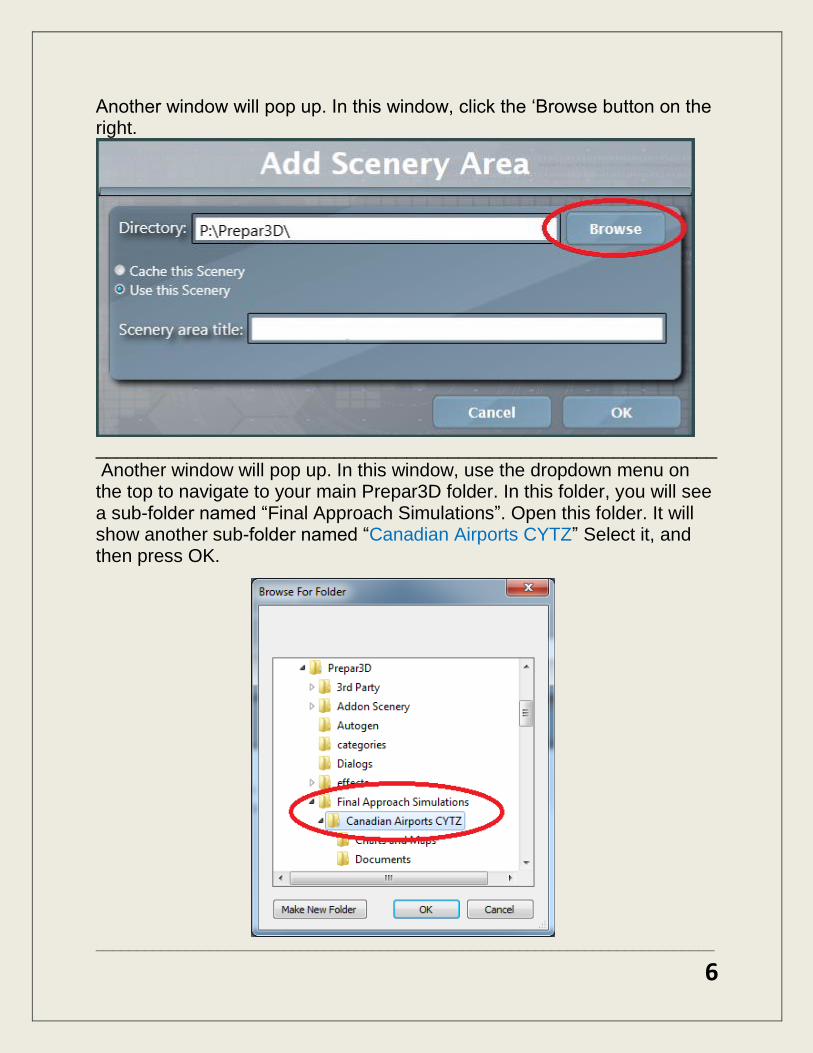
Another window will pop up. In this window, click the ‘Browse button on the right.
____________________________________________________________ Another window will pop up. In this window, use the dropdown menu on the top to navigate to your main Prepar3D folder. In this folder, you will see a sub-folder named “Final Approach Simulations”. Open this folder. It will show another sub-folder named “Canadian Airports CYTZ” Select it, and then press OK.
____________________________________________________________________________
7
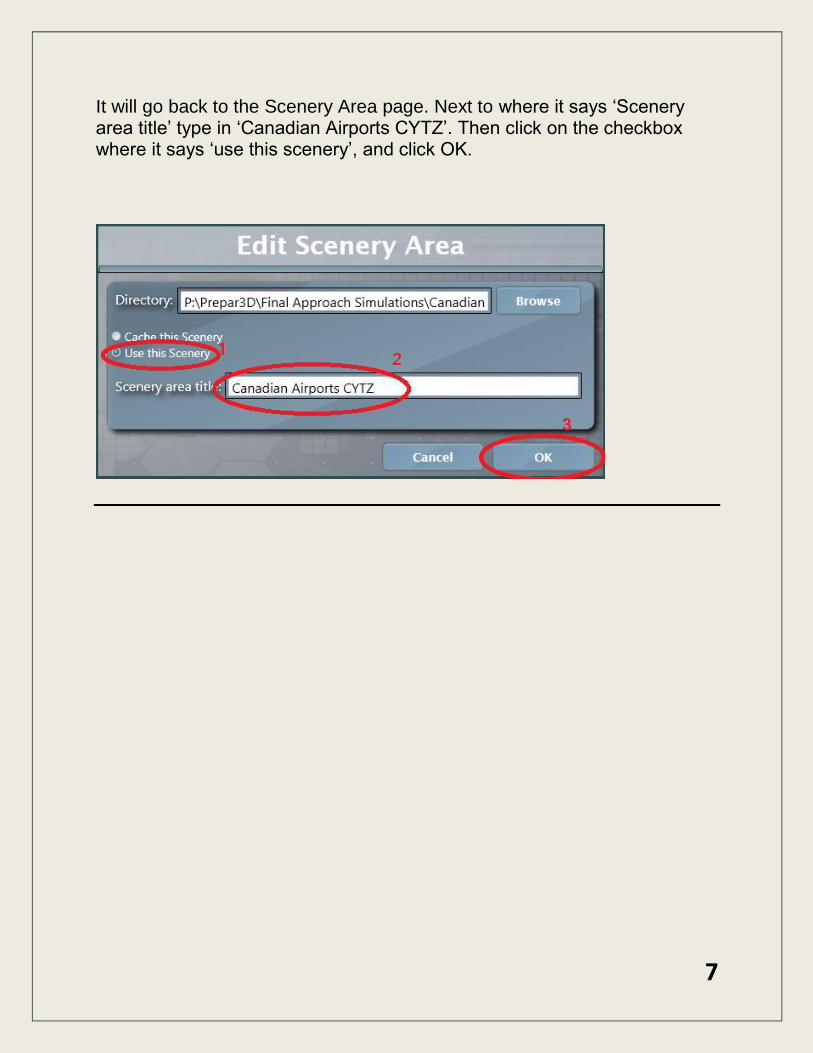
It will go back to the Scenery Area page. Next to where it says ‘Scenery area title’ type in ‘Canadian Airports CYTZ’. Then click on the checkbox where it says ‘use this scenery’, and click OK.
8
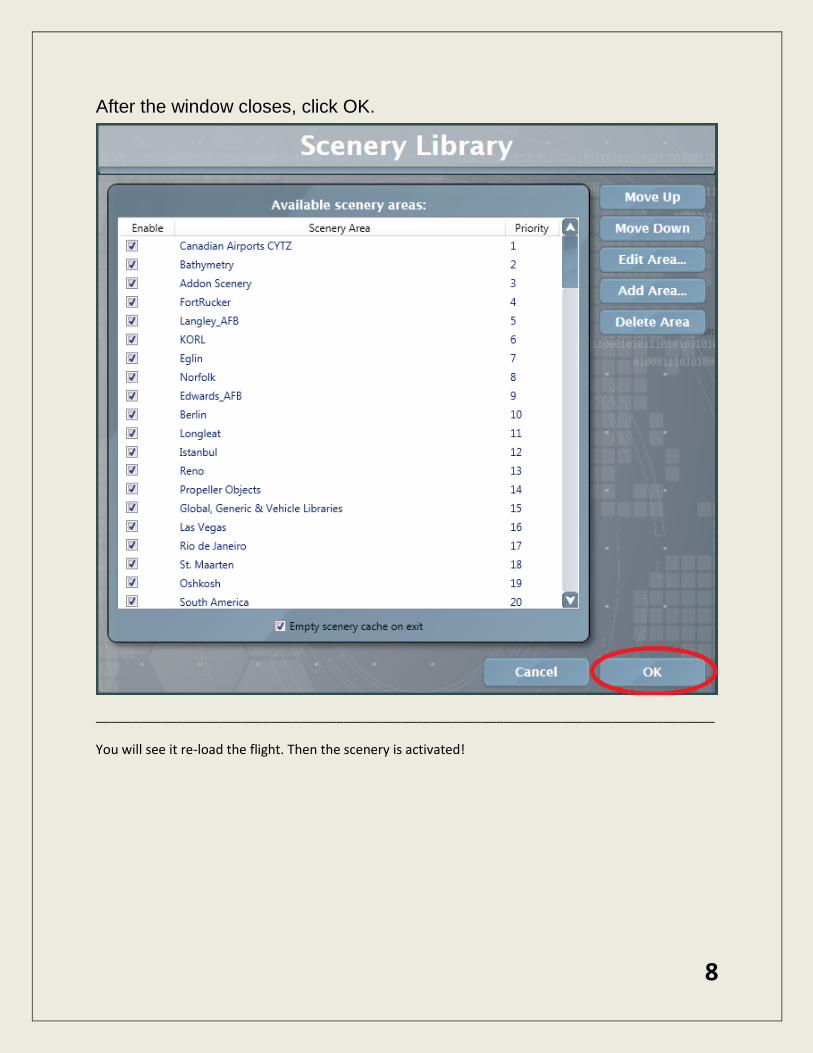
After the window closes, click OK.
_____________________________________________________________________________________
You will see it re-load the flight. Then the scenery is activated!
9
Staring your flight
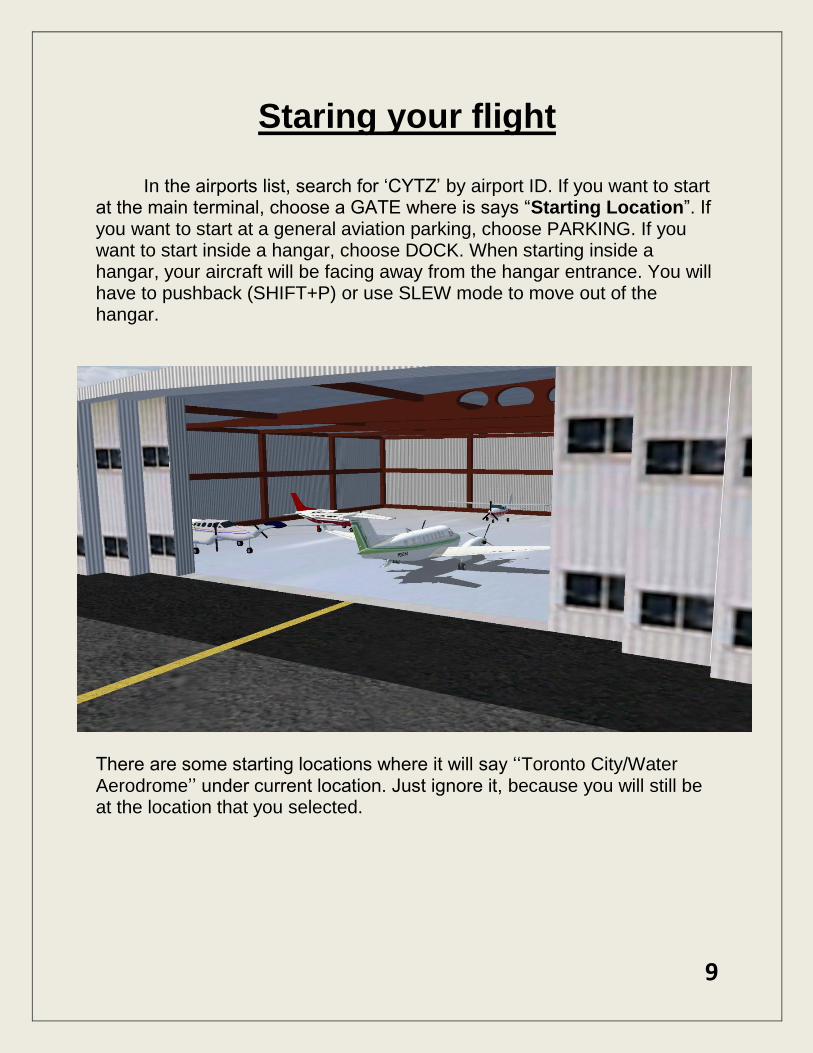
In the airports list, search for ‘CYTZ’ by airport ID. If you want to start at the main terminal, choose a GATE where is says “Starting Location”. If you want to start at a general aviation parking, choose PARKING. If you want to start inside a hangar, choose DOCK. When starting inside a hangar, your aircraft will be facing away from the hangar entrance. You will have to pushback (SHIFT+P) or use SLEW mode to move out of the hangar. There are some starting locations where it will say ‘‘Toronto City/Water Aerodrome’’ under current location. Just ignore it, because you will still be at the location that you selected.
10
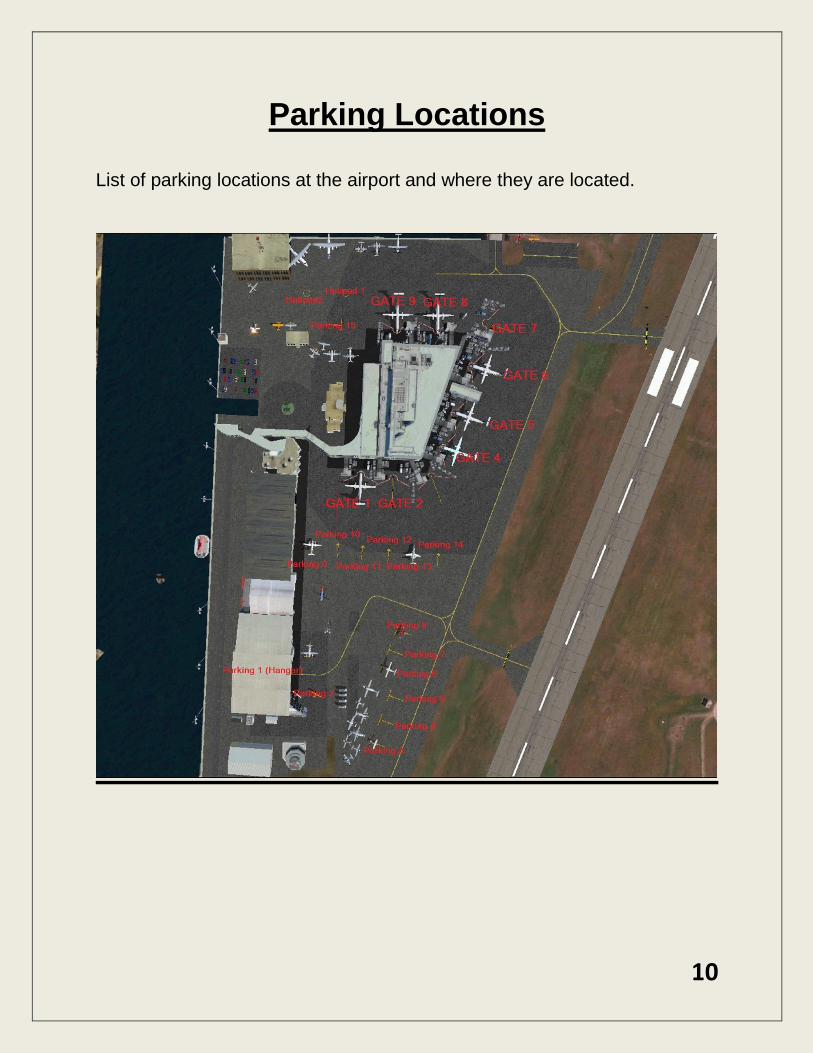
Parking Locations
List of parking locations at the airport and where they are located.
11
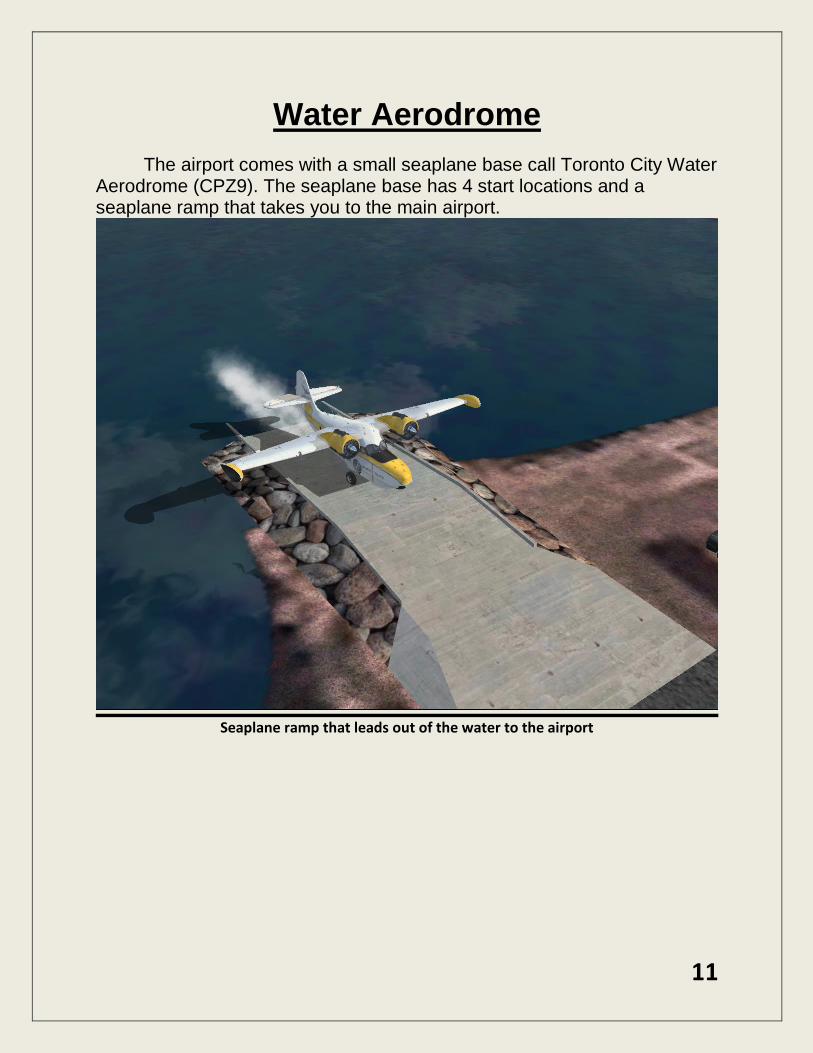
Water Aerodrome
The airport comes with a small seaplane base call Toronto City Water Aerodrome (CPZ9). The seaplane base has 4 start locations and a seaplane ramp that takes you to the main airport.
Seaplane ramp that leads out of the water to the airport

12
Static Aircraft
The airport comes with static aircraft by default. Static aircraft are the aircraft at the airport that don’t move. Static aircraft never block a taxiway, runway, or starting position. However, they are optional. If you want to remove them, first close Prepar3D. Then go to your start menu, Open the Final Approach Simulation folder and then find and open the subfolder CYTZ FSX+P3D. Then click on “Remove static aircraft”. It will ask you if you are sure you want to remove them. Type in “yes” in the box and press enter. Then when you start Prepar3D again, they won’t be there.
13
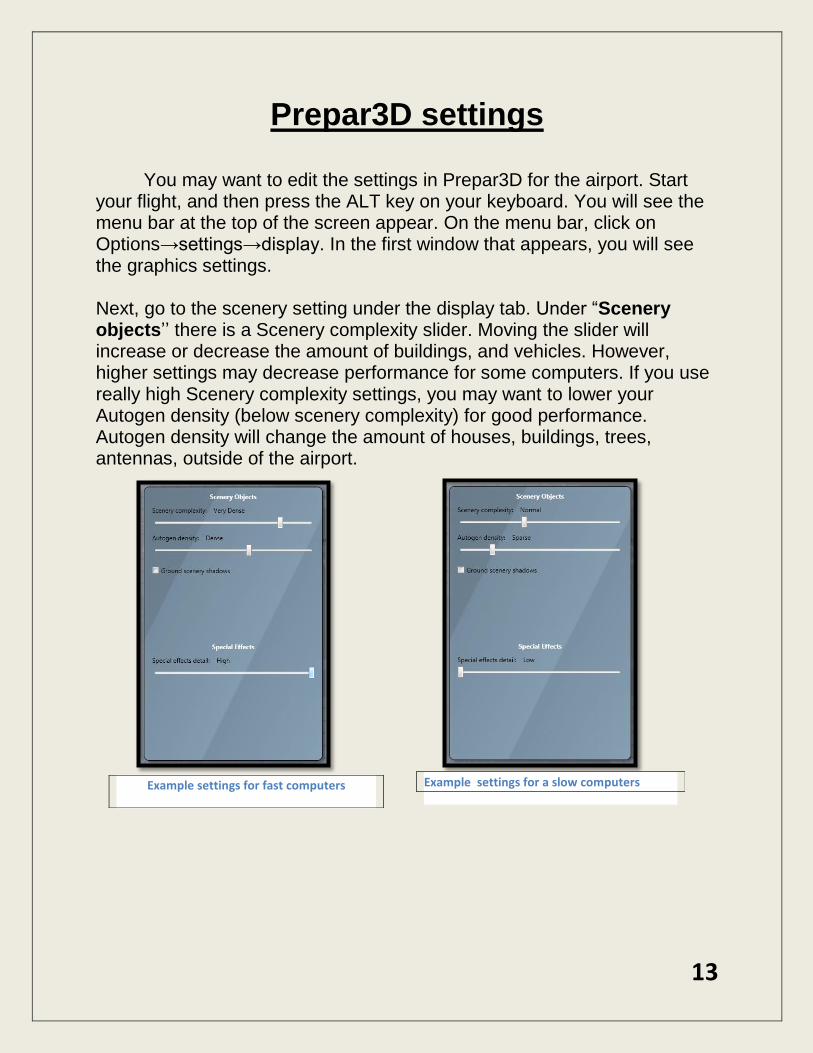
Prepar3D settings
You may want to edit the settings in Prepar3D for the airport. Start your flight, and then press the ALT key on your keyboard. You will see the menu bar at the top of the screen appear. On the menu bar, click on Options→settings→display. In the first window that appears, you will see the graphics settings. Next, go to the scenery setting under the display tab. Under “Scenery objects’’ there is a Scenery complexity slider. Moving the slider will increase or decrease the amount of buildings, and vehicles. However, higher settings may decrease performance for some computers. If you use really high Scenery complexity settings, you may want to lower your Autogen density (below scenery complexity) for good performance. Autogen density will change the amount of houses, buildings, trees, antennas, outside of the airport.
Example settings for fast computers Example settings for a slow computers
14
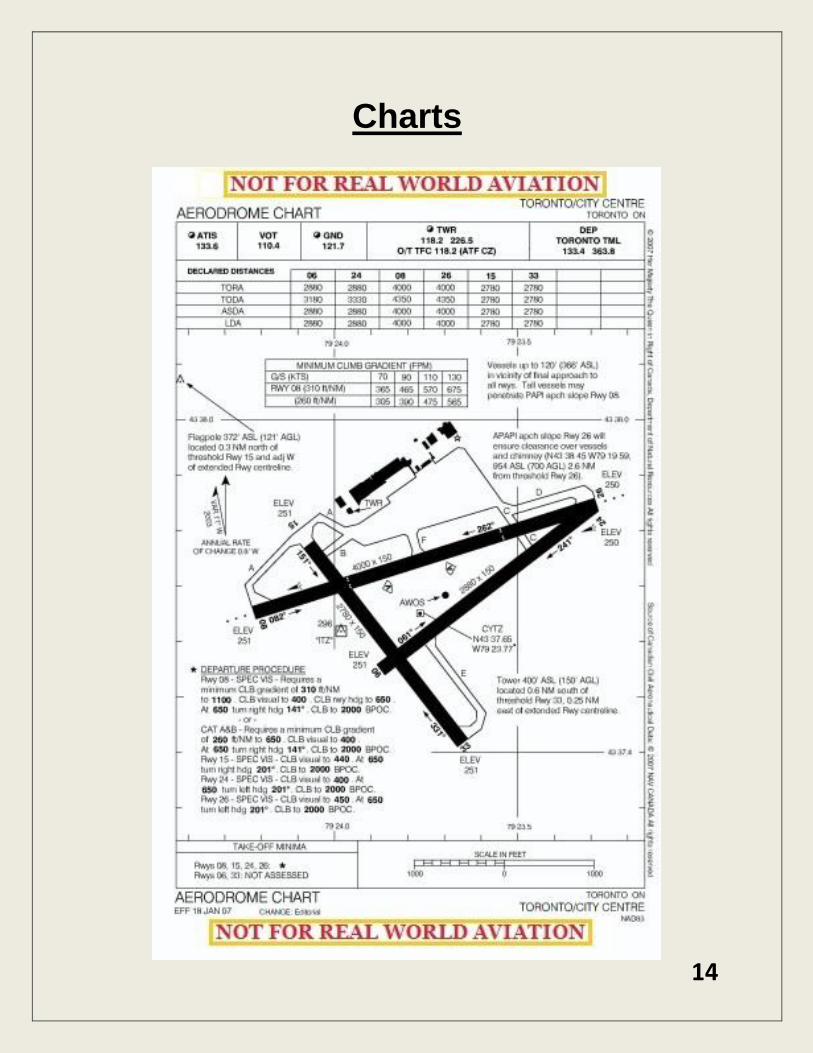
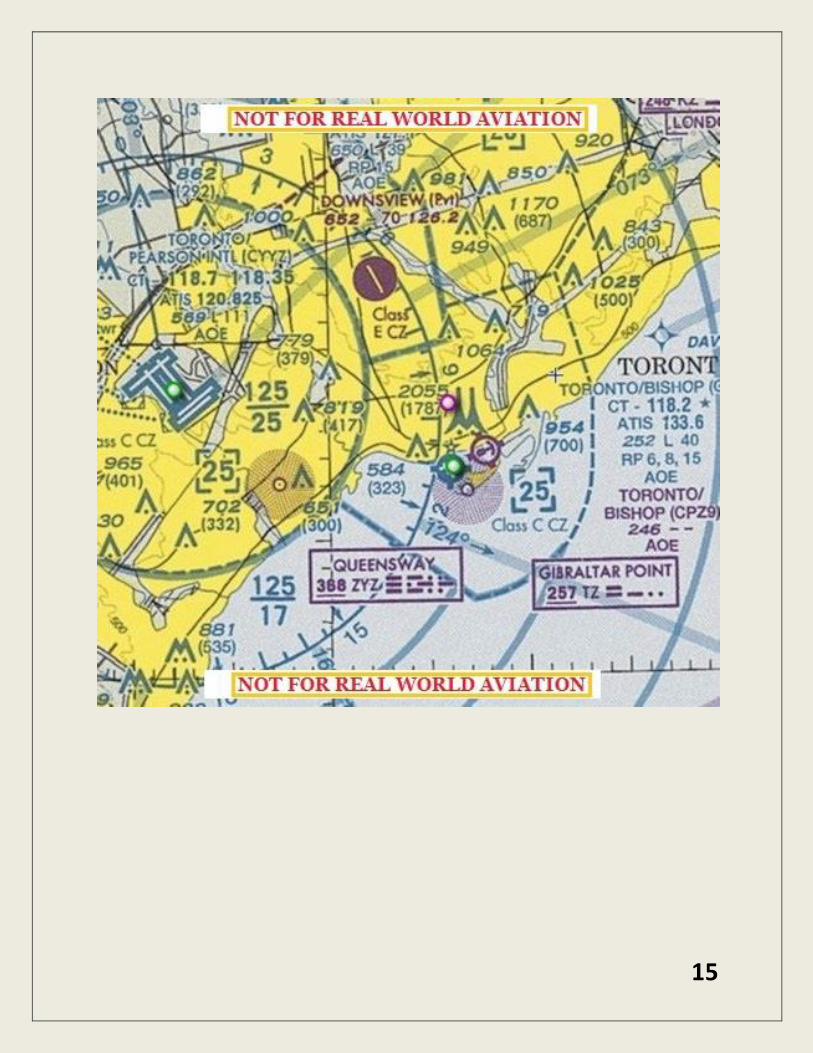
Charts
15

16
Support
For help and support, visit: www.finalapproachsim.com/support Visit the forum at forums.finalapproachsim.com Or email us at: [email protected]