chapter 3: general - helping writers become authors
TRANSCRIPT
Chapter 3: General
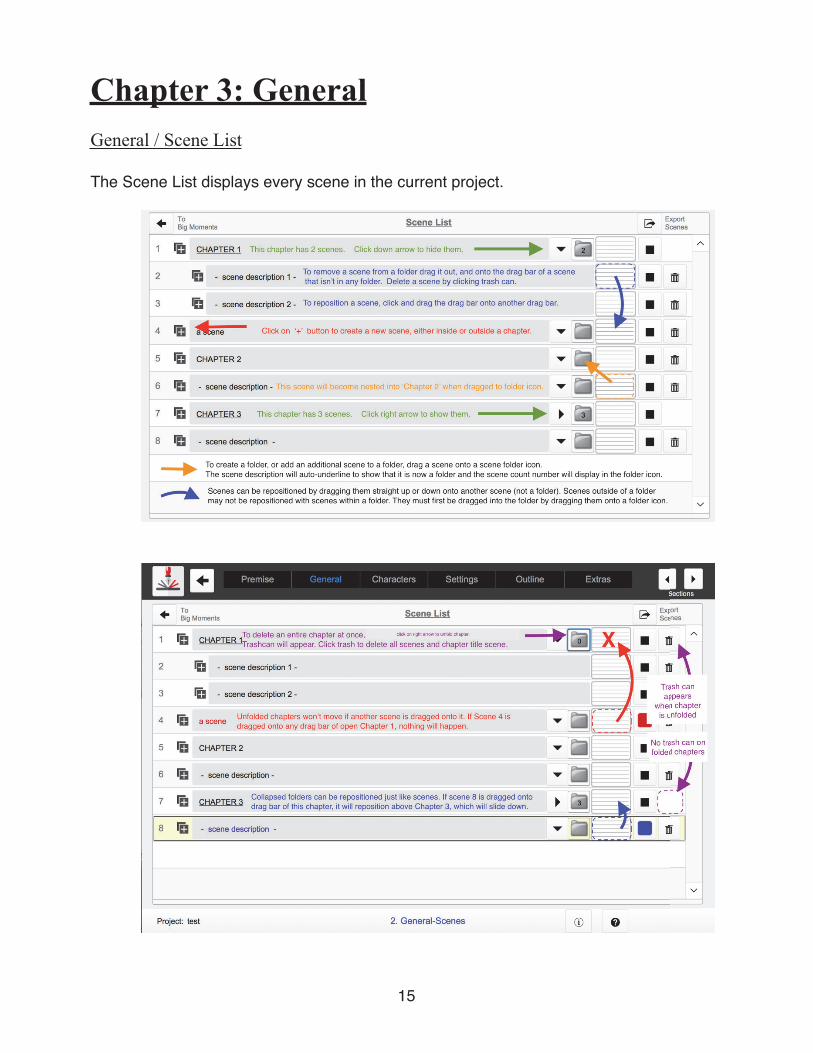
General / Scene List
The Scene List displays every scene in the current project.
15
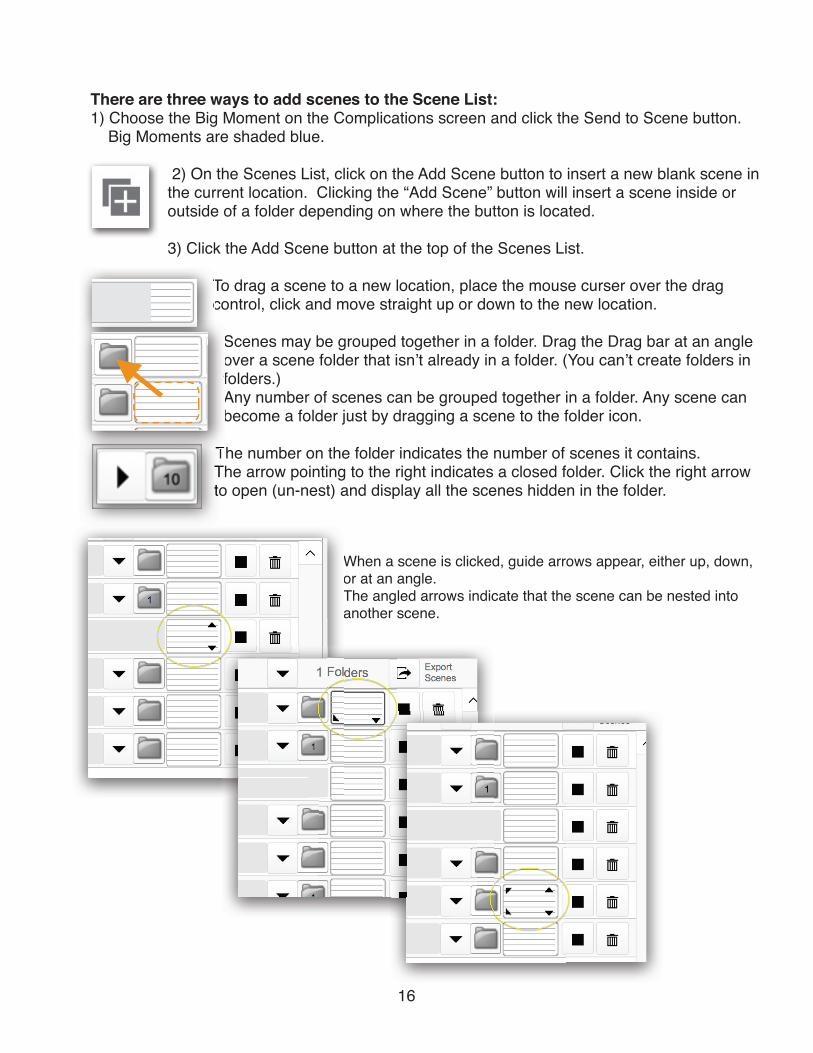
There are three ways to add scenes to the Scene List:1) Choose the Big Moment on the Complications screen and click the Send to Scene button. Big Moments are shaded blue.
2) On the Scenes List, click on the Add Scene button to insert a new blank scene in the current location. Clicking the ÒAdd SceneÓ button will insert a scene inside or outside of a folder depending on where the button is located.
3) Click the Add Scene button at the top of the Scenes List.
To drag a scene to a new location, place the mouse curser over the drag control, click and move straight up or down to the new location.
Scenes may be grouped together in a folder. Drag the Drag bar at an angle over a scene folder that isnÕt already in a folder. (You canÕt create folders in folders.)Any number of scenes can be grouped together in a folder. Any scene can become a folder just by dragging a scene to the folder icon.
The number on the folder indicates the number of scenes it contains.The arrow pointing to the right indicates a closed folder. Click the right arrow to open (un-nest) and display all the scenes hidden in the folder.
When a scene is clicked, guide arrows appear, either up, down, or at an angle.The angled arrows indicate that the scene can be nested into another scene.
16
Toco
ScovfoAnbe
ThThThto
Th
Rules about repositioning and nesting scenesA closed folder (a chapter with hidden nested scenes) will behave just like an individual scene; it will readjust when the drag control is dragged and dropped onto it.
An open folder (a chapter with visible nested scenes) will not reposition when a scene is dragged onto its drag control bar. If you want the folder to reposition when another scene is dragged onto the drag bar, then close it.
You may drag an open folder to a new position. As long as you drop it on the drag bar of an individual scene or a closed folder, the scenes will all readjust to accommodate the open folder and all of the scenes inside of it.
To add a scene to a folder, drag and release the drag bar onto a folder icon. To remove a scene from a folder, drag it out of the folder and release it on the drag bar of any individual scene.
If there is any text in the scene description Þeld when the folder is created, the text will be automatically underlined, to indicate that it has become a folder. The trash can for chapters will be hidden to indicate that it is a folder and to hinder accidental deletion of an entire folder.
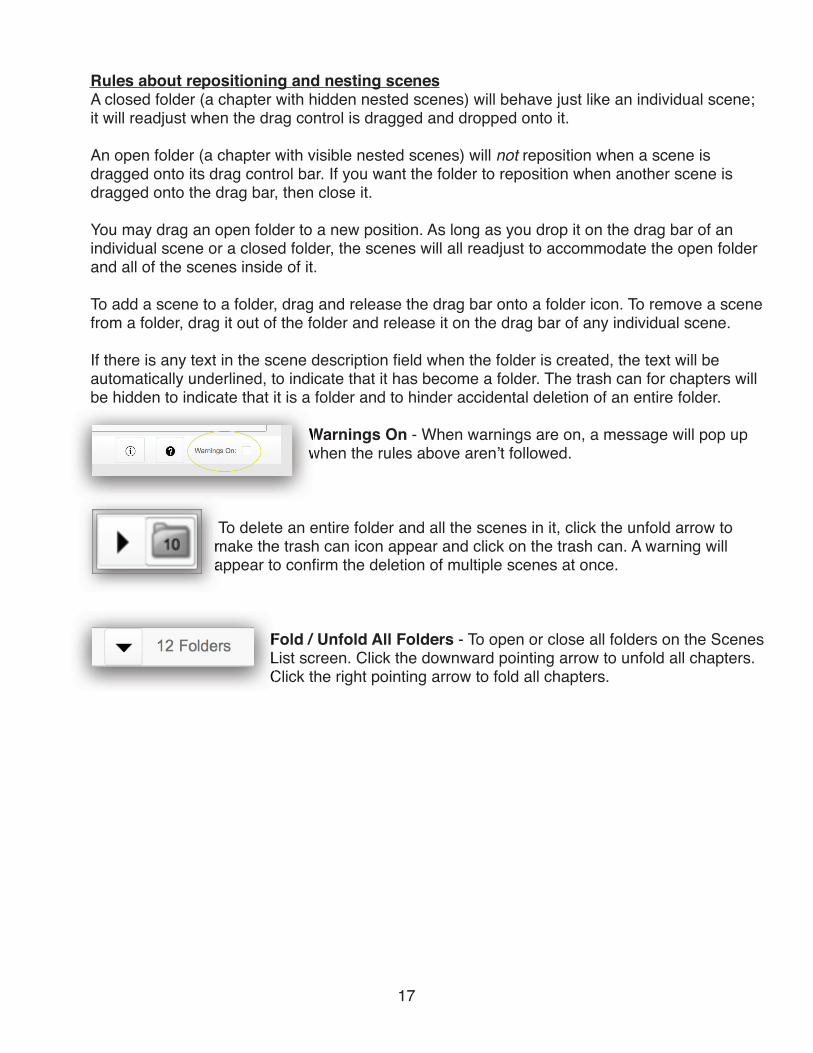
Warnings On - When warnings are on, a message will pop up when the rules above arenÕt followed.
To delete an entire folder and all the scenes in it, click the unfold arrow to make the trash can icon appear and click on the trash can. A warning will appear to conÞrm the deletion of multiple scenes at once.
Fold / Unfold All Folders - To open or close all folders on the Scenes List screen. Click the downward pointing arrow to unfold all chapters. Click the right pointing arrow to fold all chapters.
17
FoLiCl
Tmaap
Wawh
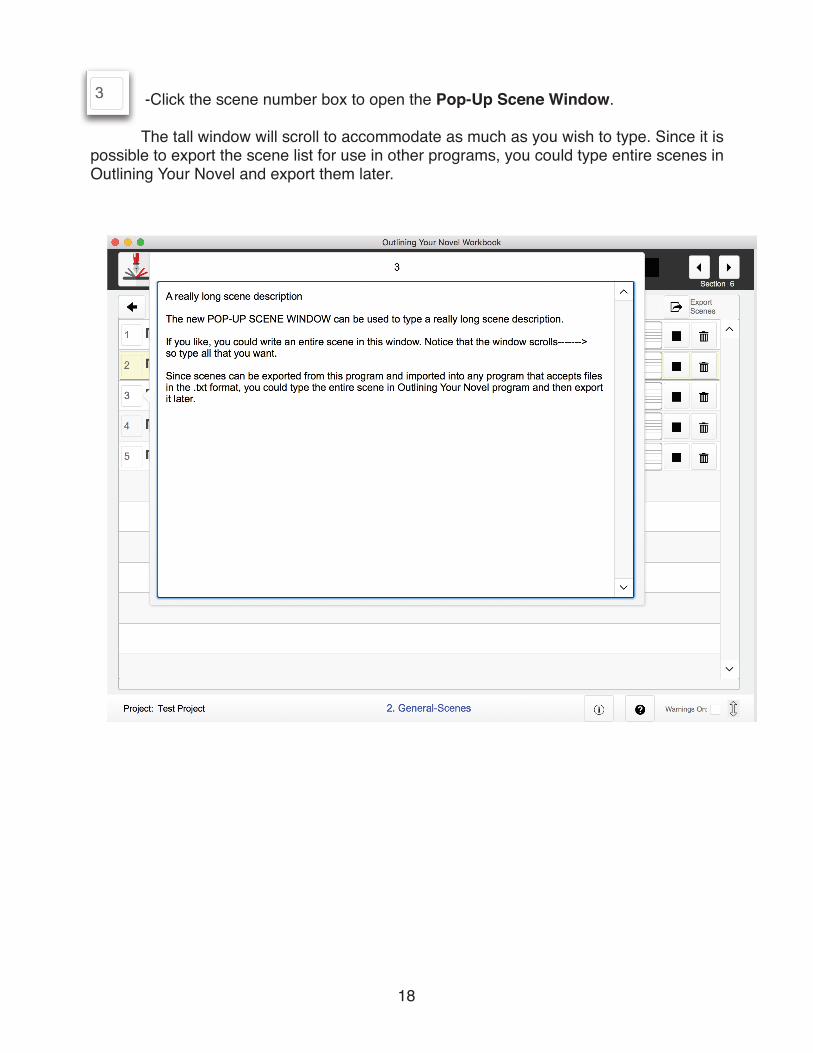
-Click the scene number box to open the Pop-Up Scene Window.
The tall window will scroll to accommodate as much as you wish to type. Since it is possible to export the scene list for use in other programs, you could type entire scenes in Outlining Your Novel and export them later.
18
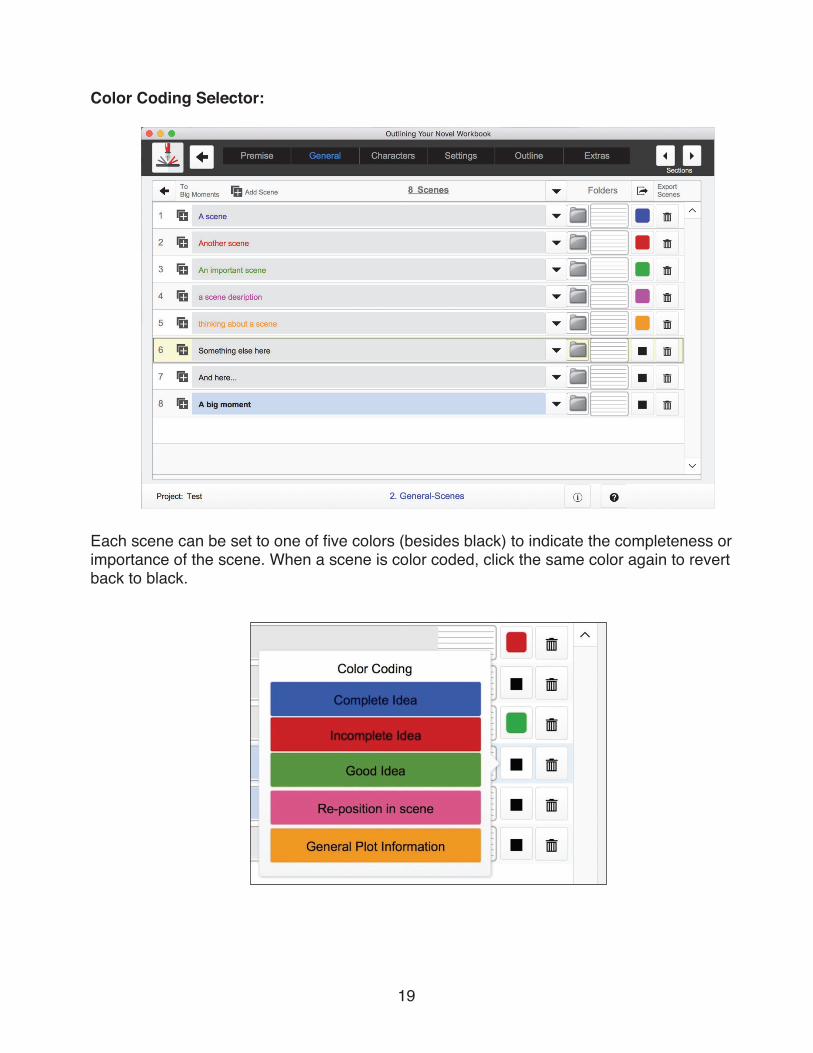
Color Coding Selector:
Each scene can be set to one of Þve colors (besides black) to indicate the completeness or importance of the scene. When a scene is color coded, click the same color again to revert back to black.
19
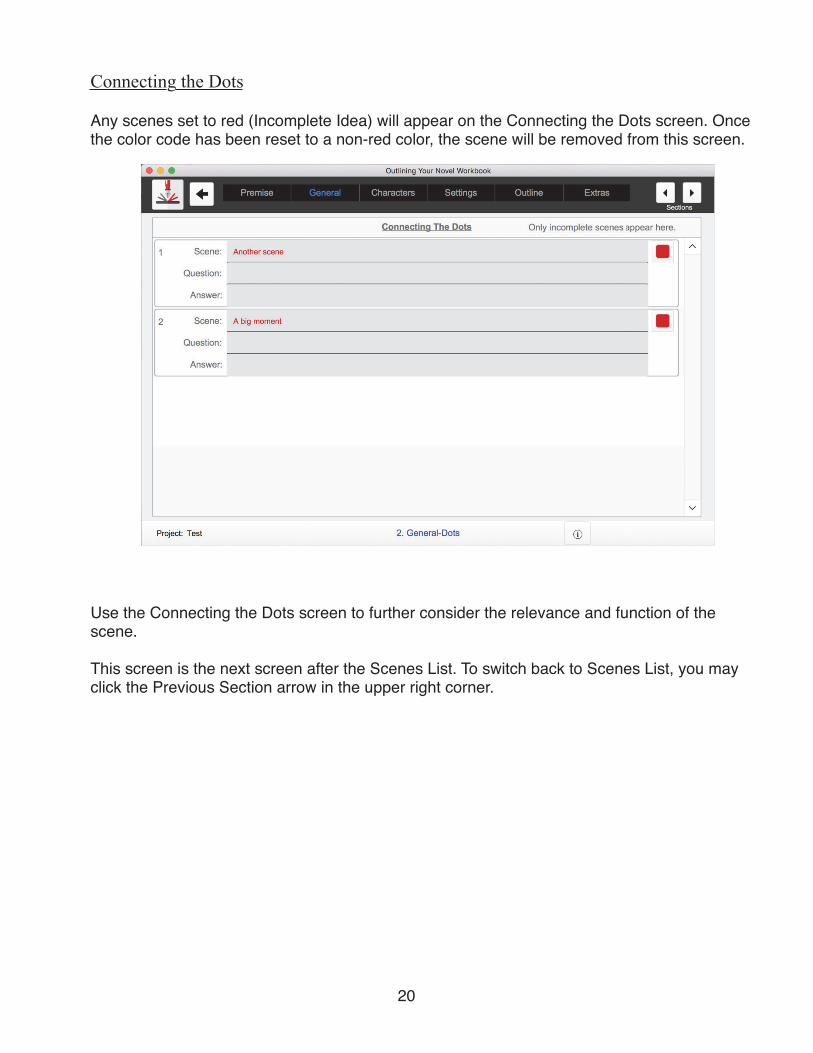
Connecting the Dots
Any scenes set to red (Incomplete Idea) will appear on the Connecting the Dots screen. Once the color code has been reset to a non-red color, the scene will be removed from this screen.
Use the Connecting the Dots screen to further consider the relevance and function of the scene.
This screen is the next screen after the Scenes List. To switch back to Scenes List, you may click the Previous Section arrow in the upper right corner.
20
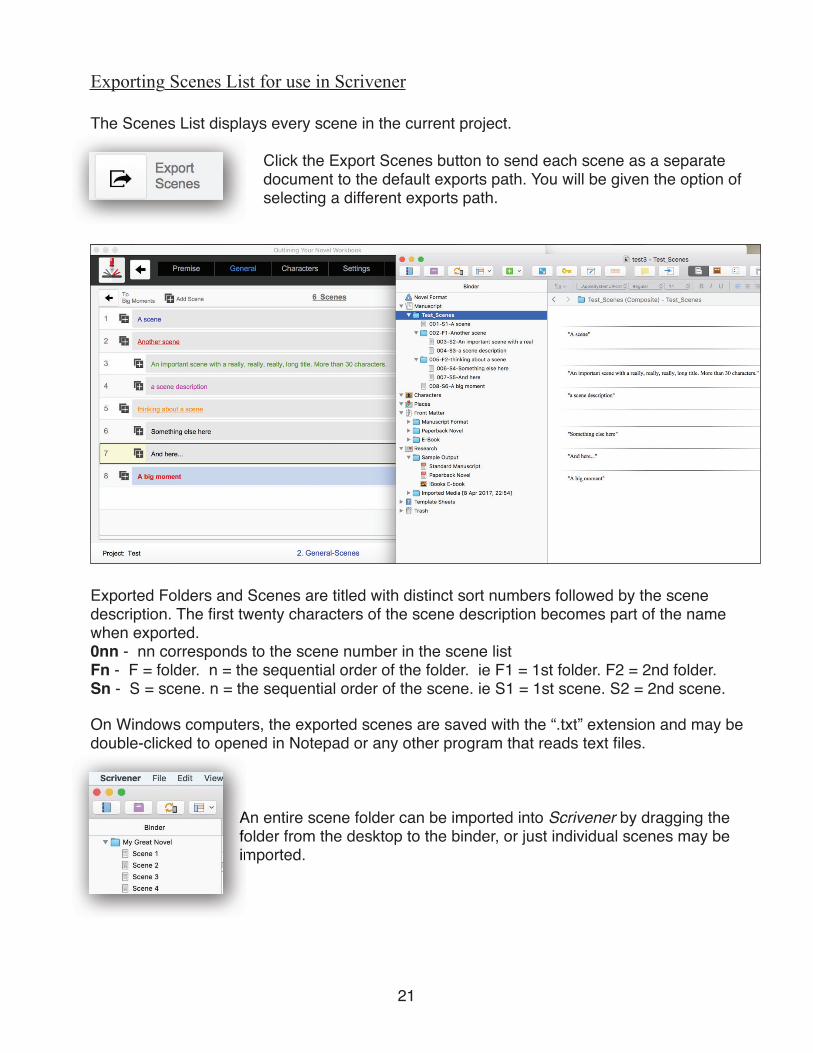
Exporting Scenes List for use in Scrivener
The Scenes List displays every scene in the current project.
Click the Export Scenes button to send each scene as a separate document to the default exports path. You will be given the option of selecting a different exports path.
Exported Folders and Scenes are titled with distinct sort numbers followed by the scene description. The Þrst twenty characters of the scene description becomes part of the name when exported.0nn - nn corresponds to the scene number in the scene listFn - F = folder. n = the sequential order of the folder. ie F1 = 1st folder. F2 = 2nd folder.Sn - S = scene. n = the sequential order of the scene. ie S1 = 1st scene. S2 = 2nd scene.
On Windows computers, the exported scenes are saved with the Ò.txtÓ extension and may be double-clicked to opened in Notepad or any other program that reads text Þles.
An entire scene folder can be imported into Scrivener by dragging the folder from the desktop to the binder, or just individual scenes may be imported.
21
Anfoim