chapter 13 advanced powerpoint features -...
TRANSCRIPT
SAMPLE
Chapter 13 Advanced PowerPoint Features 537
Adding Slide Transitions
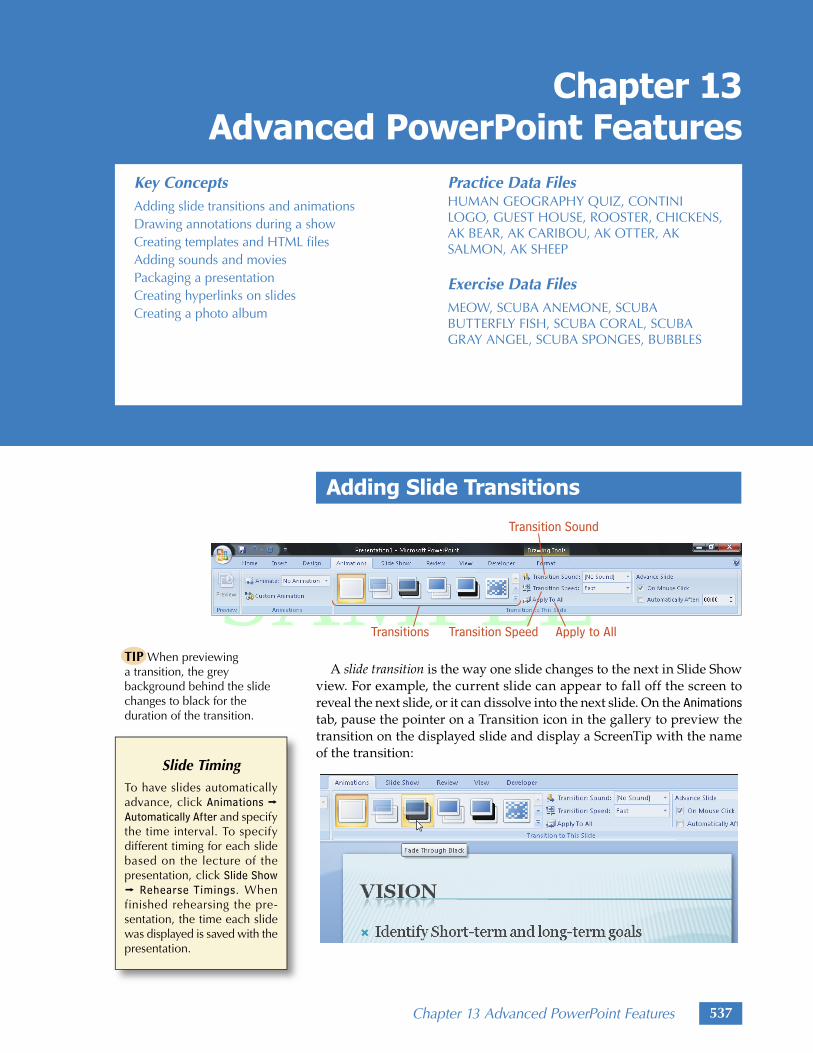
A slide transition is the way one slide changes to the next in Slide Show view. For example, the current slide can appear to fall off the screen to reveal the next slide, or it can dissolve into the next slide. On the Animationstab, pause the pointer on a Transition icon in the gallery to preview the transition on the displayed slide and display a ScreenTip with the name of the transition:
Chapter 13Advanced PowerPoint Features
Key ConceptsAdding slide transitions and animationsDrawing annotations during a showCreating templates and HTML filesAdding sounds and moviesPackaging a presentationCreating hyperlinks on slidesCreating a photo album
Practice Data FilesHUMAN GEOGRAPHY QUIZ, CONTINI LOGO, GUEST HOUSE, ROOSTER, CHICKENS, AK BEAR, AK CARIBOU, AK OTTER, AK SALMON, AK SHEEP
Exercise Data FilesMEOW, SCUBA ANEMONE, SCUBA BUTTERFLY FISH, SCUBA CORAL, SCUBA GRAY ANGEL, SCUBA SPONGES, BUBBLES
TIP When previewing a transition, the grey background behind the slide changes to black for the duration of the transition.
Slide TimingTo have slides automatically advance, click Animations j Automatically After and specify the time interval. To specify different timing for each slide based on the lecture of the presentation, click Slide Show j Rehearse Timings. When finished rehearsing the pre-sentation, the time each slide was displayed is saved with the presentation.

SAMPLE
538 Chapter 13 Advanced PowerPoint Features
preview transitions
Options in Animations j Transition Speed and Animations j Transition Sound affect the transition speed and what sound, if any, is played. Click Animations j Apply To All to apply the selected transition to the entire pre-sentation. To remove transitions from a slide, apply the first option in the gallery, No Transition.
Formatting each slide in a presentation with a different transition is perceived as choppy and disorganized, not polished and professional. For a professional appearance, apply the same transition to all slides in a presentation using the slide master. Slide transitions can also be applied to multiple selected slides in Slide Sorter view.
Slide transitions are previewed by clicking the transition icon displayed next to each slide in the Slides tab or below each slide in Slide Sorter view.
Animating Objects on a Slide
Animation is a visual effect in which objects appear to move. Text and objects can be animated to move onto the slide in various ways during a slide show. For example, titles can fade in and bulleted list items can slide in one by one or all together.
To animate text or an object on a slide, click the text or select the object and then click Animations j Animate to display a list:
For an object, select an animation such as Fade or Wipe. For text, select All At Once under the animation name to have all text transition at the same time, or select By 1st Level Paragraphs to have each bulleted item transition one by one. Remove an animation by selecting the text or object and then click Animations j Animate j No Animation.
remove transitions
design considerations for transitions
remove animations

SAMPLE
Chapter 13 Advanced PowerPoint Features 539
To make adjustments to an animation and to the order of animated items, click Animations j Custom Animation. The Custom Animation task pane is displayed. Numbers that identify each animated element and the order in which they appear are displayed on the slide:
• Numbers in the task pane list correspond to numbers on the slide next to animated objects.
• Select a numbered item in the list to view the animation details, such as what action causes the animation to start, and the direction and speed of the animated item.
• Click Play to preview the selected animation.
• Click or to change the order of the selected item.
• Click Change to apply a different animation or modify additional options, such as the motion path and emphasis.
• Click Remove to delete animation effects from the selected item.
The Custom Animation task pane is also used to apply animations. Select text or an object to animate and then click Add Effect j Entrance for a list of animations:
Select More Effects in the list to list all animations available. To close the task pane, click Close .
Custom Animation task pane

SAMPLE
540 Chapter 13 Advanced PowerPoint Features
The same considerations for slide transitions apply to animations. Viewing a slide show with different animations for each item or slide is perceived as choppy and disorganized, not polished and professional. For a professional appearance, apply the same animation to the same types of text or objects on all slides using the slide master.
Animations are previewed by clicking the transition icon displayed next to each slide in the Slides tab or below each slide in Slide Sorter view.
Practice: HUMAN GEOGRAPHY QUIZ – part 1 of 2
!! OPEN HUMAN GEOGRAPHY QUIZa. Start PowerPoint.
b. Open HUMAN GEOGRAPHY QUIZ, which is a PowerPoint data file for this text.
c. On slide 1, replace the text Name with your name.
@@ ADD TRANSITIONS TO THE ENTIRE PRESENTATIONa. Click View j Slide Master. Slide Master view is displayed.
b. In the left pane, click the slide master at the top.
c. Click Animations j Dissolve:
The transition is applied and previewed.
d. Click Animations j More Animations j Uncover Down:
The transition is applied and previewed.
e. Click Slide Master j Close Master View. Normal view is displayed.
f. In the Slides tab, click the transition icon next to slide 3. The slide is displayed and the transition is previewed.
## ADD ANIMATION TO SLIDE 1a. Display slide 1 in Normal view.
b. Place the insertion point anywhere in the words “Quiz #3….”
c. Click Animations j Animate to display a list, and then in the Wipe animations click By 1st Level Paragraphs. The animation is applied and previewed.
d. Click Animations j Animate j No Animation. The animation is removed.
$$ ADD ANIMATION TO THE ENTIRE PRESENTATIONa. Click View j Slide Master. Slide Master view is displayed.
b. In the left pane, click the slide master at the top.
c. Click Animations j Custom Animation. The task pane is displayed.
d. In the slide master, place the insertion point in the text “Click to edit Master text styles.”
design considerations for animations
preview animations
SAMPLE
Chapter 13 Advanced PowerPoint Features 541
e. In the task pane, click Add Effect j Entrance j Fade. If Fade is not available in the Entrance list, select More Effects to display a list of all effects and then select Fade and OK.
f. In the task pane, in the Start list select On Click.
g. In the task pane, in the Speed list select Fast.
h. Click Slide Master j Close Master View. Normal view is displayed.
i. In the Slides tab, click the transition icon next to slide 3. The slide is displayed and the transition and animations are previewed.
%% CUSTOMIZE THE ANIMATION FOR THE QUIZ ANSWERSa. On slide 2, select the text “TRUE.”
b. In the task pane, click Add Effect j Emphasis j 3. Change Font Style.
c. On slide 3, select the text for answer c) “a specific location on the earth.”
d. In the task pane, click Add Effect j Emphasis j 3. Change Font Style.
e. Close the task pane.
^̂ SAVE THE MODIFIED HUMAN GEOGRAPHY QUIZ
&& VIEW THE SLIDE SHOWa. Click View j Slide Show. The presentation is started with slide 1, but the subtitle is
not yet displayed.
b. Click again. The subtitle fades in.
c. Click again. Slide 1 drops down to reveal slide 2.
d. Click again. The statement fades in.
e. Click again. The text “TRUE” fades in.
f. Click again. The text “-or-” fades in.
g. Click again. The text “FALSE” fades in.
h. Click again. The text “TRUE” now appears bold.
i. Click again. Slide 3 drops down and covers slide 2.
j. Click again. The first list item fades in.
k. View the entire presentation and then return to the PowerPoint window.
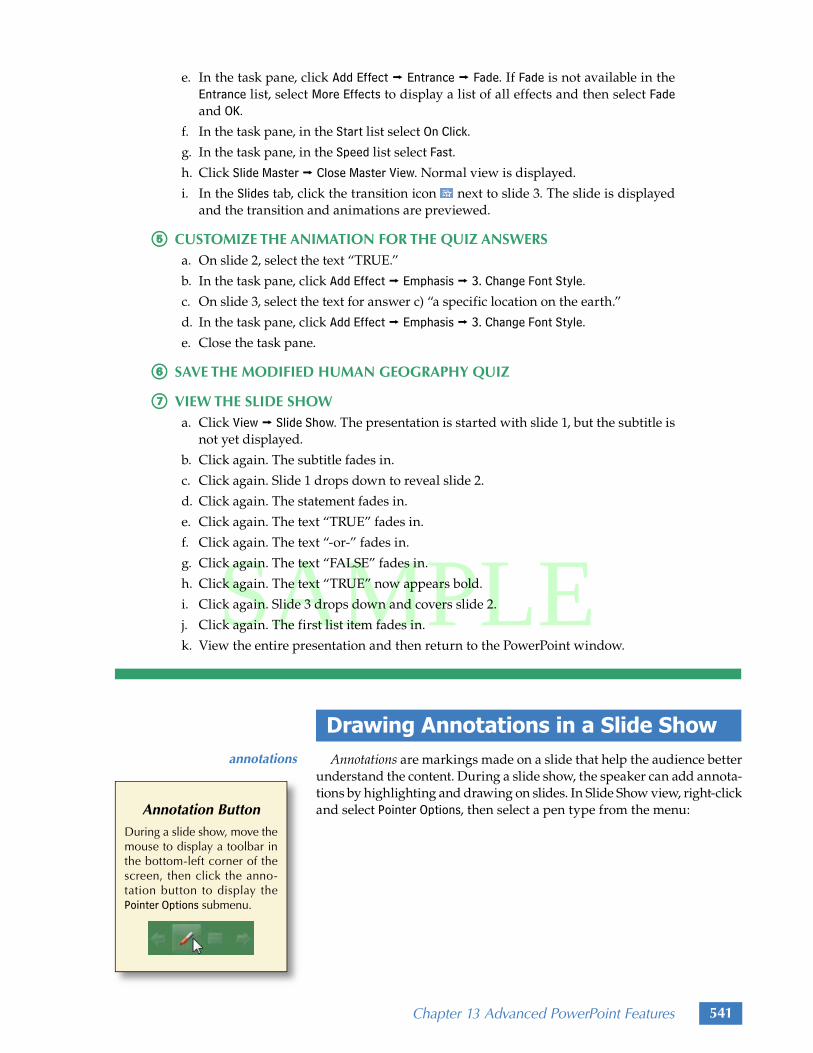
Drawing Annotations in a Slide Show Annotations are markings made on a slide that help the audience better understand the content. During a slide show, the speaker can add annota-tions by highlighting and drawing on slides. In Slide Show view, right-click and select Pointer Options, then select a pen type from the menu:
annotations
Annotation ButtonDuring a slide show, move the mouse to display a toolbar in the bottom-left corner of the screen, then click the anno-tation button to display the Pointer Options submenu.

SAMPLE
542 Chapter 13 Advanced PowerPoint Features
Drag to draw on the slide. Right-click and select Ink Color to change the color of the ink. Annotations are removed using the Eraser or by selecting Erase All Ink on Slide. Select Arrow to return the pointer to an arrow. When the slide show is ended, a dialog box appears:
Select Keep to leave the annotations on the slides, or Discard to remove the annotations.
Practice: HUMAN GEOGRAPHY QUIZ – part 2 of 2PowerPoint should already be started with HUMAN GEOGRAPHY QUIZ displayed from the last practice.
!! VIEW THE SLIDE SHOW AND USE INKa. Select View j Slide Show. The presentation is started with slide 1.
b. Press the spacebar until all the text “TRUE - or - FALSE” is displayed.
c. Anywhere on the slide, right-click and then select Pointer Options j Highlighter. The pointer changes to a small yellow rectangle.
d. Drag the pointer across the words “cultural landscape.” The text is highlighted in yellow.
e. Drag back and forth until the words are completely highlighted.
f. Anywhere on the slide, right-click and then select Pointer Options j Felt Tip Pen.
g. Draw a circle around the word “TRUE.”
h. On the same slide, experiment with other ink options and change the ink color by right-clicking and selecting Pointer Options j Ink Color.
i. Right-click and then select Pointer Options j Arrow. The pointer is an arrow again.
j. Press the spacebar until a black screen appears with the words “End of slide show, click to exit.”
k. Press Esc. A dialog box is displayed.
l. Select Discard to remove the annotations and display the PowerPoint window.

SAMPLE
Chapter 13 Advanced PowerPoint Features 543
@@ PRINT THE PRESENTATIONa. Save the modified HUMAN GEOGRAPHY QUIZ.
b. Print a copy of the presentation as Handouts with 6 slides per page.
## SAVE AND CLOSE THE MODIFIED HUMAN GEOGRAPHY QUIZ
Creating a PowerPoint Template A template is a master presentation that includes the basic formatting and elements for particular types of presentations. Templates are used again and again whenever a presentation of that type is needed. A template usually includes customized layouts, placeholders that indicate the type of information to place in them, a theme, and perhaps additional changes to the colors or fonts. For example, a company can create a template that includes their logo, corporate colors and fonts, and slide footers. The template would be used by employees to ensure a consistent design for company presentations.
To create a template, format a new presentation. Select j Save As to display a dialog box. Select PowerPoint Template in the Save as type list and type a file name in the File name box.
To create a new presentation from a template, select j New, then click My Templates to display a dialog box of templates. Select a template and then OK. PowerPoint creates a new, blank, untitled presentation that con-tains the same formatting, slides, text, and graphics as the template. This prevents accidentally saving over and changing the original template.
A variety of pre-created templates are accessible through PowerPoint. Click j New to display the New Document dialog box. Click Installed Templates to view and select local templates, which are stored on the computer. If the computer has an Internet connection, click options in the Microsoft Office Online list to view and download templates from Microsoft.
Practice: Contini, Holiday CookiesPowerPoint should already be started.
!! CREATE A NEW PRESENTATION
@@ FORMAT THE SLIDE MASTERa. Click View j Slide Master. Slide Master view is displayed.
b. In the left pane, click the slide master at the top.
c. Click Slide Master j Themes j Solstice:
d. In the slide master, select all of the text “Click to edit Master title style.”
TIP A PowerPoint template is saved with a . potx extension. PowerPoint templates that contain macros have a .potm extension.

SAMPLE
544 Chapter 13 Advanced PowerPoint Features
e. On the Home tab, change the font to Cambria.
f. Drag the slide number placeholder from the bottom-right corner of the slide into the bottom of the colored bar graphic on the left side of the slide:
g. Format the slide number <#> as 16 point and bold.
h. In the left pane, click the second slide, which is the Title Slide Layout.
i. Move the “Click to edit Master title style” placeholder and the “Click to edit Master text style” placeholder to the bottom half of the slide:
j. In the left pane, click the slide master at the top.
k. Click Insert j Header & Footer. A dialog box is displayed.
1. Select the Slide tab and set the options as shown:
2. Select Apply to All.

SAMPLE
Chapter 13 Advanced PowerPoint Features 545
## ADD A GRAPHIC, TRANSITION, AND ANIMATIONa. Click Insert j Picture. A dialog box is displayed.
1. Navigate to CONTINI LOGO, which is a data file for this text, and select it.
2. Select Insert. The graphic is placed on the slide.
b. Drag the logo so it is to between the colored bar graphic and the date. It may cover a portion of the date’s text box:
c. Click Animations j Dissolve:
The transition is applied and previewed.
d. Place the insertion point anywhere in the text “Click to edit Master text styles” or the bulleted items below it.
e. Click Animations j Animate to display a list, and then in the Wipe animations click By 1st Level Paragraphs. The animation is applied and previewed.
f. Click Slide Master j Close Master View. Normal view is displayed.
$$ SAVE THE PRESENTATION AS A TEMPLATEa. Select j Save As. The Save As dialog box is displayed.
1. In the File name box, type: Contini
2. In the Save as type list, select PowerPoint Template. Note that the Save in list has changed to display the Templates folder.
3. Select Save. The presentation is saved as a template.
%% PRINT AND CLOSE CONTINIa. Print a copy.
b. Close Contini.
^̂ CREATE A PRESENTATION USING THE TEMPLATEa. Click j New. A dialog box is displayed.
b. Click My Templates. A dialog box of templates is displayed.
c. Click Contini and then select OK. PowerPoint creates a new, blank, untitled presen-tation that contains the same formatting and graphics as the template.
&& ADD CONTENTa. On the slide, replace the text “Click to add title” with: Holiday Cookies
b. Replace the text “Click to add subtitle” with the following, replacing Name with your name: Name, Director of Recipes
c. Click Home j New Slide j Title and Content. A slide is added with the Title and Content layout.
d. Click Home j New Slide again. Another slide with the same layout is added.
SAMPLE
546 Chapter 13 Advanced PowerPoint Features
e. Display slide 2 and add the following title and text:
Last Holiday’s Cookies• Snickerdoodles• Chocolate Cremes
f. Display slide 3 and add the following title and text:
Next Holiday’s Cookies• Cranberry Shortbread• Peanut Butter Drops
** SAVE THE PRESENTATION AND VIEW THE SLIDE SHOWa. Save the presentation naming it Holiday Cookies.
b. Select View j Slide Show. The presentation is started with slide 1. Notice the subtitle is not yet displayed.
c. Press the spacebar. The subtitle wipes in.
d. Press the spacebar again. Slide 2 dissolves in.
e. View the entire presentation and then return to the PowerPoint window.
(( CLOSE HOLIDAY COOKIES
Adding a Sound to a Slide
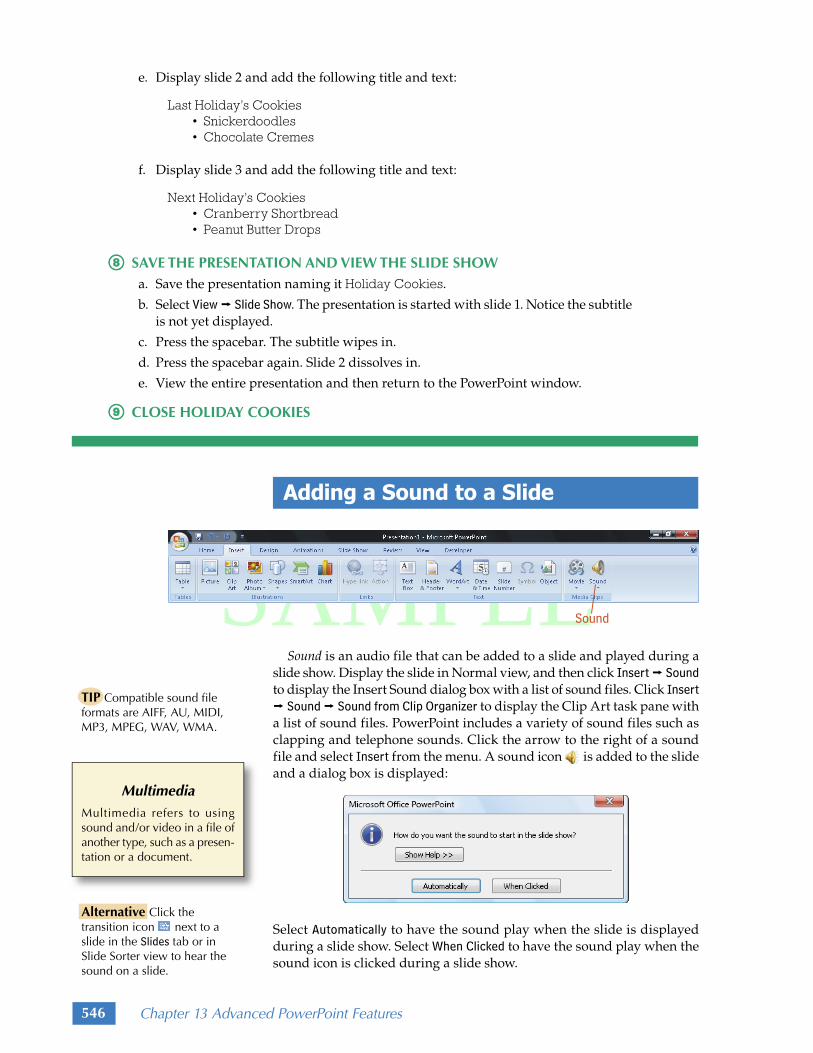
Sound is an audio file that can be added to a slide and played during a slide show. Display the slide in Normal view, and then click Insert j Sound to display the Insert Sound dialog box with a list of sound files. Click Insert j Sound j Sound from Clip Organizer to display the Clip Art task pane with a list of sound files. PowerPoint includes a variety of sound files such as clapping and telephone sounds. Click the arrow to the right of a sound file and select Insert from the menu. A sound icon is added to the slide and a dialog box is displayed:
Select Automatically to have the sound play when the slide is displayed during a slide show. Select When Clicked to have the sound play when the sound icon is clicked during a slide show.
TIP Compatible sound file formats are AIFF, AU, MIDI, MP3, MPEG, WAV, WMA.
Multimedia Multimedia refers to using sound and/or video in a file of another type, such as a presen-tation or a document.
Alternative Click the transition icon next to a slide in the Slides tab or in Slide Sorter view to hear the sound on a slide.
SAMPLE
Chapter 13 Advanced PowerPoint Features 547
During a Slide Show, the sound stops playing when another slide is displayed or when the sound file ends, whichever occurs first.
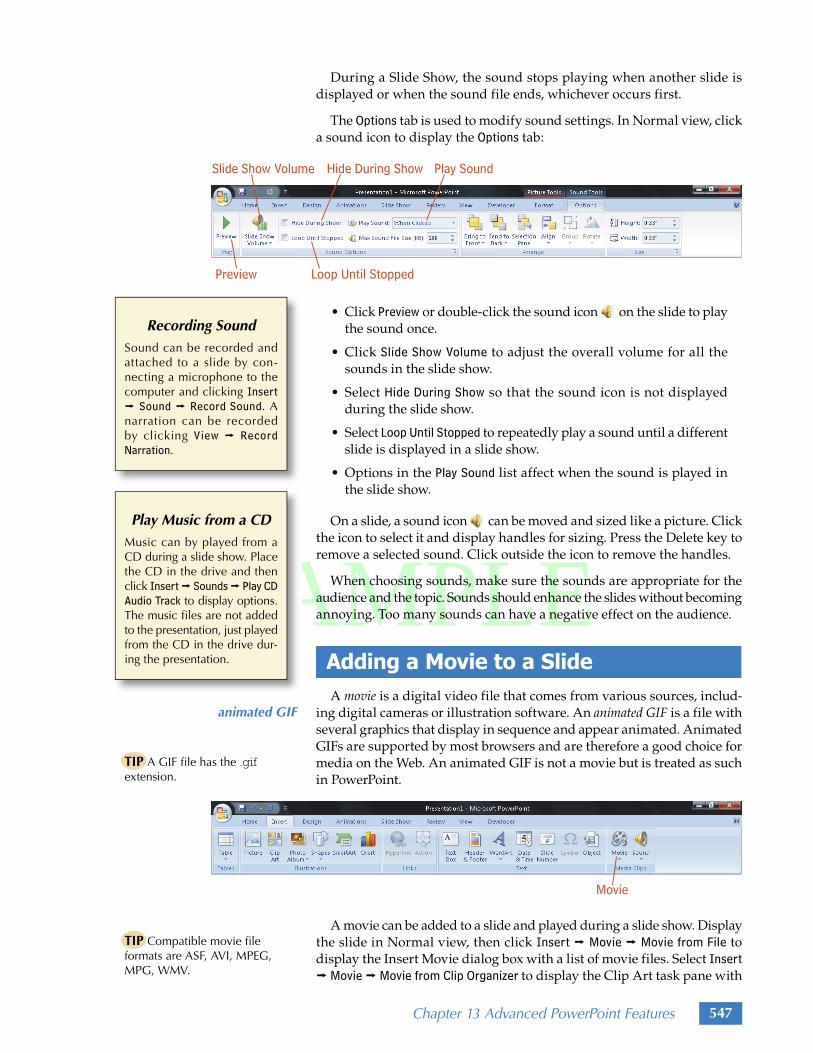
The Options tab is used to modify sound settings. In Normal view, click a sound icon to display the Options tab:
• Click Preview or double-click the sound icon on the slide to play the sound once.
• Click Slide Show Volume to adjust the overall volume for all the sounds in the slide show.
• Select Hide During Show so that the sound icon is not displayed during the slide show.
• Select Loop Until Stopped to repeatedly play a sound until a different slide is displayed in a slide show.
• Options in the Play Sound list affect when the sound is played in the slide show.
On a slide, a sound icon can be moved and sized like a picture. Click the icon to select it and display handles for sizing. Press the Delete key to remove a selected sound. Click outside the icon to remove the handles.
When choosing sounds, make sure the sounds are appropriate for the audience and the topic. Sounds should enhance the slides without becoming annoying. Too many sounds can have a negative effect on the audience.
Adding a Movie to a Slide A movie is a digital video file that comes from various sources, includ-ing digital cameras or illustration software. An animated GIF is a file with several graphics that display in sequence and appear animated. Animated GIFs are supported by most browsers and are therefore a good choice for media on the Web. An animated GIF is not a movie but is treated as such in PowerPoint.
A movie can be added to a slide and played during a slide show. Display the slide in Normal view, then click Insert j Movie j Movie from File to display the Insert Movie dialog box with a list of movie files. Select Insert j Movie j Movie from Clip Organizer to display the Clip Art task pane with
animated GIF
TIP A GIF file has the .gif extension.
Play Music from a CD Music can by played from a CD during a slide show. Place the CD in the drive and then click Insert j Sounds j Play CD Audio Track to display options. The music files are not added to the presentation, just played from the CD in the drive dur-ing the presentation.
Recording SoundSound can be recorded and attached to a slide by con-necting a microphone to the computer and clicking Insert j Sound j Record Sound. A narration can be recorded by clicking View j Record Narration.
TIP Compatible movie file formats are ASF, AVI, MPEG, MPG, WMV.

SAMPLE
548 Chapter 13 Advanced PowerPoint Features
a list of movie files. PowerPoint includes a variety of animated GIF files. Click the movie to add it the slide and display a dialog box:
Select Automatically to have the movie play when the slide is displayed during a slide show. Select When Clicked to have the movie play when it is clicked during a slide show.
During a slide show, the movie stops playing when another slide is displayed or when the movie file ends, whichever occurs first. Animated GIFs continually play until another slide is displayed.
In Normal view, click a movie to display the Options tab:
• Click Preview or double-click the movie on the slide to play the movie once.
• Click Slide Show Volume to adjust the overall volume for the slide show. This option affects movies that have sound.
• Select Loop Until Stopped to repeatedly play a movie until a different slide is displayed in a slide show.
• Select Play Full Screen to fill the screen with the movie when it plays.
• Options in the Play Movie list affect when the movie is played in a slide show.
Click the movie to select it and display handles for sizing. Press the Delete key to remove a selected movie. Click outside the movie to remove the handles.
When choosing movies, make sure the movies are appropriate for the audience and presentation topic. Movies should add information or enhance a topic without distracting the audience from the topic. Movies should be of good visual quality and should not be too long, so the audi-ence does not get distracted.
Design Considerations for Sounds and Movies
Sounds and movies can enhance a presentation if used appropriately and spar-ingly. However, too much can overwhelm the audience and detract from the presentation:
• Use effects appropriate for the audience and topic.
• Movies and sounds should not be too long, or the audi-ence will lose their focus.
TIP These commands and dialog boxes are not available for animated GIFs.
SAMPLE
Chapter 13 Advanced PowerPoint Features 549
Practice: GUEST HOUSEYou will need a sound card and speakers to hear the sounds in this practice. PowerPoint should already be started.
!! OPEN GUEST HOUSE Open GUEST HOUSE, which is a PowerPoint data file for this text.
@@ ADD A SOUND TO A SLIDEa. Display slide 2.
b. Click Insert j Sound j Sound from File. A dialog box is displayed.
1. Navigate to ROOSTER, which is a sound data file for this text, and select it.
2. Select OK. A sound icon is added to the slide and a dialog box is displayed.
3. Select When Clicked. The slide is displayed and the sound icon is visible.
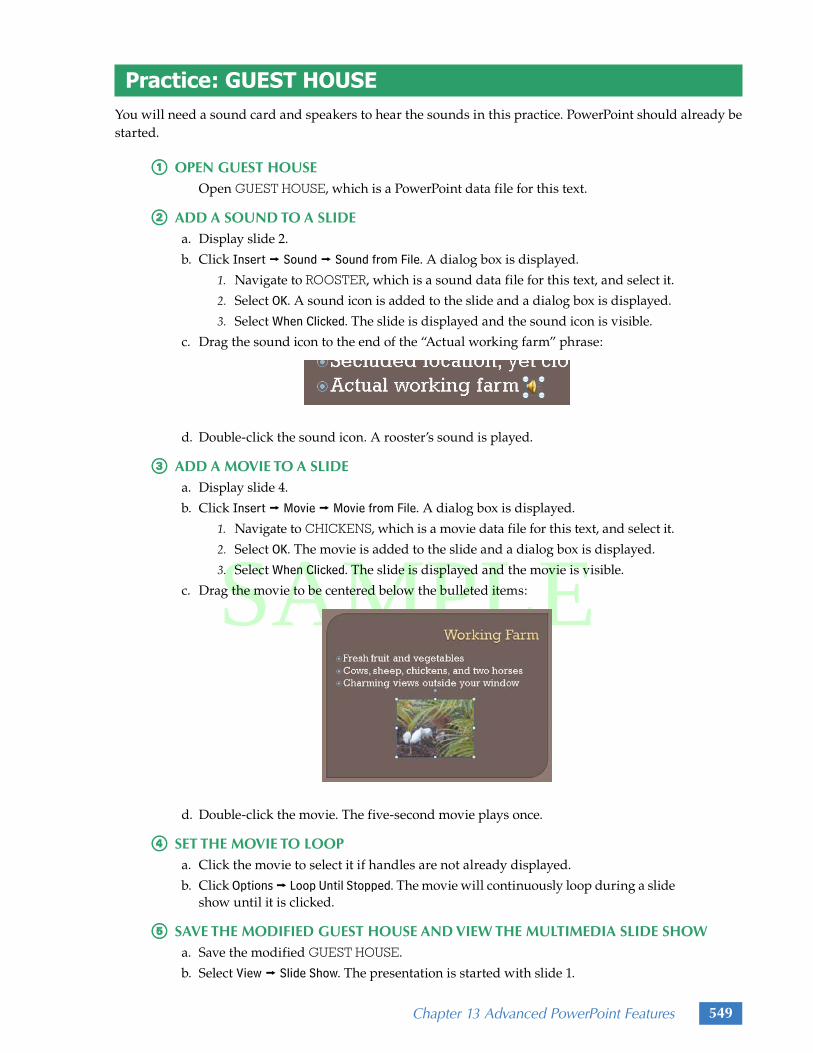
c. Drag the sound icon to the end of the “Actual working farm” phrase:
d. Double-click the sound icon. A rooster’s sound is played.
## ADD A MOVIE TO A SLIDEa. Display slide 4.
b. Click Insert j Movie j Movie from File. A dialog box is displayed.
1. Navigate to CHICKENS, which is a movie data file for this text, and select it.
2. Select OK. The movie is added to the slide and a dialog box is displayed.
3. Select When Clicked. The slide is displayed and the movie is visible.
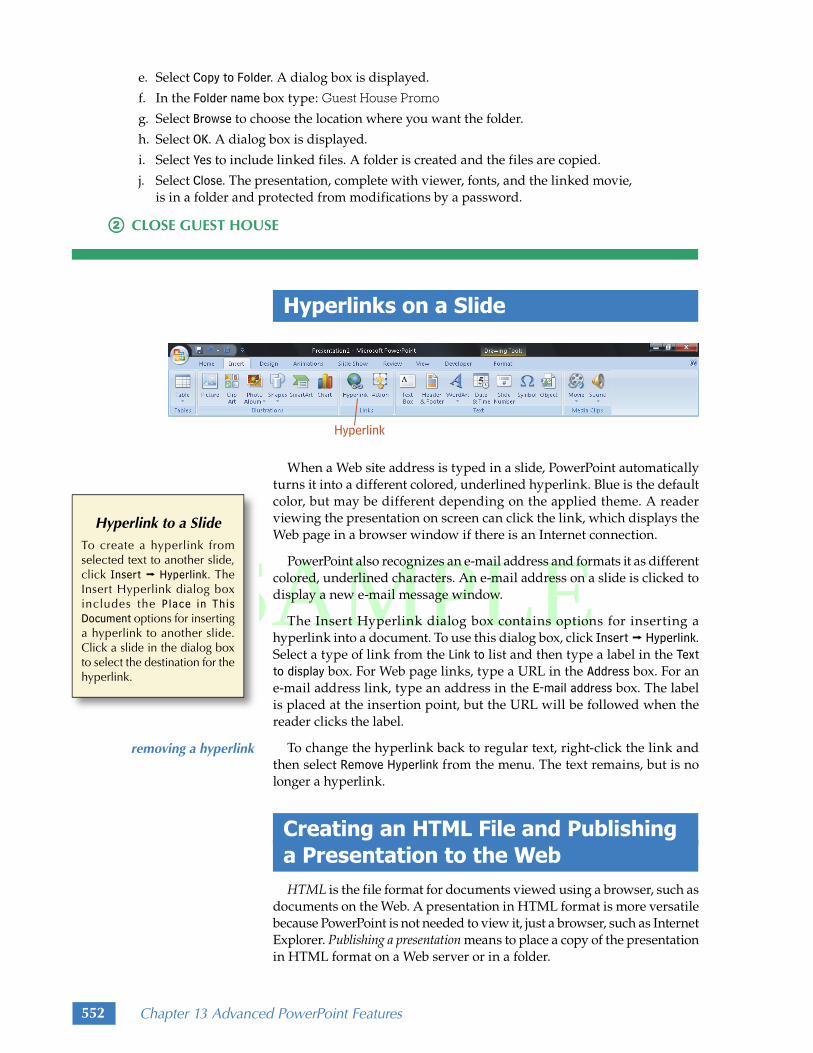
c. Drag the movie to be centered below the bulleted items:
d. Double-click the movie. The five-second movie plays once.
$$ SET THE MOVIE TO LOOPa. Click the movie to select it if handles are not already displayed.
b. Click Options j Loop Until Stopped. The movie will continuously loop during a slide show until it is clicked.
%% SAVE THE MODIFIED GUEST HOUSE AND VIEW THE MULTIMEDIA SLIDE SHOWa. Save the modified GUEST HOUSE.
b. Select View j Slide Show. The presentation is started with slide 1.

SAMPLE
550 Chapter 13 Advanced PowerPoint Features
c. Press the spacebar until the bulleted items on slide 2 appear.
d. Click the sound icon. The rooster sound is played.
e. Press the spacebar to view slide 3 and then slide 4. Stop when the bulleted items on slide 4 appear.
f. Click the movie. The movie plays continuously, over and over.
g. Click the movie. The movie stops playing.
h. Press the spacebar to end the presentation. A black screen is displayed. Press Esc to return to the PowerPoint window.
^̂ PRINT THE PRESENTATION Print a copy of the presentation as Handouts with 6 slides per page, with your name
in the footer.
Delivering a Presentation There are many ways to deliver a presentation, which refers to the location and manner in which the audience experiences the presentation:
• A live speaker lectures or narrates while the presentation is pro-jected onto a large screen in the same room as the audience. The presentation may be projected using a digital projector connected to a computer, or using an overhead projector with transparencies printed from the presentation.
• A live speaker in one location presents to audience members in other locations using collaborative meeting software such as Microsoft Office Live Meeting, WebEx, or GoToMeeting. Each audience member views the presentation on a computer at their location while listening to the speaker lecture or narrate. Everyone in the meeting sees the same presentation and can communicate with each other.
• The presentation is played in a continuous loop on an unattended computer, and viewed by anyone who chooses to watch it. For example, at a kiosk or in a museum exhibit.
• The presentation is distributed on CD or published to the Web, so that the presentation can be viewed at any time.
• The presentation is printed on paper in various layouts and given to the audience to read.
A PowerPoint presentation will need to be moved to the location where it will be delivered. To do this, the presentation and all the files associated with it, such as fonts and linked clips, can be copied to a CD or to a folder on a hard disk. Once packaged in this manner, the folder can be moved to other computers or the CD can be transported to another location or copied and distributed.
To copy an open PowerPoint presentation, select j Publish j Package for CD which displays a dialog box:
Types of Projectors LCD (liquid crystal display) projectors display colors using glass panels. DLP (digi-tal light processing) projectors use a chip with thousands of mirrors to project light. The DLP projectors are also called digital projectors and produce better-quality, brighter images than LCD.
TIP The PowerPoint Viewer, which is required to show a presentation, and any linked files are included when a presentation is copied to CD or a folder.
packaging a presentation

SAMPLE
Chapter 13 Advanced PowerPoint Features 551
• Type a name for the CD or the new folder in the Name the CD box.
• Select Add Files and select additional presentations and files to add to the package, such as any linked movie files.
• Select Options to display a dialog box with options for the Viewer, linked files, embedded fonts , and passwords that restrict opening or modifying the presentation.
Click Copy to Folder to package the presentation to a folder on a com-puter or network. Click Copy to CD to package the presentation to a blank, writable CD in a writable CD drive. Click Close to remove the dialog box without packaging the presentation.
Practice: Guest House PromoPowerPoint should already be started with GUEST HOUSE open from the last practice.
!! PACKAGE THE PRESENTATION TO A FOLDERa. Click j Publish j Package for CD. A dialog box is displayed.
b. Select OK. A dialog box is displayed.
c. Select Options. A dialog box is displayed. Set the options as shown:
d. In the Password to modify each presentation box, type a password you can remember.
1. Select OK. The Confirm Password dialog box is displayed.
2. In the Reenter the password required to modify files box, type the same password and then select OK.
TIP Refer to Chapter 1 for information on creating a strong password.
TIP WAV files larger than 100 KB, sound files in any format other than WAV, and movies and animated GIFs are linked by default and need to be included when packaging for distribution.
SAMPLE
552 Chapter 13 Advanced PowerPoint Features
e. Select Copy to Folder. A dialog box is displayed.
f. In the Folder name box type: Guest House Promo
g. Select Browse to choose the location where you want the folder.
h. Select OK. A dialog box is displayed.
i. Select Yes to include linked files. A folder is created and the files are copied.
j. Select Close. The presentation, complete with viewer, fonts, and the linked movie, is in a folder and protected from modifications by a password.
@@ CLOSE GUEST HOUSE
Hyperlinks on a Slide
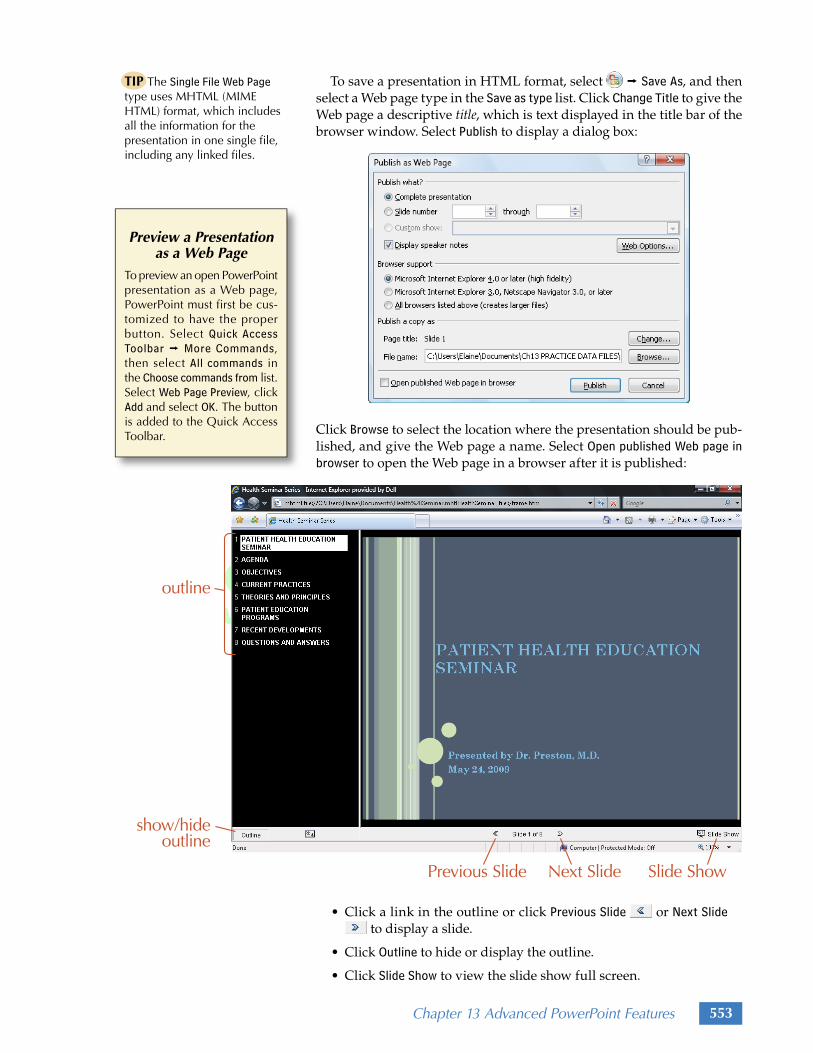
When a Web site address is typed in a slide, PowerPoint automatically turns it into a different colored, underlined hyperlink. Blue is the default color, but may be different depending on the applied theme. A reader viewing the presentation on screen can click the link, which displays the Web page in a browser window if there is an Internet connection.
PowerPoint also recognizes an e-mail address and formats it as different colored, underlined characters. An e-mail address on a slide is clicked to display a new e-mail message window.
The Insert Hyperlink dialog box contains options for inserting a hyperlink into a document. To use this dialog box, click Insert j Hyperlink. Select a type of link from the Link to list and then type a label in the Text to display box. For Web page links, type a URL in the Address box. For an e-mail address link, type an address in the E-mail address box. The label is placed at the insertion point, but the URL will be followed when the reader clicks the label.
To change the hyperlink back to regular text, right-click the link and then select Remove Hyperlink from the menu. The text remains, but is no longer a hyperlink.
Creating an HTML File and Publishing a Presentation to the Web HTML is the file format for documents viewed using a browser, such as documents on the Web. A presentation in HTML format is more versatile because PowerPoint is not needed to view it, just a browser, such as Internet Explorer. Publishing a presentation means to place a copy of the presentation in HTML format on a Web server or in a folder.
removing a hyperlink
Hyperlink to a SlideTo create a hyperlink from selected text to another slide, click Insert j Hyperlink. The Insert Hyperlink dialog box includes the Place in This Document options for inserting a hyperlink to another slide. Click a slide in the dialog box to select the destination for the hyperlink.
SAMPLE
Chapter 13 Advanced PowerPoint Features 553
To save a presentation in HTML format, select j Save As, and then select a Web page type in the Save as type list. Click Change Title to give the Web page a descriptive title, which is text displayed in the title bar of the browser window. Select Publish to display a dialog box:
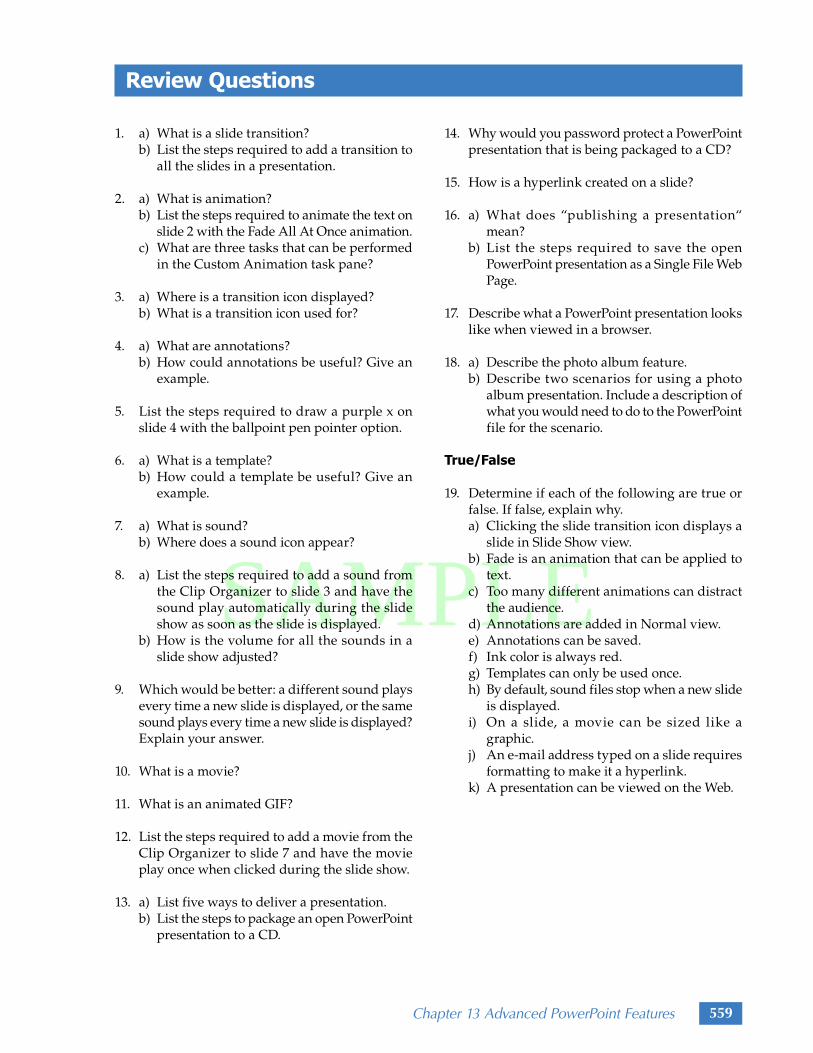
Click Browse to select the location where the presentation should be pub-lished, and give the Web page a name. Select Open published Web page in browser to open the Web page in a browser after it is published:
• Click a link in the outline or click Previous Slide or Next Slide to display a slide.
• Click Outline to hide or display the outline.
• Click Slide Show to view the slide show full screen.
Preview a Presentation as a Web Page
To preview an open PowerPoint presentation as a Web page, PowerPoint must first be cus-tomized to have the proper button. Select Quick Access Toolbar j More Commands, then select All commands in the Choose commands from list. Select Web Page Preview, click Add and select OK. The button is added to the Quick Access Toolbar.
TIP The Single File Web Page type uses MHTML ( MIME HTML) format, which includes all the information for the presentation in one single file, including any linked files.

SAMPLE
554 Chapter 13 Advanced PowerPoint Features
Publishing the presentation as a single file Web page creates a copy of the file with the extension .mht. To view the published presentation in a Web browser, open a browser, such as Internet Explorer and select File j Open. Transitions and animations are not included in the presentation when viewed in a Web browser, but are displayed when Slide Show is clicked to view the slide show full screen.
Creating a Photo Album
PowerPoint has a photo album feature that is used to create a slide show of pictures. To create a photo album presentation, click Insert j Photo Album j New Photo Album which displays a dialog box. Select File/Disk to locate and select a picture file. Add pictures one by one to the list in the dialog box. After selecting a layout in the Picture layout list, select Captions below ALL pictures to add captions to every slide. A theme can be applied in the Theme box and photos can be adjusted using buttons below the Preview. Click Create to create a new presentation with a title slide and pictures on additional slides. The presentation can be formatted like any other presen-tation. The photo album presentation can be packaged to a folder or CD to distribute, or published to the Web or another computer for viewing.
To edit a photo album presentation, click Insert j Photo Album j Edit Photo Album which displays a dialog box of options.
Practice: Alaska PhotosPowerPoint should already be started.
!! CREATE A PHOTO ALBUMa. Select Insert j Photo Album j New Photo Album. A dialog box is displayed.
b. Select File/Disk. A dialog box is displayed.
1. Navigate to AK BEAR, which is a data file for this text, and select it.
2. Select Insert. The picture is displayed in the preview and the file name is added to the Pictures in album list.
c. Select File/Disk. A dialog box is displayed.
1. Navigate to AK CARIBOU, which is a data file for this text, and select it.
2. Select Insert. The picture is added.
d. Use File/Disk to add three more pictures to the album:
AK OTTER
AK SALMON
AK SHEEP
TIP When captions are added to all the slides, the placeholder contains the file name of the photo by default.
editing a photo album

SAMPLE
Chapter 13 Advanced PowerPoint Features 555
e. In the Picture layout list, select 1 picture.
f. Click Create. After a few seconds a new presentation is created with a title slide and a slide for each picture. Slide 1 is displayed in Normal view.
@@ FORMAT THE PRESENTATION AND ADD A HYPERLINKa. In the Slides tab, select slide 6 and press the Delete key. Slide 6 is deleted.
b. Display slide 1, and change the text Photo Album to: Alaska Wildlife
c. On slide 1, change the text below the title to the following, replacing Name with your name: Photography by Name
d. Place the insertion point at the end of the your name and press Enter.
e. Type: Alaska Tours www.Lpdatafiles.com/tours.htm
f. Type a space. The Web site address turns blue and underlined.
g. Click Design j More Themes j Foundry. The Foundry theme is applied.
## ADD CAPTIONS TO THE ENTIRE PRESENTATIONa. Click Insert j Photo Album j Edit Photo Album. A dialog box is displayed.
1. Select the Captions below ALL pictures check box.
2. Select Update.
b. Display slide 2. The file name of the picture is the default caption.
c. Change the text under the photo to: Grizzly Bear
d. Display slide 3 and change the text under the photo to: Male Caribou
e. Display slide 4 and change the text under the photo to: Sea Otter
f. Display slide 5 and change the text under the photo to: Pacific Salmon
$$ SAVE THE PRESENTATION AND VIEW THE SLIDE SHOW, AND PRINT A COPYa. Save the file naming it Alaska Photos.
b. Click View j Slide Show. The presentation is started with slide 1.
c. This step requires a browser and Internet access. If either of these are not available, then skip this step.
1. Press and hold the Ctrl key and then click www.Lpdatafiles.com/tours.htm. A browser window is opened and the Web site displayed.
2. Close the browser window.
d. View the entire presentation and then return to the PowerPoint window.
%% PUBLISH THE PRESENTATIONa. Select j Save As. A dialog box is displayed.
b. In the Save as type box, select Single File Web Page.
c. Select Change Title. A dialog box is displayed.
1. In the Page title box type: Alaska Photos
2. Select OK.
d. Select Publish. A dialog box is displayed. Select options as shown:

SAMPLE
556 Chapter 13 Advanced PowerPoint Features
e. Select Browse. A dialog box is displayed.
1. Select the appropriate location for the file to be saved.
2. Select OK.
f. Select Publish. A browser window opens and the presentation is displayed.
g. Click the link on slide 1. The destination is displayed in the browser window.
h. Close the browser window. The presentation is again displayed.
i. View the presentation using the links in the outline or click Previous Slide and Next Slide at the bottom of the window.
j. Close the browser window when finished.
^̂ SAVE, PRINT, AND CLOSE THE PRESENTATIONa. Save the modified Alaska Photos.
b. Print a copy of the presentation as Handouts with 6 slides per page.
c. Close Alaska Photos.
d. Quit PowerPoint.
Chapter Summary This chapter discussed features that enhance PowerPoint presenta-tions and methods for distributing a presentation. Slide transitions and animations affect the way slides appear during a slide show and the way items move onto a slide. A professional presentation usually has one type of slide transition and animation applied to the entire presentation. Slide transitions and animations are added using the Animations tab and can be previewed in Normal view without viewing the slide show. The Custom Animation task pane includes options for formatting animations.
Annotations are notes or markings made on a slide that help the audi-ence better understand the content. During a slide show, the speaker can add annotations by drawing and highlighting on slides. The annotations can be saved with the presentation or removed when the slide show is ended.

SAMPLE
Chapter 13 Advanced PowerPoint Features 557
A PowerPoint template includes formatting and elements for presen-tations that need to be created over and over again. A template usually includes customized layouts, placeholders, and additional changes. Pre-designed templates are also accessible through PowerPoint.
Sound files and movie files can be added to a slide using the Insert tab. Sounds and movies are played during a slide show and should be appropriate for the topic and enhance a presentation without annoying the audience.
Delivering a presentation refers to the location and manner in which the audience experiences the presentation. A PowerPoint presentation need to be packaged with the associated files to be moved to the location where it will be delivered. Presentations can be copied to a CD or to a folder on a hard disk.
When a Web site address or e-mail address is typed in a slide, PowerPoint automatically turns it into a different colored, underlined hyperlink. Blue is the default color, but may be different depending on the applied theme. Clicking the link displays the Web page in a browser window or an e-mail message window.
A presentation in HTML format can be viewed in a browser instead of in PowerPoint, such as Internet Explorer. Publishing a presentation means to place a copy of the presentation in HTML format on a Web server or in a folder.
The photo album feature is used to quickly create a slide show of pic-tures. A photo album presentation can be created using the Insert tab and then packaged to a folder or CD to distribute, or published to the Web or another computer for viewing.
Vocabulary
Animated GIF A file with several graphics that display in sequence and appear animated.
Animation A visual effect that refers to the way items move.
Annotations Markings made on a slide that help the audience better understand the content.
Deliver a presentation The location and manner in which the audience experiences the presentation.
HTML The file format for documents viewed using a browser, such as documents on the Web.
Movie A digital video file from various sources, including digital cameras or illustration software.
Publishing a presentation Placing a copy of the presentation in HTML format on a Web server or in a folder.
Slide transition The way one slide changes to the next in Slide Show view.
Sound An audio file that can be added to a slide and played during a slide show.
Template A master presentation that includes the basic formatting and elements for presentations that need to be created over and over again.
Title Text in the title bar of the browser window.

SAMPLE
558 Chapter 13 Advanced PowerPoint Features
PowerPoint Commands
Animate Displays a list of animations. Found on the Animations tab.
Arrange All Displays all open presentations at the same time. Found on the View tab.
Arrow Changes the pointer to an arrow during a slide show. Found in the Pointer Options submenu displayed by right-clicking a slide during a slide show.
Ballpoint Pen Draws a thin line on a slide during a slide show. Found in the Pointer Options submenu displayed by right-clicking a slide during a slide show.
Custom Animation Displays the Custom Animation task pane. Found on the Animations tab.
Edit Photo Album Displays a dialog box used to edit a photo album presentation. Found in Insert j Photo Album.
Erase All Ink on Slide Removes all the annotations on a slide. Found in the Pointer Options submenu displayed by right-clicking a slide during a slide show.
Eraser Removes annotations when the pointer is dragged. Found in the Pointer Options submenu displayed by right-clicking a slide during a slide show.
Felt Tip Pen Draws a thick line on the slide when the pointer is dragged. Found in the Pointer Options submenu displayed by right-clicking a slide during a slide show.
Hide During Show Hides the sound icon during a slide show. Found on the Options tab.
Highlighter Draws a very wide band on the slide when the pointer is dragged. Found in the Pointer Options submenu displayed by right-clicking a slide during a slide show.
Hyperlink Displays a dialog box used to create a hyperlink. Found on the Insert tab.
Ink Color Changes the color used to draw annotations. Found in the Pointer Options submenu displayed by right-clicking a slide during a slide show.
Loop Until Stopped Formats a sound or movie to play continuously until the next slide is displayed during a slide show. Found on the Options tab.
Movie from Clip Organizer Displays the Clip Art task pane with a list of movie files. Found in Insert j Movie.
Movie from File Displays a dialog box with a list of movie files. Found in Insert j Movie.
New Photo Album Displays a dialog box used to create a photo album presentation. Found in Insert j Photo Album.
Package for CD Displays a dialog box used to pack-age an open PowerPoint presentation. Found in j Publish.
Play Full Screen Fills the screen with the movie when it plays during the slide show. Found on the Options tab.
Play Movie Displays a list of options for playing a movie during the slide show. Found on the Options tab.
Play Sound Displays a list of options for playing sound during the slide show. Found on the Options tab.
Pointer Options Displays a submenu of commands for making annotations. Found in the menu displayed by right-clicking a slide during a slide show.
Preview Plays the selected sound or movie on a slide once. Found on the Options tab.
Remove Hyperlink Changes the selected hyperlink to regular text. Found in the menu displayed by right-clicking a hyperlink.
Save As Displays a dialog box used to save a pre-sentation as a template or an HTML file. Found in the menu.
Slide Show Volume Adjusts the overall volume for the slide show. Found on the Options tab.
Sound from Clip Organizer Displays the Clip Art task pane with a list of sound files. Found in Insert j Sound.
Sound from File Displays a dialog box with a list of sound files. Found in Insert j Sound.
Transition Sound Displays a list of options that affect the sound played during a slide transition. Found on the Animations tab.
Transition Speed Displays a list of options that affect how fast a slide transition happens. Found on the Animations tab.
SAMPLE
Chapter 13 Advanced PowerPoint Features 559
Review Questions
14. Why would you password protect a PowerPoint presentation that is being packaged to a CD?
15. How is a hyperlink created on a slide?
16. a) What does “publishing a presentation“ mean?
b) List the steps required to save the open PowerPoint presentation as a Single File Web Page.
17. Describe what a PowerPoint presentation looks like when viewed in a browser.
18. a) Describe the photo album feature. b) Describe two scenarios for using a photo
album presentation. Include a description of what you would need to do to the PowerPoint file for the scenario.
True/False
19. Determine if each of the following are true or false. If false, explain why.
a) Clicking the slide transition icon displays a slide in Slide Show view.
b) Fade is an animation that can be applied to text.
c) Too many different animations can distract the audience.
d) Annotations are added in Normal view. e) Annotations can be saved. f) Ink color is always red. g) Templates can only be used once. h) By default, sound files stop when a new slide
is displayed. i) On a slide, a movie can be sized like a
graphic. j) An e-mail address typed on a slide requires
formatting to make it a hyperlink. k) A presentation can be viewed on the Web.
1. a) What is a slide transition? b) List the steps required to add a transition to
all the slides in a presentation.
2. a) What is animation? b) List the steps required to animate the text on
slide 2 with the Fade All At Once animation. c) What are three tasks that can be performed
in the Custom Animation task pane?
3. a) Where is a transition icon displayed? b) What is a transition icon used for?
4. a) What are annotations? b) How could annotations be useful? Give an
example.
5. List the steps required to draw a purple x on slide 4 with the ballpoint pen pointer option.
6. a) What is a template? b) How could a template be useful? Give an
example.
7. a) What is sound? b) Where does a sound icon appear?
8. a) List the steps required to add a sound from the Clip Organizer to slide 3 and have the sound play automatically during the slide show as soon as the slide is displayed.
b) How is the volume for all the sounds in a slide show adjusted?
9. Which would be better: a different sound plays every time a new slide is displayed, or the same sound plays every time a new slide is displayed? Explain your answer.
10. What is a movie?
11. What is an animated GIF?
12. List the steps required to add a movie from the Clip Organizer to slide 7 and have the movie play once when clicked during the slide show.
13. a) List five ways to deliver a presentation. b) List the steps to package an open PowerPoint
presentation to a CD.

SAMPLE
560 Chapter 13 Advanced PowerPoint Features
Exercises
Exercise 1 öö ——————————————————— Maple TreesThe Maple Trees presentation was created in Chapter 12, Exercise 1. Open Maple Trees and complete the following steps:
a) Apply the Fly In (By 1st Level Paragraphs) animation to all the slides.
b) Apply the Dissolve slide transition to all the slides.
c) Save the modified Maple Trees.
d) Save the presentation as a single file web page and then view and print the Web page.
Exercise 2 öö —————————————— Winter Trip OrientationThe Winter Trip Orientation presentation was created in Chapter 12, Exercise 2. Open Winter Trip Orientation and complete the following steps:
a) Apply the Fade (By 1st Level Paragraphs) animation to all the slides, and change the speed of the animation to Very Fast.
b) Apply the Fade Smoothly slide transition to all the slides.
c) On slide 2, add a fourth bulleted item with text and a hyperlink:
• Check the weather: www.weather.com
d) Save the modified Winter Trip Orientation.
e) Print the presentation so that three slides with lines for notes are printed on each page. Include a footer with your name.
Exercise 3 öö ———————————————————— CatsharksThe Catsharks presentation was created in Chapter 12, Exercise 3. Open Catsharks and complete the following steps:
a) Apply the Blinds custom animation to all the slides.
b) Apply the Wipe Left slide transition to all the slides.
c) On slide 1, add the MEOW sound, which is a data file for this text. Position the sound icon in the upper-right corner of the slide. Format the sound to automatically play once when the slide is displayed.
d) Save the presentation naming it: Catsharks
e) Print the presentation so that all the slides are printed on one page. Include a footer with your name.

SAMPLE
Chapter 13 Advanced PowerPoint Features 561
Exercise 4 ————————————————Presentation SoftwareThere are other presentation applications in addition to Microsoft Office PowerPoint 2007. Use the Internet and library to research and compare the cost and features of three other presentation programs that are currently available.
a) Create a new presentation and modify it to include a title slide and at least one slide for each researched presentation program or one slide for each feature. Include pictures if possible.
b) Include a hyperlink to each presentation program’s home page.
c) Save the presentation naming it: Presentation Software
d) Apply an appropriate theme to the presentation.
e) Apply the Fly In animation to the bulleted items on all the slides.
f) Apply the Fade Smoothly slide transition to all the slides.
g) Add a slide at the end of the presentation with notes about when each presentation program would be best suited to be used. Include notes in the Notes pane that explain your findings.
h) Save the modified Presentation Software.
i) Print the presentation so that six slides are printed on each page, with a footer that includes your name.
j) Print the last slide with notes in Notes Pages view.
Exercise 5 ——————————————————Digital Projectors Digital projectors are commonly used in classrooms and in business to project presentations onto a screen. Common features that vary between projectors are:
Brightness The greater the brightness, the farther the projector can be from the screen. Lumens is the unit used to express brightness.
Keystone Correction A keystone effect refers to one side to the projected image being larger that the other side. Keystone effect usually happens when the projector is tilted. Some projectors have a feature that corrects the keystone effect.
Lamps The lamp is the bulb that provides light in the projector. Replacement lamps vary by cost and life (how long they last).
Display Technology Two of the most common display technologies are LCD and DLP.
Use the Internet and library to research and compare the cost and features of three digital projectors.
a) Create a new presentation and modify it to include a title slide and at least one slide for each researched projector or one slide for each projector feature. Include pictures if possible.
b) Include a hyperlink to the home page of each company that produces the projectors.
c) Save the presentation naming it: Digital Projectors
d) Apply the Opulent theme and then apply the Office colors to the presentation.
e) Apply the Blinds animation to the bulleted items on all the slides and then the Fade Through Black slide transition to all the slides.

SAMPLE
562 Chapter 13 Advanced PowerPoint Features
f) Save the modified Digital Projectors.
g) Print the presentation so that six slides are printed on each page, with a footer that includes your name.
h) Save the presentation as a single file web page and then view and print the Web page.
Exercise 6 —————— Presentation Delivery, Presentation RubricChoose one of the ways to deliver a presentation discussed earlier in this chapter and make a list of all the technology needed to deliver a presentation using that method. For example:
A live speaker in one location presents to audience members in other locations using collaborative meeting software such as Microsoft Office Live Meeting. Each audience member views the presentation on a computer at their location while listening to the speaker lecture or narrate. Everyone in the meeting sees the same presentation and can communicate with each other.
The technology for this method needed would be collaborative meeting software, and computers with speakers and microphones.
Use the Internet and library to research and compare the cost and features of the technology for the delivery method you chose.
a) Create a new presentation and modify it to include a title slide and at least one slide for each researched technology. Include notes for each slide that expand on the points on the slide.
b) Save the presentation naming it: Presentation Delivery
c) Apply an appropriate design template to the presentation.
d) Apply the Fly In animation to the bulleted items on all the slides and then the Wipe Down slide transition to all the slides.
e) Add a slide to the end of the presentation, with the words The End. Add a sound to the slide from the Clip Organizer called “Claps Cheers” to the last slide. Format the sound to automatically play once when the slide is displayed.
f) Save the modified Presentation Delivery.
g) Print the presentation so that the notes are included on each page, with a footer that includes your name.
h) Schedule a time to give a practice presentation to an audience of your peers. Before the scheduled practice presentation, use Word to create a rubric that can be used by your peers for evaluating your presentation. Save the document naming it Presentation Rubric. Some criteria are listed below, include at least one more of your own. Be sure to include a scale where appropriate:
• Were the slides appropriately designed and easy to read?
• Did the presentation appear to be well-researched and did the speaker show an understanding of the topic?
• Were the speaker’s mannerisms and voice level appropriate?
If you have already created a Presentation Rubric in Chapter 12 Exercises 9, 10, or 11, you can use the same rubric in this exercise.

SAMPLE
Chapter 13 Advanced PowerPoint Features 563
i) Prepare handouts for your practice presentation. Print the handouts and a copy of the rubric for each member of your audience.
j) Give the practice presentation. After the presentation, collect the rubrics. Based on your peer critique, make improvements to your presentation. In Word, write a paragraph about what you changed and why the change is an improvement. Print a copy of the document.
Exercise 7 ————————————————————Scuba PhotosThe scuba club wants to see a slide show of photos from a recent dive trip.
a) Create a new photo album in the 1 picture Picture layout. Use the following photos, which are data files for this text:
SCUBA ANEMONESCUBA BUTTERFLY FISHSCUBA CORALSCUBA GRAY ANGELSCUBA SPONGES
b) Save the presentation naming it Scuba Photos.
c) Change the title on slide 1 to Photos from Pompano Beach.
d) On slide 1, change the text below the title to the following, replacing Name with your name: Photography by Name
e) Add the BUBBLES sound, which is a data file for this text, to each slide that has a photo. Set the sound to not be visible during the slide show, and to play once on each slide as it is displayed.
f) Change the background of all the slides to a dark blue.
g) Apply the Wipe Down slide transition to all the slides.
h) Add a caption to all the slides, and then remove the word SCUBA from each caption.
i) Save the modified Scuba Photos.
j) Print the presentation so that all the slides are printed on one page, with a footer that includes your name.
k) Package the presentation to a folder (or a CD if possible).
Exercise 8 ———————————————— Technology LectureChapter 1 in the text discussed a variety of technology-related topics. Expand your knowledge by choosing one of the following topics and researching it using books, magazines, or the Internet:
• Ergonomics• IT Careers• The history of computers• Viruses• Computer privacy issues• Networks• Communication etiquette• Operating systems
SAMPLE
564 Chapter 13 Advanced PowerPoint Features
a) Develop a well-designed PowerPoint presentation to document your research.
b) Include speaker notes for each slide.
c) Save the presentation naming it Technology Lecture.
d) Create handouts with six slides printed on each page. Include a footer with your name centered.
e) Give the presentation to the class. Include handouts for the audience.