by dick morland this is a photo essay describing the...
TRANSCRIPT

1
By Dick Morland [email protected] This is a photo essay describing the construction of the Mecca Hoist. The bill of materials is on page 17 Mecca Hoist in Action starts on page 18 This entire assembly is clearly shown in pictures 26 & 27.
Photo 26 This entire assembly is clearly shown in pictures 26 & 27.

2
Photo 27 This entire assembly is clearly shown in pictures 26 & 27.

3
The angle iron feet & rectangular tubing uprights are clearly shown in pictures 18, 19, 23, & 24.
Photo 18 The angle iron feet & rectangular tubing uprights are clearly shown in pictures 18, 19, 23, & 24.

4
Photo 19 The angle iron feet & rectangular tubing uprights are clearly shown in pictures 18, 19, 23, & 24.

5
Photo 23 The angle iron feet & rectangular tubing uprights are clearly shown in pictures 18, 19, 23, & 24.

6
Photo 24 The angle iron feet & rectangular tubing uprights are clearly shown in pictures 18, 19, 23, & 24.

7
The horizontal crossbeam assembly is clearly shown in pictures 20, 21, 22, & 25.
Photo 20 The channel iron end pieces that insert into the uprights are clearly seen in pictures 20, 21, & 22. The horizontal crossbeam assembly is clearly shown in pictures 20, 21, 22, & 25. The trolley is clearly seen in pictures 20, 22, 25, & 28.

8
Photo 21 The channel iron end pieces that insert into the uprights are clearly seen in pictures 20, 21, & 22. The horizontal crossbeam assembly is clearly shown in pictures 20, 21, 22, & 25.

9
Photo 22 The channel iron end pieces that insert into the uprights are clearly seen in pictures 20, 21, & 22. The horizontal crossbeam assembly is clearly shown in pictures 20, 21, 22, & 25. The trolley is clearly seen in pictures 20, 22, 25, & 28.
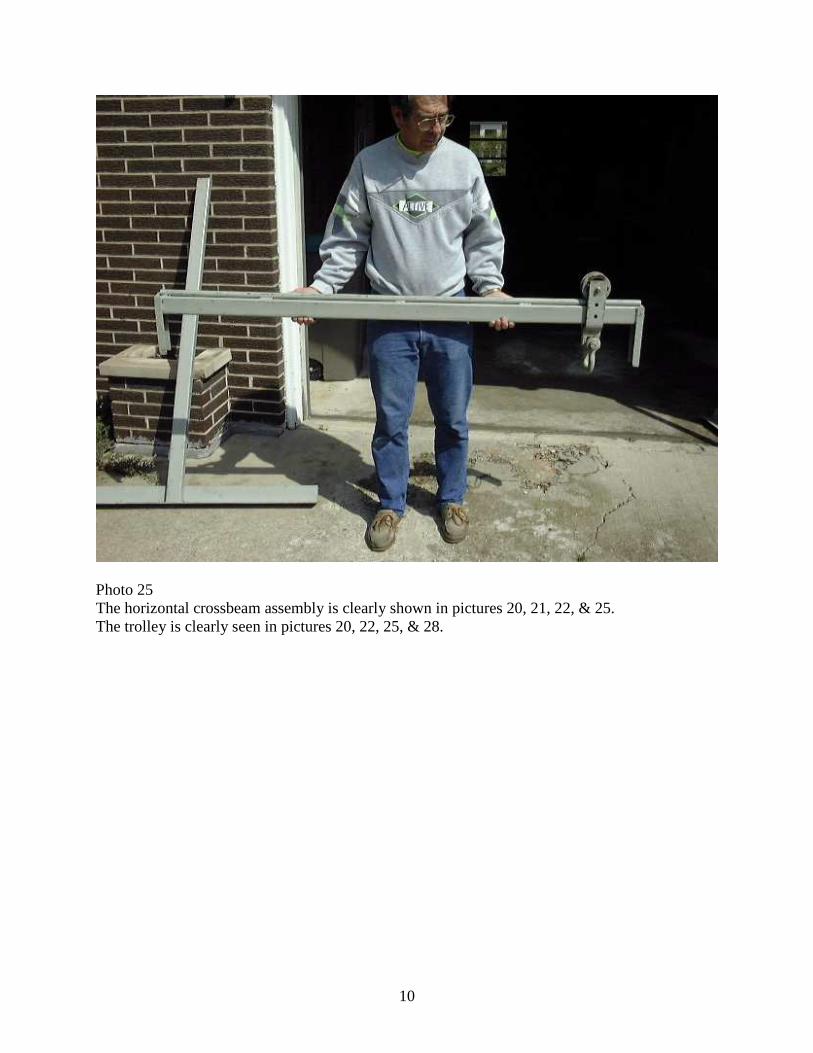
10
Photo 25 The horizontal crossbeam assembly is clearly shown in pictures 20, 21, 22, & 25. The trolley is clearly seen in pictures 20, 22, 25, & 28.

11
The 7/8” diameter heavy wall steel tubing that reinforces the horizontal crossbeam and also serves to track the trolley is seen in pictures 22, 25, & 28.
Photo 22 The trolley is clearly seen in pictures 20, 22, 25, & 28. The 7/8” diameter heavy wall steel tubing that reinforces the horizontal crossbeam and also serves to track the trolley is seen in pictures 22, 25, & 28.

12
Photo 25 The trolley is clearly seen in pictures 20, 22, 25, & 28. The 7/8” diameter heavy wall steel tubing that reinforces the horizontal crossbeam and also serves to track the trolley is seen in pictures 22, 25, & 28.

13
Photo 28 The trolley is clearly seen in pictures 20, 22, 25, & 28. The 7/8” diameter heavy wall steel tubing that reinforces the horizontal crossbeam and also serves to track the trolley as seen in pictures 22, 25, & 28.

14
A safety chain during usage is seen in picture 14.
Photo 14 A safety chain during usage is seen in picture 14.

15
Seen in pictures 12 & 16 is a screwdriver wedged under the trolley to prevent rollback of the hoisted engine & transmission. I plan on tapping the lower holes on each side of the trolley so we can use a bolt as a brake.
Photo 12 Seen in pictures 12 & 16 is a screwdriver wedged under the trolley to prevent rollback of the hoisted engine & transmission. I plan on tapping the lower holes on each side of the trolley so we can use a bolt as a brake.

16
Photo 16 Seen in pictures 12 & 16 is a screwdriver wedged under the trolley to prevent rollback of the hoisted engine & transmission. I plan on tapping the lower holes on each side of the trolley so we can use a bolt as a brake. Design of the trolley is optional, but to ensure you can clear the boat deck with the load, both the trolley extension below the crossbar and the closed length of the hoist should be kept to a minimum. Always check to make sure you can lift high enough before starting an engine / transmission lift. Dick Morland [email protected]

17
Mecca Engine Hoist, Bill of Materials
Feet (2), 3" x 3" x 3/16" angle iron, 48" long each Vertical uprights (2), 2 1/2" x1 1/2" x 3/16" wall rectangular tubing, 60" long each Horizontal Crossbeam (1) Same rectangular tubing as above, 68" long Channel Iron ends for above (2) , 2" x 1" x 3/16", 9" long each Trolley Tubing (1), 7/8" OD thickwall tubing, 68" long
Note:
The 48” length of the two angle iron feet is calculated for a 38’
Commander. Smaller boats might require shortening one side of the
foot to center the crossbeam over the center of the engine
on a twin engine boat smaller than 38’. We recently had to shorten one
end of one foot 3” to fit a 31 Commander Express.

18
THE MECCA HOIST IN ACTION
Photo 1

19
Photo 1A
Photo 2

20
Photo 3
Photo 4

21
Photo 5
Photo 6

22
Photo 7
Photo 8

23
Photo 9
Photo 10

24
Photo 11
Photo 11A

25
Photo 13
Photo 15

26
Photo 17