bmc network automation integration guide for entuity eye of
TRANSCRIPT

www.bmc.com
BMC Network Automation Integration Guide for Entuity Eye of the Storm®
Supporting
BMC Network Automation 8.2
February 2012

Contacting BMC Software
You can access the BMC Software website at http://www.bmc.com. From this website, you can obtain information about the company, its products, corporate offices, special events, and career opportunities.
United States and Canada
Address BMC SOFTWARE INC2101 CITYWEST BLVDHOUSTON TX 77042-2827 USA
Telephone 1 713 918 8800 or1 800 841 2031
Fax 1 713 918 8000
Outside United States and Canada
Telephone +01 713 918 8800 Fax +01 713 918 8000
© Copyright 2003–2012 BMC Software, Inc.
BMC, BMC Software, and the BMC Software logo are the exclusive properties of BMC Software, Inc., are registered with the U.S. Patent and Trademark Office, and may be registered or pending registration in other countries. All other BMC trademarks, service marks, and logos may be registered or pending registration in the U.S. or in other countries. All other trademarks or registered trademarks are the property of their respective owners.
BladeLogic and the BladeLogic logo are the exclusive properties of BladeLogic, Inc. The BladeLogic trademark is registered with the U.S. Patent and Trademark Office, and may be registered or pending registration in other countries. All other BladeLogic trademarks, service marks, and logos may be registered or pending registration in the U.S. or in other countries. All other trademarks or registered trademarks are the property of their respective owners.
Linux is the registered trademark of Linus Torvalds.
Oracle and Java are registered trademarks of Oracle and/or its affiliates. Other names may be trademarks of their respective owners.
UNIX is the registered trademark of The Open Group in the US and other countries.
The information included in this documentation is the proprietary and confidential information of BMC Software, Inc., its affiliates, or licensors. Your use of this information is subject to the terms and conditions of the applicable End User License agreement for the product and to the proprietary and restricted rights notices included in the product documentation.
Restricted rights legendU.S. Government Restricted Rights to Computer Software. UNPUBLISHED -- RIGHTS RESERVED UNDER THE COPYRIGHT LAWS OF THE UNITED STATES. Use, duplication, or disclosure of any data and computer software by the U.S. Government is subject to restrictions, as applicable, set forth in FAR Section 52.227-14, DFARS 252.227-7013, DFARS 252.227-7014, DFARS 252.227-7015, and DFARS 252.227-7025, as amended from time to time. Contractor/Manufacturer is BMC SOFTWARE INC, 2101 CITYWEST BLVD, HOUSTON TX 77042-2827, USA. Any contract notices should be sent to this address.

Customer support
You can obtain technical support by using the BMC Support Central website or by contacting Customer Support by telephone or e-mail. To expedite your inquiry, see “Before contacting BMC.”
Support website
You can obtain technical support from BMC 24 hours a day, 7 days a week at http://www.bmc.com/support. From this website, you can
■ read overviews about support services and programs that BMC offers■ find the most current information about BMC products■ search a database for issues similar to yours and possible solutions■ order or download product documentation■ download products and maintenance■ report an issue or ask a question■ subscribe to receive proactive e-mail alerts when new product notices are released■ find worldwide BMC support center locations and contact information, including e-mail addresses, fax numbers, and
telephone numbers
Support by telephone or e-mail
In the United States and Canada, if you need technical support and do not have access to the web, call 1 800 537 1813 or send an e-mail message to [email protected]. (In the subject line, enter SupID:<yourSupportContractID>, such as SupID:12345). Outside the United States and Canada, contact your local support center for assistance.
Before contacting BMC
Have the following information available so that Customer Support can begin working on your issue immediately:
■ product information
— product name— product version (release number)— license number and password (trial or permanent)
■ operating system and environment information
— machine type— operating system type, version, and service pack or other maintenance level such as PUT or PTF— system hardware configuration— serial numbers— related software (database, application, and communication) including type, version, and service pack or
maintenance level
■ sequence of events leading to the issue
■ commands and options that you used
■ messages received (and the time and date that you received them)
— product error messages— messages from the operating system, such as file system full— messages from related software
3

4 BMC Network Automation Integration Guide / Entuity Eye of the Storm

ContentsAbout this book 7
Related publications . . . . . . . . . . . . . . . . . . . . . . . . . . . . . . . . . . . . . . . . . . . . . . . . . . . . . . . 8Conventions . . . . . . . . . . . . . . . . . . . . . . . . . . . . . . . . . . . . . . . . . . . . . . . . . . . . . . . . . . . . . . 9
Typographical conventions . . . . . . . . . . . . . . . . . . . . . . . . . . . . . . . . . . . . . . . . . . . . . . 9Home and data directories . . . . . . . . . . . . . . . . . . . . . . . . . . . . . . . . . . . . . . . . . . . . . . 9
Chapter 1 Configuring Eye of the Storm 11
General settings and assumptions. . . . . . . . . . . . . . . . . . . . . . . . . . . . . . . . . . . . . . . . . . . 12Syslog considerations . . . . . . . . . . . . . . . . . . . . . . . . . . . . . . . . . . . . . . . . . . . . . . . . . . 12Web server port considerations. . . . . . . . . . . . . . . . . . . . . . . . . . . . . . . . . . . . . . . . . . 13Display names and host names . . . . . . . . . . . . . . . . . . . . . . . . . . . . . . . . . . . . . . . . . . 13
Device import from EYE . . . . . . . . . . . . . . . . . . . . . . . . . . . . . . . . . . . . . . . . . . . . . . . . . . . 14Method 1—single-step import into BMC Network Automation . . . . . . . . . . . . . 14Method 2—export from EYE followed by import into BMC Network Automation
. . . . . . . . . . . . . . . . . . . . . . . . . . . . . . . . . . . . . . . . . . . . . . . . . . . . . . . . . . . . . . . . . . . 15Importing EYE views into BMC Network Automation Auto-Groups . . . . . . . . . 17
EYE extensible menus for BMC Network Automation . . . . . . . . . . . . . . . . . . . . . . . . . 19Configuration . . . . . . . . . . . . . . . . . . . . . . . . . . . . . . . . . . . . . . . . . . . . . . . . . . . . . . . . . 19Operation . . . . . . . . . . . . . . . . . . . . . . . . . . . . . . . . . . . . . . . . . . . . . . . . . . . . . . . . . . . . 20
Notifying BMC Network Automation from EYE . . . . . . . . . . . . . . . . . . . . . . . . . . . . . . 22EYE configuration—EYE and BMC Network Automation co-located) . . . . . . . . 23EYE configuration—EYE and BMC Network Automation on separate servers . 24BMC Network Automation configuration. . . . . . . . . . . . . . . . . . . . . . . . . . . . . . . . . 26Configuring policy to correlate recent NMS event with configuration change . . 27
Notifying Eye of the Storm from BMC Network Automation . . . . . . . . . . . . . . . . . . . 33Eye of the Storm configuration . . . . . . . . . . . . . . . . . . . . . . . . . . . . . . . . . . . . . . . . . . 33BMC Network Automation configuration. . . . . . . . . . . . . . . . . . . . . . . . . . . . . . . . . 35Configuring discrepancy and compliance notification policies . . . . . . . . . . . . . . . 35Viewing BMC Network Automation events in EYE . . . . . . . . . . . . . . . . . . . . . . . . 35
Index 37
Contents 5

6 BMC Network Automation Integration Guide / Entuity Eye of the Storm

About this bookThis integration guide is designed to enable a site to integrate BMC Network Automation with the Entuity Eye of the Storm (EYE) network management product. The intended audience includes engineers and operators working in Enterprise and governmental Network Operations Centers (NOCs) and Managed Services Providers (MSPs).
This book and other product documentation are available on the BMC documentation website: https://docs.bmc.com/docs/display/BNA82/Home.
NOTE Access to this site requires a BMC Customer Support user name and password. You can register online at http://www.bmc.com/support.
About this book 7

Related publications
Related publicationsThe following related publications supplement this book and the online Help:
Table 1 Related publications
Document Description
BMC Network Automation documentation website: https://docs.bmc.com/docs/display/BNA82/Home.
Provides system requirements and a concise overview of all new product features, enhancements, open issues, and corrected problems. .
BMC Network Automation Quick Start Guide
Provides a high-level overview of the network change and configuration management (NCCM) solution. This guide is intended for users who are starting to learn how to use the system.
BMC Network Automation User Guide
Provides complete descriptions of how to use the network change configuration management (NCCM) solution.
BMC Network Automation Installation Guide
Provides detailed deployment considerations, installation prerequisites and procedures, and installation worksheets for the Server and Device Agents. This guide also describes how to start a client session.
BMC Network Automation Administrator Guide
Describes system files and scripts, database backup and restore procedures, device import formats from various management systems, URLs for launching reports and span actions, and troubleshooting tips.
BMC Network Automation Developer Guide
Describes how to develop and administer Web Service client applications, XML device adapters, and custom span actions.
BMC Network Automation Integration Guide for HP Network Node Manager
Provides a detailed reference for learning how the solution is integrated with the HP Network Node Manager (NNM).
BMC Continuous Compliance for Network Automation Solution Getting Started Guide
Provides a detailed reference for learning the solution as certified and integrated with the BMC Remedy ITSM Change Management system and with BMC Atrium CMDB.
BMC Decision Support – Network Automation User Guide
Provides a detailed reference for learning how to install, configure, and use BMC Decision Support – Network Automation to produce reports about the performance of BMC Network Automation and managed devices.
8 BMC Network Automation Integration Guide / Entuity Eye of the Storm

Conventions
Conventions
Typographical conventions
Unless otherwise noted, the following conventions are used in this book:
Home and data directories
The term BCAN_HOME represents the parent directory of BMC Network Automation server static files (executable and configuration files).
The default location is:
The term BCAN_DATA represents the parent directory of BMC Network Automation server dynamic data and some configuration files.
The default location is:
These directories can be changed when BMC Network Automation is installed.
Italic Variable text in path names, system messages, and code samples (for example, Host Name, IP Address).
In actual product usage, you replace these variables with real values appropriate to your environment.
Bold Window actions (for example: Save, Cancel, Enter)
Bold -> Bold Navigation of dashboard tabs and associated menu options (for example, Network -> Spans -> Devices)
Fixed pitch Code samples, command prompt sessions, and some messages
Solaris /opt/bmc/bca-networks
Linux /opt/bmc/bca-networks
Windows C:\Program Files\BMC Software\BCA-Networks
Solaris /var/bca-networks-data
Linux /var/bca-networks-data
Windows C:\BCA-Networks-Data
About this book 9

Home and data directories
The term EYE_INSTALL represents the Entuity Eye of the Storm product installation directory. For more information, see the EYE documentation.
10 BMC Network Automation Integration Guide / Entuity Eye of the Storm

C h a p t e r 1
1 Configuring Eye of the StormThis chapter presents the following topics:
General settings and assumptions. . . . . . . . . . . . . . . . . . . . . . . . . . . . . . . . . . . . . . . . . . . 12Syslog considerations . . . . . . . . . . . . . . . . . . . . . . . . . . . . . . . . . . . . . . . . . . . . . . . . . . 12Web server port considerations. . . . . . . . . . . . . . . . . . . . . . . . . . . . . . . . . . . . . . . . . . 13Display names and host names . . . . . . . . . . . . . . . . . . . . . . . . . . . . . . . . . . . . . . . . . . 13
Device import from EYE . . . . . . . . . . . . . . . . . . . . . . . . . . . . . . . . . . . . . . . . . . . . . . . . . . . 14Method 1—single-step import into BMC Network Automation . . . . . . . . . . . . . . 14Method 2—export from EYE followed by import into BMC Network Automation 15Importing EYE views into BMC Network Automation Auto-Groups . . . . . . . . . 17
EYE extensible menus for BMC Network Automation . . . . . . . . . . . . . . . . . . . . . . . . . 19Configuration . . . . . . . . . . . . . . . . . . . . . . . . . . . . . . . . . . . . . . . . . . . . . . . . . . . . . . . . . 19Operation . . . . . . . . . . . . . . . . . . . . . . . . . . . . . . . . . . . . . . . . . . . . . . . . . . . . . . . . . . . . 20
Notifying BMC Network Automation from EYE . . . . . . . . . . . . . . . . . . . . . . . . . . . . . . 22EYE configuration—EYE and BMC Network Automation co-located) . . . . . . . . 23EYE configuration—EYE and BMC Network Automation on separate servers . 24BMC Network Automation configuration. . . . . . . . . . . . . . . . . . . . . . . . . . . . . . . . . 26Configuring policy to correlate recent NMS event with configuration change . . 27
Notifying Eye of the Storm from BMC Network Automation . . . . . . . . . . . . . . . . . . . 33Eye of the Storm configuration . . . . . . . . . . . . . . . . . . . . . . . . . . . . . . . . . . . . . . . . . . 33BMC Network Automation configuration. . . . . . . . . . . . . . . . . . . . . . . . . . . . . . . . . 35Configuring discrepancy and compliance notification policies . . . . . . . . . . . . . . . 35Viewing BMC Network Automation events in EYE . . . . . . . . . . . . . . . . . . . . . . . . 35
Chapter 1 Configuring Eye of the Storm 11
General settings and assumptions
General settings and assumptions
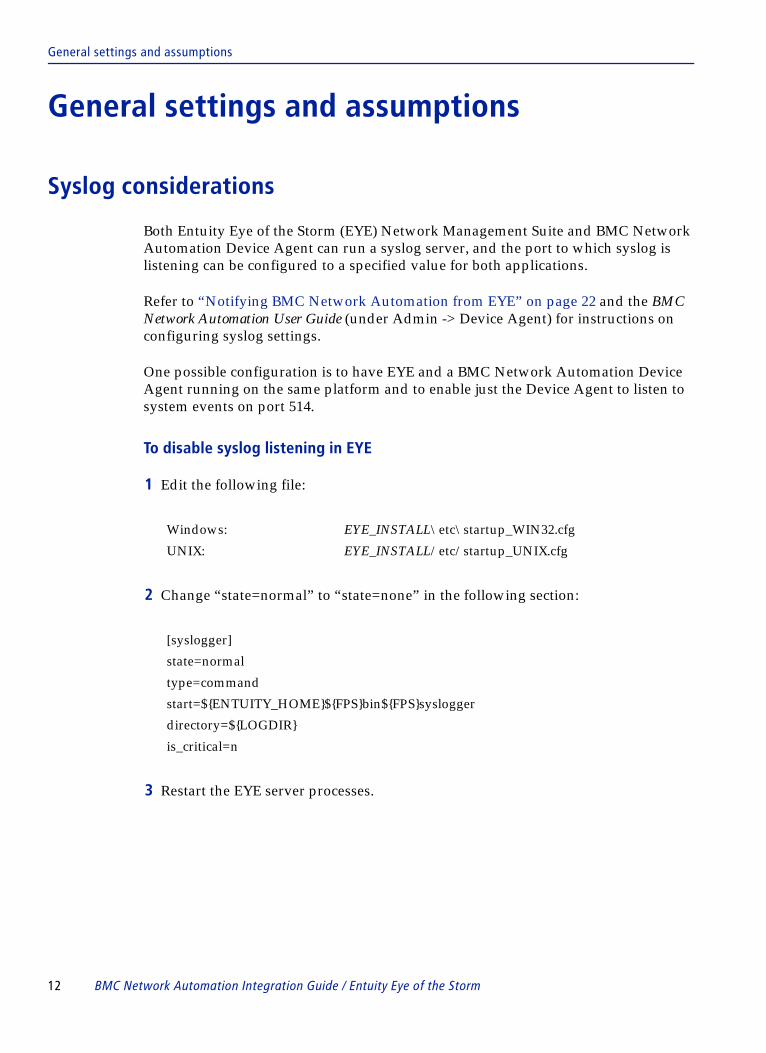
Syslog considerations
Both Entuity Eye of the Storm (EYE) Network Management Suite and BMC Network Automation Device Agent can run a syslog server, and the port to which syslog is listening can be configured to a specified value for both applications.
Refer to “Notifying BMC Network Automation from EYE” on page 22 and the BMC Network Automation User Guide (under Admin -> Device Agent) for instructions on configuring syslog settings.
One possible configuration is to have EYE and a BMC Network Automation Device Agent running on the same platform and to enable just the Device Agent to listen to system events on port 514.
To disable syslog listening in EYE
1 Edit the following file:
2 Change “state=normal” to “state=none” in the following section:
3 Restart the EYE server processes.
Windows: EYE_INSTALL\etc\startup_WIN32.cfg
UNIX: EYE_INSTALL/etc/startup_UNIX.cfg
[syslogger]
state=normal
type=command
start=${ENTUITY_HOME}${FPS}bin${FPS}syslogger
directory=${LOGDIR}
is_critical=n
12 BMC Network Automation Integration Guide / Entuity Eye of the Storm

Web server port considerations
Web server port considerations
Both EYE and BMC Network Automation run web servers so if both applications are running on the same host then care should be taken not to create an HTTP and/or HTTPS port conflict.
A common configuration is to leave BMC Network Automation at its default settings of 80 (HTTP), 443 (HTTPS), and 8005 (Web Control Port) and set EYE to use 8082 (Web Port), 8080 (Tomcat Port), 18005 (Tomcat Admin Port) and 8443 (HTTPS).
To change EYE web server port settings re-run the configure program:
To change BMC Network Automation web server port settings, re-run the InstallShield program leaving all values at defaults except for the Web Server Port values.
Display names and host names
Concerning the device database in both systems, the following table describes how device name and hostname/IP address fields will be mapped during device database import into BMC Network Automation.
To check the EYE values:
1 Launch the Eye of the Storm Component Viewer and log in.
2 Expand the folders under the views (that is, Regional, Regional Infrastructure) until you get to the Devices folder.
3 Under the Devices folder you’ll find folders corresponding to your network devices.
Windows: EYE_INSTALL\install\configure
or
EYE_INSTALL\install\configure text
UNIX: EYE_INSTALL/install/configure text
EYE BMC Network Automation
Name Name
Polled IP Address Host Name/IP Address
Chapter 1 Configuring Eye of the Storm 13

Device import from EYE
4 Select a network device. Its Name will appear in the General tab which is the default tab shown. Its Polled IP Address will be next to the IP Addresses field.
To check the BMC Network Automation device values, in BMC Network Automation:
1 Choose Network -> Devices.
“Name” is listed in the Name column and “Host Name/IP Address” is listed in the Address column.
2 If you need to review more closely or change, click the Edit object, next to the device in the column called Actions.
Device import from EYEBMC Network Automation can import devices from EYE on a scheduled or on-demand basis. There are two methods for doing this: 1) Single step process involving just the import into BMC Network Automation where the import process handles the export from EYE automatically, and 2) Two step process involving an export from EYE followed by an import into BMC Network Automation.
BMC recommends method one due to its simplicity, but documents both methods in this guide.
For both methods, instructions for optionally importing and synchronizing EYE Views with BMC Network Automation Auto-Groups are provided. The Views export from EYE was added in version 4.5 of Eye of the Storm.
Method 1—single-step import into BMC Network Automation
1 Import into BMC Network Automation by doing the following:
A Log in to BMC Network Automation as sysadmin.
B Choose Admin -> Device Import -> Add.
C Enter a value for Name, for example, EYE Import.
D Optionally enter a value for Annotation but leave Enabled checked and Auto Purge and Initial Backup unchecked.
E For the Format field, select Entuity Eye of the Storm XML Format.
14 BMC Network Automation Integration Guide / Entuity Eye of the Storm

Method 2—export from EYE followed by import into BMC Network Automation
F For Source File, copy the following URL and paste. For eye-server and eye-webport, substitute the IP address or server name and web port where Eye of the Storm is running. Also, for admin:admin substitute login credentials accordingly.
G Leave Repeat Type set at Import Once.
H Ensure Import Time is set to Now.
I Leave Dynamic Menu Fields set to Accept Unknown Values.
J Click Save.
K Check the Execution Status in the Device Import Task list. You can Refresh this screen to see updates. By clicking on Successful you will be presented with the list of devices that were imported.
2 Note to automate the import process, set Repeat Type in the previous step to Daily, Weekly, or Monthly.
Method 2—export from EYE followed by import into BMC Network Automation
The command line interface is ideal for automating the EYE export process using the operating system’s scheduling utility (that is, Windows Scheduler or UNIX cron).
1 Copy the EmprisaFormat.txt file from
to
2 Run the following commands. Substitute paths and EYE login credentials accordingly.
http://eye-server:eye-webport/EOS/cgi/GenerateReport?noCreate=1&of=xml&DeviceEx.filter=all& DeviceEx.attr=name%2CdevPolledIpAddr%2CsysOid&login=admin:admin
BCAN_HOME\public\entuity
EYE_INSTALL\lib\httpd\EOS\cgi
Chapter 1 Configuring Eye of the Storm 15

Method 2—export from EYE followed by import into BMC Network Automation
3 Copy or transfer the EntuityExport.xml file from
to
4 Import into BMC Network Automation by doing the following:
A Log in to BMC Network Automation as sysadmin.
B Choose Admin -> Device Import -> Add.
C Enter a value for Name like EYE Import.
D Optionally enter a value for Annotation but leave Enabled checked and Auto Purge and Initial Backup unchecked.
E For the Format field, select Entuity Eye of the Storm XML Format.
F For Source File, enter a path and file name that match the export file you previously generated:
G Leave Repeat Type set at Import Once.
H Ensure Import Time is set to Now.
I Leave Dynamic Menu Fields set to Accept Unknown Values.
J Click Save.
K Check the Execution Status in the Device Import Task list. You can Refresh this screen to see updates. By clicking on Successful you will be presented with the list of devices that were imported.
C:\> cd EYE_INSTALL\lib\httpd\EOS\cgi
EYE_INSTALL\lib\httpd\EOS\cgi> GenerateReport.exe login=admin:admin -r < EmprisaFormat.txt > EntuityExport.xml
EYE_INSTALL\lib\httpd\EOS\cgi
BCAN_DATA\devices
BCAN_DATA\devices\EntuityExport.xml
16 BMC Network Automation Integration Guide / Entuity Eye of the Storm

Importing EYE views into BMC Network Automation Auto-Groups
Importing EYE views into BMC Network Automation Auto-Groups
Note that Eye of the Storm version 4.5 or later is required to export Views.
1 Create a BMC Network Automation multi-select dynamic field called “Views” by doing the following:
A Log in to BMC Network Automation as sysadmin.
B Choose Admin -> Dynamic Fields -> Add.
C Leave Component set to Device.
D Leave Assignment Mechanism set to User Assigned.
E Set the Value Type to Multi Select Menu.
F For Name, enter Views.
G At a minimum, enable the Auto-Group check box. This will cause BMC Network Automation to group by Eye of the Storm Views. You may choose to enable some of the other check boxes later.
H Add at least one value to the Options list (that is, “N/A” for Not Assigned). Optionally you can add all your possible Views options, or you can have BMC Network Automation populate the values automatically at import time.
I Click Save.
2 If using Method 1 for importing, follow the instructions for “Method 1—single-step import into BMC Network Automation” on page 14, but note the following:
— For Source File, copy the following URL and paste. For eye-server and eye-webport, substitute the IP address or server name and web port where Eye of the Storm is running. Also, for “login=admin%3Aadmin” substitute login credentials for admin/admin accordingly:
NOTE To automate the import/export process, set Repeat Type in the previous step to Daily, Weekly, or Monthly and schedule it to occur just after each scheduled export. Use the command in step 2 on page 15 with Windows scheduler or UNIX cron to schedule the export from EYE.
Chapter 1 Configuring Eye of the Storm 17

Importing EYE views into BMC Network Automation Auto-Groups
— When defining the device import task, leave Dynamic Menu Fields set to Accept Unknown Values if you want BMC Network Automation to discover and build out the Views automatically. If this value is set to Reject Unknown Values, then BMC Network Automation will only import Views that you defined as menu options in the Views dynamic field.
3 If using Method 2 for importing, follow the instructions for “Method 2—export from EYE followed by import into BMC Network Automation” on page 15, but note the following:
— Instead of copying EmprisaFormat.txt, copy the file, EmprisaFormatViews.txt, from
to
— When defining the device import task, leave Dynamic Menu Fields set to Accept Unknown Values if you want BMC Network Automation to discover and build out the Views automatically. If this value is set to Reject Unknown Values, then BMC Network Automation will only import Views that you defined as menu options in the Views dynamic field.
http://eye-server:eye-webport/EOS/cgi/GenerateReport?login=admin%3Aadmin&reportStyle=inventory&reportName=Device%20View%20Membership&reportTitle=Device%20View%20Membership&viewId=1&noCreate=1&outputFormat=xml&type=DeviceEx&DeviceEx.filter=all&DeviceEx.attr=name%2CdevPolledIpAddr%2CsysOid&DeviceEx.attr.1=%23variable%20dev%20%3D%20this%3Bvariable%20allViews%20%3D%20foreach(all_of_type_no_view(%22view%22)%2C%20view(this))%3Bvariable%20views%20%3D%20foreach(allViews%2C%20this%2C%20eval(dev%2C%20this%2C%20(var.viewId%20%3E%3D%203)%20%26%26%20isinview(var.viewId)))%3Bvariable%20firstView%20%3D%20head(views)%3Bconcat(foreach(views%2C%20if%20(this%20%3D%3D%20firstView%2C%20viewName%2C%20%20%22%2C%20%22%20%2B%20viewName)))%23%2C%22Custom%20Views%22%2C%22displayType%3D%22&DeviceEx.sort=000000%2Cascending%2Cname&reportPeriod=1%401d
BCAN_HOME\public\entuity
EYE_INSTALL\lib\httpd\EOS\cgi
18 BMC Network Automation Integration Guide / Entuity Eye of the Storm

EYE extensible menus for BMC Network Automation
EYE extensible menus for BMC Network Automation
EYE Extensible Menus are supported in Eye of the Storm versions 5.0 and later. This section explains how to configure EYE Extensible Menus to display BMC Network Automation reports, execute BMC Network Automation span actions, and view your BMC Network Automation home page all from the Eye of the Storm Component Viewer.
BMC Network Automation alarm details are also easily viewable from the Eye of the Storm:
■ Bulletin Board (2008 and earlier)■ Event viewer (2009)
Configuration
1 Copy the file, sw_enetaware_menu_def.cfg, from
to
2 Edit the file EYE_INSTALL\etc\sw_enetaware_menu_def.cfg and change all occurrences of bcan_server:port to the actual hostname/IP address and web port where BMC Network Automation is located.
3 Edit the file EYE_INSTALL\etc\sw_menu_def.cfg and add the following line at the bottom of the file:
Note: In EYE 2009 SP1 you need to edit EYE_INSTALL\etc\sw_menu_def_system.cfg.
4 Stop the EYE server processes.
5 Re-run the configure program taking the defaults. You do not need to rebuild the database:
BCAN_HOME\public\entuity
EYE_INSTALL\etc
!sw_enetaware_menu_def.cfg
Chapter 1 Configuring Eye of the Storm 19

Operation
6 Start the EYE server processes. Note that after the EYE server processes are started, it still may take an hour or so before the customized menu options appear. After an hour or so, restart the EYE Component Viewer and Bulletin Board. If you are using an EYE server (2009), the Event Viewer will be started automatically by the EYE server.
Operation
The following describes the three locations where BMC Network Automation related menu options are viewable.
1 In the Component Viewer, expand the hierarchy tree to hostname -> Regional -> Devices -> Routers. See the following figure:
Windows: EYE_INSTALL\install\configure
or
EYE_INSTALL\install\configure text
UNIX: EYE_INSTALL/install/configure text
20 BMC Network Automation Integration Guide / Entuity Eye of the Storm

Operation
2 From the EYE Component Viewer, right-click a network device and choose User Actions -> BMC Network Automation -> and then the report or span action window you want to access.
The following table contains a brief description of each menu option. See the figure that follows the table.
Option Description
Telnet/SSH Proxy Launch a capture telnet/SSH session to the device
Write Mem Saves running to startup (Commit)
Upload Changes Make configuration changes to a device (Deploy to Active)
Running vs. Startup Show the differences between running and startup configurations
Compliance Summary Show the configuration rules that are currently in violation status on the device
OS Image History Show the OS image versions running on the device for the past 30 days
Configuration Change Summary
Show all configuration changes on the device along with who made them and when, for the last 7 days
Discrepancy Details Show discrepancies between current and Trusted configurations
Archive Configuration Snapshot the running and startup configurations on the device
Chapter 1 Configuring Eye of the Storm 21

Notifying BMC Network Automation from EYE
3 (This step is only for EYE servers earlier than 2009): From the EYE Bulletin Board, right-click an event and choose User Actions -> Display Event. To configure the display of BMC Network Automation SNMP notifications in Eye of the Storm see “Notifying Eye of the Storm from BMC Network Automation.”
Notifying BMC Network Automation from EYE Optionally, you can configure Eye of the Storm to forward device events like “Routing CPU High Utilization” and “SNMP Not Responding” to BMC Network Automation as syslog events. These events will then be included in Change Summary reports and can be used in satisfying triggering Conditions in the network that warrant notification (that is, AvailMonitor Node Down and Configuration Change in past 2 hours).
22 BMC Network Automation Integration Guide / Entuity Eye of the Storm

EYE configuration—EYE and BMC Network Automation co-located)
EYE configuration—EYE and BMC Network Automation co-located)
1 Copy the forkevent_ena.cfg file from:
to
2 View EYE_INSTALL\etc\forkevent_ena.cfg and check the following:
A If EYE is installed on Windows, go to the section called “[fork_nt]”. If EYE is installed on UNIX, go to the section called “[fork_unix]”.
Ensure that the “start=” and “directory=” field values are set correctly. By default, they will be set to the BMC Network Automation default installation directories.
Here is an example of what the “[fork_nt]” section will look like for a default installation:
B In the following section, ensure that the user name and password match an EYE login name and password. The “view” specifies the EYE view from which events will be forwarded.
BCAN_HOME\public\entuity
EYE_INSTALL\etc
[fork_nt]
start=c:\progra~1\bmcsof~1\bca-networks\_jvm\bin\java -jar bcan-syslogdriver-all.jar -h 127.0.0.1
args=${event.PAPIDescr} EYE Group ID:${event.PAPIEventGroup}, ${event.PAPIEventStr}
type=fork
directory=bcan-install-dir\tools
[connection]
username=admin
password=admin
view=Regional
Chapter 1 Configuring Eye of the Storm 23
EYE configuration—EYE and BMC Network Automation on separate servers
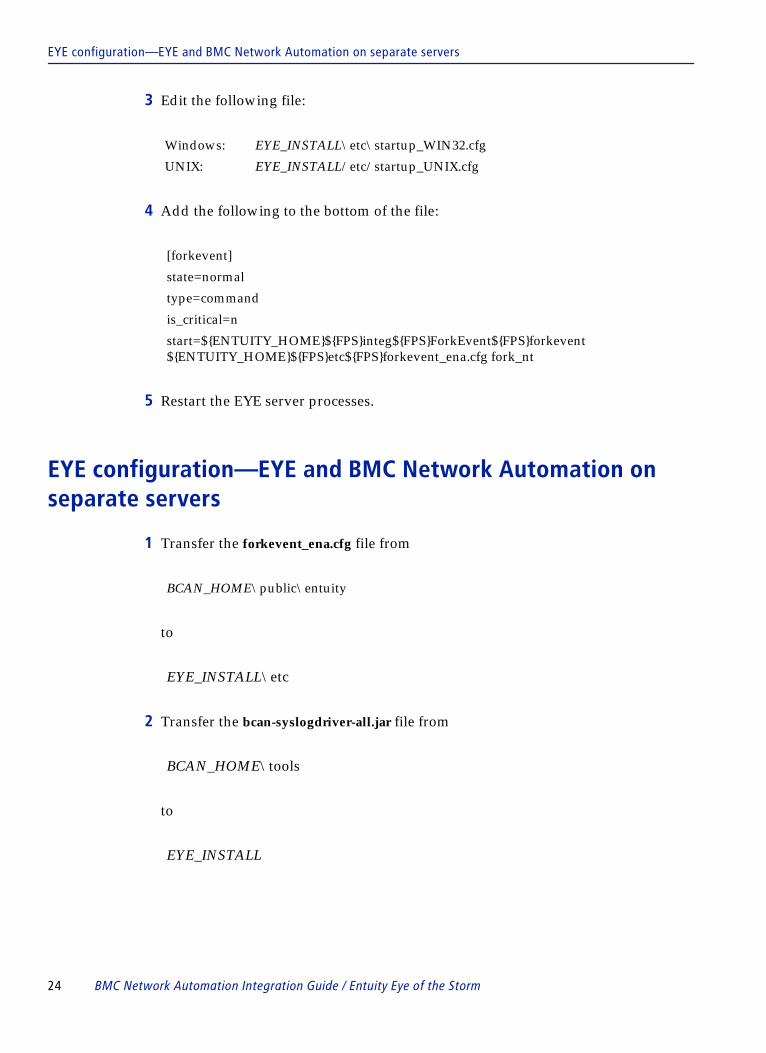
3 Edit the following file:
4 Add the following to the bottom of the file:
5 Restart the EYE server processes.
EYE configuration—EYE and BMC Network Automation on separate servers
1 Transfer the forkevent_ena.cfg file from
to
2 Transfer the bcan-syslogdriver-all.jar file from
to
Windows: EYE_INSTALL\etc\startup_WIN32.cfg
UNIX: EYE_INSTALL/etc/startup_UNIX.cfg
[forkevent]
state=normal
type=command
is_critical=n
start=${ENTUITY_HOME}${FPS}integ${FPS}ForkEvent${FPS}forkevent ${ENTUITY_HOME}${FPS}etc${FPS}forkevent_ena.cfg fork_nt
BCAN_HOME\public\entuity
EYE_INSTALL\etc
BCAN_HOME\tools
EYE_INSTALL
24 BMC Network Automation Integration Guide / Entuity Eye of the Storm

EYE configuration—EYE and BMC Network Automation on separate servers
3 View EYE_INSTALL\etc\forkevent_ena.cfg and check the following:
A If EYE is installed on Windows, go to the section called “[fork_nt]”. If EYE is installed on UNIX, go to the section called “[fork_unix]”.
1. Change the “start=” value to specify the path to Java or remove the path specification to defer to the system path.
2. Change the “directory=” value to the location of bcan-syslogdriver-all.jar. If you followed the previous step, this will be EYE_INSTALL.
3. Ensure the IP address listed after the “-h” flag is the IP address where BMC Network Automation is installed.
4. Here is an example of what the “[fork_nt]” section will typically look like when Eye and BMC Network Automation are not co-located:
B In the following section, ensure that the user name and password match an EYE login name and password. The “view” specifies the EYE view from which events will be forwarded.
4 Edit the following file:
5 Add the following code to the end of the file:
NOTE Integration with BMC Network Automation requires Java version 1.6 or later to be installed on the EYE host.
[fork_nt]
start=java -jar bcan-syslogdriver-all.jar –h 192.168.1.10
args=${event.PAPIDescr} EYE Group ID:${event.PAPIEventGroup}, ${event.PAPIEventStr}
type=fork
directory=c:\entuity
[connection]
username=admin
password=admin
view=Regional
Windows: EYE_INSTALL\etc\startup_WIN32.cfg
UNIX: EYE_INSTALL/etc/startup_UNIX.cfg
Chapter 1 Configuring Eye of the Storm 25

BMC Network Automation configuration
6 Restart the EYE server processes.
BMC Network Automation configuration
Log in to BMC Network Automation and configure the IP address where EYE is running as a syslog relay by doing the following:
1 Choose Admin -> Device Agents.
2 Edit the device agent that will be receiving syslog events from EYE.
3 Scroll down to Syslog Relays in the Syslog section and enter the IP address at which EYE is running.
4 Click Save.
Note that even if EYE is co-located with BMC Network Automation, the IP address of the local host still needs to be entered in this field (that is, 127.0.0.1).
Continuing in BMC Network Automation, add an external filter that accepts the events sent from EYE by doing the following:
1 Choose Admin -> External Events.
2 Click Add to add a new external event
3 Enter values as shown in the following figure, and then click Save:
[forkevent]
state=normal
type=command
is_critical=n
start=${ENTUITY_HOME}${FPS}integ${FPS}ForkEvent${FPS}forkevent ${ENTUITY_HOME}${FPS}etc${FPS}forkevent_ena.cfg fork_nt
26 BMC Network Automation Integration Guide / Entuity Eye of the Storm

Configuring policy to correlate recent NMS event with configuration change
Now that events from EYE are being received by BMC Network Automation, those events will be included in Change Summary reports. The other advantage of receiving events from EYE into BMC Network Automation is that BMC Network Automation policies can be configured to correlate these events with recent change. The following is an example of configuring a policy that sends a Change Summary report via Email whenever an EYE Device event occurs within 2 hours after a change has occurred on that device.
Configuring policy to correlate recent NMS event with configuration change
Keyword
1 Log in to BMC Network Automation.
2 Select Policies -> Keywords.
NOTE This example shows capturing all events from EYE in a single Event Filter and categorizing them with Event Type “Received message with Major severity.”
Chapter 1 Configuring Eye of the Storm 27

Configuring policy to correlate recent NMS event with configuration change
3 Click Add to add a new Keyword.
4 In the Add Keyword page, select the options and enter values as shown in the following table:
5 Click Add.
The Add Keyword page should look like the following example:
6 Click Save.
Option or field Selection or entry
Name Enter EYE Device Event.
Type Select Event (the default).
Severity Select all options.
Category Select External.
Event Select Any (the default).
Search String Enter *EYE Group ID:8*.
28 BMC Network Automation Integration Guide / Entuity Eye of the Storm

Configuring policy to correlate recent NMS event with configuration change
Note that this keyword catches EYE device events. You can customize your keywords to get as granular as you want. For instance, leaving the filter at “*EYE Group ID:*” will catch all EYE events. Setting to “*EYE Group ID:2*” will catch EYE Port events. Setting to “*AvailMonitor Node*” will catch just “AvailMonitor Node Down” and “AvailMonitor Node Up Events.”
Conditions
1 Choose Policies (Tab) -> Conditions.
2 Click Add to add a new Condition.
3 For Name, enter EYE Device Event Now.
4 For Keyword select to EYE Device Event.
5 Check the Triggering Condition box.
6 For Network Span, select Entire Network.
7 Click Save.
8 Choose Policies (Tab) -> Conditions.
9 Next to the factory installed Condition, Change Detected Past, click the (Copy) symbol.
10 For Name, enter Change Detected Past 2 Hours.
11 Leave Keyword selected to Changed Detected.
12 Leave the Triggering Condition box unchecked.
13 Leave the Network Span, selected Same as Triggering Device.
14 Change the Duration to Last 2 Hours.
15 Leave Occurrence Count set to 1.
16 Modify the Description to say something like “A configuration change was detected in the past 2 hours.”
The screen will look similar to the following example:
Chapter 1 Configuring Eye of the Storm 29

Configuring policy to correlate recent NMS event with configuration change
17 Click Save.
Policy
1 Choose Policies (Tab) -> Policies.
2 Click Add to add a new Policy.
3 For Name, enter EYE Device Event and Recent Change.
4 For Type, select Event Based.
5 Check the box next to Enabled and leave the rest of the fields on this tab at their defaults.
6 Click the Conditions tab.
7 For Triggering Condition, select EYE Device Event Now.
8 For the first Other Condition(s), select Change Detected Past 2 Hours.
The screen will look similar to the following example:
30 BMC Network Automation Integration Guide / Entuity Eye of the Storm

Configuring policy to correlate recent NMS event with configuration change
9 Click the Actions tab.
10 Select Add Action and choose Send Email.
11 For Annotation, enter something like “EYE Device Event and Recent Change”.
12 For To, specify Email recipients.
13 For Report, select Change Summary.
14 Leave Include Link checked.
15 Check Include Attachment.
16 Choose your attachment format (that is, PDF).
17 Check Include All Details.
18 For Network Span, select Same as Triggering Device.
19 Check Include Events.
20 Leave Configuration selected to Running.
21 Leave Time Period set to Last 2 Hours.
The screen will look similar to the following example:
Chapter 1 Configuring Eye of the Storm 31

Configuring policy to correlate recent NMS event with configuration change
22 Click OK.
23 Click Save.
To test this policy, make a change to a device that will cause some device events to be generated. For example, remove EYE from the SNMP access control list. Note that the report was generated because the “SNMP Not Responding” event occurred within 2 hours after a change was made on the device.
BMC Network Automation sent the report out automatically when this occurred. The report includes the following information:
■ Who made the change■ When the change was made■ What device was changed■ What the change consisted of: (for example, 172.21.127.10 pulled from ACL 40) ■ Device events that occurred as a result of the change: SNMP Not Responding
ACL 40 is the list that manages SNMP access. This report tells Network Operations that 172.21.127.10 needs to be returned to the list.
32 BMC Network Automation Integration Guide / Entuity Eye of the Storm

Notifying Eye of the Storm from BMC Network Automation
Notifying Eye of the Storm from BMC Network Automation
Eye of the Storm configuration
The primary means of BMC Network Automation notifying EYE is using SNMP traps. Follow these steps to load and format BMC Network Automation SNMP trap events into EYE:
1 Copy the EmprisaNetworksV2C.mib file into the EYE MIB folder:
2 Run the EYE parseMibs utility with the following commands:
3 In the EYE Component Viewer under the MIBs folder, you should now see the EMPRISANETWORKS-MIB. Below the MIB and under the Enterprise Trap Definitions folder, you should see seven (7) trap definitions:
— enaNotifyPolicyActionLow— enaNotifyPolicyActionMedium— enaNotifyPolicyActionHigh— enaNotifyDiscrepancyFound— enaNotifyAllDiscrepanciesCleared— enaNotifyCompliancyViolationFound— enaNotifyAllCompliancyViolationsCleared
4 Right click each trap definition and choose Create new Trap Event.
5 In the window that appears, change your default trap event to desired settings. Be sure to look at the Var Definitions under each Trap Definition to see possible variables that can be referenced in the Formatted String.
BMC Network Automation V2C MIB location
BCAN_HOME\public\bca-networks\mib
EYE MIB folder EYE_INSTALL\lib\mibs
cd EYE_INSTALL\lib\tools
parseMibs EmprisaNetworksV2C.mib
Chapter 1 Configuring Eye of the Storm 33

Eye of the Storm configuration
Here are examples with suggested field values for each trap definition. If a field is not addressed then you can leave it at the default value. Note that the suggested Formatted String for enaNotifyCompliancyViolationFound is a little different than the rest:
— enaNotifyPolicyActionLow:
— enaNotifyPolicyActionMedium:
— enaNotifyPolicyActionHigh:
— enaNotifyDiscrepancyFound:
— enaNotifyAllDiscrepanciesCleared:
— enaNotifyCompliancyViolationFound:
Severity: Zero Severity - Green
Name: <enaNotifyPolicyActionLow>
Formatted String: <$3, Device: $4>
Severity: Minor - Yellow
Name: <enaNotifyPolicyActionMedium>
Formatted String: <$3, Device: $4>
Severity: Major - Amber
Name: <enaNotifyPolicyActionHigh>
Formatted String: <$3, Device: $4>
Severity: Minor - Yellow
Name: <enaNotifyDiscrepancyFound>
Formatted String: <$3, Device: $4>
Severity: Zero Severity - Green
Name: <enaNotifyAllDiscrepanciesCleared>
Formatted String: <$3, Device: $4>
Severity: Minor - Yellow
Name: <enaNotifyCompliancyViolationFound>
Formatted String: <Device: $4, Violation: $6>
34 BMC Network Automation Integration Guide / Entuity Eye of the Storm

BMC Network Automation configuration
— enaNotifyAllCompliancyViolationsCleared:
BMC Network Automation configuration
Log in to BMC Network Automation and configure an SNMP Manager record that corresponds to EYE by doing the following:
1 Choose Admin -> SNMP Managers.
2 Click Add.
3 In the Address field, enter the IP address or Hostname of the server hosting EYE. If EYE is co-located with BMC Network Automation then enter the IP address of the local machine.
4 Select v2C for Version and the appropriate value for Trap Community fields.
5 Click Save.
BMC Network Automation can notify EYE concerning a wide variety of configuration events. Here are a couple of examples of setting up BMC Network Automation Policies to notify EYE when configuration discrepancies occur and clear and when configuration compliance rules are violated and cleared.
Configuring discrepancy and compliance notification policies
To configure policies to send SNMP notifications to a manager station (that is, EYE) see the BMC Network Automation Quick Start Guide.
Viewing BMC Network Automation events in EYE
BMC Network Automation events are displayed in the Eye of the Storm Bulletin Board. One way to display the Bulletin Board is to right click on the View (that is, Regional) in the Component Viewer and choose Bulletin Board.
In Eye 2009, the Event Viewer is available through the EYE Web Interface.
Severity: Zero Severity - Green
Name: <enaNotifyAllCompliancyViolationsCleared>
Formatted String: <$3, Device: $4>
Chapter 1 Configuring Eye of the Storm 35

Viewing BMC Network Automation events in EYE
36 BMC Network Automation Integration Guide / Entuity Eye of the Storm

A B C D E F G H I J K L M N O P Q R S T U V W X Y Z
Index
AAbout this book 7
BBCAN_DATA, BCAN_HOME 9BMC Software, contacting 2
CConfiguring Eye of the Storm 11Conventions 9customer support 3
Ddata directory 9Device import from EYE 14directories 9Display names and host names 13
Eexport from EYE. import into BMC Network Automation
15EYE extensible menus for BMC Network Automation 19
GGeneral settings and assumptions 12
Hhome directory 9
Iimporting Eye of the Storm views 17
Nnotifying BMC Network Automation from Eye of the
Storm 22
Pproduct support 3publications, related 8
Rrelated publications 8
Ssingle step import 14support, customer 3Syslog considerations 12
Ttechnical support 3
WWeb server port considerations 13
Index 37

A B C D E F G H I J K L M N O P Q R S T U V W X Y Z
38 BMC Network Automation Integration Guide / Entu
ity Eye of the Storm
Notes

*219027**219027**219027**219027*
*219027*