biologically-assisted acl reconstruction surgical … · output 6 ml of blood and bone marrow...
TRANSCRIPT
Biologically-Assisted ACL ReconstructionSurgical Protocol by Example
Surgical Technique
Table of Contents
Background .............................................................................................................. 1
Bone Tendon Bone Harvest ...................................................................................... 2
Tunnel Preparation ................................................................................................... 5
Graft Passage ........................................................................................................... 6
Graft Fixation ............................................................................................................ 7
Bone Marrow Aspiration ........................................................................................... 8
BioCUE® Processing ................................................................................................ 10
Ordering info .......................................................................................................... 13
1 | Biologically-Assisted ACL Reconstruction Surgical Technique
ACL ReconstructionRupture of the anterior cruciate ligament (ACL) is one of the most common knee injuries. It is estimated the annual incidence of ACL injury is about 1 in 3,000 in the USA. Therefore, 150k ACL reconstructions are estimated to be performed every year. ACL reconstruction surgery is constantly being evaluated to address unmet needs. Partially responsible for this is the patient’s need to return to sport or work. ACL reconstruction surgery failure may be caused by many factors. Recurrent instability after ACL reconstruction occurs in approximately 8% of patients and is the most common reason for ACL reconstruction failure. Literature suggests many failures are a result of a technique error. Other times a new trauma will compromise the repair. Unfortunately an inadequate biologic response results in a need for a revision. Biologic failure prevents graft to tunnel incorporation during ACL reconstruction rehab phase. Biologic failure should be evaluated as a cause of instability in a knee recently reconstructed.
This surgical technique was prepared in conjunction with Frank Bonnarens, M.D. Biomet Biologics does not practice medicine and does not recommend this or any other surgical technique for use on a specific patient and is not responsible for the kind of treatment selected for a specific patient. The treating surgeon is responsible for determining the appropriate treatment, technique(s), and product(s) for each individual patient.
Biologically-Assisted ACL Reconstruction

2 | Biologically-Assisted ACL Reconstruction Surgical Technique
Bone-Tendon-Bone HarvestIf desired for bone graft hydration, aspirate bone marrow prior to harvest of graft. A bone marrow aspiration technique is provided in Appendix A. Flex the knee and make a longitudinal incision 1 cm medial to the midline from the inferior pole of the patella to the distal end of the tibial tubercle. Extend the knee and use the patella resector to move the incision proximal and expose the patella for harvesting the bone block (Figure 1).
Pin the bone cutting template on the desired tibial location (Figure 2).
Figure 1 Figure 2
3 | Biologically-Assisted ACL Reconstruction Surgical Technique
BTB Harvest (cont.)
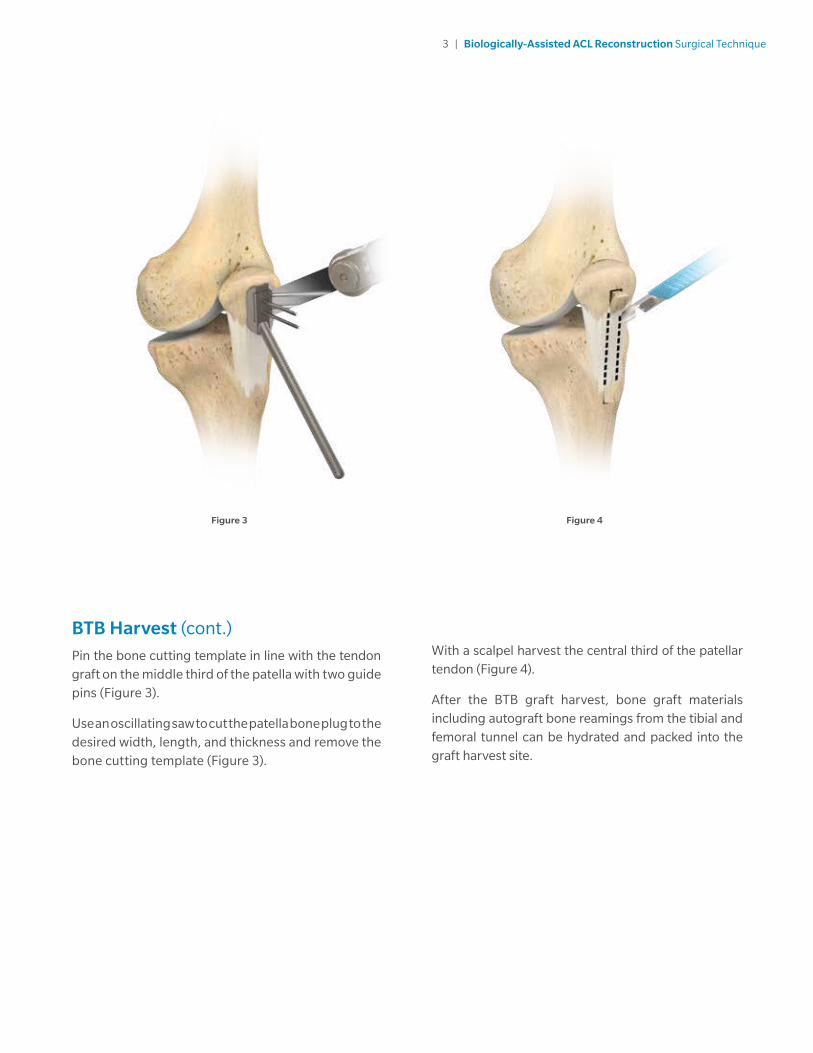
Pin the bone cutting template in line with the tendon graft on the middle third of the patella with two guide pins (Figure 3).
Use an oscillating saw to cut the patella bone plug to the desired width, length, and thickness and remove the bone cutting template (Figure 3).
With a scalpel harvest the central third of the patellar tendon (Figure 4).
After the BTB graft harvest, bone graft materials including autograft bone reamings from the tibial and femoral tunnel can be hydrated and packed into the graft harvest site.
Figure 3 Figure 4
4 | Biologically-Assisted ACL Reconstruction Surgical Technique
BTB Harvest (cont.)
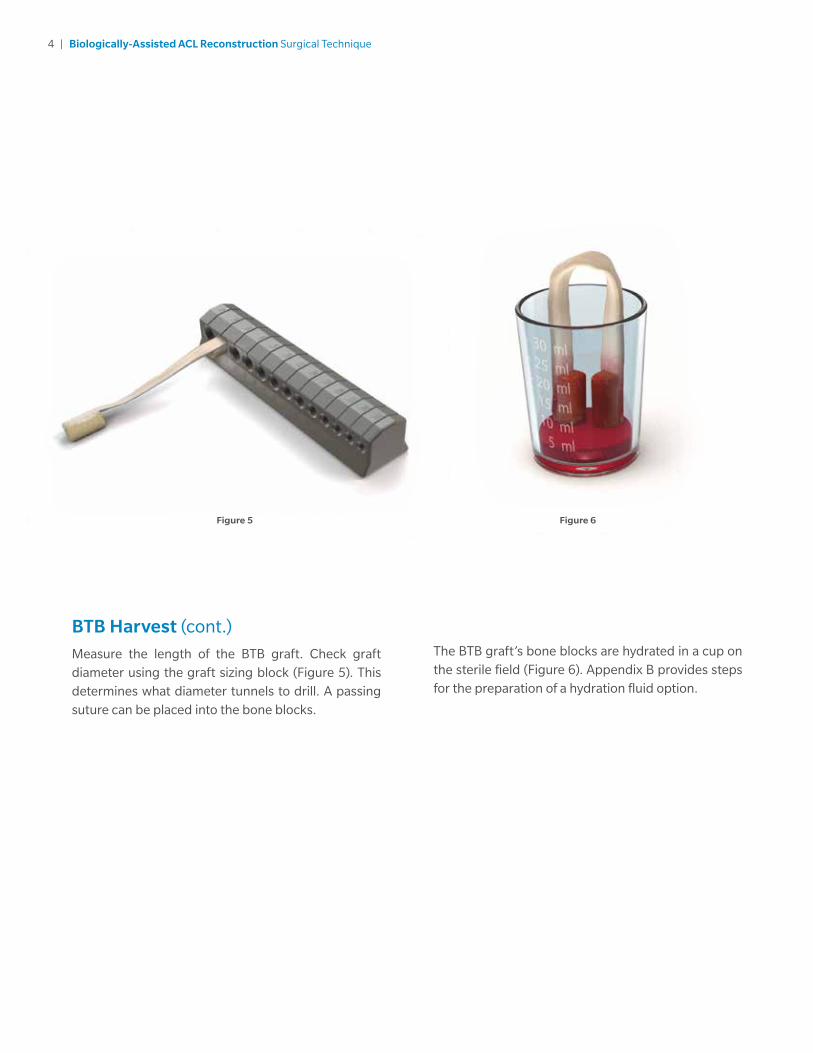
Measure the length of the BTB graft. Check graft diameter using the graft sizing block (Figure 5). This determines what diameter tunnels to drill. A passing suture can be placed into the bone blocks.
The BTB graft’s bone blocks are hydrated in a cup on the sterile field (Figure 6). Appendix B provides steps for the preparation of a hydration fluid option.
Figure 5 Figure 6
5 | Biologically-Assisted ACL Reconstruction Surgical Technique
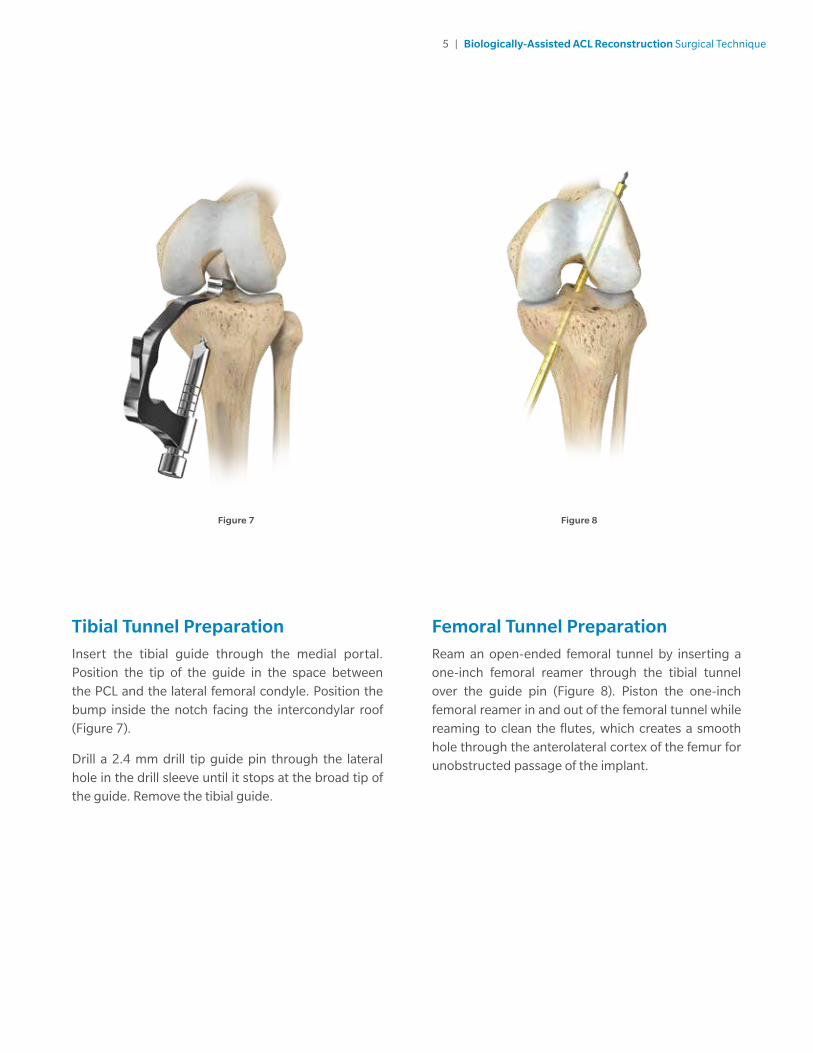
Tibial Tunnel PreparationInsert the tibial guide through the medial portal. Position the tip of the guide in the space between the PCL and the lateral femoral condyle. Position the bump inside the notch facing the intercondylar roof (Figure 7).
Drill a 2.4 mm drill tip guide pin through the lateral hole in the drill sleeve until it stops at the broad tip of the guide. Remove the tibial guide.
Femoral Tunnel PreparationReam an open-ended femoral tunnel by inserting a one-inch femoral reamer through the tibial tunnel over the guide pin (Figure 8). Piston the one-inch femoral reamer in and out of the femoral tunnel while reaming to clean the flutes, which creates a smooth hole through the anterolateral cortex of the femur for unobstructed passage of the implant.
Figure 7 Figure 8
6 | Biologically-Assisted ACL Reconstruction Surgical Technique
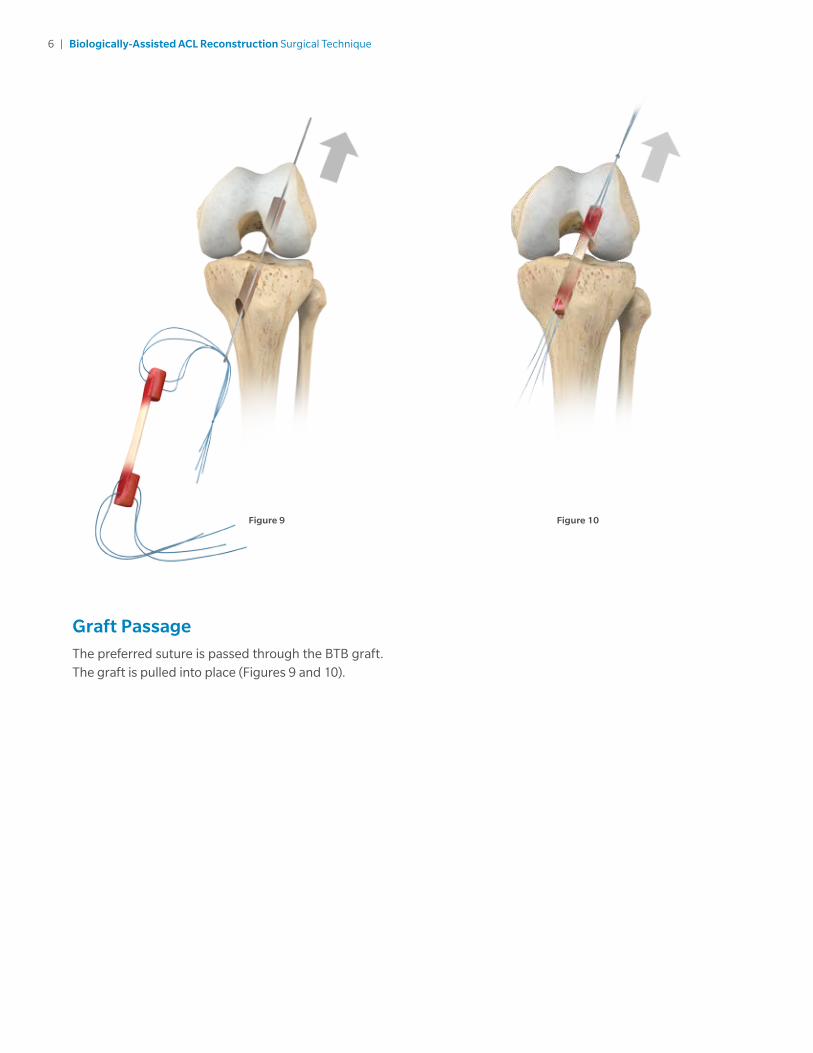
Graft PassageThe preferred suture is passed through the BTB graft. The graft is pulled into place (Figures 9 and 10).
Figure 9 Figure 10
7 | Biologically-Assisted ACL Reconstruction Surgical Technique
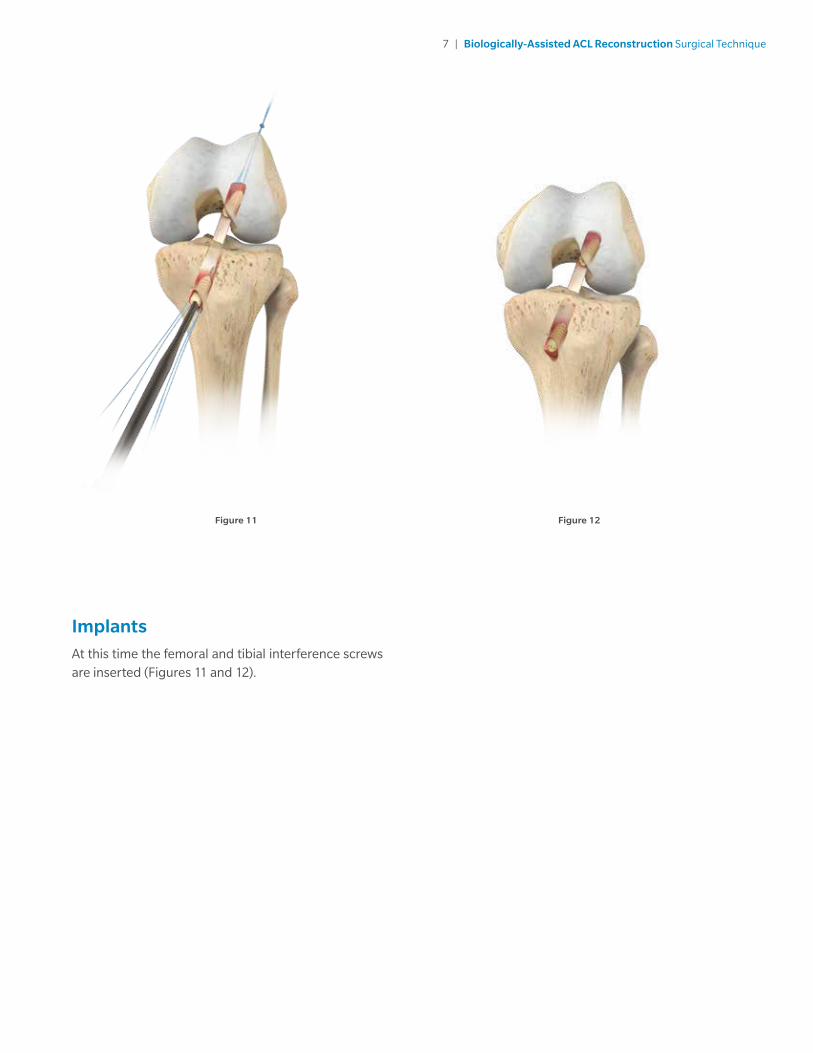
ImplantsAt this time the femoral and tibial interference screws are inserted (Figures 11 and 12).
Figure 11 Figure 12

8 | Biologically-Assisted ACL Reconstruction Surgical Technique
BMA Harvest Site OptionsInsertion is at the anteriormedial aspect of the proximal tibia metaphysis. Needle should be angled down the shaft of the tibia toward ankle. Alternatively, the BMA needle can be inserted in the same orientation as the tibial tunnel will be drilled (Figure 1).
The intercondylar notch of the distal femur is another harvest location (Figure 2). Fully insert the aspiration needle into the medullary canal of the femur. To obtain a larger volume of BMA, the needle may need to be advanced. In this scenario, the sharp trocar should be placed into the needle. This will assist in the prevention of clogging. A syringe primed with ACD-A is attached to the needle. It will be difficult to harvest bone marrow aspirate if the harvest site does not have solid cortical bone.
Figure 1 Figure 2
Appendix A
9 | Biologically-Assisted ACL Reconstruction Surgical Technique
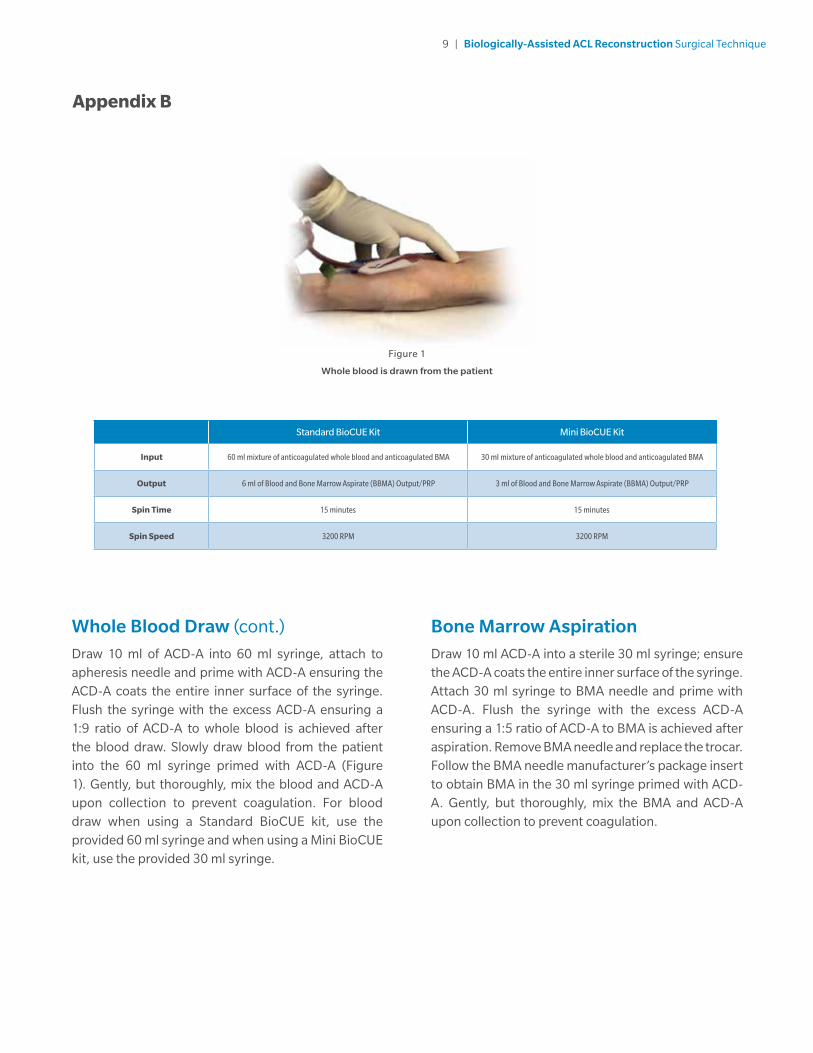
Figure 1
Whole blood is drawn from the patient
Whole Blood Draw (cont.)
Draw 10 ml of ACD-A into 60 ml syringe, attach to apheresis needle and prime with ACD-A ensuring the ACD-A coats the entire inner surface of the syringe. Flush the syringe with the excess ACD-A ensuring a 1:9 ratio of ACD-A to whole blood is achieved after the blood draw. Slowly draw blood from the patient into the 60 ml syringe primed with ACD-A (Figure 1). Gently, but thoroughly, mix the blood and ACD-A upon collection to prevent coagulation. For blood draw when using a Standard BioCUE kit, use the provided 60 ml syringe and when using a Mini BioCUE kit, use the provided 30 ml syringe.
Bone Marrow AspirationDraw 10 ml ACD-A into a sterile 30 ml syringe; ensure the ACD-A coats the entire inner surface of the syringe. Attach 30 ml syringe to BMA needle and prime with ACD-A. Flush the syringe with the excess ACD-A ensuring a 1:5 ratio of ACD-A to BMA is achieved after aspiration. Remove BMA needle and replace the trocar. Follow the BMA needle manufacturer’s package insert to obtain BMA in the 30 ml syringe primed with ACD-A. Gently, but thoroughly, mix the BMA and ACD-A upon collection to prevent coagulation.
Standard BioCUE Kit Mini BioCUE Kit
Input 60 ml mixture of anticoagulated whole blood and anticoagulated BMA 30 ml mixture of anticoagulated whole blood and anticoagulated BMA
Output 6 ml of Blood and Bone Marrow Aspirate (BBMA) Output/PRP 3 ml of Blood and Bone Marrow Aspirate (BBMA) Output/PRP
Spin Time 15 minutes 15 minutes
Spin Speed 3200 RPM 3200 RPM
Appendix B
10 | Biologically-Assisted ACL Reconstruction Surgical Technique
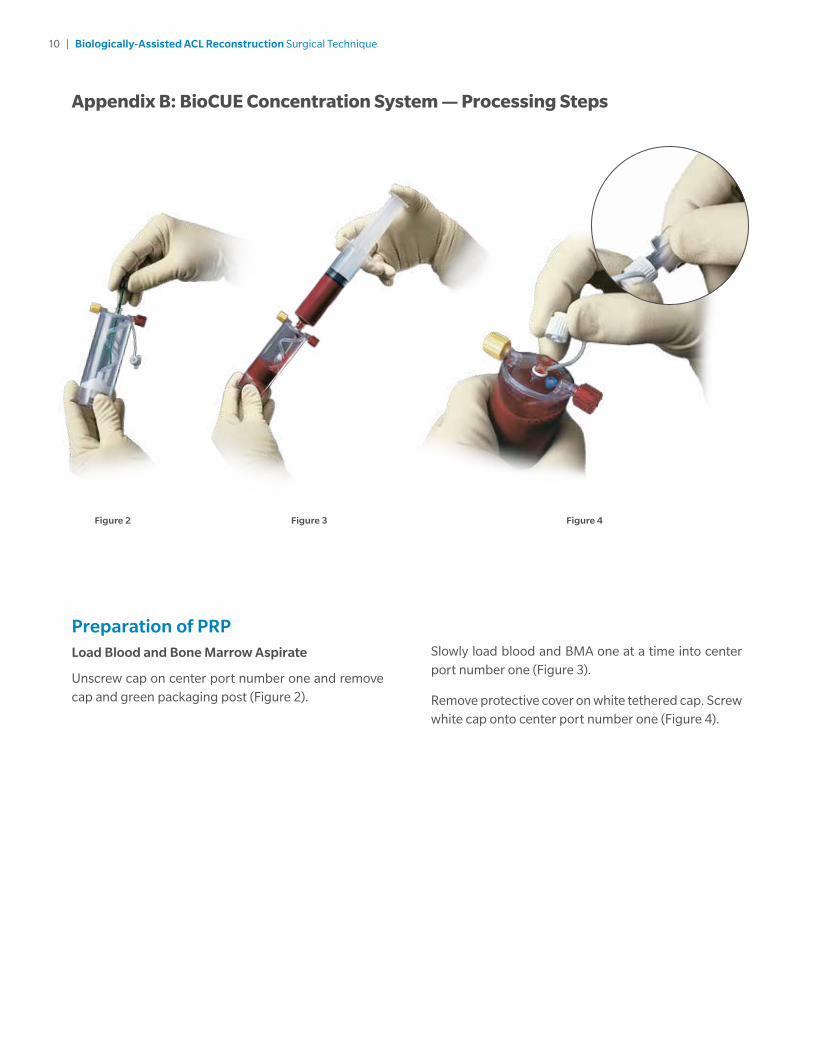
Preparation of PRPLoad Blood and Bone Marrow Aspirate
Unscrew cap on center port number one and remove cap and green packaging post (Figure 2).
Slowly load blood and BMA one at a time into center port number one (Figure 3).
Remove protective cover on white tethered cap. Screw white cap onto center port number one (Figure 4).
Figure 4Figure 3Figure 2
Appendix B: BioCUE Concentration System — Processing Steps
11 | Biologically-Assisted ACL Reconstruction Surgical Technique
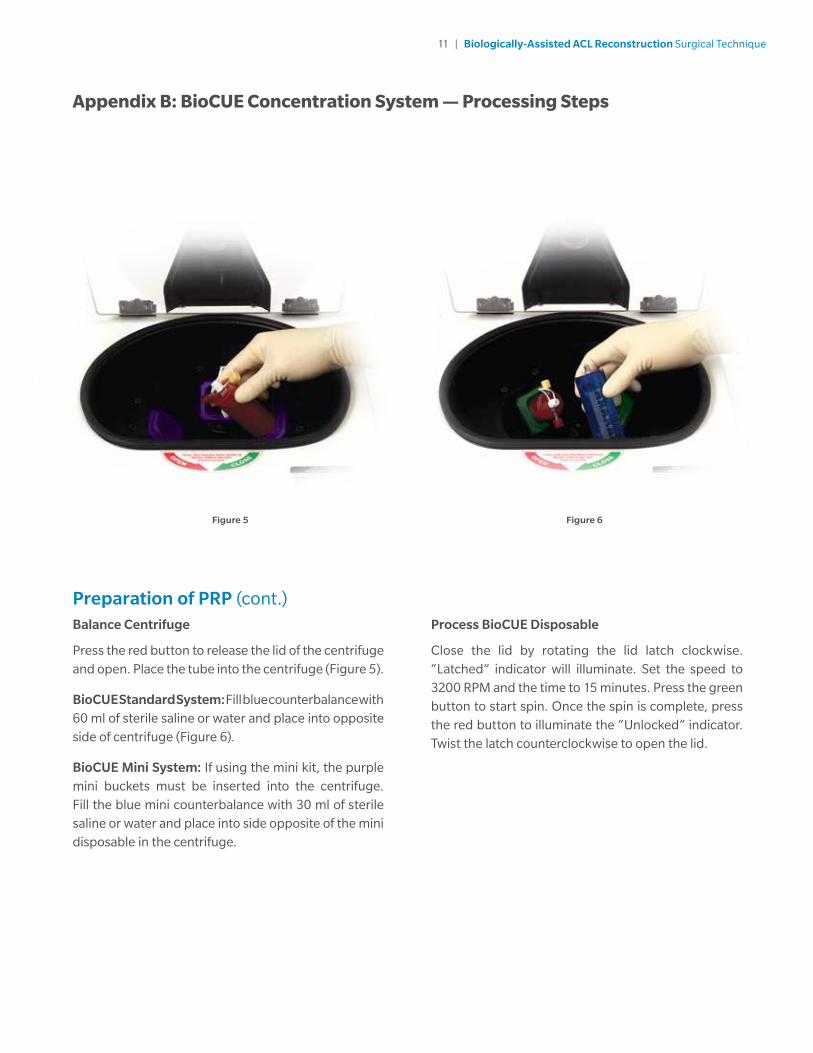
Preparation of PRP (cont.)Balance Centrifuge
Press the red button to release the lid of the centrifuge and open. Place the tube into the centrifuge (Figure 5).
BioCUE Standard System: Fill blue counterbalance with 60 ml of sterile saline or water and place into opposite side of centrifuge (Figure 6).
BioCUE Mini System: If using the mini kit, the purple mini buckets must be inserted into the centrifuge. Fill the blue mini counterbalance with 30 ml of sterile saline or water and place into side opposite of the mini disposable in the centrifuge.
Process BioCUE Disposable
Close the lid by rotating the lid latch clockwise. “Latched” indicator will illuminate. Set the speed to 3200 RPM and the time to 15 minutes. Press the green button to start spin. Once the spin is complete, press the red button to illuminate the “Unlocked” indicator. Twist the latch counterclockwise to open the lid.
Figure 5 Figure 6
Appendix B: BioCUE Concentration System — Processing Steps
12 | Biologically-Assisted ACL Reconstruction Surgical Technique
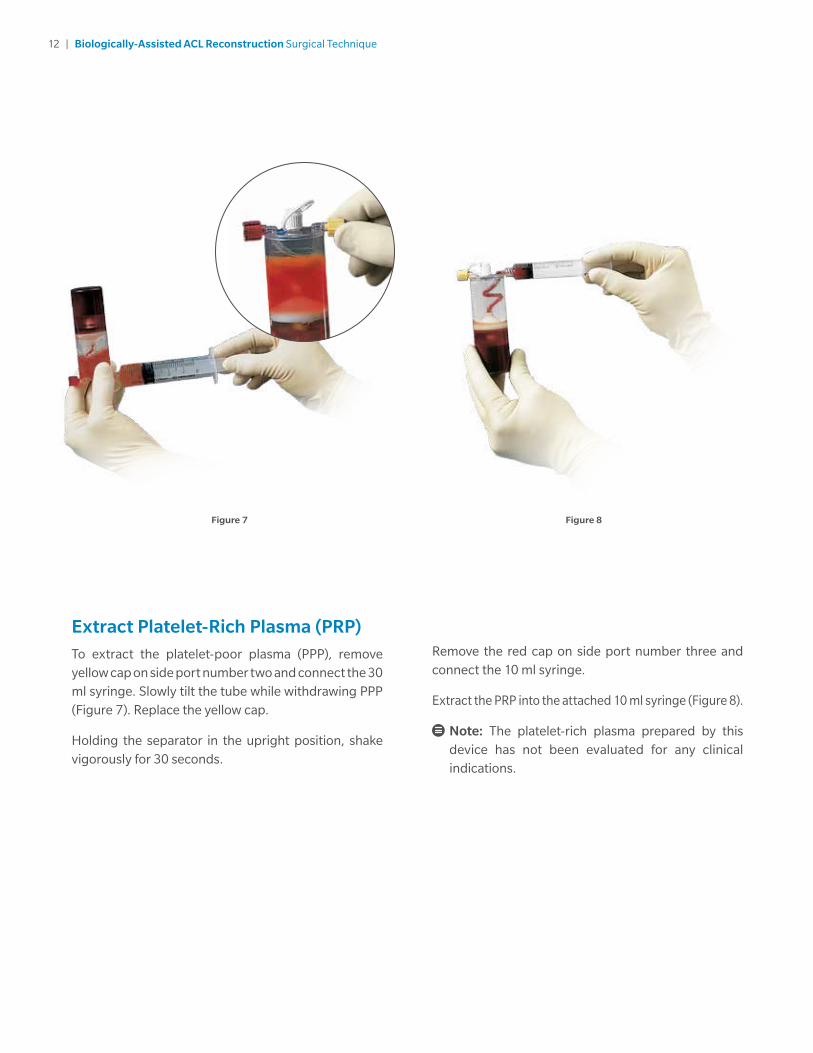
Extract Platelet-Rich Plasma (PRP)To extract the platelet-poor plasma (PPP), remove yellow cap on side port number two and connect the 30 ml syringe. Slowly tilt the tube while withdrawing PPP (Figure 7). Replace the yellow cap.
Holding the separator in the upright position, shake vigorously for 30 seconds.
Remove the red cap on side port number three and connect the 10 ml syringe.
Extract the PRP into the attached 10 ml syringe (Figure 8).
Note: The platelet-rich plasma prepared by this device has not been evaluated for any clinical indications.
Figure 7 Figure 8
13 | Biologically-Assisted ACL Reconstruction Surgical Technique
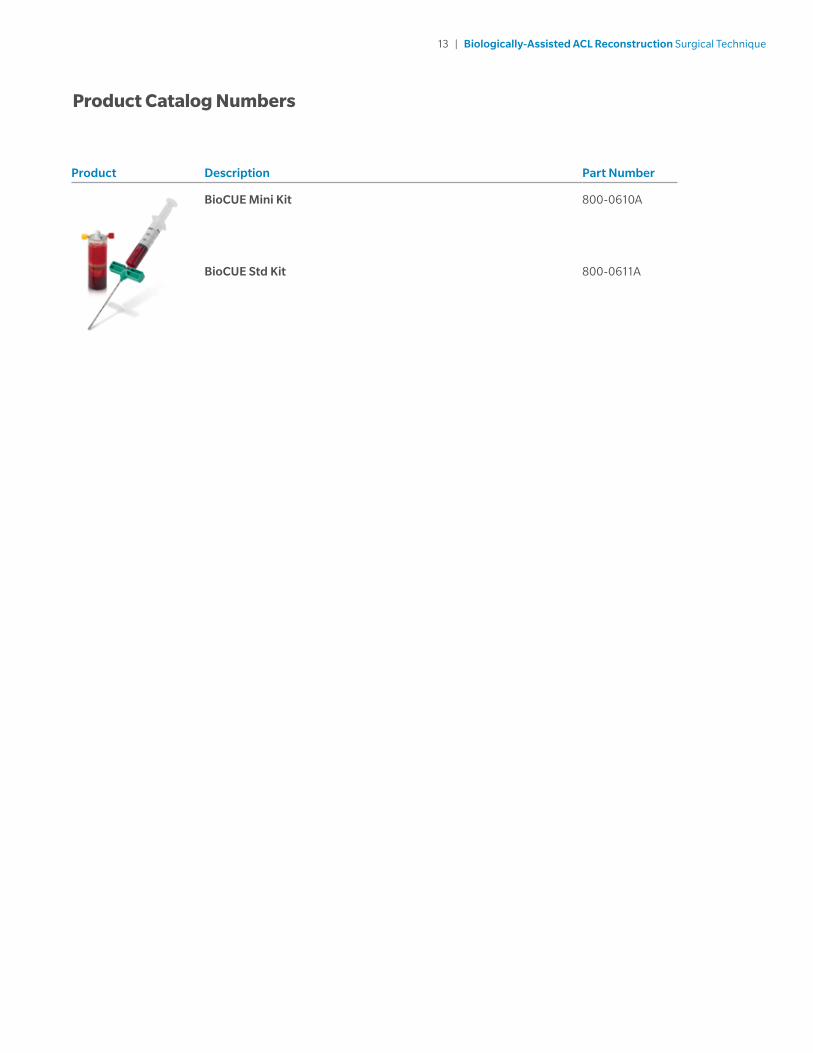
Product Catalog Numbers
Product Description Part Number
BioCUE Mini Kit 800-0610A
BioCUE Std Kit 800-0611A
All content herein is protected by copyright, trademarks and other intellectual property rights owned by or licensed to Biomet Inc. or its affiliates unless otherwise indicated, and must not be redistributed, duplicated or disclosed, in whole or in part, without the express written consent of Zimmer Biomet.
This material is intended for health care professionals and the Biomet sales force. Distribution to any other recipient is prohibited.
For complete product information, including indications, contraindications, warnings, precautions, and potential adverse effects, see the package insert and www.ZimmerBiomet.com.
©2018 Zimmer Biomet
1799.1-US-en-REV0118
Responsible ManufacturerBiomet Biologics P.O. Box 58756 E. Bell DriveWarsaw, Indiana 46581-0587 USA
zimmerbiomet.com
References
1. Biomet Research Report # 798, 2010.