biochemistry discussion - boston university discussion ... preparaon*of*crude*enzyme*extract * 3ac *...
TRANSCRIPT
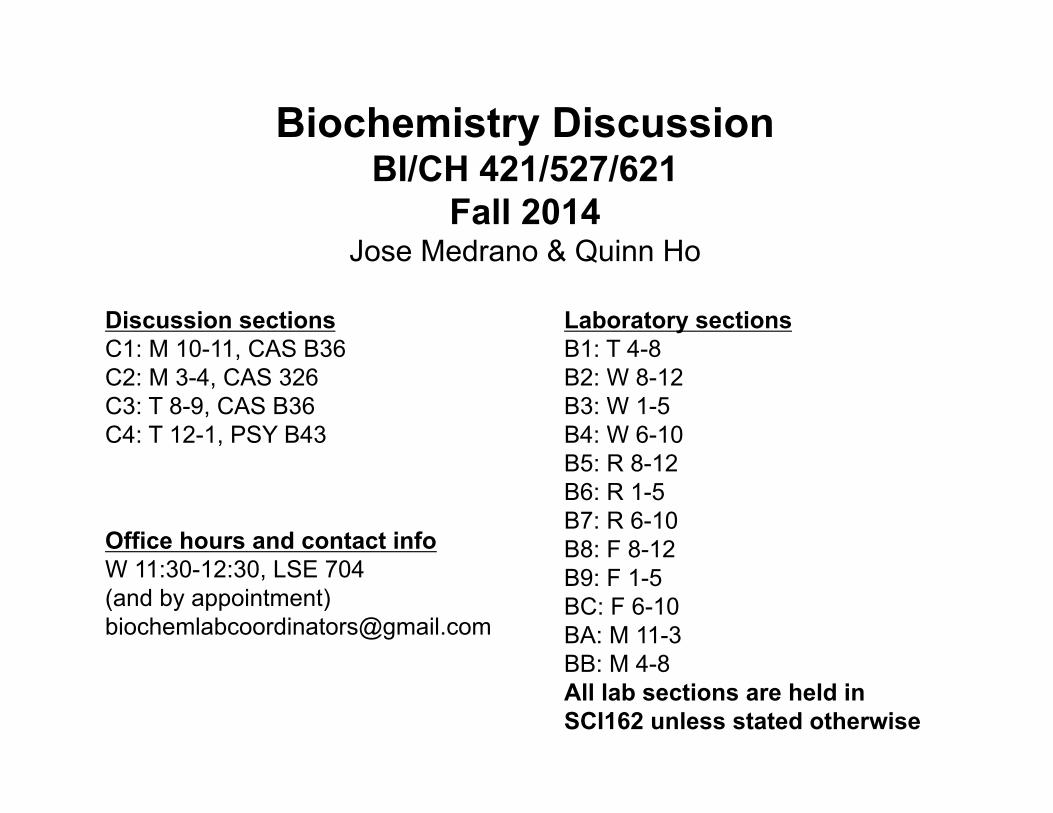
Biochemistry Discussion BI/CH 421/527/621
Fall 2014 Jose Medrano & Quinn Ho
Discussion sections C1: M 10-11, CAS B36 C2: M 3-4, CAS 326 C3: T 8-9, CAS B36 C4: T 12-1, PSY B43
Laboratory sections B1: T 4-8 B2: W 8-12 B3: W 1-5 B4: W 6-10 B5: R 8-12 B6: R 1-5 B7: R 6-10 B8: F 8-12 B9: F 1-5 BC: F 6-10 BA: M 11-3 BB: M 4-8 All lab sections are held in SCI162 unless stated otherwise
Office hours and contact info W 11:30-12:30, LSE 704 (and by appointment) [email protected]
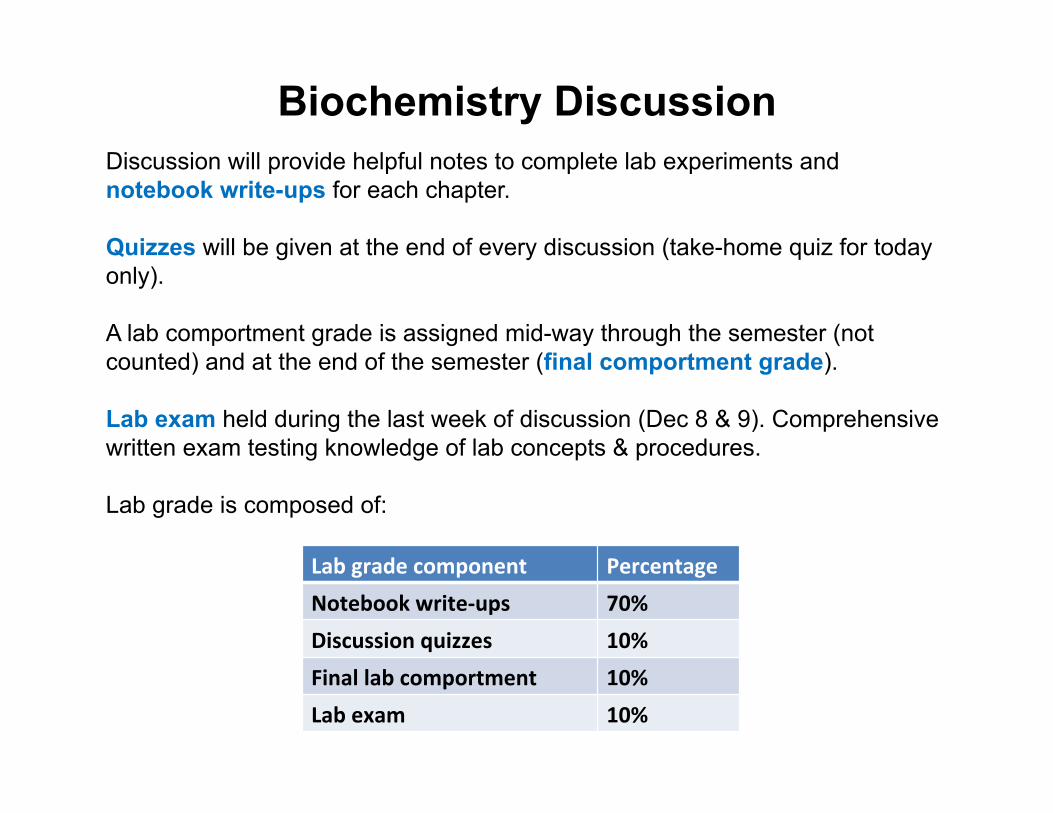
Biochemistry Discussion Discussion will provide helpful notes to complete lab experiments and notebook write-ups for each chapter.
Quizzes will be given at the end of every discussion (take-home quiz for today only).
A lab comportment grade is assigned mid-way through the semester (not counted) and at the end of the semester (final comportment grade).
Lab exam held during the last week of discussion (Dec 8 & 9). Comprehensive written exam testing knowledge of lab concepts & procedures.
Lab grade is composed of:
Lab grade component Percentage
Notebook write-‐ups 70%
Discussion quizzes 10%
Final lab comportment 10%
Lab exam 10%
Lab syllabus
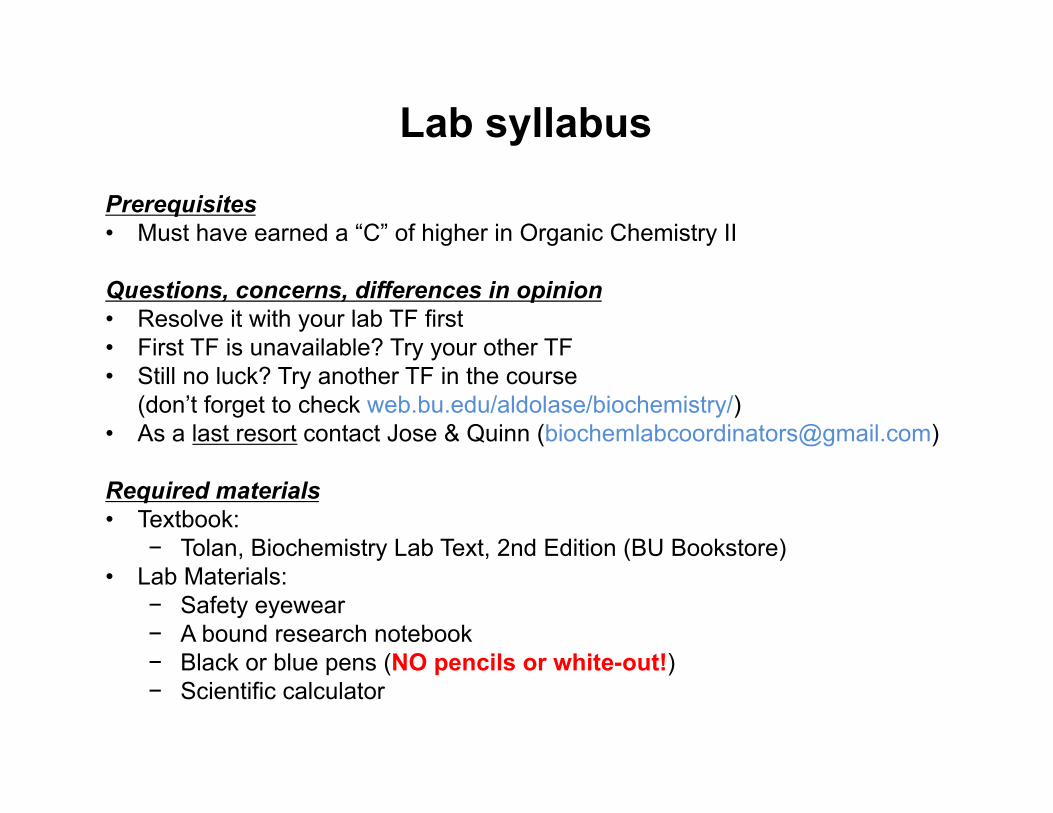
Prerequisites • Must have earned a “C” of higher in Organic Chemistry II
Questions, concerns, differences in opinion • Resolve it with your lab TF first • First TF is unavailable? Try your other TF • Still no luck? Try another TF in the course
(don’t forget to check web.bu.edu/aldolase/biochemistry/) • As a last resort contact Jose & Quinn ([email protected])
Required materials • Textbook:
− Tolan, Biochemistry Lab Text, 2nd Edition (BU Bookstore) • Lab Materials:
− Safety eyewear − A bound research notebook − Black or blue pens (NO pencils or white-out!) − Scientific calculator

Lab syllabus (cont.)
Lab safety Dress appropriately
• Closed-toed shoes, long pants, t-shirt, long hair tied back • Safety eyewear worn at all times
No food, drink, or consumables of any kind
No cosmetics
Lab gloves go in regular trash cans unless told otherwise
All sharps in designated sharps containers
All hazardous chemicals disposed of appropriately (TFs will advise each week)
Arrive to lab on time with tool kits before the hour. Do not arrive late!
Repeat violations will result in dismissal for the day and will negatively impact your comportment grade
Lab syllabus (cont.)
Lab Schedule
Experimental topic Chapter Discussion
dates Lab dates
Notebook write-‐up due at
end of lab Photometric Methods for Protein Determina2on 1 Sept 8-‐9 Sept 9-‐15 Buffers and Titra2ons 2 Sept 15-‐16 Sept 16-‐22 Chapter 1 Prepara2on of Crude Enzyme Extract 3A-‐C Sept 22-‐23 Sept 23-‐29 Chapter 2
Ammonium Sulfate Frac2ona2on & Dialysis 3D-‐E Sept 29-‐30 Sept 30 – Oct 6
Affinity Chromatography & Concentra2on of Purified LDH by Ultrafiltra2on
3F-‐G Oct 6-‐7 Oct 7-‐10, 14①
Using the Molecular Modeling Program “O”② 11A-‐B Oct 14③ Oct 15-‐21 Func2onal Characteris2cs of LDH 4 Oct 20-‐21 Oct 22-‐28 Chapter 3 & 11
Gel Filtra2on; Na2ve Mr Determina2on 5A Oct 27-‐28 Oct 29 – Nov 4
Chapter 4
Polyacrylamide Gel Electrophoresis using SDS; Subunit Mr Determina2on
5B Nov 3-‐4 Nov 5-‐11
Na2ve Zone Electrophoresis; “Zymograms” 5C Nov 10-‐11 Nov 12-‐18 Prepara2on of Plasmid DNA & Es2ma2on of DNA Concentra2on
6A-‐B Nov 17-‐18 Nov 19-‐24, Dec 2④
Chapter 5
Restric2on Mapping 6C Dec 1-‐2 Dec 3-‐9 Dec 11 Chapter 6⑤
Lab syllabus (cont.)
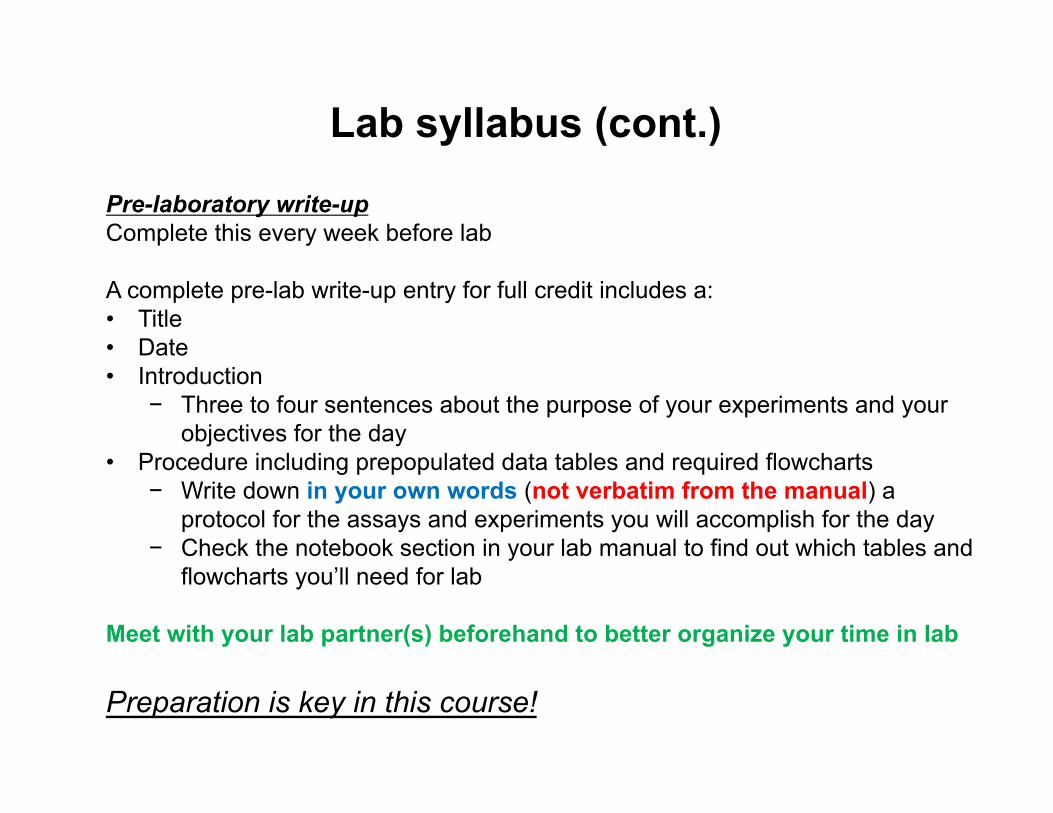
Pre-laboratory write-up Complete this every week before lab
A complete pre-lab write-up entry for full credit includes a: • Title • Date • Introduction
− Three to four sentences about the purpose of your experiments and your objectives for the day
• Procedure including prepopulated data tables and required flowcharts − Write down in your own words (not verbatim from the manual) a
protocol for the assays and experiments you will accomplish for the day − Check the notebook section in your lab manual to find out which tables and
flowcharts you’ll need for lab
Meet with your lab partner(s) beforehand to better organize your time in lab
Preparation is key in this course!
Lab syllabus (cont.)
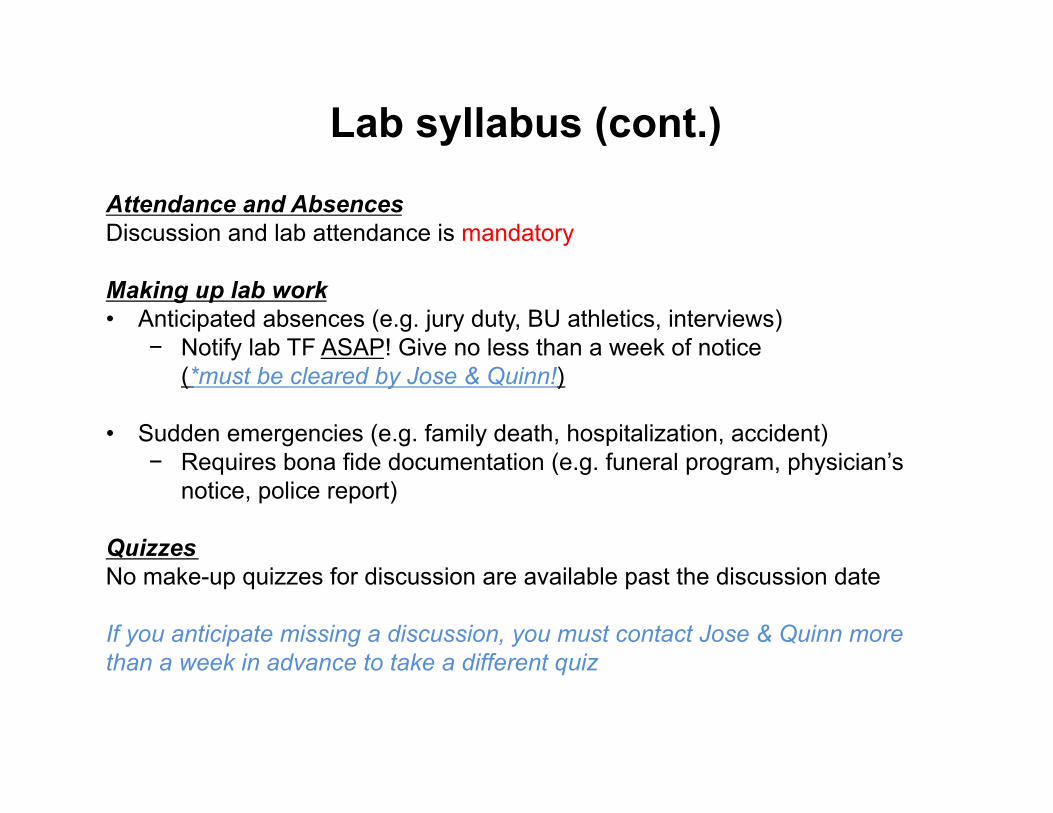
Attendance and Absences Discussion and lab attendance is mandatory
Making up lab work • Anticipated absences (e.g. jury duty, BU athletics, interviews)
− Notify lab TF ASAP! Give no less than a week of notice (*must be cleared by Jose & Quinn!)
• Sudden emergencies (e.g. family death, hospitalization, accident) − Requires bona fide documentation (e.g. funeral program, physician’s
notice, police report)
Quizzes No make-up quizzes for discussion are available past the discussion date
If you anticipate missing a discussion, you must contact Jose & Quinn more than a week in advance to take a different quiz
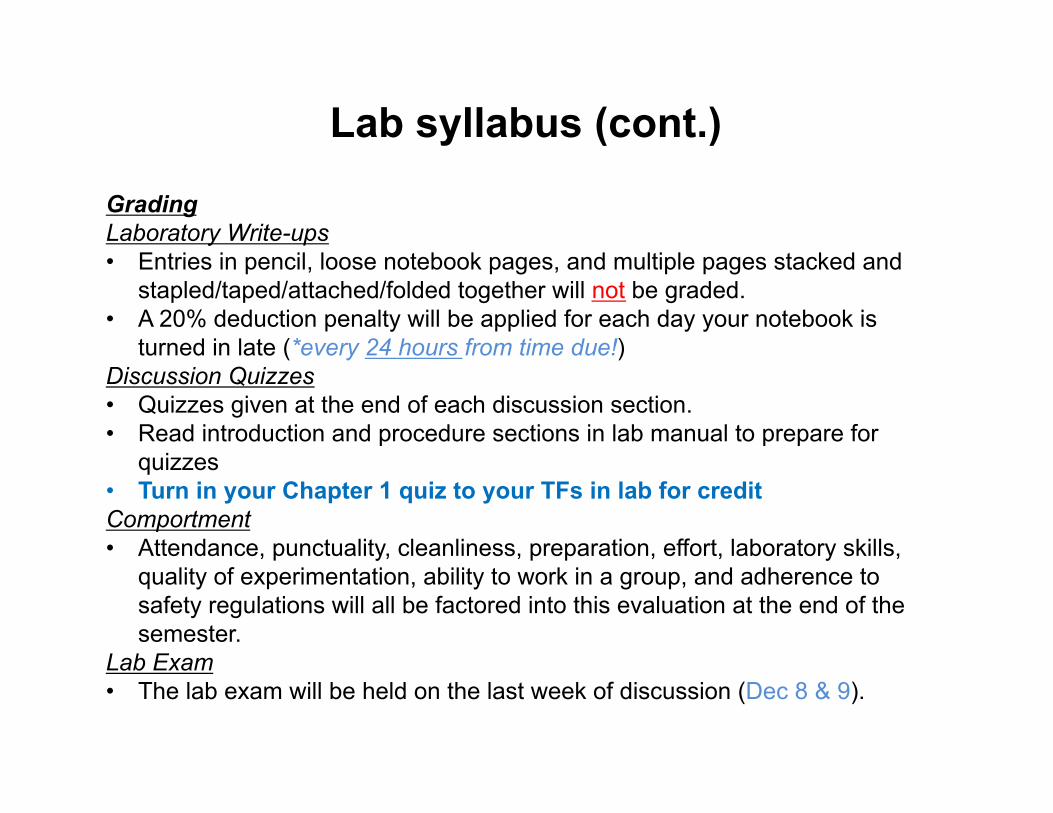
Grading Laboratory Write-ups • Entries in pencil, loose notebook pages, and multiple pages stacked and
stapled/taped/attached/folded together will not be graded. • A 20% deduction penalty will be applied for each day your notebook is
turned in late (*every 24 hours from time due!) Discussion Quizzes • Quizzes given at the end of each discussion section. • Read introduction and procedure sections in lab manual to prepare for
quizzes • Turn in your Chapter 1 quiz to your TFs in lab for credit Comportment • Attendance, punctuality, cleanliness, preparation, effort, laboratory skills,
quality of experimentation, ability to work in a group, and adherence to safety regulations will all be factored into this evaluation at the end of the semester.
Lab Exam • The lab exam will be held on the last week of discussion (Dec 8 & 9).
Lab syllabus (cont.)
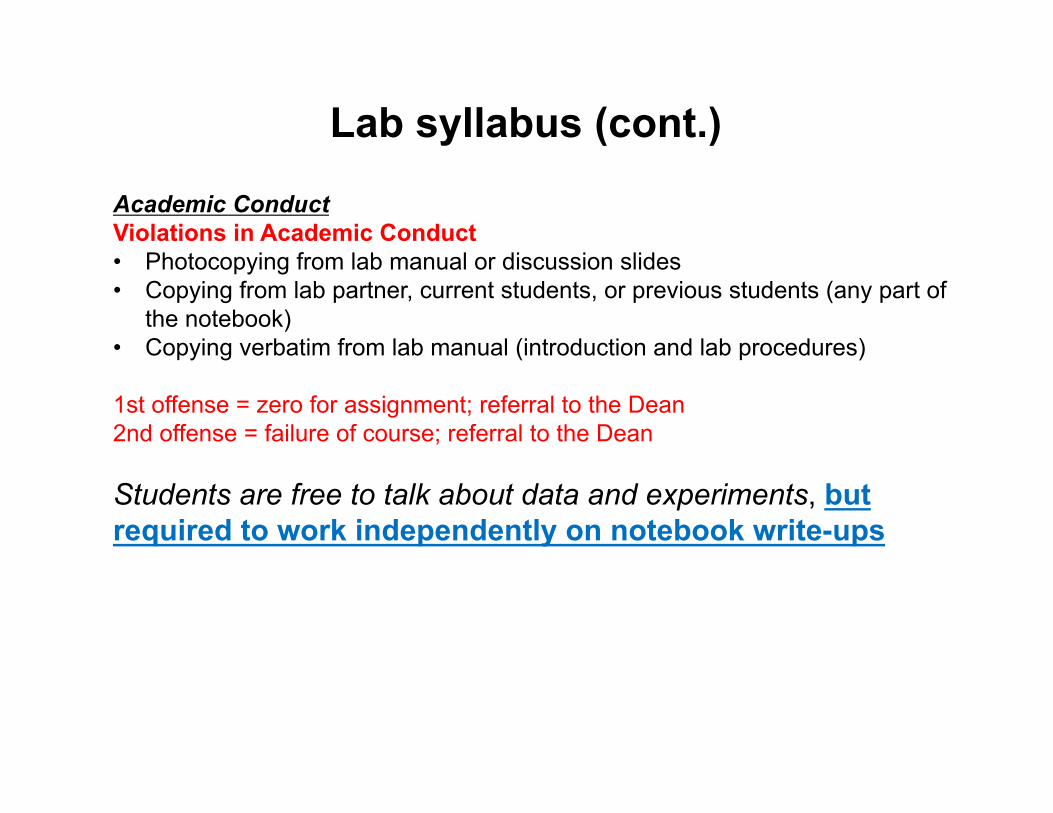
Academic Conduct Violations in Academic Conduct • Photocopying from lab manual or discussion slides • Copying from lab partner, current students, or previous students (any part of
the notebook) • Copying verbatim from lab manual (introduction and lab procedures)
1st offense = zero for assignment; referral to the Dean 2nd offense = failure of course; referral to the Dean
Students are free to talk about data and experiments, but required to work independently on notebook write-ups
Lab syllabus (cont.)
Your laboratory manual
In each chapter: Introduction
• Concepts, assays, and experiments in the chapter are explained Problems
• While these problems are for your own benefit and will not be graded, you are highly encouraged to do these on your own. These practice problems will help with calculations for the Notebook section.
References • A list of references from the Introduction section
Experimental Procedures • A step-by-step explanation on how to perform the experiments
Notebook • Use this section for completing your pre-lab and post-lab write-ups
Set-up and Materials • A list of reagents, materials, and equipment you will need
Appendix • Answers to the Problems section as well as other useful information to
help you complete your notebook write-ups
Your laboratory manual (cont.)
Bring your lab manual to discussion • Ask questions about unclear concepts and procedures
Do not bring the lab manual to lab • Your pre-lab write-up should be your guide in lab. The lab manual will
only act as a handicap.
Read the complete introduction to the lab manual
Read the chapter introduction and procedure sections before each week of discussion to prepare for quiz
As you progress through the lab manual after a few weeks, you will notice the Experimental Procedures section becomes less “cookbook” and more of what a real protocol will look like. It is your responsibility to figure out how to set up your tables, charts, master mixes, flowcharts, and data organization.
Your laboratory notebook
For each lab week: Before lab
• Read the introduction and procedure section • Complete your pre-lab write-up
− Read the notebook section of the lab manual to find out which tables and/or flowcharts are needed
During lab • Record all of your findings for all assays and experiments • Use your time wisely and efficiently
Before leaving lab • Ensure that you and your lab partner(s) each have all the data needed • Turn in your lab notebook if it is due for that week
After lab • Complete your post-lab notebook write-up

Your laboratory notebook (cont.) For a complete notebook write-up, each week you must have: Pre-lab write-up
• Title, date, introduction, procedure and any necessary tables and flowcharts
Data Collection • Show filled data tables and experiment recordings • You are responsible to having all of your data in your notebook. Graphs
and charts based off of missing data will receive no credit and be grounds for academic misconduct.
Notebook Section • Complete each prompt and exercise, including Questions, from the
Notebook section for each week in the lab manual Conclusions
• One or two sentences about the results of your experiments + complete analysis
Sample Calculations • Show a sample calculation for each different type of mathematical
manipulation • Credit will not be given to values with no sample calculations and are
grounds for academic misconduct.
Your laboratory notebook (cont.)
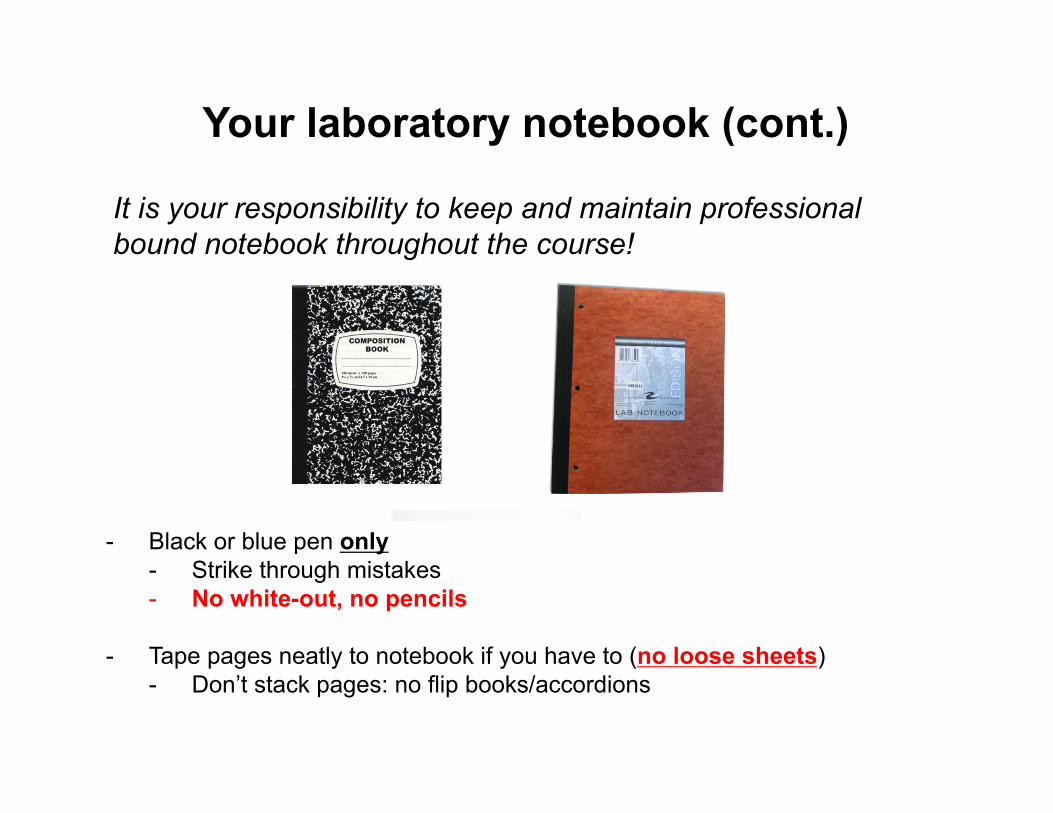
It is your responsibility to keep and maintain professional bound notebook throughout the course!
- Black or blue pen only - Strike through mistakes - No white-out, no pencils
- Tape pages neatly to notebook if you have to (no loose sheets) - Don’t stack pages: no flip books/accordions
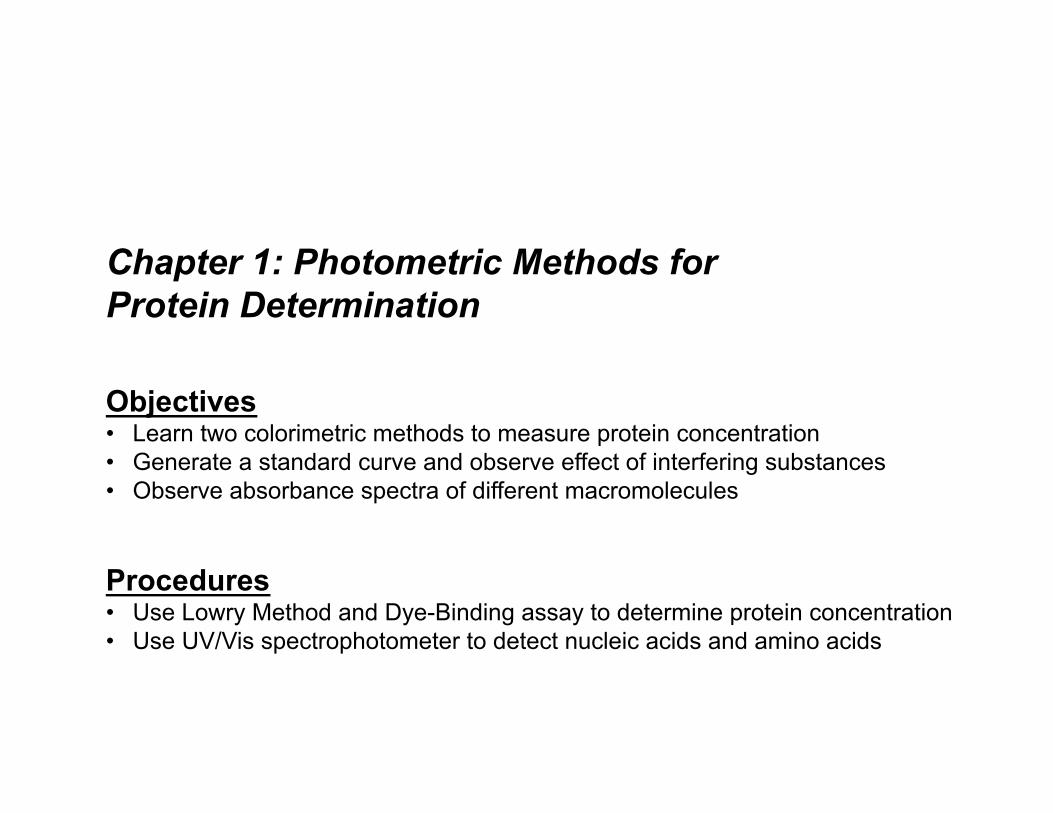
Chapter 1: Photometric Methods for Protein Determination
Objectives • Learn two colorimetric methods to measure protein concentration • Generate a standard curve and observe effect of interfering substances • Observe absorbance spectra of different macromolecules
Procedures • Use Lowry Method and Dye-Binding assay to determine protein concentration • Use UV/Vis spectrophotometer to detect nucleic acids and amino acids
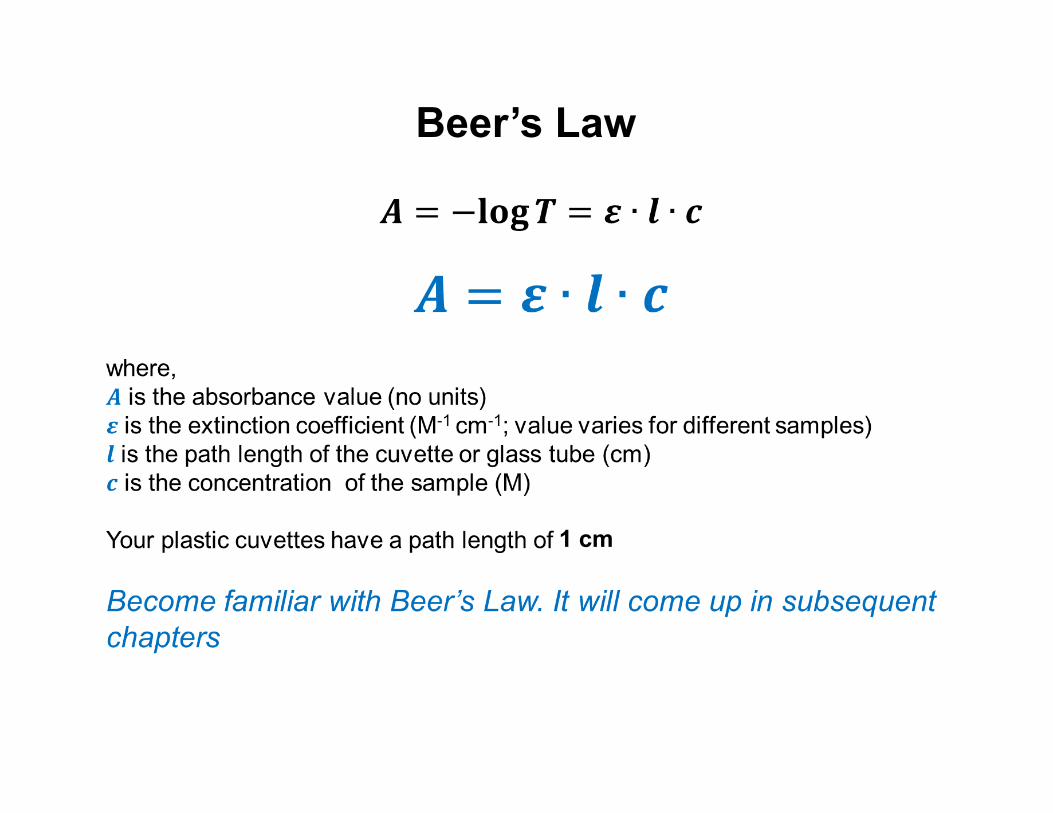
Beer’s Law
1 cm
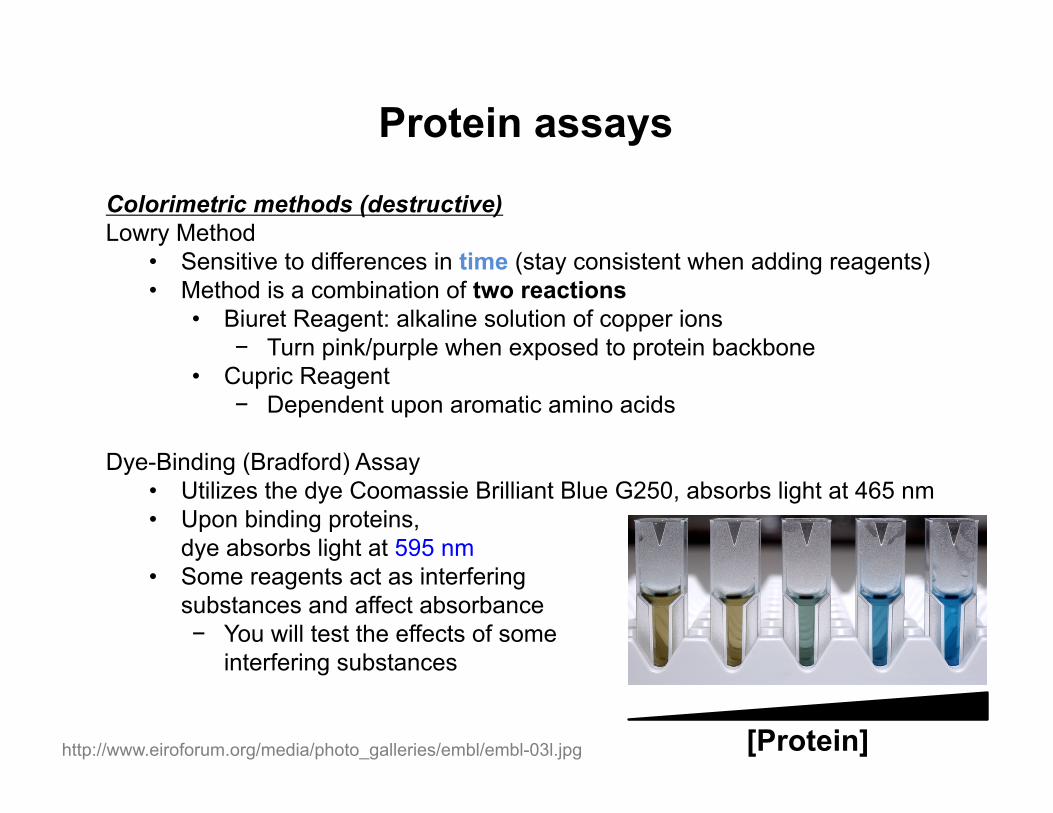
Protein assays
Colorimetric methods (destructive) Lowry Method
• Sensitive to differences in time (stay consistent when adding reagents) • Method is a combination of two reactions
• Biuret Reagent: alkaline solution of copper ions − Turn pink/purple when exposed to protein backbone
• Cupric Reagent − Dependent upon aromatic amino acids
Dye-Binding (Bradford) Assay • Utilizes the dye Coomassie Brilliant Blue G250, absorbs light at 465 nm • Upon binding proteins,
dye absorbs light at 595 nm • Some reagents act as interfering
substances and affect absorbance − You will test the effects of some
interfering substances
http://www.eiroforum.org/media/photo_galleries/embl/embl-03l.jpg [Protein]
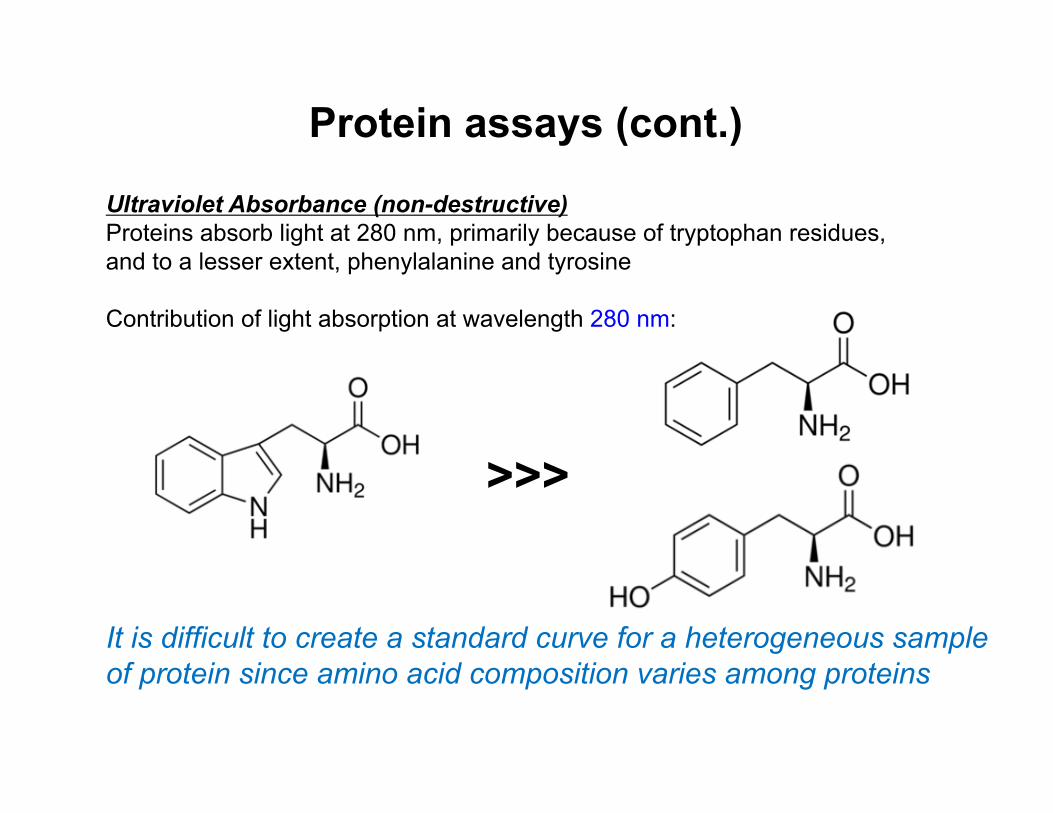
Protein assays (cont.)
>>>
Ultraviolet Absorbance (non-destructive) Proteins absorb light at 280 nm, primarily because of tryptophan residues, and to a lesser extent, phenylalanine and tyrosine
Contribution of light absorption at wavelength 280 nm:
It is difficult to create a standard curve for a heterogeneous sample of protein since amino acid composition varies among proteins

Standard curve
“A plot of the absorbance versus the mass or moles of a standard material being assayed” -page 13 of manual
Tubes 1 – 8 for both the Lowry Method and the Dye-Binding Assay will allow you to generate a standard curve for each respective procedure.
y = 0.1366x R² = 0.9753
0
0.1
0.2
0.3
0.4
0.5
0.6
0.7
0.8
0 1 2 3 4 5 6
595 nm
absorba
nce read
ing
µg of BSA
Sample standard curve
Absorbance readings
Linear(Absorbance readings)
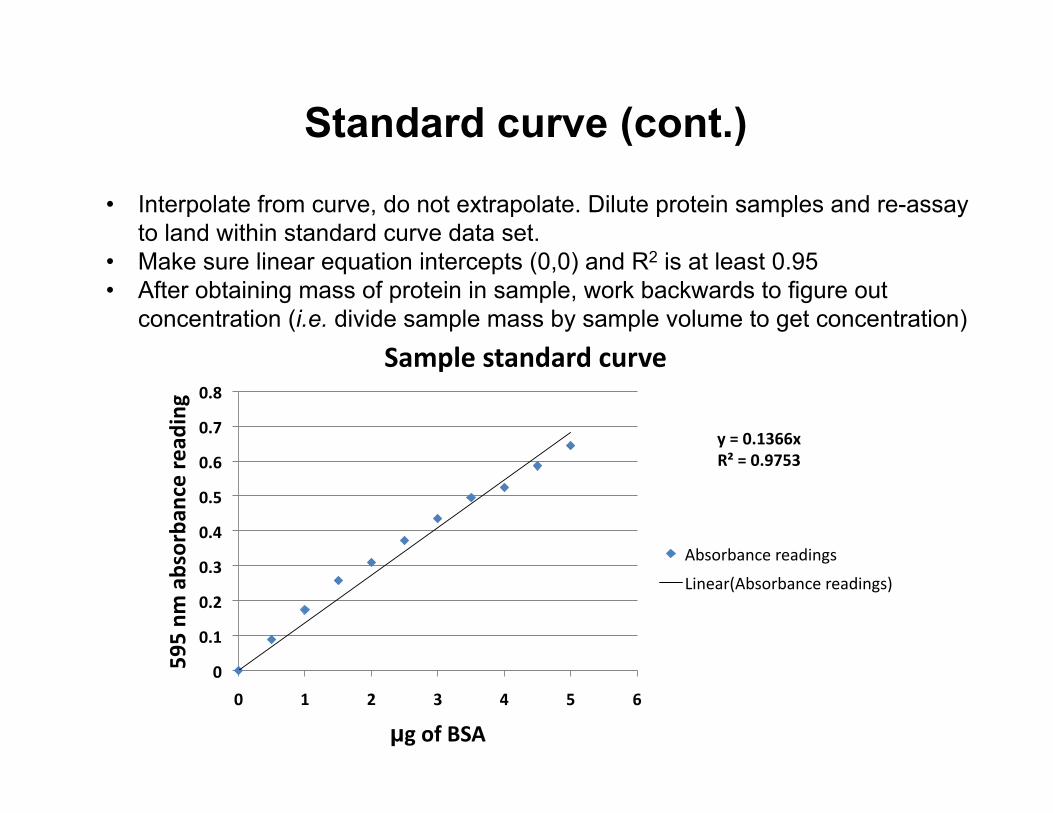
Standard curve (cont.)
• Interpolate from curve, do not extrapolate. Dilute protein samples and re-assay to land within standard curve data set.
• Make sure linear equation intercepts (0,0) and R2 is at least 0.95 • After obtaining mass of protein in sample, work backwards to figure out
concentration (i.e. divide sample mass by sample volume to get concentration)
y = 0.1366x R² = 0.9753
0
0.1
0.2
0.3
0.4
0.5
0.6
0.7
0.8
0 1 2 3 4 5 6
595 nm
absorba
nce read
ing
µg of BSA
Sample standard curve
Absorbance readings
Linear(Absorbance readings)
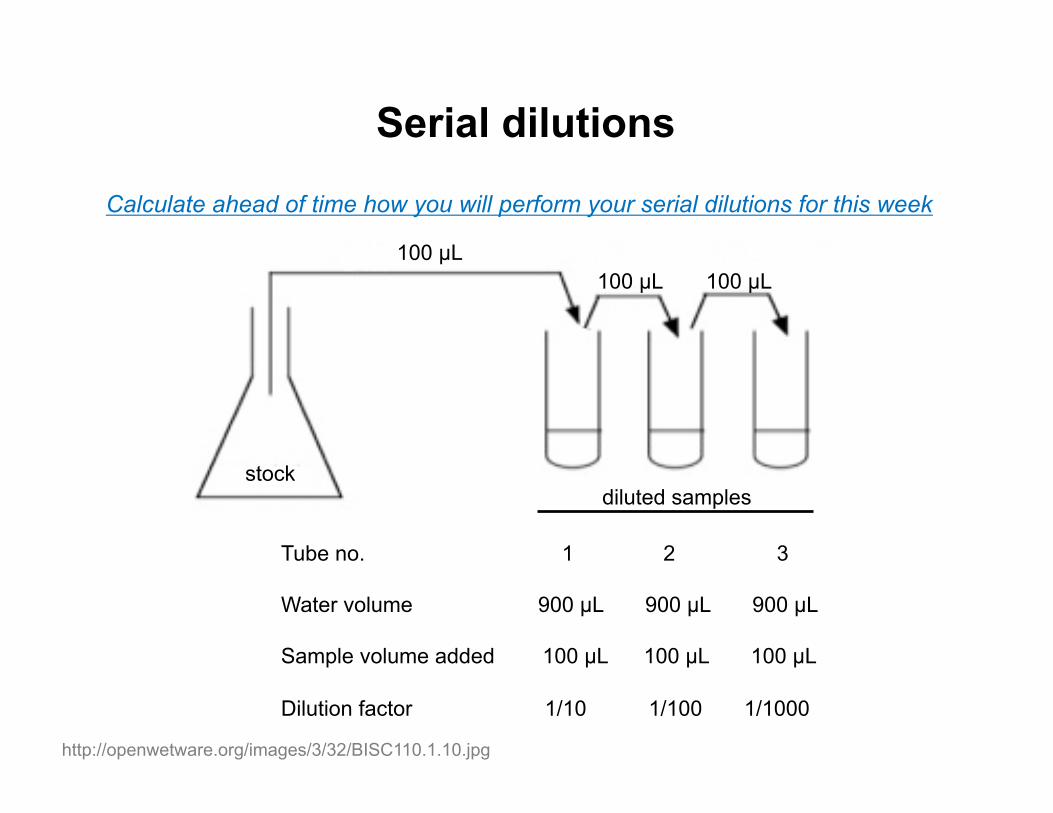
Serial dilutions
http://openwetware.org/images/3/32/BISC110.1.10.jpg
stock diluted samples
Tube no. 1 2 3
Water volume 900 µL 900 µL 900 µL
Sample volume added 100 µL 100 µL 100 µL
Dilution factor 1/10 1/100 1/1000
100 µL 100 µL 100 µL
Calculate ahead of time how you will perform your serial dilutions for this week
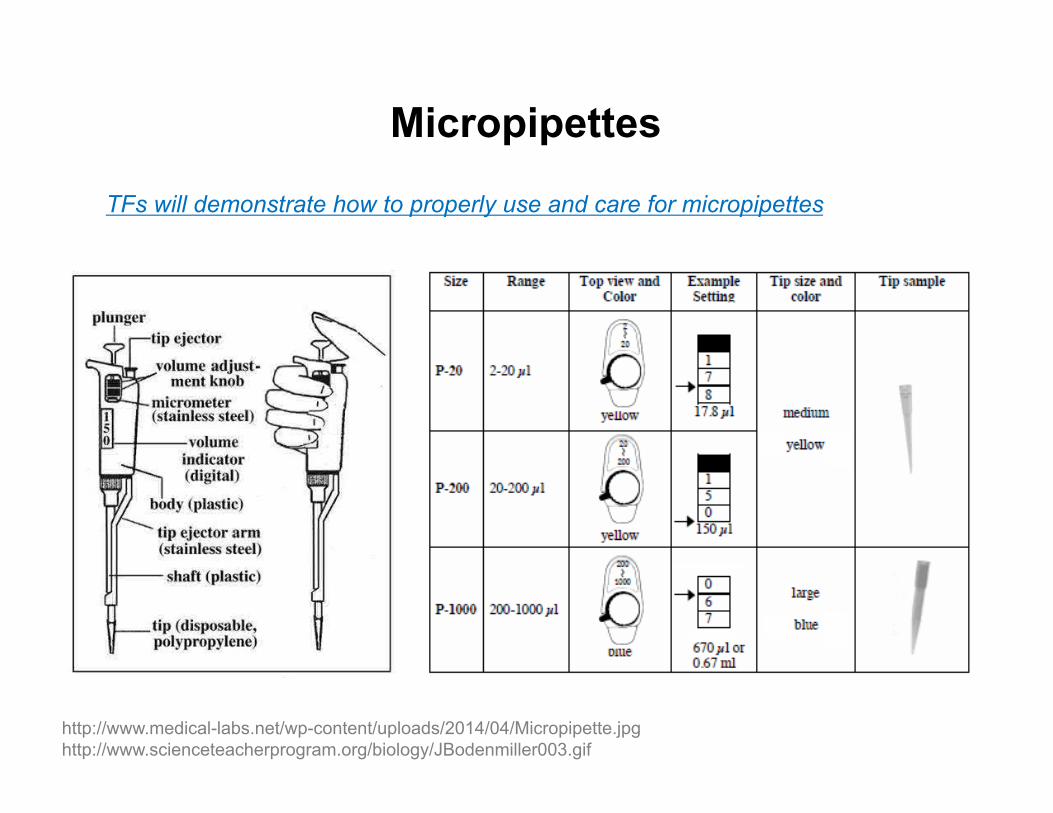
Micropipettes
http://www.medical-labs.net/wp-content/uploads/2014/04/Micropipette.jpg http://www.scienceteacherprogram.org/biology/JBodenmiller003.gif
TFs will demonstrate how to properly use and care for micropipettes

Lowry Method • Gather reagents needed & label test tubes • Prepare each tube according to columns 2, 3, and 4; page 23 in manual • This method is time-sensitive! Stay consistent time-wise when adding
reagents to tubes (e.g. space 10 seconds in between each tube) • For each sample: add 5.0 mL of alkaline copper reagent (reagent A) and
immediately vortex • Let samples stand for 10 min at room temperature • For each sample: vortex, add 0.5 mL of phosphotungstate-
phosphomolybdate (reagent B), and vortex again • Let samples stand for 45 min at room temperature • Set spectrophotometer wavelength to 550 nm and blank with tube no. 1 • Read absorbance at 550 nm and record readings in notebook
Chapter 1: Procedure
Chapter 1: Procedure
Bradford Assay • Gather reagents needed & label tubes • Prepare each tube according to columns 2, 3, and 4; page 24 in manual • Add 4.5 mL of Blue-Dye reagent and vortex each tube • Let samples stand for 2 min at room temperature • Set spectrophotometer wavelength to 595 nm and blank with tube no. 1 • Read absorbance at 595 nm and record readings in notebook
UV-Vis • Your TFs will demonstrate how to properly use the UV/Vis spec. Always ask
questions if you are unsure about something to avoid damaging/breaking expensive equipment!
• Use the plastic cuvettes in your plastic boxes • For your UV-Vis session, make sure to blank with 1.0 mL of dH2O • Measure absorbance spectra for 1.0 mL samples of BSA (1.0 mg/mL), gelatin
(1.0 mg/mL), and yeast RNA (25 µg/mL) • Print out an absorbance spectra for you and your lab partner(s)
Chapter 1: Procedure

Chapter 1 laboratory checklist
At the end of lab, you should have:
! Recordings for your Lowry Method readings
! Recordings for your Dye-Binding Method readings
! A printout of your UV/Vis absorbance spectra
! Turned in your completed Chapter 1 discussion quiz to your TFs
For the first week of lab...
• Go to lab first (SCI 162). No need for tool kit yet. Don’t be late!
• TFs will introduce themselves, take attendance, and escort you to stockroom
• Check-out tool kit and supply box, then head back to lab
• TFs will go over lab policies, lab safety, and answer questions
• TFs will preview Chapter 1 (record any procedural changes in your notebook)
• Complete Chapter 1 experiments

Questions?