biker basics by e r n e r p r i m a ry...
TRANSCRIPT
P R I M A RY ISSUESHow to check and adjust the primary chain on a Big Twin
B I K E R B A S I C S B Y S T E P H E N B E R N E R
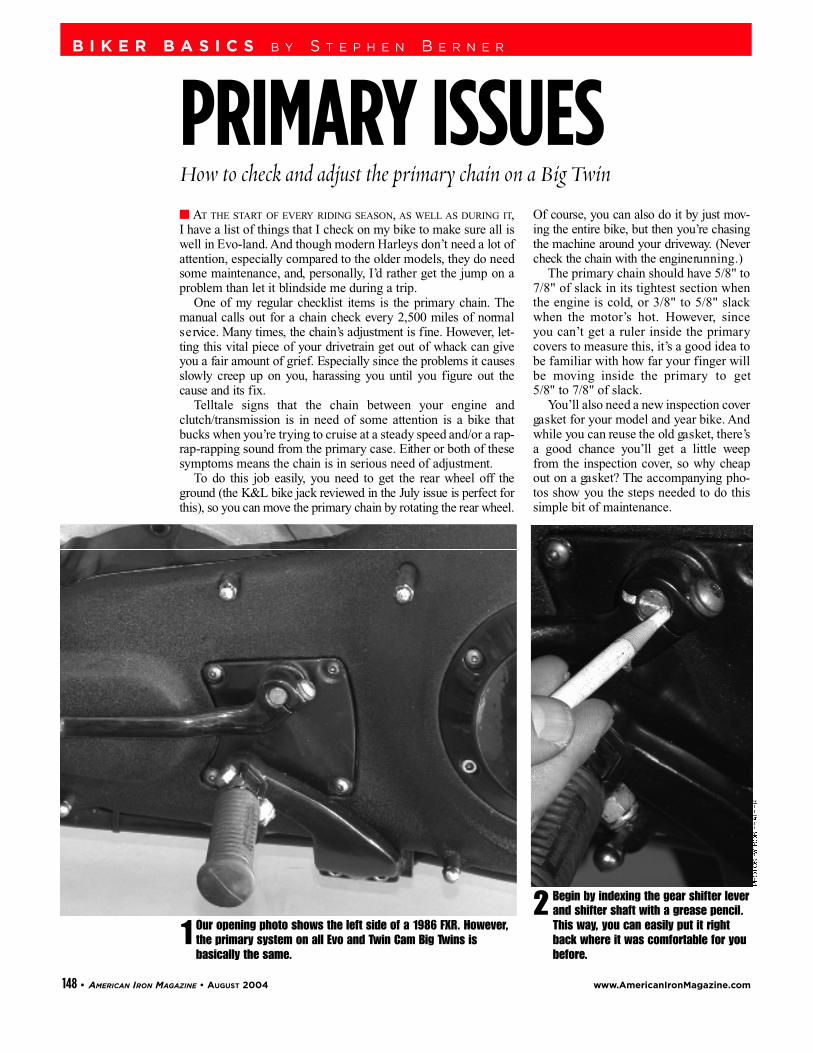
1 Our opening photo shows the left side of a 1986 FXR. However,the primary system on all Evo and Twin Cam Big Twins is basically the same.
148 • AMERICAN IRON MAGAZINE • AUGUST 2004 www.AmericanIronMagazine.com
2 Begin by indexing the gear shifter leverand shifter shaft with a grease pencil.This way, you can easily put it rightback where it was comfortable for youbefore.
■ AT T H E S TA RT O F E V E RY R I D I N G S E A S O N, A S W E L L A S D U R I N G I T,I have a list of things that I check on my bike to make sure all iswell in Evo-land. And though modern Harleys don’t need a lot ofattention, especially compared to the older models, they do needsome maintenance, and, personally, I’d rather get the jump on ap r o blem than let it blindside me during a trip.
One of my regular checklist items is the primary chain. T h emanual calls out for a chain check eve ry 2,500 miles of norm a ls e rvice. Many times, the chain’s adjustment is fine. Howeve r, let-ting this vital piece of your drivetrain get out of whack can giveyou a fair amount of grief. Especially since the problems it causess l ow ly creep up on you, harassing you until you figure out thecause and its fi x .
Telltale signs that the chain between your engine andclutch/transmission is in need of some attention is a bike thatbucks when yo u ’re trying to cruise at a steady speed and/or a rap-rap-rapping sound from the primary case. Either or both of thesesymptoms means the chain is in serious need of adjustment.
To do this job easily, you need to get the rear wheel off theground (the K&L bike jack rev i ewed in the July issue is perfect forthis), so you can move the primary chain by rotating the rear wh e e l .
Of course, you can also do it by just mov-ing the entire bike, but then yo u ’re chasingthe machine around your driveway. (Neve rcheck the chain with the engine ru n n i n g . )
The primary chain should have 5/8" to7/8" of slack in its tightest section whenthe engine is cold, or 3/8" to 5/8" slackwhen the motor’s hot. However, sinceyou can’t get a ruler inside the primarycovers to measure this, it’s a good idea tobe familiar with how far your finger willbe moving inside the primary to get 5/8" to 7/8" of slack.
Yo u ’ll also need a new inspection cove rga s ket for your model and year bike. A n dwhile you can reuse the old ga s ket, there’sa good chance yo u ’ll get a little we e pfrom the inspection cove r, so why cheapout on a ga s ket? The accompanying pho-tos show you the steps needed to do thissimple bit of maintenance.
150 • AMERICAN IRON MAGAZINE • AUGUST 2004 www.AmericanIronMagazine.com
B i k e r B a s i c s
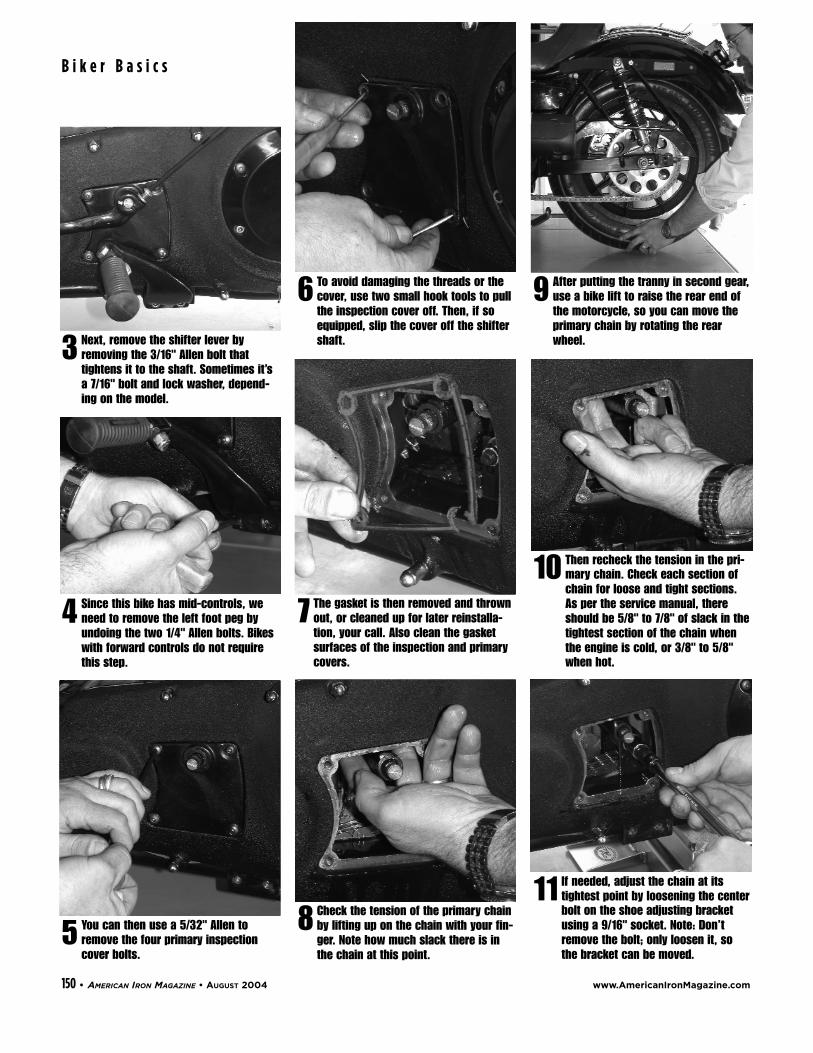
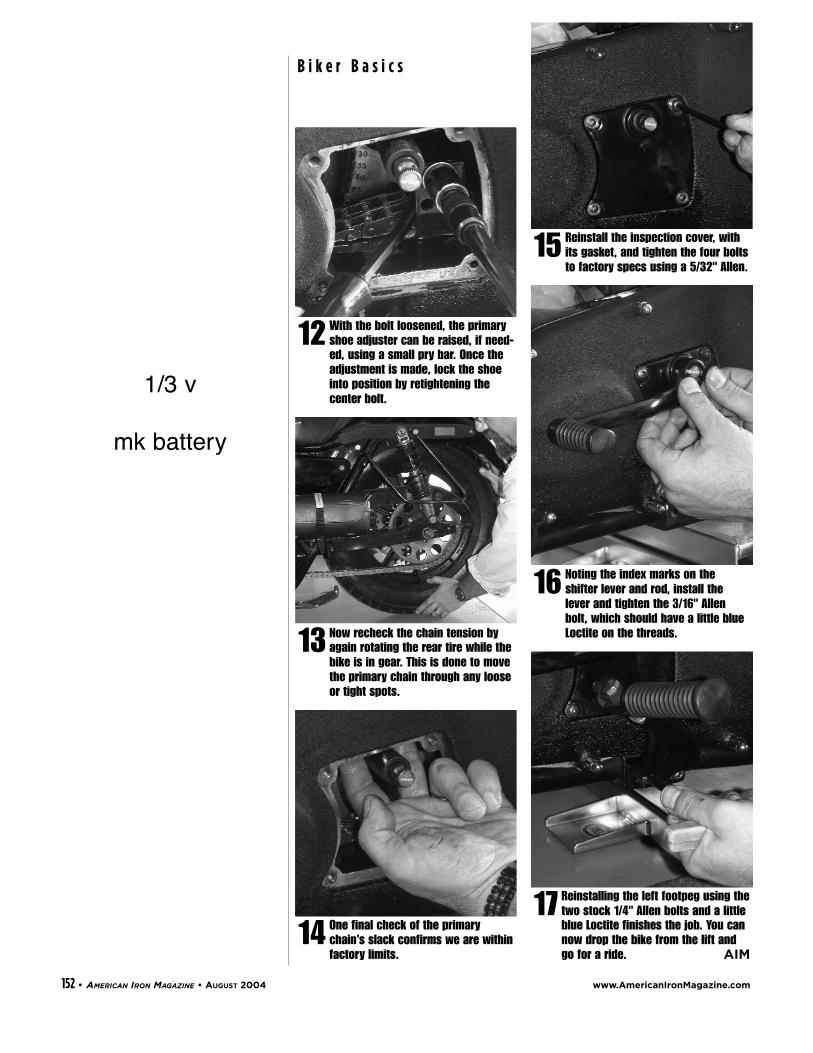
7 The gasket is then removed and thrownout, or cleaned up for later reinstalla-tion, your call. Also clean the gasketsurfaces of the inspection and primarycovers.
3 Next, remove the shifter lever byremoving the 3/16" Allen bolt thattightens it to the shaft. Sometimes it’sa 7/16" bolt and lock washer, depend-ing on the model.
4 Since this bike has mid-controls, weneed to remove the left foot peg byundoing the two 1/4" Allen bolts. Bikeswith forward controls do not requirethis step.
5 You can then use a 5/32" Allen toremove the four primary inspectioncover bolts.
6 To avoid damaging the threads or thecover, use two small hook tools to pullthe inspection cover off. Then, if soequipped, slip the cover off the shiftershaft.
8 Check the tension of the primary chainby lifting up on the chain with your fin-ger. Note how much slack there is inthe chain at this point.
10 Then recheck the tension in the pri-mary chain. Check each section ofchain for loose and tight sections.As per the service manual, thereshould be 5/8" to 7/8" of slack in thetightest section of the chain whenthe engine is cold, or 3/8" to 5/8"when hot.
9 After putting the tranny in second gear,use a bike lift to raise the rear end ofthe motorcycle, so you can move theprimary chain by rotating the rearwheel.
11 If needed, adjust the chain at itstightest point by loosening the centerbolt on the shoe adjusting bracketusing a 9/16" socket. Note: Don’tremove the bolt; only loosen it, sothe bracket can be moved.
152 • AMERICAN IRON MAGAZINE • AUGUST 2004 www.AmericanIronMagazine.com
B i k e r B a s i c s
16 Noting the index marks on theshifter lever and rod, install thelever and tighten the 3/16" Allenbolt, which should have a little blueLoctite on the threads.13 Now recheck the chain tension by
again rotating the rear tire while thebike is in gear. This is done to movethe primary chain through any looseor tight spots.
14 One final check of the primarychain’s slack confirms we are withinfactory limits.
15 Reinstall the inspection cover, withits gasket, and tighten the four boltsto factory specs using a 5/32" Allen.
17 Reinstalling the left footpeg using thetwo stock 1/4" Allen bolts and a littleblue Loctite finishes the job. You cannow drop the bike from the lift andgo for a ride. AIM
12 With the bolt loosened, the primaryshoe adjuster can be raised, if need-ed, using a small pry bar. Once theadjustment is made, lock the shoeinto position by retightening thecenter bolt.
1/3 v
mk battery