basic troop camping - · pdf filecongratulations on taking the next step in the ... basic...
TRANSCRIPT

Basic Troop Camping
Online Pre-session
1

Congratulations on taking the next step in the Progression in the Out of Doors. The pre-requisite to this course is Outdoor 101, Introduction to the Out of Doors. Some of the material from that course is
referenced in this presentation.
This online session, your planning meeting, and your Basic Troop Camping overnight, will teach you how to prepare the girls for an overnight camping trip.
Welcome to Basic Troop
Camping!
2

Acknowledgements
We would like to thank the Girl Scouts of Chesapeake Bay for sharing their resources for this online session.
You may notice some references to their council in the videos you will be viewing as part of this course.
3

Almost every Girl Scout looks forward to adventures in the out-of-doors with her troop.
Camping is an important part of a troop’s program in
the out-of-doors. Each step of the planning and preparation, as well as the camping experience itself, should involve the active participation of the girls with your guidance and help.
The skills that the girls develop in regular troop
meetings - working together in patrols, learning and practicing camp craft skills - will help prepare them for the adventure of troop camping.
Introduction
4

This pre-session will help guide you through the processes needed to plan and prepare for the overnight session of Basic Troop Camping.
By the end of the session, you will be able to: • Plan a camping trip with your patrol to be carried out during the Basic
Troop Camping overnight. • Understand and create kaper charts for the Basic Troop Camping
overnight. • Describe the three heat sources and four methods of cooking and
use each in your menu planning for the Basic Troop Camping overnight.
This pre-session will not prepare you to camp on your own. You must complete both pre-sessions and the overnight session.
Introduction
5

A link to the following resources was in your confirmation e-mail. You will need them to complete this course.
Volunteer Essentials Basic Troop Camping Manual
Guide to Council Properties (Form 07-147)
Introduction
Also, throughout this pre-session you will find skill videos. Please practice the skill along with the video. To practice, you will also need:
o Rope or Shoe Lace o A pencil or wooden dowel
6

At the end of this session, you will be asked to complete a quiz which will be reviewed during your second pre-session held in a classroom setting.
To complete the quiz, you will also need the current editions of the following resources:
This Pre-session Volunteer Essentials Basic Troop Camping Manual Guide to Council Properties (Form 07-147)
Introduction
7

Let’s Get Started
8
Progression Progression, which was reviewed in Outdoor 101 the pre-requisite to this course, is a unique and integral part of the Girl Scout program; girls acquire skills that they need in order to move on to more difficult and complex activities.
This is particularly true when it comes to camping. Taking a group of girls camping with no preparation is likely to lead to frustration and confusion on the part of both girls and adults.
9

Readiness
Are you ready and more importantly, are your girls ready for an overnight or camping trip? Please review the Troop and Girl Readiness section from Outdoor 101. The answers can help you decide the kind of overnight your troop/group could handle. As the girls practice and gain confidence, your trips can progress.
10

Planning and Preparation
Preparation and Planning is crucial.
The secret to a successful camping trip is planning, planning and more planning.
11

Planning a Camping Trip
Planning is a process that girls learn as they design and carry out troop activities. It is a skill that they can use anywhere and at any time. In Girl Scouting, girls and adults work together to make decisions and to carry out their planned activities.
Girl Planning needs to start early as Girl Scout Daisies and Brownies, so that by the time they reach the final years of Girl Scout Juniors, they have a feeling of ownership, of independence and self-reliance. If activities and trips are still being created, planned, and carried out by leaders, the girls see little difference between Girl Scouting and the rest of their lives.
12

Planning a Camping Trip In Girl/Adult Planning:
• Girls learn to look at options and make decisions. • Adults guide girls to think through their plans.
• Girls become involved in activities because they made the choices for their projects and programs.
• Girls gain self-esteem, self-reliance, and responsibility. They feel a true sense of involvement and accomplishment.
• Girls develop leadership skills and learn to work with others. 13

Planning a Camping Trip Make sure the girls take the lead on planning - - encourage their ideas. Have a brainstorming session and use brainstorming tools such as a toss around ball or a talking stick to help girls take the time to express their ideas.
14
Additional help on Girl Planning can be found in the Leader Tool Kit on the GSCM website.

Preparation When planning for an overnight/camping trip, here are a few more things to consider: • Make sure the girls are ready to go on an overnight and feel
at ease with the trip.
• Girls should participate freely in activities and not be forced to do something they are not comfortable with (this includes not forcing girls to eat)
• Take girl fears into consideration (bugs, snakes, scary stories, etc.) Be aware of any fears; don’t discount a camper’s feelings.
Pages 3-4 of the Basic Troop Camping manual offers more information on preparation steps.
15

Once you decide to go camping, the next step is to determine where.
GSCM has four council properties. To learn about each property, look through the Guide to Council Properties (Form 07-147).
Take a moment now to look in the Guide to Council Properties and familiarize yourself with the outdoor property you will be going to for your training overnight. Camp Conowingo, pages 8 – 11
Camp Ilchester, pages 12 – 15
Camp Whippoorwill, pages 16 – 18
Camp Woodlands, pages 19 – 21
Where to go…
16

To tie, or not to tie, which knot is the question…. One skill that is important to master in order to camp successfully is knot tying. At camp, knot tying knowledge will allow you to secure tent poles, carry objects, and secure or hang items. The more knots you know how to tie, the more useful the application is at camp. In this pre-session, you will learn five different knots. The first is the Square Knot, a versatile secure knot that is easy to untie.
Skill Videos Knots
17

Before continuing please gather: • 1 or 2 shoelaces or small pieces of rope.
Watch the video here: http://www.youtube.com/watch?v=u6b0Nx-LInY
Skill Video 1 Square Knot
18

Policies, Paperwork and Procedures
19
Information on required paperwork and campsite reservations was covered in Outdoor 101. Please
review that information on pages 10-11 of that packet.
All forms discussed in this section can be
downloaded from www.gscm.org in the “Camp Forms” section under Camp.
20
As the troop camp trained person, you will be responsible for not only ensuring your girls are prepared for the trip, but also ensuring all the
paper work is completed and Girl Scout policies are followed.

Policies Before going on a trip you must make sure that you have all the necessary adult positions filled and appropriately trained and approved individuals when needed:
* The two trained positions should be two different people.
1 Emergency contact (adult who is willing to stay home, and be
available by phone during the entire trip - preferably a land line)
1 Adult in charge certified in First Aid/CPR (with a current certificate in First Aid, including Adult and Child CPR or CPR/AED.)
1 Adult in charge certified in a Troop Camp Training course (Basic Troop Camping or an equivalent GSCM course.)
21

Policies
You must also double check:
Volunteer Essentials: specifically “Chapter 4 Safety-Wise”
Ensure that you have the correct adult/girl ratios for
your troop’s grade level. (See Volunteer Essentials)
** Please make note that each Troop must be accompanied by a minimum of two unrelated adults (at least one of whom is female).
22

Policies And…
Check Volunteer Essentials: specifically “Chapter 4, Safety-Wise” to make sure that you understand and follow all Girl Scout approved Transportation Guidelines.
For Example: When transporting girls to Ocean City, MD you must observe both Delaware and Maryland's laws regarding Seat Belts, Booster Seats, and Car Seats.
* There is NO CARAVANNING on Girl Scout trips. Each vehicle must have their own set of directions, a first-aid kit, and a flashlight.
* Each vehicle should also have a copies of the Parent/Guardian Permission Form and Girl Health History for the girls riding in vehicle, in case there is an emergency.
23

Policies And see to it that…
The activities your girls have decided on are covered by the Girl Scout Safety Activity Checkpoints, and that the troop has all of the appropriate and necessary equipment for the activity.
For Example, the “Camping Safety Activity Checkpoint”: states Ensure the presence of a waterproof first-aid kit.
Don’t forget to involve the girls in this process!
For instance, if girls ask "Can we go…." your response could be, "Let's check the Girl Scout Safety Activity Checkpoints.”
All checkpoints can be found on the GSCM website under “Volunteer Resources”
24

GSCM Property Use Guidelines
• DAMAGE AND CLEANING – use the GSCM Campsite checkout sheet provided in your confirmation packet to help you clean. There will be a $100.00 fee charged for the cost of cleaning or repair if the site is left dirty or damaged beyond normal wear and tear.
• LEAVE AT HOME – The following are NOT permitted on GSCM Council properties: - Pets - Trailers - Power Saws
- Narcotics - Fire Arms - Alcoholic Beverages
- Liquid Gas and Liquid Gas Equipment: This includes gasoline, kerosene, and white gas
25

• MAINTENCE REQUEST FORMS – The “Maintenance Report Form” (07-
111) is available at each site to report damage. If you find an item is in need of repair or is a danger, please fill out the form and leave for the property manager.
• SMOKING STANDARD – Smoking is permitted in FIRE CIRCLES only.
There is to be NO SMOKING in tents, GSCM buildings, when walking around camp or around the girls.
• MEN AT CAMP – When fathers or male leaders are part of the group, separate sleeping quarters and bathrooms must be made available for their use. Also, notify the Camp Ranger and/or nearby troops that a male will be accompanying your troop at camp.
• CONSERVATION – Follow the Seven Principles of Leave No Trace, which can be found in your Basic Troop Camping Manual.
GSCM Property Use Guidelines
26

• VEHICLES – One emergency vehicle per troop may be parked at the unit during the camp time. Back in for easy evacuation. All other vehicles must park in the designated camp parking area. Speed limit is 10 Miles an hour.
• WEATHER – Leaders/Advisors should pay attention to the weather
forecasts so that they can be better prepared for their camp stay. Be aware that the temperature at night, in the woods or near the water may be much cooler then “back home” and weather is often unpredictable.
• ARRIVAL AND DEPARTURE – Sites are available starting at 4
p.m. on the first day of your registration. On your last day, the site may be occupied until noon.
GSCM Property Use Guidelines
27

• SLEEPING ARRANGEMENTS – Ensure that each participant has her own bed. Parent/Guardian permission must be obtained if girls are to share a bed. Adults and girls NEVER share a bed. It is not mandatory that an adult sleep in the girls sleeping area. If an adult female does share a sleeping area, there should be two unrelated females present.
• FOOD AND EQUIPMENT – Troops need to supply all necessary
kitchen equipment. Be sure to leave nothing behind when you are preparing to leave. Clean out the refrigerator if one is at the site.
• DISINFECTING MATTRESSES – This procedure is required by
the State and County Health Departments. Procedure to follow upon arrival: Wipe each plastic covered mattress with Clorox wipes or other disinfecting wipes.
GSCM Property Use Guidelines
28

• SITE AMENITIES – Consult the grid for each camp in the Guide to Council Properties to determine site amenities.
• CELLULAR PHONES – Cellular service at our camps depends
upon individual carriers and should not be counted upon. Please make sure you have an emergency contact at home that is not on the trip with you and use the phone tree.
• EMERGENCY CONTACT PERSON – The Phone Tree. This is an adult who is willing to stay home to be by the phone during the entire trip, in case of an emergency or a change in troop itinerary.
GSCM Property Use Guidelines
29

Remember!
The 5 P’s of Outings: Planning – Girls do the planning with the help of leaders.
Program – Girls decide what they want to do while on the trip.
Progression – Girls move on once they have mastered a skill.
Permissions – Leader gets the appropriate permissions from Council for site usage, Service Unit for Trip Application, Parent Permission Form for each girl, use of certain equipment and or activities.
Prevention – Leaders and girls check site for hazards, set boundaries, discuss behavior expectations, wear proper clothing, create balanced program, follow proper safety guidelines, etc.
30

To tie, or not to tie, which knot is the question…. The second knot you are going to learn is the Clove Hitch. The Clove Hitch is often used when strength and sturdiness are most important. This knot is not tied on its own, but to something such as a pole, a stake or an anchor. Often at camp, the Clove Hitch is used to secure clotheslines, tents and tarps to stationary objects.
Skill Video 2 Clove Hitch
31
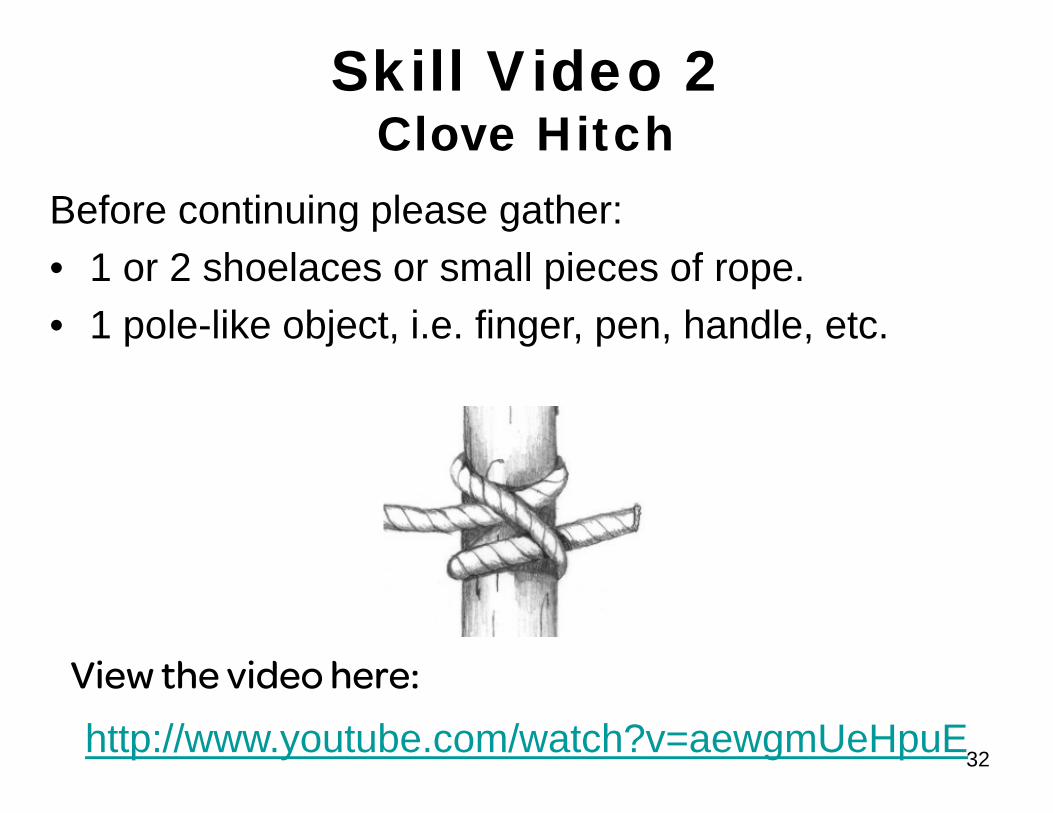
Before continuing please gather: • 1 or 2 shoelaces or small pieces of rope. • 1 pole-like object, i.e. finger, pen, handle, etc.
View the video here:
http://www.youtube.com/watch?v=aewgmUeHpuE
Skill Video 2 Clove Hitch
32

Cooking at Camp
33

Now that we know how to get to camp, let’s look at what and how we can cook while there.
Just like progressing in the outdoors, when planning a cookout, remember the grade level and experience of the majority of the girls attending. Start where the majority of the girls are before progressing to more advanced steps.
Take notice of the highlighted areas on the chart on the next slide. Those are the areas we focus on during the Basic Troop Camping overnight.
Cooking at Camp
34

Prepare a meal or snack that requires no cooking. Nose bag lunch, Sandwiches, Cereal for breakfast Salad Trail Mix Ants on a Log, etc.
Prepare a meal component all in one pot or on the camp stove. Main dish is almost the entire meal Stew Chili Soup If frying use a minimum amount of grease over moderate heat. Bacon Hamburgers Note: Be sure to try several of these with a new recipe each time.
Prepare a meal component over a bed of coals in the fire circle. Coal cooking can also be done with a terracotta pot. Turn the food and let it cook slowly. Food can be cooked on a wire rack, in foil packets, or in a pan. Toast Grilled Cheese Banana Boats Roasted Apples Foil Dinners
Prepare a meal component over low fire in the fire circle. This can be frying, steaming, boiling, etc. One pot One pan Grilling
Prepare a meal component a Dutch oven, box oven, solar oven, or reflector oven. Use coals when baking in a Dutch oven or box oven. Use fire to bake in a reflector oven Use the sun to bake in a solar oven. You can make anything !
Prepare a meal component on a stick over the fire or over coals. S’mores Bacon Hot dog Kabobs Bread twists Brown Bears / Dough boys Pigs in a blanket Cooking raw dough or meat on a stick takes patience, practice and skill.
Prepare a meal component using more advance skills. Using a tripod Cooking on a spit Planking Pits Potatoes in dirt
Prepare a meal component use a novelty method. Vagabond Stove Tin can Charcoal stove Pie irons Baking in a can Roasting in a bucket Egg on a stick After the girls have MASTERED all the previous steps, they are ready to try new ideas. Remember that tin can stoves and utensils get extremely hot and are not for inexperienced cooks.
PROGRESSION IN COOKING
NO BAKE
ONE POT/PAN
COALS
FIRE
BAKING
STICK
ADVANCED
NOVELTY
When you are starting to plan for a cookout, remember the age level and experiences of the majority of the girls in the troop.
With first year Brownies, start with Step 1 and progress through the various steps. By doing this, both leaders and girls will enjoy their first experience and will look forward to the next one.
IF YOUR GIRLS ARE OLDER, START “WHERE THEY ARE” AND ADVANCE THROUGH THE STEPS.
35

The three main heat sources used for cooking at camp are: • Propane • Charcoal • Open fire
When planning your training weekend, you will need to plan menu components using all three sources.
You will also need to include these four cooking methods: • One-pot meals • Foil cooking • Stick cooking • Baking
Cooking at Camp
36

This video, www.youtube.com/watch?v=pSZYEwd9i0A will provide examples and discuss each of the four cooking methods you will need to demonstrate at camp.
1. One-pot meals 2. Foil cooking 3. Stick cooking 4. Baking
Cooking Equipment
37
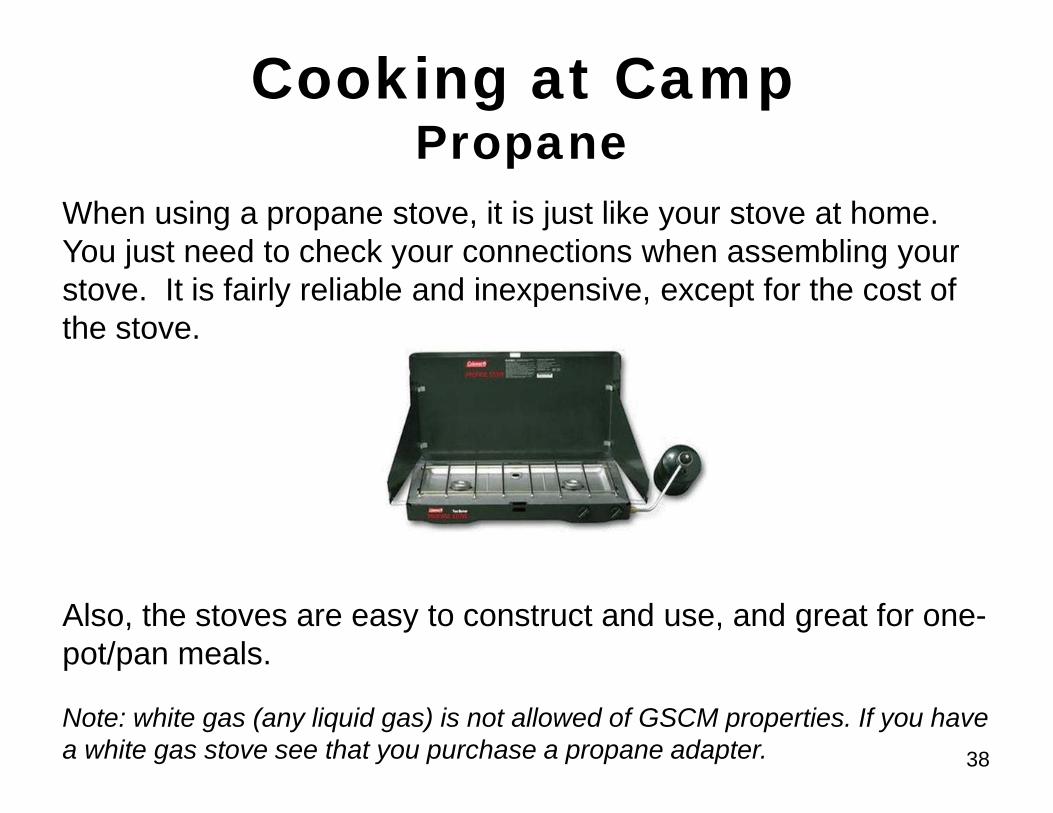
When using a propane stove, it is just like your stove at home. You just need to check your connections when assembling your stove. It is fairly reliable and inexpensive, except for the cost of the stove.
Also, the stoves are easy to construct and use, and great for one-pot/pan meals.
Note: white gas (any liquid gas) is not allowed of GSCM properties. If you have a white gas stove see that you purchase a propane adapter.
Cooking at Camp Propane
38

Putting your stove together: 1. Open your stove,
and position wind guards.
2. Make sure both burners are off.
Propane Stove
39
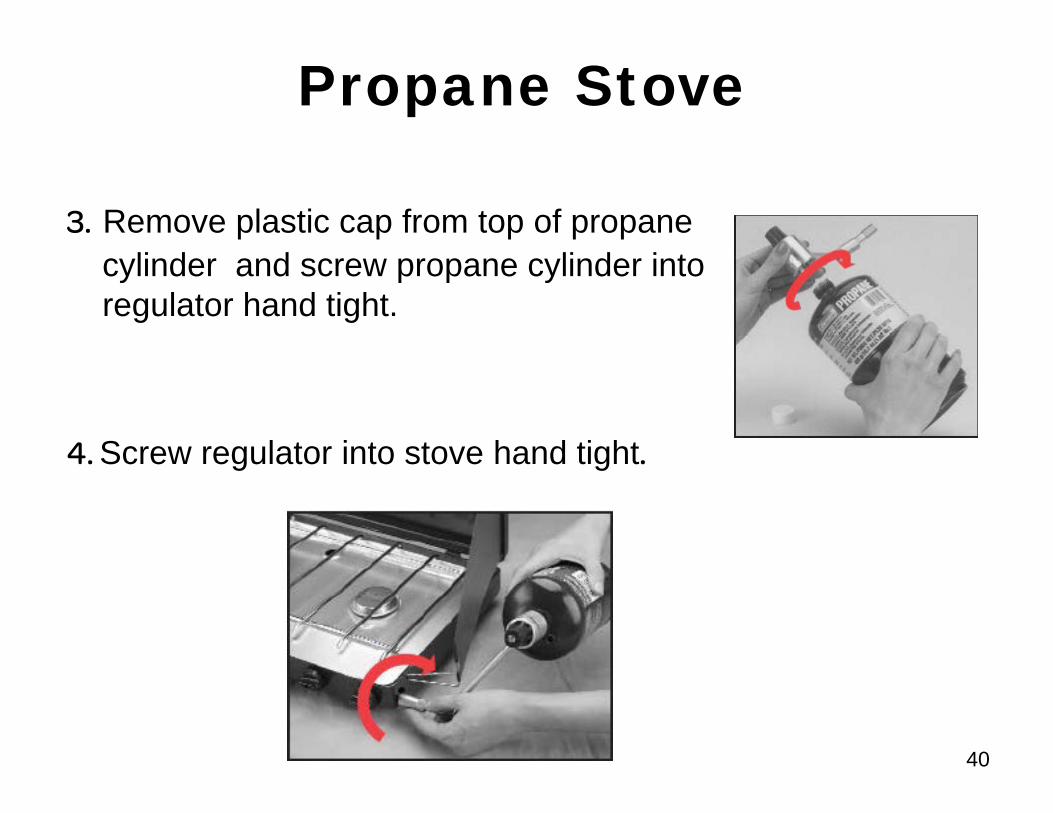
3. Remove plastic cap from top of propane cylinder and screw propane cylinder into regulator hand tight.
4. Screw regulator into stove hand tight.
Propane Stove
40
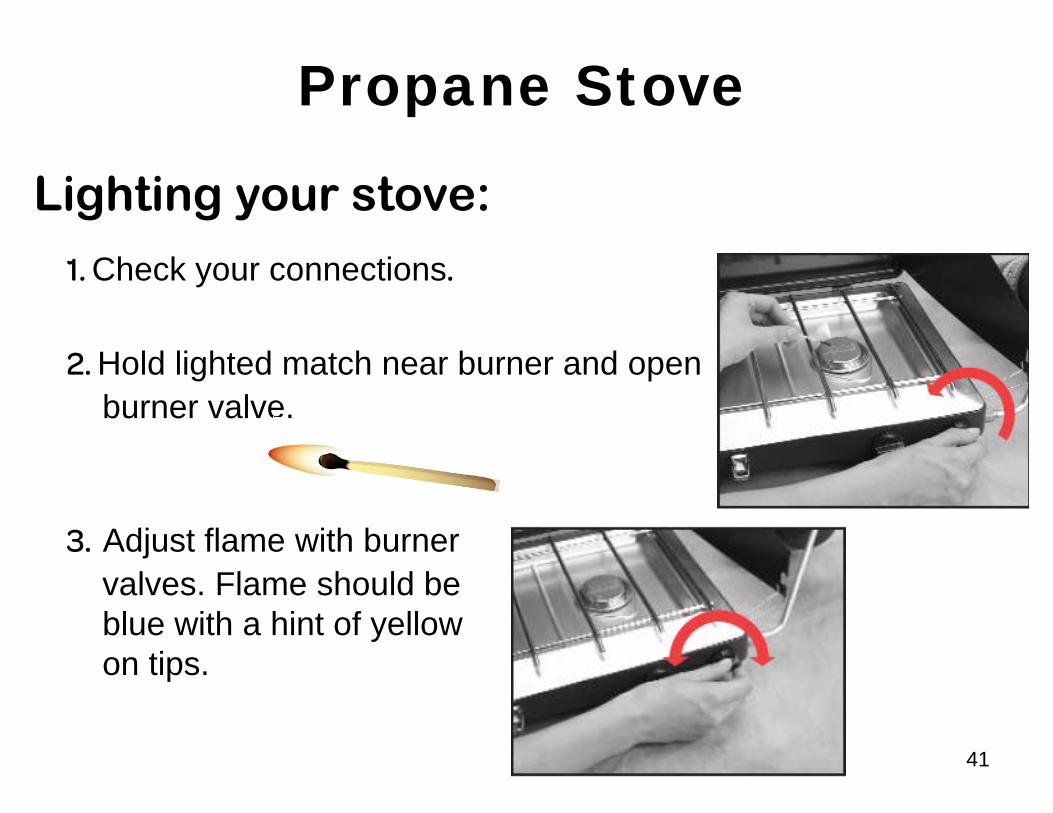
Lighting your stove:
2. Hold lighted match near burner and open burner valve.
3. Adjust flame with burner valves. Flame should be blue with a hint of yellow on tips.
1. Check your connections.
Propane Stove
41

Charcoal
42

Charcoal is versatile; food can be cooked directly in the coals, over the coals, or in a Dutch or box oven. Because of it’s versatility, coal is great for foil cooking, baking and stick cooking.
Charcoal
43

Charcoal Avoid cooking with lighter fluid treated charcoal. These coals tend to burn hotter and faster, and are unreliable for baking.
Instead, use a homemade or store bought charcoal chimney to start plain/original charcoal coals. Chimneys concentrate the heat and reduce prep time.
44

How to make a Charcoal Chimney
http://www.youtube.com/watch?v=WnctzEJKgKg
45

How to Start a Charcoal Chimney
http://www.youtube.com/watch?v=IXZEpS0ZGos
46

How to Make an Easy Box Oven
http://www.youtube.com/watch?v=q9YdEM-ADIk
47

How to Cook in an Easy Box Oven
http://www.youtube.com/watch?v=axJ85Nt4KhQ
48

Meal Planning
49
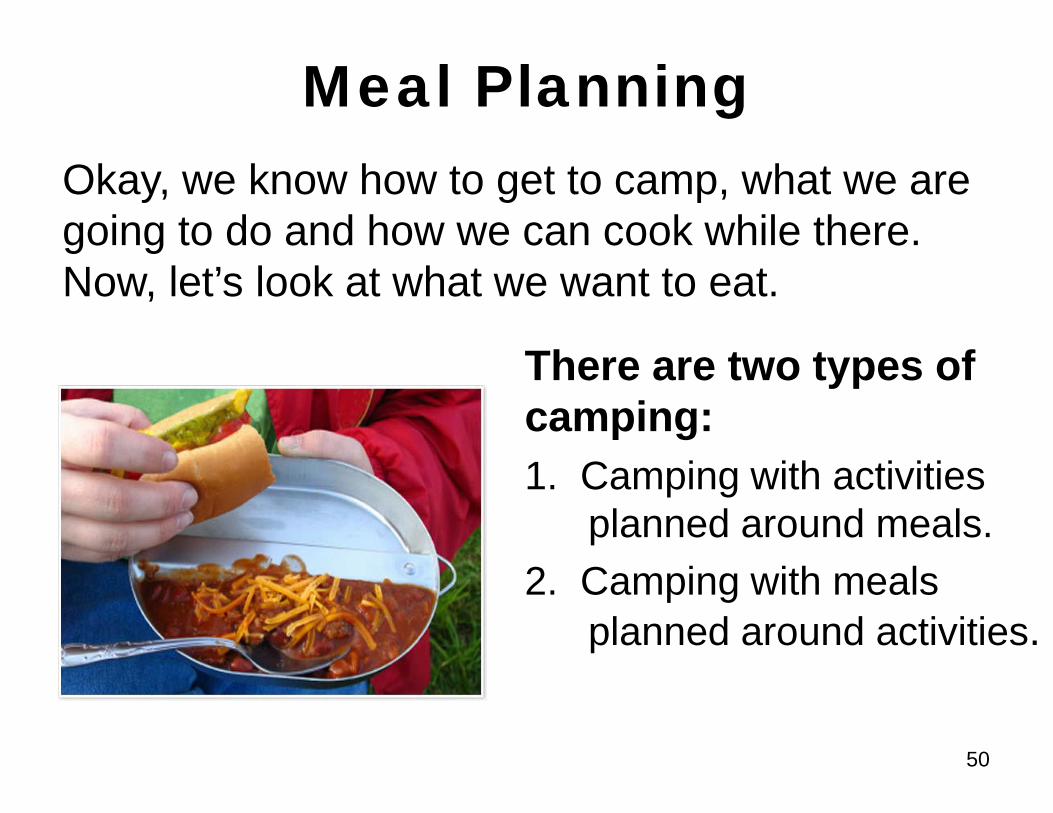
Okay, we know how to get to camp, what we are going to do and how we can cook while there. Now, let’s look at what we want to eat.
Meal Planning
There are two types of camping: 1. Camping with activities planned around meals. 2. Camping with meals planned around activities.
50

For your Basic Troop Camping overnight, you will be doing the second type of camping. With a pre-planned agenda, you have to plan your meals around the activities. You will be planning your menu with your patrol during the second pre-session in classroom.
Meal Planning
When planning, allow 2 hours for lunch, 3 hours for dinner, and as much time as you like for breakfast (so long as you get up early).
51

When planning your menu, don’t forget the three heat sources and four methods you need to include. As part your Camping Basics Training overnight, you will need to make a meal component using Propane, Charcoal, and Open fire to demonstrate:
1. One-pot or pan cooking (Soups, stews, chili, etc.) 2. Foil cooking (Foil Dinners, baked apples, toast, etc.)
3. Stick cooking (S’mores, biscuits, hot dogs, etc.) 4. Box Oven Baking (Pizza, brownies, biscuits, anything) For meal tips and recipes for each methods refer to pages 18-22 in the “Recipes”
section of the Basic Troop Camping Manual.
Meal Planning
52

Menus will vary depending on what the girls choose. When brainstorming with the girls about menu planning, remind the girls to take into account any dietary restrictions, food allergies, and cultural/religious limitations of trip participants. For the Camping Basics Training overnight, you and your patrol will plan the menus. Also remember, when at camp, to post the menu somewhere everyone can see it - preferably near where the cooks will be working.
Meal Planning
53

While planning your menu, you need to take into consideration your troop budget, the equipment needed and pre-trip shopping. When you plan with your girls, you will also break the girls into patrols, to plan each meal or specific meal components. To assist with this process, use simple charts like the one found on page 24 in the “Basic Troop Camping Manual, or like the one on the next slide.
Meal Planning
54

Saturday Night Dinner Meal: Spaghetti, (On Stove or fire) Salad, (No Bake) Garlic Bread (Foil in coals or in Box Oven)
Food Needed: Spaghetti Noodles Sauce Salt Lettuce Carrots Tomatoes Cucumbers Onions Bread Butter Garlic Powder
Equipment Needed: Pot Large Spoon Colander Bowl Knife/ Vegetable peeler Cutting Board Foil Knife
55

Meal Planning Tips:
Suggest to girls that they clip coupons for the purchase of their planned meal components.
Remember quantities! Use the “Food Quantities Equivalents” chart on pages 26-27in your Basic Troop Camping Manual to assist you.
Meal Planning
Consider a troop shopping trip to the grocery store. There, with helping adults, girls can do the grocery shopping, use their coupons, and do some price comparison shopping.
56

Part of Menu planning is planning how you will handle and store your food for the trip.
Note: For the Basic Troop Camping overnight, your training team will discuss what type of storage will
be available to store your food so that your patrol can plan accordingly.
To find out more information on the areas discussed in the following slides, please see pages 7 – 8 in your
Basic Troop Camping Manual.
Food Storage and Handling
57

Food Storage: • Food must be stored in a manner that prevents spoilage and
contamination. Hot foods should be kept at 140 degrees. • Perishables, such as dairy products, poultry, meats, and
salads must be stored at or below 45 degrees in a refrigerator or insulated cooler with ice.
• Food should be stored at least 6 inches off the ground/floor. • Ice that is to be used in drinks should be separate from ice
that is used to keep foods cold and should be dispensed with scoops, tongs, etc., not by hand.
• Do not store food in tents or sleeping quarters. This attracts bugs, mice, and other unwanted critters.
• Store ALL food in animal-proof containers. • Use zipper seal bags to reduce packaging and weight.
Food Storage and Handling
58

Food Preparation: • There must be a safe drinking water supply for cooking, drinking,
and personal use. Safe drinking water is defined as water from tap that has been tested and approved by the local health department. All other sources are considered potentially dangerous.
• Raw fruits and vegetables and poultry should be washed before preparation.
• Safe water must be used to reconstitute powdered, dehydrated, or freeze-dried food. Once reconstituted, any perishable items should be eaten within one hour of refrigeration.
• When necessary, some foods can be prepared in advance and frozen to keep fresh until needed, for example, ground beef.
• Thoroughly clean surfaces on which meat has been prepared before preparing other foods on the same surface. (Example – cutting boards and utensils)
Food Storage and Handling
59

Food Disposal: • DO NOT BURY FOOD! • All grease must be carried out. Grease can be poured into an
empty can. DO NOT put grease down any drain. • Food containers and cans should be rinsed before discarding. • Include in your equipment list containers and zipper seal bags
for leftovers. Plan to incorporate leftovers into your next or last meal. Use it up!
Food Storage and Handling
60

To tie, or not to tie, which knot is the question…. The third knot you are going to learn is the Bowline. The Bowline is a knot that creates a fixed loop at the end of a rope. It is one of the most well known and important knots used in boating, sailing and rock climbing. It is easy to learn, quickly made, and easy to untie after being placed under heavy strain.
Skill Video 3 Bowline
61

Before continuing please gather: • 1 shoelace or small piece of rope.
http://www.youtube.com/watch?v=hIdsTZTUl6E
Skill Video 3 Bowline
62

Camp Sanitation
63

Camp Sanitation
This section will provide you a quick overview of the supplies you will need to bring and how
to set-up your camp sanitation areas for bathroom, dish washing and hand washing.
64
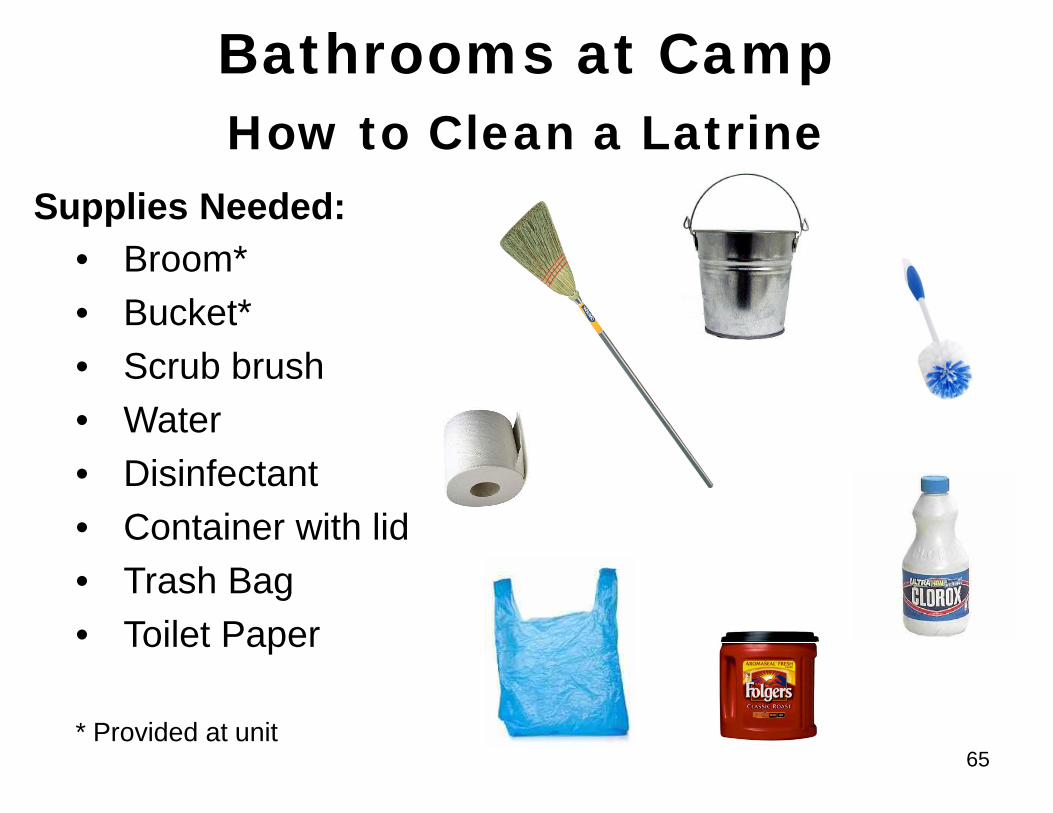
Bathrooms at Camp
How to Clean a Latrine Supplies Needed:
• Broom* • Bucket* • Scrub brush • Water • Disinfectant • Container with lid • Trash Bag • Toilet Paper
* Provided at unit
65

Bathrooms at Camp
How to Clean a Latrine Clean latrines upon arrival, throughout the day and just
before leaving camp.
Upon Arrival
3. Use a small rock to prop the lid open to dry. 4. Close lids after seats are dry to prevent flies from
breeding. 5. Place toilet paper and trash container in latrine stall.
1. Sweep everything, remove dirt, cobwebs and leaves from ceiling to floor with dry broom.
2. Scrub lids and seats with scrub brush and disinfectant water.
66
Bathrooms at Camp
How to Clean a Latrine While at Camp 1. Sweep and Clean throughout the day. 2. Check toilet paper supply regularly. 3. Empty trash. 4. Pick up papers and trash in latrine stall and surrounding area. When Leaving Camp 1. Sweep and Clean latrine stall. 2. Remove all supplies. 3. Assure no trash is left in latrine stall or
surrounding area.
67

DO keep toilet paper in a self-closing plastic bag or can with lid.
DO use a tight-fitting container with a lid for used feminine supplies to contain smells. Line the container with a plastic grocery bag or trash bag for easy clean-up.
Bathrooms at Camp
How to Clean a Latrine
68

DO NOT throw disinfectant water, chemicals, sanitary napkins or trash into latrine. Bacteria and special deodorant are put in the latrines regularly to decompose the contents and keep it from smelling. Any other substances will kill the bacteria, and they will not do the necessary job.
For more on how to clean a latrine and bathrooms at camp, see page 15 in your Basic Troop Camping Manual.
Bathrooms at Camp
How to Clean a Latrine
69

Hand Washing at Camp
How Set-up a Handwash Station Hand washing is easy to do and it's one of the most effective ways to stop germs from spreading from one person to another at camp.
Your hand washing area should be set-up in a local area of your campsite, close to both your bathrooms and your food preparation area. 70

How Set-up a Handwash Station
Hands should be washed: • Before, during, and after preparing
food • Before eating food • After using the toilet • After touching garbage • After blowing your nose, coughing,
or sneezing • Before and after treating a cut or
wound
71

Supplies Needed:
• Nylon • Soap • Water Jug * • Trash Bag • Clothes Line/rope • Paper Towels
How Set-up a Handwash Station
** Milk jugs are breeders of bacteria and they may not be used. Bleach containers may also not be used.
72
To Make a Portable Handwash Unit:
1. Wash container thoroughly, rinse, and air dry. 2. If container does not have a spout already, Puncture one hole
in the center of the cap and one hole in the top of the handle off the seam.
3. Make a small hole near the bottom of the jug. Use the twig or dowel to plug up the hole once you’ve put water in it (a golf tee also works) or poke holes in the lid and the girls can pour the water.
4. Place a pump-style liquid soap in knee-high nylon stocking.
How Set-up a Handwash Station
73

To Set-up a Portable Handwash Unit: 1. Tie the nylon to the jug’s handle. 2. Fill the jug and plug the hole (if there is one). 3. Use established washstands where they are available. Make sure
either portable handwash units are within easy access of food preparation area, first aid location and latrines.
4. For easier handling by girls: – Fill the jug only halfway – Put a stick through handle for two girls to carry
5. Hang from a tree and tie with bowline or clove hitch with two half hitches. Place it at waist height of girls or place on ground or rock.
6. Prepare drain for minimal impact. Ensure that water drips onto leaves, rocks, or pine needles to prevent erosion and mud.
How Set-up a Wash House/Stand
74

To Set-up a Portable Handwash Unit:
Example Handwash Station
75

Hand Washing at Camp
How to Set-up a Wash House/Stand
For more on hand washing, see pages 6-7 in your Ba sic Troop Ca mping Ma nua l.
76

Supplies Needed:
• 3 Dish Pans • Bleach • 1 -2 Dish Rags • A Scrub sponge/ Dish brush (no SOS) • Nylon • Liquid Dish Soap • Trash Bag/Can • Clothes Line/Rope • Clothes Hanger (optional)
How to Set-up a Dish Washing Station
77

To clean dishes at camp set-up and use a 3-basin dishwashing station. Never wash dishes at the wash stand; however strained dishwater is to be disposed of in the nearest sink per State Health Department guidelines
1. Start with hot soapy water.
2. Then use warm rinse water.
3. Finish with a cold bleach solution.
How to Set-up a Dish Washing Station
78

How to wash dishes: Set up your Dish Washing Station like so:
Cold Sanitize Solution = a capful of bleach to 1 gallon of water
How to Set-up a Dish Washing Station
79

How to wash dishes: 1. SCRAPE all leftover food and residue off all dishes into
garbage can using either rubber spatula or personal napkin.
How to Set-up a Dish Washing Station
80

How to wash dishes: 2. WASH; use hot soapy water. Girls should use dishcloth or
sponge to clean dishes.
(Do not make so hot that the girls cannot put their hands in it.)
How to Set-up a Dish Washing Station
81

How to wash dishes: 3. RINSE; use warm clear water.
How to Set-up a Dish Washing Station
82

How to wash dishes: 4. SANITIZE; use one capful of bleach in a bucket of cool water.
Dip dishes into water using tongs or in a net bag.
How to Set-up a Dish Washing Station
83

How to wash dishes: 5. DRY DISHES; if not already, place dishes in net bag and hang bag on clothes line to dry.
How to Set-up a Dish Washing Station
84

How to Dispose of Dish Water
Build a strainer for your sink:
Nylon Strainer: - Stretch a nylon stocking over one end of a bent clothes hanger. - This will collect any food particles not scraped off the dishes. - To clean the nylon, “thump” it into the trash bag, shaking off the food particles.
Plastic Bag Strainer: - Fill a trash bag or plastic grocery bag with leaves and poke holes in the bag. - This filtration method can be used for the entire weekend. Animal proof the bag at night. - Discard bag and leaves in the trash bag.
85

How to dispose of dish water:
Strain and Sanitize dish pans:
1. Hold your strainer over the wash stand sink or over a larger container to catch water waste.
2. Pour the ‘wash’ water basin through the strainer and wait for the water to drain.
3. Pour the ‘rinse’ water into the ‘wash’ basin, swish around and then pour through the strainer.
4. Pour ‘sanitize’ water basin into ‘rinse’ basin, swish around, then pour into ‘wash’ basin, swish around and then pour through the strainer.
This will sanitize all three basins.
** If using a container, dispose of the water in the nearest sink or scatter 200ft. From drink water source.
How to Dispose of Dish Water
86

Patrols and Kaper Charts
87

Using tools like patrols and kaper charts can make the trip go more smoothly.
Patrols are smaller groups of girls who work together to get things accomplished. They can be used while planning for camp to plan menus and pack. Kaper charts are easy ways to divide workloads and make sure that everyone gets a chance to help out and participate. Essentially, a kaper chart is your troop’s chore chart at camp.
Patrols and Kaper Charts
88

There are several ways to do a kaper chart and you can use more than one kaper chart for a camping trip if needed. Look on page 15 in your Basic Troop Camping Manual. Kapers fall into different categories such as: - Opening - Meals - All camp - Departure Within those categories are specific jobs such as: - Fire Builder - Cooks - Latrine Cleanup - Site Cleanup - Hostess
Patrols and Kaper Charts
89

When you and your troop design your kaper chart for this camping trip, keep in mind the jobs you would like the girls to do upon arrival, during meals, and at departure.
Patrols and Kaper Charts
Also, remember kaper charts can be both simple and creative. Here is one example of a Kaper Chart.
90

To tie, or not to tie, which knot is the question…. The fourth knot you are going to learn is the Taut Line. The Taut Line is a hitch used to tighten a line, and is ideal for clothes lines, tents and more. Once tied, the loop knot is adjustable for use on lines under tension. To be most useful the length of a rope will need to be periodically adjusted in order to maintain tension.
Skill Video 4 Taut Line
91

Before continuing please gather: • 1 shoelace or small piece of rope. • Optional: 1 pole-like object.
http://www.youtube.com/watch?v=1jkN3K5G8eE
Skill Video 4 Taut Line
92

Troop Equipment for Camp
93

Once you have planned your menu, cooking methods, and where you will be camping, it is time to figure out what to pack for the troop.
Depending on the weather, menu, location and activities planned, what you pack will change.
Remember to actively involve the girls in this process so that they learn how to do it for themselves. This is a skill that will definitely be used by them throughout their lives.
Troop Equipment for Camp
94

Before the girls focus on their own individual packing, it is important that they work together to consider what they need to bring for the troop to: cook, clean, be safe, do activities, etc.
However, some things you do not need to bring with you to a GSCM campsite. These items should be at all of GSCM campsites.
Troop Equipment for Camp
• Rake • Buckets • Grill Rack
• Shovel • Garbage Can • Toilet Brush
• Brooms • Ash Can • Fire Extinguisher 95

Everything else you will need to bring to the campsite as a troop.
However, since this is your first trip you are probably unsure of what you need to bring.
One page 28 of the Basic Troop Camping manual, you will find a list of Equipment each troop needs to bring to camp.
Please take a moment now to review this list.
Troop Equipment for Camp
96

Girls’ Equipment for Camp
97

With the troop gear and trip all planned out, it is now time to help the girls prepare for the trip. It is important that the girls are ready for the trip. This is where the pre-camp meeting outlines will help prepare both you and your troop for the Basic Troop Camping overnight and when you camp on your own for the first time.
Girls’ Equipment for Camp
98

Again, review the Equipment Checklist for Camping found on page 28 in your
Basic Troop Camping Manual.
REMEMBER! ** GIRLS SHOULD PACK THEIR OWN CLOTHES FOR THE OVERNIGHT. When an adult packs, the girl does not
know what she has, or where it is and everything always explodes out of her bag and onto the floor.
Girls’ Equipment for Camp
99

Also, it is helpful if you hand out the packing list to the girls and review the items at one of the pre-camp meetings. This way, you can explain what you expect girls to bring and why. For example: On the overnight, your troop will be sleeping in a heated building. This means girls have the option of bringing a sleeping bag, slumber bag or bed roll for sleeping.
Girls’ Equipment for Camp
- Slumber Bag: Thin material usually with a cartoon character on it.
- Sleeping Bag: Thicker material, temperature rated and no cartoons.
- Bed Roll: Series of blanket and sheet together.
100

If time allows, practice folding, packing, and rolling sleeping bags at the troop meeting.
Packing practice at the meetings can be fun! Here is an activity that will help girls learn to pack.
Girls’ Equipment for Camp
Sleeping Bag Rolling Relay
1. Have 2 teams & 2 sleeping bags. 2. Team member runs up to a rolled
(not tied) sleeping bag. 3. Unroll it, crawl inside, crawl out
again, roll bag back up. 4. Tags the next team member. 5. Sits down.
101

Dress for Success in the Out-of-Doors
102

Learning to choose the right clothes and layers for any weather can be a challenge, but it can also be fun! Please review “What to Wear in the Outdoors” found in Outdoor 101. Then, with your girls, you can have a “Dress for the Weather Relay Race.”
Dress for Success in the Out-of-Doors
103

To tie, or not to tie, which knot is the question…. The fifth knot you are going to learn is the Larks Head, also known as the Cow Hitch. The Lark’s head is most commonly known for its usage in macramé. However, it is a good knot to use wherever you need a loose, temporary knot. A camp, the larks head is often used to temporarily hang and secure objects such as net bags to a clothesline.
Skill Session 5 Larks Head
104

Before continuing please gather: • 1 shoelace or small piece of rope. • 1 pole-like object or ring
http://www.youtube.com/watch?v=IO0bi34elAw
Skill Video 5 Larks Head
105

Next Steps
106

Quiz
Please complete the quiz and evaluation for this online pre-session and bring a copy with you to the planning pre-session. The link to the quiz and evaluation was provided in your course confirmation.
107