an account and schedule an appointment for you,
TRANSCRIPT
1

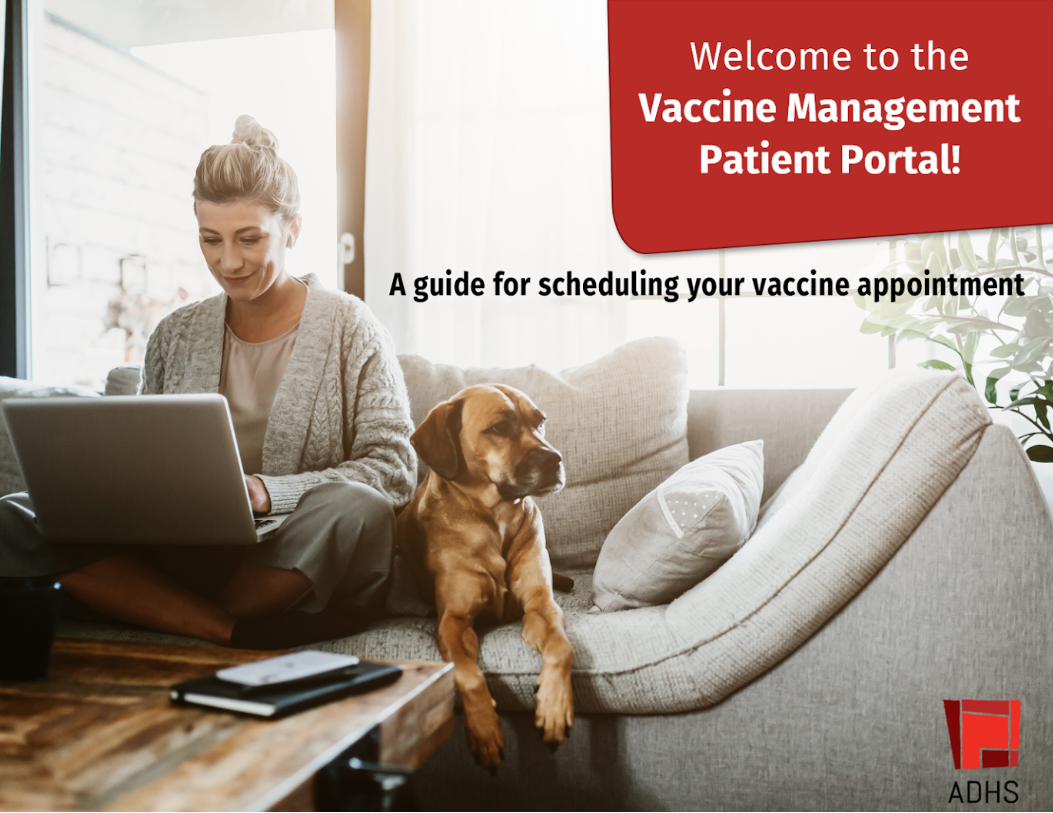
Patient Portal Guide
This is an abridged version of the Patient Portal User Guide. This resource includes instructions to help users create accounts, login to the portal and schedule vaccine appointments.
2
You are about to find out just how easy it is to schedule your V A C C I N E appointment! This guide will walk you through the steps to create an account and schedule an appointment for you, or for your entire family.
Got questions about the portal? Contact information for YOUR SUPPORT TEAM is at the end of this guide.
How to Create Your Account 1
How to Schedule a Vaccine Appointment 9
How to Cancel an Appointment XX
How to Reschedule an Appointment XX
How to Log In When You Have An Account 19
How to Reset Your Password XX
Patient Portal Guide
How to Create An Account
3
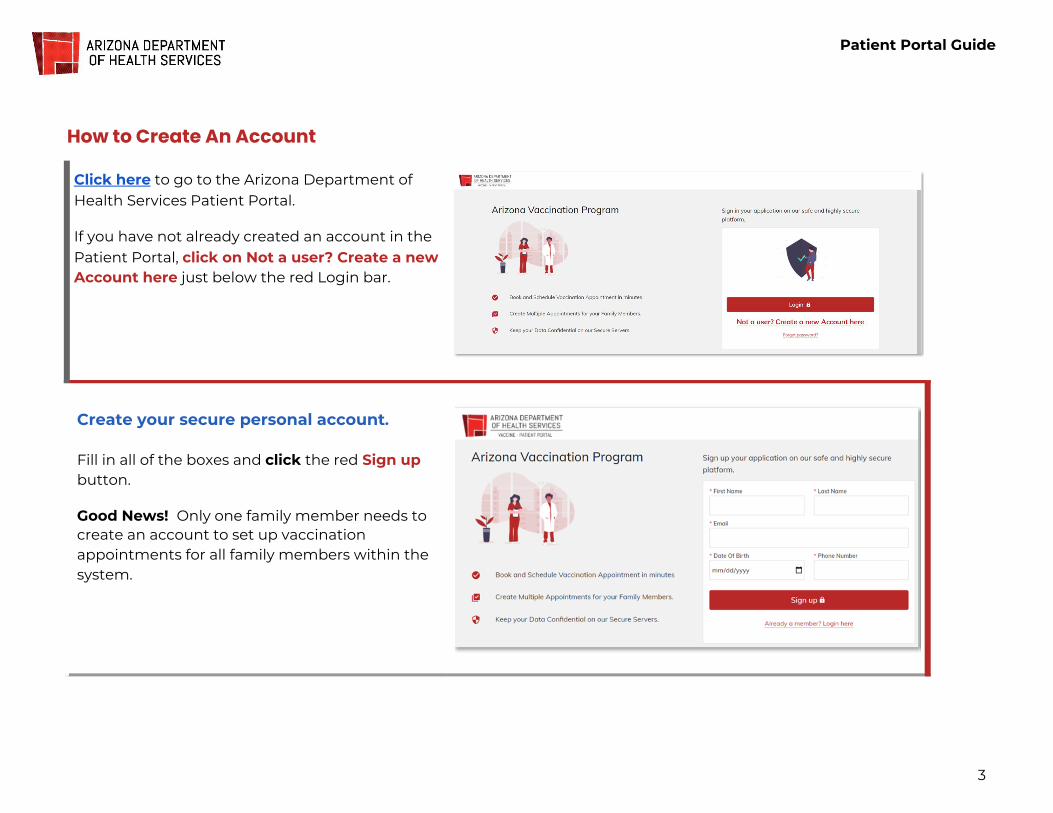
Click here to go to the Arizona Department of Health Services Patient Portal.
If you have not already created an account in the Patient Portal, click on Not a user? Create a new Account here just below the red Login bar.
Create your secure personal account.
Fill in all of the boxes and click the red Sign up button.
Good News! Only one family member needs to create an account to set up vaccination appointments for all family members within the system.

Patient Portal Guide
4
You will receive a registration email.
A registration email will be sent to the email address you entered.
The email will be sent from:
The email has a link to set up your password. Click on the link (outlined in red in the image) to set up your password and complete your registration.
Verify your account. Step 1
Enter your email address and click Send verification code.
The security of your account is a priority! This 4-step account verification process keeps your account safe and protected.

Patient Portal Guide
5
Verify your account. Step 2
This screen will display to let you know that a verification code has been sent to your email.
The email will be sent from: [email protected]
Open the email to get the code.
Verify your account. Step 3
Copy the code or write it down so you can enter it into the verification screen.

Patient Portal Guide
6
Verify your account. Step 4
Type or paste the code into the Secondary Verification Code box. Click Verify Code.
If the wrong code was entered, a message will display letting you know. Just enter the correct code and click Verify Code.
If you continue to have a problem with the code, click Send New Code, get the code from the new email, enter it and click Verify Code.
Your account is verified!
If the correct code was entered, this screen will display letting you know that the code has been verified. Click Continue.

Patient Portal Guide
7
Create a Password.
In the New Password box, type in the password you would like to use for your account.
Password requirements:
● 8-16 characters ● Includes 3 out of 4 of the following:
● Lowercase letter ● Uppercase letter ● a number (0-9) ● At least one of the following symbols: @
# $ % ^ & * - _ + = [ ] { } | \ ? / : ‘ ~ “ ( ) ; . ,
Type the password again in the Confirm New Password box. Click Continue.
Final step to create your account.
Click Login.

Patient Portal Guide
8
CONGRATULATIONS, you’ve created your account!
Enter your email address and password and click Sign in to log into the Patient Portal and schedule your vaccine appointment.

Patient Portal Guide
How to Schedule a Vaccine Appointment
9
After you log in, the Patient Portal Dashboard page will display.
From here you can schedule a vaccination, complete an Adverse Form report, and access helpful information.
All of your upcoming appointments will display on the dashboard.
Any vaccine can cause side effects. For the most part these are minor (for example, a sore arm or low-grade fever) and go away within a few days. You are encouraged to complete the Adverse Form to report any significant health problem that occurs after vaccination.
An adverse event can be reported even if it is uncertain or unlikely that the vaccine caused it. If you experience a reaction, click Adverse Form and follow the instructions.
Let’s review the steps for scheduling your appointment to receive a vaccine.

Patient Portal Guide
10
Begin to schedule a vaccine appointment.
Click Schedule a vaccination.

Patient Portal Guide
11
Schedule for yourself and family members.
You have the option to schedule an appointment for yourself only or to also book appointments for family members.
To begin, click the down arrow in the Booking For box.
● If scheduling an appointment for yourself, click Self and click Next.
● If scheduling an appointment for a family member, click Dependent/Family Member and then click Add New Family Member.
If you’re making appointments for more than one person, you will have the option to start a new appointment after you finish scheduling this one.

Patient Portal Guide
12
Choose your vaccine(s).
Click on the vaccine you want to receive at your appointment. You may select more than one.
Click Next when you have made your selection(s).
Answer supplemental questions.
These questions are asked to assist public health. Answer all of the questions and click Next.
If you are scheduling the appointment for a dependent, answer each question as it applies to that person.
For example, if you’re a healthcare worker, you would answer Yes to that question when scheduling your own appointment.
However, if your dependent is not a healthcare worker, you would answer No when scheduling their appointment.
Patient Portal Guide
13
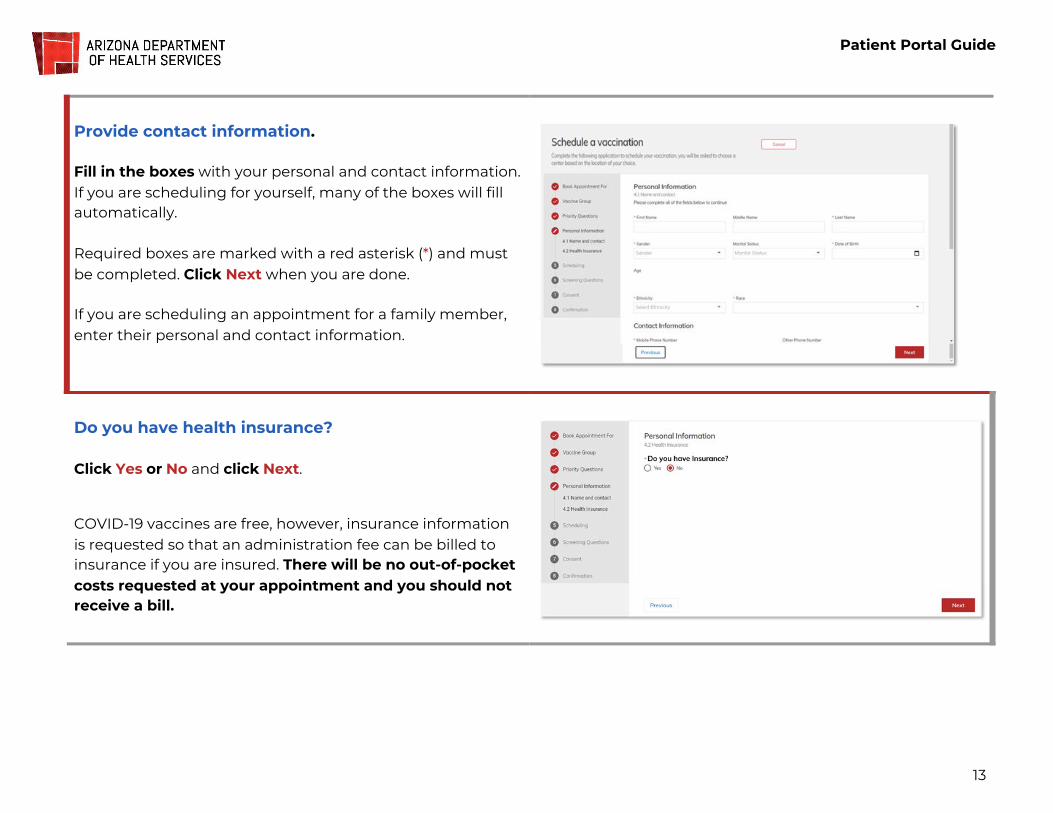
Provide contact information.
Fill in the boxes with your personal and contact information. If you are scheduling for yourself, many of the boxes will fill automatically.
Required boxes are marked with a red asterisk (*) and must be completed. Click Next when you are done.
If you are scheduling an appointment for a family member, enter their personal and contact information.
Do you have health insurance?
Click Yes or No and click Next.
COVID-19 vaccines are free, however, insurance information is requested so that an administration fee can be billed to insurance if you are insured. There will be no out-of-pocket costs requested at your appointment and you should not receive a bill.

Patient Portal Guide
14
Provide health insurance information.
If you selected Yes for insurance, enter the requested information. All boxes marked with a red asterisk (*) are required and must be completed.
When you’re done, click Next.
If you selected No, this screen will not display.
Choose a date and location.
To begin, enter a zip code. Click the calendar icon (magnified in the image). A calendar will open. Click on your preferred date. Click Search.
Locations near the zip code that have appointments available on the day you selected will display. You can search on all available locations for a date by leaving zip code blank and searching on a date only.
Once you have found a location with available appointments on a date that is good for you, click the circle next to the location and click Next.
You may need to scroll down to see the Next button
To scroll down, click and hold the grey bar (pointed out by the red arrow) and
move the bar down to the bottom of the screen.

Patient Portal Guide
15
Select a time for your appointment / Step 1
Click on Select Slot under the Actions column.
Select a time for your appointment / Step 2
Blocks of time that the facility has open for appointments on your chosen day will show on the screen.
Click on the down arrows on the right of each red bar to display the appointment times and the number of appointments available for each time slot on that day.
If no blocks of time display, that means there are no more available appointments for that location on that date. Click Previous and select another date and / or location.
Select a time for your appointment / Step 3
Click on the button to the left of the time you want to schedule and click Save.
You may need to scroll down to see the Save button.
To scroll down, click and hold the grey bar (pointed out by the red arrow) and
move the bar down to the bottom of the screen.

Patient Portal Guide
16
Confirm the time you selected.
The time slot you selected now displays. Click Next.
To change to a different time, click Remove Slot under the Action column and select a different time.
Click Next when you return to this screen.
Answer health screening questions.
Click Yes or No to answer each of the health screening questions.
Click Next when you’ve answered all of the questions.
Provide your consent to receive the vaccine.
You are almost done! The next step is to give your consent to receive the vaccination.
Read the consent form and enter the name of the person who is giving consent to get the vaccine. Click Next.

Patient Portal Guide
17
Confirm and book your appointment!
If you are scheduling only one appointment:
Review the details of your appointment. If you are not scheduling another appointment for a family member at this time and you are sure you want to receive your vaccine for the location, date, and time listed, click Book Appointment in the bottom left of the screen.
If you are scheduling another appointment:
If the location, date, and time listed are correct and you want to book an appointment for a family member, click Book Appointment & Start New Appointment.
To change any of the appointment details
Click Cancel Appointment. Another screen will display asking you if you really want to cancel. Click Yes to cancel or No if you clicked the cancel button by mistake.
If you click Yes to cancel the appointment you will return to the Schedule A Vaccination screen.

Patient Portal Guide
18
Your appointment is confirmed
After booking your appointment, you will receive a confirmation email.
The black square at the bottom of the confirmation is a QR code (outlined in red in the image). The QR code can be scanned from your phone or from a printed copy of your email when you arrive at your appointment for check-in.
As your appointment date gets near, you will receive a reminder email.
The confirmation and reminder emails will be sent from: [email protected]
Your scheduled appointments will display on your Patient Portal Dashboard.
The appointment reminder on the dashboard includes:
● Appointment ID ● Patient name ● Date and Time ● Location (with map)
To view other appointments you have scheduled, click the Next button in the middle of the screen.

Patient Portal Guide
How to Login When You Have an Account
19
Go to the Patient Portal
Click here to go to the Arizona Department of Health Services Patient Portal.
Click the red Login button.
Sign In
Enter your email address and password and click Sign in to log into the Patient Portal.