adobe acrobat reader program on-line...
TRANSCRIPT

ADOBE
ACROBAT READER PROGRAM ON-LINE GUIDE
Click one of the following topics to jump to an explanation of that topic:
How to use this on-line guide
About Adobe Acrobat software
The Acrobat Reader window
Tools and buttons
Procedures
Menu commands
his on-line guide contains all the information you need to use the Acrobat Reader program. For installation instructions, system requirements, and registration information, see the Installation Card accompanying your software.

HOW TO USE THIS ON-LINE GUIDEUse the following procedures to navigate through this guide:
Click underlined text to jump to the topic indicated. Underlined text indicates text that is “linked” to another part of the guide.
Click the Go Back button in the tool bar to return to your previ-ous location.
Click the Next Page button in the tool bar to go to the next page of the guide.
Click the First Page button in the tool bar to return to the open-ing screen of this guide.
Double-click the page icon to the left of a bookmark name to jump to the topic marked by that bookmark. Click the triangle to the left of a bookmark to show and hide subtopic bookmarks.
Click the arrow button to jump to the next screen of any contin-ued topic.
See Browsing through documents
for more information on how to page through Acrobat documents.
Topic
Distiller setu How long Compres
About

ABOUT ADOBE ACROBAT SOFTWAREThe Acrobat Reader program is part of the Adobe Acrobat family of soft-ware that lets you view, distribute, print, and save documents in Portable Document Format (PDF)—regardless of the computer, operating system, fonts, or application used to create the original file. PDF files retain all the formatting, fonts, and graphics of the original document, and virtually any document can be converted into PDF.
PDF files can be created using PDF Writer, included with the Acrobat Exchange program, or they can be created using the Acrobat Distiller program. See the following topics for more information:
How the Exchange and Reader programs display fonts
Acrobat Exchange
Acrobat Distiller
HOW THE EXCHANGE AND READER PROGRAMS DISPLAY FONTS
When the fonts used to create a PDF file are installed on your system, the Exchange and Reader programs use those fonts to display PDF files. When you do not have the fonts used to create a document, the program creates look-alike substitute fonts. These substitute fonts are not exact duplicates of the original fonts, but they are very close. Substitute fonts are also used when you print the document.
While the Exchange or Reader program is creating substitute fonts, the cur-sor appears as a spinning letter “a.”
Note:
If you open a PDF document and the original fonts are displayed in Courier, the document may have been created using the Acrobat Distiller program
without access to the proper fonts. See the Acrobat Distiller on-line guide for detailed information on how fonts are reproduced in the Distiller.

THE ACROBAT EXCHANGE PROGRAMThe Acrobat Exchange program gives you the power to exchange PDF doc-uments with other Adobe Acrobat users. In addition to the features in the Acrobat Reader program, the Acrobat Exchange program provides the abil-ity to add links, thumbnails, bookmarks, and notes to PDF documents and to save and collate multiple PDF files.
The Acrobat Exchange program also includes the PDF Writer driver, which creates PDF files from any application by “printing” to a file when you select Print from the application’s File menu. PDF Writer can be used to successfully reproduce most documents as PDF files; however, for repro-ducing EPS artwork, 24-bit images, or documents that use features available only with PostScript printers (such as blends), the Acrobat Distiller
is recommended.

THE ACROBAT DISTILLER PROGRAM
The Acrobat Distiller program creates PDF files from virtually any docu-ment that has first been saved as a PostScript language file. While PDF files can also be created using the PDF Writer included with the Exchange pro-gram
, Acrobat Distiller is recommended for high-quality reproduction of EPS artwork, 24-bit images, and documents that take advantage of features only available on PostScript printers (such as blends).
To use the Distiller program, users create a PostScript language file and then open the file using the Distiller program. The file is copied and converted to PDF and can then be viewed and printed by anyone using the Acrobat Exchange or Reader program.
Adobe offers a Distiller program for single users and a Network Distiller program that services any number of users over a network.

THE ACROBAT READER WINDOWWhen you open a file in the Acrobat Reader program, the document appears in the window. Depending on how the document has been set up, you can display bookmarks or thumbnails in an overview area to the left of the document. (See Using bookmarks
and
Using thumbnails
for more information.)
Beneath the menu bar at the top of the window is the tool bar; at the bottom left of the window is the status bar. Use the vertical scroll bar at the right of the window to scroll up and down through a document. The overview area of the window includes an independent scroll bar that you can use to scroll through bookmarks or thumbnails.
See these topics for more information about the Acrobat Reader window:
Browsing through documents
Status bar fields and controls
Magnifying the page view
Tools and buttons
Menu commands
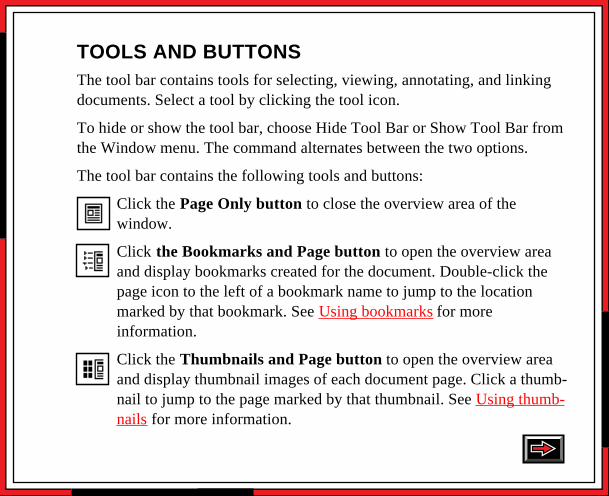
TOOLS AND BUTTONSThe tool bar contains tools for selecting, viewing, annotating, and linking documents. Select a tool by clicking the tool icon.
To hide or show the tool bar, choose Hide Tool Bar or Show Tool Bar from the Window menu. The command alternates between the two options.
The tool bar contains the following tools and buttons:
Click the
Page Only button to close the overview area of the window.
Click the Bookmarks and Page button to open the overview area and display bookmarks created for the document. Double-click the page icon to the left of a bookmark name to jump to the location marked by that bookmark. See Using bookmarks
for more information.
Click the Thumbnails and Page button to open the overview area and display thumbnail images of each document page. Click a thumb-nail to jump to the page marked by that thumbnail. See Using thumb-nails
for more information.

Use the
hand tool to move a single document page on-screen when the page does not fit within the main window. Hold down the mouse button and drag the hand tool in the direction you want to move the page.
Use the zoom tools to magnify and reduce the page display. See Magnifying the page view
for more information.
Use the text selection tool to select text in a docu-ment, which can then be copied to the Clipboard using the Copy command. See Copying text to the Clipboard
for more information.
Use the browse buttons to move to the first or last page of a document, or to move forward or back one page at a time. See Browsing through documents
for more information.

Use the navigation buttons to retrace your steps through a doc-ument, moving to each view in the order visited. See Browsing through documents
for more information.
Use the find tool to search for a word or part of a word in a doc-ument. See Searching for words
for more information.
Click the Actual Size button to display the page at 100 percent.
Click the Fit Page to Window button to scale the page to fit within the window.
Click the Fit Width to Window button to scale the page width to fill the width of the window.

STATUS BAR FIELDS AND CONTROLSThe status bar contains the following fields and controls:
Use the window splitter to adjust the width of the overview and document areas. Hold down the mouse button and drag the con-trol to where you want to divide the two areas.
The page number box displays the current page number and lets you jump to a specified page in a multi-page document. Click the page number box to display the Go to Page dialog box, enter the page number you want, and click OK.
The magnification box displays the current page magnification and lets you select from a menu of magnifications. Select the magnification box and choose Other from the menu to display the Zoom To dialog box. See Magnifying the page view
for more information.
2 of 31
400 %

PROCEDURESClick a topic name to jump to the topic:
Magnifying the page view
Browsing through documents
Using thumbnails
Using bookmarks
Printing documents
Choosing preferences
Searching for words
Using notes
Using links
Copying text to the Clipboard
Displaying information about a document
Keyboard Shortcuts

MAGNIFYING THE PAGE VIEWYou can use the zoom tools or the magnification box in the status bar to change the screen magnification.
To use the zoom tools:
• Click using the zoom-in tool (+) to magnify the document by a factor of 2. Click using the zoom-out tool (-) to reduce the magnification by a factor of 2.
• To magnify or reduce a selected area, select a zoom tool and drag the mouse to draw a rectangle around the area you want to view. With the zoom-in tool, the page view expands to show just the contents of the rectangle. With the zoom-out tool, the current page view reduces to fit within the rectangle.
• To toggle between the zoom-in and zoom-out tools, hold down the Option key.
To use the magnification box:
Move the pointer over the magnification box in the status bar and hold down the mouse button. Select a magnification level from the list; or select Other, type in the magnification level you want, and click OK.

BROWSING THROUGH DOCUMENTS
The Acrobat Reader program provides a number of ways to browse through a document:
To page through a document:
Click the Previous Page or Next Page buttons to move back or forward one page. You can also use the Previous Page and Next Page commands in the View menu or the Left Arrow (or Up Arrow) and Right Arrow (or Down Arrow) keys on your key-board. Use the PageUp or PageDown key on the keyboard to move forward or back one
screenfull at a time. (If your key-board doesn’t have PageUp and PageDown keys, press Return for PageDown and Shift-Return for PageUp.)
Use the vertical scroll bar to scroll forward and back through a document. As you drag the scroll box, a box to the left of the scroll bar displays the current page number. Click above or beneath the scroll box to move back or forward one screenfull.
Page 17
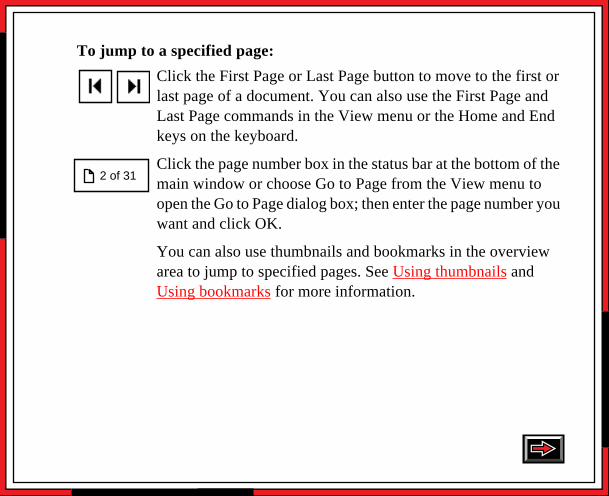
To jump to a specified page:
Click the First Page or Last Page button to move to the first or last page of a document. You can also use the First Page and Last Page commands in the View menu or the Home and End keys on the keyboard.
Click the page number box in the status bar at the bottom of the main window or choose Go to Page from the View menu to open the Go to Page dialog box; then enter the page number you want and click OK.
You can also use thumbnails and bookmarks in the overview area to jump to specified pages. See Using thumbnails
and
Using bookmarks
for more information.
2 of 31
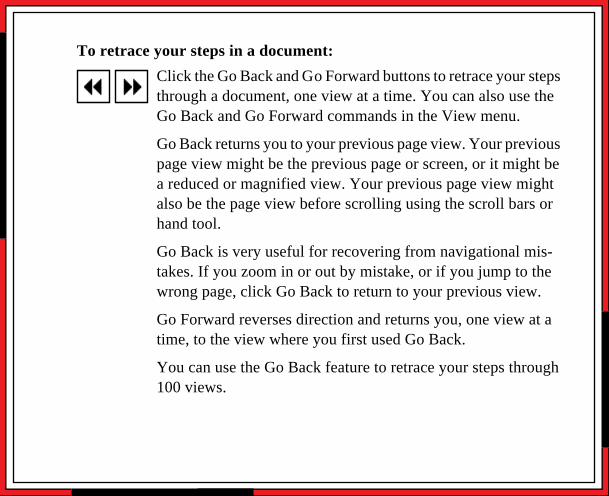
To retrace your steps in a document:
Click the Go Back and Go Forward buttons to retrace your steps through a document, one view at a time. You can also use the Go Back and Go Forward commands in the View menu.
Go Back returns you to your previous page view. Your previous page view might be the previous page or screen, or it might be a reduced or magnified view. Your previous page view might also be the page view before scrolling using the scroll bars or hand tool.
Go Back is very useful for recovering from navigational mis-takes. If you zoom in or out by mistake, or if you jump to the wrong page, click Go Back to return to your previous view.
Go Forward reverses direction and returns you, one view at a time, to the view where you first used Go Back.
You can use the Go Back feature to retrace your steps through 100 views.
USING THUMBNAILSYou can use thumbnails to jump quickly to a page, and to adjust the view of the current page. Thumbnails may be created when the PDF file is created using the Acrobat Distiller program
, or they may be added to a document using the
Acrobat Exchange program
.
To browse using thumbnails:
Click the Thumbnails and Page button or choose Thumbnails and Page from the View menu to display thumbnail images of each page in the document in the overview area. If you don’t see thumbnails in the overview area, the document was created without them. Click a thumbnail to move to that page. The spot you click determines the center of the page display.
The light gray box on the thumbnail, called the page-view box, indicates the part of the page visible in the document window. You can use the page view box to scroll around a page and to change the magnification.

To adjust the thumbnail page-view box:
• Drag the page-view box on the thumbnail to scroll around the current page.
• Drag the lower right corner of the page-view box in or out to reduce or expand the view of the current page.
• To redraw the page-view box, position the pointer anywhere outside the current page-view box and drag to draw a box around the area of the page you want to view.

USING BOOKMARKSYou can use bookmarks to jump quickly to a page, and to adjust the view of the current page. Bookmarks may be added to a PDF document using the Acrobat Exchange program
.
Click the Bookmarks and Page button or choose Bookmarks and Page from the View menu to display bookmarks for the document in the overview area. If you don’t see bookmarks in the overview area, the document was created without them. Double-click the page icon to the left of a bookmark name to move to the view specified by that book-mark.
Click the triangle to the left of a bookmark name to show and hide any subordinate bookmarks.

PRINTING DOCUMENTSTo print a document with the Acrobat Reader program, you use the standard method for printing a document. First, select the print options you want using the Page Setup command. Then choose the Print command to display the Print dialog box. The Print dialog box displayed by the Acrobat Reader program offers two print options not available with most other applications:
Shrink to Fit
Select the Shrink to Fit option to shrink (and if necessary rotate) oversized pages to fit on the paper size currently installed in your printer.
PostScript Option
If you are using a PostScript printer, the PostScript options appear in the Print dialog box. If you are using a printer that supports PostScript Level 2, selecting the Level 2 option speeds printing. If you are using the Adobe PSPrinter driver, the driver automatically selects the appropriate PostScript option for your printer, and the PostScript options are not displayed in the Print dialog box.

CHOOSING PREFERENCES
The Preferences command in the Edit menu displays a dialog box that you can use to change the way the Reader program displays and prints documents. The preferences you select affect all the Acrobat documents you view.
With the exceptions of the Substitution Fonts setting, all settings take effect immediately when you click OK in the Preferences dialog box.
Default Magnification: Select the initial magnification the Reader program uses when documents are opened.
Display Large Images: Select this option to display large images. Clear this option to display large images as gray boxes.
Note:
A “large” image is an image that requires many bytes of storage and that requires a long time to display. For example, a small but detailed photograph with many colors may require a great deal of storage and thus be considered a large image.

Greek Text below __ pixels: Select this option to adjust the size of charac-ters below which the Reader program “greeks” characters. The Reader program displays “greeked” characters as gray lines. Increasing the size of greeked characters can speed page display.
Substitution Fonts: This pop-up menu controls which multiple master fonts the Reader program substitutes for Type 1 fonts that are not available on your system. The setting affects the way PDF documents are displayed and printed.
By default, the Reader program uses the AdobeSerifMM multiple master font for missing serif fonts, and the AdobeSansXMM multiple master font for missing sans serif fonts. If PDF documents fail to print because of insufficient printer memory, you can reduce the amount of printer memory required to print PDF documents by selecting either Sans Only or Serif Only from the Substitution Fonts pop-up menu. Sans Only tells the Reader pro-gram to use AdobeSansXMM for missing sans serif and serif fonts. Serif Only tells the Reader program to use AdobeSerif MM for missing sans serif and serif fonts.

AdobeSansXMM uses less printer memory than AdobeSerifMM, but AdobeSerifMM is a better substitute for very thin, bold, narrow, or extended fonts.
When you change the Substitution Fonts setting, the change does not take effect until you restart your Macintosh.
See How the Exchange and Reader programs display fonts
for more infor-mation about font substitution.
SEARCHING FOR WORDSYou can search for a word or part of a word in a document using the Find feature.
To search for a word:
1 Click the find tool or choose Find from the Tools menu to open the Find dialog box.
2 Select the Match Whole Word Only option if you want the Reader program to ignore words that contain the word you enter. Select the Match Case option if you want the program to find only those words that contain exactly the same capital and lowercase letters you enter in the Find dialog box.
3 Enter a single word or part of a word in the Find What text box, and click Find. When the program finds the word, the Find dialog box closes and the page containing the word is displayed with the word highlighted.
4 To find the next occurrence of the word, press Command-G or reopen the Find dialog box.

USING NOTESPeople who create Acrobat documents using the Acrobat Exchange program
can attach electronic notes to document pages. Acrobat notes rest on top of document pages and can be moved around the page. Notes can also be opened and closed: an open note appears as a text window; a closed note appears as a note icon. You can use the Create Notes File command in the Tools menu to create a PDF file with the text of all the notes in a document.
To open and close notes:
Double-click a note icon to open a note. Click the close box in the upper left corner of the note window to close a note.
To move a note:
If the note is closed, simply drag the note icon to the new position. If the note is open, drag the bar at the top of the note window. You cannot move a note to a different page.

To find notes:
Choose Next Note from the Tools menu to jump to the next page in the doc-ument that contains a note.
To create a PDF file with the text of all the notes in a document:
Choose Create Notes File from the Tools menu to create a PDF file with the text of all the notes in a document. A notes file appears in a new document window. The notes are listed in page-number order, starting with page one. When a page contains more than one note, the notes are numbered in the order they were created. You can use the Print command in the File menu to print the notes.

USING LINKSPeople who create Acrobat documents using the Acrobat Exchange program
can add link buttons to documents to connect two parts of the document. You can then click the link buttons to jump to the related information. For example, the underlined text in this on-line guide represents link buttons that are linked to topics in the guide.
Link buttons may or may not be enclosed in a box. When link buttons are not enclosed in a box, the text in the link button is usually assigned special formatting to indicate that it is a link button.
The Go Back button in the tool bar gives you a convenient way of returning from linked information. After reading the linked text, click the Go Back button to return to the page containing the link button.

COPYING TEXT TO THE CLIPBOARDYou can select text in a PDF file, copy the text to the Clipboard, and paste the text into a document in another application such as a word processor. You can select text in tables, illustrations, and graphs as well as titles and paragraphs; however, text that has been created using a bitmapped font or that is part of a photographic image cannot be copied to the Clipboard.
To select text and copy it to the Clipboard:
1 Click the text selection tool or choose Select from the Tools menu. The mouse pointer becomes a cross hair (+).
2 Drag to select the text you want to copy. When you release the mouse button, the selected text is highlighted. Drawing the selection box around any part of a text line selects the whole line. (To deselect the text and start over, click anywhere outside the text selection.)
3 Choose Copy from the Edit menu to copy the selected text to the Clipboard. To view the text, choose Show Clipboard from the Window menu.
With the selected text on the Clipboard, you can switch to another application and paste the text into another document.

DISPLAYING INFORMATION ABOUT A DOCUMENT The Document Info command in the File menu displays information about a document. The information includes
• The name and location of the PDF file
• The program that created the document (if known)
• The application or driver that produced the PDF document
• The version of the Portable Document Format (PDF) used to represent the document
• The author of the document (if known)
• The date and time the document was created
MENU COMMANDS The Acrobat Reader program commands are organized in five menus.
For information on a specific command, click the appropriate menu or com-mand name below.
File menu
Edit menu
View menu
Tools menu
Window menu
Help command
FILE MENU COMMANDS
Open
(Command-O) displays the standard Open dialog for the system you are using.
Selecting the Show All File Types option shows all text files. By default, only PDF files created by the Macintosh versions of the PDF Writer printer driver and Acrobat Distiller program are shown in the document list. Select the Show All File Types option to see PDF documents created with the Windows versions of the PDF Writer printer driver
and
Acrobat Distiller
programs.
Close
(Command-W) closes the document window for the active document. Close also closes a selected note window and the Find dialog box.
You can also close a document by clicking the close box in the upper left corner of the document window. Pressing the Option key while clicking a close box closes all documents.

Document Info (Command-I) displays information about the active docu-ment. See Displaying information about a document
.
Page Setup displays the standard setup dialog box. See your printer manual for a description of the controls and settings in this dialog box.
Print (Command-P) displays the standard Print dialog box with additional options for printing to a PostScript Level 2 printer and for shrinking (and possibly rotating) page images so that they fit the paper currently installed in the printer. See Printing documents
for more information.
Quit (Command-Q) closes all document windows and returns you to the Desktop.

EDIT MENU COMMANDSUndo (Command-Z) cancels the most recent text editing. Many actions such as moving bookmarks, modifying links, and deletions cannot be undone.
Cut (Command-X) moves selected text in a dialog box (such as a filename) to the Clipboard.
Copy (Command-C) copies text selected using the text selection tool to the Clipboard. See Copying text to the Clipboard
for more information.
Paste (Command-V inserts text from the Clipboard into a dialog box.
Clear deletes selected text within a dialog box (such as a filename).
Select All (Command-A) selects all text within an open note or a bookmark.
Preferences displays a dialog box in which you can select settings that affect all documents. See Choosing preferences
for more information.

VIEW MENU COMMANDSFor additional information about using View menu commands, see Magnifying the page view
and
Browsing through documents
.
Actual Size (Command-H) displays the page at 100 percent.
Fit Page to Window (Command-J) scales the page to fit within the main window.
Fit Width to Window (Command-K) scales the page to fit the width of the main window.
Zoom To (Command-L) displays a dialog box in which you specify the per-centage of magnification or reduction. You can reduce a page to 12 percent of its normal size and you can expand a page to 800 percent of its normal size.
First Page (Command-1) displays the first page of the document.
Previous Page (Command-2) displays the previous page of the document.
Next Page (Command-3) displays the next page of the document.

Last Page
(Command-4) displays the last page of the document.
Go to Page (Command-5) displays a dialog box in which you specify the page you want to see.
Go Back (Command--) retraces your path through a document, one screen (or view) at a time. You can retrace your steps through 100 views.
Go Forward (Command-=) returns you to where you were before choosing Go Back.
Page Only closes the overview area of the window.
Bookmarks and Page displays bookmarks in the overview area if book-marks have been created for the document. Double-click the page icon to the left of a bookmark name to jump to the page marked by that bookmark. See Using bookmarks
for more information.
Thumbnails and Page displays thumbnail images of document pages in the overview area. If thumbnails have not been created for the document, pages in the overview area are represented as gray boxes. Click a thumbnail to jump to that page of the document. See Using thumbnails
for more information.

TOOLS MENU COMMANDSHand turns the mouse pointer into the hand tool. To use the hand tool, hold down the mouse button and drag the document in the direction you want it to move.
Zoom In turns the mouse pointer into the zoom-in tool. Click the tool to magnify the current view by a factor of two. See Magnifying the page view
for more information.
Zoom Out turns the mouse pointer into the zoom-out tool. Click the tool to reduce the current view by one half. See Magnifying the page view
for more information.
Select turns the mouse pointer into the text selection tool. Hold down the mouse button and drag to select text. Use the Copy command to copy the text to the Clipboard. See Copying text to the Clipboard
for more information.
Find (Command-F) displays the Find dialog box which you can use to find a word or part of a word in a document. See Searching for words
for more information.

Find Again
(Command-G) performs the same operation as the Find button in the Find dialog box: the next occurrence of the word is displayed.
Find Next Note (Command-T) moves to the next page containing a note. The command does not display or open the note.
Create Note File creates a PDF file that contains the text of all the notes in a document. See Using notes
for more information.

WINDOW MENU COMMANDSHide/Show Tool Bar hides or displays the tool bar.
Show Clipboard opens a window that shows the text on the Clipboard. Click the close box in the upper left corner of the window to close it.
Filename.PDF is the name of an open PDF file. The name of every open PDF file is listed at the bottom of the Window menu. Choose the name of a PDF file to make the window for the file the active window.

HELP COMMANDAcrobat Reader Help opens this document.
The location of the Help command depends on the version of the Macintosh operating system you are using: with System 6, the Help command is in the Apple menu; with System 7, the Help command is in the Balloon Help menu.

KEYBOARD SHORTCUTS
Tool or key Plus Result
Click close box Option Closes all document windows
Help Opens on-line guide
? key Command Opens on-line guide
Escape Interrupts display of page
period Command Interrupts display of page or find process
Zoom-in Option Zoom Out
Zoom-out Option Zoom In

book title 6/3/93 copyrt.mac.frame
1
Adobe, the Adobe logo, Acrobat, the Acrobat logo, Distiller, and PostScript are trademarks of Adobe Systems Incorporated which may be registered in certain jurisdictions. Apple, LaserWriter, and Macintosh are registered trademarks, and Centris, PowerBook, and Quadra are trademarks of Apple Computer, Inc. Classic is a registered trademark licensed to Apple Com-puter, Inc. MS-DOS is a registered trademark, and Windows is a trademark, of Microsoft Corporation. UNIX is a registered trademark of UNIX Systems Laboratories. All other products or name brands are trademarks of their respective holders.
APPLE COMPUTER, INC. (“APPLE”) MAKES NO WARRANTIES, EXPRESS OR IMPLIED, INCLUDING WITHOUT LIMITATION THE
IMPLIED WARRANTIES OF MERCHANTABILITY AND FITNESS FOR A PARTICULAR PURPOSE, REGARDING THE APPLE SOFTWARE.
APPLE DOES NOT WARRANT, GUARANTEE OR MAKE ANY REPRESENTATIONS REGARDING THE USE OR THE RESULTS OF THE
USE OF THE APPLE SOFTWARE IN TERMS OF ITS CORRECTNESS, ACCURACY, RELIABILITY, CURRENTNESS OR OTHERWISE. THE
ENTIRE RISK AS TO THE RESULTS AND PERFORMANCE OF THE APPLE SOFTWARE IS ASSUMED BY YOU. THE EXCLUSION OF
IMPLIED WARRANTIES IS NOT PERMITTED BY SOME STATES. THE ABOVE EXCLUSION MAY NOT APPLY TO YOU.
IN NO EVENT WILL APPLE, ITS DIRECTORS, OFFICERS, EMPLOYEES OR AGENTS BE LIABLE TO YOU FOR ANY CONSEQUENTIAL,
INCIDENTAL OR INDIRECT DAMAGES (INCLUDING DAMAGES FOR LOSS OF BUSINESS PROFITS, BUSINESS INTERRUPTION, LOSS
OF BUSINESS INFORMATION, AND THE LIKE) ARISING OUT OF THE USE OR INABILITY TO USE THE APPLE SOFTWARE EVEN IF
APPLE HAS BEEN ADVISED OF THE POSSIBILITY OF SUCH DAMAGES. BECAUSE SOME STATES DO NOT ALLOW THE EXCLUSION
OR LIMITATION OF LIABILITY FOR CONSEQUENTIAL OR INCIDENTAL DAMAGES, THE ABOVE LIMITATIONS MAY NOT APPLY TO
YOU.
1993 Adobe Systems Incorporated. All rights reserved.

EngineeringBob Wulff
Nabeel Al-ShammaDoug BrotzScott Byer
Richard CohnJohn Cole
Mike DiamondNathan Graham
Ken GrantSteve Hawley
Steve HerskovitzPeter HibbardPaul Holland
Karin JurcevichEoin MacDonell
Ning-Ju NanMike Ossesia
Daryoush PaknadMike Pell
Lindsay SanfordMike SchusterAlan Wootton
InternationalWiegert Tierie
Gerard HoMonique van Gelooven
Anders Hagstrom
Marketing CommunicationsGail BlumbergLinda Clarke
Lynn EdwardsLisa Wehrer
Lori BarnettLisa BeverlyKim Brown
Alice CassidyMolly DetwilerRobin Edwards
Elizabeth FajardoKaren Gordon
Jill JonesJanet Miclean
Veronica RamirezJohn Ritter
Susan VerbaMin Wang
Karla Wong
Product MarketingRob Babcock
John DawesFrank Boosman
Ellen Ablow
QAJonathan Sjørdal
Ben ArbogastJohn BrooksTom Cane
Joe CarouselPeter Crandall
Tonya CrutchfieldChristopher Eastwood
Jim GouldRob Heiser
Steve McshurleyWill Naber
Denis NeemaAndrew Otewalt
Deborah Okner-SmithClare Park
Dina SakaharaMark SonnesBrent WalkerGreg Walker
Ada Yue
QA(ATM for Macintosh)
Harrison PageGrace Williams
Erik Max Francis
QA(ATM for Windows)
Rick WulffGeoff Arnold
Louis FuhJim Al-Shamma
Curtis KunzRob Powell
Tokuro Yamashiro
Special ThanksJohn Warnock
Chuck GeschkeDave PrattBill SpallerJohn Kunze
Jamie BeverlySarah Rosenbaum
Ed Svoboda
Adobe Technical Publicationsfor their great work on theOn-line Documentation
and Quick Reference Cards
Everyone at Adobe who contributed bysharing their visions of Acrobat
and helping make that vision a reality.