ad-a238 087pge0mb no. approved - defense … · ad-a238 087pge0mb _form no. approved0704-0188 ......
TRANSCRIPT
UNCLASSIFIED
_Form ApprovedAD-A238 087PGE0MB No. 0704-0188lb. RESTRICTIVE MARKINGS
1111 oil1I 11113, 'DISTRIBUTION /AVAILABILITY OF REPORT
-- Approved for public release;2b. DECLASSIFICATION /DOWNGRADING SCHEDULE distribution is unlimited.
4. PERFORMING ORGANIZATION REPORT NUMBER(S) S. MONITORING ORGANIZATION REPORT NUMBER(S)
ARI Research Note 91-49 -
6a. NAME OF PERFORMING ORGANIZATION 1 6b. OFFICE SYMBOL 7a. NAME OF MONITORING ORGANIZATION
U.S. Army Research Institute j (If applicable)
PERI-II --
6c. ADDRESS (City, State, and ZIP Code) 7b. ADDRESS (City, State, and ZIP Code)5001 Eisenhower AvenueAlexandria, VA 22333-5600 --
8a. NAME OF FUNDING/SPONSORING 8b. OFFICE SYMBOL 9. PROCUREMENT INSTRUMENT IDENTIFICATION NUMBERORGANIZATION U.S. Army Research (if applicable)
Institute for the Behavioral DAAL03-86-D-0001and Social Sciences I -- I8c. ADDRESS (City, State, and ZIP Code) 10. SOURCE OF FUNDING NUMBERS
5001 Eisenhower Avenue PROGRAM PROJECT TASK WORK UNITELEMENT NO. NO. NO. ACCESSION NO.
Alexandria, VA 22333-5600 63007A 795 3310 H01
11. TITLE (Include Security Classification)
Automating 76C-AIT Course Test Development and Analysis Procedures
12. PERSONAL AUTHOR(S)
Fritz, Donald T. (Oxon Hill Science/Technology High School)13a. TYPE OF REPORT 13b. TIME COVERED 114. DATE OF REPORT (Year, Month, Day 5. PAGE COUNT
Final I FROM 90/06 TO.2Q0 [ 1991, April 83
16. SUPPLEMENTARY NOTATION
Contracting Officer's Representative, Angelo Mirabella ,.
17. COSATI CODES '... , 18. SUBJECT TERMS (Continue on reverse if necessiry and identify by block number)FIELD GROUP SUB-GROUP TeSt construction.. JOD aid)
___Performance evaluation, * Logisticsj
Performance support technology,/' Criterion referenced testing
19, ABSTRACT (Continue on reverse if necessary and identify by block number)"---,This report discusses thedesign of a software tool to aid researchers and instructorsin development of a test plan matrix, construction of a test item bank, collection ofstudent test results, analysis of'student test data, and creation of class tests from the
test item bank. It explains the initial program specifications, the refined specifications,the program pseudo-code, the data bas e design and operators instructions, and includesfull program documentation.
Reproduced FromBest Available Copy
20. DISTRIBUTION /AVAILABILITY OF ABSTRACT 21. ABSTRACT SECURITY CLASSIFICATION0 UNCLASSIFIEOIUNLIMITED 0 SAME AS RPT. 0 OTIC USERS I Unclassified
22a. NAME OF RESPONSIBLE INDIVIDUAL 22b. TELEPHONE (Include Area Code) 22c. OFFICE SYMBOLAngelo Mirabella (703) 274-8827 PERI-II
DD Form 1473, JUN 86 Previous editions are obsolete. SECURITY C1 ASSIFICATION OF T4IS PAGE
iUNCU\SSIFIED

ARI Research Note 91-49
Automating 76C-AIT Course TestDevelopment and Analysis Procedures
Donald T. Fritz - -
Independent Contractor
fo r r I.... . ..
Contracting Officer's Representative I "V1tL)i IA o ----Angelo Mirabella D S 1!-t ,I lo i
Automated Instructional Systems Technical AreaRobert J. Seidel, Chief
Training Research Laboratory .
Jack H. Hiller, Director
April 1991
91-047.94
United States ArmyResearch Institute for the Behavioral and Social Sciences
Approved for public roeolso; distribulion Is unlimited. Reproduced From
91 7 11 0(9 0 Best Available COpy
U.S. ARMY RESEARCH INSTITUTEFOR THE BEHAVIORAL AND SOCIAL SCIENCES
A Field Operating Agency Under the Jurisdictionof the Deputy Chief of Staff for Personnel
EDGAR M. JOHNSON JON W. BLADESTechnical Director COL, IN
Commanding
Technical review by
Angelo Mirabella
NOTICES
DISTRIBUTION: This report has been cleared for release to the Defense Technical InformationCenter (DTIC) to comply with regulatory requirements. It has been given no primary distributionother than to DTIC and will be available only through DTIC or the National TechnicalInformation Service (NTIS).
FINAL DISPOSITION: This report may be destroyed when it is no longer needed. Please do notreturn it to the U.S. Army Research Institute for the Behavioral and Social Sciences.
NOTE: The views, opinions, and findings in this report are those of the author(s) and should notbc construed as an official Department of the Army position, policy, or decision, unless sodcsignatcd by other authorized document,.
Reproduced FromBest Available Copy

AUTOMATING 76C-AIT COURSE TEST DEVELOPMENT AND ANALYSISPROCEDURES
CONTENTS
Page
INTRODUCTION ..................... ...................... 1
Purpose ...................... ....................... 1Background ..................... ...................... 2
INITIAL SPECIFICATIONS FOR SYSTEM DESIGN ........... 2
Problem Statement ................. .................. 2Scope ....................... ........................ 3System Hardware Specifications ........... ............ 3Software Specifications . ............. ............. 3Suggested Program Capabilities ................. 3Suggested Program Modules . .................. 4Files Required . . . . . . . . . . . . . . .. .. . 4
FINAL SYSTEM DESIGN SPECIFICATIONS ............... 5
System Hardware Specifications ........... ............ 5Software Specifications .............. ............... 5Program Capabilities ..................... 5Program Modules .................. ................... 6Files Required ................... .................... 7
PSEUDO-CODE OF MODULE FUNCTIONS . . . . ............... 9
PMAIN.PRG ..... ................... .......... 9PLANMAT.PRG ... ......... ...................... 10PSTUD.PRG ................. ...................... 11PTQUEST.PRG ................. ..................... 12PMTESMAT.PRG ................ ..................... 13PRCTMAT.PRG ................. ..................... 13PMSTUD.PRG ................ ...................... 15PMTQUES.PRG ................. ..................... 16PRTP.PRG .................. ....................... 16PROB.PRG .................. ....................... 17PRCLSFIL.PRG ................ ..................... 17PRTES.PRG ................... ..................... 18PNRSTP.DBF ................ ...................... 19PRNTB.PRG . . . . . . . . . . . . . . . . . . . . . . 21PRNTES.PRG ................ ...................... 21PSECUR.PRG ................ .................... . . 22PTESMAK.PRG ................................ . . . 23PTAKTEST.PRG ................ ..................... 24
iii
Reproduced FromBest Available Copy
CONTENTS (Continued)
Page
PROGRAM SECURITY ............. .................... 25
How It Works .............. ..................... .. 26Audit Trail ............... ..................... 27
PROGRAM FILE CREATION TECHNIQUES ..... ............ .. 28
REFERENCES ................. ....................... 29
USING THE 76C TEST DEVELOPMENT AND ANALYSIS PROGRAM . . . 30
Getting Started ............. ................... 30Starting the Program ................. . . .31Logging In for the First Time ..... ............ 32Opening Screen Forms ...... ................. ... 32
UNDERSTANDING THE MAIN MENU ........ ............... .. 34
Option A - Enter Data : New Test Plan .......... .. 35Option B - Enter Data : Student Test Results . ... 38Option C - Enter Data : Test Questions ....... 41Option D - Edit Data : Modify Test Plan ...... 44Option E - Modify Data: Student Test Data ...... 47Option F - Modify Data: Modify Test Questions . ... 50Option G - Review Data: Student/Class Test Analysis . 52Option H - Review Data: Test Plan Matrix ...... 55Option I - Review Data: Test Item Bank ....... 57Option J - Review Data: Course Test File Names . . . 59Option K - Review Data: Class Test Form ....... .. 60Option L - Print Data : Student Test Performance 62Option M - Print Data : Student/Class Test Analysis 65Option N - Print Data : Course Test File Names . . . 68Option 0 - Print Data : Test Item Bank ...... .. 69Option P - Print Data : Class Test Form ....... .. 70Option S - Security...................71Option T - Security : Create Test ........... .. 75Option U -Security Take Test ... .......... .. 77
Reproduced Fromiv Best Available Copy

AUTOMATING 76C-AIT COURSE TEST DEVELOPMENTAND ANALYSIS PROCEDURES
INTRODUCTION
As new training methods and technologies are being appliedto the 76C advanced individual training (AIT) course and to on-the-job training in the 76C military occupational skill (MOS),the accurate assessment of the impact of these modifications ontrainee performance is essential. Performance measures must bedeveloped that can provide a valid index of trainee skills inorder to measure the effects of such course changes.
The development of performance measures should be conductedwith the following questions in mind:
do assessment tests contain an accurate andrepresentative sample of tasks performed on the job.
do assessment tests reliably measure the trainee'sability to perform critical tasks.
are there additional elements of the job that arecritical to successful performance.
how can the performance measures reliably assesstrainee knowledge in these additional areas.
do the tests have some predictive utility in assessingthe level of performance that the trainee will exhibiton the job.
are the performance measures scorable in a consistent,objective fashion.
mTh !ct of these points is of particular importance ifthese performance measures are to be placed within a computermanaged instructional (CMI) system, which would provide automaticscoring of the tests. [CORM90)
Purpose:
This report will describe the design of an automated systemthat will assist an experimenter in the design of a performance-measurement instrument and the operational procedure to befollowed when using the system to achieve that design.
Reproduced FromBest Available Copy

Backagrund:
In their report entitled, "The Development of Content-ValidPerformance Measures for 76C Course and Field Assessment"[CORM90], the authors describe a methodology for 76C test batteryconstruction that includes the following five phases:
* Job Analysis* Test Plan* Item construction* Validation* Reliability Analysis
The automated system described in this report will assistthe experimenter in the test plan, item construction, andreliability phases of this test battery design process.
During the test plan phase, the experimenter is required todevelop a template for the construction of alternate versions ofa performance measurement test. By using this template, theexperimenter will achieve a high degree of consistency betweentest versions. This is accomplished by developing a test planmatrix which maps the critical functions and task operations ofthe job. By arranging the job functions as columns and theoperations as rows, a matrix is created which specifies the kindof functional and operational skills that need to be measured.This matrix is then used to drive the development of test itemswhich can evaluate trainees on the skills represented by each ofthe matrix cells. Next, during the item construction phase, theexperimenter creates items whiCh systematically represent each ofthe test plan categories and uses those items as an item bankfrom which different versions of the performance test can becreated. Finally, during the reliability phase, the experimentermakes an assessment of the degree to which the performance testprovides a stable index of an individuals knowledge, skills or
&• •. This is normally accomplished by hand scoring andposting the student's performance or a group of student'sperformance..• into the cells of the test plan matrix.
INITIAL SPECIFICATIONS FOR SYSTEM DESIGN
Problem Statement:
Design a system that can be used by researchers to aide inthe development of performance measurement instruments for use inthe accurate assessment of the impact of training methodmodifications on trainee performance.
2 Reproduced FromBest Available Copy
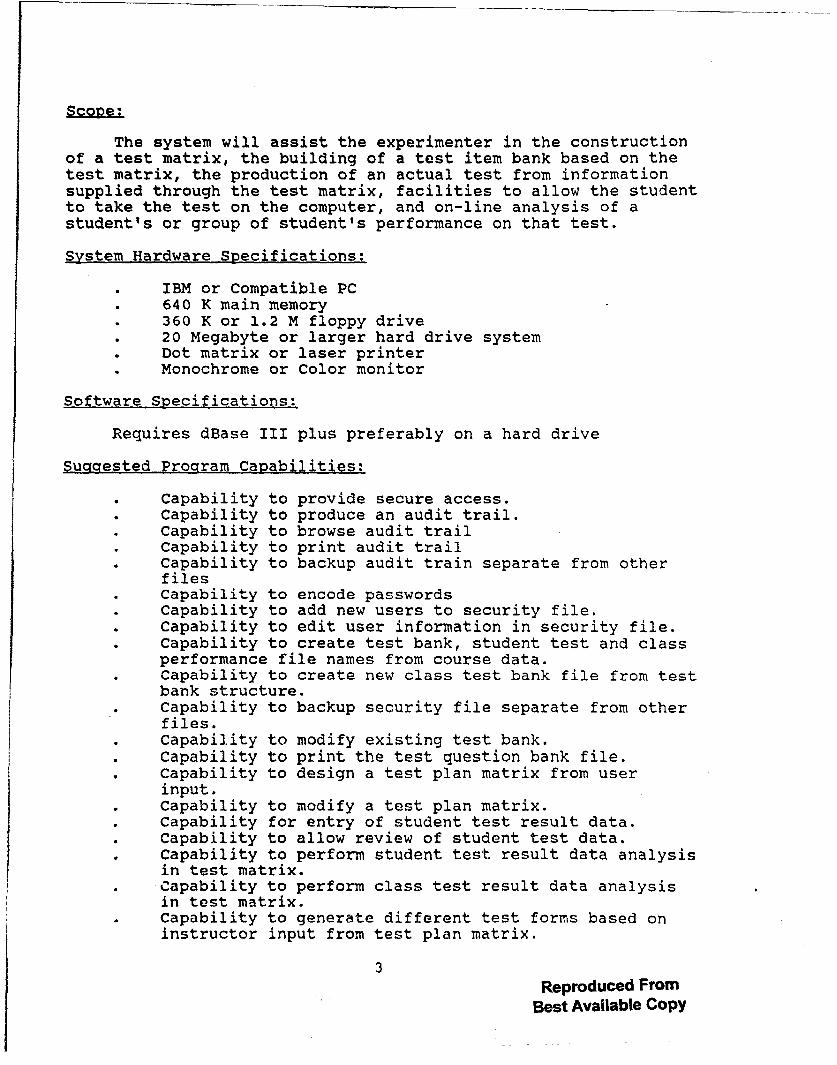
The system will assist the experimenter in the constructionof a test matrix, the building of a test item bank based on thetest matrix, the production of an actual test from informationsupplied through the test matrix, facilities to allow the studentto take the test on the computer, and on-line analysis of astudent's or group of student's performance on that test.
System Hardware Specifications:
* IBM or Compatible PC* 640 K main memory* 360 K or 1.2 M floppy drive* 20 Megabyte or larger hard drive system* Dot matrix or laser printer* Monochrome or Color monitor
Software Specifications:
Requires dBase III plus preferably on a hard drive
Suagested Program Capabilities:
* Capability to provide secure access.* Capability to produce an audit trail.
Capability to browse audit trail* Capability to print audit trail* Capability to backup audit train separate from other
filesCapability to encode passwords
• Capability to add new users to security file.• Capability to edit user information in security file.• Capability to create test bank, student test and class
performance file names from course data.Capability to create new class test bank file from testbank structure.Capability to backup security file separate from otherfiles.Capability to modify existing test bank.
* Capability to print the test question bank file.• Capability to design a test plan matrix from user
input.Capability to modify a test plan matrix.
. Capability for entry of student test result data.
. Capability to allow review of student test data.* Capability to perform student test result data analysis
in test matrix.'Capability to perform class test result data analysisin test matrix.Capability to generate different test forms based oninstructor input from test plan matrix.
3Reproduced From
Best Available Copy

* Capability to print test form• Capability to print student test result analysis
report.Capability to print a class test result analysisreport.Capability to print a test plan report.Capability to create new class files from class filestructure.Capability to read student test answer files(interactive mode)
Suggested Program Modules
Program modules should be developed to accomplish thefollowing tasks:
Security Identification entry/modification/verification* Test Bank Question Entry/modification* Student Personal and test result data
entry/modification* Test Plan Matrix development/modification• Test Data Analysis for student/class• Report Generator for test plan/student analysis/class
analysisTest Generator/printerInteractive test routine
Files Required:
Files to hold the following information will need to bedesigned:
. Class test results informationTest question data bank for each course testTest questions for student test
* Test plan matrix labels for course. Program security - passwords
Audit trail. Student responses and score (interactive mode)
Class test results file structure* Test Bank File structure* Class test file structure* Class test/test plan list• Temporary file for building test
Randomly generated numbers
4 Reproduced FromBest Available Copy

FINAL SYSTEM DESIGN SPECIFICATIONS
System Hardware Specifications:
* IBM or Compatible PC. 640 K main memory. 360 K or 1.2 M floppy drive* 20 Megabyte or larger hard drive system* Dot matrix or laser printer. Monochrome or Color monitor
Software Specifications:
dBase III Plus - full version or runtime versionpreferably installed on a hard drive.
Program Capabilities:
Password access security system in which user canchange his own password once admitted to the system bysystem manager.Produces an audit trail for each attempted log-in, eachpassword entry, and each menu selection.
* System manager can browse or print audit trail.Passwords are kept in a security file in encoded form.
* System manager can add new users to the system.System manager can edit user information in securityfile.Individual unique files are automatically created foreach test bank, student test and class results file.
• test• Allows modification to an existing test bank.
Allows printing the test question bank items.• Aids in the design a test plan matrix by the user
Allows modification of a test plan matrix.• Allows user or automatic entry of student test result
data.. Allows review of student test data.* Performs student test result data analysis using test
plan matrix.Performs class test result data analysis using testplan matrix.Randomly generates different test forms based on userinput from test plan matrix.
• Prints student test form .. Prints student test performance report.
Prints student test result analysis.• Prints class test result analysis.• Prints a test plan report.• Creates new class files from class file structure
definition.Allows student to take test on the computer.
5Reproduced From
Best Available Copy
Allows user to back up files to floppy disY whendesired.
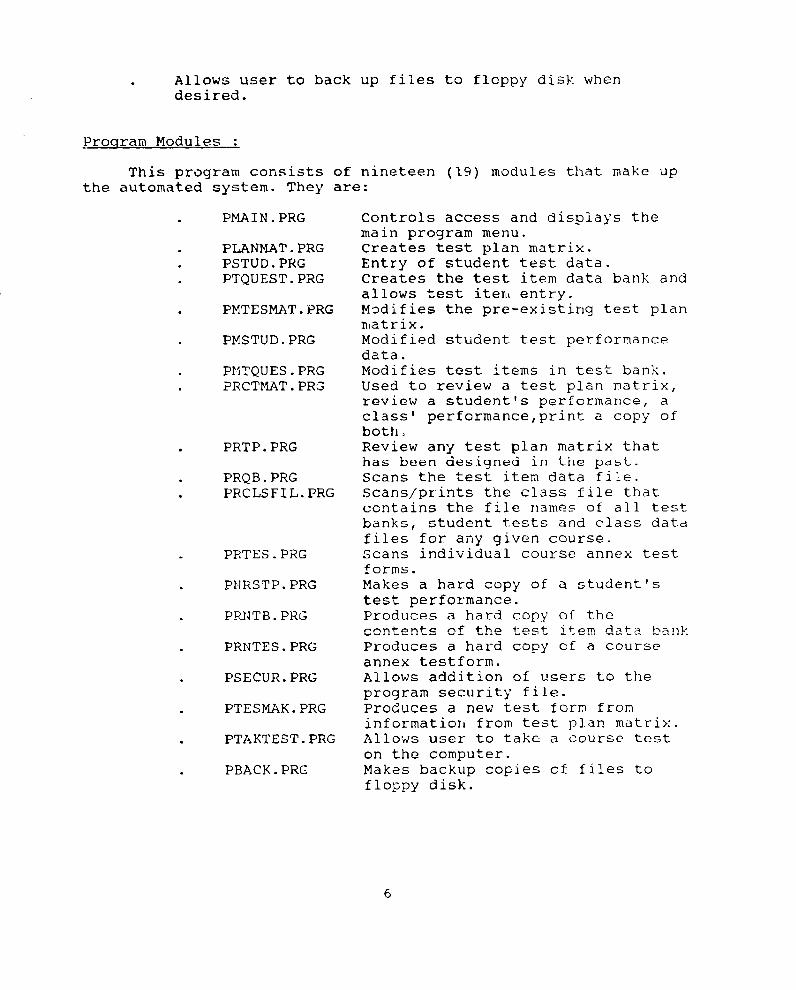
Program Modules :
This program consists of nineteen (19) modules that make upthe automated system. They are:
PMAIN.PRG Controls access and displays themain program menu.
PLANMAT.PRG Creates test plan matrix.PSTUD.PRG Entry of student test data.PTQUEST.PRG Creates the test item data bank and
allows test iterl entry.PMTESMAT.PRG Modifies the pre-existing test plan
matrix.PMSTUD.PRG Modified student test performance
data.PITQUES.PRG Modifies test items in test bank.PRCTMAT.PRG Used to review a test plan matrix,
review a student's performance, aclass' performance,print a copy ofboth.
PRTP.PRG Review any test plan matrix thathas been designed in tie psLt.
PRQB.PRG Scans the test item data file.PRCLSFIL.PRG Scans/prints the class file that
contains the file names of all testbanks, student tests and class datdfiles for any given course.
PRTES.PRG Scans individual course annex testforms.
PNRSTP.PRG Makes a hard copy of a student'stest performance.
PR1lTB.PRG Produces a hard copy of thecontents of the testim data bank
PRNTES.PRG Produces a hard copy of a courseannex testform.
PSECUR.PRG Allows addition of users to theprogram security file.
PTESMAK.PRG Produces a new test form frominformation from test plan matrix.
PTAKTEST.PRG Allows user to take a course teston the computer.
PBACK.PRC Makes backup copies of files tofloppy disk.
6
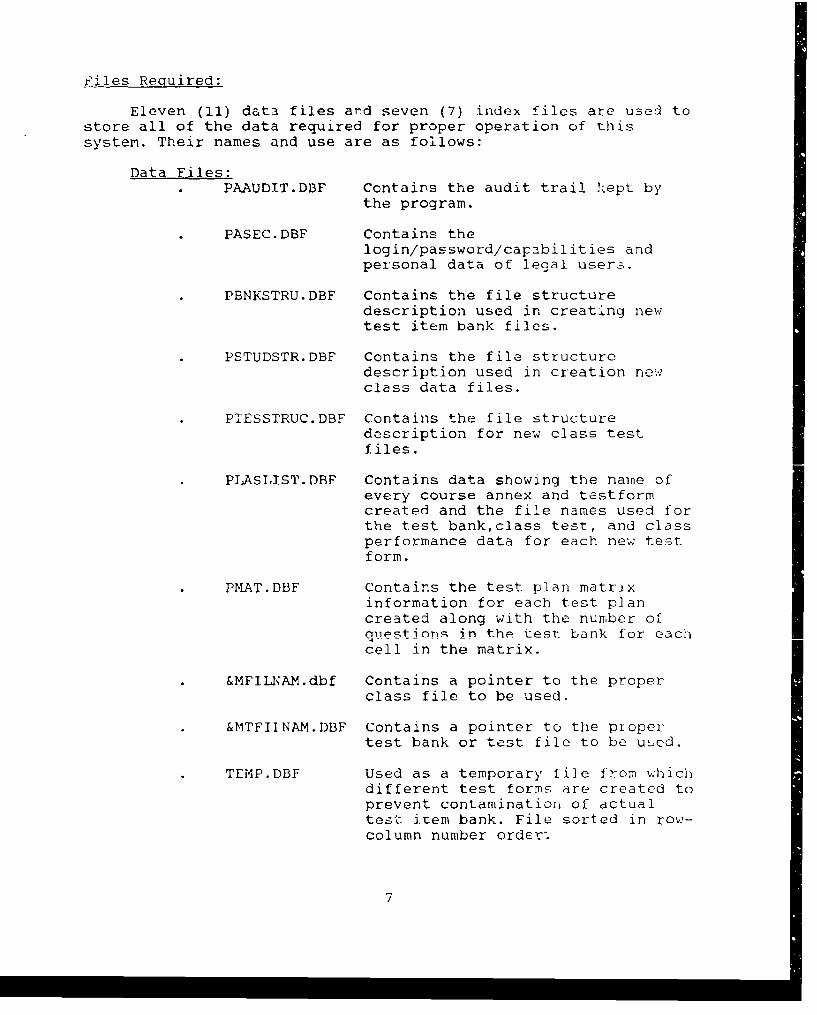
files Required:
Eleven (11) data files and seven (7) index files are used tostore all of the data required for proper operation of thissystem. Their names and use are as follows:
Data Files:.. PAAUDIT.DBF Contains the audit trail -ept by
the program.
PASEC.DBF Contains thelogin/password/capabilities andpersonal data of legal user. .
PBNKSTRU.DBF Contains the file structuredescription used in creating newtest item bank files.
PSTUDSTR.DBF Contains the file structuredescription used in creation newclass data files.
S PTESSTRUC.DBF Contains the file structuredescription for new class testfiles.
PLASLIST.DBF Contains data showing the naine ofevery course annex and testformcreated and the file names used forthe test bank,class test, and classperformance data for each new testform.
PMAT.DBF Contains the test plan matrixinformation for each test plancreated along with the number ofquestinonq in the test bank for eachcell in the matrix.
&MFILNAM.dbf Contains a pointer to the properclass file to be used.
&MTFIINAM.DBF Contains a pointer to the piopertest bank or test file to be used.
TEMP.DBF Used as a temporary file wrom whichdifferent test forms are created toprevent contamination of actualtest item bank. File sorted in row-column number order;
7

* PSHUFFL,.DBF Used to hold randomly pickedquestion numbers during testcreation.
Index Files:
* MROW.NDX Indexed on RONUM. Used withTEMP.DBF.
* PASEC.NDX Indexed on LOGIN. Used withPASEC.DBF.
* PMAT.NDX Indexed on CNUMBER. Used withPMAT.DBF.
. PLASLIST.NDX Indexed on CNUM. Used withPLASLIST.DBF
&FILNAM.NDX Points to class file index. Indexedon SID.
* &MTFILNAM.NDX Points to test file index. Indexedon QNUM
PSHUFFLE.NDX Indexed on SHUFIND. Used withPSHUFFLE.DBF
8

PSEUDO-CODE OF MODULE FUNCTIONS
PMAIN.PRG
Pmain is designed to perform two major functions - securityand module access control. The security function is accomplishedusing the PSEC.DBF which contains the log-in code, encryptedpassword and the capability level, that the system manager hasassigned to the user. The user is prompted for a log-in codewhich if net entered correctly will cause a message of warning toappear. If the log-in is not completed correctly the second timethe program will terminate. The access function is accomplishedby checking the capability code that has been assigned to theiiser against a capability list assigned to each menu option. Ifthe proper capability level is not presented, the user will bewarned of an illegal access attempt and will then be returned tothe main menu. All attempts at log-in, password entry, and menuselection are recorded in the audit trail data base. The moduleperforms these functions by carrying out these processes.
1. Set dBASE system configuration by setting the followingfunctions off: talk,confirm,status,history,bell,helpand safety.
2. Open the security and audit trail files.3. Set module constants to starting values.4. Display opening screen and prompt user for login.5. Write login into audit trail file. Check login against
security file, if legal move to step 5, otherwise warnuser of incorrect login and loop to step 4.
6. If acceptable logir, is not entered in two tries closefiles and exit prograim.
7. Extract user capability code and password from securityfile.
8. Prompt user for password.9. Accept password one character at a time.
Encode password and check against security code,ii. Write to audit trdil filie, if legal password move to
step 12, otherwise warn user of incorrect password andloop to step 8.
12. If acceptable password is not entered in three triesclose files and exit program.
13. Close security file.14. Display main menu program and prompt for menu choice.14. Process user choice in case structure checking for
proper capability level and writing choice to audittrail before continuing with selected process.
15. If proper capability is not found then warn user ofilleg,;l entry attempt and loop to main venu.
]G. If user choice is Q or R close all files aind return toeither dBASE or DOS.
17. End module.
9

PLANMAT. PRG:
The main function of this module is to assist the user indeveloping the test plan matrix. The matrix design is limited toa maximum matrix size of six (6) rows by eight (8) columns. It isdesigned by entering the operation labels for each row and thejob function labels for each column. Once that is done, agraphical form of the matrix is displayed on the screen and theuser can then make any changes required before the form is storedin the PMAT data file. Once the - all is correct response - isissued the module sets all cell values to zero and stores thedesign information in the PMAT.DBF.
1. Close all databases.2. Open PMAT using index PUAT.3. Set program constants to opening values.4. Prompt user for course number and annex letter.5. Check PMAT to see if course test plan already exists.6. If a test plan already exists notify the uters ol tlhe
fact that a test matrix already exists and ask user ifhe would like to enter another course number if theanswer is no then return to the main menu.
7. If an existing plan was not found set all row andcolumn labels to spaces.
8. Do the following steps until the test matrix is enteredcorreuLly
9. Do the following steps until the row and columnlabels have been entered correctly.
10. Prompt user for row and column labels.11. If all is correct end loop. Otherwise loop to
step 9.12. Break the labels entered for the rows arid column
headings into their proper length to be displayedon the screen in matrix form. (Two strings havinga length of 14 characters for the rows and threestrings having a length of 7 for the columrns)
i3. DisplAy t-he Tnnfriy - 8Plicnr!d.14. Prompt user for correctness.15. If not correct loop to step 8.16. Set all cell values to zero.17. Store matrix plan in PMAT18. Record the date+time+login+course number-annex
letter-flabel for the first row of matrix in the audittrail file.
19. Return to main menu.
10

PSTUD.PRG:
The purpose of this module is to allow the entry of studenttest performance data into the class database (CL*****.DBF). Thisdata includes a student ID, class ID, course number and annexcode, and incorrect responses by question number that the studentmade on the test. The name of the class file is created by themodule by encrypting the character string formed by concatenatingthe course number, annex letter, class number and test form. Theencrypted value is then concatenated to the characters CL to formthe complete class file name [ example: CL5675 ].
1. Close all data files.2. Open file PLASLIST using index PLASLIST.3. Display title of module and ask if user wishes to
continue.4. If user doesn't wish to continue, close all files and
return to main menu.5. Do the following until more = NO.6. Set screen values to spaces.7. Prompt user for date of test, test form, course
instructor, class number, annex letter.8. Create file name string.9. Enc7ypt file name.10. Concatenate "CL" to front of encrypted file name.1i. Check to see if file already exists.12. If file does not exist, search the PLASLIST file to
see if the course data is already there. If it isthen store the new class file name. It it isn't. thencreate a new record for the class containing allclass information including class file name. Finallycreate the class file from the pstudstr.dbf.
13. If the class file already exists, open it for dataentry.
14. Do the next set of processes while there is anotherstudent to enter.
15. Do while data is not correct.16. Prompt for student performance data.17. Prompt for correctness.18. End is it correct loop39. Store data in class data file.20. record date4time4login4student ID-course
number+annex+class in the audit trail data file.21. Prompt for another student22. End another student loop.23. End more loop.23. Close all data files24. Return to main mexnu.
11
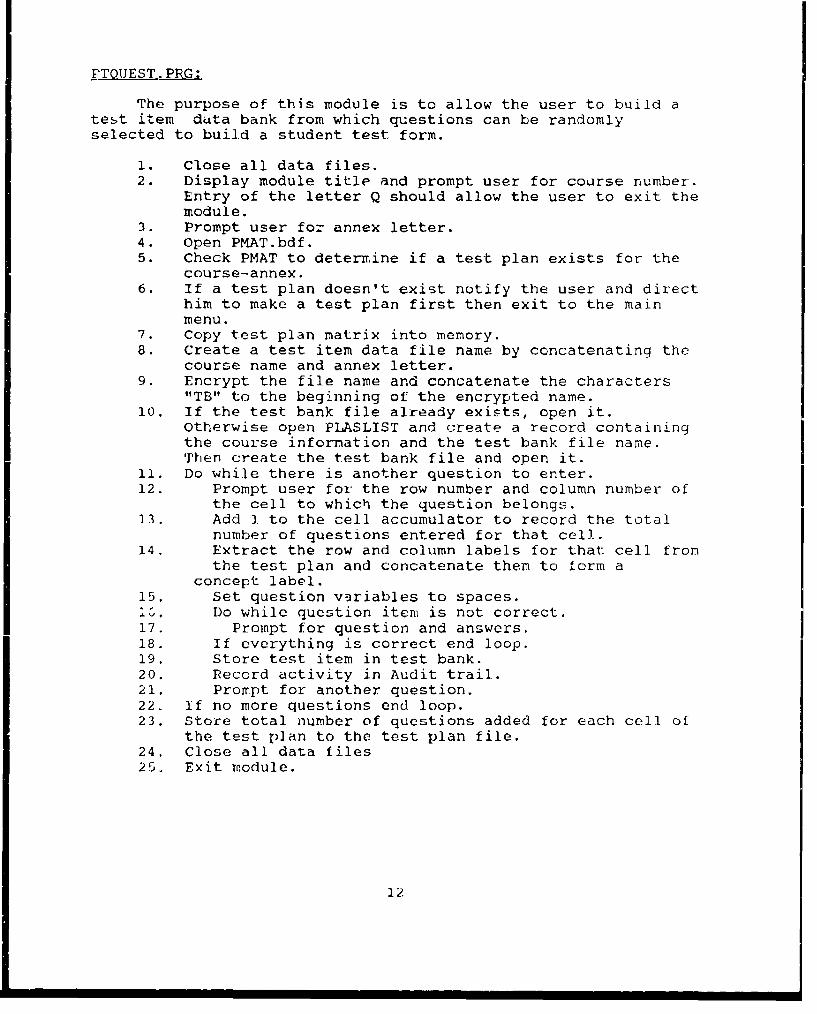
PTOIJEST.PRG:
The purpose of this module is to allow the user to build atest item data bank from which questions can be randomlyselected to build a student test form.
1. Close all data files.2. Display module title and prompt user for course number.
Entry of the letter Q should allow the user to exit themodule.
3. Prompt user for annex letter.4. Open PMAT.bdf.5. Check PMAT to determine if a test plan exists for the
course-annex.6. If a test plan doesn't exist notify the user and direct
him to make a test plan first then exit to the mainmenu.
7. Copy test plan matrix into memory.8. Create a test item data file name by concatenating the
course name and annex letter.9. Encrypt the file name and concatenate the characters
"TB" to the beginning of the encrypted name.10. If the test bank file already exists, open it.
Otherwise open PLASLIST and create a record containingthe course information and the test bank file name.Then create the test bank file and open it.
11. Do while there is another question to enter.12. Prompt user for the row number and column number of
the cell to which the question belongs.13. Add I to the cell accumulator to record the total
number of questions entered for that cell.14. Extract the row and column labels for that cell from
the test plan and concatenate them to form aconcept label.
15. Set question variables to spaces.iý. Do while question item is not correct.17. Prompt for question and answers.18. If everything is correct end loop.
19. Store test item in test bank.20. Record activity in Audit trail.21. Prompt for another question.22. If no more questions end loop.23. Store total number of questions added for each cell of
the test plan to the test plan file.24. Close all data files25. Exit module.
12

PMTESMAT.PRG:
The purpose of this routine is to allow the user to modify atest plan matrix before the building of the test bank is begun.Operation or job function labels should not be changed once thetest bank has been created or the test items will not match thenew labels without time consuming modification to the testquestion items themselves.
1. Close all databases.2. Prompt user for course number and annex letter.3. Open PMAT using index PMAT.4. Check PMAT to see if course test plan exists.5. If a test plan does not exist notify the users of the
fact then return to the main menu.6. If an existing plan was found copy test plan data to
memory variables.7. Do the following steps until the test matrix is entered
correctly8. Display the matrix as it already exists.9. Do the following steps until the row and column
labels have been entered correctly.10. P-ompt user for row and column labels.11. If all is correct end loop. Otherwise loop to step
9.12. Break the labels entered for the rows and column
headings into their proper length to be displayedon the screen in matrix form. (Two strings havinga length of 14 characters for the rows and threestrings having a length of 7 for the columns)
13. Display the matrix as designed.14. Prompt user for correctness.15. If not correct loop .16. Store matrix plan in PMAT17. Record the date+time+login+course number+annex
letter+label for the first row of matrix in the audittrail file.
18. Return to main menu.
PRCTMAT.PRG:
The purpose of this module is to allow the user to analyze astudent's or class' test performance in relation to the test planmatrix from which the test was designed.
i. Close all files.2. Determine if the program was selected from a review
menu choice or a print menu choice from the main menu.3. If from a print menu then display printer choice imenu.4. Display module menu.5. Prompt user for menu choice.
13

6. Load accumulator starting values.7. Open Plaslist.dbf8. Set initial row and column numbers for screen display.9. Do the following while course number = ?
: . Prompt user for course number.ii. If course number = Q then close all files and
exit module.12. If course number = ?13. Display all unique course numbers, annex letters
and test forms on screen.14. If screen is full erase screen and continue till
end of file.15. End course number loop.16. irompt user for annex letter.17. Prompt user for class number.18. Prompt user for test form.19. Locate a record for that class in the class list file.20. If class not found display message and exit module.21. if found copy class file name and test file name to
memory.22. Open the class file and test file.23. if menu choice was A.24. Do while student number = ?25. Display all student numbers from class on screen.26. End do27. Find requested student in class file.28. Load student performance data into memory.29. Do while not end of performance data.30. Extract question number.31. Determine row, column number for question from
test file.32. Add 3. to the row accumulator, the column
accumulator and the cell accumulator.33. End do performance data.34. Else
1,c, while not end of student file.35. Find next student in class file.36. Load student performance data into memory.37. Do while not end of performance data.38. Extract question number.39. Determine row, column number for question fromn
test file.40. Add 1 to the row accumulator, the column
accumulator and the cell accumulator.41. End do performance data.42. End if.43. Open test p2an file.44. Load test plan into mnemory.45. If user entered from print selection turn on printer.46. Display test plan with completed matrix on screen or
printer.47. Turn off printer if on.
14

48. Close all files.
49. Exit module.
PMSTUD.PRG:
This module is designed to allow the user to modify studenttest performance data.
1. Close all data files.3. Open file PLASLIST using index PLASLIST.4. Do the following until more = NO.5. Do the following while course number = ?6. Prompt user for course number.7. If course number = Q then close all files and
exit module.8. If course number = ?9. Display all unique course numbers, annex letters
and test forms on screen.10. If screen is full erase screen and continue till
end of file.11. End course number loop.12. Prompt for annex letter, class number, and test
form.13. Find record matching course number, annex, class
number and t form. if found copy class file nameto memory, otherwise loop for new course
information.14. Open class file.15. do while student ID = ?16. Prompt for student ID number.17. If student ID is Q then close files and exit
module.18. If student id = ?19. List student numbers on screen until screen is
full or end of file is reached.Zo. End student number loop.21. Locate student data anI store to inemory variables.22. Do while data is not correct.23. Display student performance data.24. Prompt for corrections.25. Prompt for correctness.26. End is it correct loop27. Store data in class data file.28. record date+time+login-s-student ID+course
number+annex+class in the audit trail data file.29. Prompt for another student30. End another student loop.31. close all data files32. ieturn to main menu.
15

PMTQUES.PRG:
The purpose of this module is to allow the user to modify atest item data bank.
1. Close all data files.2. Display module title and prompt user for course number.
Entry of the letter Q should allow the user to exit themodule.
3. Prompt user for annex letter.4. Prompt user for question number to modify.5. Open Plaslist index Plaslist.6. Find the record that matches the course number and test
annex.7. Store the test bank file name to memory.8. Do while there is another question to modify.9. Store row numLer and column number to memory
variables.10. Display present test item.11. Do while question item is not correct.12. Prompt for corrections.13. Extract. concept from test plan14. If everything is correct end loop.15. If row or column number has changed update proper
row totals and cell totals in test plan.16. Store test item in test bank.17. Record activity in Audit trail.18. Prompt for another question.19. If no more questions end loop.20. Store total number of questions added for each cell of
the test plan to the test plan file.21. Close all data files22. Exit module.
PRTP.PRG:
This routine is designed to allow the user to review any)test plan matrix that is contained in the test plan file. Itdisplays the matrix and the number of questions in the test itembank for each cell.
1. Close all data files.2. Open PMAT index PMAT.3. Prompt user for course number.4. If course number is Q then close all files and exit
module.5. Prompt user for annex letter.6. Find plan for course number,annex letter in data file.7. If found copy to memory, otherwise inform user that
record of plan does not exist and exit module.8. Display plan on screen.9. Wait while plan is reviewed.
16

!0. 2lose all files.11. Exit module.
PROB.PRG:
This module is designed to allow the user to browse throughthe test item bank file to look for errors without danger ofaccidently entering errors into the database.
1. Close all files.2. Open Plaslist index Plaslist.3. Do while more = yes.4. Set program memory variables to spaces.5. Do while course number = ?6. Prompt user for course number.7. If course number = Q then close all files and
exit module.8. If course number = ?9. risplay all unique course numbers and annex
letters.10. If screen is full erase screen and continue *-ill
end of file.11. End course number loop.12. Prompt for annex letter.13. Find record matching course number, and annex. If
found copy test bank file name to memory, otherwiseloop for new course information.
14. Open test bank file.15. Do browse while not end of file.16. Store test item to memory variables.17. Display test item.18. Prompt for continuation of browse or abandon
browse.19. End browse loop.20. End more loop.21. Close all files22. Exit module.
PRCLSFIL.PRG:
The purpose of this module is to allow the user to scan ormake a hardcopy of the records of all the courses for which testplan matrix's, test banks, class files, and student tests havebeen created.
1. Close all files.2. Open Plaslist index plaslist3. Display module title and prompt for continue.4. Check to seen if main menu option was from the review
choice section or the print choice section.
17

5. IL from print choice then set device to printer.6. Display screen headings.7. Do while not end of file.8. Display file data on screen if review, send to
printer if print.9. If printer and row coordinate is > 56 eject page and
print headings on new page, set row coordinate to 4.10. If screen and row coordinate is equal to 21 prompt
for continued browse.11. If answer to prompt is no, close files and exit
module.12. If answer to prompt is yes then erase screen
starting at row coordinate 4 ending at rowcoordinate 21, set row coordinate to 4.
13. End of end of file loop.14. If printer then set device back to screen.15. Notify user that end of file has been reached.16. close files17. Exit module.
PRTES.PRG:
The purpose of this module is to allow the user to scan tnestudent test file to get an idea of what questions the programchose from the test item bank for the student to answer.
1. Close all files.2. Open Plaslist index Plaslist.3. Do while more = yes.4. Set program imemory variables to spaces.5. Do while course number = ?6. Prompt user for course number.
If course number = Q then close all files andit -module.
8. If course number = ?9. Display all unique course numbers and annex
letters.10. If screen is full erase screen and continue till
end of file.11. End course number loop.12. Prompt for annex letter.13. Prompt for test form.13. Find record matching course number, and annex and
test form. If found copy student test file name tomemory, otherwise loop for new course information.
14. Open student test file.15. Do browse while not end of file.16. Store test item to memory variables.17. Display test item.
18

18. Prompt for continuation of browse or abandonbrowse.
19. End browse loop.20. End more loop.21. Close all files22. Exit module.
PNRSTP.DBF:
The purpose of this module is to allow the user to obtain areport of a student's test performance. More specifically itproduces a report containing the student information, questionnumber answered incorrectly and the job operations/job functionto which that question referred on the screen, on the printer, orboth.
1. Close all files2. Display module menu on screen.3. Prompt user for menu choice.4. If choice is D close files and exit module.5. Set memory variables to spaces.6. Open Plaslist file.7. Do while course number = ?8. Prompt user for course number.9. If course nurer - Q then close all files and exit
module.10. If course number = ?11. Display all unique course numbers and annex letters.12. If screen is full erase screen and continue till end
of file.13. End course number loop.14. Prompt user for annex, class number, and test form.15. Find a record having course number,annex letter, class
number and test form.f° If matching record is found extract the class file name
and stndent t~st file name from the file, otherwisedisplay file not found message, close files and exit.
17. Open the class file and student test file.18. Do while student ID = ?19. Prompt user for student ID.20. If student ID = ?21. Display all unique student ID numbers.22. If screen is full erase screen and continue till end
of file.23. End course number loop.24. Do case based on menu choice.25. Case A26. Use student file.27. Store student performance to a memory variable.28. Display analyzing message.29. Convert student performance string into separate
19

question numbers.30. Display question number and conc 'L- on screen31. Check to see if screen is full.32. If full erase screen, otherwise continue
analysis.33. When end of file reached, display message that
analysis is complete34. End case A.35. Case B36. Use student file.37. Store student performance to a memory variable.38. Display analyzing message.39. Do while not end of performance string.40. Convert student performance string into
separate question numbers.41. Display question number and concept on screen42. Check to see if screen is full.43. If full erase screen, otherwise continue
analysis.44. End analysis loop.45. Set device to printer.46. Store student performance to a memory variable.47. Print analyzing heading message.48. Do while not end of performance string.49. Convert student performance string into
separate questLon nunOeA.50. Print question number and concept51. Check to see if page is full.52. If full eject page, Print headings on new page,
continue with analysis.53. End of analysis loop.54. Set device to screen.55. When end of performance string is reached,
display message that analysis is conplete onscreen.
pr End case B.57, Case C58. Set device to printer.59. Store student performance to a memory variable.60. Print analyzing heading message.61. Do while not end of performance string.62. Convert student performance string into
separate question numbers.63. Print auestion number and concept64. Check to see if page is full.65. If full eject page, Print headings on new
page, continue with analysis.66. End of analysis loop.67. Set device to screen.68. When end of performance string is reached,
display message that analysis is complete onscreen.
20
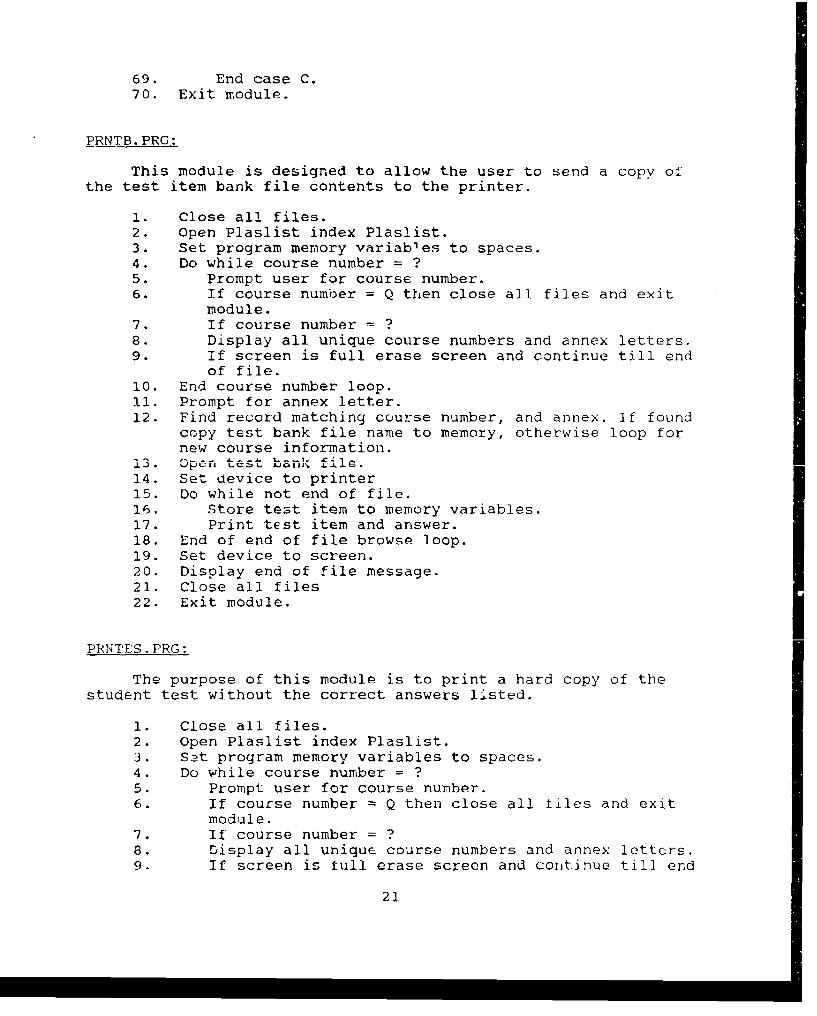
69. End case C.70. Exit module.
PRNTB.PRG:
This module is designed to allow the user to send a copy ofthe test item bank file contents to the printer.
1. Close all files.2. Open Plaslist index Plaslist.3. Set program memory variables to spaces.4. Do while course number = ?5. Prompt user for course number.6. If course number = Q then close all files and exit
module.7. If course number = ?8. Display all unique course numbers and annex letters.9. If screen is full erase screen and continue till end
of file.10. End course number loop.11. Prompt for annex letter.12. Find record matching course number, and annex. If found
copy test bank file name to memory, otherwise loop fornew course information.
13. Open test bank file.14. Set 0evice to printer15. Do while not end of file.16. Store test item to memory variables.17. Print test item and answer.18. End of end of file browse loop.19. Set device to screen.20. Display end of file message.21. Close all files22. Exit module.
PRNTES.PRG:
The purpose of this module is to print a hard copy of thestudent test without the correct answers listed.
1. Close all files.2. Open Plaslist index Plaslist.3. S.et program memory variables to spaces.4. Do while course number = ?5. Prompt user for course number.6. If course number = Q then close all files and exit
module.7. If course number = ?8. Display all unique course numbers and annex lettcrs.9. If screen is full erase screen and continue till end
21

of file.10. End course number loop.11. Prompt for annex letter.12. Find record matching course number, and annex. If found
copy student test file name to memory, otherwise loopfor new course information.
13. Open student test file.14. Set device to printer15. Do while not end of file.16. Store test item to memory variables.17. Print test item without correct answer..28. End of end of file loop.19. Set device to screen.20. Display end of file message.21. Close all files22. Exit module.
PS.CUR. PRG:
Tiie purpose of this module is to allow the system manager toset up user login, password, and capabilities and to allow a userto change his own password. The system manager's part of themodule can only be accessed by someone with a capability value ofF, while the user part of the module can be accessed by anyone.
i. Close all files.2. Open PASEC index PASEC.3. Check for capability level.4. If capability level = F5. Set choice variable to space.6. Display module menu.7. Get menu choice.8. Do case choice A9. Set variables to spaces..0. do while not correct.
!!. nisnlay screen nromnt for user information.12. Read user information.13. Encode user password.14. Prompt for correctness of data.15. end do loop correct.16. Store user data in security data base.17. Open Paaudit18. Record new user in audit trail file19. End case A.20. Do case B.21. Display menu22. Prompt user for choice23. do case choice24. choice = A25. Browse audit trial.26. choice = B
22

27. set device to printer28. report form paudit to printer29. set device to screen.30. Display report complete message.31. End case B.32. Do case C.33. Set variables to spaces.34. Retrieve old user information from data file.35. Do while not correct.36. Display screen prompt for user
information.37. Read user information.38, Encode user password.39. Prompt for correctness of data.40. End do loop correct.41. Store user data in security data base.42. Open Paaudit43. Record new user in audit trail file44. End case C.45. Else46. Clear screen.47. Prompt user for login code.48. Locate user in security file.49. Display user data.50. Prompt user for new password.51. Encode new npssword and record in security file.52. Endif53. Close all files54. Exit module.
PTESMAK.PRG:
The purpose of this module is to allow th• user to createstudent test forms from the test plan matrix and test item
's"C t inn 1'1Ank.
1. Close all files.2. Store 0 to all accumulator variables.3. Prompt user for course number.4. Prompt user for annex letter.5. Prompt user for method of selecting questions either by
row or cell.6. Open PMAT file for test plan.7. Locate required test plan.8. If test plan found9. Display explanation on how to make a test.
10. Store test plan data to memory variables.11. Create test bank file name frorm course name and
annex letter.12. Erase temporary tile and index.
23

13. Open test bank file.14. Sort test bank file on row number and column number
to temporary file.15. Index temp file on row number to mrow index.16. Else17. Notify user that the test plan file could not be
found.18. Close all files.19. Exit module.20. End if found.21. Display test plan matrix.22. Display number of questions available in test bank for
each row and individual cell.23. If user wishes to pick questions by row, prompt user
for number of questions desired from each row.24. If user wishes to pick questions by cell, prompt user
for number of questions from each cell.25. Convert the users input from character data to numeric
for numbers of questions per cell or row.26. Do while more questions to select.27. Open shuffle file.28. Determine where the first set of desired questions
starLs and ends in the temporary data file.29. Generate a set of random numbers from the record
number range for that row or cell.30. Store the numbers in the shuffle file.31. End do loop.32. Scan the class list data file to determine the last
test form that was created for the given course-annex.33. Add one to the last annex and use the new value for the
new test form letter.31. Create a new test form file name from the course-4nnex-
test form letter from the ptesstruc tile.35. Index the test file on question number.36. Do while not end of file shuffle.37. Read number in first record.38. Go to shuffle record value in Temporary file.39. Copy qubu!lui and answers to test file.40. Go to next shuffle record.41. End loop.42. Close all files43. Exit module.
PTAI'TEST. PRG:
I. Close all files.2. Set all variables to opening values.3. Prompt user for course number.4. Prompt user for annex letter.5. Prompt user for class number.6. Prompt user for test form letter.
24

7. Prompt user for ID number.8. Open class list file.9. Locate the proper testform file name.10. If test file is found go on, otherwise close all files
and exit module.11. Store zeros to accumulators.12. Do while not end of test file.13. Display test question and answer choices on screen.14. Prompt user for correct answer.15. Check user's answer against correct answer.16. If answer correct add one to correct accumulator.17. If answer is incorrect add one to incorrect
accumulator and add the question number to questionswrong string variable
18. End loop.19. Create the name of the student answer file from the
course number+annex letter+class number+testfon-mletter.
20. Check to see if the student answer file already exists.21. If file does not exist create it and index it on
student id.22. If file exists open it.23. Store student data and performance data in student
file.24. Close all files25. E'xit module.
PROGRAM SECURITY
The security aspect of this system has been addressed byincorporating a log-in/password system, a user capability and anaudit trail system into the program code. This is accomplished byfollowing these four steps.
Fi,-t, the system manager must decide who is to have accessto the program itself and then assign that user a log-in code.T'he log--in Iodu consists a t Cf u t -a.ra.ct.e.rs whchis used as a unique identifier for that user. Second, the user isalso given an initial password which is stored in the securityfile in an encoded form. This password can be changed by the userat anytime after the initial log-in has been accomplished. Third,system manager must also assign a capability code to the user.'Ihis code will determine which of the main menu options the usercan legally access. If a capability code is not assigned the userwill riot be alJowed any access to the system. Finally, theprogram itself tracks the progress of the user through theprogram as the user makes menu selections and accomplisches hi st as, .
25

How It Works:
The log-in code is checked by comparing the code entered bythe user against the code that has been stored in the securityfile for that user. This code is used not only for log-in butalso to track the user as he progresses through the system. Ifthe user does not enter the correct log-in code the first time heis warned and allowed to try again. if the correct log-in is notentered the second time, the user is singed off the system andall prog.-ar access is terminated.
After receiving an acceptable log-in code, the programtransfers the u-sprs. capability code to a memory variable and thenprompts the user for his password. The password can be up tueight (8) characters long and eight (8) characters must beentered at the password prompt. If the password is less thaneight characters long then spaces should be entered to completethe eight characters. The characters are accepted one characterat a Lime and concatenated unto the users login code to form acomplete string.
Once the complete password has been entered, any trailingblanks are truncated from the string. This isolates the paý;svworcand it can now be encrypted. The encryption process isaiccomplished asz f'ulluws:-
(1) Form a string from the letters of the password.(2) Trim off any trailing blanks from the login code and
the password string and concatenate then.(1) Extract the first letter of the password.(2) Get the ASCII value of that letter.(3) M~ultiply the ASCII value by the letters position in th.Žý
password string.(4) Sum the resulting product in step three.(5) Repeat the process until the whole passwordi has bccn
The actual. code used for the process is
MPAS =MPAS1 + MPAS2 + t4PAS3 +s MPAS4 +~ ?4PASS 4 MPjSCG-MPAS7 4 MAPS8
MI4PMJAI4 = TRIM(MLOG) + TI{IM(MPAS)MSUM 0MSTAIR 3 .DO WHILE NSTAR <= LEN(11FILNAN)
I4SUM =M.SUM 4 (AtSC (,USUI3Sm(MFILIýAM,M1431Ahý, )) *I~1A
MSTAR = STAR + IF NDHDO
26

This encryption process results in a multidigit number whichis the actual password for that user. The user get three tries toenter the correct password before his session is terminated. Thepassword check completes the sign-on security check. The nextcheck is made when the user makes selections from the main menu.Accessibility to menu options is controlled by the capabilitycode ( A, B, C or F ) assigned the user. These codes limit useraccess as follows:
User capability code .. A .. can access menu options
(B) Enter student test results(C) Enter test questions(F) Modify test questions(I) Review test questions(S) Security - change password only.(U) Take test
User capability code .. B .. can access all menu options
except:
(S) Security - set up user login codes and passwords
User capability code .. C .. can only access menu option
(U) Take test
User capability code .. F .. can access all system options,this code should be assigned to the system manager only, since itgives access to the part of the security nodule that allows theset up of new user accounts.
Audit trail:
'm,- final component of the security package is the audit
trail. '!:c audit trail is a record ot which user attempted tosign on C;,e system, the attempts at entering an incorrectpassword, the menu options selected, and selected informationabout what ,;.: done in certain modules to which the user wasallowed E2:r,'ess. A few samples of an audit trail record can beseen below.
Audit Trail Examples
Date 'jirne User Activity Menu option Comment
07/21/90- 1.:44.41--SYSTEM Main menu choice: G07/25/90-]3:40:53-******* LOG-IN for:GYSTEM No tries = 107/26,/90-12:47:03-system Main menu choice: C07/26/90-12:48:28-system-Di2345-A-51-system lrocedure•;/Fo]low Up
27

The audit trail examples above should give you a generalidea of what is stored in the audit trail file. For more specificinformation on the audit trail record for each module seeappendix E.
PROGRAM FILE CREATION TECHNIQUES
This program is designed to create its own data files forholding test items for individual course annexes, studentperformance data for individual classes, and test items forindividual class test forms. Each of these files require a uniquefile structure and a unique file name. The structures for thesefiles are contained in three files used by and supplied with thisprogram. There scructure files are PBNKSTRU.DBF, PTESSTRU.DBF AN4DPSTUDSTR.DBF. The contents of these files are listed in appendixD under file names TB******.dbf, CL******.DBF and TS******.DBF.The actual values of the asterix in the file names used by theprogram are generated using the encryption algorithri described inthe security section of this report on a string of charactersgenerated from a combination of course name, annex letter, classnumber, and test form letter.
The file nare for the course test item data bank is createdby concatenating the letters "TB" with the encrypted string madefrom the course number and course annex letter. For example, thetest item bank name for the course number 76C-AIT-PLL annex Bwhen encrypted would become the file " T35363.dbf ".
The file name for the class file would be created bybuilding a string from the course number, annex letter, classnumber and test form letter. Encrypting that string andconcatenating it to the letters "CL". For example, the class datafile name for the course 76C-AIT-PLL, annex B, class number 13,4-zt form A would become " CL7689 "
The file name for the class test form would be created bybuilding a string from the course number, annex letler and testform letter. The test form letter is automatically determined byscanning the Plaslist data file, determining the last test formletter used and taking the next letter as the letter designationfoi the new test form. This string is then encrypted and theresulting code concatenated to the letters "TS". For example, thestudent test file name for the course 76C-AIT-PLL, annex B, testform A would become " TS6208 ".
Once these files are created, their names are stored in thefile Plaslist and can be accessed by using main menu option H.The PLASLIST file is accessed by various program modules when thefile names are needed for updating, browsing or printing.
28

REFERENC'ES
CORN90 Comier, S.,Dressel,J.D, Mirabeila,A. (1990). Th__Development of Content-Valid Performance MeasurEs for76C Course and Field Assessment (Eouipmant and PartsSpecialist), US Army Institute for the Behavorial anr-Social Sciences. April 1990.
29

USING THE 76C TEST DEVELOPMENT AND ANALYSIS PROGRAM
Getting Started:
The first step in using this program involves either copyingall the program and data files from the floppy disk to the dBASEIII directory of your hard drive, to a subdirectory of the dBASEIII directory, or simply setting the default drive for the dBASEIII program to the floppy drive in which the program -s located.Each of these procedures will be explained in the followingsections.
Copying Files to the dBASE Directory
Copy the program files to your dBASE III directory asfollows:
(1) boot your system and change directories to your dBASEIII directory. CD\[name of directory]
(2) Place the program disk in drive A:(3) Type copy A:*.* after the C prompt. C:Copy A:*.*
For example:
C:CD\dbaseC.Copy a;*.*
Each file name will appear on the screen as the copy processis carried out. When the files copied message appears you canremove the program disk from drive A and store it in a securelocation.
Copyincg Files to a dBASE Subdirectory
Copy the program files to a dBASE III subdirectory using the-i,. , p- rocedure:
(1) Boot your system and change directories to your dBASEIII directory. CD\<name of directory>
(2) Create a subdirectory by typing the command MKDlR<directory name>
(3) Change directories to the new directory. CD <name ofdirectory>
(4) Place the program disk in drive A:(5) Type copy A:*.* after the C prompt. C:Copy A:*.*
For example:
C: CD\DBASEC:MKDIR PMAINC:CD PMAIl4C:COPY A:*.*
30

Each file name will appear on the screen as the copy processis carried out. When the files copied message appears you canremove the program disk from drive A and store it in a securelocation.
Starting the Program:
Once the program and data files are either copied to thedesired directory or placed in the B drive (when using dBASE fromfloppy disk) the user can start the program by doing thefollowing:
(1) Type DBASE at the C or A prompt. This will bringthe dBase interpreter on line. A copyright messagewill appear and after a few seconds a dot (.)prompt will appear in the command line at thebottom of the screen.
(2) This step depends on where your copy of the TestDevelopment and Analysis program is located.
(a) If your program is in the dBASE directorytype the command DO PMAIN to start theprogram.
(b) if your program is iin a 6ubdiiectory then youwill need to use the SET PATH command to tellthe dBASE interpreter where the program anddata files are located. This is accomplishedby typing:
SET PATH TO \<dBASE directory>\<subdirectory>
For example, let's say your dBASE directoryis called DB and the subdirectory is calledPMAIN. You would set the path to the program
SET PATH TO \DB\PMAIN
Once the path is set, the program is startedby typing the command: DO PMAIN
(c) If your program is on floppy disk and yourdBASE interpreter is on the hard drive youmust place the floppy disk in either drive Aor B and then change the default drive nameto that of the drive in which the programdisk is located. This is accomplished bytyping the command-
31

SET DEFAULT TO A: or SET DEFAJLT TO B:
Once the default drive is set, the program isstarted by typing the command: DO PMLAIN
Loging In For The First Tine:
The initial security set up for this program uses the log-incode - SYSTEM with the password MANAGER. The person assigned assystem manager for the program should immediately select thesecurity option (S) from the main menu and change the initialsecurity setup from SYSTEM and 1MAAGER to a personalized LOG-INand PASSWORD and add the other personal information required bythe security screen form.
WARNING: Do not change the capability code or you will notbe able to get back into the security setup moduleonce you log out of the program.
once the initial security set up is modified, the access tothe program can be limited by the security manager by issuingLOG-IN's, PASSWORDS and user capabilities as desired. Completeprocedures for changing the initial security and creating newuser access can be found in the section of this report thatdescribes main mnenu option S.
Opening Screer. Forms:Screen 1
WELCOME TO ARI'S TEST DEVELOPMENT AND ANALYSIS PROGRAM 1
HWritten by Donald T. Fritz 7/90I
PLEIýSE LOG-IN:I
Typ yorlgiIoea h o-npop n rs ne
etype your log-in code. at the og-int prodeipnt andtpress enther
second trial the program will terminate. once the correct log-incode has been entered the program will prompt you for yourpassword.
32

Screen 2
WELCOME TO ARI'S TEST DEVELOPMENT AND ANALYSIS PROGRAM
Written by Donald T. Fritz 7/90
PLEASE LOG-IN:SYSTEMPLEASE ENTER PASSWORD:-
The program will accept your password one letter at a timeand replace that letter with an X immediately upon entry. You donot need to press the enter key; however, you must enter eightcharacters to complete the password. If extra characters arerequired simply press the space bar to supply the required numberof extra characters. When the eighth character has been entered,the program will encode your password and check it against thepassword issued to you by the system manager. You have threechances to enter the correct password. If you do not enter thecorrect password on the third try, the program will revert backto screen I to give you a second complete try at loging in andgiving your password. If the correct password is entered the mainmenu will appear as in screen 3 below.
Screen 3 - Main Menu
Enter Data: Edit Data:(A) New Test Plan (D) Modify Test Plan(B) Student Test Results (E) Modify Student Test Data(fr st Questions (F) Modify Test Questions
Review Data: Print Data:(G) Student/Class Test Analysis (L)Student Performance Report(H) Course File Names (M) Student/Class Test Analysis(I) Test Plan matrix (N) Course Test File Names(J) Course Test File Names (0) Test Bank
H(K) Class Test Form (P) Class rest Form
Exit: Security: H(Q) Quit to Dbase (S) Change Log-in/Password(R) Quit to DOS (T) Create Test
(U) Take Test
Enter Choice: Q
33

UNDERSTANDING THE MAIN MENU
The main menu is divided into six sections determined by theprocesses that are performed by the modules accessed from eachsection.
Section I contains those options that deal withthe creation of (A) Test Plans for agiven course annex, (B) StudentPerformance data entry, and (C) TestBank item entry.
Section II contains those options that deal withthe editing of data already contained in(D) the Test Plan file, (E) the StudentPerfogmance file and (F) the itemsalready in the Test Item Bank file.
Section III contains those options that allow theuser to review data contained in orabout (G) a Student/Class Test matrixanalysis, (H) a Test plan, (I) the TestItem Bank file, (J) the course annexfile names, and (K) a Class test itpnfile.
Section IV contains those options fhat allow theuser to print hard copies of (L) aStudent performance report, (M) astudent performance analysis matrix, (N)Course Test file names, (0) the TestItem Question Bank, and (P) a pre-created test form to give to a class.
Section V contains the exit options available tothe user. (Q) exits the program to thedBASE III environment and (R) exits theprogram to the Duu environment.
Section VI contains options to allow the user to(S) change his password or in the caseof a user having system managementcapabilities to create new user accessand assign user capabilities, (T) createa new test form from the test planmatrix, and (U) take a test that wascreated from the test plan matrix.
Each of these options will be looked at in depth to explaintheir operation and use.
34
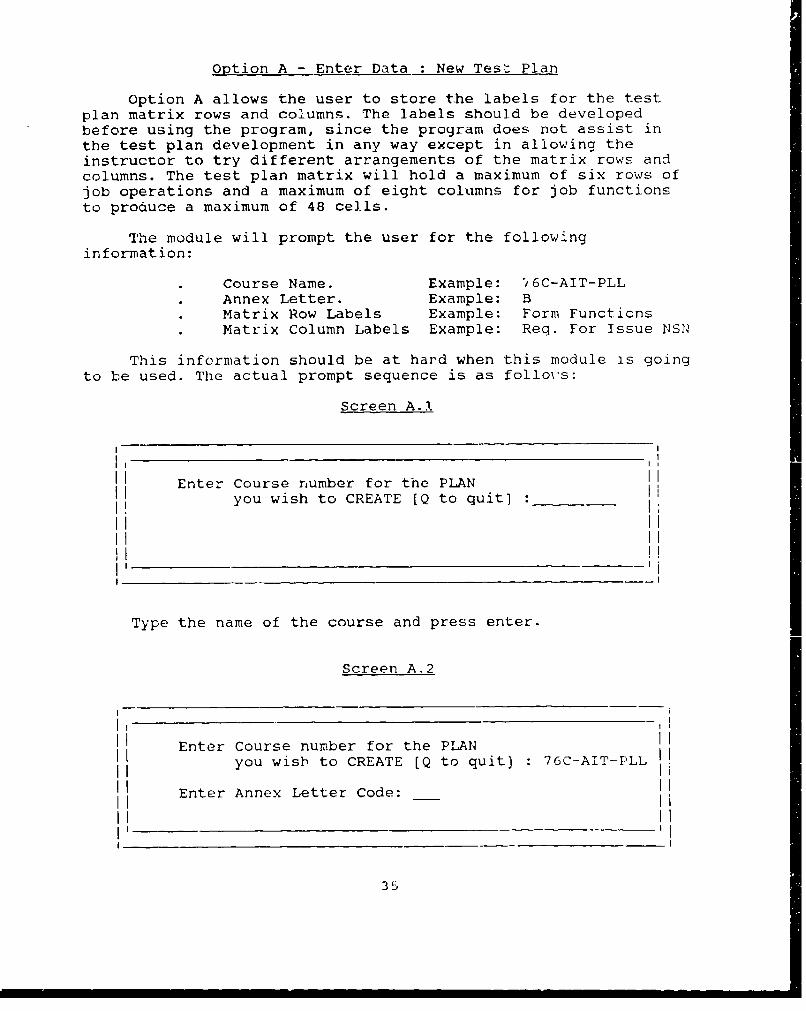
Option A - Enter Data : New Test Plan
Option A allows the user to store the labels for the testplan matrix rows and columns. The labels should be developedbefore using the program, since the program does not assist inthe test plan development in any way except in allowing theinstructor to try different arrangements of the matrix rows andcolumns. The test plan matrix will hold a maximum of six rows ofjob operations and a maximum of eight columns for job functionsto produce a maximum of 48 cells.
The module will prompt the user for the followinginformation:
Course Name. Example: ,6C-AIT-PLLAnnex Letter. Example: BMatrix Row Labels Example: Form FunctionsMatrix Column Labels Example: Req. For Issue NSN
This information should be at hard when this module is goingto be used. The actual prompt sequence is as follovs:
Screen A.!
Enter Course number for the PLAN
you wish to CREATE [Q to quit] :
Type the name of the course and press enter.
Screen A.2
Enter Course number for the PLA1N
you wisb to CREATE [Q to quit] : 76C-AIT-PLL
Enter Annex Letter Code:
35

Type the annex letter and press enter. As this is done, thecomputer will check the test plan data file to see if a test planfor that course and annex already exists. If a plan is already inthe data file this message will appear on the screen.
A Plan for that Course and Annex already exists. Wouldyou like to try another course? Y/N: Y
The default value of the message option is YES. Therefore,all you need to do to enter another course number and annex is topress the enter key and screen A.1 will reappear to let you tryagain. If a test plan for the course-annex entered does notexist, the screen will cleaýz and screen form A.3 will bedisplayed.
Screen A.3
Test Plan Matrix Design Stage
Rew 1 Label:Row 2 Label:Row 3 Label:Row 4 Label:Row 5 Label:Row 6 Label:Column 6 Label:Column 2 Label:Column 3 Label:Column 4 Label:
Column 5 Label:Column 6 Label:Column 7 Label:
II " 1 T.rn 8 Label:
Each of the Row Label fields can hold 28 characters and eachof the Column Label fields can hold 21 characters. If vu labelscoritain more characters than the field can hold, condense thoselabels by using clear abbreviations for terms that can beshortened. All of these fields are active and you can move fromfield to field at anytin~e by pressing the cursor keys on thekeyboard. You can erase characters using the backspace key,inseit characters using the insert key, type over charactersusing the insert key and delete characters using the delete key.Use the enter key to leave a data field. This will be true forall screen fields used in this program.
36
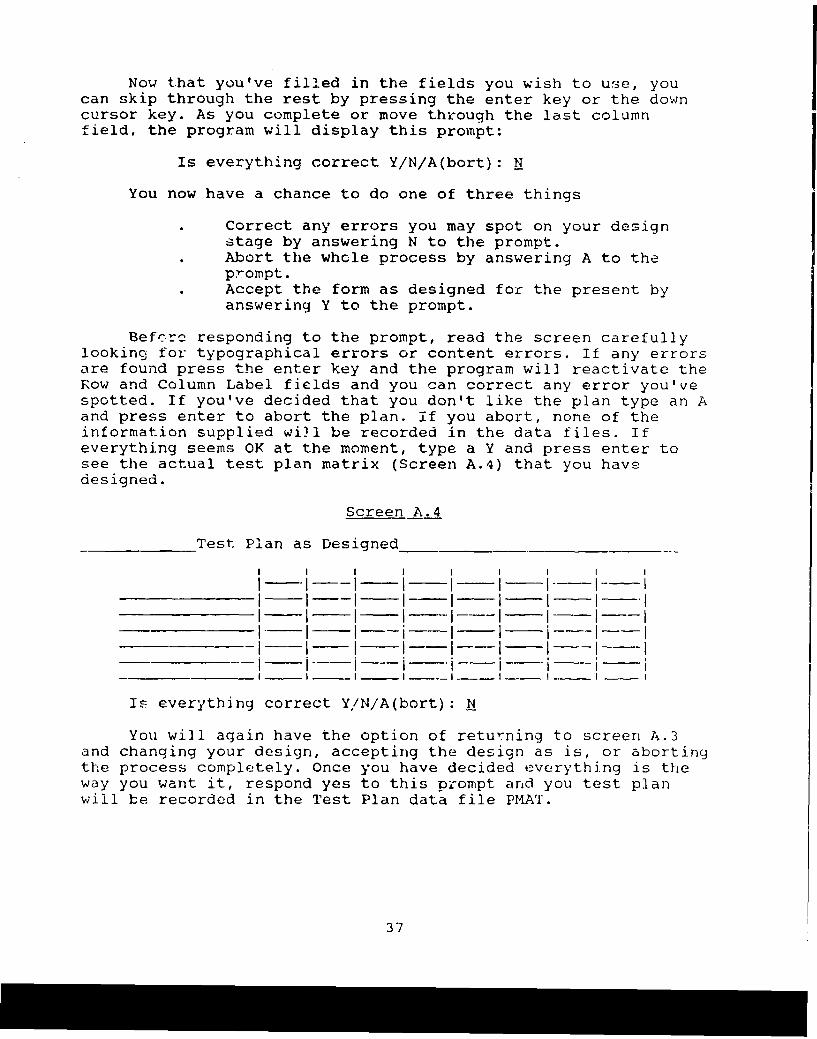
Now that you've filled in the fields you wish to use, youcan skip through the rest by pressing the enter key or the downcursor key. As you complete or move through the last columnfield, the program will display this prompt:
Is everything correct Y/N/A(bort): N
You now have a chance to do one of three things
Correct any errors you may spot on your designstage by answering N to the prompt.Abort the whcle process by answering A to theprompt.Accept the form as designed for the present byanswering Y to the prompt.
Befcore responding to the prompt, read the screen carefullylooking for typographical errors or content errors. If any errorsare found press the enter key and the program will reactivate theRow and Column Label fields and you can correct any error you'vespotted. If you've decided that you don't like the plan type an Aand press enter to abort the plan. if you abort, none of theinformation supplied will be recorded in the data files. Ifeverything seems OK at the moment, type a Y and press enter tosee the actual test plan matrix (Screen A.4) that you havedesigned.
Screen A.4
Test Plan as Designed
I ________ I - - I I I III I -I I-- I-- I Il* _____ l *****- --**i-- -- I I
-i--I I i *-******i--**I I
Is everything correct Y/N/A(bort): N
You will again have the option of returning to screen A.3and changing your design, accepting the design as is, or abortingthe process completely. Once you have decided everything is theway you want it, respond yes to this prompt and you test planwill be recorded in the Test Plan data file PMAT.
37
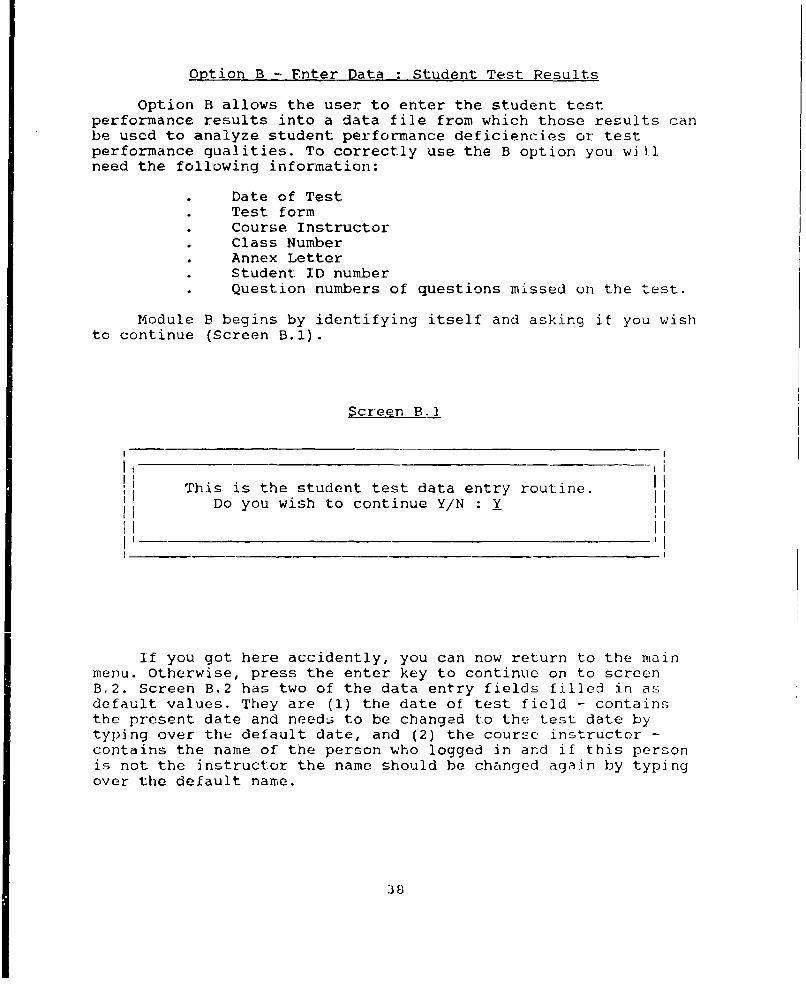
Option B - Enter Data : Student Test Results
Option B allows the user to enter the student testperformance results into a data file from which those results canbe usod to analyze student performance deficiencies or testperformance qualities. To correctly use the B option you willneed the following information:
* Date of Test* Test form• Course Instructor* Class Number* Annex Letter* Student ID number• Question numbers of questions missed on the test.
Module B begins by identifying itself and asking it you wishto continue (Screen B.1).
Screen B.]
This is the student test data entry routine.
Do you wish to continue Y/N :
If you got here accidently, you can now return to the mainmenu. Otherwise, press the enter key to continue on to screenB.2. Screen B.2 has two of the data entry fields filled in asdefault values. They are (1) the date of test field - containsthe present date and needs to be changed to the test date bytyping over the default date, and (2) the course instructor -contains the name of the person who logged in and if this personis not the instructor the name should be changed again by typingover the default name.
38

Screen B.2
Test Course and Class Data Entry
Date of Test: 08/09/90 Test Form:
Course Instructor: Person who signed on
Class Number: Course Number: Annex:
You also need to supply the test form, the class number, thecourse name and annex letter. As the last field is completed theprogram will display this prompt:
Is everything correct Y/N/A(bort): N
Read the screen form one more time before responding to besure everything is correct because you will not get anotherchance to change any of this information. Type an A to abort theprocess.
When you are sure everything is correct and respond Y to theprompt, the screen will clear and display the student data entryform (Screen B.3).
Screen B.3
Student ID: Date of test:08/09/90 Test Form:t
Course Instructor: Person entered in screen E.2
Class Number: t# Course Number:•##### Annex:#
Test questions missed (Use two digits separated by aspace Ex 03 08]
39
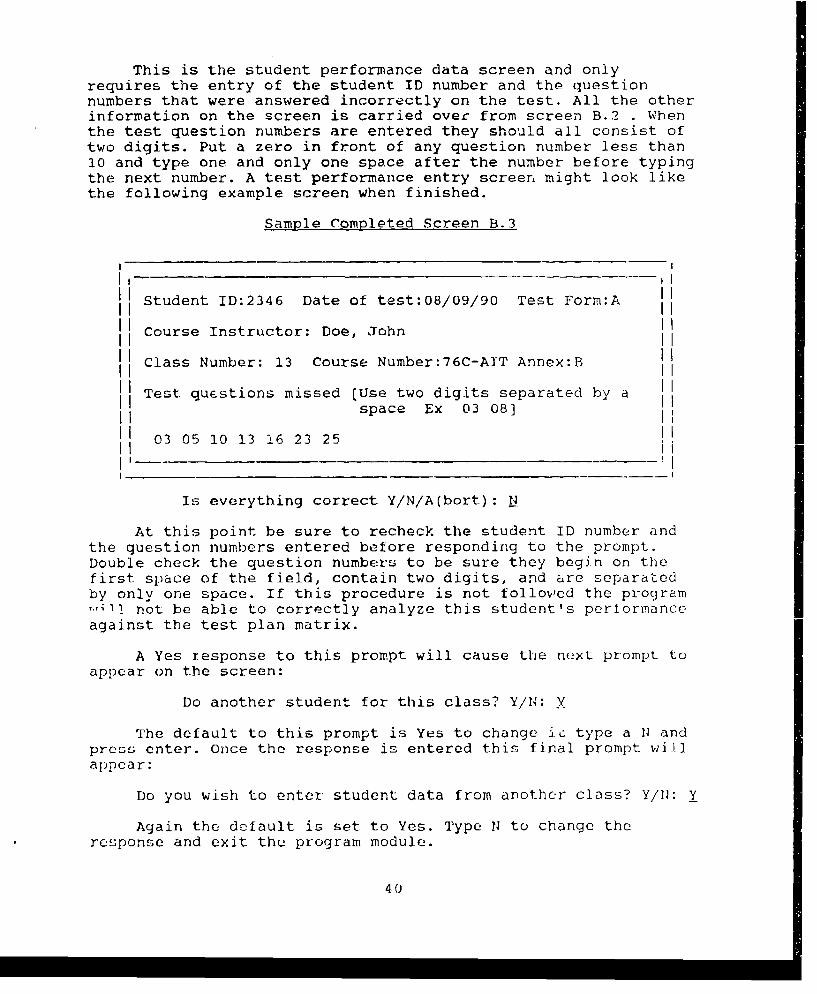
This is the student performance data screen and onlyrequires the entry of the student ID number and the questionnumbers that were answered incorrectly on the test. All the otherinformation on the screen is carried over from screen B.2 . Whenthe test question numbers are entered they should all consist oftwo digits. Put a zero in front of any question number less than10 and type one and only one space after the number before typingthe next number. A test performance entry screen might look likethe following example screen when finished.
Sample Completed Screen B.3
Student ID:2346 Date of test:08/09/90 Test Form:A
Course Instructor: Doe, John
Class Number: 13 Course Number:76C-AIT Annex:B
Test questions missed [Use two digits separated by aspace Ex 03 08]
03 05 10 13 16 23 25
Is everything correct Y/N/A(bort): :
At this point be sure to recheck the student ID number andthe question numbers entered betore responding to the prompt.Double check the question numbers to be sure they begin on thefirst space of the field, contain two digits, and &re separatedby only one space. If this procedure is not followed the program,,•ý1 not be able to correctly analyze this student's performanceagainst the test plan matrix.
A Yes response to this prompt will cause the next prompt to
appear on the screen:
Do another student for this class? Y/1: Y
The default to this prompt is Yes to change ic type a 11 andpress enter. Once the response is entered this final prompt willappear:
Do you wish to enter student data from another class? Y/11: Y
Again the default is set to Yes. Type N to change theresponse and exit the program module.
40

Option C - Enter Data - Test Questions
Option C allows you to create a test item data bank andenter test items: or enter test items to an already existing testdata bank. This is accomplished automatically by the module. Allyou have to do is to enter the Course number and annex letter. Ifa data bank already exists the program will open the file,determine the number of questions already in the data bank andadd anv new items to the end of the data file. If a data bankdoes not exist the computer will build one for you.
The information required to use this module consists of:
Course numberAnnex LetterRow and Column number of test plan cell to whichthe item belongs.The test item itself
The data entry sequence begins with a welcome to the moduleand a p::ompt for the course number (Screen C.1).
Scrcen C.1
Welcome to the Test Question Entry Routine.
Course Number [Q to quit] :
Type the number or the course you wish to work with andpress enter when finished.
Screen C.2
I Welcome to the Test Question Entry Routine.III
Course Number [Q to quit): 76C-AIT-PLL
H Annex Letter for Course:
II
Enter the annex letter for the course and press the enterkey. The module will now do two things. First, it will determineif a test plan for the course and annex entered in screen C.iexists. If it does not a message to that effect will appear onthe screen and you will be reminded that a plan must be entered
41
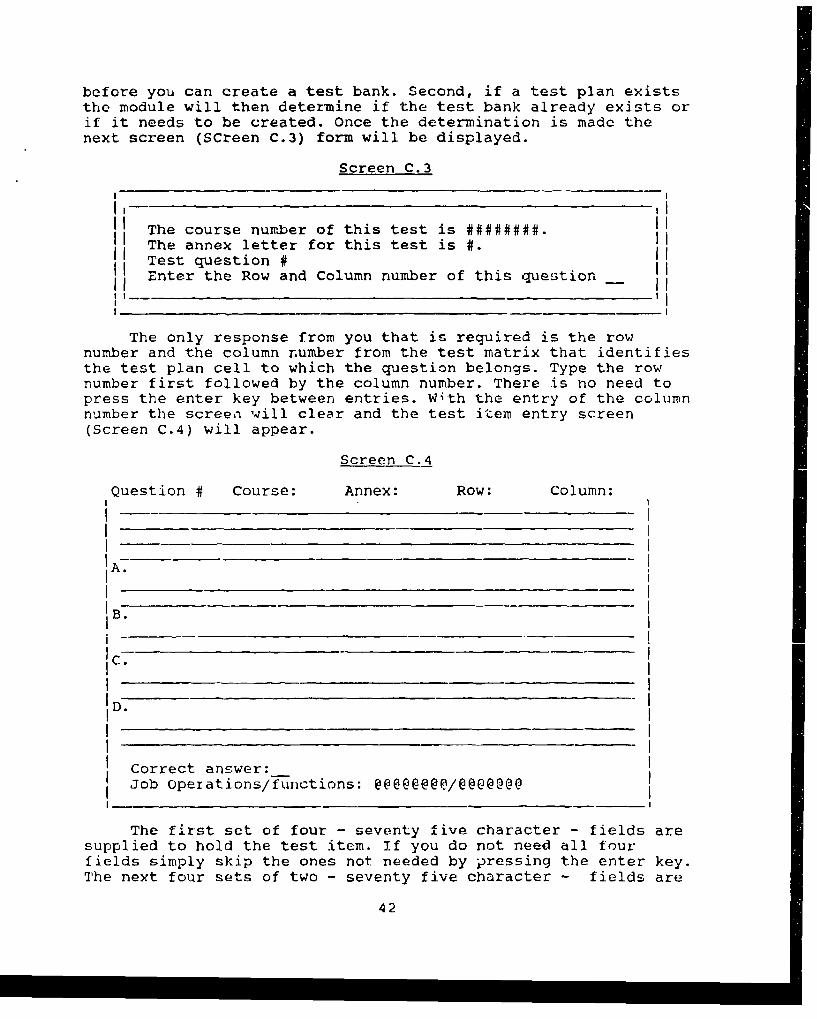
before you can create a test bank. Second, if a test plan existsthe module will then determine if the test bank already exists orif it needs to be created. Once the determination is made thenext screen (SCreen C.3) form will be displayed.
Screen C.3
The course number of this test is •#####. IThe annex letter for this test is .
ITest question #Enter the Row and Column number of this question iII II
I i
The only response from you that is required is the rownumber and the column number from the test matrix that identifiesthe test plan cell to which the question belongs. Type the rownumber first followed by the column number. There is no need topress the enter key between entries. With the entry of the columnnumber the screen will clear and the test item entry screen(Screen C.4) will appear.
Screen C.4
Question # Course: Annex: Row: Column:
IA.IA-I.B.
C.
ID.I-
I- I
Correct answer:Job Opeiations/functions: @@@@@@@@/@@@@@@@
The first set of four - seventy five character - fields aresupplied to hold the test item. If you do not need all fourfields simply skip the ones not needed by pressing the enter key.The next four sets of two - seventy five character - fields are
42

supplied to hold the four multiple choice answers for the testitem and as in the case of the question fields it is notnecessary to use all the fields.
You can move from field to field in one of two ways. First,you can move by pressing the enter key. This will move you fromthe last character in the active field to the first character inthe next field. Secondly, you can move from field to field orwithin a given field by using the cursor keys on the keyboard.
All the fields in this screen form are active as long as thecursor is within the boundaries of the form and the fields can betreated as if they were a word processing document wherecharacters can be added using the insert key, or deleted by usingthe delete key, or whole lines removed using the backspace key.
Upon entry of the correct answer, the cursor will leave theentry screen area and the prompt
Is everything correct Y/N/A(bort): N
will appear. The responses are again (Y) for yes, (N) for no, and(A) for abort the operation. Assuming everything was correct,the response to the prompt will be Y. As soon as that response isentered the test item and possible responses will be recorded inthe test item file and you will be given the next prompt.
Enter another question? Y/N: L4
At this point you can continue adding items to the bank orstop for now aid come back later to finish up.
43

Option D - Edit Data - Modify Test Plan
Option D is designed to allow you to correct any errors thatyou may find in your test plan matrix. When you use this routinebe careful that you do not change any of the job operations orfunctions once you have started adding questions to the test itembank, for if you do, you will also have to go into the item bankand change the row and column numbers of the cell questions tomatch the new cell and column locations of that cell.
This module operates much like the option A module exceptthat the modification screen will have the old row and columnlabels as default values in the label entry screen instead of thefields being empty. Another difference is in the design of thescreen. The modification screen shows the old test plan alongwith the modification fields.
The module begins with an identification of the module and aprompt for the course number as shown in screen D.1 below.
Screen D.1
Welconme to the test plan modification routine.Course number [? for list, Q to quit]: ?
This prompt defaults to a ?. If you don't know the name ofthe course test plan you wish to mndlfy or you simply wish to seea list of the cest plans that are recorded in the test plan file
• h enter key and a list of recorded plans will appear onthe screen and the execution sequence will return you to thecourse number prompt for the course number. If you wish to quitat this point, just type a Q in response to the prompt.
Entering a course number causes screen D.2 to appear.
Screen D.2
Welcome to the test plan modification routine. ICourse number [? for list, Q to quit]: 76C-AIT-PLL
Annex Letter:
i -4
44

If you enter a nonexistent course number and annex letter, amessage to that effect will be displayed and you will be returnedto the main menu. If a test plan for the course number and annexentered is found it will be displayed on the screen as shown inscreen D.3
Screen D.3
Test Plan Modification
Label label label label label label label labelI -II I I I I
II I I IRow I Label:
Label Row 2 Label:Row 3 Label: IRow 4 Label:
Label Row 5 Label: - IRow 4 Label:Row 5 Label: I
Label Row 6 Label: _
Column 1 Label:i-Column 2 Label:Lcibel !Column 2 Label:
Column 4 Label: IColumn 5 Label:
Label Column 6 Label:Column 7 Label:Column 8 Label:
Label ___
The labels for the rows and columns will be displayed in thecenter of the matrix and the cursor will be positioned at- the
-r:': label name. You can move through the labels using thecursor keys to make corrections. When you move out of the fieldfor column 8 label this prompt will appear:
Is everything correct Y/N/A(bort): N
A no answer to this prompt will reposition the cursor at thefirst row label. A yes answer will cause the screen to clear andthe new modified test plan matrix will be displayed as shown inscreen D.4
45

Screen D.4
Test Plan Modification
Label label label label label label label labelIIIII I I
IIIII IlI III I I
Label -- I - I
Label 1 -- I- -
Label I I
Label ___I __Label I
Label
Is everything correct Y/N/A(bort): N
If everything is now the way you want it, respond by typinga Y, if it is not correct simply press the enter key and the rowand column labels will again be displayed and modifications tothem may be made.
46

Option E - Modify Data : Student Test Data
Option E allows the user to modify the student testperformance results in the class data file from which thoseresults can be used to analyze student performance deficienciesor test performance qualities.
Module E begins by identifying itself and asking for thecourse number as in the following screen display.
Screen E.1
IiI
I IStudent Test Performance Data Modification iI' Course Number: C? for list, Q to quit:]: ?II III iiI IiIIIII'I
If you got here accidently, you can now return to the mainmenu by entering a Q in response to the prompt. If you do notknow the course number, press the enter key and a list of thosecourses for which tests have been given will be displayed on thescreen. If you already know the course number, enter the numberand press the enter key. The screen will now display a prompt forthe annex letter, class number and test form. (Screen E.2)
Screen E.2
Student Test Performance Data Modification
Course Number: L? for list, Q to quit:]: ?
Annex Letter:_ Class Number: Test Form: -
Enter the requested information to advance to screen E.3.
47
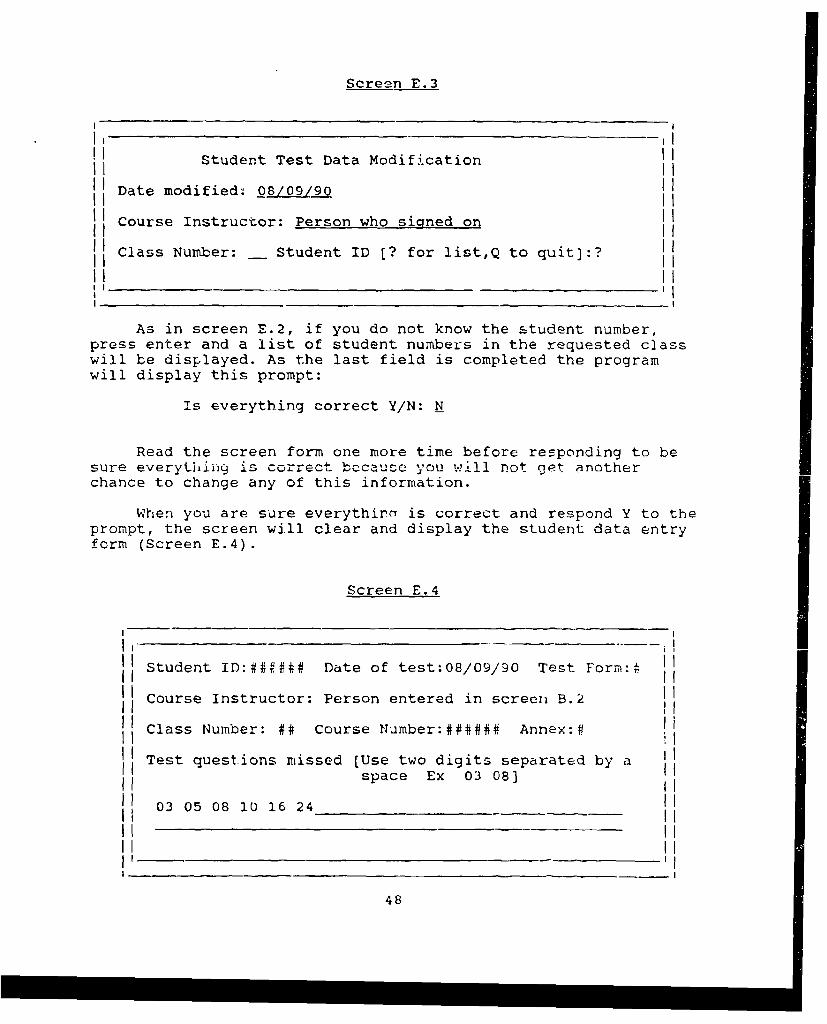
Screen E.3
Student Test Data Modification
Date modified, O8/09 90_0
Course Instructor: Person who signed on
Class Number: __ Student ID [? for list,Q to quit]:?
As in screen E.2, if you do not know the student number,press enter and a list of student numbers in the requested classwill be displayed. As the last field is completed the programwill display this prompt:
Is everything correct Y/N: N
Read the screen form one more time before responding to besure everythiicj is correct bccauce you will not get anotherchance to change any of this information.
When you are sure everythiro is correct and respond Y to theprompt, the screen will clear and display the student data entryform (Screen E.4).
Screen E.4
Student ID:#tft## Date of test:08/09/90 Test Form:lr
Course Instructor: Person entered in screeii B.2
Class Number: #t Course Number:###O## Annex:#
Test questions missed [Use two digits separated by aspace Ex 03 08]
03 05 08 10 16 24
48

This is the student performance data screen and only allowsthe user to modify the question numbers that were answeredincorrectly on the test. All the other information on the screenis carried over from screen E.3 . When the test question numbersare entered they should all consist of two digits. Put a zero infront of any question number less than 10 and type one and onlyone space after the number before typing the next number. Whenyou exit the data field this prompt appears.
Is everything correct Y/N/A(bort): .
At this point be sure to recheck the question numbersentered before responding to the prompt. Double check thequestion numbers to be sure they begin on the first space of thefield, contain two digits, and are separated by only one space.If this procedure is not followed the program will not be able tocorrectly analyze this student's performance against the testplan matrix.
A Yes response to this prompt will cause the next prompt toappear on the screen:
Do you wish to modify another student's data? Y/N: Y
The default to this prompt is Yes to change it type a N andpress enter. You will now return to the main menu screen.
49

Option F - Modify Data - Modify Test Questions
Option F allows you to modify a test item that is stored inthe test data bank. All you have to do is to enter the Coursenumber and anne'- l*etter.
Screen F.1
Welcome to the Test Question Entry Routine.
Course Number [Q to quit].
iI'
Type the number of the course you wish to work with andpress enter when finished.
Screen F.2
Welcome to the Test Question Entry Routine.II
Course Number [Q to quit]: 76C-AIT-PLLI IIII
I I v Letterci i Q ci-i n Niimbe -r.
II
To delete a question change its row number to zero!
I -
Enter the annex letter for the course and press the enterkey. Enter the question number of the item you wisn '-c modiiy.This will cause screen F.3 to appear. If you want to delete thisquestion from the data file simply change the row numier to azerc. This process does not physically remove the questi.on fromthe data bank, but simply removes it from possibility ofselection when you make a test form from the item bank. You couldreinstate the question dt some later date by changing the rownumber back from zero to a real row number. (See screen F.3)
50

Screen F.3
Question # Course: Annex: Row: Column:
IA.I -
I II E.IIC.
D.
Correct answer:Job Operations/f-unctions: @@@@@@@/@@@@@@@
You can move from field to field in onc of t,.*jo .. ays. First,you can move by pressing the enter key. This will Piove you fromthe last character in the active field to the first character inthe next field. Secondly, you cani move from field to field orwithin a given field by using the cursor keys on the keyboard.
All the fields in this screen form are active as long as thecursor is within the boundaries of the form and the fields can betreated as if they were a word processing document wherecharacters can be added using the insert key, or deleted by using
-l" pntp key, or whole lines removed using the backspace key.
Upon entry of the correct answer, the cursor will leave theentry screen area and the prompt
is everything correct Y/N/A(bort): N
will appear. The responses are again (Y) for yes, (N) for no, and(A) for abort the operation. Assuming everything was correct,the response to the prompt will be Y. As soon as that response isentered the test item and possible responses will be recorded. inthe test item file and you will be given the next prompt.
Modify another question? Y/N: 1N
At this point you can continue modifying itemis in the bankor return to the main menu.
51

Option G - Review Data - Student/Class Test Analysis
Option G is designed to allow the user to review a student'stest performance in reference to the test plan from which thetest was created. This is accomplished by determining which cellof the test plan any incorrect question responses belong in andonce all incorrect responses are mapped to their cells,displaying the test plan matrix and the number of studentincorrect responses for each cell. The module begins bydisplaying screen G.1 .
Screen G.1
III
I ' Test Performance Matrix ReviewII I IS I Ii
A. Review Individual Student PerformanceB. Review Class PerformanceC. Return to Main Menu
Enter Choice: CI
I -
Option C frr-' this menu return you to the main menu. OptionA will display the analysis of an individual student. Respondingwith either A or B to the above prompt will cause screen G.2 toappear.
Screen G.2
Class Test Performance ReviewI II i
Course Number [? for list, Q to quit): ?
Press enter if you don't know the course nunber zand a listwill be supplied. Type the course number in response to theprompt and screen G.3 will appe..r..
52

Screen G.3
I Class Test Performance Review iII I III I I
Course Number [? for list, Q to quit]: 76C-AIT-PLL
I II
Annex Letter:__ Class Number:___ Test form: -
Supply the annex letter, ctasbe number and test form tocontinue. This will bring on screen G.4
Screen G.4
'Cl lass Test Performance Review
I1Course Number [? for list, Q to quit]: 76C-AIT--PLL
SAnnex Letter: B Class Number: 13 Tet Form: A
Student ID Number [? for list]: ?
Enter the student number to begin the analysis. The programwil.l locate that student's performance data and extract that datawhile displaying the following:
Performance for student ##O~
01 05 07/ 10 13
Analyzing
53

When the analysis is complete the screen will clear and thetest plan matrix with student response analysis will bedisplayed. (Screen G.5)
Screen G.5
Test analysis for Student #### Course 76C-AIT-PLL Annex B
'Label label label 'label label label label labelI I I i IIISI 1 1 IIIII
La ell I 1-II I I I
Label2I II- II I I II -
Label I I I_ _ _ I I I i I I
Label.2 1 1 IiI i i I III
Labeli _ I I II, I I I 1 ,
Labell I I I I
2 2 2
Another: Y
Each number in a cell represents an incorrect questionLabwe . h_ number at. the beginning of the row indicates the
total nunber incorrect in each row and the numbers at the bottomof the matrix represent the nuIbe! of incorrect responSe
column. The matrix display will. remain on the screen until a Y or1 response is made to the prompt Another: Y displayed at thelower left corner of the screen.
The same basic procedure is used to display a whole c-lass'sresponse to the test questions,
54

Option H - Review Data - Test Plan Matrix
Option H is designed to allow the user to review any testplan matrix that has been developed and stored in the data files.If this opticn is used immediately after the plan is entered, allthat will be displayed is a blank test plan matrix with the rowand column labels in place; however, if the option is used afterthe test item bank has been filled, the test plan matrix will bedisplayed with numeric values in each of the cells. These valuesrepresent the total number of test items that are contained inthe test item bank for each cell of the matrix.
This module starts by displaying screen H.1.
Screen H.1
Welcome to the Test Matrix ReviewI i
(P) Send Matrix to Printer
(S) Send Matrix to Screen
Where do you want it displayed? P/S: S
This prompt is set to default to the screen. If you want tocbtain a hard copy of the test plan matrix respond to the promptv±th a P and press enter. For a screen display just press enter.
Screen H.2
I ,ICourse Number [? for list, Q to quit]: ?
Ii'I
Enter the course number for which you wish to see the testplan. Like the other modules, if you press enter with no responsea list of course test plans will appeaj on the screen. The nextprompt will ask for the annex letter ol the test plan. (Screen
55

Screen H.3
I'
Course Number C? for list, Q to quit]: ? iII IiI II_
Annex Letter:
Type in the annex letter for the course and the test planmatrix will appear on what ever device you selected from theopening screen prompt.
Screen H.4
Test Plan Matrix for Course 76C-AIT-PLL Annex B
!Label label label label label label label labeli I I I I II -- l -- l - i -- - I Iii III I i I II12 11 4 1213 6 15 3~
Lab.261 I - I I I - I --
1 a 1 4 ! .1 33 4 2LabI2 1I II
1 5 2 4 I4 4 3 3 3Lab.281 I I
{3 4 5 { 1] 2 1 5 4
4 I 4 I I 3 I I 6 5
Lab .30 1-_ -- I I I - I - I - I I
I 5 I 5 2 I I 2Lab . II I- ' I I
, , • _______ -'___Numbers indicate the number of questions in test bank for eachrow or cell C
When you have finished reviewing the test plan press theenter key to return to the main menu.
56

Ortion I - Review Data - Test Item Bank
Option I is designed to allow the user to browse through thetest item bank file to look for errors in typing or answerselections. The module begins with the following screen.
Screen I.1
Welcome to the Test Bank Review Routine
Course Number [? for list, Q to quit]:
Enter the course number of the test bank you wish to reviewand press enter. Screen 1.2 will appear.
Screen 1.2
Welcome to the Test. Bank Review Routine
Course N~umber [? for list, Q to quit]: '76C-AIT-PLL
Annex Letter:
Enter the annex letter and press enter. Screen 1.3 willappear. With the question, answer selections and correct answerdisplayed on the screen.
57

Screen 1.3
Question # Course: Annex: Row: Column:
'A.
'B.
!C.
ID.Ic-
Correct answer:Job Operations/functions: @@@@@@@@/@@@@
Press enter to continue, A to abandon: C
If you type an A and press enter, the browse will stop andthis prompt will appear.
Browse another test: Y/N: Y
58

Option J - Review Data - Course Test File Names
Option J allows you to browse through the test file namedata file. The module begins by displaying screen J.l.
Screen J.l
I
'Class File Names Browse Routine , III I I
Do You Wish to Browse the Class Name File Y/N: Y I- I
To browse the class name file respond by pressing the enterkey. Otherwise enter an N and then press enter. The file browseroutine prints a series of column headings then displays thecontents of the class name file (Plaslist.dbf).
Screen J.2
Course Class Test Test Bank Class Results Class TestNumber Annex Number Form File File File
76C-AIT-PLL B 13 A TB5363 TS4053 TS4305
Press any key to continue. Y
The class names will list until the screen fills. Once thescreen is full just press the enter key to continue the browse. Amessage will appear when the end of file is reached.
59

Option K - Review Data - Class Test Form
Option K is exactly like option I except it allows the userto review a class test form rather than the test item data file.It begins with screen K.l.
Screen K.1
Welcome to the Class Test Review Routine
Course Number 1? for list, Q to quit]:
Enter the course number of the test bank you wish to revie-wand press enter. Screen K.2 will appear.
Screen K.2
'' Welcome to the Test Bark,,K Alvlew .... u, • .,-"÷
Course Number [? for list, Q to quit]: 76C-AIT-P4LL
Annex Letter:
60
I I
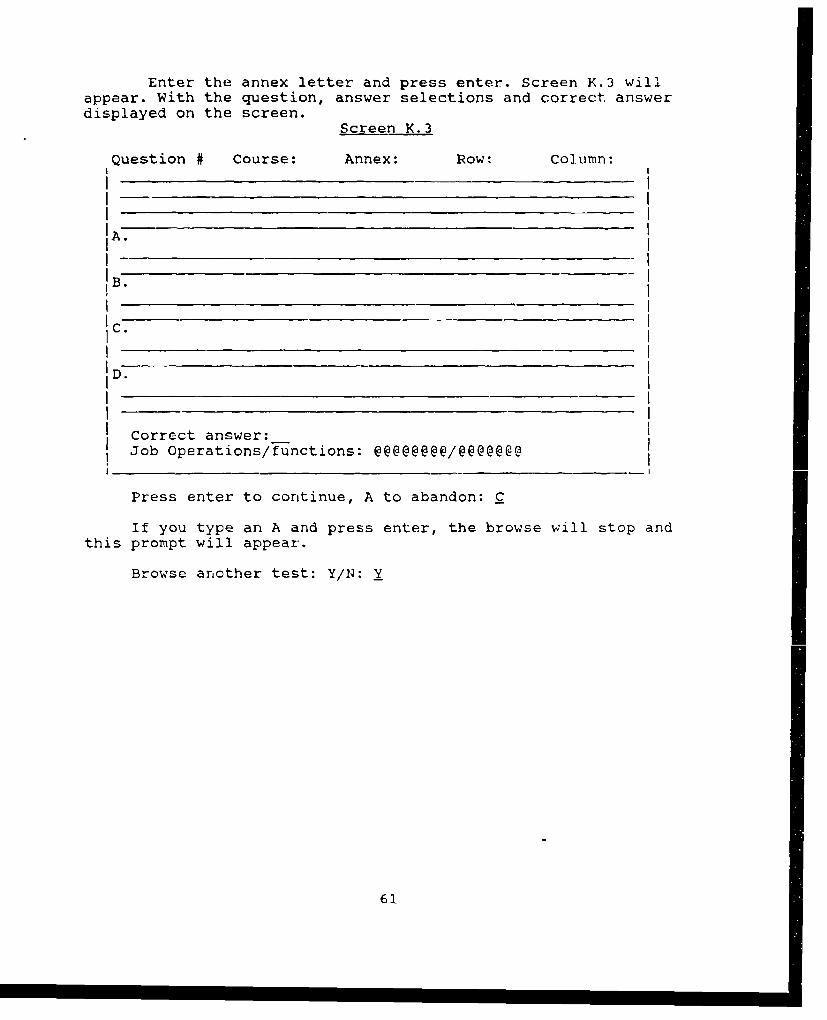
Enter the annex letter and press enter. Screen K.3 willappear. With the question, answer selections and correct answerdisplayed on the screen.
Screen K.3
Question # Course: Annex: Row: Column:
A.I.I -
IB.
1C.
ID.
Correct answer:Job Operations/functions: @@@@@@@@/@@@@@@@
Press enter to continue, A to abandon: C
If you type an A and press enter, the browse will stop andthis prompt will appear.
Browse another test: Y/N: Y
61
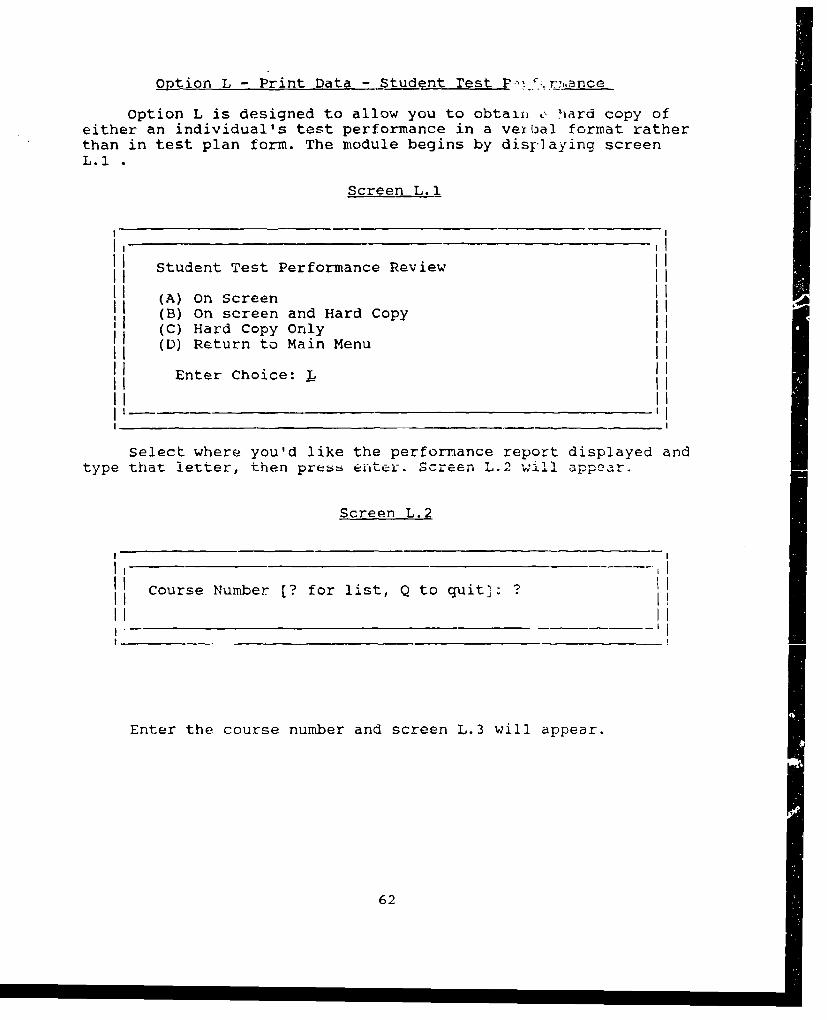
Option L - Print Data - Student Test P '..r:,nce
Option L is designed to allow you to obtain , hard copy ofeither an individual's test performance in a verbal format ratherthan in test plan form. The module begins by displaying screenL.I.
Screen L.1
Student Test Performance Review
(A) On Screen(B) On screen and Hard Copy(C) Hard Copy Only(D) Return to Main Menu
Enter Choice: L
Select where you'd like the performance report displayed andtype that letter, then press enter. Screen L.2 will appear.
Screen L.2
Course Number [? for list, Q to quit]: ?II
I I
Enter the course number and screen L.3 will appear.
62

Screen L.3
I Student Test Performance ReviewI I i
Course Number [? for list, Q to quit]: 76C-AIT-PLL
Annex Letter:- Class ITmber: Test form:
Enter the annex lett.er, class number and test form and thenext screen w-ill appear.
Screen L.4
i Class Test Performance Review
I ii iI
Course Number [? for list, Q to quit]: 76C-AIT-PLLAnnex Letter: B Class Number: 13 Test Form: A
qtident ID Number [? for list]: ?
will locate that student's performance data and extract that data
i I
Enteitl e dip aynntex fleteo lssnweradnetgoman:h
nextscren wal apea3

Screen L.5
i I Performance of Student Number ####IIIII Questions Missed: W## # ## 1# ##II
Analyzing
Ii # - Job opportunity/function
I III I
Press any key to continue.
64

Option M - Print Data - Student/Class Test Analysis
Option M is designed to allow the user to send a review of astudent's test performance in reference to the test plan fromwhich the test was created to the printer. This is accomplishedby determininy which cell of the test plan any incorrect questionresponses belong in and once all incorrect responses are mappedto their cells, displaying the test plan matrix and the number ofstudent incorrect responses for each cell. The module begins bydisplaying screen M.1 .
Scr een ?11.
IIWhat Type PrinterI
I (L) LaserI(D) Dot matrix/graphics
Choice: LI II
Select the type priiter you w'bh to use and pres enter.Screen M.2 will next appcar.
Screen M.2
TeTot Performance Matrix Review I
A. Review Individual Student PerformanceB. Review Class Performance
C. Return to Main Menu
Enter Choice: G
Optior C from this menot return you to the main menu. OptionA will display the analysis of an individual student. Respondingwith either A or B to the above prompt will cause screen M..? toappear.
65

Screen M.3
I Class Test Performance Review II I
Course Number [? for list, Q to quit]: ?
Press enter if you don"-- know the course number and a listwill be supplied. Type the course number in responIse to theprompt and screen 1M.4 will appear.
Screen M.4
H Class Test Perform~ance Review
I i
Course N~unber [? for list, Q to quit]: 76C-AIT-PLL
Annex Letter:- Class NUmber: Test form:
Supply the annex letter, class number and test form tocontinue. This will bring on screen M4.5
66

Screen M. 5
i I i Class Test Performance Review II i I III - I
Course Number [? for list, Q to quit]: 76C-AIT-PLLAnnex Letter: B Class Number: 13 'Test Form: A
Student ID Number [? for list]: ?II
IIII III I
Enter the student number to begin the analysis. The programwill locate that student's performance data and extract that datawhile displaying the following:
Performance for otudont Vf
01 05 07 10 13
Analyzing
When the analysis is complete the screen will cle.r and thetest plan matrix with student response analysis will be displayedon the selected printer.
Th!2 cne basic procedure is used to display a whole class'sresponse to the test Questions.
67

Option N - Print Data - Course Test File Names
Option N allows you to browse through the test file namedata file. The module begins by displaying screen N.I.
Screen N.1
I I
I Class File Names Print Routine , II I I iIII i _ Ii
Do You Wish to PrinL the Class Name File Y/1: Y I
--
To print the class name file respond by pressing the enterkey. Otherwise enter an N and then press enter. The file printroutine prints a series of column headings then displays thecontents of the class name file (Plaslist.dbf).
Screen N.2
Course Clazz Test Tcst Bank Class Results Class TestNumber Annex Number Form File File File
76C-AIT-PLL B 13 A TB5363 TS4053 TS4305
Press any key to continue. Y
68

Option 0 - Print Data - Test Item Bank
Option 0 is designed to allow the user to print a hard copyof the test item bank file to look for errors in typing or answerselections. The module begins with the following screen.
Screen 0.1
I I Welcome to the Test Bank Print Routine
Course Number [? for list, Q to quit):
Enter the course number ot the test bank you wish to revit--and press enter. Screen 0.2 will appear.
Screen 0. 2
Welcome to the Test Bank Print Routine
I - -7iIhT r TT
Annex. Letter:
Enter the annex letter and press enter. The contents ofthe test item bank will be sent to the printer.
69

Ontion-P - Print Data - Class Test Form
Option P is 6esigned to allow the user to print a hard copyof a class test form file to look for errors in typing or answerselections, The mod.-Ii begins with the following screen.
Screen P.1
Ii Ii
Welcome to the Class Tect Form Print Routine I
Course Number [? for list, Q to uuit]:
Enter the course number of the test bank you wish to reviewand press enter. Screen P.2 will appear.
Screen P.2
Welcome to the Class Test Form Print Routine
Course Number [? for list, Q to quit]: 76C-AIT-PLL
Annex Letter: Test Form:-
I _II
Enter thG annex letter and pr-ess enter. The contents ofthe test itemn Iank, will. be sent to the printer.
70

Option S - Security
Option S is designed to work in two modes depending of theassigned capability of the user. The first mode is available toall users except the system manager. In this mode the user canchange his own password any time he wants to. The second mode isavailable only to the system manager and allows him to enter newuser names, log-in's, passwords and capabilities. It also allowsthe manager to browse the audit trail and print hard copies ofthe audit trail. Let's look at the first mode operation.
Mode 1:
In order to change your password, select option S from themain menu. The first screen to appear will be Screen S.1.
Screen S.1 Mode 1
II i -
E Enter Log-in Code: i
Type your log-in code and press enter. Screen S.2 will nextappear.
Screen S.2 Mode 1
User Password Setup Module
User Name:
Log in: Rank:
Password:
The user name, log-in and rank will be displayed as storedin the data file. The only active field will be the passwordfield. Enter the new password in the password field and pressenter. The new password will be stored in the security file andwill become active the next time you sign on the systeri.
71

Mode 2:-
Entry into security mode 2 requires system managercapabilities. This mode begins with the following screen:
Screen S.1 Mode 2
Program Security Module
(A) Add New User(B) Browse/Print Audit Trail(C) Edit User Information(D) Return to Main MenuEnter Choice: D
Option A from this menu allows the addition of nea membersto the security file. This option begins and ends with screenS.A.1.
Screen S.A.1
User Password/Capability Set Up Module
User Name:
Log in: Rdzk:
Password: Capability:
[ A - Limited Data Entry]I B - Data and Reports ][ C - Take Test only ]
_II
Entry of a new user to the system requires the followinginput:
* Users full name.Users assigned log-in code.
* Users Rank.Users Password.Users capability [AIB:C]
72

The user's capability assignment will determine which of themain menu options the user will be able co access. A user withcapability code A will only be allowed to access options B,C,F,I,and U. A user with capability code B can access all options withthe exception of Security Mode 2. A user with capability code Ccan only access option U. The system Manager can access all theoptions plus security mode 2; however, the system manager cannotaccess security mode 1. Access to this mode by the system manageris unnecessary, since the system manager can change passwords inmode 2.
Option B from the security menu allows the system manager tobrowse through or print the contents of the audit trail file. Themodule opens with the following screen.
Screen M.5
I~IIAudit Trail Browse/Print Routine - i
I I I
(A) Browse Audit Trail I(B) Print Audit Trail I(C) Return to Main MenuIII
Enter Choice: S I
Selection of option A from this menu will switch the programinto dBASE III Browse mode. The directions for moving through thebrowse mode are located at the top of the screen. To exit fromthe browse mode you must hold down the Ctrl key and press the End.. t!.. z number pad.
Selection of option D from this menu will send a copy of thecontents of the audit trail file to the printer.
73

Option C of the security menu will allow you to modify theinformation of any user found in the security file. It starts andends with the following screen.
Screen S.C.l
1 , Enter Log-in Code: ? I 'iI I __________________,________________ ' , IIi' ' II
II.. . . II
Enter the log-in code of the user you wish to modify. If youdon't know the user's log-in code press enter for a list of log-ins and users. Once the user log-in is entered screen S.C.2 willappear with the present user information as the default values.
Screen S.C.1
User Name:
Log in: Rank:
Password: Capability:[ A - Limited Data Entry][ B - Data and Reports IL C - Take Test Cn.
Make the required modifications by typing over, inserting ordeleting data as desired. When modification is complete and youmove through the capability field, the following prompt willappear:
Is it Correct Y/N: N
A yes response will record the modifications in the securitydata file.
74
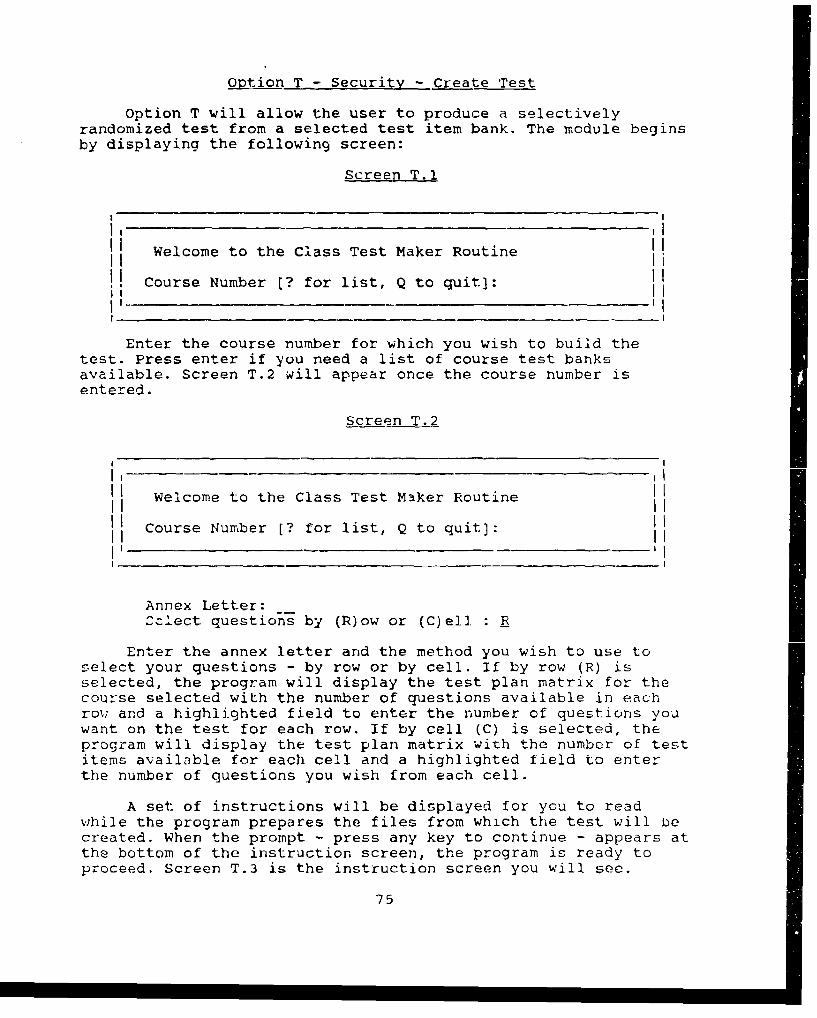
Option T - Security - Create rest
Option T will allow the user to produce a selectivelyrandomized test from a selected test item bank. The module beginsby displaying the following screen:
Screen T.1
Ii
I I Welcome to the Class Test Maker RoutineII I, Course Number [? for list, Q to quit]:
II
Enter the course number for which you wish to build thetest. Press enter if you need a list of course test banksavailable. Screen T.2 will appear once the course number isentered.
Screen T.2
IiI IWelcome to the Class Test Maker Routine
Course Number [? for list, Q to quit]:
Annex Letter:Celect questions by (R)ow or (C)ell : R
Enter the annex letter and the method you wish to use toselect your questions - by row or by cell. If by row (R) isselected, the program will display the test plan matrix for thecourse selected with the number of questions available in eachrow and a highlighted field to enter the number of questions youwant on the test for each row. If by cell (C) is selected, theprogram will display the test plan matrix with the number of testitems available for each cell and a highlighted field to enterthe number of questions you wish from each cell.
A set of instructions will be displayed for you to readwhile the program prepares the files from which the test will becreated. When the prompt - press any key to continue - appears atthe bottom of the instruction screen, the program is ready toproceed. Screen T.3 is the instruction screen you will see.
75
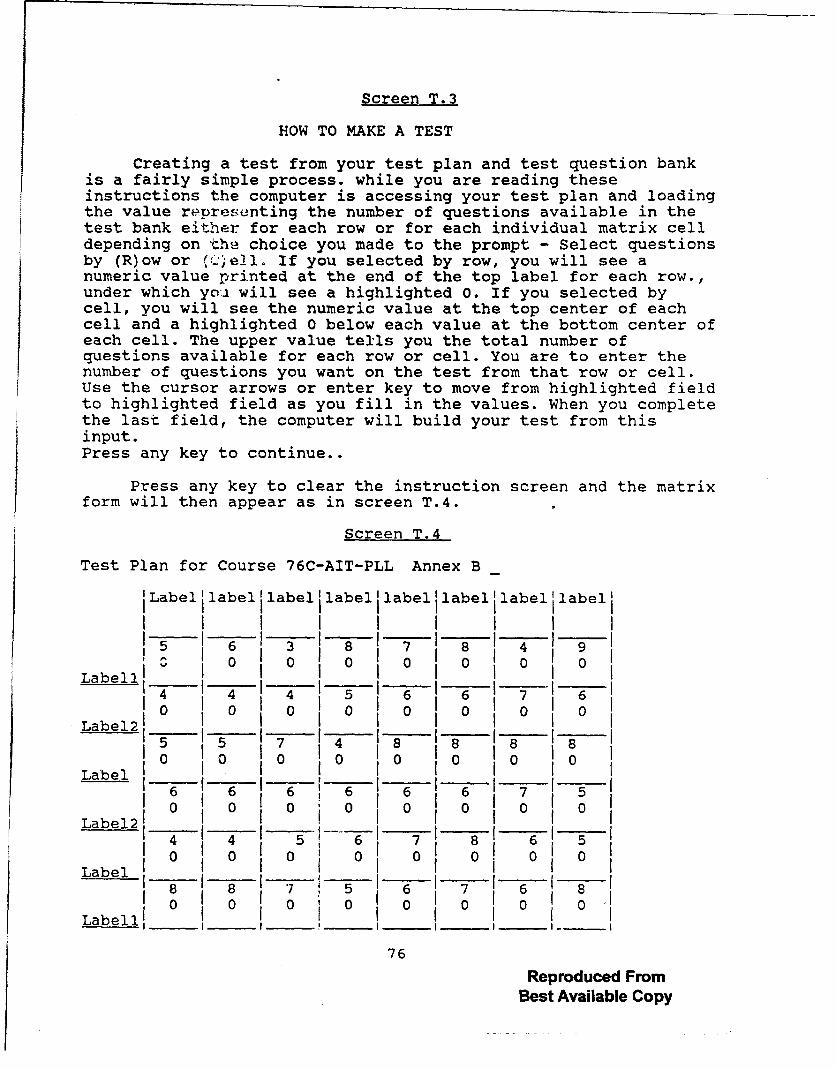
Screen T.3
HOW TO MAKE A TEST
Creating a test from your test plan and test question bankis a fairly simple process. while you are reading theseinstructions the computer is accessing your test plan and loadingthe value representing the number of questions available in thetest bank either for each row or for each individual matrix celldepending on the choice you made to the prompt - Select questionsby (R)ow or (C:e2l. If you selected by row, you will see anumeric value printed at the end of the top label for each row.,under which yo~i will see a highlighted 0. If you selected bycell, you will see the numeric value at the top center of eachcell and a highlighted 0 below each value at the bottom center ofeach cell. The upper value tells you the total number ofquestions available for each row or cell. You are to enter thenumber of questions you want on the test from that row or cell.Use the cursor arrows or enter key to move from highlighted fieldto highlighted field as you fill in the values. When you completethe last field, the computer will build your test from thisinput.Press any key to continue..
Press any key to clear the instruction screen and the matrix
form will then appear as in screen T.4.
Screen T.4
Test Plan for Course 76C-AIT-PLL Annex B
Label label label label label label label label
5I 7T 6 13 1 8 1 7 18 14 19-Label l I I I I I I
I 4 4_1 4_1_ 5 I _ _5 1 6_ 1 7 1 1
Label2 I1 5 1E1 7- 4 8 8 8 8
10 10 0 0 0 0 0 011Label I I
16 16 16 1 6 16 6 1 7 1 510 0 10 0 0 0 0 0 1
10 10 0 0 0 0 ~ 0
Label2 _I
14 14 1 6 17 8 1 6 1 511 0 1 0 1 0 1 0 1 0 0 1 0 1Label I I I II I I
1 8 1 " I __7_5 1_6 1_7 1_6 11 0 10 10' 01) 01
Labell' I I I - I
76
Reproduced FromBest Available Copy

After you've entered all the question number values theprogram will automatically produce the test from those values andwill display its progress on the screen while it is accomplishingits task. The test form is automatically determined from previousdata. You can tell what test form and file name the program isusing by recording the number that appears near the progressscreen. The created test form can be printed from option P.
Option U - Security - Take Test
Option U will allow you to take any course test for which atest form has been created. This module begins with screen U.l.
Screen U.l
I Welcome to the 76C-AIT Automated Testing Program II IH Course Number [Q to quit): II' II
Enter the course number for which ycu'd like to take a test.Enter Q to return to the main menu. As you supply the coursenumber screen U.2 will appear.
Screen U.2
I
i I Welcome to the 76C-AIT Automated Testing ProgramIi
Course Number [ Q to quit):Annex Letter:__Class Number: ITest Form: IStudent ID: I
I IIIiI II
The class number requested on this screen is the number usedby the instructor to designate the class in which you areregistered. The student ID is the number used to identifyyourself.
Enter all requested information. As the student ID field iscompleted, the screen will clear and the first test question willappear. (Screen U.3)
77Reproduced From
Best Available Copy

Screen U.3
Question # Course: Annex: Test Form:
IA.
IB.
IC.
ID.
IBI.IC
Correct answer:
As you answer each question, the computer will display thenext question until the test is completed. When you have answeredall the questions the screen will clear and screen U.4 will bedisplayed showing your performance on the test.
Screen U.4
IIH Test Results
Number of questions incorrect = 'I INumber of questions correct = I'
I'
Press any key to continue...
To end the test taking routine press any key and you willreturn to the main menu. Select option R from the main menu tocompletely leave the program.
78 Reproduced From
Best Available Copy