a green guide to yard care - wdmtexas.com (rev. 2/08) a green guide to yard care. ... these...
TRANSCRIPT

Your yard
is the
environment
over which
you have the
most control.
YardWise is a
simple four-step
program to help
you maintain a
healthy yard with
less cost,
less work, and
less waste.
T E X A S C O M M I S S I O N O N E N V I R O N M E N T A L Q U A L I T YGI-028 (Rev. 2/08)
A GREEN GUIDE TOYARD CARE
Many common yard care practices are out of balance with nature:
♦ Every year more than 5 million
tons of yard trimmings and other
organic materials end up in Texas
landfills instead of building up
the soil.
♦ Millions of gallons of city-
treated water are used to
irrigate landscapes where native
vegetation once grew in naturally
mulched soil, sustained by rainfall.
♦ Much of that water runs off
the land, eroding depleted and
unprotected soils that are unable to absorb it.
The excess sediment from your lawn and many other yards can smother aquatic life in
the receiving bodies of water. Excess sediment can also increase the cost of operating
water supply reservoirs.
♦ Costly synthetic fertilizers and pesticides are applied to compensate for the loss of
nutrients and protection once provided by organic debris and rich soil life. Surprising
as it may seem, residential users apply more pounds per acre of these chemicals than
farmers do—often to the point of disrupting beneficial soil life.
♦ As your soil loses its organic matter, it allows more of these chemicals to run off and
wash through it—contributing to the pollution of lakes, streams, and underground
water. In excess, these pollutants can harm aquatic life or contaminate the food chain.
These practices cost Texans millions of dollars every year:
♦ Disposing of organic materials in Texas landfills costs more than $150 million a year
and consumes more than 15 million cubic yards of space.
♦ The extra water and chemicals used to sustain gardens and landscapes in depleted
soil costs many more millions.
♦ It is difficult to put a price on the loss of water quality in Texas rivers, lakes, and aqui-
fers. However, it is almost always less expensive to prevent pollution than to clean it up.
Why YardWise?
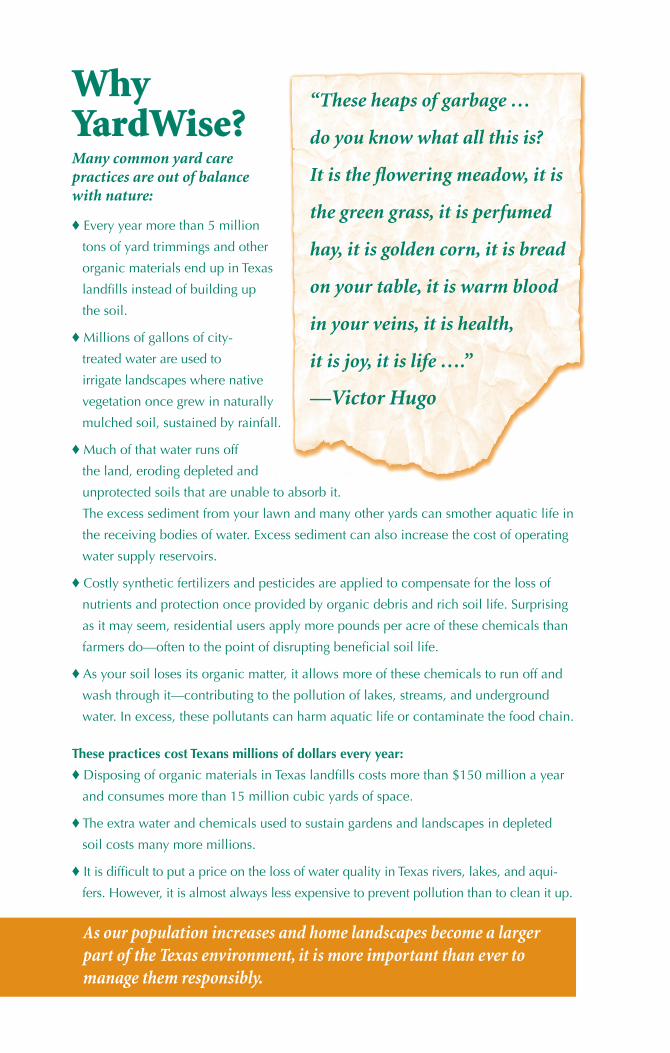
“These heaps of garbage …
do you know what all this is?
It is the flowering meadow, it is
the green grass, it is perfumed
hay, it is golden corn, it is bread
on your table, it is warm blood
in your veins, it is health,
it is joy, it is life ….”
—Victor Hugo
As our population increases and home landscapes become a larger part of the Texas environment, it is more important than ever to manage them responsibly.
Contents Glossary ........................................................ iii
Grasscycling: “Don’t Bag It!” .........................1 Basics ...............................................1 Grasscycling Benefits ................................1 Grasscycling Guidelines: Mowing ............1 Grasscycling Guidelines: Watering ....2 Grasscycling Guidelines: Fertilizing ...2
Mulching .........................................................3 Basics ...............................................3 Mulching Benefits .............................3 Mulching Guidelines: Make the Best Use of Mulch Covers ...............3
Composting ...................................................4 Basics ...............................................4 Compost Benefits ..............................4 Two Compost Recipes........................5 Cool and Easy Compost ..............5 Hot and Fast Compost .................6 The Science of Composting ...............7 Basics ........................................7 A Balanced Diet of Carbon and Nitrogen (C:N) ..................7 Adequate Moisture and Oxygen .............................8 The Right Particle Size .................8 A Healthy Temperature................9 Typical Composting Systems ............12 Piles: Open or Covered .............12 Homemade Bins .......................12 Manufactured Bins ....................13 Harvesting and Using Compost ........14 When is Compost Ready? .........14 How to Harvest Compost ..........14 How to Use Compost ................14 Worm Composting ..........................16 Kinds of Worms ........................16 Materials for Worm Composting .................16 Containers for Worm Composting .................16 Steps to Establish a Worm Composting Bin .....................17 Harvesting Worm Compost .......17 Preventing Problems .................17 Composting in the Ground ..............18
Green Landscape Design and Yard Care .............................................19 Basics .............................................19 The Right Plants in the Right Places ............................19 WaterWise .......................................20 Basics ......................................20 Watering Lawns ........................20
Watering Trees, Shrubs, and Ground Covers ................20 Drip Irrigation ...........................20 Sprinkler Irrigation ....................20 Integrated Pest Management (IPM) .......................21 Basics ......................................21 Identify the Problem..................21 Know a Friend from a Foe .........21 Use Appropriate Controls ..........21
Your Yard and Clean Air ..............................25 Small Engines —Big Problems ..........25 New Regulations— Part of the Solution .......................25 Pollution Prevention in Your Own Back Yard .....................25 Avoid Spilling Gasoline .............25 Maintain Your Equipment ..........26 Consider Cleaner Options .........26 Use Manual Tools .....................26 Reduce Mowing Time ...............26
For More Information .................................27 General ...........................................27 Composting .....................................27 General Composting .................27 Backyard Composting ...............27 Worm Composting (Vermicular) ..........................27 Xeriscaping ......................................27 Integrated Pest Management ............27 Small Gasoline Equipment for Lawns and Gardens .................27 Sources ............................................27
FiguresFigure 1. Recommended Mowing Heights ....................................1 Compost Bin Illustrations ........................11Figure 2. Desirable Compost Bin Features ...............................................13Figure 3. Trench Composting ..................18Figure 4. Burying Food or Pet Wastes ......18
TablesTable 1. Mulch Application Guide ...........3Table 2. Compost Pile Troubleshooting .....9Table 3. Compost Pile Ingredients ...........10Table 4. Comparison of Worm Composting with Composting in Large Piles .......................................16Table 5. Selected Biological Control Agents .....................................23Table 6. Selected Botanical Pesticides: Targets and Toxicity ..............................23
ii

Glossaryaerobic—having sufficient free oxygen to support respiration
anaerobic—not having sufficient free oxygen to support respiration
annual—a plant with a natural life span of one year or less
botanical—derived from plant matter without chemical alteration
“brown” materials—organic materials with a high carbon-to-nitrogen ratio such as dead leaves, dry hay, dry wood chips, and paper
dripline—the ground directly below the farthest reach of a tree’s branches
essential plant nutrients—elements that are necessary for the normal growth of plants
“green” materials—organic materials with a low carbon-to-nitrogen ratio such as green grass clippings, vegetable trimmings, and fresh manure
humus—the complex mixture of materials resulting from extensive decomposition of living things
macronutrients—essential plant nutrients that are used in relatively large quantities: nitrogen, phosphorus, potassium, calcium, magnesium, and sulfur
micronutrients—essential plant nutrients that are used in very small amounts: iron, manganese, copper, zinc, boron, molybdenum, chlorine, and cobalt
microorganism—a living thing that is only visible through a microscope
organic—consisting of residues from living things, including dead leaves and branches, grass clippings, manure, and the products of the natural decomposition of these residues
organism—a living thing
peat moss—a moss harvested from peat bogs and used as a soil amendment and as a component of potting soils
perennial—a plant with a natural life span of more than two years
pH—a measurement of the acidity or alkalinity of a material, on a scale from 0 (maximum acidity) to 14 (maximum alkalinity), with 7 representing neutral.
synthetic fertilizer—a material containing manufactured essential plant nutrients
synthetic pesticide—a material containing manufactured chemicals designed to kill pests
toxicity—the ability of a substance to cause adverse effects (that is, to be toxic) in living organisms; a high toxicity means that very small amounts of the substance cause adverse effects
iii

B a s i c sGrasscycling means leaving grass clippings on the lawn to decompose into soil.▼ Mow grass at the proper
height and disperse the grass clippings down to the soil.
▼ Water grass only as needed—about 1 inch of water once a week.
▼ Fertilize grass with slow-release fertilizers as needed to correct deficiencies.
* Don’t Bag It is a program created by the Texas AgriLife Extension Service. Used with permission.
Grasscycling Guidelines:Mowing
The key to grasscycling is to mow at the proper height (see Figure 1) and disperse the small grass clippings evenly so they fall down to the soil. Mowing grass too short causes stress, discour-ages deep root growth, and results in rapid loss of soil moisture. Letting grass grow too tall between mowings causes excess grass clippings that smother the turf and take a long time to break down.
You do not need a special mulching mower. However, grasscycling results may be improved by using a mulch-ing mower, by replacing a standard mower blade with a mulching blade, or by cover-ing a mower’s outlet chute.
♦ Raise the mowing height during the hot and dry season. A higher setting reduces moisture loss and
encourages deep root growth.
♦ Mow often enough that each mowing removes no more than one-third of the grass blade; for example, if you set your cutting height at 2 inches, then cut be-fore the grass is more than 3 inches tall.
♦ Keep mower blades sharp and clean, and mow when the grass is dry.
♦ Mow over leaves so they will decompose along with grass clippings.
♦ Collect leaves and grass clippings for mulching or composting when they are too heavy or too wet for grass-cycling.
Grasscycling: “Don’t Bag It!”*
GrasscyclinG Benefits
▼ makes turf greener and tougher
▼ prevents common turf diseases
▼ reduces lawn fertilizer requirements
▼ does not cause thatch—in fact, helps prevent it
▼ reduces total time spent mowing and maintaining your lawn
▼ cuts down on watering needs and costs
▼ eliminates disposal of grass clippings (and sometimes leaves too)
Type Cut when Set cutting of grass height reaches … height at …
Centipede 1-1/2 to 2 inches 1 to 1-1/2 inches
Common Bermuda 1-1/2 to 3 inches 1 to 2 inches
Hybrid Bermuda 3/4 to 2-1/4 inches 1/2 to 1-1/2 inches
Tall Fescue 3 to 4-1/2 inches 2 to 3 inches
St. Augustine 3 to 4-1/2 inches 2 to 3 inches
Zoysia 3/4 to 2-1/4 inches 1/2 to 1-1/2 inches
1
Figure 1. Recommended Mowing Heights

Grasscycling Guidelines: Watering
Grasscycling reduces the amount and frequency of watering. Watering too heav-ily or too often weakens the turf and causes erosion and runoff pollution.♦ Water when footprints
across the lawn remain visible or when it is diffi-cult to push a screwdriver into the turf.
♦ Water deeply (6-inch pen-etration or deeper). Apply approximately 1 inch of water once a week. Water slowly enough to avoid runoff.
♦ To measure your sprin-
kler application, place an empty 6-ounce tuna can on your lawn. Stop water-ing when it is full.
Grasscycling Guidelines: Fertilizing
Excess fertilization weak-ens roots, increases watering needs, causes thatch and excessive growth, and pol-lutes waterways. Your county extension office can help you analyze your soil and recommend fertilizers and application schedules.
♦ Grasscycling provides about 2 pounds of ni-trogen per 1,000 square feet of lawn per year.
Some people find that grasscycling completely eliminates the need for synthetic lawn fertilizers.
♦ Slow-release nitrogen sources such as compost, blood meal, sulfur-coated urea, and urea formalde-hyde help lawns grow at a moderate, even pace. Avoid using quick-release fertilizers.
♦ Gently water your lawn after applying fertilizers. Never wait for a rainstorm to water in your fertiliz-er—in most cases, the rain will fall too rapidly for the fertilizer to be absorbed, and much of it will wash into the nearest stream. ❃
2
MulchinG Benefits
▼ prevents soil compaction and erosion
▼ suppresses weeds
▼ captures and retains soil moisture
▼ protects plant roots and crowns from extreme heat and cold
▼ protects and stimulates microbial activity in the soil
▼ adds nutrients to the soil as they break down
Mulching Guidelines: Make the Best Use of Mulch Covers♦ Mulch all areas that
are not in grass or thick ground cover.
♦ Trees and shrubs benefit from mulch spread at least as far as their outermost branches (the “dripline”). To prevent diseases and pest infestation, avoid piling mulch against tree trunks.
♦ Use a layer of coarse mulch 3 or more inches in depth for weed control.
♦ When converting grassy areas to mulch, smother the grass with a thick layer of cardboard or newspa-pers rather than kill it with chemicals. Some hardy grasses must be rooted out for successful removal.
♦ Blanket perennials with several inches of shred-ded leaves or whole pine needles to protect them from winter cold.
♦ Use long-lasting mulches (wood chips, shavings, ev-ergreen needles) for trees and shrubs.
♦ Spread mulches under annuals after they are well established (4 to 6 inches tall).
♦ Water the ground thor-oughly before and after applying a mulch cover.
♦ Never rely on a rainstorm to water in your mulches. In many cases, the rain will fall too heavily and quickly, and a fair amount of your mulch may run off into the storm drain and local creeks.
♦ Never mulch with dis-eased or insect-infested yard trimmings.
Table 1 gives further de-tails about using mulch. ❃
3
MulchingB a s i c sMulch is a material spread on top of the ground to benefit soil and plant health, and make land-scape maintenance easier. Wood chips, leaves, grass clippings, wood shavings, and compost all make good mulches.
Table 1. Mulch Application Guide
Top Dressing Compost 1/4 to 1/2 inch Sifted through 1/2-inch mesh or finer screen; for Lawns apply especially after aerating or reseeding, then water in. For Annuals Grass clippings 1/2 to 1 inch Do not mulch with herbicide-treated clippings and Perennials or hay that has been treated with the persistent herbicide picloram. Shredded leaves 1 to 1-1/2 inches Can use unshredded leaves on perennial beds and stalks in autumn. Compost 1 to 2 inches Old straw 1 to 2 inches
For Shrubs Wood or 2 to 6 inches 2 to 3 inches for fine chips; up to 6 inches for and Trees bark chips large chips (more than 1 inch in length). Wood shavings 1 to 2 inches Coarse shavings only. Sawdust can bind up soil nitrogen. Compost 1 to 3 inches Coarse compost is best. For Erosion Wood chips or 2 to 4 inches 2 to 4 inches over any area without cover; Control coarse compost 3 to 4 inches on slopes.
Mulch Use Material Thickness Notes

4
B a s i c s▼ “Composting” means
the controlled decomposition (decay) of organic material such as yard trimmings, kitchen scraps, wood shavings, cardboard, and paper.
▼ “Compost” is the humus-rich material that results from composting.
▼ Compost contributes nutrients and beneficial life to the soil, improves soil structure, and helps prevent runoff that can pollute rivers and lakes.
▼ Compost helps the soil absorb and retain nutrients and moisture, and protects plants from diseases and pests. Better moisture retention means less watering, allowing you to conserve water and reduce runoff pollution.
Composting coMpost Benefits
Compost makes good mulch. It can also be mixed into garden and potting soils.
Nutrients. Compost contains the full spectrum of essential plant nutrients. However, testing the nutrient levels in your soil can be helpful in determining what supplements your landscape requires. Ask your AgriLife county extension agent for more information.▼ Compost contains micronu trients such as iron and
manganese that are often absent in synthetic fertilizers.▼ Compost releases its nutrients slowly, over several months
or years.▼ Soil enriched with compost retains fertilizers better
than lifeless soil does. Less fertilizer runs off to pollute waterways.
▼ Compost balances both acid and alkaline soils, bringing pH levels into the optimum range for nutrient availability.Soil Structure. Compost helps bind clusters of soil
particles (aggregates). Soil rich in aggregates is full of tiny air channels and pores that hold air, moisture, and nutrients like a sponge. ▼ Compost helps sandy soil retain water and nutrients that
would normally wash right through the sand.▼ Compost breaks up tightly bound particles in clay or silt
soil, allowing roots to spread, water to drain, and air to penetrate.
▼ Compost alters the texture and structure of all soils, increasing their resistance to erosion.
▼ Compost particles attract and hold nutrients strongly enough to prevent them from washing out, but loosely enough so that plant roots can take them up as needed.
▼ Compost makes any soil easier to work and cultivate.Beneficial Soil Life. Compost introduces and feeds diverse
life in the soil, including bacteria, insects, worms, and more, which support vigorous plant growth. ▼ Compost bacteria break down mulch and plant debris into
plant-available nutrients. Some soil bacteria also convert nitrogen from the air into a plant-available nutrient.
▼ Beneficial insects, worms, and other organisms are plentiful in compost-enriched soil; they burrow through the soil, keeping it loose and well aerated.
▼ Compost suppresses diseases and harmful pests that overrun poor, lifeless soil. Water Quality. In the summer, as much as half of urban
water usage goes for the irrigation of lawns and landscaped areas. Compost increases soil’s ability to retain water and decreases runoff. Runoff pollutes water by carrying soil, fertilizers, and pesticides to nearby streams. ▼ Compost promotes healthy root growth, which decreases
runoff. ▼ Compost can reduce or elimi nate your use of synthetic
fertilizers. ▼ Compost reduces the need for chemical pesticides be-
cause it contains beneficial microorganisms that protect your plants from diseases and pests.

Two Compost Recipes
There are two approaches to composting:♦ Cool and Easy Compost-
ing is adding materials gradually to a bin or pile and allowing them to compost slowly with little maintenance.
♦ Hot and Fast Compost-ing is building and actively mixing a pile to produce disease-killing tempera-tures and can yield fin-ished compost in three to four months.
The following are sample “recipes.” There is no need to follow them exactly. There are many different
“right” ways to compost.
Cool and Easy Compost
With this low-mainte-nance, “continuous feed” approach, compost is ready in six months to two years. This practice does not de-stroy weed seeds, runners, or plant diseases.
Ingredients:
♦ mixed yard trimmings as available, including grass clippings, flowers and stalks, leaves, weeds without seeds or spread-ing roots, twigs, and small branches
♦ vegetable and fruit scraps, and coffee grounds
♦ rainwater and additional water as needed
Tools:
♦ pitchfork
♦ square-point shovel or machete
♦ water hose with spray head
♦ chipper-shredder (optional, for composting thick woody materials)
♦ compost bin (optional)
♦ tarp, burlap, or black plas-tic cover (optional)
Directions:
1. Set compost bin or pile where water does not puddle when it rains, preferably a shaded spot near a water source.
2. Put yard trimmings in bin or pile as they are col-lected.
3. Chop or shred woody trimmings.
4. When adding grass clip-pings and green garden wastes to the pile, mix them into the leaves and other yard materials already in the pile.
5. Bury kitchen scraps under 10 inches of yard trim-mings or finished com-post.
6. Moisten dry materials as they are added.
7. Optional: Cover top of compost with tarp or sheet plastic to keep it moist.
8. When material at the bot-tom looks like dark, rich soil, you have compost. When convenient, move the undecomposed ma-terials into a new pile or bin, and harvest and use the compost. ❃
5
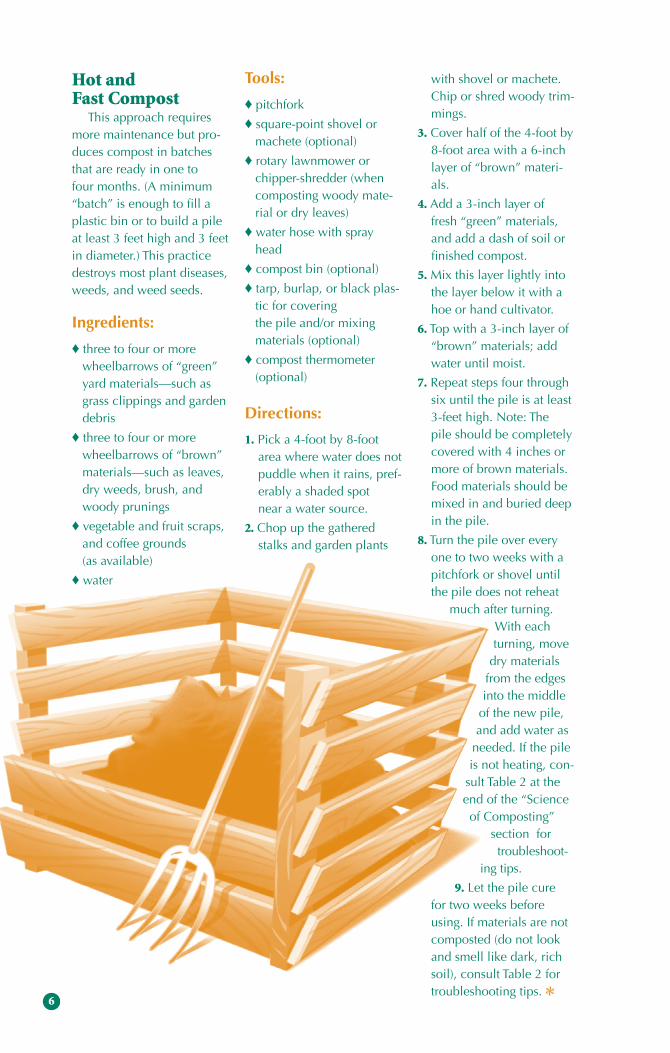
Hot and Fast Compost
This approach requires more maintenance but pro-duces compost in batches that are ready in one to four months. (A minimum “batch” is enough to fill a plastic bin or to build a pile at least 3 feet high and 3 feet in diameter.) This practice destroys most plant diseases, weeds, and weed seeds.
Ingredients:
♦ three to four or more wheelbarrows of “green” yard materials—such as grass clippings and garden debris
♦ three to four or more wheelbarrows of “brown” materials—such as leaves, dry weeds, brush, and woody prunings
♦ vegetable and fruit scraps, and coffee grounds (as available)
♦ water
Tools:
♦ pitchfork
♦ square-point shovel or machete (optional)
♦ rotary lawnmower or chipper-shredder (when composting woody mate-rial or dry leaves)
♦ water hose with spray head
♦ compost bin (optional)
♦ tarp, burlap, or black plas-tic for covering the pile and/or mixing materials (optional)
♦ compost thermometer (optional)
Directions:
1. Pick a 4-foot by 8-foot area where water does not puddle when it rains, pref-erably a shaded spot near a water source.
2. Chop up the gathered stalks and garden plants
with shovel or machete. Chip or shred woody trim-mings.
3. Cover half of the 4-foot by 8-foot area with a 6-inch layer of “brown” materi-als.
4. Add a 3-inch layer of fresh “green” materials, and add a dash of soil or finished compost.
5. Mix this layer lightly into the layer below it with a hoe or hand cultivator.
6. Top with a 3-inch layer of “brown” materials; add water until moist.
7. Repeat steps four through six until the pile is at least 3-feet high. Note: The pile should be completely covered with 4 inches or more of brown materials. Food materials should be mixed in and buried deep in the pile.
8. Turn the pile over every one to two weeks with a pitchfork or shovel until the pile does not reheat
much after turning. With each turning, move
dry materials from the edges into the middle
of the new pile, and add water as
needed. If the pile is not heating, con-
sult Table 2 at the end of the “Science of Composting”
section for troubleshoot-
ing tips.
9. Let the pile cure for two weeks before using. If materials are not composted (do not look and smell like dark, rich soil), consult Table 2 for troubleshooting tips. ❃
6

The Science of Composting
Composting involves a complex “food chain” of bacteria, fungi, mites, worms, beetles, and other beneficial organisms that consume organic materials and produce humus. The composting process is mostly accomplished by bacteria, especially when it is pro-ceeding rapidly at a high temperature. Bacteria quickly populate any good com-posting environment. Other organisms become active as conditions become favorable to them. All you have to do is maintain the conditions that allow these organisms to thrive in your pile or bin until the job is done. The proper environment for them is a mass of organic materi-als that contains a balanced diet of carbon and nitrogen, and adequate moisture and oxygen. For rapid compost-ing, the materials should also have the right particle size and heat up to 120 to 150 degrees Fahrenheit.
A Balanced Diet of Carbon and Nitrogen (C:N)
Like human beings, compost organisms require a balanced diet of nutrients. You don’t need to worry about proteins, vitamins, and minerals. Just balance the carbon and nitrogen in the composting materials by mixing high-nitrogen “green” materials—food scraps, green grass clippings, and manure—and high-carbon “brown” materials—dry grass, dead leaves, and wood
chips and shavings. (Table 3 on pages 10-11 gives carbon-nitrogen character-istics of common compost ingredients.)♦ A compost pile made up
only of “brown” materials breaks down slowly be-cause it does not contain enough nitrogen to sup-port a large population of compost organisms.
♦ A compost pile with too much “green” material begins to harbor pests and to lose its nitrogen in an ammonia form, which cre-ates odor problems.
♦ A good rule of thumb is to mix equal amounts of “green” and “brown” ma-terials by weight, or about 3 parts of “brown” materi-als to one part of “green” materials by volume.
♦ Add green and brown ma-terials in thin layers; then mix them.
♦ Where it is critical to prevent odor and pest problems, use more brown material.
Understanding C:N:
Living things are largely made up of nitrogen (in pro-teins) and carbon (in sugars, starches, and fiber). While alive, living things have a high nitrogen content—they are “green.” When they die and start decomposing and drying out in the open, airborne bacteria and other decomposers consume the protein-rich tissues first and disperse the nitrogen in the form of dead bacteria, bug droppings, ammonia, and other by-products. The carbon-rich plant fibers stay intact much longer. This is
7
B a s i c sComposting means creating an environment where things can decay without creating nuisance odors or attracting pests. There are two main causes of nuisance odors in composting: too much nitrogen or not enough oxygen.
▼ Ammonia odors are caused by too much nitrogen from fresh or “green” materials like food scraps and green grass clippings. Use “brown” ma-terials like dry grass or dead leaves for more than half of the material in your pile. Mix your “green” materials into the “brown” materials so there are no big pockets of “green” material left.
▼ “Rotten” odors are caused by low oxygen levels where your material is water-soaked and compacted. Keep your pile full of air by mixing in lots of coarse materials or by remix-ing and turning the pile often. Your compost should stay lightly moist like a wrung-out sponge so that no water drips out when you squeeze it.
Pests are attracted to compost-ing piles by “green” materials that are close to the surface. You can keep pests away from your pile by mixing “green” materi-als deep inside the pile and by keeping the top of the pile covered by a bin or a thick layer of “brown” materials. If you use “cool and easy composting,” play it safe and limit the nitro-gen and moisture in your pile. If you use “hot and fast com-posting,” be sure that you keep your pile well-mixed and balanced between carbon and nitrogen.

the process that turns “green” materials like green grass clippings that are left in the open into “brown” materi-als like dry grass. Manure is considered a “green” mate-rial because it stays rich in nitrogen for a long time.
Importance of C:N:
Part of the purpose of composting materials in piles and bins is to keep their nitrogen from dispersing. Dead bacteria and the nitrogen-rich materials that living bacteria excrete, including ammo-nia, diffuse and cascade slowly through the pile. New generations of bacteria and other composting organisms recycle this nitrogen as they consume the high-carbon plant fibers for energy.
Adequate Moisture and Oxygen
Just as carbon and nitrogen should be balanced, so does moisture and oxygen. Too much moisture leaves no air spaces, but too much ventila-tion dries out the materials.
Early in the composting process, the main difficulty is to keep all the materials in a well-mixed pile moist. Later, as they break down into a more crumbly, absor-bent, compact mass, the main challenge may be to keep the material “aerated” with fresh air. Rapid composting at high temperatures can deplete oxygen in the pile quickly, even early in the composting process.
Thoroughly moisten your mater i als, preferably with a fine spray, as you build your pile or add to it. A pile of dry organic material can shed
water like a duck. If your pile is too dry, you can ♦ turn it (pull it apart and
restack it), wetting the ma-terials as you restack them;
♦ mix in damp materials such as food scraps; or
♦ mix in fine-particle, absor-bent materials like manure.
If your pile is too wet, turn it and mix coarse materials like dry leaves or straw into it as you restack it. If your pile keeps drying out, help it retain its moisture and nutrients by building it larger (a minimum 3-foot diameter and height), by putting it in a covered bin, or by covering it with a tarp, a plastic sheet, burlap, straw, or other mulch.
Importance of Moisture and Oxygen:
Where moisture is lacking, decay is very slow. Where oxygen is lacking (that is, in “anaerobic” conditions), materials are decomposed slowly by “anaerobic organ-isms” that can produce foul smells and noxious by-products. The best level of moisture for a compost pile is as much moisture as the materials can contain without filling the air space between the particles—like a completely damp, wrung-out sponge. When you squeeze the material, no water should drip out.
Most “brown” materials, including leaves and wood chips, are coarse, stiff, and “angular,” creating air spaces in the pile and thus helping it stay “aerated” (oxygen-rich). “Brown” materials also tend to dry out quickly and to absorb moisture slowly. It can be difficult to keep them
moist. On the other hand, “green” materials, such as fresh grass clippings and food scraps, tend to be pliable and moist and to mat together into an “anaerobic” mass.
Mixing green and brown materials together also im-proves the balance between moisture and oxygen in a pile, in most cases. Paper is an exception—it is very “brown,” but it is easy to wet and tends to mat together, so it can help absorb excess moisture but does not help much with aeration.
The Right Particle Size
Composting happens where moist organic ma-terials are exposed to air. When materials are broken into small particles, there is more exposed surface area for composting organisms to attack. Microscopic organisms penetrate solid objects slowly.
Break down large objects before adding them to the pile.♦ Twigs and leaves can be run
over with a lawn mower or run through a leaf shredder.
♦ Whole branches can be run through a chipper.
♦ Garden plants and thick prunings can be chopped with a machete or pruning shears.
♦ Food scraps can be cut up in the kitchen or chopped up in a bucket with a square-point shovel.
Importance of Particle Size:
Rapid, aerobic compost-ing occurs when green and brown materials are reduced to small pieces and thorough-ly mixed together. That way,
8

every part of the pile gives decomposing organisms access to needed carbon, nitrogen, oxygen, and water. Chunks of wood and other lumps of brown material are “nitrogen-poor zones.” Whole apples or other large pieces of green material are “anaerobic zones.” A pile full of large chunks of material will have too much air space, and the surfaces
will dry out rapidly. A pile of very fine materials such as manure and sawdust may have too little oxygen and require frequent turning.
A Healthy Temperature
The best way to know whether your compost pile is “healthy” is to take its temperature. Composting occurs most efficiently when
the pile’s temp erature rises to between 120 and 160 degrees Fahrenheit and stays there until most of the mate-rial has decomposed. Com-posting can be successful at much lower temperatures—it just takes longer. ♦ If your pile does not reach
120 degrees Fahrenheit, check to be sure that the particle size is right (see preceding section); that
9
Symptom Possible Causes Possible Solutions
Damp and warm Pile too small, built too Build pile at least 3-feet high only in middle of pile gradually, or cold weather and wide. Cover with tarp. Put in a covered bin. Or allow to compost “cold.”
Pile not heating up at all 1. Not enough nitrogen 1. Mix in fresh grass clippings, manure, or food scraps. 2. Not enough oxygen 2. Turn or fluff the pile, especially where it is smelly or matted. 3. Not moist enough 3. Turn the pile, wetting as you turn to consistency of damp sponge. 4. Pile too small , built too 4. Build pile at least 3-feet high and wide. Cover gradually, or cold with tarp. Put in covered bin. Or allow to compost “cold” and slow. 5. Compost finished 5. If dark and crumbly, smells earthy (not moldy or foul)—use it!
Matted, undecomposed Compaction, poor aeration, Avoid thick layers of leaves, grass, or paper. Break leaves or grass clippings or lack of moisture up layers with garden fork, then wet and remix the pile. Shred materials. Odor like rancid butter, Not enough oxygen, Turn pile, fluffing materials to aerate them. Add vinegar, or rotten eggs too wet or compacted coarse dry materials like leaves as needed to soak up excess moisture. If odor is intense, possibly cover
with a layer of newspapers and/or coarse dry materi-als and allow pile to mellow before turning.
Odor like ammonia Not enough carbon Add “brown” materials and aerate. If odor is intense, possibly cover and allow pile to mellow before turning (see preceding row).
Attracting rats, raccoons, Inappropriate materials Dispose of meat and oil. Use a rodent-resistant dogs, flies, or other pests (meat, oil, bones) or food bin. Bury kitchen scraps 8 to 12 inches deep in the too close to surface pile. For more details on acceptable materials, see Table 3 for a list of compost pile ingredients.
Attracting various insects, Normal composting If garden pests are identified in pile, use traps or centipedes, slugs barriers between pile and garden. Infested with fire ants Too dry, not hot enough, Drench ant mounds with compost tea sweetened or food too close to surface with feed-grade molasses (see “How to Use Compost” on page 14). Broadcast low-toxicity fire ant bait for major infestations. Carefully rebuild pile to proper conditions, wetting thoroughly.
Table 2. Compost Pile Troubleshooting

the pile is big enough (a minimum 3-foot diameter and height); and that it has the right balance of green and brown materi-als, moisture, and oxygen. Building the pile larger, covering it with a tarp or burlap, or putting it in an enclosed bin helps it build up and retain heat.
♦ If your pile gets too hot
(hotter than 160 degrees Fahrenheit), turn it to release excess heat and restore depleted oxygen. Adding water to dry mate-rials as you turn them will reduce overheating and restore needed moisture.
♦ Heat dissipates at the edges of the pile. There may be 8 inches or more at the outer edges and top
of the pile that never reach 120 degrees Fahrenheit, especially in open piles or wire bins. When turning a pile, mix this outer layer into the middle of the new pile to heat the materials.
♦ Composting thermometers with long probes are available through garden centers.
10
Material Use? C:N* Comments
Algae, seaweed, and Yes N Good nutrient source.lake weed
Ash from coal or No O May contain materials that harm plants. Best to exclude.charcoal
Ashes from clean wood Caution O Small amounts are acceptable. Large quantities can(not treated or painted) elevate pH and suppress composting.
Beverages, kitchen Yes N Use in place of water to moisten the inner pile. May also rinse water presoak kitchen scraps. Avoid pouring on surface or over-wetting the pile.
Bird droppings Caution N May contain disease organisms and viable weed seeds.
Cardboard Yes C Use it if it cannot be recycled. Best if shredded into small pieces. Glue is usually organic.
Cat droppings or litter Caution N May contain disease organisms. Best to bury 5 inches deep in noncrop soils at least 100 feet from nearest lake, stream, or well.
Coffee grounds/filters Yes N Worms love them.
Compost activators/ OK; not N Millions of people make compost successfully without starters required. them.
Cornstalks, cobs Yes C Best if chopped and mixed well with green materials.
Diseased plants Caution N Piles often do not heat up enough to destroy all diseases. Compost that might contain diseased plants should be hot-composted, allowed to cure several months, and not be used around plants subject to the disease.
Dog droppings Caution N See “cat droppings” above. Also, may be flushed down a toilet.
Dryer lint Caution C Natural fiber materials only. Scatter thinly into the pile, not in clumps.
Eggshells Yes O Crush them before adding. They break down slowly.
Table 3. Compost Ingredients: Yes, No, or Use with Caution

Material Use? C:N* Comments
Importance of Temperature:
The “body heat” of teem-ing bacteria in a compost pile can build up tem-peratures of 160 degrees Fahrenheit or more when the materials are still fresh. As the material decomposes, it cannot support as many
bacteria. As the number of bacteria decreases, the temperature gradually drops. Temperatures above 130 de-grees Fahrenheit kill off most disease organisms within hours, and temperatures above 140 degrees Fahren-heit kill most weed seeds. However, rapid, hot com-
posting depletes oxygen and necessitates frequent turning of the pile. Temperatures ris-ing above 140 degrees Fahr-enheit kill off organisms that help with the later stages of com posting, thus delaying the curing of the pile.
11
Fish scraps Caution N Potent odor source. Magnet for rodents and other pests unless buried well in the middle of a hot compost pile.
Hair Yes N Scatter thinly into the pile, not in clumps.
Lime No O Add it to finished compost or soil as needed. Can kill composting organisms and can cause release of ammonia gas from compost pile.
Manure (horse, cow, Yes N Excellent source of nitrogen. If fresh or damp, mix with pig, sheep, goat, coarse brown materials.chicken, rabbit)
Meat, fat, grease, Caution N Potent odor source. Health hazard to pets. Magnet for oil, bones rodents and other pests unless buried well in the middle of a hot compost pile.
Milk, cheese, yogurt Caution N Only in small amounts. Mix thoroughly with other materials and bury 8 inches or more deep in a hot compost pile.
Newspapers Yes C Use it if it cannot be recycled. Best if shredded into small pieces. Most inks today are safe for garden use.
Oak leaves Yes C Recommend shredding. Decompose slowly. Acidic.
Pine needles and Yes C Recommend shredding and using as less than half of cones (also cedar, pile mix. Decompose slowly. Acidic. other conifers)
Sawdust and wood Yes C Very high C:N ratio. Recommend using as less than half shavings of pile mix. May need extra nitrogen source. Avoid sawdust and shavings from pressure-treated wood. Use sawdust sparingly.
Sod Caution N Avoid Bermuda sod and other hardy spreading-root sods. Compost separately, grass side down. Cover with black plastic to inhibit sod growth.
Weeds Caution N Avoid roots of Bermuda and weeds that have gone to seed unless they are mixed well inside a hot compost pile. Same for morning glory, ivy, and other plants that spread by runners. It may help to dry them thoroughly on hot pavement.
* C = high carbon, N = high nitrogen, O = doesn’t affect C:N balance
Table 3. Compost Pile Ingredients: Yes, No, or Use with Caution – Continued

Typical Composting Systems
Desirable compost bin features are summarized in Figure 2. Remember that successful composting does not require a bin.
Whichever system you adopt, place the pile in an area where it is unlikely to be washed out by rainfall runoff.
Piles: Open or CoveredApproximate Cost:
$0–$10 (for optional tarp, black plastic, burlap, or other covering).
Basic Design:Arrange your materials
in a compact mound with a minimum 3-foot height and diameter. Use a covering if desired to help contain moisture and heat.
Homemade Bins:Pallet Bin
Approximate Cost: $0–$10.
Basic Design:
Arrange four used pallets of uniform size and shape to form an open-top box. Avoid pallets with wide gaps between the boards. Use spare wire or coat hangers, nylon or poly rope,
or strapping to lash them to-gether near the top and bot-tom of each corner. Be sure that the lashing on at least one corner of the bin can easily be undone (if you use rope or strap, use a slip-loop knot, top and bottom) so you can open the bin readily by unfastening one corner and swinging one of the pallets out like a door.
Perforated Garbage Can or 55-Gallon Drum with Lid
Approximate Cost:$0–$30.
Basic Design:A metal or plastic trash
container or drum that has not contained harmful substances, if well aerated with evenly-spaced holes in its side.
Circle Bins of Wire Fence or Hardware Cloth
Approximate Cost:$0–$50.
Basic Design:A 12-foot length of wire
fence or hardware cloth (at least 3-feet high or higher), available at building materi-als and hardware stores, can be looped around with its ends overlapped about 1 foot, making a ring (cylin-der) between 3 and 4 feet in
diameter. Fasten ends with metal clips or wire ties. For safety and ease of opening, roll back and flatten the sharp cut
ends of the fencing or
hardware cloth before fas-tening together. Bins made with poultry wire will bulge and collapse unless sup-ported by a sturdy frame.
Wooden or Wood-Frame with Wire Mesh
Approximate Cost: $0–$100.
Basic Design:
Any number of designs are possible. Several designs use wood-framed panels of wire mesh for the sides. Another design is a cube-shaped frame of two-by-fours, about 4 feet on each side, with three fixed plywood or board sides, one side a hinged door, and possibly a lid on hinges. Do not use treated or creosoted wood—it can leach toxins into your soil and compost.
12

Cinder Block or Brick
Approximate Cost:$0–$100.
Basic Design:
Construct a three-sided square enclosure (at least 3 feet to a side) by laying cinder blocks or bricks in a staggered pattern without mortar. Leave gaps between the blocks for as much aera-
tion as desired. The corners can be braced, if necessary, with fenceposts inserted through the blocks if they
are lined up properly. When compost begins spilling out of the open side, it can be contained by propping up boards or
laying extra blocks or bricks across that side, one row at a time as the bin fills. When it is time to harvest the com-post, that wall can be taken down again.
Manufactured BinsApproximate Cost:
$10–$150.
Basic Design:Manufactured bins come
in a wide variety of designs, including♦ hook-together panels of
heavy-duty plastic-coated wire fencing or wood-framed wire mesh,
♦ wooden slats stacked “Lincoln-Log” fashion on metal corner rods,
♦ flexible sheet-plastic rect-angles that loop around to form cylinder-shaped bins, and
♦ molded plastic units with latching lids and harvest-ing doors.
13
Figure 2. Desirable Compost Bin Features
Capacity. The best composting temperature is reached in a pile or bin of at least 1 cubic yard (3-ft. length, width, and height).
Access. Select a bin design that allows easy access for adding material, for watering, and for turning.
Ease of assembly and relocation. These features allow turning by moving the bin and refilling.
Security. A well-managed compost pile should not attract harmful bugs, but pet and varmint access should be restricted.
Moisture and heat retention. Enclosed bins work better for smaller amounts of material.
Flexible size and adjustable shape. These features will accommodate changes in compost volume.
Aesthetics. This is a very personal consideration for both you and your neighbors.

Harvesting and Using Compost
When Is Compost Ready?
Using compost before it is ready can damage plants. Undecayed “brown” materi-als in the soil can temporar-ily reduce plant-available ni-trogen. Undecayed “green” materials can harbor pests and diseases. Immature compost can also introduce weed seeds and root-damag-ing organic acids. Compost is ready when ♦ it smells earthy—not sour,
putrid, or like ammonia;
♦ it no longer heats up after it is turned or wetted; and
♦ it has a crumbly texture and it looks like dark soil.
How to Harvest Compost
Compost can be shov-eled out of a pile or bin and used just as it is, especially for mulch. Remove unde-cayed objects by sifting them through a screen. If you are using compost in preparing soil for planting or sodding, sift it through a 1-inch mesh screen. Com-post used in potting mixes or as top-dressing on lawns is commonly sifted through a 3/8-inch or 1/2-inch mesh screen. Make a simple screen by mounting hard-ware cloth or other du-rable wire mesh in a sturdy wooden frame that will fit neatly onto the wheelbar-row or other container into which you will screen the
compost. Spread compost onto the screen in a thin layer and shake it. You can work the finer material through the screen with a paddle if it is clumpy. Add the “oversized” material that remains on top of the screen to a new pile to help it start compost-ing faster.
How to Use CompostInformation on using com-
post as a topdressing or mulch can be found in Table 1, “Mulch Application Guide,” on page 3.
The following are rules of thumb. Obtain procedures for using commercial com-post from the store where you purchased it or from the manufacturer.
14

Soil Builder: Plants benefit most from
compost when it is mixed thoroughly with the soil 6 to 12 inches deep. Plants growing in a layer of pure compost have difficulty sending roots down below the compost into the soil. Compost used as a soil preparation should be sifted through a 1/2-inch or finer mesh screen.♦ Flower and vegetable beds
and ground covers.
❖ New areas: dig or till soil to an 8- to 10-inch depth, add a 1- to 4-inch layer of compost, and mix it thoroughly into the tilled soil.
❖ Established areas: mix 1 to 3 inches of com-post into the top 6 to 10 inches of soil before each planting. (It takes one-half cubic yard or 6 bushels to cover 100 square feet to a 1-inch depth.)
♦ New Lawns. Till soil 6 to 12 inches deep and then thoroughly mix in a 1- to 2-inch layer of fine compost (sifted through a 1/2-inch or finer mesh
screen) before sodding or seeding.
♦ Trees and shrubs. Before planting, dig or till 8 to 12 inches deep over the entire planting area—or at least two to five times the area covered by the root ball. Add and thoroughly mix in a 1- to 4-inch layer of compost.
Potting Mix: Mix compost into pot-
ting soil; compost can be one-fourth to one-third of a potting soil mix in planters or seed-starting flats or pots. Unlike sand, bark, peat, ver-miculite, or pumice, com-post supplies nutrients and suppresses harmful fungi. Use only mature compost. Sift it through a 1/2-inch or finer mesh screen.
This simple potting soil recipe is acceptable for general use;♦ 1/3 compost
♦ 1/3 sand
♦ 1/3 healthy top soil
Potting soil recipes for specific types of plants are available from local nurser-ies and natural gardening manuals.
15
Compost Tea: Soak finished compost in
water to produce a nutrient-rich liquid for foliar feeding (spraying on plants) or for watering gardens, land-scapes, or potted plants. The following are two methods of making compost tea. The “dregs” can be returned to your compost pile.♦ Fill an old cloth bag or
pillow case with mature compost and tie it off. Soak it in a tub or barrel for one day. Remove and squeeze out the bag. Di-lute the compost solution to the color of iced tea.
♦ Fill a clean 5- to 15-gal-lon bucket at least half full of manure-based compost, and finish filling with water. Let the mix sit for 3 to 14 days, then strain and dilute to color of iced tea. Compost tea (especially from manure-based compost) is effec-tive against many insect and fungal pests when applied as a foliar spray. Compost tea made with feed-grade molasses is an effective drench for fire ant mounds.

16
Worm Composting
Worm composting means decomposing materials in a controlled environment where earthworms rather than bacteria do most of the work. Table 4 compares its advantages and drawbacks.
Kinds of WormsLarge soil-burrowing
worms such as “night crawl-ers” can thrive in open outdoor beds, but they do not do well in enclosed containers. Instead, select “red worms,” “red wig-glers,” “manure worms,” or “brown-nose worms.” The most widely used species is Eisenia foetida. For a list of mail-order sources of composting worms and re-lated supplies, call the Small Business and Environmental Assistance division of the Texas Commission on Envi-ronmental Quality (TCEQ) at 512-239-3100.
Materials for Worm Composting
Bedding: Torn-up paper, including
newspapers, junk mail, and cardboard, is an excellent bedding material for worms to live in. Other “brown” materials can serve as bed-ding, particularly if they are partially decomposed, such as leaf mold. Worms eventu-ally consume their bedding.
Food Scraps:Almost any material
derived from grain, fruit, or vegetable—other than oil—is suitable for worm composting. Egg shells, coffee grounds and filters, and tea bags are also fine. Worms can eat food scraps more quickly when they have been mashed or cut up or presoaked in leftover beverages. However, avoid saturating the bedding with excess liquid. Worm compost should not be damper than a wrung-out sponge.
Other Materials: A little soil or fine sand
may be needed to provide grit. Livestock manure is excellent food for worms in outdoor containers. Grass
clippings can be added in small amounts.
Materials to Avoid or Use with Caution:
The same as those noted in Table 3 on pages 10 and 11, a list of compost-pile ingredients.
Containers for Worm Composting
You need enough capac-ity to contain your food scraps and an equal amount of bedding until some of the compost is ready to har-vest (about four months). A wooden box approximately 1 ft. by 2 ft. by 3-1/2 ft., or four 10-gallon plastic con-tainers, may be about right for a medium-sized family. Because materials will be added in thin layers and worked in from above, it helps to use broad, shallow containers.
A 3- to 4-inch “mulch” layer of clean bedding on top is usually effective in keeping small pests out of the food.
A tight-fitting lid that fastens may be needed for
Table 4. Comparison of Worm Composting with Composting in Large Piles
Advantages of Drawbacks to Worm Composting Worm Composting
▼ It does a faster and more thorough job of composting paper than large compost piles.
▼ It takes less work, particularly if paper and food are the main materials to be composted. No heavy lifting or shoveling is involved.
▼ It can be done in small containers, even indoors.
▼ It creates a product richer in plant-
available nutrients than other composts.
▼ It does not destroy diseases and weed seeds, and it does not drive off pests because it does not get hot enough.
▼ It requires a larger area to handle large volumes of materials than typical compost-ing piles do.

17
outdoor containers visited by large pests like raccoons. However, worm compost-ing containers need to be ventilated to allow oxygen in and excess moisture out. Several 1/8-inch holes drilled in the sides of a wooden box provide enough ventilation. Plastic containers with sealed lids need more ventilation than wooden boxes. Cut two holes 2 inches wide by 4 inches long in the lid or upper part of the sides of a plastic bin. Cover these holes with fine-mesh screen such as “tree wrap” or stocking fabric, using a hot glue gun or duct tape to attach it. Do not put holes in the lid if the bin will be
exposed to rain.Use soil-burrowing worms
for composting in shallow beds in the ground, but fire ant infestations are likely in soil beds unless food scraps are well buried in moist bedding.
Harvesting Worm Compost
When a worm bin is full, scoop out undigested food scraps and the material that contains the most worms—usually the top 6 to 8 inches of the material. Put this worm-rich material in another bin and mix it with an equal amount of fresh bedding; cover the mixture with 2 to 3 inches of clean bedding. Use what is left in the first bin as compost. If you are not sure it is fully composted, let it sit for a few weeks without adding any more food before using it.
There are several ways to recover worms from finished compost. ♦ Sift the compost over a
3/8-inch or finer mesh screen; save the worms that don’t go through.
♦ Set the compost out in mounds and scrape off the top layer as it dries; the worms will mass at the bot-tom of each mound.
♦ In the compost, bury an on-ion sack or other mesh bag containing a favorite worm food such as rotten apple or banana for a day or two as a “worm trap,” and pull it out before harvesting the compost.
♦ In a large bin, move older material to one side and add fresh material to the other side; most of the worms will migrate out of the older material before it must be harvested.
♦ Lay compost on an old window screen above an
empty garden space and wash the compost through with a spray nozzle, leaving clean worms on top.Composting worms that
are not removed from com-post can thrive in the moist bottom layer of a mulch cover in your yard or garden.
Preventing Problems ♦ Worms can double in
population every 90 days. You should never need to add more worms unless you suddenly increase the amount of food you compost.
♦ Immediately store food scraps that are awaiting composting in a sealed container or refrigerate them to keep them free of pests.
♦ Add food scraps to the bin in small amounts, especially at first. Otherwise your bin may get smelly or moldy, or it may start hot composting and drive out your worms.
♦ Keep your bin in a shaded or sheltered location where the bedding can stay below 90 degrees Fahrenheit. If the compost must be in an area that gets hot, a large wooden box with a good amount of compost and bedding in it will resist heating better than a small plastic bin.
♦ Don’t let the bedding be-come soaking wet. Add dry paper as needed to soak up excess water in the bin.
♦ Keep the bedding damp like a wrung-out sponge. Old, dry bedding harbors roaches and other pests, and is difficult to re-wet.
♦ Handle the worms and their bedding gently—with gloved hands or a weeding fork, not a shovel.
♦ Wash your hands after you handle worm compost.
1. Soak bedding in water and let it drain.
2. Add drained bedding to a bin until it is one-third full.
3. Mix in a little soil or fine sand.4. Add a pound of worms for each
pound of food scraps you com-post each week.
5. Add a 1/2 inch or thinner layer of food scraps on top, mix it lightly into the top 3 inches of bed-ding, and cover everything with 2 inches or more of clean bedding (at least 3 inches if the bin has no lid).
6. Wait two days or longer, and then repeat step 5 as food scraps become available.
Always maintain at least 1 inch of clean bedding covering all food materials.
Steps to Establish a Worm Composting Bin
18
Composting in the Ground
Putting materials on or into the ground without com-posting them saves you time and effort, and burying the materials stops odor prob-lems fast.
Walkway Composting Spread a thick layer of
leaves, chipped branches, and grass clippings into shallow ditches or rows between garden beds to form walkways. Add more material later as it compacts. In a few months, most of this material will decompose enough to incorporate it into the garden soil when it is reworked for planting.
Sheet Composting A few inches of leaves
can be tilled into fallow garden space in the fall to enrich the soil for spring planting. Avoid sheet composting just before planting. Much of the soil’s plant-available nitrogen will become temporarily unavailable as composting microbes consume it along with the brown leaves. A few months after sheet com-posting, there will be more plant-available nitrogen in the soil than before.
Burying Food Scraps This practice is a useful
way to compost food or other high-nitrogen materi-als that have become smelly. The material should com-post within a year without releasing odors or harboring pests. Material buried too deep, how ever, decomposes more slowly and benefits
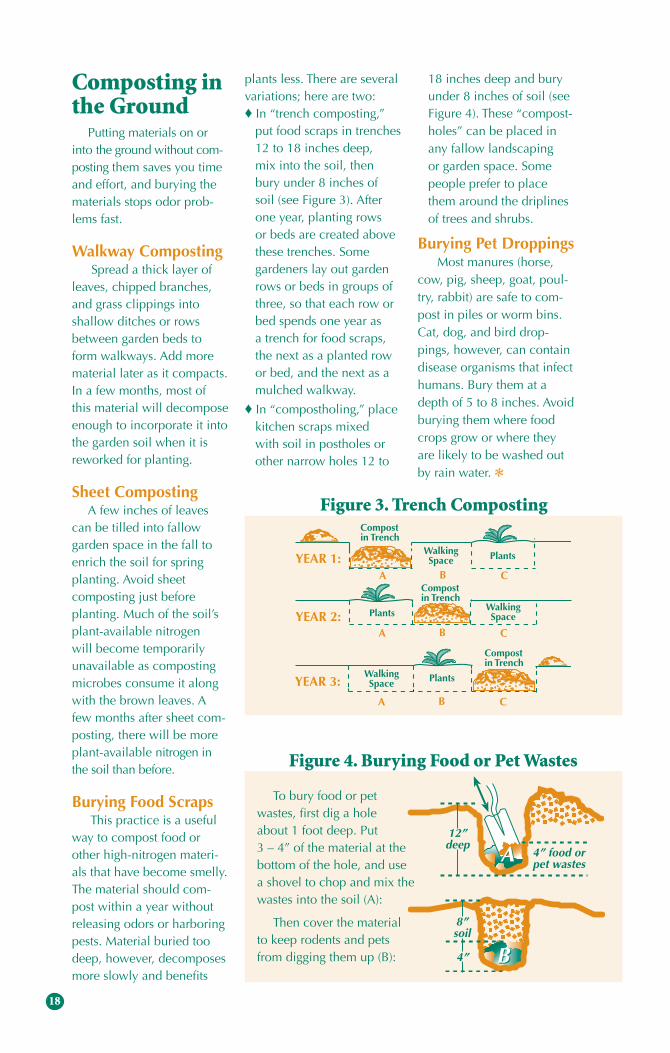
plants less. There are several variations; here are two:♦ In “trench composting,”
put food scraps in trenches 12 to 18 inches deep, mix into the soil, then bury under 8 inches of soil (see Figure 3). After one year, planting rows or beds are created above these trenches. Some gardeners lay out garden rows or beds in groups of three, so that each row or bed spends one year as a trench for food scraps, the next as a planted row or bed, and the next as a mulched walkway.
♦ In “compostholing,” place kitchen scraps mixed with soil in postholes or other narrow holes 12 to
18 inches deep and bury under 8 inches of soil (see Figure 4). These “compost-holes” can be placed in any fallow landscaping or garden space. Some people prefer to place them around the driplines of trees and shrubs.
Burying Pet Droppings Most manures (horse,
cow, pig, sheep, goat, poul-try, rabbit) are safe to com-post in piles or worm bins. Cat, dog, and bird drop-pings, however, can contain disease organisms that infect humans. Bury them at a depth of 5 to 8 inches. Avoid burying them where food crops grow or where they are likely to be washed out by rain water. ❃
Figure 3. Trench Composting
To bury food or pet wastes, first dig a hole about 1 foot deep. Put 3 – 4” of the material at the bottom of the hole, and use a shovel to chop and mix the wastes into the soil (A):
Then cover the material to keep rodents and pets from digging them up (B):
Figure 4. Burying Food or Pet Wastes
Compostin Trench
WalkingSpace Plants
PlantsWalkingSpace
Compostin Trench
WalkingSpace Plants
Compostin Trench
A B C
A B C
A B C
YEAR 1:
YEAR 2:
YEAR 3:
4”
8”soil
BB
AA 4” food orpet wastes
12”deep
4”
8”soil
BB
AA 4” food orpet wastes
12”deep
19
(For additional informa-tion on the care of lawns, gardens, and landscapes, consult your county exten-sion office, city environmen-tal office, local garden cen-ter, and various gardening publications. These sources can help you select and perfect “green” yard care practices that are appropri-ate to your climate, soil, and other local features.)
The Right Plants in the Right PlacesStart with a Plan
Begin with a well-planned design. Sketch your yard showing the location of existing structures, trees, shrubs, and grass. As you plan, consider budget, appearance, function, maintenance, and water requirements.
Grow Native Landscape Plants
Native plants are the best choice for trouble-free gardening. They need less water and fertilizer, and have fewer pest problems than plants imported from other areas.
Select Appropriate Grasses
Carefully select grasses according to their intended uses, planting location, and maintenance requirements (see the sidebar “Selected Lawn Grasses”). Grasses re-quire more frequent watering and maintenance than most other landscape plants.
Reduce Thirsty Turf Grass Area
In most landscaped areas, turf grasses have the highest water demand and the highest maintenance requirements of all plants.
B a s i c sNow you’re ready to build on your foundation of healthy soil restored by grasscycling, mulching, and composting. The following strategies will boost the health of your yard and garden, and they will minimize pests, water and chemical usage, soil erosion, runoff, and pollution.▼ Put the right plants in the
right places—using native and adapted plants and grasses.
▼ Be water wise—avoid watering wastefully, too rapidly, or too often.
▼ Use “integrated pest man-agement” to control pests with a minimum of chemical pesticides.
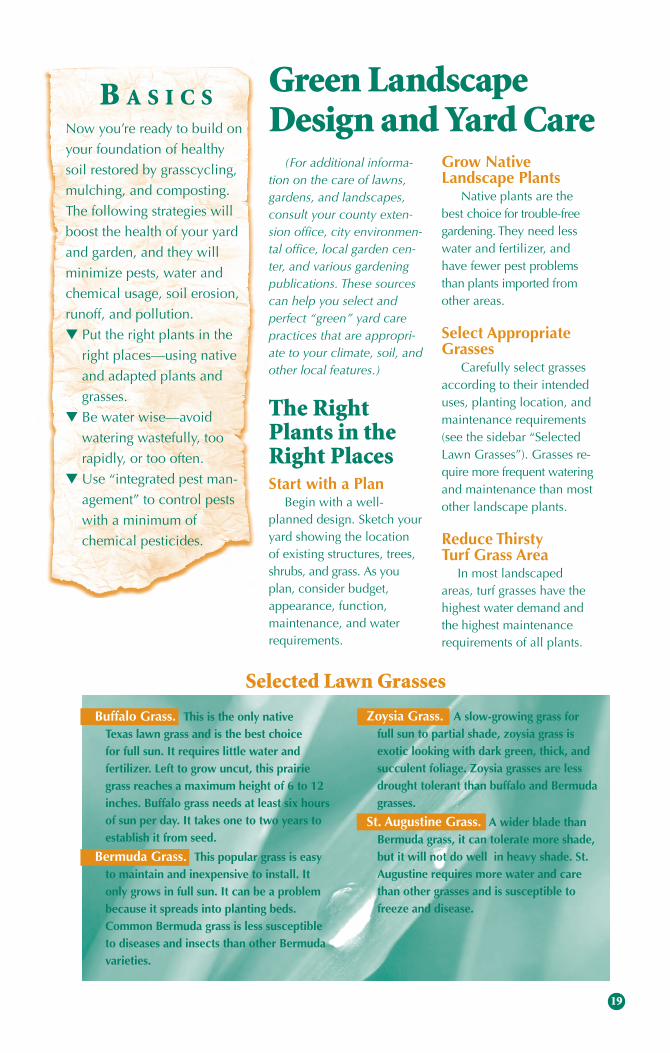
Green Landscape Design and Yard Care
Selected Lawn Grasses
Zoysia Grass. A slow-growing grass for full sun to partial shade, zoysia grass is exotic looking with dark green, thick, and succulent foliage. Zoysia grasses are less drought tolerant than buffalo and Bermuda grasses.
St. Augustine Grass. A wider blade than Bermuda grass, it can tolerate more shade, but it will not do well in heavy shade. St. Augustine requires more water and care than other grasses and is susceptible to freeze and disease.
Buffalo Grass. This is the only native Texas lawn grass and is the best choice for full sun. It requires little water and fertilizer. Left to grow uncut, this prairie grass reaches a maximum height of 6 to 12 inches. Buffalo grass needs at least six hours of sun per day. It takes one to two years to establish it from seed.
Bermuda Grass. This popular grass is easy to maintain and inexpensive to install. It only grows in full sun. It can be a problem because it spreads into planting beds. Common Bermuda grass is less susceptible to diseases and insects than other Bermuda varieties.
20
Alternative plant areas and other forms of ground cover can reduce your ongoing expenditures of time, energy, and money. Group plants that have similar watering needs to prevent overwatering and excessive plant growth.
Practice Garden Diversity
Incorporate a variety of plants. Diverse plantings provide food and cover for a variety of living things. Diver-sity minimizes damage from pests because many attack only one plant species.
Install Low-Maintenance Design Features
Lawn edging and hard surfaces between turf and other landscape features reduce weeds, trimming, and use of herbicides. Dense plantings provide shade that keeps out invading weeds. Avoid narrow strips or odd shapes of turf grass that will be difficult to irrigate without wasting water.
Minimize Soil Disturbance
Avoid frequent, deep cul-tivation, which can damage plant roots, dry out the soil, disturb healthy soil organ-isms, and bring weed seeds to the surface where they will germinate.
Design Your Landscape to Minimize Runoff Pollution
Take note of slopes, and consider including buffer zones of turf grass or other thick vegetation to absorb runoff from buildings and patios, and to reduce runoff into driveways and streets.
WaterWise Much of the water ap-
plied to lawns and gardens is never absorbed by plants. The greatest waste of water results from applying it too rapidly or too often. Water applied too rapidly is lost as runoff, which may carry polluting fertilizers and pesticides to streams and lakes. Some water evapo-rates when applied to bare, unmulched soil, or in the hot afternoon.
Watering Lawns
The key to watering lawns is to apply the water infre-quently, yet thoroughly. This creates a deep, well-rooted lawn that efficiently uses water stored in the soil. See the “Grasscycling” section on page 1 for more details.
Watering Trees, Shrubs, and Ground Covers
As with lawns, apply water infrequently yet thoroughly. In the absence of rain, most trees, shrubs, and ground covers benefit from a thor-ough monthly watering during the growing season. Move a slow-running hose from point to point along the dripline of each plant until each area becomes saturated to a depth of 8 to 10 inches.
Drip IrrigationDrip irrigation is more ef-
ficient than using a sprinkler. Drip irrigation slowly applies water to the soil. The water flows under low pressure through emitters, bubblers, or spray heads placed at each plant. Water applied by drip irrigation has little chance of waste through evaporation or runoff.
Sprinkler IrrigationMake sure that sprinkler
heads are properly adjusted to avoid watering sidewalks and driveways. A sprinkler head should spray large droplets of water instead of a fog of fine mist, which wastes water by evaporation and wind drift. Water early in the morning when possible. Avoid water-ing from mid-morning to late afternoon—you can lose one-third of your water to evaporation. Avoid watering in the evening because lawns and plants left wet overnight are more prone to disease.
B a s i c s▼ Water thoroughly, but only
as needed—monthly for trees, shrubs, and ground covers, every week or so for lawns.
▼ Water early in the morning to prevent diseases and to minimize evaporation.
▼ Use drip irrigation where possible to minimize evaporation.
▼ Avoid wasting water on sidewalks and other paved areas. Also, try to keep water from running off your yard.
▼ Set sprinkler head to spray large droplets, not fine mist.

21
Integrated Pest Management (IPM)
Practicing “green land-scaping,” including efficient watering, planting, soil building, will significantly reduce your pest problems. When, despite your best efforts, unwanted pests sometimes take hold, the steps outlined in this section provide a strategy to control pests with a minimum of harm to your health, your pocketbook, and the environment.
Identify the Problem
Before considering what control measure to use, identify what is harming your plants. Keep in mind that in-sect infestations and diseases are often not the main prob-lem, but rather a symptom of stress caused by poor grow-ing conditions such as sterile or compacted soils, nutrient deficiencies, too much or too little moisture, or a poorly adapted plant for the climate or the particular landscape conditions. Simply correcting the stressful condition may control the pest and prevent further infestations. Your county extension office, lo-cal nurseries, and gardening books can help you diagnose your landscape problems.
Know a Friend from a Foe
Nature has a system of checks and balances that lim-its pest activity. Of the mil-lions of kinds of insects in the world, less than 2 percent are harmful. Beneficial insects
such as ground beetles, ladybugs, fireflies, green lacewings, praying man-tids, spiders, and wasps keep harmful insects from devouring your plants. They also pollinate your plants and decompose organic matter. Chemicals may harm beneficial in-sects more than unwanted pests. Organic gardening books identify beneficial insects and provide tips on how to avoid interfering with them.
Use Appropriate Controls
The control depends on the problem. Options include removal by hand, barriers, repellants, traps, biological controls, and least-polluting chemical controls.
Removal The only 100-percent
effective, species-specific pesticide is removal by hand. Watch plants care-fully for signs of damage. You can catch invading pests before they do much harm. Don’t run for a can of pesticide when you could pick off and mash a few harmful insects. A blast of water can strip aphids from your plants. Use pruning shears to remove tent caterpillars. Pruning and removing dis-eased leaves, branches, or whole plants can stop the spread of diseases. Uproot weeds that have spreading roots; chop the others with a hoe or pop them with a mechanical weed-puller.
B a s i c s▼ Identify the problem
before taking action. Pests are often a symptom of plant stress caused by conditions such as poor soils, too much or too little moisture, or the wrong plant for the location. If so, the first step is to address the cause of plant stress.
▼ There are landscaping features that attract and support natural predators to keep pests under control, particularly a water source and a variety of perennial plants.
▼ Use the least-disruptive and least-polluting protections against a pest before resorting to more polluting methods. In general, try the following methods as applicable: first, physical removal, barriers, and traps; next, biological controls; then, appropriate botanical and mineral pesticides; and finally, the least toxic chemical pesticides.
▼ Carefully follow safe use and disposal instructions for all pesticides. Always store pesticides in original containers away from food and out of reach of children.
22
Barriers Barriers, like a screen
door on a kitchen, don’t kill pests but keep them out.♦ Floating row covers. These
are thin, lightweight pieces of fabric or plastic that are placed over growing plants. They allow light, air, and water to reach plants, but keep insects off. Drape them over plants, and secure the covers on the sides with stones or soil. As plants grow, they push the fabric up.
♦ Netting. Netting is good for keeping birds off plants, especially as they come into fruit.
♦ Copper slug barrier. Slugs cannot cross a 3-inch wide
sheet of copper. Cut sheet copper to size and attach to raised beds or planters. This method also keeps slugs in, so be sure
to remove any slugs first. Apply band-ing vertically (like a fence) rather than
horizontally (like a floor). The copper remains effective af-ter it turns green. The up-front investment is repaid in long-term, effective slug control.
♦ Protective collars. Protect individual seedlings from cutworms with a 3-inch collar made from stiff paper or plastic pressed 1 inch into the ground. (Toilet paper tubes work well.)
RepellantsHerbal pest repellants in-
clude garlic and hot-pepper sprays, which can be made by processing these herbs with water in a blender and straining out the pulp. You can add a few drops of soap, which is toxic to soft-bodied insects.
Traps Traps work by attracting
a target pest into a container from which it cannot es-cape. Place traps away from your garden so that pests don’t eat your plants before they get to the trap. Electric “bug zappers” destroy many more beneficial insects than harmful ones. Use traps that attract only the insects that are causing you problems.♦ Sticky traps. These use a
sticky surface with one or more attractants such as color, smell, or shape to bring the target pests in and keep them there.
♦ Japanese beetle trap. Japa-nese beetles are attracted to a fermenting mush of mashed fruit and sugar
water or wine, with some yeast to spur fermentation. Cut off
the necks of 1-gallon plastic jugs and fill one-
third full with the ferment-ing mixture. Strain out the beetles regularly and reuse the mixture.
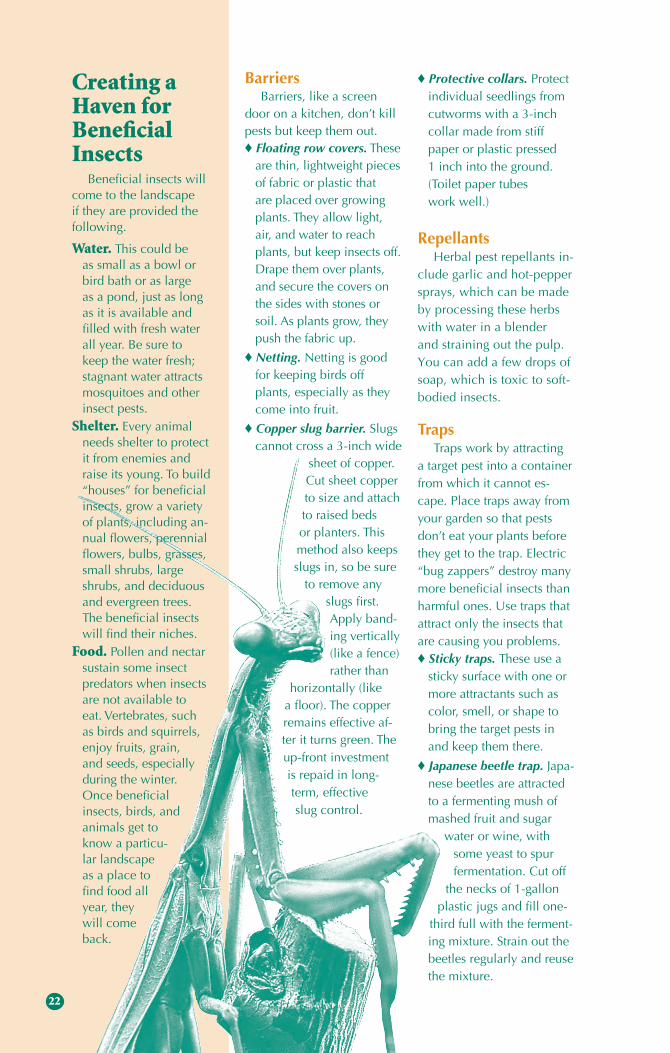
Creating a Haven for Beneficial Insects
Beneficial insects will come to the landscape if they are provided the following.
Water. This could be as small as a bowl or bird bath or as large as a pond, just as long as it is available and filled with fresh water all year. Be sure to keep the water fresh; stagnant water attracts mosquitoes and other insect pests.
Shelter. Every animal needs shelter to protect it from enemies and raise its young. To build “houses” for beneficial insects, grow a variety of plants, including an-nual flowers, perennial flowers, bulbs, grasses, small shrubs, large shrubs, and deciduous and evergreen trees. The beneficial insects will find their niches.
Food. Pollen and nectar sustain some insect predators when insects are not available to eat. Vertebrates, such as birds and squirrels, enjoy fruits, grain, and seeds, especially during the winter. Once beneficial insects, birds, and animals get to know a particu-lar landscape as a place to find food all year, they will come back.

23
♦ Slug and snail trap. Set out a bait of stale beer, spoiled yogurt, or a mix-ture of yeast and water in saucers or tuna cans. Bury with the lip of the con-tainer level with the soil surface, so the pests fall in and drown. Put a raised cover over the trap to keep rain from diluting the beer and to keep large animals from drinking it.
Biological ControlsUsing living organisms
(for example, beneficial in-sects and animals, parasitic nematodes, and microor-ganisms) to control pests is called biological control. It is the essence of a balanced
ecosystem, whether in the forest or in the backyard. A good integrated pest man-agement (IPM) plan takes the fullest advantage of the beneficial species that are naturally present.
Table 5 shows some of the biological control agents that you can buy. Their effectiveness depends on the time, location, and manner in which they are released. Obtain detailed instructions before releasing these agents.
Least-Polluting Chemical Controls
Using IPM practices can eliminate the need for pesti-cides. But you may at times
choose to use them as a last resort. All pesticides are toxic to some living things and often indirectly affect other living things. ♦ Botanical pesticides (see
Table 6), almost all of which are insecticides, are derived directly from plants. Some are more toxic than others, and a few are even more toxic than some synthetics. However, many synthetic pesticides are persistent in the environment—that is, they take a long time to break down into harm-less substances—but all botanicals break down rapidly, usually in a matter of hours or days. Also, some synthetic pesti-cides accumulate in the food chain—that is, they concentrate in the tis-sues of predators that eat
Table 5. Selected Biological Control Agents
Control Target Pests Agent
Ladybird Beetles Aphids, small worms, and other (Ladybugs) soft-bodied insects
Lacewings Aphids, scales, spider mites, and other soft-bodied insects and eggs
Predatory Mites Spider mites and other pest mites
Trichogramma Moth and butterfly eggs Wasps
Bacillus Larvae of moths, butterflies, thuringiensis (Bt) mosquitos, and other pests
Botanical Targets Human ToxicityInsecticidal Soaps Soft-bodied insects like aphids, scales, Very low and mites
Pyrethrum/ Most insects Moderate Pyrethroids
Rotenone Most insects; best used against leaf-eating Low; very toxic to fish caterpillars and beetles
Ryania Most insects; best used in hot weather Low; moderately toxic to some animals
Sabadilla Dust Most insects; works for adult insects not Very low; but lethal to controlled by other botanicals honey bees
Nicotine Sulfate Most insects Extremely toxic; use only as last resort
Table 6. Selected Botanical Pesticides: Targets and Toxicity

24
the poisoned pests—but botanicals are not known to do so.
♦ Mineral pesticides. Dor-mant and horticultural oils are low-toxicity mineral products used to suffocate insects and their eggs on plants. Powdered diato-maceous earth is a highly abrasive material used to damage the skin and body joints
of insects and to create slug barriers.
♦ Synthetic pesticides are chemical compounds invented in a laboratory. Some are more toxic than others, some are longer-lasting than others, and some release compounds
that are more toxic than the original pes-
ticides when they break down in the environment. Some accumulate in the environment and cause harm far removed from the original site or purpose of application. Others, called persistent materials, do not break down for long peri-ods of time and remain in the soil or water. ❃
sprayer, and apply it to the target area according to the label instructions. Do not pour the rinse water down the drain or onto paved surfaces. Wrap empty and rinsed containers in newspaper and dispose of them in your trash can. Home-use pesticide containers are not acceptable in most community recycling programs. For information on recycling programs for empty pesticide contain-ers, call the TCEQ’s Agri-cultural Waste program at 512-239-3100, or your county extension agent.
1 Read and follow all label directions. Never use more than is recommended.
2 Protect yourself. Wear a long-sleeved shirt, long pants, boots, rubber gloves, goggles, a hat, and a respirator when mixing and applying pesticides.
3 Never apply on a windy day or when rain is fore-cast.
4 Only mix as much as you will use in one day.
5 Dispose of unwanted pesticides safely. If possible use up all of the pesticides, or give them to someone who can use them. If you still cannot get rid of the pesticides, take them to
When Using Pesticidesa household hazardous waste collection facility or event. Never pour pesticides down the drain, into a storm drain, or directly on the ground. For more information about household hazardous waste collection and disposal, contact the TCEQ’s Small Business and Environmental Assistance division at 512-239-3100.
6 Dispose of empty con-tainers properly. When a product label says to “tri-ple rinse the container,” rinse it three times, pour the rinse water into the
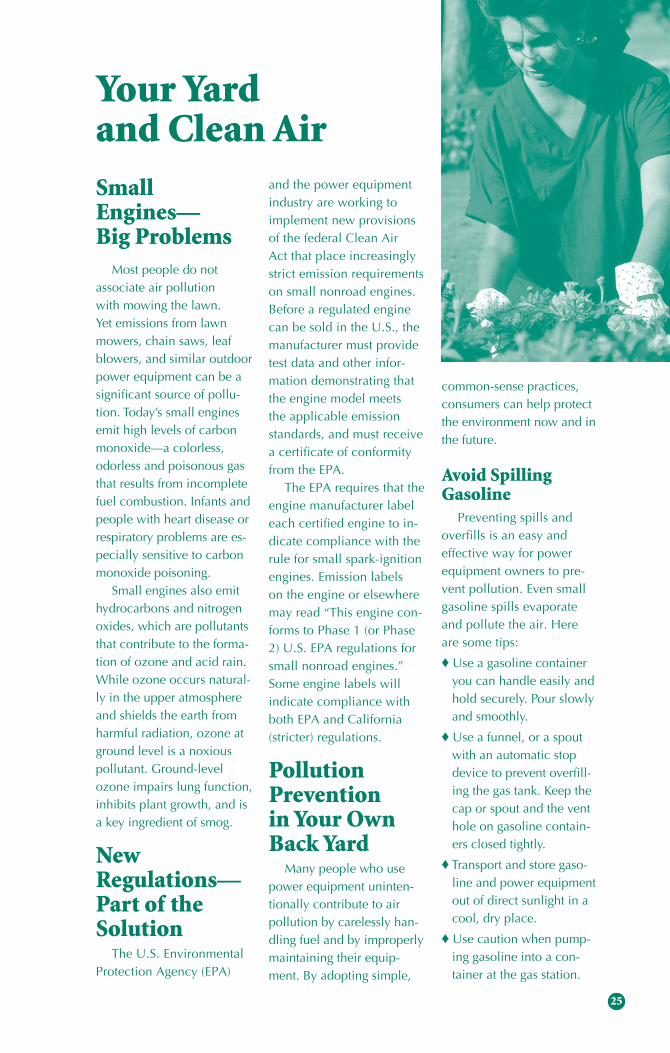
Small Engines— Big Problems
Most people do not associate air pollution with mowing the lawn. Yet emissions from lawn mowers, chain saws, leaf blowers, and similar outdoor power equipment can be a significant source of pollu-tion. Today’s small engines emit high levels of carbon monoxide—a colorless, odorless and poisonous gas that results from incomplete fuel combustion. Infants and people with heart disease or respiratory problems are es-pecially sensitive to carbon monoxide poisoning.
Small engines also emit hydrocarbons and nitrogen oxides, which are pollutants that contribute to the forma-tion of ozone and acid rain. While ozone occurs natural-ly in the upper atmosphere and shields the earth from harmful radiation, ozone at ground level is a noxious pollutant. Ground-level ozone impairs lung function, inhibits plant growth, and is a key ingredient of smog.
New Regulations—Part of the Solution
The U.S. Environmental Protection Agency (EPA)
and the power equipment industry are working to implement new provisions of the federal Clean Air Act that place increasingly strict emission requirements on small nonroad engines. Before a regulated engine can be sold in the U.S., the manufacturer must provide test data and other infor-mation demonstrating that the engine model meets the applicable emission standards, and must receive a certificate of conformity from the EPA.
The EPA requires that the engine manufacturer label each certified engine to in-dicate compliance with the rule for small spark-ignition engines. Emission labels on the engine or elsewhere may read “This engine con-forms to Phase 1 (or Phase 2) U.S. EPA regulations for small nonroad engines.” Some engine labels will indicate compliance with both EPA and California (stricter) regulations.
Pollution Prevention in Your Own Back Yard
Many people who use power equipment uninten-tionally contribute to air pollution by carelessly han-dling fuel and by improperly maintaining their equip-ment. By adopting simple,
common-sense practices, consumers can help protect the environment now and in the future.
Avoid Spilling Gasoline
Preventing spills and overfills is an easy and effective way for power equipment owners to pre-vent pollution. Even small gasoline spills evaporate and pollute the air. Here are some tips:
♦ Use a gasoline container you can handle easily and hold securely. Pour slowly and smoothly.
♦ Use a funnel, or a spout with an automatic stop device to prevent overfill-ing the gas tank. Keep the cap or spout and the vent hole on gasoline contain-ers closed tightly.
♦ Transport and store gaso-line and power equipment out of direct sunlight in a cool, dry place.
♦ Use caution when pump-ing gasoline into a con-tainer at the gas station.
Your Yard and Clean Air
25

Maintain Your Equipment
Follow the manufacturer’s guidelines for maintenance, including the following practices:♦ Change oil and clean or
replace air filters regularly. Be sure to recycle your used oil at a collection center. To locate a used-oil recycling center near you, call 1-800- CLEANUP, or go to <www.cleanup.org>.
♦ Use the proper fuel/oil mixture in equipment with two-stroke engines.
♦ Get periodic tune-ups, maintain sharp mower blades, and keep the un-derside of the deck clean.
♦ Make sure your equipment is protected from the ele-ments when not in use.
Consider Cleaner Options
Ask your dealer about the new, cleaner-operating gasoline equipment enter-
ing the marketplace. Electric equipment is cleaner than equipment powered by gasoline engines. Electrically powered lawn and garden tools produce essentially no pollution from exhaust emis-sions or through fuel evapo-ration. However, generating the power to run electric equipment does produce pollution.
Use Manual ToolsTools without electric or
gasoline engines are espe-cially handy for small yards or small jobs. Hand tools—like shears, edgers, and reel push mowers—are light-weight, quiet, easy to use, and generate no emissions.
Reduce Mowing Time ♦ Use low-maintenance turf
grasses or grass-and-flower seed mixtures that grow
slowly and require less mowing. See the “Selected Lawn Grasses” section of this guide, or check with your local Texas AgriLife Extension office or lawn and garden center about what is appropriate for your region.
♦ Replace turf grass areas with native and adapted trees, shrubs, and flow-ers. Doing so reduces the energy needed to heat and cool your house, and it provides landscaping for wildlife. Native wildflow-ers and plants require little or no maintenance after planting.
For more information on small gasoline equipment for lawns and gardens, go to this EPA Web site: www.epa.gov/otaq/ equip-ld.htm. ❃
26

For More Information
27
General Information
YardWise – Texas Information & Resourceswww.yardwise.orgwww.tceq.state.tx.us
Texas AgriLife Extension, EarthKind Information http://earthkind.tamu.edu
U.S. Environmental Protection Agency, Greenscapes for Homeowners www.epa.gov/epaoswer/non-hw/green/owners.htm
Composting
Environmental Protection Agency, www.epa.gov/epaoswer/non-hw/composting/index.htm
Texas A & M UniversityComposting guide index: http://aggie-horticulture.tamu.edu/extension/compost/compost.html
Worm Composting (Vermiculture)
Worm Digestwww.wormdigest.org
Flowerfield Enterpriseswww.wormwoman.com
Xeriscaping
Texas A & M Universityhttp://floriculture.tamu.edu:7998/urbanlandscapeguide/zipcode.html
EPA’s Green Landscaping with Native Plants www.epa.gov/greenacres
Integrated Pest Management
City of Austin – Grow Greenwww.ci.austin.tx.us/growgreen/ Click on “Landscape Problems.”
Sources
♦ U.S. Environmental Protection Agency, Office of Transportation and Air Quality
♦ Composting Council
♦ Texas AgriLife Extension Service
♦ Integrated Pest Management Practitioners Association
♦ The Secret Life of Compost by Malcolm Beck
♦ The Rodale Guide to Composting by Jerry Minnich et al.
♦ Don’t Waste Your Wastes—Compost ‘Em by Bert Whitehead
♦ The Dirt Doctor’s Guide to Organic Gardening by Howard Garrett
♦ Worms Eat My Garbage by Mary Appelhof
♦ A Guide to Alternatives to Pesticides by Environmental Services, City of Portland, Oregon
♦ Rodale’s Encyclopedia of Organic Gardening
♦ The Nature and Properties of Soils, 8th Edition by Nyle C. Brady
For more information, contact:
Small Business and Environmental Assistance Division, MC 113Texas Commission on Environmental QualityPO Box 13087Austin TX 78711-3087512-239-3100www.tceq.state.tx.us
Disclaimer Neither TCEQ nor any TCEQ employee makes any warranty, expressed or implied, or assumes
any legal liability or responsibility for the products or processes cited in this publication. Reference herein to any specific product, process, organization, or publication does not
constitute or imply an endorsement or recommendation by TCEQ. The information herein is only intended to further the public interest by facilitating awareness of composting
and green yard care practices, including awareness of sources of information and products related to these practices.
The TCEQ is an equal opportunity employer. The agency does not allow discrimination on the basis of race, color, religion, national origin, sex, disability, age, sexual orientation or veteran status. In compliance with the
Americans with Disabilities Act, this document may be requested in alternate formats by contacting the TCEQ at 512-239-0028, Fax 239-4488, or 1-800-RELAY-TX (TDD), or by writing
P.O. Box 13087, Austin, TX 78711-3087.
printed on recycled paper using soy-based ink
For more information, contact:
Small Business and Environmental Assistance Division, MC 113Texas Commission on Environmental Quality
PO Box 13087Austin, TX 78711-3087
512-239-3100www.tceq.state.tx.us
The TCEQ is a partner with the private sector, the U.S. Environmental Protection Agency, and other states to provide citizens with environmental information about their communities. An automated system provides a single source of environmental and recy-cling information over the Internet and through a state-of-the-art, computerized, interac-tive phone system. People can call 1-800-CLEAN-UP then enter their five-digit ZIP code to get information on topics such as these:
♦ local recycling information♦ environmental events♦ household hazardous waste collections
This information is available 24 hours a day using the interactive phone system or the Internet. If a community or county is not listed, citizens can add it to the system. For more information on the system, contact:
1-800-CLEAN-UPwww.cleanup.org
Texas Commission on Environmental Quality
Visit us on the Web!www.takecareoftexas.org