2014 gmc 1500 rear bumper installation instructions - … gmc... · 2014 gmc 1500 rear bumper...
TRANSCRIPT
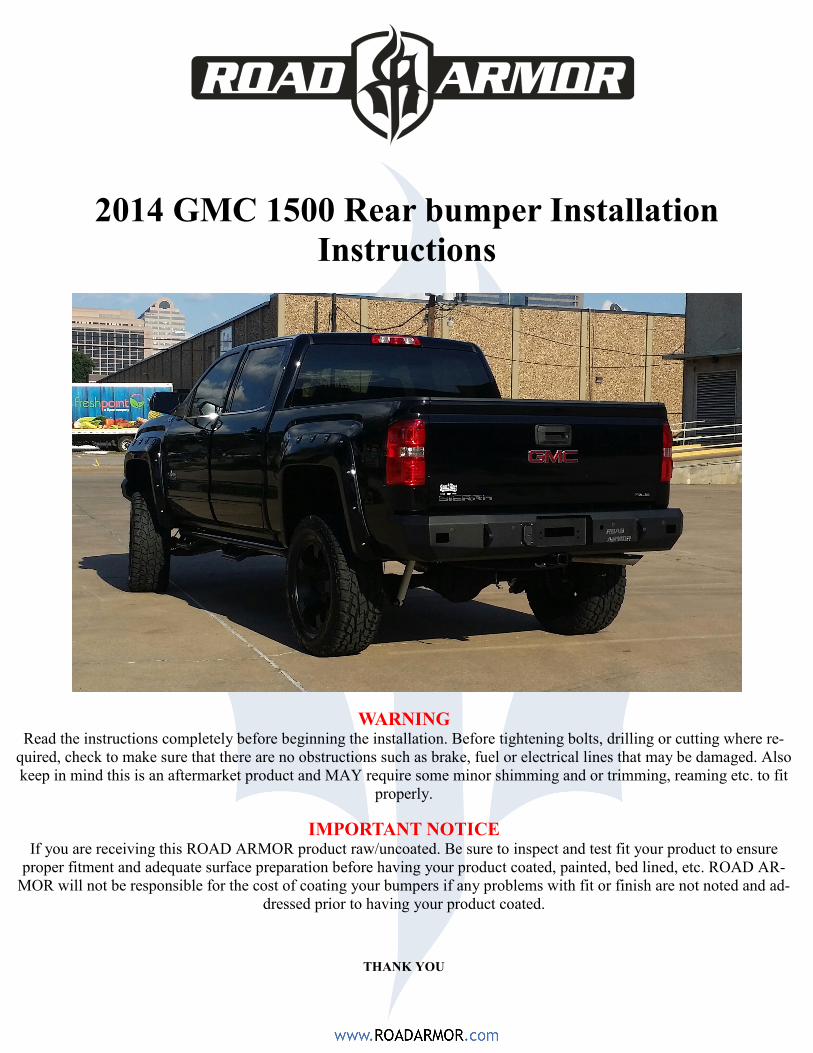
2014 GMC 1500 Rear bumper Installation
Instructions
WARNING Read the instructions completely before beginning the installation. Before tightening bolts, drilling or cutting where re-
quired, check to make sure that there are no obstructions such as brake, fuel or electrical lines that may be damaged. Also
keep in mind this is an aftermarket product and MAY require some minor shimming and or trimming, reaming etc. to fit
properly.
IMPORTANT NOTICE If you are receiving this ROAD ARMOR product raw/uncoated. Be sure to inspect and test fit your product to ensure
proper fitment and adequate surface preparation before having your product coated, painted, bed lined, etc. ROAD AR-
MOR will not be responsible for the cost of coating your bumpers if any problems with fit or finish are not noted and ad-
dressed prior to having your product coated.
THANK YOU
Installation of the Rear bumper
Step 1
Now on to installing your Road Armor bumper. This should have a part number for 312.
Verify you have all the hardware that was sent with the Bumper. The Rear Bumper requires the following hard-
ware.
(12) Single Bolt Plates
(2) 1/2” Push On Retainers
(12) 1/2” Flat Washers
(12) 1/2” Lock Washers
(12) 1/2” - 13 Hex Nuts
(2) logo kits
(4) 1” Plastic plugs
(1) Receiver plug plate
(1) Small logo
There are several steps you need to take before installing your new Road Armor bumpers.
1. unplug the Sensors
2. Remove 2 bolts in the center of the bumper
3. Remove the Trailer Hitch plug
4. Unbolt the bumper brackets
5. The bumper brackets will interfere with the bed. Loosen the bed bolts and remove factory bumper then tighten
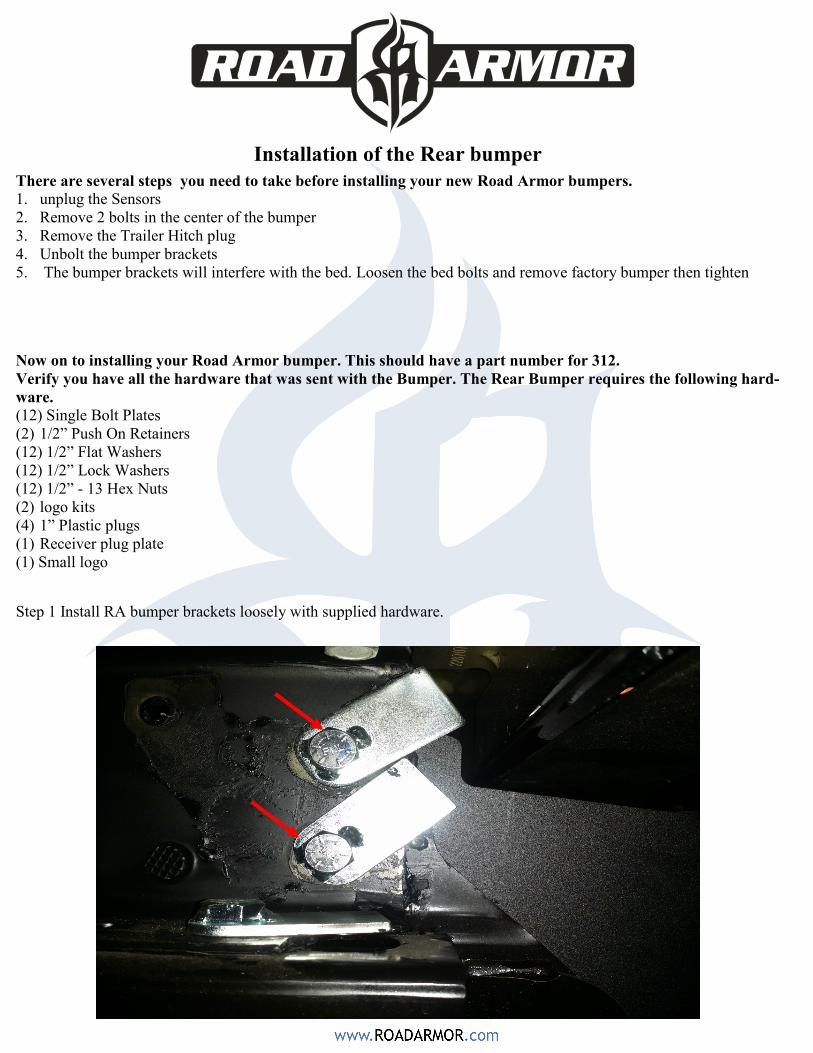
Step 1 Install RA bumper brackets loosely with supplied hardware.
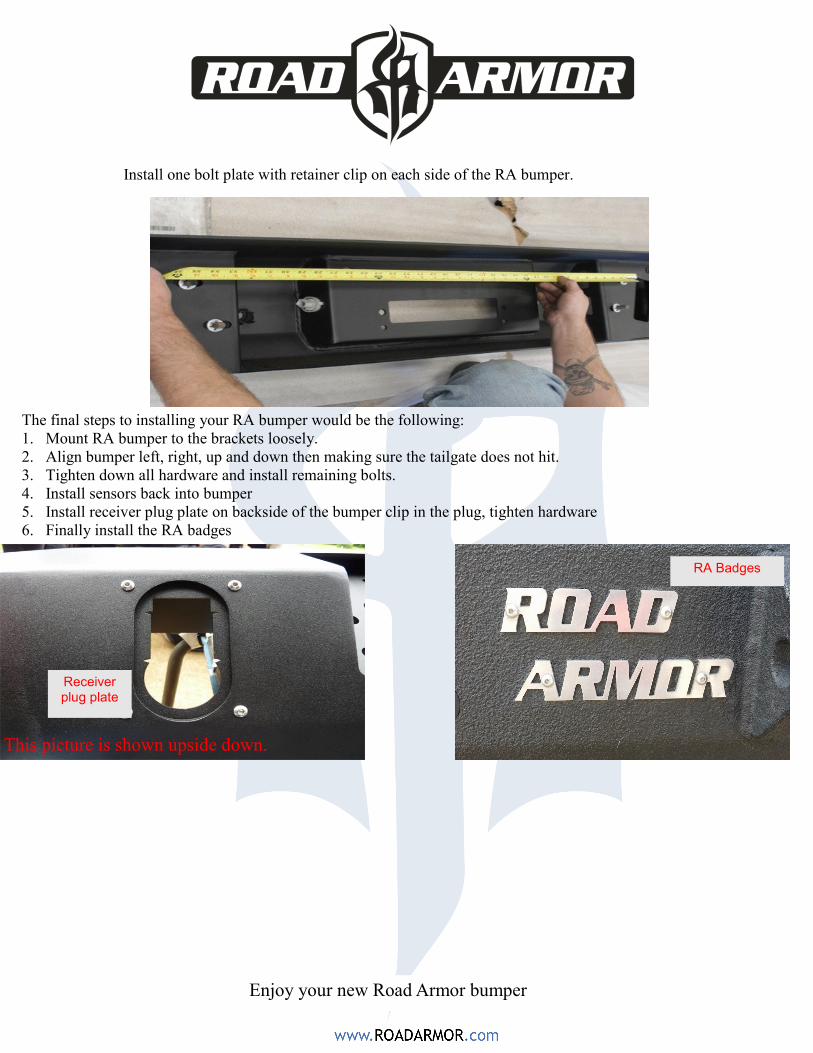
This picture is shown upside down.
The final steps to installing your RA bumper would be the following:
1. Mount RA bumper to the brackets loosely.
2. Align bumper left, right, up and down then making sure the tailgate does not hit.
3. Tighten down all hardware and install remaining bolts.
4. Install sensors back into bumper
5. Install receiver plug plate on backside of the bumper clip in the plug, tighten hardware
6. Finally install the RA badges
Install one bolt plate with retainer clip on each side of the RA bumper.
Receiver plug plate
RA Badges
Enjoy your new Road Armor bumper