1999 gmc c-series - just give me the damn manual · yellowblue i the 1999 gmc c-series owner’s...
TRANSCRIPT

yellowblue
i
The 1999 GMC C-Series Owner’s Manual
1-1 Seats and Restraint SystemsThis section tells you how to use your seats and safety belts properly.
2-1 Features and ControlsThis section explains how to start and operate your vehicle.
3-1 Comfort Controls and Audio SystemsThis section tells you how to adjust the ventilation and comfort controls and how to operate your audio system.
4-1 Your Driving and the RoadHere you’ll find helpful information and tips about the road and how to drive under different conditions.
5-1 Problems on the RoadThis section tells you what to do if you have a problem while driving, such as a flat tire or overheated engine, etc.
6-1 Service and Appearance CareHere the manual tells you how to keep your vehicle running properly and looking good.
7-1 Maintenance ScheduleThis section tells you when to perform vehicle maintenance and what fluids and lubricants to use.
8-1 Customer Assistance InformationThis section tells you how to contact GMC for assistance and how to get service and owner publications. It also gives you information on “Reporting Safety Defects” on page 8-6.
9-1 IndexHere’s an alphabetical listing of almost every subject in this manual. You can use it to quickly find something you want to read.

yellowblue
ii
GENERAL MOTORS, GM, the GM Emblem, GMC and the GMC Emblem are registered trademarks ofGeneral Motors Corporation.
This manual includes the latest information at the time it was printed. We reserve the right to make changes in the product after that time without further notice. For vehicles first sold in Canada, substitute the name“General Motors of Canada Limited” for GM MediumDuty Truck Division whenever it appears in this manual.
Please keep this manual in your vehicle, so it will bethere if you ever need it when you’re on the road. If yousell the vehicle, please leave this manual in it so the newowner can use it.
We support voluntarytechnician certification.
For Canadian Owners Who Prefer aFrench Language Manual:Aux propriétaires canadiens: Vous pouvez vousprocurer un exemplaire de ce guide en français chezvotre concessionaire ou au:
DGN Marketing Services Ltd.1577 Meyerside Dr.Mississauga, Ontario L5T 1B9
Litho in U.S.A. �Copyright General Motors Corporation 1998X9902 A First Edition All Rights Reserved

yellowblue
iii
How to Use this ManualMany people read their owner’s manual from beginningto end when they first receive their new vehicle. If you do this, it will help you learn about the features and controls for your vehicle. In this manual, you’ll find that pictures and words work together to explainthings quickly.
IndexA good place to look for what you need is the Index inback of the manual. It’s an alphabetical list of what’s inthe manual, and the page number where you’ll find it.
Safety Warnings and SymbolsYou will find a number of safety cautions in this book.We use a box and the word CAUTION to tell you about things that could hurt you if you were to ignorethe warning.
CAUTION:
These mean there is something that could hurtyou or other people.
In the caution area, we tell you what the hazard is. Thenwe tell you what to do to help avoid or reduce the hazard.Please read these cautions. If you don’t, you or otherscould be hurt.
You will also find a circlewith a slash through it in this book. This safetysymbol means “Don’t,”“Don’t do this” or “Don’tlet this happen.”

yellowblue
iv
Vehicle Damage WarningsAlso, in this book you will find these notices:
NOTICE:
These mean there is something that coulddamage your vehicle.
In the notice area, we tell you about something that candamage your vehicle. Many times, this damage wouldnot be covered by your warranty, and it could be costly.But the notice will tell you what to do to help avoid the damage.
When you read other manuals, you might seeCAUTION and NOTICE warnings in different colors orin different words.
You’ll also see warning labels on your vehicle. They usethe same words, CAUTION or NOTICE.

yellowblue
v
For example,these symbolsare used on anoriginal battery:
CAUTIONPOSSIBLE
INJURY
PROTECTEYES BY
SHIELDING
CAUSTICBATTERY
ACID COULDCAUSEBURNS
AVOIDSPARKS OR
FLAMES
SPARK ORFLAMECOULD
EXPLODEBATTERY
These symbolsare importantfor you andyour passengerswhenever yourvehicle isdriven:
DOOR LOCKUNLOCK
FASTENSEAT
BELTS
POWERWINDOW
AIR BAG
These symbolshave to do withyour lamps:
MASTERLIGHTING
SWITCH
TURNSIGNALS
PARKINGLAMPS
HAZARDWARNINGFLASHER
DAYTIMERUNNING
LAMPS
FOG LAMPS
These symbolsare on some ofyour controls:
WINDSHIELDWIPER
WINDSHIELDWASHER
WINDSHIELDDEFROSTER
REARWINDOW
DEFOGGER
VENTILATINGFAN
These symbolsare used onwarning andindicator lights:
ENGINECOOLANT
TEMP
BATTERYCHARGING
SYSTEM
BRAKE
COOLANT
ENGINE OILPRESSURE
ANTI-LOCKBRAKES
Here are someother symbolsyou may see:
FUSE
LIGHTER
HORN
SPEAKER
FUEL
Vehicle SymbolsThese are some of the symbols you may find on your vehicle.

yellowblue
vi
Model ReferenceThis manual contains information which coversconventional cab models as shown. Most models areunfinished from the factory.
C6H042
C7H042
C7H064
Since C-Series models delivered from the factory arefinished in a variety of ways by a number of companies,you’ll probably find other manuals in your finishedvehicle. These manuals are put there by the companiesthat have added components or equipment to theC-Series model. Read all these materials -- as well as this manual -- carefully, to get all of the information onyour vehicle.

1-
yellowblue
1-1
Section 1 Seats and Restraint Systems
Here you’ll find information about the seats in your vehicle and how to use your safety belts properly. You can alsolearn about some things you should not do with safety belts.
1-2 Seats and Seat Controls1-6 Safety Belts: They’re for Everyone1-10 Here are Questions Many People Ask About
Safety Belts -- and the Answers1-11 How to Wear Safety Belts Properly1-11 Driver Position1-21 Safety Belt Use During Pregnancy1-21 Right Passenger Position
1-22 Center Passenger Position1-23 Children1-26 Child Restraints1-33 Larger Children1-36 Safety Belt Extender1-36 Checking Your Restraint Systems1-36 Replacing Restraint System Parts
After a Crash

yellowblue
1-2
Seats and Seat ControlsThis section tells you about the seats in your vehicle andhow to adjust them.
CAUTION:
You can lose control of the vehicle if you try toadjust the seat while the vehicle is moving. Thesudden movement could startle and confuse you,or make you push a pedal when you don’t wantto. Adjust the driver’s seat only when the vehicleis not moving.
Bucket and Bench Seats
If your vehicle has a bucket or bench seat, you canadjust it with this lever at the front of the seat.
Slide the lever toward the outer seat support to unlock it.Slide the seat to where you want it. Then, release thelever and try to move the seat with your body to makesure the seat is locked into place.

yellowblue
1-3
Head RestraintsSome seats have adjustable head restraints. Slide anadjustable head restraint up or down so that the top ofthe restraint is closest to the top of your ears. Thisposition reduces the chance of a neck injury in a crash.
Seatback LatchesThe front of the full-width bench seat seatback foldsforward to let you reach the rear of the cab. Bucket seatshave outboard-mounted levers to tilt the seatbacksforward or rearward.
Your seatback will move back and forth freely unlessyou come to a sudden stop -- then it will lock into place.If your vehicle is parked going down a fairly steep hill,the seatback may not fold without some help from you.
To fold the seatbackforward, push the seatbacktoward the rear of thevehicle as you lift this latch.The latch must be down forthe seat to work properly.
Bench Seat Shown
CAUTION:
If the seatback isn’t locked, it could moveforward in a sudden stop or crash. That couldcause injury to the person sitting there. Alwayspress rearward on the seatback to be sure it is locked.

yellowblue
1-4
National Seats (If Equipped)
If your vehicle has the low-back National seat, there aresix ways you can adjust the seat.
If your vehicle has the high-back National seat, there arefive ways you can adjust the seat.
Height Adjustment
To adjust the height of aself-contained seat(hand-pumped air seat),push the seat heightadjustment pump lever,located on the loweroutboard side, down andcontinue pumping to raisethe seat. Press the lever andhold it to lower the seat.
To adjust the height of air-sourced seats, use the knobon the front left-hand side on the seat. Push the knob toinflate. Pull the knob to deflate.

yellowblue
1-5
To adjust the height of thecushion, lift the cushionheight adjustment handle upand forward. You canchoose between twosettings. The handle islocated underneath the seat,in the front.
Lumbar Adjustments
To get more support in thelumbar area of your back,turn the lumbar adjustmentknob. The knob is locatedon the upper cushion, on theinboard side of the driver’sseat and the outboard sideof the passenger’s seat.
Seatback Adjustment
To tilt the seatback, turn thebackrest tilt knob. The knobis located on the lowercushion, on the outboardside of the driver’s seat andthe inboard side of thepassenger’s seat.
Fore-and-Aft Adjustment
To slide the seat forward orbackward, move the levertoward the passenger’s side.The seat will lock in at 1/2 inch (1.5 cm)increments. The lever islocated underneath the seat,in the front.

yellowblue
1-6
Chugger-Snubber Lock-Out Feature (If Equipped)
This handle is located onthe lower outboard side ofthe driver’s seat and theinboard side of thepassenger’s seat. Move thehandle down to isolate anybackslap experienced whilein tractor/trailer operation orwhile operating a dumptruck application. This isonly available on low-back seats.
Safety Belts: They’re for EveryoneThis part of the manual tells you how to use safety beltsproperly. It also tells you some things you should not dowith safety belts.
CAUTION:
Don’t let anyone ride where he or she can’t weara safety belt properly. If you are in a crash andyou’re not wearing a safety belt, your injuriescan be much worse. You can hit things inside thevehicle or be ejected from it. You can be seriouslyinjured or killed. In the same crash, you mightnot be if you are buckled up. Always fasten yoursafety belt, and check that your passengers’ beltsare fastened properly too.

yellowblue
1-7
CAUTION:
It is extremely dangerous to ride in a cargo area,inside or outside of a vehicle. In a collision,people riding in these areas are more likely to beseriously injured or killed. Do not allow people toride in any area of your vehicle that is notequipped with seats and safety belts. Be sureeveryone in your vehicle is in a seat and using asafety belt properly.
If your vehicle has a safetybelt reminder light, a lightcomes on as a reminder tobuckle up. (See “Safety Belt Reminder Light” in the Index.)
If your vehicle has a safety belt reminder tone, a tonecomes on as a reminder to buckle up. See “Safety BeltReminder Tone” in the Index.
In most states and Canadian provinces, the law says towear safety belts. Here’s why: They work.
You never know if you’ll be in a crash. If you do have acrash, you don’t know if it will be a bad one.
A few crashes are mild, and some crashes can be soserious that even buckled up a person wouldn’t survive.But most crashes are in between. In many of them,people who buckle up can survive and sometimes walkaway. Without belts they could have been badly hurt or killed.
After more than 30 years of safety belts in vehicles, the facts are clear. In most crashes buckling up doesmatter ... a lot!

yellowblue
1-8
Why Safety Belts Work
Q: Aren’t safety belts for kids?
A: Yes. And they’re for adult truckers, and anyoneelse who rides in your vehicle.
Here’s why: when your vehicle goes, say, 30 mph (50 km/h), so do you and your passengers.
If the vehicle hits something, it stops -- right then. Butnothing stops the people. They keep moving.

yellowblue
1-9
Then something will stop them. It could be the windshield.
Or it could be the instrument panel.
Now, what if you and your passengers were to give thatbig vehicle a chance to deal with the force of the impact,instead of you?

yellowblue
1-10
With belts, you slow down as the vehicle does. You getmore time to stop.
You stop over more distance, and your strongest bonestake the forces. Safety belts are for everyone.
Here Are Questions Many People AskAbout Safety Belts -- and the AnswersQ: Won’t I be trapped in the vehicle after an
accident if I’m wearing a safety belt?
A: You could be -- whether you’re wearing a safetybelt or not. But you can unbuckle a safety belt,even if you’re upside down. And your chance ofbeing conscious during and after an accident, soyou can unbuckle and get out, is much greater ifyou are belted.
Q: If my vehicle has air bags, why should I have towear safety belts?
A: Air bags are in many vehicles today and will be in most of them in the future. But they aresupplemental systems only; so they work withsafety belts -- not instead of them. Every air bagsystem ever offered for sale has required the use ofsafety belts. Even if you’re in a vehicle that has airbags, you still have to buckle up to get the mostprotection. That’s true not only in frontal collisions,but especially in side and other collisions.

yellowblue
1-11
Q: If I’m a good driver, and I never drive far fromhome, why should I wear safety belts?
A: You may be an excellent driver, but if you’re in anaccident -- even one that isn’t your fault -- you andyour passengers can be hurt. Being a good driverdoesn’t protect you from things beyond yourcontrol, such as bad drivers.
Most accidents occur within 25 miles (40 km) of home. And the greatest number of seriousinjuries and deaths occur at speeds of less than 40 mph (65 km/h).
Safety belts are for everyone.
How to Wear Safety Belts ProperlyAdultsThis part is only for people of adult size.
Be aware that there are special things to know about safetybelts and children. And there are different rules for smallerchildren and babies. If a child will be riding in yourvehicle, see the part of this manual called “Children.”Follow those rules for everyone’s protection.
First, you’ll want to know which restraint systems yourvehicle has.
We’ll start with the driver position.
Driver PositionThis part describes the driver’s restraint system.
yellowblue
1-12
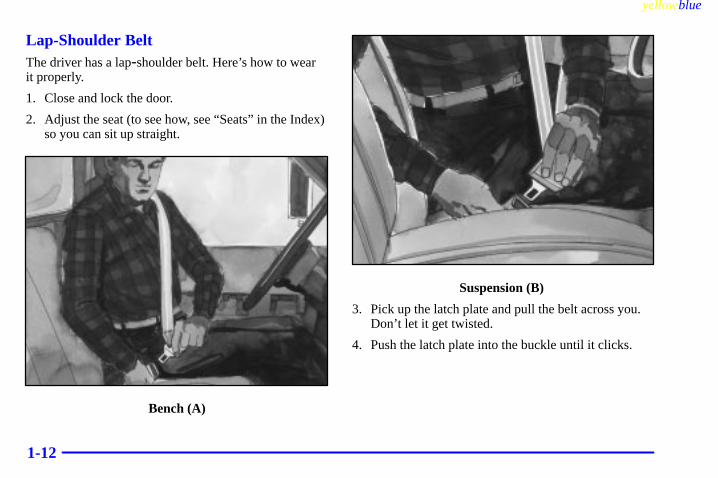
Lap-Shoulder BeltThe driver has a lap-shoulder belt. Here’s how to wear it properly.
1. Close and lock the door.
2. Adjust the seat (to see how, see “Seats” in the Index)so you can sit up straight.
Bench (A)
Suspension (B)
3. Pick up the latch plate and pull the belt across you.Don’t let it get twisted.
4. Push the latch plate into the buckle until it clicks.

yellowblue
1-13
For suspension-type seats (B), if the belt stops beforeit reaches the buckle, tilt the latch plate and keeppulling until you can buckle the belt. Pull up on thelatch plate to make sure it is secure. If the belt ispulled out all the way so that it locks, press down onthe button on the retractor cover to make it retract.
If the belt isn’t long enough, see “Safety BeltExtender” at the end of this section.
Make sure the release button on the buckle ispositioned so you would be able to unbuckle thesafety belt quickly if you ever had to.
Suspension (B)
5. To make the lap part tight on suspension-type seats (B), pull down on the buckle end of the belt asyou pull up on the shoulder belt.

yellowblue
1-14
If the shoulder belt is too tight:
� Pull out the belt at least 5 inches (130 mm).
� Let it go back all the way.

yellowblue
1-15
� You can add a small amount of slack. The systemworks like a window shade. To add a little slack, pulldown on the shoulder belt just a little -- no morethan 1 inch (25 mm).
� If it’s now too loose, pull it out like you did beforeand start again.
� If you move around in the vehicle and your shoulderbelt becomes loose, be sure to make it tight again.
The lap part of the belt should be worn low and snug onthe hips, just touching the thighs. In a crash, this appliesforce to the strong pelvic bones. And you’d be less likelyto slide under the lap belt. If you slid under it, the beltwould apply force at your abdomen. This could causeserious or even fatal injuries. The shoulder belt should goover the shoulder and across the chest. These parts of thebody are best able to take belt restraining forces.
The safety belt locks if there’s a sudden stop or a crash.

yellowblue
1-16
Q: What’s wrong with this?
A: The shoulder belt is too loose. It won’t give nearlyas much protection this way.
CAUTION:
You can be seriously hurt if your shoulder belt istoo loose. In a crash, you would move forwardtoo much, which could increase injury. Theshoulder belt should fit against your body. Don’tallow more than 1 inch (25 mm) of slack.

yellowblue
1-17
Q: What’s wrong with this?
A: The belt is buckled in the wrong place.
CAUTION:
You can be seriously injured if your belt isbuckled in the wrong place like this. In a crash,the belt would go up over your abdomen. Thebelt forces would be there, not at the pelvicbones. This could cause serious internal injuries.Always buckle your belt into the buckle nearest you.

yellowblue
1-18
Q: What’s wrong with this?
A: The shoulder belt is worn under the arm. It shouldbe worn over the shoulder at all times.
CAUTION:
You can be seriously injured if you wear theshoulder belt under your arm. In a crash, yourbody would move too far forward, which wouldincrease the chance of head and neck injury.Also, the belt would apply too much force to theribs, which aren’t as strong as shoulder bones.You could also severely injure internal organslike your liver or spleen.

yellowblue
1-19
Q: What’s wrong with this?
A: The belt is twisted across the body.
CAUTION:
You can be seriously injured by a twisted belt. Ina crash, you wouldn’t have the full width of thebelt to spread impact forces. If a belt is twisted,make it straight so it can work properly, or askyour dealer to fix it.

yellowblue
1-20
Bench (A) Suspension (B)
To unlatch the belt, just push the button on the buckle.The belt should go back out of the way. For asuspension-type seat, if the belt is pulled out all the wayso that it locks, press down on the button on the retractorcover to make it retract.
Before you close the door, be sure the belt is out of theway. If you slam the door on it, you can damage both thebelt and your vehicle.

yellowblue
1-21
Safety Belt Use During PregnancySafety belts work for everyone, including pregnantwomen. Like all occupants, they are more likely to beseriously injured if they don’t wear safety belts.
A pregnant woman should wear a lap-shoulder belt, andthe lap portion should be worn as low as possible, belowthe rounding, throughout the pregnancy.
The best way to protect the fetus is to protect themother. When a safety belt is worn properly, it’s morelikely that the fetus won’t be hurt in a crash. Forpregnant women, as for anyone, the key to makingsafety belts effective is wearing them properly.
Right Passenger PositionThe right passenger’s safety belt works the same way asthe driver’s safety belt. See “Driver Position” earlier inthis section.

yellowblue
1-22
Center Passenger Position Lap BeltIf your vehicle has a full bench seat or a two-passengerbench seat, someone can sit in the center position.
When you sit in a center seating position, you have a lapsafety belt, which has no retractor. To make the beltlonger, tilt the latch plate and pull it along the belt.

yellowblue
1-23
To make the belt shorter, pull its free end as shown untilthe belt is snug.
Buckle, position and release it the same way as the lappart of a lap-shoulder belt. If the belt isn’t long enough,see “Safety Belt Extender” at the end of this section.
Make sure the release button on the buckle is positionedso you would be able to unbuckle the safety belt quicklyif you ever had to.
ChildrenEveryone in a vehicle needs protection! That includesinfants and all children smaller than adult size. Neitherthe distance traveled nor the age and size of the travelerchanges the need, for everyone, to use safety restraints.In fact, the law in every state in the United States and inevery Canadian province says children up to some agemust be restrained while in a vehicle.

yellowblue
1-24
Smaller Children and Babies
CAUTION:
Smaller children and babies should always berestrained in a child or infant restraint. Theinstructions for the restraint will say whether it isthe right type and size for your child. A veryyoung child’s hip bones are so small that aregular belt might not stay low on the hips, as itshould. Instead, the belt will likely be over thechild’s abdomen. In a crash, the belt would applyforce right on the child’s abdomen, which couldcause serious or fatal injuries. So, be sure thatany child small enough for one is always properlyrestrained in a child or infant restraint.
Infants need complete support, including support for thehead and neck. This is necessary because an infant’sneck is weak and its head weighs so much comparedwith the rest of its body. In a frontal crash, an infant in arear-facing restraint settles into the restraint, so the crashforces can be distributed across the strongest part of theinfant’s body, the back and shoulders. A baby should besecured in an appropriate infant restraint. This is soimportant that many hospitals today won’t release anewborn infant to its parents unless there is an infantrestraint available for the baby’s first trip in a motor vehicle.
We know securing a child can present real problems in amedium-duty vehicle like yours. The only place whereyou can properly secure a child restraint is the centerseating position, the place that has the lap belt only. Butyour vehicle may not have a center seating position. Or,even if you have one, you may find that the childrestraint keeps you from operating the shift lever orother controls. The only answer may be to have thesmaller children make the trip in another vehicle, wherethey can get the protection they need.

yellowblue
1-25
CAUTION:
Never hold a baby in your arms while riding in avehicle. A baby doesn’t weigh much -- until acrash. During a crash a baby will become soheavy you can’t hold it. For example, in a crash
CAUTION: (Continued)
CAUTION: (Continued)
at only 25 mph (40 km/h), a 12-lb. (5.5 kg) babywill suddenly become a 240-lb. (110 kg) force onyour arms. The baby would be almost impossibleto hold.Secure the baby in an infant restraint.

yellowblue
1-26
Child RestraintsEvery time infants and young children ride in vehicles,they should have protection provided by appropriate restraints.
Q: What are the different types of add-on child restraints?
A: Add-on child restraints are available in four basictypes. When selecting a child restraint, take intoconsideration not only the child’s weight and size,but also whether or not the restraint will becompatible with the motor vehicle in which it willbe used.
An infant car bed (A) is a special bed made for usein a motor vehicle. It’s an infant restraint systemdesigned to restrain or position a child on acontinuous flat surface. With an infant car bed,make sure that the infant’s head rests toward thecenter of the vehicle.

yellowblue
1-27
A rear-facing infant restraint (B) positions an infantto face the rear of the vehicle. Rear-facing infantrestraints are designed for infants of up to about 20 lbs. (9 kg) and about one year of age. This typeof restraint faces the rear so that the infant’s head,neck and body can have the support they need in afrontal crash. Some infant seats come in two parts -- the base stays secured in the vehicle andthe seat part is removable.

yellowblue
1-28
A forward-facing child restraint (C-E) positions achild upright to face forward in the vehicle. These forward-facing restraints are designed to help protect children who are from 20 to 40 lbs.(9 to 18 kg) and about 26 to 40 inches (66 to 102 cm) in height, or up to around four years ofage. One type, a convertible restraint, is designed tobe used either as a rear-facing infant seat or aforward-facing child seat.

yellowblue
1-29
A booster seat (F, G) is designed for children who are about 40 to 60 lbs., or even up to 80 lbs.(18 to 27 kg, or even up to 36 kg), and about fourto eight years of age. A booster seat is designed toimprove the fit of the vehicle’s safety belt system.Booster seats with shields use lap-only belts;however, booster seats without shields uselap-shoulder belts. Booster seats can also help achild to see out the window.

yellowblue
1-30
When choosing a child restraint, be sure the childrestraint is designed to be used in a vehicle. If it is, itwill have a label saying that it meets federal motorvehicle safety standards.
Then follow the instructions for the restraint. You mayfind these instructions on the restraint itself or in abooklet, or both. These restraints use the belt system inyour vehicle, but the child also has to be secured withinthe restraint to help reduce the chance of personal injury.The instructions that come with the infant or childrestraint will show you how to do that. Both the owner’smanual and the child restraint instructions are important,so if either one of these is not available, obtain areplacement copy from the manufacturer.
The child restraint must be secured properly in thecenter of a full bench seat or the center of atwo-passenger bench seat, if it doesn’t interfere withshifting gears.
Keep in mind that an unsecured child restraint can movearound in a collision or sudden stop and injure people inthe vehicle. Be sure to properly secure any childrestraint in your vehicle -- even when no child is in it.
Top Strap
If your child restraint has a top strap, it should beanchored. If you need to have an anchor installed, yourdealer can obtain a kit with anchor hardware andinstallation instructions specifically designed for thisvehicle. The dealer can then install the anchor for you.This work will be done free of charge. Or you mayinstall the anchor yourself using the instructionsprovided in the kit.

yellowblue
1-31
Securing a Child Restraint in the CenterSeat Position (Full Bench Seat andTwo-Passenger Bench Seat)
You’ll be using the lap belt. Be sure to follow theinstructions that came with the child restraint. Secure thechild in the child restraint when and as the instructionssay. But don’t use this position if the child restraintinterferes with shifting gears.
See the earlier part about the top strap if the childrestraint has one.
1. Make the belt as long as possible by tilting the latchplate and pulling it along the belt.
2. Put the restraint on the seat.
3. Run the vehicle’s safety belt through or around therestraint. The child restraint instructions will showyou how.

yellowblue
1-32
4. Buckle the belt. Make sure the release button ispositioned so you would be able to unbuckle thesafety belt quickly if you ever had to.
5. To tighten the belt, pull its free end while you pushdown on the child restraint. If you’re using aforward-facing child restraint, you may find ithelpful to use your knee to push down on the childrestraint as you tighten the belt.
6. Push and pull the child restraint in differentdirections to be sure it is secure.
To remove the child restraint, just unbuckle the vehicle’ssafety belt. It will be ready to work for an adult or largerchild passenger.

yellowblue
1-33
Larger Children
Children who have outgrown child restraints shouldwear the vehicle’s safety belts.
If you have the choice, a child should sit next to awindow so the child can wear a lap-shoulder belt andget the additional restraint a shoulder belt can provide.
� Children who aren’t buckled up can be thrown out in a crash.
� Children who aren’t buckled up can strike otherpeople who are.

yellowblue
1-34
CAUTION:
Never do this.Here two children are wearing the same belt. Thebelt can’t properly spread the impact forces. In acrash, the two children can be crushed togetherand seriously injured. A belt must be used byonly one person at a time.
Q: What if a child is wearing a lap-shoulder belt,but the child is so small that the shoulder belt isvery close to the child’s face or neck?
A: Move the child toward the center of the vehicle, butbe sure that the shoulder belt still is on the child’sshoulder, so that in a crash the child’s upper bodywould have the restraint that belts provide. If thechild is so small that the shoulder belt is still veryclose to the child’s face or neck, you might want toplace the child in a seat that has a lap belt, if yourvehicle has one.

yellowblue
1-35
CAUTION:
Never do this.Here a child is sitting in a seat that has alap-shoulder belt, but the shoulder part is behindthe child. If the child wears the belt in this way, ina crash the child might slide under the belt. Thebelt’s force would then be applied right on thechild’s abdomen. That could cause serious orfatal injuries.
Wherever the child sits, the lap portion of the beltshould be worn low and snug on the hips, just touchingthe child’s thighs. This applies belt force to the child’spelvic bones in a crash.

yellowblue
1-36
Safety Belt ExtenderIf the vehicle’s safety belt will fasten around you, youshould use it.
But if a safety belt isn’t long enough to fasten, yourdealer will order you an extender. It’s free. When you goin to order it, take the heaviest coat you will wear, so theextender will be long enough for you. The extender willbe just for you, and just for the seat in your vehicle thatyou choose. Don’t let someone else use it, and use itonly for the seat it is made to fit. To wear it, just attach itto the regular safety belt.
Checking Your Restraint SystemsNow and then, make sure the safety belt reminder light(if your vehicle has one) and all your belts, buckles,latch plates, retractors and anchorages are workingproperly. Look for any other loose or damaged safetybelt system parts. If you see anything that might keep asafety belt system from doing its job, have it repaired.
Torn or frayed safety belts may not protect you in acrash. They can rip apart under impact forces. If a belt istorn or frayed, get a new one right away.
Replacing Restraint System PartsAfter a CrashIf you’ve had a crash, do you need new belts?
After a very minor collision, nothing may be necessary.But if the belts were stretched, as they would be if wornduring a more severe crash, then you need new belts.
If belts are cut or damaged, replace them. Collisiondamage also may mean you will need to have safety beltor seat parts repaired or replaced. New parts and repairsmay be necessary even if the belt wasn’t being used atthe time of the collision.

2-
yellowblue
2-1
Section 2 Features and Controls
Here you can learn about the many standard and optional features on your vehicle, and information on starting,shifting and braking. Also explained are the instrument panel and the warning systems that tell you if everything isworking properly -- and what to do if you have a problem.
2-2 Keys2-4 Door Locks2-5 Theft2-5 New Vehicle “Break-In”2-6 Ignition Positions2-7 Starting Your Gasoline Engine2-10 Starting Your Diesel Engine2-13 Engine Checks Before Operating2-15 Engine Coolant Heater (If Equipped)2-16 Diesel Engine Exhaust Brake2-17 Two-Speed Rear Axle Electric Shift Control
(If Equipped)2-20 Automatic Transmission Operation2-22 Manual Transmission Operation2-23 Parking2-29 Parking Over Things That Burn2-29 Engine Exhaust
2-30 Running Your Engine While You’re Parked(Automatic Transmission)
2-30 Windows2-31 Tilt Wheel (If Equipped)2-32 Turn Signal/Multifunction Lever2-39 Trailer Brake Hand Control Valve (Option)2-40 Inter-Axle Differential Lock Control
(If Equipped)2-41 Rear Axle Differential Lock Control
(If Equipped)2-42 Engine Air Control (If Equipped)2-43 Exterior Lamps2-46 Interior Lamps2-46 Mirrors2-50 Instrument Panel2-52 Instrument Panel Cluster2-55 Warning Lights, Gages and Indicators

yellowblue
2-2
Keys
CAUTION:
Leaving children in a vehicle with the ignitionkey is dangerous for many reasons. A child orothers could be badly injured or even killed.
They could operate the controls or even make thevehicle move. Don’t leave the keys in a vehiclewith children.

yellowblue
2-3
The square-head key is forthe ignition switch only.
The oval-head key is for the doors.
If you have the optional one-key system, the oval keywill operate all locks, including the ignition switch.
When a new vehicle is delivered, the dealer removes theplugs from the keys and gives them to the first owner.Each plug has a code on it that tells your dealer or aqualified locksmith how to make extra keys. Keep theplugs in a safe place. If you lose your keys, you’ll beable to have new ones made easily using this code.
NOTICE:
Your vehicle has a number of new features thatcan help prevent theft. But you can have a lot oftrouble getting into your vehicle if you ever lockyour keys inside. You may even have to damageyour vehicle to get in. So be sure you have extra keys.

yellowblue
2-4
Door Locks
CAUTION:
Unlocked doors can be dangerous.
Passengers -- especially children -- can easilyopen the doors and fall out. When a door islocked, the inside handle won’t open it.
Outsiders can easily enter through an unlockeddoor when you slow down or stop your vehicle.This may not be so obvious: You increase thechance of being thrown out of the vehicle in acrash if the doors aren’t locked. Wear safety beltsproperly, lock your doors, and you will be farbetter off whenever you drive your vehicle.
To lock your door from the inside, slide the lockcontrol down.
To unlock the door, slide the lock control up.
Power Door Locks (If Equipped)
Push the switch markedLOCK to lock both doors at once.
Push the switch marked UNLOCK to unlock both doors.

yellowblue
2-5
Leaving Your VehicleIf you are leaving the vehicle, take your keys, open yourdoor and set the locks from inside. Then get out andclose the door.
TheftVehicle theft is big business, especially in some cities,and even commercial vehicles are no exception. Althoughyour vehicle has a number of theft-deterrent features, weknow that nothing we put on it can make it impossible tosteal. However, there are ways you can help.
Key in the IgnitionIf you leave your vehicle with the keys inside, it’s aneasy target for joy riders or professional thieves -- sodon’t do it.
Remember to remove your key and take it with you.Always do this. When you take your key with you, yourignition will be locked. Also remember to lock the doors.
New Vehicle “Break-In”
NOTICE:
Your vehicle doesn’t need an elaborate“break -in.” But it will perform better in the longrun if you follow these guidelines:
� Let your engine warm up before youoperate your vehicle under load.
� Keep your speed at 55 mph (88 km/h) orless for the first 500 miles (805 km).
� Don’t drive at any one speed -- fast or slow -- for the first 500 miles (805 km).Don’t make full -throttle starts.
� Avoid making hard stops for the first 200 miles (322 km) or so. During this timeyour new brake linings aren’t yet brokenin. Hard stops with new linings can meanpremature wear and earlier replacement.Follow this breaking-in guideline everytime you get new brake linings.
NOTICE: (Continued)

yellowblue
2-6
NOTICE: (Continued)
� Use the lowest gear you can when you starta loaded vehicle in motion and when goingup hills to avoid overloading the engine.
� Check and adjust engine and transmissionfluid levels often and be sure tires are properlyinflated for the load you’re carrying.
� If you have a Caterpillar� diesel engine, see the Caterpillar Operation & Maintenance Manual.
Ignition Positions
CAUTION:
Leaving children in a vehicle with the ignitionkey is dangerous for many reasons. A child orothers could be injured or even killed. They couldoperate power windows or other controls or evenmake the vehicle move. Don’t leave the keys inthe vehicle with children.
Use your square-head key to start your vehicle (unless ithas the single-key option, where one oval-head keyworks everything, including the ignition). You can turnthe ignition switch to five different positions.

yellowblue
2-7
ACCESSORY (A): This position lets you useaccessories when the engine is off. To useACCESSORY, push in the key and turn it toward you.
LOCK (B): This position locks your ignition. You willbe able to remove your key only when the switch is inthis position.
OFF (C): This position lets you turn off the engine, butthe key can’t be removed.
RUN (D): This is the position for driving and activatingthe CAT diesel air inlet heater (if equipped).
START (E): This position starts your engine.
Engine Starter Over-Crank Protection (If Equipped)Some vehicles have an engine starter over-crankprotection system. This system includes a built-intemperature limiting switch to prevent internal damageto the starter. If the starter motor overheats and shuts off due to over-cranking, the motor must cool downbefore the switch will reset and allow you to operate thestarter. It can take up to six minutes before the starterwill work again.
Starting Your Gasoline EngineEngines start differently. The 8th digit of your VehicleIdentification Number (VIN) shows the code letter foryour engine. (See “Vehicle Identification Number” inthe Index.) Follow the proper steps to start the engine.
To start a diesel engine, see “Starting Your DieselEngine” in the Index.
Automatic TransmissionSet the parking brake and move your shift lever toNEUTRAL (N) or PARK (P) if so equipped. Yourengine won’t start in any other position -- that’s a safety feature.

yellowblue
2-8
Manual TransmissionSet the parking brake, shift your gear selector toNEUTRAL and hold the clutch pedal to the floor whilestarting the engine.
Starter Motor Operation1. The starter motor will disengage if you release
the key or the engine reaches a predetermined engine speed.
2. To prevent overheating, the starter motor willdisengage after continuously operating for 15 seconds.You must release the key from the start position tore-engage the starter.
3. The starter motor will not engage if the engine isalready running.
4. The starter motor will disengage if, after twoseconds, the starter pinion gear does not engage theflywheel or there is no engine rpm signal from theengine speed sensor.
Starting Your Engine1. Without pushing the accelerator pedal, turn your
ignition key to START. When the engine starts, letgo of the key. The idle speed will go down as yourengine gets warm.
2. If the engine doesn’t start in 10 seconds, push theaccelerator pedal all the way down and crank theengine for five more seconds, unless it starts sooner.
3. If your engine still won’t start (or starts but thenstops), it could be flooded with too much gasoline.
Wait 15 seconds to let the starter motor cool down.Do Steps 1 through 3 again.
When the engine starts, let go of the key and theaccelerator pedal.

yellowblue
2-9
NOTICE:
Your engine is designed to work with theelectronics in your vehicle. If you add electricalparts or accessories, you could change the waythe engine operates. Before adding electricalequipment, check with your dealer. If you don’t,your engine might not perform properly.If you ever have to have your vehicle towed, seethe part of this manual that tells how to do itwithout damaging your vehicle. See “TowingYour Vehicle” in the Index.
Gasoline Engine Warm-UpWhen you’ve started your engine, let it run for 20 or 30 seconds to warm up before you put a load on the engine.
Drive at moderate speeds for the first few miles,especially in cold weather. Running a cold engine athigh speed can damage it.
Restarting the Gasoline Engine WhileMoving (Automatic Transmission)If you have to restart the engine while the vehicle ismoving, you’ll first have to shift the automatictransmission to NEUTRAL (N). This safety featureprevents starting the engine when the transmission is ina drive gear.
Stopping the Gasoline EngineLet your engine idle for a few seconds before turning itoff after you have finished driving your vehicle.
If you shift to NEUTRAL (N), set the parking brake. If you shift to PARK (P), the auto-apply feature will setthe parking brake.
If your vehicle has a two-speed axle, put the rangeselector in LOW. To be sure the axle has shifted intoLOW, engage the clutch and transmission the vehiclemay move slightly when you do this.
While your engine is idling before you turn it off, youcan make a list of any operational or handling concernsto give to responsible maintenance personnel so they canhandle them right away.
Moisture will condense in a fuel tank that is almostempty if the vehicle is not run for a while, even justovernight under some conditions. So, it’s always best torefuel your vehicle at the end of each run.

yellowblue
2-10
Starting Your Diesel EngineIf you have a Caterpillar diesel engine, also refer to your Caterpillar� Operation & Maintenance Manual forstarting procedure.
To make starting easier in cold weather (below 32�F or0�C), the proper viscosity engine oil should be used. It’salso best to heat the engine oil first. You can do this byusing an engine coolant heater. A GM Automatic EtherInjection System aids cold weather starting.
NOTICE:
Your diesel engine has an electric air intakeheater system which reduces white smoke andhelps start the engine in cold weather. Do notspray starting fluid into the air intake where itcan contact the heater elements.
If you don’t have the GM Automatic EtherInjection System, don’t use starting fluid or you could damage your engine. If you have theGM system, use only GM approved starting fluidthat has been tested to establish compatibilitywith the air inlet heater system.
NOTICE:
If you ever have to have your vehicle towed, seethe part of this manual that tells how to do itwithout damaging your vehicle. See “TowingYour Vehicle” in the Index.
Restarting the Diesel Engine While Moving(Automatic Transmission)If you have to restart the engine while the vehicle ismoving, you’ll first have to shift the automatic transmissionto NEUTRAL (N). This safety feature prevents starting the engine when the transmission is in a drive gear.
Stopping the Diesel EngineIf you have a Caterpillar diesel engine, see yourCaterpillar� Operation & Maintenance Manual.
1. Set the parking brake and shift to NEUTRAL (N) orPARK (P).
2. Turn the ignition switch key to OFF.
If your vehicle has a two-speed axle, see “Rear Axle,Two-Speed Electric Shift Control” or “Rear Axle,Two-Speed Airshift Control” in the Index.

yellowblue
2-11
Cold Weather Starting (Caterpillar� Diesel)Because the diesel engine uses compression ignition, itis harder to start in cold weather than a gasoline engine.The air intake heater and use of the proper engine oil,optional engine coolant heaters and optional etherinjection systems help cold weather starting. See theCaterpillar� Operation & Maintenance Manual for more information.
Diesel Engine Warm-UpSeveral factors affect how quickly your diesel enginewarms up. These can include outside temperature,engine load, idle time and your vehicle’s option content.Your vehicle may be equipped with some features thatcan help the engine reach operating temperature sooner.Some of these features are discussed below.
Also, remember that an automatic transmission addsheat to the cooling system through the heat exchanger inthe radiator. Because of this, vehicles equipped withautomatic transmissions are often able to retain enginecoolant heat better than manual transmission vehicles.
See your Caterpillar� Operation & Maintenance manualfor additional diesel engine warm-up information.
Engine Automatic Shutdown (If Equipped)Your CHECK GAGES light will come on if the systemsenses high engine temperature or low engine oilpressure. If high engine temperature is detected, youwill also hear a tone alarm at two beats per second. Thealarm and the light will remain on until the condition isfixed. If the engine temperature condition worsens, thetone alarm will go to five beats per second. When a lowoil pressure condition is detected, the five beat persecond alarm will come on immediately.
If the system senses low engine coolant, the five beatper second alarm and the LOW COOLANT warninglight will come on.
The five beats per second tone alarm means that yourengine will shut down in 25 seconds. Pull off the roadand shut off the engine. Don’t start it until the reason forthe problem is known, and the problem is fixed. If theengine shuts down when you are still in traffic, you canrestart the engine and get another 25 seconds ofoperation. Do this only if you have to, since there is aproblem that can harm the engine if it isn’t fixed.
yellowblue
2-12
Fast Idle System (Electronically ControlledCaterpillar � Diesel and Gasoline Engines)If your vehicle is equipped with an electronicallycontrolled diesel engine, it has both automatic andmanual fast idle capabilities.
Automatic Fast Idle System (Caterpillar � Diesel Engine Only)
The automatic fast idle feature will engage wheneveryou start your vehicle and the engine is below the presetoperating temperature. This will help decrease enginewarm-up time.
Idle speed will then return to normal under any of thefollowing conditions:
� The engine reaches the preset operating temperature.
� The brake pedal is pressed.
� The trailer brake hand lever (if equipped) is applied.
� The manual transmission clutch pedal is pressed or,the automatic transmission (if equipped) is shiftedfrom NEUTRAL (N) or PARK (P).
� The vehicle speed exceeds approximately 10 mph (16 km/h).
� When the fast idle switch is pressed a second time.
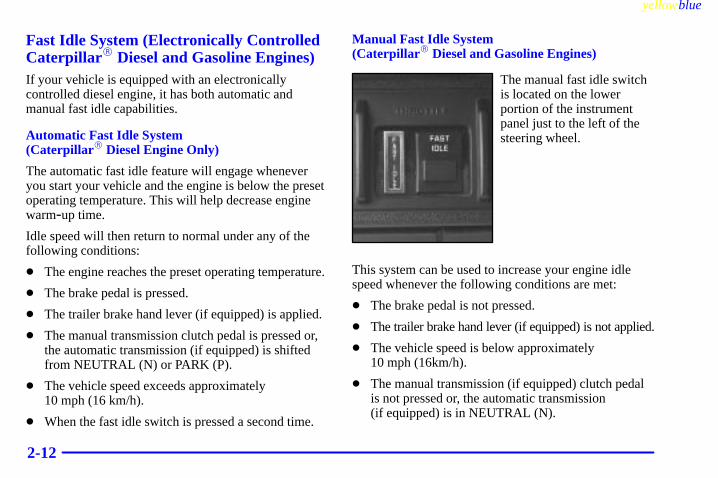
Manual Fast Idle System (Caterpillar � Diesel and Gasoline Engines)
The manual fast idle switchis located on the lowerportion of the instrumentpanel just to the left of thesteering wheel.
This system can be used to increase your engine idlespeed whenever the following conditions are met:
� The brake pedal is not pressed.
� The trailer brake hand lever (if equipped) is not applied.
� The vehicle speed is below approximately 10 mph (16km/h).
� The manual transmission (if equipped) clutch pedalis not pressed or, the automatic transmission (if equipped) is in NEUTRAL (N).

yellowblue
2-13
The manual fast idle feature is activated by pressing theswitch on the instrument panel. When the switch ispressed again, or any of the previous conditions are notmet, manual fast idle will be deactivated.
Manual fast idle can be used to set any desired idlespeed. To set a new temporary engine idle speed:
1. Make sure all of the previously described conditionsare met.
2. Press the accelerator pedal to the desired engine speed.
3. Momentarily press the manual FAST IDLE switch.
The temporary idle speed will be set. This new rpmlevel will be remembered by the system until either theignition is turned to OFF or a new idle speed is set.
Radiator Shutters -- Caterpillar� (If Equipped)Radiator shutters aid engine warm-up by blocking theairflow through the radiator and charge the air cooler toconserve heat in cold conditions.
The radiator shutters on your vehicle (if equipped)operate automatically. When the ignition switch is inRUN or START and the engine temperature is below195�F (90�C), the shutters will close, blocking the flowof air through the radiator and charge the air cooler.
When the engine temperature reaches 195�F (90�C), theshutters will open to the normal operating position.
Engine Checks Before OperatingWhen you’ve started your engine, let it run for 20 to 30 seconds before you put a load on the engine. But don’t leave the vehicle while the engine is running.
During this warm-up period, check your warning lightsand gages:
� If oil pressure doesn’t begin to rise within 15 secondsof starting, stop the engine and find the cause.
� If the engine coolant temperature gage needle goesinto the hot area on the gage, stop the engine andfind the cause of the overheating.
� If you have air brakes, the dual-needle air pressuregage should read at least 105 psi (720 kPa) for bothservice systems before you try to move the vehicle.When air pressure is below 60 psi (420 kPa), theLOW AIR light will come on and you will hear atone alarm. If the pressure doesn’t build up or dropsduring warm-up, stop the engine and find the causebefore you try to move the vehicle. Recommendedair pressure before actually driving away is 120 psi (830 kPa).

yellowblue
2-14
� The charging system light should come on when theignition switch key is turned to RUN or START andshould go out when the engine is running above idle.If the light doesn’t go out or comes back on duringnormal engine operation, have the charging systemchecked right away. (This light tells you if thegenerator is not charging; it doesn’t reflect thecondition of the battery.)
� The voltmeter charge indicator gage tells you thecondition of your battery’s charge. The gage shouldbe in the center area during engine operation. Thered area on the left indicates an underchargecondition; the red area on the right indicates anovercharge. If the gage is in either red area, have thebattery and charging system checked right away.
NOTICE:
Don’t allow the engine to operate at low idle formore than five minutes. This can cause lowengine operating temperatures which can affectengine operation and reduce engine life. Engineidle speed should be increased to 1200 rpmwhenever extended idle is required. Once started,the engine should be placed under load to allowthe engine coolant temperature to reach 150�F (66�C) before shutting off the engine.

yellowblue
2-15
Engine Coolant Heater (If Equipped)If your vehicle has thisfeature, the plug-inreceptacle is located behindthe front bumper as shown,or in the component box on the driver’s side of the vehicle.
In very cold weather, 0�F (-18�C) or colder, the enginecoolant heater can help. You’ll get easier starting andbetter fuel economy during engine warm-up. Usually,the coolant heater should be plugged in a minimum offour hours prior to starting your vehicle.
To Use the Engine Coolant Heater1. Turn off the engine.
2. Find the plug-in receptacle (either behind the frontbumper or in the component box).
3. Plug a heavy-duty, three-prong extension cord (rated for at least 15 amps) into the vehicle’s plug-inreceptacle first. Then plug the extension cord into anormal, grounded 110-volt AC outlet.
CAUTION:
Plugging the cord into an ungrounded outletcould cause an electrical shock. Also, the wrongkind of extension cord could overheat and causea fire. You could be seriously injured. Plug thecord into a properly grounded three-prong110-volt AC outlet. Use a heavy-duty three-prongextension cord rated for at least 15 amps.

yellowblue
2-16
4. Before starting the engine, be sure to unplug the cord.
How long should you keep the coolant heater pluggedin? The answer depends on the outside temperature.Above 32�F (0�C), the coolant heater is not required.From 32�F to -10�F (0�C to -23�C), keep the coolant heater plugged in at least two hours. Below-10�F (-23�C), keep the coolant heater plugged in for a minimum of eight hours or overnight. It will not harmeither the coolant heater or the vehicle to leave thecoolant heater plugged in longer than the times stated.Be sure to remove and store the cord before starting theengine. See “Diesel Fuel Requirements and FuelSystem” in the Index for information on what fuel to usein cold weather.
Diesel Engine Exhaust BrakeThe exhaust brake is available on vehicles equippedwith a diesel engine and air brakes (or an aircompressor). It is located in the exhaust system.
The switch is on the upperright side of the instrumentpanel and turns the exhaustbrake on and off.
The exhaust brake indicator light is on when the exhaustbrake is in use.
The exhaust brake is used to help slow the vehicle andmay assist the vehicle’s foundation brakes. The use of theexhaust brake will assist the braking of the vehicle andprolong the life of the foundation brake lining material.
When using the exhaust brake, the proper gear rangeselection is important. The exhaust brake will be mosteffective if the gear range selected is the lowest possiblerange that does not allow the engine rpm to go more than200 rpm above rated (full load) rpm as shown on theEngine Information Plate. (Do not exceed 2900 rpm.)

yellowblue
2-17
The accelerator and clutch pedals must be released inorder for the exhaust brake to engage. Whenever theexhaust brake is active, the light in the switch will be on.
Do not use the exhaust brake when running the engine atidle during warm-up or other extended periods.Prolonged use of the exhaust brake during idling willcause the engine to overheat.
CAUTION:
Be careful when using the exhaust brake or youcould lock the wheels and lose control of thevehicle. Operators not familiar with an exhaustbrake should not use this brake on slipperysurfaces before learning to use it on dry surfaces.If the vehicle’s wheels begin to lock when usingthe exhaust brake on slippery surfaces, switch theexhaust brake off immediately. The exhaustbrake will turn off if the anti -lock brake systemis activated.
Two-Speed Rear Axle Electric ShiftControl (If Equipped)If your vehicle has this feature, you’ll find a label (orlabels) on the ceiling above the windshield or in anotherplace near the driver that show how to use it. Be sure to follow the directions carefully. Use the followingdirections based on the type of shift control you have.
Automatic Transmission
The switch for the rear axleshift control is on the shifttower to the right of theshift lever.
When the switch is up, the rear axle is in the high range.Push it down to get the low range.

yellowblue
2-18
The two-speed axle should be in low range when youpark the vehicle. Apply the parking brake, shift to PARK (P) or NEUTRAL (N) and shut off the engine.
To operate off-road or under a heavy load, shift into lowrange when the vehicle is standing still and then operatethe transmission normally.
On the highway, with the axle in low range andtransmission in top gear, you may shift the axle to highrange by raising the switch and releasing the acceleratormomentarily. Re-apply the accelerator after your shift.
Under light load conditions, first shift the axle into thehigh range with the vehicle at a standstill and thenoperate the transmission normally.
Manual Transmission
The switch for the rear axleshift control is on the shiftlever. When the switch isup, the rear axle is in thehigh range. Push it down toget the low range.
The two-speed axle should be in low when you park thevehicle. You’ll need to engage the transmission, evenmove the vehicle a little, to be sure the axle is in the lowrange. Then apply the parking brake, shift intoNEUTRAL and shut off the engine.
Also, always start the vehicle in motion with thetwo-speed axle in the low range. When you upshift therear axle from low to high, move the switch up for thehigh range, disengage the clutch, pause, engage theclutch and then press down on the accelerator. Whenyou shift the axle down from high to low, you don’thave to clutch. Just move the switch down to low,release the accelerator and then quickly apply it again.

yellowblue
2-19
Air Shift Control (Manual Transmissions Only)
The lever for the rear axleshift control is either at thelower right corner of theinstrument panel or on theshift lever.
When the lever is moved to HI, the rear axle will be inthe high range. Switch it to LOW to get the low range.
The two-speed axle should be in LOW when you parkthe vehicle.
You’ll need to engage the transmission, even moving thevehicle a little, to be sure the axle is in the low range.Then apply the parking brake, shift into NEUTRAL andshut off the engine.
Also, always start the vehicle in motion with thetwo-speed axle in the LOW position. When you upshiftthe rear axle from LOW to HI, move the lever to the HI position, disengage the clutch, pause, engage theclutch and then press down on the accelerator. Whenyou shift the axle down from HI to LOW, you don’thave to clutch. Just move the lever to LOW, release theaccelerator and then quickly press it down again.
Air Suspension (If Equipped)Your vehicle may be equipped with the HendricksonHAS Series single-axle air suspension which is designedfor single-axle on-highway use. This feature is availablein the 19,000 lb. capacity and as a low profile option foroperations which require extra cubic capacity and areduced deck height.
With this air suspension system, the ride height is setduring vehicle assembly so that the vehicle has a constantframe height. The system will then increase or decreaseair pressure in the air springs to maintain this height.

yellowblue
2-20
Air Suspension Dump Control (If Equipped)
If your vehicle is equipped with the Hendrickson HASSeries single-axle air suspension, you may have thiscontrol. The air suspension dump control allows theoperator to lower the deck height approximately 4.5 inches (11.5 cm) from the normal frame height.
The switch to deflate andinflate the air suspension islocated on the upper leftside of the instrument panelabove the driver’s side vent.
The light in the switch will be illuminated whenever theswitch is in the “dumped” position.
Automatic Transmission OperationWe build vehicles with four, five and six-speedautomatic transmissions. This part of the manual coversthe basics of these. With some of the transmissions, youwill find another manual in your vehicle that goes intomore detail. On the ceiling, in front of and above thedriver, or in some other place near the driver, you willsee a label that describes important operating facts aboutthe automatic transmission in your vehicle. Make sureyou follow the instructions on this label.
You may have a PARK (P) position for your shift lever.This position locks your rear wheels. It is the bestposition to use when you start your engine because yourvehicle can’t move easily.
All vehicles equipped with automatic transmissions can be started in PARK (P), if equipped, or inNEUTRAL (N). When you shift out of NEUTRAL (N),you may have to hold in a push button on the shift leveror lift up on a release handle as you shift. See theAllison Automatic Transmission Operator’s Manual inyour vehicle for more information about this.
yellowblue
2-21
CAUTION:
It is dangerous to get out of your vehicle if theshift lever is not fully in PARK (P) with theparking brake firmly set. Your vehicle can roll.
Don’t leave your vehicle when the engine isrunning unless you have to. If you have left theengine running, the vehicle can move suddenly.You or others could be injured. To be sure yourvehicle won’t move, even when you’re on fairlylevel ground, always set your parking brake andmove the shift lever to PARK (P).
See “Shifting Into PARK (P)” in the Index.
CAUTION:
Shifting out of PARK (P) or NEUTRAL (N) whileyour engine is “racing” (running at high speed) isdangerous. Unless your foot is firmly on thebrake pedal, your vehicle could move veryrapidly. You could lose control and hit people orobjects. Don’t shift out of PARK (P) orNEUTRAL (N) while your engine is racing.
Automatic Transmission Third Gear Hold(If Equipped)If you have this feature, your range selector has a “2-3” position. You can’t shift up to the next higher gear when the transmission is in this position unlessyour engine-governed speed is exceeded, such as when going downhill.
This feature is useful for certain load and trafficconditions or when plowing snow. See the AllisonAutomatic Transmission Operator’s Manual in yourvehicle for further information.

yellowblue
2-22
Manual Transmission OperationThis part of the manual covers the basics of the manualtransmission. With some of the transmissions, you will find another manual in your vehicle that goes intomore detail.
Using the ClutchWhen you’re starting to move the vehicle, it’s importantto begin with the engine speed at idle. Then start toengage the clutch and listen for an engine speed drop ofabout 100 rpm. At this point, the clutch is engaging, soyou should increase the engine speed and fully engagethe clutch. It’s important not to increase the enginespeed sooner or before the clutch begins its engagement.If you do, you can cause damage to your vehicle.
Double-ClutchingYou must use the “double-clutching” method when youshift an unsynchronized gear set. Simply disengage theclutch, shift to NEUTRAL (N) and engage the clutch.When you’re shifting down to a lower gear, acceleratethe engine speed while in NEUTRAL (N) to get readyfor the lower gear.
Eaton Fuller 5 and 6-Speed Transmissionsand Dana Spicer 7-Speed TransmissionsThese transmissions have gears that automaticallysynchronize when you shift up or down (except FIRST (1) gear on the five-speed transmission which isunsynchronized). Choose the gear which will maintainthe road speed you want while keeping the engine abovetwo-thirds of the governed speed. When the enginespeed drops below two-thirds of the governed speed,shift into the next lower gear before your engine beginsto lug. When you shift down, be sure to double-clutch if required.
Eaton Fuller 9 and 10-Speed Manual TransmissionsIf your vehicle has one of these unsynchronizedtransmissions, it’s naturally somewhat complicated. The label above the windshield will tell you theoperating basics you need to know.
Before operating the vehicle with one of thesetransmissions, be sure to read the Eaton FullerTransmission Driver Instructions Manual in your vehicle.

yellowblue
2-23
Eaton Fuller Transmission with ClutchBrake (Option)Some vehicles have an optional clutch brake. It engageswhen you push your clutch pedal all the way to thefloor. Use it when you shift into first or reverse gear.Press the clutch pedal as far as it will go and then makeyour shift. If the engagement isn’t smooth when youengage the clutch, press the clutch pedal in and thenimmediately re-engage it. Use the clutch brake onlywith the engine idling and the vehicle standing still.
If you have this feature, see the Eaton FullerTransmission Driver Instructions Manual beforeoperating your vehicle.
Eaton Fuller Transmission withCountershaft Brake (If Equipped)The countershaft brake is used when you shift from astanding start into FIRST (1) or REVERSE (R). Youwill find this feature on vehicles with gasoline enginesand Eaton Fuller 9 or 10-speed transmissions.
See the Eaton Fuller Transmissions Driver Instructions Manual.
Parking
CAUTION:
If you don’t park your vehicle properly, it canroll. If you’ve left the engine running, it can movevery quickly. You or others could be injured. To be sure your vehicle won’t move, even whenyou’re on level ground, follow the steps below.
Two-Speed Rear Axle1. With the engine running, shift the two-speed rear
axle into low. To be sure it’s in low, you’ll need tomove the vehicle in gear just a little.
2. Hold the regular brake pedal down with your right foot.
3. Apply the parking brake.
4. Shift the transmission to NEUTRAL (N) or PARK (P).

yellowblue
2-24
Hydraulic BrakesIf your vehicle has hydraulic brakes, it has a parkingbrake lever or an electric/hydraulic parking brake. Thelever is below the instrument panel to the left of thesteering column. The electric/hydraulic parking brakeknob is to the right of the steering column.
Your vehicle may also be equipped with an automatictransmission which has a shift lever. This lever will havea PARK (P) position on the shift indicator. When thePARK (P) position is selected with the shift lever, theparking brake is automatically applied.
Propshaft Brake Burnish ProcedureIt is recommended that the propshaft-mounted parkingbrake be burnished as part of the new vehicle break-in.The parking brake will work best after it has beenburnished following these instructions.
Make 10 stops, using the parking brake hand lever, from20 mph (32 km/h) about 2 1/2 miles (4 km) apart.Between stops, drive the vehicle at 20 mph (32 km/h).
Lever Operated Parking Brake
To apply the parking brake,pull the lever all the way up.The PARK BRAKE lightwill come on when theparking brake is applied.Then shift the transmissionto NEUTRAL (N) or PARK (P).
The vehicle must be stopped when applying the parkingbrake, except while burnishing the parking brake linings(see “Propshaft Brake Burnish Procedure” in the Index).
You can easily adjust the parking brake by turning theknob on the lever. Turning it clockwise makes the brakegrip more tightly. It will also make the lever seem harderto pull up. Turning the knob counterclockwise makes theparking brake apply less firmly. Adjust the parkingbrake only when the lever is down (released).

yellowblue
2-25
If your parking brake doesn’t hold the vehicle whenapplied, see your GM Truck dealer who can adjust yourparking brake properly.
To release the parkingbrake, first push down theregular brake pedal. Then,push the parking brake leverall the way down and shiftthe automatic transmissionto NEUTRAL (N).
The PARK BRAKE light will remain illuminated if theparking brake is not fully released.
NOTICE:
Driving with the parking brake on can overheatthe parts in the system. You may have to replacethem, and you could also damage other parts ofyour vehicle.
Electric/Hydraulic Parking Brake (If Equipped)
CAUTION:
It will take a few seconds for the parking braketo fully apply, and even longer when it is coldoutside. Do not leave your vehicle until theparking brake applies fully. Without the parkingbrake applied, your vehicle is free to move. Itcould hit someone or something.

yellowblue
2-26
If your vehicle has thissystem, you will have aknob to the right of thesteering column.
To apply the parking brake, pull the knob toward you.Then shift the transmission to NEUTRAL (N) or PARK (P).
Push the knob in to release the parking brake. Theignition must be in RUN and the shift lever out of PARK (P) in order to release the parking brake.
The parking brake will automatically apply if theignition is turned off and in PARK (P) and will alsoapply (will not release) if the vehicle’s battery is dead or disconnected.
The PARK BRAKE light may flash while the parkingbrake is being applied or released. This is normal forthis system.
If your vehicle needs towing or the parking brake willnot release, the towing operator will need to disconnectthe propshaft before towing your vehicle. See “TowingYour Vehicle” in the Index.
Air Brake (If Equipped)
CAUTION:
When the yellow SYSTEM PARK and the redTRAILER AIR SUPPLY knobs are both pushedin, your rig will be free to move. It could strikesomeone or something. When both of these knobsare pushed in, either hold the regular brakepedal down or, if you have it, pull out the blueTRACTOR PARKING knob, to keep your rigfrom moving.

yellowblue
2-27
If your vehicle has airbrakes, you will have thiscontrol. Pulling it outapplies the parking brake.The PARK BRAKE lightwill come on when the airparking brake is applied.
Vehicles built for use as tractors or towing vehicles haveone or two more air brake controls. They look like this:
To charge a trailer’s air brake system:
1. Move your tractor into the proper position. Apply theparking brake by pulling the yellow SYSTEM PARKknob out.
2. Hook up the trailer air system properly.
3. Get into the tractor. Push and hold down the regularbrake pedal.
4. Push in both the yellow SYSTEM PARK and the redTRAILER AIR SUPPLY knobs. This will chargeyour trailer’s air system.
If you have the blue TRACTOR PARKING knob, pull it out to set the tractor brakes while the air system is charging.
After a few minutes, the trailer system should be fullycharged. When it is, the air pressure gage will showabout 125 to 135 psi (862 to 931 kPa) and you may hearthe “pop off” valve operate.
For driving with a trailer, the yellow, red and blue (if equipped) knobs all must be pushed in. It’s the samewhen you’re not pulling a trailer except that the redTRAILER AIR SUPPLY knob must be out.

yellowblue
2-28
CAUTION:
If you apply any one of the air brake parkingcontrols while the vehicle is moving, your rig willstop suddenly. If you are not ready for this, youor others could be injured. Don’t apply any oneof these controls while you’re driving, unless youhave to make an emergency stop.
If the air pressure drops below 60 to 70 psi (413 to 482 kPa), the PRIMARY BRAKE light will come on. Ifthe air pressure drops to 40 to 45 psi (275 to 309 kPa), theyellow knob will automatically pop out and apply thespring brakes. If you ever have a complete loss of air sothat your air brakes automatically apply, there is a way thatthe tow operator can release the parking brakes to tow thevehicle. See “Towing Your Vehicle” in the Index.
CAUTION:
If your vehicle is left in gear, the engine can start if the vehicle starts to roll. This can easilyhappen if you have the diesel engine. Shift thetransmission into NEUTRAL (N) before youleave the vehicle.

yellowblue
2-29
Parking Over Things That Burn
CAUTION:
Things that can burn could touch hot exhaustparts under your vehicle and ignite. Don’t parkover papers, leaves, dry grass or other things thatcan burn.
Engine Exhaust
CAUTION:
Engine exhaust can kill. It contains the gascarbon monoxide (CO), which you can’t see orsmell. It can cause unconsciousness and death.
You might have exhaust coming in if:� Your exhaust system sounds strange
or different.� Your vehicle gets rusty underneath.� Your vehicle was damaged in a collision.� Your vehicle was damaged when driving
over high points on the road or over road debris.
� Repairs weren’t done correctly.� Your vehicle or exhaust system had been
modified improperly.If you ever suspect exhaust is coming into your vehicle:� Drive it only with all the windows down to
blow out any CO; and� Have your vehicle fixed immediately.

yellowblue
2-30
Running Your Engine While You’reParked (Automatic Transmission)It’s better not to park with the engine running. But ifever you have to, here are some things to know.
CAUTION:
Idling the engine with the climate control systemoff could allow dangerous exhaust into your vehicle (see the earlier Caution under“Engine Exhaust”).Also, idling in a closed-in place can let deadlycarbon monoxide (CO) into your vehicle even ifthe fan switch is at the highest setting. One placethis can happen is a garage. Exhaust -- with CO -- can come in easily. NEVER park in agarage with the engine running.Another closed-in place can be a blizzard. (See “Blizzard” in the Index.)
CAUTION:
It can be dangerous to get out of your vehiclewithout the parking brake firmly set. Yourvehicle can roll. If you’ve left the engine running,the vehicle can move suddenly. You or otherscould be injured. To be sure your vehicle won’tmove, even when you’re on fairly level ground,always set your parking brake.
Follow the proper steps to be sure your vehicle won’t move.
WindowsManual WindowsTurn the hand crank on each door to raise or lower the window.

yellowblue
2-31
Power Windows (If Equipped)If you have power windows, the controls are on eachdoor. The driver’s door has a switch for the passenger’swindow as well. Your power windows will not moveunless the ignition switch is turned to RUN.
Push the switch marked with an up arrow to raise thewindow. Push the switch marked with a down arrow tolower the window.
HornSound the horn by pushing the center of the steeringwheel. If you have the optional air horn, it is controlledby a cord that you’ll find up above and to the left of thedriver. The harder you pull on the cord, the louder theair horn will sound. The air horn works only after yourair system pressure gets up to about 60 psi (415 kPa).
Tilt Wheel (If Equipped)A tilt steering wheel allows you to adjust the steeringwheel before you drive. You can also raise it to thehighest level to give your legs more room when youenter or exit the vehicle.

yellowblue
2-32
To tilt the wheel, hold the steering wheel and pull thelever. Move the steering wheel to a comfortable level,then release the lever to lock the wheel in place.
Turn Signal/Multifunction Lever
The lever on the left side of the steering columnincludes your:
� Turn Signal and Lane Change Indicator
� Headlamp High/Low Beam Changer
� Windshield Wipers
� Windshield Washer
� Cruise Control (If Equipped)

yellowblue
2-33
Turn Signal and Lane Change IndicatorThe turn signal has two upward (for right) and twodownward (for left) positions. These positions allow youto signal a turn or a lane change.
To signal a turn, move the lever all the way up or down. When the turn is finished, the lever will return automatically.
An arrow on the instrumentcluster will flash in thedirection of the turn or lane change.
To signal a lane change, just raise or lower the leveruntil the arrow starts to flash. Hold it there until youcomplete your lane change. The lever will return byitself when you release it.
As you signal a turn or a lane change, if the arrows don’t flashbut just stay on, check the turn signal flasher and circuit breaker. See “Fuses and Circuit Breakers” in the Index.
If a bulb is burned out, replace it to help avoid anaccident. If the arrows don’t go on at all when yousignal a turn, check the circuit breaker and forburned-out bulbs. (See “Fuses and Circuit Breakers” inthe Index.)
Signal-Stat Turn Signal and HazardWarning Flasher (If Equipped)If you have this signal system, it is mounted beside orbehind the multifunction lever on the left side of thesteering column.
To signal a turn, move the lever all the way up or down.When the turn is completed, move the lever back to thecenter position.

yellowblue
2-34
An arrow on the instrument panel will flash in thedirection of the turn when the lever is in the up or down position.
This system replaces the turn signal feature of themultifunction lever only. All other features such asheadlamp high/low beam, windshield wipers andwasher, etc. remain part of the multifunction system.
If you have this system, see “Signal-Stat Turn Signaland Hazard Warning Flasher” in the Index to find outhow the hazard warning flasher portion works.
Headlamp High/Low Beam ChangerTo change the headlamps from low beam to high, pushthe multifunction lever away from you. To switch backto low beam, pull the lever toward you.
When the high beams areon, a light on the instrumentcluster will also be on.
Windshield Wipers
The windshield wipers are controlled by turning theband with the wiper symbol on it.
For a single wiping cycle, turn the band to MIST. Holdit there until the wipers start, then let go. The wipers willstop after one cycle. If you want more cycles, hold theband on MIST longer.
For steady wiping at low speed, turn the band awayfrom you to the LO position. For fast wiping, turn theband to HI. To stop the wipers, turn the band to the off symbol.
yellowblue
2-35
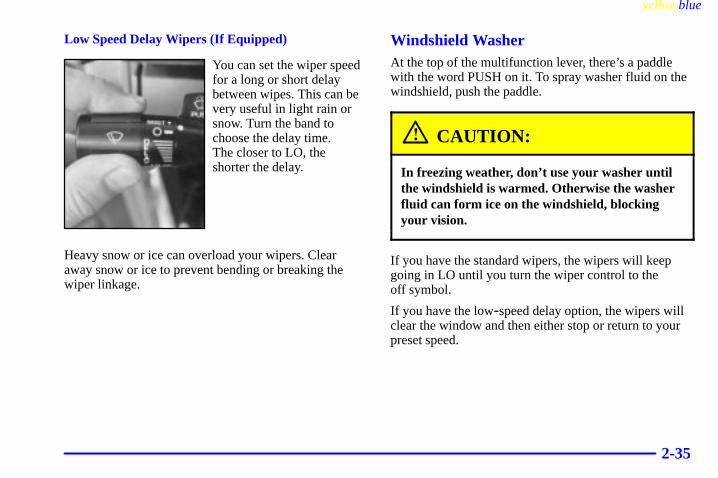
Low Speed Delay Wipers (If Equipped)
You can set the wiper speedfor a long or short delaybetween wipes. This can bevery useful in light rain orsnow. Turn the band tochoose the delay time. The closer to LO, theshorter the delay.
Heavy snow or ice can overload your wipers. Clearaway snow or ice to prevent bending or breaking thewiper linkage.
Windshield WasherAt the top of the multifunction lever, there’s a paddlewith the word PUSH on it. To spray washer fluid on thewindshield, push the paddle.
CAUTION:
In freezing weather, don’t use your washer untilthe windshield is warmed. Otherwise the washerfluid can form ice on the windshield, blockingyour vision.
If you have the standard wipers, the wipers will keepgoing in LO until you turn the wiper control to the off symbol.
If you have the low-speed delay option, the wipers willclear the window and then either stop or return to yourpreset speed.

yellowblue
2-36
Cruise Control (If Equipped)
With cruise control, you canmaintain a speed of about30 mph (48 km/h) or morewithout keeping your footon the accelerator. Cruisecontrol does not work atspeeds below about 30 mph(48 km/h).
If you have an automatic transmission and you applyyour brakes, the cruise control will shut off.
If you have a manual transmission and you apply yourbrakes or push the clutch pedal, the cruise control willshut off.
CAUTION:
� Cruise control can be dangerous where youcan’t drive safely at a steady speed. So,don’t use your cruise control on windingroads or in heavy traffic.
� Cruise control can be dangerous onslippery roads. On such roads, fast changesin tire traction can cause needless wheelspinning, and you could lose control. Don’tuse cruise control on slippery roads.

yellowblue
2-37
Setting Cruise Control
CAUTION:
If you leave your cruise control switch on whenyou’re not using cruise, you might hit a buttonand go into cruise when you don’t want to. Youcould be startled and even lose control. Keep thecruise control switch off until you want to use it.
1. Move the cruise control switch to ON.
2. Get up to the speed you want.
3. Press in the SET button at the end of the lever andrelease it.
4. Take your foot off the accelerator pedal.
Resuming a Set Speed
Once you’re going about 30 mph (48 km/h) or more,you can move the cruise control switch from ON to R/A (Resume/Accelerate) for about half a second.
The vehicle will return to your chosen speed and stay there.
If you hold the switch at R/A longer than half a second,the vehicle will keep going faster until you release theswitch or apply the brake, so unless you want to gofaster, don’t hold the switch at R/A.
If the switch is held at R/A for longer than 200 seconds,the cruise control will automatically turn off. The cruisecontrol function will be made available again the nexttime the engine is restarted.

yellowblue
2-38
Increasing Speed While Using Cruise Control
There are two ways to go to a higher speed:
� Use the accelerator pedal to get to the higher speed.Press the button at the end of the lever, then releasethe button and the accelerator pedal. You’ll nowcruise at the higher speed.
� Move the cruise switch from ON to R/A. Hold itthere until you get up to the speed you want, andthen release the switch. To increase your speed invery small amounts, move the switch to R/A for lessthan half a second. Each time you do this, yourvehicle will go about 1 mph (1.6 km/h) faster.
If the switch is held at R/A for longer than 200 seconds, the cruise control will automaticallyturn off. The cruise control function will be madeavailable again the next time the engine is restarted.
Reducing Speed While Using Cruise Control
Press in the button at the end of the lever until you reachthe lower speed you want, then release it.
To slow down in very small amounts, tap the button forless than half a second. Each time you do this, you’ll go1 mph (1.6 km/h) slower.
If the button is held for longer than 15 seconds, thecruise control will automatically turn off. To makecruise control available again, the cruise switch must bemoved to OFF then back to ON.
Passing Another Vehicle While Using Cruise Control
Use the accelerator pedal to increase your speed. Whenyou take your foot off the pedal, your vehicle will slowdown to the cruise control speed you set earlier.

yellowblue
2-39
Using Cruise Control on Hills
How well your cruise control will work on hills dependsupon your speed, load and the steepness of the hills.When going up steep hills, you may want to step on theaccelerator pedal to maintain your speed. When goingdownhill, you may have to brake or shift to a lower gearto keep your speed down. Of course, applying the brakeor clutch takes you out of cruise control. Many driversfind this to be too much trouble and don’t use cruisecontrol on steep hills.
Ending Cruise Control
There are different ways to turn off the cruise control:
� Step lightly on the brake pedal.
� Push the clutch pedal, if you have a manual transmission.
� Move the cruise switch to OFF.
Erasing Speed Memory
When you turn off the ignition, your cruise control setspeed memory is erased.
Trailer Brake Hand Control Valve(Option)If your vehicle has this feature, it is mounted on thesteering column.
This control lets you apply the trailer brakes withoutapplying the tractor brakes. You can apply the trailerbrakes a little or apply them all the way if you have to.Use this control only when you’re driving. Don’t use itfor parking or to hold the rig on a hill.

yellowblue
2-40
CAUTION:
Using the trailer brake hand control for parkingor for holding the vehicle on a hill may not keepthe vehicle from rolling. This can happen ifsomeone hits the valve by accident, or if airpressure bleeds from the system. If the vehiclerolls, you or others could be injured. To park thevehicle or hold it on a hill, use the parking brake properly.
Inter -Axle Differential Lock Control(If Equipped)
If your vehicle has thisfeature, the control islocated at the lower right corner of theinstrument panel.
If you’re approaching a slippery surface where it lookslike one or even all of the wheels may start to slip, youcan use this control. It locks your rear differentials sothat power is transmitted equally to both rear axles.

yellowblue
2-41
Let up on the accelerator before you turn on yourinter-axle differential lock. When you turn on thiscontrol, the DIFF LOCK indicator on the instrumentpanel will light.
NOTICE:
Activating the inter-axle differential lock whenthe rear wheels are actually spinning freely, asthey might on ice or snow, can cause you to losecontrol of the vehicle. It can also damage theaxles. Turn on this control only when the wheelsare not spinning freely.
Rear Axle Differential Lock Control(If Equipped)
If your vehicle has aControlled Traction orLocking Differential axle,the control is located at thelower right corner of theinstrument panel. You’ll seethis control on single rearaxle vehicles.
If you’re approaching a slippery surface where it lookslike one or even both wheels may start to slip, you canuse this control. It locks your rear differential so thatpower is transmitted equally to both rear wheels.

yellowblue
2-42
Let up on the accelerator before you turn on your rearaxle differential lock.
NOTICE:
Activating the rear-axle differential lock whenthe rear wheels are actually spinning freely, asthey might on ice or snow, can cause you to losecontrol of the vehicle. It can also damage the axle.Turn on this control only when the wheels are notspinning freely.
Engine Air Control (If Equipped)
If your vehicle has this control, the handle is located onthe instrument panel just to the right of the steeringwheel. The control is activated by pulling the handle outand turning slightly in either direction to lock it.

yellowblue
2-43
When the handle is pulled out, the engine air intakesupply is closed off from the front scoop and an underhood air supply is opened. This control is intended onlyfor use in cold weather (32� F (0� C) or below) wheresnow and ice might plug the external intake.
At temperatures above 32� F (0� C), keep the controlhandle pushed in.
NOTICE:
Operating this vehicle with the engine air controlon when outside temperatures are above 32�F(0�C), could lead to costly repairs not covered byyour warranty. It will also degrade fuel economyand the engine will not run smoothly.
Exterior LampsHeadlampsThe lamp switches are on the left side of yourinstrument panel.

yellowblue
2-44
Press the top left switch to turn on your:
� Parking Lamps
� Marker Lamps (unless your vehicle has the optionalmarker and clearance lamps switch)
� Taillamps
� Instrument Panel Lights
� License Plate Lamps
Push the bottom left switch to turn on the headlamps, aswell as all of the lamps just listed. Push the switchmarked with the “O” symbol to turn off your lamps.
Move the thumbwheel to the right of the off switchdown to dim your instrument panel lights. Moving thiswheel up makes these lights brighter. Moving it all theway up will make the interior lamp come on.
A circuit breaker protects your headlamps. If you havean electrical overload, your headlamps will flicker onand off. Have your headlamp wiring checked right awayif this ever happens.
Headlamps On Reminder (If Equipped)If you have this system, a tone alarm will sound whenyour headlamps and/or parking lamps are turned on andyour ignition is in OFF, LOCK or ACCESSORY.
Daytime Running Lamps (If Equipped)Daytime Running Lamps (DRL) can make it easier forothers to see the front of your vehicle during the day.DRL can be helpful in many different drivingconditions, but they can be especially helpful in theshort periods after dawn and before sunset.
The high and low-beam headlamps will come on atreduced brightness in daylight when:
� The ignition is on,
� The headlamp switch is off and
� The parking brake is released.
When the DRL are on, only your low-beam headlampswill be on. The exterior lamps won’t be on. Yourinstrument panel won’t be lit up either.
When it begins to get dark, your DRL indicator light is areminder to turn your headlamp switch on. The otherlamps that come on with your headlamps will also come on.

yellowblue
2-45
When you turn the headlamp switch off, the regularlamps will go off, and your low-beam headlamps willchange to the reduced brightness of DRL.
To idle your vehicle with the DRL off, set the parkingbrake. The DRL will stay off until you release theparking brake.
As with any vehicle, you should turn on the regularheadlamp system when you need it.
Marker and Clearance Lamps Switch (If Equipped)
Your vehicle will have thisswitch only if it is designedto pull a trailer. If it has thisswitch, you’ll find it on theupper right side of yourinstrument panel, just abovethe radio.
If your vehicle has no radio, the switch is just above thestorage area. Use the switch to operate your clearanceand marker lamps. The marker lamps are illuminatedwhen the indicator light is on.
Your headlamps switch will not operate these lamps.You can use the switch to manually blink the marker andclearance lamps by simply turning it on and off.

yellowblue
2-46
Interior LampsDome LampThe dome lamps will come on when you open thedriver’s door. You can also turn the dome lamps on byturning the interior lamp dimmer dial all the way upuntil it clicks.
MirrorsInside Rearview Mirror (If Equipped)Press the tab under the mirror to reduce glare at nightfrom headlamps behind you.Outside Mirrors
Adjust the outside mirror ormirrors by hand so you canjust see the side of yourvehicle when you’re sittingin the driver’s seat. Thesemirrors can fold in towardthe vehicle for enteringnarrow garages and forclearance in an automaticvehicle wash.
If your mirrors have the clearance lamps, they’ll be onwhen your parking lamps are on.
Convex Outside Mirrors (Option)Your vehicle may have optional convex mirrors. Aconvex mirror’s surface is curved so you can see morefrom the driver’s seat.
CAUTION:
A convex mirror can make things (like othervehicles) look farther away than they really are.If you cut too sharply into the right or left lane,you could hit a vehicle. Check your regularoutside mirrors (or your inside mirror, if youhave one) before changing lanes.

yellowblue
2-47
Heated Outside Mirrors (If Equipped)
If your vehicle has heatedmirrors, you’ll find thisswitch on the upper rightside of your instrumentpanel area, just above theradio. Use it to operate yourmirror heaters to defrost ordefog your mirrors.
When you turn on the mirror heaters, an indicator lightin the switch will be lit to tell you the heaters are on.Once the mirrors are clear for viewing, turn the switchoff. The mirror heaters remain on until the heater switchor ignition switch is turned off. However, when you turnthe ignition back on, the heater switch will again be onuntil turned off.
Ashtray and Cigarette Lighter (If Equipped)The ashtray is just below the gages on the right side ofyour instrument panel. If you have a cigarette lighter, itis inside the ashtray.
To use the lighter, press it in all the way and let go.When it’s ready, it will pop back by itself.
NOTICE:
Don’t hold a cigarette lighter in with your handwhile it is heating. If you do, it won’t be able toback away from the heating element when it’sready. That can make it overheat, damaging thelighter and heating element.
To remove the ashtray for cleaning, pull up on the front of it.

yellowblue
2-48
NOTICE:
Don’t put papers and other things that burn intoyour ashtray. If you do, cigarettes or othersmoking materials could set them on fire, causing damage.
Sun VisorsTo block out glare, you can move the sun visors. Youcan also swing them from side to side.
Auxiliary Power Jacks (If Equipped)If your vehicle has thesepower jacks, you’ll findthem in the ashtray.
These jacks provide 12-volt power so you can operatethings such as a citizen’s band (CB) radio or a cellularphone. You’ll see positive (red) and negative (black)outlets. They have a 20-amp fuse that is common withthe cigarette lighter. Don’t use the cigarette lighter whenyou’re using a power jack because it may overload thecircuit and blow the fuse.
NOTICE:
Whether or not your vehicle has the poweroutlets, don’t plug in FM communications gear atthe ashtray area. FM equipment creates highheat, and over time the area could get so hot thatwires could be damaged or a fire could evenbreak out.

yellowblue
2-49
Trailer Connections (If Equipped)These connections are located at the rear of the cab. There is an air connection and a trailer electrical connection.
Be sure that the couplings to the trailer are made correctly.
Air Connections
The red line is the supplyline. It provides emergencyor constant air pressure. Theblue line is the control line,providing service air.
Electrical Connections (If Equipped)If your vehicle has this system, it has a seven-wire cablethat will go to the trailer to supply electrical power tothe trailer’s lighting system. When not in use, it is storedin the trailer air-hose storage bracket.
NOTICE:
Starting in 1998, the center pin (also known asthe auxiliary circuit) of the 7-pin trailer electricalconnector will be wired to provide continuouspower for the trailer anti -lock brake systemswhen the ignition key is in ON or RUN. Careshould be taken to insure that continuous poweron this circuit will not cause damage to the trailerelectrical system.Consult with the trailer manufacturer for theproper operation and checking procedures forthe trailer anti -lock brake systems.

yellowblue
2-50
Instrument Panel

yellowblue
2-51
A. Left Side Window Defogger
B. Main Lamps Switch
C. Vent
D. Instrument Cluster
E. Warning Lights
F. Heated Mirror Switch (Option)
G. Exhaust Brake Switch (Option)
H. Marker/Clearance Lamps Switch (Option)
I. Audio System or Storage Area
J. Vents
K. Glove Box
L. Right Side Window Defogger
M. Storage Tray/Cassette Player
N. Comfort Controls
O. Air Brake Controls (If Equipped)
P. Ashtray
Q. Air Vent Controls
R. Convenience Center Fuse Panel
S. Hourmeter (Option)

yellowblue
2-52
Instrument Panel Cluster
Your instrument cluster is designed to let you know at a glance how your vehicle is running. You’ll know how fastyou’re going, about how much fuel is left and many other things you’ll need to drive safely and economically.

yellowblue
2-53
Speedometer
Your speedometer lets you see your speed in both milesper hour (mph) and kilometers per hour (km/h).
Tamper Resistant Odometer
Your odometer shows how far your vehicle has beendriven, in either miles (used in the United States) orkilometers (used in Canada).
Your odometer is tamper-resistant. The odometer willshow silver lines between the numbers if someone triesto turn it back.
You may wonder what happens if your vehicle needs anew odometer installed. If the new one can be set to themileage total of the old odometer, then it must be. But ifit can’t, then it’s set at zero, and a label must be put onthe driver’s door to show the old mileage reading whenthe new odometer was installed.

yellowblue
2-54
Engine Speed Governor
All gasoline engines have a electronic engine speedgovernor. The engine governed speeds range between3600 and 4000 rpm depending on model, engine sizeand option content.
Engine Road Speed Governor (Gasoline Engine)
This system controls maximum vehicle speedautomatically and reduces engine power until vehiclespeed gets down to maximum governed speed.
A 75 mph (120 km/h) road speed governor is standard, but is optionally available in 60 or 65 mph (97 or 105 km/h) speeds, depending on model.
Tachometer (If Equipped)
Gasoline Engine Diesel Engine
This gage shows the engine speed in revolutions perminute (rpm).

yellowblue
2-55
Warning Lights, Gages and IndicatorsThis part describes the warning lights and gages thatmay be on your vehicle. The pictures will help youlocate them.
Warning lights and gages can signal that something iswrong before it becomes serious enough to cause anexpensive repair or replacement. Paying attention toyour warning lights and gages could also save you orothers from injury.
Warning lights come on when there may be or is aproblem with one of your vehicle’s functions. As youwill see in the details on the next few pages, somewarning lights come on briefly when you start theengine just to let you know they’re working. If you arefamiliar with this section, you should not be alarmedwhen this happens.
Gages can indicate when there may be or is a problemwith one of your vehicle’s functions. Often gages andwarning lights work together to let you know whenthere’s a problem with your vehicle.
When one of the warning lights comes on and stays onwhen you are driving, or when one of the gages showsthere may be a problem, check the section that tells youwhat to do about it. Please follow this manual’s advice.Waiting to do repairs can be costly -- and evendangerous. So please get to know your warning lightsand gages. They’re a big help.
Safety Belt Reminder Light (Option)
When the key is turned toRUN or START, a light willcome on for about eightseconds to remind people to fasten their safety belts.
Safety Belt Reminder Tone (Option)When the key is turned to RUN or START, a tone willsound for about eight seconds to remind people to fastentheir safety belts.

yellowblue
2-56
Charging System Indicator Light
CAUTION:
If your vehicle has an electric/hydraulic parkingbrake, do not drive if the charging system light ison. If the battery drains too much, the parkingbrake can suddenly come on and stop the vehicle.This can cause severe injury to you and others.
The charging system light islocated in the center of theinstrument cluster justabove the odometer.
It should come on briefly when you turn on the ignition,before the engine is running, as a check to show that it is working.
If it stays on, or comes on while you are driving, have itchecked right away. You could have a loose generatordrive belt or some other problem.
Driving while this light is on could drain your battery. Ifyou must drive a short distance with the light on, turnoff your radio and other accessories.
Sustained driving with a generator failure could result ina lack of back-up braking if the engine quits or thepower steering pump should fail.
Voltmeter
When your engine isrunning, the voltmeter gage,at the lower left of theinstrument cluster, showsthe charging system voltage.
Readings in either warning zone indicate a possibleproblem in the electrical system.
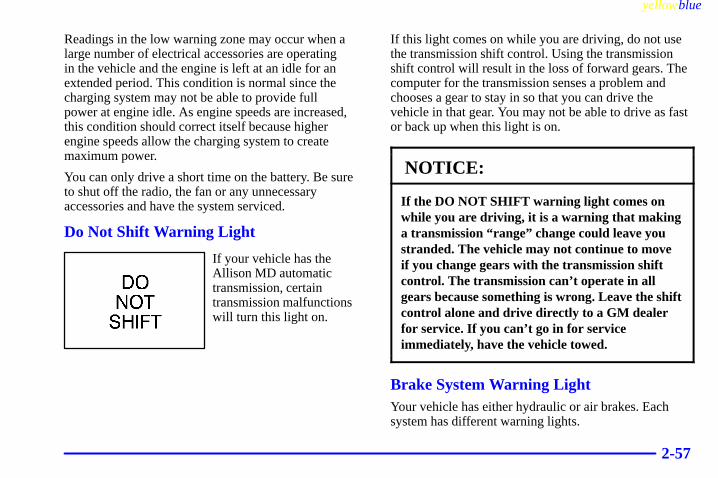
yellowblue
2-57
Readings in the low warning zone may occur when alarge number of electrical accessories are operating in the vehicle and the engine is left at an idle for anextended period. This condition is normal since thecharging system may not be able to provide full power at engine idle. As engine speeds are increased,this condition should correct itself because higherengine speeds allow the charging system to createmaximum power.
You can only drive a short time on the battery. Be sureto shut off the radio, the fan or any unnecessaryaccessories and have the system serviced.
Do Not Shift Warning Light
If your vehicle has theAllison MD automatictransmission, certaintransmission malfunctionswill turn this light on.
If this light comes on while you are driving, do not usethe transmission shift control. Using the transmissionshift control will result in the loss of forward gears. Thecomputer for the transmission senses a problem andchooses a gear to stay in so that you can drive thevehicle in that gear. You may not be able to drive as fastor back up when this light is on.
NOTICE:
If the DO NOT SHIFT warning light comes onwhile you are driving, it is a warning that makinga transmission “range” change could leave youstranded. The vehicle may not continue to moveif you change gears with the transmission shiftcontrol. The transmission can’t operate in allgears because something is wrong. Leave the shiftcontrol alone and drive directly to a GM dealerfor service. If you can’t go in for serviceimmediately, have the vehicle towed.
Brake System Warning LightYour vehicle has either hydraulic or air brakes. Eachsystem has different warning lights.

yellowblue
2-58
Hydraulic Brake System Warning Lights
Vehicles with hydraulic systems have two brake systemwarning lights on the instrument panel.
If the PRIMARY BRAKEwarning light comes on, itmeans that the fluid level inthe master cylinderreservoir is low or there isanother problem with yourprimary hydraulic brakes.
When it comes on, you will also hear a warning tone.
The PRIMARY BRAKE warning light may come on,and the warning tone may sound, when you’re turningand braking at the same time. This is normal. See“Hydraulic Brake Systems” in the Index.
If the AUX BRAKEwarning light comes on, itmeans that there issomething wrong in theauxiliary brake system.
When this light comes on, you will also hear a warning tone.
Both of these lights should come on briefly every timeyou start the engine. If they don’t come on then, havethem fixed so they will be ready to warn you if there’s aproblem. If one or both of these warning lights stay onafter you start the engine, there could be a brakeproblem. Have your brake system inspected right away.
If one or both of these lights come on and stay on whileyou are driving, pull off the road and stop carefully. Youmay notice that the pedal is harder to push. Or, the pedalmay go closer to the floor. It may take longer to stop. If either light is still on, have the vehicle towed forservice. (See “Towing Your Vehicle” in the Index.) See “Hydraulic Brake Systems” in the Index for more information.
CAUTION:
Your brake system may not be working properlyif a brake system warning light is on. Drivingwith either of the brake system warning lights oncan lead to an accident. If either light is still onafter you’ve pulled off the road and stoppedcarefully, have the vehicle towed for service.

yellowblue
2-59
Air Brake System Warning Light
Vehicles with air brake systems have one brake systemwarning light on the instrument panel.
The LOW AIR warninglight should come on, as acheck, whenever you startthe engine.
However, it is designed to come on, and stay on, whenbrake reservoir pressure has dropped below 60 to 70 psi(410 to 480 kPa).
When this warning light comes on, you will also hear awarning tone. If the warning light and tone come onwhile you are driving, you should drive only as far asthe nearest point of safety and then stop the vehicle.Here’s a very important thing for you to know:
CAUTION:
If the LOW AIR warning light comes on and thewarning tone sounds, the vehicle can stopsuddenly and without further warning. This isbecause the parking brake will come on if thepressure falls below 40 to 45 psi (275 to 310 kPa).You or others could be injured. If the LOW AIRwarning light comes on and the warning tonesounds, stop as soon as you can. You won’t know how quickly the system is losing pressure,so be aware that the parking brake may come on suddenly.

yellowblue
2-60
Apply Park Brake Warning Light (Option)
This light warns the driverthat the ignition has beenturned off without applyingthe parking brake. Thewarning light should comeon, as a check, when youstart the engine.
When it comes on, you will also hear a warning tone.Leaving the vehicle in this condition could result in yourvehicle moving and will discharge the battery.
Parking Brake Warning Light
This light turns on as acheck when the engine isfirst started and any time thesystem needs adjustment orthere is a malfunction in theelectric/hydraulic parkingbrake system.
When the SERVICE PARK BRAKE light comes on,you will also hear a warning tone. If this light comes on,have the system repaired immediately.
CAUTION:
If the SERVICE PARK BRAKE warning lightcomes on and the warning tone sounds, yourvehicle can stop suddenly and without furtherwarning. You or others could be injured. If theSERVICE PARK BRAKE warning light and thewarning tone come on, pull over to the side of theroad and apply the parking brake immediately.
Parking Brake Indicator LightVehicles with hydraulic orair brakes have a parkingbrake indicator light. Whenthe ignition is on, this lightwill come on when you setyour parking brake.
The light will stay on if your parking brake doesn’trelease fully.
This light should also come on when you turn theignition key to START. If it doesn’t come on then, haveit fixed so it will be ready to remind you if the parkingbrake is applied or hasn’t released fully.

yellowblue
2-61
Anti-Lock Brake System Warning Light(Option)
With the anti-lock brakesystem, this light will comeon when you start yourengine and it may stay onfor several seconds. That’s normal.
If the light stays on, or comes on when you’re driving,your vehicle needs service. If the PRIMARY BRAKE orLOW AIR warning light isn’t on, you still have brakes,but you don’t have the anti-lock brake feature. If thePRIMARY BRAKE and/or LOW AIR warning light ison, you don’t have anti-lock brakes and there’s aproblem with your regular brakes. See “Brake SystemWarning Light” earlier in this section.
The anti-lock brake system warning light should comeon briefly when you turn the ignition key to RUN. If thelight doesn’t come on then, have it fixed so it will beready to warn you if there is a problem.
Engine Coolant Temperature Gage
Gasoline Engine Diesel Engine
This gage shows the engine coolant temperature. If the gage pointer moves into the red area, your enginecoolant might have overheated and your engine may betoo hot. You should pull off the road, stop your vehicleand turn off the engine as soon as possible.
See “Engine Overheating” in the Index. If you have aCaterpillar� diesel engine, also see your Caterpillar�
Operation & Maintenance Manual.

yellowblue
2-62
Low Coolant Warning Light
You have a LOWCOOLANT warning light.If this light comes on, your system is low oncoolant and the engine may overheat.
The warning light should come on briefly, as a check,when you turn on the ignition.
When it comes on, you will also hear a warning tone atfive beats per second for 10 seconds. See “EngineCoolant” in the Index and have your vehicle serviced assoon as you can.
This light may also come on if your vehicle is equippedwith the optional automatic engine shutdown system andengine shutdown has begun. See“Engine AutomaticShutdown” in the Index.
Manual Fast Idle Indicator Light (If Equipped)
If your vehicle is equippedwith an electronicallycontrolled diesel engine orgasoline engine, you mayhave this indicator light. Itis located next to the FASTIDLE switch on the lower,driver’s side of theinstrument panel.
This light will illuminate whenever the manual FASTIDLE feature is engaged. For more details about thissystem, see “Fast Idle System” in the Index.

yellowblue
2-63
Intake Heater Indicator Light (Diesel Engines)
This light on the instrumentpanel will come on whenthe intake heater is on andthe ignition key is in ON.
Since the light is illuminated whenever the intake heateris activated, it is normal for the light to cycle on and offas the heater cycles during engine warm-up. See“Engine Starting” in your Caterpillar� Operation &Maintenance Manual for more information.
Diff Lock Indicator Light (If Equipped)
This light on the instrumentpanel is on when theinter-axle differential locksystem is in use.
The light will come on momentarily during starting. If the light fails to come on, have it repaired as soon aspossible so you will be aware when the lock system is in use.
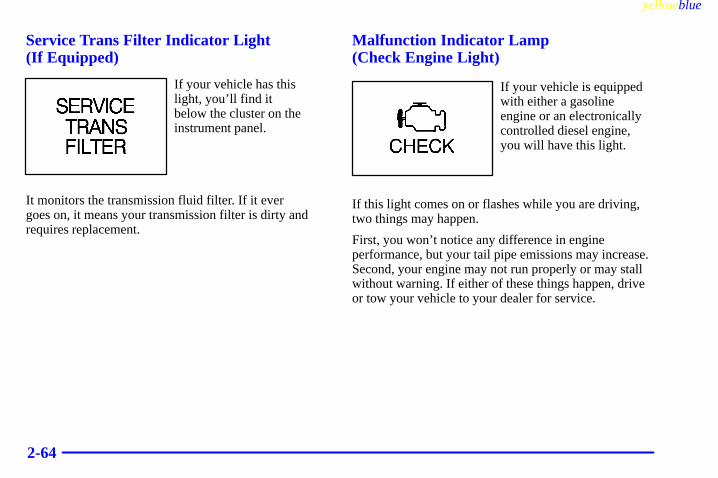
yellowblue
2-64
Service Trans Filter Indicator Light (If Equipped)
If your vehicle has thislight, you’ll find it below the cluster on theinstrument panel.
It monitors the transmission fluid filter. If it ever goes on, it means your transmission filter is dirty andrequires replacement.
Malfunction Indicator Lamp (Check Engine Light)
If your vehicle is equippedwith either a gasolineengine or an electronicallycontrolled diesel engine,you will have this light.
If this light comes on or flashes while you are driving,two things may happen.
First, you won’t notice any difference in engineperformance, but your tail pipe emissions may increase.Second, your engine may not run properly or may stallwithout warning. If either of these things happen, driveor tow your vehicle to your dealer for service.

yellowblue
2-65
This light should come on when the ignition is on, butthe engine is not running, as a check to show you it isworking. If it does not come on at all, have it repaired.
NOTICE:
If you keep driving your vehicle with this lighton, after a while, your emission controls may notwork as well, your fuel economy may not be asgood and your engine may not run as smoothly.This could lead to costly repairs that may not becovered by your warranty.
Engine Oil Pressure Gage
Gasoline Engine Diesel Engine
The engine oil pressure gage, on the lower right portionof your instrument cluster, shows engine oil pressure in psi (pounds per square inch) or in kPa (kilopascals). Oil pressure may vary with outside temperature and oilviscosity, but readings of 30 to 40 psi (205 to 275 kPa)on gasoline engines at operating temperature andmoderate road speeds are normal. If you have a dieselengine, the normal operating range should be between35 and 70 psi (240 to 480 kPa).

yellowblue
2-66
A reading in the low pressure zone may be caused by adangerously low oil level or other problem.
If you have a Caterpillar� diesel engine, also see yourCaterpillar� Operation & Maintenance Manual.
CAUTION:
Don’t keep driving if the oil pressure is low. Ifyou do, your engine can become so hot that itcatches fire. You or others could be burned.Check your oil as soon as possible and have yourvehicle serviced.
NOTICE:
Damage to your engine from neglected oilproblems can be costly and is not covered by your warranty.
Change Oil Light (If Equipped)
The CHANGE OIL lightshould come on briefly as abulb check when you startthe engine. If the lightdoesn’t come on, have it serviced.
If the CHANGE OIL light comes on and stays on afteryou start the engine, have the oil changed.
For additional information, see “Engine Oil, When toChange” in the Index. To reset the Oil Life Monitor, see“Engine Oil Life Monitor” in the Index.

yellowblue
2-67
Daytime Running Lamps (DRL) Indicator Light
This light is located on theupper cluster portion of theinstrument panel. It goes onwhenever the DaytimeRunning Lamps are on. See“Daytime Running Lamps”in the Index.
When it begins to get dark, the DRL indicator light is areminder to turn on your headlamps.
Check Gages Indicator Light (If Equipped)
This light will come on asyou’re starting the engine,just as a check.
If it ever comes on and stays on while you are driving,however, it means that either your engine coolanttemperature gage or your engine oil pressure gage maybe showing a reading in the warning zone.
When the CHECK GAGES light comes on, you willalso hear a warning tone. The tone and the light will stayactivated until the problem is corrected.
This light may also come on if your vehicle is equippedwith the optional automatic engine shutdown system andengine shutdown has begun. See “Engine AutomaticShutdown” in the Index.

yellowblue
2-68
Fuel Gage
Gasoline Engine Diesel Engine
Your fuel gage will be on the right side of yourinstrument cluster if your vehicle doesn’t have theoptional tachometer. If you have a tachometer, your fuel gage is on the lower left portion of your instrument cluster.
When the ignition is on, your fuel gage lets you knowabout how much fuel you have left. When the gage firstshows empty, you’ll still have a little fuel left, but youshould get more fuel soon.
If your vehicle has dual fuel tanks, the reading on thegage is the average of the two tanks.
Here are four concerns of some operators. None of theseshows a problem with your fuel gage:
� The gage moves a little when you turn a corner orspeed up.
� The gage doesn’t go back to empty when you turnoff the ignition.
� At the gas station, the pump shuts off before the gagereads full.
� It takes a little more or less fuel to fill up than thegage indicated.
If you have a diesel engine, also see your Caterpillar�
Operation & Maintenance Manual.

yellowblue
2-69
Transmission Temperature Gage (If Equipped)
If you have an automatictransmission and this gage,it is to the right of the dashmounted shift lever, just tothe right of yourfloor-mounted shift lever oron the lower portion of theinstrument panel to the rightof the steering wheel.
When your ignition is on, the gage shows thetemperature of the transmission oil. A reading in thewarning zone means you must stop driving and checkinto the cause. One possible cause is a low oil level inthe transmission.
NOTICE:
If you drive when the transmission temperaturegage is in the warning zone, you can badlydamage the transmission.
Air Pressure Gage (If Equipped)
If your vehicle has airbrakes, this gage at thecenter of your instrumentcluster shows the airpressure for both your frontand rear brake systems.
If the needle on the gage indicates that the air pressure isbelow 60 psi (415 kPa), the LOW AIR warning lightwill come on. An alarm will also sound if this happens.
The yellow pointer shows the pressure available for thefront system, while the green pointer shows pressure forthe rear. There should be no more than 4 psi (28 kPa)difference showing between the systems.
Don’t drive until both pointers are showing at least 120 psi (830 kPa), so you’ll have enough air if you needto apply your brakes.

yellowblue
2-70
Filterminder Gage (Diesel Engine)
This optional gage is in thelower center of theinstrument panel. Itmonitors the engine air filter.
As the filter gets dirty, the yellow indicator will begin torise. When it reaches 25 inches of vacuum on the scale,the filter should be replaced.
After replacing the filter, reset the gage by pressing inthe yellow reset pin at the bottom of the gage.
If you have a diesel engine, also see your Caterpillar�
Operation & Maintenance Manual.
Hourmeter Gage (If Equipped)
If your vehicle has thisgage, it will be to the lowerleft of the steering column,mounted on a bracket eitherabove or below the fuseblock. It shows the totalengine operating time.

3-
yellowblue
3-1
Section 3 Comfort Controls and Audio Systems
In this section, you’ll find out how to operate the comfort control and audio systems offered with your vehicle. Be sure to read about the particular systems supplied with your vehicle.
3-2 Comfort Controls3-5 Air Conditioning3-5 Heating3-6 Defogging3-6 Ventilation System3-7 Audio Systems3-7 Setting the Clock
3-8 AM/FM Stereo3-10 Remote Cassette Tape Player (If Equipped)3-10 Understanding Radio Reception3-11 Tips About Your Audio System3-12 Care of Your Cassette Tape Player3-12 Fixed Mast Antenna

yellowblue
3-2
Comfort ControlsStandard Comfort ControlsIf your vehicle does not have air conditioning, this iswhat your comfort controls will look like.
Function Lever
The top lever can be moved to three different heatingfunctions. If you place the lever between positions, itwill send air out both vents.
VENT: The air comes out at the vents on yourinstrument panel and at your front side windows.
HEATER: Heated air comes out near the floor.This is the best setting for cold weather.
DEFOG: This setting operates the defogger.Heated air comes out near the windshield. Use this whenfog or ice is on the windshield.
Temperature Lever
The bottom lever lets you select the temperature of theair flowing into your vehicle. Move the lever to the plussymbol for warmer air. Move the lever to the minussymbol for cooler air.
If your engine is equipped with an engine coolant heater,you can use it during initial start-up in cold weather(20�F (-8�C) or lower) to help heat the passengercompartment faster. See “Engine Coolant Heater” in the Index.
Fan Knob
The fan knob has four positions. To increase airflow,turn the knob toward the plus symbol. To decreaseairflow, turn it toward the minus symbol.

yellowblue
3-3
Optional Comfort Controls (If Equipped)If your vehicle has air conditioning, your comfortcontrols will look like this.
Your system has a lighted display showing each systemwhen it is operating. During normal operation, all thelights won’t come on at the same time. Only the onesdisplaying the current settings will light.
Temperature Selector Bar
The bar under your system display lets you select thetemperature of the air coming into the passenger area ofyour vehicle. Press COLD for cooler air and press HOTfor warmer air. Release the bar when the system reachesthe temperature you want. The temperature is shown onthe display by an arrow moving between C and H.
If your engine is equipped with an engine coolant heater,you can use it during initial start-up in cold weather(20�F (-8�C) or lower) to help heat the passengercompartment faster. See “Engine Coolant Heater” in the Index.

yellowblue
3-4
Left Blend Button
The airflow can be blended between the two positions.To blend between the positions, press the side of thebutton showing the area where you would like moreairflow. The system will automatically begin to blendtoward the position chosen. To stop the system betweenpositions, just press the same side of the button again.
VENT: Press the top of the button and all of theairflow will come through the instrument panel vents.
HEATER: Press the bottom of this button and allof the airflow will come through the floor outlet.
Right Blend Button
The airflow can be blended between the two positions.To blend between positions, press the side of the buttonshowing the area where you would like more airflow.The system will automatically begin to blend toward theposition chosen. To stop the system between positions,just press the same side of the button again.
DEFOG: This setting operates the defogger. Aircomes out near the bottom of the windshield and at yourfront side windows.
HEATER: Press the bottom of this button andheated air comes out near the floor.
A/C Button
Press the A/C button to turn your air conditioner on andoff. The A/C symbol will light on your display, and airwill come out of your instrument panel vents. The fanwill automatically be set on LOW.
MAX Button
If you press the MAX button, the air in your vehicle willbe recirculated. With the air conditioner on, MAX willgive you maximum cooling. It can also be used in allmodes to help keep dust out of your vehicle. WhenMAX is selected, REC will light on the display.
Fan Control Button
This button is in the upper passenger’s side corner ofyour system control panel. The fan has four settings:low, medium low, medium high and high. Press the topof the button with the plus symbol to increase airflow.Press the bottom of the button with the minus symbol todecrease airflow. The setting you select is shown onyour display as LOW, MED, HI or OFF.

yellowblue
3-5
OFF
Press this button to turn the air conditioning/heatingsystem off. Pressing OFF will erase the present mode ofoperation from the system’s memory. Outside air willstill come out of the heater outlet whenever the vehicleis moving forward.
If the OFF button is pressed, you must press A/C, MAX or one of the BLEND buttons to turn the systemback on.
Air ConditioningWhen you first turn on your vehicle’s air conditioning,open the windows long enough to clear the vehicle ofhot air, then close them. Using the MAX button can alsohelp. See “MAX Button” earlier in this section for more information.
For normal cooling on hot days, use A/C with thetemperature selector toward C.
When you press the A/C button to turn the airconditioner off, the system will operate in the ventmode. When you turn the air conditioner back on, thesystem will operate in the mode you last selected unlessthe OFF button was pressed.
If your air conditioner develops high system pressure, itwill automatically go into the MAX mode and REC willlight on your display. The A/C system will remain in theMAX mode, even if you press the MAX button, untilsystem pressure returns to a normal level.
HeatingOn cold days, use HEATER with the temperatureselector all the way toward H. When the inside of thevehicle has reached a comfortable temperature, maintainit by using the temperature selector bar.
If your vehicle is equipped with a diesel engine, and theengine has been idling for a long time when it’s coldoutside, your heater may blow out cool air. This isnormal. When you increase the engine speed under load,your heater should blow out warmer air. If it doesn’t,your coolant level may be low. See “Engine Coolant” inthe Index to check your coolant level.
While idling your diesel engine, you can use the MAXbutton to recirculate the air in the cab to help maintaininterior heat. This will preserve engine coolant temperatureand cab heat when idling cannot be avoided.
Using the MAX button while driving is not recommendedbecause interior window fogging can result.

yellowblue
3-6
DefoggingUse DEFOG, along with the HEATER setting, whenthere is fog or ice on the windshield. This will directairflow toward the windshield and front side windows.Set the temperature selector toward H and the fancontrol at a comfortable level. When the windshield isclear, use the temperature selector bar and the fancontrol button to maintain a comfortable temperature level.
Ventilation SystemAir comes into your vehicle in one of two ways: power airor ram air. Power air means bringing outside air into thecab through the air intake, using the blower fan. Fresh aircan be drawn in when the vehicle is stationary or movingat low speed. Air comes in through four vents in theinstrument panel and is exhausted through the vents andpressure relief valves in the doors and door pillars. Powerventilation means an increased supply of fresh air isbrought into the cab interior without having to open thewindows, especially during inclement weather.
Ram air is forced into the cab through the air intake inthe cowl by the vehicle’s forward motion. This air iscontrolled by two vent air handles under the instrumentpanel. Air is directed through the ventilation ducts to thefloor. Ram air provides good airflow into the cab atnormal road speeds.

yellowblue
3-7
Ventilation Tips
� Keep the hood and front air inlet free of ice, snow orany other obstruction (such as leaves). The heaterand defogger will work far better, reducing thechance of fogging the inside of your windows.
� When you enter a vehicle in cold weather, turn theblower fan to high for a few moments before drivingoff. This helps clear the intake ducts of snow andmoisture and reduces the chance of fogging theinside of your windows.
� Keep the air path under the seats clear of objects.This helps air to circulate throughout your vehicle.
The air vents are located in the center and on the sides ofyour instrument panel. You can move the vents to directthe flow of air or close the vents altogether. When youclose a vent, it will increase the flow of air coming outof any vents that are open.
If your vehicle does not have air conditioning, there areair vent controls located below the instrument panel.
Audio SystemsYour Delco Electronics audio system has been designedto operate easily and give years of listening pleasure.You will get the most enjoyment out of it if you acquaintyourself with it first. Find out what your DelcoElectronics system can do and how to operate all itscontrols, to be sure you’re getting the most out of theadvanced engineering that went into it.
Setting the ClockWhile pressing the SET button, press the UP buttonuntil the correct hour appears on the display and theDOWN button until the correct minute appears on thedisplay. If you press and hold the UP/DOWN button,hours or minutes will advance rapidly.

yellowblue
3-8
AM-FM Stereo
Playing the Radio
ON-OFF: Press the round button to turn the radio on.Press it again to turn the radio off.
VOLUME: Slide the VOLUME lever to the right toincrease volume or to the left to decrease volume.
CALL: Press this button to display the clock for a few seconds when the radio is on. To change what isnormally shown on the display (station or time), pressthis button and the SET button.
Finding a Station
AM/FM: Press this button to switch between AM andFM. The display shows your selection.
TUNE: Press UP to increase the frequency of a radiostation and DOWN to decrease the frequency of a radiostation. If you press and hold the UP or DOWN buttonfor more than half a second, the radio will tune rapidlyin that direction.
SEEK: Press SEEK to tune the radio to the next higherstation and stay there.
SCAN: Press SCAN to listen to the next higher radio station for a few seconds. Press SCAN again to stop scanning.
PUSHBUTTONS: The six numbered pushbuttons let you return to your favorite stations. You can set up to12 stations (six AM and six FM). Just:
1. Turn the radio on.
2. Press AM/FM to select a band.
3. Tune in the desired station.
4. Press SET. (SET will appear on the display and willblink for about eight seconds.)

yellowblue
3-9
5. Press one of the six pushbuttons within eightseconds. In the display, SET will stop blinkingindicating the preset is set. Whenever you press thatnumbered button, the station you set will return.
6. Repeat the steps for each pushbutton.
Also, you can use the automatic memory SET button to set the pushbuttons. You can set up to 12 stations (six AM and six FM). Just:
1. Press AM/FM to select a band.
2. Press and hold SET. (SET will appear on the displayand will blink.)
3. While pressing the SET button, press the SEEKbutton. Release both switches. The radio willautomatically search the band and select radiostations, up to six, which have good signal strength.
Setting the Tone
BAS: Slide this lever left or right to decrease or increasethe bass.
TRE: Slide this lever left or right to decrease orincrease the treble. If a station is weak or noisy, you maywant to decrease the treble.
LOUD: To increase bass and treble at low volumes,press this button. LOUD will appear in the display. Pressthis button again to turn LOUD off.
Adjusting the Speakers
BAL: Slide this lever to the left or right to adjust the speaker balance between the left and right speakers.The middle position balances the sound between the speakers.
FAD: Slide this lever to the left or right to adjust the speaker balance between the front and rear speakers.The middle position balances the sound between the speakers.

yellowblue
3-10
Remote Cassette Tape Player (If Equipped)
Your tape player is built to work best with tapes that areup to 30 to 45 minutes long on each side. Tapes longerthan that are so thin they may not work well in this player.
To load a cassette tape, hold the cassette with the tape tothe right. Then, insert the cassette tape. Tape direction isdisplayed by the lighted arrow. To change the tapedirection, press the FF button.
Once the tape is playing, use the control knobs forVOLUME, BAL, FAD, BAS and TRE just as you do for the radio.
REW: Press the left arrow to rapidly reverse the tape.Press FF to stop reversing the tape.
FF: Press the right arrow to rapidly advance the tape.Press REW to stop forwarding the tape.
PROGRAM: An arrow will light on the display toshow which side of the tape is playing.
EJ: Press this button to remove the tape.
There is a space provided with your remote cassette tapeplayer to keep cassette tapes in.
Understanding Radio Reception
AM
The range for most AM stations is greater than for FM,especially at night. The longer range, however, cancause stations to interfere with each other. AM can pickup noise from things like storms and power lines. Tryreducing the treble to reduce this noise if you ever get it.
FM Stereo
FM stereo will give you the best sound, but FM signalswill reach only about 10 to 40 miles (16 to 65 km). Tallbuildings or hills can interfere with FM signals, causingthe sound to come and go.

yellowblue
3-11
Tips About Your Audio SystemHearing damage from loud noise is almost undetectableuntil it is too late. Your hearing can adapt to highervolumes of sound. Sound that seems normal can be loudand harmful to your hearing. Take precautions byadjusting the volume control on your radio to a safesound level before your hearing adapts to it.
To help avoid hearing loss or damage:
� Adjust the volume control to the lowest setting.
� Increase volume slowly until you hear comfortablyand clearly.
NOTICE:
Before you add any sound equipment to yourvehicle -- like a tape player, CB radio, mobiletelephone or two-way radio -- be sure you canadd what you want. If you can, it’s veryimportant to do it properly. Added soundequipment may interfere with the operation ofyour vehicle’s engine, Delco Electronics radio orother systems, and even damage them. Yourvehicle’s systems may interfere with theoperation of sound equipment that has beenadded improperly.So, before adding sound equipment, check withyour dealer and be sure to check Federal rulescovering mobile radio and telephone units.

yellowblue
3-12
Care of Your Cassette Tape PlayerA tape player that is not cleaned regularly can causereduced sound quality, ruined cassettes or a damagedmechanism. Cassette tapes should be stored in theircases away from contaminants, direct sunlight andextreme heat. If they aren’t, they may not operateproperly or may cause failure of the tape player.
Your tape player should be cleaned regularly after every50 hours of use. If you notice a reduction in soundquality, try a known good cassette to see if it is the tapeor the tape player at fault. If this other cassette has noimprovement in sound quality, clean the tape player.
The recommended cleaning method for your cassettetape player is the use of a scrubbing action,non-abrasive cleaning cassette with pads which scrubthe tape head as the hubs of the cleaner cassette turn.The recommended cleaning cassette is available throughyour dealership (GM Part No. 12344789).
When using a scrubbing action, non-abrasive cleaningcassette, it is normal for the cassette to eject becauseyour unit is equipped with a cut tape detection featureand a cleaning cassette may appear as a broken tape. If the cleaning cassette ejects, insert the cassette at leastthree times to ensure thorough cleaning.
You may also choose a non-scrubbing action, wet-typecleaner which uses a cassette with a fabric belt to cleanthe tape head. This type of cleaning cassette will noteject on its own. A non-scrubbing action cleaner maynot clean as thoroughly as the scrubbing type cleaner.The use of a non-scrubbing action, dry-type cleaningcassette is not recommended.
Cassettes are subject to wear and the sound quality maydegrade over time. Always make sure the cassette tape is in good condition before you have your tape player serviced.
Fixed Mast AntennaThe fixed mast antenna can withstand most vehiclewashes without being damaged. If the mast should everbecome slightly bent, you can straighten it out by hand.If the mast is badly bent, as it might be by vandals, youshould replace it.
Check every once in a while to be sure the mast is stilltightened to the cowl.

4-
yellowblue
4-1
Section 4 Your Driving and the Road
Here you’ll find information about driving on different kinds of roads and in varying weather conditions. We’ve alsoincluded many other useful tips on driving.
4-2 Defensive Driving4-3 Drunken Driving4-6 Control of a Vehicle4-6 Braking4-9 Steering4-12 Off-Road Recovery4-12 Passing4-14 Loss of Control4-15 Driving at Night
4-16 Driving in Rain and on Wet Roads4-19 City Driving4-20 Freeway Driving4-21 Highway Hypnosis4-22 Hill and Mountain Roads4-24 Winter Driving4-28 Loading Your Vehicle4-31 Power Take-Off (PTO) (If Equipped)

yellowblue
4-2
Defensive DrivingThe best advice anyone can give about driving is: Drive defensively.
Please start with a very important safety device in yourvehicle: Buckle up. (See “Safety Belts” in the Index.)
Defensive driving really means “be ready for anything.”On city streets, rural roads or freeways, it means“always expect the unexpected.”
Assume that pedestrians or other drivers are going to becareless and make mistakes. Anticipate what they mightdo. Be ready for their mistakes.
Rear-end collisions are about the most preventable ofaccidents. Yet they are common. Allow enoughfollowing distance. It’s the best defensive drivingmaneuver, in both city and rural driving. You neverknow when the vehicle in front of you is going to brakeor turn suddenly.
Defensive driving requires that a driver concentrate onthe driving task. Anything that distracts from the driving task -- such as concentrating on a cellulartelephone call, reading, or reaching for something on the floor -- makes proper defensive driving moredifficult and can even cause a collision, with resultinginjury. Ask a passenger to help do things like this, orpull off the road in a safe place to do them yourself.These simple defensive driving techniques could saveyour life.

yellowblue
4-3
Drunken DrivingDeath and injury associated with drinking and driving isa national tragedy. It’s the number one contributor to the highway death toll, claiming thousands of victimsevery year.
Alcohol affects four things that anyone needs to drive a vehicle:
� Judgment
� Muscular Coordination
� Vision
� Attentiveness.
Police records show that almost half of all motorvehicle-related deaths involve alcohol. In most cases,these deaths are the result of someone who was drinkingand driving. In recent years, over 17,000 annual motorvehicle-related deaths have been associated with the useof alcohol, with more than 300,000 people injured.
Many adults -- by some estimates, nearly half the adultpopulation -- choose never to drink alcohol, so theynever drive after drinking. For persons under 21, it’sagainst the law in every U.S. state to drink alcohol.There are good medical, psychological anddevelopmental reasons for these laws.
The obvious way to solve the leading highway safetyproblem is for people never to drink alcohol and thendrive. But what if people do? How much is “too much”if the driver plans to drive? It’s a lot less than manymight think. Although it depends on each person andsituation, here is some general information on the problem.
The Blood Alcohol Concentration (BAC) of someonewho is drinking depends upon four things:
� The amount of alcohol consumed
� The drinker’s body weight
� The amount of food that is consumed before andduring drinking
� The length of time it has taken the drinker toconsume the alcohol.
According to the American Medical Association, a180-lb. (82 kg) person who drinks three 12-ounce (355 ml) bottles of beer in an hour will end up with aBAC of about 0.06 percent. The person would reach thesame BAC by drinking three 4-ounce (120 ml) glassesof wine or three mixed drinks if each had 1-1/2 ounces(45 ml) of a liquor like whiskey, gin or vodka.

yellowblue
4-4
It’s the amount of alcohol that counts. For example, ifthe same person drank three double martinis (3 ouncesor 90 ml of liquor each) within an hour, the person’sBAC would be close to 0.12 percent. A person whoconsumes food just before or during drinking will have asomewhat lower BAC level.
There is a gender difference, too. Women generally havea lower relative percentage of body water than men.
Since alcohol is carried in body water, this means that awoman generally will reach a higher BAC level than aman of her same body weight when each has the samenumber of drinks.
The law in many U.S. states sets the legal limit at a BACof 0.10 percent. In a growing number of U.S. states, andthroughout Canada, the limit is 0.08 percent. In someother countries, it’s even lower. The BAC limit for allcommercial drivers in the United States is 0.04 percent.
The BAC will be over 0.10 percent after three to six drinks (in one hour). Of course, as we’ve seen, itdepends on how much alcohol is in the drinks, and howquickly the person drinks them.
But the ability to drive is affected well below a BAC of0.10 percent. Research shows that the driving skills ofmany people are impaired at a BAC approaching 0.05 percent, and that the effects are worse at night. Alldrivers are impaired at BAC levels above 0.05 percent.Statistics show that the chance of being in a collisionincreases sharply for drivers who have a BAC of 0.05 percent or above. A driver with a BAC level of0.06 percent has doubled his or her chance of having acollision. At a BAC level of 0.10 percent, the chance ofthis driver having a collision is 12 times greater; at alevel of 0.15 percent, the chance is 25 times greater!

yellowblue
4-5
The body takes about an hour to rid itself of the alcoholin one drink. No amount of coffee or number of coldshowers will speed that up. “I’ll be careful” isn’t theright answer. What if there’s an emergency, a need totake sudden action, as when a child darts into the street?A person with even a moderate BAC might not be ableto react quickly enough to avoid the collision.
There’s something else about drinking and driving thatmany people don’t know. Medical research shows thatalcohol in a person’s system can make crash injuriesworse, especially injuries to the brain, spinal cord orheart. This means that when anyone who has beendrinking -- driver or passenger -- is in a crash, thatperson’s chance of being killed or permanently disabledis higher than if the person had not been drinking.
CAUTION:
Drinking and then driving is very dangerous.Your reflexes, perceptions, attentiveness andjudgment can be affected by even a small amount of alcohol. You can have a serious -- oreven fatal -- collision if you drive after drinking.Please don’t drink and drive or ride with a driverwho has been drinking. Ride home in a cab; or ifyou’re with a group, designate a driver who willnot drink.

yellowblue
4-6
Control of a VehicleYou have three systems that make your vehicle go whereyou want it to go. They are the brakes, the steering andthe accelerator. All three systems have to do their workat the places where the tires meet the road.
Sometimes, as when you’re driving on snow or ice, it’seasy to ask more of those control systems than the tiresand road can provide. That means you can lose controlof your vehicle.
BrakingBraking action involves perception time and reaction time.
First, you have to decide to push on the brake pedal.That’s perception time. Then you have to bring up yourfoot and do it. That’s reaction time.
Average reaction time is about 3/4 of a second. Butthat’s only an average. It might be less with one driverand as long as two or three seconds or more withanother. Age, physical condition, alertness, coordinationand eyesight all play a part. So do alcohol, drugs andfrustration. But even in 3/4 of a second, a vehiclemoving at 60 mph (100 km/h) travels 66 feet (20 m).That could be a lot of distance in an emergency, sokeeping enough space between your vehicle and othersis important.
And, of course, actual stopping distances vary greatlywith the surface of the road (whether it’s pavement orgravel); the condition of the road (wet, dry, icy); tiretread; the condition of your brakes; the weight of thevehicle and the amount of brake force applied.

yellowblue
4-7
Avoid needless heavy braking. Some people drive inspurts -- heavy acceleration followed by heavy braking -- rather than keeping pace with traffic. This is a mistake. Your brakes may not have time to coolbetween hard stops. Your brakes will wear out muchfaster if you do a lot of heavy braking. If you keep pacewith the traffic and allow realistic following distances,you will eliminate a lot of unnecessary braking. Thatmeans better braking and longer brake life.
If your engine ever stops while you’re driving, brakenormally but don’t pump your brakes. If you do, thepedal may get harder to push down. If your enginestops, you will still have some power brake assist. Butyou will use it when you brake. Once the power assist isused up, it may take longer to stop and the brake pedalwill be harder to push.
Hydraulic Brake SystemsIf your engine stops running, or if your primary brakesystem stops working, your vehicle has a reserve powerassist system to help you slow down. Just slowly andsteadily apply the brake pedal until you can safely getoff the road. The pedal will seem harder to push down.Don’t pump the pedal; the system won’t work well or atall that way.
You may find that the steering wheel seems hard to turnwhen you’re turning and braking at the same time. Also,the PRIMARY BRAKE warning light may come on andthe warning tone may sound. This is normal because themain hydraulic brake system and power steering bothuse the power steering pump. If this ever happens, let upon the brake pedal a little. When you let up on the brakepedal in that situation, it lets the steering get a littlemore help from the pump.
Anti-Lock Brakes (Option)Your vehicle may have anti-lock brakes (ABS). ABS isan advanced electronic braking system that will helpprevent a braking skid.
If your vehicle has anti-lockbrakes, this warning light onthe instrument panel willcome on briefly when youstart your vehicle.
When you start your engine and begin to drive away,your anti-lock brake system will check itself. You mayhear a momentary motor or clicking noise while this testis going on. This is normal.

yellowblue
4-8
If there’s a problem with the anti-lock brake system, theanti-lock brake system warning light will stay on. See“Anti -Lock Brake System Warning Light” in the Index.
Here’s how anti-lock works. Let’s say the road is wet.You’re driving safely. Suddenly an animal jumps out infront of you.
You slam on the brakes. Here’s what happens with ABS.
A computer senses that wheels are slowing down. If oneof the wheels is about to stop rolling, the computer willseparately work the brakes at each wheel.
The anti-lock system can change the brake pressurefaster than any driver could. The computer isprogrammed to make the most of available tire and road conditions.
You can steer around the obstacle while braking hard.

yellowblue
4-9
As you brake, your computer keeps receiving updates onwheel speed and controls braking pressure accordingly.
Remember: Anti-lock doesn’t change the time you needto get your foot up to the brake pedal or always decreasestopping distance. If you get too close to the vehicle infront of you, you won’t have time to apply your brakesif that vehicle suddenly slows or stops. Always leaveenough room up ahead to stop, even though you haveanti-lock brakes.
Using Anti-Lock
Don’t pump the brakes. Just hold the brake pedal downfirmly and let anti-lock work for you. You may feel thebrakes pulsate, or you may hear air exhausting, but thisis normal.
Braking in EmergenciesAt some time, nearly every driver gets into a situationthat requires hard braking.
If you have anti-lock, you can steer and brake at thesame time. However, if you don’t have anti-lock, yourfirst reaction -- to hit the brake pedal hard and hold itdown -- may be the wrong thing to do. Your wheels canstop rolling. Once they do, the vehicle can’t respond toyour steering. Momentum will carry it in whateverdirection it was headed when the wheels stopped rolling.
That could be off the road, into the very thing you weretrying to avoid, or into traffic.
If you don’t have anti-lock, use a “squeeze” brakingtechnique. This will give you maximum braking whilemaintaining steering control. You do this by pushing onthe brake pedal with steadily increasing pressure.
In an emergency, you will probably want to squeeze thebrakes hard without locking the wheels. If you hear orfeel the wheels sliding, ease off the brake pedal. Thiswill help you retain steering control. (If you do haveanti-lock, it’s different: see “Anti-Lock Brakes” in the Index.)
In many emergencies, steering can help you more thaneven the very best braking.
SteeringPower SteeringIf you lose power steering assist because the enginestops or the system is not functioning, you can steer butit will take much more effort.
On vehicles with hydraulic brakes, the power steeringand main hydraulic brake system both use the powersteering pump. See “Hydraulic Brake Systems” in the Index.

yellowblue
4-10
Steering Tips
Driving on Curves
It’s important to take curves at a reasonable speed.
A lot of the “driver lost control” accidents mentioned onthe news happen on curves. Here’s why:
Experienced driver or beginner, each of us is subject tothe same laws of physics when driving on curves. Thetraction of the tires against the road surface makes itpossible for the vehicle to change its path when you turnthe front wheels. If there’s no traction, inertia will keepthe vehicle going in the same direction. If you’ve evertried to steer a vehicle on wet ice, you’ll understand this.
The traction you can get in a curve depends on thecondition of your tires and the road surface, the angle at which the curve is banked, and your speed. Whileyou’re in a curve, speed is the one factor you can control.
Suppose you’re steering through a sharp curve. Thenyou suddenly apply the brakes. Both control systems -- steering and braking -- have to do their work where the tires meet the road. Unless you havefour-wheel anti-lock brakes, adding the hard brakingcan demand too much of those places. You can lose control.
The same thing can happen if you’re steering through asharp curve and you suddenly accelerate. Those twocontrol systems -- steering and acceleration -- canoverwhelm those places where the tires meet the roadand make you lose control.
What should you do if this ever happens? Ease up on thebrake or accelerator pedal, steer the vehicle the way youwant it to go, and slow down.
Speed limit signs near curves warn that you shouldadjust your speed. Of course, the posted speeds arebased on good weather and road conditions. Under lessfavorable conditions you’ll want to go slower.
If you need to reduce your speed as you approach acurve, do it before you enter the curve, while your frontwheels are straight ahead.
This is especially important with a tractor-trailer. Try toadjust your speed so you can “drive” through the curve.Maintain a reasonable, steady speed. Wait to accelerateuntil you are out of the curve, and then accelerate gentlyinto the straightaway.

yellowblue
4-11
Steering in EmergenciesThere are times when steering can be more effectivethan braking. For example, you come over a hill andfind a truck stopped in your lane, or a car suddenly pullsout from nowhere, or a child darts out from betweenparked cars and stops right in front of you. You canavoid these problems by braking -- if you can stop intime. But sometimes you can’t; there isn’t room. That’sthe time for evasive action -- steering around the problem.
In emergencies like these, first apply your brakes -- butunless you have anti-lock, not enough to lock yourwheels. (See “Braking in Emergencies” earlier in thissection.) It is better to remove as much speed as you canfrom a possible collision. Then steer around theproblem, to the left or right depending on the spaceavailable. If your vehicle has anti-lock brakes, you don’tneed to release the brakes to maintain steering control.
An emergency like this requires close attention and aquick decision. If you are holding the steering wheel atthe recommended 9 and 3 o’clock positions, you may beable to turn it just enough to miss the object withoutremoving either hand. But you must act fast, steeringprecisely. The more sharply you turn, the greater thechance of a skid, a rollover or a “jackknife” with atractor-trailer. Just as quickly straighten the wheel onceyou have avoided the object.
The fact that such emergency situations are alwayspossible is a good reason to practice defensive driving atall times and wear safety belts properly.

yellowblue
4-12
Off -Road RecoveryYou may find that your right wheels have dropped off theedge of a road onto the shoulder while you’re driving.
If the level of the shoulder is only slightly below thepavement, recovery should be fairly easy. Ease off theaccelerator and then, if there is nothing in the way, steer sothat your vehicle straddles the edge of the pavement. Youcan turn the steering wheel up to one-quarter turn until theright front tire contacts the pavement edge. Then turn yoursteering wheel to go straight down the roadway.
PassingThe driver of a vehicle about to pass another on atwo-lane highway waits for just the right moment,accelerates, moves around the vehicle ahead, then goesback into the right lane again. A simple maneuver?
Not necessarily! Passing another vehicle on a two-lanehighway is a potentially dangerous move, since thepassing vehicle occupies the same lane as oncomingtraffic for several seconds. A miscalculation, an error injudgment, or a brief surrender to frustration or anger cansuddenly put the passing driver face to face with theworst of all traffic accidents -- the head-on collision.
So here are some tips for passing:
� A vehicle like yours takes a longer time to reachpassing speed, so you’ll need a longer stretch of clearroad ahead than you would with a passenger car.
� “Drive ahead.” Look down the road, to the sides and tocrossroads for situations that might affect your passingpatterns. If you have any doubt whatsoever aboutmaking a successful pass, wait for a better time.

yellowblue
4-13
� Watch for traffic signs, pavement markings and lines.If you can see a sign up ahead that might indicate aturn or an intersection, delay your pass. A brokencenter line usually indicates it’s all right to pass(providing the road ahead is clear). Never cross asolid line on your side of the lane or a double solidline, even if the road seems empty of approaching traffic.
� Do not get too close to the vehicle you want to passwhile you’re awaiting an opportunity. For one thing,following too closely reduces your area of vision,especially if you’re following a larger vehicle. Also,you won’t have adequate space if the vehicle aheadsuddenly slows or stops. Keep back a reasonable distance.
� When it looks like a chance to pass is coming up,start to accelerate but stay in the right lane and don’tget too close. Time your move so you will beincreasing speed as the time comes to move into theother lane. If the way is clear to pass, you will have a“running start” that more than makes up for thedistance you would lose by dropping back. And ifsomething happens to cause you to cancel your pass,you need only slow down and drop back again andwait for another opportunity.
� If other cars are lined up to pass a slow vehicle, waityour turn. But take care that someone isn’t trying topass you as you pull out to pass the slow vehicle.
� Check your mirrors and start your left lane changesignal before moving out of the right lane to pass.When you are far enough ahead of the passed vehicleto see its front in your right outside mirror, activateyour right lane change signal and move back into theright lane. (Remember that if your right outsidemirror is convex, the vehicle you just passed mayseem to be farther away from you than it really is.)
� Try not to pass more than one vehicle at a time ontwo-lane roads. Reconsider before passing the next vehicle.
� Don’t overtake a slowly moving vehicle too rapidly.Even though the brake lamps are not flashing, it maybe slowing down or starting to turn.
� If you’re being passed, make it easy for thefollowing driver to get ahead of you. Perhaps youcan ease a little to the right.
yellowblue
4-14
Loss of ControlLet’s review what driving experts say about whathappens when the three control systems (brakes, steeringand acceleration) don’t have enough friction where thetires meet the road to do what the driver has asked.
In any emergency, don’t give up. Keep trying to steer andconstantly seek an escape route or area of less danger.
SkiddingIn a skid, a driver can lose control of the vehicle.Defensive drivers avoid most skids by taking reasonablecare suited to existing conditions, and by not “overdriving”those conditions. But skids are always possible.
The three types of skids correspond to your vehicle’sthree control systems. In the braking skid, your wheelsaren’t rolling. In the steering or cornering skid, toomuch speed or steering in a curve causes tires to slip andlose cornering force. And in the acceleration skid, toomuch throttle causes the driving wheels to spin.
A cornering skid and an acceleration skid are usually best handled by easing your foot off theaccelerator pedal.
Of course, traction is reduced when water, snow, ice,gravel or other material is on the road. For safety, you’llwant to slow down and adjust your driving to theseconditions. It is important to slow down on slipperysurfaces because stopping distance will be longer andvehicle control more limited.
While driving on a surface with reduced traction, tryyour best to avoid sudden steering, acceleration orbraking (including engine braking by shifting to a lowergear). See “Diesel Engine Exhaust Brake” in the Indexfor information about using the exhaust brake onslippery surfaces. Any sudden changes could cause thetires to slide. You may not realize the surface is slipperyuntil your vehicle is skidding. Learn to recognizewarning clues -- such as enough water, ice or packedsnow on the road to make a “mirrored surface” -- andslow down when you have any doubt.
If you have the anti-lock braking system, remember: Ithelps avoid only the braking skid. If you do not haveanti-lock, then in a braking skid (where the wheels areno longer rolling), release enough pressure on the brakesto get the wheels rolling again. This restores steeringcontrol. Push the brake pedal down steadily when youhave to stop suddenly. As long as the wheels are rolling,you will have steering control.
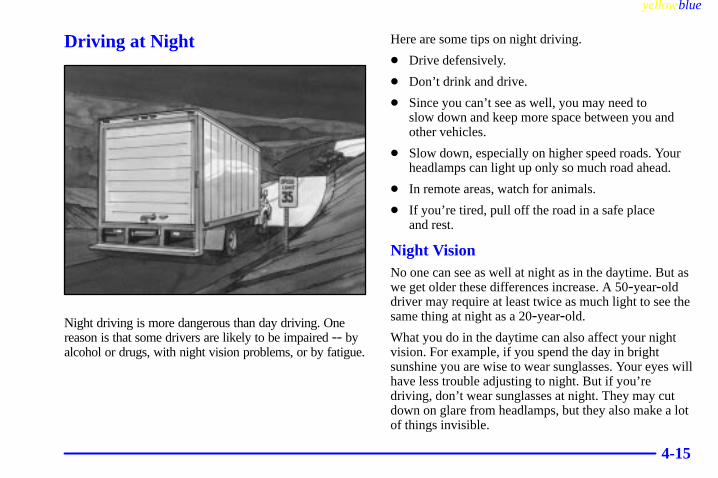
yellowblue
4-15
Driving at Night
Night driving is more dangerous than day driving. Onereason is that some drivers are likely to be impaired -- byalcohol or drugs, with night vision problems, or by fatigue.
Here are some tips on night driving.
� Drive defensively.
� Don’t drink and drive.
� Since you can’t see as well, you may need to slow down and keep more space between you andother vehicles.
� Slow down, especially on higher speed roads. Yourheadlamps can light up only so much road ahead.
� In remote areas, watch for animals.
� If you’re tired, pull off the road in a safe place and rest.
Night VisionNo one can see as well at night as in the daytime. But aswe get older these differences increase. A 50-year-olddriver may require at least twice as much light to see thesame thing at night as a 20-year-old.
What you do in the daytime can also affect your nightvision. For example, if you spend the day in brightsunshine you are wise to wear sunglasses. Your eyes willhave less trouble adjusting to night. But if you’redriving, don’t wear sunglasses at night. They may cutdown on glare from headlamps, but they also make a lotof things invisible.

yellowblue
4-16
You can be temporarily blinded by approachingheadlamps. It can take a second or two, or even severalseconds, for your eyes to readjust to the dark. When youare faced with severe glare (as from a driver whodoesn’t lower the high beams, or a vehicle withmisaimed headlamps), slow down a little. Avoid staringdirectly into the approaching headlamps.
Keep your windshield and all the glass on your vehicleclean -- inside and out. Glare at night is made muchworse by dirt on the glass. Even the inside of the glasscan build up a film caused by dust. Dirty glass makeslights dazzle and flash more than clean glass would,making the pupils of your eyes contract repeatedly.
Remember that your headlamps light up far less of aroadway when you are in a turn or curve. Keep youreyes moving; that way, it’s easier to pick out dimlylighted objects. Just as your headlamps should bechecked regularly for proper aim, so should your eyesbe examined regularly. Some drivers suffer from nightblindness -- the inability to see in dim light -- and aren’t even aware of it.
Driving in Rain and on Wet Roads
Rain and wet roads can mean driving trouble. On a wetroad, you can’t stop, accelerate or turn as well becauseyour tire-to-road traction isn’t as good as on dry roads.And, if your tires don’t have much tread left, you’ll geteven less traction. It’s always wise to go slower and becautious if rain starts to fall while you are driving. Thesurface may get wet suddenly when your reflexes aretuned for driving on dry pavement.

yellowblue
4-17
The heavier the rain, the harder it is to see. Even if yourwindshield wiper blades are in good shape, a heavy raincan make it harder to see road signs and traffic signals,pavement markings, the edge of the road and evenpeople walking.
It’s wise to keep your wiping equipment in good shapeand keep your windshield washer tank filled withwasher fluid. Replace your windshield wiper insertswhen they show signs of streaking or missing areas onthe windshield, or when strips of rubber start to separatefrom the inserts.
Driving too fast through large water puddles or evengoing through some vehicle washes can cause problems,too. The water may affect your brakes. Try to avoidpuddles. But if you can’t, try to slow down before youhit them.
CAUTION:
Wet brakes can cause accidents. They won’t workas well in a quick stop and may cause pulling toone side. You could lose control of the vehicle.
After driving through a large puddle of water ora vehicle wash, apply your brake pedal lightlyuntil your brakes work normally.

yellowblue
4-18
HydroplaningHydroplaning is dangerous. So much water can build upunder your tires that they can actually ride on the water.This can happen if the road is wet enough and you’regoing fast enough. When your vehicle is hydroplaning,it has little or no contact with the road.
Hydroplaning doesn’t happen often. But it can if yourtires do not have much tread or if the pressure in one ormore is low. It can happen if a lot of water is standing onthe road. If you can see reflections from trees, telephonepoles or other vehicles, and raindrops “dimple” thewater’s surface, there could be hydroplaning.
Hydroplaning usually happens at higher speeds. Therejust isn’t a hard and fast rule about hydroplaning. Thebest advice is to slow down when it is raining.
Driving Through Deep Standing Water
NOTICE:
If you drive too quickly through deep puddles orstanding water, water can come in through yourengine’s air intake and badly damage yourengine. Never drive through water that is slightlylower than the underbody of your vehicle. If youcan’t avoid deep puddles or standing water, drivethrough them very slowly.
Some Other Rainy Weather Tips� Turn on your low-beam headlamps and your marker
and clearance lamps, if your vehicle has them -- notjust your parking lamps -- to help make you morevisible to others.
� Besides slowing down, allow some extra followingdistance. And be especially careful when you passanother vehicle. Allow yourself more clear roomahead, and be prepared to have your view restrictedby road spray.
� Have good tires with proper tread depth. (See “Tires” in the Index.)

yellowblue
4-19
City Driving
One of the biggest problems with city streets is theamount of traffic on them. You’ll want to watch out forwhat the other drivers are doing and pay attention totraffic signals.
Here are ways to increase your safety in city driving:
� Know the best way to get to where you are going.Get a city map and plan your trip into an unknownpart of the city just as you would for a cross-country trip.
� Larger vehicles can’t be driven everywhere smallerones can. There are low underpasses, truck routesand other special situations. Usually these are wellmarked, so be sure to watch for the signs.
� Try to use the freeways that rim and crisscross most large cities. You’ll save time and energy. (See the next part, “Freeway Driving.”)
� Treat a green light as a warning signal. A traffic lightis there because the corner is busy enough to need it.When a light turns green, and just before you start tomove, check both ways for vehicles that have notcleared the intersection or may be running the red light.

yellowblue
4-20
Freeway Driving
Mile for mile, freeways (also called thruways, parkways,expressways, turnpikes or superhighways) are the safestof all roads. But they have their own special rules.
The most important advice on freeway driving is: Keepup with traffic and keep to the right. Drive at the samespeed most of the other drivers are driving. Too-fast ortoo-slow driving breaks a smooth traffic flow. Treat theleft lane on a freeway as a passing lane.
At the entrance, there is usually a ramp that leads to thefreeway. If you have a clear view of the freeway as youdrive along the entrance ramp, you should begin tocheck traffic. Try to determine where you expect toblend with the flow. Try to merge into the gap at close tothe prevailing speed. Switch on your turn signal, checkyour mirrors and try to blend smoothly with the traffic flow.
Once you are on the freeway, adjust your speed to theposted limit or to the prevailing rate if it’s slower. Stayin the right lane unless you want to pass. On somefreeways, larger vehicles aren’t allowed to use somelanes. These places usually are well-marked.
Before changing lanes, check your mirrors. Then useyour turn signal.

yellowblue
4-21
Once you are moving on the freeway, make certain youallow a reasonable following distance. Expect to moveslightly slower at night.
When you want to leave the freeway, move to the properlane well in advance. If you miss your exit, do not,under any circumstances, stop and back up. Drive on tothe next exit.
The exit ramp can be curved, sometimes quite sharply.
The exit speed for cars -- but not larger vehicles -- isusually posted. You should go more slowly.
Reduce your speed according to your speedometer, notto your sense of motion. After driving for any distanceat higher speeds, you may tend to think you are goingslower than you actually are.
Highway HypnosisIs there actually such a condition as “highway hypnosis”?Or is it just plain falling asleep at the wheel? Call ithighway hypnosis, lack of awareness, or whatever.
When you drive the vehicle for a long distance, there issomething about an easy stretch of road with the samescenery, along with the hum of the tires on the road, thedrone of the engine, and the rush of the wind against thevehicle that can make you sleepy. Don’t let it happen toyou! If it does, your vehicle can leave the road in lessthan a second, and you could crash and be injured.
What can you do about highway hypnosis? First, beaware that it can happen.
Then here are some tips:
� Make sure your vehicle is well ventilated, with acomfortably cool interior.
� Keep your eyes moving. Scan the road ahead and to the sides. Check your mirrors and yourinstruments frequently.
� If you get sleepy, pull off the road into a rest, serviceor parking area and take a nap, get some exercise, orboth. For safety, treat drowsiness on the highway asan emergency.

yellowblue
4-22
Hill and Mountain Roads
Driving on steep hills or mountains is different fromdriving in flat or rolling terrain.
Here are some tips that can make your drive throughsteep country safer:
� Keep the vehicle in good shape. Check all fluidlevels and also the brakes, tires, cooling system andtransmission. These parts can work hard onmountain roads.
� Know how to go down hills. The most importantthing to know is this: let your engine do some of theslowing down. Shift to a lower gear when you godown a steep or long hill.
CAUTION:
If you don’t shift down, your brakes could get sohot that they wouldn’t work well. You would thenhave poor braking or even none going down ahill. You could crash. Shift down to let yourengine assist your brakes on a steep downhill slope.

yellowblue
4-23
CAUTION:
Coasting downhill in NEUTRAL (N) or with theignition off is dangerous. Your brakes will have todo all the work of slowing down. They could getso hot that they wouldn’t work well. You wouldthen have poor braking or even none going downa hill. You could crash. Always have your enginerunning and your vehicle in gear when you go downhill.
� Know how to go uphill. Use lower gears. They helpcool your engine and transmission, and you canclimb the hill better.
� Stay in your own lane when driving on two-laneroads in hills or mountains. Don’t swing wide or cutacross the center of the road. Drive at speeds that letyou stay in your own lane.
� As you go over the top of a hill, be alert. There could be something in your lane, like a stalled car or an accident.
� You may see highway signs on mountains that warnof special problems. Examples are long grades,passing or no-passing zones, a falling rocks area,winding roads and special truck lanes. Be alert tothese and take appropriate action.

yellowblue
4-24
Winter Driving
Here are some tips for winter driving:
� Be sure the vehicle is in good shape for winter.
� You may want to put winter emergency supplies inyour vehicle.
Include an ice scraper, a small brush or broom, a supplyof windshield washer fluid, a rag, some winter outerclothing, a small shovel, a flashlight, a red cloth andreflective warning triangles. And, if you will be drivingunder severe conditions, include a small bag of sand, apiece of old carpet or a couple of burlap bags to helpprovide traction. Be sure you properly secure theseitems in your vehicle.
Driving on Snow or IceMost of the time, those places where your tires meet theroad probably have good traction.
However, if there is snow or ice between your tires andthe road, you can have a very slippery situation. You’llhave a lot less traction or “grip” and will need to be very careful.

yellowblue
4-25
What’s the worst time for this? “Wet ice.” Very coldsnow or ice can be slick and hard to drive on. But wetice can be even more trouble because it may offer theleast traction of all. You can get wet ice when it’s aboutfreezing (32�F; 0�C) and freezing rain begins to fall.Try to avoid driving on wet ice until salt and sand crewscan get there.
Whatever the condition -- smooth ice, packed, blowingor loose snow -- drive with caution.
Accelerate gently. Try not to break the fragile traction. If you accelerate too fast, the drive wheels will spin andpolish the surface under the tires even more.
Unless you have the anti-lock braking system, you’llwant to brake very gently, too. (If you do have anti-lock,see “Anti-Lock” in the Index. This system improvesyour vehicle’s stability when you make a hard stop on aslippery road.) Whether you have the anti-lock brakingsystem or not, you’ll want to begin stopping sooner thanyou would on dry pavement. Without anti-lock brakes,if you feel your vehicle begin to slide, let up on thebrakes a little. Push the brake pedal down steadily to getthe most traction you can.

yellowblue
4-26
Remember, unless you have anti-lock, if you brake sohard that your wheels stop rolling, you’ll just slide.Brake so your wheels always keep rolling and you canstill steer.
� Whatever your braking system, allow greaterfollowing distance on any slippery road.
� Watch for slippery spots. The road might be fineuntil you hit a spot that’s covered with ice. On anotherwise clear road, ice patches may appear inshaded areas where the sun can’t reach: aroundclumps of trees, behind buildings or under bridges.Sometimes the surface of a curve or an overpass mayremain icy when the surrounding roads are clear. Ifyou see a patch of ice ahead of you, brake before youare on it. Try not to brake while you’re actually onthe ice, and avoid sudden steering maneuvers.
If You’re Caught in a Blizzard
If you are stopped by heavy snow, you could be in aserious situation. You should probably stay with yourvehicle unless you know for sure that you are near helpand you can hike through the snow. Here are somethings to do to summon help and keep yourself and yourpassengers safe:
� Turn on your hazard flashers.

yellowblue
4-27
� Tie a red cloth to your mirror arm to alert police thatyou’ve been stopped by the snow.
� Put on extra clothing or wrap a blanket around you.If you have no blankets or extra clothing, make bodyinsulators from newspapers, burlap bags, rags, floormats -- anything you can wrap around yourself ortuck under your clothing to keep warm.
You can run the engine to keep warm, but be careful.
CAUTION:
Snow can trap exhaust gases under your vehicle.This can cause deadly CO (carbon monoxide) gasto get inside. CO could overcome you and killyou. You can’t see it or smell it, so you might notknow it is in your vehicle. Clear away snow fromaround the base of your vehicle if any is blockingyour exhaust pipe. And check around again fromtime to time to be sure snow doesn’t collect there.Open a window just a little on the side of thevehicle that’s away from the wind. This will helpkeep CO out.
Run your engine only as long as you must. This savesfuel. When you run the engine, make it go a little fasterthan just idle. That is, push the accelerator slightly. Thisuses less fuel for the heat that you get and it keeps thebattery (or batteries) charged. You will need awell-charged battery (or batteries) to restart the vehicle,and possibly for signaling later on with your headlamps.Let the heater run for a while.

yellowblue
4-28
If you have a diesel engine, you may have to run it at ahigher speed to get enough heat. Then, shut the engineoff and close the window almost all the way to preservethe heat. Start the engine again and repeat this onlywhen you feel really uncomfortable from the cold. Butdo it as little as possible. Preserve the fuel as long as youcan. To help keep warm, you can get out of the vehicleand do some fairly vigorous exercises every half hour orso until help comes.
Loading Your VehicleThe GVW/Tire Information label is found on the rearedge of the driver’s door. The label shows the size ofyour original tires and the inflation pressures needed toobtain the gross weight capacity of your vehicle.
This is called the Gross Vehicle Weight Rating(GVWR). The GVWR includes the weight of thevehicle, all occupants, fuel and cargo.

yellowblue
4-29
The Certification/Tire label is provided by the finalmanufacturer and should be on the door or door jamb. Italso tells you the maximum weights for the front and rearaxles, called Gross Axle Weight Rating (GAWR). To findout the actual loads on your front and rear axles, youneed to go to a weigh station and weigh your vehicle.Your dealer can help you with this. Be sure to spread outyour load equally on both sides of the centerline.
Never exceed the GVWR for your vehicle, or theGAWR for either the front or rear axle.
And, if you do have a heavy load, you should spread it out.
CAUTION:
Do not load your vehicle any heavier than theGVWR, or either the maximum front or rearGAWR. If you do, parts on your vehicle canbreak, and it can change the way your vehiclehandles. These could cause you to lose controland crash. Also, overloading can shorten the lifeof your vehicle.
yellowblue
4-30
Using heavier suspension components to get addeddurability might not change your weight ratings. Askyour dealer to help you load your vehicle the right way.
NOTICE:
Your warranty does not cover parts orcomponents that fail because of overloading.
If you put things inside your vehicle -- like suitcases,tools, packages or anything else -- they will go as fast asthe vehicle goes. If you have to stop or turn quickly, orif there is a crash, they’ll keep going.
CAUTION:
Things you put inside your vehicle can strike andinjure people in a sudden stop or turn, or in a crash.
� Put things in the cargo area of your vehicle.Try to spread the weight evenly.
� Never stack heavier things, like suitcases,inside the vehicle so that some of them areabove the tops of the seats.
� Don’t leave an unsecured child restraint inyour vehicle.
� When you carry something inside thevehicle, secure it whenever you can.

yellowblue
4-31
Power Take-Off (PTO) (If Equipped)Before using a PTO, refer to the body builder’s oroperator’s instructions.
To engage a PTO:
1. Make sure the vehicle is stopped.
2. Shift the transmission into NEUTRAL (N) or PARK (P), if equipped.
3. The brake or clutch pedal must be pressed andreleased once before PTO can be enabled. Do nothold the brake or clutch pedal down.
4. The cruise control switch must be in ON prior toengaging the PTO switch to enable PTO operation.This sets the PTO base engine idle at 1200 rpm.
5. Use SET/COAST to change the engine speed to thelower preset value of 1400 rpm. UseRESUME/ACCEL to change the engine speed to theupper preset value of 1800 rpm. You may togglebetween upper and lower by moving the switchbetween SET/COAST and RESUME/ACCEL.
The PTO will become inoperative when any of theconditions are changed or the CHECK GAGES lightcomes on.

yellowblue
4-32
✍ NOTES

5-
yellowblue
5-1
Section 5 Problems on the Road
Here you’ll find what to do about some problems that can occur on the road.
5-2 Hazard Warning Flashers5-3 Other Warning Devices5-5 Jump Starting5-9 Towing Your Vehicle5-18 Engine Overheating5-20 Cooling System (Gasoline Engine)
5-27 Cooling System (Diesel Engine)5-33 Engine Fan Noise5-34 If a Tire Goes Flat5-34 Changing a Flat Tire5-37 If You’re Stuck: In Sand, Mud, Ice or Snow

yellowblue
5-2
Hazard Warning Flashers
Your hazard warning flashers let you warn others. Theyalso let police know you have a problem. Your front andrear turn signal lamps will flash on and off.
The hazard flasher switch is located on the steering column.
Press the button in to make your front and rear turnsignal lamps flash on and off.
Your hazard warning flashers work no matter whatposition your key is in, and even if the key isn’t in.
To turn off the flashers, pull out on the collar. When the hazard warning flashers are on, your turn signalswon’t work.

yellowblue
5-3
Hazard Warning Flasher Switch (If Equipped)
With some options, such as U86-trailer wiring orRQ3-tractor application, you will have this switch. This switch replaces the hazard switch mounted on thesteering column. It is mounted in the instrument panel,usually to the left of and below the steering column.
Pull the switch out to make your front and rear turnsignal lamps flash on and off. A light next to the switchwill also flash. Push it back in to turn off the flashers.The turn signal lamps won’t flash if you’re braking.
This switch works no matter what position the key is in,and even if the key isn’t in the ignition.
When the hazard warning flashers are on, your turnsignals won’t work.

yellowblue
5-4
Signal-Stat Turn Signal and HazardWarning Flasher (If Equipped)If you have this system, it lets you warn others. It alsolets police know you have a problem. It makes yourfront and rear turn signal lamps flash on and off, butthey won’t flash if you’re braking.
The switch is on the end of the signal-stat housing.
To make it work, pull out on the hazard lever until itlocks into place. It works no matter what position yourkey is in, and even if the key isn’t in.
To turn off the flasher, movethe turn signal lever eitherup or down. Then move thesignal lever back to thecenter position.
When the hazard warning flashers are on, your turnsignals won’t work.
Other Warning DevicesIf you carry reflective triangles, you can set one up atthe side of the road behind your vehicle in therecommended manner per FMCSR (Federal MotorCarrier Safety Regulation) Section 392.22, to warn others.

yellowblue
5-5
Jump StartingIf your battery (or batteries) has run down, you maywant to use another vehicle and some jumper cables tostart your vehicle. But please follow the steps below todo it safely.
CAUTION:
Batteries can hurt you. They can be dangerous because:� They contain acid that can burn you.� They contain gas that can explode or ignite.� They contain enough electricity to
burn you.If you don’t follow these steps exactly, some or allof these things can hurt you.
NOTICE:
Ignoring these steps could result in costly damageto your vehicle that wouldn’t be covered by your warranty.
The ACDelco Freedom� battery in your vehiclehas a built-in hydrometer. Do not charge, test orjump start the battery if the hydrometer looksclear or light yellow. Replace the battery whenthere is a clear or light yellow hydrometer and acranking complaint.Trying to start your vehicle by pushing or pullingit won’t work, and it could damage your vehicle.
1. Check the other vehicle. It must have a 12-voltbattery with a negative ground system.
NOTICE:
If the other system isn’t a 12-volt system with anegative ground, both vehicles can be damaged.

yellowblue
5-6
If you have a diesel engine vehicle with two batteries(or more), you should know before you begin that,especially in cold weather, you may not be able toget enough power from a single battery in anothervehicle to start your diesel engine.
If your vehicle has more than one battery, use thebattery that’s closest to the starter -- this will reduceelectrical resistance.
CAUTION:
If your vehicle has air conditioning, the auxiliaryelectric fan under the hood can start up evenwhen the engine is not running and can injureyou. Keep hands, clothing and tools away fromany underhood electric fan.
2. Get the vehicles close enough so the jumper cablescan reach, but be sure the vehicles aren’t touchingeach other. You wouldn’t be able to start yourvehicle, and the bad grounding could damage theelectrical systems.
3. Turn off the ignition on both vehicles. Turn off alllamps that aren’t needed, as well as radios. This will
avoid sparks and help save both batteries, and itcould save your radio.
4. Locate the batteries on each vehicle. Find thepositive (+) and negative (-) terminals on each battery.
CAUTION:
Using a match near a battery can cause batterygas to explode. People have been hurt doing this,and some have been blinded. Use a flashlight ifyou need more light.Be sure the batteries have enough water. Youdon’t need to add water to the ACDelcoFreedom� battery (or batteries) installed inevery new GM vehicle. But if a battery has fillercaps, be sure the right amount of fluid is there. If it is low, add water to take care of that first. If you don’t, explosive gas could be present.
Battery fluid contains acid that can burn you.Don’t get it on you. If you accidentally get it inyour eyes or on your skin, flush the place withwater and get medical help immediately.

yellowblue
5-7
5. Check that the jumper cables don’t have loose ormissing insulation. If they do, you could get a shock.The vehicles could be damaged, too.
Before you connect the cables, here are some basicthings you should know. Positive (+) will go topositive (+) and negative (-) will go to a metalengine part or some other well-grounded part. Don’tconnect positive (+) to negative (-) or you’ll get ashort that would damage the battery and maybe other parts, too.
CAUTION:
Fans or other moving engine parts can injure youbadly. Keep your hands away from moving partsonce the engine is running.
6. Connect the red positive (+) cable to thepositive (+) terminal ofthe vehicle with the dead battery.
7. Don’t let the other endtouch metal. Connect it tothe positive (+) terminalof the good battery.

yellowblue
5-8
8. Now connect the blacknegative (-) cable to the good battery’snegative (-) terminal.
Don’t let the other end touch anything until the nextstep. The other end of the negative (-) cable doesn’t goto the dead battery. It goes to a heavy, unpainted, metalpart on the engine, or some other well-grounded part ofthe vehicle with the dead battery.
9. Attach the cable at least18 inches (45 cm) awayfrom the dead battery,but not near engine partsthat move. The electricalconnection is just asgood there, but thechance of sparks gettingback to the battery ismuch less.
10. Now start the vehicle with the good battery and runthe engine for one to two minutes. If your vehiclehas the high idle option, use it.
11. Try to start the vehicle with the dead battery. If it won’t start after a few tries, it probably needs service.
12. Remove the cables in reverse order to preventelectrical shorting. Take care that they don’t toucheach other or any other metal.

yellowblue
5-9
A. Heavy Metal Engine Part
B. Good Battery
C. Dead Battery
Towing Your VehicleTry to have a GM dealer or a professional towingservice tow your vehicle. They can provide the rightequipment and know-how to tow it without damage.
Before you do anything, turn on the hazard warningflashers (if they have not been damaged).
When you call, tell the towing service:
� The make, model and year of your vehicle.
� Whether you can still move the shift lever.
� If there was an accident, what was damaged.
When the towing service arrives, let the tow operatorknow that this manual contains detailed towinginstructions. The operator may want to see them.

yellowblue
5-10
CAUTION:
To help avoid injury to you or others:� Never let passengers ride in a vehicle that is
being towed.� Never tow faster than safe or posted speeds.� Never tow with damaged parts not
fully secured.� Never get under your vehicle after it has
been lifted.� Always use separate safety chains on each
side when towing a vehicle.
If your vehicle uses dragfoilers, be sure to have thedragfoiler-to-cab mounting bracket bolts tightened afteryour vehicle has been towed.
Here are specific towing instructions:
Towing Your Vehicle From the Front (Front Wheels Off the Ground)
Before Towing
Block the rear wheels of the disabled vehicle. Onvehicles with air brakes, release the emergency brakesystem by compressing the brake chamber springs asoutlined in this section. (Note: This is to prevent thepossibility of the emergency brake being applied during towing.)
On vehicles with hydraulic brakes without anelectric/hydraulic parking brake, release the parking brake fully by moving the lever to thefully-released position.
On vehicles equipped with an electric/hydraulic parkingbrake option, remove the propshaft.

yellowblue
5-11
Towing the Vehicle with the Front Bumper Removed
1. Remove the front bumper.
2. Connect and lock the lift chains to the front axle,outside of the spring anchor plates as shown.
A. Spring Anchor Plate
B. Lift Chain
C. Front Axle
3. Place a 6″ x 6″ x 5� hardwood beam underneath andslightly behind the front spring shackle brackets.
4. Connect lift chains to the tow bar and raise the towbar until lift chain slack has been taken up and thehardwood beam is fully seated against the springshackle brackets as shown.
A. Shackle Bracket
B. Tow Bar
C. Lift Chain
D. Hardwood Beam
5. Raise the vehicle to the required height.

yellowblue
5-12
Towing the Vehicle with the Front Bumper Installed
1. Connect and lock the lift chains to the front axle,outside of the spring anchor plates as previously shown.
2. Place a 6″ x 6″ x 5� hardwood beam underneath andslightly behind the front spring shackle brackets aspreviously shown.
3. Connect the lift chains to the tow bar and take up theslack in the chains until the tow bar is within 4″ ofthe front bumper facing. Place a 2″ x 12″ x 40″hardwood board with rubber pads against the frontbumper and secure as shown.
A. Rubber Pad
B. Hardwood Board
C. Shackle Bracket
D. Lift Chain
E. Hardwood Beam
F. Bumper
G. Tow Bar
4. Remove the remaining slack in the lift chains. The tow bar swing arm should rest against the 2″ x 12″ x 40″ hardwood board as shown.

yellowblue
5-13
A. Hardwood Board
B. Swing Arm
5. Raise the vehicle to the required height.
Single Drive Rear Axle
Disconnect the propshaft at the rear axle. Secure thepropshaft to the frame or crossmember.
Tandem Drive Rear Axles -- Forward Axle Off the Ground
Raise the front of the vehicle until the forward tandem axle wheels are off the ground. Remove therearward propshaft.
Tandem Drive Rear Axle -- Both Axles on theGround Due to Type of Suspension or Attached Load
Disconnect the propshaft at the forward tandem axle.Secure the propshaft to the frame or crossmember.
If there is damage or suspected damage to the axle(s),remove all axle shafts. Cover the hub openings toprevent the loss of lubricant or entry of dirt or foreign objects.

yellowblue
5-14
After Towing
Block the rear wheels and install axle and propellershafts. Check for proper phasing of universal joints.Apply the emergency brake system before disconnectingfrom the towing vehicle. Check and fill the rear axlewith oil as required.
Towing Your Vehicle From the Front (All Wheels On the Ground)Your vehicle may be towed on all wheels provided thesteering is working. Remember that the power brakesand power steering will not have power assist. Vehicleswith air brakes will not have brakes. There must be atow bar installed between the towing vehicle and thedisabled vehicle.
Before Towing
Block the wheels of the disabled vehicle. On vehicleswith air brakes, release the emergency brake system bycompressing the brake chamber springs as outlined inthis section. (Note: This is to prevent the possibility ofthe emergency brake being applied during towing.)
On vehicles with hydraulic brakes, release the parking brake fully by moving the lever to thefully-released position.
On vehicles equipped with an electric/hydraulic parkingbrake, remove the propshaft.
Disconnect the propshaft at the rear axle (forward axleon tandem axle models). Secure the propshaft to theframe or crossmember.
If there is damage or suspected damage to the axle(s),remove the axle shafts. Cover the hub openings toprevent the loss of lubricant or entry of dirt or foreign objects.
After Towing
Block the rear wheels and install axle and propshafts.Check for proper phasing of universal joints. Apply the parking brake system before disconnecting from the towing vehicle. Check and fill rear axle with oil as required.

yellowblue
5-15
Towing Your Vehicle From the Rear (Rear Wheels Off the Ground)
Before Towing
Secure the steering wheel to maintain a straight-aheadposition. Make certain that the front axle is not loadedabove the front axle Gross Axle Weight Rating (GAWR)as indicated on the vehicle’s Certification/Tire label.
After Towing
Block the rear wheels and release the steering. Apply theparking brake system before disconnecting from thetowing vehicle.
Refer to the transmission shift label for additional information.
Releasing Air-Operated Parking BrakesIf your vehicle has air brakes, you could have a specialtowing problem. If your vehicle has to be towed becauseyou had a complete loss of air pressure from bothsystems, the parking brakes may have applied. The towoperator can release the brakes manually by using thefollowing steps. Then your vehicle can be towed with allwheels or just the rear wheels on the ground.

yellowblue
5-16
CAUTION:
� Working on air brakes without first usingthe release studs to compress the springscan lead to injury. Never work on the airbrake chambers without first using therelease studs to compress the brake springs.
� When the brake springs are manuallycompressed, you will have no brakes.Release your air-operated parking brakesmanually only to tow the vehicle. Neverdrive the vehicle with the brakes released.
1. Block the wheels of the vehicle.
2. Remove the release stud and nut from the side of thebrake chamber. Some chambers have studs which arevisible at all times.

yellowblue
5-17
3. Remove the rubber cap from the rear of the chamber.
4. Put the release stud, nut and flat washer into the chamber.
5. Turn the stud clockwise a quarter of a turn.
6. Using a wrench, turn thestud nut clockwiseseveral turns to releasethe brakes. Follow thesame procedure torelease the other brake.
7. At the repair facility, apply air pressure of at least 70 psi (480 kPa) to the brake chambers, either froman external air supply or the vehicle’s air system.
8. Turn the stud nut counterclockwise several turns.Remove the stud from the chamber.
9. Put the stud into the side of the chamber, and replacethe rubber cap.

yellowblue
5-18
Engine OverheatingYou will find a coolant temperature warning gage onyour vehicle’s instrument panel, as well as a LOWCOOLANT warning light. Your vehicle also has aCHECK GAGES warning light on the instrument panel.
If Steam Is Coming From Your Engine
CAUTION:
Steam from an overheated engine can burn youbadly, even if you just open the hood. Stay awayfrom the engine if you see or hear steam comingfrom it. Just turn it off and get everyone awayfrom the vehicle until it cools down. Wait untilthere is no sign of steam or coolant before youopen the hood.
If you keep driving when your engine isoverheated, the liquids in it can catch fire. You orothers could be badly burned. Stop your engine ifit overheats, and get out of the vehicle until theengine is cool.
NOTICE:
If your engine catches fire because you keepdriving with no coolant, your vehicle can bebadly damaged. The costly repairs would not becovered by your warranty.

yellowblue
5-19
If No Steam Is Coming From Your EngineIf you get an engine overheat warning but see or hear nosteam, the problem may not be too serious. Sometimesthe engine can get a little too hot when you:
� Climb a long hill on a hot day.
� Stop after high-speed driving.
� Idle for long periods in traffic.
If you get the overheat warning with no sign of steam,try this for a minute or so:
1. If you have an air conditioner and it’s on, turn it off.
2. Turn on your heater to full hot at the highest fanspeed and open the window as necessary.
3. If you’re in a traffic jam, shift to NEUTRAL (N);otherwise, shift to the highest gear while driving -- DRIVE (D) for automatic transmissions.
4. If climbing a hill, downshift to raise engine and fan speeds.
If you no longer have the overheat warning, you candrive. Just to be safe, drive slower for about 10 minutes.If the warning doesn’t come back on, you can drive normally.
If the warning continues, pull over, stop, and park yourvehicle right away.
If there’s still no sign of steam, push down theaccelerator until the engine speed is about twice as fastas normal idle speed for at least three minutes whileyou’re parked. If you still have the warning, turn off theengine and get everyone out of the vehicle until it cools down.
You may decide not to lift the hood but to get servicehelp right away.

yellowblue
5-20
Cooling System (Gasoline Engine)When you decide it’s safe to lift the hood, here’s whatyou’ll see:
Specialty Hood
A. Coolant Recovery Tank
B. Radiator Pressure Cap
C. Engine Fan
Sloped Hood
A. Engine Fan
B. Coolant Recovery Tank
C. Radiator Pressure Cap

yellowblue
5-21
CAUTION:
If your vehicle has air conditioning, the auxiliaryelectric engine cooling fan under the hood canstart up even when the engine is not running andcan injure you. Keep hands, clothing and toolsaway from any underhood electric fan.
If the coolant inside the coolant recovery tank is boiling,don’t do anything else until it cools down.
Specialty Hood
The coolant level should be above the HOT LEVEL mark on thevehicle with the specialtyhood, or at or above the COLD LEVEL mark on the vehicle with thesloped hood.
Sloped Hood
If it isn’t, you may have a leak in the radiator hoses,heater hoses, radiator, water pump or somewhere else inthe cooling system.
CAUTION:
Heater and radiator hoses, and other engineparts, can be very hot. Don’t touch them. If youdo, you can be burned.
CAUTION: (Continued)

yellowblue
5-22
CAUTION: (Continued)
Don’t run the engine if there is a leak. If you runthe engine, it could lose all coolant. That couldcause an engine fire, and you could be burned.Get any leak fixed before you drive the vehicle.
NOTICE:
Engine damage from running your enginewithout coolant isn’t covered by your warranty.
NOTICE:
When adding coolant, it is important that you useonly DEX-COOL� (silicate-free) coolant.
NOTICE: (Continued)
NOTICE: (Continued)
If coolant other than DEX-COOL is added to thesystem, premature engine, heater core orradiator corrosion may result. In addition, theengine coolant will require change sooner -- at30,000 miles (50 000 km) or 24 months,whichever occurs first. Damage caused by the useof coolant other than DEX-COOL� is notcovered by your new vehicle warranty.
If there seems to be no leak, start the engine again. See ifthe engine cooling fan speed increases when idle speed isdoubled by pushing the accelerator pedal down. If itdoesn’t, your vehicle needs service. Turn off the engine.
How to Add Coolant to the CoolantRecovery TankIf you haven’t found a problem yet, but the coolant levelisn’t at or above the HOT LEVEL mark on the vehiclewith the specialty hood, or at or above the COLD LEVELmark on the vehicle with the sloped hood, add a 50/50mixture of clean, drinkable water and DEX-COOL�
engine coolant at the coolant recovery tank. (See “EngineCoolant” in the Index for more information.)

yellowblue
5-23
CAUTION:
Adding only plain water to your cooling systemcan be dangerous. Plain water, or some otherliquid like alcohol, can boil before the propercoolant mixture will. Your vehicle’s coolantwarning system is set for the proper coolantmixture. With plain water or the wrong mixture,your engine could get too hot but you wouldn’tget the overheat warning. Your engine couldcatch fire and you or others could be burned. Use a 50/50 mixture of clean, drinkable waterand DEX-COOL� coolant.
NOTICE:
In cold weather, water can freeze and crack theengine, radiator, heater core and other parts. Use the recommended coolant and the propercoolant mixture.
Specialty Hood Sloped Hood
CAUTION:
You can be burned if you spill coolant on hotengine parts. Coolant contains ethylene glycoland it will burn if the engine parts are hotenough. Don’t spill coolant on a hot engine.

yellowblue
5-24
When the coolant in the coolant recovery tank is at theHOT LEVEL mark on the vehicle with the specialtyhood, or approximately half full on the vehicle with thesloped hood, start your vehicle.
If the overheat warning continues, there’s one morething you can try. You can add the proper coolantmixture directly to the radiator, but be sure the coolingsystem is cool before you do it.
CAUTION:
Steam and scalding liquids from a hot coolingsystem can blow out and burn you badly. Theyare under pressure, and if you turn the radiatorpressure cap -- even a little -- they can come outat high speed. Never turn the cap when thecooling system, including the radiator pressurecap, is hot. Wait for the cooling system andradiator pressure cap to cool if you ever have toturn the pressure cap.

yellowblue
5-25
How to Add Coolant to the Radiator
1. You can remove theradiator pressure capwhen the coolingsystem, including theradiator pressure cap andupper radiator hose, isno longer hot.
Turn the pressure cap slowly counterclockwise until it first stops. (Don’t press down while turning thepressure cap.)
If you hear a hiss, wait for that to stop. A hiss meansthere is still some pressure left.
2. Then keep turning the pressure cap, butnow push down as youturn it. Remove thepressure cap.
3. Fill the radiator with theproper DEX-COOL�
coolant mixture, up tothe base of the fillerneck. (See “EngineCoolant” in the Indexfor more informationabout the proper coolant mixture.)

yellowblue
5-26
4. Then fill the coolant recovery tank to the HOTLEVEL mark on the vehicle with the specialty hood,or approximately one-half full on the vehicle withthe sloped hood.
5. Put the cap back on the coolant recovery tank, butleave the radiator pressure cap off.
6. Start the engine and let it run until you canfeel the upper radiatorhose getting hot. Watchout for the enginecooling fan(s).
7. By this time, the coolant level inside the radiatorfiller neck may be lower. If the level is lower, addmore of the proper DEX-COOL� coolant mixturethrough the filler neck until the level reaches thebase of the filler neck.
8. Then replace thepressure cap. Atany time duringthis procedure ifcoolant begins toflow out of thefiller neck, reinstallthe pressure cap.Be sure the arrowson the pressure capline up like this.

yellowblue
5-27
Cooling System (Diesel Engine)When you decide it’s safe to lift the hood, here’s whatyou’ll see:
Caterpillar � Diesel Engine
A. Engine Fan
B. Coolant Surge Tank
CAUTION:
If your vehicle has air conditioning, the auxiliaryelectric engine cooling fan under the hood canstart up even when the engine is not running andcan injure you. Keep hands, clothing and toolsaway from any underhood electric fan.
If the coolant inside the coolant surge tank is boiling,don’t do anything else until it cools down.

yellowblue
5-28
The coolant levelshould be at COLDADD or higher. If itisn’t, you may have aleak in the radiatorhoses, heater hoses,radiator, water pumpor somewhere else inthe cooling system.
Caterpillar � DieselEngine
CAUTION:
Heater and radiator hoses, and other engineparts, can be very hot. Don’t touch them. If youdo, you can be burned.
Don’t run the engine if there is a leak. If you runthe engine, it could lose all coolant. That couldcause an engine fire, and you could be burned.Get any leak fixed before you drive the vehicle.
NOTICE:
Engine damage from running your enginewithout coolant isn’t covered by your warranty.
If there seems to be no leak, start the engine again. Seeif the fan speed increases when idle speed is doubled bypushing the accelerator pedal down. If it doesn’t, yourvehicle needs service. Turn off the engine.

yellowblue
5-29
How to Add Coolant to the Coolant Surge TankIf you haven’t found a problem yet, but the coolant levelisn’t at the COLD ADD mark or higher, add a 50/50mixture of clean, drinkable water and coolant at thecoolant surge tank, but be sure the cooling system,including the coolant surge tank pressure cap, is coolbefore you do it. (See the Caterpillar� Operation &Maintenance Manual for the proper engine coolant to use.)
CAUTION:
Steam and scalding liquids from a hot coolingsystem can blow out and burn you badly. They areunder pressure, and if you turn the coolant surgetank pressure cap -- even a little -- they can comeout at high speed. Never turn the cap when thecooling system, including the coolant surge tankpressure cap, is hot. Wait for the cooling systemand coolant surge tank pressure cap to cool if youever have to turn the pressure cap.

yellowblue
5-30
CAUTION:
Adding only plain water to your cooling systemcan be dangerous. Plain water, or some otherliquid like alcohol, can boil before the propercoolant mixture will. Your vehicle’s coolantwarning system is set for the proper coolantmixture. With plain water or the wrong mixture,your engine could get too hot but you wouldn’tget the overheat warning. Your engine couldcatch fire and you or others could be burned. Use a 50/50 mixture of clean, drinkable waterand coolant.
NOTICE:
In cold weather, water can freeze and crack theengine, radiator, heater core and other parts. Souse the recommended coolant.
CAUTION:
You can be burned if you spill coolant on hotengine parts. Coolant contains ethylene glycoland it will burn if the engine parts are hotenough. Don’t spill coolant on a hot engine.

yellowblue
5-31
1. You can remove the coolant surge tank pressure capwhen the cooling system, including the coolant surgetank pressure cap and upper radiator hose, is nolonger hot. Turn the pressure cap slowlycounterclockwise until it first stops. (Don’t pressdown while turning the pressure cap.)
If you hear a hiss, wait for that to stop. A hiss meansthere is still some pressure left.
2. Then keep turning the cap, but now push down asyou turn it. Remove the pressure cap.

yellowblue
5-32
3. Then fill the coolant surge tank with the propercoolant mixture, up to the COLD FULL mark.
4. With the coolant surgetank pressure cap off,start the engine and let itrun until you can feel theupper radiator hosegetting hot. Watch outfor the engine fan.
By this time, the coolant level inside the coolant surgetank may be lower. If the level is lower, add more of theproper mixture to the coolant surge tank until the levelreaches the COLD FULL mark.

yellowblue
5-33
5. Then replace the pressure cap. Be sure the arrows onthe pressure cap line up like this.
Engine Fan NoiseYour vehicle has a clutched engine cooling fan. Whenthe clutch is engaged, the fan spins faster to providemore air to cool the engine. In most everyday drivingconditions, the clutch is not fully engaged. Thisimproves fuel economy and reduces fan noise. Underheavy vehicle loading, trailer towing and/or high outsidetemperatures, the fan speed increases when the clutchengages. So you may hear an increase in fan noise. This is normal and should not be mistaken as thetransmission slipping or making extra shifts. It is merelythe cooling system functioning properly. The fan willslow down when additional cooling is not required andthe clutch disengages.
You may also hear this fan noise when you start theengine. It will go away as the fan clutch disengages.

yellowblue
5-34
If a Tire Goes FlatIt’s unusual for a tire to “blow out” while you’re driving,especially if you maintain your tires properly. If air goesout of a tire, it’s much more likely to leak out slowly.But if you should ever have a “blowout,” here are a fewtips about what to expect and what to do:
If a front tire fails, the flat tire will create a drag thatpulls the vehicle toward that side. Take your foot off theaccelerator pedal and grip the steering wheel firmly.Steer to maintain lane position, and then gently brake toa stop well out of the traffic lane.
A rear blowout, particularly on a curve, acts much like askid and may require the same correction you’d use in askid. In any rear blowout, remove your foot from theaccelerator pedal. Get the vehicle under control bysteering the way you want the vehicle to go. It may bevery bumpy and noisy, but you can still steer. Gentlybrake to a stop -- well off the road if possible.
If a tire goes flat, the next part tells you what to do.
Changing a Flat TireA flat or damaged tire can be a major roadside problem.You’re very likely to have to go for help. Few drivers ofthese vehicles have the necessary equipment aboard tobe able to change a flat tire safely. For example, you
have to have a truck jack that can lift several thousandpounds and a torque wrench that can generate severalhundred foot-pounds (newton-meters) of twisting force.
So if you’re stopped somewhere by a flat or damagedtire or wheel, you should get expert help right then.
If the correct equipment is available, though, here is theprocedure to follow.
� Does the tire still seem to have air under pressure init? If so, stand to the side and look at the wheel. Seeif it looks like another wheel on the vehicle. If so, goon to the next step. If it doesn’t, or even if you can’tbe sure, stop and get expert help.
CAUTION:
Tire-rim assemblies can explode. If you work ona pressurized tire mounted on a damaged wheel,the assembly can expand with explosive forcewithout warning. You and others nearby can bebadly injured. Don’t work around a tire that hasair under pressure in it when its wheel is or mightbe damaged.

yellowblue
5-35
� If the wheel looks normal, see if the wheel has siderings and a lock ring around the wheel rim. If so,they must be seated properly. You can compare withanother wheel on the vehicle as you check for this.For dual wheels, you have to look between the tiresto make this check. You may not be able to tell if the side rings or lock rings are seated properly by looking. If you can’t be sure, stop and get expert help.
CAUTION:
If you work on a pressurized tire mounted on adamaged wheel, the assembly can expand withexplosive force without warning. You and othersnearby can be badly injured. Don’t work arounda tire that has air under pressure in it when itslock ring or side ring might not be properly seated.
CAUTION:
Rust or dirt on the wheel, or on the parts towhich it is fastened, can make the wheel nutsbecome loose after a time. The wheel could comeoff and cause an accident. When you change awheel, remove any rust or dirt from the placeswhere the wheel attaches to the vehicle. In anemergency, you can use a cloth or a paper towelto do this; but be sure to use a scraper or wirebrush later, if you need to, to get all the rust ordirt off.
� If the lock ring and side rings seem to be seatedproperly (or if the wheel doesn’t have these), let theair out of the tire. You can do this by taking out thevalve core.
� If the flat or damaged tire is one of a dual set, let theair out of both tires of the dual before you take offthe damaged tire and rim assembly.
� If you have the correct equipment, put on the sparewheel and tire assembly.

yellowblue
5-36
CAUTION:
Never use oil or grease on studs or nuts. If youdo, the nuts might come loose. Your wheel couldfall off, causing a serious accident.
CAUTION:
� There are many ways to be hurt badly, orbe killed, while you are trying to change atruck tire and rim. Follow all of the safetyprecautions on the truck jack and other equipment.
CAUTION: (Continued)
CAUTION: (Continued)
� If you try to put air back into a tire that hasrun flat, or even a tire that was quite low onair, without first finding out why it was lowor flat, the tire can have a sudden air-out.This could cause you to lose control of thevehicle and have a serious crash. Don’trefill a flat or very low tire with air withoutfirst having the tire taken off the wheel andchecked for damage.
� Use a clip-on chuck and hose extension when youadd air to your tires. You’ll need an accurate trucktire pressure gage. Stand to one side and add the air.Be sure you don’t go over the top inflation pressurefor the tire.

yellowblue
5-37
CAUTION:
Incorrect wheel nuts or improperly tightenedwheel nuts can cause the wheel to become looseand even come off. This could lead to an accident.Be sure to use the correct wheel nuts. If you haveto replace them, be sure to get new GM originalequipment wheel nuts.Stop somewhere as soon as you can and have thenuts tightened with a torque wrench. See “Tightening the Wheel Nuts” in the Index forthe proper torque for your particular wheel.
NOTICE:
Improperly tightened wheel nuts can lead tobrake pulsation and rotor damage. To avoidexpensive brake repairs, evenly tighten the wheelnuts in the proper sequence and to the propertorque specification.
If You’re Stuck: In Sand, Mud, Ice or SnowIn order to free your vehicle when it is stuck, you willneed to spin the wheels, but you don’t want to spin yourwheels too fast. The method known as “rocking” canhelp you get out when you’re stuck, but you must use caution.
CAUTION:
If you let your tires spin at high speed, they canexplode, and you or others could be injured. And,the transmission or other parts of the vehicle canoverheat. That could cause an enginecompartment fire or other damage. When you’restuck, spin the wheels as little as possible. Don’tspin the wheels above 35 mph (55 km/h) as shownon the speedometer.

yellowblue
5-38
NOTICE:
Spinning your wheels can destroy parts of yourvehicle as well as the tires. If you spin the wheelstoo fast while shifting your transmission backand forth, you can destroy your transmission.
Rocking Your Vehicle To Get It OutFirst, turn your steering wheel left and right. That willclear the area around your front wheels. Then shift backand forth between REVERSE (R) and a forward gear (or with a manual transmission, between FIRST (1) orSECOND (2) and REVERSE (R)), spinning the wheelsas little as possible. Release the accelerator pedal whileyou shift, and press lightly on the accelerator pedalwhen the transmission is in gear. By slowly spinningyour wheels in the forward and reverse directions, youwill cause a rocking motion that may free your vehicle.If that doesn’t get you out after a few tries, you mayneed to be towed out. If you do need to be towed out,see “Towing Your Vehicle” in the Index.

yellowblue
5-39
✍ NOTES

yellowblue
5-40
✍ NOTES

yellowblue
5-41
✍ NOTES

yellowblue
5-42
✍ NOTES

6-
yellowblue
6-1
Section 6 Service and Appearance Care
Here you will find information about the care of your vehicle. This section begins with service and fuel information,and then it shows how to check important fluid and lubricant levels. There is also technical information about yourvehicle, and a part devoted to its appearance care.
6-2 Service6-4 Fuel (Gasoline Engine)6-5 Diesel Fuel Requirements and Fuel System6-6 Fuels in Foreign Countries (Gasoline Engines)6-7 Filling Your Tank6-8 Filling a Portable Fuel Container6-9 Checking Things Under the Hood6-11 Noise Control System6-13 Engine Oil (Gasoline Engine)6-17 Engine Oil (Caterpillar� Diesel Engine)6-17 Engine Air Cleaner/Filter6-18 Automatic Transmission Fluid6-19 Manual Transmission Fluid6-20 Rear Axle6-20 Rear Axle Shift Motor (Option)6-21 Radiator Pressure Cap (Gasoline Engines)6-22 Surge Tank Pressure Cap (Diesel Engines)6-22 Thermostat
6-23 Engine Coolant (Gasoline Engine)6-27 Engine Coolant (Caterpillar� Diesel Engine)6-28 Power Steering Fluid6-29 Windshield Washer Fluid6-30 Brakes6-36 Electric/Hydraulic Parking Brake Fluid6-42 Battery6-44 Other Service Items6-48 Tires6-59 Appearance Care6-59 Cleaning the Inside of Your Vehicle6-63 Cleaning the Outside Your Vehicle6-66 GM Vehicle Care/Appearance Materials6-67 Vehicle Identification Number (VIN)6-67 Service Parts Identification Label6-68 Electrical System6-74 Capacities and Specifications6-77 Air Conditioning Refrigerants

yellowblue
6-2
ServiceYour dealer knows your vehicle best and wants you tobe happy with it. We hope you’ll go to your dealer forall your service needs. You’ll get genuine GM parts andGM-trained and supported service people.
We hope you’ll want to keep your GM vehicle all GM.Genuine GM parts have one of these marks:
Doing Your Own Service WorkIf you want to do some of your own service work, you’llwant to use the proper service manual. It tells you muchmore about how to service your vehicle than this manualcan. To order the proper service manual, see “Serviceand Owner Publications” in the Index.
You should keep a record with all parts receipts and listthe mileage and the date of any service work youperform. See “Maintenance Record” in the Index.
CAUTION:
You can be injured and your vehicle could bedamaged if you try to do service work on avehicle without knowing enough about it.
� Be sure you have sufficient knowledge,experience, the proper replacement partsand tools before you attempt any vehiclemaintenance task.
� Be sure to use the proper nuts, bolts andother fasteners. “English” and “metric”fasteners can be easily confused. If you usethe wrong fasteners, parts can later breakor fall off. You could be hurt.

yellowblue
6-3
Two Safety Cautions about Engine Fan Breakage
CAUTION:
Changing the Fan Drive Ratio or EngineGoverned SpeedIf you change the fan drive ratio or increase thegoverned speed of the engine, you may increasestress on the engine fan and the fan couldeventually fail. If the fan breaks apart while it isrotating, the flying pieces can cause severe injuryto anyone -- such as a service technician -- who isnearby. And, of course, the pieces can severelydamage the vehicle. Don’t change the fan driveratio or increase the governed speed of thevehicle without getting the necessary informationfrom your dealer.
CAUTION: (Continued)
CAUTION: (Continued)
Winter Fronts, Grille Covers or ObstructionsWinter fronts, grille covers or other add-onequipment causing obstructions in front orbehind the fan should not be used on this vehicle.They may increase the stress on the fan as theblades pass over the covered areas. If this causesthe fan to eventually break apart while it isrotating, the pieces can cause severe injury toanyone nearby, such as a service technicianworking on the engine, and of course the piecescan severely damage the vehicle.
If your vehicle is equipped with the optional radiatorshutters, see “Radiator Shutters” in the Index.

yellowblue
6-4
Fuel (Gasoline Engine)If your vehicle has a diesel engine, see “Diesel EngineFuel” in this section. For vehicles with gasoline engines,please read this.
Use regular unleaded gasoline rated at 87 octane orhigher. It is recommended that the gasoline meetspecifications which have been developed by theAmerican Automobile Manufacturers Association(AAMA) and endorsed by the Canadian Motor VehicleManufacturers Association for better vehicleperformance and engine protection. Gasolines meetingthe AAMA specification could provide improveddriveability and emission control system performancecompared to other gasolines. For more information,write to: American Automobile Manufacturer’sAssociation, 7430 Second Ave, Suite 300, Detroit MI 48202.
Be sure the posted octane is at least 87. If the octane isless than 87, you may get a heavy knocking noise whenyou drive. If it’s bad enough, it can damage your engine.
If you’re using fuel rated at 87 octane or higher and youhear heavy knocking, your engine needs service. Butdon’t worry if you hear a little pinging noise whenyou’re accelerating or driving up a hill. That’s normal,and you don’t have to buy a higher octane fuel to get ridof pinging. It’s the heavy, constant knock that meansyou have a problem.
Some gasolines that are not reformulated for lowemissions may contain an octane-enhancing additivecalled methylcyclopentadienyl manganese tricarbonyl(MMT); ask your service station operator whether or notthe fuel contains MMT. General Motors does notrecommend the use of such gasolines. If fuels containingMMT are used, spark plug life may be reduced and youremission control system performance may be affected.The malfunction indicator lamp on your instrumentpanel may turn on. If this occurs, return to yourauthorized GM dealer for service.

yellowblue
6-5
To provide cleaner air, all gasolines in the United Statesare now required to contain additives that will helpprevent deposits from forming in your engine and fuelsystem, allowing your emission control system tofunction properly. Therefore, you should not have to addanything to the fuel. In addition, gasolines containingoxygenates, such as ethers and ethanol, andreformulated gasolines may be available in your area tocontribute to clean air. General Motors recommends thatyou use these gasolines, particularly if they comply withthe specifications described earlier.
NOTICE:
Your vehicle was not designed for fuel thatcontains methanol. Don’t use it. It can corrodemetal parts in your fuel system and also damageplastic and rubber parts. That damage wouldn’tbe covered under your warranty.
Diesel Fuel Requirements and Fuel SystemDiesel Engine FuelSee your Caterpillar� Operator & Maintenance Manualfor information concerning fuel usage.
Water in FuelSometimes, water can be pumped into your fuel tankalong with your diesel fuel. This can happen if a servicestation doesn’t regularly inspect and clean its fuel tanks,or if it gets contaminated fuel from its suppliers.
If this happens, water must be drained. Your dealer canshow you how to do this.
CAUTION:
Diesel fuel containing water is still flammable.You could be burned. If you ever try to drainwater from your fuel, keep sparks, flames andsmoking materials away from the mixture.

yellowblue
6-6
NOTICE:
If there is water in your diesel fuel and theweather is warm or humid, fungus and bacteriacan grow in the fuel. They can damage your fuelsystem. You’ll need a diesel fuel biocide tosterilize your fuel system. Your dealer can adviseyou if you ever need this.If your fuel tank needs to be purged to removewater, see your dealer or a qualified technician.Improper purging can damage your fuel system.
Diesel engine vehicles that stand unused for several days or weeks can develop water in the fuel fromcondensation. It helps to fill the fuel tank if the diesel engine vehicle will not be used for a time.
Fuels in Foreign Countries (Gasoline Engines)If you plan on driving in another country outside theUnited States or Canada, the proper fuel may be hard tofind. Never use leaded gasoline or any other fuel notrecommended in the previous text on fuel. Costly repairscaused by use of improper fuel wouldn’t be covered byyour warranty.
To check on fuel availability, ask an auto club, orcontact a major oil company that does business in thecountry where you’ll be driving.
You can also write us at the following address foradvice. Just tell us where you’re going and give yourVehicle Identification Number (VIN).
General Motors Overseas Distribution Corporation1908 Colonel Sam DriveOshawa, Ontario L1H 8P7

yellowblue
6-7
Filling Your Tank
CAUTION:
Fuel vapor is highly flammable. It burnsviolently, and that can cause very bad injuries.Don’t smoke if you’re near gasoline or diesel fuel,or if you’re refueling your vehicle. Keep sparks,flames and smoking materials away fromgasoline or diesel fuel.
The fuel cap can be on either or both sides of yourvehicle depending on option content.
To take off the cap, turn it slowly to the left(counterclockwise).
CAUTION:
Gasoline Engine Vehicles: If you get gasoline onyou and then something ignites it, you could bebadly burned. Gasoline can spray out on you ifyou open the fuel filler cap too quickly. Thisspray can happen if your tank is nearly full, andis more likely in hot weather. Open the fuel fillercap slowly and wait for any “hiss” noise to stop.Then unscrew the cap all the way.
When you put the cap back on, turn it to the right until it is tight.

yellowblue
6-8
NOTICE:
If you need a new cap, be sure to get the righttype. Your dealer can get one for you. If you getthe wrong type, it may not fit or have properventing, and your fuel tank and emissions systemmight be damaged.
If you have dual tanks, fill the driver’s side first. Thefuel gage will give better readings this way. Your gagewill show the average level of both tanks combined.
Filling a Portable Fuel Container
CAUTION:
Never fill a portable fuel container while it is inyour vehicle. Static electricity discharge from thecontainer can ignite the gasoline vapor. You canbe badly burned and your vehicle damaged if thisoccurs. To help avoid injury to you and others:
� Dispense gasoline only into approved containers.
� Do not fill a container while it is inside avehicle, in a vehicle’s trunk, pickup bed oron any surface other than the ground.
� Bring the fill nozzle in contact with theinside of the fill opening before operatingthe nozzle. Contact should be maintaineduntil the filling is complete.
� Don’t smoke while pumping gasoline.

yellowblue
6-9
Checking Things Under the Hood
To tilt the hood forward, pull out on each of the hoodlatches. If the hood is equipped with hood access panels,make sure the panel latches are locked down beforerotating the hood open.
Then take the hand holds and pull the hood forward.
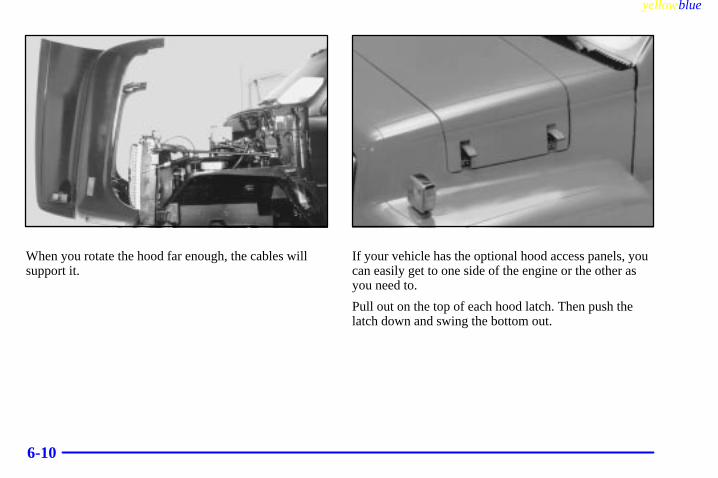
yellowblue
6-10
When you rotate the hood far enough, the cables willsupport it.
If your vehicle has the optional hood access panels, youcan easily get to one side of the engine or the other asyou need to.
Pull out on the top of each hood latch. Then push thelatch down and swing the bottom out.

yellowblue
6-11
Then place the prop rod,located on the panel, wherethe arrow is pointing.
CAUTION:
Things that burn can get on hot engine parts andstart a fire. These include liquids like gasoline ordiesel fuel, oil, coolant, brake fluid, windshieldwasher and other fluids, and plastic or rubber. Youor others could be burned. Be careful not to dropor spill things that will burn onto a hot engine.
Before closing the hood or access panels, be sure all thefiller caps are on properly.
Noise Control SystemThe following information relates to compliance withFederal noise emission standards for vehicles with aGross Vehicle Weight Rating (GVWR) of more than10,000 lbs. (4 536 kg). The Maintenance Scheduleprovides information on maintaining the noise controlsystem to minimize degradation of the noise emissioncontrol system during the life of your vehicle. The noise control system warranty is given in your Warranty booklet.
These standards apply only to vehicles sold in theUnited States.

yellowblue
6-12
Tampering With Noise Control System ProhibitedFederal law prohibits the following acts or the causing thereof:
1. The removal or rendering inoperative by any person,other than for purposes of maintenance, repair orreplacement, of any device or element of designincorporated into any new vehicle for the purpose ofnoise control, prior to its sale or delivery to theultimate purchaser or while it is in use; or
2. The use of the vehicle after such device or elementof design has been removed or rendered inoperativeby any person.
Among those acts presumed to constitute tampering arethe acts listed below.
Insulation:
� Removal of the noise shields or any underhood insulation.
Engine:
� Removal or rendering engine speed governor (ifequipped) inoperative so as to allow engine speed toexceed manufacturer specifications.
Fan and Drive:
� Removal of fan clutch (if equipped) or renderingclutch inoperative.
� Removal of the fan shroud (if equipped).
Air Intake:
� Removal of the air cleaner silencer.
� Reversing the air cleaner cover.
Exhaust:
� Removal of the muffler and/or resonator.
� Removal of the exhaust pipes and exhaust pipe clamps.
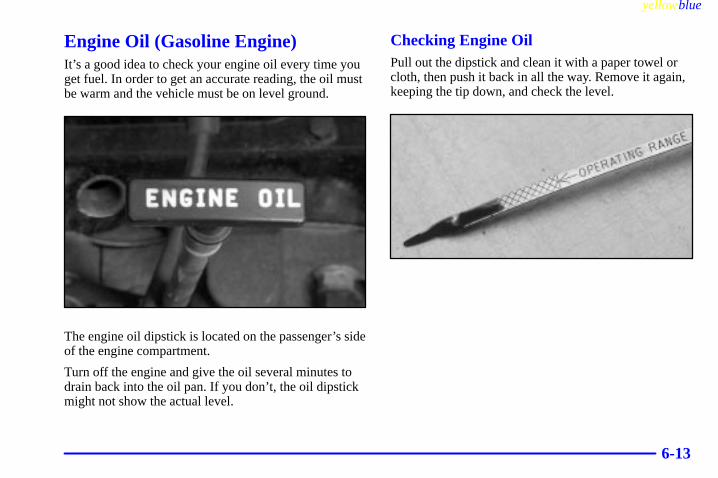
yellowblue
6-13
Engine Oil (Gasoline Engine)It’s a good idea to check your engine oil every time youget fuel. In order to get an accurate reading, the oil mustbe warm and the vehicle must be on level ground.
The engine oil dipstick is located on the passenger’s sideof the engine compartment.
Turn off the engine and give the oil several minutes todrain back into the oil pan. If you don’t, the oil dipstickmight not show the actual level.
Checking Engine OilPull out the dipstick and clean it with a paper towel orcloth, then push it back in all the way. Remove it again,keeping the tip down, and check the level.

yellowblue
6-14
When to Add Engine OilIf the oil is at or below the cross-hatched area, thenyou’ll need to add at least one quart of oil. But you mustuse the right kind. This part explains what kind of oil touse. For crankcase capacity, see “Capacities andSpecifications” in the Index.
NOTICE:
Don’t add too much oil. If your engine has somuch oil that the oil level gets above thecross-hatched area that shows the properoperating range, your engine could be damaged.
Be sure to fill it enough to put the level somewhere inthe proper operating range. Push the dipstick all the wayback in when you’re through.
What Kind of Engine Oil to UseOils recommended for your vehicle can be identified bylooking for the “Starburst” symbol. This symbolindicates that the oil has been certified by the AmericanPetroleum Institute (API). Do not use any oil whichdoes not carry this Starburst symbol.
If you change your own oil,be sure you use oil that hasthe Starburst symbol on thefront of the oil container. Ifyou have your oil changedfor you, be sure the oil putinto your engine isAmerican PetroleumInstitute certified forgasoline engines.
You should also use the proper viscosity oil for yourvehicle, as shown in the following chart:

yellowblue
6-15
As shown in the chart, SAE 5W-30 is best for yourvehicle. However, you can use SAE 10W-30 if it’s goingto be 0�F (-18�C) or above. These numbers on an oilcontainer show its viscosity, or thickness. Do not useother viscosity oils, such as SAE 20W-50.
NOTICE:
Use only engine oil with the American PetroleumInstitute Certified For Gasoline Engines“Starburst” symbol. Failure to use therecommended oil can result in engine damage not covered by your warranty.
GM Goodwrench� oil meets all the requirements foryour vehicle.
If you are in an area where the temperature falls below-20�F (-29�C), consider using either an SAE 5W-30synthetic oil or an SAE 0W-30 oil. Both will provideeasier cold starting and better protection for your engineat extremely low temperatures.

yellowblue
6-16
Engine Oil AdditivesDon’t add anything to your oil. Your dealer is ready toadvise if you think something should be added.
When to Change Engine OilYour vehicle has a computer that lets you know when tochange your engine oil. This is not based on mileage,but on engine revolutions and engine operatingtemperature. When the computer has calculated that theoil needs changing, the Oil Life Monitor will indicatethat a change is necessary. The mileage between oilchanges will vary depending on how you drive yourvehicle -- usually between 3,000 miles (5 000 km) and7,500 miles (12 500 km) since your last oil change.Under severe conditions, the indicator may come onbefore 3,000 miles (5 000 km). Never drive your vehiclemore than 7,500 miles (12 500 km) or 12 months(whichever occurs first) without an oil change.
The system won’t detect dust in the oil. So, if you drive in a dusty area, be sure to change your oil every3,000 miles (5 000 km) or sooner. Remember to resetthe CHANGE OIL light whenever the oil is changed.
How to Reset the Oil Life Monitor
To reset the CHANGE OIL message, turn the ignitionkey to RUN with the engine off. Fully press and releasethe accelerator pedal three times within 10 seconds. Ifthe CHANGE OIL message flashes for five seconds, thesystem is reset. If the message does not display for fiveseconds, you will need to reset the system again.
What to Do with Used OilDid you know that used engine oil contains certainelements that may be unhealthy for your skin and couldeven cause cancer? Don’t let used oil stay on your skinfor very long. Clean your skin and nails with soap andwater, or a good hand cleaner. Wash or properly throwaway clothing or rags containing used engine oil. (Seethe manufacturer’s warnings about the use and disposalof oil products.)
Used oil can be a real threat to the environment. If youchange your own oil, be sure to drain all free-flowing oilfrom the filter before disposal. Don’t ever dispose of oilby putting it in the trash, pouring it on the ground, intosewers, or into streams or bodies of water. Instead,recycle it by taking it to a place that collects used oil. Ifyou have a problem properly disposing of your used oil,ask your dealer, a service station or a local recyclingcenter for help.

yellowblue
6-17
Engine Oil (Caterpillar � Diesel Engines)See your Caterpillar� Operation & Maintenance Manualfor information on oil quality and viscosities as well asthe temperature range chart.
Air Filter Restriction IndicatorYour engine has an indicator that lets you know whenthe air filter is dirty and needs to be serviced. It is in theair intake tube below the air cleaner on the passenger’sside of the engine.
When the yellow indicatorreaches the red ring in thesight glass, it’s time toservice the air filter.
After the air filter is properly serviced, the indicator canbe reset by pushing the button on top of the indicator.
Engine Air Cleaner/FilterYour GM Maintenance Schedule says when to replacethe air filter.
Gasoline Engine Caterpillar� DieselEngine

yellowblue
6-18
CAUTION:
Gasoline Engines Only: Operating the enginewith the air cleaner/filter off can cause you orothers to be burned. The air cleaner not onlycleans the air, it stops flame if the enginebackfires. If it isn’t there, and the enginebackfires, you could be burned. Don’t drive withit off, and be careful working on the engine withthe air cleaner/filter off.
NOTICE:
Gasoline Engines Only: If the air cleaner/filter isoff, a backfire can cause a damaging engine fire.And, dirt can easily get into your engine, whichwill damage it. Always have the air cleaner/filterin place when you’re driving.
Your vehicle may also be equipped with an optionalFilterminder gage. See “Warning Lights, Gages andIndicators” in the Index.
Automatic Transmission FluidWhen to CheckA good time to have it checked is when the engine oil ischecked. See your Allison Automatic TransmissionOperator’s Manual to find out when to change yourtransmission fluid and filters.
How to Check and What to UseThe Allison Automatic Transmission Operator’s Manualthat came with the vehicle shows how to check theautomatic transmission fluid and what fluid to use.
NOTICE:
Too much or too little fluid can damage yourtransmission. Too much can mean that some ofthe fluid could come out and fall on hot engineparts or exhaust system parts, starting a fire. Besure to get an accurate reading if you check yourtransmission fluid.

yellowblue
6-19
Automatic Transmission External FilterYour automatic transmission spin-on type filter requiresperiodic replacement. It is mounted just behind theradiator on the outside of the passenger’s side frame rail.
Consult the Allison Automatic Transmission Operator’sManual that came with the vehicle for proper change intervals.
Automatic Transmission External FilterWith Service Trans Filter Indicator Light(Option)This automatic transmission spin-on type filter ismounted to the left of the transmission. It requiresreplacement when the SERVICE TRANS FILTERindicator light on the instrument panel comes on orevery three years, whichever occurs first.
Manual Transmission FluidWhen to CheckA good time to have it checked is when the engine oil ischecked. See your Maintenance Schedule to find outwhen to change your transmission fluid and filters.
How to Check and What to UseThe Eaton Fuller Transmission Operator’s Manual thatcame with the vehicle shows how to check the manualtranmsmission fluid and what fluid to use.
NOTICE:
Too much or too little fluid can damage yourtransmission. Too much can mean that some ofthe fluid could come out and fall on hot engineparts or exhaust system parts, starting a fire. Besure to get an accurate reading if you check yourtransmission fluid.

yellowblue
6-20
Rear AxleWhen to Check and Change LubricantRefer to the Maintenance Schedule to determine howoften to check the lubricant and when to change it. See “Scheduled Maintenance Services” in theMaintenance Schedule.
How to Check Lubricant
If the level is below the bottom of the filler plug hole,you’ll need to add some lubricant. Add enough lubricantto raise the level to the bottom of the filler plug hole.
What to UseRefer to the Maintenance Schedule to determine whatkind of lubricant to use. See “Recommended Fluids andLubricants” in the Maintenance Schedule.
Rear Axle Shift Motor (Option)When to Check and Change FluidIf you have an optional air-shift two-speed, controlledtraction, or locking differential type rear axle, a goodtime to check the fluid level in the axle shift motor iswhen the rear axle lubricant is checked. Use refrigerantoil (shift motor only).
How to Check FluidRemove the plug on the front plate of the axle shiftmotor, add enough fluid to raise the level to the bottomof the filler plug hole, then replace the plug.
What to UseRefer to your Maintenance Schedule to determine whatkind of lubricant to use.

yellowblue
6-21
Radiator Pressure Cap (Gasoline Engines)
The radiator pressure capmust be tightly installedwith the arrows on the caplined up with the top of theoverflow tube. This willprevent coolant loss andpossible engine damagefrom overheating.
When you replace your radiator pressure cap, anACDelco� cap is recommended.
NOTICE:
Your radiator pressure cap is a 9 psi (62kPa)pressure-type cap for use with medium dutycooling systems only. It must be tightly installedto prevent coolant loss and possible enginedamage from overheating. Be sure the arrows onthe cap line up with the top of the overflow tube.

yellowblue
6-22
Surge Tank Pressure Cap (Diesel Engines)
The surge tank pressure capmust be tightly installedwith the arrows on the caplined up with the top tube ofthe coolant surge tank.
When you replace your surge tank pressure cap, anACDelco� cap is recommended.
NOTICE:
Your surge tank pressure cap is a 9 psi (62kPa)pressure-type cap for use with medium dutycooling systems only. It must be tightly installedto prevent coolant loss and possible enginedamage from overheating. Be sure the arrows onthe cap line up with the top tube of the coolantsurge tank.
ThermostatEngine coolant temperature is controlled by one or morethermostats in the engine cooling system. Thethermostat stops the flow of coolant through the radiatoruntil the coolant reaches a preset temperature.
When you replace your thermostat, an ACDelco�
thermostat is recommended for gasoline engines.Caterpillar� parts are recommended for diesel engines.

yellowblue
6-23
Engine Coolant (Gasoline Engine)The cooling system in your vehicle is filled withDEX-COOL� engine coolant. This coolant is designedto remain in your vehicle for 5 years or 150,000 miles(240 000 km), whichever occurs first, if you add onlyDEX-COOL� extended life coolant.
The following explains your cooling system and how toadd coolant when it is low. If you have a problem withengine overheating, see “Engine Overheating” in the Index.
A 50/50 mixture of clean, drinkable water andDEX-COOL� coolant will:
� Give freezing protection down to -34�F (-37�C).
� Give boiling protection up to 252�F (122�C).
� Protect against rust and corrosion.
� Help keep the proper engine temperature.
� Let the warning lights and gages work as they should.
NOTICE:
When adding coolant, it is important that you use only DEX-COOL� (silicate-free) coolant.If coolant other than DEX-COOL is added to the system, premature engine, heater core orradiator corrosion may result. In addition, theengine coolant will require change sooner -- at30,000 miles (50 000 km) or 24 months,whichever occurs first. Damage caused by the use of coolant other than DEX-COOL� is notcovered by your new vehicle warranty.
yellowblue
6-24
What to UseUse a mixture of one-half clean, drinkable water andone-half DEX-COOL� coolant which won’t damagealuminum parts. If you use this coolant mixture, youdon’t need to add anything else.
CAUTION:
Adding only plain water to your cooling systemcan be dangerous. Plain water, or some otherliquid like alcohol, can boil before the propercoolant mixture will. Your vehicle’s coolantwarning system is set for the proper coolantmixture. With plain water or the wrong mixture,your engine could get too hot but you wouldn’tget the overheat warning. Your engine couldcatch fire and you or others could be burned. Use a 50/50 mixture of clean, drinkable waterand DEX-COOL� coolant.
NOTICE:
If you use an improper coolant mixture, yourengine could overheat and be badly damaged.The repair cost wouldn’t be covered by yourwarranty. Too much water in the mixture canfreeze and crack the engine, radiator, heater coreand other parts.
If you have to add coolant more than four times a year,have your dealer check your cooling system.
NOTICE:
If you use the proper coolant, you don’t have toadd extra inhibitors or additives which claim toimprove the system. These can be harmful.

yellowblue
6-25
Checking Coolant
Coolant Recovery Tank (Gasoline Engines -- Specialty Hood)
Coolant Recovery Tank (Gasoline Engines -- Sloped Hood)

yellowblue
6-26
Surge Tank (Caterpillar� Diesel Engines)
When your engine is cold, the coolant level should be atthe COLD level, or a little higher, on the coolantrecovery tank with the gasoline engine, or at the COLDFULL mark, visible through the surge tank, with thediesel engine.
If this light comes on andstays on, it means you’relow on engine coolant.
See “Lights, Low Coolant Warning Light” in the Indexfor further information.
Adding Coolant
If you need more coolant, add the proper DEX-COOL�
coolant mixture at the coolant recovery tank or the surge tank.

yellowblue
6-27
CAUTION:
Turning the radiator pressure cap (on a gasolineengine) or the surge tank cap (on a diesel engine)when the engine and radiator are hot can allowsteam and scalding liquids to blow out and burnyou badly. With the coolant recovery system, youwill almost never have to add coolant at theradiator. Never turn the radiator pressure cap or the surge tank pressure cap -- even a little -- when the engine and radiator are hot.
Add coolant mixture at the recovery tank or the surgetank, but be careful not to spill it.
CAUTION:
You can be burned if you spill coolant on hotengine parts. Coolant contains ethylene glycol,and it will burn if the engine parts are hotenough. Don’t spill coolant on a hot engine.
Some conditions, such as trapped air in the coolingsystem, can affect the coolant level in the radiator. If youneed to add coolant to the radiator, follow the stepslisted under “How to Add Coolant to the Radiator.” See “Engine Overheating” in the Index.
Engine Coolant (Caterpillar � Diesel Engine)If your vehicle has a Caterpillar diesel engine, see theCaterpillar� Operation & Maintenance Manual providedwith your vehicle to find out what to add, also when andhow to service your cooling system.

yellowblue
6-28
Power Steering FluidSee your Maintenance Schedule for when to check yourpower steering fluid.
How To Check Power Steering FluidCheck your power steering fluid only when the engine iswarm. If the engine isn’t warm, you probably won’t getan accurate reading.
Vehicles with diesel engineshave a sight glass. If youcan see fluid in the glass,you have enough.
Other models have a cap with a dipstick. If you haveone, unscrew the cap and check the dipstick. It should bebetween ADD and FULL (if the engine is warm).
If you need to add some, put in only enough of thecorrect fluid to bring the level up to the FULL mark (ifyou have the dipstick) or so you can see fluid in theglass, if you have a sight glass.

yellowblue
6-29
What to UseTo determine what kind of fluid to use, see“Recommended Fluids and Lubricants” in the Index.
NOTICE:
When adding power steering fluid or making acomplete fluid change, always use the properfluid. Failure to use the proper fluid can causeleaks and damage hoses and seals.If your power steering fluid level is low, this cancause the PRIMARY BRAKE or AUX BRAKEwarning lights to come on. If either light remainson after you have added power steering fluid tothe proper level, then shut off the engine for 10 seconds. This should reset the brake warninglights. If one or both lights stay on, though, then see “Hydraulic Brake Warning Lights” inthe Index.
Windshield Washer FluidWhat to UseWhen you need windshield washer fluid, be sure to readthe manufacturer’s instructions before use. If you will beoperating your vehicle in an area where the temperaturemay fall below freezing, use a fluid that has sufficientprotection against freezing.
Adding Washer Fluid
Open the cap labeled WASHER FLUID ONLY. Add washer fluid until the tank is full.

yellowblue
6-30
NOTICE:
� When using concentrated washer fluid,follow the manufacturer’s instructions foradding water.
� Don’t mix water with ready-to-use washerfluid. Water can cause the solution to freezeand damage your washer fluid tank andother parts of the washer system. Also,water doesn’t clean as well as washer fluid.
� Fill your washer fluid tank onlythree-quarters full when it’s very cold. This allows for expansion if freezing occurs,which could damage the tank if it iscompletely full.
� Don’t use engine coolant (antifreeze) inyour windshield washer. It can damageyour washer system and paint.
BrakesBrake Fluid
If your vehicle hashydraulic brakes, there’s a brake master cylinder. The brake master cylinderreservoir is here. Refer tothe Maintenance Scheduleto determine when to checkyour brake fluid.

yellowblue
6-31
CAUTION:
Don’t add brake fluid before you check the level.If you do, you could get too much brake fluid.Brake fluid could spill on the hot engine and itcan catch fire. You could be burned and yourvehicle could be damaged.
Checking Brake Fluid
Apply the brake pedal several times with the ignitionoff. Then clean one of the reservoir caps and the areaaround the cap, and remove it. The fluid level should beeven with the bottom ring of the filler opening.
If it’s low, add enough fluidto fill the reservoir to theproper level.
What to Add
Use the proper fluid listed in your MaintenanceSchedule. Use new brake fluid from a sealed container only.
Always clean the brake fluid reservoir cap and the areaaround the cap before removing it. This will help keepdirt from entering the reservoir.

yellowblue
6-32
CAUTION:
With the wrong kind of fluid in your brakesystem, your brakes may not work well, or theymay not even work at all. This could cause acrash. Always use the proper brake fluid.
NOTICE:
� Using the wrong fluid can badly damagebrake system parts. For example, just a fewdrops of mineral-based oil, such as engineoil, in your brake system can damage brakesystem parts so badly that they’ll have to bereplaced. Don’t let someone put in thewrong kind of fluid, and don’t use DOT-5silicone brake fluid.
NOTICE: (Continued)
NOTICE: (Continued)
� If you spill brake fluid on your vehicle’spainted surfaces, the paint finish can bedamaged. Be careful not to spill brake fluidon your vehicle. If you do, wash it offimmediately. See “Appearance Care” in the Index.
Four-Wheel Disc Brakes (Hydraulic Only)Your vehicle has four-wheel disc brakes.
Some driving conditions or climates may cause a brakesqueal when the brakes are first applied or lightlyapplied. This does not mean something is wrong withyour brakes.
Brake linings should always be replaced as completeaxle sets.

yellowblue
6-33
Four-Wheel and Six-Wheel Drum Brakes(Air Only)The brake drums should be removed and inspected eachtime the tires are removed for rotation or changing.When you have the front brakes replaced, have the rearbrakes inspected, too.
Brake linings should always be replaced as completeaxle sets.
Brake Pedal TravelSee your dealer if the brake pedal does not return tonormal height, or if there is a rapid increase in pedaltravel. This could be a sign of brake trouble.
Brake AdjustmentEvery time you make a brake stop, your brakes adjustfor wear.
Air Brake Systems (If Equipped)If you have air brakes, it is important to get rid ofmoisture in the system. Moisture will damage yoursystem if it isn’t removed daily.
There are two ways to do this. One is automatic if yourair-brake vehicle has the optional moisture ejector. Ifyour vehicle doesn’t have that option, however, youmust drain the air reservoirs every day.
Drain them at full systempressure. To be sure you’reat full pressure, check your air pressure gage. It should read at least 100 psi (692 kPa).
Moisture Ejector (Option)If you have air brakes with a moisture ejector, the valveautomatically ejects moisture from the reserve tankwhen the air compressor cycles.

yellowblue
6-34
Air Dryer (Option)If your vehicle has air brakes, it may have an air dryer.This collects and removes dirt, moisture or other foreignmatter from the air prior to entering the brake system. Itis mounted on the left frame rail.
If your dryer is aBendix-Westinghouse, ithas a filter that you need tochange at intervals. Seeyour Maintenance Schedulefor more about servicingthis filter.
Alcohol Injector (Option)If your vehicle has air brakes, it may have an alcoholinjector. It is on the frame or crossmember at the rightfront corner of the vehicle.
The alcohol injector helps prevent moisture in the airbrake system from freezing. Use it only in cold weather,32�F (0�C) or below.

yellowblue
6-35
To turn it on in coldweather, turn the valve sothat the word ON is on top.When the temperature isabove freezing, turn thevalve to OFF.
During the cold weather season, you may find that youneed to check this bottle once a week.
Replacing Brake System PartsThe braking system on a vehicle is complex. Its manyparts have to be of top quality and work well together ifthe vehicle is to have really good braking. Your vehiclewas designed and tested with top-quality GM brakeparts. When you replace parts of your braking system -- for example, when your brake linings weardown and you have to have new ones put in -- be sureyou get new approved GM replacement parts. If youdon’t, your brakes may no longer work properly. Forexample, if someone puts in brake linings that are wrongfor your vehicle, the balance between your front andrear brakes can change -- for the worse. The brakingperformance you’ve come to expect can change in manyother ways if someone puts in the wrong replacementbrake parts.

yellowblue
6-36
Electric/Hydraulic Parking Brake FluidIf you have an electric/hydraulic parking brake, a goodtime to check the fluid level is when you check the fluidlevels under the hood.
If you need to add fluid, use Dexron III automatictransmission fluid (GM Part Number 12345881).
How to Check and Add FluidFirst, apply the parking brake. To check the fluid level,look at the MAX and MIN lines on the side of thereservoir. If the level is below the MAX line, add fluid.To add fluid, clean away any dirt around the reservoircap. Remove the reservoir cap and add enough fluid tobring it up to the MAX level.
NOTICE:
Always use proper fluid (automatic transmissionfluid), not brake fluid. Failure to use the properfluid can cause leaks and damage hoses and seals.

yellowblue
6-37
Clutch Pedal Free TravelIf you have a manual transmission, your clutch will needadjustment when pedal free travel gets down to about 1 1/4 inch (32 mm), as measured at the clutch pedal pad.You should have 1 1/2 to 2 inches (38 to 51 mm) ofclutch pedal free travel. Your Maintenance Schedule hasmore on this.
If your clutch ever needs service, be sure to use onlygenuine GM clutch replacement parts.
Chassis LubricationYour Maintenance Schedule provides all of the requiredchassis lubrication intervals and identifies properlubricants to use. Be sure to see your MaintenanceSchedule before performing any chassis lubricationservice. To determine location of chassis lubricationitems, use the following charts.

yellowblue
6-38
Single Axle Models

yellowblue
6-39
ITEM NO. ITEM REMARKS
1 Brake Camshaft �, Brake CaliperRails (If Equipped)$
One fitting each (apply sparingly). For caliper rails, apply Aero Shell #5 Lubricant.
2 Steering Column Slip Joint* One fitting.
3 Steering Drag Link Ends One fitting at each end.
4 Steering Column U-Joints One fitting each joint.
5 Pivot Points and Hinges Apply chassis lubricant.
6 Slack Adjuster � One fitting.
7 Brake Cam Roller Pins at interfaceof pin and shoe �
Apply engine oil.
8 Front Steering Knuckles One fitting each side, lower bushing (hand-operated grease gun only). Hand-pack upper bearing.
9 Front Wheel Bearings Hand-pack or lubricate.
10 Steering Tie Rod Ends One fitting each end.
11 Spring Slip Pads* (Multi -Leaf Only)
Apply chassis lubricant.
12 Clutch Release Bearing* Cup or fitting.
13 Battery Terminal (except “ST” type)
Keep coated with petroleum jelly.
14 Parking Brake Bell Crank*$ One fitting.
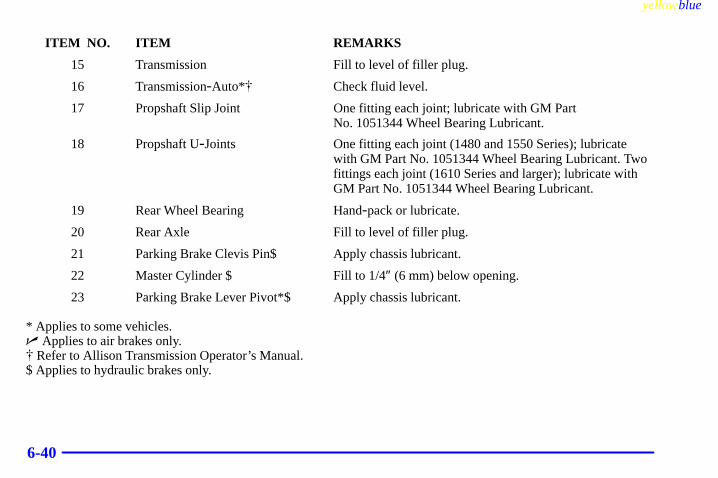
yellowblue
6-40
ITEM NO. ITEM REMARKS
15 Transmission Fill to level of filler plug.
16 Transmission-Auto*� Check fluid level.
17 Propshaft Slip Joint One fitting each joint; lubricate with GM Part No. 1051344 Wheel Bearing Lubricant.
18 Propshaft U-Joints One fitting each joint (1480 and 1550 Series); lubricatewith GM Part No. 1051344 Wheel Bearing Lubricant. Twofittings each joint (1610 Series and larger); lubricate withGM Part No. 1051344 Wheel Bearing Lubricant.
19 Rear Wheel Bearing Hand-pack or lubricate.
20 Rear Axle Fill to level of filler plug.
21 Parking Brake Clevis Pin$ Apply chassis lubricant.
22 Master Cylinder $ Fill to 1/4″ (6 mm) below opening.
23 Parking Brake Lever Pivot*$ Apply chassis lubricant.
* Applies to some vehicles.� Applies to air brakes only.� Refer to Allison Transmission Operator’s Manual.$ Applies to hydraulic brakes only.

yellowblue
6-41
Tandem Axle Models ITEMNO.
ITEM REMARKS
1 Brake Camshafts One fitting each.
2 Propshaft U-Joint One fitting each joint(1480 and 1550 Series).Lubricate with GM PartNo. 1051344, WheelBearing Lubricant.
4 Brake ShoeRoller Pins
Apply engine oil at pinto shoe joint only.
5 Rear Spring Pin One fitting each side.
6 Wheel Bearings Hand-pack or lubricate.
7 Rear Axles Fill to level of filler plug.
8 Propshaft SlipJoint
Two fittings each side.Lubricate with GM PartNo. 1051344 WheelBearing Lubricant.

yellowblue
6-42
BatteryYour new vehicle comes with one or more ACDelcoFreedom� maintenance free batteries. When it’s timefor a new battery, we recommend an ACDelco Freedommaintenance free battery. Be sure it has the replacementnumber shown on the original battery’s label.
Vehicle StorageIf you’re not going to drive your vehicle for 25 days ormore, remove the black, negative (-) cable from thebattery. This will help keep your battery from runningdown. (If your vehicle has more than one battery, besure to remove the negative (-) battery cable from each battery.)
CAUTION:
Batteries have acid that can burn you and gasthat can explode. You can be badly hurt if youaren’t careful. See “Jump Starting” in the Indexfor tips on working around a battery withoutgetting hurt.
When you are ready to use the vehicle again, refer to theengine starting procedure in the Index.
Contact your dealer to learn how to prepare your vehiclefor longer storage periods.

yellowblue
6-43
Windshield Wiper Blade Insert Replacement
Windshield wiper blades should be inspected at leasttwice a year for wear or cracking. See “Wiper BladeCheck” in Section 7 of this manual under Part B “OwnerChecks and Services” for more information.
Replacement blades come in different types and areremoved in different ways.
Here’s how to remove the Sheppard’s Hook type:
1. Pull the windshield wiper arm away from the windshield.
2. Push the release lever and slide the wiper assemblytoward the driver’s side of the vehicle.
3. Install a new blade by reversing Steps 1 and 2.

yellowblue
6-44
Other Service ItemsComponent BoxYour vehicle has a component box along the left frame rail.
What is in the box depends on what options are on yourvehicle. Normally, the fuel filter, air dryer, Luberfiner oilfilter, emission canister or other components are in there.
To get into the box, you first have to remove the topcover. To do that, remove the two 8 mm bolts on top andthe single 8 mm bolt at the top front. Then, pull thecover toward you and lift it off.
You can then remove the front cover if you need to, byremoving the two 8 mm bolts and pulling it off.
When you’re through, be sure to put the front cover on,before you put on the top cover.
Fuel Filter (Gasoline Engines)The steel fuel filter is located inside the component boxat the rear. See your Maintenance Schedule forrecommended service intervals.
If your vehicle is equipped with the optional Davcospin-on type filter, it is also located in the component box.

yellowblue
6-45
Fuel Filter (Diesel Engines)The ACDelco� fuel filter is located in the componentbox. See your Maintenance Schedule for recommendedservice intervals.
Primary Fuel Filter and Water Separator(Option)
If you have a Caterpillar�
diesel engine, you may have this spin-on filter. It is in the component boxon the driver’s side behindthe fender.
It has a clear plastic drain bowl at the bottom. Check thedrain bowl occasionally for any water or particles. Todrain the bowl, shut off the engine. Then partially openthe drain valve at the bottom of the filter. See “EngineOil” in the Index for proper disposal procedures.
Secondary Fuel Filter and WaterSeparator/Heater (Option)
If you have a Caterpillar�
diesel engine, you may havethis spin-on filter and fuelseparator/heater. It ismounted on the passenger’sside of the engine.
It has a metal drain bowl at the bottom. Occasionally, check the bowl for any water or particles. To check or drain the bowl, shut off the engine. Then push up on the spring loaded drain valve until clear fuel is flowing from the valve. The particles or water will drain out first. See “Engine Oil” in the Index for proper disposal procedures.

yellowblue
6-46
Automatic Ether Injection System (Option)
If your diesel engine vehiclehas this feature, the ethercylinder is on the upperright rear side of the enginecompartment.
To change an empty ether cylinder, follow these steps.
1. Loosen the 5/16 inch screw head on thecylinder-to-bracket clamp.
2. Spread the clamp apart.
3. Clean any dirt from the neck of the cylinder and thetop of the valve before you take out the cylinder.
4. Check the inside of the valve for any foreign matter.Clean the valve as necessary.
5. Cover the valve to protect it from dirt and take outthe cylinder.
6. Install a new gasket whenever you take out thecylinder. Use only one gasket and spread a light filmof clean oil on it before installation.
7. Put in the new cylinder. Turn it clockwise until it juststarts to contact the gasket.
8. Tighten the cylinder another half turn (180 degrees).Don’t over-tighten.
9. Retighten the cylinder clamp.
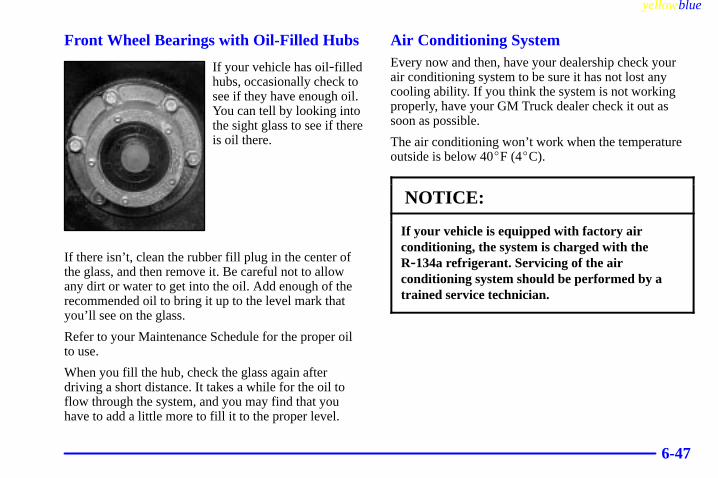
yellowblue
6-47
Front Wheel Bearings with Oil-Filled Hubs
If your vehicle has oil-filledhubs, occasionally check tosee if they have enough oil.You can tell by looking intothe sight glass to see if thereis oil there.
If there isn’t, clean the rubber fill plug in the center ofthe glass, and then remove it. Be careful not to allowany dirt or water to get into the oil. Add enough of therecommended oil to bring it up to the level mark thatyou’ll see on the glass.
Refer to your Maintenance Schedule for the proper oil to use.
When you fill the hub, check the glass again afterdriving a short distance. It takes a while for the oil toflow through the system, and you may find that youhave to add a little more to fill it to the proper level.
Air Conditioning SystemEvery now and then, have your dealership check yourair conditioning system to be sure it has not lost anycooling ability. If you think the system is not workingproperly, have your GM Truck dealer check it out assoon as possible.
The air conditioning won’t work when the temperatureoutside is below 40�F (4�C).
NOTICE:
If your vehicle is equipped with factory airconditioning, the system is charged with theR-134a refrigerant. Servicing of the airconditioning system should be performed by atrained service technician.

yellowblue
6-48
Muffler/Catalytic Converter Assemblies(Diesel Engines)Some vehicles equipped with a Caterpillar� diesel engineutilize a catalytic converter-muffler assembly. If yourvehicle is equipped with a catalytic converter-muffler,some special procedures may need to be followed whenservicing your vehicle. Consult your GM Truck dealerwho is an authorized Caterpillar� engine dealer for service.
To determine your vehicle’s muffler type, examine themuffler outer housing. If your system is a catalyticconverter-muffler type, the housing will be stampedwith the CAT logo.
TiresYour new vehicle comes with high-quality tires made bya leading tire manufacturer. If you ever have questionsabout your tire warranty and where to obtain service, seeyour GM Warranty booklet for details.
CAUTION:
Poorly maintained and improperly used tires are dangerous.� Overloading your tires can cause
overheating as a result of too much friction.You could have an air-out and a seriousaccident. See “Loading Your Vehicle” inthe Index.
� Underinflated tires pose the same danger asoverloaded tires. The resulting accidentcould cause serious injury. Check all tiresfrequently to maintain the recommendedpressure. Tire pressure should be checkedwhen your tires are cold.
� Overinflated tires are more likely to be cut,punctured or broken by a sudden impact -- such as when you hit a pothole.Keep tires at the recommended pressure.
� Worn, old tires can cause accidents. If yourtread is badly worn, or if your tires havebeen damaged, replace them.

yellowblue
6-49
Inflation -- Tire PressureThe Certification/Tire label, which is on the driver’sdoor, shows the correct inflation pressures for your tireswhen they’re cold. “Cold” means your vehicle has beensitting for at least three hours or driven no more than 1 mile (1.6 km).
NOTICE:
Don’t let anyone tell you that underinflation oroverinflation is all right. It’s not. If your tiresdon’t have enough air (underinflation), you canget the following:� Too much flexing� Too much heat� Tire overloading� Bad wear� Bad handling� Bad fuel economy.
NOTICE: (Continued)
NOTICE: (Continued)
If your tires have too much air (overinflation),you can get the following:� Unusual wear� Bad handling� Rough ride� Needless damage from road hazards.
When to Check
Check your tires once a month or more. Also, check thetire pressure of the spare tire.
How to Check
Use a good quality pocket-type gage to check tirepressure. You can’t tell if your tires are properly inflatedsimply by looking at them. Radial tires may lookproperly inflated even when they’re underinflated.
Be sure to put the valve caps back on the valve stems.They help prevent leaks by keeping out dirt and moisture.

yellowblue
6-50
Rims and WheelsRims and wheels are stamped with a maximum load andcold inflation rating. Be sure you don’t exceed these limits.
Dual Tire OperationWhen the vehicle is new, or whenever a wheel, wheelbolt or wheel nut is replaced, check the wheel nut torqueas indicated:
If your vehicle has stud piloted or hub piloted wheels,tighten the wheel stud nuts to the specified torque valuesat 100 miles (160 km), 500 miles (800 km) and 1,000 miles (1 600 km) and then every 1,000 miles (1 600 km) thereafter.
For proper torque, see “Wheel Nut Torque” in the Index.
The outer tire on a dual wheel setup generally wearsfaster than the inner tire. Your tires will wear moreevenly and last longer if you rotate the tires periodically.If you’re going to be doing a lot of driving onhigh-crown roads, you can reduce tire wear by adding 5 psi (35 kPa) to the tire pressure in the outer tires. Besure to return to the recommended pressures when nolonger driving under those conditions. See “Changing aFlat Tire” in the Index for more information.
CAUTION:
If you operate your vehicle with a tire that isbadly underinflated, the tire can overheat. Anoverheated tire can lose air suddenly or catchfire. You or others could be injured. Be sure all tires (including the spare, if any) are properly inflated.

yellowblue
6-51
When It’s Time for New TiresReplace your tires when the tread depth is down to 1/8 of an inch (3.2 mm) for the front tires, or 1/16 of an inch (1.6 mm) for a rear tire. Also, you need a newtire if:
� You can see cord or fabric showing through the tire’s rubber.
� The tread or sidewall is cracked, cut or snagged deepenough to show cord or fabric.
� The tire has a bump, bulge or split.
� The tire has a puncture, cut or other damage thatcan’t be repaired well because of the size or locationof the damage.
CAUTION:
Mixing tires could cause you to lose control whiledriving. If you mix tires of different types -- likeradial and bias-belted tires -- the vehicle may nothandle properly, and you could have a crash. Be sure to use the same type of tires all around.
When you replace tires, make sure they are the samesize, load range, speed rating and construction type(bias, bias-belted or radial) as your original tires.
Wheel Alignment and Tire BalanceThe wheels on your vehicle were aligned at the factory to give you the longest tire life and best overall performance.
Proper front wheel alignment must be maintained inorder to ensure efficient steering, good directionalstability, and prevent abnormal tire wear. If you noticeunusual tire wear or your vehicle is pulling one way orthe other, the alignment may need to be reset. If younotice your vehicle vibrating when driving on a smoothroad, your wheels may need to be balanced.

yellowblue
6-52
Tightening the Wheel Nuts
CAUTION:
Wheel nuts that are not tight can work loose. Ifall the nuts on a wheel come off, the wheel cancome off the vehicle, causing a serious crash. Allwheel nuts must be properly tightened. Followthe rules in this section to be sure they are.
This section lets you know how often to check thetightness of the wheel nuts on your vehicle and howtight they must be.
First, use these pictures to decide what kind of wheelsyou have.
Hub-Piloted Type,8-Hole
Hub-Piloted Type,10-Hole
Stud-Piloted Type, 10-Hole

yellowblue
6-53
Then, follow the steps below for the wheels you have.
Cast-Type Wheel
1. Put the tire and rim assembly on the axle hub.
2. Install the rim spacer at the rear.
3. Install the outer rear tire and rim assembly so that itsvalve stem is exactly opposite the valve stem on theinner tire and rim assembly.
4. Install the rim clamps and nuts. Position them properly.
NOTICE:
If you tighten a nut when a rim clamp is notpositioned properly, it can damage the rim andalso cause the wheel to wobble in operation. Besure to position the rim clamps properly beforeyou go on to the next step.
5. Finger-tighten the nuts. Be sure that all of the wheelclamps are seated all the way around the wheel.
6. Tighten all of the nuts using the following diagram.Be sure to use the one that matches your wheels.
7. Now repeat Step 6, but this time tighten the nuts to200 lb-ft (271 N·m) of torque.
8. Turn the wheel and measure along the sidewall to seehow much wheel run-out there is. There should beno more than 1/8 inch (3 mm) on the front wheelsand 3/16 inch (5 mm) on the rear wheels. If there istoo much wheel run-out, you can try loosening thenuts on the side where there is the most run-out andtightening the opposite nuts. When you finally havethe tire running true, tighten all of the nuts to 200 lb-ft (271 N·m).

yellowblue
6-54
Stud-Piloted 10-Stud Wheel
The studs and nuts used on the right side of the vehiclehave right-hand threads. Those used on the left sidehave left-hand threads. It is easy to tell by looking at thenuts, because they are stamped R or L.
1. Put the tire and rim assembly on the axle hub.
2. Put on the wheel nuts. If you use oil or grease on thewheel studs or nuts, the wheel nuts can’t tightenproperly. This could let the wheel come off as youare driving.
3. Finger-tighten the nuts on the rear inner wheels andthe front wheels.
4. Tighten these nuts to 575 lb-ft (780 N·m), unlessyou have aluminum wheels and/or aluminum hubs.If you have aluminum wheels and/or aluminumhubs, tighten the nuts only to 475 lb-ft (644 N·m).Use the following diagram to do this.
Front or Inner DualWheel
Outer Dual Wheel
5. Install the outer rear tire and rim assembly so that itsvalve stem is exactly opposite the valve stem on theinner tire and rim assembly.
6. Put on the wheel nuts.
7. Finger-tighten the wheel nuts.
8. Tighten the nuts to the same torque numbers shownin Step 4.
Whenever tightening both the inner and outer rear wheelnuts, first loosen the outer wheel nuts. Then tighten theinner nuts. Finally, tighten the outer nuts.

yellowblue
6-55
CAUTION:
Never use oil or grease on studs or nuts. If youdo, the nuts might come loose. Your wheel couldfall off, causing a serious accident.
Hub-Piloted Wheels, 8-Hole or 10-Hole
The studs and nuts used with these wheels haveright-hand threads.
1. With intermittent pilot pads, position a pad at 12 o’clock to center the wheel and reduce run-out.
2. Put the tire and rim assembly on the axle hub. Installthe outer rear tire and rim assembly so that its valvestem is exactly opposite the valve stem on the innertire and rim assembly.
3. Put on the wheel nuts.
4. Finger-tighten the nuts.
5. Oil the surfaces betweenthe nuts and washers asshown. Do not oil thestuds or the threads ofthe nut.

yellowblue
6-56
6. Tighten the nuts to 400 lb-ft (542 N·m) if an eight-hole stud or 480 lb-ft (650 N·m) if a 10-hole stud, use the following diagrams.
8-Hole
10-Hole (Front or Inner Dual
Wheel)
10-Hole (Outer Dual Wheel)
CAUTION:
If wheel studs are damaged, they can break. If allthe studs on a wheel broke, the wheel could comeoff and cause a serious crash. If any stud isdamaged because of a loose-running wheel, itcould be that all of the studs are damaged. To besure, replace all studs on the wheel. If the studholes in a wheel have become larger, the wheelcould collapse in operation. Replace any wheel ifits stud holes have become larger or distorted inany way. Inspect hubs and hub piloted wheels fordamage. Because of loose running wheels,piloting pad damage may occur and requirereplacement of the entire hub, for propercentering of the wheels.

yellowblue
6-57
CAUTION:
Rust or dirt on a wheel, or on the parts to whichit is fastened, can make the wheel nuts becomeloose after a time. The wheel could come off andcause an accident. When you change a wheel,remove any rust or dirt from the places where thewheel attaches to the vehicle. In an emergency,you can use a cloth or paper towel to do this; butbe sure to use a scraper or wire brush later, if youneed to, to get all the rust or dirt off.
How Often to Check
Wheel tightness is so important you should have atechnician check nut tightness on all wheels with atorque wrench every 1,000 miles (1 600 km).
When your vehicle is new or when a wheel or fastener isnew you should have a technician tighten the wheel stud and rim clamp nuts, with a torque wrench, at 100, 500 and 1,000 miles (160, 800 and 1 600 km). The reason for this is that the clamping system has toseat before the fasteners will stay tightened.
Wheel ReplacementReplace any wheel that is bent, cracked or badly rusted.If wheel nuts keep coming loose, replace the wheel. If the wheel leaks air, replace it.
Your dealer will know the kind of wheel you need.
CAUTION:
A leaking wheel could fail without warning. Awheel designed for tubeless tires could be leakingbecause it is damaged. Don’t use an inner tube orsome other thing to try to stop the leaking. Get anew wheel of the proper type.

yellowblue
6-58
CAUTION:
Without the correct wheel, you may not be ableto stop properly, and you could have otherproblems like a tire air-out. You could have acollision. If you don’t go to your dealer to get anew wheel, be sure you get the correct one. Eachnew wheel should match the original wheel inload-carrying capacity, inflation pressurecapacity, diameter, width, offset and mountingconfiguration.
Using wheels and tires with higher load-carrying limitsthan the original wheels and tires doesn’t change theGAWR or the GVWR of your vehicle.
NOTICE:
The wrong wheel can cause trouble in bearinglife, brake cooling, speedometer/odometercalibration, headlamp aim, bumper height,vehicle ground clearance, stopping distance andtire clearance to the body and chassis. You couldalso have other problems like a tire air-out.
Used Replacement Wheels
CAUTION:
Putting a used wheel on your vehicle isdangerous. You can’t know how it’s been used orhow many miles it’s been driven. It could failsuddenly and cause an accident. If you have toreplace a wheel, use a new GM originalequipment wheel.

yellowblue
6-59
Appearance CareRemember, cleaning products can be hazardous. Someare toxic. Others can burst into flame if you strike amatch or get them on a hot part of the vehicle. Some aredangerous if you breathe their fumes in a closed space.When you use anything from a container to clean yourvehicle, be sure to follow the manufacturer’s warningsand instructions. And always open your doors orwindows when you’re cleaning the inside.
Never use these to clean your vehicle:
� Gasoline
� Benzene
� Naphtha
� Carbon Tetrachloride
� Acetone
� Paint Thinner
� Turpentine
� Lacquer Thinner
� Nail Polish Remover
They can all be hazardous -- some more than others --and they can all damage your vehicle, too.
Don’t use any of these unless this manual says you can.In many uses, these will damage your vehicle:
� Alcohol
� Laundry Soap
� Bleach
� Reducing Agents
Cleaning the Inside of Your VehicleUse a vacuum cleaner often to get rid of dust and loosedirt. Wipe vinyl, leather, plastic and painted surfaceswith a clean, damp cloth.
Cleaning of Fabric/CarpetYour dealer has two cleaners, Multi-Purpose InteriorCleaner and Capture Non-Solvent Dry Spot and SoilRemover for cleaning fabric and carpet. They will cleannormal spots and stains very well. You can getGM-approved cleaning products from your dealer. (See “Appearance Care and Materials” in the Index.)
Here are some cleaning tips:
� Always read the instructions on the cleaner label.
� Clean up stains as soon as you can -- before they set.
� Carefully scrape off any excess stain.
yellowblue
6-60
� Use a clean cloth or sponge, and change to a clean area often. A soft brush may be used if stainsare stubborn.
� If a ring forms on fabric after spot cleaning, clean theentire area immediately or it will set.
Using Multi-Purpose Interior Cleaner on Fabric1. Vacuum and brush the area to remove any loose dirt.
2. Always clean a whole trim panel or section. Masksurrounding trim along stitch or welt lines.
3. Mix powdered cleaner following the directions onthe container label to form thick suds.
4. Use suds only and apply with a clean sponge. Don’tsaturate the material and don’t rub it roughly.
5. As soon as you’ve cleaned the section, use a spongeto remove the suds.
6. Wipe cleaned area with a clean, damp towel or cloth.
7. Wipe with a clean cloth and let dry.
Special Fabric Cleaning ProblemsStains caused by such things as catsup, coffee (black),egg, fruit, fruit juice, milk, soft drinks, vomit, urine andblood can be removed as follows:
1. Carefully scrape off excess stain, then sponge thesoiled area with cool water.
2. If a stain remains, follow the multi-purpose interiorcleaner instructions described earlier.
3. If an odor lingers after cleaning vomit or urine, treat the area with a water/baking soda solution: 1 teaspoon (5 ml) of baking soda to 1 cup (250 ml)of lukewarm water.
4. Let dry.
Stains caused by candy, ice cream, mayonnaise, chilisauce and unknown stains can be removed as follows:
1. Carefully scrape off excess stain.
2. First, clean with cool water and allow to dry completely.
3. If a stain remains, follow instructions forMulti -Purpose Interior Cleaner.

yellowblue
6-61
Fabric ProtectionYour vehicle has upholstery that has been treated withScotchgard� Fabric Protector, a 3M product. It protectsfabrics by repelling oil and water, which are the carriersof most stains. Even with this protection, you still needto clean your upholstery often to keep it looking new.
Further information on cleaning is available by calling1-800-433-3296 (in Minnesota, 1-800-642-6167).
Cleaning VinylUse warm water and a clean cloth.
� Rub with a clean, damp cloth to remove dirt. Youmay have to do it more than once.
� Things like tar, asphalt and shoe polish will stain if you don’t get them off quickly. Use a clean clothand a vinyl/leather cleaner. See your dealer for this product.
Cleaning the Top of the Instrument PanelUse only mild soap and water to clean the top surfacesof the instrument panel. Sprays containing silicones orwaxes may cause annoying reflections in the windshieldand even make it difficult to see through the windshieldunder certain conditions.
Cleaning Interior Plastic ComponentsUse only a mild soap and water solution on a soft cloth or sponge. Commercial cleaners may affect thesurface finish.
Care of Safety BeltsKeep belts clean and dry.
CAUTION:
Do not bleach or dye safety belts. If you do, itmay severely weaken them. In a crash, theymight not be able to provide adequate protection.Clean safety belts only with mild soap andlukewarm water.
yellowblue
6-62
Cleaning Glass SurfacesGlass should be cleaned often. GM Glass Cleaner or aliquid household glass cleaner will remove normaltobacco smoke and dust films on interior glass. (See“Appearance Care and Materials” in the Index.)
Don’t use abrasive cleaners on glass, because they maycause scratches. Avoid placing decals on the inside rearwindow, since they may have to be scraped off later.
Cleaning the Outside of theWindshield and Wiper BladesIf the windshield is not clear after using the windshieldwasher, or if the wiper blade chatters when running, wax,sap or other material may be on the blade or windshield.
Clean the outside of the windshield with GM WindshieldCleaner, Bon Ami� Powder (non-scratching glasscleaning powder), GM Part No. 1050011. The windshieldis clean if beads do not form when you rinse it with water.
Grime from the windshield will stick to the wiper bladesand affect their performance. Clean the blade by wipingvigorously with a cloth soaked in full-strengthwindshield washer solvent. Then rinse the blade with water.
Check the wiper blades and clean them as necessary;replace blades that look worn.
WeatherstripsSilicone grease on weatherstrips will make them lastlonger, seal better, and not stick or squeak. Applysilicone grease with a clean cloth at least every sixmonths. During very cold, damp weather more frequentapplication may be required. (See “RecommendedFluids and Lubricants” in the Index.)

yellowblue
6-63
Cleaning the Outside of Your VehicleThe paint finish on your vehicle provides beauty, depthof color, gloss retention and durability.
Washing Your VehicleThe best way to preserve your vehicle’s finish is to keep it clean by washing it often with lukewarm or cold water.
Don’t wash your vehicle in the direct rays of the sun.Use a car washing soap. Don’t use strong soaps orchemical detergents. Be sure to rinse the vehicle well,removing all soap residue completely. You can getGM-approved cleaning products from your dealer. (See“Appearance Care and Materials” in the Index.) Don’tuse cleaning agents that are petroleum based, or thatcontain acid or abrasives. All cleaning agents should beflushed promptly and not allowed to dry on the surface,or they could stain. Dry the finish with a soft, cleanchamois or an all-cotton towel to avoid surfacescratches and water spotting.
High pressure vehicle washes may cause water to enteryour vehicle.
Cleaning Exterior Lamps/Lenses
Use lukewarm or cold water, a soft cloth and a vehiclewashing soap to clean exterior lamps and lenses. Followinstructions under “Washing Your Vehicle.”
Finish CareOccasional waxing or mild polishing of your vehicle byhand may be necessary to remove residue from the paintfinish. You can get GM-approved cleaning productsfrom your dealer. (See “Appearance Care and Materials”in the Index.)
Your vehicle may have a “basecoat/clearcoat” paintfinish. The clearcoat gives more depth and gloss to thecolored basecoat. Always use waxes and polishes thatare non-abrasive and made for a basecoat/clearcoat paint finish.
NOTICE:
Machine compounding or aggressive polishing ona basecoat/clearcoat paint finish may dull thefinish or leave swirl marks.

yellowblue
6-64
Foreign materials such as calcium chloride and othersalts, ice melting agents, road oil and tar, tree sap, birddroppings, chemicals from industrial chimneys, etc., candamage your vehicle’s finish if they remain on paintedsurfaces. Wash the vehicle as soon as possible. Ifnecessary, use non-abrasive cleaners that are markedsafe for painted surfaces to remove foreign matter.
Exterior painted surfaces are subject to aging, weatherand chemical fallout that can take their toll over a periodof years. You can help to keep the paint finish lookingnew by keeping your vehicle garaged or coveredwhenever possible.
Protecting Exterior Bright Metal PartsBright metal parts should be cleaned regularly to keeptheir luster. Washing with water is all that is usuallyneeded. However, you may use chrome polish onchrome or stainless steel trim, if necessary.
Use special care with aluminum trim. To avoiddamaging protective trim, never use auto or chromepolish, steam or caustic soap to clean aluminum. Acoating of wax, rubbed to high polish, is recommendedfor all bright metal parts.
Cleaning TiresTo clean your tires, use a stiff brush with a tire cleaner.
NOTICE:
When applying a tire dressing always take care towipe off any overspray or splash from all paintedsurfaces on the body or wheels of the vehicle.Petroleum-based products may damage the paintfinish and tires.
Sheet Metal DamageIf your vehicle is damaged and requires sheet metalrepair or replacement, make sure the body repair shopapplies anti-corrosion material to the parts repaired orreplaced to restore corrosion protection.

yellowblue
6-65
Finish DamageAny stone chips, fractures or deep scratches in the finishshould be repaired right away. Bare metal will corrodequickly and may develop into a major repair expense.
Minor chips and scratches can be repaired with touch-upmaterials available from your dealer or other serviceoutlets. Larger areas of finish damage can be correctedin your dealer’s body and paint shop.
Underbody MaintenanceChemicals used for ice and snow removal and dust controlcan collect on the underbody. If these are not removed,accelerated corrosion (rust) can occur on the underbodyparts such as fuel lines, frame, floor pan and exhaustsystem even though they have corrosion protection.
At least every spring, flush these materials from theunderbody with plain water. Clean any areas where mudand other debris can collect. Dirt packed in closed areasof the frame should be loosened before being flushed.Your dealer or an underbody vehicle washing systemcan do this for you.
Chemical Paint SpottingSome weather and atmospheric conditions can create achemical fallout. Airborne pollutants can fall upon andattack painted surfaces on your vehicle. This damagecan take two forms: blotchy, ringlet-shapeddiscolorations, and small irregular dark spots etched intothe paint surface.
Although no defect in the paint job causes this, GM willrepair, at no charge to the owner, the surfaces of newvehicles damaged by this fallout condition within 12 months or 12,000 miles (20 000 km) of purchase,whichever occurs first.
This applies only to materials manufactured and sold byGeneral Motors. Bodies, body conversions or equipmentnot made or sold by General Motors are not covered.

yellowblue
6-66
GM Vehicle Care/Appearance Materials
PART NUMBER SIZE DESCRIPTION USAGE
994954 23 in. x 25 in. Polishing Cloth – Wax Treated Exterior polishing cloth
1050172 16 oz. (0.473 L) Tar and Road Oil Remover Removes tar, road oil and asphalt
1050173 16 oz. (0.473 L) Chrome Cleaner and Polish Use on chrome, stainless steel, nickel, copper and brass
1050174 16 oz. (0.473 L) White Sidewall Tire Cleaner Removes soil and black marks from whitewalls
1050214 32 oz. (0.946 L) Vinyl Cleaner Cleans vinyl tops, upholstery and convertible tops
1050427 23 oz. (0.680 L) Glass Cleaner Removes dirt, grime, smoke and fingerprints
1052918** 8 oz. (0.237 L) Armor All� Protectant Protects leather, wood, acrylics, Plexiglas�, plastic,rubber and vinyl
1052925 16 oz. (0.473 L) Multi-Purpose InteriorCleaner
Cleans carpets, seats, interior trim, door panels and floor mats
1052929 16 oz. (0.473 L) Wheel Cleaner Spray on and rinse with water
1052930 8 oz. (0.237 L) Capture Dry Spot Remover Attracts, absorbs and removes soils on fabric
12345721 2.5 sq. ft. Synthetic Chamois Shines vehicle without scratching
12345725 12 oz. (0.354 L) Silicone Tire Shine Spray on tire shine
12377964* 16 oz. (0.473 L) Finish Enhancer Removes dust, fingerprints and surface contaminants
12377966* 16 oz. (0.473 L) Cleaner Wax Removes light scratches and oxidation and protects finish
12377984* 16 oz. (0.473 L) Surface Cleaner Removes contaminants, blemishes and swirl marks
See your General Motors Parts Department for these products. * For exterior use only.See “Recommended Fluids and Lubricants” in the Index. **Not recommended for use on instrument panels.
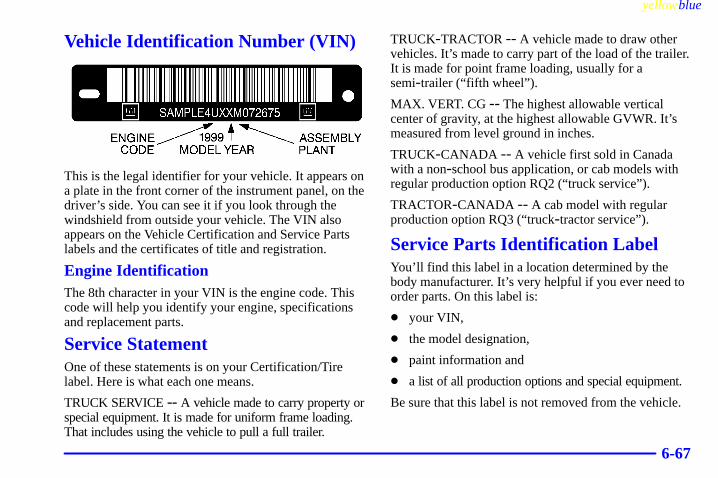
yellowblue
6-67
Vehicle Identification Number (VIN)
This is the legal identifier for your vehicle. It appears ona plate in the front corner of the instrument panel, on thedriver’s side. You can see it if you look through thewindshield from outside your vehicle. The VIN alsoappears on the Vehicle Certification and Service Partslabels and the certificates of title and registration.
Engine IdentificationThe 8th character in your VIN is the engine code. Thiscode will help you identify your engine, specificationsand replacement parts.
Service StatementOne of these statements is on your Certification/Tirelabel. Here is what each one means.
TRUCK SERVICE -- A vehicle made to carry property orspecial equipment. It is made for uniform frame loading.That includes using the vehicle to pull a full trailer.
TRUCK-TRACTOR -- A vehicle made to draw othervehicles. It’s made to carry part of the load of the trailer.It is made for point frame loading, usually for asemi-trailer (“fifth wheel”).
MAX. VERT. CG -- The highest allowable verticalcenter of gravity, at the highest allowable GVWR. It’smeasured from level ground in inches.
TRUCK-CANADA -- A vehicle first sold in Canadawith a non-school bus application, or cab models withregular production option RQ2 (“truck service”).
TRACTOR-CANADA -- A cab model with regularproduction option RQ3 (“truck-tractor service”).
Service Parts Identification LabelYou’ll find this label in a location determined by thebody manufacturer. It’s very helpful if you ever need toorder parts. On this label is:
� your VIN,
� the model designation,
� paint information and
� a list of all production options and special equipment.
Be sure that this label is not removed from the vehicle.

yellowblue
6-68
Electrical SystemAdd-On Electrical Equipment
NOTICE:
Don’t add anything electrical to your vehicleunless you check with your dealer first. Someelectrical equipment can damage your vehicleand the damage wouldn’t be covered by yourwarranty. Some add-on electrical equipment cankeep other components from working as they should.
Headlamp WiringThe headlamp wiring is protected by a circuit breaker inthe light switch. An electrical overload will cause thelights to go on and off, or in some cases to remain off. If this happens, have your headlamp wiring checkedright away.
Windshield Wiper FusesThe windshield wiper motor is protected by a circuitbreaker inside the motor and a circuit breaker in the fuseblock. If the motor overheats, the wipers will stop untilthe motor cools. If the overload is caused by anelectrical problem, be sure to get it fixed.
Fusible LinksA fusible link is a short piece of wire several gage sizessmaller than the circuit it protects. It will melt in anoverload situation, opening the circuit.
Your starter relay and other circuits have these fusiblelinks. The size is printed on the insulation. If the insulationis burned beyond recognition, consult your GM dealer forthe proper size. Replace a fusible link with one of thesame size and insulation type. Fusible link insulation is aspecial purpose high-temperature material.
The hydraulic brake booster motor feed circuit andstarter relay circuit are protected by a fusible link.Vehicles with a diesel engine have a fusible link for theintake heater feed circuit. Vehicles equipped with anelectronically controlled diesel engine also have afusible link for the engine control unit.

yellowblue
6-69
Power Windows and Other Power OptionsCircuit breakers in the fuse panel protect the powerwindows and other power accessories. When the currentload is too heavy, the circuit breaker opens and closes.This protects the circuit until the current load returns tonormal or the problem is fixed.
Fuses and Circuit BreakersThe wiring circuits in your vehicle are protected fromshort circuits by a combination of fuses, circuit breakers,maxi-fuses and fusible links. This greatly reduces thechance of a fire caused by an electrical problem. Theremay be a fuse taped to the wiring harness inside thebattery box and one near the generator also taped to thewiring harness.
There are two circuit breaker/fuse blocks in yourvehicle: the instrument panel circuit breaker block andthe maxi-fuse block.
Instrument Panel Circuit Breaker Block
This fuse block is in the lower portion of the instrumentpanel, to the left of the steering column.
To open the door, pull upand outward on the recesseddoor handle and the doorwill snap out.
To install the door, place the lower door into the bottomretainer and push the top of the door in until it snaps into place.
If you ever have a problem on the road and don’t have aspare circuit breaker, you can borrow one of the correctvalue. Just pick some feature of your vehicle that youcan get along without -- like the radio or cigarettelighter -- and use its circuit breaker if it is of the valueyou need. Remember to replace the circuit breaker assoon as you can.
These circuit breakers are non-cycling; do not replacethem with cycling circuit breakers. Also, don’t usecircuit breakers of higher amperage than those indicatedon the circuit breaker block.

yellowblue
6-70
Name Circuits Protected
HYD BRK Brake Pump Motor Relay
HYD BRK Brake Alarm Module
Name Circuits Protected
B/U IGN3 Fuel Filter Relay, Blower MotorRelays, ABS Power Relay,Back-Up Lamps, Auxiliary WiringRelay, IGN 3 Relay, PowerWindow Relay, Vehicle InterfaceModule, TransmissionTemperature Gage
STOP Stoplamps
WASH/WIPE Windshield Wipers/Washer,Accessory Relay
DOME/PNL Dome Lamp, Radio Receiver,Instrument Panel Lights, A/C Controller,Headlamp/Seatbelt Module
BLOWER Blower Motor
A/C A/C Clutch Compressor, A/C Controller
TRN/HAZ Turn Signals, Hazard Flashers

yellowblue
6-71
Name Circuits Protected
CHAS Exhaust Brake, Air SuspensionDump Valve, Air Dryer, HYDABS ECHU
PARK LP Auxiliary Wiring, Air ConditionerControls, Parking Lamps, TurnSignals, Taillamps, Stoplamps,Marker Lamps, Trailer RunningLamps, Lighted Mirrors, RadioReceiver, Mirror Clearance Lamps
HORN Horn/Diagnostic Connector
PRK BRK Parking Brake Module
FUEL Heated Fuel Filter (DieselEngines) or Fuel Pump (Gasoline Engines)
AXLE Heated Mirrors, Radiator Shutters,Two-Speed Axle Motor,Two-Speed Axle Switch
MRKR LP Roof Marker Lamps, Trailer Marker Lamps, Marker Lamp Relay
Name Circuits Protected
CIG/AUX Cigarette Lighter, Auxiliary Power Jacks
AUX Auxiliary Wiring Relay
IGN RLY/VIN Vehicle Interface Module (Diesel Engines) or Generator,Coil, Injectors (Gasoline Engines)
WDO Power Windows
CRNK Starter Relay
IGN SW Instrument Panel Cluster Telltales
AUX Auxiliary Wiring
RDO Radio, Auxiliary Wiring
DR LK Power Door Locks

yellowblue
6-72
Maxi-Fuse Block
When a circuit goes out, first check the instrument panelcircuit breaker block. If no circuit breakers are out there,the problem could in the maxi-fuse block.
This block uses blade-type fuses. It’s on the upperpassenger side of the engine compartment at the rear.
To access the maxi-fuse block, gently squeeze bothsides of the cover to unlatch the tabs at the top. Then,unsnap both attachments at the bottom and remove the cover.
Power is fed through these fuses to devices such as theheadlamp switch, ignition switch feed circuits and theauxiliary brake pump (hydraulic brake vehicles).
Be sure to replace maxi-fuses with maxi-fuses of thesame rating. Do not use maxi-fuses of higher amperagethan those indicated on the maxi-fuse block.

yellowblue
6-73
Name Circuits/Circuit BreakersProtected
STP/HAZTURN
Stop Lamp, Turn Signal/HazardLights, Fuel, Ignition Relay(Gasoline Engines)
IGN SW3 Air Conditioner, Ignition Switch,Axle, Chassis
Name Circuits/Circuit BreakersProtected
INT/EXTLIGHTS
Parking Lamps, Dome/Panel Lights
HEAD LAMP Headlamps, Daytime Running Lamps
AUX WRG Auxiliary, Park Brake
IGN SW1 Ignition Switch, Wash/Wipe,Crank, Radio
HYD PUMP Hydraulic Brake, Brake Pump Motor
HYD ABS EHCU
PWRWDO/LCKS
Window, Door Locks
PARK BRK Parking Brake Motor
BLOWERHORN
Blower, Horn, CigaretteLighter/Auxiliary
FUEL/ENGINE Empty

yellowblue
6-74
Replacement BulbsIt is recommended that you use an AC� type bulbwhenever you need to replace one.
Before you replace any bulbs, be sure that all lamps areoff and the engine isn’t running.
Capacities and SpecificationsReplacement part numbers listed in this section arebased on the latest information available at the time ofprinting. They are subject to later change. If a part listedhere isn’t the same as the part in your vehicle when itwas built, or if you have any questions, please contactyour GM Truck dealer.
Engine Identification and DataEngine RPO LG5 LP4/L21
Engine Type 7.2L L6 7.4L V8
Fuel System HEUI SPFI
Firing Order 1-5-3-6-2-4 1-8-4-3-6-5-7-2
Wheel Nut TorqueRefer to “Tightening the Wheel Nuts” in this section forwheel nut torque information.
Cooling System CapacityModel Quarts (Liters)7.2L 32.0 (30.0). . . . . . . . . . . . . . . . . . . . . . . . . . . . . .
with automatic transmission 30.0 (28.4). . . . . . . . . . 7.4L 25.0 (23.7). . . . . . . . . . . . . . . . . . . . . . . . . . . . . .
with automatic transmission 23.0 (22.7). . . . . . . . . .
Above capacities (volumes) are approximate.
Crankcase CapacityCapacities (volumes) shown are for normal refill. Addoil as indicated when the oil filter element is changed.Capacities given are approximate -- keep level withinthe operating range. Do not operate with fluid levelbelow the ADD line.
Engine Capacity-- Quarts (Liters)
7.2L 21 (19.0)*
7.4L 8 (7.5)
*Additional oil is required with auxiliary oil filtersystems. Make sure to add enough extra oil to fill theauxiliary oil filter system. For vehicles equipped withthe LUBERFINER 750-C, add 14 quarts (13.25 L).

yellowblue
6-75
Extending the recommended oil change interval requiresthe use of an infrared oil analysis program which showsthe condition of the oil and its additives. For moreinformation, consult your GM Truck dealer, who is anauthorized Caterpillar� engine dealer.
Transmission CapacityCapacities (volumes) shown are approximate. Formanual transmissions, the correct oil level is to thebottom of the fluid fill plug opening. The oil capacitywill vary, due to the angle of the transmission, with thevehicle. For automatic transmissions, see the AllisonAutomatic Transmission Operator’s Manual for oilcheck and maintenance information.
Manual Transmission Pints (Liters)RT6609 12.0 (5.7). . . . . . . . . . . . . . . . . . . . . . . . . . . . . RT6610 12.0 (5.8). . . . . . . . . . . . . . . . . . . . . . . . . . . . . RTO6610 12.0 (5.8). . . . . . . . . . . . . . . . . . . . . . . . . . .
RT6613 16.0 (7.5). . . . . . . . . . . . . . . . . . . . . . . . . . . . . RT7608LL 19.5 (9.3). . . . . . . . . . . . . . . . . . . . . . . . . . RT8609 15.0 (7.0). . . . . . . . . . . . . . . . . . . . . . . . . . . . . FS4205A, FS4205B, FS4205C 12.5 (5.9). . . . . . . . . . 5205A, FS5205C 12.5 (5.9). . . . . . . . . . . . . . . . . . . . . FS5306 18.0 (8.5). . . . . . . . . . . . . . . . . . . . . . . . . . . . . FS6305A, FS6305B 19.0 (9.0). . . . . . . . . . . . . . . . . . . FS6306 19.5 (9.2). . . . . . . . . . . . . . . . . . . . . . . . . . . . . FS7206 20.0 (9.5). . . . . . . . . . . . . . . . . . . . . . . . . . . . . T8607B 36.0 (17.0). . . . . . . . . . . . . . . . . . . . . . . . . . . Automatic Transmission Pints (Liters)AT542 (for oil pan filter change) 30.0 (14.0)*. . . . . . . AT545 (for oil pan filter change) 40.0 (19.0)*. . . . . . . MT643 (for oil pan filter change) 13.0 (24.5)*. . . . . . MT653 (for oil pan filter change) 36.0 (17.0)*. . . . . .
*Add two pints (one liter) when changing spin-on filter.

yellowblue
6-76
Rear Axle Lubricant CapacitySingle Speed Axle Lubricant, Pints (Liters)15040S 21.0 (10.1). . . . . . . . . . . . . . . . . . . . . . . . . . . . 19060S 28.0 (12.8). . . . . . . . . . . . . . . . . . . . . . . . . . . . 21060D 28.0 (14.7). . . . . . . . . . . . . . . . . . . . . . . . . . . . 21060S 28.0 (14.7). . . . . . . . . . . . . . . . . . . . . . . . . . . . 22060S 28.0 (14.7). . . . . . . . . . . . . . . . . . . . . . . . . . . . 22080S 40.0 (20.3). . . . . . . . . . . . . . . . . . . . . . . . . . . . 23080S 40.0 (20.3). . . . . . . . . . . . . . . . . . . . . . . . . . . . 23431 40.0 (20.3). . . . . . . . . . . . . . . . . . . . . . . . . . . . . 23105S 48.0 (22.7). . . . . . . . . . . . . . . . . . . . . . . . . . . . 26085P 41.0 (19.5). . . . . . . . . . . . . . . . . . . . . . . . . . . . 26105S 48.0 (22.7). . . . . . . . . . . . . . . . . . . . . . . . . . . . 30105S 46.0 (23.2). . . . . . . . . . . . . . . . . . . . . . . . . . . . Two-Speed Axle Lubricant, Pints (Liters)15040T 24.0 (11.5). . . . . . . . . . . . . . . . . . . . . . . . . . . . 19060T 35.0 (17.5). . . . . . . . . . . . . . . . . . . . . . . . . . . . 21060T 35.0 (17.5). . . . . . . . . . . . . . . . . . . . . . . . . . . . 22060T 35.0 (17.5). . . . . . . . . . . . . . . . . . . . . . . . . . . . 23080T 39.0 (19.9). . . . . . . . . . . . . . . . . . . . . . . . . . . . 26080T 41.0 (19.5). . . . . . . . . . . . . . . . . . . . . . . . . . . .
Above capacities (volumes) are approximate.
Tandem Axles Lubricant, Pints (Liters)DS344 (front) 29.0 (15.1). . . . . . . . . . . . . . . . . . . . . . . RS344 (rear) 28.0 (13.2). . . . . . . . . . . . . . . . . . . . . . . . DS454 (front) 29.0 (15.1). . . . . . . . . . . . . . . . . . . . . . . RS454 (rear) 28.0 (13.2). . . . . . . . . . . . . . . . . . . . . . . . DS404, DS404P (front) 29.0 (15.1). . . . . . . . . . . . . . . RS404 (rear) 34.0 (16.1). . . . . . . . . . . . . . . . . . . . . . . . DT402P (front) 34.0 (16.1). . . . . . . . . . . . . . . . . . . . . RT402 (rear) 34.0 (16.1). . . . . . . . . . . . . . . . . . . . . . . .
Above capacities (volumes) are approximate.
Fuel Tank CapacityModel Gallons (Liters)Standard 50 (189.0). . . . . . . . . . . . . . . . . . . . . . . . . . . Optional 35 (132.5). . . . . . . . . . . . . . . . . . . . . . . . . . . Optional 60 (227.1). . . . . . . . . . . . . . . . . . . . . . . . . . . Optional* 70 (264.0). . . . . . . . . . . . . . . . . . . . . . . . . . Optional** 100 (378.0). . . . . . . . . . . . . . . . . . . . . . . .
* Two 35-gallon (132 L) tanks**Two 50-gallon (189 L) tanksAbove capacities (volumes) are approximate.

yellowblue
6-77
Air Conditioning RefrigerantsNot all air conditioning refrigerants are the same. If the air conditioning system in your vehicle needsrefrigerant, be sure the proper refrigerant is used. If you’re not sure, ask your dealer.
Air Conditioning Refrigerant CapacityRefrigerant R-134a 2.5 lbs. (1.134 kg). . . . . . . . . . . .
This capacity (volume) is approximate.
Normal Maintenance ReplacementPartsAllison Transmission External FiltersEngine GM (AC) Part Number7.2L 25011122 (PF897). . . . . . . . . . . . . . . . . . . . . . . 7.4L 25011122 (PF897). . . . . . . . . . . . . . . . . . . . . . .
Air Compressor FilterAir Compressor GM Part Number
Bendix Tu-Flo550 (13.2 CFM)
2467368
Service Replacement Part and Filter RecommendationsEngine 7.2L 7.4L
RPO LG5 LP4/L21
Spark Plug — AC Type R41-932
—Gap — 0.060 inch (1.52 mm)
—Torque — 22.0 lb. ft. (30.0 Nm)
Oil Filter CAT� 2P4004 AC Type PF-932
PCV Valve — AC Type CV-774C
Air Cleaner* DonaldsonP522606
DonaldsonP533355
Fuel Filter AC-TP-915 Pri-mary**
AC Type GF-481
Pressure Caps RC-54 —
*Optional Davco (K28) D350921 spin-on type filterlocated in component box.
**Optional Cold Weather (KUK) Racor B6484GMspin-on type located in component box. Optional Davcoheated fuel water separator mounted on the side of thediesel engine.

yellowblue
6-78
✍ NOTES

7-
yellowblue
7-1
Section 7 Scheduled Maintenance Services
This section covers the maintenance required for your vehicle. Your vehicle needs these services to retain its safety,dependability and emission control performance.
7-2 Introduction7-4 Part A: Scheduled Maintenance Services7-5 Scheduled Maintenance
7-23 Part B: Owner Checks and Services7-28 Part C: Recommended Fluids and Lubricants7-31 Part D: Maintenance Record

yellowblue
7-2
Have you purchased the GM Protection Plan? The Plansupplements your new vehicle warranties. See yourWarranty and Owner Assistance booklet, or your GM dealer for details.
IntroductionYour Vehicle and the EnvironmentProper vehicle maintenance not only helps to keep yourvehicle in good working condition, but also helps theenvironment. All recommended maintenance proceduresare important. Improper vehicle maintenance can evenaffect the quality of the air we breathe. Improper fluidlevels or the wrong tire inflation can increase the levelof emissions from your vehicle. To help protect ourenvironment, and to keep your vehicle in goodcondition, please maintain your vehicle properly.

yellowblue
7-3
How This Section is OrganizedThis maintenance schedule is divided into five parts:
“Part A: Scheduled Maintenance Services” showswhat to have done and how often. Some of theseservices can be complex, so unless you are technicallyqualified and have the necessary equipment, you shouldlet your dealer’s service department or another qualifiedservice center do these jobs.
CAUTION:
Performing maintenance work on a vehicle canbe dangerous. In trying to do some jobs, you canbe seriously injured. Do your own maintenancework only if you have the required know-howand the proper tools and equipment for the job.If you have any doubt, have a qualifiedtechnician do the work.
If you are skilled enough to do some work on yourvehicle, you will probably want to get the serviceinformation. See “Service and Owner Publications” inthe Index.
“Part B: Owner Checks and Services” tells you what should be checked and when. It also explains whatyou can easily do to help keep your vehicle in good condition.
“Part C: Recommended Fluids and Lubricants” lists some recommended products to help keep yourvehicle properly maintained. These products, or theirequivalents, should be used whether you do the workyourself or have it done.
“Part D: Maintenance Record” provides a place for you to record the maintenance performed on yourvehicle. Whenever any maintenance is performed, besure to write it down in this part. This will help youdetermine when your next maintenance should be done.In addition, it is a good idea to keep your maintenancereceipts. They may be needed to qualify your vehicle forwarranty repairs.

yellowblue
7-4
Part A: Scheduled MaintenanceServicesUsing Your Maintenance ScheduleWe at General Motors want to help you keep yourvehicle in good working condition. But we don’t knowexactly how you’ll drive it. You may drive very shortdistances only a few times a week. Or you may drivelong distances all the time in very hot, dusty weather.You may use your vehicle in making deliveries or inmany other ways.
Because of all the different ways people use theirvehicles, maintenance needs vary. You may need morefrequent checks and replacements. So please read thefollowing and note how you drive. If you have anyquestions on how to keep your vehicle in goodcondition, see your GM dealer.
This part tells you the maintenance services you shouldhave done and when you should schedule them. If yougo to your dealer for your service needs, you’ll knowthat GM-trained and supported service people willperform the work using genuine GM parts.
The proper fluids and lubricants to use are listed in Part C.Make sure whoever services your vehicle uses these. Allparts should be replaced and all necessary repairs donebefore you or anyone else drives the vehicle.
This schedule is for vehicles that:
� carry passengers and cargo within recommendedlimits. You will find these limits on your vehicle’sCertification/Tire label. See “Loading Your Vehicle”in the Index.
� are driven on reasonable road surfaces within legaldriving limits.
� use the recommended fuel. See “Fuel” in the Index.
Scheduled Maintenance SupplementsIf your vehicle has a Caterpillar� diesel engine, your GM Owner’s Manual is supplemented by the Caterpillar�
Diesel Engine Operation & Maintenance Manual. If yourvehicle has an Allison transmission, your GM Owner’sManual is supplemented by an Allison TransmissionOperator’s Manual. Always refer to these manuals forrelated maintenance services.

yellowblue
7-5
Scheduled MaintenanceThe services shown in this schedule up to 100,000 miles(166 000 km) should be performed after 100,000 miles(166 000 km) at the same intervals. The services shownafter 100,000 miles (166 000 km) should be performedat those same intervals.
This vehicle has a computer that lets you know when tochange your engine oil. This is not based on mileage,but on engine revolutions and engine operatingtemperature. When the computer has calculated that theoil needs changing, the Oil Life Indicator will indicatethat a change is necessary.
See “Footnotes” at the end of this Maintenance Schedulefor further explanation of maintenance services andCaterpillar� diesel application.
100 Miles (160 km)� Wheel stud nut service. (45)
500 Miles (800 km)� Wheel stud nut service. (45)
1,000 Miles (1 600 km)� Wheel stud nut service. (45)(46)
3,000 Miles (5 000 km)� Engine oil and filter service. (3)(9)� Check fluid levels (or every 3 months, whichever
occurs first). (1)(2)(6)� Clutch pedal free travel service. (10)� Rear axle air shift motor service. (11)
6,000 Miles (10 000 km)� Engine oil and filter service. (3)(9)� Check fluid levels (or every 3 months, whichever
occurs first). (1)(2)(6)� Chassis lubrication service (or every 6 months,
whichever occurs first). (12)� Lubricate door hinge pins and rollers with engine oil.� Wheels and tires service. (15)� Hydraulic brake service (or every 6 months,
whichever occurs first). (7)� Hydraulic parking brake service (or every 6 months,
whichever occurs first). (8)� Clutch pedal free travel service. (10)
9,000 Miles (15 000 km)� Engine oil and filter service. (3)(9)� Check fluid levels (or every 3 months, whichever
occurs first). (1)(2)(6)

yellowblue
7-6
12,000 Miles (20 000 km)� Engine oil and filter service. (3)(9)� Check fluid levels (or every 3 months, whichever
occurs first). (1)(2)(6)� Chassis lubrication service (or every 6 months,
whichever occurs first). (12)� Lubricate door hinge pins and rollers with engine oil.� Wheels and tires service. (15)� Hydraulic brake service (or every 6 months,
whichever occurs first). (7)� Hydraulic parking brake service (or every 6 months,
whichever occurs first). (8)� Engine drive belts service (or every 12 months,
whichever occurs first). (18)� Clutch pedal free travel service. (10)� Throttle linkage service. (19)� Thermostatically controlled engine cooling
fan service. (4)(20) � Shields and underhood insulation service. (4)(5)(21)� Check air brake relay valve operation and check for
leaks (or every month, or every 300 hours,whichever occurs first).
15,000 Miles (25 000 km)� Engine oil and filter service. (3)(9)� Check fluid levels (or every 3 months, whichever
occurs first). (1)(2)(6)� Steering system service. (13)� Front and rear suspension service. (14)� Spring-to-axle U-bolts and shackle bolts service. (16)� Exhaust system service (or every 6 months,
whichever occurs first). (3)(4)(17)� Air brake service (or every 6 months, whichever
occurs first). (39)
18,000 Miles (30 000 km)� Engine oil and filter service. (3)(9)� Check fluid levels (or every 3 months, whichever
occurs first). (1)(2)(6)� Chassis lubrication service (or every 6 months,
whichever occurs first). (12)� Inspect door hinge pins and bushings and replace as
necessary. Lubricate door hinge pins and rollers withengine oil.

yellowblue
7-7
� Replace air conditioning filter dryer (or every 18 months, whichever occurs first, and wheneverrefrigerant charge is lost for any reason).
� Wheels and tires service. (15)� Hydraulic brake service (or every 6 months,
whichever occurs first). (7)� Hydraulic brake caliper service (or every 6 months,
whichever occurs first). (22)� Hydraulic parking brake service (or every 6 months,
whichever occurs first). (8)� Clutch pedal free travel service. (10)� Clean air brake application valve (or every 3 months,
or every 300 hours, whichever occurs first); lubricate linkage.
21,000 Miles (35 000 km)� Engine oil and filter service. (3)(9)� Check fluid levels (or every 3 months, whichever
occurs first). (1)(2)(6)
24,000 Miles (40 000 km)� Engine oil and filter service. (3)(9)� Check fluid levels (or every 3 months, whichever
occurs first). (1)(2)(6)
� Chassis lubrication service (or every 6 months,whichever occurs first). (12)
� Lubricate door hinge pins and rollers with engine oil.� Wheel bearing (grease type) service (or every
24 months, whichever occurs first, and wheneverhubs are removed). (23)
� Wheels and tires service. (15)� Hydraulic brake service (or every 6 months,
whichever occurs first). (7)� Hydraulic parking brake service (or every 6 months,
whichever occurs first). (8)� Engine drive belts service (or every 12 months,
whichever occurs first). (18)� Clutch pedal free travel service. (10)� Throttle linkage service. (19)� Thermostatically controlled engine cooling
fan service. (4)(20) � Shields and underhood insulation service. (4)(5)(21)� Air intake system service (or every 24 months,
whichever occurs first). (4)(5)(24)� Thermostatically controlled air cleaner service
(or every 24 months, whichever occurs first).(3)(4)(25)�
(Continued)

yellowblue
7-8
24,000 Miles (40 000 km) (Continued)� Evaporative Control System service (if equipped) (or
every 24 months, whichever occurs first). (3)(26)�� Rear axle air shift motor service. (11)� Check air brake relay valve operation and check for
leaks (or every month, or every 300 hours,whichever occurs first).
� Air brake chamber service (or every 2 months,whichever occurs first). (41)
� Trailer brake hand control valve service (or every 3 months, or 900 hours, whichever occurs first). (42)
27,000 Miles (45 000 km)� Engine oil and filter service. (3)(9)� Check fluid levels (or every 3 months, whichever
occurs first). (1)(2)(6)
30,000 Miles (50 000 km)� Engine oil and filter service. (3)(9)� Check fluid levels (or every 3 months, whichever
occurs first). (1)(2)(6)� Chassis lubrication service (or every 6 months,
whichever occurs first). (12)� Replace fuel filter(s) (or every 12 months, whichever
occurs first). (3)
� Air cleaner filter replacement service (or every 24 months, whichever occurs first). (3)(4)(27)
� Steering system service. (13)� Front and rear suspension service. (14)� Spring-to-axle U-bolts and shackle bolts service. (16)� Exhaust system service (or every 6 months,
whichever occurs first). (3)(4)(17)� Air brake service (or every 6 months, whichever
occurs first). (39) � Lubricate door hinge pins and rollers with engine oil.� Wheels and tires service. (15)� Hydraulic brake service (or every 6 months,
whichever occurs first). (7)� Hydraulic parking brake service (or every 6 months,
whichever occurs first). (8)� Clutch pedal free travel service. (10)� Air brake automatic slack adjuster service (or every
500 hours, whichever occurs first). (40)
33,000 Miles (55 000 km)� Engine oil and filter service. (3)(9)� Check fluid levels (or every 3 months, whichever
occurs first). (1)(2)(6)

yellowblue
7-9
36,000 Miles (60 000 km)� Engine oil and filter service. (3)(9)� Check fluid levels (or every 3 months, whichever
occurs first). (1)(2)(6)� Chassis lubrication service (or every 6 months,
whichever occurs first). (12)� Inspect door hinge pins and bushings and replace as
necessary. Lubricate door hinge pins and rollers withengine oil.
� Replace air conditioning filter dryer (or every 18 months, whichever occurs first, and wheneverrefrigerant charge is lost for any reason).
� Wheels and tires service. (15)� Hydraulic brake service (or every 6 months,
whichever occurs first). (7)� Hydraulic brake caliper service (or every 6 months,
whichever occurs first). (22)� Hydraulic parking brake service (or every 6 months,
whichever occurs first). (8)� Engine drive belts service (or every 12 months,
whichever occurs first). (18)� Clutch pedal free travel service. (10)� Throttle linkage service. (19)� Thermostatically controlled engine cooling
fan service. (4)(20)
� Shields and underhood insulation service. (4)(5)(21) � Check air brake relay valve operation and check for
leaks (or every month, or every 300 hours,whichever occurs first).
� Clean air brake application valve (or every 3 months,or every 300 hours, whichever occurs first); lubricate linkage.
39,000 Miles (65 000 km)� Engine oil and filter service. (3)(9)� Check fluid levels (or every 3 months, whichever
occurs first). (1)(2)(6)
42,000 Miles (70 000 km)� Engine oil and filter service. (3)(9)� Check fluid levels (or every 3 months, whichever
occurs first). (1)(2)(6)� Chassis lubrication service (or every 6 months,
whichever occurs first). (12)� Lubricate door hinge pins and rollers with engine oil.� Wheels and tires service. (15)� Hydraulic brake service (or every 6 months,
whichever occurs first). (7)� Hydraulic parking brake service (or every 6 months,
whichever occurs first). (8)� Clutch pedal free travel service. (10)

yellowblue
7-10
45,000 Miles (75 000 km)� Engine oil and filter service. (3)(9)� Check fluid levels (or every 3 months, whichever
occurs first). (1)(2)(6)� Steering system service. (13)� Front and rear suspension service. (14)� Spring-to-axle U-bolts and shackle bolts service. (16)� Exhaust system service (or every 6 months,
whichever occurs first). (3)(4)(17)� Air brake service (or every 6 months, whichever
occurs first). (39)
48,000 Miles (80 000 km)� Engine oil and filter service. (3)(9)� Check fluid levels (or every 3 months, whichever
occurs first). (1)(2)(6)� Chassis lubrication service (or every 6 months,
whichever occurs first). (12)� Lubricate door hinge pins and rollers with engine oil.� Wheel bearing (grease type) service (or every
24 months, whichever occurs first, and wheneverhubs are removed). (23)
� Wheels and tires service. (15)� Hydraulic brake service (or every 6 months,
whichever occurs first). (7)
� Hydraulic parking brake service (or every 6 months,whichever occurs first). (8)
� Engine drive belts service (or every 12 months,whichever occurs first). (18)
� Clutch pedal free travel service. (10)� Throttle linkage service. (19)� Thermostatically controlled engine cooling
fan service. (4)(20) � Shields and underhood insulation service. (4)(5)(21)� Air intake system service (or every 24 months,
whichever occurs first). (4)(5)(24)� Thermostatically controlled air cleaner service (or
every 24 months, whichever occurs first).(3)(4)(25)�
� Evaporative Control System service (if equipped) (orevery 24 months, whichever occurs first). (3)(26)�
� Rear axle air shift motor service. (11)� Check air brake relay valve operation and check for
leaks (or every month, or every 300 hours,whichever occurs first).
� Air brake chamber service (or every 2 months,whichever occurs first). (41)
� Trailer brake hand control valve service (or every 3 months, or 900 hours, whichever occurs first). (42)

yellowblue
7-11
51,000 Miles (85 000 km)� Engine oil and filter service. (3)(9)� Check fluid levels (or every 3 months, whichever
occurs first). (1)(2)(6)
54,000 Miles (90 000 km)� Engine oil and filter service. (3)(9)� Check fluid levels (or every 3 months, whichever
occurs first). (1)(2)(6)� Chassis lubrication service (or every 6 months,
whichever occurs first). (12)� Inspect door hinge pins and bushings and replace if
necessary. Lubricate door hinge pins and rollers withengine oil.
� Replace air conditioning filter dryer (or every 18 months, whichever occurs first, and wheneverrefrigerant charge is lost for any reason).
� Wheels and tires service. (15)� Hydraulic brake service (or every 6 months,
whichever occurs first). (7)� Hydraulic brake caliper service (or every 6 months,
whichever occurs first). (22)� Hydraulic parking brake service (or every 6 months,
whichever occurs first). (8)� Clutch pedal free travel service. (10)
� Spark plug service. (3)(28)� Clean air brake application valve (or every 3 months,
or every 300 hours, whichever occurs first); lubricate linkage.
57,000 Miles (95 000 km)� Engine oil and filter service. (3)(9)� Check fluid levels (or every 3 months, whichever
occurs first). (1)(2)(6)
60,000 Miles (100 000 km)� Engine oil and filter service. (3)(9)� Check fluid levels (or every 3 months, whichever
occurs first). (1)(2)(6)� Chassis lubrication service (or every 6 months,
whichever occurs first). (12)� Replace fuel filter(s) (or every 12 months, whichever
occurs first). (3)� Air cleaner filter replacement service (or every
24 months, whichever occurs first). (3)(4)(27)� Steering system service. (13)� Front and rear suspension service. (14)� Spring-to-axle U-bolts and shackle bolts service. (16)
(Continued)

yellowblue
7-12
60,000 Miles (100 000 km) (Continued)� Exhaust system service (or every 6 months,
whichever occurs first). (3)(4)(17)� Air brake service (or every 6 months, whichever
occurs first). (39) � Lubricate door hinge pins and rollers with engine oil.� Wheels and tires service. (15)� Hydraulic brake service (or every 6 months,
whichever occurs first). (7)� Hydraulic parking brake service (or every 6 months,
whichever occurs first). (8)� Engine drive belts service (or every 12 months,
whichever occurs first). (18)� Clutch pedal free travel service. (10)� Throttle linkage service. (19)� Thermostatically controlled engine cooling
fan service. (4)(20) � Shields and underhood insulation service. (4)(5)(21)� Positive Crankcase Ventilation (PCV) system service
(or every 60 months, whichever occurs first). (3)(33)� Check air brake relay valve operation and check for
leaks (or every month, or every 300 hours,whichever occurs first).
� Air brake automatic slack adjuster service (or every500 hours, whichever occurs first). (40)
63,000 Miles (105 000 km)� Engine oil and filter service. (3)(9)� Check fluid levels (or every 3 months, whichever
occurs first). (1)(2)(6)
66,000 Miles (110 000 km)� Engine oil and filter service. (3)(9)� Check fluid levels (or every 3 months, whichever
occurs first). (1)(2)(6)� Chassis lubrication service (or every 6 months,
whichever occurs first). (12)� Lubricate door hinge pins and rollers with engine oil.� Wheels and tires service. (15)� Hydraulic brake service (or every 6 months,
whichever occurs first). (7)� Hydraulic parking brake service (or every 6 months,
whichever occurs first). (8)� Clutch pedal free travel service. (10)
69,000 Miles (115 000 km)� Engine oil and filter service. (3)(9)� Check fluid levels (or every 3 months, whichever
occurs first). (1)(2)(6)

yellowblue
7-13
72,000 Miles (120 000 km)� Engine oil and filter service. (3)(9)� Check fluid levels (or every 3 months, whichever
occurs first). (1)(2)(6)� Chassis lubrication service (or every 6 months,
whichever occurs first). (12)� Inspect door hinge pins and bushings and replace as
necessary. Lubricate door hinge pins and rollers withengine oil.
� Replace air conditioning filter dryer (or every 18 months, whichever occurs first, and wheneverrefrigerant charge is lost for any reason).
� Wheel bearing (grease type) service (or every 24 months, whichever occurs first, and wheneverhubs are removed). (23)
� Wheels and tires service. (15)� Hydraulic brake service (or every 6 months,
whichever occurs first). (7)� Hydraulic brake caliper service (or every 6 months,
whichever occurs first). (22)� Hydraulic parking brake service (or every 6 months,
whichever occurs first). (8)� Engine drive belts service (or every 12 months,
whichever occurs first). (18)� Clutch pedal free travel service. (10)
� Throttle linkage service. (19)� Thermostatically controlled engine cooling
fan service. (4)(20) � Shields and underhood insulation service. (4)(5)(21)� Air intake system service (or every 24 months,
whichever occurs first). (4)(5)(24)� Thermostatically controlled air cleaner service (or
every 24 months, whichever occurs first). (3)(4)(25)� Fuel tank, fuel cap and fuel lines service (or every
72 months, whichever occurs first). (3)(30) �� EGR system inspection (or every 72 months,
whichever occurs first). (3)(31)� Electronic Vacuum Regulator Valve (EVRV)
inspection (or every 72 months, whichever occursfirst). (3)(32)
� Evaporative Control System Service (if equipped)(or every 24 months, whichever occurs first).(3)(26)�
� Rear axle air shift motor service. (11)� Check air brake relay valve operation and check for
leaks (or every month, or every 300 hours,whichever occurs first).
(Continued)

yellowblue
7-14
72,000 Miles (120 000 km) (Continued)� Clean air brake application valve (or every 3 months,
or every 300 hours, whichever occurs first); lubricate linkage.
� Air brake chamber service (or every 2 months,whichever occurs first). (41)
� Trailer brake hand control valve service (or every 3 months, or 900 hours, whichever occurs first). (42)
75,000 Miles (125 000 km)� Engine oil and filter service. (3)(9)� Check fluid levels (or every 3 months, whichever
occurs first). (1)(2)(6)� Steering system service. (13)� Front and rear suspension service. (14)� Spring-to-axle U-bolts and shackle bolts service. (16)� Exhaust system service (or every 6 months,
whichever occurs first). (3)(4)(17)� Air brake service (or every 6 months, whichever
occurs first). (39)
78,000 Miles (130 000 km)� Engine oil and filter service. (3)(9)� Check fluid levels (or every 3 months, whichever
occurs first). (1)(2)(6)
� Chassis lubrication service (or every 6 months,whichever occurs first). (12)
� Lubricate door hinge pins and rollers with engine oil.� Wheels and tires service. (15)� Hydraulic brake service (or every 6 months,
whichever occurs first). (7)� Hydraulic parking brake service (or every 6 months,
whichever occurs first). (8)� Clutch pedal free travel service. (10)
81,000 Miles (135 000 km)� Engine oil and filter service. (3)(9)� Check fluid levels (or every 3 months, whichever
occurs first). (1)(2)(6)� Wheel bearings service -- Eaton Axle (oil-filled) (or
every 24 months, whichever occurs first). (1)(23)
84,000 Miles (140 000 km)� Engine oil and filter service. (3)(9)� Check fluid levels (or every 3 months, whichever
occurs first). (1)(2)(6)� Chassis lubrication service (or every 6 months,
whichever occurs first). (12)� Lubricate door hinge pins and rollers with engine oil.� Wheels and tires service. (15)

yellowblue
7-15
� Hydraulic brake service (or every 6 months,whichever occurs first). (7)
� Hydraulic parking brake service (or every 6 months,whichever occurs first). (8)
� Engine drive belts service (or every 12 months,whichever occurs first). (18)
� Clutch pedal free travel service. (10)� Throttle linkage service. (19)� Thermostatically controlled engine cooling
fan service. (4)(20) � Shields and underhood insulation service. (4)(5)(21)� Check air brake relay valve operation and check for
leaks (or every month, or every 300 hours,whichever occurs first).
87,000 Miles (145 000 km)� Engine oil and filter service. (3)(9)� Check fluid levels (or every 3 months, whichever
occurs first). (1)(2)(6)
90,000 Miles (150 000 km)� Engine oil and filter service. (3)(9)� Check fluid levels (or every 3 months, whichever
occurs first). (1)(2)(6)� Chassis lubrication service (or every 6 months,
whichever occurs first). (12)
� Replace fuel filter(s) (or every 12 months, whicheveroccurs first). (3)
� Air cleaner filter replacement service (or every 24 months, whichever occurs first). (3)(4)(27)
� Steering system service. (13)� Front and rear suspension service. (14)� Spring-to-axle U-bolts and shackle bolts service. (16)� Exhaust system service (or every 6 months,
whichever occurs first). (3)(4)(17)� Air brake service (or every 6 months, whichever
occurs first). (39) � Inspect door hinge pins and bushings and replace as
necessary. Lubricate door hinge pins and rollers withengine oil.
� Replace air conditioning filter dryer (or every 18 months, whichever occurs first, and wheneverrefrigerant charge is lost for any reason).
� Wheels and tires service. (15)� Hydraulic brake service (or every 6 months,
whichever occurs first). (7)� Hydraulic brake caliper service (or every 6 months,
whichever occurs first). (22)� Hydraulic parking brake service (or every 6 months,
whichever occurs first). (8)
(Continued)
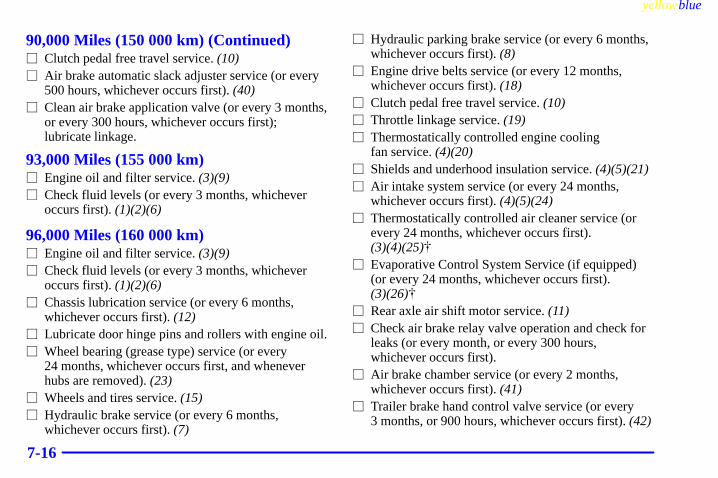
yellowblue
7-16
90,000 Miles (150 000 km) (Continued)� Clutch pedal free travel service. (10)� Air brake automatic slack adjuster service (or every
500 hours, whichever occurs first). (40)� Clean air brake application valve (or every 3 months,
or every 300 hours, whichever occurs first); lubricate linkage.
93,000 Miles (155 000 km)� Engine oil and filter service. (3)(9)� Check fluid levels (or every 3 months, whichever
occurs first). (1)(2)(6)
96,000 Miles (160 000 km)� Engine oil and filter service. (3)(9)� Check fluid levels (or every 3 months, whichever
occurs first). (1)(2)(6)� Chassis lubrication service (or every 6 months,
whichever occurs first). (12)� Lubricate door hinge pins and rollers with engine oil.� Wheel bearing (grease type) service (or every
24 months, whichever occurs first, and wheneverhubs are removed). (23)
� Wheels and tires service. (15)� Hydraulic brake service (or every 6 months,
whichever occurs first). (7)
� Hydraulic parking brake service (or every 6 months,whichever occurs first). (8)
� Engine drive belts service (or every 12 months,whichever occurs first). (18)
� Clutch pedal free travel service. (10)� Throttle linkage service. (19)� Thermostatically controlled engine cooling
fan service. (4)(20) � Shields and underhood insulation service. (4)(5)(21)� Air intake system service (or every 24 months,
whichever occurs first). (4)(5)(24)� Thermostatically controlled air cleaner service (or
every 24 months, whichever occurs first).(3)(4)(25)�
� Evaporative Control System Service (if equipped)(or every 24 months, whichever occurs first).(3)(26)�
� Rear axle air shift motor service. (11)� Check air brake relay valve operation and check for
leaks (or every month, or every 300 hours,whichever occurs first).
� Air brake chamber service (or every 2 months,whichever occurs first). (41)
� Trailer brake hand control valve service (or every 3 months, or 900 hours, whichever occurs first). (42)
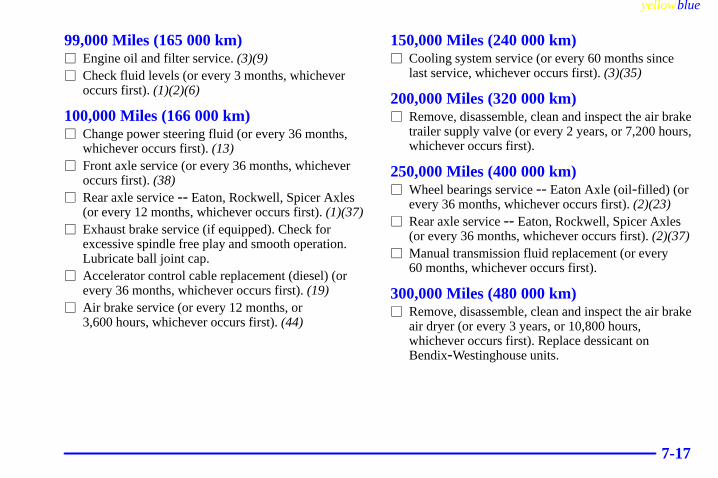
yellowblue
7-17
99,000 Miles (165 000 km)� Engine oil and filter service. (3)(9)� Check fluid levels (or every 3 months, whichever
occurs first). (1)(2)(6)
100,000 Miles (166 000 km)� Change power steering fluid (or every 36 months,
whichever occurs first). (13)� Front axle service (or every 36 months, whichever
occurs first). (38) � Rear axle service -- Eaton, Rockwell, Spicer Axles
(or every 12 months, whichever occurs first). (1)(37)� Exhaust brake service (if equipped). Check for
excessive spindle free play and smooth operation.Lubricate ball joint cap.
� Accelerator control cable replacement (diesel) (orevery 36 months, whichever occurs first). (19)
� Air brake service (or every 12 months, or 3,600 hours, whichever occurs first). (44)
150,000 Miles (240 000 km)� Cooling system service (or every 60 months since
last service, whichever occurs first). (3)(35)
200,000 Miles (320 000 km)� Remove, disassemble, clean and inspect the air brake
trailer supply valve (or every 2 years, or 7,200 hours,whichever occurs first).
250,000 Miles (400 000 km)� Wheel bearings service -- Eaton Axle (oil-filled) (or
every 36 months, whichever occurs first). (2)(23)� Rear axle service -- Eaton, Rockwell, Spicer Axles
(or every 36 months, whichever occurs first). (2)(37)� Manual transmission fluid replacement (or every
60 months, whichever occurs first).
300,000 Miles (480 000 km)� Remove, disassemble, clean and inspect the air brake
air dryer (or every 3 years, or 10,800 hours,whichever occurs first). Replace dessicant onBendix-Westinghouse units.

yellowblue
7-18
Footnotes� = The U.S. Environmental Protection Agency or theCalifornia Air Resources Board has determined that thefailure to perform this maintenance item will not nullifythe emission warranty or limit recall liability prior to thecompletion of the vehicle’s useful life. We, however,urge that all recommended maintenance services beperformed at the indicated intervals and the maintenancebe recorded.
(1) = If your vehicle has an Allison automatictransmission, your GM Owner’s Manual issupplemented by an Allison Transmission Operator’sManual. Always refer to these manuals for relatedmaintenance services.
(2) = Check the fluid level in the manual transmission.
(3) = An Emission Control Service.
(4) = A Noise Emission Control Device.
(5) = Applies only to vehicles sold in the United States.
(6) = Check fluid level in brake master cylinder, clutchmaster cylinder (if equipped), power steering pump,axle, transmission and hydraulic spring parking brakepump (if equipped). A low fluid level in the brakemaster cylinder can indicate worn brake linings andshould be checked accordingly.
(7) = Inspect brake lines and hoses for proper hook-up,binding, leaks, cracks, chafing, etc. Inspect disc brakepads for wear and rotors for surface condition. Checkbrake pedal for excessive free play or travel (or every 6 months, whichever occurs first) and have serviced ifneeded. Check brakes more often if driving habits andconditions result in frequent braking.
(8) = Inspect hydraulic parking brake drum and liningsfor wear or cracks and check linkage and adjustment.Check spring brake actuator and pump for leaks. Note: The spring brake section of the actuator isnon-serviceable.
(9) = This vehicle has an Engine Oil Life Monitor. Thismonitor will show you when to change the engine oiland filter -- usually between 3,000 miles (5 000 km) and7,500 miles (12 500 km) since your last oil change.Under severe conditions, the indicator may come onbefore 3,000 miles (5 000 km). Never drive your vehiclemore than 7,500 miles (12 500 km) or 12 monthswithout an oil and filter change.
The system won’t detect dust in the oil. So if you drivein a dusty area, be sure to change your oil and filterevery 3,000 miles (5 000 km) or sooner if the ChangeOil Light comes on. Remember to reset the Oil LifeMonitor whenever the oil is changed. For moreinformation, see “Change Oil Light” in the Index.

yellowblue
7-19
(10) = Check clutch pedal for free travel. Press pedal by hand until resistance is felt. Free travel should bemaintained at 1.5 to 2 inches (38 to 51 mm) measured at the clutch pedal pad. Make checks at 3,000 miles (5 000 km) and 6,000 miles (10 000 km) and then every6,000 miles (10 000 km) thereafter.
(11) = Inspect rear axle air shift motor for fluid leaks.Remove plug to check fluid level. Inspect air lines andhoses for proper hook-up, binding, leaks, etc. Inspect at3,000 miles (5 000 km) and 24,000 miles (40 000 km)and then every 24,000 miles (40 000 km) thereafter.
(12) = Chassis Lubrication Service: Lubricate all greasefittings in front suspension, front axle and steeringlinkage. DO NOT lubricate kingpin bushings with airpressure equipment; instead, use a hand grease gun toensure complete purge and eliminate sealer capdistortion. Lubricate transmission and shift linkage,hood latches and hood hinges, parking brake lever pivot,clevis pins and linkage, disc brake caliper rails, clutchlinkage and release bearing (if equipped), propeller shaftslip joint, universal joint, brake camshaft bracket, slackadjusters, pedal shaft, clutch cross shaft and clutch pedalsprings. Lubricate suspension, axle and steering linkagemore often when operating under dusty or muddyconditions and in excessive off-road use.
(13) = Check steering system:
� Look for damaged, loose or missing parts. Also look for parts showing signs of wear or lack oflubrication. Replace parts as needed. Also checksteering gear mounting bolts, pitman arm nut, gearhousing upper cover and side cover attaching bolts,steering column mounting bolts and cardan joint clamp bolts; tighten if necessary. (See service manual.)
� Inspect power steering hoses, tubes and fittings forleaks. Hoses and lines must not be twisted, kinked ortightly bent. Make sure clips, clamps, supportingtubes and hoses are in place and properly secured.
� Check steering gear for leakage around pitman shaftand housing. If leakage is evident (lubricant oozing out, not just oily film), leak should becorrected immediately.
(14) = Check front and rear suspension. Look fordamaged, loose or missing parts or parts showing signsof wear or lack of lubrication. Replace parts as needed.
(15) = Adjust tire pressures as indicated on theCertification/Tire label for optimum tire life. See “Tires”in the Index for further details. Check tires for excessiveor abnormal wear or damage. Also check for damagedwheels. Replace wheels and/or tires as needed.

yellowblue
7-20
(16) = Check spring-to-axle U-bolts and shackle boltsfor proper torque. See the service manual for torquesequence and specifications. When parts are replaced,the torque must be checked and adjusted more oftenduring the first 6,000 miles (10 000 km). Check torqueat 500 miles (800 km) and 2,000 miles (3 000 km) afterfirst use of parts.
(17) = Check complete exhaust system and cab areasnear the exhaust system for broken, damaged, missing orout-of-position parts. Also inspect for open seams,holes, loose connections or other conditions which couldlet exhaust fumes seep into the driver compartment.Needed repairs should be made at once. To helpmaintain system integrity, replace exhaust pipeswhenever a new muffler is put on.
(18) = Check all engine drive belts for cracks, fraying,wear and proper tension. Adjust or replace as needed.
(19) = Check throttle linkage for damaged or missingparts (including throttle return springs), interference orbinding. Fix any problems at once. Do not lubricateaccelerator and cruise control cables.
(20) = With the engine off and below normal operatingtemperature, check to see that the thermostaticallycontrolled engine cooling fan can be rotated by hand onviscous-operated drives. Replace as needed.
(21) = Check shields and underhood insulation fordamage or looseness. Adjust or replace as needed.
(22) = Lubricate caliper housing, caliper support springand caliper support key.
(23) = Wheel bearing service:
� Grease type -- Clean, inspect and lubricate with theproper wheel bearing grease at designated intervalsor when hubs are removed. See “RecommendedFluids and Lubricants” in the Index.
� Oil-filled type -- Some wheel bearings are lubricatedby rear axle lubricant. When you have oil-filledhubs, use lubricant identical to that used in your rearaxle. Lubricant change intervals are the same forfront and rear axles. However, you must maintain oillevel at the OIL LEVEL mark between changeintervals. See “Recommended Fluids andLubricants” in the Index.
(24) = Check the air intake system installation to seethat gaskets are seated properly and all hoseconnections, fasteners and other components are tight.For gasoline engines, also check to be sure the aircleaner housing is properly seated, that the cover fitstightly and that the wing nut is tight. Tightenconnections and fasteners or replace parts as required.

yellowblue
7-21
(25) = Check thermostatically controlled air cleanerinstallation to make certain that all ducts are connected andcorrectly installed. Also, check valve for proper operation.
(26) = Evaporative Control System Service (if equipped):Check all fuel and vapor lines and hoses for properconnections and correct routing (or every 24 months,whichever occurs first). Replace parts as needed.
(27) = Replace air cleaner filter (or every 24 months,whichever occurs first). Replace filter more often ifdriving in dusty conditions. Ask your dealer for theproper replacement intervals for your driving conditions.
(28) = Replace spark plugs. Inspect wires for damage.Check the wire boot and boot heat shield fit at sparkplugs and coil. Replace parts as needed.
(30) = Check the fuel tank, fuel cap and fuel lines fordamage which could cause leakage. Inspect fuel cap forcorrect sealing ability and any indications of damage.Check fuel cap gasket for even filler neck imprint.Replace parts as needed.
(31) = Check EGR system as described in the service manual. See “Service and Owner Publications” in the Index.
(32) = Inspect Electronic Vacuum Regulator Valve(EVRV) filter for excessive contamination or plugging.If needed, clean filter with solution of soap and water,let dry and install.
(33) = Check the PCV system for proper operation andclean PCV valve. Replace hoses as needed.
(34) = Replace PCV valve and blow out the PCV valvehose with compressed air. Replace hoses as needed.
(35) = Drain, flush and refill cooling system. See“Recommended Fluids and Lubricants” in the Index forwhat to use. Inspect hoses. Clean radiator, condenser,pressure cap and neck. Pressure test cooling system andpressure cap. For Caterpillar� diesel engines, always referto the Caterpillar Diesel Engine Operation & MaintenanceManual for coolant recommendations and change intervals.
(37) = Rear axle service: Change the lubricant. See“Recommended Fluids and Lubricants” in the Index.
(38) = Front axle service: Re-pack upper kingpin roller bearing.
(39) = Air brake service:
� Inspect brake lines and hoses for proper hook-up,binding, leaks, cracks, chafing, etc. Inspect drumbrake linings for wear or cracks. Inspect other brakeparts at each wheel, including drums, wheel cylindersand piston heat shields and boots. Check brake pedalfor excessive free play or travel (or every 6 months,whichever occurs first) and have serviced if needed.Check brakes more often if driving habits andconditions result in frequent braking.

yellowblue
7-22
� Test air lines for leaks; tighten as needed. Replacecompressor filter.
� Inspect air parking brake chamber for leaks anddamage. Inspect lines and hoses for leaks, cracks,chafing, etc. Also check all attachments fortightness, wear or damage. Note: The spring brakesection of the rear brake diaphragms arenon-serviceable.
� Replace the air compressor filter element, mountedon the air compressor. For remote air compressorintake service, refer to air cleaner filter replacement.
(40) = Clean and lubricate air brake automatic slackadjuster. Check pushrod travel and auto adjustmentoperation. Have serviced if needed.
(41) = Air brake chamber service: Check operation,mounting, clamps and air lines and check for leaks.
(42) = Trailer brake hand control valve service: Checkoperation; lubricate cam and follower.
(44) = Air brake service: Remove, disassemble, cleanand inspect the safety valve, standard brake chamber,quick release valve, quick release/double check valvecombination, parking brake control valve, double checkvalve, pressure protection valve and alcohol injector.
Remove, disassemble and clean the application valve;replace parts showing wear. Remove, disassemble, cleanand inspect the spring brake control valve; replacerubber parts.
(45) = For Stud Piloted Wheels Only: Tighten the wheelstud nuts to the specified torque values at 100 miles (160 km), 500 miles (800 km) and 1,000 miles (1 600 km) and then every 1,000 miles (1 600 km)thereafter. See “Tightening the Wheel Nuts” in the Index.
(46) = For Hub Piloted Wheels Only: Tighten the wheelstud nuts to the specified torque values at 1,000 miles (1 600 km). Thereafter, tighten them 1,000 miles (1 600 km) after each time the wheel is removed. See“Tightening the Wheel Nuts” in the Index.
(47) = Short Trip/City Maintenance Schedule. See“Maintenance Schedule Definition” in the introductionpages at the beginning of this section.
(48) = Long Trip/Highway Maintenance Schedule. See“Maintenance Schedule Definition” in the introductionpages at the beginning of this section.

yellowblue
7-23
Part B: Owner Checks and ServicesListed in this part are owner checks and services whichshould be performed at the intervals specified to helpensure the safety, dependability and emission controlperformance of your vehicle.
For your safety and that of others, any of thesafety-related components that may have been damagedin an accident should be checked and any needed repairsmade before operating the vehicle.
At the minimum, these routine checks should be madeevery 6 months or 6,000 miles (10 000 km), whicheveroccurs first. Whenever repairs are needed, have themcompleted before operating the vehicle.
At Each Fuel FillIt is important for you or a service station attendant toperform these underhood checks at each fuel fill.
Engine Oil Level Check
Check the engine oil level and add the proper oil ifnecessary. See “Engine Oil” in the Index for further details.
Engine Coolant Level Check
Check the engine coolant level and add DEX-COOL�
coolant mixture if necessary. See “Engine Coolant” inthe Index for further details.
Windshield Washer Fluid Level Check
Check the windshield washer fluid level in thewindshield washer tank and add the proper fluid ifnecessary. See “Windshield Washer Fluid” in the Indexfor further details.
Tire Inflation Check
Check tire inflation cold. Make sure tires are inflated tothe pressures specified on the Certification/Tire label.See “Tires” in the Index for further details.

yellowblue
7-24
At Least Twice a Year
Restraint System Check
Make sure the safety belt reminder light (if equipped)and all your belts, buckles, latch plates, retractors andanchorages are working properly. Look for any otherloose or damaged safety belt system parts. If you seeanything that might keep a safety belt system fromdoing its job, have it repaired. Have any torn or frayedsafety belts replaced.
Wiper Blade Check
Inspect wiper blades for wear or cracking. Replace bladeinserts that appear worn or damaged or that streak ormiss areas of the windshield. Also see “Wiper Blades,Cleaning” in the Index.
Weatherstrip Lubrication
Silicone grease on weatherstrips will make them lastlonger, seal better, and not stick or squeak. Applysilicone grease with a clean cloth. During very cold,damp weather more frequent application may berequired. (See “Recommended Fluids and Lubricants” in the Index.)
Body Lubrication Service
Lubricate all surfaces such as door checks, door lockbolts, lock strike plates, door hinge bushings anddovetail bumper wedges. Where oil holes are provided,a dripless oil can be used. The seat adjusters, seat track,door weatherstrips and rubber hood bumpers should alsobe lubricated.
Part C tells you what to use. More frequent lubrication may be required when exposed to a corrosive environment.
Parking Brake Check
Park on a fairly steep hill and hold the vehicle with theparking brake only. This checks holding ability.

yellowblue
7-25
Starter Switch Check
CAUTION:
When you are doing this check, the vehicle couldmove suddenly. If it does, you or others could beinjured. Follow the steps below.
1. Before you start, be sure you have enough roomaround the vehicle.
2. Firmly apply both the parking brake (see “ParkingBrake” in the Index if necessary) and the regular brakes.
NOTE: Do not use the accelerator pedal, and beready to turn off the engine immediately if it starts.
3. On automatic transmission vehicles, try to start theengine in each gear. The starter should work only inPARK (P), if equipped, or NEUTRAL (N). If thestarter works in any other position, your vehicleneeds service.
Automatic Transmission Shift Indicator Check
Check that the indicator points to the gear chosen.
Steering Check
Be alert for any changes in steering action, abnormalfront tire wear or steering wheel position. An inspectionor service is needed when the steering wheel is harder toturn or has too much free play, or if there are strangesounds when turning or parking.
Brake System Check
Be alert to illumination of the low air warning lamp orfor the tone alarm, or changes in braking action, such asrepeated pulling to one side, unusual sounds whenbraking or increased brake pedal travel. Make sure airbrake system reservoirs are drained daily with fullsystem air pressure, and check system for leaks. Any ofthese conditions could indicate the need for brakesystem inspection and/or service.

yellowblue
7-26
Engine Cooling System Service
Inspect the hoses and have them replaced if they arecracked, swollen or deteriorated. Inspect all pipes,fittings and clamps; replace as needed. Clean the outsideof the radiator and air conditioning condenser. To helpensure proper operation, a pressure test of the coolingsystem and pressure cap is recommended at least once a year.
Exhaust System Check
Be alert for any changes in the sound of the exhaustsystem or any smell of fumes. These are signs thesystem may be leaking. Have it checked and/or repairedat once. Refer to “Engine Exhaust” and “Running YourEngine While You’re Parked” in the Index.
Windshield Wipers and Washers Check
Check operation and condition of the wiper blades.Check the flow of the washer spray.
Defroster Check
Move the control to the defrost symbol and the fan to HIor the high symbol. Then check the airflow from theducts at the inside base of the windshield.
Mirrors and Sun Visors Check
Check that friction joints hold mirrors and sun visors in place.
Seat Adjuster Check
When adjusting a manual seat, be sure seat adjusterslatch by attempting to move the seat after latching.
Lamps Check
Check panel lighting, warning lights, indicator lightsand interior lamps. On the outside, check: license platelamps, sidemarker lamps, reflectors or lights on outsidemirrors, headlamps, parking lamps, identification andclearance lamps, taillamps, brake lamps, turn signals,backup lamps and hazard warning flashers. Haveheadlamp aim checked at once if beams seemimproperly aimed.
Glass, Mirrors, Lamps and/or Reflectors Condition Check
Look for broken, scratched, dirty or damaged glass,mirrors, lamps or reflectors that could reduce the viewor visibility or cause injury. Replace, clean or repair promptly.

yellowblue
7-27
Door Latches Check
Check that doors close, latch and lock tightly. Check forbroken, damaged or missing parts that might preventtight latching.
Hood Latches Check
Check that the hood closes firmly. Check for broken,damaged, loose or missing parts that might prevent tightlatching. Make sure the secondary latch (if equipped)keeps the hood from opening all the way when theprimary latch is released.
Fluid Leaks Check
Check for fuel, coolant, oil or other fluid leaks bylooking at the surface beneath the vehicle after it hasbeen parked for a while.
Underbody Inspection
Corrosive materials used for ice, snow removal and dustcontrol can collect on the underbody. If these materialsare not removed, accelerated corrosion (rust) can occuron underbody parts such as fuel lines, frame, floor panand exhaust system. At least every spring, flush these
materials from the underbody with plain water. Takecare to clean well any areas where mud and other debriscan collect. Sediment packed in closed areas of theframe should be loosened before being flushed.
Engine Cover Check
Check that the cab’s engine cover and seal (if equipped)are not torn or damaged. Be sure that the cover is bolteddown firmly to the floor.
At Least Once a Year
Key Lock Cylinders Service
Lubricate the key lock cylinders with the lubricantspecified in Part C.
Underbody Flushing Service
At least every spring, use plain water to flush anycorrosive materials from the underbody. Take care toclean thoroughly any areas where mud and other debriscan collect.
Tractor Protection (Breakaway) Valve Check
On air brake models, remove, disassemble, clean andinspect the tractor protection (breakaway) valve.

yellowblue
7-28
Part C: Recommended Fluids and LubricantsNOTE: Fluids and lubricants identified below by name, part number or specification may be obtainedfrom your dealer.
USAGE FLUID/LUBRICANT
Engine Oil(GasolineEngine)
Engine Oil with the AmericanPetroleum Institute Certified ForGasoline Engines “Starburst”symbol of the proper viscosity. Todetermine the preferred viscosityfor your vehicle’s engine, see“Engine Oil” in the Index.
Engine Oil(CaterpillarDiesel Engine)
See the Caterpillar� Operation &Maintenance Manual for EngineOil recommendations.
Engine Coolant(GM GasolineEngine)
50/50 mixture of clean, drinkablewater and use only GMGoodwrench� DEX-COOL� orHavoline� DEX-COOL�
Coolant. See “Engine Coolant” inthe Index.
USAGE FLUID/LUBRICANT
Engine Coolant(CaterpillarDiesel Engine)
See the Caterpillar� Operation &Maintenance Manual for EngineCoolant recommendations.
Hydraulic BrakeSystem
Delco Supreme 11� Brake Fluid(GM Part No. 12377967 orequivalent DOT-3 Brake Fluid).
WindshieldWasher Solvent
GM Optikleen� Washer Solvent(GM Part No. 1051515) or equivalent.
Clutch BearingLubricant
Clutch Bearing Lubricant (GMPart No. 12345777 or equivalent)or NLGI #3 consistency.
Exhaust BrakeBall Joint CapLubricant
High-Temperature Grease (GMPart No. 1051344 or equivalent) orNLGI #3 consistency.
Spring ParkingBrake HydraulicPump
DEXRON�-III AutomaticTransmission Fluid.

yellowblue
7-29
USAGE FLUID/LUBRICANT
Brake CaliperHousing, CaliperSupport Springand CaliperSupport Key
Aeroshell #5 Grease (GM Part No. 12377969 or equivalent).
Air BrakeSystem AlcoholEvaporator
Commercial grade of MethylAlcohol as specified in GM 6015-M.
Power SteeringSystem
GM Power Steering Fluid (GM Part No. 1052884 - 1 pint,1050017 - 1 quart, or equivalent).
ManualTransmission
Synthetic Manual TransmissionFluid (GM Part No. 12345724) isthe recommended lubricant to use.
USAGE FLUID/LUBRICANT
AutomaticTransmission
See the Allison TransmissionOperator’s Manual for correctTransmission Fluid.
ChassisLubrication
Chassis Lubricant (GM Part No. 12377985 or equivalent) orlubricant meeting requirements of NLGI # 2, Category LB or GC-LB.
Wheel BearingGrease
Wheel Bearing Lubricant meetingrequirements of NLGI # 2,Category GC or GC-LB (GM Part No. 1051344 or equivalent).

yellowblue
7-30
USAGE FLUID/LUBRICANT
Front WheelBearings withOil Filled Hubs
SAE 75W-90 Synthetic AxleLubricant for Medium DutyTrucks (GM Part No. 12345841 or equivalent).
Rear Axle SAE 75W-90 Synthetic AxleLubricant for Medium DutyTrucks (GM Part No. 12345841 or equivalent).
Rear Axle ShiftMotor Lubricant
Refrigerant Oil (GM Part No. 5416939).
USAGE FLUID/LUBRICANT
Propshafts andSplines
Wheel Bearing Lubricant meetingrequirements of NLGI # 2,Category GC or GC-LB (GM Part No. 1051344 or equivalent).
Cab -- DoorHinges andLatches
Multi -Purpose Lubricant,Superlube� (GM Part No. 12346241 or equivalent).
WeatherstripConditioning
Dielectric Silicone Grease (GMPart No. 12345579 or equivalent).
WeatherstripSqueaks
Synthetic Grease with Teflon,Superlube� (GM Part No. 12371287 or equivalent).

yellowblue
7-31
Part D: Maintenance RecordAfter the scheduled services are performed, enter thedate, odometer reading and services performed on themaintenance record charts provided here. Any additionalinformation from “Owner Checks and Services” can be
added on the following record pages. Also, you shouldretain all maintenance receipts. Your owner informationportfolio is a convenient place to store them.
Maintenance Record
DATEODOMETER
READING SERVICED BY MAINTENANCE PERFORMED

yellowblue
7-32
Maintenance Record
DATEODOMETER
READING SERVICED BY MAINTENANCE PERFORMED

8-
yellowblue
8-1
Section 8 Customer Assistance Information
Here you will find out how to contact GMC if you need assistance. This section also tells you how to obtain servicepublications and how to report any safety defects.
8-2 Customer Satisfaction Procedure8-3 Customer Assistance for Text Telephone
(TTY) Users8-3 Customer Assistance Offices8-5 Roadside Assistance8-5 Warranty Information8-6 Reporting Safety Defects to the United
States Government
8-6 Reporting Safety Defects to the Canadian Government
8-7 Reporting Safety Defects to General Motors8-7 Ordering Service and Owner Publications
in Canada

yellowblue
8-2
Customer Satisfaction Procedure Your satisfaction and goodwill are important to yourdealer and to GMC. Normally, any concerns with thesales transaction or the operation of your vehicle will beresolved by your dealer’s sales or service departments.Sometimes, however, despite the best intentions of allconcerned, misunderstandings can occur. If yourconcern has not been resolved to your satisfaction, thefollowing steps should be taken:
STEP ONE -- Discuss your concern with a member ofdealership management. Normally, concerns can bequickly resolved at that level. If the matter has already been reviewed with the sales, service or partsmanager, contact the owner of the dealership or thegeneral manager.
STEP TWO -- If after contacting a member ofdealership management, it appears your concern cannotbe resolved by the dealership without further help,contact the GMC Consumer Relations Manager bycalling 1-800-GMC-8782 (1-800-462-8782, CustomerAssistance prompt). In Canada, contact GM of CanadaCustomer Communication Centre in Oshawa by calling1-800-263-3777 (English) or 1-800-263-7854 (French).

yellowblue
8-3
We encourage you to call the toll-free number in orderto give your inquiry prompt attention. Please have thefollowing information available to give the CustomerAssistance Representative:
� Vehicle Identification Number (This is availablefrom the vehicle registration or title, or the plate at the top left of the instrument panel and visiblethrough the windshield.)
� Dealership name and location
� Vehicle delivery date and present mileage
When contacting GMC, please remember that yourconcern will likely be resolved at a dealer’s facility. Thatis why we suggest you follow Step One first if you havea concern.
Customer Assistance for TextTelephone (TTY) UsersTo assist customers who are deaf, hard of hearing, orspeech-impaired and who use Text Telephones (TTYs),GMC has TTY equipment available at its CustomerAssistance Center. Any TTY user can communicate withGMC by dialing: 1-800-GMC-8583 (1-800-462-8583). (TTY users in Canada can dial 1-800-263-3830.)
Customer Assistance OfficesGMC encourages customers to call the toll-free numberfor assistance. If a U.S. customer wishes to write to GMC,the letter should be addressed to GMC’s CustomerAssistance Center.
United StatesPontiac-GMC Customer Assistance CenterP.O. Box 436008Pontiac, MI 48343-6008
1-800-GMC-8782 (1-800-462-8782)1-800-462-8583 (For Text Telephone devices (TTYs))Roadside Assistance: 1-800-GMC-8782

yellowblue
8-4
CanadaGeneral Motors of Canada LimitedCustomer Communication Centre, 163-0051908 Colonel Sam DriveOshawa, Ontario L1H 8P7
1-800-263-3777 (English)1-800-263-7854 (French)1-800-263-3830 (For Text Telephone devices (TTYs))Roadside Assistance: 1-800-268-6800
All Overseas LocationsGMODC - Customer Communication Centre169-0071908 Colonel Sam DriveOshawa, Ontario L1H 8P7
Telephone: 905-644-4112Fax: 905-644-4866
Caribbean Numbers1-800-496-9992 (English) Puerto Rico1-800-496-9993 (Spanish) Puerto Rico1-800-751-4135 (English) Dominican Republic1-800-751-4136 (Spanish) Dominican Republic1-800-496-9994 U.S. Virgin Islands1-800-389-0009 Bahamas1-800-534-0122 Bermuda, Barbados, Antigua & B.V.I.
If toll free service is not available in the Caribbean, call Puerto Rico 1-787-763-1315.

yellowblue
8-5
Roadside Assistance
GM Medium Duty Truck’s Roadside Assistanceprovides stranded owners with towing service fordisabled vehicles.
This service combines the efforts of trained telephonerepresentatives with a network of GM Medium DutyTruck’s dealer services.
Just dial Medium Duty Roadside Assistance at1-800-GMC-8782 (1-800-462-8782) to reach aqualified representative who can assist you in a repair or arrange a tow. Other recommended services can also be arranged for situations such as retrievinglocked-in keys, changing a tire or delivering gasoline, at a charge to the owner. We also provide dealerinformation at no charge such as location of the nearestauthorized medium duty GM Truck dealer and theirhours of operation.
Roadside Assistance is available 24 hours a day, 7 daysa week, 365 days a year, including weekends andholidays. Should you have any questions about RoadsideAssistance, call the GMC Roadside Assistance Center orcontact your dealer.
Warranty InformationYour vehicle comes with a separate warranty bookletthat contains detailed warranty information.

yellowblue
8-6
REPORTING SAFETY DEFECTSTO THE UNITED STATESGOVERNMENTIf you believe that your vehicle has a defect which couldcause a crash or could cause injury or death, you shouldimmediately inform the National Highway TrafficSafety Administration (NHTSA), in addition tonotifying General Motors.
If NHTSA receives similar complaints, it may open aninvestigation, and if it finds that a safety defect exists ina group of vehicles, it may order a recall and remedycampaign. However, NHTSA cannot become involvedin individual problems between you, your dealer orGeneral Motors.
To contact NHTSA, you may either call the Auto SafetyHotline toll-free at 1-800-424-9393 (or 366-0123 in theWashington, D.C. area) or write to:
NHTSA, U.S. Department of TransportationWashington, D.C. 20590
You can also obtain other information about motorvehicle safety from the hotline.
REPORTING SAFETY DEFECTS TOTHE CANADIAN GOVERNMENTIf you live in Canada, and you believe that your vehiclehas a safety defect, you should immediately notifyTransport Canada, in addition to notifying GeneralMotors of Canada Limited. You may write to:
Transport Canada330 Sparks StreetTower COttawa, Ontario K1A 0N5

yellowblue
8-7
REPORTING SAFETY DEFECTSTO GENERAL MOTORSIn addition to notifying NHTSA (or Transport Canada)in a situation like this, we certainly hope you’ll notifyus. Please call us at 1-800-GMC-8782(1-800-462-8782), or write:
Pontiac-GMC Customer Assistance CenterP.O. Box 436008Pontiac, MI 48343-6008
In Canada, please call us at 1-800-263-3777 (English)or 1-800-263-7854 (French). Or, write:
General Motors of Canada LimitedCustomer Communication Centre, 163-0051908 Colonel Sam DriveOshawa, Ontario L1H 8P7
Ordering Service and OwnerPublications in CanadaService manuals, owner’s manuals and other serviceliterature are available for purchase for all current andpast model General Motors vehicles.
The toll-free telephone number for ordering informationin Canada is 1-800-668-5539.
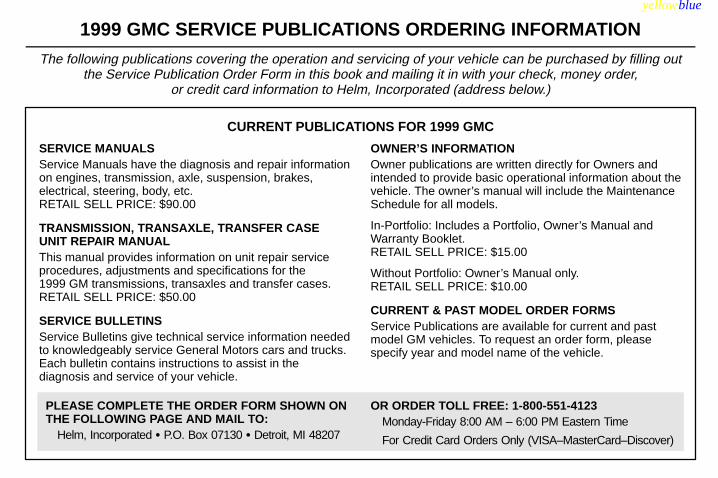
yellowblue
8-8
CURRENT PUBLICATIONS FOR 1999 GMC
SERVICE MANUALSService Manuals have the diagnosis and repair informationon engines, transmission, axle, suspension, brakes,electrical, steering, body, etc.RETAIL SELL PRICE: $90.00
TRANSMISSION, TRANSAXLE, TRANSFER CASEUNIT REPAIR MANUALThis manual provides information on unit repair serviceprocedures, adjustments and specifications for the 1999 GM transmissions, transaxles and transfer cases.RETAIL SELL PRICE: $50.00
SERVICE BULLETINSService Bulletins give technical service information neededto knowledgeably service General Motors cars and trucks.Each bulletin contains instructions to assist in thediagnosis and service of your vehicle.
OWNER’S INFORMATIONOwner publications are written directly for Owners andintended to provide basic operational information about thevehicle. The owner’s manual will include the MaintenanceSchedule for all models.
In-Portfolio: Includes a Portfolio, Owner’s Manual andWarranty Booklet.RETAIL SELL PRICE: $15.00
Without Portfolio: Owner’s Manual only.RETAIL SELL PRICE: $10.00
CURRENT & PAST MODEL ORDER FORMSService Publications are available for current and pastmodel GM vehicles. To request an order form, pleasespecify year and model name of the vehicle.
PLEASE COMPLETE THE ORDER FORM SHOWN ONTHE FOLLOWING PAGE AND MAIL TO:
Helm, Incorporated � P.O. Box 07130 � Detroit, MI 48207
OR ORDER TOLL FREE: 1-800-551-4123Monday-Friday 8:00 AM – 6:00 PM Eastern Time
For Credit Card Orders Only (VISA–MasterCard–Discover)
1999 GMC SERVICE PUBLICATIONS ORDERING INFORMATION
The following publications covering the operation and servicing of your vehicle can be purchased by filling outthe Service Publication Order Form in this book and mailing it in with your check, money order,
or credit card information to Helm, Incorporated (address below.)
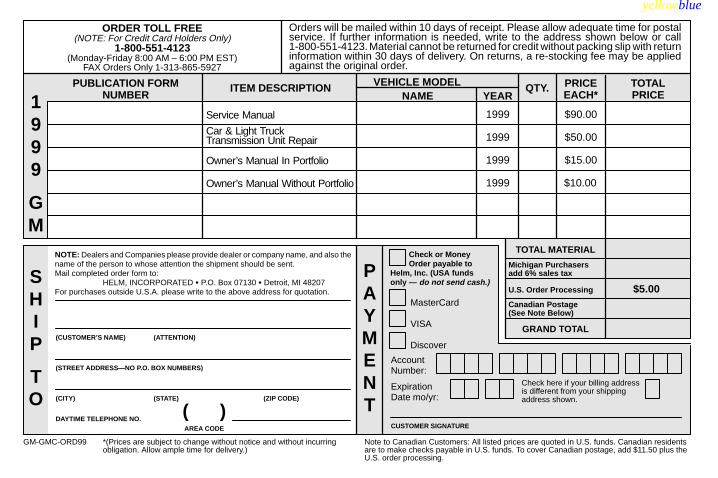
yellowblue
8-9
PUBLICATION FORMNUMBER
Orders will be mailed within 10 days of receipt. Please allow adequate time for postalservice. If further information is needed, write to the address shown below or call1-800-551-4123. Material cannot be returned for credit without packing slip with returninformation within 30 days of delivery. On returns, a re-stocking fee may be appliedagainst the original order.
ORDER TOLL FREE(NOTE: For Credit Card Holders Only)
1-800-551-4123(Monday-Friday 8:00 AM – 6:00 PM EST)
FAX Orders Only 1-313-865-5927
Service Manual
NOTE: Dealers and Companies please provide dealer or company name, and also thename of the person to whose attention the shipment should be sent. Mail completed order form to:
HELM, INCORPORATED � P.O. Box 07130 � Detroit, MI 48207For purchases outside U.S.A. please write to the above address for quotation.
1999 $90.00
1999 $50.00
1999 $15.00
1999 $10.00
TOTAL MATERIAL
Michigan Purchasers
U.S. Order Processing $5.00Canadian Postage
GRAND TOTAL
add 6% sales tax
(See Note Below)
GM-GMC-ORD99 *(Prices are subject to change without notice and without incurringobligation. Allow ample time for delivery.)
Note to Canadian Customers: All listed prices are quoted in U.S. funds. Canadian residentsare to make checks payable in U.S. funds. To cover Canadian postage, add $11.50 plus theU.S. order processing.
(CUSTOMER’S NAME) (ATTENTION)
(STREET ADDRESS—NO P.O. BOX NUMBERS)
(CITY) (ZIP CODE)
DAYTIME TELEPHONE NO.
(STATE)
AREA CODE
( )
PCheck or Money Order payable to
Helm, Inc. (USA fundsonly — do not send cash.)
VISA
Discover
AccountNumber:
ExpirationDate mo/yr:
CUSTOMER SIGNATURE
S
ITEM DESCRIPTIONNAME YEAR
VEHICLE MODEL QTY. PRICEEACH*
TOTALPRICE1
999
GM
HIP TO
AYMENT
Owner’s Manual Without Portfolio
Owner’s Manual In Portfolio
Car & Light TruckTransmission Unit Repair
MasterCard
Check here if your billing address is different from your shipping address shown.
PUBLICATION FORMNUMBER

yellowblue
8-10
✍ NOTES

9-
yellowblue
9-1
Section 9 Index
A irBrake System Warning Light 2-59. . . . . . . . . . . . . . . . . . . . Cleaner 6-17. . . . . . . . . . . . . . . . . . . . . . . . . . . . . . . . . . . . . Cleaner Filter 6-77. . . . . . . . . . . . . . . . . . . . . . . . . . . . . . . . Compressor Filter 6-77. . . . . . . . . . . . . . . . . . . . . . . . . . . . . Conditioning 3-5, 6-77. . . . . . . . . . . . . . . . . . . . . . . . . . . . Conditioning Refrigerants 6-77. . . . . . . . . . . . . . . . . . . . . . Dryer 6-34. . . . . . . . . . . . . . . . . . . . . . . . . . . . . . . . . . . . . . Filter Restriction Indicator 6-17. . . . . . . . . . . . . . . . . . . . . . Suspension 2-19. . . . . . . . . . . . . . . . . . . . . . . . . . . . . . . . . .
Air Brake Systems 6-33. . . . . . . . . . . . . . . . . . . . . . . . . . . . . . Air Dryer 6-34. . . . . . . . . . . . . . . . . . . . . . . . . . . . . . . . . . . Alcohol Injector 6-34. . . . . . . . . . . . . . . . . . . . . . . . . . . . . . Moisture Ejector 6-33. . . . . . . . . . . . . . . . . . . . . . . . . . . . . .
Alcohol Injector 6-34. . . . . . . . . . . . . . . . . . . . . . . . . . . . . . . . Alignment and Balance, Tire 6-51. . . . . . . . . . . . . . . . . . . . . . AM-FM Stereo 3-8. . . . . . . . . . . . . . . . . . . . . . . . . . . . . . . . . AM-FM Stereo with Remote Cassette Tape Player 3-10. . . . . Antenna 3-12. . . . . . . . . . . . . . . . . . . . . . . . . . . . . . . . . . . . . . Antifreeze 6-23. . . . . . . . . . . . . . . . . . . . . . . . . . . . . . . . . . . . . Anti-Lock
Brakes 4-7. . . . . . . . . . . . . . . . . . . . . . . . . . . . . . . . . . . . . . Brake System Warning Light 2-61, 4-7. . . . . . . . . . . . . . . .
Appearance Care 6-59. . . . . . . . . . . . . . . . . . . . . . . . . . . . . . . Appearance Care Materials 6-66. . . . . . . . . . . . . . . . . . . . . . .
Apply Park Brake Warning Light 2-60. . . . . . . . . . . . . . . . . . Ashtray 2-47. . . . . . . . . . . . . . . . . . . . . . . . . . . . . . . . . . . . . . . Audio Systems 3-7. . . . . . . . . . . . . . . . . . . . . . . . . . . . . . . . . . Automatic Transmission Fluid 6-18. . . . . . . . . . . . . . . . . . . . . Automatic Transmission Shift Indicator Check 7-25. . . . . . . . Auxiliary Power Jacks 2-48. . . . . . . . . . . . . . . . . . . . . . . . . . . Axle, Rear 6-20. . . . . . . . . . . . . . . . . . . . . . . . . . . . . . . . . . . .
Airshift Control 2-19. . . . . . . . . . . . . . . . . . . . . . . . . . . . . . Differential Lock Control 2-41. . . . . . . . . . . . . . . . . . . . . . . Fluid Capacity 6-76. . . . . . . . . . . . . . . . . . . . . . . . . . . . . . . Shift Motor 6-20. . . . . . . . . . . . . . . . . . . . . . . . . . . . . . . . . . Two-Speed Electric Shift Control 2-17. . . . . . . . . . . . . . . . Towing 5-15. . . . . . . . . . . . . . . . . . . . . . . . . . . . . . . . . . . . .
Battery 6-42. . . . . . . . . . . . . . . . . . . . . . . . . . . . . . . . . . . . . . Battery, Jump Starting 5-5. . . . . . . . . . . . . . . . . . . . . . . . . . . . Brake
Adjustment 6-33. . . . . . . . . . . . . . . . . . . . . . . . . . . . . . . . . . Air Brake Systems 6-33. . . . . . . . . . . . . . . . . . . . . . . . . . . . Air Parking Brake 2-26. . . . . . . . . . . . . . . . . . . . . . . . . . . . Electric/Hydraulic Parking Brake 2-25. . . . . . . . . . . . . . . . Electric/Hydraulic Parking Brake Fluid 6-36. . . . . . . . . . . . Exhaust 2-16. . . . . . . . . . . . . . . . . . . . . . . . . . . . . . . . . . . . . Fluid 6-30. . . . . . . . . . . . . . . . . . . . . . . . . . . . . . . . . . . . . . .

yellowblue
9-2
Brake (Continued)Four-Wheel and Six-Wheel Drum 6-33. . . . . . . . . . . . . . . Four-Wheel Disc 6-32. . . . . . . . . . . . . . . . . . . . . . . . . . . . . Hydraulic Systems 4-7. . . . . . . . . . . . . . . . . . . . . . . . . . . . . Master Cylinder 6-30. . . . . . . . . . . . . . . . . . . . . . . . . . . . . . Parking 2-23. . . . . . . . . . . . . . . . . . . . . . . . . . . . . . . . . . . . . Pedal Travel 6-33. . . . . . . . . . . . . . . . . . . . . . . . . . . . . . . . . Propshaft Brake Burnish Procedure 2-24. . . . . . . . . . . . . . . Releasing Air-Operated Parking Brakes 5-15. . . . . . . . . . . Replacing System Parts 6-35. . . . . . . . . . . . . . . . . . . . . . . . System Check 7-25. . . . . . . . . . . . . . . . . . . . . . . . . . . . . . . . System Warning Lights 2-57. . . . . . . . . . . . . . . . . . . . . . . .
Brake, Anti-Lock 4-7. . . . . . . . . . . . . . . . . . . . . . . . . . . . . . . . Braking 4-6. . . . . . . . . . . . . . . . . . . . . . . . . . . . . . . . . . . . . . . . Braking in Emergencies 4-9. . . . . . . . . . . . . . . . . . . . . . . . . . . Break-In, New Vehicle 2-5. . . . . . . . . . . . . . . . . . . . . . . . . . .
Capacities and Specifications 6-74. . . . . . . . . . . . . . . . . . . . Carbon Monoxide 2-29, 2-30 , 4-27. . . . . . . . . . . . . . . . . . . Cassette Tape Player Care 3-12. . . . . . . . . . . . . . . . . . . . . . . . Center Passenger Position 1-22. . . . . . . . . . . . . . . . . . . . . . . . Certification/Tire Label 4-28, 6-67. . . . . . . . . . . . . . . . . . . . . Changing a Flat Tire 5-34. . . . . . . . . . . . . . . . . . . . . . . . . . . . . Charging System Light 2-56. . . . . . . . . . . . . . . . . . . . . . . . . . Chassis Lubrication 6-37. . . . . . . . . . . . . . . . . . . . . . . . . . . . . Check Gages Light 2-67. . . . . . . . . . . . . . . . . . . . . . . . . . . . . . Checking Your Restraint Systems 1-36. . . . . . . . . . . . . . . . . . Chemical Paint Spotting 6-65. . . . . . . . . . . . . . . . . . . . . . . . . .
Child Restraints 1-26. . . . . . . . . . . . . . . . . . . . . . . . . . . . . . . . Securing in the Center Seat Position 1-31. . . . . . . . . . . . . . Top Strap 1-30. . . . . . . . . . . . . . . . . . . . . . . . . . . . . . . . . . .
Cigarette Lighter 2-47. . . . . . . . . . . . . . . . . . . . . . . . . . . . . . . Circuit Breaker Block, Instrument Panel 6-69. . . . . . . . . . . . . Cleaner, Air 6-17. . . . . . . . . . . . . . . . . . . . . . . . . . . . . . . . . . . Cleaning
Fabric 6-59. . . . . . . . . . . . . . . . . . . . . . . . . . . . . . . . . . . . . . Glass 6-62. . . . . . . . . . . . . . . . . . . . . . . . . . . . . . . . . . . . . . . Inside of Your Vehicle 6-59. . . . . . . . . . . . . . . . . . . . . . . . . Instrument Panel 6-61. . . . . . . . . . . . . . . . . . . . . . . . . . . . . Outside of Your Vehicle 6-63. . . . . . . . . . . . . . . . . . . . . . . . Safety Belts 6-61. . . . . . . . . . . . . . . . . . . . . . . . . . . . . . . . . Special Problems 6-60. . . . . . . . . . . . . . . . . . . . . . . . . . . . . Tires 6-64. . . . . . . . . . . . . . . . . . . . . . . . . . . . . . . . . . . . . . . Vinyl 6-61. . . . . . . . . . . . . . . . . . . . . . . . . . . . . . . . . . . . . . . Windshield and Wiper Blades 6-62. . . . . . . . . . . . . . . . . . .
Clock, Setting the 3-7. . . . . . . . . . . . . . . . . . . . . . . . . . . . . . . . Clutch Pedal Free Travel 6-37. . . . . . . . . . . . . . . . . . . . . . . . . Comfort Controls 3-2. . . . . . . . . . . . . . . . . . . . . . . . . . . . . . . . Component Box 6-44. . . . . . . . . . . . . . . . . . . . . . . . . . . . . . . . Connections, Trailer 2-49. . . . . . . . . . . . . . . . . . . . . . . . . . . . . Control of a Vehicle 4-6. . . . . . . . . . . . . . . . . . . . . . . . . . . . . . Coolant 6-23. . . . . . . . . . . . . . . . . . . . . . . . . . . . . . . . . . . . . . .
Heater, Engine 2-15. . . . . . . . . . . . . . . . . . . . . . . . . . . . . . . Recovery Tank 5-22. . . . . . . . . . . . . . . . . . . . . . . . . . . . . . . Surge Tank 5-29. . . . . . . . . . . . . . . . . . . . . . . . . . . . . . . . . .

yellowblue
9-3
Cooling SystemCapacity 6-74. . . . . . . . . . . . . . . . . . . . . . . . . . . . . . . . . . . . Diesel Engines 5-27, 6-25. . . . . . . . . . . . . . . . . . . . . . . . . . Gasoline Engines 5-20, 6-23. . . . . . . . . . . . . . . . . . . . . . . .
Crankcase Capacity 6-74. . . . . . . . . . . . . . . . . . . . . . . . . . . . . Cruise Control 2-36. . . . . . . . . . . . . . . . . . . . . . . . . . . . . . . . . Customer Assistance for Text Telephone Users 8-3. . . . . . . . . Customer Assistance Information 8-1. . . . . . . . . . . . . . . . . . . Customer Satisfaction Procedure 8-2. . . . . . . . . . . . . . . . . . . .
DamageFinish 6-65. . . . . . . . . . . . . . . . . . . . . . . . . . . . . . . . . . . . . . Sheet Metal 6-64. . . . . . . . . . . . . . . . . . . . . . . . . . . . . . . . .
Daytime Running Lamps 2-44. . . . . . . . . . . . . . . . . . . . . . . . . Daytime Running Lamps Indicator Light 2-67. . . . . . . . . . . . Defects, Reporting Safety 8-6, 8-7. . . . . . . . . . . . . . . . . . . . . Defensive Driving 4-2. . . . . . . . . . . . . . . . . . . . . . . . . . . . . . . Defogging 3-6. . . . . . . . . . . . . . . . . . . . . . . . . . . . . . . . . . . . . Diesel Engine Exhaust Brake 2-16. . . . . . . . . . . . . . . . . . . . . . Diff Lock Indicator Light 2-63. . . . . . . . . . . . . . . . . . . . . . . . . Do Not Shift Light 2-57. . . . . . . . . . . . . . . . . . . . . . . . . . . . . . Dome Lamps 2-46. . . . . . . . . . . . . . . . . . . . . . . . . . . . . . . . . . Door
Latches Check 7-27. . . . . . . . . . . . . . . . . . . . . . . . . . . . . . . Locks 2-4. . . . . . . . . . . . . . . . . . . . . . . . . . . . . . . . . . . . . . . Power Locks 2-4. . . . . . . . . . . . . . . . . . . . . . . . . . . . . . . . . .
Driver Position 1-11. . . . . . . . . . . . . . . . . . . . . . . . . . . . . . . . . Driving
City 4-19. . . . . . . . . . . . . . . . . . . . . . . . . . . . . . . . . . . . . . . . Defensive 4-2. . . . . . . . . . . . . . . . . . . . . . . . . . . . . . . . . . . .
Drunken 4-3. . . . . . . . . . . . . . . . . . . . . . . . . . . . . . . . . . . . . Freeway 4-20. . . . . . . . . . . . . . . . . . . . . . . . . . . . . . . . . . . . In a Blizzard 4-26. . . . . . . . . . . . . . . . . . . . . . . . . . . . . . . . . In Rain and on Wet Roads 4-16. . . . . . . . . . . . . . . . . . . . . . Night 4-15. . . . . . . . . . . . . . . . . . . . . . . . . . . . . . . . . . . . . . On Curves 4-10. . . . . . . . . . . . . . . . . . . . . . . . . . . . . . . . . . On Hill and Mountain Roads 4-22. . . . . . . . . . . . . . . . . . . . On Snow and Ice 4-24. . . . . . . . . . . . . . . . . . . . . . . . . . . . . Through Water 4-18. . . . . . . . . . . . . . . . . . . . . . . . . . . . . . . Winter 4-24. . . . . . . . . . . . . . . . . . . . . . . . . . . . . . . . . . . . . .
Drunken Driving 4-3. . . . . . . . . . . . . . . . . . . . . . . . . . . . . . . .
Electrical Equipment, Adding 6-68. . . . . . . . . . . . . . . . . . . . Electrical System 6-68. . . . . . . . . . . . . . . . . . . . . . . . . . . . . . . Engine
Air Cleaner Filter 6-77. . . . . . . . . . . . . . . . . . . . . . . . . . . . . Air Control 2-42. . . . . . . . . . . . . . . . . . . . . . . . . . . . . . . . . . Automatic Shutdown 2-11. . . . . . . . . . . . . . . . . . . . . . . . . . Coolant (Caterpillar� Diesel Engine) 6-27. . . . . . . . . . . . . Coolant (Gasoline Engine) 6-23. . . . . . . . . . . . . . . . . . . . . . Coolant Heater 2-15. . . . . . . . . . . . . . . . . . . . . . . . . . . . . . . Coolant Level Check 7-23. . . . . . . . . . . . . . . . . . . . . . . . . . Coolant Temperature Gage 2-62. . . . . . . . . . . . . . . . . . . . . Cooling System Capacity 6-74. . . . . . . . . . . . . . . . . . . . . . . Crankcase Capacity 6-74. . . . . . . . . . . . . . . . . . . . . . . . . . . Diesel,Warm-Up 2-11. . . . . . . . . . . . . . . . . . . . . . . . . . . . . Exhaust 2-29, 2-30, 4-27. . . . . . . . . . . . . . . . . . . . . . . . . . . Fan Breakage 6-3. . . . . . . . . . . . . . . . . . . . . . . . . . . . . . . . . Fan Noise 5-33. . . . . . . . . . . . . . . . . . . . . . . . . . . . . . . . . . . Fast Idle System 2-12. . . . . . . . . . . . . . . . . . . . . . . . . . . . . .

yellowblue
9-4
Engine (Continued)Fuse Blocks 6-69, 6-72. . . . . . . . . . . . . . . . . . . . . . . . . . . . Identification 6-67. . . . . . . . . . . . . . . . . . . . . . . . . . . . . . . . Oil 6-13, 6-17. . . . . . . . . . . . . . . . . . . . . . . . . . . . . . . . . . . Oil Filters and PCV Valves 6-77. . . . . . . . . . . . . . . . . . . . . Oil Level Check 7-23. . . . . . . . . . . . . . . . . . . . . . . . . . . . . . Overheating 5-18. . . . . . . . . . . . . . . . . . . . . . . . . . . . . . . . . Road Speed Governor 2-54. . . . . . . . . . . . . . . . . . . . . . . . . Running While Parked 2-30. . . . . . . . . . . . . . . . . . . . . . . . . Specifications 6-74. . . . . . . . . . . . . . . . . . . . . . . . . . . . . . . . Starter Over-Crank Protection 2-7. . . . . . . . . . . . . . . . . . . . Starting 2-7, 2-10. . . . . . . . . . . . . . . . . . . . . . . . . . . . . . . . .
Engine Oil 6-13, 6-17. . . . . . . . . . . . . . . . . . . . . . . . . . . . . . . Additives 6-16. . . . . . . . . . . . . . . . . . . . . . . . . . . . . . . . . . . Checking 6-13. . . . . . . . . . . . . . . . . . . . . . . . . . . . . . . . . . . Diesel Engines 6-17. . . . . . . . . . . . . . . . . . . . . . . . . . . . . . . Filters 6-77. . . . . . . . . . . . . . . . . . . . . . . . . . . . . . . . . . . . . . Oil Life Monitor 6-16. . . . . . . . . . . . . . . . . . . . . . . . . . . . . . Pressure Gage 2-66. . . . . . . . . . . . . . . . . . . . . . . . . . . . . . . . Used 6-16. . . . . . . . . . . . . . . . . . . . . . . . . . . . . . . . . . . . . . . What Kind to Use 6-14. . . . . . . . . . . . . . . . . . . . . . . . . . . . . When to Add 6-14. . . . . . . . . . . . . . . . . . . . . . . . . . . . . . . . When to Change 6-16. . . . . . . . . . . . . . . . . . . . . . . . . . . . . .
Ether Injection System 6-46. . . . . . . . . . . . . . . . . . . . . . . . . . . Exhaust
Brake 2-16. . . . . . . . . . . . . . . . . . . . . . . . . . . . . . . . . . . . . . Engine 2-29, 2-30, 4-27. . . . . . . . . . . . . . . . . . . . . . . . . . . System Check 7-26. . . . . . . . . . . . . . . . . . . . . . . . . . . . . . . .
Fabric Cleaning 6-59. . . . . . . . . . . . . . . . . . . . . . . . . . . . . . . Filling a Portable Fuel Container 6-8. . . . . . . . . . . . . . . . . . . . Filling Your Tank 6-7. . . . . . . . . . . . . . . . . . . . . . . . . . . . . . . . Filter
Air Cleaner 6-77. . . . . . . . . . . . . . . . . . . . . . . . . . . . . . . . . . Air Compressor 6-77. . . . . . . . . . . . . . . . . . . . . . . . . . . . . . Engine Oil 6-77. . . . . . . . . . . . . . . . . . . . . . . . . . . . . . . . . .
Filterminder Gage 2-70. . . . . . . . . . . . . . . . . . . . . . . . . . . . . . Finish Care 6-63. . . . . . . . . . . . . . . . . . . . . . . . . . . . . . . . . . . . Finish Damage 6-65. . . . . . . . . . . . . . . . . . . . . . . . . . . . . . . . . Flashers, Hazard Warning 5-2. . . . . . . . . . . . . . . . . . . . . . . . . Flat Tire, Changing 5-34. . . . . . . . . . . . . . . . . . . . . . . . . . . . . Fluid Leaks Check 7-27. . . . . . . . . . . . . . . . . . . . . . . . . . . . . . Fluids and Lubricants 7-28. . . . . . . . . . . . . . . . . . . . . . . . . . . . Footnotes 7-18. . . . . . . . . . . . . . . . . . . . . . . . . . . . . . . . . . . . . French Language Manual ii. . . . . . . . . . . . . . . . . . . . . . . . . . . Front Towing 5-10, 5-14. . . . . . . . . . . . . . . . . . . . . . . . . . . . . Front Wheel Bearings with Oil-Filled Hubs 6-47. . . . . . . . . . Fuel
Diesel Engine 6-5. . . . . . . . . . . . . . . . . . . . . . . . . . . . . . . . . Filling a Portable Container 6-8. . . . . . . . . . . . . . . . . . . . . . Filling Your Tank 6-7. . . . . . . . . . . . . . . . . . . . . . . . . . . . . . Filter 6-44, 6-77. . . . . . . . . . . . . . . . . . . . . . . . . . . . . . . . . . Gage 2-68. . . . . . . . . . . . . . . . . . . . . . . . . . . . . . . . . . . . . . . Gasoline Engine 6-4. . . . . . . . . . . . . . . . . . . . . . . . . . . . . . . Tank Capacity 6-76. . . . . . . . . . . . . . . . . . . . . . . . . . . . . . . Water in Fuel 6-5. . . . . . . . . . . . . . . . . . . . . . . . . . . . . . . . .
Fuels in Foreign Countries -- Gasoline 6-6. . . . . . . . . . . . . . . Fuses and Circuit Breakers 6-69. . . . . . . . . . . . . . . . . . . . . . . Fusible Links 6-68. . . . . . . . . . . . . . . . . . . . . . . . . . . . . . . . . .

yellowblue
9-5
GagesAir Pressure 2-69. . . . . . . . . . . . . . . . . . . . . . . . . . . . . . . . . Engine Coolant Temperature 2-61. . . . . . . . . . . . . . . . . . . . Engine Oil Pressure 2-65. . . . . . . . . . . . . . . . . . . . . . . . . . . Filterminder 2-70. . . . . . . . . . . . . . . . . . . . . . . . . . . . . . . . . Fuel 2-68. . . . . . . . . . . . . . . . . . . . . . . . . . . . . . . . . . . . . . . Hourmeter 2-70. . . . . . . . . . . . . . . . . . . . . . . . . . . . . . . . . . Oil Pressure 2-65. . . . . . . . . . . . . . . . . . . . . . . . . . . . . . . . . Speedometer 2-53. . . . . . . . . . . . . . . . . . . . . . . . . . . . . . . . . Tachometer 2-54. . . . . . . . . . . . . . . . . . . . . . . . . . . . . . . . . . Transmission Temperature 2-69. . . . . . . . . . . . . . . . . . . . . . Voltmeter 2-56. . . . . . . . . . . . . . . . . . . . . . . . . . . . . . . . . . .
Guide en Français ii. . . . . . . . . . . . . . . . . . . . . . . . . . . . . . . . .
Hazard Warning Flasher Switch 5-3. . . . . . . . . . . . . . . . . . . Hazard Warning Flashers 5-2. . . . . . . . . . . . . . . . . . . . . . . . . . Head Restraints 1-3. . . . . . . . . . . . . . . . . . . . . . . . . . . . . . . . . Headlamps 2-43. . . . . . . . . . . . . . . . . . . . . . . . . . . . . . . . . . . .
High/Low Beam Changer 2-34. . . . . . . . . . . . . . . . . . . . . . Wiring 6-68. . . . . . . . . . . . . . . . . . . . . . . . . . . . . . . . . . . . .
Heating 3-5. . . . . . . . . . . . . . . . . . . . . . . . . . . . . . . . . . . . . . . . Highway Hypnosis 4-21. . . . . . . . . . . . . . . . . . . . . . . . . . . . . . Hill and Mountain Roads 4-22. . . . . . . . . . . . . . . . . . . . . . . . . Hood
Access Panels 6-10. . . . . . . . . . . . . . . . . . . . . . . . . . . . . . . . Checking Things Under 6-9. . . . . . . . . . . . . . . . . . . . . . . . . Latches Check 7-27. . . . . . . . . . . . . . . . . . . . . . . . . . . . . . .
Horn 2-31. . . . . . . . . . . . . . . . . . . . . . . . . . . . . . . . . . . . . . . . .
Hourmeter Gage 2-70. . . . . . . . . . . . . . . . . . . . . . . . . . . . . . . . Hydraulic Brake Warning Light 2-58. . . . . . . . . . . . . . . . . . . . Hydroplaning 4-18. . . . . . . . . . . . . . . . . . . . . . . . . . . . . . . . . .
I gnition Positions 2-6. . . . . . . . . . . . . . . . . . . . . . . . . . . . . . . Inflation, Tire 6-49. . . . . . . . . . . . . . . . . . . . . . . . . . . . . . . . . . Inspections
Engine Cover Check 7-27. . . . . . . . . . . . . . . . . . . . . . . . . . Underbody 7-27. . . . . . . . . . . . . . . . . . . . . . . . . . . . . . . . . .
Instrument Panel 2-50. . . . . . . . . . . . . . . . . . . . . . . . . . . . . . . Circuit Breaker Block 6-69. . . . . . . . . . . . . . . . . . . . . . . . . Cleaning 6-61. . . . . . . . . . . . . . . . . . . . . . . . . . . . . . . . . . . . Cluster 2-52. . . . . . . . . . . . . . . . . . . . . . . . . . . . . . . . . . . . .
Intake Heater Indicator Light 2-63. . . . . . . . . . . . . . . . . . . . . . Inter-Axle Differential Lock Control 2-40. . . . . . . . . . . . . . . .
Jump Starting 5-5. . . . . . . . . . . . . . . . . . . . . . . . . . . . . . . . . .
K eys 2-2. . . . . . . . . . . . . . . . . . . . . . . . . . . . . . . . . . . . . . . . .
L abelsCertification/Tire 4-28, 6-67. . . . . . . . . . . . . . . . . . . . . . . . Service Parts Identification 6-67. . . . . . . . . . . . . . . . . . . . . Vehicle Identification Number 6-67. . . . . . . . . . . . . . . . . . .
Lamp and Bulb Data 6-74. . . . . . . . . . . . . . . . . . . . . . . . . . . . Lamp Check 7-26. . . . . . . . . . . . . . . . . . . . . . . . . . . . . . . . . . .

yellowblue
9-6
Lamps 2-43. . . . . . . . . . . . . . . . . . . . . . . . . . . . . . . . . . . . . . . . Dome 2-46. . . . . . . . . . . . . . . . . . . . . . . . . . . . . . . . . . . . . . On Reminder 2-44. . . . . . . . . . . . . . . . . . . . . . . . . . . . . . . .
Latches, Seatback 1-3. . . . . . . . . . . . . . . . . . . . . . . . . . . . . . . . Leaving Your Vehicle 2-5. . . . . . . . . . . . . . . . . . . . . . . . . . . . . Lighter 2-47. . . . . . . . . . . . . . . . . . . . . . . . . . . . . . . . . . . . . . . Lights
Air Brake System Warning 2-59. . . . . . . . . . . . . . . . . . . . . Anti-Lock Brake System Warning 2-61, 4-7. . . . . . . . . . . . Apply Park Brake Warning 2-60. . . . . . . . . . . . . . . . . . . . . Brake System Warning 2-57. . . . . . . . . . . . . . . . . . . . . . . . . Charging System Indicator 2-56. . . . . . . . . . . . . . . . . . . . . . Check Gages Indicator 2-67. . . . . . . . . . . . . . . . . . . . . . . . . Daytime Running Lamps Indicator 2-67. . . . . . . . . . . . . . . Diff Lock Indicator 2-63. . . . . . . . . . . . . . . . . . . . . . . . . . . Do Not Shift Warning 2-57. . . . . . . . . . . . . . . . . . . . . . . . . Hydraulic Brake System Warning 2-58. . . . . . . . . . . . . . . . Intake Heater Indicator 2-63. . . . . . . . . . . . . . . . . . . . . . . . . Lamp and Bulb Data 6-74. . . . . . . . . . . . . . . . . . . . . . . . . . Low Coolant Warning 2-62. . . . . . . . . . . . . . . . . . . . . . . . . Parking Brake Warning 2-60. . . . . . . . . . . . . . . . . . . . . . . . Parking Brake Indicator 2-60. . . . . . . . . . . . . . . . . . . . . . . . Safety Belt Reminder 1-7, 2-55. . . . . . . . . . . . . . . . . . . . . . Service Park Brake Warning 2-60. . . . . . . . . . . . . . . . . . . . Service Trans Filter Indicator 2-64. . . . . . . . . . . . . . . . . . . . Manual Fast Idle Indicator Light 2-62. . . . . . . . . . . . . . . . .
Loading Your Vehicle 4-28. . . . . . . . . . . . . . . . . . . . . . . . . . .
LocksDoor 2-4. . . . . . . . . . . . . . . . . . . . . . . . . . . . . . . . . . . . . . . . Power Door 2-4. . . . . . . . . . . . . . . . . . . . . . . . . . . . . . . . . .
Lubricants and Fluids 7-28. . . . . . . . . . . . . . . . . . . . . . . . . . . . Lubrication Service, Body 7-24. . . . . . . . . . . . . . . . . . . . . . . .
M aintenance Record 7-31. . . . . . . . . . . . . . . . . . . . . . . . . . . Owner Checks and Services 7-23. . . . . . . . . . . . . . . . . . . . . Recommended Fluids and Lubricants 7-28. . . . . . . . . . . . . Scheduled Maintenance Services 7-4. . . . . . . . . . . . . . . . . .
Maintenance, Underbody 6-65. . . . . . . . . . . . . . . . . . . . . . . . . Malfunction Indicator Lamp 2-64. . . . . . . . . . . . . . . . . . . . . . Manual Fast Idle Indicator Light 2-62. . . . . . . . . . . . . . . . . . . Manual Transmission Fluid 6-19. . . . . . . . . . . . . . . . . . . . . . . Marker and Clearance Lamps 2-45. . . . . . . . . . . . . . . . . . . . . Maxi-Fuse Block 6-72. . . . . . . . . . . . . . . . . . . . . . . . . . . . . . . Mirrors
Convex Outside 2-46. . . . . . . . . . . . . . . . . . . . . . . . . . . . . . Heated Outside 2-47. . . . . . . . . . . . . . . . . . . . . . . . . . . . . . . Inside Rearview 2-46. . . . . . . . . . . . . . . . . . . . . . . . . . . . . . Outside 2-46. . . . . . . . . . . . . . . . . . . . . . . . . . . . . . . . . . . . .
Model Reference vi. . . . . . . . . . . . . . . . . . . . . . . . . . . . . . . . . Moisture Ejector 6-33. . . . . . . . . . . . . . . . . . . . . . . . . . . . . . . . Mountain Roads 4-22. . . . . . . . . . . . . . . . . . . . . . . . . . . . . . . . Muffler/Catalytic Converter Assembly 6-48. . . . . . . . . . . . . . Multifunction Lever 2-32. . . . . . . . . . . . . . . . . . . . . . . . . . . . .

yellowblue
9-7
New Vehicle “Break-In” 2-5. . . . . . . . . . . . . . . . . . . . . . . . . Night Vision 4-15. . . . . . . . . . . . . . . . . . . . . . . . . . . . . . . . . . . Noise Control System 6-11. . . . . . . . . . . . . . . . . . . . . . . . . . .
Odometer 2-53. . . . . . . . . . . . . . . . . . . . . . . . . . . . . . . . . . . . Off-Road Recovery 4-12. . . . . . . . . . . . . . . . . . . . . . . . . . . . . Oil, Engine 6-13, 6-17. . . . . . . . . . . . . . . . . . . . . . . . . . . . . . . Owner Checks and Services 7-23. . . . . . . . . . . . . . . . . . . . . . . Owner Publications Order Form 8-9. . . . . . . . . . . . . . . . . . . . Owner Publications, Ordering 8-8. . . . . . . . . . . . . . . . . . . . . .
Paint Spotting, Chemical 6-65. . . . . . . . . . . . . . . . . . . . . . . . Parking
Brake 2-24. . . . . . . . . . . . . . . . . . . . . . . . . . . . . . . . . . . . . . Brake Check 7-24. . . . . . . . . . . . . . . . . . . . . . . . . . . . . . . . . Brake Indicator Light 2-60. . . . . . . . . . . . . . . . . . . . . . . . . . Over Things That Burn 2-29. . . . . . . . . . . . . . . . . . . . . . . .
Passing 4-12. . . . . . . . . . . . . . . . . . . . . . . . . . . . . . . . . . . . . . . Power
Door Locks 2-4. . . . . . . . . . . . . . . . . . . . . . . . . . . . . . . . . . . Option Fuses 6-69. . . . . . . . . . . . . . . . . . . . . . . . . . . . . . . . Steering 4-9. . . . . . . . . . . . . . . . . . . . . . . . . . . . . . . . . . . . . Steering Fluid 6-28. . . . . . . . . . . . . . . . . . . . . . . . . . . . . . . . Windows 2-31. . . . . . . . . . . . . . . . . . . . . . . . . . . . . . . . . . .
Power Take-Off (PTO) 4-31. . . . . . . . . . . . . . . . . . . . . . . . . . Pregnancy, Use of Safety Belts 1-21. . . . . . . . . . . . . . . . . . . . Pressure Caps 6-77. . . . . . . . . . . . . . . . . . . . . . . . . . . . . . . . . . Problems on the Road 5-1. . . . . . . . . . . . . . . . . . . . . . . . . . . . Publications, Service and Owner 8-8. . . . . . . . . . . . . . . . . . . .
Radiator 5-25. . . . . . . . . . . . . . . . . . . . . . . . . . . . . . . . . . . . . Radiator Pressure Cap 6-21. . . . . . . . . . . . . . . . . . . . . . . . . . . Radiator Shutters 2-13. . . . . . . . . . . . . . . . . . . . . . . . . . . . . . . Radio Reception 3-10. . . . . . . . . . . . . . . . . . . . . . . . . . . . . . . . Rear Axle 6-20. . . . . . . . . . . . . . . . . . . . . . . . . . . . . . . . . . . . .
Airshift Control 2-19. . . . . . . . . . . . . . . . . . . . . . . . . . . . . . Differential Lock Control 2-41. . . . . . . . . . . . . . . . . . . . . . . Fluid Capacity 6-76. . . . . . . . . . . . . . . . . . . . . . . . . . . . . . . Shift Motor 6-20. . . . . . . . . . . . . . . . . . . . . . . . . . . . . . . . . . Two-Speed Electric Shift Control 2-17. . . . . . . . . . . . . . . . Towing 5-15. . . . . . . . . . . . . . . . . . . . . . . . . . . . . . . . . . . . .
Recovery Tank, Coolant 5-22. . . . . . . . . . . . . . . . . . . . . . . . . . Refrigerants, Air Conditioning 6-77. . . . . . . . . . . . . . . . . . . . Releasing Air Operated Parking Brake 5-15. . . . . . . . . . . . . . Remote Cassette Tape Player 3-10. . . . . . . . . . . . . . . . . . . . . . Replacement Wheels 6-57. . . . . . . . . . . . . . . . . . . . . . . . . . . . Replacing Safety Belts 1-36. . . . . . . . . . . . . . . . . . . . . . . . . . . Reporting Safety Defects 8-6, 8-7. . . . . . . . . . . . . . . . . . . . . . Restraints
Checking 1-36. . . . . . . . . . . . . . . . . . . . . . . . . . . . . . . . . . . Child 1-26. . . . . . . . . . . . . . . . . . . . . . . . . . . . . . . . . . . . . . . Head 1-3. . . . . . . . . . . . . . . . . . . . . . . . . . . . . . . . . . . . . . . . Replacing Parts After a Crash 1-36. . . . . . . . . . . . . . . . . . . System Check 7-24. . . . . . . . . . . . . . . . . . . . . . . . . . . . . . . .
Right Passenger Position 1-21. . . . . . . . . . . . . . . . . . . . . . . . . Roadside Assistance 8-5. . . . . . . . . . . . . . . . . . . . . . . . . . . . . . Rocking Your Vehicle 5-38. . . . . . . . . . . . . . . . . . . . . . . . . . .

yellowblue
9-8
Safety Belts 1-6. . . . . . . . . . . . . . . . . . . . . . . . . . . . . . . . . . . Adults 1-11. . . . . . . . . . . . . . . . . . . . . . . . . . . . . . . . . . . . . . Care 6-61. . . . . . . . . . . . . . . . . . . . . . . . . . . . . . . . . . . . . . . Center Passenger Position 1-22. . . . . . . . . . . . . . . . . . . . . . Children 1-23. . . . . . . . . . . . . . . . . . . . . . . . . . . . . . . . . . . . Driver Position 1-11. . . . . . . . . . . . . . . . . . . . . . . . . . . . . . . Extender 1-36. . . . . . . . . . . . . . . . . . . . . . . . . . . . . . . . . . . . How to Wear Properly 1-11. . . . . . . . . . . . . . . . . . . . . . . . . Lap Belt 1-22. . . . . . . . . . . . . . . . . . . . . . . . . . . . . . . . . . . . Lap-Shoulder Belt 1-12. . . . . . . . . . . . . . . . . . . . . . . . . . . . Larger Children 1-33. . . . . . . . . . . . . . . . . . . . . . . . . . . . . . Questions and Answers 1-10. . . . . . . . . . . . . . . . . . . . . . . . Reminder Light 1-7, 2-55. . . . . . . . . . . . . . . . . . . . . . . . . . Replacing After a Crash 1-36. . . . . . . . . . . . . . . . . . . . . . . . Right Passenger Position 1-21. . . . . . . . . . . . . . . . . . . . . . . Smaller Children and Babies 1-23. . . . . . . . . . . . . . . . . . . . Use During Pregnancy 1-21. . . . . . . . . . . . . . . . . . . . . . . . . Why They Work 1-8. . . . . . . . . . . . . . . . . . . . . . . . . . . . . . .
Safety Defects, Reporting 8-6, 8-7. . . . . . . . . . . . . . . . . . . . . Safety Warnings and Symbols iii. . . . . . . . . . . . . . . . . . . . . . . Scheduled Maintenance 7-5. . . . . . . . . . . . . . . . . . . . . . . . . . . Scheduled Maintenance Services 7-4. . . . . . . . . . . . . . . . . . . . Seat Adjuster Check 7-26. . . . . . . . . . . . . . . . . . . . . . . . . . . . . Seatback Latches 1-3. . . . . . . . . . . . . . . . . . . . . . . . . . . . . . . . Seats
Bucket and Bench 1-2. . . . . . . . . . . . . . . . . . . . . . . . . . . . . Chugger-Snubber Lock-Out 1-6. . . . . . . . . . . . . . . . . . . . . Controls 1-2. . . . . . . . . . . . . . . . . . . . . . . . . . . . . . . . . . . . . Cushion Adjustment 1-5. . . . . . . . . . . . . . . . . . . . . . . . . . . . Fore-and-Aft Adjustment 1-5. . . . . . . . . . . . . . . . . . . . . . .
Height Adjustment 1-4. . . . . . . . . . . . . . . . . . . . . . . . . . . . . Lumbar Adjustments 1-5. . . . . . . . . . . . . . . . . . . . . . . . . . . National 1-4. . . . . . . . . . . . . . . . . . . . . . . . . . . . . . . . . . . . .
Securing a Child Restraint 1-31. . . . . . . . . . . . . . . . . . . . . . . . Service 6-2. . . . . . . . . . . . . . . . . . . . . . . . . . . . . . . . . . . . . . . .
Bulletins, Ordering 8-8. . . . . . . . . . . . . . . . . . . . . . . . . . . . . Manuals, Ordering 8-8. . . . . . . . . . . . . . . . . . . . . . . . . . . . . Park Brake Warning Light 2-60. . . . . . . . . . . . . . . . . . . . . . Parts Identification Label 6-67. . . . . . . . . . . . . . . . . . . . . . . Publications, Ordering 8-8. . . . . . . . . . . . . . . . . . . . . . . . . . Trans Filter Indicator Light 2-64. . . . . . . . . . . . . . . . . . . . . Work, Doing Your Own 6-3. . . . . . . . . . . . . . . . . . . . . . . . .
Service and Appearance Care 6-1. . . . . . . . . . . . . . . . . . . . . . Service and Owner Publications 8-8. . . . . . . . . . . . . . . . . . . . Sheet Metal Damage 6-64. . . . . . . . . . . . . . . . . . . . . . . . . . . . Signal-Stat Turn Signal 2-33, 5-4. . . . . . . . . . . . . . . . . . . . . . Skidding 4-14. . . . . . . . . . . . . . . . . . . . . . . . . . . . . . . . . . . . . . Specifications, Engine 6-74. . . . . . . . . . . . . . . . . . . . . . . . . . . Speedometer 2-53. . . . . . . . . . . . . . . . . . . . . . . . . . . . . . . . . . . Starter Switch Check 7-25. . . . . . . . . . . . . . . . . . . . . . . . . . . . Starting Your Diesel Engine 2-10. . . . . . . . . . . . . . . . . . . . . . . Starting Your Gasoline Engine 2-7. . . . . . . . . . . . . . . . . . . . . . Steam 5-18. . . . . . . . . . . . . . . . . . . . . . . . . . . . . . . . . . . . . . . . Steering 4-9. . . . . . . . . . . . . . . . . . . . . . . . . . . . . . . . . . . . . . .
Check 7-25. . . . . . . . . . . . . . . . . . . . . . . . . . . . . . . . . . . . . . In Emergencies 4-11. . . . . . . . . . . . . . . . . . . . . . . . . . . . . . . Power 4-9. . . . . . . . . . . . . . . . . . . . . . . . . . . . . . . . . . . . . . . Tips 4-10. . . . . . . . . . . . . . . . . . . . . . . . . . . . . . . . . . . . . . . . Wheel, Tilt 2-31. . . . . . . . . . . . . . . . . . . . . . . . . . . . . . . . . .
yellowblue
9-9
Storage, Vehicle 6-42. . . . . . . . . . . . . . . . . . . . . . . . . . . . . . . . Stuck: In Sand, Mud, Ice or Snow 5-37. . . . . . . . . . . . . . . . . . Sun Visors 2-48. . . . . . . . . . . . . . . . . . . . . . . . . . . . . . . . . . . . Surge Tank, Coolant 5-29. . . . . . . . . . . . . . . . . . . . . . . . . . . . . Surge Tank Pressure Cap 6-22. . . . . . . . . . . . . . . . . . . . . . . . . Symbols, Vehicle v. . . . . . . . . . . . . . . . . . . . . . . . . . . . . . . . . .
Tape Player Care 3-12. . . . . . . . . . . . . . . . . . . . . . . . . . . . . . Theft 2-5. . . . . . . . . . . . . . . . . . . . . . . . . . . . . . . . . . . . . . . . . . Thermostat 6-22. . . . . . . . . . . . . . . . . . . . . . . . . . . . . . . . . . . . Tilt Steering Wheel 2-31. . . . . . . . . . . . . . . . . . . . . . . . . . . . . Tire Loading 6-48. . . . . . . . . . . . . . . . . . . . . . . . . . . . . . . . . . . Tires 6-48. . . . . . . . . . . . . . . . . . . . . . . . . . . . . . . . . . . . . . . . .
Changing a Flat 5-34. . . . . . . . . . . . . . . . . . . . . . . . . . . . . . Cleaning 6-64. . . . . . . . . . . . . . . . . . . . . . . . . . . . . . . . . . . . Dual Tire Operation 6-50. . . . . . . . . . . . . . . . . . . . . . . . . . . Inflation 6-49. . . . . . . . . . . . . . . . . . . . . . . . . . . . . . . . . . . . Inflation Check 7-23. . . . . . . . . . . . . . . . . . . . . . . . . . . . . . . Loading 6-48. . . . . . . . . . . . . . . . . . . . . . . . . . . . . . . . . . . . Pressure 6-49. . . . . . . . . . . . . . . . . . . . . . . . . . . . . . . . . . . . Rims and Wheels 6-50. . . . . . . . . . . . . . . . . . . . . . . . . . . . . Wheel Replacement 6-57. . . . . . . . . . . . . . . . . . . . . . . . . . . When It’s Time for New 6-51. . . . . . . . . . . . . . . . . . . . . . .
Top Strap 1-30. . . . . . . . . . . . . . . . . . . . . . . . . . . . . . . . . . . . . Torque, Wheel Nut 6-52 , 6-74. . . . . . . . . . . . . . . . . . . . . . . . Towing Your Vehicle 5-9. . . . . . . . . . . . . . . . . . . . . . . . . . . . .
Trailer Brake Hand Control Valve 2-39. . . . . . . . . . . . . . . . . . Trailer Connections 2-49. . . . . . . . . . . . . . . . . . . . . . . . . . . . . Transmission
Automatic 2-20, 6-18. . . . . . . . . . . . . . . . . . . . . . . . . . . . . . Automatic Transmission External Filter 6-19. . . . . . . . . . . Double-Clutching 2-22. . . . . . . . . . . . . . . . . . . . . . . . . . . . Filters 6-77. . . . . . . . . . . . . . . . . . . . . . . . . . . . . . . . . . . . . . Fluid, Automatic 6-18. . . . . . . . . . . . . . . . . . . . . . . . . . . . . Fluid Capacity 6-75. . . . . . . . . . . . . . . . . . . . . . . . . . . . . . . Manual 2-22, 6-19. . . . . . . . . . . . . . . . . . . . . . . . . . . . . . . . Manual, Fluid 6-19. . . . . . . . . . . . . . . . . . . . . . . . . . . . . . . . Third Gear Hold 2-21. . . . . . . . . . . . . . . . . . . . . . . . . . . . . . Using the Clutch 2-22. . . . . . . . . . . . . . . . . . . . . . . . . . . . . Automatic 6-18. . . . . . . . . . . . . . . . . . . . . . . . . . . . . . . . . . . Manual 6-19. . . . . . . . . . . . . . . . . . . . . . . . . . . . . . . . . . . . .
TTY Users 8-3. . . . . . . . . . . . . . . . . . . . . . . . . . . . . . . . . . . . . Turn and Lane Change Indicator 2-33. . . . . . . . . . . . . . . . . . .
Underbody Maintenance 6-65. . . . . . . . . . . . . . . . . . . . . . . .
VehicleControl 4-6. . . . . . . . . . . . . . . . . . . . . . . . . . . . . . . . . . . . . . Damage Warnings iv. . . . . . . . . . . . . . . . . . . . . . . . . . . . . . Identification Number 6-67. . . . . . . . . . . . . . . . . . . . . . . . . Loading 4-28. . . . . . . . . . . . . . . . . . . . . . . . . . . . . . . . . . . . Storage 6-42. . . . . . . . . . . . . . . . . . . . . . . . . . . . . . . . . . . . .
Ventilation System 3-6. . . . . . . . . . . . . . . . . . . . . . . . . . . . . . . Visors, Sun 2-48. . . . . . . . . . . . . . . . . . . . . . . . . . . . . . . . . . . . Voltmeter 2-56. . . . . . . . . . . . . . . . . . . . . . . . . . . . . . . . . . . . .

yellowblue
9-10
Warning Devices 5-4. . . . . . . . . . . . . . . . . . . . . . . . . . . . . . . Warning Lights and Gages 2-55. . . . . . . . . . . . . . . . . . . . . . . . Warranty Information 8-5. . . . . . . . . . . . . . . . . . . . . . . . . . . . . Washer Fluid, Windshield 2-35, 6-29. . . . . . . . . . . . . . . . . . . Washing Your Vehicle 6-63. . . . . . . . . . . . . . . . . . . . . . . . . . . Weatherstrips 6-62. . . . . . . . . . . . . . . . . . . . . . . . . . . . . . . . . . Wheel
Alignment 6-51. . . . . . . . . . . . . . . . . . . . . . . . . . . . . . . . . . Nut Torque 6-52, 6-74. . . . . . . . . . . . . . . . . . . . . . . . . . . . . Replacement 6-57. . . . . . . . . . . . . . . . . . . . . . . . . . . . . . . . . Tightening the Wheel Nuts 6-52. . . . . . . . . . . . . . . . . . . . .
Windows 2-30. . . . . . . . . . . . . . . . . . . . . . . . . . . . . . . . . . . . . Manual 2-30. . . . . . . . . . . . . . . . . . . . . . . . . . . . . . . . . . . . . Power 2-31. . . . . . . . . . . . . . . . . . . . . . . . . . . . . . . . . . . . . .
Windshield WasherFluid 2-35. . . . . . . . . . . . . . . . . . . . . . . . . . . . . . . . . . . . . . . Fluid Level Check 7-23. . . . . . . . . . . . . . . . . . . . . . . . . . . .
Windshield Wipers 2-35. . . . . . . . . . . . . . . . . . . . . . . . . . . . . . Blade Cleaning 6-62. . . . . . . . . . . . . . . . . . . . . . . . . . . . . . . Blade Replacement 6-43. . . . . . . . . . . . . . . . . . . . . . . . . . . Fuses 6-68. . . . . . . . . . . . . . . . . . . . . . . . . . . . . . . . . . . . . . Low Speed Delay 2-35. . . . . . . . . . . . . . . . . . . . . . . . . . . . .
Winter Driving 4-24. . . . . . . . . . . . . . . . . . . . . . . . . . . . . . . . . Wiper Blade Check 7-24. . . . . . . . . . . . . . . . . . . . . . . . . . . . . Wiring, Headlamp 6-68. . . . . . . . . . . . . . . . . . . . . . . . . . . . . .