170 gallons a day
TRANSCRIPT
170 Gallons a Day 2
INTRODUCTION
Accessing and Purifying Water
During an Emergency
Leonardo da Vinci said, “Water is the driving force of all nature.”
How true! It is essential to life itself. Without it there would be no trees or flowers, rivers or lakes, snow covered mountaintops or oceans. Most importantly, there would be no “us” because humans need water to survive. In fact, water comprises 60-70% of the average human body, or the equivalent of fourteen gallons of water.1
In other words, each person is carrying almost three 5-pound buckets of water around each day. Equally important is the fact that the body has a low tolerance for water loss, and loses as much as 3 quarts every day through normal biological processes. On a typical day, a person sweats, urinates and breathes away the equivalent of three-quarters of a gallon of water or as much as 10% of their body weight.
Clearly, people cannot go long without water, which is precisely why it is important to know how to get clean drinking water on any given day, in any kind of situation.
Given the number of natural and man-made
disasters occurring in the world on a routine basis,
understanding how to find and clean at least one half
gallon of water each day in order to survive is critical.
Unfortunately, most people are often at a loss as to
INTRODUCTION
WHAT IS “FRESH WATER”?
WATER, WATEREVERYWHERE
PURIFYINGWATER
LOCHNESS MONSTER& OTHER WATER MYTHS
CONCLUSION
Inside This Report
2
5
7
12
20
23
170 GALLONS A DAY
170 Gallons a Day 3
how they can access drinkable water if it
doesn’t come from a tap.
In terms of survival, water only comes behind finding shelter during an emergency. If you have shelter, then water moves to first place. Since some kind of shelter is usually available, accessing clean water is a top priority.
In the following sections, the world of survival water in an urban setting is explored in detail. If you live in the city or suburbs, this book will be an invaluable source of information on meeting your long-term fresh water needs if disaster strikes.
You will learn about typical water contaminants, methods for collecting water, steps for emergency urine recycling, and how to purify water using a variety of natural methods. By the end of this report, you will know how to obtain enough clean water to survive on a daily basis during a disaster by taking advantage of any available water, no matter how contaminated.
The Importance of Water
How important is water? For such a simple chemical composition (2 parts hydrogen and 1 part oxygen) it is remarkably essential to all life on earth in various ways.
Water is a basic necessity, and even more essential for your survival and health than foot. While humans can survive without food for weeks in true emergencies, just a few water-deprived days will lead to serious problems, including death by dehydration.
Exactly how long it would take for someone to die due to lack of water depends on:
X Body weight
X Available food
X General health
X Weather conditions and exposure to the elements
X Activity level
Every cell in your body contains water. In fact, the human brain is made up of around 95% water, while your blood is made up of approximately 82% water. Without adequate water, your kidneys begin to fail, your brain experiences memory and concentration problems, and your body becomes fatigued and overheated. The side effects of dehydration make it even more difficult to handle the tasks associated with disaster survival.
Though you can live without water for around 3 days, there is a catch. You can’t be moving around too much. The 3 day upper limit assumes you are just sitting, and that isn’t likely to happen during a disaster. You need approximately 1 gallon of water a day to survive if you’re moving around. You can survive on a half gallon of water each day, if you’re fairly inactive. However, if you live in the desert or in an area with high humidity, you will need more than a gallon of water each day. The body must work harder to maintain its internal temperature in hot and humid climates.
170 Gallons a Day 4
Aside from drinking water, you also need water for cooking and cleaning food, washing clothes, and personal hygiene. If you have animals or a garden, you’ll also need to plan for their needs in the event of a disaster.
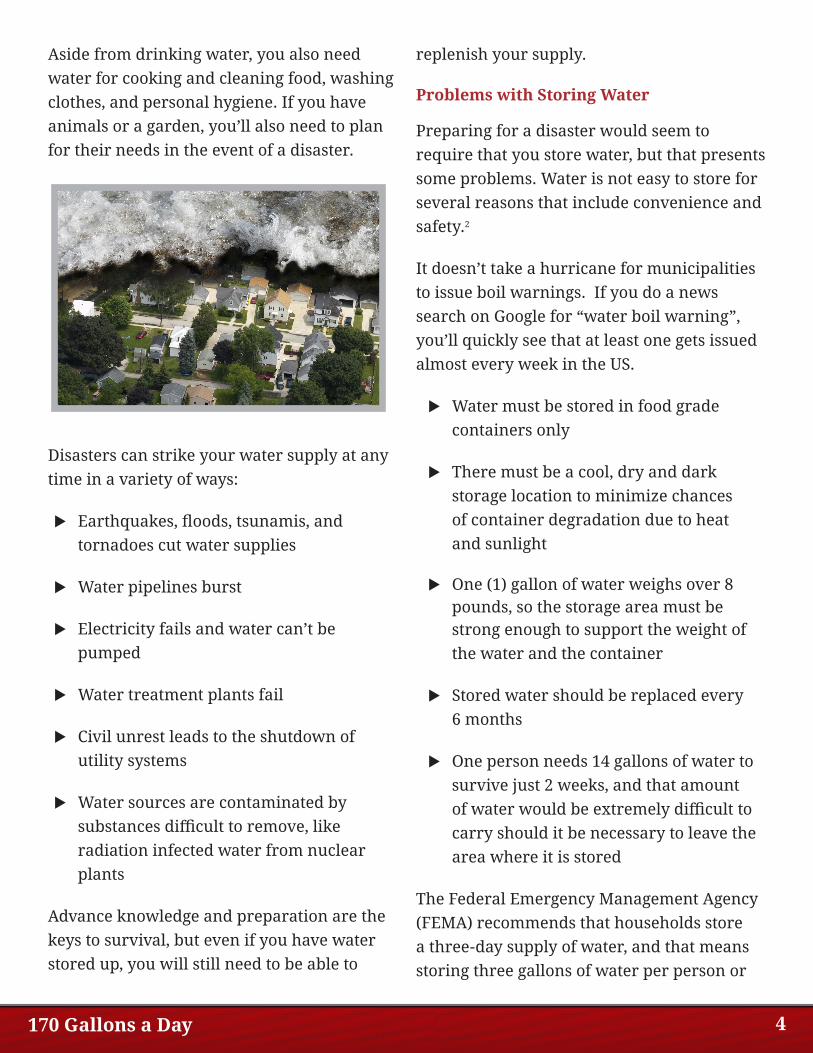
Disasters can strike your water supply at any time in a variety of ways:
X Earthquakes, floods, tsunamis, and tornadoes cut water supplies
X Water pipelines burst
X Electricity fails and water can’t be pumped
X Water treatment plants fail
X Civil unrest leads to the shutdown of utility systems
X Water sources are contaminated by substances difficult to remove, like radiation infected water from nuclear plants
Advance knowledge and preparation are the keys to survival, but even if you have water stored up, you will still need to be able to
replenish your supply.
Problems with Storing Water
Preparing for a disaster would seem to require that you store water, but that presents some problems. Water is not easy to store for several reasons that include convenience and safety.2
It doesn’t take a hurricane for municipalities to issue boil warnings. If you do a news search on Google for “water boil warning”, you’ll quickly see that at least one gets issued almost every week in the US.
X Water must be stored in food grade containers only
X There must be a cool, dry and dark storage location to minimize chances of container degradation due to heat and sunlight
X One (1) gallon of water weighs over 8 pounds, so the storage area must be strong enough to support the weight of the water and the container
X Stored water should be replaced every 6 months
X One person needs 14 gallons of water to survive just 2 weeks, and that amount of water would be extremely difficult to carry should it be necessary to leave the area where it is stored
The Federal Emergency Management Agency (FEMA) recommends that households store a three-day supply of water, and that means storing three gallons of water per person or
170 Gallons a Day 5
one gallon of water per person for each day, as an absolute minimum. Since each gallon of water requires approximately 1/7th cubic foot of storage space, it is often impossible to find appropriate storage area for adequate household water.3
Of course, based on the recent disasters, a three day supply will only be a temporary solution at best. After the three days, you will still need to collect and purify water if public water supplies remain inoperable.
WHAT IS “FRESH WATER”?
Water in the Wild
The first point to keep in mind is that you can find water in the wild or in the city. If you happen to be camping, fishing or hiking during a disaster, water tends to be more plentiful than in the city. In the wilderness, water is found in abundance in lakes, streams, creeks, ponds, wetlands, rivers and rock crevasses.
You can obtain water from certain edible plants like wild vegetables or berries or also from plant leaves.
One of the problems with wilderness water is that it is untreated. This means it may contain any of a number of organisms or toxins that include:
X Viruses
X Bacteria
X Worms
X Larva
X Protozoa (microscope animals)
X Chemical pollutants
X Mineral pollutants
X Animal feces
X Plant toxins
Most of these micro-organisms, organisms and pollutants can be eliminated with filtering or boiling. In some cases, adding chemicals like chlorine can purify the water from the wild. However, you do need to know what you are doing to ensure your water supply is safe for drinking.
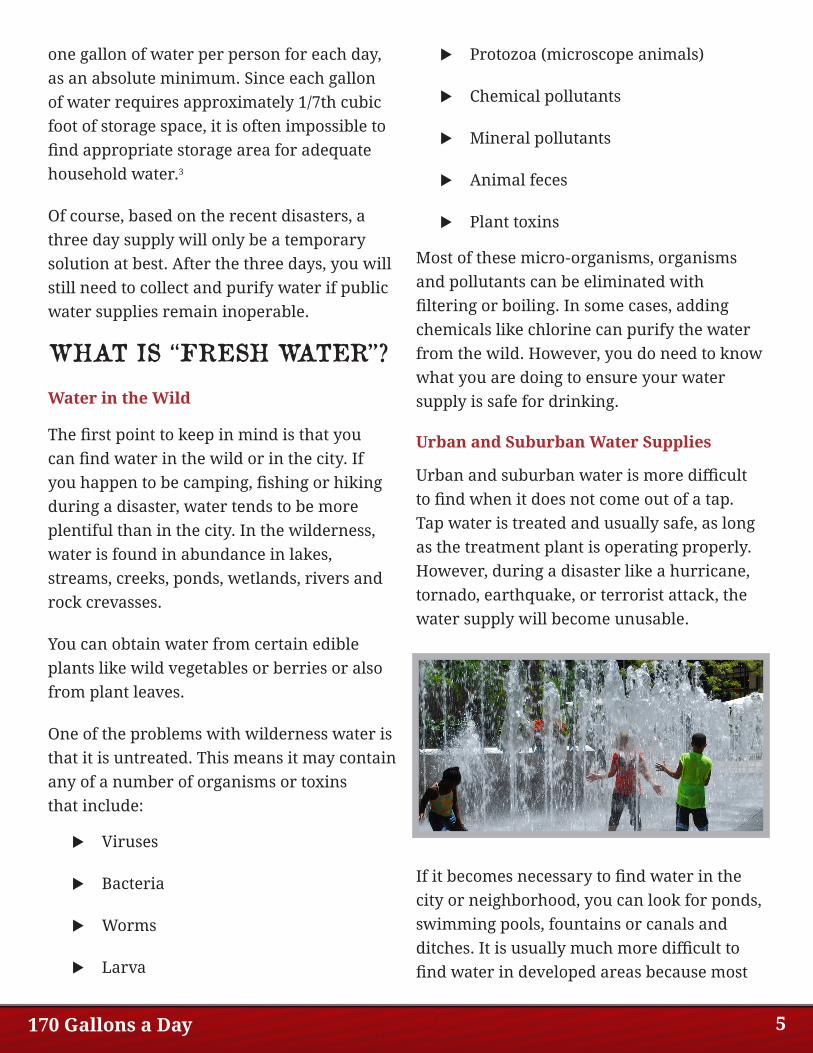
Urban and Suburban Water Supplies
Urban and suburban water is more difficult to find when it does not come out of a tap. Tap water is treated and usually safe, as long as the treatment plant is operating properly. However, during a disaster like a hurricane, tornado, earthquake, or terrorist attack, the water supply will become unusable.
If it becomes necessary to find water in the city or neighborhood, you can look for ponds, swimming pools, fountains or canals and ditches. It is usually much more difficult to find water in developed areas because most
170 Gallons a Day 6
houses and apartment buildings are not located near bodies of water. Even if your home is located near water, you still have to find a way to collect enough for the family and transport it from its source to the house. At roughly 9lbs per gallon, it requires a lot of physical strength to carry even a small bucket of water.
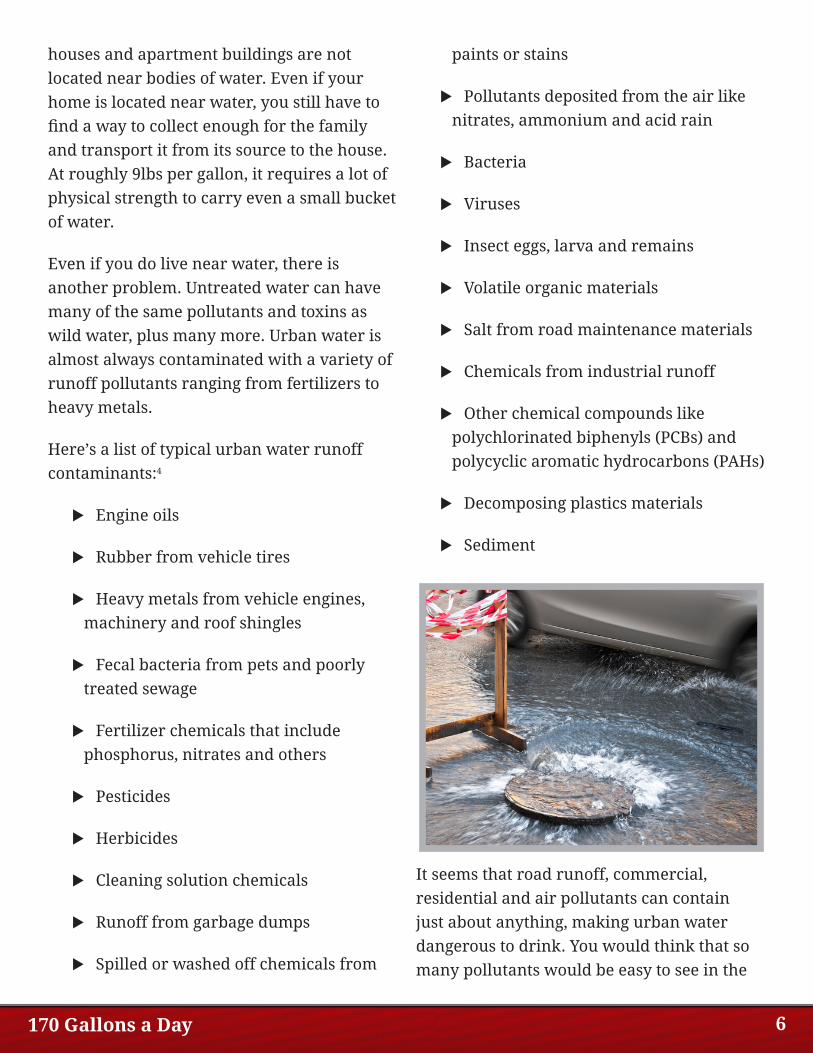
Even if you do live near water, there is another problem. Untreated water can have many of the same pollutants and toxins as wild water, plus many more. Urban water is almost always contaminated with a variety of runoff pollutants ranging from fertilizers to heavy metals.
Here’s a list of typical urban water runoff contaminants:4
X Engine oils
X Rubber from vehicle tires
X Heavy metals from vehicle engines, machinery and roof shingles
X Fecal bacteria from pets and poorly treated sewage
X Fertilizer chemicals that include phosphorus, nitrates and others
X Pesticides
X Herbicides
X Cleaning solution chemicals
X Runoff from garbage dumps
X Spilled or washed off chemicals from
paints or stains
X Pollutants deposited from the air like nitrates, ammonium and acid rain
X Bacteria
X Viruses
X Insect eggs, larva and remains
X Volatile organic materials
X Salt from road maintenance materials
X Chemicals from industrial runoff
X Other chemical compounds like polychlorinated biphenyls (PCBs) and polycyclic aromatic hydrocarbons (PAHs)
X Decomposing plastics materials
X Sediment
It seems that road runoff, commercial, residential and air pollutants can contain just about anything, making urban water dangerous to drink. You would think that so many pollutants would be easy to see in the
170 Gallons a Day 7
water, but most of them are quite small and invisible to the naked eye.
For example, bacteria averages 2-5 microns in size, while viruses are as small as .004 microns. The parasite giardia lamblia averages 8 to 12 microns, while cryptosporidium parvum is 4-6 microns.
The incredibly small size of some water pollutants means that you must be careful when choosing the method of water purification. The purification process used has to effectively remove or make harmless the most common urban water contaminants.
WATER, WATER EVERYWHERE
Collecting Water
Before you can purify water, it must be collected. There are many sources of water in urban areas that you probably do not consider as drinking water under normal circumstances, but they are readily collected water supplies in an emergency. They include:
X Swimming pools
X Hot tubs
X Hot water tanks
X Backyard ponds or fountains
X Roof water tanks
X Golf course ponds
X Retention ponds
X Rain catchments
X Drainage ditches
X Hot water tanks
Unfortunately, you may not be able to get to
all of these water sources during a disaster.
The following sources of water are available
in a true emergency, when there is no clear
source of water available and survival is the
top priority.
Sources of Water
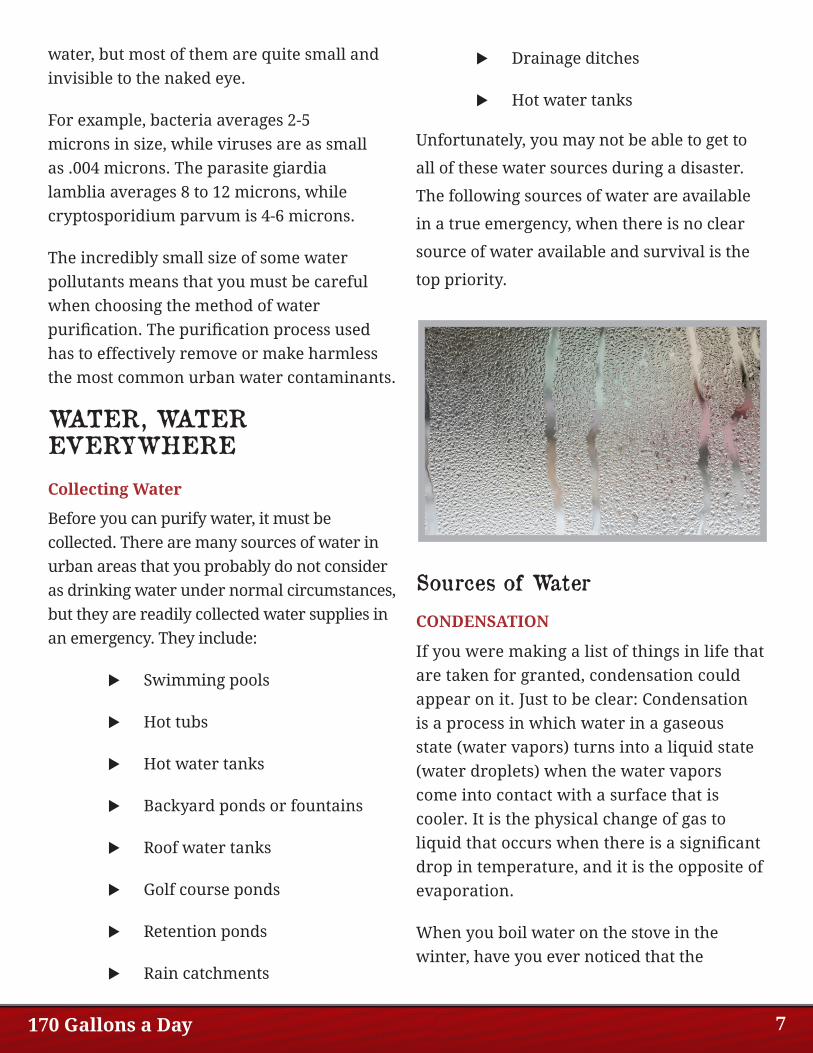
CONDENSATION
If you were making a list of things in life that are taken for granted, condensation could appear on it. Just to be clear: Condensation is a process in which water in a gaseous state (water vapors) turns into a liquid state (water droplets) when the water vapors come into contact with a surface that is cooler. It is the physical change of gas to liquid that occurs when there is a significant drop in temperature, and it is the opposite of evaporation.
When you boil water on the stove in the winter, have you ever noticed that the
170 Gallons a Day 8
windows get fogged up? The condensation on your windows is the result of water vapors hitting the cooler window and converting back to water droplets. Your kitchen becomes a mini-physics lab!
As mentioned earlier, water is critical to all
living things. The way those living things
get water represents a cycle of evaporation
(clouds) and condensation (rain). Since most
living things are composed mostly of water,
they lose water through evaporation. Simply
stated, by boiling some of those living things,
like plants, you can catch the water vapors
and turn the vapors into water droplets.
In fact, water evaporates from anything that has water in it—living or not. Water in mud puddles evaporates. Seawater evaporates. Water in sap evaporates. Urine evaporates. Water in clay will evaporate. Contaminated water will evaporate.
Catch enough water droplets and you have a water supply. Obviously, it takes a lot of water droplets to make a glass of water. The good news is that the evaporation process removes most impurities in the water.
Evaporation occurs when the object or item containing water is heated. To collect the water, you can set up a still. A still setup heats the substance to force evaporation. The evaporation is caught and channeled, and as it cools, it is converted to water droplets. Further channeling directs the water droplets into a container.
There are different types of stills that include:5
X Vegetation still
X Sweat bag still
X Solar still (also called an evaporation still)
X Plastic bag or tarpaulin placed over a fire still
X Inflatable solar survival still (purchased)
The vegetation, sweat bag still, and solar still are discussed in detail in following sections.
The plastic bag or tarpaulin still is quite simple. A tripod is built out of sticks and placed over a fire. The tripod is capped with a plastic bag or tarpaulin that has had its edges folded to the inside to serve as a condensation catchment. A pot containing a substance with water content is placed over the fire. As the water evaporates, the tripod cap will catch the condensation.
Actually, anything able to be folded in a way that it can catch condensation can serve as a water collector over a heated substance in a container. For example, you can use a large flat leaf or saturated fabric or other items. The important thing to remember is to set up the water collecting system in a way that the cap over the fire and/or pot does not catch on fire.
Inflatable solar survival stills are usually carried on boats or life rafts. They are used to desalinate water to make the water drinkable. It distills collected sea water or contaminated water.
170 Gallons a Day 9
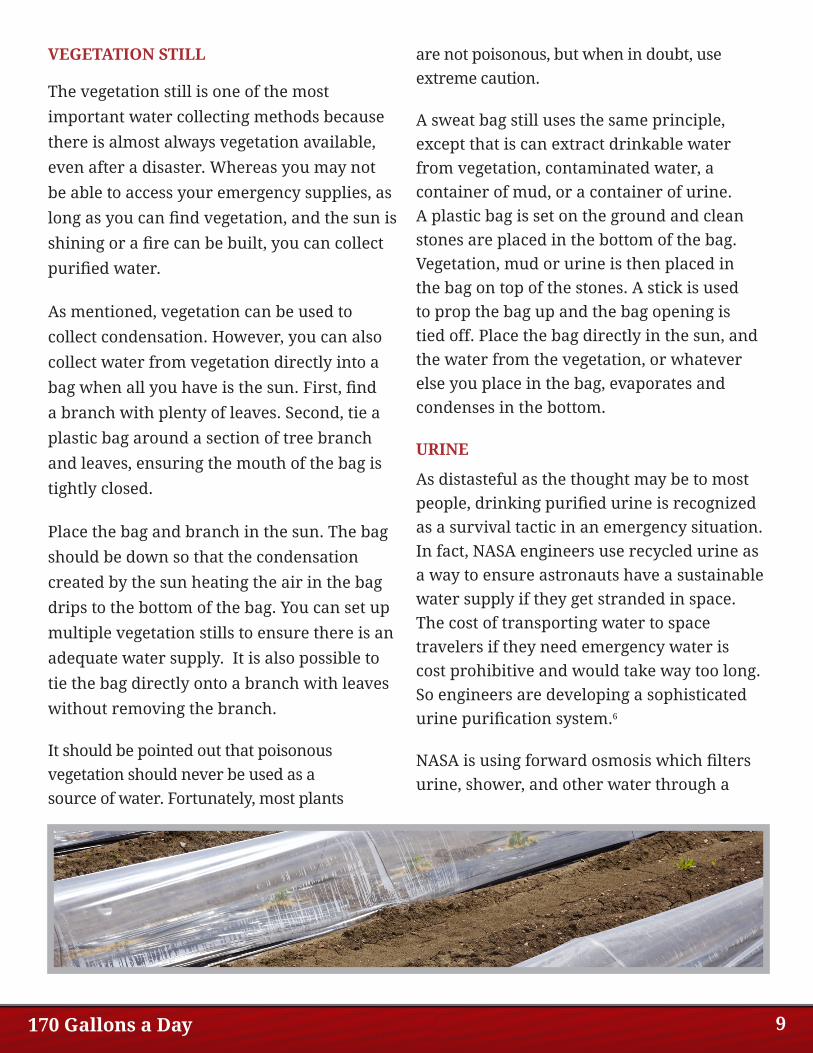
VEGETATION STILL
The vegetation still is one of the most
important water collecting methods because
there is almost always vegetation available,
even after a disaster. Whereas you may not
be able to access your emergency supplies, as
long as you can find vegetation, and the sun is
shining or a fire can be built, you can collect
purified water.
As mentioned, vegetation can be used to
collect condensation. However, you can also
collect water from vegetation directly into a
bag when all you have is the sun. First, find
a branch with plenty of leaves. Second, tie a
plastic bag around a section of tree branch
and leaves, ensuring the mouth of the bag is
tightly closed.
Place the bag and branch in the sun. The bag
should be down so that the condensation
created by the sun heating the air in the bag
drips to the bottom of the bag. You can set up
multiple vegetation stills to ensure there is an
adequate water supply. It is also possible to
tie the bag directly onto a branch with leaves
without removing the branch.
It should be pointed out that poisonous vegetation should never be used as a source of water. Fortunately, most plants
are not poisonous, but when in doubt, use extreme caution.
A sweat bag still uses the same principle, except that is can extract drinkable water from vegetation, contaminated water, a container of mud, or a container of urine. A plastic bag is set on the ground and clean stones are placed in the bottom of the bag. Vegetation, mud or urine is then placed in the bag on top of the stones. A stick is used to prop the bag up and the bag opening is tied off. Place the bag directly in the sun, and the water from the vegetation, or whatever else you place in the bag, evaporates and condenses in the bottom.
URINE
As distasteful as the thought may be to most people, drinking purified urine is recognized as a survival tactic in an emergency situation. In fact, NASA engineers use recycled urine as a way to ensure astronauts have a sustainable water supply if they get stranded in space. The cost of transporting water to space travelers if they need emergency water is cost prohibitive and would take way too long. So engineers are developing a sophisticated urine purification system.6
NASA is using forward osmosis which filters urine, shower, and other water through a
170 Gallons a Day 10
semi-permeable membrane, which effectively strains the contaminants out of the water. Of course, you would likely not have such a sophisticated purification system at hand in the event of an emergency. However, it is nice to know that admirable people like astronauts are willing to drink filtered urine and hygiene water.
It is generally advised by health professionals that you should not drink urine, but if you must drink it do so a maximum of 3 times, and only if there is no alternative water supply. In other words, it is a last resort water supply. However, anyone would admit that it is better to drink urine than die from dehydration.
The guidelines are as follows:
X Only drink purified urine unless it is a matter of life or death
X If you are unable to make a solar still, use water purification tablets as a minimum purification step
X Do not drink the first urine in the morning, as it is usually the most concentrated flow of the day in terms of body toxin content
X DO NOT try to collect urine contaminated by sewage because it is way too dangerous to your health
X Only drink your own urine and never drink another person’s urine.
X Do not tell people you drank your urine because they will not be impressed in the
least, even if it is an emergency
X Once again, only drink purified urine a maximum of 3 times
There are very good reasons why the amount of urine you drink should be limited Urine is approximately 95% water and 5% waste elements. The waste elements are just that—substances your body does not need. These substances include potassium, chloride, sodium, nitrogen and calcium. Sodium attracts water in cells, which is why you cannot drink salt water. Too much sodium will lead to dehydration, while too much potassium can interfere with your heart functioning.7
Urine may also contain traces of medications or other substances that you do not want to put back into your body.
When a disaster occurs, there is also a good chance you may be at risk of dehydration already, if you’re desperate enough to consider drinking your own urine. When the body is dehydrated, urine contains less water which means the waste elements make up a larger percentage of the urine’s composition.
This may sound like a list of reasons designed to stop you from drinking urine. However, it is important to understand the limitations of urine as a source of emergency water. If you know other ways to obtain fresh water, you are less likely to succumb to the temptation to drink more urine. In fact, unpurified urine should only be drunk in the most severe emergencies, when there are no other options for obtaining water.
170 Gallons a Day 11
Urine can, and always should be, purified before drinking it. The easiest way to purify it is to distill it or process the urine through a solar still. This will eliminate most contaminants, including solids. A solar still is the most efficient low-fuel usage choice, as you will learn in the next sections on purifying water. A distiller requires a particular setup and heat and can require a lot of fuel to produce the heat. If you are considering drinking your own urine, there is an excellent chance that you are unable to set up a distiller, so the best option for purifying urine is a solar still. In the next chapter, you will learn how to purify urine or water using a solar still.
RAINWATER
Rainwater is a good source of water, if you are lucky enough to live in a climate with regular rainfall or a disaster occurs during the rainy season. One inch of rainfall equates to 27,000 gallons of water falling on 1 acre of land. Rain falls on roofs too, and if you catch the rain in containers, it is possible to quickly collect water.
To calculate the amount of rain that falls on
your roof, just use the following equation:
.6 gallons of water per inch of rain per square foot of roof X roof square footage = rainfall amount
For example, a 2,000 square foot roof would produce 1,200 gallons of water that could potentially be collected. This is water that can be used for:
X Purifying
X Washing dishes
X Bathing
X Cooking
Rainfall can be directed into a 55 gallon drum using gutters and downspouts.
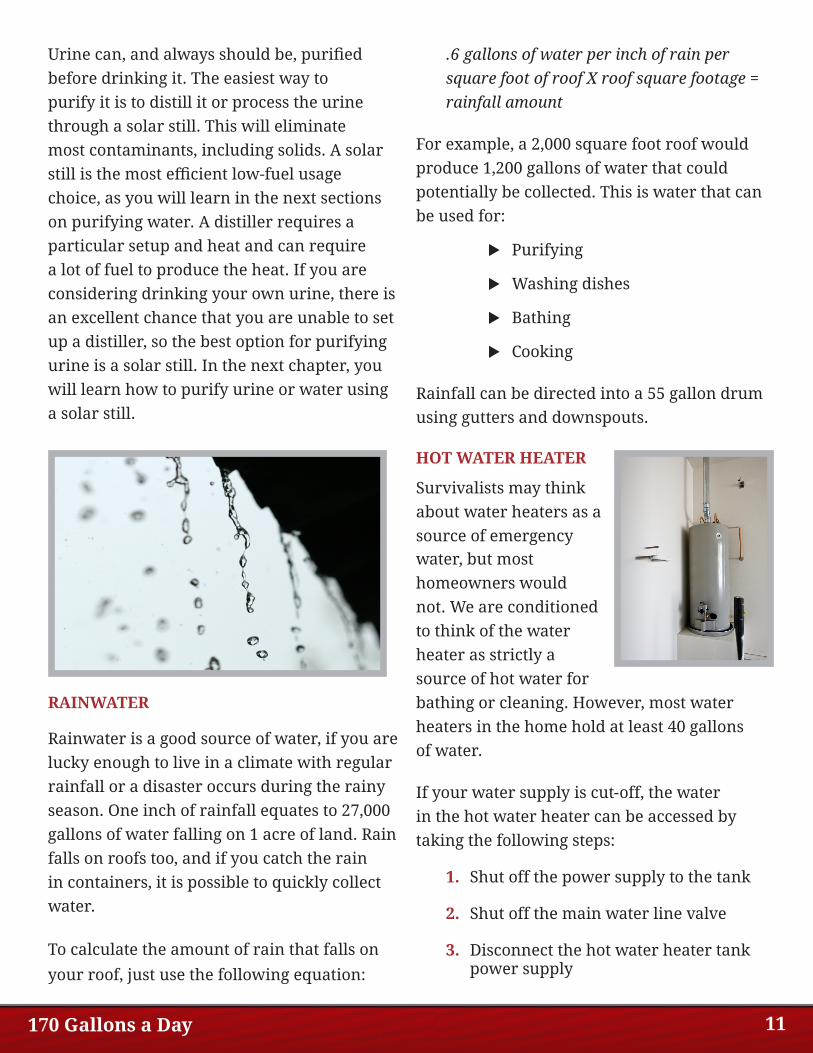
HOT WATER HEATER
Survivalists may think about water heaters as a source of emergency water, but most homeowners would not. We are conditioned to think of the water heater as strictly a source of hot water for bathing or cleaning. However, most water heaters in the home hold at least 40 gallons of water.
If your water supply is cut-off, the water in the hot water heater can be accessed by taking the following steps:
1. Shut off the power supply to the tank
2. Shut off the main water line valve
3. Disconnect the hot water heater tank power supply

170 Gallons a Day 12
4. Let the water cool for several hours
5. Disconnect the hot water line
6. Have a water container handy for holding drained water and a short length of rubber hose or garden hose
7. Connect the hose to the hot water tank drain
8. Open the water drain valve on the tank and let the water drain into the clean container through the hose
9. Purify the water using bleach
Watch for tank corrosion sediment or rust while the water is draining. The first water may need discarding. Water can also be filtered through material or coffee filters to catch rust or tank sediment.
Up to this point, you have read about wilderness and suburban water supplies and sources and methods for collecting water. In the next chapter, the various methods of purifying water are reviewed.
PURIFYING WATER
Defining Purification
Water purification is a process in which
all types of impurities, contaminants and
pollutants are removed from the water. If
you remember, contaminants and pollutants
can include a variety of substances like
microorganisms, metals and chemicals. Most
purification processes involve multiple steps,
and especially when water purifying is done
in emergency conditions.
Contaminated water can cause serious health problems that include:
X Severe and prolonged diarrhea
X Diseases like typhoid and cholera
X Parasites in the digestive system
or blood stream
X Leeches that can cause internal
bleeding wounds
X Infections
In a disaster, or when treated water is
unavailable for whatever reason, water
should be purified. Sometimes the water
will clearly indicate contamination, like
when it is cloudy or dirty. However, the
appearance of water does not always reflect
its contamination with microorganisms or
pollutants.
The most rudimentary purification process
involves allowing sediment to settle in the
bottom of the water or pouring the water

170 Gallons a Day 13
through some handy material. However,
all this does is remove larger materials and
dirt and does nothing to eliminate biological
contaminants.
There are a number of methods for purifying
water, and some are more effective than
others. However, by knowing different
purification methods, you are better prepared
to handle an emergency or disaster when
treated water is not available.
Methods of Purifying
FILTRATION
There are several ways to filter water using natural materials when there is no commercial water filter available. In effect, you are copying Mother Nature by allowing water to run through layers of natural materials to trap suspended particles and organic materials.
The very simplest filtration system involves running water through a cloth or some other tightly woven material.
In some cases, you can find the rudiments of supplies needed to build a filtration system in which water is poured on top and allowed to run out the bottom after passing through layers of gravel, sand and charcoal .
1. Punch a small holes in the bottom of a 5 gallon bucket
2. Place a layer of course gravel in the bucket
3. Layer pea gravel on top of the course gravel
4. Layer sand on top of the pea gravel
5. Layer 4 pounds of activated charcoal on top of the sand
6. Place another layer of sand on top of the charcoal
7. The top layer is pea gravel placed over the sand
8. Place bucket over clean container or set one bucket inside of another bucket
9. Pour water into the bucket and let it slowly filter through the layers into a second container
This filtration system will purify approximately 480 gallons of water, which will support a five person household for about six months. After purifying 480-500 gallons of water, the charcoal should be replaced.
One of the important characteristics of filtration systems is that they can be adapted to anything that can hold layers of gravel, sand and charcoal. For example, a 2 liter soda bottle, a PVC pipe length, or a large can will also work for work filtering.
In fact, if you don’t have a bucket, a rough filtration system can be made by wrapping birch or other bark into a cone shape and tying it so it won’t open up. Then layer the inside of the cone with:
1. 2 inches of pebbles
2. Gravel
170 Gallons a Day 14
3. Charcoal
4. Sand
Whether using a 5-gallon bucket or a cone, you will need to let the filtered water run through the layers of material into a second container. Be sure to visually inspect the water before drinking it. If it does not look clean, you will have to run the water through again.
Charcoal can remove many toxic compounds. Activated charcoal has been treated with oxygen to create many tiny pores in the carbon material. Activated charcoal can be obtained by:
X Purchasing online
X Purchasing at a pet supplies store
X Purchasing all natural charcoal (chemical free) at a specialty store
X Making your own
Making charcoal is not difficult, but you will need to do it before a disaster strikes. There are a couple of methods called direct and indirect, and the reference in footnote 8 provides a lot of information.8
Charcoal that is not activated is called “low grade” charcoal. If you make or buy it, the charcoal may need to be broken into smaller pieces. If you need to do so, make sure the charcoal dust is washed off before it is used in the filtration system.
It takes approximately 20 grams of charcoal to purify a gallon of water.
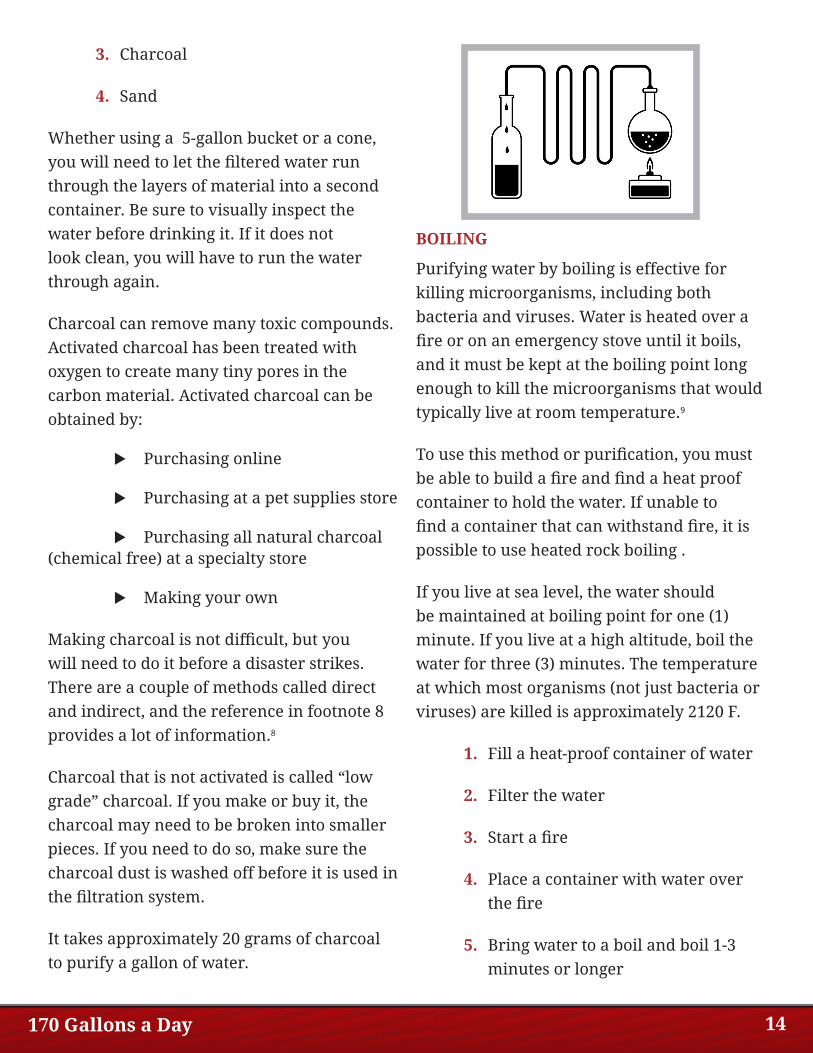
BOILING
Purifying water by boiling is effective for killing microorganisms, including both bacteria and viruses. Water is heated over a fire or on an emergency stove until it boils, and it must be kept at the boiling point long enough to kill the microorganisms that would typically live at room temperature.9
To use this method or purification, you must be able to build a fire and find a heat proof container to hold the water. If unable to find a container that can withstand fire, it is possible to use heated rock boiling .
If you live at sea level, the water should be maintained at boiling point for one (1) minute. If you live at a high altitude, boil the water for three (3) minutes. The temperature at which most organisms (not just bacteria or viruses) are killed is approximately 2120 F.
1. Fill a heat-proof container of water
2. Filter the water
3. Start a fire
4. Place a container with water over the fire
5. Bring water to a boil and boil 1-3 minutes or longer
170 Gallons a Day 15
6. Allow water to thoroughly cool before drinking
One of the drawbacks to boiling is that it does not remove many chemicals, minerals or heavy metals.
HEATED ROCK BOILING
The heated rock boiling purification system is effective for killing microorganisms if you can build a fire for boiling water, but cannot find a heat-proof container. Instead of using a container, it is rocks that are used to heat the water.
X Fill a container of water
X Filter the water
X Start a fire
X Place stones in the fire
X Once the stones are hot, carefully remove them from the fire and place in the water container
X Repeat the process until the water boils and continues boiling for 5 minutes (longer than boiling over a fire as a precaution)
DISTILLATION
Distillation was mentioned earlier while discussing condensation. It is a process in which water is boiled in a container to produce water vapors or steam. The steam rises to meet a cooled surface where the vapors are converted to water droplets.
The droplets are then collected in another container for water.
Distilling will kill microorganisms because the water is boiled. It also removes salt and a number of other impurities, so the process is appropriate for converting sea water, in addition to all other water, to drinking water. In fact, distillation can be used to purify urine .
1. Place an empty glass inside a pan or tie a cup to the pan’s lid
2. Pour water into the pan to a level below the glass rim
3. Cover the pan but turn the cover upside down
4. Boil the water over a fire or on a stove (if available) for 20 minutes
5. Let the steam condense on the pan lid and drip into the glass
6. Let the glass cool before touching
When you have the supplies, it is possible to set up a still that is reminiscent of the old-fashioned moonshiners. In that kind of setup, a covered water container is connected to a second empty container via a hose. The water container is heated over a fire until the water boils to generate steam. The steam runs through the hose to the collection container where it is turned to water after cooling. Impurities remain in the original water container and include viruses, bacteria, salts, chemicals, heavy metals and particulate pollutants.
If you are in a severe emergency situation in the desert or where the ground is warm and
170 Gallons a Day 16
must distill urine, it is possible to use this same process. When there is no electricity and no way to build a fire, you can use the ground heat.
1. Dig a shallow hole in the ground
2. Urinate in the hole
3. Place an empty glass inside the hole
4. Cover the glass with a plastic bag
5. Let the natural sand or soil heat evaporate the water
Similar to the rugged distillation systems just described is solar distillation. Instead of a fire, stove or ground, it is the sun that becomes the power source. In a survival situation, it is possible to use a mixing bowl or other container to hold a glass and the water. Covering the bowl tightly with plastic wrap, a small stone placed in the middle of the plastic will direct condensation into the glass. Place the bowl in the sun to heat the water.
A solar distillation method that uses two bottles and a hose is also effective for making a larger amount of drinking water.
X Obtain two bottles or other containers of any size
X Fill one bottle with water
X Place the water filled bottle in the sun
X Place the empty bottle in a spot that is out of the sun
X Connect the water filled bottle to the
empty bottle with tubing that runs from one opening to another
X Let the sun heat and evaporate the water, which will run through the tubing and collect in the empty bottle
Solar distillation that is completely natural can also provide drinking water. Water that evaporates from the earth as the sun heats the ground, forms clouds and then returns to earth as rain is the same as distilled water. The naturally distilled rain water becomes clean drinking water when it is collected in a clean container.
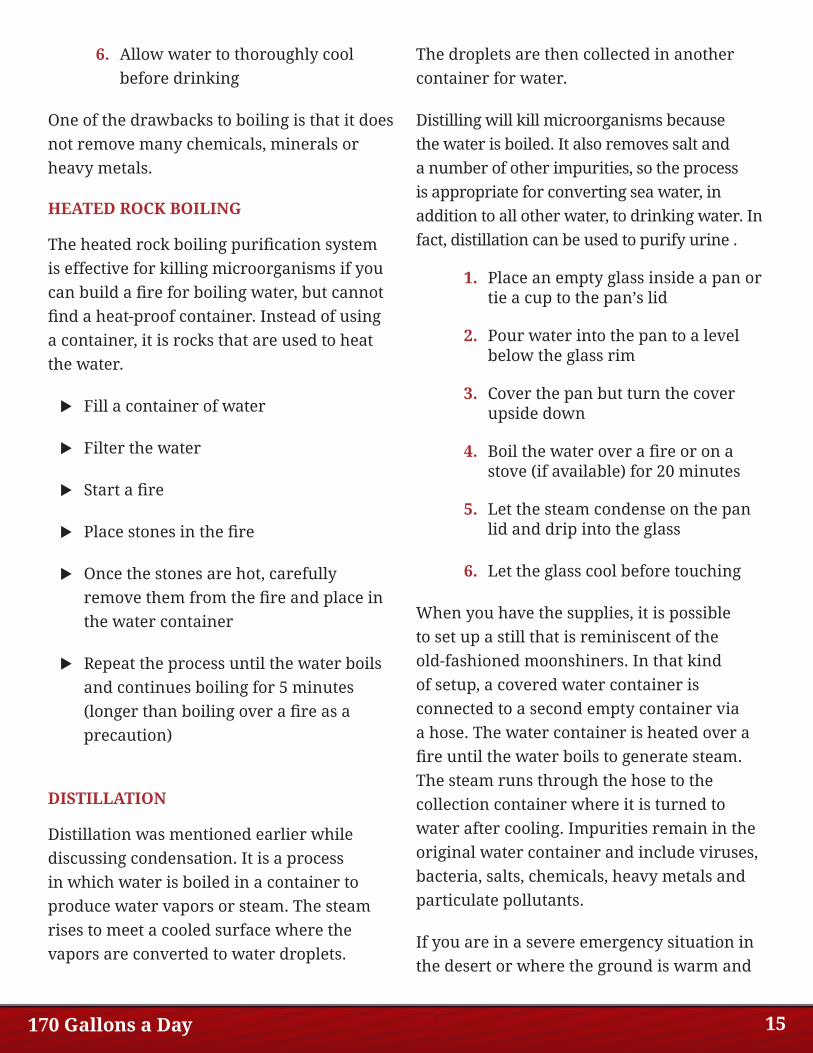
SODIS (SOLAR DISINFECTION)
Solar water disinfection is a process in which water is purified using the sun’s ultraviolet (IV) rays. The higher the temperature, the faster this process works. If it is a sunny day, the water is disinfected within 6 hours. If it is cloudy, it will take 2 full days. This system should not be used if most days are rainy.10
Solar water disinfection will kill many
impurities that include bacteria and viruses,
Giardia, cryptosporidia parasites and other
microorganisms.
X First filter water
X Fill bottles with water, preferably clear
PET (polyethyleneteraphtalate) types, that
source: http://www.climate.org/climatelab/
170 Gallons a Day 17
are 2 liters or less
X Shake the bottles
X Place the bottles where solar radiation can
reach the bottles (directly in the sunlight)
After SODIS treatment, it is important to use the
water fairly quickly. If the bottles are stored in
a dark area, remaining bacteria not killed by
radiation can begin to reproduce again.
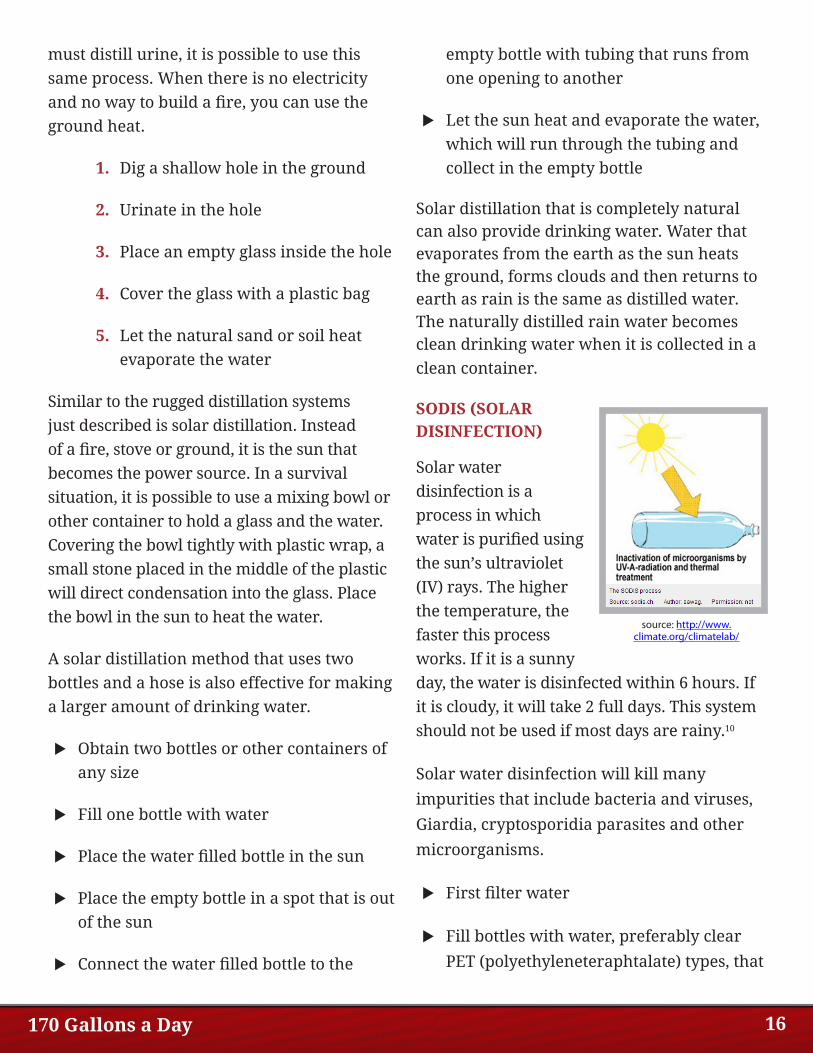
SOLAR STILL
A solar still is a special setup designed to use the sun’s rays to heat the air in a pit to drive evaporation out of the soil to a cooler surface of some sort. where the evaporation cools and condenses. The condensed water then falls into a container.
In the solar still, the sun heats the ground moisture, making it evaporate. The evaporation cannot escape the pit so it collects and condenses on the pit covering. The condensation then drips into the cup.11
1. Dig a pit in the ground that is deep enough to reach damp soil (approximately 2 feet x 3 feet)
2. Place a cup in the center of the pit
3. Place the end of a 6 foot piece of plastic tubing in the cup
4. Cover the pit with a plastic sheet, making sure no air can escape and that the other end of the plastic tubing is outside the pit
5. Weight the plastic sheet down on each side using the soil from the pit or rocks
6. Place a small rock in the center of the plastic over the cup so water will run into the cup after the evaporation condenses
7. Use the tube to access the water in the cup
The pit should be dug wherever the ground is dampest. There must be sunny days for this water purifying method to work. Also, the size of the pit is dependent on the size of the available plastic sheet that must cover the hole. Finally, you can add vegetation to the pit, if desired. That will speed up the formation of water.
You can also build a solar still box, which is much more complicated than a ground solar still because it requires wood and construction. It is a project that could not be easily completed during a disaster and should be made in advance.
PASTEURIZATION
Solar pasteurization is the use of heat or radiation to kill microorganisms. Water only needs to be heated to 1490 F for
170 Gallons a Day 18
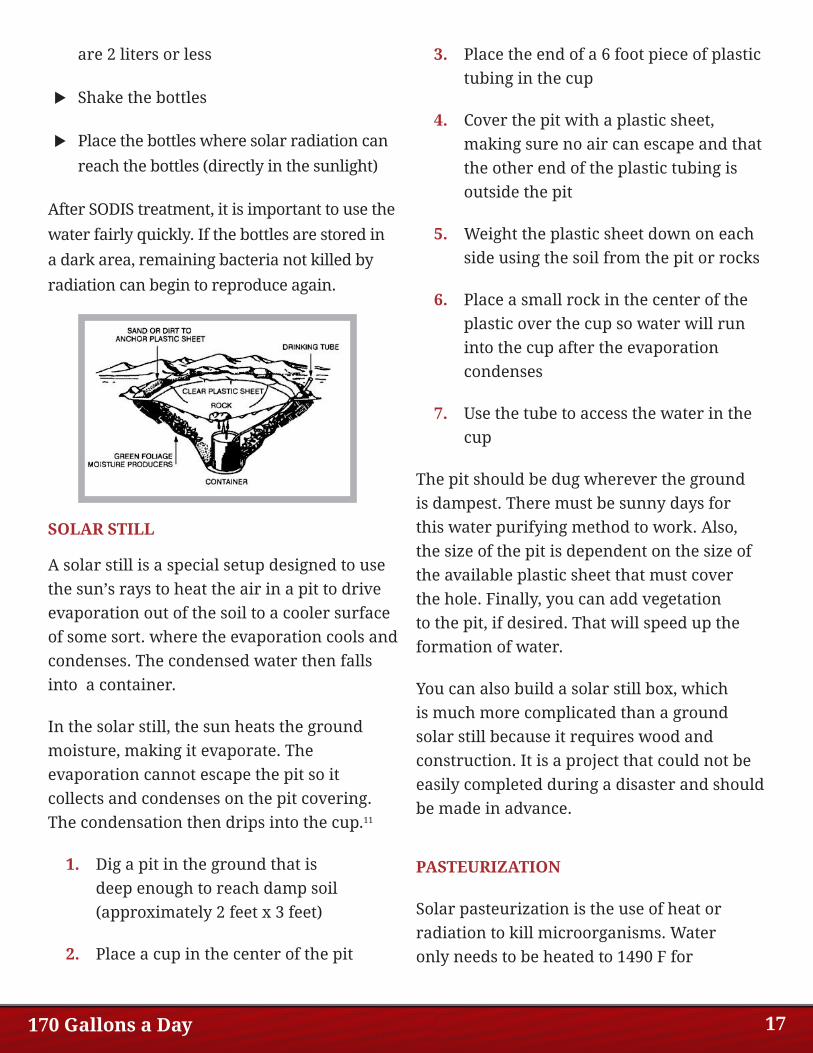
approximately 6 minutes to kill parasites, bacteria, and viruses.11 In fact, 99.9% of water pathogens will be destroyed.
If you have a solar cooker, a dark covered pan filled with contaminated water can be set on the solar cooker. The solar cooker is sealed to trap the air which is heated by the sun. The heated air then heats the water. However, during a disaster a purchased solar cooker may not be available. In that case, you can build a solar pasteurization system using simple materials.12
X Dig a pit approximately 4 inches deep and 3 feet wide
X Line with natural materials like leaves or grass about 2 inches deep for insulation, making a lower area in one corner (trough)
X Cover the insulation with a layer of clear plastic and a layer of black plastic so that the plastic edges run up the sides of the pit and extend outside of the pit
X Add water approximately 3 inches deep
X Place one end of a hosepipe or tubing in the trough for siphoning the pasteurized water, clipping the other end closed
X Place a WAPI in the trough
X Cover the pit with clear plastic
X Cover the clear plastic with wadded paper creating an air space
X Cover the wadded paper with clear plastic and make sure the sheet edges are weighted down with dirt or rocks
X When WAPI indicates water is pasteurized, siphon off the water
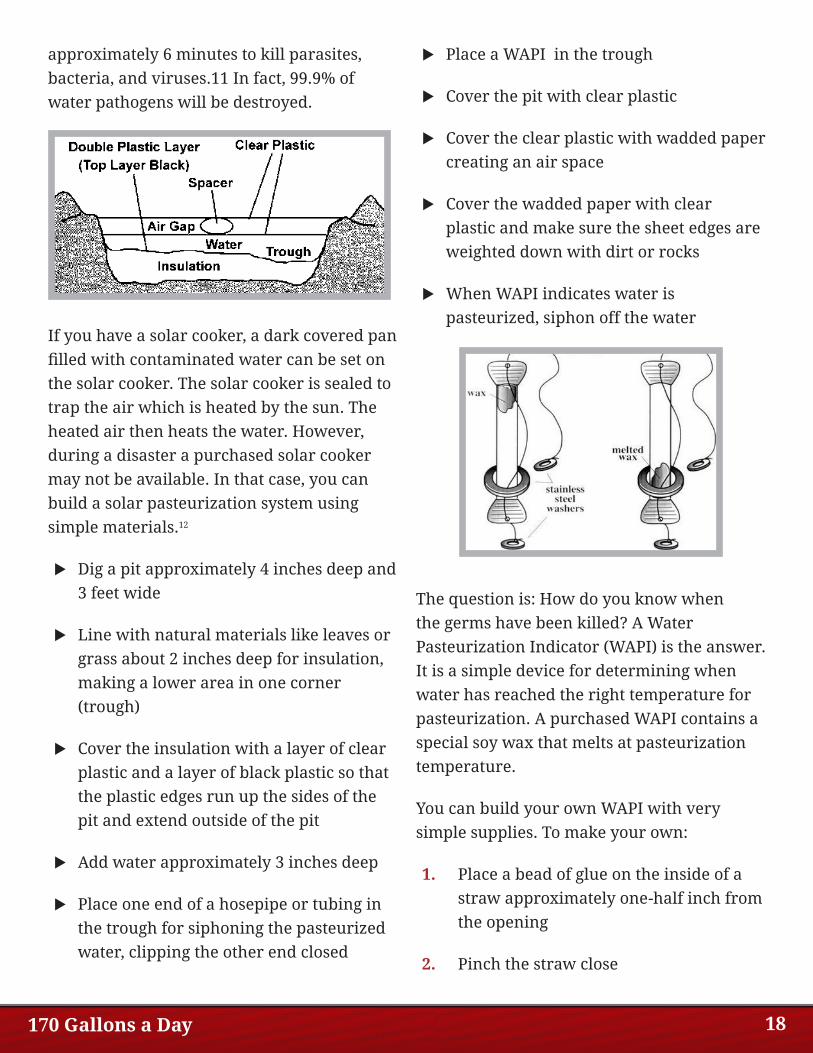
The question is: How do you know when the germs have been killed? A Water Pasteurization Indicator (WAPI) is the answer. It is a simple device for determining when water has reached the right temperature for pasteurization. A purchased WAPI contains a special soy wax that melts at pasteurization temperature.
You can build your own WAPI with very simple supplies. To make your own:
1. Place a bead of glue on the inside of a straw approximately one-half inch from the opening
2. Pinch the straw close
170 Gallons a Day 19
3. Make a tiny hole in the closed straw end with a needle
4. Melt beeswax into an eyedropper
5. Drip the melted wax into the open straw end until the wax is about one-fourth inch tall
6. Place a bead of glue on the inside of a straw approximately one-half inch from the opening on the other end of the straw
7. Pinch this end of the straw close (now both ends are pinched flat)
8. String fishing line through the small hole made on one end of the straw and tie it into a loop
Beeswax will melt at pasteurization temperature. The homemade WAPI is placed in the water and when the wax melts, the water is safe to drink. However, the homemade WAPI should only be used when you are unable to buy one.
CHEMICAL ADDITIVES
The two most common chemicals used
to purify water during an emergency are
bleach and iodine. There are others like
Potassium Permanganate, Sodium, Chlorite
and Chlor-floc tablets or crystals, but they
are not usually found or kept on–hand unless
someone has purchased emergency supplies
or is an avid outdoors person.13
Bleach is almost always readily available
and should always be the first choice for
water treatment. If iodine is used, it is
recommended that it contain at least 5.25%
sodium hypochlorite to be the most effective,
though that is not always possible.
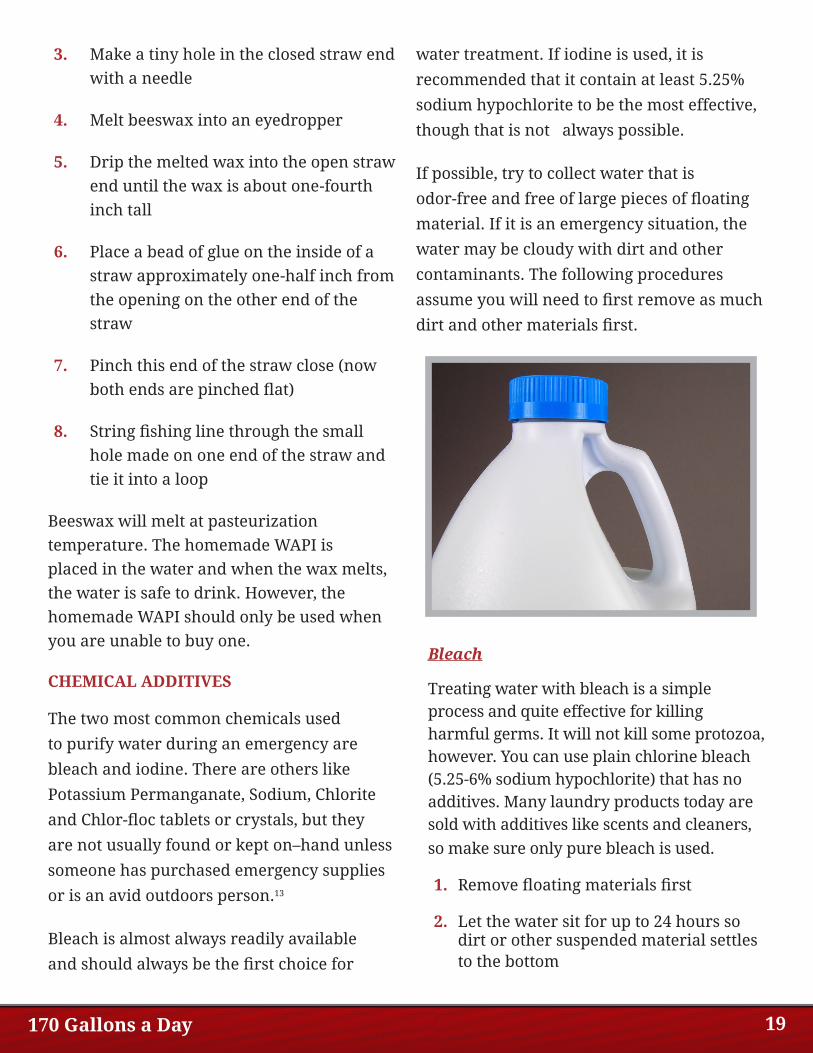
If possible, try to collect water that is
odor-free and free of large pieces of floating
material. If it is an emergency situation, the
water may be cloudy with dirt and other
contaminants. The following procedures
assume you will need to first remove as much
dirt and other materials first.
Bleach
Treating water with bleach is a simple process and quite effective for killing harmful germs. It will not kill some protozoa, however. You can use plain chlorine bleach (5.25-6% sodium hypochlorite) that has no additives. Many laundry products today are sold with additives like scents and cleaners, so make sure only pure bleach is used.
1. Remove floating materials first
2. Let the water sit for up to 24 hours so dirt or other suspended material settles to the bottom
170 Gallons a Day 20
3. After dirt settles, transfer cleaner water over sediment to a clean container
4. Run the clean water through a filter
5. Add 16 drops of bleach for each gallon of water to be treated and stir
6. Let the bleached water stand for at least 30 minutes
7. Test the water by smelling it to detect a light bleach scent
8. If no bleach scent, repeat the treatment
9. If still no bleach scent, discard the water because it is too contaminated for drinking
Iodine
Iodine is light sensitive, which is why it is stored in a dark bottle. It comes in a 2% tincture (liquid) and crystal form. The easiest method uses tincture of iodine because iodine crystals must be kept separate from the drinking water. A similar process as that used for bleach is followed.
Be aware that some people are allergic to iodine, and in that case bleach is a better choice for purifying water.
Also, iodine is most effective when the water temperature is over 680 F. If the water is colder, you can try to heat it up in the sun first.14
1. Remove floating materials first
2. Let the water sit for up to 24 hours so dirt or other suspended material settles to the bottom
3. After dirt settles, transfer cleaner water
over sediment to a clean container
4. Run the clean water through a filter
5. Add 5 drops of iodine tincture for each quart of water to be treated and stir
6. If the water is cloudy, add an additional 5 drops per quart of water
7. Let the water stand for at least 30 minutes
No matter what purification process is used, water can be filtered using a variety of materials like cloth, paper towels or coffee filters. In other words, use whatever is on hand.
LOCH NESS MONSTER AND OTHER WATER MYTHS
Urban myths are fascinating and people refuse to let go of them despite scientific evidence to the contrary. For example, does the Loch Ness monster exist? It is almost certain that it doesn’t because multiple passes over the bottom of the lake using sophisticated scientific instrumentation has found no evidence of large animals. The
170 Gallons a Day 21
water may not be drinkable without purifying it first, but one thing seems certain—it is not due to Loch Ness monster waste.
Rumors about finding safe urban water during a disaster abound. It is important to know what is true and what is false or at least questionable. When in survival mode, the goal is to…well…survive. You don’t want to make false assumptions that can harm your health and threaten your survival. Following are some of the common assumptions about water that fall into the myth category .
Myth 1: Water must be boiled for a minimum of 10 minutes to disinfect it.
This is not true as discussed earlier. By the time water reaches a boil, the microorganisms are dead. Boiling water beyond the recommended time of a few minutes will waste precious fuel.15
Myth 2: Cactus plants are a good source of water.
Cactus plants or succulents may have high water content, but they also contain natural chemicals that can induce nausea, vomiting and diarrhea. These are not side effects you want to experience during an emergency when sanitary restroom conditions are not easily available. It is more prudent to collect water from rock crevasses because a little dirt will not make you sick.15
Myth 3: Running water is always safe drinking water.
Would you drink water from a river that runs
next to a damaged nuclear plant? Of course not! Though collecting water from moving water sources is often a better than drinking stagnant, muddy water, you cannot assume that running water is safe just because it is moving. The safety of the water depends on the water source and what has emptied into the water during a disaster.
In any emergency situation, you must rely on common sense and go with your instincts.
Myth 4: Drinking a little saltwater is okay.
It is never safe to drink saltwater. Salt will cause rapid dehydration and can quickly cause death.
Myth 5: You can store plastic bottles of water anywhere in the garage or basement.
Plastic bottles should be stored so they do not touch concrete that can get hot. Over time,
170 Gallons a Day 22
the heated concrete will leach toxins into the plastic container and contaminate your water. In fact, water should not be stored in areas where sunlight or high temperatures can impact water quality.
Myth 6: You are already dehydrated when you feel thirsty.
That is not necessarily true. Dehydration is generally defined as a condition in which the concentration of substances in the blood has risen by 5% or more. You will feel thirsty when the concentration has increased by 2%.
So don’t panic if you are feeling thirsty and water is not readily available. You still have time to purify water and quench your thirst.
Myth 7: Only water hydrates the body.
Most drink items that contain water can serve as a source of hydration for survival. Be aware that anything other than water will be treated as waste and force your kidneys to work overtime in order to filter out everything but the water. Also be careful of anything high in sodium as this will inhibit hydration. Water is still your best choice but the best choice isn’t always an option.
Myth 8: Water can go stale.
Water tastes flat when it has no oxygen. You can oxygenate water quite easily by pouring it back and forth between two containers. After several pour’s the water should regain its original “flavor”.
Myth 9: Drinking alcohol, which has water, is a good way to warm the body.
You should never drink alcohol during an emergency, even if extremely cold. Alcohol constricts blood vessels, impeding blood flow. You will get colder and not warmer. Anyone approaching hypothermia is risking their life by drinking alcohol.
Myth 10: Clear water from high elevations is safe to drink.
It does not matter how high the source of water is when it comes to safety. Water can be contaminated by acid rain at the top of a mountain, just as well as it can be polluted in the city .
The bottom line is this: Always purify any water that does not come from a water treatment plant.
There is enough information in this discussion to help you access clean water, even when disaster strikes. Think through the various suggestions and then make a plan that will work for you. Advance preparation is always the best plan for survival.
170 Gallons a Day 23
CITATIONS
1 Richter, Brian. “Walking Water: H2O and the Human Body”. 2012 March 6. Retrieved from http://newswatch.nationalgeographic.com/author/brichter/ on December 23, 2012.
2 Miner, Dorothy L. “Emergency Drinking Water Supplies”. (n.d.) Retrieved from the North Carolina Cooperative Extension Service Water Quality Waste Management at http://www.bae.ncsu.edu/programs/extension/publicat/wqwm/emergwatersuppl.html on December 23, 2012.
3 American Red Cross and FEMA preparedness document (FEMA 475), “Food and Water in an Emergency”, 2004 August. Retrieved at http://www.fema.gov/pdf/library/pfd.pdf on December 23, 2012.
4 University of Wisconsin-Extension and the Wisconsin Department of Natural Resources. “Polluted Urban Runoff—A Source of Concern“. (n.d.) Retrieved from http://clean-water.uwex.edu/pubs/pdf/urban.pdf on December 23, 2012.
5 Modern Survivor Magazine. “Water from Condensation” 2010 May 12. Retrieved from http://survivor-magazine.com/water-from-condensation/ on December 24, 2012.
6 Dickinson, Boonsri. “How NASA is recycling urine into drinking water”. 2011 January 13. Retrieved at http://www.smartplanet.com/blog/science-scope/how-nasa-is-recycling-urine-into-drinking-water/6246 December 26, 2012.
7 Bradley, Ryan. “Classic FYI: Is It Ever OK to Drink Your Own Urine?”. 2011 April 21. Retrieved at http://www.popsci.com/science/article/2011-03/fyi-it-ever-ok-drink-your-own-urine on December 26, 2012.
8 Gill, Dan. “How to make charcoal at home”. Retrieved at http://www.pine3.info/Charmake.htm on December 26, 2012.
9 US EPA. “Ground Water & Drinking Water”. 2012 December 29. Retrieved at http://www.epa.gov/safewater/faq/emerg.htm on December 29, 2012.
10 Climate Institute. “Solar Water Treatment”. 2010. Retrieved at http://www.climate.org/climatelab/Solar_Water_Treatment on December 27, 2012.
11 Green Energy Ohio. “Solar Water Pasteurization Techniques”. (n.d.) Retrieved at http://www.greenenergyohio.org/page.cfm?pageID=74 on December 27, 2012.
12 Pace Project. “Solar Pasteurization—Action Sheet 25”. (n.d.) Retrieved from http://www.paceproject.net/UserFiles/File/Water/Solar%20pasteurisation.pdf on December 29, 2012.
13 Waskon, R. at Colorado State University Extension. “Emergency Water Supplies and Treatment”. 2011 June. Retrieved at http://www.ext.colostate.edu/pubs/natres/06704.html on December 28, 2012.
14 Curtis, Rick. “OA Guide to Water Purification”. 1998 March. Retrieved at http://www.princeton.edu/~oa/manual/water.shtml on December 29, 2012.
15 McCafferty, Ketih. “Fact or Fiction? Top 8 Survival Myths”. 2010 May 15. Retrieved at http://www.fieldandstream.com/articles/survival/water/2010/05/survival-myths on December 29, 2012.

Copyright © 2014 by Survival Life, LLC
Published by:
Survival Life, LLC
P.O. Box 91074
Austin, Texas 78709
Website: http://www.survivallife.com
Mail: [email protected]