1) agency sign in my account update account change password 2) data entry exchange/sale enter data
DESCRIPTION
1) Agency Sign In My Account Update Account Change Password 2) Data Entry Exchange/Sale Enter Data Bulk Import Instructions and Template Non Federal Recipients Enter Data Bulk Import Instructions and Template Controlled Accountable Assets. 3) Reports Create Query Saved Query - PowerPoint PPT PresentationTRANSCRIPT

1
GSA Personal Property Reporting ToolTraining Manual and Review Guide
https://gsa.inl.gov/propertyTable of Contents
1) Agency Sign In• My Account• Update Account• Change Password2) Data EntryExchange/Sale• Enter Data• Bulk Import• Instructions and TemplateNon Federal Recipients• Enter Data• Bulk Import• Instructions and TemplateControlled Accountable Assets
3) Reports• Create Query• Saved Query4) Help• What’s New?• Frequently Asked Questions• Usage Agreement• Who Can I Contact?5) Managers Guide• Manager User• Manage (Tier) Organizations• List Recent Users• Report Verification (Data Entry tab)• Send E-Mail6) Suggestions and Point of
Contacts

2
Section 1
• My Account
• Update Account
• Change Password

3
Your first login information was sent to you via email, Username is your email account. If you have forgotten your password please notify your Manager.
4
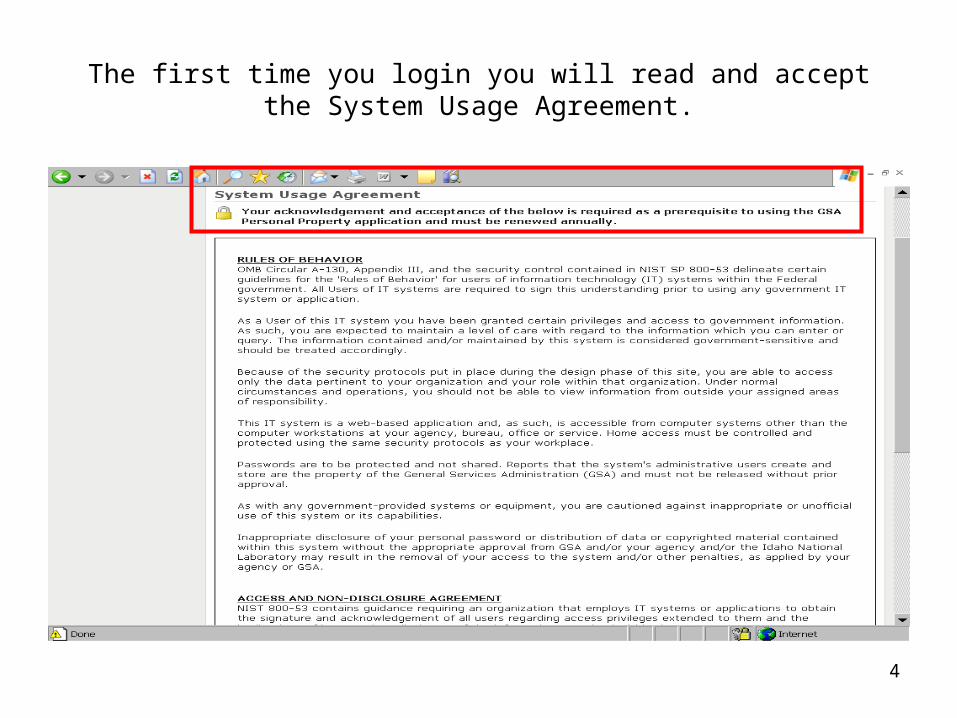
The first time you login you will read and accept the System Usage Agreement.

5
Continuation of System Usage Agreement…you must click on accept to continue.
6
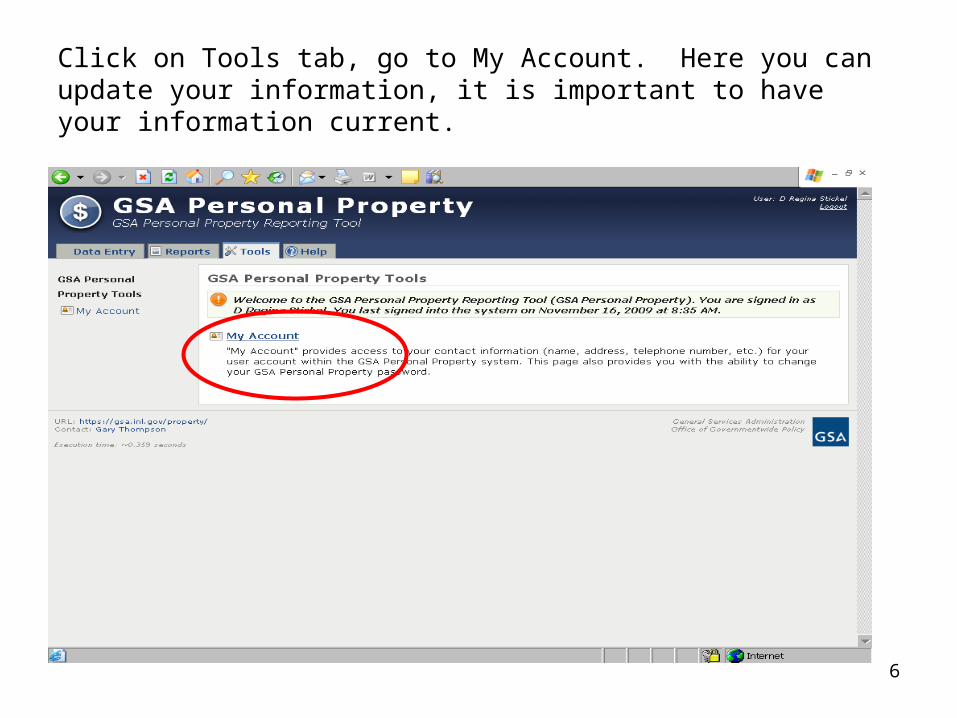
Click on Tools tab, go to My Account. Here you can update your information, it is important to have your information current.
7
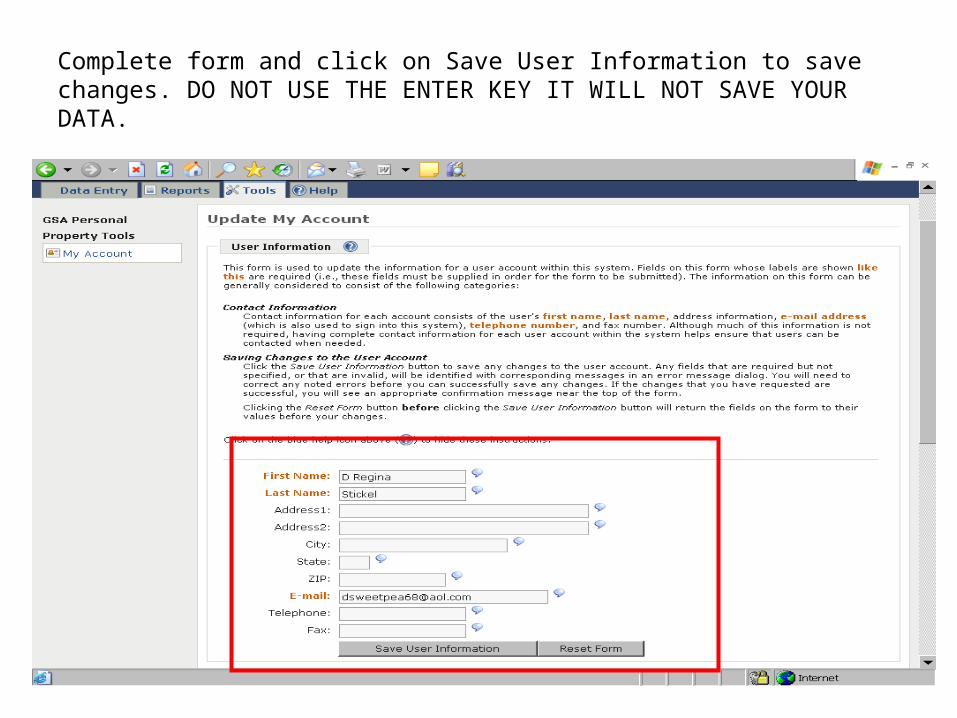
Complete form and click on Save User Information to save changes. DO NOT USE THE ENTER KEY IT WILL NOT SAVE YOUR DATA.

8
Continuation of Update My Account…If you are have difficulties coming up with a new password, click on Generate Password, the system will make suggestions for you.

9
Section 2Data Entry
Exchange/Sale•Enter Data•Bulk Import•Instructions and Template
Non Federal Recipients•Enter Data•Bulk Import•Instructions and Template•Controlled Accountable Assets

10
Data Entry – the drop down table for FY and the icons are described. Roll your mouse over the icons and the descriptors will appear on your screen.
Fiscal Year drop down Click here for
Exchange/Sale
Click here for Non-Federal Recipients
Click here for Controlled
Accountable Assets

11
Highlighted are drop down tables; Exchange/Sold, FSC groups, the FSC-Groups.pdf which defines which FSC code and the Save icon. Always use the save icon. DO NOT USE THE ENTER KEY. After entry is saved the data will be sorted into tables: Exchanged or Sold.

12
You can add your data after each action or at the end of the FY you can Import your spreadsheet to the reporting tool. We have provided a template for the data needed. Click on the icon for instructions and the template.

13
After clicking on the “Exchange/Sale Import Template” icon the screen below show the Instructions for Data Import.

14
The system will only except this spreadsheet; you must Download this spreadsheet to your Excel (save under different name).
15
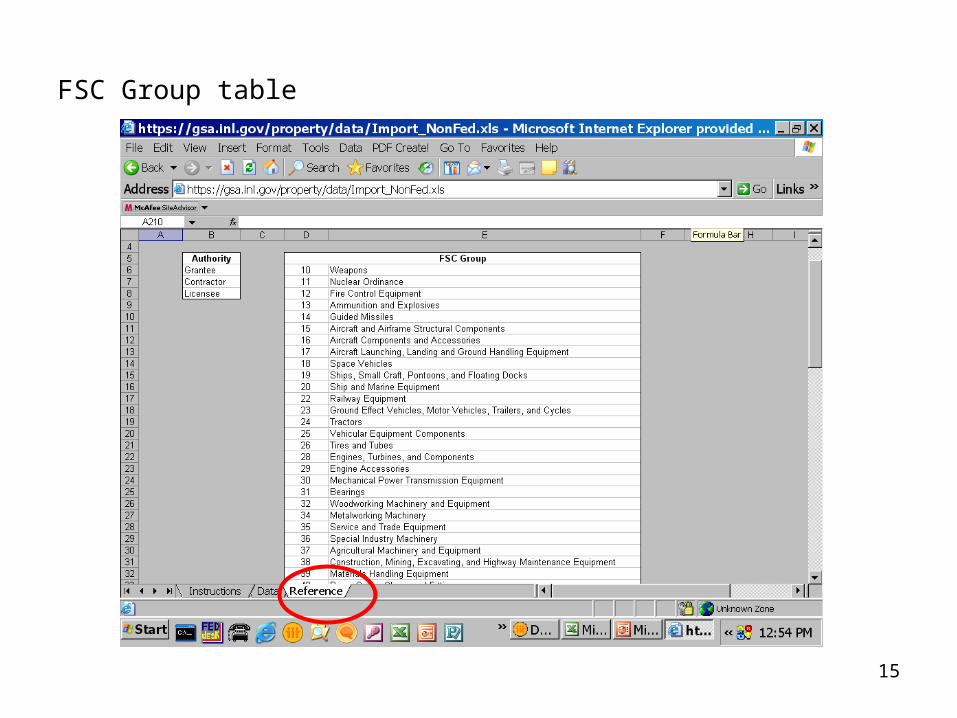
FSC Group table

16
Click on the Non-Federal Recipients report icon to begin entering data.
17
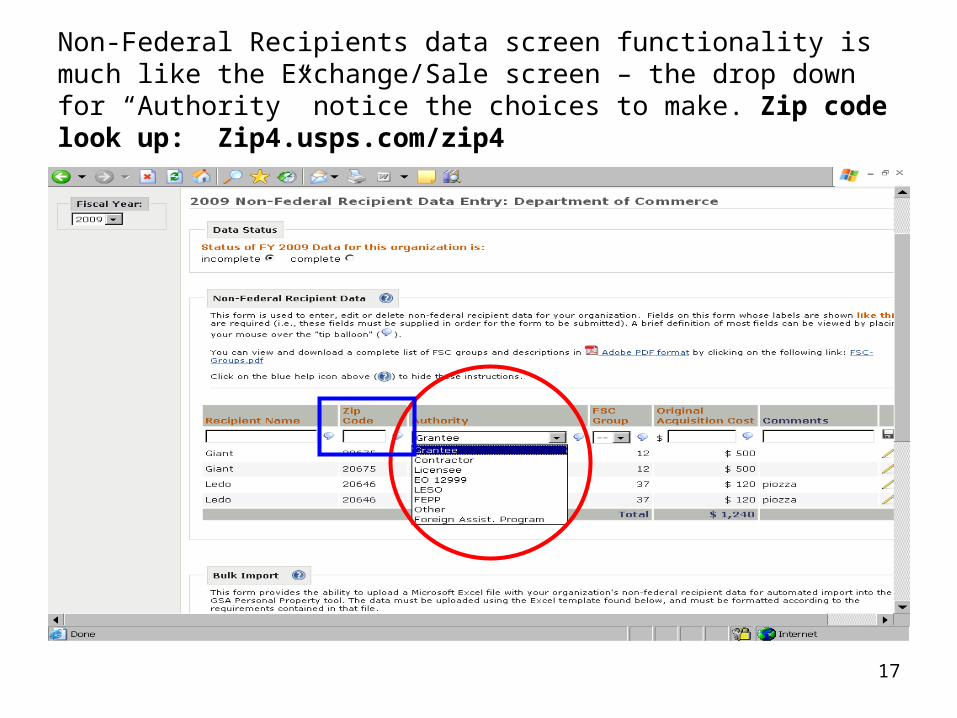
Non-Federal Recipients data screen functionality is much like the Exchange/Sale screen – the drop down for “Authority” notice the choices to make. Zip code look up: Zip4.usps.com/zip4

18
Click here to go to the Non-Federal Recipients report instructions and Template. You can import your excel spreadsheet on this screen.

19
The Instructions for the Non-Federal Recipients Data Import, click on the Reference tab to see the FSC group table.

20
Data elements for the Non-Federal Recipients report.

21
FSC Groups and Codes are found under the Reference tab.

22
FUTURE 2009 Measurement of Controlled/Accountable Assets
23
Section 3Reports
• Create Query
• Saved Query

24
Agencies can make their own Queries to track their progress or use already formatted queries. If you have suggestions as to format please contact GSA. Click on your choice at either icon.

25
Click on which report to query.

26
Build your report by clicking on the values needed; filter and sorting tools, then click on Run Query. This screen shows the Exchange/Sale data elements.

27
Build your report by clicking on the values needed; filter and sorting tools, then click on Run Query. This screen shows the Non-Federal Recipients data elements.

28
Sample report.

29
Section 4Help
• What’s New?
• Frequently Asked Questions
• Usage Agreement
• Who Can I Contact?

30
Click on the Help tab at the top of your page

31
Section 5Managers Guide
Tools tab
• Manage Users
• Manage (Tier) Organizations
• List Recent Users
• Report Verification (Data Entry Tab)
• Send E-Mail

32
On this page Managers can access what is needed to add, delete, and change their Organizations structure, and accounts users. To begin click on Manage Users
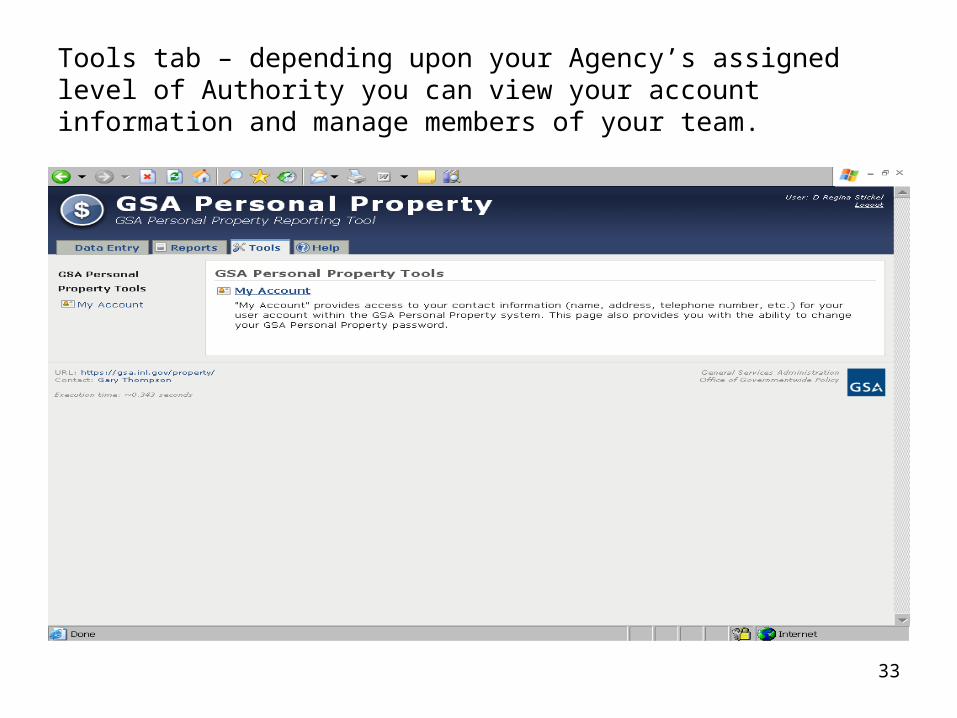
33
Tools tab – depending upon your Agency’s assigned level of Authority you can view your account information and manage members of your team.

34
Click on the Manage Users selection; here you can Add users, Reset users Passwords, set the assignment level of each user, and make deletions were necessary.
Edit
Reset Password

35
Description of Add new users, assign user roles and organization tier the user will be responsible for. Always use “Save User Information” button.

36
Ensure all fields have been completed for optimal performance.

37
Instructions for Manage Users, ensure all user data is complete. (screen 1, top of page)
38
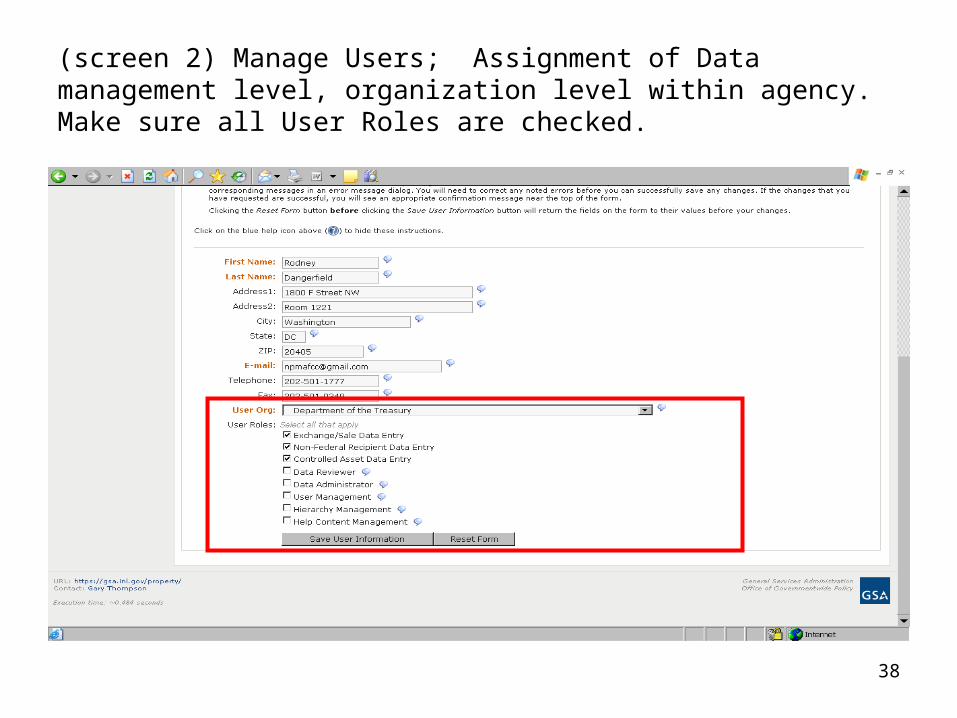
(screen 2) Manage Users; Assignment of Data management level, organization level within agency. Make sure all User Roles are checked.

39
Manage Organization: Agency's can add their tier organizations using this function. It is the agency's discretion on how many levels they go down. Example show DHS as 3 drill down levels.

40
Click on the Edit Org icon, the top of the page is the how to narrative, below managers will complete to make additions and deletions to the agency tier organizations

41
Drop down tables make it easy for entry, as well as a check to ensure your organizations are available for use. Each tier level is indented to his parent organization.

42
Managers ensure all data elements are completed on each organization and Manager. Always save your entries using the Save button, do not use the ENTER KEY on your keyboard.

43
List Recent Users, allows the managers to view who has been in the tool, up to the last 7 days.

44
As each tier level completes their report, a green dot appears on the page, a solid green dot denotes a complete and a green dot with a spot in the middle denotes a negative report. After the agency level completes reports to GSA a check mark denote FY reporting is complete.

45
You can send emails using this tool, all inquiries go to Gary Thompson at GSA.

46
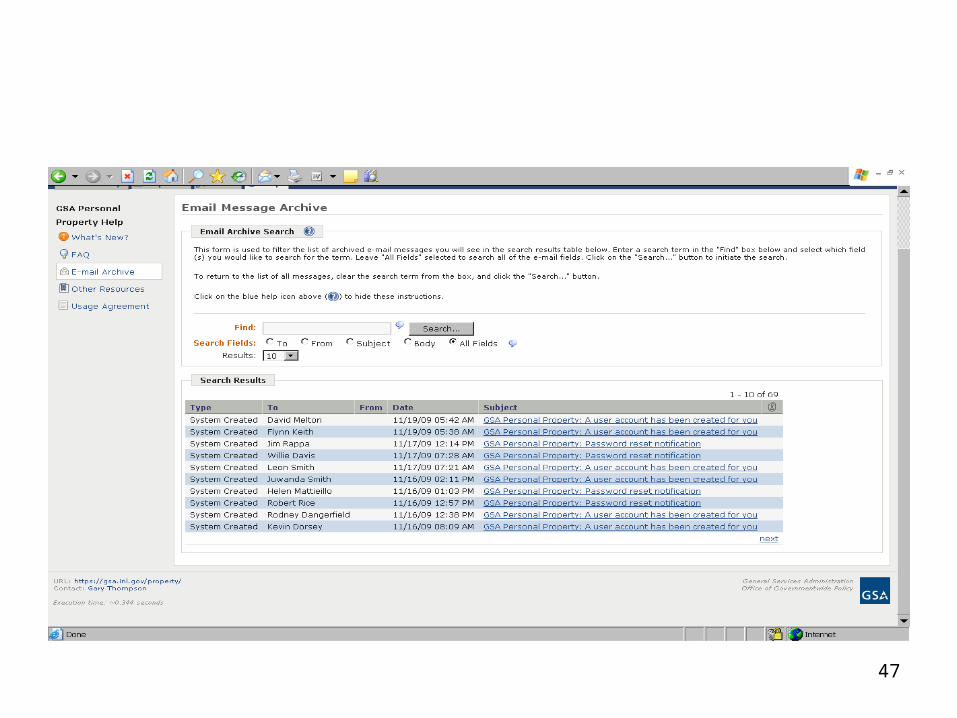
47
48
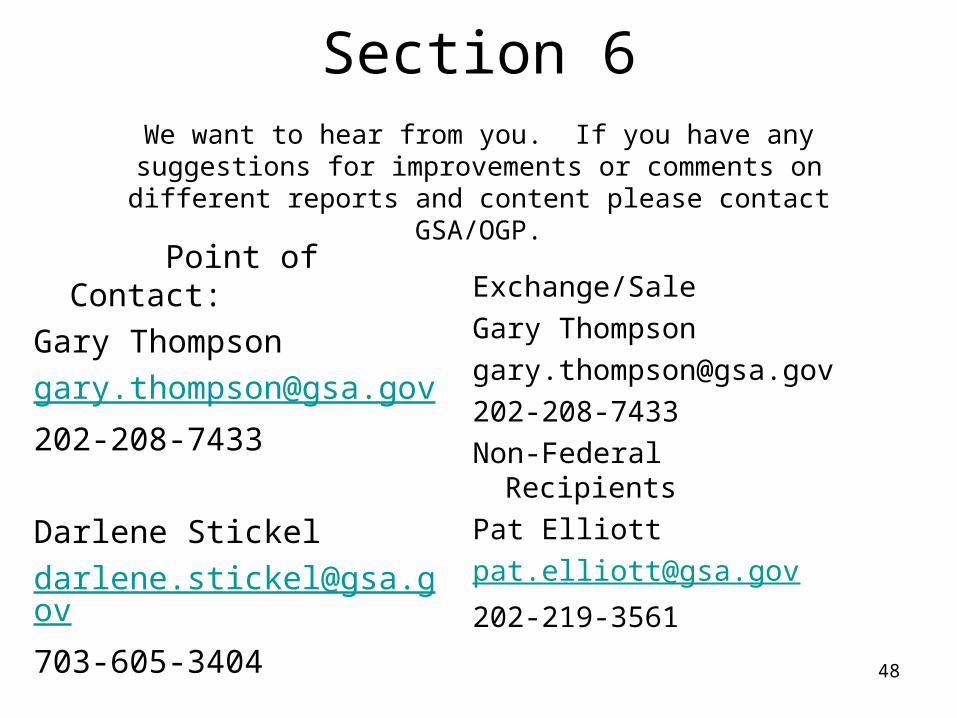
Section 6We want to hear from you. If you have any suggestions for
improvements or comments on different reports and content please contact GSA/OGP.
Point of Contact:
Gary Thompson
202-208-7433
Darlene Stickel
703-605-3404
Exchange/Sale
Gary Thompson
202-208-7433
Non-Federal Recipients
Pat Elliott
202-219-3561

49
Notes