· 4 seguridad todos los transmisores de radio conllevan el riesgo de interferencias, si se...
TRANSCRIPT

TELÉFONO GSMMANUAL DE USUARIO
MODELO: LG – 600
ESPAÑOLENGLISH
Lea este manual atentamente antes de hacer funcionar su aparato. Guárdelo para consultarlo en el futuro.

TELÉFONO GSMMANUAL DE USUARIO
MODELO: LG – 600
ESPAÑOL
Lea este manual atentamente antes de hacer funcionar su aparato. Guárdelo para consultarlo en el futuro.

3
LG-600 Teléfono GSM
El LG-600 presenta un acabado pulido queproporciona un tacto agradable y una gran
comodidad de manejo.

4
Seguridad
Todos los transmisores de radio conllevan el riesgo de interferencias, si seencuentran cerca de aparatos electrónicos.
Los teléfonos GSM deben estar desactivados en todomomento dentro de un avión.
No lo utilice en gasolineras, depósitos de combustible,plantas químicas o áreas de manipulación de explosivos.
Evite el uso en hospitales: los aparatos electrónicosmédicos, p. ej. marcapasos y audífonos, pueden verseafectados.
Pequeñas interferencias pueden afectar a televisores,radios, PCs, etc.
No sostenga el teléfono con las manos mientrasconduzca.
No desmonte el aparato ni la batería.

5
Tenga en cuenta:
Utilice sólo las baterías y los cargadores especificados,pues otros pueden dañar el teléfono.
Las baterías que no se puedan ya utilizar, se deberánreciclar de acuerdo con la legislación vigente.
Utilice sólo accesorios ORIGINALES para evitar dañosen su teléfono.

6
Visión general
Accesorios ........................................................................... 10
Parte del teléfono ................................................................ 11• Frente del teléfono ............................................................ 11• Parte trasera del teléfono .................................................. 12
Descripción de teclas ......................................................... 13• Parte lateral del teléfono .................................................. 14• Teclas alfanuméricas ........................................................ 15
Información de pantalla
Información de pantalla ....................................................... 16• Iconos en la pantalla ......................................................... 16
Puesta en marcha
Instalación ........................................................................... 18• Instalación de la tarjeta SIM .............................................. 18• Instalar la batería .............................................................. 19• Cargar la batería ............................................................... 20• Desconectar el cargador ................................................... 20
Secuencia de encendido ................................................... 22
Códigos de acceso ............................................................. 23• Código PIN (4 a 8 dígitos) ................................................. 23• Código PIN2 (4 a 8 dígitos) ............................................... 23• Código PUK (4 a 8 dígitos) ............................................... 24• Código PUK2 (4 a 8 dígitos) ............................................. 24• Código de seguridad (4 a 8 dígitos) .................................. 24
Escribir y leer mensajes ..................................................... 25• Escribir mensaje ............................................................... 25• Leer mensaje ................................................................... 25
Texto eZi .............................................................................. 26• Cómo se usa el texto eZi .................................................. 26
Indice

7
Funciones de llamada
Hacer y contestar llamadas ................................................ 29• Hacer llamadas ................................................................. 29• Contestar llamadas ........................................................... 31
Números recientes .............................................................. 32• Nrs. marcados ................................................................... 32• Nrs. recibidos ..................................................................... 32• Nrs. no atend. ................................................................... 32
Acceder al menú
Agenda telefónica ............................................................... 33• Buscar [Nombres 1] .......................................................... 34• Buscar e-mail [Nombres 2] ............................................... 34• Añadir entrada [Nombres 3] .............................................. 35• Añadir e-mail [Nombres 4] ................................................ 36• Grupos [Nombres 5] .......................................................... 36• Marc. rápida [Nombres 6] ................................................. 38• Borrar todas [Nombres 7] .................................................. 39• Memoria [Nombres 8] ....................................................... 39• Copiar [Nombres 9] ........................................................... 40• Número de marcación de servicio [Nombres 10]
(depende de SIM) ..............................................................41• Número propio [Nombres 11] ............................................ 41
Estructura de menús .......................................................... 42
Usar el Menú ........................................................................ 46
Navegación en el menú mediante desplazamientos ....... 46
Atajos hacia los menús ..................................................... 46
Mensajes [Menú 1] .............................................................. 47• Escribir mens. [Menú 1-1] ................................................. 47• Buzón salida [Menú 1-2] ................................................... 48• Buzón entrada [Menú 1-3] ................................................ 49

8
• Informe estado [Menú 1-4] ................................................ 50• Lam. buz. voz [Menú 1-5] .................................................. 51• Difusión Celda [Menú 1-6] ................................................ 51• Estado Memoria [Menú 1-7] .............................................. 53• Configuración [Menú 1-8] .................................................. 53
Opción llam. [Menú 2] ......................................................... 55• Desvío llamada [Menú 2-1] ............................................... 55• Restric. Llam. [Menú 2-2] .................................................. 57• Llamada espera [Menú 2-3] .............................................. 58• Envío núm. tel [Menú 2-4] ................................................. 58• Grupo CUG [Menú 2-5] ..................................................... 59
Coste llam. [Menú 3]- (depende de la SIM) ....................... 60• Duración llam. [Menú 3-1] ................................................. 60• Coste llamadas [Menú 3-2] ............................................... 60• Config. coste [Menú 3-3] ................................................... 61
Seguridad [Menú 4] ............................................................. 63• Activar PIN [Menú 4-1] ...................................................... 63• Camb. códig. [Menú 4-2] ................................................... 63• Núm marc. fija. [Menú 4-3] ................................................ 64
Configur. [Menú 5] .............................................................. 65• Selecc. red [Menú 5-1] ...................................................... 65• Config. Tlfno. [Menú 5-2] .................................................. 65• Config. Llam. [Menú 5-3] ................................................... 67• Config. hora [Menú 5-4] ................................................... 68• Perfiles [Menú 5-5] ............................................................ 70
Accesorios [Menú 6] ........................................................... 71• Planificador [Menú 6-1] ..................................................... 71• Hora mundial [Menú 6-2] .................................................. 73• Calculadora [Menú 6-3] ..................................................... 73• Conver. unidad [Menú 6-4] ............................................... 73• Juego [Menú 6-5] .............................................................. 74• PC Sync ............................................................................ 74

9
Marcac. Voz [Menú 7] .......................................................... 75• Entrenamiento [Menú 7-1] ................................................ 75• Buscar [Menú 7-2] ............................................................. 75• Configuración [Menú 7-3] .................................................. 76• Borrar todas [Menú 7-4] .................................................... 76
Internet [Menú 8] ................................................................. 77• Inicio [Menú 8-1] ............................................................... 77• Marcad. Favor. [Menú 8-2] ................................................ 77• Perfiles [Menú 8-3] ............................................................ 78• Borrar caché [Menú 8-4] ................................................... 78
Menú dentro del Internet .................................................... 79
Funciones adicionales
Cómo enviar tonos DTMF ................................................... 80• Caracteres de espera ....................................................... 80• Consultar a su contestador automático (ejemplo) ............ 80• Durante una llamada ......................................................... 80
Opciones dentro de una llamada ....................................... 81
Cómo utilizar las llamadas de datos y de Fax .................. 85• Hacer una llamada de datos o de fax ................................85• Hacer una llamada de Voz & Fax ..................................... 86
Notas de voz ........................................................................ 87• Notas de voz ..................................................................... 87• Menú de la nota de voz ..................................................... 87
Cuidado y mantenimiento .................................................. 88
Datos técnicos ..................................................................... 89• En general ......................................................................... 89• Dimensiones ..................................................................... 89• Temperaturas de entorno ................................................. 89

Accesorios Visión general
10
Compruebe que dispone de todos los componentes que se ilustran en la figura.
<Accesorios opcionales>
Teléfono
Adaptador para viaje
Cargador de sobremesa (DC-11G )
Batería Alta Capacidad(BEL-11G)
Solución para datos/CD (DK-10G)
Manos libres portátil (PHF-10G)
Adaptador paraencendedor(CLA-10G)
Manual delusuario
Batería estándar
Pinza de Cinturón
Solnción manoslibres
(IHF-11G)
Tarjeta(s)

Parte del teléfono Visión general
11
Frente del teléfono
1 Auricular2 Tapa articulada activa3 Pantalla4 Tecla multifuncional izquierda5 Tecla “Grabar”6 Tecla “Confirmar”7 Tecla “Enviar”8 Tecla de subida / bajada9 Toma para auriculares10 Tecla “Asterisco”11 Luz indicadora de llamada 12 Tecla multifuncional derecha13 Teclas de navegación14 Tecla ENCENDIDO/
APAGADO15 Teclas numéricas16 Tecla “Almohadilla”17 Micrófono
12
2
5
9
8
3
4
12
11
3
4
1314
15
16
17
6
10
7
1
1 Pantalla frontal LCD2 Iconos de estado3 Luz indicadora de llamada 4 Antena

12
Visión generalParte del teléfono
Parte trasera del teléfono
1
56
4
2
3
1 Tapa de la batería2 Conector para cable
/Conector para cargadorde batería /Conector parael kit manos libres para elcoche
3 Soporte para la tarjeta SIM4 Terminales de batería 5 Orificio para la correa de
transporte 6 Pestillo de la batería
56
4
3
2
1

13
Visión general Descripción de teclas
Descripción del teclado Tecla Descripción
Tecla multifuncional izquierda/derecha Cada una de estas teclas realiza la función indicada por el texto que aparece en la pantalla justo encima de cadauna de ellas.
Tecla rápida WAP Puede conectar directamente a WAP, pulsando esta tecla.
Teclas de navegación Usted puede usar estas teclas para desplazarse a travésde nombres, números de teléfonos, opciones de menú oajuste. En el modo de espera, al pulsar las teclas de subir/ bajar, usted podrá ver el “Número marcado”, “Númerorecibido” y “Número perdido”.
Tecla “Enviar” Usted puede marcar un número de teléfono y contestaruna llamada. Si pulsa esta tecla, sin introducir unnúmero, su teléfono mostrará el último número marcado.
Teclas numéricas Estas teclas se utilizan principalmente para marcar en elmodo de espera y para introducir números o caracteresen el modo de edición. Cuando usted pulsa estas teclasdurante un tiempo. • Se usa para llamar a su buzón de voz mediante .• Se usa para hacer una llamada internacional mediante .• Se usa para llamara marcación rápida mediante ~ .
Tecla de asteriscoSe usa para entrar en el modo vibración, si pulsa estatecla durante un tiempo.
A continuación se describen las diferentes teclas del teléfono.
14
Descripción de teclas
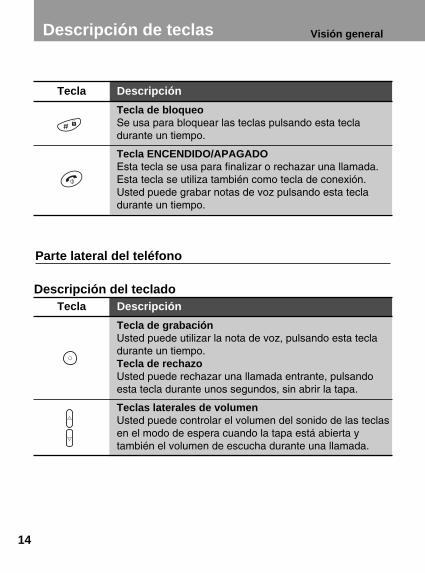
Parte lateral del teléfono
Descripción del teclado Tecla Descripción
Tecla de grabación Usted puede utilizar la nota de voz, pulsando esta tecladurante un tiempo.Tecla de rechazo Usted puede rechazar una llamada entrante, pulsandoesta tecla durante unos segundos, sin abrir la tapa.
Teclas laterales de volumen Usted puede controlar el volumen del sonido de las teclasen el modo de espera cuando la tapa está abierta ytambién el volumen de escucha durante una llamada.
Visión general
Tecla Descripción
Tecla de bloqueo Se usa para bloquear las teclas pulsando esta tecladurante un tiempo.
Tecla ENCENDIDO/APAGADO Esta tecla se usa para finalizar o rechazar una llamada.Esta tecla se utiliza también como tecla de conexión.Usted puede grabar notas de voz pulsando esta tecladurante un tiempo.

15
Visión general
Teclas alfanuméricas En la siguiente tabla se indican las letras y símbolos que corresponden acada una de las teclas del teclado numérico.
Tecla Descripción
. ! ‘ ´ , - ? @ 1 _
A B C 2 Ä À Á Â Ã Å Æ Ç a b c ä à á â ã å æ ç
D E F 3 Ë È É Ê d e f ë è é ê
J K L 5 j k l
M N O 6 Ñ Ö Ó Ò Ô Õ Œ m n o ñ ö ò ó ô õ œ
T U V 8 Ü Ù Ú Û t u v ü ù ú û
W X Y Z 9 w x y z
[Tecla espaciadora] 0 Ø ø
Nota• En caso de usar el modo de símbolos, se pasa automáticamente
al modo de letras mayúsculas después de haber introducido elcarácter. Y si usted quiere entrar otro carácter de símbolo,encuéntrelo usando las teclas de navegación, las teclas
y , pulse la tecla o la tecla para guardar. También puede utilizar la próxima página de símbolos con , .

16
Información de pantalla Información de pantalla
La pantalla muestra diferentes iconos. A continuación se describe cadauno de los que usted puede ver en el teléfono.
Icono / Indicador Descripción
Le indica la potencia de la señal de la red.
Usted está en un área sin servicio/La llamada haconectado.
Muestra que usted está utilizando un servicio deitinerancia (roaming).
Usted ha recibido un nuevo mensaje de texto.
Usted ha recibido un mensaje de voz (depende de lasubscripción)
Se han desconectado todas las señales sonoras.
Todos los tonos están desconectados.
La alarma ha sido ajustada y está conectada.
Le indica el estado de la batería.
Iconos en la pantalla

17
Información de pantalla
Icono Descripción
Mensajes
Opciones de llamada
Coste de la llamada
Seguridad
Configuración
Accesorios
Marcación de voz
Internet
Icono Descripción
Mensaje completado Aparece en pantalla cuando la navegación del menú está completa.
Mensaje de información
Mensaje guardado
Mensaje de aviso Aparece en pantalla con un mensaje de error o de aviso.
Iconos del Menú principal
Iconos de resultado
18
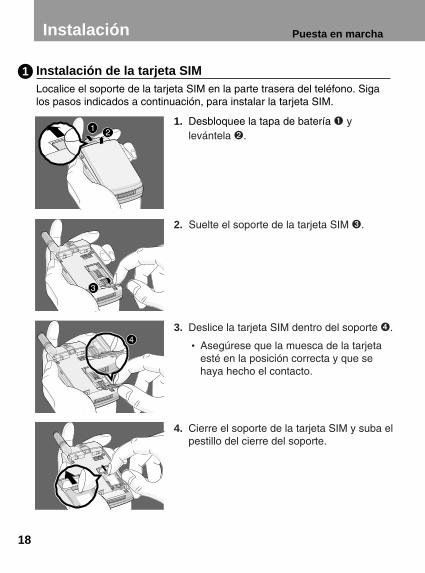
Instalación de la tarjeta SIM Localice el soporte de la tarjeta SIM en la parte trasera del teléfono. Sigalos pasos indicados a continuación, para instalar la tarjeta SIM.
1
Instalación Puesta en marcha
1. Desbloquee la tapa de batería � ylevántela �.
2. Suelte el soporte de la tarjeta SIM �.
3. Deslice la tarjeta SIM dentro del soporte �.
• Asegúrese que la muesca de la tarjetaesté en la posición correcta y que sehaya hecho el contacto.
4. Cierre el soporte de la tarjeta SIM y suba elpestillo del cierre del soporte.

19
Nota:
• Antes de instalar la tarjeta SIM, asegúrese que el teléfono estádesconectado y que se ha retirado la batería.
• El contacto metálico de la tarjeta SIM puede dañarse fácilmente sise araña. Preste especial atención a la tarjeta SIM cuando lamanipule e instale. Siga las instrucciones suministradas junto conla tarjeta SIM.
Puesta en marcha
Instalar la batería 2
1. Sitúe el lado superior de la batería en elteléfono. (Como ilustración, véase la figurade la izquierda).
2. Empuje la batería hasta que oiga un“CLICK”.
3. Cierre la tapa de la batería.

20
Instalación Puesta en marcha
Cargar la batería Para conectar el adaptador de viaje al teléfono, usted deberá instalar labatería.
3
1. Inserte un lado del adaptador de viaje enla parte inferior del teléfono.
2. Conecte el adaptador a un enchufe CA enla pared. Utilice sólo el cargador incluidoen el embalaje.
Tipo de bateríaAutonomías Autonomías de uso
de carga En espera En conversación
Estándar 2.5 horas hasta 100~150 horas hasta 2 horas 30 minutos
Extendido 3 horas hasta 250 horas hasta 4 horas
Las autonomías de uso pueden ser diferentes, dependiendo del servicio de la red.
Desconectar el cargador 4
Desconecte el adaptador de viaje del teléfonopulsando sus botones laterales.

21
Puesta en marcha
Nota • Recuerde cargar la batería nueva totalmente, después de
cambiarla.• No retire su batería o tarjeta SIM durante la carga.• En la pantalla se muestra “Batería cargando”, después de que se
haya conectado el adaptador de viaje. Sólo si la batería estátotalmente vacía, la luz indicadora de Llamada estará encendida,sin que se muestre “Batería cargando”.
• Las barras móviles del icono de la batería pararán después deque se haya completado la carga.
Nota• En caso de que la batería no se cargue correctamente...
1. Después de pulsar la tecla de ENCENDIDO/APAGADO de laenergía, intente recargarla.
2. Si la batería está unida, retírela del teléfono. Después vuelva a ponerla para volver a cargarla.

Secuencia de encendido Puesta en marcha
22
Para poner en marcha su teléfono, siga lossiguientes pasos: 1. Pulse y mantenga pulsado el botón
hasta que oiga un tono de conexión de suteléfono.
2. Si está habilitada la petición de código PIN de su tarjeta SIM, su teléfono le pedirá queintroduzca el código PIN. Introduzca elcódigo PIN y su teléfono se conectará conuna red GSM (si hubiera alguna permitidapresente) y el nombre de ésta aparecerá enla pantalla al poco tiempo.
3. Entonces su teléfono irá al modo de espera.Si el código PIN está deshabilitado, suteléfono se conectará directamente a la redsin pedirle el código PIN.

Códigos de acceso
Usted podrá utilizar los códigos de acceso descritos en esta sección paraevitar el uso de su teléfono por personas no autorizadas. Los códigosPIN/PIN2 y el código de seguridad pueden ser cambiados usando [Menú4-2]. Véase la siguiente sección.
Código PIN (4 a 8 dígitos) El código PIN (Número de identificación personal) protege su tarjeta SIMcontra uso no autorizado. El código PIN se suministra normalmente juntocon la tarjeta SIM. Cuando está habilitada la petición del código PIN [Menú4-1-1], se pregunta por el código cada vez que usted trate de cambiar elcódigo PIN o habilitar / inhabilitar la petición del código PIN, o cuando seconecta su teléfono. Si usted cambia el código PIN, anótelo, pero guardeesa información alejada del teléfono.
Código PIN2 (4 a 8 dígitos) El código PIN2, suministrado con algunas tarjetas SIM, se pide paraacceder a algunas funciones como son informe sobre el coste de unallamada o los números de marcación fija. Estas funciones sólo estarándisponibles si son soportadas por su tarjeta SIM.
23
Puesta en marcha
4-2
O K Atrás
Activar PINCamb. códig.Núm marc. fija
4-2-1
O K Atrás
PIN PIN2 Código segur.

24
Códigos de acceso Puesta en marcha
Código PUK (4 a 8 dígitos) El código PUK (Código personal de desbloqueo) se necesita para cambiarun código PIN bloqueado. El código PUK puede ser suministrado con latarjeta SIM. Si no fuese así, contacte con su proveedor de servicio localpara que le entregue el código. Si usted pierde el código, contacte tambiéncon su proveedor de servicio local.
Código PUK2 (4 a 8 dígitos) El código PUK2, suministrado con algunas tarjetas SIM, se necesita paracambiar un código PIN2 bloqueado. Si usted pierde el código, contactetambién con su proveedor de servicio local.
Código de seguridad (4 a 8 dígitos)El código de seguridad protege contra el uso no autorizado de su teléfono.Normalmente, se suministra con el teléfono. Este código se necesita paraborrar todas las entradas la agenda telefónica.

25
Puesta en marcha Escribir y leer mensajes
Escribir mensaje Si usted quiere escribir un mensaje corto, deberá seguir el siguienteprocedimiento.
1. Pulse [Menú].
2. Seleccione Mensajes en el menú principal,pulsando [OK]. Después, si quiere escribirun mensaje nuevo, seleccione Escribir mens.en el menú. Si quiere modificar el mensajeanterior, seleccione Buzón salida en el menú,entonces podrá editar el mensaje, utilizando eleditor de texto eZi o el editor normal. Si quiereescribir un mensaje de contestación,seleccione Buzón entrada en el menú.
Leer mensaje Si quiere leer el anterior Mensaje corto guardado, que haya recibido conanterioridad, deberá seguir los siguientes pasos:
1. Pulse [Menú].
2. Entonces podrá ver el menú inicial y seleccionar Mensajes pulsando[OK].
3. Cuando esté en pantalla el menú de Mensajes, desplácese hastaentrada utilizando y y pulse [OK].
4. Una vez que introduzca en este menú, podrá ver los últimos mensajesrecibidos. Desplácese hasta llegar al mensaje deseado, usando , .Y si quiere salir del menú de Buzón entrada, pulse [Atrás].Mientras esté leyendo el mensaje, pulse [Opción] para acceder alas opciones disponibles. Podrá ver la explicación de Opción en [Menú1-3].
Si quiere leer el mensaje corto que ha recibido en este momento, deberáseguir los siguientes pasos.
1. Cuando se haya recibido un mensaje corto, en la pantalla aparecerá .
2. Pulse [OK], y podrá leer el mensaje recibido en este momento.
1-1
O K Atrás
Escribir mens.Buzón salidaBuzón entradaInforme estado

NOTA
• Usted puede cambiar un idioma con . Y también puedecambiar el modo de mayúsculas con y . Por ejemplo: you ➝ You ➝ YOU ➝ Y.O.U ➝ y.o.u.
Cómo se usa el texto eZiEl texto eZi permite al usuario escribir fácil y rápidamente. Sencillamentepulsando cada tecla una vez por cada carácter, podrá obtener las palabrasque quiere. Además, la palabra candidata se predice junto con otroscandidatos que encajan con las letras tecleadas hasta ese momento. Así no necesita entrar caracteres enteros para hacer la palabra.
� Cómo cambiar el modo
Este teléfono soporta tres tipos de modo de edición: modo eZi, modonumérico y modo de letras. Para cambiar el modo, pulse sólo la tecla
, entonces podrá elegir uno de los tres modos.
� Cómo escribir en el modo eZi
Para escribir un carácter en modo eZi, basta con pulsar una sola vez latecla en que aparezca. Por ejemplo, en modo eZi, campos se escribeasí:
Texto eZi
26
Puesta en marcha

27
� Cómo usar el modo numérico
Puede usar este modo para introducir unnúmero y cambiar a otro modo mediante latecla .
1. Cambie el modo de entrada a numérico.
2. Pulse la tecla que quiere entrar.
� Cómo usar el modo de letra.
Existen tres sub-modos en el modo de letra: Modo de mayúsculas,Modo de minúscula y Modo de símbolos.
123
Atrás
Puesta en marcha
Opción
ABC
Atrás
abc
Atrás
@£$¥ !”# % & ( )
*+-#!
O K Atrás
’
Modo demayúsculas
Modo deminúsculas
Modo de símbolos
Tecla Descripción
cambia a otro modo, p.ej. modo eZi ➝ modo Numérico.
cambia el modo de Mayúsculas a modo de Minúsculaso modo de Minúsculas a modo de mayúsculas.
introduce el modo símbolo pulsando esta tecla durante un tiempo.
Lleva a la próxima página de Símbolos en el modo deSímbolos.
Opción Opción

Texto eZi
� Cómo usar el diccionario del usuario
Usted puede usar el diccionario de usuario en caso de escribir SMS. Eltexto eZi tiene diccionario de usuario. Usted puede añadir unas cuantaspalabras al diccionario de usuario y entonces cada una de estaspalabras tendrán alta prioridad.
� Cómo añadir una palabra al diccionario de usuario
1. En la pantalla del modo de texto eZi, pulse la tecla [Opción].
2. Desplácese hasta el menú Diccionario, pulse la tecla [OK].
3. Pulse la tecla [Opción] después de entrar la palabra que desee.
4. Desplácese hasta el menú Agreg. a dic. (Añadir al Diccionariopersonal del usuario), pulse la tecla [OK].
5. Cuando aparezca el mensaje Ejecutado (realizado) en el teléfono,la palabra se ha añadido con éxito al diccionario del usuario.
6. Y usted puede comprobar que la palabra está añadida, en el menúde Listar dicc.
� Cómo se borra una palabra del diccionario de usuario
1. Desplácese hasta el menú Listar dicc.
2. Pulse la tecla [OK] después de haber seleccionado la palabraque quiere borrar.
3. En la próxima pantalla pulse la tecla [Opción].
4. Pulse la tecla [OK] después de haber seleccionado Supr. dedic. (borrar del UPD).
5. Cuando aparezca el mensaje Ejecutado (realizado) en el teléfono,la palabra se ha borrado con éxito del diccionario del usuario.
Puesta en marcha
28
Nota
• En caso del modo de símbolo, después de entrar el carácter, elmodo se convierte automáticamente al modo de letrasMayúsculas.

Hacer llamadas 1. Teclee el número de teléfono, incluyendo. el código
de área. Para editar un número en la pantalla, pulsepara mover el cursor hacia la izquierda y pulsepara mover el cursor a la derecha.
2. Pulse para llamar al número.
3. Pulse para finalizar la llamada o para cancelar el intento dellamada).
� Marcac. Voz (Marcación por voz)
1. Si usted selecciona Habilitar en el ajuste [7-3], puede llamar sólocon la voz.
2. Al abrir la tapa, en la pantalla de su teléfono aparece “Mensaje guía”y usted oirá “Diga el nombre”.
3. Entonces deberá decir en el plazo de cinco segundos el nombre dela persona a la que quiere llamar.
4. Su teléfono marcará el número asociado con este nombreprogramado.
� Llamadas internacionales
1. Pulse y mantenga la tecla para el prefijo internacional. (El carácter + sustituye el código de acceso internacional.)
2. Introduzca el código del país, el código del área y el número deteléfono.
3. Para llamar al número, pulse .
29
Hacer y contestar llamadas Funciones de llamada
Nota
• Usted deberá asociar su voz al número deseado para utilizaresta función. Para más información, consulte el Menú 7 (Menúde Marcación por voz).

Hacer y contestar llamadas
30
Funciones de llamada
� Hacer una llamada, utilizando la agenda telefónica.
1. En el modo de espera, seleccione Nombres pulsando la tecla[Nombres].
2. Cuando aparece en pantalla el menú del agenda telefónico, puedeseleccionar Buscar, pulsando la tecla [OK].
3. Teclee la primera letra del nombre y pulse [Buscar].
4. Utilice las teclas y para llegar al nombre deseado.
5. Pulse para marcar.
� Rellamada al último número
1. Pulse y verá el último número marcado.
2. Entonces pulse una vez más, si quiere volver a marcar elnúmero.
3. Si quiere marcar el último número mediante una pulsación de tecla,pulse y mantenga pulsada la tecla .
� Llamar a su buzón de voz
1. Pulse hasta que su teléfono vaya al modode llamada. También puede llamar utilizando[Menú 1-5]. Si quiere utilizar el menú, vea[Menú 1-5]. (Los servicios de buzón de vozdeben ser contratados con el operador de sured).
2. Si el teléfono pregunta por el número del buzón de voz, tecléelo ypulse [OK]. Podrá obtener este número de su proveedor deservicio. También podrá editar este número más tarde.
� Hacer llamadas con marcación rápida
Vea la sección Agenda telefónica – Marcación rápida.
1-5
O K Atrás
Buzón salida Buzón entrada Informe estado Llam. buz. vozDifusión Celda

31
Contestar llamadas
1. El modo de contestar una llamada depende delajuste del [Menú 5-3-1].
2. Si selecciona Encendido en Contestación concualquier tecla [Menú 5-3-1] usted puedecontestar una llamada entrante pulsandocualquier tecla excepto Si seleccionaApagado, puede hacerlo, abriendo la tapa. Si latapa está ya abierta, puede contestar también lallamada pulsando .
3. Pulse o cierre la tapa para finalizar la llamada.
5-3-1
O K Atrás
Cualg. teclaRemar. Autom.Modo llamada Resp. Autom.
Funciones de llamada

32
Números recientes Funciones de llamada
En el modo de espera, al pulsar las teclas o , aparecerán en pantallalas siguientes opciones de menú. En una agenda de teléfonos se puedenguardar Números marcados, Números recibidos y Números perdidos.
Nrs. marcadosMuestra los número de teléfono recientemente marcados, que no han sidocontestados. Una vez localizado un número de teléfono, usted puedehacer una llamada o borrar el número de teléfono.
Nrs. recibidosMuestra hasta 10 números de teléfono recibidos recientemente. Despuésde localizar un número de teléfono, usted puede hacer una llamada (si lared facilita este servicio) o borrar el número de teléfono.
Nrs. no atend.Muestra hasta 10 recientes números de teléfono entrantes y perdidos.Estos números han sido llamados, pero no han sido contestados. Una vezlocalizado un número de teléfono, usted puede hacer una llamada o borrarel número de teléfono.
O K Atrás
Nrs. marcadosNrs. recibidosNrs. no atend.

33
Agenda telefónica Acceder al menú
Nombres Descripción
1 Buscar Permite la búsqueda de un nombre específico.
2 Buscar e-mail Permite la búsqueda de una dirección de e-mail por el nombre.
3 Añadir entrada Permite añadir nuevos nombres y números.
4 Añadir e-mail Permite añadir nuevos nombres y direccionesde e-mail.
5 Grupos Permite mostrar una lista de grupo.
6 Marc. rápida Permite asignar hasta 8 (2-9) entradas de laagenda mediante una sola una pulsación.
7 Borrar todas Permite borrar todos los datos tanto en suagenda telefónica como en su tarjeta SIM,seleccionando la memoria.
8 Memoria Permite seleccionar la memoria preferida delteléfono / la tarjeta SIM o ver el estado de lamemoria.
9 Copiar Permite copiar entradas de su memoria deteléfono a la tarjeta SIM o de su tarjeta SIM a lamemoria del teléfono.
10 Número SDN Permite mostrar las entradas de Service DialNumber (Número de marcación de servicio).
11 Número propio Permite entrar y mostrar sus números propios.
Nombres Descripción
La agenda telefónica tiene varios menús,introduzca los que usted puede elegir. Pulse[Nombres] en el modo de espera y desplácese alpunto deseado.
34
Acceder al menúAgenda telefónico
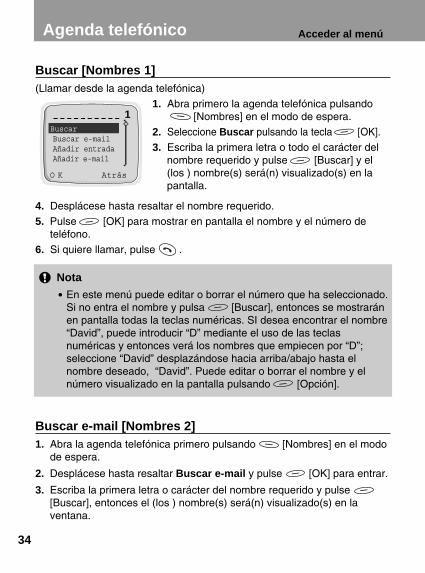
Buscar [Nombres 1] (Llamar desde la agenda telefónica)
1. Abra primero la agenda telefónica pulsando[Nombres] en el modo de espera.
2. Seleccione Buscar pulsando la tecla [OK].
3. Escriba la primera letra o todo el carácter delnombre requerido y pulse [Buscar] y el(los ) nombre(s) será(n) visualizado(s) en lapantalla.
4. Desplácese hasta resaltar el nombre requerido.
5. Pulse [OK] para mostrar en pantalla el nombre y el número deteléfono.
6. Si quiere llamar, pulse .
Buscar e-mail [Nombres 2]1. Abra la agenda telefónica primero pulsando [Nombres] en el modo
de espera.
2. Desplácese hasta resaltar Buscar e-mail y pulse [OK] para entrar.
3. Escriba la primera letra o carácter del nombre requerido y pulse[Buscar], entonces el (los ) nombre(s) será(n) visualizado(s) en laventana.
1
O K Atrás
Buscar Buscar e-mail Añadir entrada Añadir e-mail
Nota
• En este menú puede editar o borrar el número que ha seleccionado.Si no entra el nombre y pulsa [Buscar], entonces se mostraránen pantalla todas la teclas numéricas. SI desea encontrar el nombre“David”, puede introducir “D” mediante el uso de las teclasnuméricas y entonces verá los nombres que empiecen por “D”;seleccione “David” desplazándose hacia arriba/abajo hasta elnombre deseado, “David”. Puede editar o borrar el nombre y elnúmero visualizado en la pantalla pulsando [Opción].

35
4. Desplácese para resaltar el nombre deseado.
5. Pulse [OK] para visualizar la dirección de e-mail.
Añadir entrada [Nombres 3] Puede añadir un nombre y un número de teléfono usando esta función.Después de la edición puede guardarlos bien en la tarjeta SIM o en lamemoria del teléfono.
La capacidad de la memoria del teléfono es de 500 entradas de númerospersonales y la capacidad de la memoria para números personales de latarjeta SIM depende del proveedor del servicio. También puede guardar 20caracteres de nombre en la memoria del teléfono así como en la memoriade la tarjeta SIM. El número de caracteres depende de las característicasde la SIM.
1. Abra la agenda telefónica primero pulsando [Nombres] en el modode espera.
2. Desplácese hasta resaltar Añadir entrada y pulse [OK] para entrar.
3. Introduzca un nombre para añadir.
4. Pulse [OK] y se visualizará en pantalla la ventana para entrar elnúmero.
5. Edite el número de teléfono.
6. Pulse [OK] y se visualizará en pantalla la ventana para la selecciónde la memoria. En esta ventana podrá guardar el número de telefónobien en la tarjeta SIM o en el teléfono.
7. Si la memoria está disponible, usted puede añadir la entrada. De todasformas, si la memoria está llena, se visualizará en pantalla un mensajede error y el menú se moverá hacia el paso anterior.
Nota
• Puede editar o borrar el nombre y la dirección de e-mail visualizados en la ventana pulsando [Opción].
Acceder al menú
36
Agenda telefónico Acceder al menú
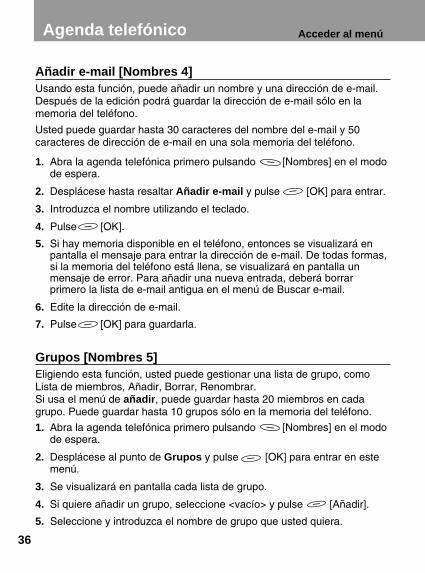
Añadir e-mail [Nombres 4]Usando esta función, puede añadir un nombre y una dirección de e-mail.Después de la edición podrá guardar la dirección de e-mail sólo en lamemoria del teléfono.
Usted puede guardar hasta 30 caracteres del nombre del e-mail y 50caracteres de dirección de e-mail en una sola memoria del teléfono.
1. Abra la agenda telefónica primero pulsando [Nombres] en el modode espera.
2. Desplácese hasta resaltar Añadir e-mail y pulse [OK] para entrar.
3. Introduzca el nombre utilizando el teclado.
4. Pulse [OK].
5. Si hay memoria disponible en el teléfono, entonces se visualizará enpantalla el mensaje para entrar la dirección de e-mail. De todas formas,si la memoria del teléfono está llena, se visualizará en pantalla unmensaje de error. Para añadir una nueva entrada, deberá borrarprimero la lista de e-mail antigua en el menú de Buscar e-mail.
6. Edite la dirección de e-mail.
7. Pulse [OK] para guardarla.
Grupos [Nombres 5] Eligiendo esta función, usted puede gestionar una lista de grupo, comoLista de miembros, Añadir, Borrar, Renombrar.Si usa el menú de añadir, puede guardar hasta 20 miembros en cadagrupo. Puede guardar hasta 10 grupos sólo en la memoria del teléfono.
1. Abra la agenda telefónica primero pulsando [Nombres] en el modode espera.
2. Desplácese al punto de Grupos y pulse [OK] para entrar en estemenú.
3. Se visualizará en pantalla cada lista de grupo.
4. Si quiere añadir un grupo, seleccione <vacío> y pulse [Añadir].
5. Seleccione y introduzca el nombre de grupo que usted quiera.

37
6. Después de pulsar [Opción] para un número elegido, sevisualizarán en pantalla los sub-menús de más abajo.
� Lista miembros: Este punto del menú tiene tres sub-menús: Añadir una nueva entrada,Añadir una entrada existente y Borrar una entrada.
1. Seleccione Lista miembros y pulse [OK] para entrar.
2. Entonces se visualizará en pantalla la Lista miembros.
3. Seleccione el miembro y pulse [Opción] para entrar.
4. Entonces aparecerá Añad nueva ent, Añadir entrada y Borrarentrada.
• Añadir nueva ent : Usted puede añadir una nueva entrada en elgrupo o la agenda telefónica seleccionado.
• Añadir entrada : Puede añadir una entrada existente,buscándola en la agenda telefónica.
• Borrar entrada : Puede borrar una entrada seleccionada deun grupo.
� Renombrar:
Usted puede cambiar el nombre de un grupo.
1. Desplácese hasta resaltar Grupos y pulse [OK] para entrar.
2. Desplácese hasta resaltar Renombrar y pulse [OK] para entrar.
3. Entonces aparecerá en pantalla la ventana para editar grupos.
4. Pulse [OK] para renombrar o pulse [Atrás] para cancelar.
Nota
• El hecho de seleccionar este punto no significa que usted puedeañadir una nueva entrada a los grupos. Para añadir una nuevaentrada en el grupo, deberá elegir Lista de miembros.
Acceder al menú

38
Agenda telefónico Acceder al menú
� Borrar:
Usted puede borrar un Grupo de la lista de grupos.
1. Desplácese hasta resaltar Grupos y pulse [OK] para entrar.
2. Desplácese hasta resaltar Borrar y pulse [OK] para entrar.
3. Entonces aparecerá en pantalla un mensaje de confirmación.
4. Pulse [OK] para borrar o pulse [Atrás] para cancelar.
Marc. rápida [Nombres 6] Usted puede asociar cualquiera de las teclas a con una entradade la lista de nombres, para darle un acceso directo con una únicapulsación larga de la tecla en modo de espera.
1. Abra primero la agenda telefónica pulsando [Nombres] en el modode espera.
2. Desplácese hasta resaltar Marc. rápida y pulse [OK] para entraren este menú.
3. En pantalla aparecerá la lista de marcación rápida.
4. Existen tres sub-menús: Añadir, Cambiar y Borrar. Si quiere añadir unnúmero de marcación rápida, seleccione <Vacío> y pulse [Añadir].Usted puede cambiar la localización del número de marcación rápida,tecleando Cambiar, y borrar el número de marcación rápida ubicadointroduciendo Borrar.
Nota:
• Aunque usted borre un grupo en la lista de grupos, las entradas permanecerán en la memoria.

39
Borrar todas [Nombres 7] Usted puede borrar todos los números y nombres guardados. Esta funciónpuede necesitar el código de seguridad.
1. Abra primero la agenda telefónica pulsando [Nombres] en el modode espera.
2. Desplácese hasta resaltar Borrar todas y pulse [OK] para entraren este menú.
3. En pantalla aparecerá un mensaje de aviso para asegurar su decisión.
4. Si usted pulsa [OK], entonces puede ser que se le pida entrar elcódigo de seguridad ‘0000’.
5. Pulse [OK] para borrar, pulse [Atrás] para cancelar.
Memoria [Nombres 8] 1. Abra primero la agenda telefónica pulsando [Nombres] en el modo
de espera.
2. Desplácese hasta resaltar memoria y pulse [OK] para entrar eneste menú.
3. Entonces, en la pantalla aparecerán los siguientes puntos de menú.
• Seleccionar : Esta función le permite seleccionar la memoria:Tarjeta SIM o teléfono.
• Mostrar Estado : Esta función le permite comprobar la totalidad delas memorias y saber cuantas memorias se estánusando en su agenda telefónica.
Acceder al menú

40
Agenda telefónico Acceder al menú
Copiar [Nombres 9] Usted puede copiar entradas de una memoria a otra. Usted puede copiar /mover entradas de memoria de la tarjeta SIM a la memoria del teléfonouna por una o todas a la vez. Y usted puede copiar / mover entradas desdela memoria del teléfono a la memoria de la tarjeta SIM una por una o todasa la vez.
1. Abra primero la agenda telefónica pulsando [Nombres] en el modode espera.
2. Desplácese hasta resaltar Copiar y pulse [OK] para entrar en este menú.
3. En pantalla aparecerán los siguientes submenús.
SIM ➡ Tel. : Usted puede copiar / mover laentrada de la tarjeta SIM a lamemoria del teléfono.
Tel. ➡ SIM : Usted puede copiar / mover laentrada de la memoria delteléfono a la tarjeta SIM.
Una por uno : Usted puede copiar / mover unaentrada a la vez.
Copiar todos : Usted puede copiar / movertodas las entradas a la vez.
Mant. Original : Se mantendrán en la memoriatanto las entradas originalescomo las copiadas.
Borrar Orig. : Se borrará la entrada original,mientras la entrada copiadapermanece en la memoria.
9-1
O K Atrás
9-1-1
O K Atrás
9-1-1-1
O K Atrás
SIM ➡ Tel.Tel. ➡ S I M
Una por unoCopiar todos
Mant. OriginalBorrar orig.

41
4. Seleccione la entrada a copiar / mover en la agenda telefónica.
5. Pulse [OK] para copiar / mover y pulse [Atrás] para cancelar.
Número SDN : Número de marcación de servicio [Nombres 10] (depende de SIM)Use esta función para acceder a una lista particular de servicios facilitadospor su operador de red (si la tarjeta SIM lo soporta).
1. Abra primero la agenda telefónica pulsando [Nombres] en el modode espera.
2. Desplácese hasta resaltar Número SDN y pulse [OK] para entrar.
3. Se mostrarán los nombres de los servicios disponibles.
4. Use y para seleccionar un servicio.
5. Pulse para llamar al servicio.
Número propio [Nombres 11] Si usted entra su número de teléfono, aparecerá Número Propio.
1. Abra primero la agenda telefónica pulsando [Nombres] en el modode espera.
2. Desplácese hasta resaltar Número propio y pulse [OK] paraentrar en este menú.
3. Se mostrarán los nombres del número propio disponible, si entra sunombre y número.
Acceder al menú

42
Estructura de menús Acceder al menú
1 Mensajes
1-1 Escribir mens.1-2 Buzón salida1-3 Buzón entrada 1-4 Informe estado1-5 Lam. buz. voz1-6 Difusión Celda1-6-1 Opc. difusión1-6-1-1 Encendido1-6-1-2 Apagado1-6-2 Leer 1-6-3 Temas1-6-3-1 Tarjeta SIM1-6-3-1-1 Añadir1-6-3-1-2 Borrar1-6-3-2 Teléfeno1-6-3-2-1 Añadir1-6-3-2-2 Seleccionar1-6-3-2-3 Borrar1-6-4 Idiomas1-7 Estado Memoria1-8 Configuración1-8-1 Informe estado1-8-2 Tipo Mensaje1-8-3 Periodo valid.1-8-4 Centro SMS1-8-5 Centro de voz1-8-6 Aviso
2 Opción llam.
2-1 Desvío llamada2-1-1 Llamadas voz2-1-1-1 Desviar todas 2-1-1-2 Desviar si no accesible2-1-1-3 Desviar si ocupado2-1-1-4 Desviar si no responde2-1-1-5 Cancelar todas2-1-2 Info llamadas 2-1-3 Info faxes 2-1-4 Cancelar todas2-2 Restric. Llam.2-2-1 Todas las llamadas
salientes2-2-2 Llamadas
internacionales salientes2-2-3 Llam. Intern. sal. excep.
IIam. IocaIes2-2-4 Todas las llamadas
entrantes2-2-5 Llamadas entrantes en
itinerancia2-2-6 Cancelar todas2-2-7 Cambiar contraseña2-3 Llamada espera2-4 Envío núm. tel2-5 Grupo CUG

43
3 Caste llam.
3-1 Duración llam.3-1-1 Última llamada3-1-2 Todas llamad. 3-1-3 Llam entrantes3-1-4 Llam salientes3-1-5 Restablecer 3-2 Coste llamadas3-2-1 Última llamada3-2-2 Todas llamad. 3-2-3 Restablecer3-3 Config. coste3-3-1 Lím gasto llam3-3-2 Establ. tarifa3-3-3 Resum llamada
4 Seguridad
4-1 Activar PIN 4-2 Camb. códig.4-2-1 PIN4-2-2 PIN24-2-3 Código segur.4-3 Núm marc. fija
5 Configur.
5-1 Selecc. red 5-1-1 Automótico5-1-2 Manual5-2 Config. Tlfno.5-2-1 Aviso5-2-2 Ilumin. fondo5-2-3 Volúmen tecla5-2-4 Vol. avisador5-2-5 Contraste LCD5-2-6 Tipo de timbre5-2-7 Idioma5-2-8 Pant. Bienv.5-2-9 Pant. espera5-3 Config. Llam.5-3-1 Cualq. tecla 5-3-2 Remar. Autom.5-3-3 Modo llamada5-3-4 Resp. Autom.5-4 Config. hora 5-4-1 Reloj5-4-1-1 Establ. hora
Acceder al menú

44
Estructura de menús Acceder al menú
5-4-1-2 Formato hora5-4-2 Fecha5-4-2-1 Establ. fecha5-4-2-2 Formato fecha5-4-3 Alarma5-4-3-1 Config. alarma5-4-3-2 Cancel. alarma5-4-3-3 Son al aun ap5-5 Perfiles
6 Accesorios
6-1 Planificador6-1-1 Ver día6-1-1-1 Borrar6-1-1-2 Editar6-1-1-3 Enviar nota6-1-2 Anotar6-1-2-1 Agenda6-1-2-2 Llamar6-1-2-3 Memoria6-1-2-4 Aniversario6-1-3 Borrar6-1-3-1 De fecha selec6-1-3-2 Uno por uno6-1-3-3 Todas a la vez6-1-4 Ver todas6-2 Hora mundial6-3 Calculadora6-4 Conver. unidad 6-4-1 Longitud6-4-2 Peso6-4-3 Volumen6-4-4 Superficie6-5 Juego6-5-1 Corsair 6-5-2 Crazy Race6-5-3 Diamond King6-5-4 Stone Axe6-5-5 Black Jack

45
7 Marcac. Voz7-1 Entrenamiento 7-2 Buscar7-2-1 Búsqueda voz7-2-1-1 Editar voz7-2-1-2 Editar número7-2-1-3 Borrar7-2-2 Búsqueda núm.7-2-2-1 Editar voz7-2-2-2 Editar número7-2-2-3 Borrar7-3 Configuración7-3-1 Habilitar7-3-2 Deshabilitar7-4 Borrar todas
8 Internet 8-1 Inicio8-2 Marcad. Favor.8-2-1 Ir a 8-2-2 Editar8-2-3 Borrar 8-2-4 Añad. marc.8-3 Perfiles8-4 Borrar caché
Acceder al menú

46
Su teléfono ofrece las funciones que le permiten ajustar el teléfono a susnecesidades. Estas funciones están dispuestas en menús y submenús. Se puede acceder a los menús y submenús desplazándose mediante y
o utilizando un atajo apropiado.
El menú principal le da acceso a todos los demás menús.
1. Pulse o para alcanzar el menú principal deseado (p.ej. Seguridad).después pulse [Menú] para entrar al menú principal; por el contrariodeberá pulsar [Atrás] para salir de los menús.
2. Si quiere entrar al submenú, encuentre el que quiera pulando o Ypulse [OK] para entrar al submenú, pulse [Atrás] para salir delsubmenú.
Si usted sabe los números de los menús, usted puede usarlos para entrarrápidamente a un menú. En este libro, los números de los menús semuestran de la siguiente forma.
1. Pulse [Menú].
2. Teclee enseguida el número de índice de la función de menú a la quequiere acceder.
Por ejemplo, para ajustar la función de cualquier tecla:
: para Entrar al menú.
: para para Ajuste.
: para Ajuste de llamada.
: para Contestación por cualquier tecla.
Navegación en el menú mediante desplazamientos
Atajos hacia los menús
Acceder al menúUsar el Menú

47
Mensajes [Menú 1] Acceder al menú
Este menú en su teléfono incluye funciones relacionadas con los mensajesde texto, mensajes de voz, mensajes de difusión de célula, así como unajuste para mensaje.
Escribir mens. [Menú 1-1] Con el menú de Escribir mens., usted puede escribir y editar un mensajede texto de hasta 160 caracteres. Cuando haya terminado de escribir sumensaje, pulse [Opción]. Entonces aparecerá en pantalla el siguientemenú.
� Enviar: Envía el mensaje editado 1. Una vez que introduzca en este menú, su teléfono pide que
introduzca el número al que lo quiere enviar.
2. Después de enviarlo, su teléfono preguntará si quiere guardar elmensaje editado.
3. Pulse [OK] si quiere guardarlo en la Salida y pulse [Atrás] sino quiere hacerlo.
� Almacenar: Guarda el mensaje en la Salida.1. Su teléfono pregunta si quiere guardar el mensaje editado o no.
2. Pulse [OK], si quiere guardarlo en la Salida y pulse [Atrás]si no quiere hacerlo.
� Edit modo eZi : Si selecciona esto, podrá escribir un mensajemediante el método de entrada de texto eZi.
1
MensajesO K Atrás

48
Mensajes [Menú 1] Acceder al menú
� Edit modo nom. : Si selecciona esto, podrá escribir un mensaje enel modo de letra.
� Edit modo núm. : Si selecciona esto, podrá escribir un mensaje enel modo numérico.
� Diccionario : En esta opción podrá añadir o borrar una palabraen el diccionario de usuario.
1. Pulse la tecla [Opción] después de entrar la palabra que quierey podrá ver el siguiente menú. Agreg. a dic. Supr. de dic.
2. Seleccione Agreg. a dic., si quiere añadir la palabra entradaanteriormente en el diccionario de usuario del lenguaje eZiactualmente seleccionado. Esta palabra será buscada por eZi, siusted edita en el modo eZi.
3. Seleccione Supr. de dic., si quiere borrar una palabra entradaanteriormente en el diccionario de usuario del lenguaje eZiactualmente seleccionado.
La palabra añadida será buscada por eZi, si usted edita en el modo eZi.
� Listar dicc. : Si usted selecciona esto, podrá ver palabrasadicionales en el diccionario de usuario del lenguajeeZi actualmente seleccionado. Seleccione unapalabra que quiere editar o borrar y podráseleccionar añadir o borrar la nueva palabra editadasiguiendo el menú.
Buzón salida [Menú 1-2] Cuando entra en este menú, podrá ver los mensajes guardados.Desplácese hasta el mensaje deseado, usando , y puede ver lapágina superior o inferior usando , Y si quiere salir del menú deSalida, pulse [Atrás].

49
Si quiere editar el mensaje, pulse [Editar] y podrá editar el mensajeseleccionado. Cuando haya terminado de editar el mensaje y pulse la tecla
[Opción], podrá ver el siguiente menú: Enviar, Guardar, Borrar,Borrar todas.
� Enviar:
Usted puede enviar el mensaje seleccionado. La secuencia es idénticaa la opción de enviar en Escribir Mensaje.
� Guardar:
Usted puede enviar el mensaje seleccionado. La secuencia es idénticaa la opción de enviar en Escribir Mensaje.
� Borrar:
El mensaje es borrado.
� Borrar todas:
Se borrarán todos los mensajes en la Salida. En este menú, su teléfonopreguntará por seguridad, si realmente quiere borrar todos losmensajes. Después pulse [OK] para quitar todos los mensajes ypulse [Atrás], si no quiere hacerlo.
Buzón entrada [Menú 1-3] Cuando se recibe un mensaje de texto, su teléfono muestra y lo guardaen la lista de mensajes entrantes. Muestra el símbolo, hasta cuando ustedhaya leído el mensaje. Una vez que introduzca en este menú puede ver elúltimo mensaje recibido. Desplácese hasta el mensaje deseado, usando , y vea la página superior o inferior usando , Si quieresalir del menú de entrada, pulse [Atrás]. Mientras esté leyendo elmensaje, pulse [Opción] para acceder a las opciones disponibles.
Acceder al menú
Mensajes [Menú 1]
� Borrar: El mensaje es borrado.
� Responder:Usted puede contestar al emisor mediante un mensaje. Una vez hayaentrado en este menú podrá editar el mensaje que quiere enviar ypulsar [OK] para enviarlo o pulsar [Atrás] para cancelarlo.
� Reenviar:Usted puede reenviar el mensaje seleccionado a otro número deteléfono. En este menú, su teléfono le pedirá que introduzca el númeroy después lo enviará.
� Devolver llam.:Usted puede devolver la llamada a quien le envió el mensaje. Si ustedselecciona este punto, su teléfono marcará automáticamente.
� Extraer número: Con esta función, podrá extraer números mostrados en el teléfono. Se extraen sólo los primeros números mostrados en el contenido. Losnúmeros deben estar compuestos de más de 2 cifras y menos de 21, peropara números internacionales, pueden ser más de 8 y menos de 21 cifras,incluyendo el símbolo “ + ”. No debe haber espacios entre los números.
� Borrar todas:Se borrarán todos los mensajes en la Entrada. Por seguridad, su teléfonopregunta si quiere realmente borrar todos los mensajes. Después pulse
[OK] para quitarlos y pulse [Atrás], si no quiere hacerlo.
Informe estado [Menú 1-4] Usted puede recibir un informe de estado para el envío del mensaje si loprograma así. Cuando recibe un mensaje de texto con el informe deestado, su teléfono lo guarda en la lista de mensajes de informe de estado.
Si la memoria de informe de estado está llena, el teléfono borraráautomáticamente el informe de estado más antiguo y guardará el últimoinforme de estado.
Acceder al menú
50

Una vez haya entrado en este menú, usted podrá ver el anterior informe deestado guardado. Desplácese hasta el mensaje deseado, usando , yvea la página superior o inferior usando , y si quiere salir del menú deinforme de estado, pulse [Atrás]. Mientras esté leyendo el mensaje,pulse [Opción] para acceder a las opciones disponibles.
� Borrar
Se borrará el informe de estado seleccionado.
� Borrar todas
Se borrarán todos los mensajes en el informe de estado. Por seguridad,su teléfono pregunta si quiere realmente borrar todos los mensajes.Después pulse [OK] para quitarlos y pulse [Atrás], si no quierehacerlo.
Lam. buz. voz [Menú 1-5]En este menú usted puede escuchar sus mensajes de voz. Si su teléfonoguarda la dirección del centro de mensajes de voz, llamaráautomáticamente, en caso contrario pedirá que introduzca la dirección.
Difusión Celda [Menú 1-6]Los mensajes de difusión celular son mensajes de texto difundidos por lared a grupos de usuarios de teléfonos GSM. Facilitan información generalcomo informes meteorológicos, noticias de tráfico y la cotización de lasacciones. Cada tipo de información tiene un número de tipo de informaciónasociado. Cuando reciba un mensaje de difusión, podrá leerlo de lasiguiente manera:
1. Si recibe un mensaje de difusión, es visualizado automáticamente en lapantalla. Si el mensaje es tan largo que no puede ser visualizado enterode una vez, usted lo podrá leer hojeando y .
2. Después de leer el mensaje, pulse [OK] para volver al estado deespera.
3. Su teléfono lo guardará hasta que llegue un mensaje nuevo del canal.
4. Si quiere volver a leerlo, vea el [Menú 1-6-2] (Leer).
51
Acceder al menú
Mensajes [Menú 1] Acceder al menú
52
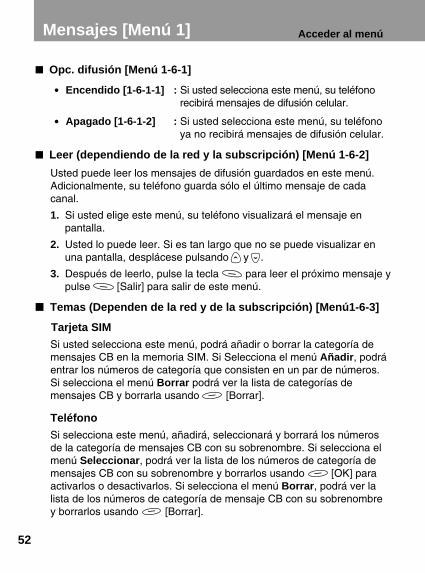
� Opc. difusión [Menú 1-6-1]
• Encendido [1-6-1-1] : Si usted selecciona este menú, su teléfonorecibirá mensajes de difusión celular.
• Apagado [1-6-1-2] : Si usted selecciona este menú, su teléfonoya no recibirá mensajes de difusión celular.
� Leer (dependiendo de la red y la subscripción) [Menú 1-6-2]
Usted puede leer los mensajes de difusión guardados en este menú.Adicionalmente, su teléfono guarda sólo el último mensaje de cadacanal.
1. Si usted elige este menú, su teléfono visualizará el mensaje enpantalla.
2. Usted lo puede leer. Si es tan largo que no se puede visualizar enuna pantalla, desplácese pulsando y .
3. Después de leerlo, pulse la tecla para leer el próximo mensaje ypulse [Salir] para salir de este menú.
� Temas (Dependen de la red y de la subscripción) [Menú1-6-3]
Tarjeta SIM
Si usted selecciona este menú, podrá añadir o borrar la categoría demensajes CB en la memoria SIM. Si Selecciona el menú Añadir, podráentrar los números de categoría que consisten en un par de números.Si selecciona el menú Borrar podrá ver la lista de categorías demensajes CB y borrarla usando [Borrar].
Teléfono
Si selecciona este menú, añadirá, seleccionará y borrará los númerosde la categoría de mensajes CB con su sobrenombre. Si selecciona elmenú Seleccionar, podrá ver la lista de los números de categoría demensajes CB con su sobrenombre y borrarlos usando [OK] paraactivarlos o desactivarlos. Si selecciona el menú Borrar, podrá ver lalista de los números de categoría de mensaje CB con su sobrenombrey borrarlos usando [Borrar].

53
� Idiomas [Menú 1-6-4]
En este menú puede seleccionar idiomas. Entonces su teléfono recibirálos mensajes de difusión celular escritos en el idioma seleccionado.
1. En este menú podrá ver diferentes idiomas (p.ej. Inglés, Francés ...)
2. Desplácese para resaltar el idioma que quiere, seleccione conectar /desconectar.
3. Podrá seleccionar más de un punto mediante el procedimiento 1~2.
Estado Memoria [Menú 1-7] Si el usuario selecciona este menú, el teléfono muestra la memoria usaday la cantidad total de memoria. La memoria total es la suma de la memoriaSIM y la memoria del teléfono.
Configuración [Menú 1-8]
� Informe estado [Menú 1-8-1]
En este menú puede ajustar el servicio de mensajes para recibirmensajes que sean enviados. Este informe será presentado tanto si elmensaje ha sido enviado al destino con éxito o no.• Encendido : Si selecciona este menú, recibirá el informe de
estado del mensaje. • Apagado : Si selecciona este menú, no recibirá el informe de
estado del mensaje.
� Tipo Mensaje [Menú 1-8-2]
: Texto, Voz, Fax, X.400, E-mail, ERMESNormalmente, esta elección de menú deberá estar puesta en “Texto”.Su servicio de mensajes puede, de todas formas, ofrecerle laposibilidad de convertir su mensaje de texto en formatos alternativosque sean adecuados para el equipo que recibirá los mensajes.Contacte con su proveedor de servicio en referencia a la disponibilidadde esta función.
Acceder al menú

� Periodo valid. [Menú 1-8-3]
Este servicio de red le permite ajustar cuanto tiempo sus mensajes detexto se guardarán en el centro de mensajes, mientras que se estétratando de entregárselos: 1 hora, 6 horas, 12 horas, 1 día, 2 días, 1semana, Máximo.
� Centro SMS [Menú 1-8-4]
En este menú su teléfono pregunta por la dirección de su centro SMS.Esto se necesita para enviar mensajes de texto.
� Centro de voz [Menú 1-8-5]
En este menú su teléfono le pedirá que introduzca el número de subuzón de voz.
� Aviso [Menú 1-8-6]
El usuario puede ajustar cuántas veces y cuán a menudo el teléfonoavisa el usuario sobre mensajes entrantes.
54
Mensajes [Menú 1] Acceder al menú

Use el menú de “opción de llamada” para acceder a serviciossuplementarios facilitados por la red GSM.
Desvío llamada [Menú 2-1] (Depende de la red y de la subscripción)
El desvío de llamadas reenvía llamadas de voz, fax y/o datos entrantes aotro número de teléfono.
1. Pulse [Menú] en el modo de espera.
2. Pulse para acceder o uso directamente y para entrar en laopción de llamada.
3. Seleccione el menú de Desvío llamada y pulse [OK] para entrar.
4. Seleccione Llamadas voz.
Opción llam. [Menú 2]
55
Acceder al menú
NOTA
• Los menús de desvío de llamada, excepción de llamada y llamadaen espera contienen cada uno una opción para visualizar enpantalla el estado actual del servicio. Esta función hace una llamadaa la red. Esta llamada puede serle cobrada. Consulte con suproveedor de servicio.
2
Opción llam.O K Atrás<Pulse una vez>

56
Opción llam. [Menú 2] Acceder al menú
� Llamadas voz [Menú 2-1-1]
• Desviar todas : Desviar toda las llamadas incondiconalmente.
• Desviar si no accesible :Desviar las llamadas, si la red no puede acceder a usted.
• Desviar si ocupado :Desviar las llamadas, cuando el teléfono está ocupado.
• Desviar si no responde :Desviar las llamadas a las que usted no contesta.
• Cancelar todas :Sólo cancela el desvío de llamadas de voz.
� Info llamadas [Menú 2-1-2] : Desviar incondicionalmente todas las llamadas de datos.
1. Pulse [Menú] en el modo de espera.
2. Pulse para acceso o uso directo y para entrar la opciónde llamada.
3. Seleccione el menú de Desvío llamada y pulse [OK] para entrar.
4. Seleccione Info llamadas.
� Info faxes [Menú 2-1-3] : Desviar incondicionalmente todas las llamadas de fax.
1. Pulse [Menú] en el modo de espera.
2. Pulse para acceso o uso directo y para entrar la opciónde llamada.
3. Seleccione el menú de Desvío llamada y pulse [OK] paraentrar.
4. Seleccione Info faxes.

57
� Cancelar todas [Menú 2-1-4] : Cancelar todos los desvíos de llamadas de voz, datos y fax.
1. Pulse [Menú] en el modo de espera.
2. Pulse para acceso o uso directo y para entrar la opciónde llamada.
3. Seleccione el menú de Desvío llamada y pulse [OK] paraentrar.
4. Seleccione Cancelar todas.
Restric. Llam. [Menú 2-2] (depende de la red y de la subscripción)
El servicio de Restricción de llamada impide que su teléfono haga y / oreciba determinadas categorías de llamadas. Esta función requiere lacontraseña de restricción de llamada, que puede obtener de su proveedorde servicio.
1. Pulse [Menú] en el modo de espera.
2. Pulse para acceso o uso directo y para entrar la opción dellamada.
3. Desplácese hasta resaltar el menú de Restric. Llam. y pulse [OK]para entrar.
• Todas las llamadas salientes :El servicio de excepción para todas las llamadas salientes.
• Llamadas internacionales salientes : El servicio de excepción para todas las llamadas salientesinternacionales.
• Llam. Intern. sal. excep. llam locales : El servicio de excepción para todas las llamadas salientesinternacionales a la red de casa.
• Todas las llamadas entrantes : El servicio de excepción para todas las llamadas entrantes.
Acceder al menú

58
Opción llam. [Menú 2]
• Llamadas entrantes en itinerancia: El servicio de excepción para todas las llamadas entrantes enitinerancia.
• Cancelar todas : Cancela sólo el servicio de restricción de llamadas de voz.
• Cambiar contraseña :Cambia la contraseña de restricción de llamada.
Llamada espera [Menú 2-3] (depende de la red y de la subscripción)
Activar o desactivar el servicio de llamada en espera. Si este servicio estáactivado, el usuario puede aceptar una llamada (entrante) en espera. Sieste servicio está desactivado, el usuario no puede aceptar una llamada(entrante) en espera y no puede reconocerla.
1. Pulse [Menú] en el modo de espera.
2. Pulse para acceso directo o use y para entrar a la opción dellamada.
3. Desplácese hasta resaltar el menú Llamada espera y pulse [OK]para entrar.
Envío núm. tel [Menú 2-4](depende de la red y de la subscripción)
Este menú es válido sólo si el usuario subscribe el modo temporal.
Si usted selecciona Activ., usted puede permitir que su número de teléfonosea visualizado en pantalla a la otra parte. Puede cambiar de modo Activ.(conectado) a Desact. (desconectado), y viceversa, si lo desea.
1. Pulse [Menú] en el modo de espera.
2. Pulse para acceso directo o use y para entrar a la opción dellamada.
3. Desplácese hasta resaltar el menú Envío núm. tel. y pulse [OK]para entrar.
Acceder al menú

59
Grupo CUG [Menú 2-5](depende de la red)
Utilice esta función para restringir el uso del teléfono a llamadas connúmeros que pertenecen a determinados grupos de usuario. Cuando seusa esta función, cada llamada saliente es asociada con un índice degrupo. Si se ha especificado un índice de grupo, se usa para todas lasllamadas salientes. Si no está especificado un índice de grupo, la redusará el índice preferente (un índice específico que está guardado en la red).
1. Pulse [Menú] en el modo de espera.
2. Pulse para acceso directo o use y para entrar a la opción dellamada.
3. Desplácese hasta resaltar el menú Grupo CUG y pulse [OK] paraentrar.
Acceder al menú
60
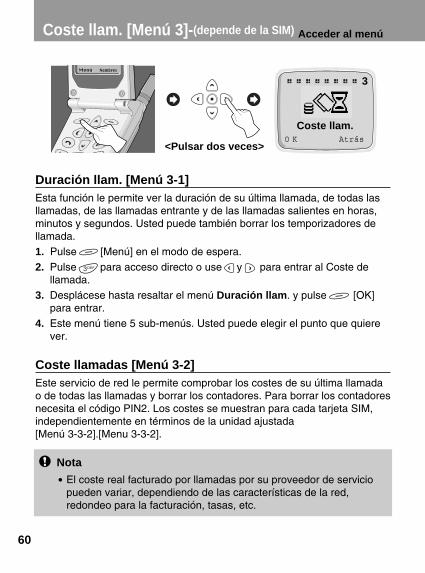
Coste llam. [Menú 3]-(depende de la SIM)
Duración llam. [Menú 3-1] Esta función le permite ver la duración de su última llamada, de todas lasllamadas, de las llamadas entrante y de las llamadas salientes en horas,minutos y segundos. Usted puede también borrar los temporizadores dellamada.
1. Pulse [Menú] en el modo de espera.
2. Pulse para acceso directo o use y para entrar al Coste dellamada.
3. Desplácese hasta resaltar el menú Duración llam. y pulse [OK]para entrar.
4. Este menú tiene 5 sub-menús. Usted puede elegir el punto que quierever.
Coste llamadas [Menú 3-2] Este servicio de red le permite comprobar los costes de su última llamadao de todas las llamadas y borrar los contadores. Para borrar los contadoresnecesita el código PIN2. Los costes se muestran para cada tarjeta SIM,independientemente en términos de la unidad ajustada [Menú 3-3-2].[Menu 3-3-2].
Acceder al menú
Nota
• El coste real facturado por llamadas por su proveedor de serviciopueden variar, dependiendo de las características de la red,redondeo para la facturación, tasas, etc.
3
Coste llam.O K Atrás
<Pulsar dos veces>

61
1. Pulse [Menú] en el modo de espera.
2. Pulse para acceso directo o use y para entrar al Coste dellamada.
3. Desplácese hasta resaltar el menú Coste llamadas y pulse [OK]para entrar.
4. Este menú tiene 3 sub-menús. Usted puede elegir el punto que quierever.
Config. coste [Menú 3-3](depende de SIM)
� Lím gasto llam [Menú 3-3-1]
Este servicio de red le permite limitar los costes de sus llamadas a unacantidad seleccionadas de Unidades de facturación. Si usted haseleccionado Encendido, usted puede ajustar el límite de costes entérminos de unidad y usar su teléfono hasta una cantidad seleccionadade unidades de facturación. Si ha seleccionado Apagado, puedeutilizar su teléfono sin limitación de coste. Cuando se han usado todaslas unidades, no se pueden hacer más llamadas a excepción de lasllamadas de emergencia.Para ajustar un Límite de coste de llamada, usted necesita el códigoPIN2.
1. Pulse [Menú] en el modo de espera.
2. Pulse para acceso directo o use y para entrar al Coste dellamada.
3. Desplácese hasta resaltar el menú Config. coste y pulse [OK]para entrar.
4. Seleccione Lím gasto llam para entrar.
Acceder al menú

Coste llam. [Menú 3]-(depende de la SIM)
� Establ. tarifa [Menú 3-3-2]
Usted puede ajustar el nombre de la moneda y el precio de la unidad.Contacte con su proveedor de servicio para ajustar los precios deunidad a facturar. Para seleccionar la moneda o unidad en este menú,usted necesita el código PIN2.
1. Pulse [Menú] en el modo de espera.
2. Pulse para acceso directo o use y para entrar al Coste dellamada.
3. Desplácese hasta resaltar el menú Config. coste y pulse [OK]para entrar.
4. Seleccione Establ. tarifa para entrar.
� Resum llamada [Menú 3-3-3]
1. Pulse [Menú] en el modo de espera.
2. Pulse para acceso directo o use y para entrar al Coste dellamada.
3. Desplácese hasta resaltar el menú Config. coste y pulse [OK]para entrar.
4. Seleccione Resum llamada para entrar.
Acceder al menú
62
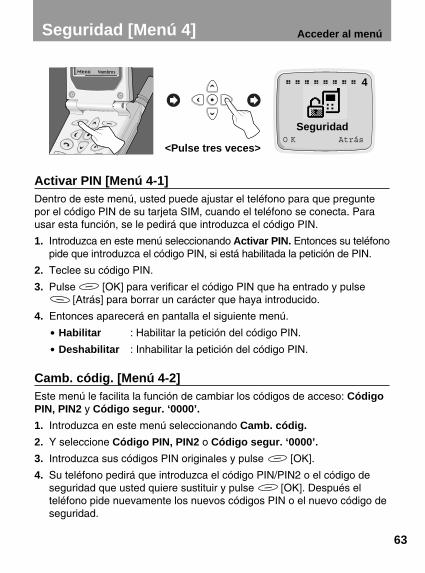
Seguridad [Menú 4] Acceder al menú
63
Activar PIN [Menú 4-1] Dentro de este menú, usted puede ajustar el teléfono para que preguntepor el código PIN de su tarjeta SIM, cuando el teléfono se conecta. Parausar esta función, se le pedirá que introduzca el código PIN.
1. Introduzca en este menú seleccionando Activar PIN. Entonces su teléfonopide que introduzca el código PIN, si está habilitada la petición de PIN.
2. Teclee su código PIN.
3. Pulse [OK] para verificar el código PIN que ha entrado y pulse[Atrás] para borrar un carácter que haya introducido.
4. Entonces aparecerá en pantalla el siguiente menú.
• Habilitar : Habilitar la petición del código PIN.
• Deshabilitar : Inhabilitar la petición del código PIN.
Camb. códig. [Menú 4-2] Este menú le facilita la función de cambiar los códigos de acceso: CódigoPIN, PIN2 y Código segur. ‘0000’.
1. Introduzca en este menú seleccionando Camb. códig.
2. Y seleccione Código PIN, PIN2 o Código segur. ‘0000’.
3. Introduzca sus códigos PIN originales y pulse [OK].
4. Su teléfono pedirá que introduzca el código PIN/PIN2 o el código deseguridad que usted quiere sustituir y pulse [OK]. Después elteléfono pide nuevamente los nuevos códigos PIN o el nuevo código deseguridad.
4
SeguridadO K Atrás
<Pulse tres veces>
5. Si usted teclea correctamente el código PIN/PIN2 o el código deseguridad original y confirma correctamente los nuevos, estos seráncambiados.
Núm marc. fija. [Menú 4-3] Usted puede restringir sus llamadas salientes a unos números de teléfonoseleccionados, si esta función es soportada por su tarjeta SIM. Estosnúmeros están protegidos por su PIN2.
1. Introduzca en este menú, seleccionando Núm marc. fij. Su teléfonopedirá el código PIN2.
2. Teclee su código de PIN2 original y pulse [OK]. Si el código PIN2,tecleado por usted es correcto, aparecerá en pantalla el siguientemenú.
• Habilitar : Facilita la función de que usted pueda restringir lasllamadas salientes a unos números de teléfonoseleccionados, si su tarjeta SIM lo soporta.
• Deshabilitar : Ninguna restricción de llamadas salientes.
• Número : Permite añadir, editar y borrar el número demarcación fija.
64
Seguridad [Menú 4] Acceder al menú

Configur. [Menú 5] Acceder al menú
65
Selecc. red [Menú 5-1] Usted puede seleccionar automáticamente o manualmente la red en la queserá registrado.
� Automótico [Menú 5-1-1]
El teléfono selecciona automáticamente la red disponible en el área.
� Manual [Menú 5-1-2]
El teléfono encontrará la lista de redes disponibles y se la muestra.Entonces, usted podrá seleccionar la red que quiere usar, si esta redtiene un acuerdo de itinerancia con su Operador de red.
Config. Tlfno. [Menú 5-2]
� Aviso [menú 5-2-1]
Este ajuste define cómo el teléfono le informará sobre una llamada devoz entrante: Aviso acústico, Vibracíon, Vibr. & acúst., Acús despVibr y Silencio. Una vez que haya seleccionado el menú es posible losiguiente. Este teléfono muestra el menú: Aviso acústico, Vibracíon,Vibr. & acúst., Acús desp Vibr y Silencio. Seleccione una formapulsando y .
� Ilumin. fondo [Menú 5-2-2]
Usted puede ajustar durante cuanto tiempo quiere que el teclado y lapantalla se iluminen cada vez que pulse una tecla: Apagado, Siempreal abrir la tapa, 20 segundos, 10 segundos, 5 segundos.
5
Configur.O K Atrás
<Pulse cuatro veces>

� Volúmen tecla [Menú 5-2-3]
Usted puede ajustar el nivel de volumen para el tono de las teclaspulsadas: Nivel 1~5 y apagado.
� Vol. avisador [Menú 5-2-4]
Usted puede ajustar el nivel de volumen para el tono del timbre: Nivel 1~5 y apagado.
� Contraste LCD [menú 5-2-5]
Usted puede ajustar el contraste de los caracteres en la pantalla. Valor0~9.
� Tipo de timbre [menú 5-2-6]
Si usted selecciona este menú, podrá seleccionar las diferentesmelodías y tonos de timbre. 1. Introduzca en este menú. Su teléfono pedirá que seleccione el tono
de timbre y la melodía de timbre.2. Su teléfono muestra la lista de melodía de timbre. Seleccione una de
ellas, pulsando , . También podrá cambiar el tono de timbrepulsando , .
� Idioma [Menú 5-2-7]
Este menú le facilita la selección del idioma en el que se mostrarán lostextos visualizados en pantalla. Si se selecciona el ajuste automático, elidioma usado se elegirá según la tarjeta SIM actual. Si el idioma de latarjeta SIM no se encuentra en el teléfono, se utilizará el Inglés.
� Pant. Bienv. [Menú 5-2-8]
Este menú le permite ajustar el texto o la animación que se muestrabreves instantes al conectar el teléfono. 1. Desplácese hasta resaltar Pant. Bienv.2. Entonces aparecerá en pantalla el siguiente menú.
• Texto : Usted puede hacer aparecer en pantalla su propiotexto, su teléfono le pide que edite el mensaje.
• Animación : Aparecerá en pantalla la animación.
66
Safety Information MENU DESCRIPTIONConfigur. [Menú 5] Acceder al menú

67
� Pant. espera [menú 5-2-9]
Este menú le permite seleccionar su propia ventana de espera en lapantalla. Usted puede seleccionar uno de los siguientes: Zodiaco(propio del usuario, mensual), Reloj Digital, Reloj Analóg., Normaly Texto. En el modo de texto usted podrá editar el texto.
Config. Llam. [Menú 5-3]
� Cualq. tecla [Menú 5-3-1]
• Encendido : Si selecciona esto, usted puede contestar el teléfonoo bien abriendo la tapa o pulsando cualquier teclaexcepto la tecla ENCENDIDO/APAGADO, mientrasesté abierta la tapa.
• Apagado : Si usted selecciona esto, puede contestar el teléfonosólo pulsando .
� Remar. Autom. [5-3-2]
• Encendido : Cuando está función está activada, su teléfono haráhasta 10 intentos para conectar la llamada despuésde un intento de llamada fallido.
• Apagado : Cuando está función está activada, su teléfono nohará ningún intento para conectar la llamada despuésde un intento de llamada fallido.
� Modo llamada [Menú 5-3-3] En este menú, usted puede usar el teléfono y un PC conectado paraenviar y recibir faxes, datos y voz. Una vez que introduzca en estemenú, aparecerán en pantalla las siguientes opciones.
• Modo único :Para usar un servicio de datos o de fax, asegúrese que el modo dellamada es Modo único. En este modo usted puede comunicar voz,datos o fax.
• Voz y fax :En este modo puede transmitir voz y también fax.
Acceder al menú
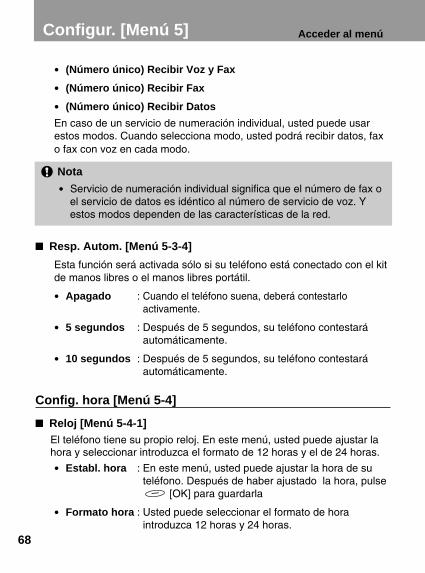
• (Número único) Recibir Voz y Fax
• (Número único) Recibir Fax
• (Número único) Recibir Datos
En caso de un servicio de numeración individual, usted puede usarestos modos. Cuando selecciona modo, usted podrá recibir datos, faxo fax con voz en cada modo.
� Resp. Autom. [Menú 5-3-4]
Esta función será activada sólo si su teléfono está conectado con el kitde manos libres o el manos libres portátil.
• Apagado : Cuando el teléfono suena, deberá contestarloactivamente.
• 5 segundos : Después de 5 segundos, su teléfono contestaráautomáticamente.
• 10 segundos : Después de 5 segundos, su teléfono contestaráautomáticamente.
Config. hora [Menú 5-4]
� Reloj [Menú 5-4-1] El teléfono tiene su propio reloj. En este menú, usted puede ajustar lahora y seleccionar introduzca el formato de 12 horas y el de 24 horas.
• Establ. hora : En este menú, usted puede ajustar la hora de suteléfono. Después de haber ajustado la hora, pulse
[OK] para guardarla
• Formato hora : Usted puede seleccionar el formato de horaintroduzca 12 horas y 24 horas.
Nota
• Servicio de numeración individual significa que el número de fax oel servicio de datos es idéntico al número de servicio de voz. Yestos modos dependen de las características de la red.
68
Configur. [Menú 5] Acceder al menú
69
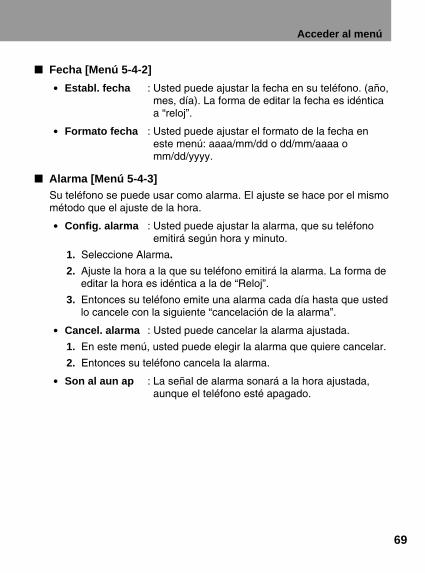
� Fecha [Menú 5-4-2]
• Establ. fecha : Usted puede ajustar la fecha en su teléfono. (año,mes, día). La forma de editar la fecha es idénticaa “reloj”.
• Formato fecha : Usted puede ajustar el formato de la fecha eneste menú: aaaa/mm/dd o dd/mm/aaaa omm/dd/yyyy.
� Alarma [Menú 5-4-3] Su teléfono se puede usar como alarma. El ajuste se hace por el mismométodo que el ajuste de la hora.
• Config. alarma : Usted puede ajustar la alarma, que su teléfonoemitirá según hora y minuto.
1. Seleccione Alarma.
2. Ajuste la hora a la que su teléfono emitirá la alarma. La forma deeditar la hora es idéntica a la de “Reloj”.
3. Entonces su teléfono emite una alarma cada día hasta que ustedlo cancele con la siguiente “cancelación de la alarma”.
• Cancel. alarma : Usted puede cancelar la alarma ajustada.
1. En este menú, usted puede elegir la alarma que quiere cancelar.
2. Entonces su teléfono cancela la alarma.
• Son al aun ap : La señal de alarma sonará a la hora ajustada,aunque el teléfono esté apagado.
Acceder al menú

Perfiles [Menú 5-5] En este menú, usted puede seleccionar un grupo de ajustes paraadaptarse a una variedad de entornos. (P.ej. si está al aire libre, podráelegir el perfil de aire libre, etc.). Los entornos son Normal, Silencio, Airelibre y Propio del usuario.
Un grupo de ajustes son Alerta, Volumen de las teclas, Volumen de timbre.
� Normal / Silencio / Exterior
• Activar : Usted puede ajustar el perfil a los entornos.Alerta, Volumen de las teclas y Volumen detimbre se ajustan simultaneamente.
• Cambiar : Usted puede cambiar el valor de los ajustes ;Alerta, Volumen de las teclas, Volumen detimbre.
� Propio usuario
• Editar Nombre : Usted puede editar el nombre de perfil.
• Activar : Usted puede ajustar el perfil según su propioentorno.
• Cambiar : Usted puede cambiar el valor de los ajustes.
Configur. [Menú 5]
70
Acceder al menú

71
Accessing the MenuAccesorios [Menú 6] Acceder al menú
Planificador [Menú 6-1] Cuando introduzca en este menú, en pantalla aparecerá un calendario.Arriba en la pantalla hay secciones para fechas e iconos. Usted puedecambiar el día, el mes y el año, usando las teclas de navegación y lasteclas numéricas. Un cursor cuadrado hará resaltar el día seleccionado. Unsubrayado en una fecha en particular significa que hay una entrada paraese día. Se puede ajustar una alarma para recordarle sus eventosprogramados.
� Ver día
Muestra notas dispuestas para el día elegido. Utilice , para pasarpor la(s) nota(s). Si ajusta una alarma para la nota, en pantallaaparecerá el despertador. Pulse [Opción] para borrar, editar, enviarla nota que elija.
• Borrar : permite borrar la nota.
• Editar : permite editar la nota.
• Enviar nota : Permite enviar la nota como mensaje corto (SMS).Para detalles véase Mensajes [Menú 1].
6
AccesoriosO K Atrás
<pulsar cinco veces>
Nota
• Para utilizar esta función, su teléfono deberá estar conectado.

Accesorios [Menú 6]
� Anotar
Le permite escribir una nota. Usted puede elegir los siguientes tipos denota. Puede editar un máximo de 40 caracteres y hacer un máximo de50 programas.
• Agenda : Introduzca la hora del asunto y la hora de alarma ydespués pulse [OK].
• Llamar : Introduzca el número de teléfono (o impórtelo dellistín de teléfonos), la hora y la hora de la alarma ydespués pulse [OK].
• Memoria : Introduzca la hora del asunto y la hora de alarma ydespués pulse [OK].
• Aniversario : Introduzca la hora del asunto y la hora de alarma ydespués pulse [OK]. Usted puede seleccionarun título del sub-menú Cumpleaños, Aniv. boda,Memoria, Etcétera.
� Borrar
Le permite borrar la(s) nota(s) elegida(s).
• De fecha selec
• Uno por uno
• Todas a la vez
� Ver todas
Muestra las notas que se han ajustado para todos los días. Use ypara pasar por la(s) nota(s) . Pulsando [Opción] podrá acceder almismo menú que para ver día. .
Acceder al menú
72
Nota
• En la fecha elegida, la alarma sonará y la nota aparecerá enpantalla.

73
Hora mundial [Menú 6-2] Esta función muestra el mapamundi, ciudades y hora local. La hora actualaparece en pantalla de acuerdo al formato de hora (12/24 horas). Pulse , para cambiar la zona horaria y , para pasar por nombres deciudades. Pulse [Ajustar] para ajustar la hora de su teléfono a la horalocal de la ciudad seleccionada.
Calculadora [Menú 6-3] Esta función soporta cálculos matemáticos básicos como son la suma, laresta, la multiplicación y la división.
1. Introduzca los números que quiere calcular.
2. Para seleccionar la función, use y . El operador seleccionadoserá resaltado con un cursor cuadrado. Pulse [tecla fácil] paraasegurar su elección.
3. Cuando haya terminado el cálculo podrá elegir el operador “=” o[Resultado] para ver el resultado.
Conver. unidad [Menú 6-4] 1. Seleccione los puntos del menú que usted quiere convertir Longitud,
Peso, Volumen, Superficie.
2. Ponga los números a convertir usando las teclas y y numéricas.
3. Y seleccione la unidad que está relacionada con el valor actual.
4. Finalmente seleccione la unidad a la que quiere convertir el valor actual.
5. Entonces aparecerá en pantalla el valor y la unidad requerida.
Acceder al menú

74
Juego [Menú 6-5] En el teléfono están programados los siguientes juegos.
• Corsair
• Crazy Race
• Diamond King
• Stone Axe
• Black Jack
Accesorios [Menú 6] Acceder al menú
Nota
Las teclas de control son diferentes para cada juego.
Pero cada juego tiene pantallas para explicar la tecla de controlprincipal.
Otras teclas de control comunes están abajo.
[Función de tecla común]
• [Tecla 1 de pantalla] : Pausa juego
• [Tecla 2 de pantalla] : Continuar juego
• [Tecla de envío] : Comenzar juego, Guardar puntuación
• [Tecla de encendido] : Salir del juego
PC Sync
PC Sync es un programa para el intercambio de datos introduzca PCy teléfono por cable de datos. Por lo tanto, si usted quiere usar estafunción, deberá comprar el kit accesorio. Para más detalle sobre laguía del usuario, remítase al archivo de Ayuda para PC Sync en el CDde PC Sync.
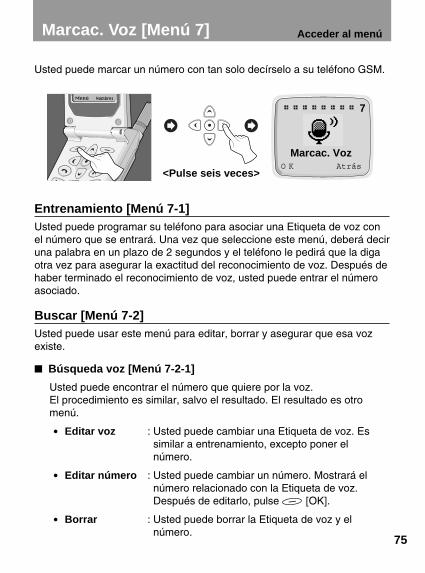
75
Marcac. Voz [Menú 7] Acceder al menú
Usted puede marcar un número con tan solo decírselo a su teléfono GSM.
Entrenamiento [Menú 7-1] Usted puede programar su teléfono para asociar una Etiqueta de voz conel número que se entrará. Una vez que seleccione este menú, deberá deciruna palabra en un plazo de 2 segundos y el teléfono le pedirá que la digaotra vez para asegurar la exactitud del reconocimiento de voz. Después dehaber terminado el reconocimiento de voz, usted puede entrar el númeroasociado.
Buscar [Menú 7-2] Usted puede usar este menú para editar, borrar y asegurar que esa vozexiste.
� Búsqueda voz [Menú 7-2-1]
Usted puede encontrar el número que quiere por la voz.El procedimiento es similar, salvo el resultado. El resultado es otromenú.
• Editar voz : Usted puede cambiar una Etiqueta de voz. Essimilar a entrenamiento, excepto poner elnúmero.
• Editar número : Usted puede cambiar un número. Mostrará elnúmero relacionado con la Etiqueta de voz.Después de editarlo, pulse [OK].
• Borrar : Usted puede borrar la Etiqueta de voz y elnúmero.
7
Marcac. VozO K Atrás
<Pulse seis veces>
76
� Búsqueda núm. [Menú 7-2-2]
Usted puede encontrar sólo los números grabados por número. Ustedno debe teclear los números enteros. Mostrará los números, inclusive laparte que queda por teclear. Usted puede escuchar la voz y ver elnúmero usando y . Usted puede escuchar el número posicionadopor voz pulsando en el lado del teléfono. Los sub-menús son losmismos que los del sub-menú de búsqueda de voz.
Configuración [Menú 7-3]
• Habilitar : Usted puede llamar por voz si selecciona esta función.
• Deshabilitar : No puede llamar por voz.
Borrar todas [Menú 7-4] Este menú le facilita la posibilidad de borrar todos los números demarcación por voz.
Marcac. Voz [Menú 7] Acceder al menú

77
Internet [Menú 8]
Usted puede navegar por Internet y obtener la información más actual.Esta información está disponible en un formato especial (WAP) adaptado alas opciones de la pantalla disponibles en el teléfono. Acceder a Internetpuede requerir un registro en su proveedor de servicio.
Inicio [Menú 8-1] Volver a la página inicial. La página inicial puede ser el sitio que estádefinido en el perfil activado por su proveedor de servicio.
Para activar WAP, pulse o bien la tecla durante unos segundos en elmodo de espera o pulse el botón [OK] en el menú inicial [Menú 8-1].
Marcad. Favor. [Menú 8-2] Cuando entra en este menú, aparecerá en pantalla su lista personal demarcadores de sitio. También puede guardar hasta 9 marcadores de sitio.Después pulse [OK] para acceder a la opción disponible o pulse[Atrás] para salir de ella.
• Ir a : Ir a los marcadores de sitio seleccionado.
• Editar : Editar la dirección y el título del marcador de sitioseleccionado.
• Borrar : Borrar los marcadores de sitio seleccionados de la listade marcadores de sitio.
• Añad. marc. : Edite la dirección y el título del sitio que quiere añadir ala lista de sus marcadores de sitio preferidos.
Acceder al menú
<Pulse 7 veces>
8
Internet O K Atrás

78
Perfiles [Menú 8-3] Haga aparecer en pantalla o introduzca sus propios ajustes de perfil parala conexión a Internet. Podrá crear hasta 5 perfiles y activar la opciónrequerida. Desplácese hasta el perfil deseado y pulse [OK] paraacceder a las opciones disponibles.
• Activar : Activar el perfil seleccionado.
• Configuración : Ajustar los detalles del perfil.
- Nombre perfil : Editar el nombre del perfil. - Núm conex WAP : Editar el número de llamada de datos.- Tipo llamada : Seleccione el tipo de llamada. - Dirección IP : Edite la dirección IP del portal al que se quiere
conectar.- Puerto IP : Edite el número del puerto IP del portal al que se
quiere conectar.- ID usuario : Edite el nombre de usuario de la página inicial
definida en el perfil seleccionado. - Contraseña : Edite la contraseña de la página inicial definida en
este perfil.- Página inicio : Usted puede editar la dirección del sitio. Esta
dirección será conectada cuando usted seleccioneel menú Internet – Página inicial o iniciar Internet através de .
Borrar caché [Menú 8-4]Su teléfono quitará los contenidos de la Memoria caché.
Safety InformationInternet [Menú 8] Acceder al menú

79
Menú dentro del Internet Acceder al menú
� Inicio
Se refiere al [Menú 8-1].
� Marcad. Favor.
Se refiere a [Menú 8-2].
� Guardar marc.
Usted puede añadir el sitio, al que su teléfono está conectado, a la listade marcadores de sitio en este menú.
� Ir a URL
Va al sitio que usted desea. En este menú, usted puede editar ladirección del sitio.
� Mostrar URL
En este menú, le mostrará el URL de la página a la que está conectadoactualmente.
� Volver a carg.
Carga nuevamente la página a la que está conectado actualmente.
� Borrar caché
Se refiere a [Menú 8-5].
� Salir
Desconecta y sale de WAP.

80
Algunos servicios telefónicos (como contestador automático ybuscapersonas) exigen que su teléfono transmita tonos DTMF (Dual ToneMultifrequency), que se conocen también como “tonos de contacto”. Estosse usan para comunicar contraseñas, números de rellamada, etc.
Caracteres de espera Para obtener un carácter de espera, pulse y mantenga pulsada la tecla -
. La pantalla muestra P por una espera. El teléfono interpreta siempreP como carácter de espera. Cuando usted marca un número que contieneun carácter de espera, su teléfono marca la primera parte (el número deteléfono) y después espera la conexión de la llamada, antes de enviar elresto de los dígitos como tonos DTMF.
Consultar a su contestador automático (ejemplo) Por ejemplo: Para escuchar todos los mensajes en su contestadorautomático (contraseña 5452) en el número de teléfono 12345678, ustedpuede llamar: 12345678PP5452. El teléfono marca 12345678 y espera laconexión de la llamada. Cuando está conectada, el teléfono transmite 5452(la contraseña).
Durante una llamada Cuando usted necesita enviar un tono DTMF, pulse los números y el tonoDTMF será enviado.
Cómo enviar tonos DTMF Funciones adicionales

81
Opciones dentro de una llamada
El teléfono proporciona una serie de funciones de control que usted puedeusar durante una llamada. Usted no puede utilizar todas estas funcionesen todos los momentos. La mayoría de las opciones dentro de una llamadason servicios de red. Pulsando [Opción] durante una llamada, puedenestar disponibles las siguientes opciones dentro de una llamada:
� LIam en espera (Dependiendo de la red)
Durante una llamada usted puede retener una llamada activa.
1. Durante una llamada, pulse [OK] para entrar en la opcióndentro de la llamada.
2. Seleccione Retener llamada para retener una llamada activa.
� Recup. llamada (Dependiendo de la red)
Si usted ya tiene una llamada retenida, usted puede recuperar estallamada.
1. Durante una llamada, pulse [OK] para entrar en la opcióndentro de la llamada.
2. Seleccione Recuperar llamada para recuperar una llamadaretenida.
� Conm. introduzca llamadas (Dependiendo de la red)
Si hay una llamada activa y una llamada retenida, este menú retiene lallamada activa y pone activa la llamada retenida. Usted puede alternarentre las dos llamadas según lo necesite.
1. Durante una llamada, pulse [OK] para entrar en la opcióndentro de la llamada.
2. Seleccione conm. llamadas para alternar entre una llamada activa yuna llamada retenida.
Funciones adicionales

82
Funciones adicionales
� Multiconfr. (dependiendo de la red) Esta función permite que hasta seis personas participen en una llamadade conferencia (dependiendo de la red):
1. Al estar dentro de una llamada, marque el número de teléfono ypulse . La primera llamada es retenida.
2. Para que el primer participante de la conferencia se una a lallamada, pulse [Opción], elija llamada de conferencia, seleccionereunir y pulse [OK].
3. Para añadir un nuevo participante a la llamada, repita los pasos 1 y 2.
4. Para eliminar un participante individual de la llamada, pulse[Opción], elija Llamada de conferencia, seleccione privado y pulse
[OK]. Seleccione el participante que quiere eliminar y pulse .
5. Para terminar la llamada de conferencia, cierre la tapa.
� Desconectar Usted puede desconectar la llamada que está ya retenida, estáactualmente activa y todas las llamadas, desplanzándose hacia arriba yabajo en los puntos de menú, como son llamada activa, retener llamaday todas las llamadas.
• Llamada activa
• Retener llamada
• Todas las llamadas
� Silencio on Si se selecciona esta función, la otra parte no puede oírle, pero ustedpuede oír la voz de la otra parte. Cuando la llamada se desconecta, seactivará automáticamente Mute desconectado. El ajuste por omisión esMute desconectado.
1. Durante una llamada, pulse [Opción] para entrar en la opcióndentro de una llamada.
2. Seleccione silencio on para silenciar su teléfono.
Opciones dentro de una llamada

83
� Silencio off Cuando está seleccionada esta función, la otra parte puede oírle. Elajuste por omisión es Mute desconectado.
� Activar DTMF
Si está seleccionada esta función, usted puede enviar tonos DTMF. Elajuste por omisión es DTMF ON. Para más detalles, véase como enviarDTMF.
1. Durante una llamada, pulse [Opción] para entrar en la opcióndentro de una llamada.
2. Seleccione Activar DTMF para enviar tonos DTMF.
� Desac. DTMF
Si está seleccionada esta función, usted no puede enviar tonos DTMF.El ajuste por omisión es DTMF ON.
1. Durante una llamada, pulse [Opción] para entrar en la opcióndentro de una llamada.
2. Seleccione Desac. DTMF para impedir el envío de tonos DTMF.
� Tomar una nota
Usando esta función, usted puede tomar una nota (número de teléfono)mientras se está realizando una llamada. Después de desconectar lallamada, el número de teléfono aparecerá en pantalla y usted puedeguardarlo en un agenda telefónica., y conectar una llamada pulsando
.
1. Durante una llamada, pulse [Opción] para entrar en la opcióndentro de una llamada.
2. Seleccione Tomar una nota para tomar una nota (número deteléfono).
Funciones adicionales

84
Opciones dentro de una llamada Funciones adicionales
� Grabar
Cuando necesite grabar su llamada, pulse y mantenga pulsado ,entonces su llamada será grabada. Para parar la grabación, pulse
, o simplemente cierre la tapa. Para reproducir susgrabaciones, vea la sección de <Nota de voz>. Para detalles véase<Nota de voz>. Durante una llamada pulse y mantenga pulsado enel lado derecho del teléfono.
� Mensaje
Si usted selecciona esta función, puede ir al menú de mensajes [Menú 1]. Para detalles véase <Mensaje> [Menú 1].
1. Durante una llamada, pulse [Opción] para entrar en la opcióndentro de una llamada.
2. Seleccione Mensaje para enviar un mensaje.
� Servicio SIM
Su proveedor de servicio puede ofrecer una aplicación especial a travésde la tarjeta SIM, como es Banco desde casa, mercado de acciones,etc. Si usted está registrado para uno de estos servicios, el nombre delservicio aparecerá al final del menú principal. Con el menú de serviciosSIM, su teléfono está apto para el futuro y soportará adiciones alservicio de su proveedor de servicio. Para más información, contactecon su proveedor de servicio.
85
Funciones adicionales
Para poder utilizar el servicio de datos o fax, usted necesita el software decomunicación adecuado, como pueden ser un programa de datos o de fax.Antes de usar estas funciones, deberá conectar su teléfono a un ordenadoro asegurarse que su teléfono está en conexión con un aparato compatible.
Hacer una llamada de datos o de fax Para utilizar un servicio de datos o de fax, asegúrese que el modo dellamada es “modo individual” (Ajuste Ajuste de llamada Modo dellamada Modo individual). En este modo, usted puede comunicar voz,datos o fax. Si usted ajusta el modo de llamada para que sea “modo devoz & fax” (Ajuste Ajuste de llamada Modo de llamada Modo devoz y fax), usted puede transmitir voz y fax sin la liberación de la llamadade voz.
� Enviar una llamada de datos o de fax
1. Conecte su ordenador al teléfono.
2. Después de activar el software de comunicación de datos, haga unallamada y transmita datos o fax.
3. Después de la transmisión de datos o fax, usted puede terminar lallamada sencillamente desactivando el software de comunicación,pulsando o cerrando la pestaña.
� Recibir una llamada de datos o de fax
1. Conecte su ordenador al teléfono.
2. Después de inicializar el software de comunicación de datos, acepteuna llamada y reciba datos o fax.
3. Después de la recepción de datos o fax, usted puede terminar lallamada sencillamente desactivando el software de comunicación,pulsando o cerrando la pestaña.
Cómo utilizar las llamadas de datos y de Fax

Cómo utilizar las llamadas de datos y de Fax
Hacer una llamada de Voz & Fax En este modo, usted puede transmitir voz y también fax sin liberar lallamada de voz.
� Enviar llamadas de Voz y Fax
1. Conecte su ordenador al teléfono.
2. Seleccione Modo Voz y Fax. El modo voz y fax le permite conmutarintroduzca el modo de voz al modo de fax durante la llamada.
3. Si en el teléfono aparece en pantalla Seleccionado, entonces estálisto para la transmisión.
4. Teclee o recupere el número de teléfono deseado y pulse .
5. Después de la transmisión de voz, usted puede iniciar unatransmisión de fax.
6. Después de la transmisión del fax, usted puede terminar la llamadasencillamente desactivando el software de comunicación, pulsando
o cerrando la pestaña.
� Recibir llamadas de voz y de fax
1. Conecte su ordenador al teléfono.
2. Después de la transmisión de voz, usted puede contestar la llamadade fax, iniciando el programa de software (si no contestaautomáticamente).
86
Nota
• Este modo es una característica de la red. Si la red no soporta estemodo, usted no puede usar la llamada de voz y fax.
Funciones adicionales

La nota de voz hace posible grabar hasta 3 mensajes de voz y cada unopuede durar hasta 30 segundos. Esto es práctico, cuando usted no tienelápiz y papel a mano, para tomar direcciones o un mensaje.
Notas de voz 1. Para usar esta función, pulse [Tecla de grabación] durante un cierto
tiempo durante una llamada o en el modo de espera.
2. Se inicia la grabación y en la pantalla aparecerá el mensaje Grabando yel tiempo de grabación
3. Si usted quiere terminar de grabar, pulse brevemente [Tecla deGrabación].
Menú de la nota de voz El teléfono muestra la información sobre la nota de voz, que incluye eltiempo de grabación y la fecha, pulsando [Tecla de Grabación] por untiempo breve. Una vez que haya seleccionado la nota de voz, utilizando
y , pulse [Opción] y podrá ver este menú.
� Reproducir [Menú de nota de voz 1]
Usted puede reproducir la nota de voz seleccionada en este menú.También puede escuchar su nota de voz a a través del altavoz de laparte trasera del teléfono.
� Borrar [Menú de nota de voz 2]
Usted puede borrar la nota de voz seleccionada.
� Borrar todas [Menú de nota de voz 3]
Su teléfono borrará todas las notas de voz grabadas.
87
Notas de voz Funciones adicionales

88
Cuidado y mantenimiento
Al usar esta unidad se deberán cumplir siempre las precaucionesbásicas de seguridad, indicadas a continuación.
• No toque el cargador con las manos mojadas. • No desmonte esta unidad (llévela a un servicio técnico cualificado si
necesitara trabajos de reparación).• Manténgase alejado de aparatos eléctricos como son televisores,
radios u ordenadores personales. • La unidad deberá mantenerse alejada de fuentes de calor como son
radiadores u hornillos.• No lo deje caer. • No someta esta unidad a vibraciones mecánicas o golpes. • La carcasa del teléfono puede dañarse si se cubre con un envoltorio de
vinilo u otro material.• Use un trapo seco para limpiar la parte exterior de la unidad (no use
disolventes como benceno o alcohol).• No someta esta unidad a excesivo humo o polvo.
� Cuidado de la batería
• Usted no necesita descargar la batería completamente, antes derecargarla. Al contrario que otros sistemas de batería, no hay efectomemoria que pudiera comprometer las prestaciones de la batería.
• Utilice sólo baterías y cargadores LG. Los cargadores LG estándiseñados para maximizar la vida de la batería.
• No desmonte o ponga en cortocircuito la batería.• Mantenga limpios los contactos metálicos de la batería. • Sustituya la batería, cuando ya no trabaja de forma aceptable. La
batería puede ser recargado cientos de veces, antes de necesitarser repuesto.
• Recargue la batería, si no se ha usado durante un largo tiempo, paramaximizar sus posibilidades de utilización.
• No exponga el cargador de la batería a luz solar directa ni lo use conalta humedad, como por ejemplo en el baño.
• No deje la batería en lugares calientes o fríos, esto podría deteriorarel trabajo de la batería.

89
Datos técnicos
En generalNombre del producto : LG-600
Sistema : GSM 900/DCS 1800
Tarjeta SIM : Tarjeta plug- in pequeña, tipo 3 V o 5 V.
Dimensiones Tamaño: 80 x 44 x 25 mm
Peso con batería estándar: 90.4 g
Temperaturas de entorno Máximo: +55 ºC
Mínimo: -10 ºC

Nombres

GSM PhoneUSER'S MANUAL
MODEL : LG - 600
ENGLISH
Please read this manual carefully beforeoperating your set. Retain it for future reference.


3
LG-600 GSM Phone
LG-600 has a polished style which providesusers’ a better feel and convenience.

4
For Your Safety
All radio transmitters carry risks of interference with electronics in closeproximity.
GSM Phones must be switched off at all times in anaircraft.
Do not activate near petrol stations, fuel depots,chemical plants or blasting operations.
Avoid use in hospitals : medical electronics, e.g.pacemakers and hearing aids can be affected.
Minor interference may affect TVs, radios, PCs, etc.
Do not hold the phone in your hand while driving.
Do not dismantle phone or battery.
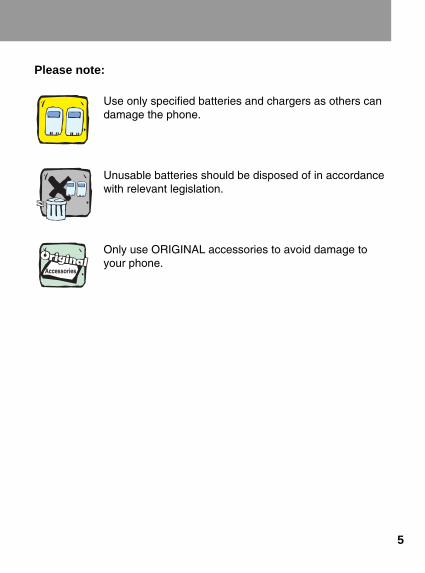
5
Please note:
Use only specified batteries and chargers as others candamage the phone.
Unusable batteries should be disposed of in accordancewith relevant legislation.
Only use ORIGINAL accessories to avoid damage toyour phone.

6
Overview
Accessories .......................................................................... 10Part of the Phone ................................................................ 11• Front of the Phone ............................................................ 11• Rear of the Phone ............................................................. 12
Key Description ................................................................... 13• Side of the Phone ............................................................. 14• Alphanumeric Keys ........................................................... 15
Display Information
Display Information ............................................................. 16• On-Screen Icons ............................................................... 16
Getting Started
Installation ........................................................................... 18• Installing the SIM Card ...................................................... 18• Installing the Battery ......................................................... 19• Charging the Battery ......................................................... 20• Disconnecting the Charger ................................................20
Powering On Sequence ...................................................... 21Access Codes ...................................................................... 22• PIN code (4 to 8 digits) ..................................................... 22• PIN2 code (4 to 8 digits) ................................................... 22• PUK1 code (4 to 8 digits) ................................................... 22• PUK2 code (4 to 8 digits) ................................................... 22• Security code (4 to 8 digits) ............................................... 22
Write and Read Messages .................................................. 23• Write message ................................................................... 23• Read message................................................................... 23
eZi Text.................................................................................. 24• How to Use eZi Text .......................................................... 24
Contents

7
Call Functions
Making and Answering Calls ............................................. 27• Making Calls ..................................................................... 27• Answering Calls ................................................................ 28
Recent Numbers .................................................................. 29• Dialed Number ................................................................... 29• Received Number .............................................................. 29• Missed Number.................................................................. 29
Accessing the Menu
Phonebook ........................................................................... 30• Search [Names 1] ............................................................. 30• Search E-Mail [Names 2] .................................................. 31• Add Entry [Names 3] ......................................................... 31• Add E-Mail [Names 4] ....................................................... 32• Groups [Names 5] ............................................................. 33• Speed Dials [Names 6] ..................................................... 35• Delete all [Names 7] .......................................................... 35• Memory [Names 8] ............................................................ 35• Copy [Names 9] ................................................................ 36• Service Dial Number [Names 10] (SIM dependent) .......... 37• Own Number [Names 11] ................................................. 37
MMI Structure ...................................................................... 38
Using the Menu ................................................................... 42
Menu Navigation by scrolling ............................................ 42
Shortcuts into Menus ......................................................... 42
Messages [Menu 1] ............................................................. 43• Write Message [Menu 1-1] ................................................ 43• Outbox [Menu 1-2] ............................................................ 44• Inbox [Menu 1-3] ............................................................... 45

8
• Status Report [Menu 1-4] .................................................. 46• Call Voicemail [Menu 1-5] ................................................. 47• Cell Broadcast [Menu 1-6] ................................................ 47• Memory Status [Menu 1-7] ................................................ 48• Setting [Menu 1-8] ............................................................. 49
Call Option [Menu 2] ........................................................... 50• Call Divert [Menu 2-1] ....................................................... 50• Call Barring [Menu 2-2] ..................................................... 51• Call Waiting [Menu 2-3] ..................................................... 52• Sending Number [Menu 2-4] ............................................. 53• Closed User Group [Menu 2-5] ......................................... 53
Call Charge [Menu 3] - (SIM dependent) ........................... 54• Call Duration [Menu 3-1] ................................................... 54• Call Costs [Menu 3-2] ....................................................... 54• Cost Settings [Menu 3-3] .................................................. 55
Security [Menu 4] ................................................................ 56• PIN Enable [Menu 4-1] ...................................................... 56• Change Codes [Menu 4-2] ................................................ 56• Fixed Dial Number [Menu 4-3] .......................................... 57
Setting [Menu 5] .................................................................. 58• Network Selection [Menu 5-1] ........................................... 58• Phone Setting [Menu 5-2] ................................................. 58• Call Setting [Menu 5-3] ..................................................... 60• Time Setting [Menu 5-4] .................................................... 62• Profiles [Menu 5-5] ............................................................ 63
Accessories [Menu 6] ......................................................... 65• Scheduler [Menu 6-1] ........................................................ 65• World Time [Menu 6-2] ..................................................... 67• Calculator [Menu 6-3] ........................................................ 67• Unit Convert [Menu 6-4] .................................................... 67• Game [Menu 6-5] .............................................................. 68• PC Sync ............................................................................ 68

9
Voice Dial [Menu 7] ............................................................. 69• Training [Menu 7-1] ........................................................... 69• Search [Menu 7-2] ............................................................ 69• Setting [Menu 7-3] ............................................................. 70• Delete all [Menu 7-4] ......................................................... 70
Internet [Menu 8] ................................................................. 71• Home [Menu 8-1] .............................................................. 71• Bookmarks [Menu 8-2] ...................................................... 71• Profiles [Menu 8-3] ............................................................ 72• Empty Cache [Menu 8-4] .................................................. 72
In Internet Menu .................................................................. 73
Additional Functions
How to Send DTMF tones ................................................... 74• Wait Characters ................................................................ 74• Interrogating your Answering Machine(example) ............. 74• During a Call ..................................................................... 74
In-Call Options ..................................................................... 75
How to Use Data and Fax Call ............................................ 79• Making a Data or Fax call ..................................................79
• Making a Voice & Fax call ................................................. 80
Voice Memo ......................................................................... 81• Voice Memo ...................................................................... 81• Voice Memo Menu ............................................................ 81
Care and Maintenance ..................................................... 82
Technical Data ...................................................................... 83• General ............................................................................. 83• Dimensions ....................................................................... 83• Ambient Temperatures ..................................................... 83
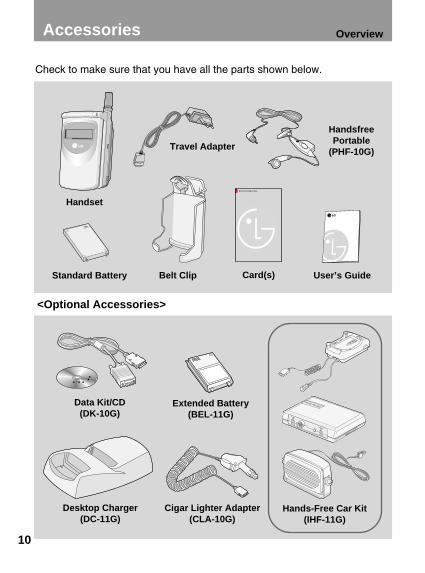
Accessories Overview
10
Check to make sure that you have all the parts shown below.
<Optional Accessories>
Handset
Travel Adapter
Desktop Charger(DC-11G)
Extended Battery(BEL-11G)
Data Kit/CD(DK-10G)
HandsfreePortable
(PHF-10G)
Cigar Lighter Adapter(CLA-10G)
User’s Guide Standard Battery Belt Clip
Hands-Free Car Kit(IHF-11G)
Card(s)

Part of the Phone Overview
11
Front of the Phone
1 Earpiece2 Active Folder3 Display Screen4 Soft Left Key5 Record Key6 Confirm Key7 Send Key8 Up/Down Side Key9 Ear Microphone10 Star Key11 Call Indicator Light12 Soft Right Key13 Navigation Keys14 END/PWR Key15 Numeric Keys 16 Hash Key17 Microphone
12
2
5
9
8
3
4
12
11
3
4
1314
15
16
17
6
10
7
1
1 Front LCD Screen2 Hard Icons3 Call Indicator Light4 Antenna

12
OverviewPart of the Phone
Rear of the Phone
1
56
4
2
3
1 Battery Cover2 Cable Connector/
Battery ChargingConnector/Hands-Free Car kitConnector
3 SIM Card Socket4 Battery Terminals5 Handstrap Hole6 Battery Lock
5 64
3
2
1

13
OverviewKey Description
Keypad DescriptionKey Description
Soft Left Key / Soft Right KeyEach of these keys performs the function indicated by the text on the display immediately above it.
WAP Hotkey You can directly connect to WAP by pressing this key.
Navigation KeysYou can use these keys to scroll through names, phonenumbers, menus or setting options. In a standby mode, if you press up/down navigation keys, you can see the "Dialed Number” “Received Number” and “MissedNumber”.
Send KeyYou can dial a phone number and answer a call. If you press this key without entering a number, yourphone shows the most recently dialled number.
Numeric KeysThese keys are used mainly to dial in standby mode and enter numbers or characters in editing mode. When you press these keys for a long time.• Used to call your voice mail box by .• Used to call for international call by .• Used to call speed dials by ~ .
Star KeyUsed to enter to vibration mode by pressing this key for a long time.
The following shows key components of the phone.
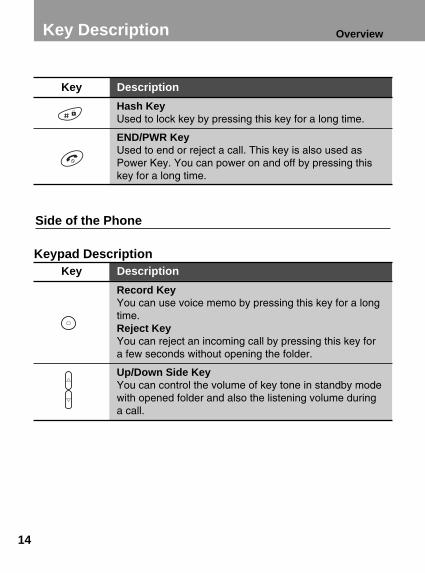
14
Key Description Overview
Key Description
Hash KeyUsed to lock key by pressing this key for a long time.
END/PWR KeyUsed to end or reject a call. This key is also used asPower Key. You can power on and off by pressing this key for a long time.
Side of the Phone
Keypad DescriptionKey Description
Record KeyYou can use voice memo by pressing this key for a longtime.Reject KeyYou can reject an incoming call by pressing this key for a few seconds without opening the folder.
Up/Down Side Key You can control the volume of key tone in standby modewith opened folder and also the listening volume during a call.
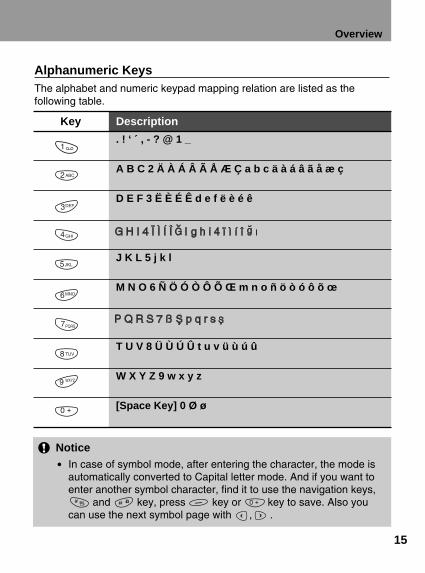
15
Overview
Alphanumeric KeysThe alphabet and numeric keypad mapping relation are listed as thefollowing table.
Key Description
. ! ‘ ´ , - ? @ 1 _
A B C 2 Ä À Á Â Ã Å Æ Ç a b c ä à á â ã å æ ç
D E F 3 Ë È É Ê d e f ë è é ê
J K L 5 j k l
M N O 6 Ñ Ö Ó Ò Ô Õ Œ m n o ñ ö ò ó ô õ œ
T U V 8 Ü Ù Ú Û t u v ü ù ú û
W X Y Z 9 w x y z
[Space Key] 0 Ø ø
Notice• In case of symbol mode, after entering the character, the mode is
automatically converted to Capital letter mode. And if you want toenter another symbol character, find it to use the navigation keys,
and key, press key or key to save. Also youcan use the next symbol page with , .

16
Display Information Display Information
The screen displays several icons the following describe each of them youmay see on the phone.
Signal Strength
Call status
Roaming Vibrator Mode
Voice Message
Alarm
Battery Status
SMS Message
Icon/Indicator Description
Tells you the strength of the network signal.
You are in no service area. / Call is connected.
Shows that you are using a roaming service.
You have received a new text message.
You have received a voice message, depending on yoursubscription.
All audible signals are turned off.
All tones are switched off.
The alarm has been set and is on.
Tells you the status of the battery.
On-Screen Icons

17
Display Information
Icon Description
Messages
Call Option
Call Charge
Security
Setting
Accessories
Voice Dial
Internet
Icon Description
Completed MessageDisplayed when menu navigation is completed.
Information Message
Save Message
Warning MessageDisplayed with error or warning message.
Top Menu Icons
Result Icons

18
Installation Getting Started
1. Unlock the battery cover � and lift it off �.
2. Flip the SIM holder �.
3. Slide the SIM card into the holder �.• Ensure the angled corner is positioned
correctly and the contact is made.
4. Close the SIM card holder, and move theholder lock lever up.
Installing the SIM CardLocate the SIM card socket in the back of the phone. Follow the stepsbelow to install the SIM card.
1

19
Getting Started
Installing the Battery2
1. Place the top end of the battery on thephone. (See the picture left for purposes ofillustration.)
2. Push the battery in until you hear a“CLICK” sound.
Notice
• Before installing SIM card, please make sure that the phone isswitched off and the battery is removed.
• The metal contact of the SIM card can be easily damaged byscratches. Pay special attention to the SIM card when you handleand install. Follow the instructions supplied with the SIM card.
3. Close the battery cover.
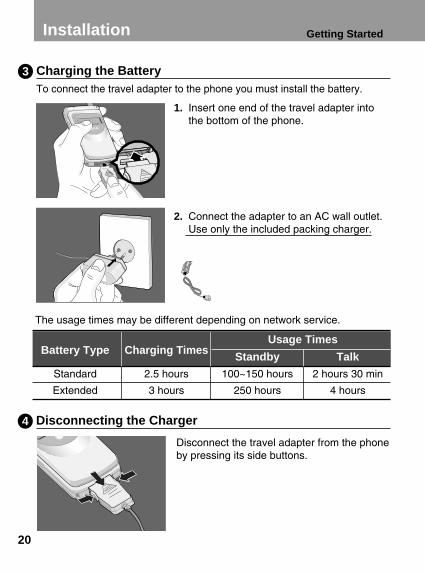
20
Installation Getting Started
Charging the BatteryTo connect the travel adapter to the phone you must install the battery.
3
1. Insert one end of the travel adapter intothe bottom of the phone.
2. Connect the adapter to an AC wall outlet.Use only the included packing charger.
The usage times may be different depending on network service.
Battery Type Charging TimesUsage Times
Standby Talk
Standard 2.5 hours 100~150 hours 2 hours 30 min
Extended 3 hours 250 hours 4 hours
Disconnecting the Charger 4
Disconnect the travel adapter from the phoneby pressing its side buttons.

21
Getting Started
In order to get started with your phone, follow the steps.
1. Press and hold button until you hear atone from your phone to switch on.
2. If PIN code request of your SIM card isenabled, your phone asks you to enter PINcode. Enter the PIN code, then your phoneconnects to a GSM network and thenetwork name appears on the displayshortly.
3. And then your phone goes to standbymode. If the PIN code is disabled, yourphone connects to the network without therequest of entering PIN code.
Notice• Remember to charge the new battery fully after changing it.• Do not remove your battery or SIM card while charging.• “Battery Charging” is displayed on the screen after connecting the
travel adapter. Only if the battery is totally empty, Call IndicatorLight will be on without displaying “Battery Charging”.
• The moving bars of battery icon will stop after charging completely.
Powering On Sequence
Note• In case of the battery is not charged properly...
1. After switching On/Off Power key, please try to recharge it.2. In case the battery is attached, please detach it from the phone.
Then place it back to recharge it again.

22
Access Codes Getting Started
You can use the access codes described in this section to avoidunauthorised use of your phone. PIN / PIN2 codes and Security code canbe changed by using [Menu 4-2]. See the following section.
PIN code (4 to 8 digits)The PIN (Personal Identification Number) code protects your SIM cardagainst unauthorized use. The PIN code is usually supplied with the SIMcard. When the PIN code request is enabled [Menu 4-1-1], the code isasked each time you try to change PIN code or enable/disable PIN coderequest, or your phone is switched on. If you change the PIN code, mark anote of it but keep separate from the phone.
PIN2 code (4 to 8 digits)The PIN2 code, supplied with some SIM cards, is required to access somefunctions such as Advice of call charge, Fixed Dial number. Thesefunctions are only available if supported by your SIM card.
PUK1 code (4 to 8 digits)The PUK(Personal Unblocking Key) code is required to change a blockedPIN code. The PUK code may be supplied with the SIM card. If not, contactyour local service provider for the code. If you lose the code, also contactyour service provider.
PUK2 code (4 to 8 digits)The PUK2 code, supplied with some SIM cards, is required to change ablocked PIN2 code. If you lose the code, also contact your service provider.
Security code (4 to 8 digits)The security code protects the unauthorized use of your phone. It is usuallysupplied with the phone. This code is required to delete all phonebook entries.
4-2
O K Back
PIN EnableChange CodesFixed Dial No.
4-2-1
O K Back
PINPIN2Security Code

23
Getting StartedWrite and Read Messages
Write MessageIf you want to write the short message, you will follow the next procedure.
1. Press [Menu].
2. Select Messages in main menu by pressing[OK]. And then If you want to write a new
message, select Write Message in the menu. If you want to modify the previous message,select Outbox in the menu, then you can editthe message by using eZi text editor or normaleditor. If you want to write a reply message,select Inbox in the menu.
Read MessageIf you want to read the previous stored short message received before, youwill follow the next steps.
1. Press [Menu].2. Then you can see the top menu. And select Messages by pressing
[OK].
3. When Messages menu is displayed, scroll to Inbox by using andand press [OK].
4. Once you enter this menu, you can see the last received messages.Scroll to the desired message by using , . And if you want to exit Inbox menu, press [Back]. While readingmessage, press [Opt] to access the available options. You can seethe explanation of Option in [Menu 1-3].
If you want to read the short message just received, you will follow the nextsteps.
1. When received a short message, will be displayed on the screen.
2. Press [OK], then you can read the just received message.
1-1
O K Back
Write MessageOutboxInboxStatus Report

How to Use eZi Text The eZi Text allows the user to type easily and quickly. Simply pressingeach key once for each character, you can get the words you want.Furthermore, the candidate is predicted along with other candidates that fitthe letters typed thus far. So, you don’t need to input entire characters tomake the word.
� How to change mode
This phone supports three kinds of edit mode : eZi mode, Numericmode and Letter mode. To change mode just press key, then youcan select the one among three modes.
� How to use in eZi mode
To input text in eZi mode, simply press eachkey once for each letter. After inputting the character, you can see thatthe candidate is appeared in text box, whichhas a high priority. Also you can choose othercandidates using and .
E.g. If you want to enter “Meet at church after lunch”.
To type “Meet”, the user types the letters on the keys requiring only onekey-hit per letter. The candidate “Meet” is predicted along with othercandidates which fit the letters typed thus far. The user uses the select“Meet”.
The user continues inputting characters in a similar manner for the restof the message. Each candidate only requires a couple of key hits tofind the target word.
Now lets demonstrate the predictive power. The word “lunch” is 5 letterslong. Text input only requires 4 key hits before the word is predicted.
If at any time the user wants to input some punctuation, they press onlykey to input punctuation.
eZi Text
24
Getting Started
eZi
Opt Back
E N
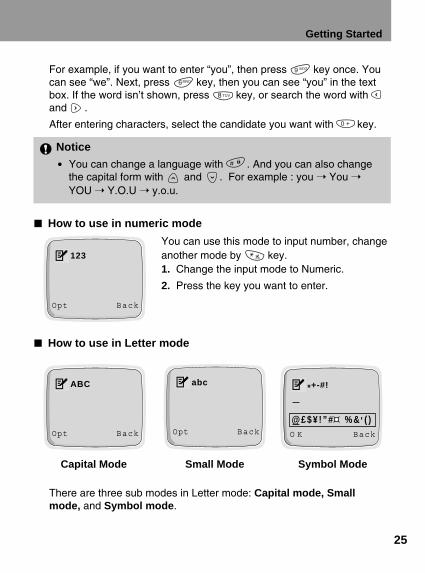
25
Getting Started
For example, if you want to enter “you”, then press key once. Youcan see “we”. Next, press key, then you can see “you” in the textbox. If the word isn’t shown, press key, or search the word withand .
After entering characters, select the candidate you want with key.
� How to use in numeric mode
You can use this mode to input number, changeanother mode by key.1. Change the input mode to Numeric.
2. Press the key you want to enter.
� How to use in Letter mode
There are three sub modes in Letter mode: Capital mode, Smallmode, and Symbol mode.
Notice
• You can change a language with . And you can also changethe capital form with and . For example : you ➝ You ➝YOU ➝ Y.O.U ➝ y.o.u.
123
Opt Back
ABC
Opt Back
abc
Opt Back@£$¥ !”# % & ( )
*+-#!
O K Back
’
Capital Mode Small Mode Symbol Mode

eZi Text
26
Getting Started
� How to use user’s dictionary You can use user’s dictionary in case of writing SMS. The eZi Text hasuser’s dictionary. You can add a few words to user’s dictionary and thenthe word has a high priority.
� How to add word to user’s dictionary 1. In the screen of eZi text mode press [Opt] key.2. Scroll to Dictionary menu, press [OK] key.3. Press [Opt] key after entering word you want.4. Scroll to Add to UPD menu, press [OK] key.5. If Done message is displayed in phone, it is added successfully to
user’s dictionary.6. And you can check the word is added on List Dictionary menu.
� How to erase word from user’s dictionary1. Scroll to List Dictionary menu.2. Press [OK] key after selecting word you want to delete.3. In next screen, press [Opt] key.4. Press [OK] key after selecting Del from UPD.5. If Done message is displayed in phone, then it is deleted
successfully from user’s dictionary.
Notice
• In case of Symbol mode, after entering the character, mode isautomatically converted to CAP letter mode.
Key Description
changes another mode e.g. eZi mode ➝ Numeric mode.
changes Capital mode to Small mode or Small mode toCapital mode.
enters Symbol mode by pressing this key for a long time.
moves next Symbol page in Symbol mode.

27
Making and Answering Calls Call Functions
Making Calls1. Key in phone number including the area code. To edit
a number on the display, press to move cursor tothe left, and press to move cursor to the right.
2. Press to call the number.
3. Press to end the call (or to cancel the call attempt).
� Voice Dial 1. If you select Enable in Setting [7-3], you can call by only voice. 2. When you open the flip, your phone display “Guide Message” and
you will hear “Please say name”. 3. Then you must speak a programmed name which you want to call
within 5 seconds. 4. Your phone will dial the number associated with that programmed
name.
� International Calls1. Press and hold the key for the international prefix. (+character
replaces the international access code.)2. Enter the country code, area code and phone number.3. To call the number, press .
� Making a Call using the Phonebook1. In a standby mode, select Names by pressing [Names] key. 2. When phonebook menu is displayed, you can select Search by
pressing [OK].3. Key in the first letter of the name and press [Search].4. Use and key, reach the desired name.5. Press to dial.
Note
• You have to associate your voice to the desired no. in order to usethis function. Refer to Menu 7 (Voice Dial Menu) for furtherinformation.

28
Making and Answering Calls
� Last Number Redial
1. Press and then you will see the last dialed number.
2. Then press one more if you want to dial to the number again.
3. If you want to dial the latest number by one key stroke, press andhold .
� Calling your Voicemail Service
1. Press until your phone goes to callingmode. Or you can call it by using [Menu 1-5]. If you want to use menu, see [Menu 1-5].(Voicemail Services must be set up with yournetwork operator.)
2. If the phone asks for the voicemail number, keyit in and press [OK]. You can obtain thisnumber from your service provider. Also, youcan edit this number later on.
� Making Call by Speed Dials
See the Section Phonebook - Speed Dials.
Answering Calls
1. The way to answer an incoming call isdependent on setting of [Menu 5-3-1].
2. If you select On in Any Key Answer [Menu 5-3-1], you can answer an incoming call by pressingany key except . If you select Off, you cando it by opening the folder. If folder is alreadyopened, you can also answer the call bypressing .
3. Press or close folder to end the call.
� Answering call during use of Ear-mike (Handsfree Portable):
Press the button on ear-mike for a few seconds to receive an incomingcall while ear-mike is connected to the phone.
1-5
O K Back
OutboxInboxStatus ReportCall VoicemailCell Broadcast
5-3-1
O K Back
Any Key AnswerAuto RedialCall ModeAuto Answer
Call Functions

29
Recent Numbers Call Functions
In a standby mode, when you press or , these menu items below willbe displayed. Dialed Number, Received Number and Missed Number canbe saved in a Phonebook.
Dialed NumberShows recently dialed phone numbers that were not answered. Afterlocating a phone number, you can make a call or erase the phone number.
Received NumberShows recently received phone numbers up to 10. After locating a phonenumber you can make a call(if the network provides the service) or erasethe phone number.
Missed NumberShows recently missed incoming phone numbers up to 10. Those numbersthat were called but were not answered. After locating a phone number,you can make a call or erase the phone number.
O K Back
Dialed No.Received No.Missed No.

Names Description
1 Search Allows you to search for a specific name.2 Search E-Mail Allows you to search for E-Mail address by name.3 Add Entry Allows you to add new names and numbers.4 Add E-Mail Allows you to add new names and E-mail address.5 Groups Allows you to show group list.6 Speed Dials Allows you to assign up to 8(2-9) one- touch dial
allocations.7 Delete all Allows you to erase all the data in either your
phonebook or the SIM card by selecting the memory.8 Memory Allows you to select the preferred memory of
Phone/SIM card or to view the memory status.9 Copy Allows you to copy entries from your Phone memory
to SIM card or from SIM card to Phone memory.10 SDN Allows you to show the Service Dial Number entries.11 Own Number Allows you to enter and show your own numbers
Names Description
30
Accessing the MenuPhonebook
The phonebook has several menus from whichyou can choose. Press [Names] in a standbymode and then scroll to the desired item.
Search [Names 1] (Calling from phonebook)
1. Open the phonebook first by pressing[Names] in a standby mode.
2. Select Search by pressing [OK] key.
3. Write the first letter or all character of requiredname and press [Search] then the name(s)will be displayed on the screen.
1
O K Back
SearchSearch E-mailAdd EntryAdd E-mail

31
Accessing the Menu
4. Scroll to highlight required name.
5. Press [OK] to display the name and phone number.
6. If you want to call, press .
Search E-Mail [Names 2] 1. Open the phonebook first by pressing [Names] in a standby mode.
2. Scroll to highlight Search E-Mail, and press [OK] to enter.
3. Write the first letter or all character of required name and press[Search], then the name(s) will be displayed on the window.
4. Scroll to highlight the desired name.
5. Press [OK] to display the E-mail address.
Add Entry [Names 3]You can add name and phone number by using this function. After editing,you can save either to the SIM card or to the Phone memory.
Note
• In this menu, you can edit or delete the number you selected. If youdo not enter the name and press [Search], then all entries will bedisplayed. If you want to find the name “David”, you may enter “D” by using the digit keys then you will see names starting with “D”, and you choose “David” by scrolling up/down to the required name“David”. On the window displayed name and phone number, you can edit or delete them by pressing [Opt].
Note
• On the window displayed name and E-mail address, you can edit or delete the name and E-mail address by pressing [Opt].

32
Phonebook Accessing the Menu
Phone memory capacity is 500 entries of personal number, and SIM cardmemory capacity of personal number depends on the service provider. You can also save 20 characters of name in the Phone memory and theSIM card memory each. The number of characters is dependent on SIMfeature.
1. Open the phonebook first by pressing [Names] in a standby mode.
2. Scroll to highlight Add Entry, and press [OK] to enter.
3. Input a name to add.
4. Press [OK], then the window for inputting mumber will be displayed.
5. Edit phone number.
6. Press [OK], then memory selection window will be displayed. In thiswindow, you can store the phone number in, either the SIM card or thePhone.
7. If the memory is available, you can add the entry. However, if thememory is full, then error message will be displayed and the menu willmove to the previous step.
Add E-Mail [Names 4]You can add name and E-Mail address by using this function. After editing,you can save E-mail address only to the phone memory.
You can save up to 30 characters of E-mail name and 50 characters of E-mail address only in a Phone memory.
1. Open the phonebook first by pressing [Names] in a standby mode.
2. Scroll to highlight Add E-Mail, and press [OK] to enter.
3. Input the name using the keypad.
4. Press [OK].
5. If Phone memory is available, then the message for inputting E-mailaddress will be displayed. However, if Phone memory is full, errormessage will be displayed. In order to add new entry, you need todelete old E-mail list first in Search E-mail menu.
6. Edit E-Mail Address.
7. Press [OK] to save.

33
Accessing the Menu
Groups [Names 5]By choosing this function, you can manage Group list, such as Member list,Add, Delete, Rename.If you use Add menu, you can save up to 20 members in each group.
You can save up to 10 groups only in the Phone memory.
1. Open the phone book first by pressing [Names] in a standby mode.
2. Scroll to Groups item then press [OK] to enter this menu.
3. Every Group list will be displayed.
4. If you want to Add Group, select <Empty> and press [Add].
5. Select and input a Group name that you want.
6. After pressing [Opt] for a selected group, submenus below will bedisplayed.
� Member list: This menu item has three submenus: Add New Entry, Add Being Entryand Delete Entry.
1. Select Member list, then press [OK] to enter.
2. Then Member list will be displayed.
3. Select Member, and press [Opt] to enter.
4. Then Add New Entry, Add Being Entry and Delete Entry will showup.• Add New Entry : You can add a new entry in the selected Group
or phonebook.• Add Being Entry : You can add an existing entry by searching from
phone book.• Delete Entry : You can delete a selected entry in a Group.
Notice
• Selecting this item does not mean that you can add new entry inthe Groups. In order to add new entry in the Group, you need tochoose Member list.

34
Phonebook Accessing the Menu
� Delete:
You can delete Group in the Group list.
1. Scroll to highlight Groups, then press [OK] to enter.
2. Scroll to highlight Delete, then press [OK] to enter.
3. Then confirmation message will be displayed.
4. Press [OK] to delete, or press [Back] to cancel.
� Rename:
You can change group name.
1. Scroll to highlight Groups, then press [OK] to enter.
2. Scroll to highlight Rename item, then press [OK] to enter.
3. Then Group Name editing window will be displayed.
4. Press [OK] to rename, and press [Back] to cancel.
Notice
• Even though you delete a Group in the Group list, the entries will remain in memory.

35
Accessing the Menu
Speed Dials [Names 6] You can associate any of the keys to with a Name list entry togive you direct access, with a single long key press in a standby mode.
1. Open the phonebook first by pressing [Names] in a standby mode.
2. Scroll to Speed Dials, then press [OK] to enter this menu.
3. Then Speed Dials list will be displayed.
4. There are three submenus: Add, Change and Delete. If you want toadd Speed Dials number, select <Empty> and press [Add]. Youcan change the Speed Dials number allocation by entering Change anddelete the allocated speed dials number by entering Delete.
Delete all [Names 7] You can delete all stored numbers and names. This function may requireSecurity code.
1. Open the phonebook first by pressing [Names] in a standby mode.
2. Scroll to Delete all, then press [OK] to enter this menu.
3. Then select the memory to erase: SIM card or Phone.
4. Warning message will be displayed to make sure your decision.
5. If you press [OK] then you may be requested to enter Security Code‘0000’.
6. Press [OK] to erase, press [Back] to cancel.
Memory [Names 8] 1. Open the phonebook first by pressing [Names] in a standby mode.
2. Scroll to Memory, then press [OK] to enter this menu.
3. Then menu items below will be displayed.
• Select : This feature allows you to select the memory: SIMcard or Phone.
• Show Status : This feature allows you to check the total memoriesand how many memories are used in yourphonebook.

36
Phonebook Accessing the Menu
Copy [Names 9]You can copy entries from one memory to another. You can copy/moveentries from SIM card memory to Phone memory once at a time or all atonce. And you can copy/move entries from Phone memory to SIM cardmemory once at a time or all at once.
1. Open the phonebook first by pressing [Names] in a standby mode.
2. Scroll to Copy, then press [OK] to enter this menu.
3. Then submenus below will be displayed.
SIM ➡ Phone : You can copy/move the entryfrom SIM Card to Phonememory.
Phone ➡ SIM : You can copy/move the entryfrom Phone memory to SIMCard.
One by One : You can copy/move an entryonce at a time.
Copy All : You can copy/move all entries atonce.
Keep Original : Both original and located entriesare kept in memories.
Erase Original : Original entry is erased whereaslocated entry remains in thememory.
4. Select the entry to copy/move in the phonebook.
5. Press [OK] to copy/move, and press [Back] to cancel.
9-1
O K Back
9-1-1
O K Back
9-1-1-1
O K Back
SIM ➡ PhonePhone ➡ S I M
One by oneCopy All
Keep OriginalErase Original

37
Accessing the Menu
Service Dial Number [Names 10] (SIM dependent)Use this function to access a particular list of services provided by yournetwork operator (if supported by the SIM card).
1. Open the phonebook first by pressing [Names] in a standby mode.
2. Scroll to SDN, then press [OK] to enter.
3. The names of the available services will be shown.
4. Use and to select a service.
5. Press to call the service.
Own Number [Names 11] If you input your phone number, Own Number will show up.
1. Open the phonebook first by pressing [Names] in a standby mode.
2. Scroll to Own Number, then press [OK] to enter this menu.
3. The names of the available own number will be shown, if you input yourname and number.

38
MMI Structure Accessing the Menu
1 Messages
1-1 Write Message1-2 Outbox1-3 Inbox1-4 Status Report1-5 Call Voicemail1-6 Cell Broadcast1-6-1 CB Option1-6-1-1 On1-6-1-2 Off1-6-2 Read1-6-3 Topics1-6-3-1 SIM1-6-3-1-1 Add1-6-3-1-2 Delete1-6-3-2 Phone1-6-3-2-1 Add1-6-3-2-2 Select1-6-3-2-3 Delete1-6-4 Languages1-7 Memory Status1-8 Setting1-8-1 Status Report1-8-2 Message Type1-8-3 Expiry Period1-8-4 SMS Centre1-8-5 Voice Centre1-8-6 Alert
2 Call Option
2-1 Call Divert2-1-1 Voice Calls2-1-1-1 Divert All Voice Calls2-1-1-2 Divert if not Reachable2-1-1-3 Divert if Busy2-1-1-4 Divert if No Reply2-1-1-5 Cancel All2-1-2 All Data Call2-1-3 All Fax Call2-1-4 Cancel All2-2 Call Barring2-2-1 All Outgoing Calls2-2-2 Outgoing International calls2-2-3 Outgoing International except Home2-2-4 AII Incoming Calls2-2-5 Incoming Calls When Roaming2-2-6 Cancel All2-2-7 Password Change2-3 Call Waiting2-4 Sending Number2-5 CUG

39
Accessing the Menu
3 Call Charge
3-1 Call Duration3-1-1 Last Call3-1-2 All Calls3-1-3 Incoming Call3-1-4 Outgoing Call3-1-5 Reset3-2 Call Costs3-2-1 Last Call3-2-2 All Calls3-2-3 Reset3-3 Cost Settings3-3-1 Call Cost Limit3-3-2 Set Tariff3-3-3 Sum. After Call
4 Security
4-1 PIN Enable4-2 Change Codes4-2-1 PIN4-2-2 PIN24-2-3 Security Code4-3 Fixed Dial No.
5 Setting
5-1 Network Selection5-1-1 Automatic5-1-2 Manual5-2 Phone Setting5-2-1 Alert5-2-2 Backlight5-2-3 Key Tone Volume5-2-4 Ring Volume5-2-5 LCD Contrast5-2-6 Ring Pattern5-2-7 Language5-2-8 Welcome Display5-2-9 Standby Display5-3 Call Setting5-3-1 Any Key Answer5-3-2 Auto Redial5-3-3 Call Mode5-3-4 Auto Answer5-4 Time Setting5-4-1 Clock5-4-1-1 Set Time

40
MMI Structure Accessing the Menu
5-4-1-2 Set Time Format5-4-2 Date5-4-2-1 Set Date5-4-2-2 Set Date Format5-4-3 Alarm5-4-3-1 Set Alarm5-4-3-2 Cancel Alarm5-4-3-3 Power Off Alarm5-5 Profiles
6 Accessories
6-1 Scheduler6-1-1 View day6-1-1-1 Delete6-1-1-2 Edit6-1-1-3 Send Note6-1-2 Make6-1-2-1 Schedule6-1-2-2 Call6-1-2-3 Memo6-1-2-4 Anniversary6-1-3 Delete6-1-3-1 Of Chosen Day6-1-3-2 One by One6-1-3-3 All At Once6-1-4 View All6-2 World Time6-3 Calculator6-4 Unit Convert6-4-1 Length6-4-2 Weight6-4-3 Volumes6-4-4 Surface6-5 Game6-5-1 Corsair 6-5-2 Crazy Race6-5-3 Diamond King6-5-4 Stone Axe6-5-5 Black Jack

41
Accessing the Menu
7 Voice Dial
7-1 Training7-2 Search7-2-1 Voice Search7-2-1-1 Edit Voice7-2-1-2 Edit Number7-2-1-3 Delete7-2-2 Number Search7-2-2-1 Edit Voice7-2-2-2 Edit Number7-2-2-3 Delete7-3 Setting7-3-1 Enable7-3-2 Disable7-4 Delete all
8 Internet
8-1 Home8-2 Bookmarks8-2-1 Go to8-2-2 Edit8-2-3 Erase8-2-4 Add Bookmark8-3 Profiles8-4 Empty cache
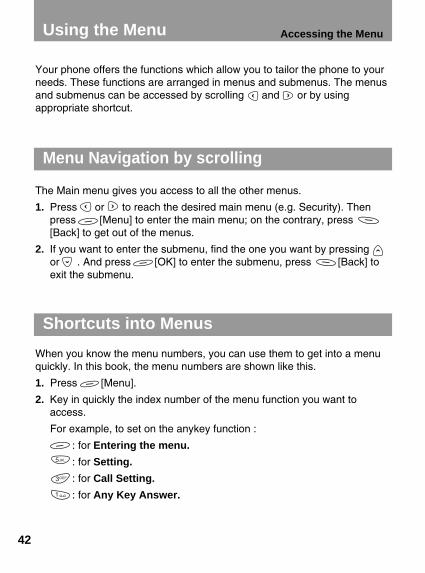
42
Your phone offers the functions which allow you to tailor the phone to yourneeds. These functions are arranged in menus and submenus. The menusand submenus can be accessed by scrolling and or by usingappropriate shortcut.
The Main menu gives you access to all the other menus.
1. Press or to reach the desired main menu (e.g. Security). Thenpress [Menu] to enter the main menu; on the contrary, press[Back] to get out of the menus.
2. If you want to enter the submenu, find the one you want by pressingor . And press [OK] to enter the submenu, press [Back] toexit the submenu.
When you know the menu numbers, you can use them to get into a menuquickly. In this book, the menu numbers are shown like this.
1. Press [Menu].
2. Key in quickly the index number of the menu function you want toaccess.
For example, to set on the anykey function :
: for Entering the menu.
: for Setting.
: for Call Setting.
: for Any Key Answer.
Menu Navigation by scrolling
Shortcuts into Menus
Accessing the MenuUsing the Menu

43
Messages [Menu 1] Accessing the Menu
This menu in your phone includes functions related to text message, voicemessage, cell broadcast message, as well as setting for message.
Write Message [Menu 1-1]With the Write Message menu, you can write and edit text message up to160 characters. When you have finished writing your message, press[Opt]. Then following menu will be displayed.
� Send : Sends the edited message. 1. Once you enter this menu, your phone asks you to enter the number
that you want to send it to. 2. After sending it, your phone asks whether you will store the edited
message. 3. Press [OK] if you want to store it in Outbox and press [Back]
if you don’t want to.
� Store : Stores the message in Outbox. 1. Your phone asks whether you will store the edited message or not. 2. Press [OK] if you want to store it in Outbox and press [Back]
if you don’t want to.
� Edit eZi Mode : If you select this, you can write a message by eZitext input method.
� Edit LTR Mode : If you select this, you can write a message in lettermode.
� Edit Num Mode : If you select this, you can write a message innumeric mode.
1
M e s s a g e sO K Back

44
Messages [Menu 1] Accessing the Menu
� Dictionary : In this option, you can add or delete a word to user’sdictionary.
1. Press [Opt] key after entering word you want, then you can seethe following menu.Add to UPDDel from UPD
2. Select Add to UPD if you want to add the word entered before in theuser’s dictionary of current selected eZi language. This word will besearched by the eZi when you edit in eZi mode.
3. Select Del from UPD, if you want to delete word entered before inthe user’s dictionary or current selected eZi language.
The added word will be searched by the eZi when you edit in eZi mode.
� List Dictionary : If you select this, you can see additional words inuser dictionary of current selected eZi language.Select a word which you want to edit or delete, andyou can select to add or delete new edited word inthe following the menu.
Outbox [Menu 1-2]When you enter this menu, you can see the stored messages. Scroll to thedesired message by using , and you can see upper or lower pageusing , . And if you want to exit Outbox menu, press [Back].
If you want to edit the message, press [Edit] and you can edit themessage selected. When you have finished editing the message and pressthe [Opt], you can show the next menu: Send, Save, Delete, Delete all.
� Send:
You can send the selected message. The sequence is identical withSend option in Write message.
� Save:
You can save the selected message. The sequence is identical withSave option in Write message.

45
� Delete:
The message is deleted.
� Delete all:
All messages in Outbox will be deleted. In this menu, your phone willask you if you really want to delete all messages for safety. Then press
[OK] to remove all messages, and press [Back] if you don’twant to.
Inbox [Menu 1-3]When a text message is received, your phone shows and stores it inthe incoming message list. It shows the symbol until you read the message.Once you enter this menu, you can see the last received message. Scrollto the desired message by using , and see upper or lower page byusing , . If you want to exit Inbox menu, press [Back]. Whilereading message, press [Opt] to access the available options.
� Delete:
The message is deleted.
� Reply:
You can reply to the sender by message. Once you enter in this menu,you can edit the message you want to send and press [OK] to sendit or press [Back] to cancel it.
� Forward:
You can forward the selected message to another phone number. Inthis menu, your phone asks you to enter the number and then sends it.
� Return Call:
You can call back to the sender who sent the message. If you select thisitem, your phone will dial automatically.
Accessing the Menu

Messages [Menu 1]
� Extract Number:
With this function, you will be able to extract numbers displayed on thephone. It extracts only the first numbers displayed in the content.Numbers should be composed of more than 2 and less than 21 figures,but for international numbers, more than 8 and less than 21 figuresincluding ‘+’. There should be no space between the numbers.
� Delete all:
All messages in Inbox will be deleted. Your phone asks you if you reallywant to delete all messages for safety. Then press [OK] to removethem, and press [Back] if you don’t want to.
Status Report [Menu 1-4]You can receive a status report for sending message by setting it. Whenyou receive a text message of status report, your phone stores it in thestatus report message lists.
If the memory for status report is full, the phone will delete the oldest statusreport automatically and store the latest status report.
Once you enter this menu, you can see the previous stored status report.Scroll to the desired message by using , and see upper or lowerpage by using , . And if you want to exit Status Report menu, press
[Back]. While reading message, press [Opt] to access theavailable options.
� Delete
The selected status report message is deleted.
� Delete All
All messages in Status Report will be deleted. Your phone asks you ifyou really want to delete all messages for safety. Then press [OK]to remove all messages, and press [Back] if you don’t want to.
Accessing the Menu
46

47
Call Voicemail [Menu 1-5]In this menu, you can listen to your voice messages. If your phone storesvoice message centre address, it will call automatically, otherwise, it willask to enter address.
Cell Broadcast [Menu 1-6]Cell broadcast messages are text messages broadcasted by the network togroups of GSM phone users. They provide general information such asweather reports, traffic news, and stock market prices. Each type ofinformation has an associated information type number. When you receivebroadcast message, you can read it following sequence :
1. When you receive broadcast message, it is automatically displayed onthe window. If the message is so long that cannot be displayed all in awindow, you can read it by scrolling and .
2. After reading the message, press [OK] to return to the Idle mode.
3. Your phone will store it until a new message of the channel is reached.
4. If you want to read it again, see the [Menu 1-6-2](Read).
� CB Option [Menu 1-6-1]
• On [1-6-1-1] : If you select this menu, your phone will receive CellBroadcast messages.
• Off [1-6-1-2] : If you select this menu, your phone will not receivethe Cell Broadcast messages anymore.
� Read (Dependent on network and subscription) [Menu 1-6-2]
You can read the stored broadcast messages in this menu. In addition,your phone stores only the last message of each channel.
1. If you select this menu, your phone will display the message.
2. You can read it. If it is so long that cannot be displayed in a screen,scroll by pressing and .
3. After reading, press key to read next message, and press[Exit] to exit this menu.
Accessing the Menu

48
Messages [Menu 1]
� Topics (Dependent to network and subscription) [Menu 1-6-3]
Add
If you select this menu, you can add or delete the CB message categoryin SIM memory. If you select the Background menu, you can enter theonly category numbers which consists in a pair of number.If you select Foreground menu, you can see the list of CB messagecategory and delete it by using [Delete].
Select
If you select this menu, you will add, select and delete the CB messagecategory in Phone memory. If you select the Add menu, you will add theCB message category numbers with its nickname. If you select Selectmenu, you can see the list of CB message category numbers with itsnickname and select them by using [OK] to activate or deactivatethem. If you select the Delete menu, you can see the list of CBmessage category numbers with its nickname and an delete them byusing [Delete].
� Languages [Menu 1-6-4]
You can select languages in this menu. Then your phone will receivethe cell broadcast messages written in the selected language.
1. In this menu, you can see several languages. (e.g.- English, French, ...)
2. Scroll to highlight the language you want, select on/off.
3. You can select more than one item through the procedure of 1~2.
Memory Status [Menu 1-7]If the user selects this menu, the phone shows an used memory and totalamount of memory. The total memory is sum of SIM and Phone memory.
Accessing the Menu

49
Setting [Menu 1-8]
� Status Report [Menu 1-8-1]
In this menu, you can set the message service to receive messageswhich will be sent. This report is represented whether the message issent to destination successfully or not.• On : If you select this menu, you will receive the status report of
message.• Off : If you select this menu, you will not receive the status report
of message.
� Message Type [Menu 1-8-2]
:Text, Voice, Fax, X.400, E-mail, ERMESUsually, this menu choice should be set to “Text”. Your messageservice may, however, offer you the facility of converting your textmessage into alternative formats which are suitable for the equipmentthat will be received messages. Contact your service provider for theavailability of this function.
� Expiry Period [Menu 1-8-3]
This network service allows you to set how long your text messages willbe stored at the message centre while attempts are made to deliverthem to you: 1 hour, 6 hours, 12 hours, 1 day, 2 days, 1 Week, Max.
� SMS Centre [Menu 1-8-4]
In this menu, your phone asks for the address of your SMS centre. Thisis needed for sending text messages.
� Voice Centre [Menu 1-8-5]
In this menu, your phone asks to enter the number for your voicemessage. This is needed for listening to your voice messages.
� Alert [Menu 1-8-6]
The user can set how many times and how often the phone alerts theuser to incoming messages.
Accessing the Menu

50
Call Option [Menu 2]
Use the “Call Option” menu to access supplementary services provided bythe GSM network.
Call Divert [Menu 2-1](network and subscription dependent)
The Call Divert service diverts incoming voice calls, fax calls, and/or datacalls to another number.
1. Press [Menu] in a standby mode.
2. Press for direct access or use and to enter Call Option.
3. Select Call Divert menu and press [OK] to enter.
4. Select Voice Calls.
� Voice Calls [Menu 2-1-1]
• Divert All Voice Calls : Divert calls unconditionally.
• Divert if not Reachable : Divert calls when the network cannot reach you.
• Divert if Busy : Divert calls when the phone is busy.
• Divert if No Reply : Divert calls which you do not answer.
• Cancel All : Only cancel voice call divert.
Note
• The Call Divert, Call Barring, and Call Waiting menus each containsan option for displaying the current status of the service. Thisfunction makes a call to the network. This call may be charged toyou. Check with your service provider.
Accessing the Menu
2
Call OptionO K Back<Press once>

51
� All Data Call [Menu 2-1-2] : Divert all data calls unconditionally.
1. Press [Menu] in a standby mode.
2. Press for direct access or use and to enter Call Option.
3. Select Call Divert menu and press [OK] to enter.
4. Select All Data Call.
� All Fax Call [Menu 2-1-3] : Divert all fax calls unconditionally.
1. Press [Menu] in a standby mode.
2. Press for direct access or use and to enter Call Option.
3. Select Call Divert menu and press [OK] to enter.
4. Select All Fax Call.
� Cancel All [Menu 2-1-4] : Cancel all voice, data and fax call divert.
1. Press [Menu] in a standby mode.
2. Press for direct access or use and to enter Call Option.
3. Select Call Divert menu and press [OK] to enter.
4. Select Cancel All.
Call Barring [Menu 2-2](network and subscription dependent)
The Call barring service prevents your phone from making and/or receivingcertain categories of calls. This function requires the call barring passwordobtained from your service provider.
Accessing the Menu

52
Call Option [Menu 2]
1. Press [Menu] in a standby mode.
2. Press for direct access or use and to enter Call Option.
3. Scroll to highlight Call Barring menu and press [OK] to enter.
• All Outgoing Calls : The barring service of all outgoing calls.
• Outgoing International : The barring service of outgoing Calls international calls
• Outgoing International : The barring service of all international except Home outgoing calls,except to your home
network.
• AII Incoming Calls : The barring service of all incoming calls.
• Incoming Calls When : The barring service of all incoming calls Roaming when roaming.
• Cancel All : Only cancels the barring service ofvoice call.
• Password Change : Changes Call Barring password.
Call Waiting [Menu 2-3](network and subscription dependent)
Activate or deactivate the Call Waiting service. If this service is activated,the user can accept a waiting(incoming) call. If this service is deactivated,the user cannot accept a waiting(incoming) call and cannot recognize it.
1. Press [Menu] in a standby mode.
2. Press for direct access or use and to enter Call Option.
3. Scroll to highlight Call Waiting menu and press [OK] to enter.
Accessing the Menu

53
Sending Number [Menu 2-4](network and subscription dependent)
This menu is valid only when the user subscribes temporary mode.
If you Select On, you allow your phone number to be displayed to the otherparty. Also, you can change this mode On/Off you want.
1. Press [Menu] in a standby mode.
2. Press for direct access or use and to enter Call Option.
3. Scroll to highlight Sending Number and press [OK] to enter.
Closed User Group [Menu 2-5](network dependent)
Use this function to restrict usage of the phone to calls with numbers thatbelong to certain user groups. When this function is used, every outgoingcall is associated with a group index. If a group index is specified, it is usedfor all outgoing calls. If no group index is specified, the network will use thepreferential index (a specific index that is stored in the network).
1. Press [Menu] in a standby mode.
2. Press for direct access or use and to enter Call Option.
3. Scroll to highlight CUG and press [OK] to enter.
Accessing the Menu

54
Call Charge [Menu 3] - (SIM dependent)
Call Duration [Menu 3-1]This function allows you to view the duration of your Last Call, All Calls,Incoming Call and Outgoing Call in hours, minutes and seconds. You canalso clear the call timers.
1. Press [Menu] in a standby mode.
2. Press for direct access or use and to enter Call Charge.
3. Select Call Duration and press [OK] to enter.
4. This menu has 5 submenus. You can choose the item that you want tosee.
Call Costs [Menu 3-2]This network service allows you to check the costs of your last call or allcalls and clear the counters. To clear the counters you need the PIN2 code.The Costs are shown for each SIM card independently in terms of the unitset within [Menu 3-3-2].
1. Press [Menu] in a standby mode.
2. Press for direct access or use and to enter Call Charge.
3. Scroll to highlight Call Costs and press [OK] to enter.
4. This menu has 3 Submenus. Select the item that you want to.
Accessing the Menu
Note
• The actual cost invoiced for calls by your service provider may varydepending upon network features, rounding-off for billing, taxes, etc.
3
Call ChargeO K Back
<Press twice>

55
Accessing the Menu
Cost Settings [Menu 3-3](SIM dependent)
� Call Cost Limit [Menu 3-3-1]
This network service allows you to limit the costs of your calls to aselected number of charging units. If you have selected On, you can setcost limit in terms of unit and use your phone to a selected number ofcharging units. If you have selected Off, you can use your phonewithout cost limitation. When all units have been used, no calls can bemade except emergency calls. To set a call cost limit, you need the PIN2 code.
1. Press [Menu] in a standby mode.
2. Press for direct access or use and to enter Call Charge.
3. Scroll to highlight Cost Settings and press [OK] to enter.
4. Select Call Cost Limit to enter.
� Set Tariff [Menu 3-3-2]
You can set currency name and unit price. Contact your serviceprovider to set the chargeable unit prices. To select the currency or unitin this menu, you will need the PIN2 code.
1. Press [Menu] in a standby mode.
2. Press for direct access or use and to enter Call Charge.
3. Scroll to highlight Cost Settings and press [OK] to enter.
4. Select Set Tariff to enter.
� Sum. After Call [Menu 3-3-3]
You can check the duration and the cost of call during a call or afterending a call if you set On.
1. Press [Menu] in a standby mode.
2. Press for direct access or use to enter Call Charge.
3. Scroll to highlight Cost Settings and press OK to enter.
4. Select Sum After Call.

56
Security [Menu 4]
PIN Enable [Menu 4-1]Within this menu, you can set the phone to ask for the PIN code of yourSIM card when the phone is switched on. To use this function, you will berequested to enter the PIN code.
1. Enter this menu by selecting PIN Enable. Then your phone requests toenter PIN code if PIN request is enabled.
2. Key in your PIN code.
3. Press [OK] to verify entered PIN code, and press [Back] toerase a character you entered.
4. Then following menu will be displayed.• Enable : Enable PIN code request. • Disable : Disable PIN code request.
Change Codes [Menu 4-2]This menu provides you with the function of changing access codes : PIN,PIN2 code, and Security code ‘0000’.
1. Enter this menu by selecting Change Codes.
2. And select PIN, PIN2, or Security Code.
3. Input your original PIN codes and press [OK].
4. Your phone asks you to enter the PIN/PIN2 code or Security Codewhich would replace ones and press [OK]. Then phone requeststhe new PIN codes or Security Code again.
5. If you key in correct original PIN/PIN2 code or Security Code and makecorrect confirmation for new ones, they will be changed.
Accessing the Menu
4
SecurityO K Back
<Press three times>

57
Accessing the Menu
Fixed Dial Number [Menu 4-3]You can restrict your outgoing calls to selected phone numbers, if thisfunction is supported by your SIM card. These numbers are protected byyour PIN2.
1. Enter this menu by selecting Fixed Dial No. Your phone will request thePIN2 code.
2. Key in your original PIN2 code and press [OK]. If you key in PIN2code is correct, following menu will be displayed.
• Enable : Providing the function for you of restricting youroutgoing calls to selected phone numbers, if it issupported by your SIM card.
• Disable : No restriction on outgoing calls.
• Number : Allows to add, to edit and to delete the Fixed DialNumber.
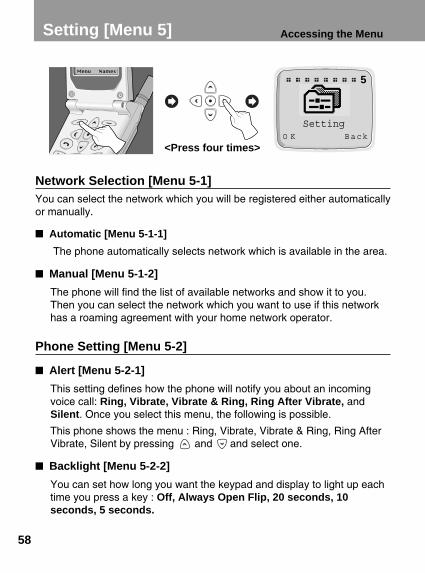
58
Safety Information MENU DESCRIPTION
Network Selection [Menu 5-1]You can select the network which you will be registered either automaticallyor manually.
� Automatic [Menu 5-1-1]
The phone automatically selects network which is available in the area.
� Manual [Menu 5-1-2]
The phone will find the list of available networks and show it to you.Then you can select the network which you want to use if this networkhas a roaming agreement with your home network operator.
Phone Setting [Menu 5-2]
� Alert [Menu 5-2-1]
This setting defines how the phone will notify you about an incomingvoice call: Ring, Vibrate, Vibrate & Ring, Ring After Vibrate, andSilent. Once you select this menu, the following is possible.
This phone shows the menu : Ring, Vibrate, Vibrate & Ring, Ring AfterVibrate, Silent by pressing and and select one.
� Backlight [Menu 5-2-2]
You can set how long you want the keypad and display to light up eachtime you press a key : Off, Always Open Flip, 20 seconds, 10seconds, 5 seconds.
Setting [Menu 5] Accessing the Menu
5
SettingO K Back
<Press four times>
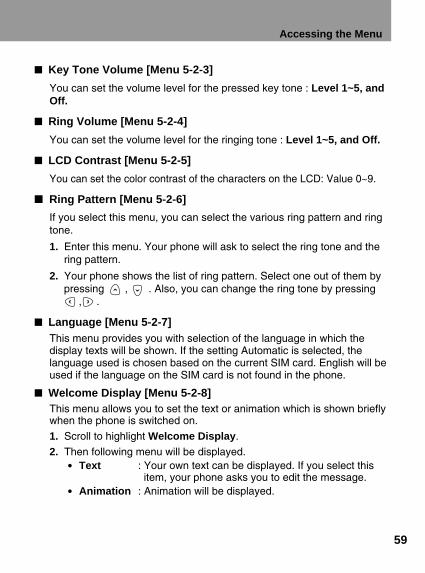
59
� Key Tone Volume [Menu 5-2-3]
You can set the volume level for the pressed key tone : Level 1~5, andOff.
� Ring Volume [Menu 5-2-4]
You can set the volume level for the ringing tone : Level 1~5, and Off.
� LCD Contrast [Menu 5-2-5]
You can set the color contrast of the characters on the LCD: Value 0~9.
� Ring Pattern [Menu 5-2-6]
If you select this menu, you can select the various ring pattern and ringtone.
1. Enter this menu. Your phone will ask to select the ring tone and thering pattern.
2. Your phone shows the list of ring pattern. Select one out of them bypressing , . Also, you can change the ring tone by pressing
, .
� Language [Menu 5-2-7]This menu provides you with selection of the language in which thedisplay texts will be shown. If the setting Automatic is selected, thelanguage used is chosen based on the current SIM card. English will beused if the language on the SIM card is not found in the phone.
� Welcome Display [Menu 5-2-8]This menu allows you to set the text or animation which is shown brieflywhen the phone is switched on.
1. Scroll to highlight Welcome Display.
2. Then following menu will be displayed.• Text : Your own text can be displayed. If you select this
item, your phone asks you to edit the message.• Animation : Animation will be displayed.
Accessing the Menu

60
Setting [Menu 5]
� Standby Display [Menu 5-2-9]
This menu allows you to select the standby window display. You canselect one out of Zodiac (User Own, Monthly), Digital Clock, AnalogClock, Normal, and Text. In text mode, you can edit the text.
Call Setting [Menu 5-3]
� Any Key Answer [Menu 5-3-1]
• On : If you select this, you can answer the phone either byopening the folder or pressing any keys exceptEND/PWR key while folder is opened.
• Off : If you select this, you can answer the phone only bypressing .
� Auto Redial [Menu 5-3-2]
• On : When this function is set on, your phone will make up to10 attempts to connect the call after an unsuccessfulcall attempt.
• Off : When this function is set on, your phone will not makeany attempts to connect the call after an unsuccessfulcall attempt.
Accessing the Menu
61
Accessing the Menu
� Call Mode [Menu 5-3-3]
In this menu, you can use the phone and a connected PC to send andreceive faxes, data, and voice. Once you enter this menu, the followingoptions are displayed.
• Single Mode :To use a data or a fax service, make sure that call mode is Singlemode. In this mode, you can communicate voice, data or fax.
• Voice and Fax :In this mode, you can transmit voice and also fax.
• (SINGLE NUMBER) RX VOICE AND FAX
• (SINGLE NUMBER) RX FAX
• (SINGLE NUMBER) RX DATA
In case of single numbering service, you can use these modes. If youselect mode, you can receive data, fax or fax with voice each mode.
Notice
• Single numbering service means that the number of fax or dataservice is identical with the number of voice service. And, thesemodes depend on network feature.

� Auto Answer [Menu 5-3-4]
This function will be activated only when your phone is attached to theHandsfree kit or Portable Handsfree.
• Off : When the phone rings, you must actively answer it.
• 5 Seconds : After 5 seconds, your phone will answerautomatically.
• 10 Seconds : After 10 seconds, your phone will answerautomatically.
Time Setting [Menu 5-4]
� Clock [Menu 5-4-1]The phone has its own clock. In this menu you can set the time andselect between the 12-hour or 24-hour time formats.
• Set Time : You can set time of your phone in this menu.After setting the time, press [OK] to store it.
• Set Time Format : You can select time format between 12-hours or24-hours.
� Date [Menu 5-4-2]
• Set Date : You can set the date on your phone.(year,month, day) The way to edit the date is identicalto “Clock”
• Set Date Format : You can set the date format in this menu: yyyy/mm/dd or dd/mm/yyyy or mm/dd/yyyy.
Setting [Menu 5]
62
Accessing the Menu

63
Accessing the Menu
� Alarm [Menu 5-4-3]Your phone can be used as an alarm. The setting is made by the samemethod as used in time setting.
• Set Alarm : You can set alarm which your phone will raiseaccording to Hour and Minute.
1. Select Alarm.
2. Set the time your phone will raise the alarm. The way to edit timeis identical to “Clock”.
3. Then your phone raises alarm every day until you will cancel infollowing “Cancel Alarm”.
• Cancel Alarm : You can cancel the alarm which was set.
1. In this menu, you may select the alarm which you will cancel.
2. Then your phone cancels alarm.
• Power Off Alarm : The alarm signal sounds at the time set, even ifthe phone is turned off.
Profiles [Menu 5-5]In this Menu, You can select a group of settings to adjust a variety ofenvironments. (e.g. When you are in outdoor, you can choose the outdoorprofile, Etc) Environments are Normal, Silent, Outdoors, and User Own.
A group of settings are Alert, Key Tone Volume, Ring Volume.
� Normal/Silent/Outdoors
• Activate You can adjust the profile as environments. Alert, Key Tone Volume, and Ring Volume are setsimultaneously.
• Change You can change the value of settings.; Alert, Key Tone Volume, Ring Volume.
64
Setting [Menu 5]
� User Own
• Edit Name You can edit Profile Name.
• Activate You can adjust the profile as your own environment.
• Change You can change the value of settings.
Accessing the Menu

65
Accessing the MenuAccessories [Menu 6] Accessing the Menu
Scheduler [Menu 6-1]When you enter this menu, a Calendar will be displayed. On top of thescreen there are sections for date and icons. You can change the day,month and year by using navigation keys and numeric keys. A squarecursor will highlight the selected day. An underscore on a particular datemeans there is an entry for that day. An alarm can be set to remind you ofscheduled events.
� View day
Shows notes set for the chosen day. Use , to browse throughthe note(s). If you set alarm for the note, alarm watch is displayed. Press [Opt] to delete, edit, send note you select.
• Delete : allows you to delete the note.
• Edit : allows you to edit the note.
• Send Note : allows you to send the note as Short Message (SMS).For details see Messages [Menu 1].
6
AccessoriesO K Back
<Press five times>
Note
• Your phone should be switched on to use this function.

Accessories [Menu 6]
� Make
Allows you to write a note. You can choose the following types of note.You can edit a maximum of 40 characters, and make a maximum of 50schedules.
• Schedule : Input the subject time and alarm time and the press[OK].
• Call : Input the phone number(or recall it from the PhoneBook), the time and alarm time and then press[OK].
• Memo : Input the subject and alarm time and then press[OK].
• Anniversary : Input the subject time and alarm time and then press[OK]. You can select a title from the submenu
Birthday, Wedding, Memorial, Etc.
� Delete
Allows you to delete for the selected note(s).
• Of Chosen Day
• One by One
• All At Once
Accessing the Menu
66
Note
• On the selected date, the alarm will sound and the note will bedisplayed.

Accessing the Menu
67
� View All
Shows the notes that are set for all days. Use and to browsethrough the note(s). Pressing [opt] allows to access to the samemenu as in ‘View day’.
World Time [Menu 6-2]This function shows the world map, cities and local time. The Current timeis displayed according to time format(12/24 Hours). Press , to changethe time zone and , to browse city names. Press [Set] to setyour phone time to the local time of the selected city.
Calculator [Menu 6-3]This function supports basic mathematical calculations such as addition,subtraction, multiplication and division.
1. Input the numbers you want to calculate.
2. In order to select the function, use and . The selected operator willbe highlighted with square cursor. Press [Easy Key] to make sureyour choice.
3. When you have finished the calculation, you can choose “=” operator or [Result] key to see the result.
Unit Convert [Menu 6-4]1. Select the menu items that you want to convert.
Length, Weight, Volumes, Surface.
2. Put the numbers to convert by using and and numeric keys.
3. And select the unit which is related to the current value.
4. Finally select the unit which you want to convert current value to.
5. Then required value and unit will be displayed.

68
Game [Menu 6-5]The following games are programmed in the phone.
• Corsair
• Crazy Race
• Diamond King
• Stone Axe
• Black Jack
Accessories [Menu 6] Accessing the Menu
Note
The Control keys are different for each game.
But each game has screens to explain the main control key.
Other common control keys are below.
[Common Key Function]
• [Soft 1 Key] : Pause Game
• [Soft 2 Key] : Continue Game
• [Send Key] : Start Game, Save Score
• [Power Key] : Exit Game
PC Sync
PC Sync is a program for data exchange PC & Phone by data cable.Therefore, if you want to use this function, you have to purchaseaccessory kit. About more detail for using guide refers to PC Sync helpfile on the PC Sync CD.

69
Voice Dial [Menu 7] Accessing the Menu
You can dial a number by speaking to your GSM Phone.
Training [Menu 7-1]You can programme your phone to associate a voice tag with the numberwhich will be entered. Once you select this menu, you should speak a wordwithin 2 seconds, and the phone asks you to speak it again to ensure theaccuracy of voice recognition. After voice recognition has finished, you canenter the associated number.
Search [Menu 7-2]You can use this menu to edit, delete, and ensure what voice exists.
� Voice Search [Menu 7-2-1]
You can find the number you want by voice.
The procedure is similar except the result. The result is another menu.
• Edit voice : You can change a voice tag. It is similar to trainingexcept putting the number.
• Edit number : You can change a number. It will show the numberrelated with the voice tag. After editing it, press[OK].
• Delete : You can delete the voice tag and number.
7
Voice DialO K Back
<Press six times>

70
� Number Search [Menu 7-2-2]
You can find the only numbers recorded by number. You don’t have totype all numbers. It will show the numbers including part for to type in.You can hear the voice and see the number using and . You canhear the voice positioned the number by pressing on the side of thephone. The submenus are same to Voice Search submenu.
Setting [Menu 7-3]
• Enable : You can call by voice if you select this function.
• Disable : You cannot call by voice.
Delete all [Menu 7-4]This menu provides you with the ability of deleting all voice dial numbers.
Voice Dial [Menu 7] Accessing the Menu

71
Internet [Menu 8]
You can surf the Internet and get the latest information. This information ismade available in a special format (WAP) adapted to the display optionsavailable in the phone. Accessing the Internet may be required registrationwith your Service Provider.
Home [Menu 8-1]Return to homepage. The homepage may be the site which is defined inactivated profile by your service provider.
To activate WAP, either press key for a few seconds in Standby modeor press [OK] button in Home menu [Menu 8-1].
Bookmarks [Menu 8-2]When you enter this menu, your personal list of bookmarks will bedisplayed. Also, you can save bookmarks up to 9. Then press [OK] toaccess available option, or press [Back] to exit it.
• Go to : Move to selected bookmarks.
• Edit : Edit the address and title of selectedbookmark.
• Erase : Erase selected bookmarks from the bookmarklist.
• Add Bookmark : Edit the address and title of the site which youwant to add your favourite bookmark list.
Accessing the Menu
<Press seven times>
8
InternetO K Back

72
Profiles [Menu 8-3]Display or enter your own profile settings for the internet connection. Youcan make up to 5 profiles and activate the required option. Scroll to desiredprofile and press [OK] to access available options.
• Activate : Activate the selected profile.
• Setting : Set the profile details.- Profile Name : Edit the Profile Name.- Dial-up Number : Edit the data call number. - Call type : Select the call type.- IP Address : Edit the IP address of gateway which you want to
connect to.- IP Port : Edit the IP port number of gateway which you
want to connect to.- Log-in name : Edit the login name of the homepage defined in
selected profile.- Password : Edit the password of the homepage defined in this
profile.- Homepage : You can edit the address of site. This address will
be connected when you select the menu Internet -Home or start Internet through .
Empty Cache [Menu 8-4]Your phone will remove the contents of Cache memory.
Safety InformationInternet [Menu 8] Accessing the Menu

73
In Internet Menu Accessing the Menu
� Home
Refers to [Menu 8-1].
� Bookmarks
Refers to [Menu 8-2].
� Save as Bookmark
You can add the site which your phone is connecting to bookmark list inthis menu.
� Go to URL
Moves to the site you require. In this menu, you can edit the siteaddress.
� Show URL
In this menu, it will show you the URL of current connected page.
� Reload
Reloads current connected page.
� Empty Cache
Refers to [Menu 8-4].
� Exit
Disconnects and exits WAP.
74
Some telephone services(such as telephone answering machine andpager) require your telephone to transmit DTMF tones(Dual Tone Multi-Frequency), also known as “touch tones”. These are used to communicatepasswords, call back numbers, and so on.
Wait CharactersTo obtain a wait character, press and hold . The display shows P for a wait. The phone always interprets the P as a wait character. When you dial a number containing a wait character, your phone dials thefirst part(the phone number) and then waits for the call to be connectedbefore sending the rest of the digits as DTMF tones.
Interrogating your Answering Machine(example)For example: To hear all messages on your answering machine(password 5452) at phone number 12345678, you can call:12345678P5452.The phone dials 12345678 and waits for the call toconnect. When connected, the phone transmits 5452(the password).
During a CallWhen you need to send DTMF tone, just press the numbers, then DTMFtone will be sent.
How to Send DTMF tones Additional Functions

75
In-Call Options
The phone provides a number of control functions that you can use duringa call. You cannot utilize all of these functions at all times. Most of the In-Call options are network services. By pressing [Opt] during a call, thefollowing In-Call options may be available:
� Hold Call (network dependent)
During a call, you can put an active call on hold.
1. During a call, press [OK] to enter In-Call Option.
2. Select Hold Call to put an active call on hold.
� Retrieve Call (network dependent)
If you have a call already on hold, you can retrieve that call.
1. During a call, press [OK] to enter In-Call Option.
2. Select Retrieve Call to retrieve a held call.
� Swap Call (network dependent)
When there are an active call and a held call, this menu places theactive call on hold and the Held call on active. You may swap back andforth required.
1. During a call, press [OK] to enter “In-Call Option”.
2. Select Swap Call to swap an active call and a held call.
� Conference Call(network dependent)
This feature allows up to six persons to take part in a conference call(network dependent.).
1. While in a call, dial phone number and press . The first call is puton hold.
2. To join the first conference participant in the call, press [Opt],choose conference call, select join and press [OK].
Additional Functions

76
Additional Functions
3. To add a new participant to the call, repeat steps 1 and 2.
4. To drop a single participant from the call, press [Opt], chooseconference call, select private and press [OK]. Select theparticipant that you want to drop and press .
5. To end the conference call, close the flip.
� Disconnect
You can disconnect the call that is already on hold, currently active andall calls by scrolling up and down the menu items such as Active call,Hold call, and All calls.
• Active call
• Hold call
• All calls
� Mute On
If this function is selected, the other party cannot hear you but you canhear the other party’s voice. When the call is disconnected, the Mute Offwill be activated automatically. Default Setting is Mute Off.
1. During a call, press [Opt] to enter In-Call Option.
2. Select Mute On to mute your phone.
� Mute Off
If this function is selected, the other party can hear you. Default Settingis Mute Off.
� DTMF On
If this function is selected, you can send DTMF tones. Default Setting isDTMF ON. For details, see how to send DTMF.
1. During a call, press [Opt] to enter In-Call Option.
2. Select DTMF On to send DTMF tones.
In-Call Options

77
Additional Functions
� DTMF Off
If this function is selected, you cannot send DTMF tones. Default Settingis DTMF ON.
1. During a call, press [Opt] to enter In-Call Option.
2. Select DTMF Off to prohibit from sending DTMF tones.
� Scratch PAD
You can take a note(phone number) while a call is in a progress byusing this function. After disconnecting the call, the phone number willbe displayed on the screen and you can save it a phonebook andconnect a call by pressing .
1. During a call, press [Opt] to enter In-Call Option.
2. Select Scratch PAD to take a note(phone number).
� Recording
When you need to record your call, press and hold then your call willbe recorded. To stop the recording, press , or just close the flip.To play back your recordings, see the <Voice Memo> section. Fordetails, see <Voice Memo>. During a call, press and hold on the rightside of the phone.
� Message
If you select this function, you can go to the message menu [Menu 1].
For details see <Message> [Menu 1].
1. During a call, press [Opt] to enter In-Call Option.
2. Select Message to send message.
78
In-Call Options Additional Functions
� SIM SERVICE
Your service provider can offer special application through SIM card,such as homebanking, stock market, etc. If you are registered for one ofthese services, the service name will appear at the end of the MainMenu. With the SIM Services menu your phone is future-proof and willsupport additions to your service provider’s service. For furtherinformation contact your service provider.
79
Additional Functions
To be able to data or fax service, you need the communicate software suchas a data or a fax program. Before using these functions, you need toconnect your phone to a computer or make sure that your phone is inconnection with a compatible device.
Making a Data or Fax call To use a data or a fax service, make sure that call mode is “single mode”(Setting ➝ Call Setting ➝ Call Mode ➝ Single Mode). In this mode, youcan communicate voice, data or fax. If you set call mode to be “voice & faxmode” (Setting ➝ Call Setting ➝ Call Mode ➝ Voice & Fax mode), you cantransmit voice and fax without voice call release.
� Sending a data or fax call
1. Connect your computer to the phone.
2. After starting the communicate software, make a call and transmit adata or fax.
3. After the data or fax transmission, you can end the call by just endingof the communicate software, pressing or by closing the flip.
� Receiving a data or fax call
1. Connect your computer to the phone.
2. After starting the communicate software, accept a call and receive adata or fax.
3. After the data or fax reception, you can end the call by just ending ofthe communicate software, pressing or by closing the flip.
How to Use Data and Fax Call

How to Use Data and Fax Call
Making a Voice & Fax call In this mode, you can transmit voice and also fax without voice call release.
� Sending voice and fax calls
1. Connect your computer to the phone.
2. Select Voice and Fax mode. Voice and fax mode allows you toswitch from voice mode to fax mode during call.
3. If Selected message is displayed in phone, it is ready fortransmission.
4. Key in or recall the desired phone number and press .
5. After the voice transmission, you can start a fax transmission.
6. After the fax transmission, you can end the call by just ending of faxsoftware, pressing or by closing the flip.
� Receiving voice and fax calls
1. Connect your computer to the phone.
2. After the voice transmission, you can answer the fax call by startingthe software program (if it does not answer automatically).
80
Note
• This mode is network feature. If the network doesn’t support thismode, you can’t use a voice & fax call.
Additional Functions

The voice memo features you to record up to 3 voice messages and eachone is up to 30 seconds. This is useful when you don’t have a pen andpaper to hand for taking directions or a messages.
Voice Memo1. To use this function, press [Record Key] for a long time during a call
or in a standby mode.
2. Recording is started and display will show the message Recording andthe recording time.
3. If you want to finish recording, press [Record Key] shortly.
Voice Memo MenuThe phone shows voice memo information which includes the recordingtime and date by pressing [Record Key] for a short time. After youselected the memo by using and , press [Opt], you can see thismenu.
� Play [Voice Memo Menu 1]
You can play the selected voice memo in this menu. Also, you can hearyour voice memo through speaker on the rear of the phone.
� Delete [Voice Memo Menu 2]
You can delete the selected voice memo.
� Delete All [Voice Memo Menu 3]
Your phone will delete all recorded voice memos.
81
Voice Memo Additional Functions

82
Care and Maintenance
When using this unit, basic safety precautions as below should bealways followed.
• Do not touch the adapter with wet hands.• Do not disassemble this unit. (Take it to a qualified service technician
when repair work is required.)• Away from electrical appliance such as a TV, radio or personal
computer.• The unit should be situated from heat sources such as radiators or
cookers.• Do not drop.• Do not subject this unit to mechanical vibration or shock.• The coating of the phone may be damaged if covered with wrap or vinyl
wrapper.• Use dry cloth to clean the exterior of the unit. (Do not use solvent such
as benzene, thinner or alcohol.)• Do not subject this unit to excessive smoke or dust.
� Caring for the Battery
• You do not need to completely discharge the battery beforerecharging. Unlike other battery systems, there is no memory effectthat could compromise the battery’s performance.
• Use only LG batteries and chargers. LG chargers are designed tomaximize the battery life.
• Do not disassemble or short-circuit the battery pack.• Keep the metal contacts of the battery pack clean.• Replace the battery when it no longer provides acceptable
performance. The battery pack may be recharged hundreds of timesuntil it needs replacing.
• Recharge the battery if it has not been used for a long time tomaximize usability.
• Do not expose the battery charger to direct sunlight or use it in highhumidity, such as the bathroom.
• Do not leave the battery in hot or cold places, this may deterioratethe battery performance.

83
Technical Data
GeneralProduct Name : LG-600
System : GSM 900/DCS 1800
SIM Card : Small plug-in card, 3V or 5V type
DimensionsSize : 80 X 44 X 25 mm
Weight with Standard battery : 90.4g
Ambient TemperaturesMax : +55°C
Min : -10°C

Memo


Memo

P/NO : MMBB0039601NOVEMBER 2001/EDICIÓN 1
IMPRESO EN COREA