xna resources - xna tutorials, gse tutorials, xna news, game … · 2009-05-24 · a better...
TRANSCRIPT
A Better Animated Sprite
In the Star Defense tutorial series, we created a simple AnimatedSprite class, which worked well for our purposes in that particular game, but it
could be vastly improved upon to be made more useful in general. That will be the subject of this tutorial.
Lets start by looking at what the AnimatedSprite class from Star Defense allowed us to do:
Create a sprite with a looping animation of a developer-determined number of frames on a single line in our sprite sheet
Position the sprite on the screen and move it around
Set timing information for the frames in the sprite
All pretty basic. In the Star Defense series we expanded upon these capabilities by adding more detail to the higher level classes that represented
the player, enemies, bullets, and the like. Often, however, a lot of this work was duplicated between the different higher level classes and could have
been handled by the sprite class itself. While we will do some of that generalization here, we will also be adding some additional features as well,
such as:
Multiple animations defined for a single sprite, playable by setting the animation by name
Sprite movement towards a target point at a specified speed
Sprite "pathing" along a list of points
Automatic sprite rotation based on movement
I also want to credit Nick Gravelyn's Tile Engine video series for the genesis of some of the ideas here as well. The excellent series can be viewed
here : http://www.nickontech.com/archive/#tileengine
Some Graphics
Lets start with the graphic we are going to use, as the layout will be important when we start creating frame animations. Below is a .PNG file I put
together using Ari Feldman's "Spritelib GPL" graphics (great for an artwork-incapable developer like me to get something up and visible quickly). The
SpriteLib GPL information page is here : http://www.flyingyogi.com/fun/spritelib.html
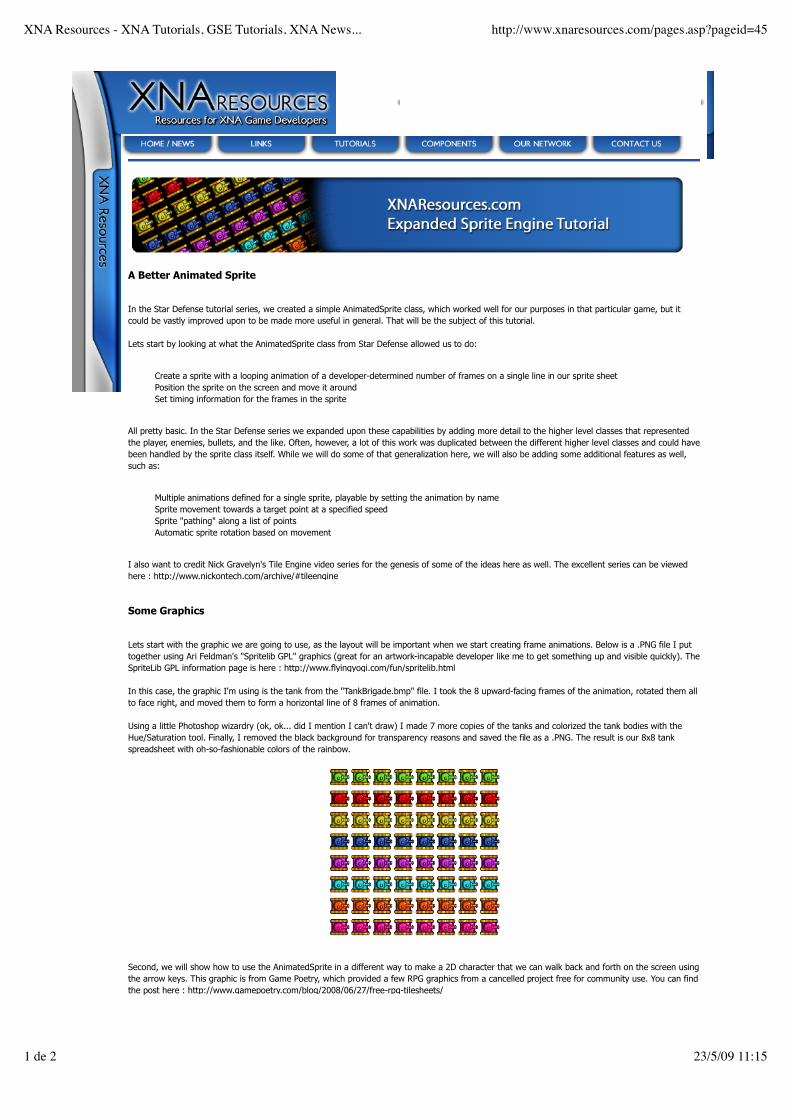
In this case, the graphic I'm using is the tank from the "TankBrigade.bmp" file. I took the 8 upward-facing frames of the animation, rotated them all
to face right, and moved them to form a horizontal line of 8 frames of animation.
Using a little Photoshop wizardry (ok, ok... did I mention I can't draw) I made 7 more copies of the tanks and colorized the tank bodies with the
Hue/Saturation tool. Finally, I removed the black background for transparency reasons and saved the file as a .PNG. The result is our 8x8 tank
spreadsheet with oh-so-fashionable colors of the rainbow.
Second, we will show how to use the AnimatedSprite in a different way to make a 2D character that we can walk back and forth on the screen using
the arrow keys. This graphic is from Game Poetry, which provided a few RPG graphics from a cancelled project free for community use. You can find
the post here : http://www.gamepoetry.com/blog/2008/06/27/free-rpg-tilesheets/
XNA Resources - XNA Tutorials, GSE Tutorials, XNA News... http://www.xnaresources.com/pages.asp?pageid=45
1 de 2 23/5/09 11:15
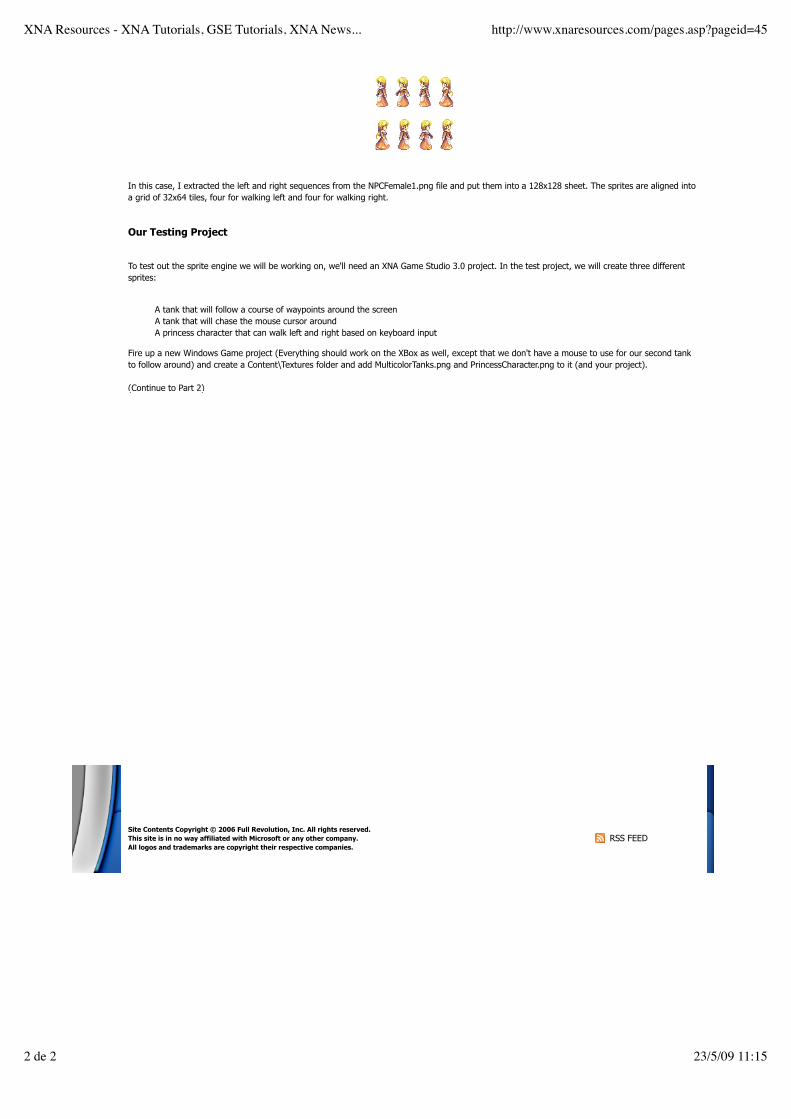
In this case, I extracted the left and right sequences from the NPCFemale1.png file and put them into a 128x128 sheet. The sprites are aligned into
a grid of 32x64 tiles, four for walking left and four for walking right.
Our Testing Project
To test out the sprite engine we will be working on, we'll need an XNA Game Studio 3.0 project. In the test project, we will create three different
sprites:
A tank that will follow a course of waypoints around the screen
A tank that will chase the mouse cursor around
A princess character that can walk left and right based on keyboard input
Fire up a new Windows Game project (Everything should work on the XBox as well, except that we don't have a mouse to use for our second tank
to follow around) and create a Content\Textures folder and add MulticolorTanks.png and PrincessCharacter.png to it (and your project).
(Continue to Part 2)
Site Contents Copyright © 2006 Full Revolution, Inc. All rights reserved.
This site is in no way affiliated with Microsoft or any other company.
All logos and trademarks are copyright their respective companies.
RSS FEED
XNA Resources - XNA Tutorials, GSE Tutorials, XNA News... http://www.xnaresources.com/pages.asp?pageid=45
2 de 2 23/5/09 11:15
A Framework for Animations
In our Star Defense project, we only had a single animation for a sprite. That animation might have contained one frame, or multiple frames, and
we could toggle the automatic playing of frames on and off. For exampke, we used a 4-frame, non animated "animation" for the player's ship, with
each from displaying a different direction/status of the player's starfighter. For our "PowerUps", we used a 23 frame looping animation of a spinning
barrel.
But in all cases, there was a single animation. Playing or not was our only control (other than play speed if it was playing).
In order to move beyond that structure, we need a way to define animations within our sprite sheet that we can then "play" whenever we need
them. In Star Defense, for example, we could have combined the Enemy and Explosion sprite sheets into a single sheet and had a "flying" and an
"exploding" animation defined for them. This would have meant resizing our explosions, so it might not have been practical, but it is an example of
what we could have set up.
We will be keeping the restriction that all animations must be on a single horizontal line. We could have done this differently by defining an array of
rectangles for our FrameAnimation class, but I find it simpler to calculate the locations from a single rectangle instead, so that will be an "exercise
for the reader".
In order to define our animations, we will create a class called FrameAnimation. It is a very simple class that, essentially, hold
a rectangle and a frame counter. Since it will handle it's own updates, we will add a few more things to it, but on the whole it
will be straightforward.
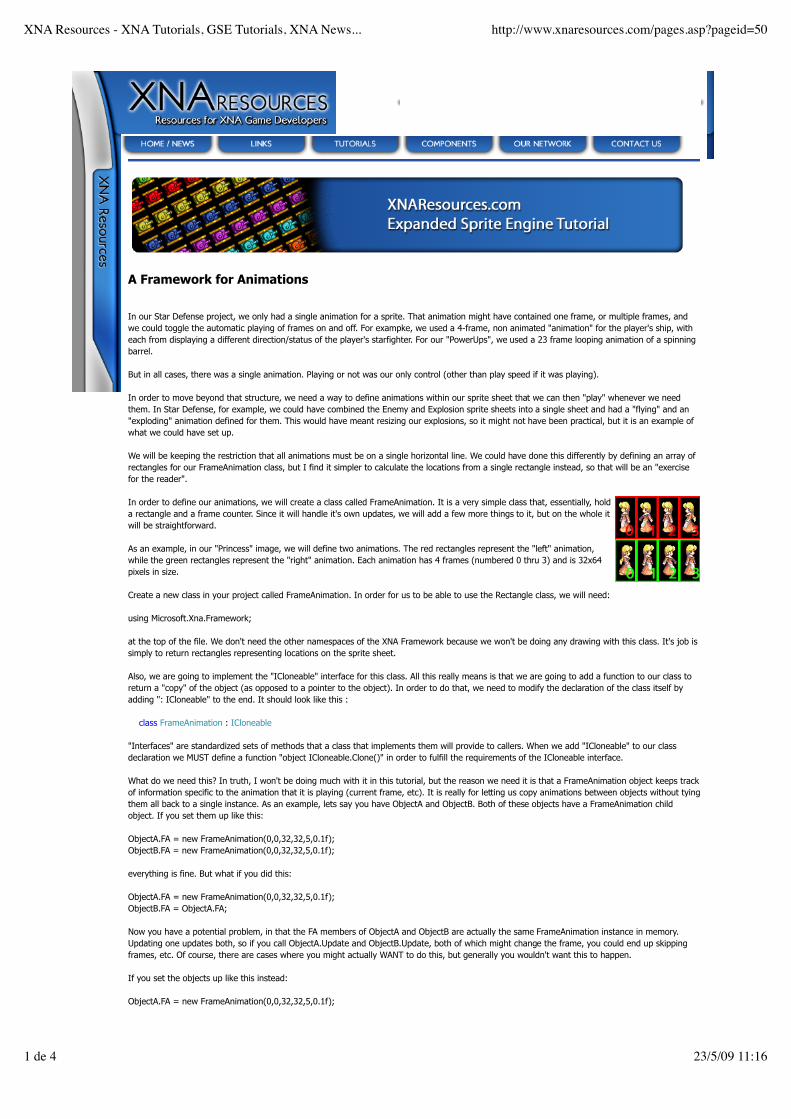
As an example, in our "Princess" image, we will define two animations. The red rectangles represent the "left" animation,
while the green rectangles represent the "right" animation. Each animation has 4 frames (numbered 0 thru 3) and is 32x64
pixels in size.
Create a new class in your project called FrameAnimation. In order for us to be able to use the Rectangle class, we will need:
using Microsoft.Xna.Framework;
at the top of the file. We don't need the other namespaces of the XNA Framework because we won't be doing any drawing with this class. It's job is
simply to return rectangles representing locations on the sprite sheet.
Also, we are going to implement the "ICloneable" interface for this class. All this really means is that we are going to add a function to our class to
return a "copy" of the object (as opposed to a pointer to the object). In order to do that, we need to modify the declaration of the class itself by
adding ": ICloneable" to the end. It should look like this :
class FrameAnimation : ICloneable
"Interfaces" are standardized sets of methods that a class that implements them will provide to callers. When we add "ICloneable" to our class
declaration we MUST define a function "object ICloneable.Clone()" in order to fulfill the requirements of the ICloneable interface.
What do we need this? In truth, I won't be doing much with it in this tutorial, but the reason we need it is that a FrameAnimation object keeps track
of information specific to the animation that it is playing (current frame, etc). It is really for letting us copy animations between objects without tying
them all back to a single instance. As an example, lets say you have ObjectA and ObjectB. Both of these objects have a FrameAnimation child
object. If you set them up like this:
ObjectA.FA = new FrameAnimation(0,0,32,32,5,0.1f);
ObjectB.FA = new FrameAnimation(0,0,32,32,5,0.1f);
everything is fine. But what if you did this:
ObjectA.FA = new FrameAnimation(0,0,32,32,5,0.1f);
ObjectB.FA = ObjectA.FA;
Now you have a potential problem, in that the FA members of ObjectA and ObjectB are actually the same FrameAnimation instance in memory.
Updating one updates both, so if you call ObjectA.Update and ObjectB.Update, both of which might change the frame, you could end up skipping
frames, etc. Of course, there are cases where you might actually WANT to do this, but generally you wouldn't want this to happen.
If you set the objects up like this instead:
ObjectA.FA = new FrameAnimation(0,0,32,32,5,0.1f);
XNA Resources - XNA Tutorials, GSE Tutorials, XNA News... http://www.xnaresources.com/pages.asp?pageid=50
1 de 4 23/5/09 11:16
ObjectB.FA = ObjectA.FA.Clone();
Then you actually get a copy of the ObjectA.FA object instead of a pointer to it. Now ObjectA and ObjectB have independant FA objects and
everyone is happy.
Anyway! On to declarations. We are going to keep track of a small number of things in this class:
// The first frame of the Animation. We will calculate other
// frames on the fly based on this frame.
private Rectangle rectInitialFrame;
// Number of frames in the Animation
private int iFrameCount = 1;
// The frame currently being displayed.
// This value ranges from 0 to iFrameCount-1
private int iCurrentFrame = 0;
// Amount of time (in seconds) to display each frame
private float fFrameLength = 0.2f;
// Amount of time that has passed since we last animated
private float fFrameTimer = 0.0f;
// The number of times this animation has been played
private int iPlayCount = 0;
// The animation that should be played after this animation
private string sNextAnimation = null;
I've left the code comments in place (a different approach than the Star Defense tutorial where I stripped them out and explained each parameter in
the text afterward) so you can see what each of the variables are for. Everything here is straightforward with the exception of the "sNextAnimation"
member variable.
When we put together our higher level SpriteAnimation class that will use the FrameAnimation class, we will be keeping track of any number of
Animations for a particular sprite. Each of these animations will have a name associated with it. When an animation plays completely through, we
can set up our SpriteAnimation class the look at the NextAnimation property of our FrameAnimation class to decide what to do next. We'll get into
the more later, but you might also notice that a FrameAnimation doesn't know what it's own name is. That's OK, since FrameAnimations won't be
managing a collection of themselves. That is done at a higher level.
While the FrameAnimation class will do it's own work (via an Update method) we still need controlled access to some of it's member variables from
a higher level. In C#, of course, the way we do this is to define properties. Here are the properties we need for the FrameAnimation class:
/// <summary>
/// The number of frames the animation contains
/// </summary>
public int FrameCount
{
get { return iFrameCount;}
set { iFrameCount = value; }
}
/// <summary>
/// The time (in seconds) to display each frame
/// </summary>
public float FrameLength
{
get { return fFrameLength; }
set { fFrameLength = value; }
}
/// <summary>
/// The frame number currently being displayed
/// </summary>
public int CurrentFrame
{
get { return iCurrentFrame; }
set { iCurrentFrame = (int)MathHelper.Clamp(value, 0, iFrameCount - 1); }
}
public int FrameWidth
{
get { return rectInitialFrame.Width; }
}
public int FrameHeight
{
get { return rectInitialFrame.Height; }
}
/// <summary>
XNA Resources - XNA Tutorials, GSE Tutorials, XNA News... http://www.xnaresources.com/pages.asp?pageid=50
2 de 4 23/5/09 11:16
/// The rectangle associated with the current
/// animation frame.
/// </summary>
public Rectangle FrameRectangle
{
get
{
return new Rectangle(
rectInitialFrame.X + (rectInitialFrame.Width * iCurrentFrame),
rectInitialFrame.Y, rectInitialFrame.Width, rectInitialFrame.Height);
}
}
public int PlayCount
{
get { return iPlayCount; }
set { iPlayCount = value; }
}
public string NextAnimation
{
get { return sNextAnimation; }
set { sNextAnimation = value; }
}
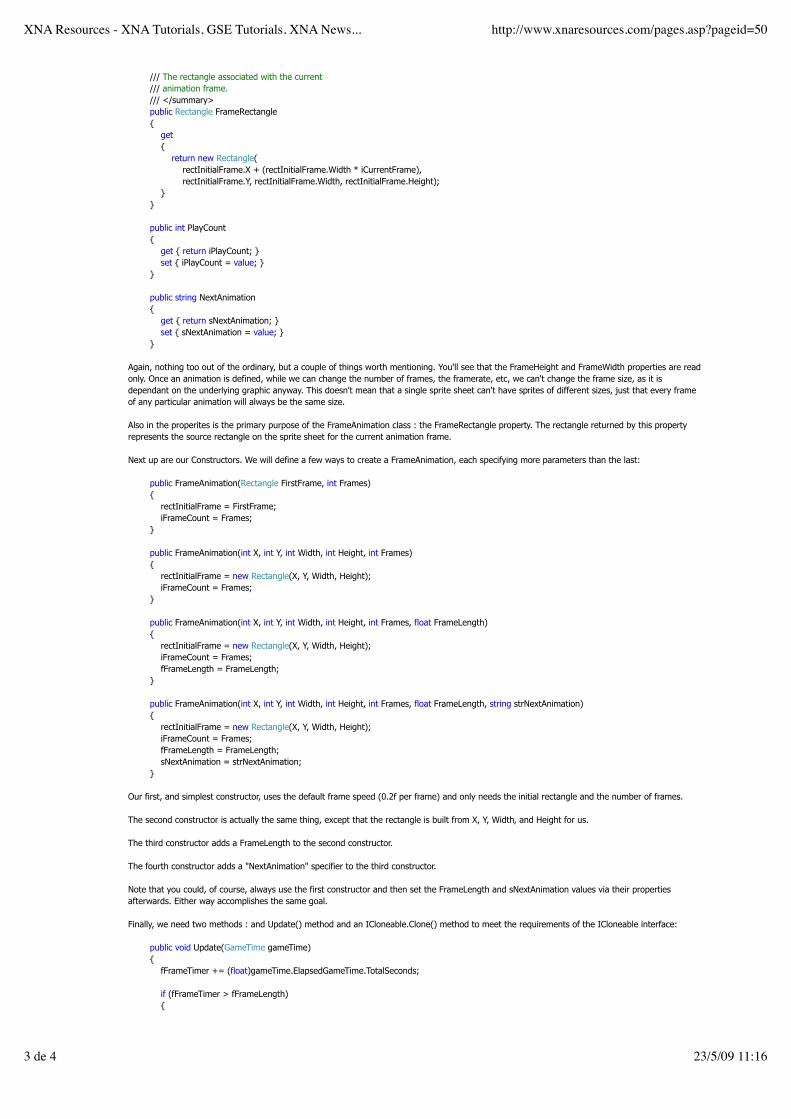
Again, nothing too out of the ordinary, but a couple of things worth mentioning. You'll see that the FrameHeight and FrameWidth properties are read
only. Once an animation is defined, while we can change the number of frames, the framerate, etc, we can't change the frame size, as it is
dependant on the underlying graphic anyway. This doesn't mean that a single sprite sheet can't have sprites of different sizes, just that every frame
of any particular animation will always be the same size.
Also in the properites is the primary purpose of the FrameAnimation class : the FrameRectangle property. The rectangle returned by this property
represents the source rectangle on the sprite sheet for the current animation frame.
Next up are our Constructors. We will define a few ways to create a FrameAnimation, each specifying more parameters than the last:
public FrameAnimation(Rectangle FirstFrame, int Frames)
{
rectInitialFrame = FirstFrame;
iFrameCount = Frames;
}
public FrameAnimation(int X, int Y, int Width, int Height, int Frames)
{
rectInitialFrame = new Rectangle(X, Y, Width, Height);
iFrameCount = Frames;
}
public FrameAnimation(int X, int Y, int Width, int Height, int Frames, float FrameLength)
{
rectInitialFrame = new Rectangle(X, Y, Width, Height);
iFrameCount = Frames;
fFrameLength = FrameLength;
}
public FrameAnimation(int X, int Y, int Width, int Height, int Frames, float FrameLength, string strNextAnimation)
{
rectInitialFrame = new Rectangle(X, Y, Width, Height);
iFrameCount = Frames;
fFrameLength = FrameLength;
sNextAnimation = strNextAnimation;
}
Our first, and simplest constructor, uses the default frame speed (0.2f per frame) and only needs the initial rectangle and the number of frames.
The second constructor is actually the same thing, except that the rectangle is built from X, Y, Width, and Height for us.
The third constructor adds a FrameLength to the second constructor.
The fourth constructor adds a "NextAnimation" specifier to the third constructor.
Note that you could, of course, always use the first constructor and then set the FrameLength and sNextAnimation values via their properties
afterwards. Either way accomplishes the same goal.
Finally, we need two methods : and Update() method and an ICloneable.Clone() method to meet the requirements of the ICloneable interface:
public void Update(GameTime gameTime)
{
fFrameTimer += (float)gameTime.ElapsedGameTime.TotalSeconds;
if (fFrameTimer > fFrameLength)
{
XNA Resources - XNA Tutorials, GSE Tutorials, XNA News... http://www.xnaresources.com/pages.asp?pageid=50
3 de 4 23/5/09 11:16

fFrameTimer = 0.0f;
iCurrentFrame = (iCurrentFrame + 1) % iFrameCount;
if (iCurrentFrame == 0)
iPlayCount = (int)MathHelper.Min(iPlayCount + 1, int.MaxValue);
}
}
object ICloneable.Clone()
{
return new FrameAnimation(this.rectInitialFrame.X, this.rectInitialFrame.Y,
this.rectInitialFrame.Width, this.rectInitialFrame.Height,
this.iFrameCount, this.fFrameLength, sNextAnimation);
}
The "timing" code in the update method should be familiar from Star Defense. We simply accumulate elapsed game time until it is time for us to
take an action. In this case, the action we take is to reset the timer and increment the value of iCurrentFrame. If we have looped back to zero, we
increment iPlayCount (limiting it to the max value of an integer so we don't overflow and crash).
Our ICloneable.Clone method simply creates a new instance of the FrameAnimation class and fills in all of the current parameters in the constructor.
I decided to let the iPlayCount variable come over as the default (0) since this new instance of FrameAnimation technically hasn't been played yet.
(Continue to Part 3)
Site Contents Copyright © 2006 Full Revolution, Inc. All rights reserved.
This site is in no way affiliated with Microsoft or any other company.
All logos and trademarks are copyright their respective companies.
RSS FEED
XNA Resources - XNA Tutorials, GSE Tutorials, XNA News... http://www.xnaresources.com/pages.asp?pageid=50
4 de 4 23/5/09 11:16
Building a Sprite
Now that we have our Rectangle Returner we can move up a level and create our next class. This class will be responsible for the following:
Tracking the position of the sprite on the screen
Holding the actual sprite sheet the sprite is drawn from
Managing all FrameAnimations associated with the sprite
Handle automatic rotation if it is turned on
Add a new class called "SpriteAnimation" to your project. This time we will need both the XNA Framework and the Framework Graphics
namespaces:
using Microsoft.Xna.Framework.Graphics;
using Microsoft.Xna.Framework;
As far as declarations:
// The texture that holds the images for this sprite
Texture2D t2dTexture;
// True if animations are being played
bool bAnimating = true;
// If set to anything other than Color.White, will colorize
// the sprite with that color.
Color colorTint = Color.White;
// Screen Position of the Sprite
Vector2 v2Position = new Vector2(0, 0);
Vector2 v2LastPosition = new Vector2(0, 0);
// Dictionary holding all of the FrameAnimation objects
// associated with this sprite.
Dictionary<string, FrameAnimation> faAnimations = new Dictionary<string, FrameAnimation>();
// Which FrameAnimation from the dictionary above is playing
string sCurrentAnimation = null;
// If true, the sprite will automatically rotate to align itself
// with the angle difference between it's new position and
// it's previous position. In this case, the 0 rotation point
// is to the right (so the sprite should start out facing to
// the right.
bool bRotateByPosition = false;
// How much the sprite should be rotated by when drawn
// Value is in Radians, and 0 indicates no rotation.
float fRotation = 0f;
// Calcualted center of the sprite
Vector2 v2Center;
// Calculated width and height of the sprite
int iWidth;
int iHeight;
Of particular interest here is the "Dictionary faAnimations = new Dictionary();" which will hold all of the FrameAnimations associated with this sprite.
What exactly is a Dictionary? Think of it like an array or a List, but instead of using a numeric index each object in the array is accessed by a "key"
or name. The "key" of each entry must be unique.
To illustrate, lets say we create a dictionary like this:
XNA Resources - XNA Tutorials, GSE Tutorials, XNA News... http://www.xnaresources.com/pages.asp?pageid=47
1 de 6 23/5/09 11:16
Dictionary<string, integer> ScreenWidths = new Dictionary<string, integer>();
ScreenWidths.Add("PC", 1600);
ScreenWidths.Add("XBOX", 640);
ScreenWidths.Add("XBOX360", 1280);
We could access these values by using their unique key, so:
X=ScreenWidths("XBOX360");
would return 1280 to X. We are going to use our dictionary to store FrameAnimation objects associated with an animation name.
It is also important to note here that *IF* we are going to use Automatic Rotation, our sprite graphics should be oriented so that when not rotated
they are facing to the right. This is why I rotated the tanks in the image above. For fRotation, the value is in Radians, and 0 is along the X axis, for
no rotation.
Finally, you will not that the iWidth and iHeight indicate that they are "calculated". When you add an animation to a sprite, the iWidth and iHeight
get set depending on the size of the animation you create.
As normal, it's time for our properties:
///
/// Vector2 representing the position of the sprite's upper left
/// corner pixel.
///
public Vector2 Position
{
get { return v2Position; }
set
{
v2LastPosition = v2Position;
v2Position = value;
UpdateRotation();
}
}
///
/// The X position of the sprite's upper left corner pixel.
///
public int X
{
get { return (int)v2Position.X; }
set
{
v2LastPosition.X = v2Position.X;
v2Position.X = value;
UpdateRotation();
}
}
///
/// The Y position of the sprite's upper left corner pixel.
///
public int Y
{
get { return (int)v2Position.Y; }
set
{
v2LastPosition.Y = v2Position.Y;
v2Position.Y = value;
UpdateRotation();
}
}
///
/// Width (in pixels) of the sprite animation frames
///
public int Width
{
get { return iWidth; }
}
///
/// Height (in pixels) of the sprite animation frames
///
public int Height
{
get { return iHeight; }
}
XNA Resources - XNA Tutorials, GSE Tutorials, XNA News... http://www.xnaresources.com/pages.asp?pageid=47
2 de 6 23/5/09 11:16
///
/// If true, the sprite will automatically rotate in the direction
/// of motion whenever the sprite's Position changes.
///
public bool AutoRotate
{
get { return bRotateByPosition; }
set { bRotateByPosition = value; }
}
///
/// The degree of rotation (in radians) to be applied to the
/// sprite when drawn.
///
public float Rotation
{
get { return fRotation; }
set { fRotation = value; }
}
///
/// Screen coordinates of the bounding box surrounding this sprite
///
public Rectangle BoundingBox
{
get { return new Rectangle(X, Y, iWidth, iHeight); }
}
///
/// The texture associated with this sprite. All FrameAnimations will be
/// relative to this texture.
///
public Texture2D Texture
{
get { return t2dTexture; }
}
///
/// Color value to tint the sprite with when drawing. Color.White
/// (the default) indicates no tinting.
///
public Color Tint
{
get { return colorTint; }
set { colorTint = value; }
}
///
/// True if the sprite is (or should be) playing animation frames. If this value is set
/// to false, the sprite will not be drawn (a sprite needs at least 1 single frame animation
/// in order to be displayed.
///
public bool IsAnimating
{
get { return bAnimating; }
set { bAnimating = value; }
}
///
/// The FrameAnimation object of the currently playing animation
///
public FrameAnimation CurrentFrameAnimation
{
get
{
if (!string.IsNullOrEmpty(sCurrentAnimation))
return faAnimations[sCurrentAnimation];
else
return null;
}
}
///
/// The string name of the currently playing animaton. Setting the animation
/// resets the CurrentFrame and PlayCount properties to zero.
///
public string CurrentAnimation
{
get { return sCurrentAnimation; }
set
XNA Resources - XNA Tutorials, GSE Tutorials, XNA News... http://www.xnaresources.com/pages.asp?pageid=47
3 de 6 23/5/09 11:16
{
if (faAnimations.ContainsKey(value))
{
sCurrentAnimation = value;
faAnimations[sCurrentAnimation].CurrentFrame = 0;
faAnimations[sCurrentAnimation].PlayCount = 0;
}
}
}
There are a lot of them, but we can break them down section by section. At the top, we have everything dealing with the position, size, and rotation
of the sprite. Nothing fancy here. A Vector2 holds the position, the X, Y, Width, and Height are all derrived and returned for simplicity.
The AutoRotate and Rotation variables are *not* tied to each other. You can specify rotation without enabling AutoRotate (and in fact AutoRotate
will override Rotation if you have it turned on).
Next, we have the properties that determine the "look" of the sprite. First the Texture2D itself, and then a Tint color. You will recall that we used this
in Star Defense to create different colored barrels for Power Ups.
IsAnimating is checked in both the Update and Draw routines. If it is false, neither routine will try to do anything with the sprite.
Next, we have a couple of properties that deal our FrameAnimation dictionary. The first, CurrentFrameAnimation returns the FrameAnimation object
associated with the currently playing animation for this sprite. We won't use this as often as you might think, because the next property,
CurrentAnimation, returns the name of the currently playing animation which is normally all the information we need when dealing with
FrameAnimations.
Note that CurrentFrameAnimation is read only, while CurrentAnimation will also let us set the current animation by name. When we do this, we reset
the CurrentFrame and PlayCount properties of the FrameAnimation to 0. This means that the animation will always start playing from the beginning,
and the number of times it has been played will always be relative to when it stated.
The constructor for our SpriteAnimation class is very simple:
public SpriteAnimation(Texture2D Texture)
{
t2dTexture = Texture;
}
Why so small? Because we need to do the work of setting up the FrameAnimations after the sprite object has been created. We will look at how we
do that shortly.
Finally, we need some methods to manipulate our SpriteAnimations. There are a few of these, so I'll break it down into multiple sections and talk
about each one.
void UpdateRotation()
{
if (bRotateByPosition)
{
fRotation = (float)Math.Atan2(v2Position.Y - v2LastPosition.Y, v2Position.X - v2LastPosition.X);
}
}
If you look at the positional properties above (and the upcoming MoveBy method) you will see that whenever the position of the sprite is updated
the previous position is stored in v2LastPosition and UpdateRotation is called after the change is made.
Our UpdateRotation method checks to see if AutoRotate is turned on. If it is, we use the magic of trigonometry to calculate the angle (in radians)
between the old position and the current position. We store it in fRotation to be used later when the sprite is drawn (remember that I said earlier
that AutoRotate will override the Rotation property when on. This is where that happens).
Next, we will deal with adding animations to our Dictionary. This isn't too difficult, as we are basically just creating a FrameAnimation object and
setting it's properties:
public void AddAnimation(string Name, int X, int Y, int Width, int Height, int Frames, float FrameLength)
{
faAnimations.Add(Name, new FrameAnimation(X, Y, Width, Height, Frames, FrameLength));
iWidth = Width;
iHeight = Height;
v2Center = new Vector2(iWidth / 2, iHeight / 2);
}
public void AddAnimation(string Name, int X, int Y, int Width, int Height, int Frames, float FrameLength, string NextAnimation)
{
faAnimations.Add(Name, new FrameAnimation(X, Y, Width, Height, Frames, FrameLength, NextAnimation));
iWidth = Width;
iHeight = Height;
v2Center = new Vector2(iWidth / 2, iHeight / 2);
}
As with the FrameAnimation we have a couple of different constructors that just pass their parameters along to the FrameAnimation constructors.
We also calculate the height, width, and center of the sprite here. For this reason, all of our animations for a particular sprite need to be the same
size (for each frame) or you will end up with some definitely weird results.
XNA Resources - XNA Tutorials, GSE Tutorials, XNA News... http://www.xnaresources.com/pages.asp?pageid=47
4 de 6 23/5/09 11:16
This routine simply uses the Dictionary to get the FrameAnimation object associated with an animation name:
public FrameAnimation GetAnimationByName(string Name)
{
if (faAnimations.ContainsKey(Name))
{
return faAnimations[Name];
}
else
{
return null;
}
}
While there are already a couple of ways (via properties) to move the sprite, this is one more to keep things simple. Pass in an X and Y offset and
the sprite will be moved by that number of pixels (negatives are fine, of course)):
public void MoveBy(int x, int y)
{
v2LastPosition = v2Position;
v2Position.X += x;
v2Position.Y += y;
UpdateRotation();
}
Finally we come to our Update and Draw methods:
public void Update(GameTime gameTime)
{
// Don't do anything if the sprite is not animating
if (bAnimating)
{
// If there is not a currently active animation
if (CurrentFrameAnimation == null)
{
// Make sure we have an animation associated with this sprite
if (faAnimations.Count > 0)
{
// Set the active animation to the first animation
// associated with this sprite
string[] sKeys = new string[faAnimations.Count];
faAnimations.Keys.CopyTo(sKeys, 0);
CurrentAnimation = sKeys[0];
}
else
{
return;
}
}
// Run the Animation's update method
CurrentFrameAnimation.Update(gameTime);
// Check to see if there is a "followup" animation named for this animation
if (!String.IsNullOrEmpty(CurrentFrameAnimation.NextAnimation))
{
// If there is, see if the currently playing animation has
// completed a full animation loop
if (CurrentFrameAnimation.PlayCount>0)
{
// If it has, set up the next animation
CurrentAnimation=CurrentFrameAnimation.NextAnimation;
}
}
}
}
public void Draw(SpriteBatch spriteBatch, int XOffset, int YOffset)
{
if (bAnimating)
spriteBatch.Draw(t2dTexture, (v2Position + new Vector2(XOffset, YOffset) + v2Center),
CurrentFrameAnimation.FrameRectangle, colorTint,
fRotation, v2Center,1f, SpriteEffects.None, 0);
}
Draw, as normal, is very straightforward. Well, in the sense that it is pretty much a one-liner. There is a lot of fun math in there to take rotation into
account, and it is possible to pass an X and Y offset in as well, though we usually won't be doing that.
Update is the first real chunk of code we've see but only because we need to handle two special cases (without them,
CurrentFrameAnimation.Updage(gameTime) would be the only line in the method). These two cases are:
XNA Resources - XNA Tutorials, GSE Tutorials, XNA News... http://www.xnaresources.com/pages.asp?pageid=47
5 de 6 23/5/09 11:16
CurrentAnimationFrame == null : If this is true, we haven't set any kind of animation up for this sprite, but we are trying to play it (IsAnimating is
true). In this case, we check to see if there are any defined animations. If there are, we pick the first one and make it the current animation.
The next case is if there is a NextAnimation defined for this animation. If so, we check to see if we have finished a complete play loop (all frames of
the animation have been played, so PlayCount > 0) and if so, we set the CurrentAnimation to the FrameAnimation's "NextAnimation" property.
But why would you want to do that? Well, lets say you have a cannon sprite on the screen. It has an animation loop running where it is billowing
smoke, or some such. Now you want the cannon to fire, so you have a nice animation where, just like in the cartoons, the cannon scrunches up and
BOOM! Elongates and fires a cannon ball. Now what? Well, lets say you have defined two FrameAnimations, one called "idle" and one called "fire!".
If you set the NextAnimation property of "fire!" to "idle", when you trigger "fire!" it will play the animation and then go right back to idle instead of
looping the fire animation over and over again.
You can also use it to make things disappear. Lets pretend we have a target that has four animations:
"idle" : looping animation where it just sits there, maybe glinting in the light
"hit" : one-time animation where it rocks back and forth from the impact of the player's gun
"hurt" : looping animation where it looks beat up... kinda like someone shot it!
"boom" : one-time animation where it explodes
"gone" : which is a 1 frame "looping" animation on an empty portion of the texture
Now, you can set "hit"s NextAnimation property to "hurt" and "boom"s NextAnimation property to "gone". When it gets hit, you play the "hit"
animation, which will fall into "hurt", showing the target in a damaged state. When it gets hit while damaged, play "boom", which will fall into
"gone" when it is finished. You can even just test the CurrentAnimation property for it to read "gone" and know that you can then clean up the
target object because it has finished animating it's explosion.
That's it for our SpriteAnimation class. At this point, we have expanded quite a bit on our AnimatedSprite class from Star Defense, but we're not
done yet! One more class to go, and then it's time for some Sample Code Fun!
(Continue to Part 4)
Site Contents Copyright © 2006 Full Revolution, Inc. All rights reserved.
This site is in no way affiliated with Microsoft or any other company.
All logos and trademarks are copyright their respective companies.
RSS FEED
XNA Resources - XNA Tutorials, GSE Tutorials, XNA News... http://www.xnaresources.com/pages.asp?pageid=47
6 de 6 23/5/09 11:16
Mobile Sprites
Now, I know we have a SpriteAnimation class that we can move around, but wouldn't it be nice if our sprites did some of that work for us? That's
where our next class comes in. The MobileSprite class will be responsible for the following:
Providing an interface to the SpriteAnimation objects below
Move sprites at a defined speed towards a targeted point
Allow a "path" of points to be assigned to a sprite
Provide collision information
Sounds complicated (especially that whole "path of points" thing) but in reality it won't be that bad. Lets add a new class to the project and call it
MobileSprite. As normal, we need the using statements:
using Microsoft.Xna.Framework;
using Microsoft.Xna.Framework.Graphics;
We're going to declare a bunch of variables, but I've left all the comments in. I'll discuss a few of them below the code block:
// The SpriteAnimation object that holds the graphical and animation data for this object
SpriteAnimation asSprite;
// A queue of pathing vectors to allow the sprite to move along a path
Queue<Vector2> queuePath = new Queue<Vector2>();
// The location the sprite is currently moving towards
Vector2 v2Target;
// The speed at which the sprite will close with it's target
float fSpeed = 1f;
// These two integers represent a clipping range for determining bounding-box style
// collisions. They return the bounding box of the sprite trimmed by a horizonal and
// verticle offset to get a collision cushion
int iCollisionBufferX=0;
int iCollisionBufferY=0;
// Determine the status of the sprite. An inactive sprite will not be updated but will be drawn.
bool bActive = true;
// Determines if the sprite should track towards a v2Target. If set to false, the sprite
// will not move on it's own towards v2Target, and will not process pathing information
bool bMovingTowardsTarget = true;
// Determines if the sprite will follow the path in it's Path queue. If true, when the sprite
// has reached v2Target the next path node will be pulled from the queue and set as
// the new v2Target.
bool bPathing = true;
// If true, any pathing node popped from the Queue will be placed back onto the end of the queue
bool bLoopPath = true;
// If true, the sprite can collide with other objects. Note that this is only provided as a flag
// for testing with outside code.
bool bCollidable = true;
// If true, the sprite will be drawn to the screen
bool bVisible = true;
// If true, the sprite will be deactivated when the Pathing Queue is empty.
bool bDeactivateAtEndOfPath = false;
XNA Resources - XNA Tutorials, GSE Tutorials, XNA News... http://www.xnaresources.com/pages.asp?pageid=48
1 de 6 23/5/09 11:16
// If true, bVisible will be set to false when the Pathing Queue is empty.
bool bHideAtEndOfPath = false;
// If set, when the Pathing Queue is empty, the named animation will be set as the
// current animation on the sprite.
string sEndPathAnimation = null;
Ok, so many of these are self explanatory (bVisible, etc), but several deserve some explanation:
v2Target : Our MobileSprite class supports automatic movement of the sprite towards a targeted point. The v2Target variable holds the current point
we are moving towards (if automatic moving is enabled).
iCollisionBufferX, and iCollisionBufferY : One of the properties we will be adding is a CollisionBox property, which is simply the sprite's bounding box
with the edges shrunken in by these two values. This has the effect of giving the collision detection a bit of a cushion to make it look more accurate.
bPathing and bLoopPath : These control how the Queue (I'll talk about it below) are used. If bPathing is false, then the queue isn't used at all. If
bLoopPath is false, the path will be executed once and stop. If it is true, the path will be repeated.
bDeactivateAtEndOfPath and bHideAtEndOfPath : These booleans control what happens when the end of the path is reached (and bLoopPath is
false).
sEndPathAnimation : If bLooopPath if false and then end of the path has been reached, the sprite will play this animation (if it is defined).
queuePath : Ok, I saved it for last for a good reason. There is a lot to talk about here. First, what is a queue? There are a number of Generic
Collection structures in the .NET Framework, and Queue is one of them. Essentially all of these objects (List, Stack, Queue, and even the Dictionary
we are using for animations) allow you to store groups of the same type of object in different ways. The key differences are how information gets in
and out of the collection:
List : Objects are added with the .Add method and removed with .Remove. However, you cannot iterate over the list once you remove an item. You
have to start back at the beginning again. Generally, you use a "for each" loop to go through the items in a list.
Dictionary : As discussed above, a dictionary has "key, value" pairs in it. You look up values by key. You could iterate over the Dictionary by getting
the keys and then looping through them, but generally you wouldn't do that (or you would be using a List instead).
Stack : A Stack is just like a stack of papers on your desk. It is a Last-In-First-Out (LIFO) structure. If I put a piece of paper on top of the pile, it is
the first one I'm going to get when I get something off the pile. Items are Pushed onto the stack and Popped off of the stack. Whatever was pushed
last will be what you get when you pop.
Queue : A Queue is like a line at the bank. When you enter the queue (via the Enqueue method) you stand at the back of the line. Anyone who
Enqueues after you is behind you, waiting their turn. At the counter, people are being "Dequeued" from the queue in the same order they entered
the queue.
So, as you can see if the order that things were added to the collection is important (and it certainly is if we are setting down a path of points for
our sprite to follow), the Queue is a good choice for a structure since we can pull the points off in order. We don't really care what happens to them
after we are done with them (ok that isn't quite true as we will see later) and when the queue is empty we are done moving.
So now we need to add our properties. Again, there are a bunch of them:
public SpriteAnimation Sprite
{
get { return asSprite; }
}
public Vector2 Position
{
get { return asSprite.Position; }
set { asSprite.Position = value; }
}
public Vector2 Target
{
get { return v2Target; }
set { v2Target = value; }
}
public int HorizontalCollisionBuffer
{
get { return iCollisionBufferX; }
set { iCollisionBufferX = value; }
}
public int VerticalCollisionBuffer
{
get { return iCollisionBufferY; }
set { iCollisionBufferY = value; }
}
public bool IsPathing
{
get { return bPathing; }
set { bPathing = value; }
XNA Resources - XNA Tutorials, GSE Tutorials, XNA News... http://www.xnaresources.com/pages.asp?pageid=48
2 de 6 23/5/09 11:16
}
public bool DeactivateAfterPathing
{
get { return bDeactivateAtEndOfPath; }
set { bDeactivateAtEndOfPath = value; }
}
public bool LoopPath
{
get { return bLoopPath; }
set { bLoopPath = value; }
}
public string EndPathAnimation
{
get { return sEndPathAnimation; }
set { sEndPathAnimation = value; }
}
public bool HideAtEndOfPath
{
get { return bHideAtEndOfPath; }
set { bHideAtEndOfPath = value; }
}
public bool IsVisible
{
get { return bVisible; }
set { bVisible = value; }
}
public float Speed
{
get { return fSpeed; }
set { fSpeed = value; }
}
public bool IsActive
{
get { return bActive; }
set { bActive = value; }
}
public bool IsMoving
{
get { return bMovingTowardsTarget; }
set { bMovingTowardsTarget = value; }
}
public bool IsCollidable
{
get { return bCollidable; }
set { bCollidable = value; }
}
public Rectangle BoundingBox
{
get { return asSprite.BoundingBox; }
}
public Rectangle CollisionBox
{
get
{
return new Rectangle(
asSprite.BoundingBox.X + iCollisionBufferX,
asSprite.BoundingBox.Y + iCollisionBufferY,
asSprite.Width - (2 * iCollisionBufferX),
asSprite.Height - (2 * iCollisionBufferY));
}
}
A couple of these (BoundingBox and Position) are simply pass-throughs to the underlying SpriteAnimation object. We could have just used the
Sprite.Position notation, but having the properties at this level doesn't really hurt anything and is convenient.
There is only one property in the list that isn't a simple get/set value pair, and that is the CollisionBox property I mentioned earlier, which returns a
bounding box with the edges pulled by the offset values.
The other important things to note here are the toggles:
XNA Resources - XNA Tutorials, GSE Tutorials, XNA News... http://www.xnaresources.com/pages.asp?pageid=48
3 de 6 23/5/09 11:16
IsMoving : If true, the sprite will move towards it's Target.
IsPathing : If true, the sprite will follow pathing points from queuePath.
LoopPath : If true, each pathing node will be requeued at the back of the queue after it is dequeued.
One last thing to note is that IsCollidable is not used for anything in the MobileSprite code itself. It is there for you to set when writing your own
collision detection routines.
As with the SpriteAnimation class, the constructor for MobileSprite is very simple:
public MobileSprite(Texture2D texture)
{
asSprite = new SpriteAnimation(texture);
}
This is because, of course, we will be setting animations, paths, etc up for the sprite after it has been created.
Finally, a few methods. We'll do this in a couple of parts:
public void AddPathNode(Vector2 node)
{
queuePath.Enqueue(node);
}
public void AddPathNode(int X, int Y)
{
queuePath.Enqueue(new Vector2(X, Y));
}
public void ClearPathNodes()
{
queuePath.Clear();
}
These three methods are for managing the queuePath list. Two ways to add a note (via a Vector2 or with an X,Y) and a method to clear all nodes
from the queue. Next, our Update and Draw:
public void Update(GameTime gameTime)
{
if (bActive && bMovingTowardsTarget)
{
if (!(v2Target == null))
{
// Get a vector pointing from the current location of the sprite
// to the destination.
Vector2 Delta = new Vector2(v2Target.X - asSprite.X, v2Target.Y - asSprite.Y);
if (Delta.Length() > Speed)
{
Delta.Normalize();
Delta *= Speed;
Position += Delta;
}
else
{
if (v2Target == asSprite.Position)
{
if (bPathing)
{
if (queuePath.Count > 0)
{
v2Target = queuePath.Dequeue();
if (bLoopPath)
{
queuePath.Enqueue(v2Target);
}
}
else
{
if (!(sEndPathAnimation == null))
{
if (!(Sprite.CurrentAnimation == sEndPathAnimation))
{
Sprite.CurrentAnimation = sEndPathAnimation;
}
}
if (bDeactivateAtEndOfPath)
{
IsActive = false;
}
XNA Resources - XNA Tutorials, GSE Tutorials, XNA News... http://www.xnaresources.com/pages.asp?pageid=48
4 de 6 23/5/09 11:16
if (bHideAtEndOfPath)
{
IsVisible = false;
}
}
}
}
else
{
asSprite.Position = v2Target;
}
}
}
}
if (bActive)
asSprite.Update(gameTime);
}
public void Draw(SpriteBatch spriteBatch)
{
if (bVisible)
{
asSprite.Draw(spriteBatch, 0, 0);
}
}
Again, Draw is super-simple (even moreso this time... we pass the 0, 0 for offsets as we aren't applying an offset to all of our sprites.
Update is, as usual, where everything happens. The first thing we do is check to see if we are active and moving. (If we are active but not moving
we will still update the SpriteAnimation object but we won't run any of the moving/pathing code).
If we should be moving, we have to figure out where we are going to move to. In order to do so, we get a vector by subtracting our current position
(where we are) from our Target position (where we want to be).
Next, we check the length of the Delta vector to see if we can move the full "speed" amount and still be on our way to the point. If so, we normalize
the Delta vector, which sets it's length to 1 while keeping the directional information and multiply it by our speed factor. We add this to our current
position.
If we couldn't move the full speed, one of two things is true. Either we are already sitting at the point, or we are close to it and should go to the
point as our next move. We check to see if we are there first. If we are, we need to pull our next point out of queuePath and make it our newe
v2Target. Notice that we check to see if bLoopPath is true. If it is, right after we dequeue the new target we enqueue it back onto the end of the
queue. This has the effect of making our path a large loop which will never end.
If, however, there are no more points in queuePath (queuepath.Count is 0) then we check to see what we should do now that the end of the path
has been reached. We may play an animation, deactivate the sprite, or hide the sprite at this point.
If we were "close to" our target point, but not quite there yet, we simply set our location to the target point and wait for the next loop to happen.
Finally, the last thing the Update method does is call Update for the underlying SpriteAnimation object, which will update our FrameAnimations.
(Continue to Part 5)
XNA Resources - XNA Tutorials, GSE Tutorials, XNA News... http://www.xnaresources.com/pages.asp?pageid=48
5 de 6 23/5/09 11:16
Time to Do Something With It!
Finally! We get to see what we have been putting all this code together for. Make sure you have the two images from the beginning of this tutorial
as part of your project, and lets add a few lines of code to the Declarations section of our Game1.cs file:
Texture2D t2dTanks;
Texture2D t2dPrincess;
MobileSprite myTank;
MobileSprite mouseTank;
MobileSprite myPrincess;
We will be drawing two tanks to the screen, and one pricess character. That's all we need for declarations, but we need to enable the mouse for this
particular demonstration, so in your Initialize method, add the line:
this.IsMouseVisible = true;
Next we need to load our content and set up our sprites. I'm going to do this in several parts, explaining each part in between:
t2dTanks = Content.Load<Texture2D>(@"Textures\MulticolorTanks");
t2dPrincess = Content.Load<Texture2D>(@"Textures\PrincessCharacter");
Standard texture loading stuff here. This should be familiar by now.
myTank = new MobileSprite(t2dTanks);
myTank.Sprite.AddAnimation("green", 0, 0, 32, 32, 8, 0.1f);
myTank.Sprite.AutoRotate = true;
myTank.Position = new Vector2(100, 100);
myTank.Target = myTank.Position;
myTank.AddPathNode(new Vector2(200, 200));
myTank.AddPathNode(new Vector2(400, 200));
myTank.AddPathNode(new Vector2(400, 400));
myTank.AddPathNode(new Vector2(200, 400));
myTank.Speed = 3;
myTank.LoopPath = true;
Here we set up our first tank. After running the constructor and passing it the texture we are using, we add an animation called "green", which
starts at 0,0 on the sprite sheet, is 32x32 pixels in size, and contains 8 frames. We want the frames to play for 0.1f seconds each.
We turn on Auto Rotation, and set the initial location for the tank to 100,100. We also set the tank's target to it's current position so that it doesn't
run off to 0,0 before following it's pathing information.
Next, we add four pathing nodes for the tank. These nodes form a square near the center of the screen. We set the tank's speed to 3 and tell it we
want the path to loop forever.
Lets add another tank:
mouseTank = new MobileSprite(t2dTanks);
mouseTank.Sprite.AddAnimation("red", 0, 32, 32, 32, 8, 0.1f);
mouseTank.Sprite.AddAnimation("purple", 0, 128, 32, 32, 8, 0.1f, "red");
mouseTank.Sprite.AddAnimation("yellow", 0, 64, 32, 32, 8, 0.1f);
mouseTank.Sprite.AutoRotate = true;
mouseTank.Position = new Vector2(100, 100);
mouseTank.Target = mouseTank.Position;
mouseTank.IsPathing = true;
mouseTank.EndPathAnimation = "yellow";
mouseTank.LoopPath = false;
myTank.Speed = 2;
As you can see, we define this tank in a very different way. We have three animations, "red", "purple", and "yellow". The NextAnimation property of
our "purple" animation is set to "red", meaning that when the purple animation plays it will play once, and go back to "red".
We also set an EndPathAnimation (to "yellow"). Note that since IsPathing is false, we won't use it right now, but we will change that a little later.
XNA Resources - XNA Tutorials, GSE Tutorials, XNA News... http://www.xnaresources.com/pages.asp?pageid=49
1 de 4 23/5/09 11:16
Again, the tank is going to AutoRotate, and we set an initial position, but we aren't going to use pathing information for this tank. Instead, this tank
will "chase" the mouse cursor around.
Finally, lets add our Princess character:
myPrincess = new MobileSprite(t2dPrincess);
myPrincess.Sprite.AddAnimation("leftstop", 0, 0, 32, 64, 1, 0.1f);
myPrincess.Sprite.AddAnimation("left", 0, 0, 32, 64, 4, 0.1f);
myPrincess.Sprite.AddAnimation("rightstop", 0, 64, 32, 64, 1, 0.1f);
myPrincess.Sprite.AddAnimation("right", 0, 64, 32, 64, 4, 0.1f);
myPrincess.Sprite.CurrentAnimation = "rightstop";
myPrincess.Position = new Vector2(100,500);
myPrincess.Sprite.AutoRotate = false;
myPrincess.IsPathing=false;
myPrincess.IsMoving=false;
Our Princess has four animations defined. One each for walking left and right, and one each for facing left and right while stopped. As you can see,
the "leftstop" and "rightstop" animations overlap the "left" and "right" animations, which is perfectly fine.
We set the CurrentAnimation to "rightstop" and set the position of the sprite. Then we turn off all of our options (AutoRotate, IsPathing, and
IsMoving) since we want to control the princess with the keyboard.
Lets do our Draw method real quick (since it is easy) and we'll save update for last. Edit your Draw method to look like this:
protected override void Draw(GameTime gameTime)
{
GraphicsDevice.Clear(Color.CornflowerBlue);
// TODO: Add your drawing code here
spriteBatch.Begin(SpriteBlendMode.AlphaBlend);
myTank.Draw(spriteBatch);
mouseTank.Draw(spriteBatch);
myPrincess.Draw(spriteBatch);
spriteBatch.End();
base.Draw(gameTime);
}
Nothing at all out of the ordinary... we just start a SpriteBatch, draw our three objects, and end the SpriteBatch.
Now for Update. Again, I'm going to break this down into a couple of pieces. First, lets get the Keyboard and Mouse states:
MouseState ms = Mouse.GetState();
KeyboardState ks = Keyboard.GetState();
We will need those a little later. Now it is time to update our "pathing" tank:
myTank.Update(gameTime);
Yep, that's it. He knows everything he is supposed to be doing already, so just calling update will cause him to follow his circuit around the screen
over and over and over again.
Now lets look at our "mouseTank" object:
mouseTank.Target = new Vector2(ms.X, ms.Y);
if (ms.LeftButton == ButtonState.Pressed)
{
if (mouseTank.Sprite.CurrentAnimation == "red")
{
mouseTank.Sprite.CurrentAnimation = "purple";
}
}
mouseTank.Update(gameTime);
If we weren't demonstrating a "fire and forget" animation with this tank (the purple -> red animation) we would only have two lines here as well.
We set the tank's target to the current location of the mouse. When mouseTank.Update is called, it will move towards that mouse point.
We also check to see if the left mouse button is clicked. If it is, and we are playing the "red" animation, we fire off the "purple" animation, which will
play 8 frames as a purple tank and then go back to red.
Finally, lets add our princess to the game. There is a bit more code here because we are checking for player input:
bool leftkey = ks.IsKeyDown(Keys.Left);
bool rightkey = ks.IsKeyDown(Keys.Right);
if (leftkey)
{
if (myPrincess.Sprite.CurrentAnimation != "left")
XNA Resources - XNA Tutorials, GSE Tutorials, XNA News... http://www.xnaresources.com/pages.asp?pageid=49
2 de 4 23/5/09 11:16
{
myPrincess.Sprite.CurrentAnimation = "left";
}
myPrincess.Sprite.MoveBy(-2, 0);
}
if (rightkey)
{
if (myPrincess.Sprite.CurrentAnimation != "right")
{
myPrincess.Sprite.CurrentAnimation = "right";
}
myPrincess.Sprite.MoveBy(2, 0);
}
if (!leftkey && !rightkey)
{
if (myPrincess.Sprite.CurrentAnimation == "left")
{
myPrincess.Sprite.CurrentAnimation = "leftstop";
}
if (myPrincess.Sprite.CurrentAnimation == "right")
{
myPrincess.Sprite.CurrentAnimation = "rightstop";
}
}
myPrincess.Update(gameTime);
Here, we get the status of the left and the right keys. If the left or right key is pressed and we aren't already playing the corresponding animation,
we start playing it. We also move 2 pixels in that direction. If neither key is pressed, the princess stops, and switches to either the leftstop or
rightstop animations depending on what she was playing before stopping.
Fire it up! You should have a green tank running in circles, a red tank chasing your mouse (that turns purple if you click) and a princess you can
walk back and forth with the left and right arrow keys.
Want more? Comment out the mouseTank code and replace it with this:
if (ms.LeftButton == ButtonState.Pressed)
{
mouseTank.AddPathNode(ms.X, ms.Y);
if (mouseTank.Sprite.CurrentAnimation != "red")
mouseTank.Sprite.CurrentAnimation = "red";
}
mouseTank.Update(gameTime);
Also, go up to your LoadContent method where we define mouseTank and change IsPathing to true. Now when you run the program you will have a
tank that starts out red and waits for you to click the mouse. When you do, it will move to whatever points you click on. When it has reached the
last point it will turn yellow and wait for more clicks.
As you can see, this new set of classes gives us some nice ways of handling animated sprites. And remember, sprites don't have to just be players
and enemies. Animated interface objects can be created as sprites and can handle all of their own animation after you start them off.
XNA Resources - XNA Tutorials, GSE Tutorials, XNA News... http://www.xnaresources.com/pages.asp?pageid=49
3 de 4 23/5/09 11:16