wireless-g router for 3g/umts broadband · 3g/umts broadband only before you begin, make sure that...
TRANSCRIPT
Wireless-G Router for 3G/UMTS Broadband
Model No: WRT54G3GV2-VF
QUICK INSTALLATION
Package ContentsWireless-G Router for
3G/UMTS Broadband
Setup CD-ROM
User Guide and Quick Installation on
CD-ROM
AC Power Supply with UK, Euro, and
Australia Plug Adapters
Car Power Adapter
Ethernet Cable
•
••
•
••

3
Overview
There are two ways to set up the Router for Internet connection. Select one.
Broadband WAN and 3G/UMTS Broadband 3G/UMTS Broadband Only
Before you begin, make sure that you have the following:
Broadband WAN and 3G/UMTS BroadbandActivated 3G/UMTS broadband service from Vodafone Vodafone 3G/UMTS broadband device service informationBroadband modemSettings for your broadband Internet connection
3G/UMTS Broadband OnlyActivated 3G/UMTS broadband service from VodafoneVodafone 3G/UMTS broadband device service information
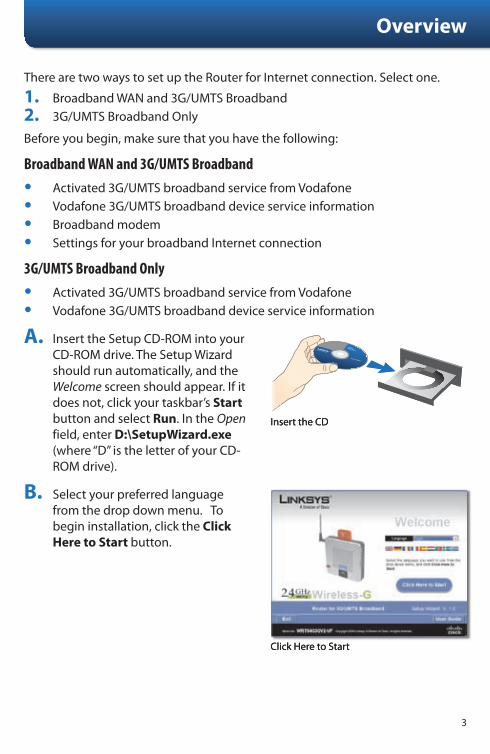
Insert the Setup CD-ROM into your CD-ROM drive. The Setup Wizard should run automatically, and the Welcome screen should appear. If it does not, click your taskbar’s Start button and select Run. In the Open field, enter D:\SetupWizard.exe (where “D” is the letter of your CD-ROM drive).
Select your preferred language from the drop down menu. To begin installation, click the Click Here to Start button.
1.2.
••••
••
A.
B.
Insert the CDInsert the CD
Click Here to StartClick Here to Start
�
Overview
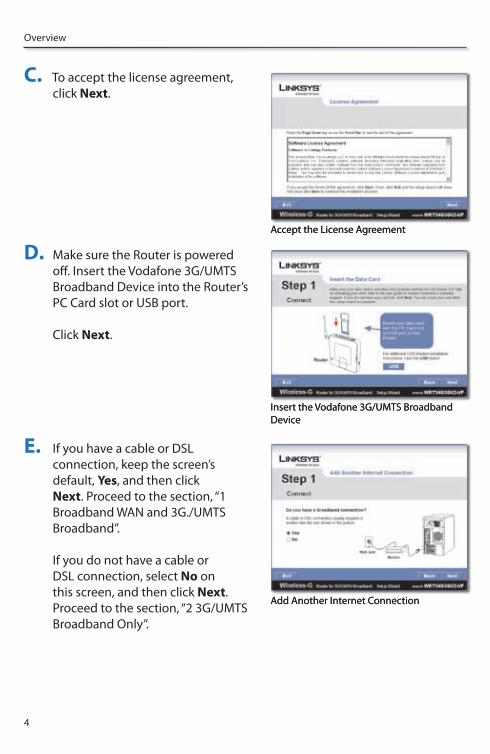
To accept the license agreement, click Next.
Make sure the Router is powered off. Insert the Vodafone 3G/UMTS Broadband Device into the Router’s PC Card slot or USB port. Click Next.
If you have a cable or DSL connection, keep the screen’s default, Yes, and then click Next. Proceed to the section, “1 Broadband WAN and 3G./UMTS Broadband”. If you do not have a cable or DSL connection, select No on this screen, and then click Next. Proceed to the section, “2 3G/UMTS Broadband Only”.
C.
D.
E.
Accept the License AgreementAccept the License Agreement
Insert the Vodafone 3G/UMTS Broadband DeviceInsert the Vodafone 3G/UMTS Broadband Device
Add Another Internet ConnectionAdd Another Internet Connection
�
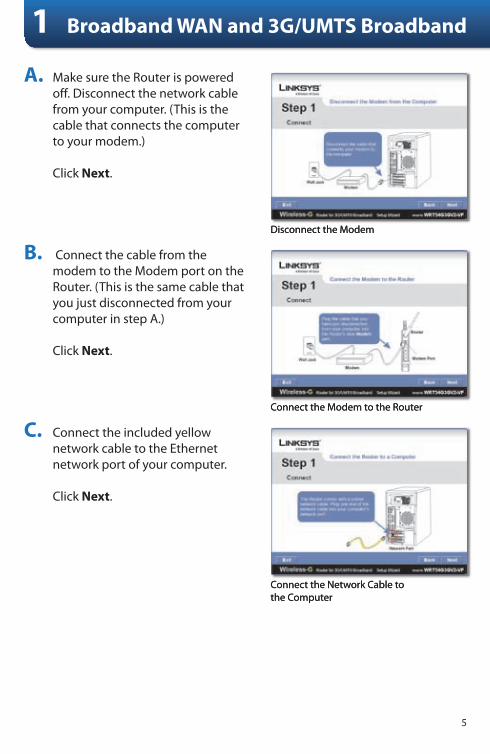
Make sure the Router is powered off. Disconnect the network cable from your computer. (This is the cable that connects the computer to your modem.) Click Next.
Connect the cable from the modem to the Modem port on the Router. (This is the same cable that you just disconnected from your computer in step A.) Click Next.
Connect the included yellow network cable to the Ethernet network port of your computer. Click Next.
A.
B.
C.
Disconnect the ModemDisconnect the Modem
Connect the Modem to the RouterConnect the Modem to the Router
Connect the Network Cable to the ComputerConnect the Network Cable to the Computer
Broadband WAN and 3G/UMTS Broadband1�

�
Broadband WAN and 3G/UMTS Broadband
Connect the other end of the yellow cable to one of the yellow Ethernet ports labeled 1-� on the side panel of the Router. Repeat steps C and D to connect additional computers or other devices to the Router. (Additional network cables are not included.) Click Next.
Connect the power adapter to the Router’s Power port. Plug the cord into an electrical outlet (if needed, attach the included, appropriate power plug adapter). Click Next.
The Power LED will flash for about a minute during the self-test. It will be solidly lit when the self-test is complete. If the Power LED does not stop flashing, refer to “Appendix A: Troubleshooting” in the User Guide on the CD-ROM. Click Next.
D.
E.
F.
Connect the Network Cable to the RouterConnect the Network Cable to the Router
Connect to PowerConnect to Power
Check the Router’s StatusCheck the Router’s Status
�
Broadband WAN and 3G/UMTS Broadband
Follow the on-screen instructions to complete the setup and configuration.
NOTE: For advanced configuration changes, refer to “Chapter 3: Advanced Configuration” in the User Guide on the CD-ROM.
G.
�
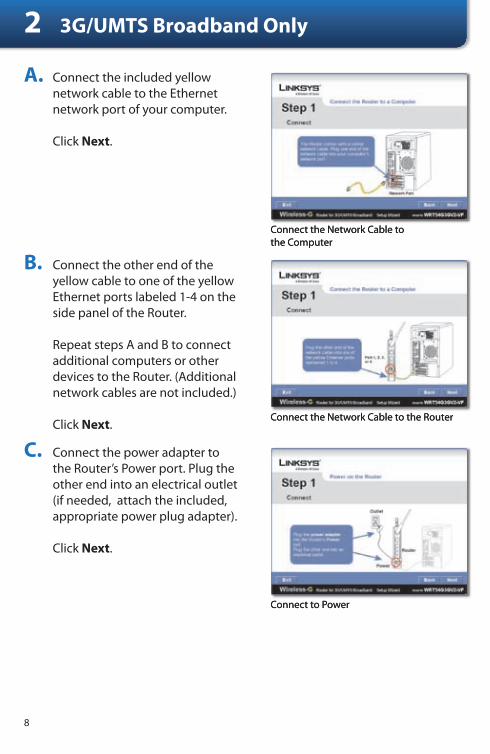
Connect the included yellow network cable to the Ethernet network port of your computer. Click Next.
Connect the other end of the yellow cable to one of the yellow Ethernet ports labeled 1-� on the side panel of the Router. Repeat steps A and B to connect additional computers or other devices to the Router. (Additional network cables are not included.) Click Next.
Connect the power adapter to the Router’s Power port. Plug the other end into an electrical outlet (if needed, attach the included, appropriate power plug adapter). Click Next.
A.
B.
C.
Connect the Network Cable to the ComputerConnect the Network Cable to the Computer
Connect the Network Cable to the RouterConnect the Network Cable to the Router
Connect to PowerConnect to Power
3G/UMTS Broadband Only2�
�
3G/UMTS Broadband Only
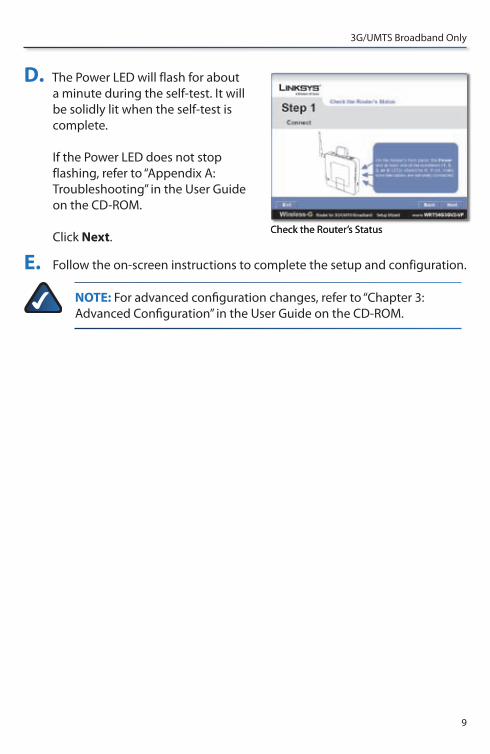
The Power LED will flash for about a minute during the self-test. It will be solidly lit when the self-test is complete. If the Power LED does not stop flashing, refer to “Appendix A: Troubleshooting” in the User Guide on the CD-ROM. Click Next.
Follow the on-screen instructions to complete the setup and configuration.
NOTE: For advanced configuration changes, refer to “Chapter 3: Advanced Configuration” in the User Guide on the CD-ROM.
D.
E.
Check the Router’s StatusCheck the Router’s Status
10
Notes
�0�1�10NC-DF

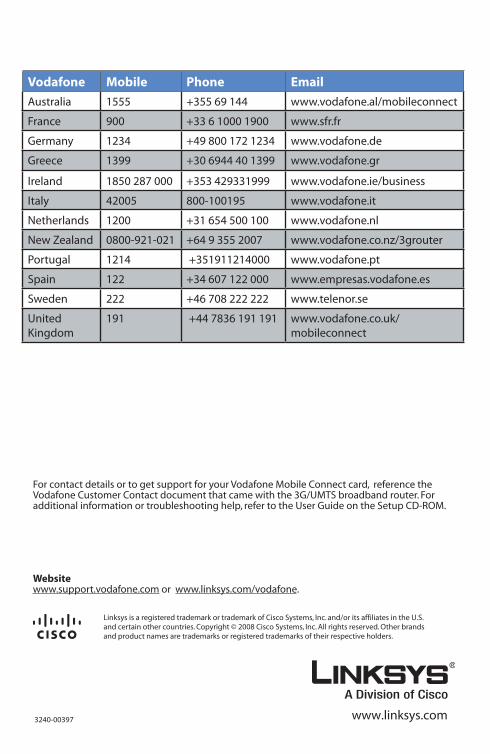
For contact details or to get support for your Vodafone Mobile Connect card, reference the Vodafone Customer Contact document that came with the 3G/UMTS broadband router. For additional information or troubleshooting help, refer to the User Guide on the Setup CD-ROM.
Website www.support.vodafone.com or www.linksys.com/vodafone.
Linksys is a registered trademark or trademark of Cisco Systems, Inc. and/or its affiliates in the U.S. and certain other countries. Copyright © 2008 Cisco Systems, Inc. All rights reserved. Other brands and product names are trademarks or registered trademarks of their respective holders.
www.linksys.com32�0-003��
Vodafone Mobile Phone Email
Australia 1��� +3�� �� 1�� www.vodafone.al/mobileconnect
France �00 +33 � 1000 1�00 www.sfr.fr
Germany 123� +�� �00 1�2 123� www.vodafone.de
Greece 13�� +30 ���� �0 13�� www.vodafone.gr
Ireland 1��0 2�� 000 +3�3 �2�331��� www.vodafone.ie/business
Italy �200� �00-1001�� www.vodafone.it
Netherlands 1200 +31 ��� �00 100 www.vodafone.nl
New Zealand 0�00-�21-021 +�� � 3�� 200� www.vodafone.co.nz/3grouter
Portugal 121� +3�1�1121�000 www.vodafone.pt
Spain 122 +3� �0� 122 000 www.empresas.vodafone.es
Sweden 222 +�� �0� 222 222 www.telenor.se
United Kingdom
1�1 +�� ��3� 1�1 1�1 www.vodafone.co.uk/mobileconnect