windows server enu_labmanual
TRANSCRIPT

O F F I C I A L M I C R O S O F T L E A R N I N G P R O D U C T
6419A Lab Instructions and Answer Key: Configuring, Managing and Maintaining Windows Server® 2008 Servers

Information in this document, including URL and other Internet Web site references, is subject to change without notice. Unless otherwise noted, the example companies, organizations, products, domain names, e-mail addresses, logos, people, places, and events depicted herein are fictitious, and no association with any real company, organization, product, domain name, e-mail address, logo, person, place or event is intended or should be inferred. Complying with all applicable copyright laws is the responsibility of the user. Without limiting the rights under copyright, no part of this document may be reproduced, stored in or introduced into a retrieval system, or transmitted in any form or by any means (electronic, mechanical, photocopying, recording, or otherwise), or for any purpose, without the express written permission of Microsoft Corporation.
Microsoft may have patents, patent applications, trademarks, copyrights, or other intellectual property rights covering subject matter in this document. Except as expressly provided in any written license agreement from Microsoft, the furnishing of this document does not give you any license to these patents, trademarks, copyrights, or other intellectual property.
The names of manufacturers, products, or URLs are provided for informational purposes only and Microsoft makes no representations and warranties, either expressed, implied, or statutory, regarding these manufacturers or the use of the products with any Microsoft technologies. The inclusion of a manufacturer or product does not imply endorsement of Microsoft of the manufacturer or product. Links may be provided to third party sites. Such sites are not under the control of Microsoft and Microsoft is not responsible for the contents of any linked site or any link contained in a linked site, or any changes or updates to such sites. Microsoft is not responsible for webcasting or any other form of transmission received from any linked site. Microsoft is providing these links to you only as a convenience, and the inclusion of any link does not imply endorsement of Microsoft of the site or the products contained therein.
© 2009 Microsoft Corporation. All rights reserved.
Microsoft, Microsoft Press, Active Directory, ActiveX, BitLocker, Excel, Hyper-V, Internet Explorer, MS, MSDN, PowerPoint, SharePoint, SQL Server, Visual Basic, Visual Studio, Win32, Windows, Windows Media, Windows NT, Windows PowerShell, Windows Server, and Windows Vista are either registered trademarks or trademarks of Microsoft Corporation in the United States and/or other countries.
All other trademarks are property of their respective owners.
Product Number: 6419A
Part Number: X15-19813
Released: 02/2009
Lab Instructions: Introduction to Managing Microsoft Windows Server 2008 Environment 1
Module 1 Lab Instructions: Introduction to Managing Microsoft Windows Server 2008 Environment
Contents: Exercise 1: Install the DNS Server Role 2
Exercise 2: Configuring Remote Desktop for Administration 4
2 Lab Instructions: Introduction to Managing Microsoft Windows Server 2008 Environment
Lab: Administering Windows Server 2008
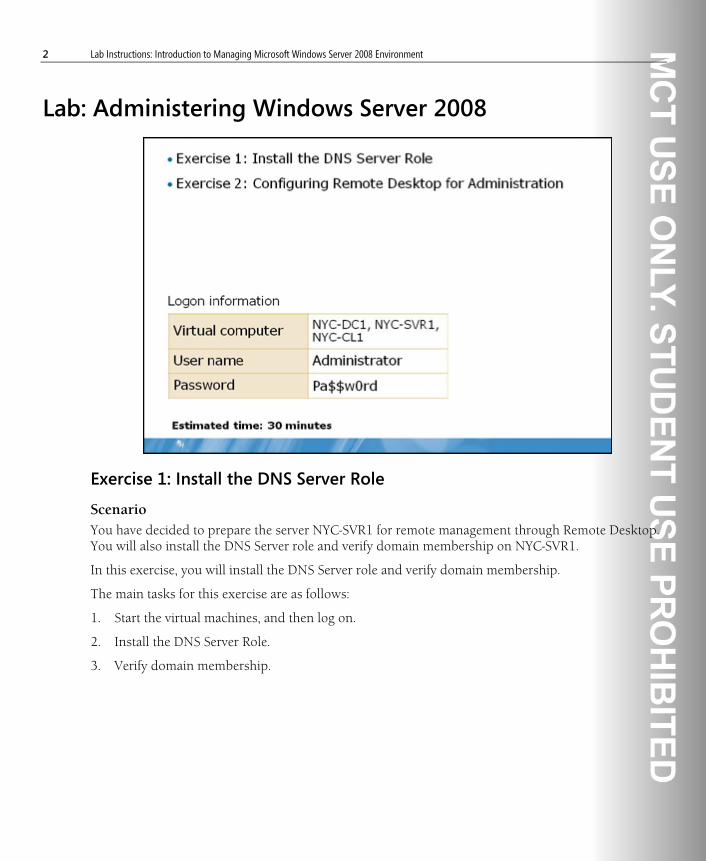
Exercise 1: Install the DNS Server Role
Scenario You have decided to prepare the server NYC-SVR1 for remote management through Remote Desktop. You will also install the DNS Server role and verify domain membership on NYC-SVR1.
In this exercise, you will install the DNS Server role and verify domain membership.
The main tasks for this exercise are as follows:
1. Start the virtual machines, and then log on.
2. Install the DNS Server Role.
3. Verify domain membership.

Lab Instructions: Introduction to Managing Microsoft Windows Server 2008 Environment 3
Task 1: Start the virtual machines, and then log on 1. On your host machine, click Start, point to All Programs, point to Microsoft Learning, and then
click 6419A. The Lab Launcher starts.
2. In the Lab Launcher, next to 6419A-NYC-DC1, click Launch.
3. In the Lab Launcher, next to 6419A-NYC-CL1, click Launch.
4. In the Lab Launcher, next to 6419A-NYC-SVR1, click Launch.
5. Log on to NYC-DC1 as Administrator with the password Pa$$w0rd.
6. Log on to NYC-CL1 as Administrator with the password Pa$$w0rd.
7. Log on to NYC-SVR1 as Administrator with the password Pa$$w0rd.
8. Minimize the Lab Launcher window.
Task 2: Install the DNS Server role • On NYC-SVR1, use Server Manager to install the DNS Server role using the following settings:
• Add only the DNS Server role service.
Task 3: Verify domain membership 1. On NYC-DC1, in Active Directory Users and Computers, verify that the NYC-SVR1 computer
account exists.
2. On NYC-SVR1, in Local Users and Groups, verify that Domain Admins is a member of the local administrators group.
Results: After this exercise, you should have successfully installed the DNS Server role and successfully verified domain membership.

4 Lab Instructions: Introduction to Managing Microsoft Windows Server 2008 Environment
Exercise 2: Configuring Remote Desktop for Administration
Scenario The server NYC-SVR1 is being used to run a new application for loan applications. The person responsible for monitoring this application needs access to NYC-SVR1 remotely because he is not authorized to enter the data center. You need to enable Remote Desktop for Administration for Axel Delgado with the highest level of security possible.
In this exercise, you will enable Remote Desktop for Administration, and configure security settings to allow Axel Delgato to carry out remote administration tasks.
The main tasks for this exercise are as follows:
1. Enable Remote Desktop for Administration.
2. Grant Axel Delgado access to Remote Desktop for Administration on NYC-SVR1.
3. Configure security for Remote Desktop for Administration.
4. Give Axel Delgado rights to run Reliability and Performance Monitor.
5. Verify Remote Desktop for Administration Functionality.
Task 1: Enable Remote Desktop for Administration 1. On NYC-SVR1, open Remote settings in System Properties.
2. Allow connections only if Network Level Authentication is used.
Task 2: Grant Axel Delgado access to Remote Desktop for Administration on NYC-SVR1 • On NYC-SVR1 in Remote Settings, add Axel Delgado as a user allowed to connect remotely.

Lab Instructions: Introduction to Managing Microsoft Windows Server 2008 Environment 5
Task 3: Configure security for Remote Desktop for Administration 1. On NYC-SVR1, open Terminal Service Configuration.
2. In the properties of RDP-TCP, configure:
• Security layer: SSL (TLS1.0)
• Encryption level: High
• Allow connections only from computers running Remote Desktop with Network Level Authentication
Task 4: Give Axel Delgado rights to run Reliability and Performance Monitor • On NYC-SVR1, use Local Users and Groups to add Axel Delgado as a member of Performance
Log Users.
Task 5: Verify Remote Desktop for Administration functionality 1. On NYC-CL1, open Remote Desktop Connection.
2. Log on using the following information:
• Computer: NYC-SVR1.woodgrovebank.com
• User name: woodgrovebank\Axel
• Password: Pa$$w0rd
3. In the Remote Desktop Connection window, open Reliability and Performance Monitor. Notice that data associated with Resource Overview is not available to Axel Delgado because Axel Delgado is not a local Administrator.
4. Verify that Axel Delgado can view information in Performance Monitor.
Results: After this exercise, you should have successfully used Axel Delgado's account to remotely access NYC-SVR1 and run Reliability and Performance Monitor.
Lab Shutdown After you complete the lab, you must shut down the 6419A-NYC-DC1, 6419A-NYC-CL1, and 6419A-NYC-SVR1 virtual machines and discard any changes.

Lab Instructions: Creating Active Directory Domain Services User and Computer Objects 1
Module 2 Lab Instructions: Creating Active Directory Domain Services User and Computer Objects
Contents: Exercise 1: Creating and Configuring User Accounts 3
Exercise 2: Creating and Configuring Computer Accounts 7
Exercise 3: Automating the Management of AD DS Objects 9

2 Lab Instructions: Creating Active Directory Domain Services User and Computer Objects
Lab: Creating AD DS User and Computer Accounts
Scenario Woodgrove Bank is an enterprise that has offices located in several cities throughout the world. Woodgrove Bank has deployed AD DS for Windows Server 2008. As one of the network administrators, one of your primary tasks will be to create and manage user and computer accounts.
Lab Instructions: Creating Active Directory Domain Services User and Computer Objects 3
Exercise 1: Creating and Configuring User Accounts In this exercise, you will create and configure user accounts. You will create a template and a user account based on the template. Finally, you will create a saved query and verify its ability to return expected search results.
The main tasks are as follows:
1. Start the virtual machines, and then log on.
2. Create a new user account.
3. Modify Kerim Hanif’s user account properties.
4. Create a template for the New York Customer Service department.
5. Create a new user account based on the customer service template.
6. Modify the user account properties for all customer service representatives in New York.
7. Modify the user account properties for all Branch Managers.
8. Create a saved query to find all investment users.
Task 1: Start the virtual machines, and then log on 1. Click the 6419A Lab Launcher shortcut on your desktop. The Lab Launcher
starts.
2. In the Lab Launcher, next to 6419A-NYC-DC1, click Launch.
3. In the Lab Launcher, next to 6419A-NYC-CL1, click Launch.
4. Log on to NYC-DC1 as Administrator with the password Pa$$w0rd.
5. Minimize the Lab Launcher window.
4 Lab Instructions: Creating Active Directory Domain Services User and Computer Objects
Task 2: Create a new user account 1. On NYC-DC1, open Active Directory Users and Computers.
2. In the ITAdmins OU, create a new user with the following parameters:
• First name: Kerim
• Last name: Hanif
• Full name: Kerim Hanif
• User logon name: Kerim
• Password: Pa$$w0rd
3. On NYC-CL1, verify that you can log on as Kerim, with a password of Pa$$w0rd. When prompted, change the password to Pa$$w0rd1.
4. Log off from NYC-CL1.
Task 3: Modify Kerim Hanif’s user account properties 1. Modify the user account properties for Kerim Hanif’s account as follows:
• Telephone number: 204-555-0100
• Office: Downtown
• E-mail: [email protected]
• Remote Access Permission : Allow access
• Logon Hours. Mon-Fri, 8:00 A.M. and 5:00 P.M
2. Add Kerim to the ITAdmins_WoodgroveGG group.
Lab Instructions: Creating Active Directory Domain Services User and Computer Objects 5
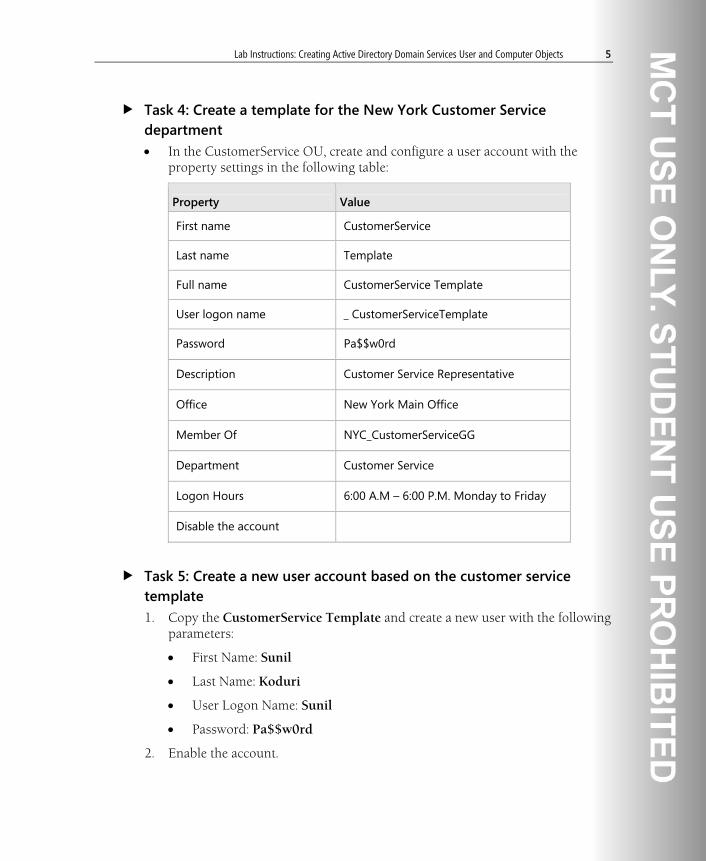
Task 4: Create a template for the New York Customer Service department • In the CustomerService OU, create and configure a user account with the
property settings in the following table:
Property Value
First name CustomerService
Last name Template
Full name CustomerService Template
User logon name _ CustomerServiceTemplate
Password Pa$$w0rd
Description Customer Service Representative
Office New York Main Office
Member Of NYC_CustomerServiceGG
Department Customer Service
Logon Hours 6:00 A.M – 6:00 P.M. Monday to Friday
Disable the account
Task 5: Create a new user account based on the customer service template 1. Copy the CustomerService Template and create a new user with the following
parameters:
• First Name: Sunil
• Last Name: Koduri
• User Logon Name: Sunil
• Password: Pa$$w0rd
2. Enable the account.

6 Lab Instructions: Creating Active Directory Domain Services User and Computer Objects
Task 6: Modify the user account properties for all customer service representatives in New York 1. In the CustomerService OU, update the properties of all the users to reflect the
following information:
• Description: Customer Service Representative
• Office: New York Main Office
• Department: Customer Service
2. View the properties of one of the user accounts in the OU to confirm that the Description, Office and Department attributes have been updated.
Task 7: Modify the user account properties for all Branch Managers 1. In Active Directory Users and Computers, search the WoodgroveBank.com
domain.
2. Use an advanced search and search for all user accounts that have a job title of Branch Manager.
3. Select all of the user accounts located by the search, and add them to the BranchManagersGG group.
Task 8: Create a saved query to find all investment users 1. In Active Directory Users and Computers, create a new saved query named
Find_Investment_Users that will search for all users with a department attribute that starts with Investments.
2. Verify that the query displays all the users in the Investment departments in each city.
Result: At the end of this exercise, you will have created and configured user accounts. You will have created a template and a user account based on the template. And you will have created a saved query and verified its ability to return expected search results.

Lab Instructions: Creating Active Directory Domain Services User and Computer Objects 7
Exercise 2: Creating and Configuring Computer Accounts In this exercise, you will create and configure computer accounts, delete a computer account and join a computer to an AD DS domain.
The main tasks are as follows:
1. Create a computer account by using Active Directory Users and Computers.
2. Delete a computer account in AD DS.
3. Join a computer to an AD DS domain.
Task 1: Create a computer account by using Active Directory Users and Computers 1. On NYC-DC1, in Active Directory Users and Computers, create a new
computer account named Vista1 in the Computers container.
2. Configure the computer account settings so that Doris Krieger can join the computer to the domain.
Task 2: Delete a computer account in AD DS 1. In Active Directory Users and Computers, delete the NYC-CL1 computer
account.
2. On NYC-CL1, attempt to log on as Axel with a password of Pa$$w0rd.
Task 3: Join a computer to an AD DS domain 1. On NYC-CL1, log on as a local Administrator with a password of Pa$$w0rd.
2. Access the System control panel, and click Change settings.
3. Change the computer name to NYC-CL3 and configure the computer to be a member of a Workgroup called WORKGROUP.
Note: You will be prompted to authenticate. Authenticate as Administrator with a password of Pa$$w0rd.

8 Lab Instructions: Creating Active Directory Domain Services User and Computer Objects
4. Restart the computer.
5. After the computer restarts, log on as Administrator with a password of Pa$$w0rd.
6. Access the System control panel, and click Change settings.
7. Configure the computer to be a member of the WoodgroveBank.com domain.
8. Use the administrator credentials to join the computer to the domain.
9. Restart the computer.
10. On NYC-DC1, in Active Directory Users and Computers, verify that the NYC-CL3 account was added to the domain.
11. On NYC-CL3, verify that you can log on as WoodgroveBank\Axel with a password of Pa$$w0rd.
Result: At the end of this exercise, you will have created and configured computer accounts, deleted a computer account and joined a computer to an AD DS domain.

Lab Instructions: Creating Active Directory Domain Services User and Computer Objects 9
Exercise 3: Automating the Management of AD DS Objects Woodgrove Bank is opening a new Houston branch. The HR department has provided you with a file that includes all of the new users that are being hired for the Houston location. You need to import the user accounts into AD DS, and then activate and assign passwords to all of the accounts.
You also need to modify the user properties for the Houston users by updating the city information.
Woodgrove Bank is also planning on starting a Research and Development department in the NYC location. You need to create a new OU for the research and development (R&D) department in the Woodgrove Bank domain, and import and configure new user accounts into AD DS.
The main tasks are as follows:
1. Modify and use the Importusers.csv file to import a group of users into AD DS.
2. Modify and run the ActivateUser.vbs script to enable the imported user accounts and assign a password to each account.
3. Modify and use the Modifyusers.ldf file to prepare for modifying the properties for a group of users in AD DS.
4. Run the CreateUser.ps1 script to add new users to AD DS.
Task 1: Modify and use the Importusers.csv file to import a group of users into AD DS 1. On NYC-DC1, browse to E:\Mod02\Labfiles and open ImportUsers.csv with
Notepad. Examine the header information required to create OUs and user accounts.
2. Copy and paste the contents of the ImportUsers.txt file into the ImportUsers.csv file, starting with the second line. Save the file as C:\import.csv.
3. At the command prompt, type CSVDE –I –F C:\import.csv and then press ENTER.
4. In Active Directory Users and Computers, verify that the Houston OU and five child OUs were created, and that several user accounts were created in each OU.

10 Lab Instructions: Creating Active Directory Domain Services User and Computer Objects
Task 2: Modify and run the ActivateUser.vbs script to enable the imported user accounts and assign a password to each account 1. On NYC-DC1, in E:\ Mod02\Labfiles, edit Activateusers.vbs.
2. Modify the container value in the second line to: OU=BranchManagers,OU=Houston,DC=WoodgroveBank,DC=com.
3. Modify the container values in the additional lines at the end of the script to include the following OUs, and then save the file:
• OU=CustomerService,OU=Houston,DC=WoodgroveBank,DC=com
• OU=Executives,OU=Houston,DC=WoodgroveBank,DC=com
• OU=Investments,OU=Houston,DC=WoodgroveBank,DC=com
• OU=ITAdmins,OU=Houston,DC=WoodgroveBank,DC=com
4. Save the file as c:\Activateusers.vbs, and then run using Cscript c:\Activateusers.vbs.
5. In Active Directory Users and Computers, browse to the Houston OU, and then confirm that user accounts in all child OUs are activated.
Task 3: Modify and use the Modifyusers.ldf file to prepare to modify the properties for a group of users in AD DS 1. On NYC-DC1, export all of the user accounts in the Houston child OUs by
using the following command:
LDIFDE –f c:\Modifyusers.ldf –d "OU=Houston,DC=WoodgroveBank,DC=com" –r "objectClass=user" –l physicalDeliveryOfficeName.
2. Edit the C:\Modifyusers.ldf file.
3. On the Edit menu, use the Replace option to replace all instances of changetype: add, with changetype: modify.
4. After each changetype line, add the following lines:
replace: physicalDeliveryOfficeName physicalDeliveryOfficeName: Houston
5. At the end of the entry for each user, add a dash (–) on its own line followed by a blank line.

Lab Instructions: Creating Active Directory Domain Services User and Computer Objects 11
6. Save the file as C:\Modifyusers.
7. At the command prompt, type ldifde –I –f c:\Modifyusers.ldf and then press ENTER.
8. In Active Directory Users and Computers, verify that the Office attribute for the user accounts in Houston has been updated with the Houston location.
Task 4: Modify and run the CreateUser.ps1 script to add a new user to AD DS 1. On NYC-DC1, in E:\Mod02\LabFiles, open CreateUser.ps1.
2. Under #Assign the location where the user account will be created, note the entry $objADSI = [ADSI]"LDAP://ou=ITAdmins,DC=WoodgroveBank,DC=com".
3. Enable execution in PowerShell by typing the following at a command prompt: Set-ExecutionPolicy AllSigned, and then press ENTER.
4. Run the script: E:\Mod02\Labfiles\CreateUser.ps1
Note: You will be prompted to authenticate. Authenticate as Administrator with a password of Pa$$w0rd. In Active Directory Users and Computers, in the ITAdmins OU, verify that the user Jesper has been created.
Task 5: Close all virtual machines and discard undo disks 1. For each virtual machine that is running, close the Virtual Machine Remote
Control window.
2. In the Close box, select Turn off machine and discard changes. Click OK.
3. Close the 6419A Lab Launcher.
Result: At the end of this exercise, you will have examined several options for automating the management of user objects.

Lab Instructions: Creating Groups and Organizational Units 1
Module 3 Lab Instructions: Creating Groups and Organizational Units
Contents: Exercise 1: Creating AD DS Groups 3
Exercise 2: Planning an OU Hierarchy (Discussion) 6
Exercise 3: Creating an OU Hierarchy 7

2 Lab Instructions: Creating Groups and Organizational Units
Lab: Creating an OU Infrastructure
Scenario Woodgrove Bank is an enterprise that has offices located in several cities throughout the world. Woodgrove Bank is opening a new subsidiary in Vancouver, and they need an OU design for the subsidiary. Woodgrove Bank has deployed AD DS on servers running Windows Server 2008, and one of your primary tasks will be to create a new OU design and move users from current positions to the new subsidiary.

Lab Instructions: Creating Groups and Organizational Units 3
Exercise 1: Creating AD DS Groups In this exercise, you will create three new groups by using Active Directory Users and Computers. You will create one group by using Dsadd. You will add users to the groups and inspect the results.
The main tasks are as follows:
1. Start the virtual machines, and then log on.
2. Create three groups using Active Directory Users and Computers.
3. Create a group using the Dsadd command-line tool.
4. Add members to the new groups.
5. Inspect the contents of the Vancouver groups.
Task 1: Start the virtual machines, and then log on 1. Click the 6419A Lab Launcher shortcut on your desktop. The Lab Launcher
starts.
2. In the Lab Launcher, next to 6419A-NYC-DC1, click Launch.
3. In the Lab Launcher, next to 6419A-NYC-SVR1, click Launch.
4. Log on to NYC-DC1 as WOODGROVEBANK\Administrator with the password Pa$$w0rd.
5. Minimize the Lab Launcher window.

4 Lab Instructions: Creating Groups and Organizational Units
Task 2: Create three groups using Active Directory Users and Computers 1. On NYC-DC1, open Active Directory Users and Computers.
2. In the WoodgroveBank.com domain, create a new group in the Users container using the following parameters:
• Group Name: VAN_BranchManagersGG
• Scope: Global
• Type: Security
3. Repeat step 2 to create two more groups that have the same scope and type. The two group names are as follows:
• VAN_CustomerServiceGG
• VAN_InvestmentsGG
Task 3: Create a group using the Dsadd command-line tool 1. At a command prompt, enter the following command:
dsadd group “cn=VAN_MarketingGG,cn=Users,dc=WoodgroveBank,dc=com” –samid VAN_MarketingGG –secgrp yes –scope g
2. Press ENTER.
3. Use the Find command to locate the new group in the WoodgroveBank.com OU.
Lab Instructions: Creating Groups and Organizational Units 5
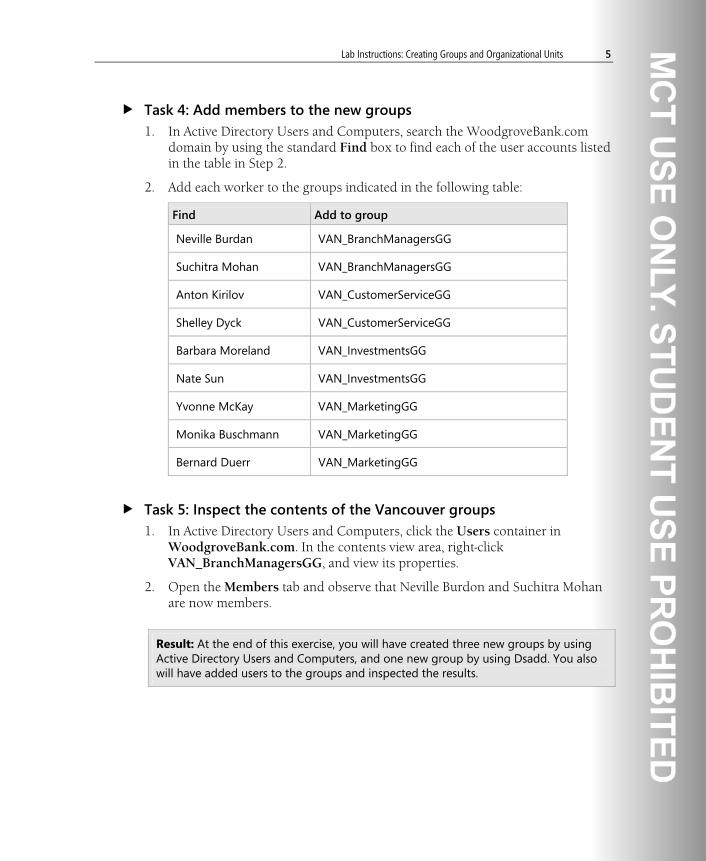
Task 4: Add members to the new groups 1. In Active Directory Users and Computers, search the WoodgroveBank.com
domain by using the standard Find box to find each of the user accounts listed in the table in Step 2.
2. Add each worker to the groups indicated in the following table:
Find Add to group
Neville Burdan VAN_BranchManagersGG
Suchitra Mohan VAN_BranchManagersGG
Anton Kirilov VAN_CustomerServiceGG
Shelley Dyck VAN_CustomerServiceGG
Barbara Moreland VAN_InvestmentsGG
Nate Sun VAN_InvestmentsGG
Yvonne McKay VAN_MarketingGG
Monika Buschmann VAN_MarketingGG
Bernard Duerr VAN_MarketingGG
Task 5: Inspect the contents of the Vancouver groups 1. In Active Directory Users and Computers, click the Users container in
WoodgroveBank.com. In the contents view area, right-click VAN_BranchManagersGG, and view its properties.
2. Open the Members tab and observe that Neville Burdon and Suchitra Mohan are now members.
Result: At the end of this exercise, you will have created three new groups by using Active Directory Users and Computers, and one new group by using Dsadd. You also will have added users to the groups and inspected the results.

6 Lab Instructions: Creating Groups and Organizational Units
Exercise 2: Planning an OU Hierarchy (Discussion) In this exercise, you will discuss and determine how to plan an OU hierarchy.
Scenario A new subsidiary of Woodgrove Bank is located in Vancouver, Canada. It will have the following departments:
• Management
• Customer Service
• Marketing
• Investments
The OU hierarchy has to support delegation of administrative tasks to users within that organizational unit.
Discussion Questions 1. Which approach to extending the organizational hierarchy of
WoodgroveBank.com is the most likely to be applied in creating the new subsidiary’s resources: Geographic, Organizational, or Functional? Why?
2. What would be the most logical way to additionally subdivide the subsidiary’s organizational unit (Geographic, Organizational, or Functional)?
3. What does the pattern of naming second level OUs in other centers suggest for the new Vancouver OU?
4. What would be a simple but effective way of delegating administrative tasks (such as adding users and computers to the domain, and changing user properties such as password resets, and employee contact details) to certain users within a department?
Result: At the end of this exercise, you will have discussed and determined how to plan an OU hierarchy.

Lab Instructions: Creating Groups and Organizational Units 7
Exercise 3: Creating an OU Hierarchy In this exercise, you will use the output from the previous discussion to create an OU structure for the new Vancouver subsidiary of WoodgroveBank.com. You also will move users (see list in this section) from other subsidiaries into groups, and add groups to the appropriate OUs. Additionally, you will populate the groups that have the members of the corresponding departments, and update the descriptions of the user accounts that have been moved into the new subsidiary.
The benefit of having OUs based on administrative units is in delegating administrative responsibilities to members of those units.
You will create OUs in two ways:
• In Active Directory Users and Computers, by using an MMC snap-in
• In Directory Service Tools, by using the Dsadd command-line tool
The main tasks are as follows:
1. Create OUs using Active Directory Users and Computers.
2. Create an OU using Dsadd.
3. Nest an OU inside another OU.
4. Move groups that you created in Exercise 1 into the appropriate OUs.
5. Find and move users into Vancouver OUs.
6. Delegate control over an OU.
7. Test delegated user rights.
8. Close all virtual machines, and discard undo disks.
Task 1: Create OUs using Active Directory Users and Computers 1. On NYC-DC1, open Active Directory Users and Computers.
2. At the root level of WoodgroveBank.com, create a new OU called Vancouver.
3. Inside the Vancouver OU, create three OUs with the following names:
• BranchManagers
• CustomerService
• Marketing

8 Lab Instructions: Creating Groups and Organizational Units
Task 2: Create an OU using Dsadd 1. Click Start, click Run, and then type cmd to open a command-line window.
2. Type the following command at the command prompt:
dsadd ou “ou=Investments,dc=WoodgroveBank,dc=com” -desc “Investment department” -d WoodgroveBank.com -u Administrator -p Pa$$w0rd
3. Press ENTER.
4. In Active Directory Users and Computers, refresh the WoodgroveBank.com domain object, and note the presence of the new OU.
Task 3: Nest an OU inside another OU 1. In Active Directory Users and Computers, refresh the object tree.
2. Move the new Investments OU from WoodgroveBank.com domain level into the Vancouver OU. Click OK to dismiss the warning message.
Note: There is a potential risk associated with the movement of security groups from one OU into another. Group Policies that are in effect in one OU may no longer be applied in the new location. By default, AD DS notifies administrators of that risk whenever a group is moved between OUs.
Lab Instructions: Creating Groups and Organizational Units 9
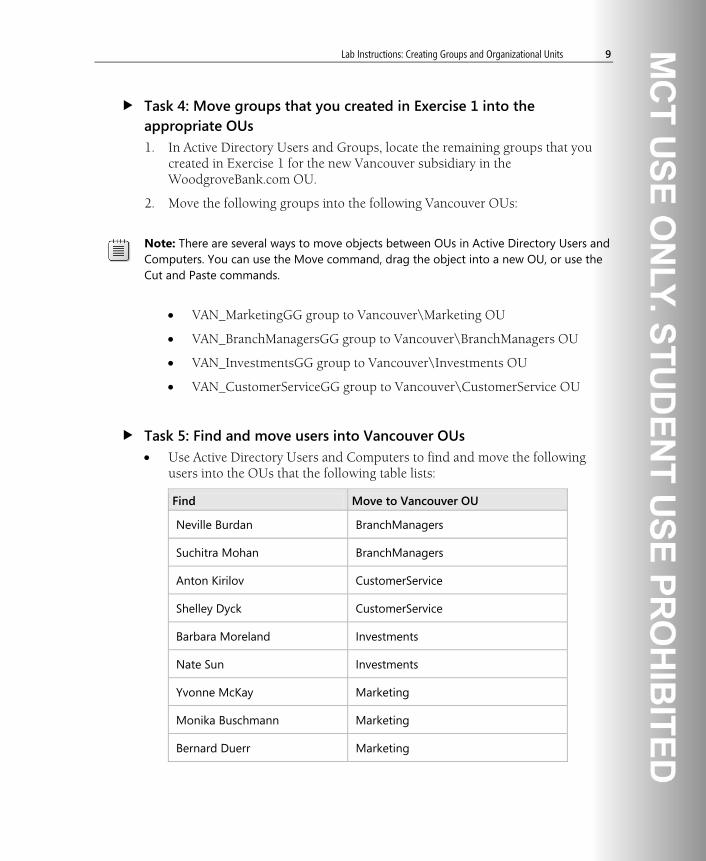
Task 4: Move groups that you created in Exercise 1 into the appropriate OUs 1. In Active Directory Users and Groups, locate the remaining groups that you
created in Exercise 1 for the new Vancouver subsidiary in the WoodgroveBank.com OU.
2. Move the following groups into the following Vancouver OUs:
Note: There are several ways to move objects between OUs in Active Directory Users and Computers. You can use the Move command, drag the object into a new OU, or use the Cut and Paste commands.
• VAN_MarketingGG group to Vancouver\Marketing OU
• VAN_BranchManagersGG group to Vancouver\BranchManagers OU
• VAN_InvestmentsGG group to Vancouver\Investments OU
• VAN_CustomerServiceGG group to Vancouver\CustomerService OU
Task 5: Find and move users into Vancouver OUs • Use Active Directory Users and Computers to find and move the following
users into the OUs that the following table lists:
Find Move to Vancouver OU
Neville Burdan BranchManagers
Suchitra Mohan BranchManagers
Anton Kirilov CustomerService
Shelley Dyck CustomerService
Barbara Moreland Investments
Nate Sun Investments
Yvonne McKay Marketing
Monika Buschmann Marketing
Bernard Duerr Marketing
10 Lab Instructions: Creating Groups and Organizational Units
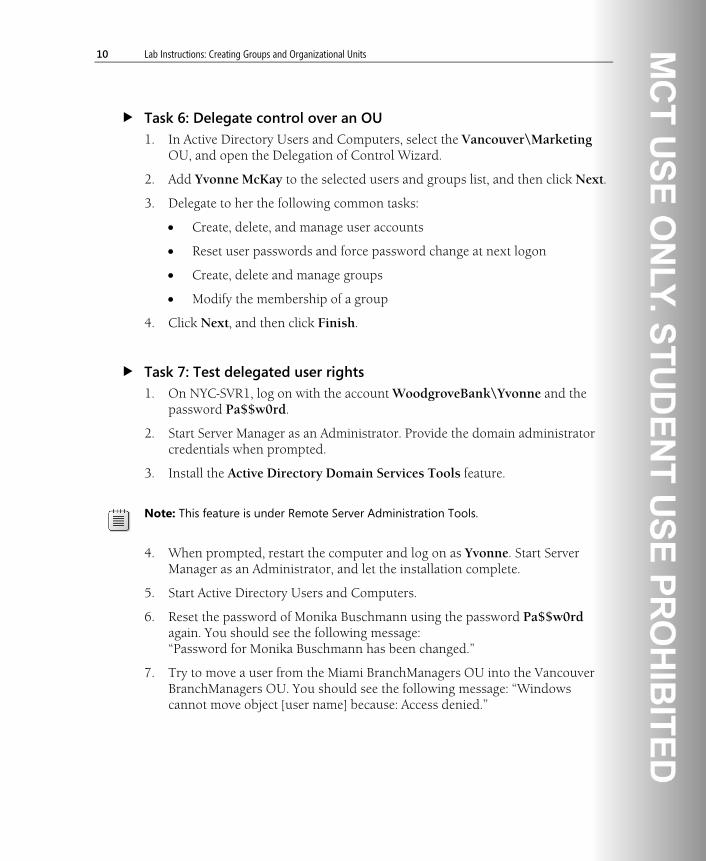
Task 6: Delegate control over an OU 1. In Active Directory Users and Computers, select the Vancouver\Marketing
OU, and open the Delegation of Control Wizard.
2. Add Yvonne McKay to the selected users and groups list, and then click Next.
3. Delegate to her the following common tasks:
• Create, delete, and manage user accounts
• Reset user passwords and force password change at next logon
• Create, delete and manage groups
• Modify the membership of a group
4. Click Next, and then click Finish.
Task 7: Test delegated user rights 1. On NYC-SVR1, log on with the account WoodgroveBank\Yvonne and the
password Pa$$w0rd.
2. Start Server Manager as an Administrator. Provide the domain administrator credentials when prompted.
3. Install the Active Directory Domain Services Tools feature.
Note: This feature is under Remote Server Administration Tools.
4. When prompted, restart the computer and log on as Yvonne. Start Server Manager as an Administrator, and let the installation complete.
5. Start Active Directory Users and Computers.
6. Reset the password of Monika Buschmann using the password Pa$$w0rd again. You should see the following message: “Password for Monika Buschmann has been changed.”
7. Try to move a user from the Miami BranchManagers OU into the Vancouver BranchManagers OU. You should see the following message: “Windows cannot move object [user name] because: Access denied.”

Lab Instructions: Creating Groups and Organizational Units 11
Task 8: Close all virtual machines, and discard undo disks 1. For each virtual machine that is running, close the Virtual Machine Remote
Control window.
2. In the Close box, select Turn off machine and discard changes. Click OK.
3. Close the 6419A Lab Launcher.
Result: At the end of this exercise, you will have created OUs by using Active Directory Users and Computers and Dsadd. You also will have delegated administrative permissions and tested them.
Lab Instructions: Managing Access to Resources in Active Directory Domain Services 1
Module 4 Lab Instructions: Managing Access to Resources in Active Directory Domain Services
Contents: Exercise 1: Planning a Shared Folder Implementation (Discussion) 3
Exercise 2: Implementing a Shared Folder Implementation 4
Exercise 3: Evaluating the Shared Folder Implementation 7

2 Lab Instructions: Managing Access to Resources in Active Directory Domain Services
Lab: Managing Access to Resources
Scenario Woodgrove Bank is an enterprise that has offices located in several cities throughout the world. Woodgrove Bank has deployed AD DS in Windows Server 2008. They have recently opened a new subsidiary in Toronto, Canada. As a network administrator assigned to the new subsidiary, one of your primary tasks will be to create and manage access to resources, including the shared folder implementation. For example, groups that mirror the departmental organization of the bank need shared file storage areas. You must also have shared folders to enable files to be shared during special projects between departments.

Lab Instructions: Managing Access to Resources in Active Directory Domain Services 3
Exercise 1: Planning a Shared Folder Implementation (Discussion) In this exercise, you will discuss and determine the best solutions for a shared folder implementation.
Discussion Questions: 1. The Woodgrove Bank Toronto subsidiary has an organizational hierarchy, as
outlined by its organizational units (OUs) that supports the activities of its four departments: Marketing, Investments, Management, and Customer Service. Each department has groups populated with the employees in that department. How could you give each department separate file-sharing spaces?
2. All members of the Toronto subsidiary must be able to read documents posted by management about topics such as staffing, targets and projections, and company news. To create a series of folders that will enable this information to be available to all employees in the subsidiary, and managers from other parts of the Woodgrove Bank, what sorts of groups would be needed? What sorts of permissions would each require? What sorts of folder structures might be needed?
3. A task force on reducing the subsidiary’s carbon footprint (that is, its negative impact on the natural environment) is collecting data from various departments. They plan to keep the information private until they can publish a report. How can individuals from various departments have contributing status while restricting access to those outside their project?
Result: At the end of this exercise, you will have discussed and determined solutions for a shared folder implementation.

4 Lab Instructions: Managing Access to Resources in Active Directory Domain Services
Exercise 2: Implementing a Shared Folder Implementation In this exercise, you will create the shared folder implementation based on the discussion in the previous exercise.
The main tasks are as follows:
1. Start the virtual machines, and then log on.
2. Create four new folders by using Windows Explorer.
3. Set share permissions for the folders.
4. Create a shared folder for all Domain Users by using Share and Storage Management Microsoft Management Console (MMC).
5. Create a new group and shared folder for an interdepartmental project.
Task 1: Start the virtual machines, and then log on 1. Click the 6419A Lab Launcher shortcut on your desktop. The Lab Launcher
starts.
2. In the Lab Launcher, next to 6419A-NYC-DC1, click Launch.
3. In the Lab Launcher, next to 6419A-NYC-CL1, click Launch.
4. Log on to NYC-DC1 as Administrator with the password Pa$$w0rd.
5. Minimize the Lab Launcher window.
Task 2: Create four new folders by using Windows Explorer 1. On NYC-DC1, open Windows Explorer.
2. On drive C, create folders named:
• Marketing
• Managers
• Investments
• CustomerService

Lab Instructions: Managing Access to Resources in Active Directory Domain Services 5
Task 3: Set share properties for the folder 1. Right-click the Marketing folder, and then click Share.
2. In File Sharing dialog box, type TOR_MarketingGG, and then click Add.
3. Change the permission level to Contributor, and then click Share.
4. Repeat creating shares for each of the remaining folders, assigning the groups and permissions.
• TOR_BranchManagersGG (Managers folder)
• TOR_InvestmentsGG (Investments folder)
• TOR_CustomerServiceGG (CustomerService folder)
Task 4: Create another shared folder by using Share and Storage Management MMC 1. On the Start menu, in Administrative Tools, click Share and Storage
Management.
2. Start Provision Share Wizard.
3. Click the Browse button. In the Browse Folder window, create a new folder named CompanyNews on the C drive.
4. Do not change any other settings, but click Next all the way through to the Create button. Click Create, and then click Close.
5. In the Shares list of the Share and Storage Management MMC, right-click CompanyNews, and then click Properties.
6. In the Permissions tab, click Share Permissions. Add the Domain Users group, and notice that their permission is set as Read.
7. Add the TOR _BranchManagersGG group, and give them Full Control permissions.
8. Finish the Permissions settings, and exit Share and Storage Management MMC.

6 Lab Instructions: Managing Access to Resources in Active Directory Domain Services
Task 5: Create a new group and shared folder for an interdepartmental project 1. Open Active Directory Users and Computers MMC.
2. Click the Toronto OU, and add a new global security group named TOR_SpecialProjectGG.
3. Expand the following Toronto OUs, and use the Add to group command to add the users listed in the following table:
Toronto OUs Names
Investment Aaron Con
Marketing Aidan Delaney
Branch Managers Sven Buck
Customer Service Dorena Paschke
4. Close Active Directory Users and Computers.
5. Create a new folder in drive C, and name it SpecialProjects.
6. Share the folder, adding the TOR_SpecialProjectGG group that has Contribute permission levels.
7. Click Share.
Task 6: Block inheritance of a folder in a shared folder 1. Open the SpecialProjects folder.
2. Create a new folder called Unshared.
3. Change Unshared Properties by removing the inheritable permissions.
4. Give permissions back the Administrator.
Result: At the end of this exercise, you will have created a shared folder implementation.

Lab Instructions: Managing Access to Resources in Active Directory Domain Services 7
Exercise 3: Evaluating the Shared Folder Implementation In this exercise, you will verify that the shared folder implementation meets the security requirements provided in the documentation. You will log on as some users to make sure that they have the required level of access.
The main tasks are as follows:
1. Log on to NYC-CL1 as Sven.
2. Check the permissions for Company News.
3. Check permissions of interdepartmental share Special Projects.
4. Close all virtual machines, and discard undo disks.
Task 1: Log on to NYC-CL1 as Sven • Log on to NYC-CL1 as Sven, with the password Pa$$w0rd.
Task 2: Check the permissions for Company News 1. After you are logged on as Sven, open the Company News folder and create a
text file. Name it News.txt.
2. Create a folder named News, and drag News.txt into it.
3. Close the Company News window and log off.
Task 3: Check permissions of interdepartmental share Special Projects 1. Log on as Dorena with the password Pa$$w0rd.
2. Open the Special Project volume and create a text document.
3. Try to open Company News. Open the News.txt file inside the News folder.
4. Log off as Dorena.

8 Lab Instructions: Managing Access to Resources in Active Directory Domain Services
Task 4: Close all virtual machines, and discard undo disks 1. For each virtual machine that is running, close the Virtual Machine Remote
Control window.
2. In the Close box, select Turn off machine and discard changes. Click OK.
3. Close the 6419A Lab Launcher.
Result: At the end of this exercise, you will have verified that the shared folder implementation meets security requirements.

Lab Instructions: Configuring Active Directory Objects and Trusts 1
Module 5 Lab Instructions: Configuring Active Directory Objects and Trusts
Contents: Lab A: Configuring Active Directory Delegation
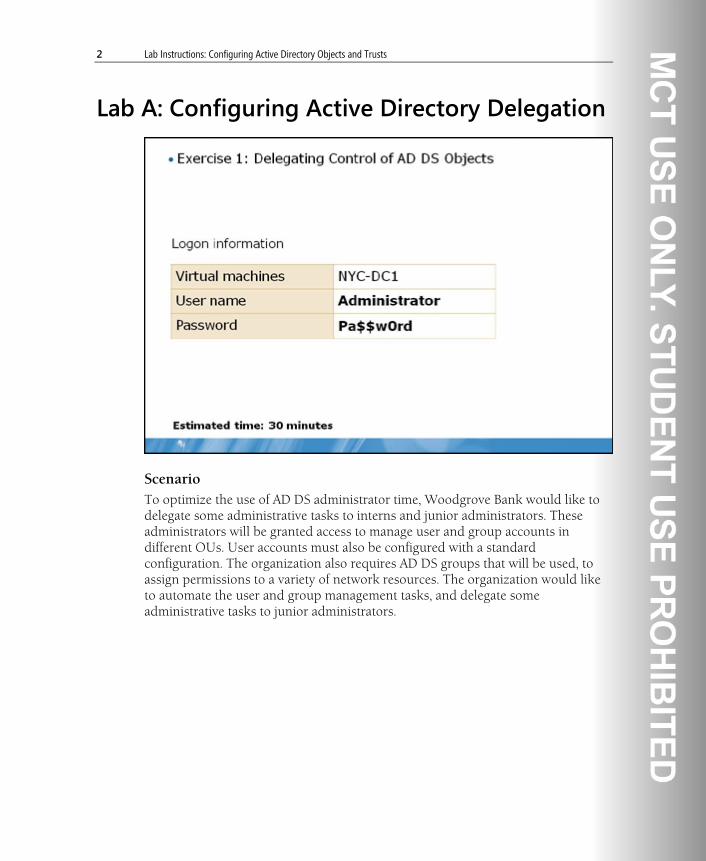
Exercise 1: Delegating Control of AD DS Objects 3
Lab B: Configuring Active Directory Trusts
Exercise 1: Configuring AD DS Trusts 7
2 Lab Instructions: Configuring Active Directory Objects and Trusts
Lab A: Configuring Active Directory Delegation
Scenario To optimize the use of AD DS administrator time, Woodgrove Bank would like to delegate some administrative tasks to interns and junior administrators. These administrators will be granted access to manage user and group accounts in different OUs. User accounts must also be configured with a standard configuration. The organization also requires AD DS groups that will be used, to assign permissions to a variety of network resources. The organization would like to automate the user and group management tasks, and delegate some administrative tasks to junior administrators.
Lab Instructions: Configuring Active Directory Objects and Trusts 3
Exercise 1: Delegating Control of AD DS Objects In this exercise, you will delegate control of AD DS objects for other administrators. You will also test the delegate permissions to ensure that administrators can perform the required actions, but cannot perform other actions.
Woodgrove Bank has decided to delegate administrative tasks for the Toronto office. In this office, the branch managers must be able to create and manage user and group accounts. The customer service personnel must be able to reset user passwords and configure some user information, such as phone numbers and addresses.
The main tasks are as follows:
1. Start the virtual machine and log on.
2. Assign full control of users and groups in the Toronto OU.
3. Assign rights to reset passwords and configure private user information in the Toronto OU.
4. Verify the effective permissions assigned for the Toronto OU.
5. Test the delegated permissions for the Toronto OU.
Task 1: Start the virtual machine, and then log on 1. On your host machine, click Start, point to All Programs, point to Microsoft
Learning, and then click 6419A. The Lab Launcher starts.
2. In the Lab Launcher, next to 6419A-NYC-DC1, click Launch.
3. Log on to 6419A-NYC-DC1 as Administrator with the password Pa$$w0rd.
4. Minimize the Lab Launcher window.
Task 2: Assign full control of users and groups in the Toronto OU 1. On NYC-DC1, run the Delegation of Control Wizard on the Toronto OU.
2. Assign the right to Create, delete and manage user accounts and the Create, delete and manage groups to the Tor_BranchManagersGG.

4 Lab Instructions: Configuring Active Directory Objects and Trusts
Task 3: Assign rights to reset passwords and configure private user information in the Toronto OU 1. On NYC-DC1, run the Delegation of Control Wizard on the Toronto OU.
2. Assign the right to Reset user passwords and force password change at next logon to the Tor_CustomerServiceGG group.
3. Run the Delegation of Control Wizard again. Choose the option to create a custom task.
4. Assign the Tor_CustomerServiceGG group permission to change personal information only for user accounts.
Task 4: Verify the effective permissions assigned for the Toronto OU 1. In Active Directory Users and Computers, enable viewing of Advanced
Features.
2. Access the Advanced Security Settings for the Toronto OU.
3. Check the effective permissions for Sven Buck. Sven is a member of the Tor_BranchManagersGG group. Verify that Sven has permissions to create and delete user and group accounts.
4. Access the advanced security settings for Matt Berg, located in the CustomerService OU in the Toronto OU. Verify that Matt has permissions to create and delete user and group accounts.
5. Check the effective permissions for Helge Hoening. Helge is a member of the Tor_CustomerServiceGG group. Verify that Helge has permissions to reset passwords and permission to write personal attributes.

Lab Instructions: Configuring Active Directory Objects and Trusts 5
Task 5: Test the delegated permissions for the Toronto OU 1. Log on to NYC-DC1 as Sven with the password of Pa$$w0rd.
2. Start Active Directory Users and Computers, and verify that Sven can create a new user in the Toronto organizational unit.
3. Verify that Sven can create a new group in the Toronto OU.
4. Verify that Sven cannot create a user in the ITAdmins OU.
5. Log off NYC-DC1, and then log on as Helge with the password Pa$$w0rd.
6. In Active Directory Users and Computers, verify that Helge does not have permissions to create any new objects in the Toronto OU.
7. Verify that Helge can reset user passwords and configure user properties, such as the office and telephone number.
Result: At the end of this exercise, you will have delegated the administrative tasks for the Toronto office.

6 Lab Instructions: Configuring Active Directory Objects and Trusts
Lab B: Configuring Active Directory Trusts
Scenario Woodgrove Bank also has established a partner relationship with another organization. Some users in each organization must be able to access resources in the other organization. However, the access between organizations must be limited to as few users and as few servers as possible.

Lab Instructions: Configuring Active Directory Objects and Trusts 7
Exercise 1: Configuring AD DS Trusts In this exercise, you will configure trusts based on a trust-configuration design that the enterprise administrator provides. You also will test the trust configuration to ensure that the trusts are configured correctly.
Woodgrove Bank has initiated a strategic partnership with Fabrikam. Users at Woodgrove Bank will need to have access to several file shares and applications running on several servers at Fabrikam. Only users from Fabrikam should be able to access shares on NYC-SVR1.
The main tasks are as follows:
1. Start the virtual machines, and then log on.
2. Configure the Network and DNS Settings to enable the forest trust.
3. Configure a forest trust between WoodgroveBank.com and Fabrikam.com.
4. Configure selective authentication for the forest trust to enable access to only NYC-DC2.
5. Test the selective authentication.
6. Close all virtual machines and discard undo disks.
Task 1: Start the virtual machines, and then log on 1. In the Lab Launcher, next to 6419A-VAN-DC1, click Launch.
2. In the Lab Launcher, next to 6419A-NYC-DC2, click Launch.
3. In the Lab Launcher, next to 6419A-NYC-CL1, click Launch.
4. Log on to 6419A-VAN-DC1 as Administrator with the password Pa$$w0rd.
5. Minimize the Lab Launcher window.
Task 2: Configure the Network and DNS Settings to enable the forest trust 1. On VAN-DC1, modify the Local Area Network properties to change the IP
address to 10.10.0.110, the Default gateway to 10.10.0.1, and the Preferred DNS server to 10.10.0.110, and then click OK.
2. Synchronize the time on VAN-DC1 with NYC-DC1.

8 Lab Instructions: Configuring Active Directory Objects and Trusts
3. In DNS Manager, add a conditional forwarder to forward all queries for Woodgrovebank.com to 10.10.0.10.
4. In Active Directory Domains and Trusts, raise the domain and forest functional level to Windows Server 2003.
5. On NYC-DC1, in the DNS Manager console, add a conditional forwarder to forward all queries for Fabrikam.com to 10.10.0.110.
6. Close the DNS Manager console.
Task 3: Configure a forest trust between WoodgroveBank.com and Fabrikam.com 1. On NYC-DC1, start Active Directory Domains and Trusts from the
Administrative Tools folder.
2. Right-click WoodgroveBank.com and then click Properties.
3. Start the New Trust Wizard and configure a forest trust with Fabikam.com.
4. Configure both sides of the trust. Use [email protected] to verify the trust.
5. Accept the default s setting of domain-wide authentication for both domains.
6. Confirm both trusts.
Task 4: Configure selective authentication for the forest trust to enable access to only NYC-DC2 1. In Active Directory Domains and Trusts, modify the incoming trust from
Fabriakm.com to use selective authentication.
2. In Active Directory Users and Computers, access NYC-DC2’s properties. On the Security tab, grant the MarketingGG group from Fabrikam.com permission to authenticate to this server.
3. Access NYC-CL1’s properties. On the Security tab, grant the MarketingGG group from Fabrikam.com permission to authenticate to this workstation.

Lab Instructions: Configuring Active Directory Objects and Trusts 9
Task 5: Test the selective authentication 1. Log on to the NYC-CL1 virtual machine as [email protected] using the
password Pa$$w0rd.
Note: Adam is a member of the MarketingGG group at Fabrikam. He is able to log on to a computer in the WoodgroveBank.com domain because of the trust between the two forests and because he has been allowed to authenticate to NYC-CL1.
2. Try to access the \\NYC-DC2\Netlogon folder. Adam should be able to access the folder.
3. Try to access the \\NYC-DC1\Netlogon folder. Adam should not be able to access the folder because the server is not configured for selective authentication.
Task 6: Close all virtual machines and discard undo disks 1. For each running virtual machine, close the Virtual Machine Remote Control
window.
2. In the Close box, select Turn off machine and discard changes, and then click OK.
3. Close the 6419A Lab Launcher.
Result: At the end of this exercise, you will have configured trusts based on a trust configuration design.

Lab Instructions: Creating and Configuring Group Policy 1
Module 6 Lab Instructions: Creating and Configuring Group Policy
Contents: Lab A: Creating and Configuring GPOs
Exercise 1: Creating and Configuring Group Policy Objects 3
Exercise 2: Managing the Scope of GPO Application 6
Lab B: Verifying and Managing GPOs
Exercise 1: Verifying GPO Application 9
Exercise 2: Managing GPOs 12
Exercise 3: Delegating Administrative Control of GPOs 14

2 Lab Instructions: Creating and Configuring Group Policy
Lab A: Creating and Configuring GPOs
Scenario The Woodgrove Bank has decided to implement Group Policy to manage user desktops and to configure computer security. The organization already implemented an OU configuration that includes top-level OUs by location, with additional OUs within each location OU for different departments. User accounts are in the same container as their workstation computer accounts. Server computer accounts are spread throughout various OUs.
Note: Some of the tasks in this lab are designed to illustrate GPO management techniques and settings and may not always follow best practices.
Group Policy Requirements • Domain users will not have access to the Run menu. The policy will apply to
all users except users in the IT Admin OU.
• Executives will not have access to the desktop display settings.

Lab Instructions: Creating and Configuring Group Policy 3
• The NYC, Miami and Toronto branch users will not have access to the Control Panel. All branch managers will be exempt from this restriction.
• All domain computers will have a mandatory baseline security policy applied that does not display the name of the last logged on user.
• Computers running Windows Vista or Windows XP will have additional settings applied to wait for the network at startup.
• Users in the administrators group will have the URL for Microsoft support added to their Favorites.
• Kiosk computers in the branch offices will have Loopback processing enabled.
Exercise 1: Creating and Configuring Group Policy Objects You will create and link the GPOs that the enterprise administrator’s design specifies. Tasks include modifying the default domain policy, and creating policy settings linked to specific OUs and sites.
The main tasks are as follows:
1. Start and log on to NYC-DC1.
2. Create the GPOs.
3. Configure GPOs.
4. Link the GPOs.
Task 1: Start the virtual machines and then log on 1. On your host machine, click Start, point to All Programs, point to Microsoft
Learning, and then click 6419A. The Lab Launcher starts.
2. In the Lab Launcher, next to 6419A-NYC-DC1, click Launch.
3. Log on to NYC-DC1as Administrator with the password Pa$$w0rd.
4. Minimize the Lab Launcher window.

4 Lab Instructions: Creating and Configuring Group Policy
Task 2: Create the group policy settings • Use the GPMC to perform the following:
• Create a GPO named Restrict Control Panel.
• Create a GPO named Restrict Desktop Display.
• Create a GPO named Restrict Run Command.
• Create a GPO named Baseline Security.
• Create a GPO named Vista and XP Security.
• Create a GPO named Admin Favorites.
• Create a GPO named Kiosk Computer Security.
Task 3: Configure the policy settings 1. Edit the Baseline Security GPO (Computer Configuration\Policies\Windows
Settings\Security Settings\Local Policies\Security Options\ Interactive logon: Do not display last user name) so that the name of the last logged on user is not displayed.
2. Edit the Admin Favorites GPO (User Configuration\Policies\Windows Settings\Internet Explorer Maintenance\URLs\Favorites and Links) to include the URL for Microsoft tech support (http://support.microsoft.com) in the Internet Favorites.
3. Edit the Restrict Desktop Display GPO (User Configuration\Policies \Administrative Templates\Control Panel\Display\Remove Display in Control Panel) to prevent access to the desktop display settings.
4. Edit the Kiosk Computer Security GPO (Computer Configuration\Policies \Administrative Templates\System\Group Policy\User Group Policy loopback processing mode) to use loopback processing, and to hide and disable all items on the desktop for the logged on user.
5. Edit the Restrict Control Panel GPO (User Configuration\Policies \Administrative Templates\Control Panel\Prohibit access to the Control Panel) to prevent user access to Control Panel.

Lab Instructions: Creating and Configuring Group Policy 5
6. Edit the Restrict Run Command GPO (User Configuration\Policies \Administrative Templates\Start Menu and Taskbar\Remove Run Menu from the Start Menu) to prevent access to the Run menu.
7. Edit the Vista and XP Security GPO (Computer Configuration\Policies \Administrative Templates\System\Logon\Always wait for the network at computer startup and logon) to ensure that computers wait for the network at startup.
Task 4: Link the GPOs to the appropriate containers • Use the GPMC to perform the following:
• Link the Restrict Run Command GPO to the domain container.
• Link the Baseline Security GPO to the domain container.
• Link the Vista and XP Security GPO to the domain container
• Link the Kiosk Computer Security GPO to the domain container.
• Link the Admin Favorites GPO to the ITAdmins OU.
• Link the Restrict Control Panel GPO to the NYC, Miami and Toronto OUs.
• Link the Restrict Desktop Display GPO to the Executive OU.
Result: At the end of this exercise, you will have created and configured GPOs.

6 Lab Instructions: Creating and Configuring Group Policy
Exercise 2: Managing the Scope of GPO Application In this exercise, you will configure the scope of GPO settings based on the enterprise administrator’s design. Tasks include disabling portions of GPOs, blocking and enforcing inheritance, and applying filtering based on security groups and WMI filters.
The main tasks are as follows:
1. Configure Group Policy management for the domain container.
2. Configure Group Policy management for the IT Admin OU.
3. Configure Group Policy management for the branch OUs.
4. Create and apply a WMI filter for the Vista and XP Security GPO.
Task 1: Configure Group Policy management for the domain container 1. Configure the Baseline Security link to be Enforced, and the disable the User
side of the policy.
2. Configure the Vista and XP Security link to be Enforced.
3. Use security group membership filtering to configure the Kiosk Computer Security GPO to apply only to the Kiosk Computers global group.
Task 2: Configure Group Policy management for the IT Admin OU • Block inheritance at the IT Admin OU, to exempt the ITAdmins users from the
Restrict Run Command GPO.

Lab Instructions: Creating and Configuring Group Policy 7
Task 3: Configure Group Policy management for the branch OUs • Use security group membership filtering to configure the Restrict Control
Panel GPO to deny the Apply Group Policy permission to the following groups:
• Mia_BranchManagersGG
• NYC_BranchManagersGG
• Tor_BranchManagersGG
Task 4: Create and apply a WMI filter for the Vista and XP Security GPO 1. Create a new WMI query to retrieve users from the Windows XP and
Windows Vista operating systems.
2. Open GPMC and create a new WMI Filter.
3. Write a query to retrieve Windows XP and Windows Vista users in the WMI Query box.
Result: At the end of this exercise, you will have configured the scope of GPO settings.

8 Lab Instructions: Creating and Configuring Group Policy
Lab B: Verifying and Managing GPOs
Scenario The enterprise administrator has created a GPO deployment plan. You have been asked to create GPOs so that certain policies can be applied to all domain objects. Some policies are considered mandatory. You also want to create policy settings that will apply only to subsets of the domain’s objects, and you want to have separate policies for computer settings and user settings. You must delegate GPO administration to administrators within each company location.
Note: Some of the tasks in this lab are designed to illustrate GPO management techniques and settings and may not always follow best practices.

Lab Instructions: Creating and Configuring Group Policy 9
Group Policy Requirements • Domain users will not have access to the Run menu. The policy will apply to
all users except users in the IT Admin OU.
• Executives will not have access to the desktop display settings.
• The NYC, Miami and Toronto branch users will not have access to the Control Panel. All branch managers will be exempt from this restriction.
• All domain computers will have a mandatory baseline security policy applied that does not display the name of the last logged on user.
• Computers running Windows Vista or Windows XP will have additional settings applied to wait for the network at startup.
• Users in the administrators group will have the URL for Microsoft support added to their Favorites.
• Kiosk computers in the branch offices will have Loopback processing enabled.
Exercise 1: Verifying GPO Application In this exercise, you will test the application of GPOs to ensure that the GPOs are being applied as the design specifies. Students will log on as specific users, and also use Group Policy Modeling and Resultant Set of Policy (RSoP) to verify that GPOs are being applied correctly.
The main tasks are as follows:
1. Start NYC-CL1.
2. Verify that a Miami branch user is receiving the correct policy.
3. Verify that a Miami Branch Manager is receiving the correct policy.
4. Verify that a user in the IT Admin OU is receiving the correct policy.
5. Verify that a user in the Executive OU user is receiving the correct policy.
6. Verify that the username does not appear.
7. Use Group Policy modeling to test kiosk computer settings.
10 Lab Instructions: Creating and Configuring Group Policy
Task 1: Start NYC-CL1 • Log on to NYC-CL1 as WOODGROVEBANK\Anton with the password
Pa$$w0rd.
Task 2: Verify that a Miami branch user is receiving the correct policy 1. Ensure that there is no link to the Run menu in the Accessories folder on the
Start menu.
2. Ensure that there is no link to Control Panel on the Start menu.
3. Log off.
Task 3: Verify that a Miami Branch Manager is receiving the correct policy 1. Log on to NYC-CL1 as WOODGROVEBANK\Roya with the password
Pa$$w0rd.
2. Ensure that there is no link to the Run menu in the Accessories folder on the Start menu.
3. Ensure that a link to Control Panel appears on the Start menu.
4. Log off.
Task 4: Verify that a user in the IT Admin OU is receiving the correct policy 1. Log on to NYC-CL1 as WOODGROVEBANK\Betsy with the password
Pa$$w0rd.
2. Ensure that a link to the Run menu appears in the Accessories folder on the Start menu.
3. Ensure that a link to Control Panel appears on the Start menu.
4. Launch Internet Explorer, open the Favorites pane, and then ensure that the link to Tech Support appears.
5. Log off.

Lab Instructions: Creating and Configuring Group Policy 11
Task 5: Verify that a user in the Executive OU user is receiving the correct policy 1. Log on to NYC-CL1 as Chase with the password Pa$$w0rd.
2. Ensure that there is no link to the Run menu in the Accessories folder on the Start menu.
3. Ensure that a link to Control Panel appears on the Start menu.
4. Ensure that there is no access to the desktop display settings.
Hint: When you attempt to access display settings you will receive a message informing you that this has been disabled.
5. Log off.
Task 6: Verify that the last logged on username does not appear • Verify that the last logged on username does not appear.
Task 7: Use Group Policy modeling to test kiosk computer settings 1. Log on to NYC-DC1 as Administrator with the password Pa$$w0rd.
2. Launch the GPMC, right-click the Group Policy Modeling folder, click Group Policy Modeling Wizard, and then click Next twice.
3. On the User and Computer Selection screen, click Computer and enter Woodgrovebank\NYC-CL1, and click then Next three times.
4. In the Computer Security Groups screen, click Add.
5. In the Select Groups dialog box, type Kiosk Computers, and then click Next.
6. In the WMI Filters for Computers screen, click Next twice, click Finish and then view the report.
Result: At the end of this exercise, you will have tested and verified a GPO application.

12 Lab Instructions: Creating and Configuring Group Policy
Exercise 2: Managing GPOs In this exercise, you will use the GPMC to back up, restore, and import GPOs.
The main tasks are as follows:
1. Backup an individual policy.
2. Back up all GPOs.
3. Delete and restore an individual GPO.
4. Import a GPO.
Task 1: Backup an individual policy 1. Create a folder named C:\GPOBackup.
2. In the GPMC, open the Group Policy Objects folder.
3. Right-click the Restrict Control Panel policy, and then click Backup.
4. Browse to C:\GPOBackup.
5. Click Backup, and then click OK after the backup succeeds.
Task 2: Back up all GPOs 1. Right-click the Group Policy Objects folder and then click Back Up All.
2. Ensure that C:\GPOBackup is the backup location. Confirm the deletion.
Task 3: Delete and restore an individual GPO 1. Right-click the Admin Favorites policy and then click Delete. Click Yes and
then click OK when the deletion succeeds.
2. Right-click the Group Policy Objects folder and then click Manage Backups.
3. Restore the Admin Favorites GPO.
4. Confirm that the Admin Favorites policy appears in the Group Policy Objects folder.

Lab Instructions: Creating and Configuring Group Policy 13
Task 4: Import a GPO 1. Create a new GPO named Import in the Group Policy Objects folder.
2. Right-click the Import GPO, and then click Import Settings.
3. In the Import Settings Wizard, click Next.
4. On the Backup GPO window, click Next.
5. Ensure the Backup folder location is C:\GPOBackup.
6. On the Source GPO screen, click Restrict Control Panel, and then click Next.
7. Finish the Import Settings wizard.
8. Click Import GPO, click the Settings tab, and then ensure that the Restrict Access to Control Panel setting is Enabled.
Result: At the end of this exercise, you will have backed up, restored, and imported GPOs.

14 Lab Instructions: Creating and Configuring Group Policy
Exercise 3: Delegating Administrative Control of GPOs In this exercise, you will delegate administrative control of GPOs based on the enterprise administrator design. Tasks include configuring permissions to create, edit and link GPOs. You will then test the permissions configuration.
The main tasks are as follows:
1. Grant Betsy the right to create GPOs in the domain.
2. Delegate the right to edit the Import GPO to Betsy.
3. Delegate the right to link GPOs to the Executives OU to Betsy.
4. Enable Domain Users to log on to domain controllers.
5. Test the delegation.
6. Close all virtual machines and discard undo disks.
Task 1: Grant Betsy the right to create GPOs in the domain 1. Select the Group Policy Objects folder and then click the Delegation tab, and
then click Add.
2. In the Select Users dialog box, type Betsy in the Object name field, and then click OK.
Task 2: Delegate the right to edit the Import GPO to Betsy 1. In the Group Policy Objects folder, select Import GPO, click the Delegation
tab, and then click Add.
2. In the Select Users dialog box, type Betsy in the Object name field and then click OK.
3. In the Add Group or User dialog box, select Edit Settings from the drop-down list, and then click OK.

Lab Instructions: Creating and Configuring Group Policy 15
Task 3: Delegate the right to link GPOs to the Executives OU to Betsy 1. Select the Executives OU, the click the Delegation tab, and then click Add.
2. In the Select Users dialog box, type Betsy in the Object name field, and then click OK.
3. In the Add Group or User dialog box select This container only, and then click OK.
Task 4: Enable Domain Users to log on to domain controllers
Note: This step is included in the lab to enable you to test the delegated permissions. As a best practice, you should install the administration tools on a Windows workstation rather than enable Domain Users to log on to domain controllers.
1. On NYC-DC1, start Group Policy Management, and then edit the Default Domain Controllers Policy.
2. In the Group Policy Management Editor window, access the User Rights Assignment folder.
3. Double-click Allow log on locally. In the Allow log on locally Properties dialog box, click Add User or Group.
4. Grant the Domain Users group the log on locally right.
5. Open a command prompt, type GPUpdate /force, and then press ENTER.
Task 5: Test the delegation 1. Log on to NYC-CL1 as Betsy.
2. Create a Group Policy Management Console.
3. Right-click the Group Policy Objects folder, and then click New.
4. Create a new policy named Test. This operation will succeed.
5. Right-click Import GPO, and then click Edit. This operation will succeed.

16 Lab Instructions: Creating and Configuring Group Policy
6. Right-click Executives OU, and link the Test GPO to it. This operation will succeed.
7. Right-click the Admin Favorites policy, and attempt to edit it. This operation is not possible.
8. Close the GPMC.
Task 6: Close all virtual machines, and discard undo disks 1. For each virtual machine that is running, close the Virtual Machine Remote
Control window.
2. In the Close box, select Turn off machine and discard changes, and then click OK.
3. Close the 6419A Lab Launcher.
Result: At the end of this exercise, you will have backed up, restored, and imported GPOs.

Lab Instructions: Configure User and Computer Environments By Using Group Policy 1
Module 7 Lab Instructions: Configure User and Computer Environments By Using Group Policy
Contents: Lab A: Configuring Logon Scripts and Folder Redirection Using Group Policy
Exercise 1: Configure Logon Scripts and Folder Redirection 2
Lab B: Configuring Administrative Templates
Exercise 1: Configure Administrative Templates 6
Exercise 2: Verify GPO Application 9
Lab C: Deploying Software with Group Policy
Exercise 1: Deploy a Software Package with Group Policy 11
Exercise 2: Verify Software Installation 13
Lab D: Configuring Group Policy Preferences
Exercise 1: Configure Group Policy Preferences 14
Exercise 2: Verify Group Policy Preferences Application 17
Lab E: Troubleshooting Group Policy Issues
Exercise 1: Troubleshoot Group Policy Scripts 18
Exercise 2: Troubleshoot GPO Lab-7B 22
Exercise 3: Troubleshoot GPO Lab-7C 25
Exercise 4: Troubleshoot GPO Lab-7D 27
2 Lab Instructions: Configure User and Computer Environments By Using Group Policy
Lab A: Configuring Logon Scripts and Folder Redirection Using Group Policy
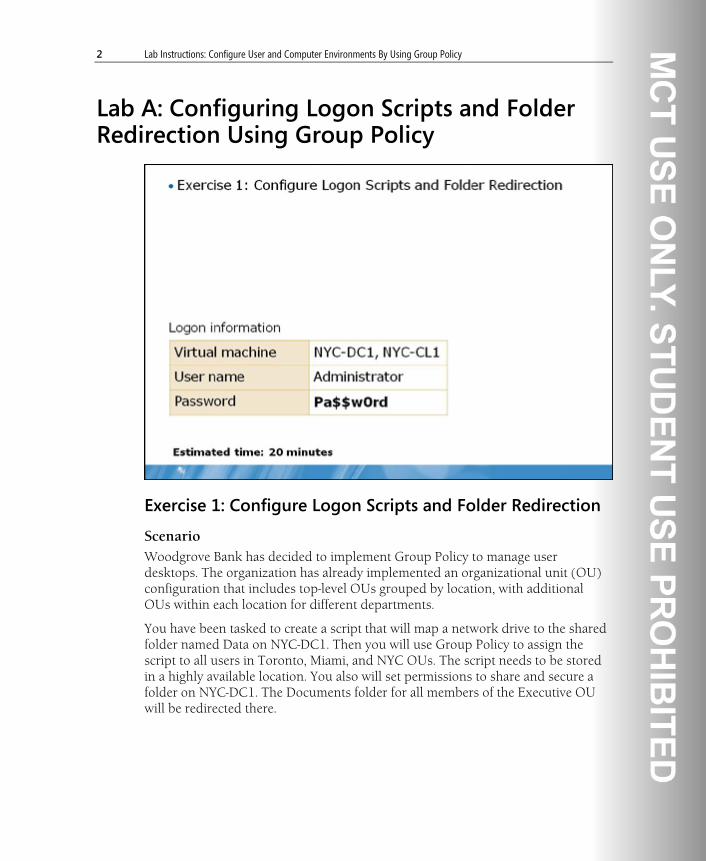
Exercise 1: Configure Logon Scripts and Folder Redirection
Scenario Woodgrove Bank has decided to implement Group Policy to manage user desktops. The organization has already implemented an organizational unit (OU) configuration that includes top-level OUs grouped by location, with additional OUs within each location for different departments.
You have been tasked to create a script that will map a network drive to the shared folder named Data on NYC-DC1. Then you will use Group Policy to assign the script to all users in Toronto, Miami, and NYC OUs. The script needs to be stored in a highly available location. You also will set permissions to share and secure a folder on NYC-DC1. The Documents folder for all members of the Executive OU will be redirected there.

Lab Instructions: Configure User and Computer Environments By Using Group Policy 3
The main tasks for this exercise are:
1. Start the 6419A-NYC-DC1 virtual machine and log.
2. Review the logon script to map a network drive.
3. Configure and link the Logon Script GPO.
4. Share and secure a folder for the Executives group.
5. Redirect the Documents folder for the Executives group.
6. Start the 6419A-NYC-CL1 virtual machine, and then log on as WOODGROVEBANK\Tony.
7. Observe the applied settings while logged on as a user in the Executives OU.
Task 1: Start the 6419A-NYC-DC1 virtual machine and log on as WOODGROVEBANK\Administrator • Start NYC-DC1, and then log on as WOODGROVEBANK\Administrator
using the password Pa$$w0rd.
Task 2: Review the logon script to map a network drive 1. On NYC-DC1, browse to E:\Mod07\LabFiles\Scripts.
2. Review the Map.bat script, and then copy it to the clipboard.
Task 3: Configure and link the Logon Script GPO 1. Open Group Policy Management, and then create a new GPO named Logon
Script, linked to the WoodgroveBank.com domain.
2. Configure the Logon Script GPO with the following settings:
• Under User Configuration, Policies, Windows Settings, Scripts (Logon/Logoff), double-click Logon.
• Paste the Map.bat logon script from the clipboard.

4 Lab Instructions: Configure User and Computer Environments By Using Group Policy
Task 4: Share and secure a folder for the Executives group 1. In Windows Explorer, browse to E:\Mod07\Labfiles.
2. Share the ExecData folder and set the following permissions:
• Remove the Everyone group.
• Add the Executives_WoodgroveGG group with full control.
• On the Security tab, click Advanced.
• Remove all users and groups except for CREATOR OWNER and SYSTEM.
• Add the Executives_WoodgroveGG group and apply the settings to this folder only.
• For Executives_WoodgroveGG, allow the List folder / read data and Create folders / append data permissions.
Task 5: Redirect the Documents folder for the Executives group 1. In the Group Policy Management window, create a new GPO named
Executive Redirection, linked to the Executives OU.
2. Configure the Executives GPO with the following settings:
• Under User Configuration, Polices, Windows Settings, Folder Redirection, modify Documents.
• Select the Basic - Redirect everyone's folder to the same location option.
• In the Root Path field, type \\NYC-DC1\ExecData.

Lab Instructions: Configure User and Computer Environments By Using Group Policy 5
Task 6: Start the 6419A-NYC-CL1 virtual machine, and then log on as WOODGROVEBANK\Tony • Start NYC-CL1, and then log on as WOODGROVEBANK\Tony using the
password Pa$$w0rd.
Task 7: Observe the applied settings while logged on as a user in the Executives OU 1. Verify that the J: drive is mapped to the Data share on NYC-DC1.
2. In Documents Properties, verify the location is \\NYC-DC1\ExecData\Tony.
Result: At the end of this exercise, you will have configured logon scripts and folders redirection.
6 Lab Instructions: Configure User and Computer Environments By Using Group Policy
Lab B: Configuring Administrative Templates
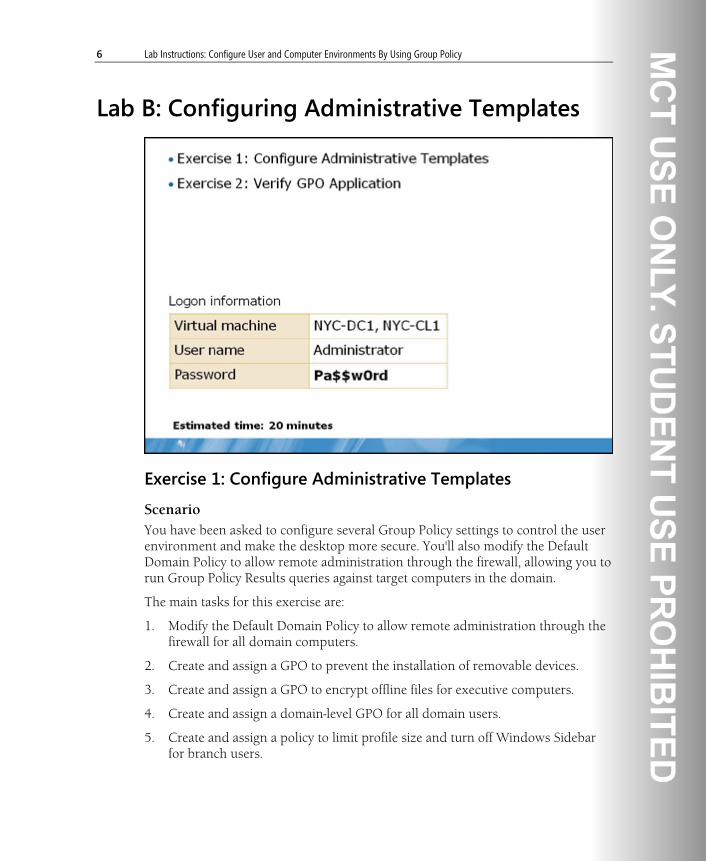
Exercise 1: Configure Administrative Templates
Scenario You have been asked to configure several Group Policy settings to control the user environment and make the desktop more secure. You'll also modify the Default Domain Policy to allow remote administration through the firewall, allowing you to run Group Policy Results queries against target computers in the domain.
The main tasks for this exercise are:
1. Modify the Default Domain Policy to allow remote administration through the firewall for all domain computers.
2. Create and assign a GPO to prevent the installation of removable devices.
3. Create and assign a GPO to encrypt offline files for executive computers.
4. Create and assign a domain-level GPO for all domain users.
5. Create and assign a policy to limit profile size and turn off Windows Sidebar for branch users.

Lab Instructions: Configure User and Computer Environments By Using Group Policy 7
Task 1: Modify the Default Domain Policy allow remote administration through the firewall for all domain computers • On NYC-DC1, in the Group Policy Management console pane, configure the
Default Domain Policy GPO with the following settings:
• Under Computer Configuration, Polices, Administrative Templates, Network, Network Connections, Windows Firewall, Domain Profile, enable Windows Firewall: Allow inbound remote administration exception.
• Under System, Group Policy, enable Group Policy slow link detection and assign a Connection speed value of 800 Kbps.
Result: At the end of this task, you will have enabled remote administration through the firewall. This allows the Group Policy Results Wizard to query target computers.
Task 2: Create and assign a GPO to prevent the installation of removable devices 1. In the Group Policy Management window, create a new GPO named Prevent
Removable Devices, linked to the Miami, NYC, and Toronto OUs.
2. Configure the Prevent Removable Devices GPO with the following settings:
• Under Computer Configuration, Policies, Administrative Templates, System, Device Installation, Device Installation Restrictions, enable Prevent installation of removable devices.
Task 3: Create and assign a GPO to encrypt offline files for executive computers 1. In the Group Policy Management window, create a new GPO named Encrypt
Offline Files, linked to the Executives OU.
2. Configure the Encrypt Offline Files GPO with the following settings:
• Under Computer Configuration, Policies, Administrative Templates, Network, Offline Files, enable Encrypt the Offline Files cache.
8 Lab Instructions: Configure User and Computer Environments By Using Group Policy
Task 4: Create and assign a domain-level GPO for all domain users 1. In the Group Policy Management window, create a new GPO named All Users
Policy, linked to the WoodgroveBank.com domain.
2. Configure the All Users Policy GPO with the following settings:
• Under User Configuration, Policies, Administrative Templates, System, enable Prevent access to registry editing tools.
• Under Start Menu and Taskbar, enable Remove Clock from the system notification area.
Task 5: Create and assign a policy to limit profile size and turn off Windows Sidebar for branch users 1. In the Group Policy Management window, create a new GPO named Branch
Users Policy, linked to the Miami, NYC, and Toronto OUs.
2. Configure the Branch Users Policy GPO with the following settings:
• Under User Configuration, Policies, Administrative Templates, System, User Profiles, enable Limit profile size and assign a Max Profile size of 1000000 KB.
• Under Windows Components, Windows Sidebar, enable Turn off Windows Sidebar.

Lab Instructions: Configure User and Computer Environments By Using Group Policy 9
Exercise 2: Verify GPO Application The main tasks for this exercise are:
1. Verify that the preferences have been applied.
2. Log on as a user in a Branch Office and observe the applied settings.
3. Use the Group Policy Results Wizard to review Group Policy application for a target user and computer.
Task 1: Verify that the settings for Executives have been applied 1. On NYC-CL1, log on as WOODGROVEBANK\Tony.
Note: Some user settings can only be applied during logon or may not apply due to cached credentials. These include roaming user profile path, Folder Redirection path, and Software Installation settings. If the user is already logged on when these settings are detected, they will not be applied until the next time the user is logged on.
2. Verify that the Windows Sidebar is not displayed.
3. In the notification area, verify that the clock is not displayed.
4. In the Taskbar Properties, on the Notification Area tab, verify that you do not have the option to display the clock.
5. Verify that you do not have access to registry editing tools.
6. Log off NYC-CL1.
Task 2: Log on as a user in a Branch Office and observe the applied settings 1. On NYC-CL1, log on as WOODGROVEBANK\Roya.
2. Verify that the Windows Sidebar is not displayed.
3. In the notification area, verify that the clock is not displayed.
4. In the notification area, double-click the Available profile space icon and review the information.
5. In Documents Properties, verify the location is C:\Users\Roya.

10 Lab Instructions: Configure User and Computer Environments By Using Group Policy
6. Verify that you do not have access to registry editing tools.
7. Verify that the J: drive is mapped to the Data share on NYC-DC1.
8. Log off NYC-CL1
Task 3: Use the Group Policy Results Wizard to review Group Policy application for a target user and computer 1. On NYC-DC1, in the Group Policy Management window, run the Group Policy
Results Wizard against NYC-CL1 for the user Tony.
2. Review the list of applied computer and user GPOs.
Question: Which GPOs were applied to the computer?
Question: Which GPOs were applied to the user?
3. On the Settings tab, under Computer Configuration, click Administrative Templates, and then expand each of the settings.
Question: What settings were delivered to the computer?
4. Under User Configuration, expand each of the settings.
Question: What settings were delivered to the user?
Result: At the end of this exercise, you will have configured several Administrative Templates policy settings for various OUs in the organization and then verified successful GPO application.

Lab Instructions: Configure User and Computer Environments By Using Group Policy 11
Lab C: Deploying Software with Group Policy
Exercise 1: Deploy a Software Package with Group Policy
Scenario Not all computers have Microsoft Office installed, but even those users may need to be able to open and view a document such as a PowerPoint presentation. You need to deploy the Microsoft Office PowerPoint viewer application to all computers in the WoodgroveBank.com domain.
The main tasks for this exercise are:
1. Copy a software package to the Data share.
2. Configure and review the software deployment GPO.
12 Lab Instructions: Configure User and Computer Environments By Using Group Policy
Task 1: Copy a software package to the Data share • On NYC-DC1, browse to E:\Mod07\LabFiles and copy and paste
PPVIEWER.MSI to the Data folder.
Task 2: Configure and review the software deployment GPO 1. On NYC-DC1, in the Group Policy Management window create a new GPO
named Software Deployment, linked to the WoodgroveBank.com domain.
2. Configure the Software Deployment GPO with the following settings:
• Under Computer Configuration, Policies, Software Settings, Software installation, right-click Software installation, point to New, and then click Package.
• Choose the Assign option, and type \\NYC-DC1\Data\ppviewer.msi.
3. Open the Microsoft Office PowerPoint Viewer 2003 package properties and review the options on the following tabs:
• General
• Deployment
• Upgrades
• Categories
• Modifications
• Security

Lab Instructions: Configure User and Computer Environments By Using Group Policy 13
Exercise 2: Verify Software Installation The main task for this exercise is:
1. Verify that the software package has been installed.
Task 1: Verify that the software package has been installed 1. On NYC-CL1, log on as WOODGROVEBANK\Administrator.
2. From a Command Prompt window, type GPUpdate /force and then restart the computer when prompted.
3. When the computer restarts, log on as WOODGROVEBANK\Administrator.
4. In the Control Panel window, click Uninstall a program.
5. Notice that the Microsoft Office PowerPoint Viewer 2003 program has been successfully installed.
6. Uninstall Microsoft Office PowerPoint Viewer 2003.
7. When the process completes, press F5 and notice that even though you can uninstall the program, it comes back because the program is assigned through Group Policy.
Result: At the end of this exercise, you will have successfully deployed an assigned software package using Group Policy.
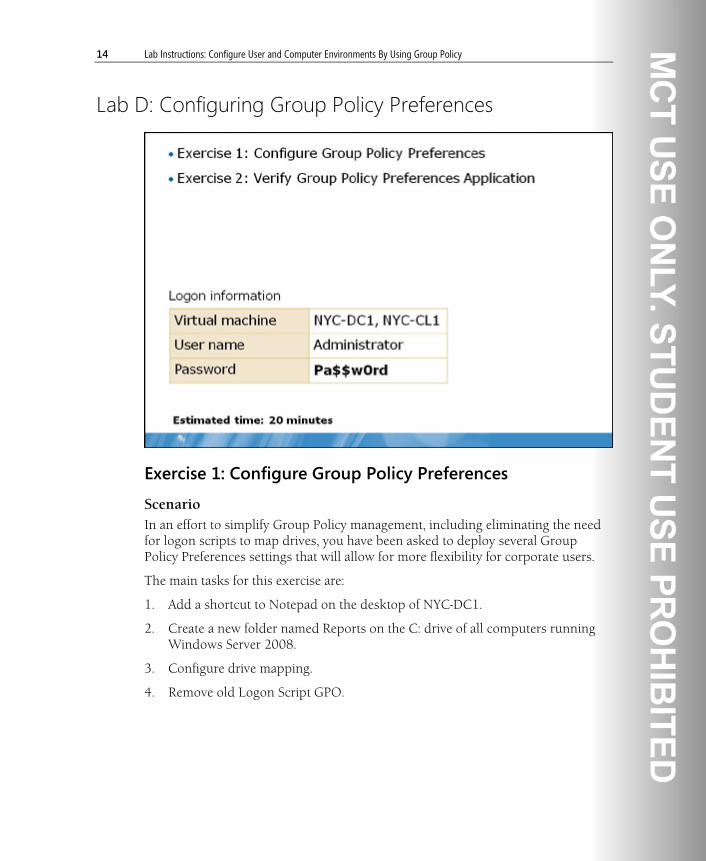
14 Lab Instructions: Configure User and Computer Environments By Using Group Policy
Lab D: Configuring Group Policy Preferences
Exercise 1: Configure Group Policy Preferences
Scenario In an effort to simplify Group Policy management, including eliminating the need for logon scripts to map drives, you have been asked to deploy several Group Policy Preferences settings that will allow for more flexibility for corporate users.
The main tasks for this exercise are:
1. Add a shortcut to Notepad on the desktop of NYC-DC1.
2. Create a new folder named Reports on the C: drive of all computers running Windows Server 2008.
3. Configure drive mapping.
4. Remove old Logon Script GPO.

Lab Instructions: Configure User and Computer Environments By Using Group Policy 15
Task 1: Add a shortcut to Notepad on the desktop of NYC-DC1 1. On NYC-DC1, in the Group Policy Management window, configure the
Default Domain Policy GPO with the following settings:
• Under Computer Configuration, Preferences, Windows Settings, right-click Shortcuts, point to New, and then click Shortcut.
• In the New Shortcut Properties dialog box, create a shortcut for Notepad.exe in the All Users Desktop location.
• On the Common tab, configure item-level targeting for the computer NYC-DC1.
2. Leave the Group Policy Management Editor window open for the next task.
Task 2: Create a new folder named Reports on the C: drive of all computers running Windows Server 2008 1. In the Group Policy Management Editor window, under Windows Settings,
right click Folders, point to New, and then click Folder.
2. In the New Folder Properties dialog box, create the C:\Reports folder.
3. On the Common tab, configure item-level targeting for the Windows Server 2008 operating system.
4. Leave the Group Policy Management Editor window open for the next task.

16 Lab Instructions: Configure User and Computer Environments By Using Group Policy
Task 3: Configure drive mapping 1. In the Group Policy Management Editor window, under User Configuration,
Preferences, Windows Settings, Drive Maps, right-click Drive Maps, point to New, and then click Mapped Drive.
2. Create a new mapped drive labeled Data for \\NYC-DC1\Data, using the drive letter P, and select the Reconnect option.
Task 4: Remove old Logon Script GPO • In the Group Policy Management window, delete the Logon Script link for the
WoodgroveBank.com domain.
Note: You aren’t actually deleting the GPO, just the link to it in the domain.

Lab Instructions: Configure User and Computer Environments By Using Group Policy 17
Exercise 2: Verify Group Policy Preferences Application The main tasks for this exercise are:
1. Verify that the preferences have been applied.
2. Close all virtual machines and discard undo disks.
Task 1: Verify that the preferences have been applied 1. On NYC-DC1, log off, and then log back on as
WOODGROVEBANK\Administrator.
2. Verify that the P: drive is mapped to the Data share on NYC-DC1.
3. Verify that the C:\Reports folder exists.
Note: It may take a few moments for this folder to appear.
Note: To apply Group Policy preferences to Windows Vista computers, you must download and install Group Policy Preference Client Side Extensions for Windows Vista (KB943729).
Task 2: Close all virtual machines and discard undo disks 1 For each virtual machine that is running, close the Virtual Machine Remote
Control window.
2. In the Close dialog box, select Turn off machine and discard changes, and then click OK.
Result: At the end of this exercise, you will have configured and tested Group Policy Preferences and verified their application.

18 Lab Instructions: Configure User and Computer Environments By Using Group Policy
Lab E: Troubleshooting Group Policy Issues
Exercise 1: Troubleshoot Group Policy Scripts
Scenario Woodgrove Bank has completed its deployment of Windows Server 2008. As the AD DS administrator, one of your primary tasks is troubleshooting AD DS issues that have been escalated to you from the company’s help desk. You are responsible for resolving issues related to Group Policy application and configuration.
All domain users will have a drive mapping to a shared folder named Data. The GPO is already created, and is backed up. You will restore and apply the GPO that delivers that policy to the domain, and troubleshoot any issues with the policy.
Lab Instructions: Configure User and Computer Environments By Using Group Policy 19
The main tasks for this exercise are:
1. Start the 6419A-NYC-DC1 virtual machine and log on as WOODGROVEBANK\Administrator.
2. Create and link a domain Desktop policy.
3. Restore the Lab7A GPO.
4. Link the Lab7A GPO to the domain.
5. Start NYC-CL1 and log on as WOODGROVEBANK\Administrator.
6. Test the GPO.
7. Troubleshoot the GPO.
8. Resolve the issue and test the resolution.
Task 1: Start the 6419A-NYC-DC1 virtual machine and log on as WOODGROVEBANK\Administrator • Start NYC-DC1, and then log on as WOODGROVEBANK\Administrator.
Task 2: Create and link a domain Desktop policy 1. On NYC-DC1, open Group Policy Management, and then create a new GPO
named Desktop, linked to the WoodgroveBank.com domain.
2. Configure the Desktop GPO with the following settings:
• Under Computer Configuration, Policies, Administrative Templates, System, Logon, enable Always wait for the network at computer startup and logon.
• Under Network, Network Connections, Windows Firewall, Domain Profile, enable Windows Firewall: Allow inbound remote administration exception.
• Under User Configuration, Policies, Windows Settings, Internet Explorer Maintenance, in Important URLS, add http://WoodGroveBank.com as a customized home page URL.
• Under Administrative Templates, Start Menu and Taskbar, enable Force classic Start Menu.
20 Lab Instructions: Configure User and Computer Environments By Using Group Policy
Task 3: Restore the Lab7A GPO • In the Group Policy Management window, restore the Lab 7A GPO from
E:\Mod07\LabFiles\GPOBackup.
Task 4: Link the Lab7A GPO to the domain • In the Group Policy Management window, link the Lab 7A GPO to the
WoodgroveBank.com domain.
Task 5: Start NYC-CL1 and log on as WOODGROVEBANK\Administrator 1. Start NYC-CL1, and then log on as WOODGROVEBANK\Administrator.
2. Disable the Windows Firewall on NYC-CL1.
Task 6: Test the GPO 1. Verify that you see the classic Start menu.
2. In Windows Internet Explorer, verify that the home page opens to http://WoodgroveBank.com.
3. Verify that the J: drive is mapped to the Data share on NYC-DC1.
4. Log off, and then log back on as WOODGROVEBANK\Roya.
5. Verify that you see the classic Start menu.
6. In Internet Explorer, verify that the home page opens to http://WoodgroveBank.com.
7. Notice that the J: drive is not mapped to the Data share on NYC-DC1.
8. Log off NYC-CL1.
Task 7: Troubleshoot the GPO 1. On NYC-DC1, in the Group Policy Management window, run the Group Policy
Results Wizard against NYC-CL1 for the user Roya.
2. Review the list of applied computer and user GPOs. Notice that the settings for both the Desktop GPO and the Lab 7A GPO were applied successfully.
Lab Instructions: Configure User and Computer Environments By Using Group Policy 21
3. On the Settings tab, under User Configuration, Windows Settings, Scripts, Logon, notice that the Lab 7A GPO was applied correctly.
4. On NYC-CL1, log on as WOODGROVEBANK\Roya.
5. Attempt to access the \\NYC-DC1\Scripts share, and then review the error.
6. Log off NYC-CL1.
Note: If time permits, you can view the Group Policy operational log as Administrator on NYC-CL1. If you filter the view to show events that Roya generates, you would see that the log does not detect any errors or warnings for this user. This is because the GPO only sets a registry value that defines the location of the scripts folder. Group Policy is unaware if the user has access to the location. The write to the registry was successful. Therefore, the Group Policy log does not see any errors. You would have to audit Object Access for the scripts folder to determine access issues.
Task 8: Resolve the issue and test the resolution 1. On NYC-DC1, browse to E:\Mod07\Labfiles\Scripts.
2. Review the permissions on the share and make sure that Authenticated Users have permission to access the share.
3. On NYC-CL1, log on as WOODGROVEBANK\Roya.
4. Verify that the J: drive is now mapped to the Data share on NYC-DC1.
5. Log off NYC-CL1.
Note: Another way to resolve the issue would be to move the script to the Netlogon share, or to eliminate the need for such a logon script altogether, you could configure a mapped drive in Group Policy Preferences.
Result: At the end of this exercise, you will have resolved a Group Policy scripts issue.

22 Lab Instructions: Configure User and Computer Environments By Using Group Policy
Exercise 2: Troubleshoot GPO Lab-7B
Scenario Domain users in the Miami OU and all sub OUs should not have access to Control Panel. You will restore and apply the GPO that delivers that policy to the Miami OU.
The local onsite technician has submitted a help-desk ticket and escalated the following issue to the server team:
• Description of problem: No users should be able to access the Control Panel. However, some users do have access to Control Panel, while others do not. In particular, Roya, a Miami branch manager, has access to Control Panel.
This ticket has been escalated to the server team for resolution.
The main tasks in this exercise are:
1. Restore the Lab7B GPO.
2. Link the Lab7B GPO to the Miami OU.
3. Test the GPO.
4. Troubleshoot the GPO.
5. Resolve the issue and test the resolution.
Task 1: Restore the Lab7B GPO • On NYC-DC1, in the Group Policy Management window, restore the Lab 7B
GPO from backup.
Task 2: Link the Lab7B GPO to the Miami OU • In the Group Policy Management window, link the Lab 7B GPO to the Miami
OU.

Lab Instructions: Configure User and Computer Environments By Using Group Policy 23
Task 3: Test the GPO 1. On NYC-CL1, log on as WOODGROVEBANK\Rich.
Note: Rich is a member of the Miami OU.
2. Verify that you see the classic Start menu.
3. In Internet Explorer, verify that the home page opens to http://WoodgroveBank.com.
4. Verify that the J: drive is mapped to the Data share on NYC-DC1.
5. Notice that the Control Panel does not appear on the desktop or Start menu. This is a setting from the Lab 7B GPO that was applied to the Miami OU.
6. Log off NYC-CLI, and then log back on as WOODGROVEBANK\Roya.
7. Notice that even though the GPO should prevent it, the Control Panel is still present on the desktop and Start menu.
8. Log off NYC-CL1.
Task 4: Troubleshoot the GPO 1. On NYC-DC1, in the Group Policy Management window, run the Group Policy
Results Wizard against NYC-CL1 for the user Rich.
2. In the report summary, notice that the Lab 7B GPO was applied.
3. On the Settings tab, under User Configuration, notice that the policy setting to prohibit access to the Control Panel is enabled.
4. Rerun the query for Roya on NYC-CL1.
5. In the report summary, notice that the Lab 7B GPO has not been applied.
6. Review the denied GPOs and notice that the Lab 7B GPO is listed amongst the denied GPO.
24 Lab Instructions: Configure User and Computer Environments By Using Group Policy
Task 5: Resolve the issue and test the resolution 1. In the Group Policy Management window, review the Delegation tab for the
Lab 7B GPO.
2. Under Advanced settings, review the permissions for MIA_BranchManagerGG, and notice that the Apply group policy setting is set to Deny.
3. Remove the MIA_BranchManagerGG group from the permission list.
4. On NYC-CL1, log on as WOODGROVEBANK\Roya.
5. Notice that the Control Panel now correctly does not appear on the desktop or Start menu.
6. Log off NYC-CL1.
Result: At the end of this exercise, you will have resolved a Group Policy objects issue.
Lab Instructions: Configure User and Computer Environments By Using Group Policy 25
Exercise 3: Troubleshoot GPO Lab-7C
Scenario Users in the Miami OU should not have access to the Run command on the Start menu. You will restore and link the Lab 7C GPO to apply this setting.
The local desktop technician has escalated the following issue to the server team:
• Description of problem: No users should be able to access the Run command on the Start menu, but all users in the Miami OU have access to the Run command.
The main tasks in this exercise are:
1. Restore the Lab7C GPO.
2. Link the Lab7C GPO to the Miami OU.
3. Test the GPO.
4. Troubleshoot the GPO.
5. Resolve the issue and test the resolution.
Task 1: Restore the Lab7C GPO • On NYC-DC1, in the Group Policy Management window, restore the Lab 7C
GPO from backup.
Task 2: Link the Lab7C GPO to the Miami OU • In the Group Policy Management window, link the Lab 7C GPO to the Miami
OU.
Task 3: Test the GPO 1. On NYC-CLI, log on as WOODGROVEBANK\Roya.
2. Click Start, and then notice the presence of the Run command. It is not supposed to be there.
3. Log off NYC-CL1.

26 Lab Instructions: Configure User and Computer Environments By Using Group Policy
Task 4: Troubleshoot the GPO 1. On NYC-DC1, in the Group Policy Management window, rerun the query for
Roya on NYC-CL1.
2. In the report summary, under User Configuration Summary, notice that the Lab 7C GPO is being applied.
3. On the Settings tab, under User Configuration, notice that the Add the Run command to the Start Menu setting is enabled.
Task 5: Resolve the issue and test the resolution 1. Edit the Lab 7C GPO.
2. In the Group Policy Management Editor window, under User Configuration, Policies, Administrative Templates, Start Menu and Taskbar, change Add the Run command to the Start Menu to Not Configured, and then click OK.
3. Change Add the Run command to the Start Menu to Enabled, and then click OK.
4. On NYC-CL1, log on as WOODGROVEBANK\Roya.
5. Click Start, and notice that the Run command is no longer present.
6. Do not log off NYC-CL1.
Result: At the end of this exercise, you will have resolved a Group Policy objects issue.
Lab Instructions: Configure User and Computer Environments By Using Group Policy 27
Exercise 4: Troubleshoot GPO Lab-7D
Scenario You will restore the Lab 7D GPO and link it to the Loopback folder. This GPO is designed to enhance security.
A user in the Miami OU has submitted the following helpdesk ticket:
• Description of problem: Since the application of the GPO, Roya no longer has the classic Start menu or drive mapping, and no longer can run Internet Explorer.
The main tasks in this exercise are:
1. Create a new OU named Loopback.
2. Restore the Lab7D GPO.
3. Link the Lab7D GPO to the Loopback OU.
4. Move NYC-CL1 to the Loopback OU.
5. Test the GPO.
6. Troubleshoot the GPO.
7. Resolve the issue and test the resolution.
Task 1: Create a new OU named Loopback 1. On NYC-DC1, open Active Directory Users and Computers.
2. Create a new Organizational Unit under WoodgroveBank.com named Loopback.
Task 2: Restore the Lab7D GPO • On NYC-DC1, in the Group Policy Management window, restore the Lab 7D
GPO from backup.
28 Lab Instructions: Configure User and Computer Environments By Using Group Policy
Task 3: Link the Lab7D GPO to the Loopback OU • In the Group Policy Management window, link the Lab 7D GPO to the
Loopback OU.
Task 4: Move NYC-CL1 to the Loopback OU • In Active Directory Users and Computers, move the NYC-CL1 computer from
the Computers container to the Loopback OU.
Task 5: Test the GPO 1. Restart NYC-CL1.
2. When the computer restarts, log on as WOODGROVEBANK\Roya.
3. Click Start and notice that the Run command is present once again.
4. Notice also that the Control Panel is present on the desktop and Start menu. These changes are not intentional.
5. Open Windows Internet Explorer and notice that Internet Explorer does not launch.
Task 6: Troubleshoot the GPO 1. On NYC-DC1, in the Group Policy Management window, rerun the query for
Roya on NYC-CL1.
2. In the summary report, under Computer Configuration, review the applied GPOs and notice that the Lab 7D GPO has been applied.
3. On the Settings tab, under Computer Configuration, notice that loopback processing mode is enabled.
Note: Group Policy applies to the user or computer in a manner that depends on where both the user and the computer objects are located in Active Directory. However, in some cases, users may need policy applied to them based on the location of the computer object alone. You can use the Group Policy loopback feature to apply GPOs that depend only on which computer the user logs on to.

Lab Instructions: Configure User and Computer Environments By Using Group Policy 29
Task 7: Resolve the issue and test the resolution 1. In the Group Policy Management window, disable the link for the Lab 7D
GPO.
Note: Another alternative would be to disable loopback processing in the GPO itself, especially if there were other settings in the GPO that you did wish to have applied.
2. Restart NYC-CL1.
3. When the computer restarts, log on as WOODGROVEBANK\Roya.
4. Click Start and notice that the Run command is no longer present.
5. Notice that the Control Panel is again absent from the desktop and Start menu.
6. Open Internet Explorer and notice that Internet Explorer again opens properly.
Task 8: Close all virtual machines and discard undo disks 1. For each virtual machine that is running, close the Virtual Machine Remote
Control window.
2. In the Close dialog box, select Turn off machine and discard changes, and then click OK.
3. Close the 619A Lab Launcher.
Result: At the end of this exercise, you will have resolved a Group Policy objects issue.

Lab Instructions: Implementing Security Using Group Policy 1
Module 8 Lab Instructions: Implementing Security Using Group Policy
Contents: Lab A: Implementing Security Using Group Policy
Exercise 1: Configuring Account and Security Policy Settings 3
Exercise 2: Implementing Fine-Grained Password Policies 6
Lab B: Configuring and Verifying Security Policies
Exercise 1: Configuring Restricted Groups and Software Restriction
Policies 9
Exercise 2: Configuring Security Templates 11
Exercise 3: Verifying the Security Configuration 14

2 Lab Instructions: Implementing Security Using Group Policy
Lab A: Implementing Security Using Group Policy
Scenario Woodgrove Bank has decided to implement Group Policy to configure security for users and computers in the organization. The company recently upgraded all of the workstations to Windows Vista, and all of the servers to Windows Server 2008. The organization wants to utilize Group Policy to implement security settings for the workstations, servers, and users.
Note: Some of the tasks in this lab are designed to illustrate GPO management techniques and settings, and may not always follow best practices.

Lab Instructions: Implementing Security Using Group Policy 3
Exercise 1: Configuring Account and Security Policy Settings You have been tasked to implement a domain account policy with the following criteria:
• Domain passwords will be eight characters.
• Strong passwords will be enforced.
• Passwords will be changed exactly every 20 days.
• Accounts will be locked out for 30 minutes after five invalid logon attempts.
You also will configure a local policy on the Windows Vista client that enables the local Administrator account, and prohibits access to the Run menu for Non-Administrators.
Then you will create a wireless network policy for Windows Vista that creates a profile for the Corp wireless network. This profile will define 802.1x as the authentication method. This policy also will deny access to a wireless network named Research.
Finally, you will configure a policy to prevent the Windows Installer service from running on any domain controller.
The main tasks in this exercise are:
1. Start the virtual machine, and log on as Administrator.
2. Create an account policy for the domain.
3. Configure local policy settings for a Windows Vista client.
4. Create a wireless network GPO for Windows Vista clients.
5. Configure a GPO that prohibits a service on all domain controllers.
Task 1: Start the virtual machines, and then log on 1. On your host machine, click Start, point to All Programs, point to Microsoft
Learning, and then click 6419A. The Lab Launcher starts.
2. In the Lab Launcher, next to 6419A-NYC-DC1, click Launch.
3. Log on to NYC-DC1 as Administrator with the password Pa$$w0rd.
4. Minimize the Lab Launcher window.

4 Lab Instructions: Implementing Security Using Group Policy
Task 2: Create an account policy for the domain 1. Launch the Group Policy Management Console.
2. In the Group Policy Management console pane, expand Forest: WoodgroveBank.com, expand Domains, expand WoodgroveBank.com, and then click Group Policy Objects.
3. In the details pane, right-click Default Domain Policy, and then click Edit.
4. In the Group Policy Management Editor, under Computer Configuration, expand Policies, expand Windows Settings, expand Security Settings, and then expand Account Policies.
5. Edit the Account Policy in the Default Domain Policy with the following values:
• Password Policy:
• Domain passwords: 8 characters in length
• Strong passwords: enforced
• Minimum password age: 19 days
• Maximum password age: 20 days
• Account lockout policy:
• Account Lockout Threshold: 5 invalid logon attempts
• Account lockout duration: 30 minutes
• Lockout counter: reset after 30 minutes
Task 3: Configure local policy settings for a Windows Vista client 1. Start NYC-CL1 and log on as WoodgroveBank\Administrator using the
password Pa$$w0rd.
2. Create a new MMC, and then add the snap-in for the Group Policy Object Editor for the Local Computer.
3. Open Computer Configuration’s Windows Settings, open Security Settings, open Local Policies, open Security Options, and then enable the Accounts: Administrator Account Status setting.
4. Add the Group Policy Object Editor snap-in to the MMC again and then click Browse.

Lab Instructions: Implementing Security Using Group Policy 5
5. Click the Users tab, select the Non-Administrators group, click OK, and then Finish.
6. Open User Configuration, Administrative Templates, click the Start Menu and Taskbar folder, and then enable the Remove Run from Start Menu setting.
7. Close the MMC without saving the changes.
Task 4: Create a wireless network GPO for Windows Vista clients 1. On NYC-DC1, in the GPMC, create a new GPO named Vista Wireless.
2. Edit the GPO by right-clicking Windows Settings\Security Settings\Wireless Network (IEEE 802.11) Policies, and then clicking Create a New Windows Vista Policy.
3. In the New Vista Wireless Network Policy dialog box, click Add, and then click Infrastructure.
4. Create a new profile named Corporate, and then in the Network Name (SSID) field, type Corp.
5. Click the Security tab, change the Authentication method to Open with 802.1X, and then click OK.
6. Click the Network Permissions tab, and then click Add.
7. Type Research in the Network Name (SSID): field, set the Permission to Deny, and then click OK twice.
8. Close the Group Policy Management Editor, and then leave the GPMC open.
Task 5: Configure a policy that prohibits a service on all domain controllers 1. Edit the following to disable the Windows Installer service: Default Domain
Controller Policy, Computer Configuration, Policies, Windows Settings, Security Settings, and System Services.
2. Close the Group Policy Management Editor and leave the GPMC open.
Result: At the end of this exercise, you will have configured account and security policy settings.

6 Lab Instructions: Implementing Security Using Group Policy
Exercise 2: Implementing Fine-Grained Password Policies Your corporate security policy dictates that members of the IT Administrative group will have strict password policies. The passwords must meet the following criteria:
• 30 passwords will be remembered in password history.
• Domain passwords will be 10 characters.
• Strong passwords will be enforced.
• Passwords will not be stored with reversible encryption.
• Passwords will be changed every seven days exactly.
• Accounts will be locked out for 30 minutes after three invalid logon attempts.
You will create a fine-grained password policy to enforce these policies for the IT Admins global group.
The main tasks are as follows:
1. Create a PSO using ADSI Edit.
2. Assign the ITAdmin PSO to the IT Admins global group.
Task 1: Create a PSO using ADSI edit 1. On NYC-DC1, in the Run menu, type adsiedit.msc, and then press ENTER.
2. Right-click ADSI Edit, click Connect to, and then click OK to accept the defaults.
3. Navigate to DC=woodgrovebank, DC=com, CN=System, CN=Password Settings Container, right-click CN=Password Settings Container, and then create a new object.
4. In the Create Object dialog box, click msDS-PasswordSettings, and then click Next.
5. In Value box type ITAdmin.
6. In the msDS-PasswordSettingsPrecedence value, type 10.
7. In the msDS-PasswordReversibleEncryptionEnabled value, type FALSE.
8. In the msDS-PasswordHistoryLength value, type 30.
9. In the msDS-PasswordComplexityEnabled value, type TRUE.

Lab Instructions: Implementing Security Using Group Policy 7
10. In the msDS-MinimumPasswordLength value, type 10.
11. In the msDS-MinimumPasswordAge value, type -5184000000000.
Note: PSO values are time-based values entered using the integer8 format. Integer8 is a 64-bit number that represents the amount of time, in 100-nanosecond intervals, that has passed since 12:00 AM January 1, 1601.
12. In the msDS-MaximumPasswordAge value, type -6040000000000.
13. In the msDS-LockoutThreshold value, type 3.
14. In the msDS-LockoutObservationWindow value, type -18000000000.
15. In the msDS-LockoutDuration value, type -18000000000 and then click Finish.
16. Close the ADSI Edit MMC without saving changes.
Task 2: Assign the ITAdmin password policy to the IT Admins global group 1. Open Active Directory Users and Computers.
2. Click View, and then click Advanced Features.
3. Expand Woodgrovebank.com, expand System, and then click Password Settings Container.
4. In the details pane, right-click the ITAdmin PSO, and then click Properties.
5. Click the Attribute Editor tab, scroll down, select the msDS-PSOAppliesTo attribute, and then click Edit.
6. Add the ITAdmins_WoodgroveGG group.
7. Close Active Directory Users and Computers.
Result: At the end of this exercise, you will have implemented fine-grained password policies.

8 Lab Instructions: Implementing Security Using Group Policy
Lab B: Configuring and Verifying Security Policies
Scenario The enterprise administrator created a design that includes modifications to the default domain security policy, and additional GPOs for configuring security. The company wants to have the flexibility to assign different password policies for specific users. The company also wants to automate the configuration of security settings as much as possible.

Lab Instructions: Implementing Security Using Group Policy 9
Exercise 1: Configuring Restricted Groups and Software Restriction Policies You need to ensure that the ITAdmins global group is included in the local Administrators group for all of the organization’s computers. Domain controllers are considered high security, and Internet Explorer will not be allowed to run on domain controllers. You also will prevent any Visual Basic scripts (VBS) from running on the C: drive of domain controllers.
The main tasks are as follows:
1. Configure restricted groups for the local administrators group.
2. Create a GPO that prohibits Internet Explorer and VBS scripts from running on domain controllers.
Task 1: Configure restricted groups for the local administrators group 1. If required, open the GPMC, open the Group Policy Objects folder and then
edit the Default Domain Policy.
2. Navigate to Computer Configuration, expand Policies, expand Windows Settings, expand Security Settings, right-click Restricted Groups, and then click Add Group.
3. Add the Administrators group, and then click OK.
4. In the Administrators Properties dialog box, add the following groups:
• Woodgrovebank\ITAdmins_WoodgroveGG
• Woodgrovebank\Domain Admins
5. Close the Group Policy Management Editor.

10 Lab Instructions: Implementing Security Using Group Policy
Task 2: Prohibit Internet Explorer and VBS scripts from running on domain controllers 1. Edit the Default Domain Controllers Policy.
2. Navigate to Windows Settings, expand Security Settings, right-click Software Restriction Policies, and then click New Software Restriction Policy.
3. Right-click Additional Rules, and then click New Hash Rule.
4. Browse and navigate to C:\Program Files\Internet Explorer\iexplore.exe, and then click Open. Ensure that the Security level is Disallowed.
5. Right-click Additional Rules, and then click New Path Rule.
6. In the Path field, type *.vbs and then click OK.
7. Close the Group Policy Management Editor.
Result: At the end of this exercise, you will have configured restricted groups and software restriction policies.

Lab Instructions: Implementing Security Using Group Policy 11
Exercise 2: Configuring Security Templates You will create a security template for file and print servers that will rename the Administrator account, and does not display the last user name that logged on. You then will use the Security Configuration Wizard to create a security policy that hardens the file and print server, and includes the security template. You will use the SCW interface to apply the policy to the file and NYC-SVR1print server. Finally, you will transform the policy into a GPO named FPSecurity.
The main tasks for this exercise are:
1. Create a security template for the file and print servers.
2. Start NYC-SVR1, and disable the Windows Firewall.
3. Run the Security Configuration Wizard and import the FPSecurity template.
4. Transform the FPPolicy into a GPO.
Task 1: Create a security template for the file and print servers 1. On NYC-DC1, create a new MMC, and then add the snap-in for Security
Templates.
2. Expand Security Templates, right-click C:\Users\Administrators \Documents\Security\Templates, and then click New Template.
3. Name the template FPSecurity.
4. Navigate to Local Polices, and then Security Options. Define the Accounts: Rename administrator account with the value FPAdmin.
5. Set the Interactive Logon: Do not display last user name to be Enabled.
6. In the folder pane, right-click FPSecurity, and then click Save.
7. Close the MMC without saving the changes.
Task 2: Start NYC-SVR1 and disable the Windows Firewall 1. Start NYC-SVR1 and log on as WOODGROVEBANK\Administrator with the
password Pa$$w0rd.
2. Disable the Windows Firewall.
12 Lab Instructions: Implementing Security Using Group Policy
Note: This step is performed to simplify the lab and is not a recommended practice.
Task 3: Run the Security Configuration Wizard and import the FPSecurity template 1. On NYC-DC1, launch the Security Configuration Wizard.
2. On the Welcome page, click Next.
3. On the Configuration Action screen, click Next.
4. On the Select Server screen type NYC-SVR1.woodgrovebank.com, and then click Next.
5. After the configuration databases processes, click Next.
6. On the Role-Based service Configuration screen, click Next.
7. On the Select server Roles screen, clear the checkbox beside DNS Server.
8. Select the checkbox beside File Server.
9. Select the checkbox beside Print Server and then click Next.
10. On the Select Client Features screen, click Next.
11. On the Select Administration and Other Options screen, click Next.
12. On the Select Additional Services screen, click Next.
13. On the Handling Unspecified Services screen, continue clicking Next until you reach the Security Policy File Name screen.
14. On the Security Policy File Name screen, type FPPolicy at the end of the C:\Windows\security\msscw\policies\ path.
15. Click Include Security Templates, and then click Add.
16. Add the Documents\Security\Templates\FPSecurity policy.
17. On the Apply Security Policy screen, click Apply Now, and then click Next.
18. On the Applying Security Policy screen, click Next, and then click Finish.

Lab Instructions: Implementing Security Using Group Policy 13
Task 4: Transform the FPPolicy into a GPO 1. On NYC-DC1, launch the Command Prompt and type scwcmd transform
/p:”C:\Windows\security\msscw\Policies\FPpolicy.xml” /g:FileServerSecurity.
2. Open the GPMC if necessary and then open the Group Policy Objects folder. Double click the FilesServerSecurity GPO and then examine the settings.
3. Close the GPMC and log off NYC-DC1.
Result: At the end of this exercise, you will have configured security templates.

14 Lab Instructions: Implementing Security Using Group Policy
Exercise 3: Verifying the Security Configuration You will log on as various users to test the results of Group Policy.
The main tasks for this exercise are:
1. Log on as the Local Administrator of the Windows Vista computer and check the membership of the local administrators group.
2. Log on to the Windows Vista computer as an ordinary user and test the account policy.
3. Log on to the domain controller as the domain administrator and test software restrictions and services.
4. Use Group Policy modeling to test the settings on the file and print server.
5. Close all virtual machines and discard undo disks.
Task 1: Log on as the Local Administrator of the Windows Vista computer and check the membership of the local administrators group 1. Log on to NYC-CLI as NYC-CL1\administrator with the password
Pa$$w0rd.
2. Launch a Command Prompt, and run the GPupdate /force command.
3. Ensure that the Run menu appears in the Accessories folder on the Start menu.
4. Open Control Panel, click User Accounts, click User Accounts, click Manage User Accounts, click the Advanced tab, click Advanced, click Groups, open the Administrators group, and then ensure that the Domain Admins and the ITAdmins global groups are present.
5. Restart NYC-CL1.
Task 2: Log on to the Windows Vista computer as an ordinary user, and test the policy 1. Log on to NYC-CL1 as Woodgrovebank\Roya with the password Pa$$w0rd.
2. Ensure that the Run menu does not appear in the Accessories folder on the Start menu.

Lab Instructions: Implementing Security Using Group Policy 15
3. Press Right-ALT + DELETE, and then click Change a password.
4. In the Old Password field, type Pa$$w0rd.
5. In the New Password and Confirm password fields, type w0rdPa$$. You will not be able to update the password because the minimum password age has not expired.
6. Press Right-ALT + DELETE, and then click Change a password.
7. In the New Password and Confirm password fields, type pa. You will not be able to update the password because the minimum password length has not expired.
8. Log off NYC-CL1.
Task 3: Log on to the domain controller as the domain administrator, and test software restrictions and services 1. Log on to NYC-DC1 as Administrator with the password Pa$$w0rd.
2. Launch a Command Prompt, and then run the GPupdate /force command.
3. Attempt to launch Internet Explorer, read the error message, and then click OK.
4. Navigate to E:\mod08\labfiles, double-click Hello.vbs, read the error message, and then click OK.
5. Open the Services MMC in Administrative Tools. Scroll down to the Windows Installer service, and ensure that it is set up Disabled.
Task 4: Use Group Policy modeling to test the settings on the file and print server 1. Open the GPMC, and then launch the Group Policy Modeling Wizard.
2. Accept all the defaults except on the User and Computer Selection window.
3. Click Computer, and then type Woodgrovebank\NYC-SVR1.
4. After completing the wizard, observe the policy settings.

16 Lab Instructions: Implementing Security Using Group Policy
Task 5: Close all virtual machines and discard undo disks 1. For each virtual machine that is running, close the Virtual Machine Remote
Control window.
2. In the Close box, select Turn off machine and discard changes, and then click OK.
3. Close the 6419A Lab Launcher.
Result: At the end of this exercise, you will have verified the security configuration.

Lab Instructions: Configuring Server Security Compliance 1
Module 9 Lab Instructions: Configuring Server Security Compliance
Contents: Exercise 1: Configuring Windows Software Update Services 2
Exercise 2: Configure Auditing 6

2 Lab Instructions: Configuring Server Security Compliance
Lab: Manage Server Security
Exercise 1: Configuring Windows Software Update Services
Scenario As the Windows Infrastructure Services Technology Specialist, you have been tasked with configuring and managing server and client security patch compliance as well as implementing an audit policy to track specific events occurring in AD DS. You must ensure systems maintain compliance with corporate standards.
In this exercise, you will configure WSUS.
The main tasks are as follows:
1. Start the virtual machines, and then log on.
2. Use the Group Policy Management Console to create and link a GPO to the domain to configure client updates.
3. Use the WSUS administration tool to view WSUS properties.

Lab Instructions: Configuring Server Security Compliance 3
4. Create a computer group, and add NYC-CL2 to the new group.
5. Approve an update for Windows Vista clients.
6. Install an update on the Windows Vista client.
7. View WSUS reports.
Task 1: Start the virtual machines, and log on 1. On the host machine, click Start, point to All Programs, point to Microsoft
Learning, and then click 6419A. The Lab Launcher starts.
2. In the Lab Launcher, next to 6419A-NYC-DC1, click Launch.
3. In the Lab Launcher, next to 6419A-NYC-SVR1, click Launch.
4. In the Lab Launcher, next to 6419A-NYC-CL2, click Launch.
5. Log on to each virtual machine as Woodgrovebank\Administrator with the password Pa$$w0rd.
6. Minimize the Lab Launcher window.
Task 2: Use the Group Policy Management Console to create and link a GPO to the domain to configure client updates 1. On NYC-DC1, open Group Policy Management.
2. Create a new GPO in the WoodGroveBank.com domain named WSUS.
3. Open the Group Policy Management Editor to edit the WSUS GPO.
4. In the Group Policy Management Editor window, under Computer Configuration, expand Policies, expand Administrative Templates, expand Windows Components, and then click Windows Update.
5. Enable Configure Automatic Updates.
6. Enable Specify intranet Microsoft update service location.
• Set the intranet update service for detecting updates and the intranet statistics server to http://NYC-SVR1.
7. Enable Automatic Updates detection frequency.

4 Lab Instructions: Configuring Server Security Compliance
8. On NYC-CL2, run the GPUpdate /force command from the command prompt.
9. Restart NYC-CL2 and log on as WoodgroveBank\Administrator after NYC-CL2 restarts.
Task 3: Use the WSUS administration tool to view WSUS properties 1. On NYC-SVR1, open Microsoft Windows Server Update Services 3.0 SP1.
2. In the Update Services window, in the console pane under NYC-SVR1, click Options.
3. Using the details pane, view the configuration settings available in WSUS.
Task 4: Create a computer group, and add NYC-CL2 to the new group 1. In the list pane, expand Computers, and then select All Computers.
2. In the Actions pane, click Add Computer Group, and name the group HO Computers.
3. Change membership of the NYC-CL2.woodgrovebank.com computer object so that it is a part of the HO Computers group.
Task 5: Approve an update for Windows Vista clients 1. In the Update Services windows, in the console pane, expand Updates, and
then click Security Updates.
2. In the details pane, change both the Approval and Status filters to Any, and then click Refresh. Notice all of the updates available.
3. In the Critical Updates details pane, right-click Security Update for Windows Vista (KB957095), and then click Approve.
4. Approve the update for all computers.

Lab Instructions: Configuring Server Security Compliance 5
5. In the Critical Updates details pane, right-click Security Update for Windows Vista (KB957095), and then click Approve.
6. Set the deadline to yesterday's date.
Note: Entering yesterday’s date will cause the update to be installed as soon as the client computers contact the server. Note that because these VMs use the Microsoft Lab Launcher environment, their date will not correspond with the actual date. This is by design. Take note of the VMs configured date and enter a date one day before the VMs configured date.
Task 6: Install an update on the Windows Vista client 1. On NYC-CL2, at the command prompt, type GPUpdate /force.
2. Once the policy has finished updating, type wuauclt /detectnow.
3. When prompted, restart the computer.
4. Log on as Woodgrovebank\administrator with a password of Pa$$w0rd.
5. Open Windows Update to review recently installed updates.
Task 7: View WSUS reports • On NYC-SVR1, run a Computer Detailed Status report to view updates for
NYC-CL2.
Results: After this exercise, you should have configured WSUS.

6 Lab Instructions: Configuring Server Security Compliance
Exercise 2: Configure Auditing
Scenario As the network administrator, you have been tasked with implementing an audit policy to track specific events occurring in AD DS. First, you will examine the audit policy’s current state. Then you will configure auditing as required to track successful and unsuccessful modifications made to Active Directory objects, including the old and new attributes values. Finally, you will test the policy.
In this exercise you will enable auditing.
The main tasks for this exercise are:
1. Examine the current state of the audit policy.
2. Enable Audit Directory Service Access on domain controllers.
3. Set the SACL for the domain.
4. Test the policy.
5. Close all virtual machines and discard undo disks.
Task 1: Examine the current state of the audit policy • On NYC-DC1, type the following at the command prompt: Auditpol.exe /get
/category:* and then press ENTER.
Task 2: Enable Audit Directory Service Access on domain controllers 1. Open Group Policy Management. In the console pane, click
WoodgroveBank.com, expand Group Policy Objects, and then right-click the Default Domain Controllers Policy, and then click Edit.
2. Expand Computer Configuration, expand Windows Settings, expand Security Settings, expand Local Policies, and then click Audit Policy.
3. Enable the Audit Directory Service Access policy to audit both Success and Failure.
4. At the Command Prompt, type Gpupdate.
5. When the update completes, run the Auditpol.exe /get /category:* command again, and then examine the default audit-policy settings.

Lab Instructions: Configuring Server Security Compliance 7
Task 3: Set the SACL for the domain 1. Open Active Directory Users and Computers.
2. On the View menu, click Advanced Features.
3. Enable auditing for the WoodgroveBank.com domain object.
• Enable auditing for Everyone.
• Audit both Successful and Failed for Write all Properties.
Task 4: Test the policy 1. Rename the Toronto OU to GTA.
2. Open Event Viewer, expand Windows Logs, and then click Security.
3. Open event 4662 and examine the event.
4. Return to Active Directory Users and Computers, and edit any user account to change the phone number.
5. Return to Event Viewer, and examine the resulting directory service changes events.
6. Close all open windows.
Task 5: Close all virtual machines and discard undo disks 1. For each virtual machine that is running, close the Virtual Machine Remote
Control window.
2. In the Close box, select Turn off machine and discard changes, and then click OK.
3. Close the 6419A Lab Launcher.
Result: At the end of this exercise, you will have configured AD DS Auditing.

Lab Instructions: Configuring and Managing Storage Technologies 1
Module 10 Lab Instructions: Configuring and Managing Storage Technologies
Contents: Lab A: Installing the FSRM Role Service
Exercise 1: Installing the FSRM Role Service 2
Lab B: Configuring Storage Quotas
Exercise 1: Configuring Storage Quotas 4
Lab C: Configuring File Screening
Exercise 1: Configuring File Screening 6
Lab D: Generating Storage Reports
Exercise 1: Generating Storage Reports 8

2 Lab Instructions: Configuring and Managing Storage Technologies
Lab A: Installing the FSRM Role Service
Scenario As the Windows Infrastructure Services (WIS) Technology Specialist, you have been tasked with configuring storage on a server to comply with corporate standards. You must create the storage with minimal long-term management by utilizing file screening and quota management.
Exercise 1: Installing the FSRM Role Service
Scenario In this exercise, you will install the FSRM role service.
The main tasks for this exercise are as follows:
1. Start the NYC-DC1 and NYC-SVR1 virtual machines.
2. Install the FSRM server role on NYC-SVR1.
Lab Instructions: Configuring and Managing Storage Technologies 3
Task 1: Start the NYC-DC1 and NYC-SVR1 virtual machines 1. On the host machine, click Start, point to All Programs, point to Microsoft
Learning, and then click 6419A. The Lab Launcher starts.
2. In the Lab Launcher, next to 6419A-NYC-DC1, click Launch.
3. In the Lab Launcher, next to 6419A-NYC-SVR1, click Launch.
4. Log on to both virtual machines as Woodgrovebank\Administrator with the password Pa$$w0rd.
5. Minimize the Lab Launcher window.
Task 2: Install the FSRM server role on NYC-SVR1 1. Using Server Manager, install the File System Resource Manager role service.
The role service is located under the File Services role.
2. Set Storage Usage Monitoring to Allfiles (E:).
Results: After this exercise, you should have successfully installed the FSRM role service on NYC-SVR1.

4 Lab Instructions: Configuring and Managing Storage Technologies
Lab B: Configuring Storage Quotas
Exercise 1: Configuring Storage Quotas
Scenario You must configure a quota template that allows users a maximum of 100 MB of data in their user folders. When users exceed 85 percent of the quota, or when they attempt to add files larger than 100 MB, an event should be logged to the Event Viewer on the server.
The main tasks for this exercise are as follows:
1. Create a quota template.
2. Configure a quota based on the quota template.
3. Test that the quota is working by generating several large files.

Lab Instructions: Configuring and Managing Storage Technologies 5
Task 1: Create a quota template • In the File Server Resource Manager console, use the Quota Templates node
to configure a template that sets a hard limit of 100 MB on the maximum folder size. Make sure this template also notifies the Event Viewer when the folder reaches 85 percent and 100 percent capacity.
Task 2: Configure a quota based on the quota template 1. Use the File Server Resource Manager console and the Quotas node to create a
quota in the E:\Mod10\Labfiles\Users folder by using the quota template that you created in Task 1.
2. Create an additional folder named User4 in the E:\Mod10\Labfiles\Users folder, and ensure that the new folder is listed in the quotas list.
Task 3: Test that the Quota is working by generating several large files 1. Open a command prompt and use the fsutil file createnew file1.txt
89400000 command to create a file in the E:\Mod10\Labfiles\Users\User1 folder.
2. Check the Event Viewer for an Event ID of 12325.
3. Test that the quota works by attempting to create a file that is 16,400,000 bytes, and then press ENTER.
4. Enable NTFS folder compression for the E:\Mod10\Labfiles\Users folder. Check to see what effect this has in the Quota console. Try again to create a file that is 16,400,000 bytes.
Results: After this exercise, you should have seen the effect of a quota template that imposes a 100MB limit on user storage on the E:\Mod10\Labfiles\Users folder.

6 Lab Instructions: Configuring and Managing Storage Technologies
Lab C: Configuring File Screening
Exercise 1: Configuring File Screening
Scenario You must configure file screening to monitor executable files.
The main tasks for this exercise are as follows:
1. Create a file screen.
2. Test the file screen.

Lab Instructions: Configuring and Managing Storage Technologies 7
Task 1: Create a file screen • On NYC-SVR1, in the File Server Resource Manager console, use the File
Screens node to create a file screen that monitors executable files in the E:\Mod10\Labfiles\Users folder. When an executable is dropped into the folder, the file screen will log an 8215 event in the Event Viewer.
Task 2: Test the file screen 1. Copy and paste E:\Mod10\Labfiles\example.bat to
E:\Mod10\Labfiles\Users\user1.
2. Open the Event Viewer and check the application log for Event ID 8215.
Results: After this exercise, you should have successfully implemented a file screen that logs attempts to save executable files in E:\Mod10\Labfiles\Users.
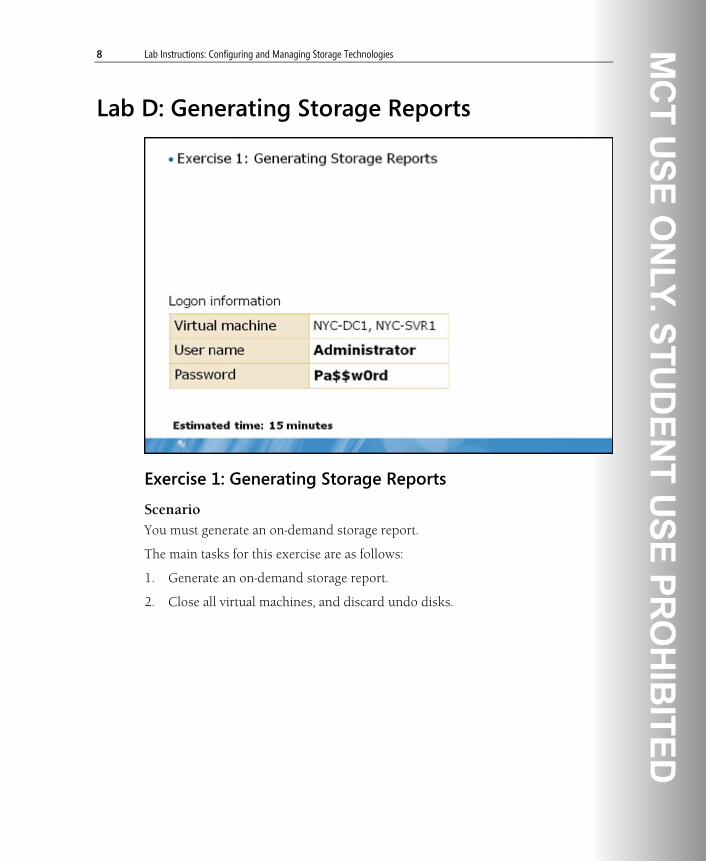
8 Lab Instructions: Configuring and Managing Storage Technologies
Lab D: Generating Storage Reports
Exercise 1: Generating Storage Reports
Scenario You must generate an on-demand storage report.
The main tasks for this exercise are as follows:
1. Generate an on-demand storage report.
2. Close all virtual machines, and discard undo disks.

Lab Instructions: Configuring and Managing Storage Technologies 9
Task 1: Generate an on-demand storage report 1. In the File Server Resource Manager console, run the Generate reports now
option in the Reports node.
2. Store the report in the E:\Mod10\Labfiles\Users folder.
3. Generate a File Screening Audit and a Quota Usage report.
4. Review the contents of the report.
Task 2: Close all virtual machines, and discard undo disks 1. For each virtual machine that is running, close the Virtual Machine Remote
Control (VMRC) window.
2. In the Close box, select Turn off machine and discard changes, and then click OK.
3. Close the 6419A Lab Launcher.
Results: After this exercise, you should have successfully generated an on-demand storage report.

Lab Instructions: Configuring and Managing Distributed File System 1
Module 11 Lab Instructions: Configuring and Managing Distributed File System
Contents: Lab A: Installing the Distributed File System Role Service and Creating a DFS Namespace
Exercise 1: Installing the Distributed File System Role Service 3
Exercise 2: Creating a DFS Namespace 5
Lab B: Configuring Folder Targets and Viewing Diagnostic Reports
Exercise 1: Configuring Folder Targets and Folder Replication 6
Exercise 2: Viewing Diagnostic Reports for Replicated Folders 10

2 Lab Instructions: Configuring and Managing Distributed File System
Lab A: Installing the Distributed File System Role Service and Creating a DFS Namespace
Objectives • Install the Distributed File System Role Service.
• Create a DFS Namespace.
Logon Information • Virtual Machines: 6419A-NYC-DC1 and 6419A-NYC-SVR1
• User Name: WoodgroveBank\Administrator
• Password: Pa$$w0rd
Lab Instructions: Configuring and Managing Distributed File System 3
Exercise 1: Installing the Distributed File System Role Service In this exercise, you will install the Distributed File System Role Service on both NYC-DC1 and NYC-SVR1. This will provide redundancy for the CorpDocs namespace and allow clients to contact the namespace server within their own site.
The main tasks for this exercise are as follows:
1. Start each virtual machine and log on.
2. Install the Distributed File System Role Service on NYC-DC1.
3. Install the Distributed File System Role Service on NYC-SVR1.
Task 1: Start each virtual machine and log on 1. On the host machine, click Start, point to All Programs, point to Microsoft
Learning, and then click 6419A. The Lab Launcher starts.
2. In the Lab Launcher, next to 6419A-NYC-DC1, click Launch.
3. In the Lab Launcher, next to 6419A-NYC-SVR1, click Launch.
4. Log on to both virtual machines as Woodgrovebank\Administrator with the password Pa$$w0rd.
5. Minimize the Lab Launcher window.
Task 2: Install the Distributed File System Role Service on NYC-DC1 1. On NYC-DC1, start Server Manager.
2. Use the Add Roles Wizard to add the Distributed File System Role Service including the DFS Namespaces and DFS Replication role services. Do not create a namespace at this point.
3. Using the Server Manager Roles pane, verify that File Server, Distributed File System, DFS Namespaces, and DFS Replication are installed.

4 Lab Instructions: Configuring and Managing Distributed File System
Task 3: Install the Distributed File System Role Service on NYC-SVR1 1. On NYC-SVR1, start Server Manager.
2. Use the Add Roles Wizard to add the Distributed File System Role Service including the DFS Namespaces and DFS Replication role services. Do not create a namespace at this point.
3. Using the Server Manager Roles pane, verify that File Server, Distributed File System, DFS Namespaces, and DFS Replication are all installed.

Lab Instructions: Configuring and Managing Distributed File System 5
Exercise 2: Creating a DFS Namespace In this exercise, you will create the CorpDocs DFS namespace. You also will configure both NYC-DC1 and NYC-SVR1 to host the CorpDocs namespace to provide redundancy.
The main tasks for this exercise are as follows:
1. Use the New Namespace Wizard to create a new namespace.
2. Add an additional namespace server to host the namespace.
Task 1: Use the New Namespace Wizard to create a new namespace 1. On NYC-DC1, start the DFS Management console.
2. Use the New Namespaces Wizard to create a namespace with the following options:
• Namespace Server: NYC-DC1
• Namespace Name and Settings: CorpDocs
• Namespace Type: Domain-based namespace
3. In the left pane, click the plus sign next to Namespaces, and then click \\WoodgroveBank.com\CorpDocs.
4. Verify that the CorpDocs namespace has been created on NYC-DC1.
Task 2: Add an additional namespace server to host the namespace 1. On NYC-DC1, in the DFS Management console, use the Add Namespace
Server Wizard to add a new namespace server with the following options:
• Namespace server: NYC-SVR1
• Click Yes to start the Distributed File System service
2. In the left pane, click the plus sign next to Namespaces, and then click \\WoodgroveBank.com\CorpDocs.
Note: Verify from the Details pane that that the CorpDocs namespace is now hosted on both NYC-DC1 and NYC-SVR1.

6 Lab Instructions: Configuring and Managing Distributed File System
Lab B: Configuring Folder Targets and Viewing Diagnostic Reports
Exercise 1: Configuring Folder Targets and Folder Replication In this exercise, you initially will create folder targets on two separate servers and then verify that the CorpDocs namespace functions correctly. You then will add availability and redundancy by creating additional folder targets and configuring replication.
The main tasks for this exercise are as follows:
1. Create the HRTemplates folder, and configure a folder target on NYC-DC1.
2. Create the PolicyFiles folder, and configure a folder target on NYC-SVR1.
3. Verify the CorpDocs namespace functionality.
Lab Instructions: Configuring and Managing Distributed File System 7
4. Create additional folder targets for the HRTemplates folder, and then configure folder replication.
5. Create additional folder targets for the PolicyFiles folder, and then configure folder replication.
Task 1: Create the HRTemplates folder, and configure a folder target on NYC-DC1 1. On NYC-DC1, in the DFS Management console, right-click
\\WoodgroveBank.com\CorpDocs.
2. Create a new folder called HRTemplates.
3. Add a new folder target called HRTemplateFiles using the following options:
• Click the New Shared Folder button.
• Share Name: HRTemplateFiles
• Local path of shared folder: C:\HRTemplateFiles
• Shared Folder Permissions: Administrators have full access; other users have read-only permissions
4. In the console tree, click \\WoodgroveBank.com\CorpDocs.
5. In the details pane, click the Namespace tab. Notice that HRTemplates is listed as an entry in the namespace.
6. In the console tree, expand \\WoodgroveBank.com\CorpDocs and then click HRTemplates. In the details pane, notice that on the Folder Targets tab, one folder target is configured.
7. Click the Replication tab, and notice that replication is not configured.
Task 2: Create the PolicyFiles folder, and configure a folder target on NYC-SVR1 1. On NYC-DC1, in the DFS Management console, right-click
\\WoodgroveBank.com\CorpDocs.
2. Create a new folder called PolicyFiles on NYC-SVR1.
8 Lab Instructions: Configuring and Managing Distributed File System
3. Add a new Folder target called PolicyFiles using the following options:
• Click the New Shared Folder button.
• Share Name: PolicyFiles
• Local path of shared folder: C:\Policyfiles
• Shared Folder Permissions: Administrators have full access; other users have read-only permissions
4. In the console tree, expand \\WoodgroveBank.com\CorpDocs and then click PolicyFiles. In the details pane, notice that on the Folder Targets tab, one folder target is configured.
Task 3: Verify the CorpDocs namespace functionality 1. On NYC-DC1, click Start and then click Run.
2. Access the \\WoodgroveBank\CorpDocs namespace, and verify that both HRTemplates and PolicyFiles are visible. (If they are not visible, wait for approximately five minutes to complete.)
3. In the HRTemplates folder, create a new Rich Text Document file called VacationRequest.
4. In the PolicyFiles folder, create a new Rich Text Document file called OrderPolicies.
Task 4: Create additional folder targets for the HRTemplates folder, and then configure folder replication 1. On NYC-DC1, in the DFS Management console, add a folder target with the
following options:
• Path to folder target: \\NYC-SVR1\HRTemplates
• Create share: Yes
• Local Path of shared folder: C:\HRTemplates
• Shared folder permissions: Administrators have full access; other users have read-only permissions
• Replication group: Yes
• Replication Group name: woodgrovebank.com\corpdocs\hrtemplates
Lab Instructions: Configuring and Managing Distributed File System 9
• Replicated folder name: HRTemplates
• Primary member: NYC-DC1
• Topology: Full mesh
• Replication schedule: default
2. In the console tree, expand the Replication node, and then click woodgrovebank.com\corpdocs\hrtemplates.
3. In the details pane, on the Memberships tab, verify that both NYC-DC1 and NYC-SVR1 are listed and enabled.
Task 5: Create additional folder targets for the PolicyFiles folder, and then configure folder replication 1. On NYC-DC1, in the DFS Management console, add a folder target with the
following options:
• Path to folder target: \\NYC-DC1\PolicyFiles
• Create share: Yes
• Local Path of shared folder: C:\PolicyFiles
• Shared folder permissions: Administrators have full access; other users have read-only permissions
• Replication group: Yes
• Replication Group name: woodgrovebank.com\corpdocs\policyfiles
• Replicated folder name: PolicyFiles
• Primary member: NYC-SVR1
• Topology: Full mesh
• Replication schedule: default
2. In the console tree, expand the Replication node, and then click woodgrovebank.com\corpdocs\PolicyFiles.
3. In the details pane, on the Memberships tab, verify that both NYC-DC1 and NYC-SVR1 are listed and enabled.

10 Lab Instructions: Configuring and Managing Distributed File System
Exercise 2: Viewing Diagnostic Reports for Replicated Folders In this exercise, you will generate a diagnostic report to view the folder replication status.
The main tasks for this exercise are as follows:
1. Create a diagnostic report for woodgrovebank.com\corpdocs\hrtemplates.
2. Close all virtual machines, and discard undo disks.
Task 1: Create a diagnostic report for woodgrovebank.com\corpdocs\hrtemplates 1. On NYC-DC1, create a diagnostic report for
woodgrovebank.com\corpdocs\hrtemplates based upon the following options:
• Type of Diagnostic Report or Test: health report
• Path and Name: default
• Members to include: NYC-DC1 and NYC-SVR1
• Options: Backlogged files enabled; Count replicated files enabled
2. Read through the report and take note of any errors or warnings. When you are finished, close the Microsoft Internet Explorer® window.
3. Create a diagnostic report for the policy files replication group. Read through the report and take note of any errors or warnings. When you are finished, close the Internet Explorer window. Note that there may be errors reported if replication has not yet begun or finished.
Task 2: Close all virtual machines, and discard undo disks 1. For each virtual machine that is running, close the Virtual Machine Remote
Control (VMRC) window.
2. In the Close box, select Turn off machine and discard changes, and then click OK.
3. Close the 6419A Lab Launcher.

Lab Instructions: Configuring Network Access Protection 1
Module 12 Lab Instructions: Configuring Network Access Protection
Contents: Exercise 1: Configuring Network Access Protocol (NAP) for Dynamic Host Configuration Protocol (DHCP) Clients 3
Exercise 2: Configuring NAP for VPN Clients 15

2 Lab Instructions: Configuring Network Access Protection
Lab: Configuring NAP for DHCP and VPN
Objectives • Configure NAP for DHCP clients
• Configure NAP for VPN clients
Scenario As the Woodgrove Bank technology specialist, you need to establish a way to bring client computers automatically into compliance. You will do this by using Network Policy Server, creating client compliance policies, and configuring a NAP server to check the current health of computers.
Note: Since NAP is a new and complex technology in Windows Server 2008, detailed steps have been provided here for each of the tasks in this lab. For this reason, there will be no separate lab answer key for this module.

Lab Instructions: Configuring Network Access Protection 3
Exercise 1: Configuring Network Access Protocol (NAP) for Dynamic Host Configuration Protocol (DHCP) Clients In this exercise, you will configure and test NAP for DHCP clients.
The main tasks are as follows:
1. Start the NYC-DC1, NYC-SVR1, and NYC-CL1 virtual machines.
2. Install the Network Policy Server (NPS) and Dynamic Host Configuration Protocol (DHCP) server roles.
3. Configure NYC-SVR1 as a NAP health policy server.
4. Configure DHCP service for NAP enforcement.
5. Configure NYC-CL1 as DHCP and NAP client.
6. Test NAP Enforcement.
Task 1: Start the NYC-DC1, NYC-SVR1, and NYC-CL1 virtual machines 1. On the host machine, click Start, point to All Programs, point to Microsoft
Learning, and then click 6419A.
2. In the Lab Launcher, next to 6419A-NYC-DC1, click Launch.
3. In the Lab Launcher, next to 6419A-NYC-SVR1, click Launch.
4. In the Lab Launcher, next to 6419A-NYC-CL1, click Launch.
5. Log on to each virtual machine as WOODGROVEBANK\Administrator with the password Pa$$w0rd.
6. Minimize the Lab Launcher window.
Task 2: Install the Network Policy Server (NPS) and Dynamic Host Configuration Protocol (DHCP) server roles 1. On NYC-SVR1, click Start, and then click Server Manager.
2. In the Server Manager console pane, right-click Roles, and then click Add Roles.
3. On the Before You Begin page, click Next.

4 Lab Instructions: Configuring Network Access Protection
4. On the Select Server Roles page, select the DHCP Server and Network Policy and Access Services check boxes, and then click Next twice.
5. On the Select Role Services page, select the Network Policy Server check box, and then click Next twice.
6. On the Select Network Connection Bindings page, verify that 10.10.0.24 is selected, and then click Next.
7. On the Specify IPv4 DNS Server Settings page, for Parent Domain, verify that WoodGroveBank.com is listed.
8. In the Preferred DNS Server IPv4 Address field, type 10.10.0.10, and then click Validate.
9. Verify that the result returned is Valid, and then click Next.
10. On the Specify IPv4 WINS Server Settings page, verify that WINS is not required for applications on this network is selected, and then click Next.
11. On the Add or Edit DHCP Scopes page, click Add.
12. In the Add Scope dialog box, in Scope Name field, type NAP Scope.
13. In the Starting IP Address field, type 10.10.0.50.
14. In the Ending IP Address field, type 10.10.0.99.
15. In the Subnet Mask field, type 255.255.0.0.
16. Verify that the Activate this scope check box is selected, click OK, and then click Next.
17. On the Configure DHCPv6 Stateless Mode page, click Disable DHCPv6 stateless mode for this server, and then click Next.
18. On the Authorize DHCP Server page, verify that Use current credentials is selected, and then click Next.
19. On the Confirm Installation Selections page, click Install.
20. When the installation completes, click Close.
21. Close Server Manager.

Lab Instructions: Configuring Network Access Protection 5
Task 3: Configure NYC-SVR1 as a NAP health policy server 1. Click Start, point to Administrative Tools, and then click Network Policy
Server.
2. Configure SHVs:
a. In the Network Policy Server console pane, expand Network Access Protection, and then click System Health Validators.
b. In the details pane, double-click Windows Security Health Validator.
c. In the Windows Security Health Validator Properties dialog box, click Configure.
d. In the Windows Security Health Validator dialog box, on the Windows Vista tab, clear all check boxes except A firewall is enabled for all network connections.
e. Click OK twice.
3. Configure remediation server groups:
a. In the console pane, under Network Access Protection, right-click Remediation Server Groups, and then click New.
b. In the New Remediation Server Group dialog box, in the Group Name field, type Rem1.
c. Click Add.
d. In the Add New Server dialog box, in the IP address or DNS name field, type 10.10.0.10, and then click Resolve.
e. Click OK twice.
4. Configure health policies:
a. In the console pane, expand Policies.
b. Right-click Health Policies, and then click New.
c. In the Create New Health Policy dialog box, in the Policy name field, type DHCP Compliant.
d. In the Client SHV checks list, verify that Client passes all SHV checks is selected.
e. Under SHVs used in this health policy, select the Windows Security Health Validator check box, and then click OK.
6 Lab Instructions: Configuring Network Access Protection
f. In the console pane, right-click Health Policies, and then click New.
g. In the Create New Health Policy dialog box, in the Policy name field, type DHCP Noncompliant.
h. In the Client SHV checks list, click Client fails one or more SHV checks.
i. Under SHVs used in this health policy, select the Windows Security Health Validator check box, and then click OK.
5. Configure a network policy for compliant computers:
a. In the console pane, under Policies, click Network Policies.
b. In the details pane, right-click Connections to Microsoft Routing and Remote Access server and then click Disable.
c. Right-click Connections to other access servers, and then click Disable.
d. In the console pane, right-click Network Policies, and then click New.
e. On the Specify Network Policy Name and Connection Type page, in the Policy name field, type DHCP Compliant-Full Access.
f. In the Type of network access server list, click DHCP Server and then click Next.
g. On the Specify Conditions page, click Add.
h. In the Select condition dialog box, double-click Health Policies.
i. In the Health Policies dialog box, in the Health policies list, click DHCP Compliant, and then click OK.
j. On the Specify Conditions page, verify that Health Policy is specified under Conditions with a value of DHCP Compliant.
k. On the Specify Conditions page, click Add.
l. In the Select condition dialog box, double-click MS-Service Class.
m. In the MS-Service Class dialog box, type NAP Scope, and then click OK.
n. On the Specify Conditions page, verify that MS-Service class is specified under Conditions with a value of NAP Scope, and then click Next.
o. On the Specify Access Permission page, verify that Access granted is selected, and then click Next.
p. On the Configure Authentication Methods page, clear all check boxes, then select Perform machine health check only, and then click Next.

Lab Instructions: Configuring Network Access Protection 7
q. On the Configure Constraints page, click Next.
r. On the Configure Settings page, click NAP Enforcement.
s. In the details pane, verify that Allow full network access is selected and then click Next.
t. On the Completing New Network Policy page, click Finish to complete configuration of the network policy for compliant client computers.
6. Configure a network policy for non-compliant computers:
a. In the console pane, right-click Network Policies, and then click New.
b. On the Specify Network Policy Name and Connection Type page, in the Policy name field, type DHCP Noncompliant-Restricted Access.
c. In the Type of network access server list, click DHCP Server and then click Next.
d. On the Specify Conditions page, click Add.
e. In the Select condition dialog box, double-click Health Policies.
f. In the Health Policies dialog box, in the Health policies list, click DHCP Noncompliant, and then click OK.
g. On the Specify Conditions page, verify that Health Policy is specified under Conditions with a value of DHCP Noncompliant.
h. Click Add.
i. In the Select condition dialog box, double-click MS-Service Class.
j. In the MS-Service Class dialog box, type NAP Scope, and then click OK.
k. On the Specify Conditions page, verify that MS-Service class is specified under Conditions with a value of NAP Scope, and then click Next.
l. On the Specify Access Permission page, verify that Access granted is selected, and then click Next.
Note: A setting of Access granted does not mean that non-compliant clients are granted full network access. It specifies that clients matching these conditions will be granted an access level that the policy determines.
m. On the Configure Authentication Methods page, clear all check boxes, then select Perform machine health check only, and then click Next.

8 Lab Instructions: Configuring Network Access Protection
n. On the Configure Constraints page, click Next.
o. On the Configure Settings page, click NAP Enforcement.
p. In the details pane, click Allow limited access.
q. Click Configure.
r. In the Remediation Server Group and Troubleshooting URL dialog box, in the Remediation Server Group list, click Rem1.
s. In the Troubleshooting URL field, type http://remediation.restricted.woodgrovebank.com, and then click OK.
t. Verify that Enable auto-remediation of client computers is selected and then click Next.
Note: that although this remediation server does not exist due to the limitations of the lab environment, it's important to understand how to configure the settings.
u. On the Completing New Network Policy page, click Finish to complete configuration of the network policy for non-compliant client computers.
7. Configure a network policy for non NAP-capable computers:
a. In the console pane, right-click Network Policies, and then click New.
b. On the Specify Network Policy Name and Connection Type page, in the Policy name field, type DHCP Non NAP-Capable.
c. In the Type of network access server list, click DHCP Server and then click Next.
d. On the Specify Conditions page, click Add.
e. In the Select condition dialog box, double-click NAP-Capable Computers.
f. In the NAP-Capable Computers dialog box, click Only computers that are not NAP-capable, and then click OK.
g. On the Specify Conditions page, verify that NAP-Capable is specified under Condition with a value of Computer is not NAP-Capable.
h. On the Specify Conditions page, click Add.
i. In the Select condition dialog box, double-click MS-Service Class.

Lab Instructions: Configuring Network Access Protection 9
j. In the MS-Service Class dialog box, type Non NAP Scope, and then click OK.
k. On the Specify Conditions page, verify that MS-Service class is specified under Conditions with a value of Non NAP Scope, and then click Next.
l. On the Specify Access Permission page, verify that Access granted is selected, and then click Next.
m. On the Configure Authentication Methods page, clear all check boxes, then select Perform machine health check only, and then click Next.
n. On the Configure Constraints page, click Next.
o. On the Configure Settings page, click NAP Enforcement.
p. In the details pane, click Allow limited access.
q. Click Configure.
r. In the Remediation Server Group and Troubleshooting URL dialog box, in the Remediation Server Group list, click Rem1.
s. In the Troubleshooting URL field, type http://remediation.restricted.woodgrovebank.com, and then click OK.
t. Verify that Enable auto-remediation of client computers is selected and then click Next.
u. On the Completing New Network Policy page, click Finish to complete configuration of the network policy for older, non NAP-capable client computers.
8. Configure connection request policy:
a. In the console pane, right-click Connection Request Policies, and then click New.
b. On the Specify Connection Request Policy Name and Connection Type page, in the Policy name field, type NAP DCHP.
c. In the Type of network access server list, click DHCP Server, and then click Next.
d. On the Conditions page, click Add.
e. In the Select condition dialog box, double-click Day and Time Restrictions.
f. In the Day and time restrictions dialog box, click All and then click Permitted.

10 Lab Instructions: Configuring Network Access Protection
g. Click OK and click Next.
h. On the Specify Connection Request Forwarding page, verify that Authenticate requests on this server is selected and click Next.
i. On Specify Authentication Methods page, verify that Override network policy authentication settings is not selected.
j. Click Next twice, and then click Finish.
Result: This completes configuration of the NAP network policies.
Task 4: Configure DHCP service for NAP enforcement 1. On NYC-DC1, click Start, point to Administrative Tools, and then click
DHCP.
2. In the DHCP console pane, expand nyc-dc1.woodgrovebank.com, expand IPv4, and then click Scope [10.10.0.0] HeadOffice.
3. Right-click Scope [10.10.0.0] HeadOffice, and then click Delete.
4. In the DHCP dialog box, click Yes twice.
5. Close DHCP.
6. On NYC-SVR1, click Start, point to Administrative Tools, and then click DHCP.
7. In the DHCP console pane, expand nyc-svr1.woodgrovebank.com, and then expand IPv4, and then click Scope [10.10.0.0] NAP Scope.
8. Right-click Scope [10.10.0.0] NAP Scope, and then click Properties.
9. In the Scope [10.10.0.0] NAP Scope Properties dialog box, on the Network Access Protection tab, click Enable for this scope.
10. Select Use custom profile.
11. In the Profile Name field, type NAP Scope, and then click OK.
12. In console pane, click Scope Options.
13. Right-click Scope Options, and then click Configure Options.
14. In the Scope Options dialog box, on the Advanced tab, in the User class list, verify that Default User Class is selected.
15. Under Available Options, select the 015 DNS Domain Name check box.

Lab Instructions: Configuring Network Access Protection 11
16. In the String value field, type woodgrovebank.com, and then click OK.
17. In console pane, right-click Scope Options, and then click Configure Options.
18. In the Scope Options dialog box, on the Advanced tab, in the User class list, click Default Network Access Protection Class.
19. Under Available Options, select the 006 DNS Servers check box.
20. In the IP address field, type 10.10.0.10, and then click Add.
Note: that in this lab, the DNS server address is same for both the restricted and non-restricted networks. In a real environment, you would specify a DNS server that existed on the restricted network here.
21. Under Available Options, select the 015 DNS Domain Name check box.
22. In the String value field, type restricted.woodgrovebank.com, and then click OK.
Note: The restricted.woodgrovebank.com domain is a restricted access network assigned to non-compliant NAP clients.
23. Close DHCP.
Task 5: Configure NYC-CL1 as DHCP and NAP client 1. On NYC-CL1, enable Security Center:
a. Click Start, type mmc, and then press ENTER.
b. In the Console1 window, on the File menu, click Add/Remove Snap-in.
c. In the Add or Remove Snap-ins dialog box, under Available snap-ins, click Group Policy Object Editor, and then click Add.
d. In the Select Group Policy Object dialog box, click Finish, and then click OK.
e. In the console pane, expand Local Computer Policy, expand Computer Configuration, expand Administrative Templates, expand Windows Components, and then click Security Center.

12 Lab Instructions: Configuring Network Access Protection
f. In the details pane, double-click Turn on Security Center (Domain PCs only).
g. In the Turn on Security Center (Domain PCs only) Properties dialog box, click Enabled, and then click OK.
2. Enable the DHCP enforcement client:
a. On the File menu, click Add/Remove Snap-in.
b. In the Add or Remove Snap-ins dialog box, under Available snap-ins, click NAP Client Configuration, and then click Add.
c. In the NAP Client Configuration dialog box, click OK twice.
d. In the console pane, click NAP Client Configuration (Local Computer).
e. In the NAP Client Configuration details pane, click Enforcement Clients.
f. Right-click DHCP Quarantine Enforcement Client, and then click Enable.
3. Enable and start the NAP agent service:
a. On the File menu, click Add/Remove Snap-in.
b. In the Add or Remove Snap-ins dialog box, under Available snap-ins, click Services, and then click Add.
c. In the Services dialog box, click Finish, and then click OK.
d. In the console pane, click Services.
e. In the details pane, double-click Network Access Protection Agent.
f. In the Network Access Protection Agent Properties (Local Computer) dialog box, in the Startup type list, click Automatic, and then click Start.
g. Wait for the NAP agent service to start, and then click OK.
h. Close Console1. When prompted to save settings, click No.
4. Configure NYC-CL1 for DHCP address assignment:
a. Click Start, right-click Network, and then click Properties.
b. In the Network and Sharing Center window, click View status.
c. In the Local Area Connection Status dialog box, click Properties.

Lab Instructions: Configuring Network Access Protection 13
d. In the Local Area Connection Properties dialog box, clear the Internet Protocol Version 6 (TCP/IPv6) check box.
Note: This reduces the lab’s complexity, particularly for those who are not familiar with IPv6.
e. Click Internet Protocol Version 4 (TCP/IPv4), and then click Properties.
f. In the Internet Protocol Version 4 (TCP/IP) Properties dialog box, click Obtain an IP address automatically, and then click Obtain DNS server address automatically.
g. Click OK, and then click Close twice.
h. Close Network and Sharing Center.
Task 6: Test NAP enforcement 1. Verify DHCP assigned address and current quarantine state:
a. Click Start, point to All Programs, point to Accessories, and then click Command Prompt.
b. At the command prompt, type ipconfig /all, and then press ENTER.
c. Verify that the DNS Suffix Search List is Woodgrovebank.com and System Quarantine State is Not Restricted.
2. Configure the System Health Validator policy to require antivirus software:
a. On NYC-SVR1, in the Network Policy Server console pane, expand Network Access Protection, and then click System Health Validators.
b. In the details pane, double-click Windows Security Health Validator.
c. In the Windows Security Health Validator Properties dialog box, click Configure.
d. In the Windows Security Health Validator dialog box, under Virus Protection, select the An antivirus application is on check box and then click OK twice.

14 Lab Instructions: Configuring Network Access Protection
3. Verify the restricted network on NYC-CL1:
a. On NYC-CL1, at the command prompt, type ipconfig /release and then press ENTER.
b. Type ipconfig /renew and then press ENTER.
c. Verify the Connection-specific DNS suffix is now restricted.woodgrovebank.com.
4. Close Command Prompt.
5. In the notification area, double-click the Network Access Protection icon.
Note: Notice it tells you the computer is not compliant with requirements of the network. This may take a few minutes to appear.
6. Click Close.

Lab Instructions: Configuring Network Access Protection 15
Exercise 2: Configuring NAP for VPN Clients In this exercise, you will configure NAP for VPN Clients. This exercise uses the Windows Security Health Agent and Windows Security Health Validator to require that client computers have Windows Firewall enabled and have an antivirus application installed.
You will create two network policies in this exercise. A compliant policy grants full network access to an intranet network segment. A non-compliant policy demonstrates network restriction by applying IP filters to the VPN tunnel interface that only allow client access to a single remediation server.
The main tasks are as follows:
1. Configure NYC-DC1 as an Enterprise Root CA.
2. Configure NYC-SVR1 with NPS functioning as a health policy server.
3. Configure NYC-SVR1 with the Routing and Remote Access Service (RRAS) configured as a VPN server.
4. Configure NYC-CL1 as a VPN and NAP client.
5. Configure System Help for Networking.
6. Close all virtual machines, and discard undo disks.
Task 1: Configure NYC-DC1 as an Enterprise Root CA 1. On NYC-DC1, click Start, point to Administrative Tools, and then click
Certification Authority.
2. In the certsrv – [Certification Authority (Local)] console pane, expand WoodgroveBank-NYC-DC1-CA, right-click Certificate Templates, and then click Manage.
3. In the Certificate Templates Console details pane, right-click Computer, and then click Properties.
4. In the Computer Properties dialog box, on the Security tab, click Authenticated Users.
5. In the Permissions for Authenticated Users pane, for Enroll, select the Allow check box, and then click OK.
6. Close all windows.

16 Lab Instructions: Configuring Network Access Protection
Task 2: Configure NYC-SVR1 with NPS functioning as a health policy server 1. Obtain computer certificate on NYC-SVR1 for server-side PEAP authentication:
a. On NYC-SVR1, click Start, type mmc, and then press ENTER.
b. In the Console1 window, on the File menu, click Add/Remove Snap-in.
c. In the Add or Remove Snap-ins dialog box, click Certificates, and then click Add.
d. In the Certificates snap-in dialog box, click Computer account, click Next, and then click Finish.
e. Click OK.
f. In the console pane, expand Certificates (Local Computer), right-click Personal, point to All Tasks, and then click Request New Certificate.
g. In the Certificate Enrollment dialog box, click Next.
h. On the Request Certificates page, select the Computer check box, and then click Enroll.
i. Verify the status of certificate installation as Succeeded, and then click Finish.
j. Close Console1. When prompted to save settings, click No.
2. Install the Remote Access Service role service:
a. Click Start, and then click Server Manager.
b. In the Server Manager console pane, expand Roles, right-click Network Policy and Access Services, and then click Add Role Services.
c. On the Select Role Services page, select the Remote Access Service check box, and then click Next.
d. On the Confirm Installation Selections page, click Install.
e. When the installation completes, click Close.
f. Close Server Manager.
3. Configure NPS as a NAP health policy server:
a. In the Network Policy Server console pane, click System Health Validators.
b. In the details pane, double-click Windows Security Health Validator.

Lab Instructions: Configuring Network Access Protection 17
c. In the Windows Security Health Validator Properties dialog box, click Configure.
d. In the Windows Security Health Validator dialog box, clear the An antivirus application is on check box, and then click OK twice.
4. Configure Network Policies using the Network Policy Wizard:
a. In the console pane, click NPS(local).
b. In the details pane, click Configure NAP.
c. On the Select Network Connection Method For Use with NAP page, in the Network connection method list, click Virtual Private Network (VPN) and then click Next.
d. On the Specify NAP Enforcement Servers Running VPN Server page, click Next.
e. On the Configure User Groups and Machine Groups page, click Next.
f. On the Configure an Authentication Method page, review the settings, and then click Next.
g. On the Specify NAP Remediation Server Group and URL page, in the Remediation Server Group list, click Rem1.
h. In the Troubleshooting URL field, type http://remediation.restricted.woodgrovebank.com and click Next.
i. On the Define NAP Health Policy page, review the settings, and then click Next.
j. On the Completing NAP Enforcement Policy and RADIUS Client Configuration page, review the policies that will be created, and then click Finish.
5. Configure NAP VPN Non-compliant policy:
a. In the console pane, click Network Policies.
b. In the details pane, right-click NAP VPN Noncompliant, and then click Properties.
c. On the Settings tab, click IP Filters.
d. Under IPv4, click Input Filters.
e. In the Inbound Filters dialog box, click New.

18 Lab Instructions: Configuring Network Access Protection
f. In the Add IP Filter dialog box, select the Destination network check box.
g. In the IP Address field, type 10.10.0.10.
h. In the Subnet mask field, type 255.255.255.255.
i. Click OK.
j. In the Inbound Filters dialog box, click Permit only the packets listed below.
k. Click OK.
Note: This ensures that traffic from non-compliant clients can reach only NYC DC1.
l. Under IPv4, click Output Filters.
m. In the Outbound Filters dialog box, click New.
n. In the Add IP Filter dialog box, select Source network check box.
o. In the IP address field, type 10.10.0.10.
p. In the Subnet mask field, type 255.255.255.255.
q. Click OK.
r. In the Outbound Filters dialog box, click Permit only the packets listed below.
s. Click OK twice.
Note: This ensures that only traffic from NYC DC1 can be sent to non-compliant clients.
6. Configure connection request policies:
a. In the console pane, click Connection Request Policies.
b. In the details pane, right-click Use windows authentication for all users, and then click Disable.
c. Right-click NAP VPN, and then click Properties.
d. In the NAP VPN Properties dialog box, on the Conditions tab, click Add.
e. In the Select condition dialog box, double-click Tunnel Type.

Lab Instructions: Configuring Network Access Protection 19
f. In the Tunnel Type dialog box, select the Layer Two Tunneling Protocol L2TP and Point-to-Point Tunneling Protocol PPTP check boxes, and then click OK.
g. On the Settings tab, click Authentication, and review the settings.
h. Click Authentication Methods, and review the settings.
i. In the details pane, click Add.
j. In the Add EAP dialog box, click Microsoft: Secured password (EAP-MSCHAP v2), and then click OK.
k. Click Microsoft: Protected EAP (PEAP), and then click Edit.
l. In the Configure Protected EAP Properties dialog box, verify that Enable Quarantine checks is selected, and then click OK twice.
Task 3: Configure NYC-SVR1 with the Routing and Remote Access Service (RRAS) configured as a VPN server 1. On NYC-SVR1, click Start, point to Administrative Tools, and then click
Routing and Remote Access.
2. In the Routing and Remote Access window, right-click NYC-SVR1 (local), and then click Configure and Enable Routing and Remote Access.
3. In the Routing and Remote Access Server Setup Wizard, click Next.
4. On the Configuration page, verify that Remote access (dial-up or VPN) is selected, and then click Next.
5. On the Remote Access page, select the VPN check box, and then click Next.
6. On the VPN Connection page, click Local Area Connection 2.
7. Clear the Enable security on the selected interface by setting up static packet filters check box, and then click Next.
Note: This ensures that NYC SVR1 will be able to ping NYC DC1 when attached to the Internet subnet without requiring that you configure additional packet filters for Internet Control Message Protocol (ICMP) traffic.
8. On the IP Address Assignment page, click From a specified range of addresses, and then click Next.

20 Lab Instructions: Configuring Network Access Protection
9. On the Address Range Assignment page, click New.
10. In the New IPv4 Address Range dialog box, in the Start IP address field, type 10.10.0.100.
11. In the End IP address field, type 10.10.0.110, click OK and then click Next.
12. On the Managing Multiple Remote Access Servers page, verify that No, use Routing and Remote Access to authenticate connection requests is selected, and then click Next.
13. Click Finish.
14. In the Routing and Remote Access dialog box, click OK twice.
15. Close Routing and Remote Access.
16. In the Network Policy Server console pane, right-click Connection Request Policies and then click Refresh.
17. In the details pane, right-click Microsoft Routing and Remote Access Service Policy and then click Disable.
Task 4: Configure NYC-CL1 as a VPN and NAP client 1. Enable the remote-access, quarantine-enforcement client:
a. On NYC-CL1, click Start, type napclcfg.msc, and then press ENTER.
b. In the napclcfg - [NAP Client Configuration (Local Computer)] console pane, click Enforcement Clients.
c. In the details pane, right-click Remote Access Quarantine Enforcement Client, and then click Enable.
d. Close the NAP Client Configuration window.
2. Configure NYC-CL1 for the Internet network segment:
a. Click Start, right-click Network, and then click Properties.
b. In the Network and Sharing Center window, next to Local Area Connection, click View status.
c. In the Local Area Connection dialog box, click Properties.
d. In the Local Area Connection Properties dialog box, click Internet Protocol Version 4 (TCP/IPv4), and then click Properties.
Lab Instructions: Configuring Network Access Protection 21
e. In the Internet Protocol Version 4 (TCP/IPv4) Properties dialog box, click Use the following IP address.
f. In the IP address field, type 10.10.0.50.
g. In the Subnet mask field, type 255.255.0.0.
h. In the Default gateway field, type 10.10.0.1.
i. In the Preferred DNS server field, type 10.10.0.10.
j. Click OK twice, and then click Close.
3. Verify network connectivity for NYC-CL1:
a. Click Start | All Programs | Accessories, and then click Command Prompt.
b. At the command prompt, type ping nyc-dc1 and then press ENTER.
c. Verify that a successful reply from 10.10.0.10 is returned.
4. Configure a VPN connection:
a. In the Network and Sharing Center Tasks pane, click Set up a connection or network.
b. On the Choose a connection page, click Connect to a workplace, and then click Next.
c. On the How do you want to connect page, click Use my Internet connection (VPN).
d. On the Do you want to set up an Internet connection before continuing page, click I’ll set up an Internet connection later.
e. On the Type the Internet address to connect to page, in the Internet address field, type 10.10.0.30.
f. In the Destination name field, type Woodgrove VPN.
g. Select the Allow other people to use this connection check box, and then click Next.
h. On the Type your user name and password page, in the User name field, type Administrator.
i. In the Password field, type Pa$$w0rd and then select the Remember this password check box.
j. In the Domain (optional) field, type WOODGROVEBANK, and then click Create.
22 Lab Instructions: Configuring Network Access Protection
k. On the The connection is ready to use page, click Close.
l. In the Network and Sharing Center Tasks pane, click Manage network connections.
m. In the Network Connections window, right-click Woodgrovebank VPN, and then click Properties.
n. In the Woodgrove VPN Properties dialog box, on the Security tab, click Advanced (custom settings), and then click Settings.
o. In the Advanced Security Settings dialog box, click Use Extensible Authentication Protocol (EAP), and then in the Use Extensible Authentication Protocol (EAP) list, click Protected EAP (PEAP) (encryption enabled).
p. Click Properties.
q. In the Protected EAP Properties dialog box, verify that the Validate server certificate check box is selected, and then clear the Connect to these servers check box.
r. In the Select Authentication Method list, verify that Secured Password (EAP-MSCHAP v2) is selected.
s. Clear the Enable Fast Reconnect check box, and then select the Enable Quarantine checks check box.
t. Click OK three times.
5. Test the VPN connection:
a. In the Network Connections window, right-click Woodgrove VPN, and then click Connect.
b. In the Connect Woodgrove VPN dialog box, click Connect.
c. In the Enter Credentials dialog box, click OK.
d. In the Validate Server Certificate dialog box, click View Server Certificate.
e. In the Certificate dialog box, verify that Certificate Information states that the certificate was issued to nyc-svr1Woodgrovebank.com by WoodgroveBank-NYC-DC1-CA and then click OK twice.
f. Wait for the VPN connection to be made. Because NYC-CL1 is compliant, it should have unlimited access to the intranet subnet.
g. At the command prompt, type ipconfig /all and press ENTER.

Lab Instructions: Configuring Network Access Protection 23
h. Review the IP configuration and verify that System Quarantine State is Not Restricted.
i. Type ping nyc-svr1 and then press ENTER. This should be successful.
Note: The client now meets the requirement for VPN full connectivity.
j. In the Network Connections window, right-click Woodgrove VPN, and then click Disconnect.
6. Configure Windows Security Health Validator to require an antivirus application:
a. On NYC-SVR1, in the Network Policy Server console pane, click System Health Validators.
b. In the details pane, double-click Windows Security Health Validator.
c. In the Windows Security Health Validator Properties dialog box, click Configure.
d. In the Windows Security Health Validator dialog box, select the An antivirus application is on check box.
e. Click OK twice.
7. Verify the client is placed on the restricted network:
a. On NYC-CL1, in the Network Connections window, right-click Woodgrove VPN, and then click Connect.
b. In the Connect Woodgrove VPN dialog box, click Connect.
c. In the Enter Credentials dialog box, click OK.
d. Wait for the VPN connection to be made.
e. In the notification area, double-click the network access icon in the system tray.
f. In the Network Access Protection dialog box, review the settings and then click Close.
Note: This dialog box indicates the computer does not meet health requirements. This message is displayed because antivirus software has not been installed.

24 Lab Instructions: Configuring Network Access Protection
g. At the command prompt, type ipconfig /all and then press ENTER.
h. Review the IP configuration. The System Quarantine State should be Restricted.
8. Disconnect from Woodgrovebank VPN.
Task 5: Configure System Help for Networking 1. On NYC-SVR1, click Start and then click Help and Support.
2. In the Windows Help and Support window, click Networking.
3. Verify that the Networking help topics exist.
Task 6: Close all virtual machines, and discard undo disks 1. For each virtual machine that is running, close the Virtual Machine Remote
Control (VMRC) window.
2. In the Close box, select Turn off machine and discard changes, and then click OK.
3. Close the 6419A Lab Launcher.

Lab Instructions: Configuring Availability of Network Content and Resources 1
Module 13 Lab Instructions: Configuring Availability of Network Content and Resources
Contents: Lab A: Configuring Shadow Copying
Exercise 1: Configuring Shadow Copying 2
Lab B: Configuring Network Load Balancing
Exercise 1: Configuring Network Load Balancing 5

2 Lab Instructions: Configuring Availability of Network Content and Resources
Lab A: Configuring Shadow Copying
Exercise 1: Configuring Shadow Copying
Scenario You are the storage administrator for Woodgrove bank. You find your time is often spent restoring previous versions of files from backups. You want to institute shadow copies to allow users to recover their own previous versions.
In this exercise, you will configure and test shadow copies.
The main tasks are as follows:
1. Enable shadow copies on a volume.
2. Change a file in a share location.
3. Manually create a shadow copy.
4. View the file previous versions, and restore to a previous version.

Lab Instructions: Configuring Availability of Network Content and Resources 3
Task 1: Start the virtual machines, and then log on 1. Click the 6419A Lab Launcher shortcut on your desktop. The Lab Launcher
starts.
2. In the Lab Launcher, next to 6419A-NYC-DC1, click Launch.
3. In the Lab Launcher, next to 6419A-NYC-SVR1, click Launch.
4. In the Lab Launcher, next to 6419A-NYC-CL1, click Launch.
5. Log on to NYC-DC1 as WOODGROVEBANK\Administrator with the password Pa$$w0rd.
6. Minimize the Lab Launcher window.
Task 2: Enable shadow copies on a volume 1. Using the Computer Management console, enable shadow copies for drive E:\.
2. Create an initial shadow copy for drive E:\.
Task 3: Change a file in a share location 1. On NYC-CL1, open the shadowtest.txt file at \\NYC-DC1\shadow\.
2. Add the following text to the end of the text file:
This is my text that I am adding to the file.
3. Save and close the shadowtest.txt file.
4. On NYC-CL1, open the shadowtest.txt file at \\NYC-DC1\shadow\.
5. Add the following text to the end of the text file:
This is my second modification to the file.
6. Save and close the shadowtest.txt file.
Task 4: Manually create a shadow copy • On NYC-DC1, create a new shadow copy of drive E\:.

4 Lab Instructions: Configuring Availability of Network Content and Resources
Task 5: View the previous file versions, and restore to a previous version 1. On NYC-CL1, view the previous versions tab of the properties of
\\NYC-DC1\shadow\shadowtest.txt.
2. View the previous version.
3. Restore the previous version.
Results: After this exercise, you should have established shadow copies on a share, changed a file, and then restored the original version.
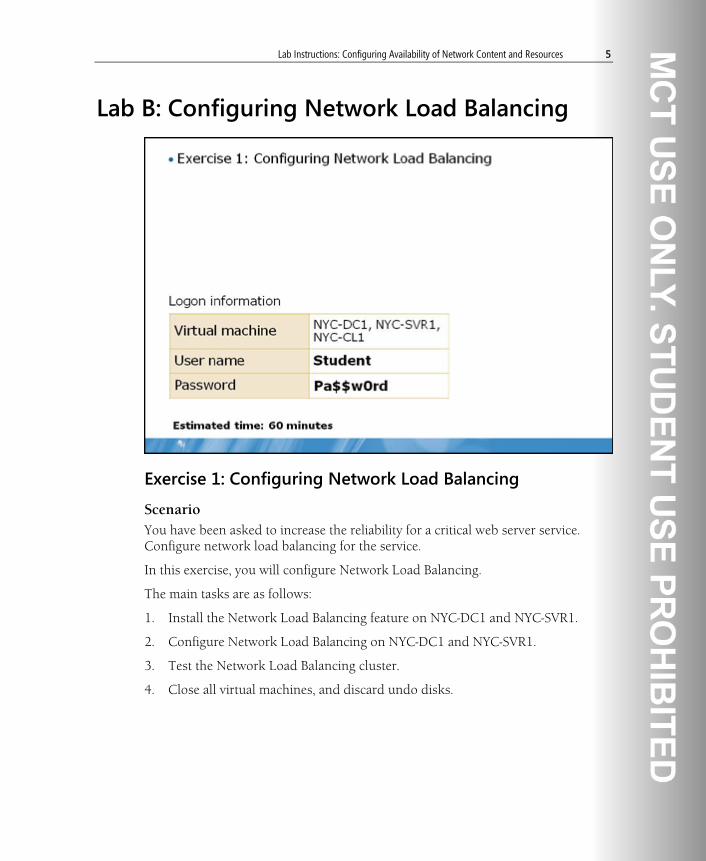
Lab Instructions: Configuring Availability of Network Content and Resources 5
Lab B: Configuring Network Load Balancing
Exercise 1: Configuring Network Load Balancing
Scenario You have been asked to increase the reliability for a critical web server service. Configure network load balancing for the service.
In this exercise, you will configure Network Load Balancing.
The main tasks are as follows:
1. Install the Network Load Balancing feature on NYC-DC1 and NYC-SVR1.
2. Configure Network Load Balancing on NYC-DC1 and NYC-SVR1.
3. Test the Network Load Balancing cluster.
4. Close all virtual machines, and discard undo disks.

6 Lab Instructions: Configuring Availability of Network Content and Resources
Task 1: Install Network Load Balancing 1. On NYC-DC1, open Server Manager.
2. Add the Network Load Balancing feature.
3. Repeat for NYC-SVR1.
Task 2: Create an NLB Cluster 1. On NYC-DC1, open Network Load Balancing Manager.
2. Create a new cluster with the hostname NYC-DC1 and start it.
3. Specify an IPv4 cluster IP of 10.10.0.70 with a Subnet Mask of 255.255.0.0.
4. Give the cluster a Full Internet Name of webfarm.woodgrovebank.com and set the operation mode to Multicast.
5. Define port rules:
• Port Range: 80 to 80
• Protocols: TCP
• Filtering mode: Multiple host
• Affinity: none
6. Add the host NYC-SVR1 to the cluster.
Task 3: Test the NLB Cluster 1. Use Internet Explorer to browse to http://10.10.0.70.
2. The IIS 7.0 default page appears.
3. Turn off NYC-SVR1.
4. Use Internet Explorer to browse to http://10.10.0.70.

Lab Instructions: Configuring Availability of Network Content and Resources 7
Task 4: Close all virtual machines, and discard undo disks 1. For each virtual machine that is running, close the Virtual Machine Remote
Control (VMRC) window.
2. In the Close box, select Turn off machine and discard changes, and then click OK.
3. Close the 6419A Lab Launcher.
Results: Even though a NLB Cluster member is unavailable, the web site is still available.

Lab Instructions: Monitoring and Maintaining Windows Server 2008 Servers 1
Module 14 Lab Instructions: Monitoring and Maintaining Windows Server 2008 Servers
Contents: Lab A: Identifying Windows Server 2008 Monitoring Requirements
Exercise 1: Evaluating Performance Metrics 2
Exercise 2: Monitoring Performance Metrics 6
Lab B: Configuring Windows Server 2008 Monitoring
Exercise 1: Configuring Data Collector Sets 7
Exercise 2: Monitoring Extension Exercise 8
Exercise 3: Automating Maintenance Tasks 9
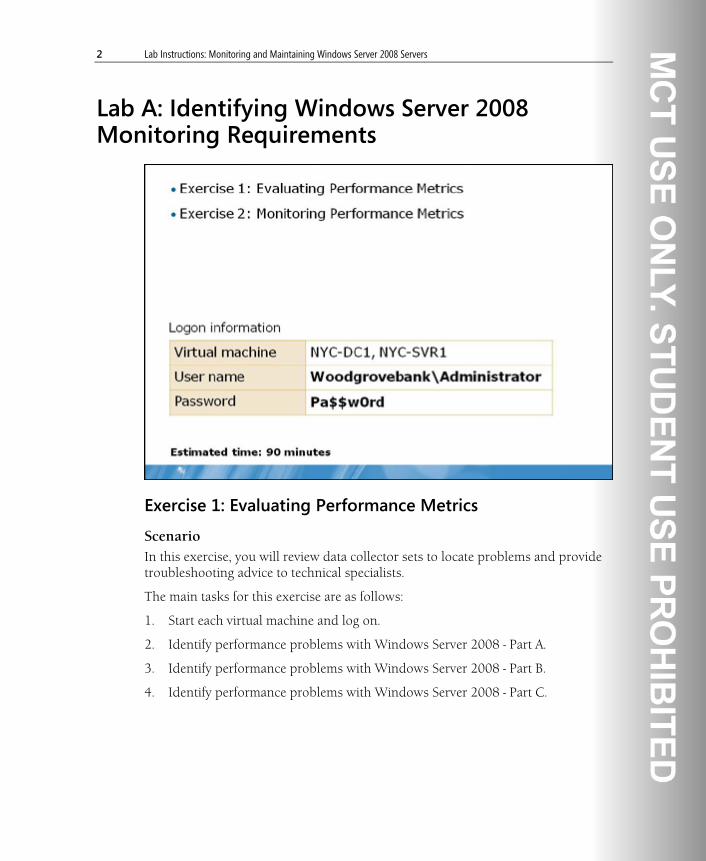
2 Lab Instructions: Monitoring and Maintaining Windows Server 2008 Servers
Lab A: Identifying Windows Server 2008 Monitoring Requirements
Exercise 1: Evaluating Performance Metrics
Scenario In this exercise, you will review data collector sets to locate problems and provide troubleshooting advice to technical specialists.
The main tasks for this exercise are as follows:
1. Start each virtual machine and log on.
2. Identify performance problems with Windows Server 2008 - Part A.
3. Identify performance problems with Windows Server 2008 - Part B.
4. Identify performance problems with Windows Server 2008 - Part C.

Lab Instructions: Monitoring and Maintaining Windows Server 2008 Servers 3
Task 1: Start each virtual machine and log on 1. On the host machine, click Start, point to All Programs, point to Microsoft
Learning, and then click 6419A. The Lab Launcher starts.
2. In the Lab Launcher, next to 6419A-NYC-DC1, click Launch.
3. In the Lab Launcher, next to 6419A-NYC-SVR1, click Launch.
4. Log on to both virtual machines as Woodgrovebank\Administrator with the password Pa$$w0rd.
5. Minimize the Lab Launcher window.
Task 2: Identify performance problems with Windows Server 2008 - Part A You know that the server 6419A-NYC-SVR1 experiences low network traffic and has limited disk activity, but the help desk is receiving many reports that the server is slow.
Use Performance Monitor to review the data collector log at E:\Labfiles\Mod14\Ex1A\6419A-NYC-SVR1-LAB14-EX1A.blg on the server 6419A-NYC-SRV1:
• Examine the following counters:
• Processor - % Processor Time
• System - Processor Queue Length
• Process _ % Processor Time (All Instances)
• What appears to be the problem on this server?
• Write a brief report that outlines your findings and suggests possible solutions to the problem.
4 Lab Instructions: Monitoring and Maintaining Windows Server 2008 Servers
Task 3: Identify performance problems with Windows Server 2008 - Part B You know that the server 6419A-NYC-SVR1 is not running processor-intensive applications, but the help desk is receiving many reports that the server is slow.
Use Performance Monitor to review the data collector log at E:\Labfiles\Mod14\Ex1B\6419A-NYC-SVR1-LAB14-EX1B.blg on the server 6419A-NYC-SVR1:
• Examine the following counters:
• PhysicalDisk - Avg. Disk Queue Length
• PhysicalDisk - Current Disk Queue Length
• PhysicalDisk - Disk Transfers/sec
• Process - IO Data Bytes/sec (All Instances)
• What appears to be the problem on this server?
• Write a brief report that outlines your findings and suggests possible solutions to the problem.

Lab Instructions: Monitoring and Maintaining Windows Server 2008 Servers 5
Task 4: Identify performance problems with Windows Server 2008 - Part C You know that the server 6419A-NYC-SVR1 experiences low network traffic and is not running processor-intensive applications, but the help desk is receiving many reports that the server is slow.
Use Performance Monitor to review the data collector log at E:\Labfiles\Mod14\Ex1C\6419A-NYC-SVR1-LAB14-EX1C.blg on the server 6419A-NYC-SVR1.
• Examine the following counters:
• Process - Working Set-Private (All Instances)
• Paging File - % Usage
• Paging File - % Usage Peak
• Memory - % Committed Bytes In Use
• Memory - Available Mbytes
• Memory - Committed Bytes
• Memory - Page Faults/sec
• Memory - Pool Nonpaged Bytes
• Memory - Pool Paged Bytes
• What appears to be the problem on this server?
• Write a brief report that outlines your findings and suggests possible solutions to the problem.
Results: After this exercise, you should have identified performance issues with servers and suggested steps to resolve the problems.

6 Lab Instructions: Monitoring and Maintaining Windows Server 2008 Servers
Exercise 2: Monitoring Performance Metrics
Scenario In this exercise, you will plan the performance metrics that are required to measure the scalability of a server.
The main task for this exercise is to create a data collector set to measure server requirements.
Task 1: Create a data collector set to measure server requirements • Create a data collector set based on the System Performance template to
measure the performance requirements of a file server. This forms the base performance metrics for measuring the capacity of this server.
• Which specific counters do you anticipate will require careful analysis?
Results: After this exercise, you should have identified steps to create a data collector set for measuring file server performance.

Lab Instructions: Monitoring and Maintaining Windows Server 2008 Servers 7
Lab B: Configuring Windows Server 2008 Monitoring
Exercise 1: Configuring Data Collector Sets
Scenario In this exercise, you will configure data collector sets to generate an alert.
The main task for this exercise is to generate an alert by using a data collector set.
Task 1: Generate an alert by using a data collector set • Create a user-defined data collector set and configure an alert to trigger when
the counter Process - % Processor Time reaches 95%.
• The alert should log an event in the application event log.
Results: After this exercise, you should have configured a performance alert.

8 Lab Instructions: Monitoring and Maintaining Windows Server 2008 Servers
Exercise 2: Monitoring Extension Exercise
Scenario In this exercise, you will create a data collector set to monitor a server that you currently administer.
The main task for this exercise is to create a tailored data collector set.
Task 1: Create a tailored data collector set • Use the Reliability and Performance Monitor to create a data collector set for a
server in your organization.
Results: After this exercise, you should have identified performance counters that you will need to collect from a server in your own organization.

Lab Instructions: Monitoring and Maintaining Windows Server 2008 Servers 9
Exercise 3: Automating Maintenance Tasks
Scenario You decide that it will be easier to review the Directory Service log information from a single, central location. You also want to produce a simple report about disk space across several servers at the same time.
In this exercise, you will configure event forwarding for Directory Service events.
The main tasks for this exercise are as follows:
1. Forward Directory Service replication error messages to a central location.
2. Run a script to review disk space.
3. Close all virtual machines, and discard undo disks.
Task 1: Forward Directory Service replication error messages to a central location • Log on to 6419A-NYC-DC1 by using the following information:
• User name: woodgrovebank\administrator
• Password: Pa$$w0rd
• Add the computer NYC-SVR1 to the Administrators group in the WoodgroveBank.com domain.
• Log on to 6419A-NYC-SVR1 by using the following information:
• User name: woodgrovebank\administrator
• Password: Pa$$w0rd
• Open Event Viewer.
• Create a subscription to forward events from NYC-DC1 to NYC-SVR1 by manually entering the query in the following code example:
<QueryList> <Query Id="0" Path="Directory Service"> <Select Path="Directory Service">*[System[(Level=2 or Level=3) and (EventID=1308 or EventID=1864)]]</Select> </Query> </QueryList>

10 Lab Instructions: Monitoring and Maintaining Windows Server 2008 Servers
Task 2: Run a script to review disk space • Open Notepad.
• Enter the text in the following code example into Notepad:
$aryComputers = "NYC-DC1","NYC-SVR1" Set-Variable -name intDriveType -value 3 -option constant foreach ($strComputer in $aryComputers) {"Hard drives on: " + $strComputer Get-WmiObject -class win32_logicaldisk -computername $strComputer | Where {$_.drivetype -eq $intDriveType} | Format-table}
• Save as C:\Users\Administrator.Woodgrovebank\Documents \DriveReport.ps1.
• Start Windows PowerShell.
• Turn on Windows PowerShell script execution by typing the following: set-executionpolicy unrestricted.
• Run the DriveReport.ps1 script that you created and review the results.
Results: After this exercise, you should have configured Event Log forwarding for Active Directory directory service replication errors and run a script to review disk space.
Task 3: Close all virtual machines, and discard undo disks 1. For each virtual machine that is running, close the Virtual Machine Remote
Control (VMRC) window.
2. In the Close box, select Turn off machine and discard changes, and then click OK.
3. Close the 6419A Lab Launcher.

Lab Instructions: Managing Windows Server 2008 Backup and Restore 1
Module 15 Lab Instructions: Managing Windows Server 2008 Backup and Restore
Contents: Lab A: Planning Windows Server 2008 Backup Policy
Exercise 1: Evaluating the Existing Backup Plan 2
Exercise 2: Updating the Backup Policy 5
Exercise 3: Reviewing Backup Policy and Plans 6
Exercise 4: Implementing the Backup Policy 7
Lab B: Planning Windows Server 2008 Restore
Exercise 1: Evaluating Backup Data 9
Exercise 2: Planning a Restore 12
Exercise 3: Investigating a Failed Restore 13
Exercise 4: Restoring System State Data 14

2 Lab Instructions: Managing Windows Server 2008 Backup and Restore
Lab A: Planning Windows Server 2008 Backup Policy
Exercise 1: Evaluating the Existing Backup Plan
Scenario At Woodgrove Bank, data for several departments is stored across servers on the network. In the New York office, several file servers are part of a domain-based Distributed File System (DFS) namespace and host the following shares:
• Sales. This share holds the shared data for the Sales department. The Sales department updates it regularly with budgets, forecasts, and sales figures.
• Finance. This share holds important data for the Finance department that supplements the Finance application database. The Finance database should not form part of your backup plan.
• Human Resources. This share holds highly confidential data for the Human Resources department. You have encrypted some of this data by using EFS.

Lab Instructions: Managing Windows Server 2008 Backup and Restore 3
• Technical Library. This share holds technical information, such as white papers and guidance documents, for the IT department. The IT department updates this information infrequently.
• Projects. This share holds documents that relate to any projects that are running at the New York office and changes frequently.
In addition to the file servers, you are responsible for ensuring that four intranet Web servers and two domain controllers can have the data or server restored in the event of a disaster. Web pages on the intranet Web sites do not change frequently.
Currently, there is a scheduled weekly backup of the volumes that contain the shares on the file servers and the volumes that contain the Web page content on the Web servers.
In this exercise, you must review the existing backup plan against requirements that the management team at Woodgrove Bank have specified.
The main tasks for this exercise are as follows:
1. Review the existing backup plan.
2. Propose changes to the backup plan.
Task 1: Start the NYC-DC1 and NYC-SVR1 virtual machines 1. On the host machine, click Start, point to All Programs, point to Microsoft
Learning, and then click 6419A. The Lab Launcher starts.
2. In the Lab Launcher, next to 6419A-NYC-DC1, click Launch.
3. In the Lab Launcher, next to 6419A-NYC-SVR1, click Launch.
4. Log on to each virtual machine as WOODGROVEBANK\Administrator with the password Pa$$w0rd.
5. Minimize the Lab Launcher window.

4 Lab Instructions: Managing Windows Server 2008 Backup and Restore
Task 2: Review the existing backup plan 1. You have agreed that no more than one day's critical data should be lost in the
event of a disaster. Critical data includes the Sales, Finance, and Projects data. Does the current backup plan meet this requirement?
2. Currently, you copy the Human Resources confidential data onto a removable hard disk that is attached to a computer in the Human Resources office. This task is performed weekly by using a script to preserve the encryption on the files. What are the consequences of this process and how would you address them?
3. You have also agreed that, if a server fails, you should be able to restore that server, including all installed roles, features, applications, and security identity, in six hours. Does the current backup plan enable you to restore the servers in this way?
Task 3: Propose changes to the backup plan 1. Propose an appropriate backup frequency for the shares in the following table:
Backup Frequency
Sales
Finance
Human Resources
Technical Library
Projects
2. How would you address the requirement to restore the servers and how
frequently would you back up the servers?
Results: After this exercise, you should have reviewed the existing backup plan and proposed changes to the backup plan.

Lab Instructions: Managing Windows Server 2008 Backup and Restore 5
Exercise 2: Updating the Backup Policy
Scenario The management team at Woodgrove Bank has decided that an SLA should be put in place for the mission-critical data that is stored on the intranet file servers and Web servers. The SLA will specify availability for data and the recovery of deleted items.
In addition, Woodgrove Bank must also comply with legal regulations that state how long the bank must keep customer and financial data. Failure to comply with these requirements entails heavy fines and penalties for the company. You must keep Human Resources and financial information for a minimum of seven years. In the event of an audit, you must provide access to this data within three working days.
In this exercise, you will examine the SLA and legal requirements and propose solutions to ensure compliance.
The main tasks for this exercise are as follows:
1. Create a backup strategy to comply with the SLA.
2. Create a backup strategy to comply with legal requirements.
Task 1: Create a backup strategy to comply with the SLA 1. You should be able to restore critical data, which includes the Sales, Finance,
and Projects shares, as quickly as possible in the event of a disaster. What factors affect how quickly you can restore data?
2. Given that you have a limited budget to meet the SLA requirements, how could you maximize your budget while providing backup for all of the network data for which you are responsible?
Task 2: Create a backup strategy to comply with legal requirements • How will you ensure that the required data is stored for the minimum legal
requirement period and that the data is available for audit purposes when it is required?
Results: After this exercise, you should have created a backup strategy to comply with the SLA and legal storage requirements.

6 Lab Instructions: Managing Windows Server 2008 Backup and Restore
Exercise 3: Reviewing Backup Policy and Plans
Scenario In this exercise, you will share your solutions with the class in an instructor-led discussion. Be prepared to add solutions from your own experience at work to the discussion.
The main task for this exercise is to discuss your solutions with the class.

Lab Instructions: Managing Windows Server 2008 Backup and Restore 7
Exercise 4: Implementing the Backup Policy
Scenario In this exercise, you will implement a Backup policy for the NYC-SVR1 file server.
The main tasks for this exercise are as follows:
1. Initialize the backup storage volume.
2. Create the new backup schedule.
Task 1: Initialize the backup storage volume 1. Log on to 6419A-NYC-SVR1 by using the following information:
• User name: Woodgrovebank\Administrator
• Password: Pa$$w0rd
2. Use Disk Management to create a maximum-size simple volume on Disk 2. Use a quick format.
Task 2: Create the new backup schedule • Use Windows Server Backup to create a new backup schedule. The backup
should include the file shares on the E: volume and backup to Disk 2, and you should schedule the backup for 12:30 and 21:00 every day.
Results: After these tasks, you should have initialized a new disk and created the new backup schedule by using Windows Server Backup.
Task 3: Backup the Domain Recovery Agent's Private Key 1. On NYC-DC1, use the Group Policy Management Editor to browse to the
Encrypting File System public policy (located in Default Group Policy\Computer Configuration\Policies\Windows Settings\Security Settings\Public Key Policies\Encrypting Files System).
2. From the Group Policy Management Editor, export the File Recovery certificate private key to C:\AdminKey.pfx using a password of Pa$$w0rd.

8 Lab Instructions: Managing Windows Server 2008 Backup and Restore
Task 4: Lab Shutdown 1. For each virtual machine that is running, close the Virtual Machine Remote
Control (VMRC) window.
2. In the Close box, select Turn off machine and discard changes, and then click OK.
3. Close the 6419A Lab Launcher.
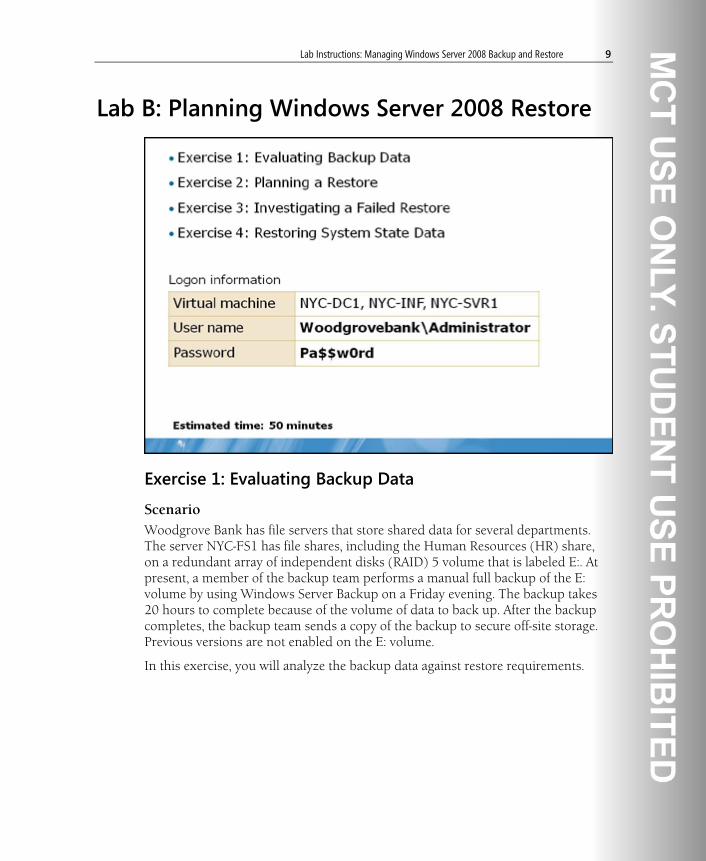
Lab Instructions: Managing Windows Server 2008 Backup and Restore 9
Lab B: Planning Windows Server 2008 Restore
Exercise 1: Evaluating Backup Data
Scenario Woodgrove Bank has file servers that store shared data for several departments. The server NYC-FS1 has file shares, including the Human Resources (HR) share, on a redundant array of independent disks (RAID) 5 volume that is labeled E:. At present, a member of the backup team performs a manual full backup of the E: volume by using Windows Server Backup on a Friday evening. The backup takes 20 hours to complete because of the volume of data to back up. After the backup completes, the backup team sends a copy of the backup to secure off-site storage. Previous versions are not enabled on the E: volume.
In this exercise, you will analyze the backup data against restore requirements.

10 Lab Instructions: Managing Windows Server 2008 Backup and Restore
The main tasks for this exercise are as follows:
1. Evaluate file restoration.
2. Restore EFS files.
3. Evaluate server restore.
Task 1: Start the NYC-DC1, NYC-SVR1, and NYC-INF virtual machines 1. On the host machine, click Start, point to All Programs, point to Microsoft
Learning, and then click 6419A. The Lab Launcher starts.
2. In the Lab Launcher, next to 6419A-NYC-DC1, click Launch.
3. In the Lab Launcher, next to 6419A-NYC-SVR1, click Launch.
4. In the Lab Launcher, next to 6419A-NYC-INF, click Launch.
5. Log on to each virtual machine as WOODGROVEBANK\Administrator with the password Pa$$w0rd.
6. Minimize the Lab Launcher window.
Task 2: Evaluate file restoration On Thursday, a member of the HR department asks you to restore an important file, which he created two days ago but someone subsequently deleted.
1. Why can you not restore the file?
2. How could you change the backup strategy so that it is possible to restore files that have changed more recently?
3. What other effects would a change in backup strategy cause?
Task 3: Restore EFS files Members of the HR department have encrypted some of the files that are stored on the HR share by using EFS. The HR director asks you to restore some encrypted confidential files that were originally written by Tommy Hartono, who has since left the company. After you have restored the files, how can you provide access to the files for the HR director?

Lab Instructions: Managing Windows Server 2008 Backup and Restore 11
Task 4: Evaluate server restore On Wednesday, the server, NYC-FS1, suffers a hardware failure. Both the C: and E: volumes are lost.
1. How can you restore the server and data?
2. How could you make the restore process easier?
Results: After this exercise, you should have analyzed the backup data against the restore requirements.
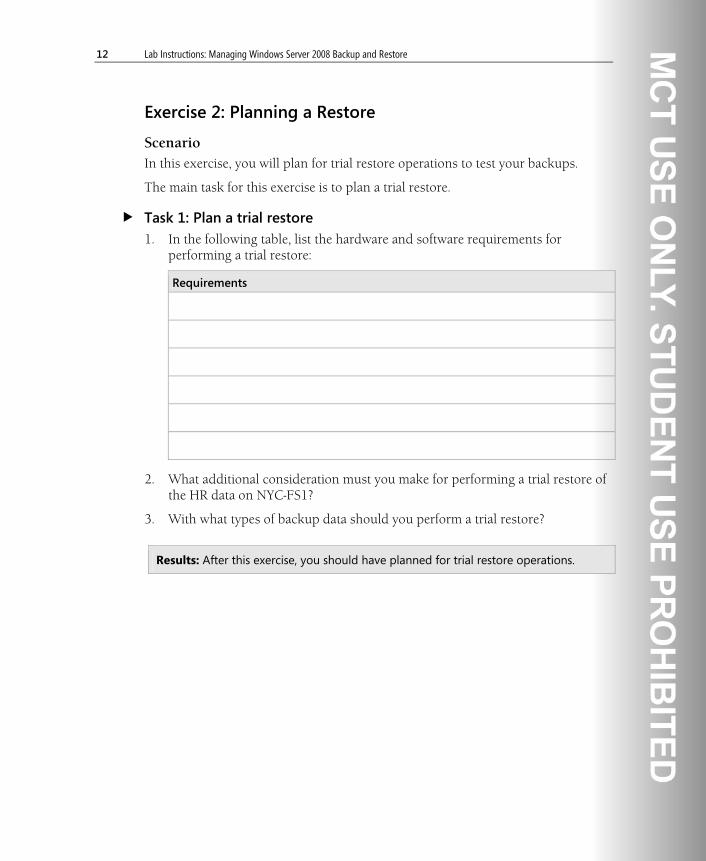
12 Lab Instructions: Managing Windows Server 2008 Backup and Restore
Exercise 2: Planning a Restore
Scenario In this exercise, you will plan for trial restore operations to test your backups.
The main task for this exercise is to plan a trial restore.
Task 1: Plan a trial restore 1. In the following table, list the hardware and software requirements for
performing a trial restore:
Requirements
2. What additional consideration must you make for performing a trial restore of
the HR data on NYC-FS1?
3. With what types of backup data should you perform a trial restore?
Results: After this exercise, you should have planned for trial restore operations.
Lab Instructions: Managing Windows Server 2008 Backup and Restore 13
Exercise 3: Investigating a Failed Restore
Scenario Users have reported that some files in the Technical Library share on 6419A-NYC-SVR1 appear to be the wrong version.
In this exercise, you will investigate the files and resolve the problem.
The main tasks for this exercise are as follows:
1. Determine the reason for the wrong file version.
2. Create a Restore Operators group.
3. Separate the Backup and Restore roles.
Task 1: Determine the reason for the wrong file version 1. Log on to 6419A-NYC-SVR1 by using the following information:
• Username: Woodgrovebank\Administrator
• Password: Pa$$w0rd
2. Review the backup logs.
3. What operation was last performed?
Task 2: Create a Restore Operators group • Create a new local group on 6419A-NYC-SVR1 that is named Restore
Operators.
Task 3: Separate the Backup and Restore roles • Edit the local security policy on 6419A-NYC-SVR1 by using the following
settings:
• Prevent the Backup Operators group from being able to restore files.
• Allow the Restore Operators group to restore files.
Results: After this exercise, you should have investigated a failed restore and changed the backup policy.
14 Lab Instructions: Managing Windows Server 2008 Backup and Restore
Exercise 4: Restoring System State Data
Scenario The infrastructure team at Woodgrove Bank has escalated a problem with Dynamic Host Configuration Protocol (DHCP). The DHCP service on 6419A-NYC-INF cannot start and the server reports a general error.
In this exercise, you will perform a system state restore to repair the server.
The main tasks for this exercise are as follows:
1. Backup and restore specific files and folders.
2. Check the state of the DHCP service.
3. Perform a system state restore.
Task 1: Backup and restore specific files and folders 1. Run the Windows Server Backup.
2. Back up the E: volume.
3. Delete a file.
4. Use Windows Server Backup to recover the file.
Task 2: Check the state of the DHCP service 1. Log on to 6419A-NYC-INF by using the following information:
• Username: Woodgrovebank\Administrator
• Password: Pa$$w0rd
2. Is the DHCP service running?

Lab Instructions: Managing Windows Server 2008 Backup and Restore 15
Task 3: Perform a system state restore 1. Use the following command to get the backup version identifier:
wbadmin get versions -backuptarget:f:
2. Use the following command to perform the system state restore:
wbadmin start systemstaterecovery -version:<version identifier> -backuptarget:f:
3. Cancel the backup after a couple of minutes.
Results: After this exercise, you should have seen how to backup and recovery files from the command line and from the Windows Server Backup utility.
Task 4: Lab Shutdown 1. For each virtual machine that is running, close the Virtual Machine Remote
Control (VMRC) window.
2. In the Close box, select Turn off machine and discard changes, and then click OK.
3. Close the 6419A Lab Launcher.
Lab Answer Key: Introduction to Managing Microsoft Windows Server 2008 Environment -1
Module 1 Lab Answer Key: Introduction to Managing Microsoft Windows Server 2008 Environment
Contents: Exercise 1: Install the DNS Server Role 2
Exercise 2: Configuring Remote Desktop for Administration 4

2 Lab Answer Key: Introduction to Managing Microsoft Windows Server 2008 Environment
Lab: Administering Windows Server 2008
Note: If you have already logged on to a virtual machine, skip the
logon task for that particular virtual machine.
Exercise 1: Install the DNS Server Role
Task 1: Start the virtual machines, and then log on 1. On your host machine, click Start, point to All Programs, point to Microsoft
Learning, and then click 6419A. The Lab Launcher starts.
2. In the Lab Launcher, next to 6419A-NYC-DC1, click Launch.
3. In the Lab Launcher, next to 6419A-NYC-SVR1, click Launch.
4. In the Lab Launcher, next to 6419A-NYC-CL1, click Launch.
5. Log on to NYC-DC1 as WOODGROVEBANK\Administrator with the password Pa$$w0rd.
6. Log on to NYC-SVR1 as NYC-SVR1\Administrator with the password Pa$$w0rd.
7. Log on to NYC-CL1 as NYC-CL1\LocalAdmin with the password Pa$$w0rd.
8. Minimize the Lab Launcher window.
Task 2: Install the DNS Server role 1. On NYC-SVR1, click Start and then click Server Manager.
2. The Server Manager window opens. In the console pane, click Roles.
3. In the details pane, click Add Roles.
4. The Add Roles Wizard appears. Click Next.
5. On the Select Server Roles page, select DNS Server and then click Next.
6. On the DNS Server page, click Next.

Lab Answer Key: Introduction to Managing Microsoft Windows Server 2008 Environment -3
7. On the Confirm Installation page, click Install.
8. Allow the role installation to complete.
9. On the Installation Results page, click Close.
10. Close Server Manager.
Task 3: Verify domain membership 1. On NYC-DC1, click Start, point to Administrative Tools, and then click
Active Directory Users and Computers.
2. In the console pane, click Computers.
3. Notice the NYC-SVR1 exists here. Member server computer accounts are added to the Computers container by default.
4. Close Active Directory Users and Computers.
5. On NYC-SVR1, click Start, and click Server Manager.
6. In the console pane, expand Configuration, expand Local Users and Groups, and then click Groups.
7. Double-click Administrators.
Note: Notice that WOODGROVEBANK\Domain Admins is a member of this group because this server is joined to the domain.
8. Click Cancel and close Server Manager.
Results: After this exercise, you should have successfully installed the DNS Server role and successfully verified domain membership.

4 Lab Answer Key: Introduction to Managing Microsoft Windows Server 2008 Environment
Exercise 2: Configuring Remote Desktop for Administration
Task 1: Enable Remote Desktop for Administration 1. On NYC-SVR1, click Start, right-click Computer, and then click Properties.
2. Under Tasks, click Remote settings.
3. In the System Properties dialog box, select Allow connections from computers running Remote Desktop with Network Level Authentication (more secure).
4. A confirmation dialog box appears. Click OK.
Task 2: Grant Axel Delgado access to Remote Desktop for Administration on NYC-SVR1 1. In the System Properties dialog box, click Select Users.
2. In the Remote Desktop Users dialog box, click Add, type Axel Delgado, click Check Names, and then click OK.
3. Click OK to close the Remote Desktop Users dialog box.
4. Click OK to close the System Properties dialog box.
5. Close the System window.
Task 3: Configure security for Remote Desktop for Administration 1. On NYC-SVR1, click Start, point to Administrative Tools, point to Terminal
Services, and then click Terminal Services Configuration.
2. In the details pane, right-click RDP-Tcp and click Properties.
3. In the Security layer list, click SSL (TLS 1.0).
4. In the Encryption level list, click High.
5. Verify that Allow connections only from computers running Remote Desktop with Network Level Authentication is selected.
6. Click OK to save the changes.
7. Close Terminal Services Configuration.

Lab Answer Key: Introduction to Managing Microsoft Windows Server 2008 Environment -5
Task 4: Give Axel Delgado rights to run Reliability and Performance Monitor 1. On NYC-SVR1, click Start, and then click Server Manager.
2. In the console pane, expand Configuration, expand Local Users and Groups, and then click Groups.
3. Double-click Performance Log Users.
4. In the Performance Log Users Properties window, click Add, type Axel Delgado, click Check Names, and then click OK.
5. Click OK to close the Performance Log Users Properties window.
6. Close Server Manager.
Task 5: Verify Remote Desktop for Administration Functionality 1. On NYC-CL1, click Start, point to All Programs, click Accessories, and then
click Remote Desktop Connection.
2. In the Computer field, type NYC-SVR1.woodgrovebank.com, and then click Connect.
3. In the User name field, type woodgrovebank\Axel.
4. In the Password box, type Pa$$w0rd, and then click OK.
5. In the Remote Desktop Connection window, click Start, point to Administrative Tools, and then click Reliability and Performance Monitor.
Note: Notice that there is no data in the Resource Overview screen because Axel Delgado is not a local Administrator.
6. In the console pane, click Performance Monitor.
7. Notice that Axel Delgado is able to use Performance Monitor to view server statistics. By default, % Processor Time is listed.
8. Close Reliability and Performance Monitor.
9. Log off NYC-SVR1 in Remote Desktop.

6 Lab Answer Key: Introduction to Managing Microsoft Windows Server 2008 Environment
Task 6: Close all virtual machines and discard undo disks 1. For each virtual machine that is running, close the Virtual Machine Remote
Control window.
2. In the Close box, select Turn off machine and discard changes. Click OK.
3. Close the 6419A Lab Launcher.
Results: After this exercise, you should have successfully used Axel Delgado's account to remotely access NYC-SVR1 and run Reliability and Performance Monitor.
Note: After you have completed the lab exercises closing the VM’s and selecting undo disk is not required for hosted labs. Click the Quit button to exit.

Lab Answer Key: Creating Active Directory Domain Services User and Computer Objects 1
Module 2 Lab Answer Key: Creating Active Directory Domain Services User and Computer Objects
Contents: Exercise 1: Creating and Configuring User Accounts 2
Exercise 2: Creating and Configuring Computer Accounts 8
Exercise 3: Automating the Management of AD DS Objects 10

2 Lab Answer Key: Creating Active Directory Domain Services User and Computer Objects
Lab: Creating AD DS User and Computer Accounts
Note: If you have already logged on to a virtual machine, skip the
logon task for that particular virtual machine.
Exercise 1: Creating and Configuring User Accounts
Task 1: Start the virtual machines, and then log on 1. In the Lab Launcher, next to 6419A-NYC-DC1, click Launch.
2. In the Lab Launcher, next to 6419A-NYC-CL1, click Launch.
3. Log on to NYC-DC1 as WOODGROVEBANK\Administrator with the password Pa$$w0rd.
4. Minimize the Lab Launcher window.
Task 2: Create a new user account 1. On NYC-DC1, click Start, point to Administrative Tools, and then click
Active Directory Users and Computers.
2. In the console pane, ensure WoodgroveBank.com is expanded, right-click the ITAdmins OU, point to New, and then click User.
3. In the New Object – User dialog box, enter the following information:
a. First name: Kerim
b. Last name: Hanif
c. Full name: Kerim Hanif
d. User logon name: Kerim
4. Click Next.
5. In the Password and Confirm password fields, type Pa$$w0rd.
Lab Answer Key: Creating Active Directory Domain Services User and Computer Objects 3
6. Verify that the User must change password at next logon check box is selected.
7. Click Next, and then click Finish.
8. On NYC-CL1, test the user account that you just created by logging on to NYC-CL1 as WOODGROVEBANK\Kerim with the password of Pa$$w0rd.
9. When prompted, click OK, type Pa$$w0rd1 as the new password, type Pa$$w0rd1 in the Confirm password field, click the right arrow button, and then click OK.
10. Log off from NYC-CL1.
Task 3: Modify Kerim Hanif’s user account properties 1. On NYC-DC1, in Active Directory Users and Computers, in the details pane,
right-click Kerim Hanif, and then click Properties.
2. Modify the user properties as follows:
a. On the General tab, enter the following information:
i. Office: Downtown
ii. Telephone number: 204-555-0100
iii. E-mail: [email protected]
b. On the Dial-in tab, under Network Access Permission, click Allow access.
c. On the Account tab, click Logon Hours. Configure logon hours to be permitted Monday through Friday between 8:00 A.M. and 5:00 P.M and then click OK.
d. On the Member Of tab, click Add.
e. In the Select Groups dialog box, type ITAdmins_WoodgroveGG, and then click OK twice.

4 Lab Answer Key: Creating Active Directory Domain Services User and Computer Objects
Task 4: Create a template for the New York Customer Service department 1. On NYC-DC1, in Active Directory Users and Computers, click on the NYC
OU, and then expand the CustomerService OU.Click CustomerService OU
2. Right click the CustomerService OU Click new and click users
3. In the New object–User dialog box enter the following information
Property Value
First name CustomerService
Last name Template
Full name CustomerService Template
User logon name _ CustomerServiceTemplate
4. Click Next and Enter the follwing details and click finish
Property Value
Password Pa$$w0rd
Confirm Password Pa$$w0rd
Account is disabled Selected
User must change password at next logon
Selected
5. In the Detail pane right click _ CustomerServiceTemplate and then click Properties and enter the following details in general tab
Description Customer Service Representative
Office New York Main Office
6. In the Member of Tab type the following details

Lab Answer Key: Creating Active Directory Domain Services User and Computer Objects 5
Member Of NYC_CustomerServiceGG
7. In the Organization Tab type the following details
Department Customer Service
8. In the Account Tab enter the following Details and click Ok .
Logon Hours 6:00 A.M – 6:00 P.M. Monday to Friday

6 Lab Answer Key: Creating Active Directory Domain Services User and Computer Objects
Task 5: Create a new user account based on the customer service template 1. Right-click the CustomerService Template user, and then click Copy.
2. In the Copy Object – User dialog box, enter the following information:
a. First Name: Sunil
b. Last Name: Koduri
c. User Logon Name: Sunil
3. Click Next.
4. In the Password and Confirm Password fields, type Pa$$w0rd and then click Next.
5. Click Next, and then click Finish.
6. Right-click Sunil Koduri, and then click Enable Account. Click OK.
7. Double-click Sunil Koduri, and verify that the group membership and logon hours are correct. Review the settings on the General and Organization tabs.
Question: What values did not transfer from the template?
Answer: The Description and Office attributes.
Task 6: Modify the user account properties for all customer service representatives in New York 1. Select the top user in the details pane, hold SHIFT, and then click the last user
in the details pane.
2. Hold CTRL, and then click NYC_CustomerServiceGG.
3. Right-click the highlighted user accounts, and then click Properties.
4. On the General tab, select the appropriate check boxes, and enter the following information:
a. Description: Customer Service Representative
b. Office: New York Main Office
5. On the Organization tab, select the Department checkbox, enter Customer Service, and then click OK.
Lab Answer Key: Creating Active Directory Domain Services User and Computer Objects 7
6. Double-click Eli Bowen, and verity that the Description, Office, and Department attributes have been updated. Click OK.
Task 7: Modify the user account properties for all Branch Managers 1. On NYC-DC1, in Active Directory Users and Computers, right-click
WoodgroveBank.com, and then click Find.
2. In the Find Users, Contacts, and Groups dialog box, click the Advanced tab.
3. Click Field, point to User, and then click Job Title.
4. In the Condition list, click Is (exactly), and in the Value field, type Branch Manager.
5. Click Add, and then click Find Now.
6. Select all of the user accounts in the Search Results, right-click the highlighted user accounts, and then click Add to a group.
7. In the Select Groups dialog box, type BranchManagersGG, and then click OK twice.
8. Close the Find Users, Contacts, and Groups dialog box.
Task 8: Create a saved query to find all investment users 1. In Active Directory Users and Computers, right-click the Saved Queries
folder, point to New, and then click Query.
2. In the New Query dialog box, in the Name field, type Find Investment Users.
3. Click Define Query.
4. In the Find list, click Users, Contacts and Groups.
5. Click the Advanced tab.
6. Click Field, point to User and then click Department.
7. In the Condition list, verify that Starts with is selected, and in the Value field, type Investments.
8. Click Add, and then click OK twice.
9. Under Saved Queries, click Find Investment Users.
10. The query should display all the users in the Investment departments in each city.

8 Lab Answer Key: Creating Active Directory Domain Services User and Computer Objects
Results: At the end of this exercise you will have created and configured user accounts; created a template and a user account based on the template; and created a saved query and verified its ability to return expected search results.
Exercise 2: Creating and Configuring Computer Accounts
Task 1: Create a computer account by using Active Directory Users and Computers 1. On NYC-DC1, in Active Directory Users and Computers, right-click
Computers, point to New, and then click Computer.
2. In the New Object-Computer dialog box, in the Computer name field, type Vista1.
3. Click Change.
4. In the Select User or Group dialog box, type Doris, click Check Names, and then click OK twice.
Task 2: Delete a computer account in AD DS 1. On NYC-DC1, in Active Directory Users and Computers, click Computers.
2. Right-click NYC-CL1, and then click Delete.
3. In the Active Directory Domain Services dialog box, click Yes.
4. On NYC-CL1, press the right ALT key and DELETE. Click Switch User.
5. Click Other User, then log on as Axel with the password of Pa$$w0rd.
6. Press ENTER, read the error message, and then click OK.
Task 3: Join a computer to an AD DS domain 1. Log in as NYC-CL1\LocalAdmin with a password of Pa$$w0rd.
2. Click Start, right-click Computer, and then click Properties.
3. In the System control panel, click Change settings. In the User Account Control dialog box, click Continue.
4. On the Computer Name tab, click Change.

Lab Answer Key: Creating Active Directory Domain Services User and Computer Objects 9
5. In the Computer Name/Domain Changes dialog box, for Computer name, type NYC-CL3.
6. Under Member of, click Workgroup, and then type WORKGROUP. Click OK.
7. In the Windows Security dialog box, in the User name field, type Administrator and in the Password field, type Pa$$w0rd.
8. Click OK twice.
9. In Computer Name/Domain Changes dialog box, click OK twice, and then click Close.
10. Click Restart Now.
11. After the computer restarts, log in as LocalAdmin with a password of Pa$$w0rd.
12. Click Start, right-click Computer, and then click Properties.
13. In the System control panel, click Change settings.
14. In the User Account Control dialog box, click Continue.
15. On the Computer Name tab, click Change.
16. In the Computer Name/Domain Changes dialog box, under Member of, click Domain, and then type WoodgroveBank.com. Click OK.
17. In the Windows Security dialog box, in the User name field, type Administrator and in the Password field, type Pa$$w0rd.
18. Click OK twice.
19. In the Computer Name/Domain Changes dialog box, click OK twice, and then click Close.
20. Click Restart Now.
21. On NYC-DC1, in Active Directory Users and Computers, click Computers or press F5 to refresh the view. Verify that the NYC-CL3 account has been added to the container object.
22. After NYC-CL3 restarts, verify that you can log on as WoodgroveBank\Axel with a password of Pa$$w0rd.
Results: At the end of this exercise you will have created and configured computer accounts deleted a computer account and joined a computer to an AS DS domain.
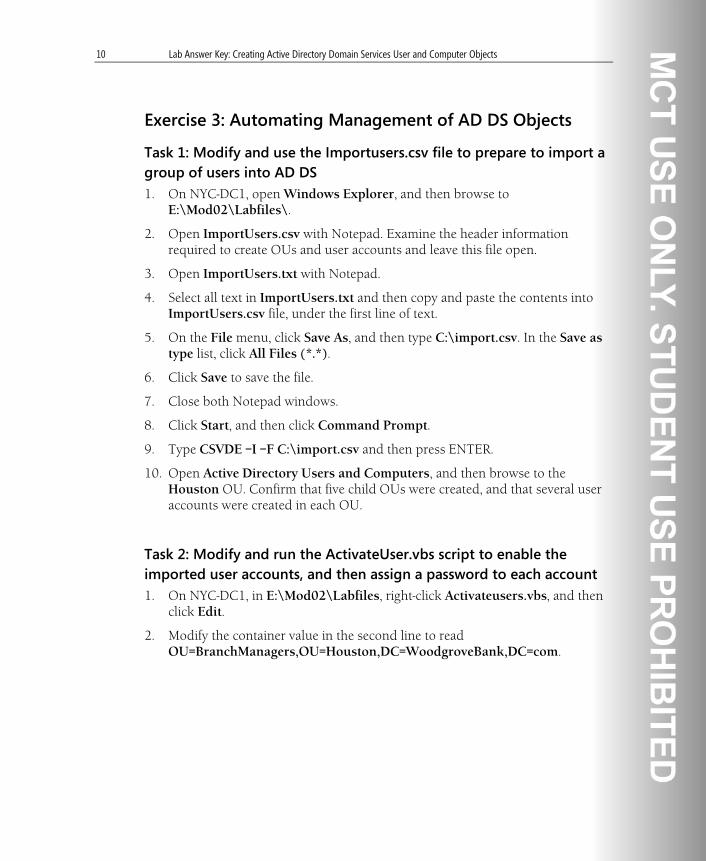
10 Lab Answer Key: Creating Active Directory Domain Services User and Computer Objects
Exercise 3: Automating Management of AD DS Objects
Task 1: Modify and use the Importusers.csv file to prepare to import a group of users into AD DS 1. On NYC-DC1, open Windows Explorer, and then browse to
E:\Mod02\Labfiles\.
2. Open ImportUsers.csv with Notepad. Examine the header information required to create OUs and user accounts and leave this file open.
3. Open ImportUsers.txt with Notepad.
4. Select all text in ImportUsers.txt and then copy and paste the contents into ImportUsers.csv file, under the first line of text.
5. On the File menu, click Save As, and then type C:\import.csv. In the Save as type list, click All Files (*.*).
6. Click Save to save the file.
7. Close both Notepad windows.
8. Click Start, and then click Command Prompt.
9. Type CSVDE –I –F C:\import.csv and then press ENTER.
10. Open Active Directory Users and Computers, and then browse to the Houston OU. Confirm that five child OUs were created, and that several user accounts were created in each OU.
Task 2: Modify and run the ActivateUser.vbs script to enable the imported user accounts, and then assign a password to each account 1. On NYC-DC1, in E:\Mod02\Labfiles, right-click Activateusers.vbs, and then
click Edit.
2. Modify the container value in the second line to read OU=BranchManagers,OU=Houston,DC=WoodgroveBank,DC=com.

Lab Answer Key: Creating Active Directory Domain Services User and Computer Objects 11
3. Modify the container values in the additional lines at the end of the script to include the following OUs:
• OU=ITAdmins,OU=Houston,DC=WoodgroveBank,DC=com
• OU=Investments,OU=Houston,DC=WoodgroveBank,DC=com
• OU=Executives,OU=Houston,DC=WoodgroveBank,DC=com
• OU=CustomerService,OU=Houston,DC=WoodgroveBank,DC=com
4. On the File menu, click Save As, and then type C:\activateusers.vbs. In the Save as type list, click All Files (*.*).
5. Click Save to save the file.
6. Close Notepad.
7. In Command Prompt, type Cscript C:\ActivateUsers.vbs and then press ENTER.
8. In Active Directory Users and Computers, browse to the Houston OU. Confirm that user accounts in all child OUs are enabled.
Note: There is no confirmation when the script is complete.
Task 3: Modify the Modifyusers.ldf file to prepare to modify the properties for a group of users in AD DS 1. On NYC-DC1, at the command prompt, type
LDIFDE –f c:\Modifyusers.ldf –d "OU=Houston,DC=WoodgroveBank,DC =com" –r "objectClass=user" –l physicalDeliveryOfficeName and then press ENTER.
This command exports all of the user accounts in the Houston and child OUs. Because the Office attribute is blank for each object, the attribute is not exported.
2. Type Notepad C:\Modifyusers.ldf and then press ENTER.
3. On the Edit menu, click Replace.
4. In the Find what field, type changetype: add and in the Replace with field, type changetype: modify and then click Replace All.
5. Click Cancel.

12 Lab Answer Key: Creating Active Directory Domain Services User and Computer Objects
6. Under each changetype line, add the following lines: replace: physicalDeliveryOfficeName physicalDeliveryOfficeName: Houston
7. At the end of the entry for each user, add a dash (–) followed by a blank line.
8. When you are done, the entry for each user should be similar to:
dn: CN=Dieter Massalsky,OU=ITAdmins,OU=Houston,DC=WoodgroveBank,DC=com changetype: modify replace: physicalDeliveryOfficeName physicalDeliveryOfficeName: Houston -
9. On the File menu, click Save and then close Notepad.
10. At the command prompt, type LDIFDE–I –f c:\Modifyusers.ldf, and then press ENTER.
11. In Active Directory Users and Computers, in the ITAdmins OU under the Houston OU, double-click Dieter Massalsky.
12. Verify that the Office attribute for the user accounts in Houston has been updated with the Houston location.
Task 4: Run the CreateUser.ps1 script to add new users to AD DS 1. On NYC-DC1, in E:\Mod02\Labfiles, right-click CreateUser.ps1, and then
click Edit.
2. Under #Assign the location where the user account will be created, note the entry $objADSI = [ADSI]"LDAP://ou=ITAdmins,DC=WoodgroveBank,DC=com".
3. Close Notepad.
4. Select Start | All Programs | Windows PowerShell 1.0, and then click Windows PowerShell.
5. Type Set-ExecutionPolicy AllSigned and then press ENTER.
6. Type E:\Mod02\Labfiles\CreateUser.ps1, and then press ENTER.
7. When the prompt appears, press R and then press ENTER.
8. In Active Directory Users and Computers, in the ITAdmins OU, verify that the user Jesper has been created.
Lab Answer Key: Creating Active Directory Domain Services User and Computer Objects 13
Task 5: Close all virtual machines and discard undo disks 1. For each virtual machine that is running, close the Virtual Machine Remote
Control window.
2. In the Close box, select Turn off machine and discard changes. Click OK.
3. Close the 6419A Lab Launcher.
Results: At the end of this exercise you will have examined several options for automating the management of user objects.
Note: After you have completed the lab exercises closing the VM’s and selecting undo disk is not required for hosted labs. Click the Quit button to exit.

Lab Answer Key: Creating Groups and Organizational Units 1
Module 3 Lab Answer Key: Creating Groups and Organizational Units
Contents: Exercise 1: Creating AD DS Groups 2
Exercise 2: Planning an OU Hierarchy (Discussion) 5
Exercise 3: Creating an OU Hierarchy 6
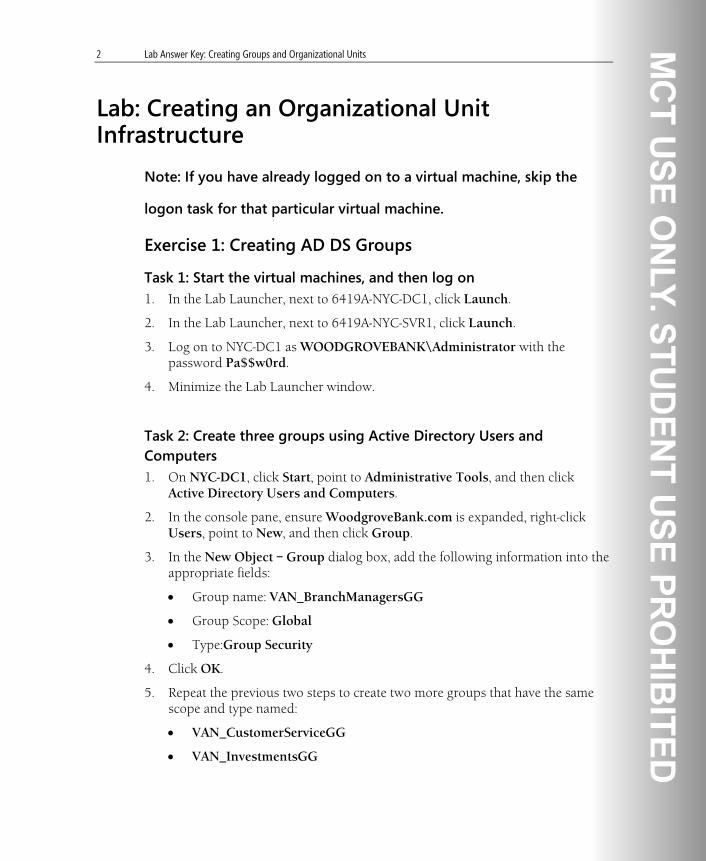
2 Lab Answer Key: Creating Groups and Organizational Units
Lab: Creating an Organizational Unit Infrastructure
Note: If you have already logged on to a virtual machine, skip the
logon task for that particular virtual machine.
Exercise 1: Creating AD DS Groups
Task 1: Start the virtual machines, and then log on 1. In the Lab Launcher, next to 6419A-NYC-DC1, click Launch.
2. In the Lab Launcher, next to 6419A-NYC-SVR1, click Launch.
3. Log on to NYC-DC1 as WOODGROVEBANK\Administrator with the password Pa$$w0rd.
4. Minimize the Lab Launcher window.
Task 2: Create three groups using Active Directory Users and Computers 1. On NYC-DC1, click Start, point to Administrative Tools, and then click
Active Directory Users and Computers.
2. In the console pane, ensure WoodgroveBank.com is expanded, right-click Users, point to New, and then click Group.
3. In the New Object – Group dialog box, add the following information into the appropriate fields:
• Group name: VAN_BranchManagersGG
• Group Scope: Global
• Type:Group Security
4. Click OK.
5. Repeat the previous two steps to create two more groups that have the same scope and type named:
• VAN_CustomerServiceGG
• VAN_InvestmentsGG

Lab Answer Key: Creating Groups and Organizational Units 3
Task 3: Create a group using the Dsadd command-line tool 1. On NYC-DC1, click Start, and then click Command Prompt.
2. At the command prompt, type dsadd group “cn=VAN_MarketingGG,cn=Users,dc=WoodgroveBank,dc=com” –samid VAN_MarketingGG –secgrp yes –scope g and then press ENTER.
3. The command line will display either of the following messages:
a. “dsadd failed…” :
If you receive this error, carefully type the command again.
b. “dsadd succeeded…”:
If you receive this message, type exit, and then press ENTER to close the command line window.
4. Click the Users OU.
5. In Active Directory Users and Computers, under WoodgroveBank.com, right-click Users, and then click Refresh.
6. Note the presence of the VAN_MarketingGG as well as the other Vancouver groups inside the Users container.
Task 4: Add members to the new groups 1. In Active Directory Users and Computers, right-click WoodgroveBank.com,
and then click Find.
2. In the Find Users, Contacts, and Groups dialog box, type Neville and then click Find Now.
3. In the Search results pane, right-click Neville Burdan, and then click Add to a group.
4. In the Select Groups dialog box, type VAN_BranchManagersGG, and then click OK twice.
5. Click Close to Find Users,Contacts and Groups.
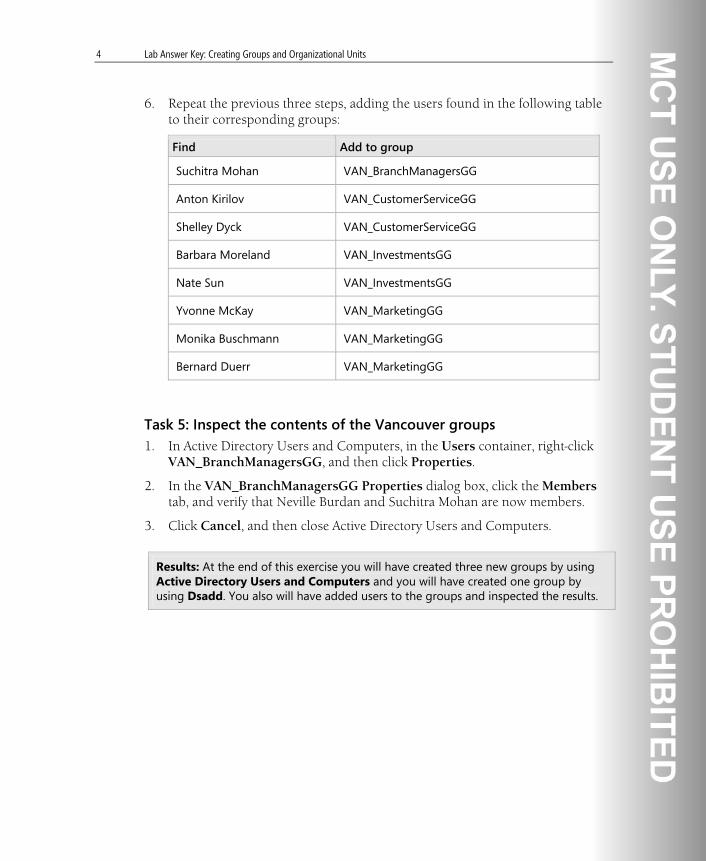
4 Lab Answer Key: Creating Groups and Organizational Units
6. Repeat the previous three steps, adding the users found in the following table to their corresponding groups:
Find Add to group
Suchitra Mohan VAN_BranchManagersGG
Anton Kirilov VAN_CustomerServiceGG
Shelley Dyck VAN_CustomerServiceGG
Barbara Moreland VAN_InvestmentsGG
Nate Sun VAN_InvestmentsGG
Yvonne McKay VAN_MarketingGG
Monika Buschmann VAN_MarketingGG
Bernard Duerr VAN_MarketingGG
Task 5: Inspect the contents of the Vancouver groups 1. In Active Directory Users and Computers, in the Users container, right-click
VAN_BranchManagersGG, and then click Properties.
2. In the VAN_BranchManagersGG Properties dialog box, click the Members tab, and verify that Neville Burdan and Suchitra Mohan are now members.
3. Click Cancel, and then close Active Directory Users and Computers.
Results: At the end of this exercise you will have created three new groups by using Active Directory Users and Computers and you will have created one group by using Dsadd. You also will have added users to the groups and inspected the results.

Lab Answer Key: Creating Groups and Organizational Units 5
Exercise 2: Planning an OU Hierarchy (Discussion) Here are possible answers for the discussion questions.
Scenario A new subsidiary of Woodgrove Bank is located in Vancouver, Canada. It will have the following departments:
• Management
• Customer Service
• Marketing
• Investments
The organizational unit (OU) hierarchy has to support delegation of administrative tasks to users within that organizational unit.
Discussion questions: 1. Which approach to extending the organizational hierarchy of
WoodgroveBank.com is most likely to be applied in creating the new subsidiary’s resources: Geographic, Organizational, or Functional? Why?
Answer: The Geographical approach to naming top level OUs (those that already exist within the domain hierarchy) should be extended in order to keep that logic. Geographic naming and organization is permanent, allows for future expansion, and its name easily identifies its functionality.
2. What would be the most logical way to further subdivide the subsidiary’s organizational unit: Geographic, Organizational, or Functional?
Answer: Four new OUs inside the Vancouver OU that are based on the organizations departments would best support the operations of the new subsidiary. Organizations can use these OUs to handle groupings of similar user, computer, and other AD DS resources, according to their similarities. This also supports the need to delegate administrative roles over those resources, as somebody within each group will be able to respond to most needs in a timely manner.

6 Lab Answer Key: Creating Groups and Organizational Units
3. What does the pattern of naming second level OUs in other centers suggest for the new Vancouver OU?
Answer: The naming convention being applied consistently to upper level OUs across the AD DS recognizes the company’s geographic divisions. Second level OUs at each location match the organizational divisions in those locations. Therefore, the new subsidiary should name its second level OUs as: Managers, Customer Support, Marketing, and Investment.
4. What would be a simple but effective way of delegating administrative tasks—including adding users and computers to the domain, and changing user properties such as password resets, and employee contact details-- to certain users within a department?
Answer: You can use the “Delegation of control” wizard to delegate administrative rights at the OU level. Both users and groups can be added to the delegation list. Additionally, you can use a list of rights to customize administrative capabilities.
Results: At the end of this exercise you will have discussed and determined how to plan an OU hierarchy.
Exercise 3: Creating an OU Hierarchy
Task 1: Create OUs using Active Directory Users and Computers 1. On NYC-DC1, click Start, click Administrative Tools, and then click Active
Directory Users and Computers.
2. In the console pane, right-click WoodgroveBank.com, point to New, and then click Organizational Unit.
3. In the New Object – Organizational Unit dialog box, type Vancouver.
4. Verify that the Protect container from accidental deletion check box is selected, and then click OK.
5. Right-click Vancouver OU, point to New, and then click Organizational Unit.
6. In the New Object – Organizational Unit dialog box, type BranchManagers, and then click OK.
7. Repeat the previous two steps to create two more OUs named:
• CustomerService

Lab Answer Key: Creating Groups and Organizational Units 7
• Marketing
Task 2: Create an OU using Dsadd 1. On NYC-DC1, click Start, and then click Command Prompt.
2. At the command prompt, type dsadd ou “ou=Investments,dc=WoodgroveBank,dc=com” -desc “Investment department” -d WoodgroveBank.com -u Administrator -p Pa$$w0rd and then press ENTER.
3. In Active Directory Users and Computers, right-click WoodgroveBank.com, and then click Refresh.
4. Note the presence of the new Investments OU.
Task 3: Nest an OU inside another OU 1. In Active Directory Users and Computers, right-click Investments, and then
click Move.
2. In the Move dialog box, click Vancouver, and then click OK.
Task 4: Move groups that you created in Exercise 1 into the appropriate OUs 1. In Active Directory Users and Groups, click Users, and note the groups that
you created in Exercise 1.
2. Move the following groups into the following Vancouver OUs (see methods later in this section):
• VAN_BranchManagersGG group to Vancouver\BranchManagers OU
• VAN_CustomerServiceGG group to Vancouver\CustomerService OU
• VAN_InvestmentsGG group to Vancouver\Investments OU
• VAN_MarketingGG group to Vancouver\Marketing OU
• You may select any of the following methods to move these groups:
a. Drag the group into the appropriate Vancouver OU object. When the AD DS warning appears, click Yes.
b. Use Cut and Paste to move the group into the appropriate Vancouver OU:

8 Lab Answer Key: Creating Groups and Organizational Units
i. Right-click the group, and then click Cut.
ii. Locate and expand the Vancouver OU.
iii. Right-click the appropriate subordinate OU, and then click Paste.
iv. When the AD DS warning appears, click Yes.
c. Use the Move command to move the group into the appropriate Vancouver OU:
i. Right-click the group, and then click Move.
ii. In the Move object into container dialog box, expand the Vancouver OU.
iii. Click the appropriate subordinate OU, and then click OK.
Task 5: Find and move users into Vancouver OUs Use Active Directory Users and Computers to find and move the following users into the OUs noted next to their names:
Find Move to Vancouver OU
Neville Burdan BranchManagers
Suchitra Mohan BranchManagers
Anton Kirilov CustomerService
Shelley Dyck CustomerService
Barbara Moreland Investments
Nate Sun Investments
Yvonne McKay Marketing
Monika Buschmann Marketing
Bernard Duerr Marketing
1. Right-click WoodgroveBank domain, and then click Find.
2. In the Find Users, Contacts, and Groups dialog box, type Neville, and then click Find Now.
Lab Answer Key: Creating Groups and Organizational Units 9
3. In the Search results pane, right-click Neville Burdan, and then click Move.
4. In the Move dialog box, expand Vancouver, click BranchManagers, and then click OK.
5. Repeat the previous three steps for each name in the chart and then close the Find Users, Contacts, and Groups dialog box.
Task 6: Delegate control over an OU 1. In Active Directory Users and Computers, in the Vancouver OU, right-click
Marketing, and then click Delegate control.
2. In the Delegation of Control Wizard, click Next.
3. On the Users or Groups page, click Add.
4. In the Select Users, Computers, or Groups dialog box, type Yvonne, and then click OK.
5. Click Next.
6. On the Tasks to Delegate page, select the check boxes next to the following common tasks:
• Create, delete, and manage user accounts
• Reset user passwords and force password change at next logon
• Create, delete and manage groups
• Modify the membership of a group
7. Click Next.
8. On the Completing the Delegation of Control Wizard page, click Finish.
Task 7: Test delegated user rights 1. Log on to NYC-SVR1 as WOODGROVEBANK\Yvonne with the password
Pa$$w0rd.
2. Click Start, right-click Server Manager, and then click Run as administrator.
3. In the User Account Control dialog box, in the User name field, type Administrator, and in the Password field, type Pa$$w0rd, and then click OK.
4. In the console tree, right-click Features, and then click Add Features.

10 Lab Answer Key: Creating Groups and Organizational Units
5. In the Add Features Wizard, expand Remote Server Administration Tools and ensure it is installed, expand Role Administration Tools, and then select the Active Directory Domain Services Tools check box.
6. Click Next, and then click Install.
7. When the installation is complete, click Close, and then click Yes to restart the computer.
8. Log on to NYC-SVR1 as WOODGROVEBANK\Yvonne with the password Pa$$w0rd.
9. Click Start, right-click Server Manager and then click Run as administrator.
10. In the User Account Control dialog box, in the User name field, type Administrator, and in the Password field, type Pa$$w0rd, and then click OK.
11. Wait for the installation to finish, and then click Close.
12. Click Start, point to Administrative Tools, and then click Active Directory Users and Computers.
13. In the console pane, right-click WoodgroveBank.com, and then click Find.
14. In the Find Users, Contacts, and Groups dialog box, type Monika, and then click Find Now.
15. In the Search results pane, right-click Monika Buschmann, and then click Reset Password.
16. In the Reset Password dialog box, in the New password and Confirm password fields, type Pa$$w0rd and then click OK.
17. In the Active Directory Domain Services dialog box, click OK.
Note: This message indicates that Yvonne McKay’s account has the authorization to reset passwords of fellow users in the Marketing OU.
18. Close the Find Users, Contacts, and Groups dialog box.
19. In the console pane, expand WoodgroveBank.com, expand Miami, and then click BranchManagers.

Lab Answer Key: Creating Groups and Organizational Units 11
20. In the details pane, right-click William Vong, and then click Move.
21. In the Move dialog box, expand Vancouver.
22. Click Marketing, and then click OK.
23. In the Active Directory Domain Services dialog box, click OK.
Note: This warning appears because user Yvonne McKay does not have delegated control over the Miami OU.
Task 8: Close all virtual machines, and discard undo disks 1. For each virtual machine that is running, close the Virtual Machine Remote
Control window.
2. In the Close box, select Turn off machine and discard changes. Click OK.
3. Close the 6419A Lab Launcher.
Results: At the end of this exercise you will have created OUs by using Active Directory Users and Computers and Dsadd. You also will have delegated and tested administrative permissions.
Note: After you have completed the lab exercises closing the VM’s and selecting undo disk is not required for hosted labs. Click the Quit button to exit.

Lab Answer Key: Managing Access to Resources in Active Directory Domain Services 1
Module 4 Lab Answer Key: Managing Access to Resources in Active Directory Domain Services
Contents: Exercise 1: Planning a Shared Folder Implementation (Discussion) 2
Exercise 2: Implementing a Shared Folder Implementation 3
Exercise 3: Evaluating the Shared Folder Implementation 6

2 Lab Answer Key: Managing Access to Resources in Active Directory Domain Services
Lab: Managing Access to Resources
Note: If you have already logged on to a virtual machine, skip the
logon task for that particular virtual machine.
Exercise 1: Planning a Shared Folder Implementation (Discussion)
Answer: On their domain controller (or member server), use Windows Explorer to create a folder for each department. Right-click each folder, and set Sharing permissions. Remove the Everyone group, and add the global group for which the shared folder is intended. Give the global groups Contributor status.
Answer: Create a new folder named Company. Assign it a shared permissions level of Read for all Domain Users. Next, add the Branch Managers global group as Contributors. Inside the Company folder, create a folder for: News, Staffing, and Projections.
Answer: You should create a new global group for this project, and a new shared folder that has as its only member, in addition to Administrator, the new global group that you create. You should set their permission level to Contributors.

Lab Answer Key: Managing Access to Resources in Active Directory Domain Services 3
Exercise 2: Implementing a Shared Folder Implementation
Task 1: Start the virtual machines, and then log on 1. In the Lab Launcher, next to 6419A-NYC-DC1, click Launch.
2. In the Lab Launcher, next to 6419A-NYC-CL1, click Launch.
3. Log on to NYC-DC1 as WOODGROVEBANK\Administrator with the password Pa$$w0rd.
4. Minimize the Lab Launcher window.
Task 2: Create four new folders by using Windows Explorer 1. On NYC-DC1, click Start, and then click Computer.
2. Double-click Local Disk (C:).
3. On the File menu, point to New and then click Folder.
4. Name the folder Marketing.
5. Repeat the previous two steps to create three additional folders named:
• Managers
• Investments
• CustomerService
Task 3: Set share properties for the folders 1. In the Windows Explorer window, right-click the folder named Marketing,
and then click Share.
2. In the File Sharing dialog box, type TOR_MarketingGG and then click Add. TOR_MarketingGG will appear in the list window underneath the name box.
3. Click TOR_MarketingGG and then click Contributor.
4. Click Share, and then click Done.
5. To assign file-sharing properties for each of the other folders that you created in Task 2, repeat the previous four steps by using the groups listed:
• TOR_BranchManagersGG (Managers folder)
• TOR_InvestmentsGG (Investments folder)

4 Lab Answer Key: Managing Access to Resources in Active Directory Domain Services
• TOR_CustomerServiceGG (CustomerService folder)
6. Close Windows Explorer.
Task 4: Create another shared folder by using Share and Storage Management MMC 1. Click Start, click Administrative Tools, and then click Share and Storage
Management.
2. In the Actions pane, click Provision Share.
3. The Provision a Shared Folder Wizard will start. Click Browse.
4. In the Browse For Folder dialog box, click the c$ location and then click Make New Folder.
5. Type CompanyNews, press ENTER, and then click OK.
6. Accept all default values by clicking Next until you get to the Review Settings and Create Share page. Click Create.
7. On the confirmation page, click Close.
8. In the Share and Storage Management MMC details pane, right-click CompanyNews, and then click Properties.
9. In the CompanyNews Properties dialog box, click the Permissions tab.
10. Click Share Permissions. In the Permissions for CompanyNews dialog box, click Add.
11. In the Select Users, Computers, or Groups dialog box, type Domain Users, and then click OK.
12. In the Permissions for CompanyNews dialog box, Domain Users (Woodgrovebank\Domain Users) now should be listed in the Group or user names window. When you click it, in the Permissions for Domain Users pane, the Read option should be set to Allow.Click Apply and Ok
13. Repeat the previous three steps to add TOR_BranchManagersGG to the Group or user names pane.
14. In Permissions for TOR_BranchManagersGG pane, next to Full Control, select Allow.
15. Click Everyone, and then click Remove.
16. Click Apply, and then click OK twice.

Lab Answer Key: Managing Access to Resources in Active Directory Domain Services 5
17. Close Share and Storage Management.
Task 5: Create a new group and shared folder for an interdepartmental project 1. Click Start, click Administrative Tools, and then click Active Directory Users
and Computers.
2. In console pane, ensure WoodgroveBank.com is expanded, right-click the Toronto OU, point to New, and then click Group.
3. In the New Object – Group dialog box, in the Group name field, type TOR_SpecialProjectGG, and then click OK.
4. In the console pane, expand the Toronto OU, and then click the Marketing OU.
5. In the details pane, right-click Aidan Delaney, and then click Add to a group.
6. In the Select Groups dialog box, type TOR_SpecialProjectGG and then click OK twice.
7. Add other members to the TOR_SpecialProjectGG group by following previous steps. Use the users listed in the following table:
Look inside Toronto OUs: Find Names:
Investment Aaron Con
BranchManagers Sven Buck
CustomerService Dorena Paschke
8. Close Active Directory Users and Computers.
9. Click Start, click Computer, and then double-click Local drive(C:).
10. On the File menu, point to New and then click Folder.
11. Name the folder SpecialProjects.
12. Right-click SpecialProjects, and then click Share.
13. In the File Sharing dialog box, type TOR_ SpecialProjectGG and then click Add.
14. Click TOR_ SpecialProjectGG and then click Contributor.
15. Click Share, and then click Done.

6 Lab Answer Key: Managing Access to Resources in Active Directory Domain Services
Results: TOR_SpecialProjectGG group should now have Contributor rights to the SpecialProjects folder.
Task 6: Block inheritance of a folder in a shared folder 1. Double-click SpecialProjects.
2. On the File menu, point to New and then click Folder.
3. Name the folder Unshared.
4. Right-click the Unshared folder and select Properties.
5. In the Unshared Properties dialog box, click the Security tab.
6. Click the Advanced button.
7. In the Advanced Security Settings for Unshared dialog box, click Edit.
8. Clear the Include inheritable permissions from this object’s parent check box.
9. In the Windows Security dialog box, click Remove.
10. Click OK, Click Continue and Edit.
11. In the Advanced Security Settings for Unshared dialog box, click Add.
12. In the Select User, Computer, or Group dialog box, for the Enter the object name to select field, type Administrators and click OK.
13. In the Permissions Entry for Unshared dialog box, for Full Control, check Allow and click OK four times.
Exercise 3: Evaluating the Shared Folder Implementation
Task 1: Log on to NYC-CL1 as Sven • Log on to NYC-CL1 as WOODGROVEBANK\Sven, with password
Pa$$w0rd.
Task 2: Check permissions for Company News 1. Click Start, type \\NYC-DC1 in the search, and then press ENTER.
2. Double-click the CompanyNews folder.

Lab Answer Key: Managing Access to Resources in Active Directory Domain Services 7
3. Right-click inside the open window, point to New, and then click Folder.
4. Type News, and then press ENTER.
5. Right-click inside the open window again, point to New, and then click Text document.
6. Type Welcome, and then press ENTER.
7. Drag and drop the Welcome file onto the News folder.
8. Click Start, then point to the right-arrow and then click Log Off.
Results: Sven, a member of the BranchManagersGG, should have ownership of the CompanyNews folder. He should be able to create files and folders in both locations.
Task 3: Check permissions of interdepartmental share Special Projects 1. On NYC-CL1, log on as WOODGROVEBANK\Dorena with password
Pa$$w0rd.
2. Click Start, type \\NYC-DC1 in the search, and then press ENTER.
3. Double-click the SpecialProjects folder.
Results: Since the permissions of the Unshared folder were blocked, Dorena will not be able to view or access the Unshared folder.
4. Right-click inside the details pane of Windows Explorer, point to New, and
then click Text Document.
5. On the navigation bar in Windows Explorer, click the Back button.
6. Double-click CompanyNews and then double-click the News folder.
7. Double-click Welcome.
8. Click Start, then point to the right-arrow and then click Log Off.
Results: Dorena has permissions to create new files inside the SpecialFolders folder and also view existing files in the News folder.
Task 4: Close all virtual machines, and discard undo disks 1. For each virtual machine that is running, close the Virtual Machine Remote
Control window.

8 Lab Answer Key: Managing Access to Resources in Active Directory Domain Services
2. In the Close box, select Turn off machine and discard changes. Click OK.
3. Close the 6419A Lab Launcher.
Note: After you have completed the lab exercises closing the VM’s and selecting undo disk is not required for hosted labs. Click the Quit button to exit.

Lab Answer Key: Configuring Active Directory Objects and Trusts 1
Module 5 Lab Answer Key: Configuring Active Directory Objects and Trusts
Contents: Lab A: Configuring Active Directory Delegation
Exercise 1: Delegating Control of AD DS Objects 2
Lab B: Configuring Active Directory Trusts
Exercise 1: Configuring AD DS Trusts 7

2 Lab Answer Key: Configuring Active Directory Objects and Trusts
Lab A: Configuring Active Directory Delegation
Note: If you have already logged on to a virtual machine, skip the
logon task for that particular virtual machine.
Exercise 1: Delegating Control of AD DS Objects
Task 1: Start the virtual machine, and then log on 1. In the Lab Launcher, next to 6419A-NYC-DC1, click Launch.
2. Log on to NYC-DC1 as WOODGROVEBANK \Administrator with the password Pa$$w0rd.
3. Minimize the Lab Launcher window.
Task 2: Assign full control of users and groups in the Toronto OU 1. On NYC-DC1, click Start, point to Administrative Tools, and then click
Active Directory Users and Computers.
2. In the console pane, right-click Toronto, and then click Delegate Control.
3. In the Delegation of Control Wizard, click Next.
4. On the Users or Groups page, click Add.
5. In the Select User, Computer, or Group dialog box, type TOR_BranchManagersGG, and then click OK.
6. Click Next.
7. On the Tasks to Delegate page, select the Create, delete, and manage user accounts and the Create, delete and manage groups check boxes.
8. Click Next, and then click Finish.

Lab Answer Key: Configuring Active Directory Objects and Trusts 3
Task 3: Assign rights to reset passwords and configure private user information in the Toronto OU 1. On NYC-DC1, in Active Directory Users and Computers, right-click Toronto,
and then click Delegate Control.
2. In the Delegation of Control Wizard, click Next.
3. On the Users or Groups page, click Add.
4. In the Select Users, Computers, or Groups dialog box, type TOR_CustomerServiceGG, click OK.
5. Click Next.
6. On the Tasks to Delegate page, select the Reset user passwords and force password change at next logon check box.
7. Click Next, and then click Finish.
8. Right-click Toronto, and then click Delegate Control.
9. In the Delegation of Control Wizard, click Next.
10. On the Users or Groups page, click Add.
11. In the Select Users, Computers, or Groups dialog box, type TOR_CustomerServiceGG, click OK.
12. Click Next.
13. On the Tasks to Delegate page, click Create a custom task to delegate, and then click Next.
14. On the Active Directory Object Type page, click Only the following objects in the folder, and then select the User objects check box.
15. Click Next.
16. On the Permissions page, ensure that the General check box is selected.
17. Under Permissions, select the Read and write personal information check box, and then click Next.
18. Click Finish.

4 Lab Answer Key: Configuring Active Directory Objects and Trusts
Task 4: Verify the effective permissions assigned for the Toronto OU 1. On NYC-DC1, in Active Directory Users and Computers, on the View menu,
click Advanced Features.
2. In the console pane, right-click the Toronto OU, and then click Properties.
3. In the Toronto Properties dialog box, on the Security tab, click Advanced.
4. In the Advanced Security Settings for Toronto dialog box, on the Effective Permissions tab, click Select.
5. In the Select User, Computer, or Group dialog box, type Sven, and then click OK. Sven Buck is a member of the TOR_BranchManagersGG group.
6. Review Sven’s effective permissions. Verify that Sven has permissions to create and delete user and group objects.
7. Click Cancel twice.
8. Expand the Toronto OU, and then click the Customer Service OU.
9. In the details pane, right-click Matt Berg, and then click Properties.
10. In the Matt Berg Properties dialog box, on the Security tab, click Advanced.
11. In the Advanced Security Settings for Matt Berg dialog box, on the Effective Permissions tab, click Select.
12. In the Select User, Computer, or Group dialog box, type Helge, and then click OK. Helge Hoeing is a member of the TOR_CustomerServiceGG group.
13. Review Helge’s effective permissions. Verify that Helge has permissions to reset passwords and to write personal information.
14. Click Cancel twice.
15. Close Active Directory Users and Computers.

Lab Answer Key: Configuring Active Directory Objects and Trusts 5
Task 5: Test the delegated permissions for the Toronto OU 1. Log on to NYC-DC1 as WOODGROVEBANK\Sven with the password of
Pa$$w0rd.
2. Click Start, point to Administrative Tools, and then click Active Directory Users and Computers.
3. In the User Account Control dialog box, type Pa$$w0rd, and then click OK.
4. In the console pane, expand WoodgroveBank.com, right-click the Toronto OU, and then point to New, and then click User.
5. Create a new user with the following properties:
a. First name: Test1
b. User logon name: Test1
c. Password: Pa$$w0rd
6. Click Next. This task will succeed because Sven Buck was delegated the authority to perform that task.
7. Right-click the Toronto OU, and then point to New, and then click Group.
8. Create a new global security group named Group1. This task will succeed because Sven Buck was delegated the authority to perform that task.
9. Right-click the ITAdmins OU, and review the menu options. Verify that Sven does not have permissions to create any new objects in the ITAdmins OU.Close Active Directory Users and Computers.
10. Log off and then log on to NYC-DC1 as WOODGROVEBANK\Helge with the password of Pa$$w0rd.
11. Click Start, point to Administrative Tools, and then click Active Directory Users and Computers.
12. In the User Account Control dialog box, type Pa$$w0rd, and then click OK.
13. In the console pane, expand WoodgroveBank.com, right-click the Toronto OU, and review the menu options. Verify that Helge does not have permissions to create any new objects in the Toronto OU.
14. Expand Toronto, click CustomerService, right-click Matt Berg, and then click Reset Password.
15. In the Reset Password dialog box, in the New password and Confirm password fields, type Pa$$w0rd, and then click OK twice.

6 Lab Answer Key: Configuring Active Directory Objects and Trusts
16. Right-click Matt Berg, and then click Properties.
17. In the Matt Berg Properties dialog box, verify that Helge has permission to set some user properties such as Office and Telephone number, but not settings such as Description and E-mail.
18. Click Cancel.
19. Close Active Directory Users and Computers, and then log off.
Result: At the end of this exercise you will have delegated the administrative tasks for the Toronto office.

Lab Answer Key: Configuring Active Directory Objects and Trusts 7
Lab B: Configuring Active Directory Trusts Exercise 1: Configuring AD DS Trusts
Task 1: Start the virtual machines, and then log on 1. In the Lab Launcher, next to 6419A-VAN-DC1, click Launch.
2. In the Lab Launcher, next to 6419A-NYC-CL1, click Launch.
3. In the Lab Launcher, next to 6419A-NYC-DC2, click Launch.
4. Log on to VAN-DC1 as FABRIKAM\Administrator with the password Pa$$w0rd.
5. Minimize the Lab Launcher window.
Task 2: Configure the Network and DNS Settings to enable the forest trust 1. On VAN-DC1, click Start, point to Control Panel, point to Network
Connections, and then click Local Area Connection.
2. In the Local Area Connection Status dialog box, click Properties.
3. Click Internet Protocol (TCP/IP), and then click Properties.
4. Change the IP address to 10.10.0.110, the Default gateway to 10.10.0.1, and the Preferred DNS server to 10.10.0.110.
5. Click OK, and then click Close twice.
6. Click Start, and then click Run.
7. In the Open box, type cmd, and then click OK.
8. At the command prompt, type net time\\10.10.0.10 /set /y and then press ENTER. This command synchronizes the time between VAN-DC1 and NYC-DC1.
9. Type exit and then press ENTER.

8 Lab Answer Key: Configuring Active Directory Objects and Trusts
10. Click Start, point to Administrative Tools, and then click DNS.
11. In the console pane, expand VAN-DC1.
12. Right-click VAN-DC1, and then click Properties.
13. On the Forwarders tab, click New.
14. Type Woodgrovebank.com, and then click OK.
15. In the Selected domain’s forwarder IP address list field, type 10.10.0.10, and then click Add.
16. Click OK, and then close the DNS management console.
17. Click Start, point to Administrative Tools, and then click Active Directory Domains and Trusts.
18. In console pane, right-click Fabrikam.com, and then click Raise Domain Functional Level.
19. In the Raise Domain Functional Level dialog box, in the Select an available domain functional level list, click Windows Server 2003.
20. Click Raise, and then click OK twice.
21. Right-click Active Directory Domains and Trusts, and then click Raise Forest Functional Level.
22. In the Raise Forest Functional Level dialog box, click Raise, and then click OK twice.
23. Close Active Directory Domains and Trusts.
24. On NYC-DC1, log on as WOODGROVEBANK\Administrator.
25. Click Start, point to Administrative Tools, and then click DNS.
26. In the console pane, ensure NYC-DC1 is already expanded.
27. Right-click Conditional Forwarders, and then click New Conditional Forwarder.
28. In the DNS Domain field, type Fabrikam.com.
29. Click under IP Address, and then type 10.10.0.110.
30. Press ENTER, and then click OK.
31. Close DNS Manager.

Lab Answer Key: Configuring Active Directory Objects and Trusts 9
Task 3: Configure a forest trust between WoodgroveBank.com and Fabrikam.com 1. On NYC-DC1, click Start, point to Administrative Tools, and then click
Active Directory Domains and Trusts.
2. In then console pane, right-click WoodgroveBank.com, and then click Properties.
3. On the Trusts tab, click New Trust.
4. In the New Trust Wizard, click Next.
5. On the Trust Name page, type Fabrikam.com, and then click Next.
6. On the Trust Type page, click Forest trust, and then click Next.
7. On the Direction of Trust page, ensure thatTwo-way is selected, and then click Next.
8. On the Sides of Trust page, click Both this domain and the specified domain, and then click Next.
9. On the User Name and Password page, in the User name field, type [email protected], and in the Password field, type Pa$$w0rd, and then click Next.
10. On the Outgoing Trust Authentication Level--Local Forest page, ensureForest-wide authentication is selected, and then click Next.
11. On the Outgoing Trust Authentication Level- Specified Forest page, click Forest-wide authentication, and then click Next.
12. On the Trust Selections Complete page, click Next.
13. On the Trust Creation Complete page, click Next.
14. On the Confirm Outgoing Trust page, click Yes, confirm the outgoing trust, and then click Next.
15. On the Confirm Incoming Trust page, click Yes, confirm the incoming trust, and then click Next.
16. On the Completing the New Trust Wizard page, click Finish and then click OK.

10 Lab Answer Key: Configuring Active Directory Objects and Trusts
Task 4: Configure selective authentication for the forest trust to enable access to only NYC-DC2 1. In Active Directory Domains and Trusts, right-click WoodgroveBank.com, and
then click Properties.
2. On the Trusts tab, under Domains that trust this domain (incoming trusts), click Fabrikam.com, and then click Properties.
3. In the Fabrikam.com Properties dialog box, on the Authentication tab, click Selective Authentication.
4. Click OK twice, and then close Active Directory Domains and Trusts.
5. Click Start, point to Administrative Tools, and then click Active Directory Users and Computers.
6. On the View menu, ensure that Advanced Features is selected.
7. In the console pane, click Domain Controllers.
8. In the details pane, double-click NYC-DC2.
9. In the NYC-DC2 Properties dialog box, on the Security tab, click Add.
10. In the Select User, Computer, or Group dialog box, click Locations, click Fabrikam.com, and then click OK.
11. In the Select Users, Computers, or Groups dialog box, type MarketingGG, and then click OK.
12. Under Permissions for MarketingGG, next to Allowed to authenticate, select the Allow check box, and then click OK.
13. In the console pane, click Computers.
14. In the details pane, double-click NYC-CL1.
15. In the NYC-CL1 Properties dialog box, on the Security tab, click Add.
16. In the Select Users, Computers, or Groups dialog box, click Locations, click Fabrikam.com, and then click OK.
17. In the Select Users, Computers, or Groups dialog box, type MarketingGG, and then click OK.
18. Under Permissions for MarketingGG, next to Allowed to authenticate, select the Allow check box, and then click OK.
19. Close Active Directory Users and Computers.

Lab Answer Key: Configuring Active Directory Objects and Trusts 11
Task 5: Test the selective authentication 1. Log on to NYC-CL1 as FABRIKAM\Adam with the password Pa$$w0rd.
Adam is a member of the MarketingGG group at Fabrikam. He is able to log on to a computer in the WoodgroveBank.com domain because of the trust between the two forests, and because he has been allowed to authenticate to NYC-CL1.
2. Click Start, type \\NYC-DC2\netlogon, and then press ENTER. Adam should be able to access to the folder.
3. Click Start, \\NYC-DC1\netlogon, and then press ENTER. Adam should not be able to access the folder because the server is not configured for selective authentication.
Task 6: Close all virtual machines and discard undo disks 1. For each running virtual machine, close the Virtual Machine Remote Control
window.
2. In the Close box, select Turn off machine and discard changes, and then click OK.
3. Close the 6419A Lab Launcher.
Result: At the end of this exercise you will have configured trusts based on a trust configuration design.
Note: After you have completed the lab exercises closing the VM’s and selecting undo disk is not required for hosted labs. Click the Quit button to exit.

Lab Answer Key: Creating and Configuring Group Policy 1
Module 6 Lab Answer Key: Creating and Configuring Group Policy
Contents: Lab A: Creating and Configuring GPOs
Exercise 1: Creating and Configuring Group Policy Objects 2
Exercise 2: Managing the Scope of GPO Application 7
Lab B: Verifying and Managing GPOs
Exercise 1: Verifying GPO Application 10
Exercise 2: Managing GPOs 13
Exercise 3: Delegating Administrative Control of GPOs 15
2 Lab Answer Key: Creating and Configuring Group Policy
Lab A: Creating and Configuring GPOs
Note: If you have already logged on to a virtual machine, skip the
logon task for that particular virtual machine.
Exercise 1: Creating and Configuring Group Policy Objects
Task 1: Start the virtual machines, and then log on 1. In the Lab Launcher, next to 6419A-NYC-DC1, click Launch.
2. Log on to NYC-DC1as WOODGROVEBANK\Administrator with the password Pa$$w0rd.
3. Minimize the Lab Launcher window.
Task 2: Create the group policy settings 1. Click Start, point to Administrative Tools and then click Group Policy
Management.
2. In the Group Policy Management window, ensure Forest: WoodgroveBank.com, and Domains are expanded, expand WoodgroveBank.com, and then expand Group Policy Objects.
3. Right-click the Group Policy Objects folder, and then click New.
4. In the New GPO dialog box, in the Name field, type Restrict Control Panel, and then click OK.
5. Repeat the previous two steps create the following GPOs:
• Restrict Desktop Display
• Restrict Run Command
• Baseline Security
• Vista and XP Security
• Admin Favorites
• Kiosk Computer Security
Lab Answer Key: Creating and Configuring Group Policy 3
Task 3: Configure the policy settings
A. Configure the Baseline Security policy 1. In the Group Policy Management window, in the Group Policy Objects folder,
right-click the Baseline Security policy, and then click Edit.
2. In the Group Policy Management Editor window, under Computer Configuration, expand Policies, expand Windows Settings, expand Security Settings, expand Local Policies, and then click Security Options.
3. In the details pane, double-click Interactive logon: Do not display last user name.
4. In the Interactive logon: Do not display last user name Properties dialog box, select the Define this policy setting check box, click Enabled, and then click OK.
5. Close Group Policy Management Editor.
B. Configure the Admin Favorites policy 1. In the Group Policy Management window, in the Group Policy Objects folder,
right-click the Admin Favorites policy, and then click Edit.
2. In the Group Policy Management Editor window, under User Configuration, expand Policies, expand Windows Settings, expand Internet Explorer Maintenance, and then click URLs.
3. In the details pane, double-click Favorites and Links.
4. In the Favorites and Links dialog box, click Add URL.
5. In the Details dialog box, in the Name field, type Tech Support.
6. In the URL field, type http://support.microsoft.com.
7. Click OK twice.
8. Close Group Policy Management Editor.

4 Lab Answer Key: Creating and Configuring Group Policy
C. Configure the Restrict Desktop Display policy 1. In the Group Policy Management window, in the Group Policy Objects folder,
right-click the Restrict Desktop Display policy, and then click Edit.
2. In the Group Policy Management Editor window, under User Configuration, expand Policies, expand Administrative Templates, expand Control Panel, and then click Display.
3. In the details pane, double-click Remove Display in Control Panel.
4. In the Remove Display in Control Panel Properties dialog box, click Enabled, and then click OK.
5. Close Group Policy Management Editor.
D. Configure the Kiosk Computer Security policy 1. In the Group Policy Management window, in the Group Policy Objects folder,
right-click the Kiosk Computer Security policy and then click Edit.
2. In the Group Policy Management Editor, under Computer Configuration, expand Policies, expand Administrative Templates, expand System, and then click Group Policy.
3. In the details pane, double-click User Group Policy loopback processing mode.
4. In the User Group Policy loopback processing mode Properties dialog box, click Enabled, ensure the Mode is set to Replace, and then click OK.
5. In the Group Policy Management Editor window, under User Configuration, expand Policies, expand Administrative Templates, and then click Desktop.
6. In the details pane, double-click Hide and Disable all items on the desktop.
7. In the Hide and Disable all items on the desktop Properties dialog box, click Enabled, and then click OK.
8. Close Group Policy Management Editor.

Lab Answer Key: Creating and Configuring Group Policy 5
E. Configure the Restrict Control Panel policy 1. In the Group Policy Management window, in the Group Policy Objects folder,
right-click the Restrict Control Panel policy and then click Edit.
2. In the Group Policy Management Editor window, under User Configuration, expand Policies, expand Administrative Templates, and then click Control Panel.
3. In the details pane, double-click Prohibit access to the Control Panel.
4. In the Prohibit Access to Control Panel Properties dialog box, click Enabled, and then click OK.
5. Close Group Policy Management Editor.
F. Configure the Restrict Run Command policy 1. In the Group Policy Management window, in the Group Policy Objects folder,
right-click the Restrict Run Command policy, and then click Edit.
2. In the Group Policy Management Editor window, under User Configuration, expand Policies, expand Administrative Templates, and then click Start Menu and Taskbar.
3. In the details pane, double-click Remove Run menu from the Start Menu.
4. In the Remove Run menu from Start Menu Properties dialog box, click Enabled, and then click OK.
5. Close Group Policy Management Editor.
G. Configure the Vista and XP Security policy 1. In the Group Policy Management window, in the Group Policy Objects folder,
right-click the Vista and XP Security GPO, and then click Edit.
2. In the Group Policy Management Editor window, under Computer Configuration, expand Policies, expand Administrative Templates, expand System, and then click Logon.
3. In the details pane, double-click Always wait for the network at computer startup and logon.
4. In the Always wait for the network at computer startup and logon Properties dialog box, click Enabled, and then click OK.
5. Close Group Policy Management Editor.

6 Lab Answer Key: Creating and Configuring Group Policy
Task 4: Link the GPOs to the appropriate containers 1. In the Group Policy Management window, right-click the
WoodgroveBank.com domain, and then click Link an Existing GPO.
2. In the Select GPO dialog box, click the Baseline Security GPO. Hold down CTRL and then click the following GPOs:
• Kiosk Computer Security
• Restrict Run Command
• Vista and XP Security
3. Click OK.
4. Right-click the ITAdmins OU, and then click Link an Existing GPO.
5. In the Select GPO dialog box, click the Admin Favorites GPO, and then click OK.
6. Right-click the Executives OU, and then click Link an Existing GPO.
7. In the Select GPO dialog box, click the Restrict Desktop Display GPO, and then click OK.
8. Right click the Miami OU, and then click Link an Existing GPO.
9. In the Select GPO dialog box, click the Restrict Control Panel GPO, and then click OK.
10. Repeat the previous two steps to link the Restrict Control Panel policy to the NYC and Toronto OUs.
Result: At the end of this exercise you will have created and configured GPOs.

Lab Answer Key: Creating and Configuring Group Policy 7
Exercise 2: Managing the Scope of GPO Application
Task 1: Configure Group Policy management for the domain container 1. In the Group Policy Management window, expand the WoodgroveBank.com
domain to expose the linked policies (denoted by the shortcut icons).
2. Right-click the Baseline Security link, and then click Enforced.
Result: A lock appears next to the Baseline Security link.
3. Click the Baseline Security link.
4. When the Group Policy Management Console dialog appears, select Do not show this message again, and then click OK.
5. In the details pane, click the Details tab.
6. In the GPO Status list, click User configuration settings disabled.
7. When the Group Policy Management dialog appears, click OK.
8. Click the Kiosk Computer Security link.
9. In the details pane, click the Delegation tab.
10. Click Advanced.
11. In the Kiosk Computer Security Security Settings dialog box, click the Authenticated Users group, and then click Remove.
12. Click Add, and then in the Select Users, Computers, or Groups dialog box, type Kiosk Computers, and then click OK.
13. Under Permissions for Kiosk Computers, next to Apply group policy, select Allow, and then click OK.

8 Lab Answer Key: Creating and Configuring Group Policy
Task 2: Configure Group Policy management for the IT Admin OU • In the Group Policy Management window, right-click the ITAdmins OU, and
then click Block Inheritance.
Task 3: Configure Group Policy management for the branch OUs 1. In the Group Policy Management window, in the console pane under the
Group Policy Objects folder, click the Restrict Control Panel policy.
2. In the details pane, click the Delegation tab, and then on the Delegation tab click Advanced.
3. In the Restrict Control Panel Security Settings dialog box, click Add.
4. In the Select Users, Computers, or Groups dialog box, type MIA_BranchManagersGG; NYC_BranchManagersGG; TOR_BranchManagersGG.
5. Click OK.
6. Under Group or user names, click MIA_BranchManagersGG.
7. Under Permissions for MIA_BranchManagersGG pane, next to Apply group policy, select Deny.
8. Repeat the previous two steps for NYC_BranchManagersGG and Tor_BranchManagersGG.
9. Click OK.
10. In the Windows Security dialog, click Yes.

Lab Answer Key: Creating and Configuring Group Policy 9
Task 4: Create and apply a WMI filter for the Server Security GPO 1. In the Group Policy Management window console pane, right-click the WMI
Filters folder, and then click New.
2. In the New WMI Filter dialog box, in the Name field, type Windows Vista or XP operating system.
3. Click Add.
4. In the WMI Query dialog box, in the Query field, type Select * from Win32OperatingSystem where Caption = “Microsoft Windows Vista Enterprise” OR Caption = “Microsoft Windows XP Professional”.
5. Click OK, and then click Save.
6. In the Group Policy Objects folder, click the Vista or XP Security policy, and then in the details pane, click the Scope tab.
7. In the WMI Filtering list, click Windows Vista or XP operating system.
8. In the Group Policy Management dialog, click Yes.
Result: At the end of this exercise you will have configured the scope of GPO settings.

10 Lab Answer Key: Creating and Configuring Group Policy
Lab B: Verifying and Managing GPOs Exercise 1: Verifying GPO Application
Task 1: Start NYC-CL1 • Log on to NYC-CL1 as WOODGROVEBANK\Anton with the password
Pa$$w0rd.
Task 2: Verify that a Miami branch user is receiving the correct policy 1. Click Start and then verify that the Control Panel is not present on the Start
menu.
2. Click Start, point to All Programs, point to Accessories and then verify that Run is not present in the Start menu.
3. Log off.
Task 3: Verify that a Miami Branch Manager is receiving the correct policy 1. Log on to NYC-CL1 as WOODGROVEBANK\Roya with a password of
Pa$$w0rd.
2. Click Start and then verify that the Control Panel is present on the Start menu.
3. Click Start, point to All Programs, point to Accessories and then verify that Run is not present in the Start menu.
4. Log off.

Lab Answer Key: Creating and Configuring Group Policy 11
Task 4: Verify that a user in the IT Admin OU is receiving the correct policy 1. Log on to NYC-CL1 as WOODGROVEBANK\Betsy with a password of
Pa$$w0rd.
2. Click Start and then verify that the Control Panel is present on the Start menu.
3. Click Start, point to All Programs, click Accessories and then verify that Run is present.
4. Click Start and then click Internet.
5. In the Internet Explorer window, click the Favorites Center button, and then verify that the link to Tech Support is present.
6. Log off.
Task 5: Verify that a user in the Executive OU user is receiving the correct policy 1. Log on to NYC-CL1 as WOODGROVEBANK\Chase with a password of
Pa$$w0rd.
2. Click Start, point to All Programs, point to Accessories and then verify that Run is not present in the Start menu.
3. Click Start and then verify that the Control Panel is present on the Start menu.
4. Click Start and then click Control Panel.
5. In the Control Panel window, under Appearance and Personalization, click Change desktop background and then verify that there is no access to the Desktop Display Settings.
6. Log off.
Hint: When you attempt to access display settings you will receive a message informing you that this has been disabled.

12 Lab Answer Key: Creating and Configuring Group Policy
Task 6: Verify that the last logged on username does not appear • Verify that the last logged on username does not appear.
Note: To see this information, press CTRL-ALT-DEL to see the logon screen.
Task 7: Use Group Policy modeling to test kiosk computer settings 1. On NYC-DC1, in the Group Policy Management window, right-click the
Group Policy Modeling folder, and then click Group Policy Modeling Wizard.
2. In the Group Policy Modeling Wizard, click Next.
3. On the Domain Controller Selection page, click Next.
4. On the User and Computer Selection page, under Computer information, click Computer.
5. In the Computer field, type WOODGROVEBANK\NYC-CL1, and then click Next.
6. On the Advanced Simulation Options page, click Loopback processing, and then click Next.
7. On the Alternate Active Directory Paths page, click Next.
8. On the User Security Groups page, click Next.
9. On the Computer Security Groups page, click Add.
10. In the Select Groups dialog box, type Kiosk Computers, click OK, and then click Next.
11. On the WMI Filters for Users page, click Next.
12. On the WMI Filters for Computers page, click Next.
13. On the Summary of Selections page, click Next.
14. On the Completing the Group Policy Modeling Wizard page, click Finish.
15. In Group Policy Management window, view the report. This will take a few moments to process.
Result: At the end of this exercise you will have tested and verified a GPO application
Lab Answer Key: Creating and Configuring Group Policy 13
Exercise 2: Managing GPOs
Task 1: Back up an individual policy 1. On NYC-DC1, in the Group Policy Management window, under the Group
Policy Objects folder, right-click the Restrict Control Panel policy, and then click Back Up.
2. In the Back Up Group Policy Object dialog box, click Browse.
3. Browse to C:\ and then click Make New Folder.
4. Type GPO Backup, and then press ENTER.
5. Click OK, and then click Back Up.
6. When the backup completes, click OK.
Task 2: Back up all GPOs 1. In the console pane, right-click the Group Policy Objects folder and then click
Back Up All.
2. In the Back Up Group Policy Object dialog box, in the Location field, type C:\GPO Backup and then click Back Up.
3. When the backup completes, click OK.
Task 3: Delete and restore an individual GPO 1. In the Group Policy Objects folder, right-click the Admin Favorites policy,
and then click Delete.
2. In the Group Policy Management dialog box, click Yes.
3. Right-click the Group Policy Objects folder, and then click Manage Backups.
4. In the Manage Backups dialog, click the Admin Favorites GPO, and then click Restore.
5. In the Group Policy Management dialog box, click OK.
6. In the Restore dialog box, click OK and then click Close.
7. Verify that the Admin Favorites GPO appears in the Group Policy Objects folder.
14 Lab Answer Key: Creating and Configuring Group Policy
Task 4: Import a GPO 1. Right-click the Group Policy Objects folder, and then click New.
2. In the New GPO dialog box, in the Name field, type Import, and then click OK.
3. Right-click the Import GPO, and then click Import Settings.
4. In the Import Settings Wizard, click Next.
5. On the Backup GPO page, click Next.
6. On the Backup location page, verify the Backup folder is C:\GPO Backup, and then click Next.
7. On the Source GPO page, click Restrict Control Panel, and then click Next.
Note: If more than one copy of the Restrict Control Panel GPO appears, choose the newer one.
8. On the Scanning Backup page, click Next, and then click Finish.
9. When the import completes, click OK.
10. In the Group Policy Objects folder, click the Import GPO, and then in the details pane, click the Settings tab.
11. Click show all.
12. Verify that the Prohibit access to the Control Panel policy setting is enabled.
Result: At the end of this exercise you will have backed up restored and imported GPOs.

Lab Answer Key: Creating and Configuring Group Policy 15
Exercise 3: Delegating Administrative Control of GPOs
Task 1: Grant Betsy the right to create GPOs in the domain 1. On NYC-DC1, in the Group Policy Management window, click the Group
Policy Objects folder.
2. In the details pane, click the Delegation tab, and then click Add.
3. In the Select User, Computer, or Group dialog box, type Betsy, and then click OK.
Task 2: Delegate the right to edit the Import GPO to Betsy 1. In the Group Policy Objects folder, click the Import GPO.
2. In the details pane, click the Delegation tab, and then click Add.
3. In the Select User, Computer, or Group dialog box, type Betsy, and then click OK.
4. In the Add Group or User dialog box, in the Permissions list, click Edit settings, and then click OK.
Task 3: Delegate the right to link GPOs to the Executives OU to Betsy 1. In the WoodgroveBank.com domain, click the Executives OU.
2. In the details pane, click the Delegation tab, and then click Add.
3. In the Select User, Computer, or Group dialog box, type Betsy, and then click OK.
4. In the Add Group or User dialog box, in the Permissions, list, click This container only, and then click OK.

16 Lab Answer Key: Creating and Configuring Group Policy
Task 4: Enable Domain Users to log on to domain controllers
Note: This step is included in the lab to allow you to test the delegated permissions. As a best practice you should install the administration tools on a Windows workstation rather than enable Domain Users to log on to domain controllers.
1. In the Group Policy Management window, expand Domain Controllers.
2. Right-click Default Domain Controllers Policy, and then click Edit.
3. In the Group Policy Management Editor window, under Computer Configuration, expand Policies, expand Windows Settings, expand Security Settings, expand Local Policies, and then click User Rights Assignment.
4. In the details pane, double-click Allow log on locally.
5. In the Allow log on locally Properties dialog box, click Add User or Group.
6. In the Add User or Group dialog box, type Domain Users, and click OK twice.
7. Close all open windows.
8. Click Start, and then click Command Prompt.
9. In the Command Prompt window, type GPUpdate /force and press ENTER.
10. Wait for the command to complete, type exit, and then press ENTER.
11. Log off.
Task 5: Test the delegation 1. Log on to NYC-DC1 as WOODGROVEBANK\Betsy.
2. Click Start, type MMC, and then press ENTER.
3. In the User Account Control dialog box, type Pa$$w0rd, and then click OK.
4. On the File menu, click Add/Remove Snap-in.
5. In the Add or Remove Snap-ins dialog, click Group Policy Management, click Add, and then click OK.

Lab Answer Key: Creating and Configuring Group Policy 17
6. Expand Group Policy Management, expand Forest: WoodgroveBank.com, expand Domains, and then expand WoodgroveBank.com.
7. Right-click the Group Policy Objects folder, and then click New.
8. In the New GPO dialog box, type Test, and then click OK. This operation will succeed.
9. Expand the Group Policy Objects folder, and right-click the Import GPO, and then click Edit. This operation will succeed.
10. Close Group Policy Management Editor.
11. Right-click the Executives OU, and then click Link an Existing GPO.
12. In the Select GPO dialog box, click Test and click OK. This operation will succeed.
13. Right-click the Admin Favorites GPO, and then click Edit. This operation is not possible because the Edit link is grayed out.
Task 6: Close all virtual machines and discard undo disks 1. For each virtual machine that is running, close the Virtual Machine Remote
Control window.
2. In the Close dialog box, click Turn off machine and discard changes, and then click OK.
3. Close the 6419A Lab Launcher.
Result: At the end of this exercise, you will have backed up, restored, and imported GPOs.
Note: After you have completed the lab exercises closing the VM’s and selecting undo disk is not required for hosted labs. Click the Quit button to exit.
Lab Answer Key: Configure User and Computer Environments By Using Group Policy 1
Module 7 Lab Answer Key: Configure User and Computer Environments By Using Group Policy
Contents: Lab A: Configuring Logon Scripts and Folder Redirection Using Group Policy
Exercise 1: Configure Logon Scripts and Folder Redirection 2
Lab B: Configuring Administrative Templates
Exercise 1: Configure Administrative Templates 6
Exercise 2: Verify GPO Application 10
Lab C: Deploying Software with Group Policy
Exercise 1: Deploy a Software Package with Group Policy 13
Exercise 2: Verify Software Installation 15
Lab D: Configuring Group Policy Preferences
Exercise 1: Configure Group Policy Preferences 16
Exercise 2: Verify Group Policy Preferences Application 18
Lab E: Troubleshooting Group Policy Issues
Exercise 1: Troubleshoot Group Policy Scripts 19
Exercise 2: Troubleshoot GPO Lab-7B 24
Exercise 3: Troubleshoot GPO Lab-7C 27
Exercise 4: Troubleshoot GPO Lab-7D 29

2 Lab Answer Key: Configure User and Computer Environments By Using Group Policy
Lab A: Configuring Scripts and Folder Redirection with Group Policy
Exercise 1: Configure Logon Scripts and Folder Redirection
Task 1: Start the 6419A-NYC-DC1 virtual machine and log 1. In the Lab Launcher, next to 6419A-NYC-DC1, click Launch.
2. Log on to NYC-DC1 as WOODGROVEBANK\Administrator using the password Pa$$w0rd.
3. Minimize the Lab Launcher window.
Task 2: Review the logon script to map a network drive 1. On NYC-DC1, click Start, and then click Computer.
2. In the Computer window, browse to E:\Mod07\LabFiles\Scripts.
3. Right-click Map.bat, and then click Edit.
4. In the Notepad window, review the script and then close Notepad.
5. Right-click Map.bat, and then click Copy.
6. Close Windows Explorer.
Task 3: Configure and link the Logon Script GPO 1. Click Start, point to Administrative Tools, and then click Group Policy
Management.
2. In the Group Policy Management console pane, expand Forest: WoodgroveBank.com, expand Domains, expand WoodgroveBank.com, right-click Group Policy Objects, and then click New.

Lab Answer Key: Configure User and Computer Environments By Using Group Policy 3
3. In the New GPO dialog box, in the Name field, type Logon Script, and then click OK.
4. Expand Group Policy Objects, right-click Logon Script, and then click Edit.
5. In the Group Policy Management Editor, under User Configuration, expand Policies, expand Windows Settings, and then click Scripts (Logon/Logoff).
6. In the details pane, double-click Logon.
7. In the Logon Properties dialog box, click Show Files.
8. In the Logon window details pane, right-click and then click Paste to copy the Map.bat script from the clipboard to the scripts folder.
9. Close the Logon window.
10. In the Logon Properties dialog box, click Add.
11. In the Add a Script dialog box, click Browse.
12. In the Browse dialog box, click Map.bat, and then click Open.
13. Click OK twice.
14. Close Group Policy Management Editor.
15. In the Group Policy Management window console pane, right-click WoodgroveBank.com, and then click Link an Existing GPO.
16. In the Select GPO dialog box, click Logon Script, and then click OK.
Task 4: Share and secure a folder for the Executives group 1. In Windows Explorer, browse to E:\Mod07\Labfiles.
2. Right-click ExecData, and then click Properties.
3. In the ExecData Properties dialog box, on the Sharing tab, click Advanced Sharing.
4. In the Advanced Sharing dialog box, select the Share this folder check box, and then click Permissions.
5. In the Permissions for ExecData dialog box, click Remove to remove the Everyone group.
6. Click Add.
7. In the Select Users, Computers, or Groups dialog box, type Executives_WoodgroveGG, and then click OK.

4 Lab Answer Key: Configure User and Computer Environments By Using Group Policy
8. Under Permissions for WoodgroveGG, next to Full Control, select the Allow check box, and then click OK twice.
9. In the ExecData Properties dialog box, on the Security tab, click Advanced.
10. In the Advanced Security Settings for ExecData dialog box, click Edit.
11. In the Advanced Security Settings for ExecData dialog box, clear the Include inheritable permissions from this object’s parent check box.
12. In the Windows Security dialog box, click Copy.
13. In the Advanced Security Settings for ExecData dialog box, click Remove.
14. Repeat the above step to remove all users and groups except CREATOR OWNER and SYSTEM.
15. Click Add.
16. In the Select User, Computer, or Group dialog box, type Executives_WoodgroveGG, and then click OK.
17. In the Permission Entry for ExecData dialog box, in the Apply to list, click This folder only.
18. Under Permissions, next to List folder / read data and Create folders / append data, select the Allow check boxes.
19. Click OK three times, and then click Close.
20. Close Windows Explorer.
Task 5: Redirect the Documents folder for the Executives group 1. In the Group Policy Management window console pane, right-click Group
Policy Objects, and then click New.
2. In the New GPO dialog box, in the Name field, type Executive Redirection, and then click OK.
3. Right-click Executive Redirection, and then click Edit.
4. In the Group Policy Management Editor, under User Configuration, expand Policies, expand Windows Settings, expand Folder Redirection, right-click Documents, and then click Properties.
5. In the Documents Properties dialog box, in the Setting list, click Basic - Redirect everyone’s folder to the same location.
6. In the Root Path field, type \\NYC-DC1\ExecData.

Lab Answer Key: Configure User and Computer Environments By Using Group Policy 5
7. On the Settings tab, review the current settings, and then click OK.
8. In the Warning dialog box, click Yes.
9. Close Group Policy Management Editor.
10. In the Group Policy Management console pane, right-click Executives, and then click Link an Existing GPO.
11. In the Select GPO dialog box, click Executive Redirection, and then click OK.
Task 6: Start the 6419A-NYC-CL1 virtual machine, and then log on as WOODGROVEBANK\Tony 1. Turn on the 6419A-NYC-CL1 VM.
2. Log on to NYC-CL1 as WOODGROVEBANK\Tony using the password Pa$$w0rd.
Task 7: Observe the applied settings while logged on as a user in the Executives OU 1. Click Start, and then click Computer.
2. In the Computer window, verify that the K: drive is mapped to the Data share on NYC-DC1.
Note: It may take 2 to 3 minutes before this drive appears.
3. Close Computer.
4. Click Start, right-click Documents, and then click Properties.
5. In the Documents Properties dialog box, verify the location is \\NYC-DC1\ExecData\Tony, and then click Cancel.
6. Log off NYC-CL1.
Result: At the end of this exercise, you will have configured logon scripts and folders redirection.

6 Lab Answer Key: Configure User and Computer Environments By Using Group Policy
Lab B: Configuring Administrative Templates Exercise 1: Configure Administrative Templates
Task 1: Modify the Default Domain Policy allow remote administration through the firewall for all domain computers 1. On NYC-DC1, in the Group Policy Management console pane, right-click
Default Domain Policy and then click Edit.
2. In the Group Policy Management Editor console pane, under Computer Configuration, expand Policies, expand Administrative Templates, expand Network, expand Network Connections, expand Windows Firewall, and then click Domain Profile.
3. In the details pane, double-click Windows Firewall: Allow inbound remote administration exception.
4. In the Windows Firewall: Allow inbound remote administration exception dialog box, click Enabled, and then click OK.
5. In the console pane, under Administrative Templates, expand System, and then click Group Policy.
6. In the details pane, double-click Group Policy slow link detection.
7. In the Group Policy slow link detection Properties dialog box, click Enabled.
8. In the Connection speed (Kbps) field, type 800, and then click OK.
9. Close Group Policy Management Editor.
Result: At the end of this task, you will have enabled remote administration through the firewall. This allows the Group Policy Results Wizard to query target computers.

Lab Answer Key: Configure User and Computer Environments By Using Group Policy 7
Task 2: Create and assign a GPO to prevent the installation of removable devices 1. In the Group Policy Management console pane, right-click Group Policy
Objects, and then click New.
2. In the New GPO dialog box, in the Name field, type Prevent Removable Devices, and then click OK.
3. Right-click Prevent Removable Devices, and then click Edit.
4. In the Group Policy Management Editor console pane, under Computer Configuration, expand Policies, expand Administrative Templates, expand System, expand Device Installation, and then click Device Installation Restrictions.
5. In the details pane, double-click Prevent installation of removable devices.
6. In the Prevent installation of removable devices Properties dialog box, click Enabled, and then click OK.
7. Close Group Policy Management Editor.
8. In the Group Policy Management console pane, right-click Miami, and then click Link an Existing GPO.
9. In the Select GPO dialog box, click Prevent Removable Devices, and then click OK.
10. Repeat the previous two steps to link the Prevent Removable Devices GPO to the NYC and Toronto OUs.
Task 3: Create and assign a GPO to encrypt offline files for executive computers 1. In the Group Policy Management console pane, right-click Group Policy
Objects, and then click New.
2. In the New GPO dialog box, in the Name field, type Encrypt Offline Files, and then click OK.
3. Right-click Encrypt Offline Files, and then click Edit.
4. In the Group Policy Management Editor console pane, under Computer Configuration, expand Policies, expand Administrative Templates, expand Network and then click Offline Files.

8 Lab Answer Key: Configure User and Computer Environments By Using Group Policy
5. In the details pane, double-click Encrypt the Offline Files cache.
6. In the Encrypt the Offline Files cache Properties dialog box, click Enabled, and then click OK.
7. Close Group Policy Management Editor.
8. In the Group Policy Management console pane, right-click Executives, and then click Link an Existing GPO.
9. In the Select GPO dialog box, click Encrypt Offline Files, and then click OK.
Task 4: Create and assign a domain-level GPO for all domain users 1. In the Group Policy Management console pane, right-click Group Policy
Objects, and then click New.
2. In the New GPO dialog box, in the Name field, type All Users Policy, and then click OK.
3. Right-click All Users Policy, and then click Edit.
4. In the Group Policy Management Editor console pane, under User Configuration, expand Policies, expand Administrative Templates, and then click System.
5. In the details pane, double-click Prevent access to registry editing tools.
6. In the Prevent access to registry editing tools Properties dialog box, click Enabled, and then click OK.
7. In the console pane, click Start Menu and Taskbar.
8. In the details pane, double-click Remove Clock from the system notification area.
9. In the Remove Clock from the system notification area Properties dialog box, click Enabled, and then click OK.
10. Close Group Policy Management Editor.
11. In the Group Policy Management console pane, right-click WoodgroveBank.com, and then click Link an Existing GPO.
12. In the Select GPO dialog box, click All Users Policy, and then click OK.

Lab Answer Key: Configure User and Computer Environments By Using Group Policy 9
Task 5: Create and assign a policy to limit profile size and turn off Windows Sidebar for branch users 1. In the Group Policy Management console pane, right-click Group Policy
Objects, and then click New.
2. In the New GPO dialog box, in the Name field, type Branch Users Policy, and then click OK.
3. Right-click Branch Users Policy, and then click Edit.
4. In the Group Policy Management Editor console pane, under User Configuration, expand Policies, expand Administrative Templates, expand System, and then click User Profiles.
5. In the details pane, double-click Limit profile size.
6. In the Limit profile size Properties dialog box, click Enabled.
7. In the Max Profile size (KB) field, type 1000000 and then click OK.
8. In the console pane, under Administrative Templates, expand Windows Components, and then click Windows Sidebar.
9. In the details pane, double-click Turn off Windows Sidebar.
10. In the Turn off Windows Sidebar Properties dialog box, click Enabled, and then click OK.
11. Close Group Policy Management Editor.
12. In the Group Policy Management console pane, right-click Miami, and then click Link an Existing GPO.
13. In the Select GPO dialog box, click Branch Users Policy, and then click OK.
14. Repeat the previous two steps to link the Branch Users Policy GPO to the NYC and Toronto OUs.

10 Lab Answer Key: Configure User and Computer Environments By Using Group Policy
Exercise 2: Verify GPO Application
Task 1: Verify that the settings for Executives have been applied 1. On NYC-CL1, log on as WOODGROVEBANK\Tony using the password
Pa$$w0rd.
Note: Some user settings can only be applied during logon or may not apply due to cached credentials. These include roaming user profile path, Folder Redirection path, and Software Installation settings. If the user is already logged on when these settings are detected, they will not be applied until the next time the user is logged on.
2. Verify that the Windows Sidebar is not displayed.
3. In the notification area, verify that the clock is not displayed.
4. Right-click the Taskbar, and then click Properties.
5. In the Taskbar and Start Menu Properties dialog box, on the Notification Area tab, verify that you do not have the option to display the clock, and then click Cancel.
6. Click Start, type regedit, and then press ENTER.
7. In the Registry Editor dialog box, review the error, and then click OK.
8. Log off NYC-CL1.
Task 2: Log on as a user in a Branch Office and observe the applied settings 1. On NYC-CL1, log on as WOODGROVEBANK\Roya using the password
Pa$$w0rd.
2. Verify that the Windows Sidebar is not displayed.
3. In the notification area, verify that the clock is not displayed.
4. In the notification area, double-click the Available profile space icon.
5. In the Profile Storage Space dialog box, review the information and then click OK.
6. Click Start, right-click Documents, and then click Properties.

Lab Answer Key: Configure User and Computer Environments By Using Group Policy 11
7. In the Documents Properties dialog box, verify the location is C:\Users\Roya, and then click Cancel.
8. Click Start, type regedit, and then press ENTER.
9. In the Registry Editor dialog box, review the error, and then click OK.
10. Click Start, and then click Computer.
11. In the Computer window, verify that the K: drive is mapped to the Data share on NYC-DC1.
12. Log off NYC-CL1.
Task 3: Use the Group Policy Results Wizard to review Group Policy application for a target user and computer 1. On NYC-DC1, in the Group Policy Management console pane, right-click
Group Policy Results, and then click Group Policy Results Wizard.
2. In the Group Policy Results Wizard, click Next.
3. On the Computer Selection page, click Another computer, type WoodgroveBank\NYC-CL1 and click Next.
Note: If you receive an error after the step above, retry the step above in 2 minutes.
4. On the User Selection page, click WOODGROVEBANK\Tony, and then click Next.
5. On the Summary of Selections page, click Next, and then click Finish.
6. In the details pane, click show all.
7. Review the list of applied computer and user GPOs.
Question: Which GPOs were applied to the computer?
Answer: Only the Default Domain Policy.
Question: Which GPOs were applied to the user?
Answer: All Users Policy, Login Script, and Executive Redirection.

12 Lab Answer Key: Configure User and Computer Environments By Using Group Policy
8. On the Settings tab, under Computer Configuration, click Administrative Templates, and then expand each of the settings.
Question: What settings were delivered to the computer?
Answer: Windows Firewall: Allow inbound remote administration exception.
9. Under User Configuration, expand each of the settings.
Question: What settings were delivered to the user?
Answer: The Executive Redirection policy delivers folder redirection settings. The All Users Policy delivers settings to remove the clock and disable registry editing.
Result: At the end of this exercise, you will have configured several Administrative Templates policy settings for various OUs in the organization and then verified successful GPO application.

Lab Answer Key: Configure User and Computer Environments By Using Group Policy 13
Lab C: Deploying Software with Group Policy Exercise 1: Deploy a Software Package with Group Policy
Task 1: Copy a software package to the Data share 1. On NYC-DC1, click Start, and then click Computer.
2. In the Computer window, browse to E:\Mod07\LabFiles.
3. Right-click PPVIEWER.MSI, and then click Copy.
4. Double-click Data.
5. In the details pane, right-click, and then click Paste.
6. Close Windows Explorer.
Task 2: Configure and review the software deployment GPO 1. On NYC-DC1, in the Group Policy Management console pane, right-click
WoodgroveBank.com, and then click Create a GPO in this domain, and Link it here.
2. In the New GPO dialog box, in the Name field, type Software Deployment and then click OK.
3. Right-click Software Deployment, and then click Edit.
4. In the Group Policy Management Editor, in the console pane, under Computer Configuration, expand Policies, expand Software Settings, and then click Software installation.
5. Right-click Software installation, point to New, and then click Package.
6. In the Open dialog box, type \\NYC-DC1\Data\ppviewer.msi and then click Open.

14 Lab Answer Key: Configure User and Computer Environments By Using Group Policy
7. In the Deploy Software dialog box, review the configuration options. When you are done, verify that Assigned is selected, and then click OK.
8. Right-click Microsoft Office PowerPoint Viewer 2003, and then click Properties.
9. In the Microsoft Office PowerPoint Viewer 2003 Properties dialog box, review the options on the following tabs:
• General
• Deployment
• Upgrades
• Categories
• Modifications
• Security
10. When done, click Cancel, and then close Group Policy Management Editor.

Lab Answer Key: Configure User and Computer Environments By Using Group Policy 15
Exercise 2: Verify Software Installation
Task 1: Verify that the software package has been installed 1. On NYC-CL1, log on as WOODGROVEBANK\Administrator using the
password Pa$$w0rd.
2. Click Start | All Programs | Accessories, and then click Command Prompt.
3. In the Command Prompt window, type GPUpdate /force and then press ENTER.
4. When the update completes, read the warning that appears. When you are done, press Y, and then press ENTER.
5. In the You are about to be logged off dialog box, click Close.
6. When the computer restarts, log on as WOODGROVEBANK\Administrator using the password Pa$$w0rd.
7. Click Start, and then click Control Panel.
8. In the Control Panel window, click Uninstall a program.
9. Notice that the Microsoft Office PowerPoint Viewer 2003 program has been successfully installed.
10. Double-click Microsoft Office PowerPoint Viewer 2003.
11. In Programs and Features dialog box, click Yes to uninstall the program.
12. When the process completes, press F5 and notice that even though you can uninstall the program, it comes back because the program is assigned through Group Policy.
13. Close Control Panel.
Result: At the end of this exercise, you will have successfully deployed an assigned software package using Group Policy.
16 Lab Answer Key: Configure User and Computer Environments By Using Group Policy
Lab D: Configuring Group Policy Preferences Exercise 1: Configure Group Policy Preferences
Task 1: Add a shortcut to Notepad on the desktop of NYC-DC1 1. On NYC-DC1, in the Group Policy Management console pane, right-click
Default Domain Policy, and then click Edit.
2. In the Group Policy Management Editor console pane, under Computer Configuration, expand Preferences, expand Windows Settings, right-click Shortcuts, point to New, and then click Shortcut.
3. In the New Shortcut Properties dialog box, in the Action list, click Create.
4. In the Name field, type Notepad.
5. In the Location list, click All Users Desktop.
6. In the Target path field, type C:\Windows\System32\Notepad.exe.
7. On the Common tab, select the Item-level targeting check box, and then click Targeting.
8. In the Targeting Editor dialog box, on the New Item menu, click Computer Name.
9. In the Computer name field, type NYC-DC1, and then click OK twice.
Task 2: Create a new folder named Reports on the C: drive of all computers running Windows Server 2008 1. In the Group Policy Management Editor console pane, under Windows
Settings, right click Folders, point to New, and then click Folder.
2. In the New Folder Properties dialog box, in the Action list, click Create.
3. In the Path field, type C:\Reports.
4. On the Common tab, select the Item-level targeting check box, and then click Targeting.
Lab Answer Key: Configure User and Computer Environments By Using Group Policy 17
5. In the Targeting Editor dialog box, on the New Item menu, click Operating System.
6. In the Product list, click Windows Server 2008, and then click OK twice.
Task 3: Configure drive mapping 1. In the Group Policy Management Editor console pane, under User
Configuration, expand Preferences, expand Windows Settings, and then click Drive Maps.
2. Right-click Drive Maps, point to New, and then click Mapped Drive.
3. In the New Drive Properties dialog box, in the Action list, click Create.
4. In the Location field, type \\NYC-DC1\Data.
5. Select the Reconnect check box.
6. In the Label as field, type Data.
7. In the Drive Letter list, click P.
8. Review the remaining configuration options, and then click OK.
9. Close Group Policy Management Editor.
Task 4: Remove old Logon Script GPO 1. In the Group Policy Management console pane, under WoodgroveBank.com,
right-click Logon Script, and then click Delete.
2. In the Group Policy Management dialog box, review the message and then click OK.
Note: You aren’t actually deleting the GPO, just the link to it in the domain.
3. Close Group Policy Management.

18 Lab Answer Key: Configure User and Computer Environments By Using Group Policy
Exercise 2: Verify Group Policy Preferences Application
Task 1: Verify that the preferences have been applied 1. On NYC-DC1, log off, and then log back on as
WOODGROVEBANK\Administrator using the password of Pa$$w0rd.
2. Click Start, and then click Computer.
3. In the Computer window, verify that the P: drive is mapped to the Data share on NYC-DC1.
4. Browse to C: and then verify that the Reports folder exists.
Note: It may take a few moments for this folder to appear.
5. Close Windows Explorer.
Note: To apply Group Policy preferences to Windows Vista computers, you must download and install Group Policy Preference Client Side Extensions for Windows Vista (KB943729).
Task 2: Close all virtual machines and discard undo disks 1. For each virtual machine that is running, close the Virtual Machine Remote
Control window.
2. In the Close box, select Turn off machine and discard changes, and then click OK.
Result: At the end of this exercise, you will have configured and tested Group Policy Preferences and verified their application.

Lab Answer Key: Configure User and Computer Environments By Using Group Policy 19
Lab E: Troubleshooting Group Policy Issues Exercise 1: Troubleshoot Group Policy Scripts
Task 1: Start the 6419A-NYC-DC1 virtual machine and log on as WOODGROVEBANK\Administrator 1. In the Lab Launcher, next to 6419A-NYC-DC1, click Launch.
2. Log on to NYC-DC1 as WOODGROVEBANK\Administrator using the password Pa$$w0rd.
Task 2: Create and link a domain Desktop policy 1. On NYC-DC1, click Start, point Administrative Tools, and then click Group
Policy Management.
2. In the Group Policy Management console pane, expand Forest:WoodgroveBank.com, and then expand Domains.
3. Right-click WoodgroveBank.com, and then click Create a GPO in this domain, and Link it here.
4. In the New GPO dialog box, in the Name field, type Desktop, and then click OK.
5. Expand WoodgroveBank.com, expand Group Policy Objects, right-click Desktop, and then click Edit.
6. In the Group Policy Management Editor console pane, under Computer Configuration, expand Policies, expand Administrative Templates, expand System, and then click Logon.
7. In the details pane, double-click Always wait for the network at computer startup and logon.
8. In the Always wait for the network at computer startup and logon Properties dialog box, click Enabled, and then click OK.
9. In the console pane, under Administrative Templates, expand Network, expand Network Connections, expand Windows Firewall, and then click Domain Profile.
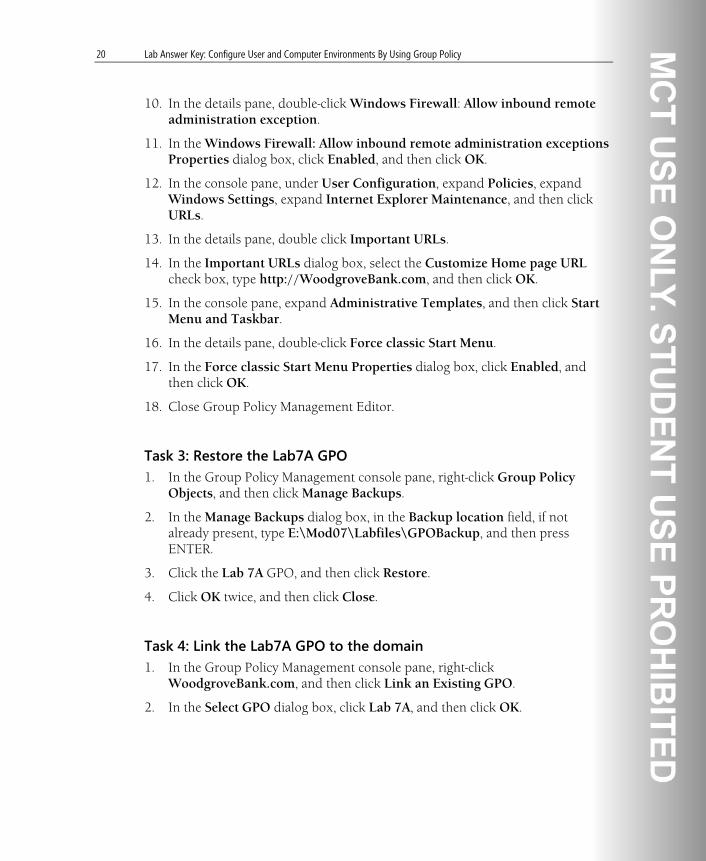
20 Lab Answer Key: Configure User and Computer Environments By Using Group Policy
10. In the details pane, double-click Windows Firewall: Allow inbound remote administration exception.
11. In the Windows Firewall: Allow inbound remote administration exceptions Properties dialog box, click Enabled, and then click OK.
12. In the console pane, under User Configuration, expand Policies, expand Windows Settings, expand Internet Explorer Maintenance, and then click URLs.
13. In the details pane, double click Important URLs.
14. In the Important URLs dialog box, select the Customize Home page URL check box, type http://WoodgroveBank.com, and then click OK.
15. In the console pane, expand Administrative Templates, and then click Start Menu and Taskbar.
16. In the details pane, double-click Force classic Start Menu.
17. In the Force classic Start Menu Properties dialog box, click Enabled, and then click OK.
18. Close Group Policy Management Editor.
Task 3: Restore the Lab7A GPO 1. In the Group Policy Management console pane, right-click Group Policy
Objects, and then click Manage Backups.
2. In the Manage Backups dialog box, in the Backup location field, if not already present, type E:\Mod07\Labfiles\GPOBackup, and then press ENTER.
3. Click the Lab 7A GPO, and then click Restore.
4. Click OK twice, and then click Close.
Task 4: Link the Lab7A GPO to the domain 1. In the Group Policy Management console pane, right-click
WoodgroveBank.com, and then click Link an Existing GPO.
2. In the Select GPO dialog box, click Lab 7A, and then click OK.

Lab Answer Key: Configure User and Computer Environments By Using Group Policy 21
Task 5: Start NYC-CL1 and log on as WOODGROVEBANK\Administrator 1. In the Lab Launcher, next to 6419A-NYC-CL1, click Launch.
2. Log on to NYC-CL1 as WOODGROVEBANK\Administrator using the password Pa$$w0rd.
3. Click Start and then click Control Panel.
4. The Control Panel window opens.
5. Click Security.
6. Under Windows Firewall, click Turn Windows Firewall on or off.
7. The Windows Firewall Settings dialog box appears.
8. Click Off (not recommended) and then click OK.
9. Close Control Panel.
Task 6: Test the GPO
Note: The changes you are looking for below may not appear until the second logon.
1. On NYC-CL1, click Start, and then verify you see the classic Start menu.
2. On the desktop, double click Internet Explorer.
3. In the Windows Internet Explorer window, click the Home button. After a moment the WoodgroveBank.com IIS7 home page will load.
4. Close Internet Explorer.
5. On the desktop, double-click Computer.
6. In the Computer window, verify that the K: drive is mapped to the Data share on NYC-DC1.
7. Log off, and then log back on to as WOODGROVEBANK\Roya using the password Pa$$w0rd.
8. Click Start, and then verify you see the classic Start menu.

22 Lab Answer Key: Configure User and Computer Environments By Using Group Policy
9. On the desktop, double click Internet Explorer.
10. In the Windows Internet Explorer window, click the Home button. After a moment the WoodgroveBank.com IIS7 home page will load.
11. Close Windows Internet Explorer.
12. On the desktop, double-click Computer.
13. In the Computer window, notice that the J: drive is not correctly mapped to the Data share on NYC-DC1.
14. Log off NYC-CL1.
Task 7: Troubleshoot the GPO 1. On NYC-DC1, in the Group Policy Management console pane, right-click
Group Policy Results, and then click Group Policy Results Wizard.
2. In the Group Policy Results Wizard, click Next.
3. On the Computer Selection page, click Another computer, type NYC-CL1, and then click Next.
4. On the User Selection page, click WOODGROVEBANK\Roya, and then click Next.
5. On the Summary of Selections page, click Next, and then click Finish.
6. In the details pane, under User Configuration Summary, click Group Policy Objects, and then click Applied GPOs. Notice that the settings for both the Desktop GPO and the Lab 7A GPO were applied successfully.
7. Click the Settings tab.
8. Under User Configuration, under Windows Settings, click Scripts, and then expand Logon. Notice that the Lab 7A GPO was applied correctly.
9. On NYC-CL1 log on WOODGROVEBANK\Roya with a password of Pa$$w0rd.
10. To test Roya’s permission to the scripts location, click Start, click Run, type \\NYC-DC1\Scripts, and then press ENTER.
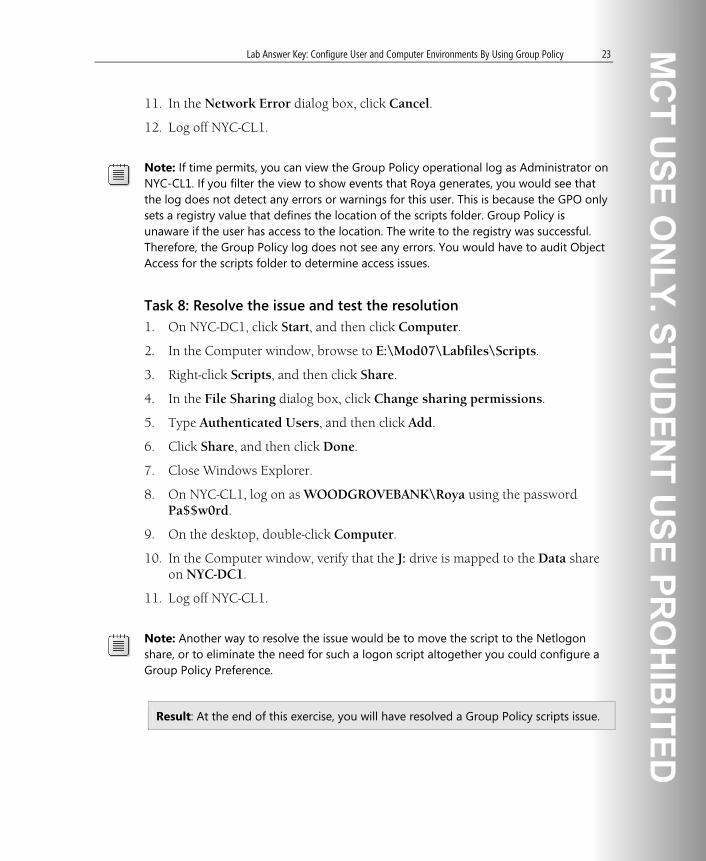
Lab Answer Key: Configure User and Computer Environments By Using Group Policy 23
11. In the Network Error dialog box, click Cancel.
12. Log off NYC-CL1.
Note: If time permits, you can view the Group Policy operational log as Administrator on NYC-CL1. If you filter the view to show events that Roya generates, you would see that the log does not detect any errors or warnings for this user. This is because the GPO only sets a registry value that defines the location of the scripts folder. Group Policy is unaware if the user has access to the location. The write to the registry was successful. Therefore, the Group Policy log does not see any errors. You would have to audit Object Access for the scripts folder to determine access issues.
Task 8: Resolve the issue and test the resolution 1. On NYC-DC1, click Start, and then click Computer.
2. In the Computer window, browse to E:\Mod07\Labfiles\Scripts.
3. Right-click Scripts, and then click Share.
4. In the File Sharing dialog box, click Change sharing permissions.
5. Type Authenticated Users, and then click Add.
6. Click Share, and then click Done.
7. Close Windows Explorer.
8. On NYC-CL1, log on as WOODGROVEBANK\Roya using the password Pa$$w0rd.
9. On the desktop, double-click Computer.
10. In the Computer window, verify that the J: drive is mapped to the Data share on NYC-DC1.
11. Log off NYC-CL1.
Note: Another way to resolve the issue would be to move the script to the Netlogon share, or to eliminate the need for such a logon script altogether you could configure a Group Policy Preference.
Result: At the end of this exercise, you will have resolved a Group Policy scripts issue.

24 Lab Answer Key: Configure User and Computer Environments By Using Group Policy
Exercise 2: Troubleshoot GPO Lab-7B
Task 1: Restore the Lab7B GPO 1. On NYC-DC1, in the Group Policy Management console pane, right-click
Group Policy Objects, and then click Manage Backups.
2. In the Manage Backups dialog box, click Lab 7B, and then click Restore.
3. Click OK twice, and then click Close.
Task 2: Link the Lab7B GPO to the Miami OU 1. In the Group Policy Management console pane, right-click Miami, and then
click Link an Existing GPO.
2. In the Select GPO dialog box, click Lab 7B, and then click OK.
Task 3: Test the GPO 1. On NYC-CL1, log on as WOODGROVEBANK\Rich using the password
Pa$$w0rd.
Note: Rich is a member of the Miami OU.
2. Click Start, and then verify you see the classic Start menu.
3. On the desktop, double click Internet Explorer.
4. In the Internet Explorer window, click the Home button. After a moment the WoodgroveBank.com IIS7 home page will load.
5. Close Internet Explorer.
6. On the desktop, double-click Computer.
7. In the Computer window, verify that the K: drive is mapped to the Data share on NYC-DC1
8. Notice that the Control Panel does not appear on the desktop or Start menu. This is a setting from the Lab 7B GPO that was applied to the Miami OU.
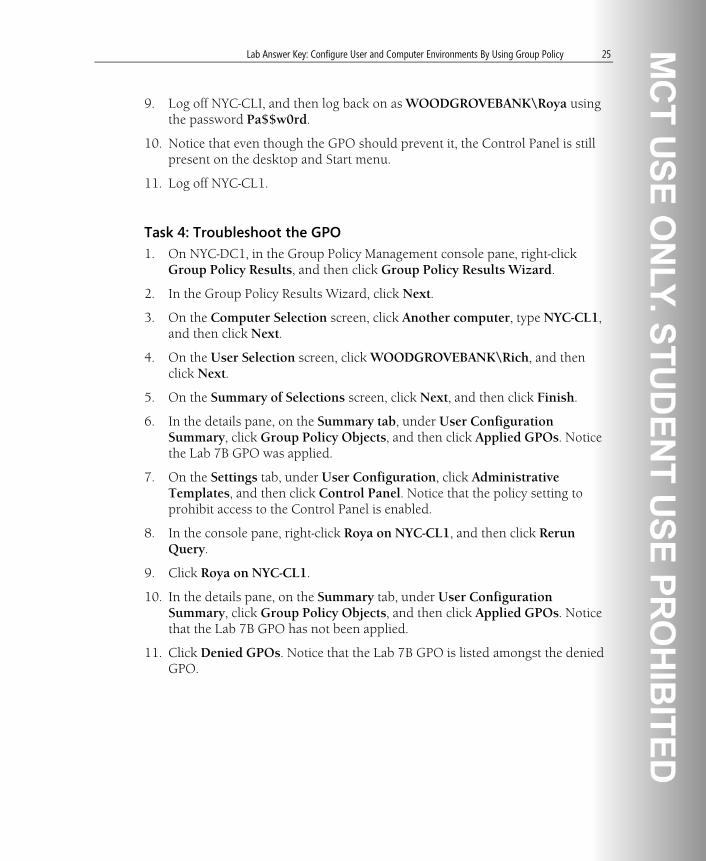
Lab Answer Key: Configure User and Computer Environments By Using Group Policy 25
9. Log off NYC-CLI, and then log back on as WOODGROVEBANK\Roya using the password Pa$$w0rd.
10. Notice that even though the GPO should prevent it, the Control Panel is still present on the desktop and Start menu.
11. Log off NYC-CL1.
Task 4: Troubleshoot the GPO 1. On NYC-DC1, in the Group Policy Management console pane, right-click
Group Policy Results, and then click Group Policy Results Wizard.
2. In the Group Policy Results Wizard, click Next.
3. On the Computer Selection screen, click Another computer, type NYC-CL1, and then click Next.
4. On the User Selection screen, click WOODGROVEBANK\Rich, and then click Next.
5. On the Summary of Selections screen, click Next, and then click Finish.
6. In the details pane, on the Summary tab, under User Configuration Summary, click Group Policy Objects, and then click Applied GPOs. Notice the Lab 7B GPO was applied.
7. On the Settings tab, under User Configuration, click Administrative Templates, and then click Control Panel. Notice that the policy setting to prohibit access to the Control Panel is enabled.
8. In the console pane, right-click Roya on NYC-CL1, and then click Rerun Query.
9. Click Roya on NYC-CL1.
10. In the details pane, on the Summary tab, under User Configuration Summary, click Group Policy Objects, and then click Applied GPOs. Notice that the Lab 7B GPO has not been applied.
11. Click Denied GPOs. Notice that the Lab 7B GPO is listed amongst the denied GPO.

26 Lab Answer Key: Configure User and Computer Environments By Using Group Policy
Task 5: Resolve the issue and test the resolution 1. In the Group Policy Management console pane, under Group Policy Objects,
click Lab 7B.
2. In the details pane, on the Delegation tab, and then click Advanced.
3. In the Lab 7B Security Settings dialog box, click the MIA_BranchManagersGG.
4. Under Permissions for MIA_BranchManagerGG, notice that the Apply group policy setting is set to Deny.
5. Click Remove to remove the Miami_BranchManagersGG from the permission list, and then click OK.
6. On NYC-CLI, log on as WOODGROVEBANK\Roya using password Pa$$w0rd.
7. Notice that the Control Panel now correctly does not appear on the desktop or Start menu.
8. Log off NYC-CL1.
Result: At the end of this exercise, you will have resolved a Group Policy objects issue.
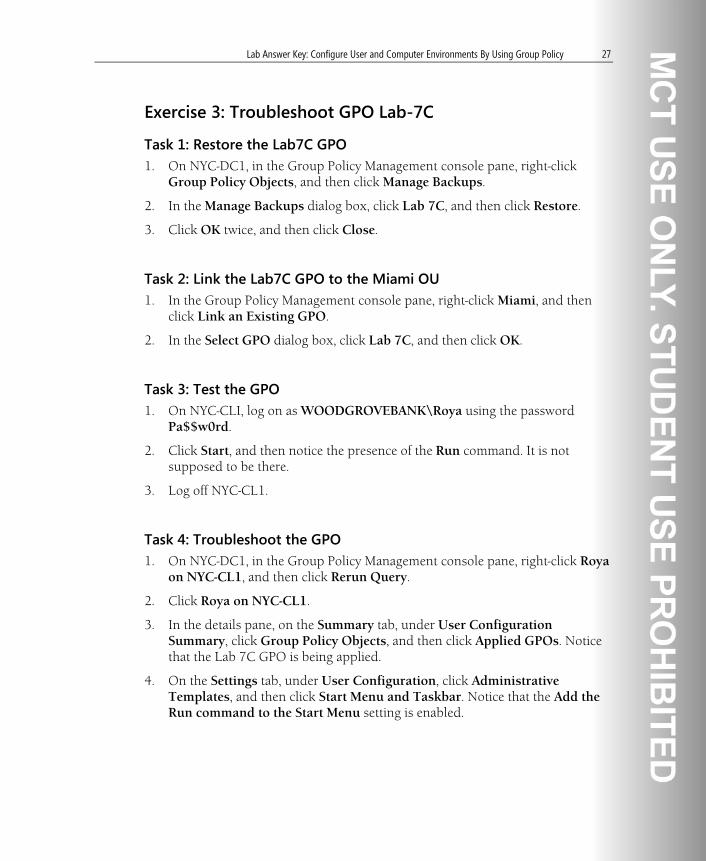
Lab Answer Key: Configure User and Computer Environments By Using Group Policy 27
Exercise 3: Troubleshoot GPO Lab-7C
Task 1: Restore the Lab7C GPO 1. On NYC-DC1, in the Group Policy Management console pane, right-click
Group Policy Objects, and then click Manage Backups.
2. In the Manage Backups dialog box, click Lab 7C, and then click Restore.
3. Click OK twice, and then click Close.
Task 2: Link the Lab7C GPO to the Miami OU 1. In the Group Policy Management console pane, right-click Miami, and then
click Link an Existing GPO.
2. In the Select GPO dialog box, click Lab 7C, and then click OK.
Task 3: Test the GPO 1. On NYC-CLI, log on as WOODGROVEBANK\Roya using the password
Pa$$w0rd.
2. Click Start, and then notice the presence of the Run command. It is not supposed to be there.
3. Log off NYC-CL1.
Task 4: Troubleshoot the GPO 1. On NYC-DC1, in the Group Policy Management console pane, right-click Roya
on NYC-CL1, and then click Rerun Query.
2. Click Roya on NYC-CL1.
3. In the details pane, on the Summary tab, under User Configuration Summary, click Group Policy Objects, and then click Applied GPOs. Notice that the Lab 7C GPO is being applied.
4. On the Settings tab, under User Configuration, click Administrative Templates, and then click Start Menu and Taskbar. Notice that the Add the Run command to the Start Menu setting is enabled.

28 Lab Answer Key: Configure User and Computer Environments By Using Group Policy
Task 5: Resolve the issue and test the resolution 1. In the Group Policy Management console pane, under Group Policy Objects,
right-click Lab 7C, and then click Edit.
2. In the Group Policy Management Editor window, under User Configuration, expand Policies, expand Administrative Templates, and then click Start Menu and Taskbar.
3. In the details pane, double-click Add the Run command to the Start Menu.
4. In the Add the Run command to the Start Menu Properties dialog box, click Not Configured, and then click OK.
5. Double-click Remove Run menu from the Start Menu.
6. In the Remove Run menu from Start Menu Properties dialog box, click Enabled, and then click OK.
7. Close Group Policy Object Editor.
8. On NYC-CLI, log on as WOODGROVEBANK\Roya using the password Pa$$w0rd.
9. Click Start, and then notice that the Run command is no longer present.
Result: At the end of this exercise, you will have resolved a Group Policy objects issue.

Lab Answer Key: Configure User and Computer Environments By Using Group Policy 29
Exercise 4: Troubleshoot GPO Lab-7D
Task 1: Create a new OU named Loopback 1. On NYC-DC1, click Start, point to Administrative Tools, and then click Active
Directory Users and Computers.
2. In the Active Directory Users and Computers console pane, right-click WoodgroveBank.com, point to New and then click Organizational Unit.
3. In the New Object – Organizational Unit dialog box, type Loopback, and then click OK.
Task 2: Restore the Lab7D GPO 1. On NYC-DC1, in the Group Policy Management console pane, right-click
Group Policy Objects, and then click Manage Backups.
2. In the Manage Backups dialog box, click Lab 7D, and then click Restore.
3. Click OK twice, and then click Close.
Task 3: Link the Lab7D GPO to the Loopback OU 1. In the Group Policy Management console pane, right-click Group Policy
Management, and then click Refresh.
2. Right-click Loopback, and then click Link an Existing GPO.
3. In the Select GPO dialog box, click Lab 7D, and then click OK.
Task 4: Move NYC-CL1 to the Loopback OU 1. In the Active Directory Users and Computers console pane, expand
WoodgroveBank.com, and then click Computers.
2. In the details pane, right-click NYC-CL1, and then click Move.
3. In the Move dialog box, click Loopback, and then click OK.
4. Close Active Directory Users and Computers.

30 Lab Answer Key: Configure User and Computer Environments By Using Group Policy
Task 5: Test the GPO 1. On NYC-CL1, restart the computer.
2. When the computer restarts, log on as WOODGROVEBANK\Roya using the password Pa$$w0rd.
3. Click Start and notice that the Run command is present once again.
4. Notice that Control Panel is present on the desktop and Start menu. These changes are not intentional.
5. On the desktop, double-click Internet Explorer. Notice that nothing happens, and Internet Explorer does not launch.
Task 6: Troubleshoot the GPO 1. On NYC-DC1, in the Group Policy Management console pane, right-click Roya
on NYC-CL1, and then click Rerun Query.
2. In the details pane, on the Summary tab, under Computer Configuration Summary, click Group Policy Objects, and then click Applied GPOs. Notice that the Lab 7D GPO has been applied.
3. On the Settings tab, under Computer Configuration, click Administrative Templates, and then click System/Group Policy. Notice that loopback processing mode is enabled.
Note: Group Policy applies to the user or computer in a manner that depends on where both the user and the computer objects are located in Active Directory. However, in some cases, users may need policy applied to them based on the location of the computer object alone. You can use the Group Policy loopback feature to apply Group Policy Objects (GPOs) that depend only on which computer the user logs on to.

Lab Answer Key: Configure User and Computer Environments By Using Group Policy 31
Task 7: Resolve the issue and test the resolution 1. In the Group Policy Management console pane, expand the Loopback OU,
right-click Lab 7D, and then click Link Enabled to clear the check mark.
Note: Another alternative would be to disable loopback processing in the GPO itself, especially if there were other settings in the GPO that you did wish to have applied.
2. Close Group Policy Management.
3. On NYC-CL1, restart the computer.
4. When the computer restarts, log on as WOODGROVEBANK\Roya using the password Pa$$w0rd.
5. Click Start and notice that the Run command is no longer present.
6. Notice that Control Panel is again absent from the desktop and Start menu.
7. On the desktop, double-click Internet Explorer. Notice that Internet Explorer again opens properly.
Task 8: Close all virtual machines and discard undo disks 1. For each virtual machine that is running, close the Virtual Machine Remote
Control window.
2. In the Close box, select Turn off machine and discard changes, and then click OK.
3. Close the 6419A Lab Launcher.
Result: At the end of this exercise, you will have resolved a Group Policy objects issue.

Lab Answer Key: Implementing Security Using Group Policy 1
Module 8 Lab Answer Key: Implementing Security Using Group Policy
Contents: Lab A: Implementing Security Using Group Policy
Exercise 1: Configuring Account and Security Policy Settings 2
Exercise 2: Implementing Fine-Grained Password Policies 5
Lab B: Configuring and Verifying Security Policies
Exercise 1: Configuring Restricted Groups and Software Restriction
Policies 7
Exercise 2: Configuring Security Templates 9
Exercise 3: Verifying the Security Configuration 12

2 Lab Answer Key: Implementing Security Using Group Policy
Lab A: Implementing Security Using Group Policy
Note: If you have already logged on to a virtual machine, skip the
logon task for that particular virtual machine.
Exercise 1: Configuring Account and Security Policy Settings
Task 1: Start the virtual machines, and then log on 1. In the Lab Launcher, next to 6419A-NYC-DC1, click Launch.
2. Log on to NYC-DC1 as WOODGROVEBANK\Administrator with the password Pa$$w0rd.
3. Minimize the Lab Launcher window.
Task 2: Create an account policy for the domain 1. Click Start, point to Administrative Tools, and then click Group Policy
Management.
2. In the Group Policy Management console pane, expand Forest: WoodgroveBank.com, expand Domains, expand WoodgroveBank.com, and then ensure Group Policy Objects is clicked.
3. In the details pane, right-click Default Domain Policy, and then click Edit.
4. In the Group Policy Management Editor, under Computer Configuration, expand Policies, expand Windows Settings, expand Security Settings, expand Account Policies, and then click Password Policy.
5. In the details pane, double-click Minimum password length.
6. In the Minimum password length Properties dialog box, in the Password must be at least field, type 8, and then click OK.
7. Double-click Minimum password age.
8. In the Minimum password age Properties dialog box, in the Password can be changed after field, type 19, and then click OK.
9. Double-click Maximum password age.

Lab Answer Key: Implementing Security Using Group Policy 3
10. In the Maximum password age Properties dialog box, in the Password will expire in field, type 20, and then click OK.
11. In the console pane, click Account Lockout Policy.
12. In the details pane, double-click Account lockout threshold.
13. In the Account lockout threshold Properties dialog box, under Account will not lock out, type 5, and then click OK.
14. In the Suggested Value Changes dialog box, click OK to accept the values of 30 minutes.
15. Close Group Policy Management Editor.
Task 3: Configure local policy settings for a Windows Vista client 1. Start NYC-CL1 and log on as WOODGROVEBANK\Administrator using the
password Pa$$w0rd.
2. Click Start, type MMC in the search box, and then press ENTER.
3. In the Console1 window, on the File menu, click Add/Remove Snap-in.
4. In the Add or Remove Snap-ins dialog box, click Group Policy Object Editor, click Add, click Finish and then click OK.
5. In the console pane, expand Local Computer Policy, expand Computer Configuration, expand Windows Settings, expand Security Settings, expand Local Policies, and then click Security Options.
6. In the details pane, double-click Accounts: Administrator account status.
7. In the Accounts: Administrator account status Properties dialog box, click Enabled, and then click OK.
8. On the File menu, click Add/Remove Snap-in.
9. In the Add or Remove Snap-ins dialog box, click Group Policy Object Editor, click Add, and then click Browse.
10. In the Browse for a Group Policy Object dialog box, click the Users tab.
11. Click Non-Administrators, click OK, click Finish, and then click OK.
12. In then console pane, expand Local Computer\Non-Administrators Policy, expand User Configuration, expand Administrative Templates, and then click Start Menu and Taskbar.
13. In the details pane, double-click Remove Run menu from Start Menu.

4 Lab Answer Key: Implementing Security Using Group Policy
14. In the Remove Run menu from Start Menu Properties dialog box, click Enabled, and then click OK.
15. Close the MMC window and do not save changes.
16. Restart NYC-CL1,go to start and then select Right arrow and click restart
Task 4: Create a wireless network GPO for Windows Vista clients 1. On NYC-DC1, in the Group Policy Management console pane, right-click
Group Policy Objects, and then click New.
2. In the New GPO dialog box, in the Name field, type Vista Wireless, and then click OK.
3. In the details pane, right-click Vista Wireless, and then click Edit.
4. In the Group Policy Management Editor, under Computer Configuration, expand Policies, expand Windows Settings, and then expand Security Settings.
5. Right-click Wireless Network (IEEE 802.11) Policies, and then click Create A New Windows Vista Policy.
6. In the New Vista Wireless Network Policy Properties dialog box, click Add, and then click Infrastructure.
7. In the New Profiles properties dialog box, in the Profile Name field, type Corporate.
8. In the Network Name(s) (SSID) field, type Corp, and then click Add.
9. On the Security tab, in the Authentication list, click Open with 802.1X, and then click OK.
10. On the Network Permissions tab, click Add.
11. In the New Permission Entry dialog box, in the Network Name (SSID): field, type Research, verify that Permission is set to Deny, and then click OK twice.
12. Close Group Policy Management Editor.
13. In the Group Policy Management console pane, right-click Woodgrovebank.com, and then click Link an existing GPO.
14. In the Select GPO dialog box, click Vista Wireless, and then click OK.

Lab Answer Key: Implementing Security Using Group Policy 5
Task 5: Configure a policy that prohibits a service on all domain controllers 1. In the Group Policy Management console pane, expand Group Policy
Objects, right-click Default Domain Controllers Policy, and then click Edit.
2. In the Group Policy Management Editor, under Computer Configuration, expand Policies, expand Windows Settings, expand Security Settings, and then click System Services.
3. In the details pane, double-click Windows Installer.
4. In the Windows Installer Properties dialog box, select the Define this policy setting check box, verify that Disabled is selected, and then click OK.
5. Close Group Policy Management Editor.
Result: At the end of this exercise you will have configured account and security policy settings.
Exercise 2: Implementing Fine-Grained Password Policies
Task 1: Create a PSO using ADSI edit 1. On NYC-DC1, click Start, in the search type adsiedit.msc, and then press
ENTER.
2. In the ADSI Edit window, in the console pane, right-click ADSI Edit, and then click Connect to.
3. In the Connection Settings dialog box, click OK.
4. In the console pane, expand Default naming context [NYC-DC1.WoodgroveBank.com], expand DC=WoodgroveBank, DC=com, expand CN=System, right-click CN=Password Settings Container, point to New, and then click Object.
5. In the Create Object dialog box, ensure msDS-PasswordSettings is clicked, and then click Next.
6. On the Attribute: cn page, in the Value field, type ITAdmin, and then click Next.
7. On the Attribute: msDS-PasswordSettingsPrecedence page, in the Value field, type 10, and then click Next.
6 Lab Answer Key: Implementing Security Using Group Policy
8. On the Attribute: msDS-PasswordReversibleEncryptionEnabled page, in the Value field, type false, and then click Next.
9. On the Attribute: msDS-PasswordHistoryLength page, in the Value field, type 30, and then click Next.
10. On the Attribute: msDS-PasswordComplexityEnabled page, in the Value field, type true, and then click Next.
11. On the Attribute: msDS-MinimumPasswordLength page, in the Value field, type 10, and then click Next.
12. On the Attribute: msDS-MinimumPasswordAge page, in the Value field, type -5184000000000, and then click Next.
Note: PSO values are time-based values entered using the integer8 format. Integer8 is a 64-bit number that represents the amount of time, in 100-nanosecond intervals, that has passed since 12:00 AM January 1, 1601.
13. On the Attribute: msDS-MaximumPasswordAge page, in the Value field, type -6040000000000, and then click Next.
14. On the Attribute: msDS-LockoutThreshold page, in the Value field, type 3, and then click Next.
15. On the Attribute: msDS-LockoutObservationWindow page, in the Value field, type -18000000000, and then click Next.
16. On the Attribute: msDS-LockoutDuration page, in the Value field, type -18000000000, click Next, and then click Finish.
17. Close the ADSI Edit.
Task 2: Assign the ITAdmin password policy to the IT Admins global group 1. Click Start, point to Administrative Tools, and then click Active Directory
Users and Computers.
2. In the Active Directory Users and Computers window, on the View menu, click Advanced Features.
3. In the console pane, expand WoodgroveBank.com, expand System, and then click Password Settings Container.

Lab Answer Key: Implementing Security Using Group Policy 7
4. In the details pane, right-click ITAdmin, and then click Properties.
5. In the ITAdmin Properties dialog box, on the Attribute Editor tab, scroll down, click msDS-PSOAppliesTo, and then click Edit.
6. In the Multi-valued Distinguished Name With Security Principle Editor dialog box, click Add Windows Account.
7. In the Select Users, Computers, or Groups dialog box, type ITAdmins_WoodgroveGG, and then click OK three times.
8. Close Active Directory Users and Computers.
Result: At the end of this exercise, you will have implemented fine grained password policies.
Lab B: Configuring and Verifying Security Policies
Exercise 1: Configuring Restricted Groups and Software Restriction Policies
Task 1: Configure restricted groups for the local administrators group 1. On NYC-DC1, in the Group Policy Management console pane, right-click
Default Domain Policy, and then click Edit.
2. In the Group Policy Management Editor window, under Computer Configuration, expand Policies, expand Windows Settings, expand Security Settings, and then click Restricted Groups.
3. Right-click Restricted Groups and then click Add Group.
4. In the Add Group dialog box, type Administrators and then click OK.
5. In the Administrators Properties dialog box, next to Members of this group, click Add.
6. In the Add Member dialog box, type WOODGROVEBANK\ITAdmins_WoodgroveGG, and then click OK.
7. Next to Members of this group, click Add.
8. In the Add Member dialog box, type WOODGROVEBANK\Domain Admins, and then click OK twice.
9. Close Group Policy Management Editor.
8 Lab Answer Key: Implementing Security Using Group Policy
Task 2: Prohibit Internet Explorer and VBS scripts from running on domain controllers 1. In the Group Policy Management console pane, right-click Default Domain
Controllers Policy, and then click Edit.
2. In the Group Policy Management Editor window, under Computer Configuration, expand Policies, expand Windows Settings, expand Security Settings, and then click Software Restriction Policies.
3. Right-click Software Restriction Policies, and then click New Software Restriction Policies.
4. In the details pane, right-click Additional Rules, and then click New Hash Rule.
5. In the New Hash Rule dialog box, click Browse.
6. In the Open dialog box, browse to C:\Program Files\Internet Explorer.
7. Click iexplore.exe, and then click Open.
8. Verify that the Security level is Disallowed, and then click OK.
9. Right-click Additional Rules, and then click New Path Rule.
10. In the New Path Rule dialog box, in the Path field, type *.vbs, and then click OK.
11. Close Group Policy Management Editor, and then close Group Policy Management.
Result: At the end of this exercise you will have configured restricted groups and software restriction policies.

Lab Answer Key: Implementing Security Using Group Policy 9
Exercise 2: Configuring Security Templates
Task 1: Create a security template for the file and print servers 1. On NYC-DC1, click Start, type MMC, and then press ENTER.
2. In the Console1 window, on the File menu, click Add/Remove Snap-in.
3. In the Add or Remove Snap-ins dialog box, scroll down, click Security Templates, click Add, and then click OK.
4. In the console pane, expand Security Templates, right-click C:\Users\Administrator\Documents\Security\Templates, and then click New Template.
5. In the C:\Users\Administrator\Documents\Security\Templates dialog box, in the Template name field, type FPSecurity, and then click OK.
6. Expand C:\Users\Administrator\Documents\Security\Templates, expand FPSecurity, expand Local Polices, and then click Security Options.
7. In the details pane, double-click Accounts: Rename administrator account.
8. In the Accounts: Rename administrator account Properties dialog box, select the Define this policy setting in the template check box.
9. In the Define this policy setting in the template field, type FPAdmin, and then click OK.
10. In the details pane, double-click Interactive Logon: Do not display last user name.
11. In the Interactive logon: Do not display last user name Properties dialog box, select the Define this policy setting in the template check box, click Enabled, and then click OK.
12. In the console pane, right-click FPSecurity, and then click Save.
13. Close the MMC window and do not save changes.

10 Lab Answer Key: Implementing Security Using Group Policy
Task 2: Start NYC-SVR1 and disable the Windows Firewall 1. Start NYC-SVR1. Log on as WOODGROVEBANK\Administrator, with the
password Pa$$w0rd.
2. Click Start, and then click Control Panel.
3. In the Control Panel window, double-click Windows Firewall.
4. In the Windows Firewall window, click Change settings.
5. In the Windows Firewall Settings dialog box, click Off, and then click OK.
Note: This next step is performed to simplify the lab and is not a recommended practice.
6. Close Windows Firewall, and then close Control Panel.
Task 3: Run the Security Configuration Wizard and import the FPSecurity template 1. On NYC-DC1, click Start, point to Administrative Tools, and then click
Security Configuration Wizard.
2. On the Security Configuration Wizard dialog box, click Next.
3. On the Configuration Action page, click Next.
4. On the Select Server page, type NYC-SVR1.WoodgroveBank.com, and then click Next.
5. When the security configuration databases process completes, click Next.
6. On the Role-Based service Configuration page, click Next.
7. On the Select Server Roles page, clear the DNS Server check box.
8. Verify that the File Server check box is selected.
9. Select the Print Server check box, and then click Next.
10. On the Select Client Features page, click Next.
11. On the Select Administration and Other Options page, click Next.
12. On the Select Additional Services page, click Next.

Lab Answer Key: Implementing Security Using Group Policy 11
13. On the Handling Unspecified Services page, click Next.
14. On the Confirm Service Changes page, review the changes, and then click Next.
15. On the Network Security page, click Next.
16. On the Network Security Rules page, click Next.
17. On the Registry Settings page, click Next.
18. On the Require SMB security Signatures page, click Next.
19. On the Outbound Authentication Methods page, click Next.
20. On the Outbound Authentication using Domain Accounts page, select the Clocks that are synchronized with the selected server’s clock check box, and then click Next.
21. On the Inbound Authentication Methods page, click Next.
22. On the Registry Settings Summary page, click Next.
23. On the Audit Policy page, click Next.
24. On the System Audit Policy page, click Next.
25. On the Audit Policy Summary page, click Next.
26. On the Save Security Policy page, click Next.
27. On the Security Policy File Name page, type FPPolicy at the end of the C:\Windows\security\msscw\Policies\ path, and then click Include Security Templates.
28. In the Include Security Templates dialog box, click Add.
29. In the Open dialog box, browse to C:\Users\Administrator\Documents\Security\Templates.
30. Click FPSecurity.inf, and then click Open.
31. Click OK, and then click Next.
32. On the Apply Security Policy page, click Apply now, and then click Next.
33. When the security policy application process completes, click Next, and then click Finish.

12 Lab Answer Key: Implementing Security Using Group Policy
Task 4: Transform the FPPolicy into a GPO 1. On NYC-DC1, click Start and then click the Command Prompt.
2. At the command prompt, type scwcmd transform /p:C:\Windows\security\msscw\Policies\FPpolicy.xml /g:FileServerSecurity, and then press ENTER.
3. When the process completes, type exit and then press ENTER.
4. Click Start, point to Administrative Tools, and then click Group Policy Management.
5. In the Group Policy Management console pane,ensure Group Policy Objects is expanded.
6. Click FilesServerSecurity, and then in the details pane, click the Settings tab.
7. In the details pane, click show all and review the Group Policy settings.
8. Close Group Policy Management.
Result: At the end of this exercise you will have configured security templates.
Exercise 3: Verifying the Security Configuration
Task 1: Log on as the Local Administrator of the Windows Vista computer and check the membership of the local administrators group 1. Log on to NYC-CL1 as WOODGROVEBANK\Administrator with the
password Pa$$w0rd.
2. Click Start, type GPupdate /force in the search, and then press ENTER.
3. When this process completes, click Start, point to All Programs, point to Accessories, and verify that the Run menu appears.
4. Click Start, and then click Control Panel.
5. In the Control Panel window, click User Accounts, and then click User Accounts again.
6. Click Manage User Accounts.
7. In the User Accounts dialog box, on the Advanced tab, click Advanced.
Lab Answer Key: Implementing Security Using Group Policy 13
8. In the Local Users and Groups window, in the console pane, click Groups.
9. In the details pane, double-click Administrators. Verify that the Domain Admins and the ITAdmins global groups are present.
10. Click Cancel and close all windows.
11. Log off NYC-CL1.
Task 2: Log on to the Windows Vista computer as an ordinary user, and test the policy 1. Log on to NYC-CL1 as WOODGROVEBANK\Roya, with a password of
Pa$$w0rd.
2. Click Start, point to All Programs, and then click Accessories. Ensure that the Run menu does not appear.
3. Press Right-ALT+DELETE, and then click Change a password.
4. In the Old Password field, type Pa$$w0rd.
5. In the New Password and Confirm password fields, type w0rdPa$$, and then press ENTER. You will not be able to update the password because the minimum password age has not expired.
6. In the Old Password field, type Pa$$w0rd.
7. In the New Password and Confirm password fields, type pa, and then press ENTER. You will not be able to update the password because the minimum password length has not been met.
8. Click Cancel.
Task 3: Log on to the domain controller as the domain administrator, and test software restrictions and services 1. On NYC-DC1, click Start, type GPUpdate /force, and then press ENTER.
2. Click Start, then point to All Programs, and then click Internet Explorer.
3. Review the error message, and then click OK.
Note: This error message may not appear until the second logon.

14 Lab Answer Key: Implementing Security Using Group Policy
4. Click Start, and then click Computer.
5. In the Computer window, browse to E:\Mod08\LabFiles, and then double-click hello.vbs.
6. Click OK.
7. Review the error message, and then click OK.
8. Click Start, point to Administrative Tools, and then click Services.
9. In the Services window details pane, scroll down to the Windows Installer service, and verify that it is set to Disabled.
Task 4: Use Group Policy modeling to test the settings on the file and print server 1. Click Start, point to Administrative Tools, and then click Group Policy
Management.
2. In the Group Policy Management window console pane, right-click Group Policy Modeling, and then click Group Policy Modeling Wizard.
3. In the Group Policy Modeling Wizard dialog box, click Next.
4. On the Domain Controller Selection page, click Next.
5. On the User and Computer Selection page, in the Computer information section, click Computer.
6. In the Computer field, type WOODGROVEBANK\NYC-SVR1, and then click Next.
7. On the Advance Simulation Options page, click Next.
8. On the Alternate Active Directory Paths page, click Next.
9. On the Computer Security Groups page, click Next.
10. On the WMI Filters for Computers page, click Next.
11. On the Summary of Selections page, click Next.
12. When the process completes, click Finish.
13. In the details pane, click show all and review the Group Policy settings.
Lab Answer Key: Implementing Security Using Group Policy 15
Task 5: Close all virtual machines and discard undo disks 1. For each virtual machine that is running, close the Virtual Machine Remote
Control window.
2. In the Close box, select Turn off machine and discard changes, and then click OK.
3. Close the 6419A Lab Launcher.
Result: At the end of this exercise, you will have verified the security configuration.
Note: After you have completed the lab exercises closing the VM’s and selecting undo disk is not required for hosted labs. Click the Quit button to exit.
Lab Answer Key: Configuring Server Security Compliance 1
Module 9 Lab Answer Key: Configuring Server Security Compliance
Contents: Exercise 1: Configuring Windows Software Update Services 2
Exercise 2: Configure Auditing 7

2 Lab Answer Key: Configuring Server Security Compliance
Lab: Manage Server Security
Note: If you have already logged on to a virtual machine, skip the
logon task for that particular virtual machine.
Exercise 1: Configuring Windows Software Update Services (WSUS)
Task 1: Start the virtual machines, and log on 1. In the Lab Launcher, next to 6419A-NYC-DC1, click Launch.
2. In the Lab Launcher, next to 6419A-NYC-SVR1, click Launch.
3. In the Lab Launcher, next to 6419A-NYC-CL2, click Launch
4. Log on to each virtual machine as WOODGROVEBANK\Administrator with the password Pa$$w0rd.
5. Minimize the Lab Launcher window.
Task 2: Use the Group Policy Management Console to create and link a Group Policy Object (GPO) to the domain to configure client updates 1. On NYC-DC1, click Start, point to Administrative Tools, and then click
Group Policy Management.
2. In the console pane, ensure Forest: WoodgroveBank.com, Domains are already expanded, and then click WoodgroveBank.com.
3. Right-click WoodgroveBank.com, and then click Create a GPO in this domain, and Link it here.
4. In the New GPO dialog box, type WSUS in the name , and then click OK.
5. In the details pane, right-click WSUS, and then click Edit.
6. In the Group Policy Management Editor window, under Computer Configuration, expand Policies, expand Administrative Templates, expand Windows Components, and then click Windows Update.
7. In the details pane, double-click Configure Automatic Updates.

Lab Answer Key: Configuring Server Security Compliance 3
Note: the order of the settings below may be different and you may need to locate and open each one separately.
8. In the Configure Automatic Updates Properties dialog box, click Enabled, and then click Next Setting.
9. On the Specify intranet Microsoft update service location Properties dialog box, click Enabled.
10. In the Set the intranet update service for detecting updates field, type http://NYC-SVR1.
11. In the Set the intranet statistics server field, type http://NYC-SVR1, and then click Next Setting.
12. On the Automatic Updates detection frequency Properties dialog box, click Enabled, and then click OK.
13. Close Group Policy Management Editor, and then close Group Policy Management.
14. On NYC-CL2, click Start | All Programs |Accessories | Command Prompt.
15. In the Command Prompt, type GPUpdate /force, and then press ENTER.
16. Allow the GPUpdate command to complete.
17. Click Start, click the right-arrow button, and then click Restart.
18. Allow NYC-CL2 to restart.
19. Log on to NYC-CL2 virtual machine as WOODGROVEBANK\Administrator with the password Pa$$w0rd.
Task 3: Use the WSUS administration tool to view WSUS properties 1. On NYC-SVR1, click Start, point to Administrative Tools, and then click
Microsoft Windows Server Update Services 3.0 SP1.
2. In the Update Services window, in the console pane ensire NYC-SVR1 is expanded, and then click Options.
3. In the details pane, click Update Source and Proxy Server.
4. Review the options on both tabs, and then click Cancel.
5. In the details pane, click Products and Classifications.

4 Lab Answer Key: Configuring Server Security Compliance
6. Review the options for product support and update classifications, and then click Cancel.
7. In the details pane, click Update Files and Languages.
8. Review the options for downloading updates and support for languages, and then click Cancel.
9. In the details pane, click Synchronization Schedule.
10. Review the options for synchronizing content, and then click Cancel.
Task 4: Create a computer group, and add NYC-CL2 to the new group 1. In the console pane, expand Computers, and then click All Computers.
2. In the Actions pane, click Add Computer Group.
3. In the Add Computer Group dialog box, type HO Computers, and then click Add.
4. In the console pane, expand All Computers, and then click Unassigned Computers.
5. In the details pane, in the Status list, click Any, and then click Refresh.
6. Right-click nyc-cl2.woodgrovebank.com, and then click Change Membership.
7. In the Set Computer Group Membership dialog box, select the HO Computers check box, and then click OK.
Task 5: Approve an update for Windows Vista clients 1. In the console pane, expand Updates, and then click Security Updates.
2. In the details pane, in the Approval list, click Any Except Declined.
3. In the Status list, click Any, and then click Refresh.
Note: Notice all of the updates available.
4. In the details pane, click Title to sort the results by title.
5. Scroll down, right-click Security Update for Windows Vista (KB957095), and then click Approve.

Lab Answer Key: Configuring Server Security Compliance 5
6. In the Approve Updates dialog box, click the arrow next to All Computers, click Approved for Install, and then click OK.
7. On the Approval Progress page, when the process is complete, click Close.
8. In the details pane, right-click Security Update for Windows Vista (KB957097), and then click Approve.
9. In the Approve Updates dialog box, click the arrow next to All Computers, point to Deadline, and then click Custom.
10. In the Choose Deadline dialog box, in the Date field, type in yesterday’s date, and then click OK twice.
Note: Entering yesterday’s date will cause the update to be installed as soon as the client computers contact the server. Note that because these VMs use the Microsoft Lab Launcher environment, their date will not correspond with the actual date. This is by design. Take note of the VMs configured date and enter a date one day before the VMs configured date.
11. In the Approval Progress dialog box, click Close.
Task 6: Install an update on the Windows Vista client 1. On NYC-CL2, click Start, type cmd, and then press ENTER.
2. At the Command Prompt, type GPUpdate /force, and then press ENTER.
Note: Wait for the policy to finish updating.
3. At the command prompt, type wuauclt /detectnow, and then press ENTER.
4. The Windows Update dialog box will appear notifying you that the update is being installed and the computer needs to restart. Click Restart now.
Note: It may take several minutes for the Window Update dialog box to appear.

6 Lab Answer Key: Configuring Server Security Compliance
5. Log on to NYC-CL2 as WOODGROVEBANK\Administrator with the password of Pa$$w0rd.
6. Click Start, point to All Programs, and then click Windows Update.
7. In the Windows Update window, in the left pane, click View Update History.
8. On the Review your update history page, locate the Security Update for Windows Vista (KB957097).
Note: Due to the limitations of the lab environment, the KB957097 update is pre-loaded on the WSUS server to demonstrate the update process.
9. Close Windows Explorer.
Task 7: View WSUS reports 1. On NYC-SVR1, in the Update Services console pane, click Reports.
2. Review the various reports available in WSUS.
3. In the details pane, click Computer Detailed Status.
4. In the Computers Report for NYC-SVR1 window, click Run Report.
5. On the completed report, note how many updates are listed under nyc-cl2.woodgrovebank.com.
6. Close the Computers Report for NYC-SVR1 window.
7. Close Update Services.

Lab Answer Key: Configuring Server Security Compliance 7
Exercise 2: Configure Auditing
Task 1: Examine the current state of the audit policy 1. On NYC-DC1, click Start, and then click Command Prompt.
2. At the command prompt, type Auditpol.exe /get /category:*, press ENTER, and then examine the default audit policy settings.
3. Minimize the command prompt.
Task 2: Enable DS Access auditing on domain controllers 1. On NYC-DC1, click Start, click Administrative Tools, and then click Group
Policy Management.
2. In the console pane, expand WoodgroveBank.com, expand Group Policy Objects, and then right-click the Default Domain Controllers Policy, and then click Edit.
3. In the Group Policy Management Editor console pane, expand Computer Configuration, expand Policies, expand Windows Settings, expand Security Settings, expand Local Policies, and then click Audit Policy. Notice that all policy settings are set to Not Defined.
4. Double-click Audit directory service access.
5. In the Audit directory service access Properties dialog box, select Define these policy settings.
6. Select both the Success and Failure check boxes, and then click OK.
7. Close the Group Policy Management Editor, and then close the Group Policy Management console.
8. Restore the Command Prompt, type Gpupdate and then press ENTER.
9. When the update completes, run the Auditpol.exe /get /category:* command again, and then examine the audit policy.
10. Close Command Prompt.
8 Lab Answer Key: Configuring Server Security Compliance
Task 3: Set the SACL for the domain 1. Click Start, point to Administrative Tools, and then click Active Directory
Users and Computers.
2. On the View menu, click Advanced Features.
3. In the console pane, right-click WoodgroveBank.com, and then click Properties.
4. In the WoodgroveBank.com Properties dialog box, click the Security tab.
5. Click Advanced.
6. On the Advanced Security Settings for WoodgroveBank dialog box, click the Auditing tab, and then click Add.
7. In the Select Users, Computers, and Groups dialog box, type Everyone, and then click OK.
8. In the Auditing Entry for WoodgroveBank dialog box, for Write all properties select the Successful and Failed check boxes.
9. Click OK three times.
Task 4: Test the policy 1. In the console tree, right-click Toronto, and then click Rename.
2. Type GTA, and then press ENTER.
3. Minimize Active Directory Users and Computers.
4. Click Start, and then click Server Manager.
5. In the Server Manager console pane, expand Diagnostics, expand Event Viewer, expand Windows Logs, and then click Security.
6. In the details pane, locate the event with the 4662 ID. Double-click then event, and then examine the event.
7. Close the Event Properties dialog box.
8. Minimize Server Manager.
9. Restore Active Directory Users and Computers.
10. In the console pane, click Users.
11. In the details pane, double-click Administrator.
Lab Answer Key: Configuring Server Security Compliance 9
12. In the Administrator Properties dialog box, click the Telephones tab.
13. In the Mobile field, type 555-555-5555, and then click OK.
14. Close Active Directory Users and Computers, and then restore Server Manager.
15. In the details pane, locate the newest 4662 event, and double-click to view details.
Note: You may have to wait a minute for the event to appear.
16. Close all open windows.
Task 5: Close all virtual machines and discard undo disks 1. For each virtual machine that is running, close the Virtual Machine Remote
Control window.
2. In the Close box, select Turn off machine and discard changes, and then click OK.
3. Close the 6419A Lab Launcher.
Note: After you have completed the lab exercises closing the VM’s and selecting undo disk is not required for hosted labs. Click the Quit button to exit.

Lab Answer Key: Configuring and Managing Storage Technologies 1
Module 10 Lab Answer Key: Configuring and Managing Storage Technologies
Contents: Lab A: Installing the FSRM Role Service
Exercise 1: Installing the FSRM Role Service 2
Lab B: Configuring Storage Quotas
Exercise 1: Configuring Storage Quotas 4
Lab C: Configuring File Screening
Exercise 1: Configuring File Screening 7
Lab D: Generating Storage Reports
Exercise 1: Generating Storage Reports 8

2 Lab Answer Key: Configuring and Managing Storage Technologies
Lab A: Installing the FSRM Role Service
Note: If you have already logged on to a virtual machine, skip the
logon task for that particular virtual machine.
Exercise 1: Installing the File Server Resource Manager (FSRM) Role Service
Task 1: Start the NYC-DC1 and NYC-SVR1 virtual machines 1. In the Lab Launcher, next to 6419A-NYC-DC1, click Launch.
2. In the Lab Launcher, next to 6419A-NYC-SVR1, click Launch.
3. Log on to both virtual machines as Woodgrovebank\Administrator with the password Pa$$w0rd.
4. Minimize the Lab Launcher window.
Task 2: Install the FSRM role service on NYC-SVR1 1. On NYC-SVR1, click Start, and then click Server Manager.
2. In the Server Manager console pane, expand Roles. Notice that the File Services role already has been installed.
3. Right-click File Services, and then click Add Role Services.
4. In the Select Role Services dialog box, select File Server Resource Manager, and then click Next.
5. On the Configure Storage Usage Monitoring page, select the Allfiles (E:) check box, and then click Next.

Lab Answer Key: Configuring and Managing Storage Technologies 3
6. On the Set Report Options page, review the default options, and then click Next.
7. On the Confirm Installation Selections page, click Install.
8. When the installation is complete, click Close.
9. Close Server Manager.
Results: After this exercise, you should have successfully installed the FSRM role service on NYC-SVR1.

4 Lab Answer Key: Configuring and Managing Storage Technologies
Lab B: Configuring Storage Quotas Exercise 1: Configuring Storage Quotas
Task 1: Create a quota template 1. On NYC-SVR1, click Start, point to Administrative tools, and then click File
Server Resource Manager.
2. In the File Server Resource Manager console pane, expand Quota Management, and then click Quota Templates.
3. Right-click Quota Templates, and then click Create Quota Template.
4. In the Create Quota Template dialog box, in the Template Name field, type 100 MB Limit Log to Event Viewer.
5. Under Notifications Thresholds, click Add.
6. In the Add Threshold dialog box, click the Event log tab.
7. Select the Send warning to event log check box, and then click OK.
8. In the Create Quota Template dialog box, click Add.
9. In the Add Threshold dialog box, in the Generate notification when the usages reaches field, type 100.
10. Click the Event Log tab, and then select the Send warning to event log check box.
11. Click OK twice.
Task 2: Configure a quota based on the quota template 1. In the File Server Resource Manager console pane, click Quotas.
2. Right-click Quotas, and then click Create Quota.
3. On the Create Quota dialog box, in the Quota path field, type E:\Mod10\Labfiles\Users.
4. Click Auto apply template and create quotas on existing and new subfolders.
5. In the Derive properties from this quota template (recommended) list, click 100MB Limit Log to Event Viewer, and then click Create.

Lab Answer Key: Configuring and Managing Storage Technologies 5
6. In the details pane, verify that the E:\Mod10\Labfiles\Users\* path has been configured with its own quota entry. You may have to refresh the Quotas folder to view the changes.
7. Right-click Start, and then click Explorer.
8. In Windows Explorer, browse to E:\Mod10\Labfiles\Users.
9. Create a new folder named Roya.
10. In File Server Resource Manager, on the Action menu, click Refresh.
11. In the details pane, notice that the newly created folder appears in the list.
Task 3: Test that the Quota is working by generating several large files 1. Click Start, and then click Command Prompt.
2. Type E:, and then press ENTER.
3. Type cd \Mod10\Users\Roya, and then press ENTER.
4. Type fsutil file createnew file1.txt 89400000, and then press ENTER. This creates a file that is over 85 MB, which will generate a warning in Event Viewer.
5. Click Start, point to Administrative Tools, and then click Event Viewer.
6. In the Event Viewer console pane, expand Windows Logs, and then click Application.
7. In the details pane, note the event with Event ID of 12325.
8. In the Command Prompt window, type fsutil file createnew file2.txt 16400000, and then press ENTER. Notice that the file cannot be created because it would surpass the quota limit.
9. In Windows Explorer, right-click the Users folder, and then click Properties.
10. In the Users Properties dialog box, click Advanced.
11. In the Advanced Attributes dialog box, select the Compress contents to save disk space check box, and then click OK twice.
Important: When the Users folder is compressed, you reduced the file’s actual space. If you were to specify this using NTFS file system quotas, the actual file size would be calculated and not the compressed size.

6 Lab Answer Key: Configuring and Managing Storage Technologies
12. In the Confirm Attribute Changes dialog box, verify that Apply changes to this folder, subfolders and files is selected and then click OK.
13. In the File Server Resource Manager details pane, right-click Quotas, and then click Refresh. Notice that the amount of used space is reduced significantly.
14. In the Command Prompt window, type fsutil file createnew file2.txt 16400000, and then press ENTER. The file will now be successfully created.
Important: When creating files, you are specifying the number of bytes they will be. This is why they are not exactly 85000000, because a byte is only eight bits.
15. Type exit, and then press ENTER.
Results: After this exercise, you should have seen the effect of a quota template that imposes a 100MB limit on user storage on the E:\Mod10\Labfiles\Labfiles\Users folder.

Lab Answer Key: Configuring and Managing Storage Technologies 7
Lab C: Configuring File Screening Exercise 1: Configuring File Screening
Task 1: Create a File screen 1. On NYC-SVR1, in the File Server Resource Manager console pane, expand File
Screening Management, and then click File Screens.
2. Right-click File Screens, and then click Create File Screen.
3. In the Create File Screen dialog box, in the File screen path field, type E:\Mod10\Labfiles\Users.
4. Click Define custom file screen properties, and then click Custom Properties.
5. In the File Screen Properties dialog box, click Passive screening.
6. Under Select file groups to block, select the Executable Files check box.
7. On the Event Log tab, select the Send warning to event log check box, and then click OK.
8. In the Create File Screen dialog box, click Create.
9. In the Save Custom Properties as a Template dialog box, in the Template name field, type Monitor Executables, and then click OK.
Task 2: Test the file screen 1. In Windows Explorer, browse to to the E:\Mod10\Labfiles.
2. Right-click Example.bat file, and then click Copy.
3. Browse to E:\Mod10\Labfiles\Users\Roya.
4. Right-click Roya, and then click Paste.
5. In the Event Viewer console pane, under Windows Logs, right-click Application, and then click Refresh.
6. In the details pane, note the event with Event ID of 8215.
7. Close Event Viewer, and then close Windows Explorer.
Results: After this exercise, you should have successfully implemented a file screen that logs attempts to save executable files in E:\Mod10\Labfiles\Labfiles\Users.

8 Lab Answer Key: Configuring and Managing Storage Technologies
Lab D: Generating Storage Reports Exercise 1: Generating Storage Reports
Task 1: Generate an on-demand storage report 1. On NYC-SVR1, in the File Server Resource Manager console pane, click
Storage Reports Management.
2. Right-click Storage Reports Management, and then click Generate Reports Now.
3. In the Storage Reports Task Properties dialog box, click Add.
4. In the Browse For Folder dialog box, browse to E:\Mod10\Labfiles\Users, and then click OK.
5. Under Select reports to generate, select the File Screening Audit and Quota Usage check boxes, and then click OK.
6. In the Generate Storage Reports dialog box, verify that Wait for reports to be generated and then display them is selected, and then click OK.
7. In the Windows Internet Explorer window, review the generated reports.
Task 2: Close all virtual machines, and discard undo disks 1. For each virtual machine that is running, close the Virtual Machine Remote
Control (VMRC) window.
2. In the Close box, select Turn off machine and discard changes, and then click OK.
3. Close the 6419A Lab Launcher.
Results: After this exercise, you should have successfully generated an on-demand storage report.
Note: After you have completed the lab exercises closing the VM’s and selecting undo disk is not required for hosted labs. Click the Quit button to exit.

Lab Answer Key: Configuring and Managing Distributed File System 1
Module 11 Lab Answer Key: Configuring and Managing Distributed File System
Contents: Lab A: Installing the Distributed File System Role Service and Creating a DFS Namespace
Exercise 1: Installing the Distributed File System Role Service 2
Exercise 2: Creating a DFS Namespace 4
Lab B: Configuring Folder Targets and Viewing Diagnostic Reports
Exercise 1: Configuring Folder Targets and Folder Replication 5
Exercise 2: Viewing Diagnostic Reports for Replicated Folders 11

2 Lab Answer Key: Configuring and Managing Distributed File System
Lab A: Installing the Distributed File System Role Service and Creating a DFS Namespace
Note: If you have already logged on to a virtual machine, skip the
logon task for that particular virtual machine.
Exercise 1: Installing the Distributed File System (DFS) Role Service
Task 1: Start each virtual machine and log on 1. In the Lab Launcher, next to 6419A-NYC-DC1, click Launch.
2. In the Lab Launcher, next to 6419A-NYC-SVR1, click Launch.
3. Log on to both virtual machines as Woodgrovebank\Administrator with the password Pa$$w0rd.
4. Minimize the Lab Launcher window.
Task 2: Install the Distributed File System Role Service on NYC-DC1 1. On NYC-DC1, click Start, and then click Server Manager.
2. In the console pane, click Roles.
3. In the details pane, under Roles Summary, notice that the File Services role has been installed. You now must add specific role services for this role.
4. Scroll down to the File Services section, and then under Role Services, click Add Role Services.
5. On the Select Role Services page, select Distributed File System, and then click Next.

Lab Answer Key: Configuring and Managing Distributed File System 3
6. On the Create a DFS Namespace page, click Create a namespace later using the DFS Management snap-in in Server Manager, and then click Next.
7. On the Confirm Installation Selections page, click Install.
8. When the installation is complete, click Close
9. In Server Manager, verify that File Server, Distributed File System, DFS Namespaces, and DFS Replication all are installed.
10. Close Server Manager.
Task 3: Install the Distributed File System Role Service on NYC-SVR1 1. On NYC-SVR1, click Start, and then click Server Manager.
2. In the console pane, click Roles.
3. In the details pane, under Roles Summary, notice that the File Services role has been installed. You now must add specific role services for this role.
4. Scroll down to the File Services section, and then under Role Services, click Add Role Services.
5. On the Select Role Services page, select Distributed File System, and then click Next.
6. On the Create a DFS Namespace page, click Create a namespace later using the DFS Management snap-in in Server Manager, and then click Next.
7. On the Confirm Installation Selections page, click Install.
8. When the installation is complete, click Close.
9. In Server Manager, verify that File Server, Distributed File System, DFS Namespaces, and DFS Replication are all installed.
10. Close Server Manager.

4 Lab Answer Key: Configuring and Managing Distributed File System
Exercise 2: Creating a DFS Namespace
Task 1: Use the New Namespace Wizard to create a new namespace 1. On NYC-DC1, click Start, point to Administrative Tools, and then click DFS
Management.
2. In the DFS Management console pane, click Namespaces.
3. Right-click Namespaces, and then click New Namespace.
4. On the Namespace Server page, in the Server field, type NYC-DC1, and then click Next.
5. On the Namespace Name and Settings page, in the Name field, type CorpDocs, and then click Next.
6. On the Namespace Type page, verify that Domain-based namespace is selected, and then click Next.
7. On the Review Settings and Create Namespace page, review the settings, and then click Create.
8. On the Confirmation page, verify that the Status column shows Success, and then click Close. The CorpDocs namespace has now been created.
9. In the console pane, expand Namespaces, and then click \\WoodgroveBank.com\CorpDocs.
10. In the details pane, click the Namespace Servers tab. Notice that the CorpDocs namespace is hosted on a single namespace server (NYC-DC1).
Task 2: Add an additional namespace server to host the namespace 1. On NYC-DC1, in the DFS Management console pane, right-click
\\WoodgroveBank.com\CorpDocs, and then click Add Namespace Server.
2. In the Add Namespace Server dialog box, in the Namespace server field, type NYC-SVR1, and then click OK.
3. If you receive a warning dialog box that states the Distributed File System service is not running, click Yes to start the service automatically.
4. Verify from the Details pane that that the CorpDocs namespace is now hosted on both NYC-DC1 and NYC-SVR1.

Lab Answer Key: Configuring and Managing Distributed File System 5
Lab B: Configuring Folder Targets and Viewing Diagnostic Reports Exercise 1: Configuring Folder Targets and Folder Replication
Task 1: Create the HRTemplates folder, and configure a folder target on NYC-DC1 1. On NYC-DC1, in the DFS Management console pane, right-click
\\WoodgroveBank.com\CorpDocs, and then click New Folder.
2. In the New Folder dialog box, in the Name field, type HRTemplates.
3. Click Add.
4. In the Add Folder Target dialog box, click Browse.
5. In the Browse for Shared Folders dialog box, click New Shared Folder.
6. In the Create Share dialog box, in the Share name field, type HRTemplateFiles.
7. In the Local path of shared folder field, type C:\HRTemplateFiles.
8. Under Shared folder permissions, click Administrators have full access; other users have read-only permissions, and then click OK.
9. In the Warning dialog box, click Yes to create the C:\HRTemplateFiles folder.
10. In the Browse for Shared Folders dialog box, click OK.
11. In the Add Folder Target dialog box, verify that the path shows \\NYC-DC1\HRTemplateFiles, and then click OK.
12. In the New Folder dialog box, verify that HRTemplates is listed for the Name and \\NYC-DC1\HRTemplateFiles is listed for the Folder targets, and then click OK.
13. In the console pane,ensure \\WoodgroveBank.com\CorpDocs is selected.
14. In the details pane, click the Namespace tab. Notice that HRTemplates is listed as an entry in the namespace.
6 Lab Answer Key: Configuring and Managing Distributed File System
15. In the console pane, expand \\WoodgroveBank.com\CorpDocs, and then click HRTemplates. In the details pane, notice that on the Folder Targets tab, one folder target is configured.
16. Click the Replication tab, and notice that replication is not configured.
Task 2: Create the PolicyFiles folder, and configure a folder target on NYC-SVR1 1. On NYC-DC1, in the DFS Management console pane, right-click
\\WoodgroveBank.com\CorpDocs, and then click New Folder.
2. In the New Folder dialog box, in the Name field, type PolicyFiles.
3. Click Add.
4. In the Add Folder Target dialog box, click Browse.
5. In the Browse for Shared Folders dialog box, in the Server field, type NYC-SVR1, and then click Show Shared Folders.
6. Click New Shared Folder.
7. In the Create Share dialog box, in the Share name field, type PolicyFiles.
8. In the Local path of shared folder field, type C:\PolicyFiles.
9. Under Shared folder permissions, click Administrators have full access; other users have read-only permissions, and then click OK.
10. In the Warning dialog box, click Yes to create the C:\PolicyFiles folder.
11. In the Browse for Shared Folders dialog box, click OK.
12. In the Add Folder Target dialog box, verify that the path shows \\NYC-SVR1\PolicyFiles, and then click OK.
13. In the New Folder dialog box, verify that PolicyFiles is listed for the Name and \\NYC-SVR1\PolicyFiles is listed for the Folder targets, and then click OK.
14. In the console pane, click PolicyFiles. In the details pane, notice that on the Folder Targets tab, one folder target is configured.

Lab Answer Key: Configuring and Managing Distributed File System 7
Task 3: Verify the CorpDocs namespace functionality 1. On NYC-DC1, click Start, type \\WoodgroveBank.com\CorpDocs, and then
press ENTER.
2. In the Windows Explorer window that opens, notice that the HRTemplates and PolicyFiles folders both are visible.
Note: If they are not visible, you may need to wait up to five minutes for the configuration to complete.
3. Double-click HRTemplates.
4. On the File menu, point to New, and then click Rich Text Document.
5. Type Vacation Request, and then press ENTER.
6. On the navigation bar, click the Back button.
7. Double-click PolicyFiles.
8. On the File menu, point to New, and then click Rich Text Document.
9. Type Order Policies, and then press ENTER.
10. Close the PolicyFiles window.
11. On NYC-SVR1, click Start, type \\WoodgroveBank.com\CorpDocs, and then press ENTER.
12. In the Windows Explorer window that opens, notice that the HRTemplates and PolicyFiles folders both are visible.
13. Browse both folders and verify that you can access the files. Close the window when complete.
Task 4: Create additional folder targets for the HRTemplates folder, and configure folder replication 1. On NYC-DC1, in the DFS Management console pane, right-click
HRTemplates, and then click Add Folder Target.
2. In the New Folder Target dialog box, in the Path to folder target field, type \\NYC-SVR1\HRTemplates, and then click OK.

8 Lab Answer Key: Configuring and Managing Distributed File System
3. In the Warning box, click Yes to create the \\NYC-SVR1\HRTemplates shared folder.
4. In the Create Share dialog box, in the Local path of shared folder field, type C:\HRTemplates.
5. Under Shared folder permissions, click Administrators have full access; other users have read-only permissions, and then click OK.
6. In the Warning dialog box, click Yes to create the C:\HRTemplates folder.
7. In the Replication dialog box, click Yes to create a replication group.
8. On the Replication Group and Replicated Folder Name page, verify that woodgrovebank.com\corpdocs\hrtemplates is listed as the Replication group name and that HRTemplates is listed as the Replicated folder name, and then click Next.
9. On the Replication Eligibility page, verify that both NYC-DC1 and NYC-SVR1 are listed, and then click Next.
10. On the Primary Member page, in the Primary Member list, click NYC-DC1, and then click Next.
11. On the Topology Selection page, verify that Full mesh is selected, and then click Next.
12. On the Replication Group Schedule and Bandwidth page, verify that Replicate continuously using the specified bandwidth is selected and that in the Bandwidth list, Full is selected, and then click Next.
13. On the Review Settings and Create Replication Group page, review the settings, and then click Create.
14. On the Confirmation page, verify that all tasks completed successfully, and then click Close.
15. Read the Replication Delay message, and then click OK.
16. In the console pane, expand Replication, and then click woodgrovebank.com\corpdocs\hrtemplates.
17. In the details pane, on the Memberships tab, verify that both NYC-DC1 and NYC-SVR1 are listed and enabled.
Lab Answer Key: Configuring and Managing Distributed File System 9
Task 5: Create additional folder targets for the PolicyFiles folder, and configure folder replication 1. On NYC-DC1, in the DFS Management console pane, right-click PolicyFiles,
and then click Add Folder Target.
2. In the New Folder Target dialog box, in the Path to folder target field, type \\NYC-DC1\PolicyFiles, and then click OK.
3. In the Warning dialog box, click Yes to create the \\NYC-DC1\PolicyFiles shared folder.
4. In the Create Share dialog box, in the Local path of shared folder field, type C:\PolicyFiles.
5. Under Shared folder permissions, click Administrators have full access; other users have read-only permissions, and then click OK.
6. In the Warning box, click Yes to create the C:\PolicyFiles folder.
7. In the Replication dialog box, click Yes to create a replication group.
8. On the Replication Group and Replicated Folder Name page, verify that woodgrovebank.com\corpdocs\policyfiles is listed as the Replication group name and that PolicyFiles is listed as the Replicated folder name, and then click Next.
9. On the Replication Eligibility page, verify that both NYC-DC1 and NYC-SVR1 are listed, and then click Next.
10. On the Primary Member page, in the Primary member list, click NYC-SVR1, and then click Next.
11. On the Topology Selection page, verify that Full mesh is selected, and then click Next.
10 Lab Answer Key: Configuring and Managing Distributed File System
12. On the Replication Group Schedule and Bandwidth page, verify that Replicate continuously using the specified bandwidth is selected and that in the Bandwidth list, Full is selected, and then click Next.
13. On the Review Settings and Create Replication Group page, review the settings, and then click Create.
14. On the Confirmation page, verify that all tasks completed successfully, and then click Close.
15. Read the Replication Delay message, and then click OK.
16. In the console pane, click woodgrovebank.com\corpdocs\policyfiles.
17. In the details pane, on the Memberships tab, verify that both NYC-DC1 and NYC-SVR1 are listed and enabled.

Lab Answer Key: Configuring and Managing Distributed File System 11
Exercise 2: Viewing Diagnostic Reports for Replicated Folders
Task 1: Create a diagnostic report for woodgrovebank.com\corpdocs\hrtemplates 1. On NYC-DC1, in the DFS Management console pane, under Replication,
right-click woodgrovebank.com\corpdocs\hrtemplates, and then click Create Diagnostic Report.
2. On the Type of Diagnostic Report or Test page, verify that Health report is selected, and then click Next.
3. On the Path and Name page, click Next.
4. On the Members to Include page, verify that both NYC-DC1 and NYC-SVR1 are listed in the Included members column, and then click Next.
5. On the Options page, verify that Yes, count backlogged files in this report is selected.
6. Select Count the replicated files and their sizes on each member, and then click Next.
7. On the Review Settings and Create Report page, review the settings, and then click Create.
8. The DFS Replication Health Report Web page opens. Read through the report and take note of any errors or warnings. Errors will appear if replication is still in process or has not taken place yet. When you are finished, close the Internet Explorer window.
9. Repeat the above steps to create a diagnostic report for the policyfiles replication group. Read through the report, and take note of any errors or warnings. When you are finished, close the Internet Explorer window. Note that there may be errors reported if replication has not begun or finished yet.
12 Lab Answer Key: Configuring and Managing Distributed File System
Task 2: Close all virtual machines, and discard undo disks 1. For each virtual machine that is running, close the Virtual Machine Remote
Control (VMRC) window.
2. In the Close box, select Turn off machine and discard changes, and then click OK.
3. Close the 6419A Lab Launcher.
Note: After you have completed the lab exercises closing the VM’s and selecting undo disk is not required for hosted labs. Click the Quit button to exit.

Lab Answer Key: Configuring Network Access Protection 1
Module 12 Lab Answer Key: Configuring Network Access Protection
Contents: Exercise 1: Configuring Network Access Protocol (NAP) for Dynamic Host Configuration Protocol (DHCP) Clients 2
Exercise 2: Configuring NAP for VPN Clients 14

2 Lab Answer Key: Configuring Network Access Protection
Lab: Configuring NAP for DHCP and VPN
Exercise 1: Configuring Network Access Protocol (NAP) for Dynamic Host Configuration Protocol (DHCP) Clients Note: If you have already logged on to a virtual machine, skip the logon task for that particular virtual machine.
In this exercise, you will configure and test NAP for DHCP clients.
The main tasks are as follows:
1. Start the NYC-DC1, NYC-SVR1, and NYC-CL1 virtual machines.
2. Install the Network Policy Server (NPS) and Dynamic Host Configuration Protocol (DHCP) server roles.
3. Configure NYC-SVR1 as a NAP health policy server.
4. Configure DHCP service for NAP enforcement.
5. Configure NYC-CL1 as DHCP and NAP client.
6. Test NAP Enforcement.
Task 1: Start the NYC-DC1, NYC-SVR1, and NYC-CL1 virtual machines 1. On the host machine, click Start, point to All Programs, point to Microsoft
Learning, and then click 6419A.
2. In the Lab Launcher, next to 6419A-NYC-DC1, click Launch.
3. In the Lab Launcher, next to 6419A-NYC-SVR1, click Launch.
4. In the Lab Launcher, next to 6419A-NYC-CL1, click Launch.
5. Log on to each virtual machine as WOODGROVEBANK\Administrator with the password Pa$$w0rd.
6. Minimize the Lab Launcher window.
Task 2: Install the Network Policy Server (NPS) and Dynamic Host Configuration Protocol (DHCP) server roles 1. On NYC-SVR1, click Start, and then click Server Manager.

Lab Answer Key: Configuring Network Access Protection 3
2. In the Server Manager console pane, right-click Roles, and then click Add Roles.
3. On the Before You Begin page, click Next.
4. On the Select Server Roles page, select the DHCP Server and Network Policy and Access Services check boxes, and then click Next twice.
5. On the Select Role Services page, select the Network Policy Server check box, and then click Next twice.
6. On the Select Network Connection Bindings page, verify that 10.10.0.24 is selected, and then click Next.
7. On the Specify IPv4 DNS Server Settings page, for Parent Domain, verify that WoodGroveBank.com is listed.
8. In the Preferred DNS Server IPv4 Address field, type 10.10.0.10, and then click Validate.
9. Verify that the result returned is Valid, and then click Next.
10. On the Specify IPv4 WINS Server Settings page, verify that WINS is not required for applications on this network is selected, and then click Next.
11. On the Add or Edit DHCP Scopes page, click Add.
12. In the Add Scope dialog box, in Scope Name field, type NAP Scope.
13. In the Starting IP Address field, type 10.10.0.50.
14. In the Ending IP Address field, type 10.10.0.99.
15. In the Subnet Mask field, type 255.255.0.0.
16. Verify that the Activate this scope check box is selected, click OK, and then click Next.
17. On the Configure DHCPv6 Stateless Mode page, click Disable DHCPv6 stateless mode for this server, and then click Next.
18. On the Authorize DHCP Server page, verify that Use current credentials is selected, and then click Next.
19. On the Confirm Installation Selections page, click Install.
20. When the installation completes, click Close.
21. Close Server Manager.

4 Lab Answer Key: Configuring Network Access Protection
Task 3: Configure NYC-SVR1 as a NAP health policy server 1. Click Start, point to Administrative Tools, and then click Network Policy
Server.
2. Configure SHVs:
a. In the Network Policy Server console pane, expand Network Access Protection, and then click System Health Validators.
b. In the details pane, double-click Windows Security Health Validator.
c. In the Windows Security Health Validator Properties dialog box, click Configure.
d. In the Windows Security Health Validator dialog box, on the Windows Vista tab, clear all check boxes except A firewall is enabled for all network connections.
e. Click OK twice.
3. Configure remediation server groups:
a. In the console pane, under Network Access Protection, right-click Remediation Server Groups, and then click New.
b. In the New Remediation Server Group dialog box, in the Group Name field, type Rem1.
c. Click Add.
d. In the Add New Server dialog box, in the IP address or DNS name field, type 10.10.0.10, and then click Resolve.
e. Click OK twice.
4. Configure health policies:
a. In the console pane, expand Policies.
b. Right-click Health Policies, and then click New.
c. In the Create New Health Policy dialog box, in the Policy name field, type DHCP Compliant.
d. In the Client SHV checks list, verify that Client passes all SHV checks is selected.
e. Under SHVs used in this health policy, select the Windows Security Health Validator check box, and then click OK.

Lab Answer Key: Configuring Network Access Protection 5
f. In the console pane, right-click Health Policies, and then click New.
g. In the Create New Health Policy dialog box, in the Policy name field, type DHCP Noncompliant.
h. In the Client SHV checks list, click Client fails one or more SHV checks.
i. Under SHVs used in this health policy, select the Windows Security Health Validator check box, and then click OK.
5. Configure a network policy for compliant computers:
a. In the console pane, under Policies, click Network Policies.
b. In the details pane, right-click Connections to Microsoft Routing and Remote Access server and then click Disable.
c. Right-click Connections to other access servers, and then click Disable.
d. In the console pane, right-click Network Policies, and then click New.
e. On the Specify Network Policy Name and Connection Type page, in the Policy name field, type DHCP Compliant-Full Access.
f. In the Type of network access server list, click DHCP Server and then click Next.
g. On the Specify Conditions page, click Add.
h. In the Select condition dialog box, double-click Health Policies.
i. In the Health Policies dialog box, in the Health policies list, click DHCP Compliant, and then click OK.
j. On the Specify Conditions page, verify that Health Policy is specified under Conditions with a value of DHCP Compliant.
k. On the Specify Conditions page, click Add.
l. In the Select condition dialog box, double-click MS-Service Class.
m. In the MS-Service Class dialog box, type NAP Scope, and then click OK.
n. On the Specify Conditions page, verify that MS-Service class is specified under Conditions with a value of NAP Scope, and then click Next.
o. On the Specify Access Permission page, verify that Access granted is selected, and then click Next.
p. On the Configure Authentication Methods page, clear all check boxes, then select Perform machine health check only, and then click Next.
6 Lab Answer Key: Configuring Network Access Protection
q. On the Configure Constraints page, click Next.
r. On the Configure Settings page, click NAP Enforcement.
s. In the details pane, verify that Allow full network access is selected and then click Next.
t. On the Completing New Network Policy page, click Finish to complete configuration of the network policy for compliant client computers.
6. Configure a network policy for non-compliant computers:
a. In the console pane, right-click Network Policies, and then click New.
b. On the Specify Network Policy Name and Connection Type page, in the Policy name field, type DHCP Noncompliant-Restricted Access.
c. In the Type of network access server list, click DHCP Server and then click Next.
d. On the Specify Conditions page, click Add.
e. In the Select condition dialog box, double-click Health Policies.
f. In the Health Policies dialog box, in the Health policies list, click DHCP Noncompliant, and then click OK.
g. On the Specify Conditions page, verify that Health Policy is specified under Conditions with a value of DHCP Noncompliant.
h. Click Add.
i. In the Select condition dialog box, double-click MS-Service Class.
j. In the MS-Service Class dialog box, type NAP Scope, and then click OK.
k. On the Specify Conditions page, verify that MS-Service class is specified under Conditions with a value of NAP Scope, and then click Next.
l. On the Specify Access Permission page, verify that Access granted is selected, and then click Next.
Note: A setting of Access granted does not mean that non-compliant clients are granted full network access. It specifies that clients matching these conditions will be granted an access level that the policy determines.
m. On the Configure Authentication Methods page, clear all check boxes, then select Perform machine health check only, and then click Next.

Lab Answer Key: Configuring Network Access Protection 7
n. On the Configure Constraints page, click Next.
o. On the Configure Settings page, click NAP Enforcement.
p. In the details pane, click Allow limited access.
q. Click Configure.
r. In the Remediation Servers and Troubleshooting URL dialog box, in the Remediation Servers Group list, click Rem1.
s. In the Troubleshooting URL field, type http://remediation.restricted.woodgrovebank.com, and then click OK.
t. Verify that Enable auto-remediation of client computers is selected and then click Next.
Note: that although this remediation server does not exist due to the limitations of the lab environment, it's important to understand how to configure the settings.
u. On the Completing New Network Policy page, click Finish to complete configuration of the network policy for non-compliant client computers.
7. Configure a network policy for non NAP-capable computers:
a. In the console pane, right-click Network Policies, and then click New.
b. On the Specify Network Policy Name and Connection Type page, in the Policy name field, type DHCP Non NAP-Capable.
c. In the Type of network access server list, click DHCP Server and then click Next.
d. On the Specify Conditions page, click Add.
e. In the Select condition dialog box, double-click NAP-Capable Computers.
f. In the NAP-Capable Computers dialog box, click Only computers that are not NAP-capable, and then click OK.
g. On the Specify Conditions page, verify that NAP-Capable is specified under Condition with a value of Computer is not NAP-Capable.
h. On the Specify Conditions page, click Add.
i. In the Select condition dialog box, double-click MS-Service Class.

8 Lab Answer Key: Configuring Network Access Protection
j. In the MS-Service Class dialog box, type Non NAP Scope, and then click OK.
k. On the Specify Conditions page, verify that MS-Service class is specified under Conditions with a value of Non NAP Scope, and then click Next.
l. On the Specify Access Permission page, verify that Access granted is selected, and then click Next.
m. On the Configure Authentication Methods page, clear all check boxes, then select Perform machine health check only, and then click Next.
n. On the Configure Constraints page, click Next.
o. On the Configure Settings page, click NAP Enforcement.
p. In the details pane, click Allow limited access.
q. Click Configure.
r. In the Remediation Servers and Troubleshooting URL dialog box, in the Remediation Servers Group list, click Rem1.
s. In the Troubleshooting URL field, type http://remediation.restricted.woodgrovebank.com, and then click OK.
t. Verify that Enable auto-remediation of client computers is selected and then click Next.
u. On the Completing New Network Policy page, click Finish to complete configuration of the network policy for older, non NAP-capable client computers.
8. Configure connection request policy:
a. In the console pane, right-click Connection Request Policies, and then click New.
b. On the Specify Connection Request Policy Name and Connection Type page, in the Policy name field, type NAP DCHP.
c. In the Type of network access server list, click DHCP Server, and then click Next.
d. On the Conditions page, click Add.
e. In the Select condition dialog box, double-click Day and Time Restrictions.
f. In the Day and time restrictions dialog box, click All and then click Permitted.

Lab Answer Key: Configuring Network Access Protection 9
g. Click OK and click Next.
h. On the Specify Connection Request Forwarding page, verify that Authenticate requests on this server is selected and click Next.
i. On Specify Authentication Methods page, verify that Override network policy authentication settings is not selected.
j. Click Next twice, and then click Finish.
Result: This completes configuration of the NAP network policies.
Task 4: Configure DHCP service for NAP enforcement 1. On NYC-DC1, click Start, point to Administrative Tools, and then click
DHCP.
2. In the DHCP console pane, expand nyc-dc1.woodgrovebank.com, expand IPv4, and then click Scope [10.10.0.0] HeadOffice.
3. Right-click Scope [10.10.0.0] HeadOffice, and then click Delete.
4. In the DHCP dialog box, click Yes twice.
5. Close DHCP.
6. On NYC-SVR1, click Start, point to Administrative Tools, and then click DHCP.
7. In the DHCP console pane, expand nyc-svr1.woodgrovebank.com, and then expand IPv4, and then click Scope [10.10.0.0] NAP Scope.
8. Right-click Scope [10.10.0.0] NAP Scope, and then click Properties.
9. In the Scope [10.10.0.0] NAP Scope Properties dialog box, on the Network Access Protection tab, click Enable for this scope.
10. Select Use custom profile.
11. In the Profile Name field, type NAP Scope, and then click OK.
12. In console pane, click Scope Options.
13. Right-click Scope Options, and then click Configure Options.
14. In the Scope Options dialog box, on the Advanced tab, in the User class list, verify that Default User Class is selected.
15. Under Available Options, select the 015 DNS Domain Name check box.

10 Lab Answer Key: Configuring Network Access Protection
16. In the String value field, type woodgrovebank.com, and then click OK.
17. In console pane, right-click Scope Options, and then click Configure Options.
18. In the Scope Options dialog box, on the Advanced tab, in the User class list, click Default Network Access Protection Class.
19. Under Available Options, select the 006 DNS Servers check box.
20. In the IP address field, type 10.10.0.10, and then click Add.
Note: that in this lab, the DNS server address is same for both the restricted and non-restricted networks. In a real environment, you would specify a DNS server that existed on the restricted network here.
21. Under Available Options, select the 015 DNS Domain Name check box.
22. In the String value field, type restricted.woodgrovebank.com, and then click OK.
Note: The restricted.woodgrovebank.com domain is a restricted access network assigned to non-compliant NAP clients.
23. Close DHCP.
Task 5: Configure NYC-CL1 as DHCP and NAP client 1. On NYC-CL1, enable Security Center:
a. Click Start, type mmc, and then press ENTER.
b. In the Console1 window, on the File menu, click Add/Remove Snap-in.
c. In the Add or Remove Snap-ins dialog box, under Available snap-ins, click Group Policy Object Editor, and then click Add.
d. In the Select Group Policy Object dialog box, click Finish, and then click OK.
e. In the console pane, expand Local Computer Policy, expand Computer Configuration, expand Administrative Templates, expand Windows Components, and then click Security Center.

Lab Answer Key: Configuring Network Access Protection 11
f. In the details pane, double-click Turn on Security Center (Domain PCs only).
g. In the Turn on Security Center (Domain PCs only) Properties dialog box, click Enabled, and then click OK.
2. Enable the DHCP enforcement client:
a. On the File menu, click Add/Remove Snap-in.
b. In the Add or Remove Snap-ins dialog box, under Available snap-ins, click NAP Client Configuration, and then click Add.
c. In the NAP Client Configuration dialog box, click OK twice.
d. In the console pane, click NAP Client Configuration (Local Computer).
e. In the NAP Client Configuration details pane, click Enforcement Clients.
f. Right-click DHCP Quarantine Enforcement Client, and then click Enable.
3. Enable and start the NAP agent service:
a. On the File menu, click Add/Remove Snap-in.
b. In the Add or Remove Snap-ins dialog box, under Available snap-ins, click Services, and then click Add.
c. In the Services dialog box, click Finish, and then click OK.
d. In the console pane, click Services.
e. In the details pane, double-click Network Access Protection Agent.
f. In the Network Access Protection Agent Properties (Local Computer) dialog box, in the Startup type list, click Automatic, and then click Start.
g. Wait for the NAP agent service to start, and then click OK.
h. Close Console1. When prompted to save settings, click No.
4. Configure NYC-CL1 for DHCP address assignment:
a. Click Start, right-click Network, and then click Properties.
b. In the Network and Sharing Center window, click View status.
c. In the Local Area Connection Status dialog box, click Properties.

12 Lab Answer Key: Configuring Network Access Protection
d. In the Local Area Connection Properties dialog box, clear the Internet Protocol Version 6 (TCP/IPv6) check box.
Note: This reduces the lab’s complexity, particularly for those who are not familiar with IPv6.
e. Click Internet Protocol Version 4 (TCP/IPv4), and then click Properties.
f. In the Internet Protocol Version 4 (TCP/IP) Properties dialog box, click Obtain an IP address automatically, and then click Obtain DNS server address automatically.
g. Click OK, and then click Close twice.
h. Close Network and Sharing Center.
Task 6: Test NAP enforcement 1. Verify DHCP assigned address and current quarantine state:
a. Click Start, point to All Programs, point to Accessories, and then click Command Prompt.
b. At the command prompt, type ipconfig /all, and then press ENTER.
c. Verify that the DNS Suffix Search List is Woodgrovebank.com and System Quarantine State is Not Restricted.
2. Configure the System Health Validator policy to require antivirus software:
a. On NYC-SVR1, in the Network Policy Server console pane, expand Network Access Protection, and then click System Health Validators.
b. In the details pane, double-click Windows Security Health Validator.
c. In the Windows Security Health Validator Properties dialog box, click Configure.
d. In the Windows Security Health Validator dialog box, under Virus Protection, select the An antivirus application is on check box and then click OK twice.

Lab Answer Key: Configuring Network Access Protection 13
3. Verify the restricted network on NYC-CL1:
a. On NYC-CL1, at the command prompt, type ipconfig /release and then press ENTER.
b. Type ipconfig /renew and then press ENTER.
c. Verify the Connection-specific DNS suffix is now restricted.woodgrovebank.com.
4. Close Command Prompt.
5. In the notification area, double-click the Network Access Protection icon.
Note: Notice it tells you the computer is not compliant with requirements of the network. This may take a few minutes to appear.
6. Click Close.

14 Lab Answer Key: Configuring Network Access Protection
Exercise 2: Configuring NAP for VPN Clients In this exercise, you will configure NAP for VPN Clients. This exercise uses the Windows Security Health Agent and Windows Security Health Validator to require that client computers have Windows Firewall enabled and have an antivirus application installed.
You will create two network policies in this exercise. A compliant policy grants full network access to an intranet network segment. A non-compliant policy demonstrates network restriction by applying IP filters to the VPN tunnel interface that only allow client access to a single remediation server.
The main tasks are as follows:
1. Configure NYC-DC1 as an Enterprise Root CA.
2. Configure NYC-SVR1 with NPS functioning as a health policy server.
3. Configure NYC-SVR1 with the Routing and Remote Access Service (RRAS) configured as a VPN server.
4. Configure NYC-CL1 as a VPN and NAP client.
5. Configure System Help for Networking.
6. Close all virtual machines, and discard undo disks.
Task 1: Configure NYC-DC1 as an Enterprise Root CA 1. On NYC-DC1, click Start, point to Administrative Tools, and then click
Certification Authority.
2. In the certsrv – [Certification Authority (Local)] console pane, expand WoodgroveBank-NYC-DC1-CA, right-click Certificate Templates, and then click Manage.
3. In the Certificate Templates Console details pane, right-click Computer, and then click Properties.
4. In the Computer Properties dialog box, on the Security tab, click Authenticated Users.
5. In the Permissions for Authenticated Users pane, for Enroll, select the Allow check box, and then click OK.
6. Close all windows.

Lab Answer Key: Configuring Network Access Protection 15
Task 2: Configure NYC-SVR1 with NPS functioning as a health policy server 1. Obtain computer certificate on NYC-SVR1 for server-side PEAP authentication:
a. On NYC-SVR1, click Start, type mmc, and then press ENTER.
b. In the Console1 window, on the File menu, click Add/Remove Snap-in.
c. In the Add or Remove Snap-ins dialog box, click Certificates, and then click Add.
d. In the Certificates snap-in dialog box, click Computer account, click Next, and then click Finish.
e. Click OK.
f. In the console pane, expand Certificates (Local Computer), right-click Personal, point to All Tasks, and then click Request New Certificate.
g. In the Certificate Enrollment dialog box, click Next.
h. On the Request Certificates page, select the Computer check box, and then click Enroll.
i. Verify the status of certificate installation as Succeeded, and then click Finish.
j. Close Console1. When prompted to save settings, click No.
2. Install the Remote Access Service role service:
a. Click Start, and then click Server Manager.
b. In the Server Manager console pane, expand Roles, right-click Network Policy and Access Services, and then click Add Role Services.
c. On the Select Role Services page, select the Remote Access Service check box, and then click Next.
d. On the Confirm Installation Selections page, click Install.
e. When the installation completes, click Close.
f. Close Server Manager.
3. Configure NPS as a NAP health policy server:
a. In the Network Policy Server console pane, click System Health Validators.
b. In the details pane, double-click Windows Security Health Validator.
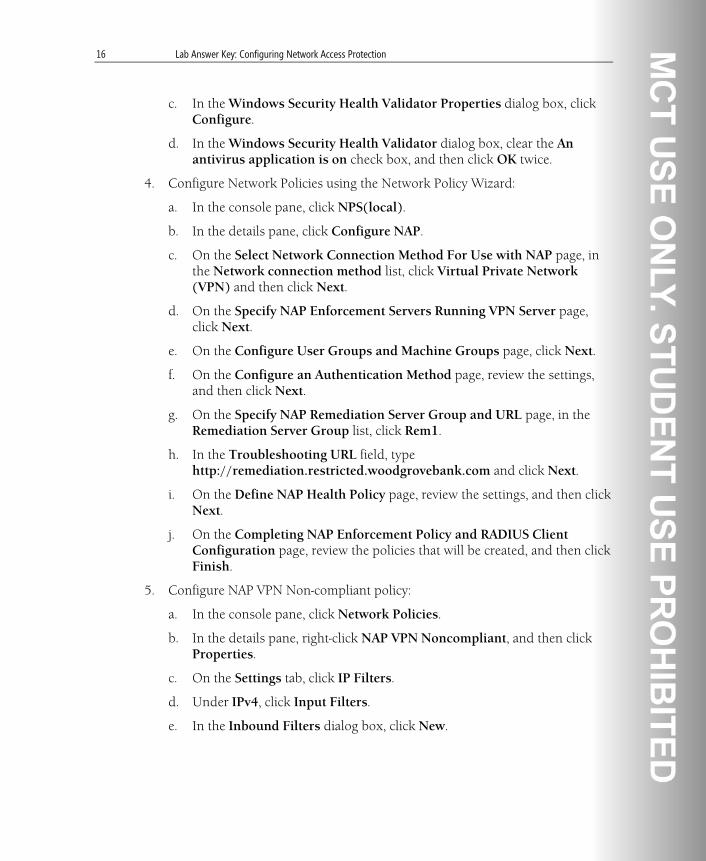
16 Lab Answer Key: Configuring Network Access Protection
c. In the Windows Security Health Validator Properties dialog box, click Configure.
d. In the Windows Security Health Validator dialog box, clear the An antivirus application is on check box, and then click OK twice.
4. Configure Network Policies using the Network Policy Wizard:
a. In the console pane, click NPS(local).
b. In the details pane, click Configure NAP.
c. On the Select Network Connection Method For Use with NAP page, in the Network connection method list, click Virtual Private Network (VPN) and then click Next.
d. On the Specify NAP Enforcement Servers Running VPN Server page, click Next.
e. On the Configure User Groups and Machine Groups page, click Next.
f. On the Configure an Authentication Method page, review the settings, and then click Next.
g. On the Specify NAP Remediation Server Group and URL page, in the Remediation Server Group list, click Rem1.
h. In the Troubleshooting URL field, type http://remediation.restricted.woodgrovebank.com and click Next.
i. On the Define NAP Health Policy page, review the settings, and then click Next.
j. On the Completing NAP Enforcement Policy and RADIUS Client Configuration page, review the policies that will be created, and then click Finish.
5. Configure NAP VPN Non-compliant policy:
a. In the console pane, click Network Policies.
b. In the details pane, right-click NAP VPN Noncompliant, and then click Properties.
c. On the Settings tab, click IP Filters.
d. Under IPv4, click Input Filters.
e. In the Inbound Filters dialog box, click New.

Lab Answer Key: Configuring Network Access Protection 17
f. In the Add IP Filter dialog box, select the Destination network check box.
g. In the IP Address field, type 10.10.0.10.
h. In the Subnet mask field, type 255.255.255.255.
i. Click OK.
j. In the Inbound Filters dialog box, click Permit only the packets listed below.
k. Click OK.
Note: This ensures that traffic from non-compliant clients can reach only NYC DC1.
l. Under IPv4, click Output Filters.
m. In the Outbound Filters dialog box, click New.
n. In the Add IP Filter dialog box, select Source network check box.
o. In the IP address field, type 10.10.0.10.
p. In the Subnet mask field, type 255.255.255.255.
q. Click OK.
r. In the Outbound Filters dialog box, click Permit only the packets listed below.
s. Click OK twice.
Note: This ensures that only traffic from NYC DC1 can be sent to non-compliant clients.
6. Configure connection request policies:
a. In the console pane, click Connection Request Policies.
b. In the details pane, right-click Use windows authentication for all users, and then click Disable.
c. Right-click NAP VPN, and then click Properties.
d. In the NAP VPN Properties dialog box, on the Conditions tab, click Add.
e. In the Select condition dialog box, double-click Tunnel Type.
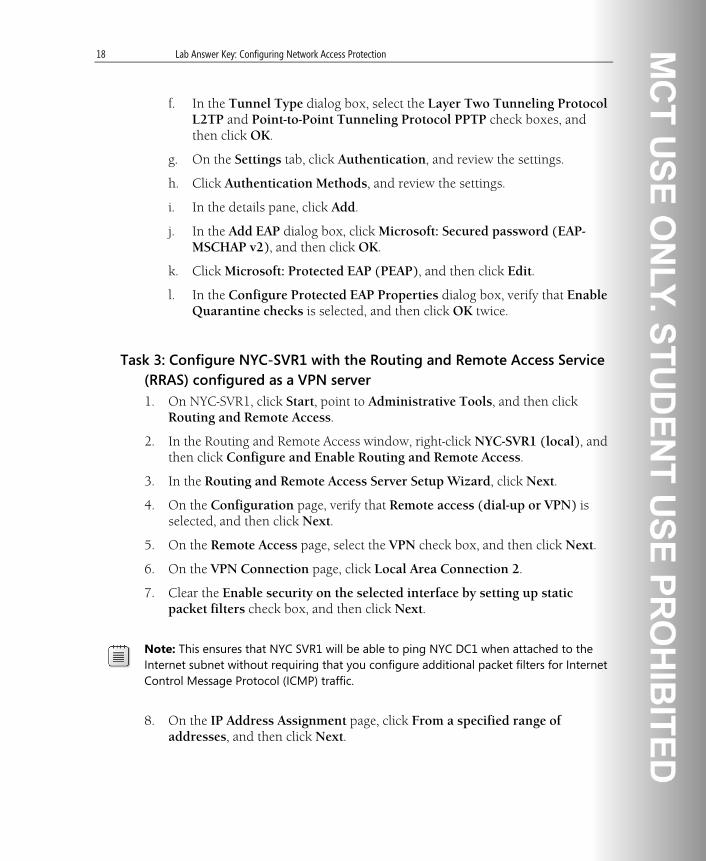
18 Lab Answer Key: Configuring Network Access Protection
f. In the Tunnel Type dialog box, select the Layer Two Tunneling Protocol L2TP and Point-to-Point Tunneling Protocol PPTP check boxes, and then click OK.
g. On the Settings tab, click Authentication, and review the settings.
h. Click Authentication Methods, and review the settings.
i. In the details pane, click Add.
j. In the Add EAP dialog box, click Microsoft: Secured password (EAP-MSCHAP v2), and then click OK.
k. Click Microsoft: Protected EAP (PEAP), and then click Edit.
l. In the Configure Protected EAP Properties dialog box, verify that Enable Quarantine checks is selected, and then click OK twice.
Task 3: Configure NYC-SVR1 with the Routing and Remote Access Service (RRAS) configured as a VPN server 1. On NYC-SVR1, click Start, point to Administrative Tools, and then click
Routing and Remote Access.
2. In the Routing and Remote Access window, right-click NYC-SVR1 (local), and then click Configure and Enable Routing and Remote Access.
3. In the Routing and Remote Access Server Setup Wizard, click Next.
4. On the Configuration page, verify that Remote access (dial-up or VPN) is selected, and then click Next.
5. On the Remote Access page, select the VPN check box, and then click Next.
6. On the VPN Connection page, click Local Area Connection 2.
7. Clear the Enable security on the selected interface by setting up static packet filters check box, and then click Next.
Note: This ensures that NYC SVR1 will be able to ping NYC DC1 when attached to the Internet subnet without requiring that you configure additional packet filters for Internet Control Message Protocol (ICMP) traffic.
8. On the IP Address Assignment page, click From a specified range of addresses, and then click Next.
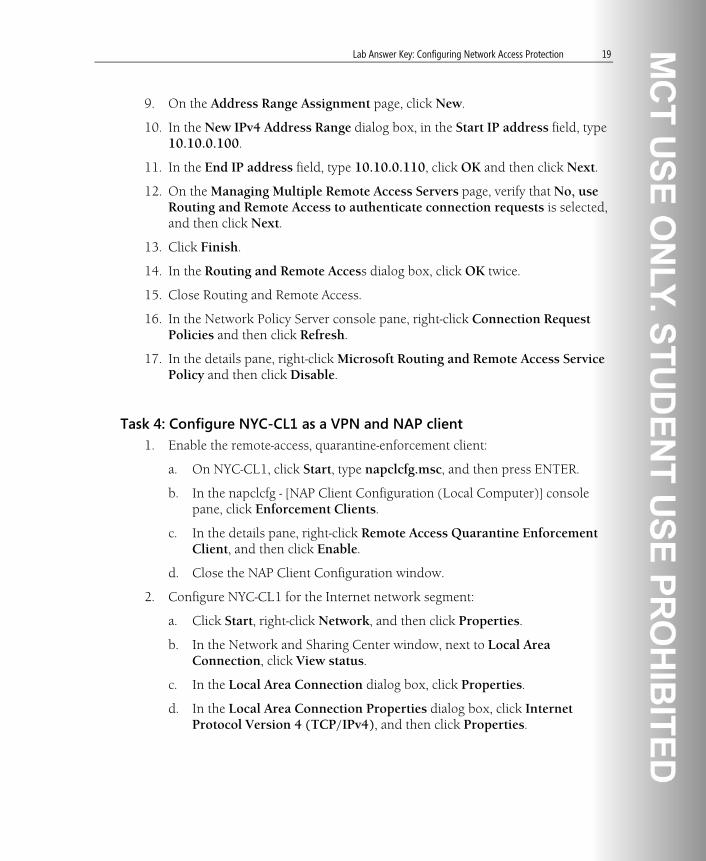
Lab Answer Key: Configuring Network Access Protection 19
9. On the Address Range Assignment page, click New.
10. In the New IPv4 Address Range dialog box, in the Start IP address field, type 10.10.0.100.
11. In the End IP address field, type 10.10.0.110, click OK and then click Next.
12. On the Managing Multiple Remote Access Servers page, verify that No, use Routing and Remote Access to authenticate connection requests is selected, and then click Next.
13. Click Finish.
14. In the Routing and Remote Access dialog box, click OK twice.
15. Close Routing and Remote Access.
16. In the Network Policy Server console pane, right-click Connection Request Policies and then click Refresh.
17. In the details pane, right-click Microsoft Routing and Remote Access Service Policy and then click Disable.
Task 4: Configure NYC-CL1 as a VPN and NAP client 1. Enable the remote-access, quarantine-enforcement client:
a. On NYC-CL1, click Start, type napclcfg.msc, and then press ENTER.
b. In the napclcfg - [NAP Client Configuration (Local Computer)] console pane, click Enforcement Clients.
c. In the details pane, right-click Remote Access Quarantine Enforcement Client, and then click Enable.
d. Close the NAP Client Configuration window.
2. Configure NYC-CL1 for the Internet network segment:
a. Click Start, right-click Network, and then click Properties.
b. In the Network and Sharing Center window, next to Local Area Connection, click View status.
c. In the Local Area Connection dialog box, click Properties.
d. In the Local Area Connection Properties dialog box, click Internet Protocol Version 4 (TCP/IPv4), and then click Properties.
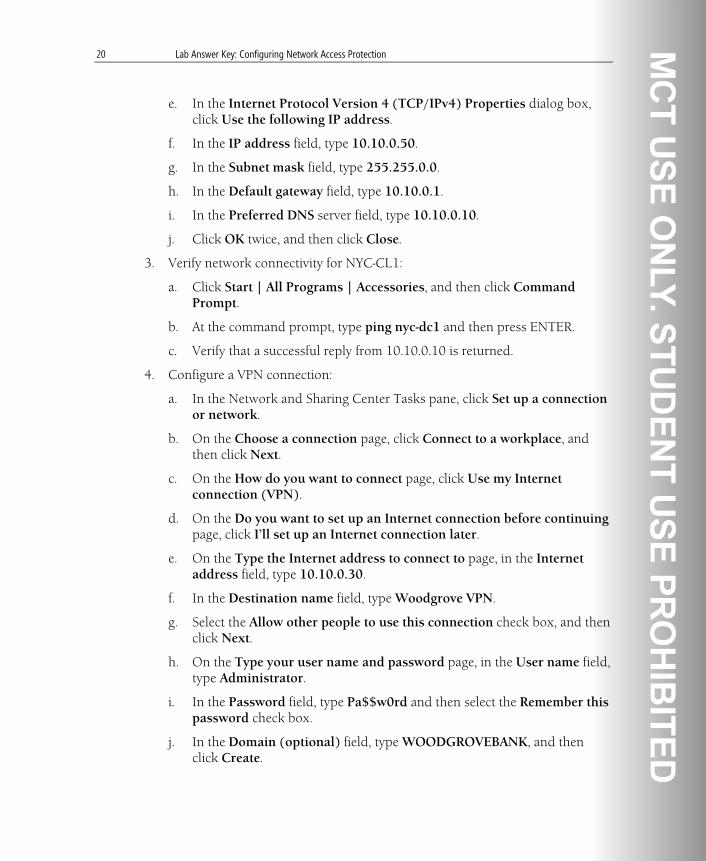
20 Lab Answer Key: Configuring Network Access Protection
e. In the Internet Protocol Version 4 (TCP/IPv4) Properties dialog box, click Use the following IP address.
f. In the IP address field, type 10.10.0.50.
g. In the Subnet mask field, type 255.255.0.0.
h. In the Default gateway field, type 10.10.0.1.
i. In the Preferred DNS server field, type 10.10.0.10.
j. Click OK twice, and then click Close.
3. Verify network connectivity for NYC-CL1:
a. Click Start | All Programs | Accessories, and then click Command Prompt.
b. At the command prompt, type ping nyc-dc1 and then press ENTER.
c. Verify that a successful reply from 10.10.0.10 is returned.
4. Configure a VPN connection:
a. In the Network and Sharing Center Tasks pane, click Set up a connection or network.
b. On the Choose a connection page, click Connect to a workplace, and then click Next.
c. On the How do you want to connect page, click Use my Internet connection (VPN).
d. On the Do you want to set up an Internet connection before continuing page, click I’ll set up an Internet connection later.
e. On the Type the Internet address to connect to page, in the Internet address field, type 10.10.0.30.
f. In the Destination name field, type Woodgrove VPN.
g. Select the Allow other people to use this connection check box, and then click Next.
h. On the Type your user name and password page, in the User name field, type Administrator.
i. In the Password field, type Pa$$w0rd and then select the Remember this password check box.
j. In the Domain (optional) field, type WOODGROVEBANK, and then click Create.

Lab Answer Key: Configuring Network Access Protection 21
k. On the The connection is ready to use page, click Close.
l. In the Network and Sharing Center Tasks pane, click Manage network connections.
m. In the Network Connections window, right-click Woodgrovebank VPN, and then click Properties.
n. In the Woodgrove VPN Properties dialog box, on the Security tab, click Advanced (custom settings), and then click Settings.
o. In the Advanced Security Settings dialog box, click Use Extensible Authentication Protocol (EAP), and then in the Use Extensible Authentication Protocol (EAP) list, click Protected EAP (PEAP) (encryption enabled).
p. Click Properties.
q. In the Protected EAP Properties dialog box, verify that the Validate server certificate check box is selected, and then clear the Connect to these servers check box.
r. In the Select Authentication Method list, verify that Secured Password (EAP-MSCHAP v2) is selected.
s. Clear the Enable Fast Reconnect check box, and then select the Enable Quarantine checks check box.
t. Click OK three times.
5. Test the VPN connection:
a. In the Network Connections window, right-click Woodgrove VPN, and then click Connect.
b. In the Connect Woodgrove VPN dialog box, click Connect.
c. In the Enter Credentials dialog box, click OK.
d. In the Validate Server Certificate dialog box, click View Server Certificate.
e. In the Certificate dialog box, verify that Certificate Information states that the certificate was issued to nyc-svr1Woodgrovebank.com by WoodgroveBank-NYC-DC1-CA and then click OK twice.
f. Wait for the VPN connection to be made. Because NYC-CL1 is compliant, it should have unlimited access to the intranet subnet.
g. At the command prompt, type ipconfig /all and press ENTER.

22 Lab Answer Key: Configuring Network Access Protection
h. Review the IP configuration and verify that System Quarantine State is Not Restricted.
i. Type ping nyc-svr1 and then press ENTER. This should be successful.
Note: The client now meets the requirement for VPN full connectivity.
j. In the Network Connections window, right-click Woodgrove VPN, and then click Disconnect.
6. Configure Windows Security Health Validator to require an antivirus application:
a. On NYC-SVR1, in the Network Policy Server console pane, click System Health Validators.
b. In the details pane, double-click Windows Security Health Validator.
c. In the Windows Security Health Validator Properties dialog box, click Configure.
d. In the Windows Security Health Validator dialog box, select the An antivirus application is on check box.
e. Click OK twice.
7. Verify the client is placed on the restricted network:
a. On NYC-CL1, in the Network Connections window, right-click Woodgrove VPN, and then click Connect.
b. In the Connect Woodgrove VPN dialog box, click Connect.
c. In the Enter Credentials dialog box, click OK.
d. Wait for the VPN connection to be made.
e. In the notification area, double-click the network access icon in the system tray.
f. In the Network Access Protection dialog box, review the settings and then click Close.
Note: This dialog box indicates the computer does not meet health requirements. This message is displayed because antivirus software has not been installed.

Lab Answer Key: Configuring Network Access Protection 23
g. At the command prompt, type ipconfig /all and then press ENTER.
h. Review the IP configuration. The System Quarantine State should be Restricted.
8. Disconnect from Woodgrovebank VPN.
Task 5: Configure System Help for Networking 1. On NYC-SVR1, click Start and then click Help and Support.
2. In the Windows Help and Support window, click Networking.
3. Verify that the Networking help topics exist.
Task 6: Close all virtual machines, and discard undo disks 1. For each virtual machine that is running, close the Virtual Machine Remote
Control (VMRC) window.
2. In the Close box, select Turn off machine and discard changes, and then click OK.
3. Close the 6419A Lab Launcher.
Note: After you have completed the lab exercises closing the VM’s and
selecting undo disk is not required for hosted labs. Click the Quit button to
exit.

Lab Answer Key: Configuring Availability of Network Content and Resources 1
Module 13 Lab Answer Key: Configuring Availability of Network Content and Resources
Contents: Lab A: Configuring Shadow Copying
Exercise 1: Configuring Shadow Copying 2
Lab B: Configuring Network Load Balancing
Exercise 1: Configuring Network Load Balancing 5
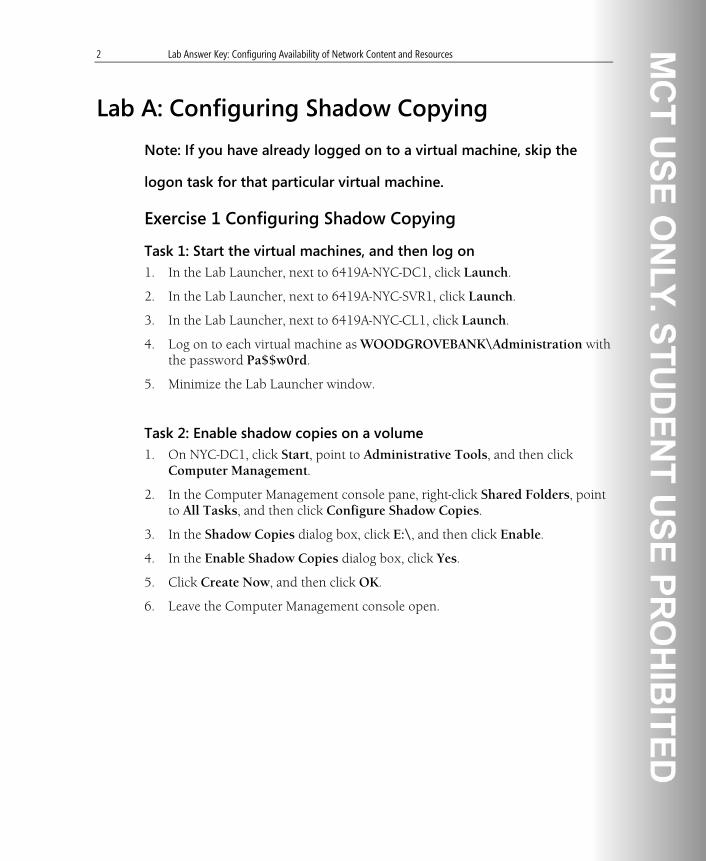
2 Lab Answer Key: Configuring Availability of Network Content and Resources
Lab A: Configuring Shadow Copying
Note: If you have already logged on to a virtual machine, skip the
logon task for that particular virtual machine.
Exercise 1 Configuring Shadow Copying
Task 1: Start the virtual machines, and then log on 1. In the Lab Launcher, next to 6419A-NYC-DC1, click Launch.
2. In the Lab Launcher, next to 6419A-NYC-SVR1, click Launch.
3. In the Lab Launcher, next to 6419A-NYC-CL1, click Launch.
4. Log on to each virtual machine as WOODGROVEBANK\Administration with the password Pa$$w0rd.
5. Minimize the Lab Launcher window.
Task 2: Enable shadow copies on a volume 1. On NYC-DC1, click Start, point to Administrative Tools, and then click
Computer Management.
2. In the Computer Management console pane, right-click Shared Folders, point to All Tasks, and then click Configure Shadow Copies.
3. In the Shadow Copies dialog box, click E:\, and then click Enable.
4. In the Enable Shadow Copies dialog box, click Yes.
5. Click Create Now, and then click OK.
6. Leave the Computer Management console open.

Lab Answer Key: Configuring Availability of Network Content and Resources 3
Task 3: Change a file in a share location 1. On NYC-CL1, click Start, type \\NYC-DC1\Shadow in the search, and then
press ENTER.
2. In the Shadow window, double-click ShadowTest.
3. In the Notepad window, type This is my text that I am adding to the file.
4. On the File menu, click Save.
5. Close Notepad, but leave the Windows Explorer window open.
6. In the Shadow window, double-click ShadowTest.
7. In the Notepad window, type This is my second modification to the file.
8. On the File menu, click Save.
9. Close Notepad, but leave the Windows Explorer window open.
Task 4: Manually create a shadow copy 1. On NYC-DC1, in the Computer Management console pane, right-click Shared
Folders, point to All Tasks, and then click Configure Shadow Copies.
2. In the Shadow Copies dialog box, click E:\, and then click Create Now.
3. The Shadow copies of selected volume pane should now have three entries listed. Click OK.
4. Close Computer Management.
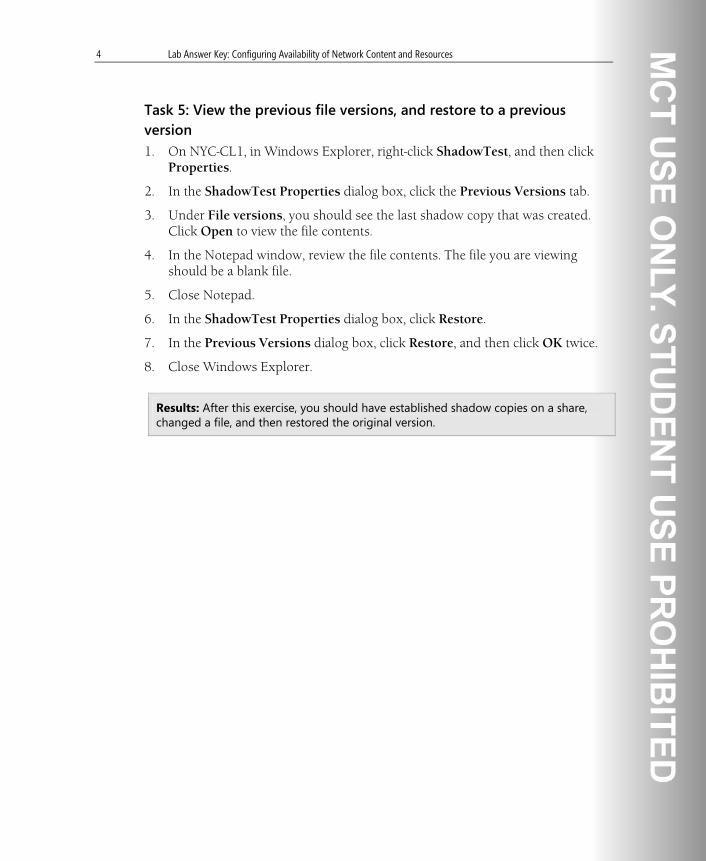
4 Lab Answer Key: Configuring Availability of Network Content and Resources
Task 5: View the previous file versions, and restore to a previous version 1. On NYC-CL1, in Windows Explorer, right-click ShadowTest, and then click
Properties.
2. In the ShadowTest Properties dialog box, click the Previous Versions tab.
3. Under File versions, you should see the last shadow copy that was created. Click Open to view the file contents.
4. In the Notepad window, review the file contents. The file you are viewing should be a blank file.
5. Close Notepad.
6. In the ShadowTest Properties dialog box, click Restore.
7. In the Previous Versions dialog box, click Restore, and then click OK twice.
8. Close Windows Explorer.
Results: After this exercise, you should have established shadow copies on a share, changed a file, and then restored the original version.

Lab Answer Key: Configuring Availability of Network Content and Resources 5
Lab B: Configuring Network Load Balancing
Exercise 1: Configuring Network Load Balancing with IIS
Task 1: Install NLB
Note: Perform these steps on both NYC-DC1 and NYC-SVR1. First perform the steps on NYC-DC1. Then perform the steps on NYC-SVR1.
1. Click Start | Server Manager. The Server Manager window opens.
2. In the Server Manager console tree, click Features.
3. In the details pane, click Add Features.
4. In the Add Features Wizard, select Network Load Balancing, and then click Next.
5. On the Confirm Installation Selections page, click Install.
6. On the Installation Results page, click Close.
7. Close Server Manager.
Task 2: Create an NLB cluster
Note: Perform these steps on NYC-DC1
1. Click Start | Administrative Tools | Network Load Balancing Manager.
2. The Network Load Balancing Manager window opens. Maximize the window.
3. In the console tree, right-click Network Load Balancing Clusters and then click New Cluster.
4. In the New Cluster: Connect dialog box, in the Host field, type NYC-DC1 and then click Connect.

6 Lab Answer Key: Configuring Availability of Network Content and Resources
5. Under Interfaces available for configuring a new cluster, click the interface on the 10.10.0.10 network, and then click Next.
6. On the Host Parameters page, click Add.
7. In the Add IP Address dialog box, in the IPv4 address field, type 10.10.0.80, press TAB and the Subnet mask field will automatically fill.
8. Click OK, and then click Next.
9. In the Cluster IP Addresses page, click Add.
10. In the Add IP Address dialog box, in the IPv4 address field, type 10.10.0.70, press TAB and the Subnet mask field will automatically fill.
11. Click OK, and then click Next.
12. On the Cluster Parameters page, in the Full Internet name field, type webfarm.woodgrovebank.com.
13. Click Multicast and then click Next.
14. On the Port Rules page, click Edit.
15. In the Add/Edit Port Rule dialog box, in the From field, type 80, and in the To field, type 80.
16. Under Protocols click TCP.
17. For Affinity click None.
18. Click OK, and then click Finish.
Note: Do not begin the steps below until after the previous change has completed. Use the log entries in the bottom pane to determine when the previous change has completed.
19. In the console tree, right-click webfarm.woodgrovebank.com and then click Add Host to Cluster.
20. In the Add Host to Cluster: Connect dialog box, in the Host field, type NYC-SVR1 and then click Connect.

Lab Answer Key: Configuring Availability of Network Content and Resources 7
21. Under Interfaces available for configuring a new cluster, click the interface with the 10.10.0.24 IP address, and then click Next.
22. On the Host Parameters page, click Add.
23. In the Add IP Address dialog box, in the IPv4 address field, type 10.10.0.81, press TAB and the Subnet mask field will automatically fill.
24. Click OK, and then click Next.
25. On the Port Rules page, click Finish.
Note: It may take three minutes for the NLB cluster hosts to converge. Wait for both NLB hosts to display a status of Converged before moving to the steps below.
Task 3: Test the NLB cluster
Note: Perform these steps on NYC-DC1
1. Click Start | All Programs | Internet Explorer.
2. In the Internet Explorer address bar, type http://10.10.0.70, and then press ENTER.
3. The IIS 7.0 default page appears.
4. Turn off NYC-SVR1.
5. On NYC-DC1, in the Internet Explorer address bar, type http://10.10.0.70, and then press ENTER.
Results: Even though a NLB Cluster member is unavailable, the web site is still available.
Note: After you have completed the lab exercises closing the VM’s and selecting undo disk is not required for hosted labs. Click the Quit button to exit.

Lab Answer Key: Monitoring and Maintaining Windows Server 2008 Servers 1
Module 14 Lab Answer Key: Monitoring and Maintaining Windows Server 2008 Servers
Contents: Lab A: Identifying Windows Server 2008 Monitoring Requirements
Exercise 1: Evaluating Performance Metrics 2
Exercise 2: Monitoring Performance Metrics 6
Lab B: Configuring Windows Server 2008 Monitoring
Exercise 1: Configuring Data Collector Sets 7
Exercise 2: Monitoring Extension Exercise 8
Exercise 3: Automating Maintenance Tasks 9

2 Lab Answer Key: Monitoring and Maintaining Windows Server 2008 Servers
Lab A: Identifying Windows Server 2008 Monitoring Requirements
Note: If you have already logged on to a virtual machine, skip the
logon task for that particular virtual machine.
Exercise 1: Evaluating Performance Metrics
Task 1: Start each virtual machine and log on 1. In the Lab Launcher, next to 6419A-NYC-DC1, click Launch.
2. In the Lab Launcher, next to 6419A-NYC-SVR1, click Launch.
3. Log on to both virtual machines as WOODGROVEBANK\Administrator with the password Pa$$w0rd.
4. Minimize the Lab Launcher window.
Task 2: Identify performance problems with Windows Server 2008 - Part A 1. On NYC-SVR1, click Start, point to Administrative Tools, and then click
Reliability and Performance Monitor.
2. In the Reliability and Performance Monitor console pane, expand Monitoring Tools, and then click Performance Monitor.
3. In details pane, click the View Log Data button (CTRL+L).
4. In the Performance Monitor Properties dialog box, on the Source tab, click Log files, and then click Add.
5. In the Select Log File dialog box, browse to E:\Mod14\Labfiles\Ex1A.

Lab Answer Key: Monitoring and Maintaining Windows Server 2008 Servers 3
6. Click 6419A-NYC-SVR1-LAB14-EX1A.blg and then click Open.
7. In the Performance Monitor Properties dialog box, click OK.
8. In the Performance Monitor details pane, click Add (CTRL+I).
9. In the Add Counters dialog box, under Available counters, expand Processor, and then click % Processor Time.
10. Under Instances of selected object, click 0, and then click Add.
11. In the Add Counters dialog box, under Available counters, expand System, click Processor Queue Length, click Add, and then click OK.
12. At the bottom of the window, click % Processor Time to view the graph of the CPU usage on NYC-SVR1 and notice that:
• The minimum value is 34 percent
• The maximum value is 100 percent.
• The average value is 82.58 percent.
13. Click Add (CTRL+I).
14. In the Add Counters dialog box, under Available counters, expand Process, and then click % Processor Time.
15. Under Instances of selected object, click <All Instances>, click Add, and then click OK.
16. Review the % Processor Time used by each process. It is useful to use the Highlight button (CTRL+ H) to view each instance. Identify the process that is consuming the CPU.
Answer: The cpustres process is consuming most of the CPU time.
17. Close Reliability and Performance Monitor.

4 Lab Answer Key: Monitoring and Maintaining Windows Server 2008 Servers
Task 3: Identify performance problems with Windows Server 2008 – Part B 1. On NYC-SVR1, click Start, point to Administrative Tools, and then click
Reliability and Performance Monitor.
2. In the Reliability and Performance Monitor console pane, expand Monitoring Tools, and then click Performance Monitor.
3. In the details pane, click View Log Data (CTRL+L).
4. In the Performance Monitor Properties dialog box, on the Source tab, click Log files, and then click Add.
5. In the Select Log File dialog box, browse to E:\Mod14\Labfiles\Ex1B.
6. Click 6419A-NYC-SVR1-LAB14-EX1B.blg and then click Open.
7. In the Performance Monitor Properties dialog box, click OK.
8. In the Performance Monitor details pane, click Add (CTRL+I).
9. In the Add Counters dialog box, under Available counters, expand PhysicalDisk, and then click Avg. Disk Queue Length.
10. Under Instances of selected object, click 0 C:, and then click Add.
11. Under Available counters, click Current Disk Queue Length.
12. Under Instances of selected object, click 0 C:, and then click Add.
13. Under Available counters, click Disk Transfers/sec.
14. Under Instances of selected object, click 0 C:, and then click Add.
15. Under Available counters, expand Process, and then click IO Data Bytes/sec.
16. Under Instances of selected object, click <All Instances>, click Add, and then click OK.
17. Review the IO Data Bytes/sec values for each process. It is useful to use the Highlight button (Ctrl+H) to view each instance. Identify the process that is consuming the disk transfer capacity.
Answer: The explorer process is consuming the disk resources.
18. Close Reliability and Performance Monitor.
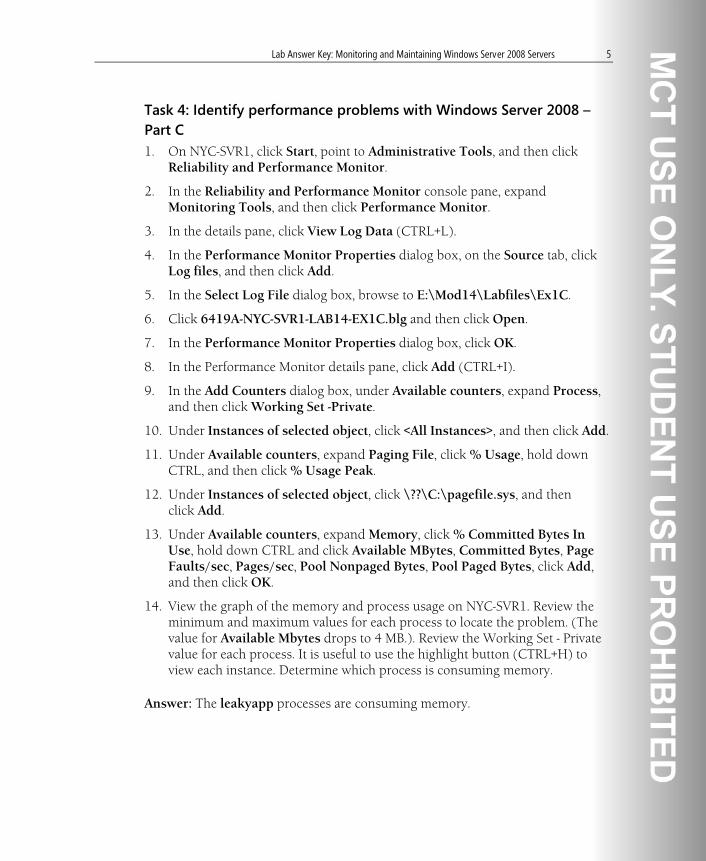
Lab Answer Key: Monitoring and Maintaining Windows Server 2008 Servers 5
Task 4: Identify performance problems with Windows Server 2008 – Part C 1. On NYC-SVR1, click Start, point to Administrative Tools, and then click
Reliability and Performance Monitor.
2. In the Reliability and Performance Monitor console pane, expand Monitoring Tools, and then click Performance Monitor.
3. In the details pane, click View Log Data (CTRL+L).
4. In the Performance Monitor Properties dialog box, on the Source tab, click Log files, and then click Add.
5. In the Select Log File dialog box, browse to E:\Mod14\Labfiles\Ex1C.
6. Click 6419A-NYC-SVR1-LAB14-EX1C.blg and then click Open.
7. In the Performance Monitor Properties dialog box, click OK.
8. In the Performance Monitor details pane, click Add (CTRL+I).
9. In the Add Counters dialog box, under Available counters, expand Process, and then click Working Set -Private.
10. Under Instances of selected object, click <All Instances>, and then click Add.
11. Under Available counters, expand Paging File, click % Usage, hold down CTRL, and then click % Usage Peak.
12. Under Instances of selected object, click \??\C:\pagefile.sys, and then click Add.
13. Under Available counters, expand Memory, click % Committed Bytes In Use, hold down CTRL and click Available MBytes, Committed Bytes, Page Faults/sec, Pages/sec, Pool Nonpaged Bytes, Pool Paged Bytes, click Add, and then click OK.
14. View the graph of the memory and process usage on NYC-SVR1. Review the minimum and maximum values for each process to locate the problem. (The value for Available Mbytes drops to 4 MB.). Review the Working Set - Private value for each process. It is useful to use the highlight button (CTRL+H) to view each instance. Determine which process is consuming memory.
Answer: The leakyapp processes are consuming memory.

6 Lab Answer Key: Monitoring and Maintaining Windows Server 2008 Servers
Exercise 2: Monitoring Performance Metrics
Task 1: Create a data collector set to measure server requirements 1. On NYC-SVR1, in Reliability and Performance Monitor, expand Data
Collector Sets, and then click User Defined.
2. On the Action menu, point to New, and then click Data Collector Set.
3. In the Create new Data Collector Set dialog box, in the Name field, type File Server Monitoring and then click Next.
4. On the Which template would you like to use? page, verify that System Performance is selected, and then click Next.
5. On the Where would you like the data to be saved? page review the default path, and then click Next.
6. On the Create the data collector set? page review the options, and then click Finish.
7. In the Reliability and Performance Monitor details pane, double-click File Server Monitoring, and then double-click Performance Counter.
8. In the Performance Counter Properties dialog box, review the objects and counters, and then click OK.
9. In the console pane, right-click File Server Monitoring, and then click Properties.
10. In the File Server Monitoring Properties dialog box, on the Stop Condition tab, in the Overall duration field type 2 and then click OK.
11. In the console pane, right-click File Server Monitoring, and then click Start.
Note: If you receive an error, click OK, and attempt to start the collector set again.
12. On the Action menu, click Latest Report.
13. After about two minutes, the data will be collected and the report should be shown. Review the collected data.

Lab Answer Key: Monitoring and Maintaining Windows Server 2008 Servers 7
Lab B: Configuring Windows Server 2008 Monitoring Exercise 1: Configuring Data Collector Sets
Task 1: Generate an alert by using a data collector set 1. On NYC-SVR1, in the Reliability and Performance Monitor console pane,
under Data Collector Sets, click User Defined.
2. On the Action menu, point to New, and then click Data Collector Set.
3. In the Create new Data Collector Set dialog box, in the Name field, type High CPU Monitoring
4. Click Create manually (Advanced), and then click Next.
5. On the What type of data do you want to include? page, click Performance Counter Alert, and then click Next.
6. On the Which performance counters would you like to monitor? page, click Add.
7. Under Available counters, expand Processor, and then click % Processor Time.
8. Under Instances of selected object, click 0, click Add, and then click OK.
9. On the Which performance counters would you like to monitor? page, in the Limit field, type 95 and then click Next.
10. On the Create the data collector set? page, click Finish.
11. In the details pane, double-click High CPU Monitoring, and then double-click DataCollector01.
12. In the DataCollector01 Properties dialog box, on the Alert Action tab, select the Log an entry in the application event log check box, and then click OK.
13. Close Reliability and Performance Monitor.

8 Lab Answer Key: Monitoring and Maintaining Windows Server 2008 Servers
Exercise 2: Monitoring Extension Exercise
Task 1: Create a tailored data collector set • Use the Reliability and Performance Monitor to create a data collector set for a
server in your organization.

Lab Answer Key: Monitoring and Maintaining Windows Server 2008 Servers 9
Exercise 3: Automating Maintenance Tasks
Task 1: Forward Directory Service replication error messages to a central location 1. On NYC-DC1, click Start, point to Administrative Tools, and then click
Active Directory Users and Computers.
2. In the Active Directory Users and Computers console pane, expand WoodgroveBank.com, and then click Builtin.
3. In the details pane, right-click Administrators, and then click Properties.
4. In the Administrators Properties dialog box, on the Members tab, click Add.
5. In the Select Users, Contacts, Computers, or Groups dialog box, click Object Types.
6. In the Object Types dialog box, select the Computers check box, and then click OK.
7. In the Select Users, Contacts, Computers, or Groups dialog box, type NYC-SVR1, and then click OK twice.
8. Close Active Directory Users and Computers.
9. On NYC-SVR1, click Start, point to Administrative Tools, and then click Event Viewer.
10. In the Event Viewer console pane, click Subscriptions.
11. In the Event Viewer dialog box, click Yes.
12. In the console pane, right-click Subscriptions, and then click Create Subscription.
13. In the Subscription Properties dialog box, in the Subscription name field, type Replication Errors.
14. Verify that in the Destination log list, Forwarded Events is selected and then click Select Computers.
15. In the Computers dialog box, click Add Domain Computers.

10 Lab Answer Key: Monitoring and Maintaining Windows Server 2008 Servers
16. In the Select Computer dialog box, type NYC-DC1 and then click OK twice.
17. In the Subscription Properties dialog box, click Select Events.
18. In the Query Filter dialog box, on the XML tab, select the Edit query manually check box.
19. In the Event Viewer dialog box, click Yes.
20. In the Query Filter dialog box, type the following, and then click OK.
<QueryList> <Query Id="0" Path="Directory Service"> <Select Path="Directory Service">*[System[(Level=2 or Level=3) and (EventID=1308 or EventID=1864)]]</Select> </Query> </QueryList>
21. In the Subscription Properties dialog box, click OK.
22. Close Event Viewer.
Task 2: Run a script to review disk space 1. On NYC-SVR1, click Start, point to All Programs, click Accessories, and then
click Notepad.
2. Type the following code example into Notepad:
$aryComputers = "NYC-DC1","NYC-SVR1" Set-Variable -name intDriveType -value 3 -option constant foreach ($strComputer in $aryComputers) {"Hard drives on: " + $strComputer Get-WmiObject -class win32_logicaldisk -computername $strComputer | Where {$_.drivetype -eq $intDriveType} | Format-table}
3. On the File menu, click Save As.
4. In the Save As dialog box, in the File name field, type DriveReport.ps1.
5. In the Save as type list, click All Files, and then click Save.
6. Close Notepad.

Lab Answer Key: Monitoring and Maintaining Windows Server 2008 Servers 11
7. Click Start, point to All Programs, click Windows PowerShell 1.0, and then click Windows PowerShell.
8. In the Windows PowerShell window, type Set-ExecutionPolicy unrestricted and then press ENTER.
Note: This command allows you to run scripts that are unsigned.
9. Type C:\Users\Administrator.Woodgrovebank\Documents \DriveReport.ps1 and then press ENTER.
10. Review the results of the script.
11. Type exit, and then press ENTER.
Task 3: Close all virtual machines, and discard undo disks 1. For each virtual machine that is running, close the Virtual Machine Remote
Control (VMRC) window.
2. In the Close box, select Turn off machine and discard changes, and then click OK.
Note: After you have completed the lab exercises closing the VM’s and selecting undo disk is not required for hosted labs. Click the Quit button to exit.

Lab Answer Key: Managing Windows Server 2008 Backup and Restore 1
Module 15 Lab Answer Key: Managing Windows Server 2008 Backup and Restore
Contents: Lab A: Planning Windows Server 2008 Backup Policy
Exercise 1: Evaluating the Existing Backup Plan 2
Exercise 2: Updating the Backup Policy 4
Exercise 3: Reviewing Backup Policy and Plans 5
Exercise 4: Implementing the Backup Policy 5
Lab B: Planning Windows Server 2008 Restore
Exercise 1: Evaluating Backup Data 8
Exercise 2: Planning a Restore 10
Exercise 3: Investigating a Failed Restore 11
Exercise 4: Restoring System State Data 12
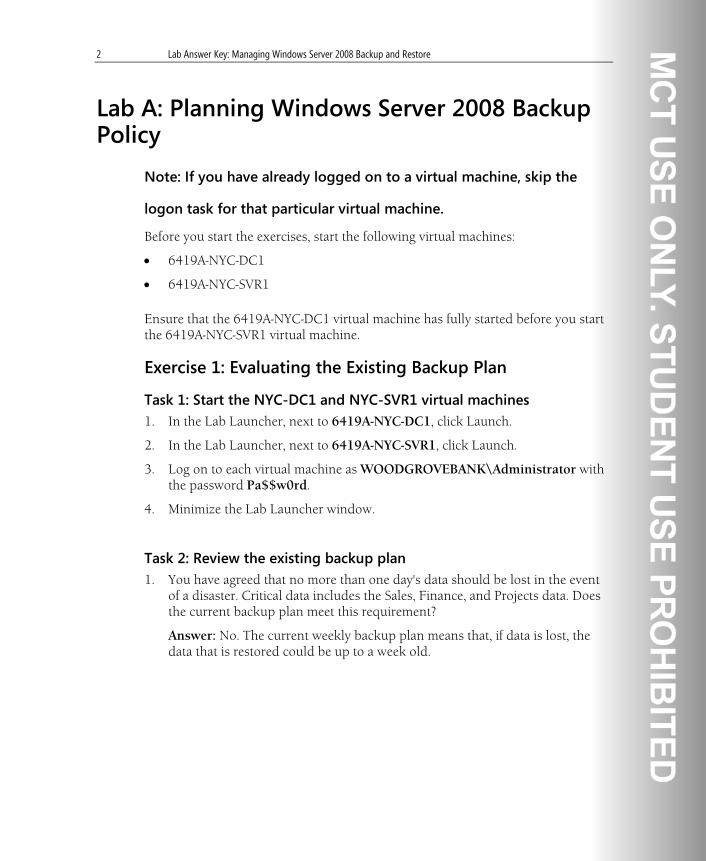
2 Lab Answer Key: Managing Windows Server 2008 Backup and Restore
Lab A: Planning Windows Server 2008 Backup Policy
Note: If you have already logged on to a virtual machine, skip the
logon task for that particular virtual machine.
Before you start the exercises, start the following virtual machines:
• 6419A-NYC-DC1
• 6419A-NYC-SVR1
Ensure that the 6419A-NYC-DC1 virtual machine has fully started before you start the 6419A-NYC-SVR1 virtual machine.
Exercise 1: Evaluating the Existing Backup Plan
Task 1: Start the NYC-DC1 and NYC-SVR1 virtual machines 1. In the Lab Launcher, next to 6419A-NYC-DC1, click Launch.
2. In the Lab Launcher, next to 6419A-NYC-SVR1, click Launch.
3. Log on to each virtual machine as WOODGROVEBANK\Administrator with the password Pa$$w0rd.
4. Minimize the Lab Launcher window.
Task 2: Review the existing backup plan 1. You have agreed that no more than one day's data should be lost in the event
of a disaster. Critical data includes the Sales, Finance, and Projects data. Does the current backup plan meet this requirement?
Answer: No. The current weekly backup plan means that, if data is lost, the data that is restored could be up to a week old.
Lab Answer Key: Managing Windows Server 2008 Backup and Restore 3
2. Currently, you copy the Human Resources confidential data onto a removable hard disk that is attached to a computer in the Human Resources office. This task is performed weekly by using a script to preserve the encryption on the files. What are the consequences of this process and how would you address them?
Answer: The issue is that the confidential files are on an easily removable device in an unsecured office. You could provide a secure data storage device, or you could place the removable hard disk in a secure area after the backup job is complete.
3. You have also agreed that, if a server fails, you should be able to restore that server, including all installed roles, features, applications, and security identity, in six hours. Does the current backup plan enable you to restore the servers in this way?
Answer: No. No system state backups are being performed on the servers, so the servers must be rebuilt in the event of a failure. This would make restoring the original configuration very difficult.
Task 3: Propose changes to the backup plan 1. Propose an appropriate backup frequency for the shares in the following table:
Backup Frequency
Sales Daily
Finance Daily
Human Resources Daily
Technical Library Weekly
Projects Daily, or perhaps more frequently
2. How would you address the requirement to restore the servers and how
frequently would you back up the servers?
Answer: Back up the system state data on the servers so that you can restore them later. The backup should be at an appropriate frequency, so this will depend on how often the server configuration is changed. Typical schedules may be weekly or monthly.

4 Lab Answer Key: Managing Windows Server 2008 Backup and Restore
Exercise 2: Updating the Backup Policy
Task 1: Create a backup strategy to comply with the SLA 1. You should be able to restore critical data, which includes the Sales, Finance,
and Projects shares, as quickly as possible in the event of a disaster. What factors affect how quickly you can restore data?
Answer: The size of the backed-up data and the backup hardware and media both affect how quickly you can restore data.
2. Given that you have a limited budget to meet the SLA requirements, how could you maximize your budget while providing backup for the entire network data for which you are responsible?
Answer: Consider using a tiered approach to back up and restore: use faster backup hardware and media for critical data, which costs more, but use slower backup hardware and media for noncritical data to reduce costs.
Task 2: Create a backup strategy to comply with legal requirements • How will you ensure that the required data is stored for the minimum legal
requirement period and that the data is available for audit purposes when it is required?
Answer: Various approaches are valid, such as:
• Create separate archive backups for legal compliance purposes. Include only the required data in these archives. A user who has restore privilege is required to access the data if an audit is performed. You must also consider the storage lifetime of the media—a tape may not retain seven-year-old data if it is not refreshed.
• Store the legal compliance data on a separate network device such as another server or archive device. This device may offer policies to help you control retention requirements.

Lab Answer Key: Managing Windows Server 2008 Backup and Restore 5
Exercise 3: Reviewing Backup Policy and Plans The main task for this exercise is to discuss your solutions with the class.
Exercise 4: Implementing the Backup Policy
Task 1: Initialize the backup storage volume 1. On NYC-SVR1, click Start, point to Administrative Tools, and then click
Computer Management.
2. In the Computer Management console pane, click Disk Management.
3. In the Initialize Disk dialog box, click OK.
4. In the details pane, next to Disk 2, right-click Unallocated, and then click New Simple Volume.
5. In the New Simple Volume Wizard, click Next.
6. On the Specify Volume Size page, review the configuration options, and then click Next.
7. On the Assign Drive Letter or Path page, review the configuration options, and then click Next.
8. On the Format Partition page, in the Volume label field, type Backup.
9. Select the Perform a quick format check box, and then click Next.
10. On the Completing the New Simple Volume Wizard page, click Finish.
11. When the format operation is complete, close Computer Management.
Task 2: Create the new backup schedule 1. On NYC-SVR1, click Start, point to Administrative Tools, and then click
Windows Server Backup.
2. In the Windows Server Backup window, on the Action menu, click Backup Schedule.
3. In the Backup Schedule Wizard, click Next.
4. On the Select backup configuration page, click Custom, and then click Next.

6 Lab Answer Key: Managing Windows Server 2008 Backup and Restore
5. On the Select backup items page, clear the Allfiles (E:) and Backup (D:) check boxes, and then click Next.
6. On the Specify backup time page, click More than once a day.
7. Under Available time, click 12:30 PM, click Add, and then click Next.
8. On the Select destination disk page, click Show All Available Disks.
9. In the Show All Available Disks dialog box, select the Disk 2 check box, and then click OK.
10. On the Select destination disk page, select the Disk 2 check box, and then click Next.
11. In the Windows Server Backup dialog box, click Yes.
12. On the Label destination disk page, click Next.
13. On the Confirmation page, click Finish.
14. On the Summary page, click Close.
15. Close Windows Server Backup.
Task 3: Backup the Domain Recovery Agent’s Private Key 1. On NYC-DC1, click Start, point to Administrative Tools, and then click
Group Policy Management.
2. In the Group Policy Management window, ensure Forest: WoodgroveBank.com, Domains, WoodgroveBank.com is expanded, and then click Group Policy Objects.
3. In the details pane, right-click Default Group Policy and click Edit.
4. In the Group Policy Management Editor window, under Computer Configuration, expand Policies, expand Windows Settings, expand Security Settings, expand Public Key Policies, and then click Encrypting File System.
5. In the details pane, right-click Administrator, point to All Tasks, and then click Export.
6. In the Certificate Export Wizard, click Next.
Lab Answer Key: Managing Windows Server 2008 Backup and Restore 7
7. On the Export Private Key page, select the Yes, export the private key radio button, and then click Next.
8. On the Export File Format page, click Next.
9. On the Password page, in the Password and Type and confirm password (mandatory) fields, type Pa$$w0rd, and then click Next.
10. On the File to Export page, in the File Name field, type C:\AdminKey.pfx, and then click Next.
11. On the Completing the Certificate Export Wizard page, click Finish.
12. In the information dialog box, click OK.
13. Close all windows
Task 4: Lab Shutdown 1. For each virtual machine that is running, close the Virtual Machine Remote
Control (VMRC) window.
2. In the Close box, select Turn off machine and discard changes, and then click OK.
3. Close the 6419A Lab Launcher.
8 Lab Answer Key: Managing Windows Server 2008 Backup and Restore
Lab B: Planning Windows Server 2008 Restore
Exercise 1: Evaluating Backup Data
Task 1: Start the NYC-DC1, NYC-SVR1, and NYC-INF virtual machines 1. In the Lab Launcher, next to 6419A-NYC-DC1, click Launch.
2. In the Lab Launcher, next to 6419A-NYC-SVR1, click Launch.
3. In the Lab Launcher, next to 6419A-NYC-INF, click Launch
4. Log on to each virtual machine as WOODGROVEBANK\Administrator with the password Pa$$w0rd.
5. Minimize the Lab Launcher window.
Task 2: Evaluate file restoration On Thursday, a member of the HR department asks you to restore an important file, which he created two days ago but someone subsequently deleted.
1. Why can you not restore the file?
Answer: The file was created after the last backup was performed, so the file cannot be restored.
2. How could you change the backup strategy so that it is possible to restore files that have changed more recently?
Answer: You could perform daily backups to enable you to restore files that are more recent. However, because a full backup takes 20 hours, you must perform incremental backups to reduce the backup time. You can configure this by creating a schedule in Windows Server Backup.
3. What other effects would a change in backup strategy cause?
Answer: Backup time would be significantly reduced after the first backup. Backup storage requirements would be reduced because subsequent backups store only changes instead of all the data.

Lab Answer Key: Managing Windows Server 2008 Backup and Restore 9
Task 3: Restore EFS files Members of the HR department have encrypted some of the files that are stored on the HR share by using EFS. The HR director asks you to restore some encrypted confidential files that were originally written by Tommy Hartono, who has since left the company. After you have restored the files, how can you provide access to the files for the HR director?
To provide access to the restored encrypted files, you require either the key of the authorized user who encrypted the file (Tommy Hartono) or the key of a designated data recovery agent (DRA).
Task 3: Evaluate server restore On Wednesday, the server, NYC-FS1, suffers a hardware failure. Both the C: and E: volumes are lost.
1. How can you restore the server and data?
Answer: To restore the server, you must perform the following tasks:
a. Reinstall the Windows Server 2008 operating system.
b. Reinstall any required Windows Server 2008 roles and features such as the file server role and the Windows Server Backup feature.
c. Reinstall any previously installed applications such as management tools or antivirus software.
d. Reconfigure the E: volume.
e. Restore the data to the E: volume.
2. How could you make the restore process easier?
Answer: Regularly backing up the C: volume, including the system state data, would make the server restore easier because you could restore the server from the Windows Recovery Environment (Windows RE).

10 Lab Answer Key: Managing Windows Server 2008 Backup and Restore
Exercise 2: Planning a Restore
Task 1: Plan a trial restore 1. In the following table, list the hardware and software requirements for
performing a trial restore.
Requirements
Additional server (physical or virtual)
Backup hardware; for example, tape drive, connection to network, or connection to storage area network (SAN)
Access to backup media; for example, tapes
Windows Server 2008 source (DVD)
Backup software such as third-party backup software
2. What additional consideration must you make for performing a trial restore of
the HR data on NYC-FS1?
Answer: You must retrieve the off-site backup media for testing.
3. With what types of backup data should you perform a trial restore?
Answer: You should perform trial restores on all types of backup, including volume backups, complete server backups, and database backups.
Lab Answer Key: Managing Windows Server 2008 Backup and Restore 11
Exercise 3: Investigating a Failed Restore
Task 1: Determine the reason for the wrong file version 1. On NYC-SVR1, click Start, and then click Server Manager.
2. In the Server Manager console pane, expand Diagnostics, expand Event Viewer, expand Applications and Services Logs, expand Microsoft, expand Windows, expand Backup, and then click Operational.
This is where you can view any issues that occur with a restore operation.
Task 2: Create a Restore Operators group 1. In the Server Manager console pane, expand Configuration, expand Local
Users and Groups, and then click Groups.
2. Right-click Groups, and then click New Group.
3. In the New Group dialog box, in the Group name field, type Restore Operators, click Create, and then, click Close.
4. Close Server Manager.
Task 3: Separate the Backup and Restore roles 1. Click Start, point to Administrative Tools, and then click Local Security
Policy.
2. In the Local Security Policy console pane, expand Local Policies, and then click User Rights Assignment.
3. In the details pane, double-click Restore files and directories.
4. In the Restore files and directories Properties dialog box, on the Local Security Setting tab, click Backup Operators, and then click Remove.
5. Click Add User or Group.
6. In the Select Users, Computers, or Groups dialog box, click Locations.
7. In the Locations dialog box, click NYC-SVR1, and then click OK.
8. In the Select Users or Groups dialog box, click Object Types.

12 Lab Answer Key: Managing Windows Server 2008 Backup and Restore
9. In the Object Types dialog box, select the Groups check box, and then click OK.
10. In the Select Users or Groups dialog box, type Restore Operators and then click OK twice.
11. Close Local Security Policy.
Exercise 4: Restoring System State Data
Task 1: Backup and restore specific files and folders 1. On NYC-INF Click Start, point to Administrative Tools, and then click
Windows Server Backup.
2. In the Windows Server Backup window, in the Actions pane, click Backup Once.
3. On the Backup options page, ensure that Different options radio button is selected, and then click Next.
4. On the Select backup configuration page, click Custom, and then click Next.
5. On the Select backup items page, clear the Enable system recovery check box.
6. Select the Allfiles (E:) check box, and then click Next.
7. On the Specify destination type page, click Remote shared folder, and then click Next.
8. On the Specify remote folder page, type \\NYC-DC1\Data, and then click Next.
9. On the Specify advanced option page, click VSS full backup, and then click Next.
10. On the Confirmation page, click Backup.
11. The backup will take up to 10 minutes to complete. When it is finished, click Close.
Results: You should have a full backup of the E drive now.
12. Click Start and then click Computer.
13. In the Computer window, browse to E\Mod15.
14. Right-click Document 3.txt and then click Delete.

Lab Answer Key: Managing Windows Server 2008 Backup and Restore 13
15. In the Delete File dialog box, click Yes.
16. In the Windows Server Backup window, in the Actions pane, click Recover.
17. On the Getting started page, click Next.
18. On the Select backup date, click Next.
19. On the Select recovery type page, verify that Files and folders is selected, and then click Next.
20. On the Select items to recover page, under Available items, expand NYC-INF, expand Allfiles (E :)and then click Mod15.
21. In the details pane, click Document 3.txt, and then click Next.
22. On the Specify recovery options page, review the configuration options, and then click Next.
23. On the Confirmation page, click Recover.
24. When the restore operation is complete, click Close.
25. Close Windows Server Backup.
26. In Windows Explorer, note that Document 3.txt is present.
27. Close Windows Explorer.
Task 2: Check the state of the DHCP service 1. On NYC-INF, click Start, point to Administrative Tools, and then click
Services.
2. In the Services details pane, double-click DHCPServer.
3. In the Services dialog box, review the error message, and then click OK.
4. In the second Services dialog box, review the error message, and then click OK.
5. Close Services.

14 Lab Answer Key: Managing Windows Server 2008 Backup and Restore
Task 3: Perform a system state restore 1. Click Start, and then click Command Prompt.
2. In the Administrator: Command Prompt window, type wbadmin get versions -backuptarget:e: and then press ENTER.
3. Take note of the version identifier.
4. Type wbadmin start systemstaterecovery -version:<version identifier> -backuptarget:e: and then press ENTER.
5. When prompted to start the system state recovery operation, press Y, and then press ENTER.
6. After a short while, you may press Ctrl+C to cancel the restore.
Note: A full system restore would take a considerable amount of time to complete, but once it is done, the DHCP Server service will start successfully.
Results: You have successfully backed up and restored files using the Windows Server Backup utility.
Task 4: Lab Shutdown 1. For each virtual machine that is running, close the Virtual Machine Remote
Control (VMRC) window.
2. In the Close box, select Turn off machine and discard changes, and then click OK.
3. Close the 6419A Lab Launcher.
Note: After you have completed the lab exercises closing the VM’s and selecting undo disk is not required for hosted labs. Click the Quit button to exit.