visual basic 5-6 course part 10
TRANSCRIPT

8/9/2019 Visual Basic 5-6 Course Part 10
http://slidepdf.com/reader/full/visual-basic-5-6-course-part-10 1/23
Visual Basic 5Programming - 10
A Specialised Training Course

8/9/2019 Visual Basic 5-6 Course Part 10
http://slidepdf.com/reader/full/visual-basic-5-6-course-part-10 2/23
Visual Basic Book 10 © Mark Collins 1999 Page 1
ContentsERROR HANDLING AND DEBUGGING ......................................................... .................................... 2
ERROR HANDLING..................... ............................................................ .............................................. 2
ERROR HANDLING FUNDAMENTALS...................................... ........................................................ 2
SETTING THE ERROR TRAP.............................................. ........................................................... ....... 3
ON ERROR STATEMENT................................ ........................................................... ........................... 3HANDLING THE ERROR .................................................... ........................................................... ....... 4
STRUCTURING A PROCEDURE THAT INCLUDES ERROR HANDLING....................................... 4
RETURN TO NORMAL PROCESSING..................... ........................................................... ................. 6
PUTTING THINGS OFF ....................................................... ........................................................... ....... 6
DISABLING ERROR HANDLING....................................... ........................................................... ....... 6
GUIDELINES FOR LARGE PROJECTS.................................................... .............................................. 7
CENTRALISED ERROR HANDLING FUNDAMENTALS........................................................... ....... 7
DEBUGGING .......................................................... ........................................................... ........................... 7
LOGICAL ERRORS .................................................... ........................................................... ................. 8
COMPILE ERRORS.................................................... ........................................................... ................. 8
BUG AVOIDANCE.... ........................................................... ........................................................... ....... 8
DEBUGGER FACILITIES .................................................... ........................................................... ....... 9OVERVIEW OF FACILITIES....... ............................................................ ............................................ 10
FACILITY ................................................... ............................................................ .................................. 10
DESCRIPTION....................................................... ........................................................... ......................... 10
ADDING BREAKPOINTS INTO CODE ............................................................ .................................. 10
INVESTIGATING PROGRAM BEHAVIOUR FURTHER................................ .................................. 11
STEP INTO.................................................. ............................................................ .................................. 11
STEP OUT................................................... ............................................................ .................................. 11
STEP OVER .......................................................... ........................................................... ......................... 11
RUN TO CURSOR .................................................. ........................................................... ......................... 11
NEXT STATEMENT ......................................................... ........................................................... ............... 11
SHOWING NEXT STATEMENT ................................................... ........................................................... ..... 12
USING WATCH EXPRESSIONS ................................................... ...................................................... 12
MONITORING THE CALL STACK........................... ........................................................... ............... 12
THE IMMEDIATE WINDOW ........................................................ ...................................................... 13
THE DEBUG OBJECT .......................................................... ........................................................... ..... 13
USING THE IMMEDIATE WINDOW ..................................................... ............................................ 13
EXPLICITLY ACCESSING VALUES........................................................... ............................................ 13
EXPLICITLY ACCESSING VALUES........................................................... ............................................ 13
VERIFYING CODE WITH ASSERTIONS........................... ........................................................... ..... 15
OTIMISING YOUR PROJECT ....................................................... ...................................................... 15
OPTIMINISATION ISSUES ........................................................... ...................................................... 15
OPTIMISING VISUAL BASIC PROJECTS ....................................................... .................................. 16
AVOID VARIANT VARIABLES.................................................... ........................................................... ..... 16
USE INTEGER MATH AND LONG DATA TYPES .......................................................... .................................. 16
CACHING FREQUENTLY USED PROPERTIES AS VARIABLES......................................................... ............... 16USE INLINE PROCEDURES ........................................................ ........................................................... ..... 17
USE CONSTANTS.................................................. ........................................................... ......................... 17
PASSING ARGUMENTS BYVAL........................................................... ...................................................... 17
TYPED OPTIONAL ARGUMENTS ......................................................... ...................................................... 17
USE COLLECTIONS ........................................................ ........................................................... ............... 17
USE EARLY BINDING ..................................................... ........................................................... ............... 17
CHOOSE SCREEN GRAPHICS TECHNIQUES......................................................... ......................... 17
OPTIMISING FOR PERCEIVED SPEED............................. ........................................................... ..... 18
OPTIMISING FOR SIZE ....................................................... ........................................................... ..... 18
DISTRIBUTION OF YOUR PROJECT .................................................... ............................................ 20
CREATING AN INSTALL PROGRAM................................................................................. ............... 20
CREATING A CUSTOM INSTALL PROGRAM........................................................ ......................... 21
UNINSTALL REMOVAL FAILURES................................................................ .................................. 22

8/9/2019 Visual Basic 5-6 Course Part 10
http://slidepdf.com/reader/full/visual-basic-5-6-course-part-10 3/23
Visual Basic Book 10 © Mark Collins 1999 Page 2
ERROR HANDLING AND DEBUGGING
As your programs get bigger and more complex, then debugging and error trapping
become essential part of your project and can take up significant proportion of your
resources. It is a necessary evil to provide robustness and reliability into your project,
otherwise your clients will contact you very quickly when your program hits an error andcrashes or locks up on a regular basis.
ERROR HANDLING
So far we have concentrated on the positive aspects of computing, examining how to
produce code to perform certain tasks without considering how to cope when things go
wrong. Errors normally occur due to logical problems within the code or run-time
exceptions/events that can occur at any time.
The run time errors are exceptions that are normally out of our control, such as…• floppy disks being taken out of its drive before or during loading/saving of files
• enough disk space to save files
• files being moved, deleted or renamed
• network drives disconnecting or remapped
• incorrect user input
• mathematical errors i.e. division by zero, overflow/underflow
Normally errors occur in your code are relatively minor bugs that may produce odd
behaviour, such as, controls being set with incorrect properties or the cursor not changing
back to the default shape after program was busy working or waiting for results. More
severe bugs can cause the program to inadvertently crash the program or worst still, even
lock the computer and other applications up.
In these situations, it is quite possible that the program would have quit unexpectedly and
quite possibly losing data as well. Obviously, if we are to produce applications to a
professional standard, then we need to incorporate error handling. An error handler is a
routine for trapping and responding to the errors your program comes across and is
needed in any procedures where you anticipate the possibility of an error occurring.
ERROR HANDLING FUNDAMENTALS
When setting up an error handling routine we must first add a line label to mark the
commencement of the error handling routine. The label is usually a descriptive name,
such as, CheckError: and the name must be followed by a colon. Normal practice is to put
the error handling code is at the end of the procedure with an Exit statement immediately
before the line label so that the procedure can terminate without executing the error
handling code if no error has occurred.

8/9/2019 Visual Basic 5-6 Course Part 10
http://slidepdf.com/reader/full/visual-basic-5-6-course-part-10 4/23
Visual Basic Book 10 © Mark Collins 1999 Page 3
The main body of the error handling routine normally consists of a either a…
• If … Then… Else statement
• Select case… Case Else statement
The programmer has to determine what errors are likely to occur and provide appropriate
messages and course of actions to recover from each error. The Else or Case Else clause
is important to the error handling routine to allow for any unexpected errors to be
handled. The Err object provides the appropriate error number related to the error
encountered and a string giving the description of the type of error that has occurred. The
Err.Number is tested in the If … Then… Else or Select case… Case Else statements to
find the type of error that has occurred and take the appropriate action.
The basic technique for handling trappable errors involves four steps…
• Set up the Error trap
• Handle the error
• Take corrective action
• Return if possible to normal processing
SETTING THE ERROR TRAP
When your program comes across an error the ON ERROR statement is executed and
specifies an error handler that becomes active. While only one error trap can be enabled at
any one time in any given procedure, you can create several alternative error traps and
enable different ones at different times.
ON ERROR STATEMENT
This enables the trap and specifies an error handling routine within the active procedure
where the error occurred. An error handler remains active from the time a run-time error
has been trapped until a Resume, Exit Sub, or Exit Function statement is executed in the
error handler. You will notice that an error handling routine is not a SUB or Function
procedure, but a block of code marked by a line label or line number within the same
procedure as the code generating the error.
If you don’t use an On Error statement then any run-time error that occurs is fatal and the
program immediate halts after the error has occurred, tells you the error number and
terminates itself. There are five ways to handle an error…
• ON Error GoTo line [number / label]
• ON Error Resume 0
• ON Error Resume Next
• ON Error Resume Line
• ON Error GoTo 0

8/9/2019 Visual Basic 5-6 Course Part 10
http://slidepdf.com/reader/full/visual-basic-5-6-course-part-10 5/23
Visual Basic Book 10 © Mark Collins 1999 Page 4
The GoTo line option specifies the starting point for the error handling routine, this is a
line label or a line number. If a run-time error occurs, program control branches to that
point. The specified line must be in the same procedure as the ON Error statement
The Resume 0 option resumes execution with the same statement that caused the error
and is used to repeat an operation after the correcting the condition that caused the error.The Resume Next option specifies that when a run-time error occurs, control goes to the
statement immediately following the statement in which the error has occurred. If the
error occurred outside a procedure that contains the error handling, then the next
statement after the procedural call is executed.
The Resume Line option resumes execution at the line label or line number (non zero
line number) that is within the same procedure as the error handler.
The GoTo 0 option disables any error handler in the current procedure.
HANDLING THE ERRORThe error handling routine relies on the Err.object to provide a value that relates to the
cause of the encountered error. The value from the Err reflects only the most recent error.
You can use the Err.Number to return the error number or Err.Description to return the
error message associated with any given run-time error number. Note, that different
versions of Visual Basic have varying descriptions for the same error, therefore use only
the Err.Number to identify the specific error that has occurred.
STRUCTURING A PROCEDURE THAT INCLUDES ERROR HANDLING
Error handling code can be placed anywhere in a procedure, although it is common
practice to place it at the end. To prevent error-handling code from being executed whenno error has occurred, place an Exit Sub or Exit Function statement immediately ahead
of the error-handling routine, as shown in the following example:
Sub AnyProcedure()
On Error GoTo handleError
… ‘ code that may generate errors
Exit Sub ‘ no error has occurred so exit procedure
HandleError: ‘ Line reference to start error handling code
… ‘ code to handle errors
Resume Next
End Sub
In this example, the error handling code follows the Exit Sub statement and precedes the
End Sub statement to partition it from the normal execution of flow of the procedure.
Within the error handling code itself there several options, depending on how predictable
the likely errors are. If the error is not predictable, the minimum you should consider is to
display a fairly meaningful error message to the user by using the Err object functions…

8/9/2019 Visual Basic 5-6 Course Part 10
http://slidepdf.com/reader/full/visual-basic-5-6-course-part-10 6/23
Visual Basic Book 10 © Mark Collins 1999 Page 5
Dim ErrorMessage as String
ErrorMessage = “Error: “ & Err.Number & “ “ & Err.Description
MsgBox ErrorMessage, vbExamation
Even if certain errors are predictable and handled specifically it is worth including such a
line for exceptions. In the help files of Visual Basic, you will find a large list of trappable
errors. Normal practice is to include the likely errors in a select… case… statement to
handle each specifically. Also if… then… else… statement can be used, but with multiple
errors this approach becomes unwieldy due to all the if statements and becomes difficult
to read and follow. Below is an example of using the case statement to handle errors
relating to invalid filenames and disk drives.
Sub AnyProcedure()
Dim ErrorMessage as String
… ‘ Normal code body of procedure
On Error GoTo HandleError
Exit Function ‘ used to finish procedure under normal no error condition
HandleError: ‘ Line reference
Select Case Err.Number ‘ uses the error number for testing error type
Case 52, 64
MsgBox “Your filename has invalid characters in it”
Case 71
MsgBox “Put disk in drive or make sure its not write protected”
Case 68
MsgBox “Drive was not available”
Case ElseErrorMessage = “Error: “ & Err.Number & “ “ & Err.Description
MsgBox ErrorMessage, vbExamation
End Select
Resume Next
End Sub

8/9/2019 Visual Basic 5-6 Course Part 10
http://slidepdf.com/reader/full/visual-basic-5-6-course-part-10 7/23
Visual Basic Book 10 © Mark Collins 1999 Page 6
RETURN TO NORMAL PROCESSING
The above examples have an enabled error handler and is active for that procedure when
the on error is executed. An active error handler is the one that is currently being
executed. Theactive
error handler can only be used when it has been enabled to servicethe errors, i.e. hasn’t been turned off.
Depending on the severity of the error it may be possible to resume where the code last
left off before transferring to the error handler or it may need to pass the error to another
error handler along the error handling hierarchy.
Supposing, if an event procedure A called procedure B which then called function C and
an error occurred in C and this procedure doesn’t have a valid error handler or can’t
provide a valid value; then Visual Basic starts to search backwards and propagates back
up the calling procedure list to find an enabled error handler. As function C hasn’t
handled the error, procedure B then attempts to handle the error, but if no error handler is
available, it is then passed onto A. If A can’t handle the error and Visual Basic doesn’tencounter an error handler anywhere in the call list then it takes control by displaying the
error and exiting the application.
Note that the program continues to handle the error, but not where it was encountered i.e.
in function C and this can cause confusion to programmers, but it is also a useful way for
Visual Basic to tidy up the error handling. The effect of the propagation up the error
handling hierarchy of the call list is hard to predict as the error handling may use Resume
or Resume Next statements and this has implications as how the error is handled and is
propagated up the call list.
PUTTING THINGS OFF
In life, when there are problems, it is sometimes better to put things off until later. The
same concept applies here and may also be a familiar concept to C programmers.
This is what happens when we use the On Error Resume Next option. When an error
occurs it is registered, but the next line is processed regardless. Later on in the procedure
you can check the return value from the Err object to see if an error has occurred. If there
was no error then the Err object will return 0 (zero).
DISABLING ERROR HANDLING
The last part of the puzzle is to use the On Error GoTo 0 option. This disables any errorhandling in the current procedure and an error may now cause problems.

8/9/2019 Visual Basic 5-6 Course Part 10
http://slidepdf.com/reader/full/visual-basic-5-6-course-part-10 8/23
Visual Basic Book 10 © Mark Collins 1999 Page 7
GUIDELINES FOR LARGE PROJECTS
When large projects employ multiple modules, then the error handling and propagation
makes the error handling quite complex and the following guidelines should be
employed…
1. Use the Err object Raise method to regenerate an error so that the application will try to
correct the error and if it isn’t handled then Visual Basic will display any error message
that isn’t handled. This helps aid testing your project by uncovering any inadequate error
handlers. Be aware that if the Raise method is only used, then the application, when an
error occurs will terminate directly after displaying the error without allowing the user to
save any data, etc.
2. The Clear method should be used directly after handling the error, particularly with in-
line error handling with On Resume Next statement. Normally Visual Basic automatically
clears the error when Resume, Exit Sub, Exit Function or On Error statements are
encountered.
3. Use a fail-safe error handling procedure that all your error handlers can call as the final
last resort if they can’t handle the error. This procedure can provide an opportunity to tidy
up any unsaved data and any other house tidying jobs (unloading of forms) before the
application is terminated.
CENTRALISED ERROR HANDLING FUNDAMENTALS
In the previous examples we have talked about error handling at procedure level, but as
you write more projects, you will notice that the same error handling code is being used
again. Professional programmers have a set of standard generic error handling codemodules that can be attached to new projects.
Centralised code modules will help reduce the amount of code being written and as they
have already been used in other projects, then they should work and handle the common
error situations correctly i.e. drive or file related errors, etc. Generally constants are
defined for the common error codes and are made public and are declared in a single
standard code module ready for inserting into new projects.
DEBUGGING
The IDE has an extensive debugging environment that is extremely helpful in analysingand locating the source of bugs within your program. There are other more advanced add-
on applications that can be used to interrogate your programs and performance related
problems, but are outside the scope of this course.
It is well worth knowing the debugging environment features available, as they will help
guide you to the location of bugs with relative ease. Novice programmers tend to clear
the error message produced by the debugger to look at the code, but the message from the
debugger gives details of the related problem about the bug in your code. Understanding
about what the debugger is telling you and bug resolution becomes a lot quicker when you
have a better understanding of what the associated problem is.
8/9/2019 Visual Basic 5-6 Course Part 10
http://slidepdf.com/reader/full/visual-basic-5-6-course-part-10 9/23
Visual Basic Book 10 © Mark Collins 1999 Page 8
As your projects get larger, then their complexity becomes greater and generally bugs are
more likely to be present as the programmer can’t fully realise all the implications and
interdependencies related to the project. This also means that bug resolution tends to
become more difficult to irradiate and fix.
There are three main types of error that can occur during our program execution…
• Logical program errors
• Compile errors
• Run-time errors (already covered)
LOGICAL ERRORS
Logical errors can be very elusive and difficult to resolve as the program can run without
any syntactical errors, but may perform invalid calculations, occasionally produceincorrect results or even unexpected behaviour.
COMPILE ERRORS
These errors arise from incorrectly constructed code within your project i.e. normally they
extraneous code that shouldn’t be there or syntactically incorrectly constructed code.
As Visual Basic is normally run within the IDE and is interpreted, this means that only the
syntax errors and program behaviour encountered during the running of the program will
be found. Any code that hasn’t been run i.e. hasn’t been directly executed will not show
up as having any errors. So if the programmer doesn’t use all of the features of the
program and their various combinations of use, then it is unlikely that all of the bugs have
been found.
BUG AVOIDANCE
Due to the complexity of programs there will always be bugs, but how can we help reduce
common errors or try to avoid the introduction of them? The common errors can usually
put down to typing errors, weak type checking of data types used or confusing one control
for another and invoking the incorrect method or control.
There are several ways that we can help reduce or eliminate common bugs from our
projects…
• Well designed projects using the appropriate methodology to analyse and design
the data, events, behaviour, procedures and functions required
• Produce stronger type checking by using the Option Explicit by setting the check
box for Required Variable Declaration in the tabbed dialogue under Tools,
Options, Editor menu and explicitly reference data types and objects. Do not use
variant data types unless absolutely necessary
• Use Microsoft’s naming convention or other naming scheme for all variables,
constants and controls used in project

8/9/2019 Visual Basic 5-6 Course Part 10
http://slidepdf.com/reader/full/visual-basic-5-6-course-part-10 10/23
Visual Basic Book 10 © Mark Collins 1999 Page 9
• Use the other options in the Tools, Options, Editor tabbed dialogue menu to
reduce typing and syntax errors
1. Auto syntax checking – checks correct syntax of written line of code
2. Auto list members – reduce typing/syntax errors by logical completion of
statement
3. Auto Quick info – reduce typing/syntax errors of parameters into procedures
and functions
4. Auto Data tips – shows variable current value that the mouse cursor is over
5. Auto indent - makes program code blocks more readable
There are various techniques that the professional programmers can employ to provide
wide covering testing of projects, but these methodical approaches are rather too
extensive for smaller projects to use, never the less, they are still appropriate. In this partof the course, it is intended to show you the Visual Basic debugger facilities to aid bug
resolution in your projects.
DEBUGGER FACILITIES
Start
Break
End
Toggle
Breakpoint
Step
Into
Step
Over
Step
Out
Locals
Window
Immediate
Window
Watch
Window
Quick
watch
Call
Stack

8/9/2019 Visual Basic 5-6 Course Part 10
http://slidepdf.com/reader/full/visual-basic-5-6-course-part-10 11/23
Visual Basic Book 10 © Mark Collins 1999 Page 10
OVERVIEW OF FACILITIES
Facility DescriptionStart Starts program and button changes to continue, if in break
mode
Break Temporarily halts program execution, click button to
resume program execution
End Terminates program execution and returns to IDE design
mode
Toggle
Breakpoint
Clears/sets breakpoint at current line
Step Into Executes one program statement at a time
Step Over Executes current procedure/function call and halts at next
program statement after finishing current
procedure/function
Step Out Executes the remaining program statements in the current
procedure/function
Locals Window Displays all of the declared variables in the current
procedure/function and their values in the Local Window
ImmediateWindow
Displays information resulting from debugging statementsin your code or from commands typed directly into the
window. The Window allows execution of program
statements and query values; when in break mode
Watch Window Displays the values of selected watch expressions that are
currently in scope
Quick Watch Displays current value of a selected watch expression;
when in break mode
Call Stack Displays all procedures/functions that have been called and
have not finished; when in break mode
ADDING BREAKPOINTS INTO CODE
Putting breakpoints into our code is very simple and allows us to directly investigate
variables and properties of controls. Breakpoints can be toggled on/off into by pressing
the F9 function key, by selecting the Debug menu and choosing breakpoint, or by
clicking on the left hand side of the code window margin. When a breakpoint is toggled
on then a dot in the code margin and a rectangle highlighting that particular statement
appears.

8/9/2019 Visual Basic 5-6 Course Part 10
http://slidepdf.com/reader/full/visual-basic-5-6-course-part-10 12/23
Visual Basic Book 10 © Mark Collins 1999 Page 11
INVESTIGATING PROGRAM BEHAVIOUR FURTHER
Once we have stopped the program from running and looked at certain variables, etc. then
further investigation is required by selectively running portions of our code or skip certain
portions of the code. To help investigate the program’s behaviour further there are useful
debugging facilities to expedite bug resolution…• Step into
• Step out
• Step over
Step into
This debugging feature is very useful when you think that you have found the place where
the bug occurs and allows you to single step through each statement by pressing F8
function key to execute the next statement. This allows you to see the effects of each
statement on the behaviour of the program on the forms or via the debugging windows.
Effectively Visual Basic will run a single code statement and then automatically revert
back to break mode after every statement. A highlighted rectangular box shows the
current statement that has been executed.
Step out
This is used where the code concerned within a procedure is not relevant to our
investigation and will advance past the remainder portion of the current procedure without
pausing at each statement. The execution then stops past the next statement that called the
procedure.
Step over
This is used where the code within a procedure is working correctly and we don’t need to
investigate that particular procedure at all. The effect is that the procedure is completely
executed as a whole and stops at the next statement past the call of the procedure. This
saves a lot of time stepping through procedures that we are not concerned with.
Run to cursor
When in break mode, another useful facility is the run to cursor option in the Debug
menu where we can place the mouse cursor to a particular statement in our code and theprogram will execute up to the selected statement so that we can further investigate the
program’s behaviour. This is very useful to step over large portions of program code that
are irrelevant to our investigation.
Next statement
This is used to skip a statement that is known to cause a problem and allows the program
to effectively step over that procedure entirely without executing it and continue with the
statement past it or a whole section of statements. In break mode, put the cursor to the
required position and in the Debug menu select Set next statement and the program
changes from the current statement to the chosen one.

8/9/2019 Visual Basic 5-6 Course Part 10
http://slidepdf.com/reader/full/visual-basic-5-6-course-part-10 13/23
Visual Basic Book 10 © Mark Collins 1999 Page 12
Showing Next statement
This is used where we are not sure which statement will be executed next. This situation
occurs in error handling and the resume next statement isn’t clear to the programmer
where program will jump back to. This facility will position the cursor on the next
statement that will be executed.
USING WATCH EXPRESSIONS
Logical errors, such as, calculations that give incorrect results or get assigned certain values
that may cause problems that usually are not traceable to a specific point within a statement,
then a Watch Window is very useful facility to interrogate the behaviour of the procedure and
values of the variables concerned.
The environment automatically monitors all the watch expressions that you have defined in
the watch window and when the program goes into break mode; the watch widow presents
the expressions with their corresponding values. This is fine when we know exactly where theproblem area is and inserting a breakpoint into the offending procedure will be ideal, but
quite often it is not that obvious of where the problem lies.
The answer is that the programmer can enable the watch window to automatically put the
running program into break mode when particular values have been reached within any
expression or when the expression value changes. This is particularly useful if the procedure
under consideration has a large looping construct, where many iterations through the loop are
executed before investigation of the problem appears. We can setup a particular value within
the watch expression and the program will run until the specified value is reached and goes
into break mode to allow us to investigate the programs behaviour further by modifying
variable values or single stepping through the code.
Watch expressions can be added at design or in break mode by selecting the Debug menu and
choosing the Add Watch, where you can add the expression and from what procedure and
module this expression relates to. We can then set the type of watch to either stop when a
breakpoint occurs, when the expression is true or when the value of the expression changes.
There is also a quick watch facility where we can check variable or expression that hasn’t
been defined in the watch window. The expression is selected from the code window and
added into the quick watch where the corresponding value is displayed. If the expression
hasn’t been executed yet then the add button will be disabled as there has not been a valueassigned to the expression.
MONITORING THE CALL STACK
There are situations where we may need to look at the call stack, such as tracing nested
procedures and when recursive procedures are implemented. The call stack shows each
procedure called in turn and puts them in a list. The latest call being put onto the top of the
list. This facility is very useful in tracing procedures that employ recursion that call
themselves with the modified parameters values being passed to the latest procedure call.

8/9/2019 Visual Basic 5-6 Course Part 10
http://slidepdf.com/reader/full/visual-basic-5-6-course-part-10 14/23
Visual Basic Book 10 © Mark Collins 1999 Page 13
THE IMMEDIATE WINDOW
This is very useful way of dynamically interacting with the program by allowing us to
query/set variable values or control properties and also allows us to evaluate any valid
Visual Basic statement to enable testing of procedures and functions.
THE DEBUG OBJECT
The Debug object allows the program at run time or in debugging sessions to print text,
variable values and control properties directly to the immediate window. The program can
be run and the immediate window will print out the value of variables and control
properties when a Debug statement is found in the program code. This is used where a
variable may change at a particular place, the following code gives some examples…
Debug.Print “User pressed key =”; key_pressed
Debug.Print “Running total for dept. “; dept_bugdet_costs
Debug.Print “No. of items in list”; lstItems.ListCount
Debug.Print “Current selected item”; lstItems.ListIndex
USING THE IMMEDIATE WINDOW
When in break mode, click mouse cursor into immediate window and we can now type in
variable names or controls to print their values in the window. The variables or properties
are printed to the screen and relate to the current form/module in use, but we can print any
variable or control property on other forms, etc. by explicitly adding their names before
the variable/control…
Implicitly accessing values
Print txtInput.text
Print employee_name
Print employee_age
Explicitly accessing values
Print frmMainInput.customer_name
Print frmStats.average_value
The short hand way to print values to the screen is to use the ‘?’ to query values…
Implicitly accessing values
? txtInput.text
? employee_age
Explicitly accessing values

8/9/2019 Visual Basic 5-6 Course Part 10
http://slidepdf.com/reader/full/visual-basic-5-6-course-part-10 15/23
Visual Basic Book 10 © Mark Collins 1999 Page 14
? frmMainInput.customer_name
? frmStats.average_value
? frmStats.backColor
? frmStats.lblDisplay.Height
It is also very handy to assign values to existing variables or properties to controls to test
the effects of the program’s behaviour with different values. Setting variable values or
control properties is very easy and when all the values and properties have been set in the
immediate window, then program execution can continue with the new values…
txtInput.text = “23.45”
employee_name = “”
employee_age = -10
The immediate window also supports calling functions and procedures with any given set
of arguments. It is important that only procedure calls in scope and variables in scope can
be executed i.e. variables must have been declared and calls in current form are
permissible and calls to procedures in modules are allowed. If the procedure is declared
private in the module, then the scope is only within that module, so calls can only be
executed if the break mode was inside that particular module that the private procedure
resides. When the procedure or function has executed then Visual Basic reverts back to
break mode.
Here are some examples of calling functions and procedures…
Ave = Average(2, 3)
X = factorial(6)
CmdSave_click
Accelerate 100, 50
Vector 47.67, 29.68, 523.1, 100.002
frmDrag_MouseDown x_coord, y_coord, 155, 200
This means that the immediate window can be used to test multiple instances of a
procedure repeatedly with different test values to see that it behaves correctly under
different conditions. This allows you to set up different test conditions for variables and
property settings in each instance of the procedure. Each instance can be looked at by
invoking the Call Stack window which lists the procedures executed by each command
from the immediate window and separated by <debug Window> in the stack. The next
run of the statement can be done quickly by inserting the mouse cursor back to that
statement and pressing the enter key. It is possible to modify the statement line to change
values being used for that procedure before pressing the enter key.

8/9/2019 Visual Basic 5-6 Course Part 10
http://slidepdf.com/reader/full/visual-basic-5-6-course-part-10 16/23
Visual Basic Book 10 © Mark Collins 1999 Page 15
VERIFYING CODE WITH ASSERTIONS
Programmers quite often assume that values coming into procedures and various values
for variables are within normal parameters, this is fine for normal conditions, but
anomalies or exceptions do occur in real life. The way that programmers can help verify
these assumptions is to use assertions to alert the programmer when value is out of thenormal condition/range. The Debug object has an assert method to test that the
assumptions are within or outside their valid range…
Debug.Assert (Boolean expression)
If a variable called order_number normally has a valid range of 20 to 100 then an
assertion may take the form…
Debug.Assert (order_number>=20 And order_number<=100)
An assertion will fire when it evaluates to False, in the above example if the variable
order_number is less than 20 or greater then 100 then the assertion evaluates to False and
warns the programmer that the value is outside the normal range.
OTIMISING YOUR PROJECT
Now that you have tested your project and it is giving reliable behaviour and results, then
perhaps certain parts of your project are perceived as being rather slow. Now is the time to
optimise your project to increase speed or reduce program footprint in memory.
Computer systems are getting larger and more sophisticated with applications that
multitask and interact with other applications and share and manipulate data, therefore
optimisation becomes more of an important issue. Optimisation can make your program
harder to understand and maintain as various methods are used to speed up the program.
The most important point is that a good designed project will have good data structures
and most importantly good algorithms to give either fast speed or small footprint in
memory.
OPTIMINISATION ISSUES
Clearly there are not enough resources to completely optimise the project, but quite often
there is a point where you can achieve maximum return for a minimum amount of work,
after that the Law of Diminishing Returns rears it head. The problem is knowing when the
maximum benefits have been reached and the extra work is not achieving a great deal
more.
Although optimisation is at the end of this course, ideally and in good project practise the
optimisation takes place as the project progresses and any module or algorithm that gives
poor performance or memory usage is carefully looked at to give better results.
Normally an optimisation is a trade off between speed or memory size. Generally larger
programs can be faster as the procedures are inline and large memory storage provide
quick access to details for the algorithms.
Smaller programs are easier to understand with maybe recursive algorithms and smaller
memory storage, but this usually results in higher overheads in computational time due to
more testing of conditions, swapping of information around on the stack and in memory.

8/9/2019 Visual Basic 5-6 Course Part 10
http://slidepdf.com/reader/full/visual-basic-5-6-course-part-10 17/23
Visual Basic Book 10 © Mark Collins 1999 Page 16
Firstly we look at the types of optimisation that we may be trying to achieve…
• Raw speed for real time applications that require instant responses
• Display speed of screen
• Perceived speed to user (how fast your application appears to run)
• Graphics – affect speed and size of memory usage
• Size of footprint in memory
OPTIMISING VISUAL BASIC PROJECTS
There are several factors that can reduce the speed of your project and are listed below…
• Avoid variant variables
• Use integer math and Long integer variables where possible
• Cache frequently used properties as variables
• Use inline procedures instead of calling them
• Use constants whenever possible
• Pass arguments with ByVal in procedures than using ByRef
• Use typed optional arguments where possible
• Use collections where possible
• Use early binding instead or late binding
• Choose screen graphics techniques carefully
Avoid variant variables
Although variants give the best flexibility, their downside is that no strong data type
checking is ensured and also that the computer has to high overheads associated with
checking what type of data is stored within the variant whenever it is used. Always use
option explicit in your project to specify what data type is to be used.
Use integer math and long data types
Integer maths is much faster than floating point arithmetic as integer maths doesn’toffload the calculations to the maths coprocessor. Maths calculations where 2 decimal
places are needed can be easily converted into integer values with integer maths
performed and the answer converted back to 2 decimal places. The reason that the Long
data type is very efficient is that the CPU native data type is the same, so operations are
very fast. If Longs can not be used then integers or bytes are the next best solution. When
floating point calculations are needed then double types are quicker than currency types.
Caching frequently used properties as variables
Using variables to store frequently used values for control properties are much faster (20
to 30 times faster) than setting with the properties directly. This means that when used

8/9/2019 Visual Basic 5-6 Course Part 10
http://slidepdf.com/reader/full/visual-basic-5-6-course-part-10 18/23
Visual Basic Book 10 © Mark Collins 1999 Page 17
within a loop to reset a property in a group of controls to the assign value the cached
variable is instantly available.
Use inline procedures
Using procedures makes for easier maintenance and makes your project more modular,but the overhead associated with putting the procedure and arguments on the stack is high
in memory and time. If there is code with a loop that calls a procedure many times, then it
is better to write the procedure code directly into the loop to eliminate the stack
overheads.
Use constants
Constants are a lot more readable, easier to maintain and have the advantage that they are
very fast in execution as the appropriate value is written directly in via the compiler into
the code. These values are only resolved once, when the values are compiled by the
compiler; unlike variables that require retrieving from memory at run time by theprogram.
Passing arguments ByVal
The arguments used in functions and procedures are faster when passed by value than by
reference. If the procedure doesn’t actually change the arguments outside the procedure,
then it best to pass the arguments by value.
Typed Optional arguments
Optional arguments in functions should be declared as their data type to ensure better typechecking, reduce overheads associated with using variants and reduced stack overheads.
Use Collections
Arrays of objects are useful when there are small numbers and searching through
sequentially with no key present is best up to 100 objects. Collections are more efficient
when large numbers of objects are being held and particularly when a unique key is
present, so that searching isn’t sequential. Collections are fast when using for each…Next
statement and avoid using the before or after arguments that slows performance down.
Use Early binding
The compiler can resolve most of the work relating to the definition of objects and stating
the object type provides the compiler with the actual object to be used, this is known as
early binding. When the code declares a variable of As object , then as the program runs
the actual object type given to the variable, the program has to resolve the definition type;
this is known as late binding and has a high run time overhead associated with it.
CHOOSE SCREEN GRAPHICS TECHNIQUES
The Windows GUI graphical screen is particularly prone to being the bottleneck for
slowing down the display due to the complex Windows graphical environment. There aretechniques that can give the appearance of faster response (perceived speed) by reducing

8/9/2019 Visual Basic 5-6 Course Part 10
http://slidepdf.com/reader/full/visual-basic-5-6-course-part-10 19/23
Visual Basic Book 10 © Mark Collins 1999 Page 18
the graphical operations or the more computational intensive ones in the following
ways…
Frame and picture boxes clipControls properties should be set to False when there are no
graphics used in these containers. This can greatly speed up repaints as the background
doesn’t have to be redrawn first, before repainting the containers and controls.
AutoRedraw on controls and forms should be set to False so that repaints don’t involve
Visual Basic providing large bitmaps in memory of the controls and forms. When a
repaint is executed, the bitmaps are transferred from memory to the screen, which is very
slow and consumes large amounts of memory to store the bitmaps. If there are graphics on
the screen that are updated frequently, then the repaints to the screen will slow the project
down very significantly.
Hide controls on forms before manipulating them i.e. change size or repositioning them,as this greatly reduces the number of repaints to only one when the controls are made
visible again after the changes have been made.
If only pictures are needed to be displayed, then image controls are best option to choose.
Picture boxes are only needed if additional facilities are to be employed i.e. graphical
methods, contain other controls or employ DDE (dynamic data exchange).
Using Pset function to draw lines is very slow and computationally intensive, therefore it
much better to use the line function directly.
OPTIMISING FOR PERCEIVED SPEED
This is very subjective part of optimising, where the user feels that the application is
responding quicker and doing things instead of waiting. The user is happy if the
application is displaying information as to the progress of calculations, showing forms
and splash screens quickly.
The programmer can add a splash screen to the application while loading other modules,
DLL’s, forms and other files into memory. These forms are used in the application and arehidden from the user. When the forms are needed, then they are just shown giving very
quick response, but the hidden forms have a high overhead in memory usage. Other visual
indicators, such as progress bars to give feedback to users that the program is still doing
something and hasn’t ground to a halt.
OPTIMISING FOR SIZE
This isn’t a big issue now, as the operating systems are much better at handling resources
and have become much less of a limiting factor, particularly as new machines have large

8/9/2019 Visual Basic 5-6 Course Part 10
http://slidepdf.com/reader/full/visual-basic-5-6-course-part-10 20/23
Visual Basic Book 10 © Mark Collins 1999 Page 19
amounts of memory as standard. However, smaller applications load faster and have
smaller memory footprint.
Reducing the size of your project involves several techniques that you can apply to help
reduce the overall size of the executable file. Eliminating unwanted files i.e. extra
database DLL’s when they are not required in the distribution set or by reducing the
number of forms and graphical elements within the project can considerably reduce the
size of the overall project. The type of considerations to reduce code size are given
below…
• Reduce number of forms by redesigning and combine some forms
• Reduce the number of controls by redesigning the interface to be more efficient
• Use labels instead of text boxes for hidden fields to store text
• Only load data files when needed and store in dynamic arrays
• Use dynamic arrays and reclaim memory on the unused portion of the arrays
• Reclaim memory used by strings and object variables by deleting them when not
in use
• Use the correct data type instead of using variants to save memory and gain speed
• Clear out unused variables and dead code from projects and modules
• Reorganise modules into smaller units
• Load bitmaps only when needed
• Reduce graphic controls to lighter versions i.e. image controls instead of
pictureboxes• Use Paintpicture to display multiple images of a bitmap i.e. background on forms
etc.
• Free memory from graphics that aren’t used any more in program
• Use RLE format bitmaps or metafiles instead of default bitmaps
Remember optimisation is a useful tool to for achieving a particular goal, but trying to
optimise for speed and memory usage is likely to fail as there conflicting interests. Generally
the way the techniques work are usually in direct conflict with each other. Algorithms thattend to get greater speed are more complex and need more information at hand i.e. hold large
chunks of memory to provide quick comparisons, while compact algorithms tend to do
comparisons in a simpler way, but usually do the simpler task many times over to get the
same result. Choosing the correct algorithms to do the solution can make a very significant
difference the way your program responds i.e. produces results in seconds, minutes, hours,
days or no results at all.
8/9/2019 Visual Basic 5-6 Course Part 10
http://slidepdf.com/reader/full/visual-basic-5-6-course-part-10 21/23
Visual Basic Book 10 © Mark Collins 1999 Page 20
DISTRIBUTION OF YOUR PROJECT
Once you are happy that your project performs as expected; then the Set-up Toolkit and
Set-up Wizard provides a simple way to distribute your application to clients. These tools
allow you to produce a professional set-up program to install your project on your client’scomputer or network server.
CREATING AN INSTALL PROGRAM
The Set-up Wizard can be accessed in several ways…
1. under the main start-up program files of Visual Basic
2. click on Application Wizard… menu option from the Add-Ins menu
3. from the add-in toolbar; if loaded via the Add-Manager
The Set-up Wizard provides most of the hard work associated with the installation
program and determines…
• files needed to be distributed, plus additional files
• where the installation is going to be installed on user’s machine
• enter files into the system registry
• create program group(s)
• create start-up menu entry
• master distribution disks or directories for internet or network installation
The Set-up Wizard optionally allows you to rebuild and compile your project into a final
executable program for distribution. All dependency files are found and a list is produced
to include these files into the distribution disks. The Set-up Wizard produces a
dependency file (.dep) of any file that is used within your project and any associated run-
time files needed to be included with the project to become a stand alone program i.e. any
DLL’s for Visual Basic controls or customised controls (professional and user written
controls/components). Also a project dependency file is also created so that an uninstall
program can remove all components from the users machine at a later date; and a project
VBini dependency file to check that all components are installed correctly before the
program is run.
The Wizard then compresses all the files and determines where the files will be located on
the distribution disks. The programmer can choose which type of media is used for
distribution i.e. floppy disks and storage density or disk directories on hard disk for
distribution on CD’s or network installation. The programmer may also set-up a template
distribution information file so that the next increment distribution has all the available
information ready for distribution, but be aware that any additional controls may need
additional run-time files for the project to run correctly.
If floppy disk installation is chosen, then the Wizard will then transfer the compressedfiles and set-up program onto pre-formatted correct storage density disks and prompts for
8/9/2019 Visual Basic 5-6 Course Part 10
http://slidepdf.com/reader/full/visual-basic-5-6-course-part-10 22/23
Visual Basic Book 10 © Mark Collins 1999 Page 21
any additional spanning disks to complete the set of installation disks and then notifies
that the master distribution set has been completed. Note that the Set-up Wizard is only
for production of the master disks, not for making multiple distribution copies. The
project is now ready for installation testing and run-time testing.
CREATING A CUSTOM INSTALL PROGRAM
The Set-up Wizard uses the set-up toolkit program, but there are occasions when a custom
set-up is necessary to modify or enhance the installation program. The toolkit resides in
the VB\Setupkit\Setup1 subdirectory and has a set of utilities that reside in
VB\Setupkit\Kitfil32 subdirectory. The file that we are concerned about is the Setup1.vbp
file that contains the code that prompts the user where the installation shall reside and
other house keeping jobs to complete the installation. Note that the any changes to the
original set-up toolkit program will be reflected in any later installs, therefore ALWAYS
copy the subdirectory into your project that requires customised installation so that the
existing set-up program is not modified.
The custom installation may include any of the following…
• customised user prompts
• specialised behaviour in set-up process
• specialised displays (billboard information) in set-up process
• specialised utilities to run during set-up process
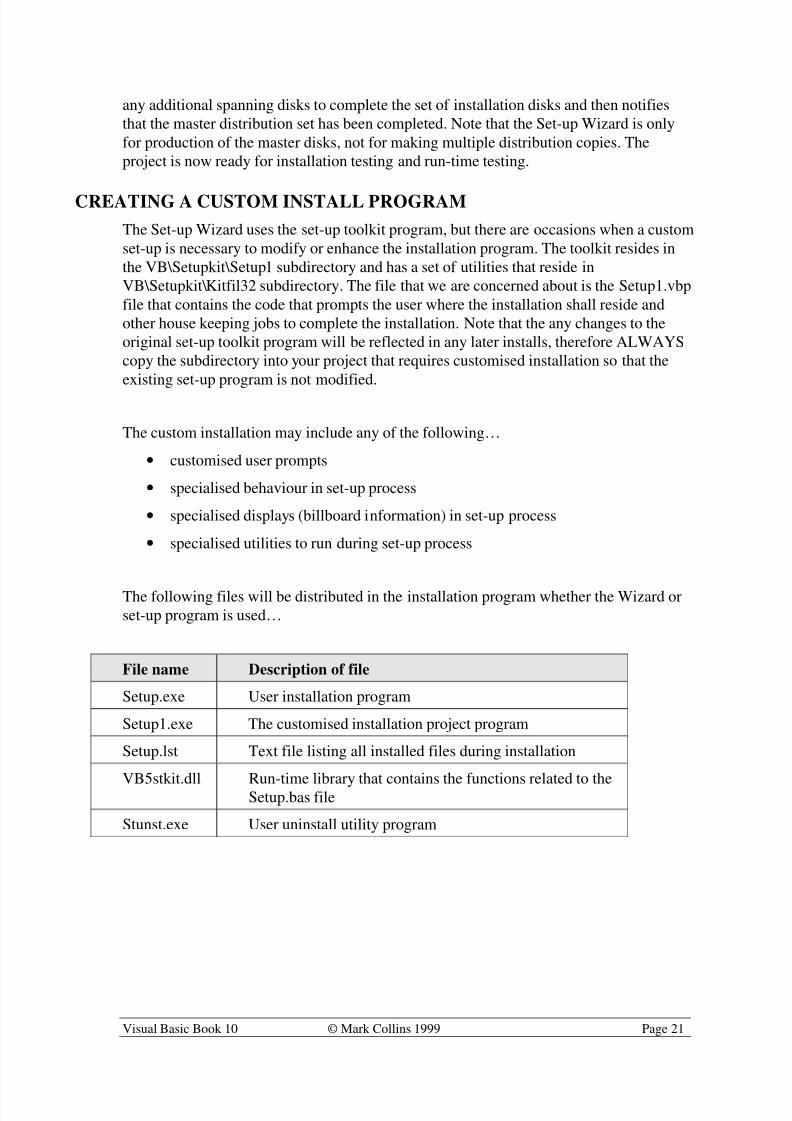
The following files will be distributed in the installation program whether the Wizard or
set-up program is used…
File name Description of file
Setup.exe User installation program
Setup1.exe The customised installation project program
Setup.lst Text file listing all installed files during installation
VB5stkit.dll Run-time library that contains the functions related to theSetup.bas file
Stunst.exe User uninstall utility program

8/9/2019 Visual Basic 5-6 Course Part 10
http://slidepdf.com/reader/full/visual-basic-5-6-course-part-10 23/23
Visual Basic Book 10 © Mark Collins 1999 Page 22
The installation can now be tested on a workstation or from the server computer to ensure
that the installation goes ahead as expected. Once the user has installed the application,
then at a future date the application may need to be moved elsewhere on the system or
removed completely from the system. During installation the following information is
contained within the uninstall log file…
• any directories created
• any installed files and where they were installed
• all uninstalled files
• all shared files
• any newer version any files that already exist
• registry file entries created or modified
• any customised controls or programs that are self registered
• program groups and icon created and entries in start-up menu
• control panel add / remove program applet entries
UNINSTALL REMOVAL FAILURES
The user actions given below will cause problems with the system registry and file
dependencies and may ultimately cause shared files to be removed that relate to other
applications. This means that those applications will not run without the corresponding file or
files. Other custom controls and files may still be present in the system registry and can only
be deleted after they have been run as well as the corresponding system entries. Note always
remove existing installation before installing the same software into a new directory or work area.
There are various reasons that could cause the uninstall program to not remove the
application properly…
• user may copy installation files and bypass file registration
• user deletes any of the installed files and/or directories instead of using the uninstall
program
• user deletes the log file or setup log file so that the uninstall program doesn’t know
what to remove• non compliant Windows program installs the same shared files that already installed
by a Windows compliant program
• a shared file is installed into a different sub directory than the one that already exists
on the hard disk
• remote server application is installed as a stand alone program and then later program
is installed as server program
• user installs program twice in different sub directories causing 1st
program not to work
and removal program cannot work due to file clashes
That’s the course finished now, so have fun and enjoy programming with Visual Basic.