video editing with microsoft movie makerstaffresources.uhi.ac.uk/support_portal/resources/... ·...
TRANSCRIPT

Video Editing with Microsoft Movie Maker
1 University of the Highlands and Islands 2016
Contents Introduction ..................................................................................................................... 2
Creating a new project ..................................................................................................... 2
Importing footage ............................................................................................................ 3
Import from DV tape ..................................................................................................... 3
Question ................................................................................................................... 4
Getting started ................................................................................................................. 4
Editor view ....................................................................................................................... 5
Editing a clip ..................................................................................................................... 6
Splitting clips .................................................................................................................... 6
Splitting a clip ............................................................................................................... 7
Question ................................................................................................................... 7
Trimming clips .................................................................................................................. 7
Trimming a clip ............................................................................................................. 8
Clip audio ......................................................................................................................... 8
Titles, captions and credits ............................................................................................... 9
Adding titles ............................................................................................................... 10
Adding captions .......................................................................................................... 10
Adding credits ............................................................................................................. 11
Text tools ....................................................................................................................... 12
Background audio .......................................................................................................... 12
Narration ....................................................................................................................... 13
Editing tools ................................................................................................................ 14
Audio emphasis .............................................................................................................. 14
Aspect ratio ................................................................................................................ 15
Webcam recording ......................................................................................................... 15
Animations and visual effects ......................................................................................... 15
Saving the movie ............................................................................................................ 16
Custom formats .......................................................................................................... 17
Publishing the movie ...................................................................................................... 18
UHI Media Library (Helix)................................................................................................ 18
Recommendations for video production for use in online material ........................... 19
Potential supporting materials ....................................................................................... 20

Video Editing with Microsoft Movie Maker
2 University of the Highlands and Islands 2016
Video tutorials ............................................................................................................ 20
Exercise .......................................................................................................................... 20
Activity ....................................................................................................................... 20
Introduction The benefits of using video content to support learning were explored in the section on
"Creating and using video content". This section provides a step by step guide to editing
video content, adding titles and captions and saving and publishing movies using Microsoft
Windows Movie Maker which is part of the Windows Essentials suite of resources. Further
guidance is also available from the instructional videos which come with the ‘Windows
Movie Maker’ software.
You may need to download the essentials package to get Movie Maker. Administrator
rights are required to install software on most university computers, so you may require
help from the UHI Helpdesk to install this software.
This resource will cover the preparation of source video files for the on-line learning
environment.
Following completion of this guide you will be able to:
• Remove imperfections from a video.
• Split videos to length and create short linked video tutorials.
• Create transitions to cover up cuts in the video.
• Add audio to clips to enhance the users viewing experience.
• Add titles, captions and effects to video clips at specific points.
Information is provided in easy to follow step by step guides. Short videos have also been
included which demonstrate these step by step in action.
Creating a new project When editing video, your project structure can become quite complex. Splitting video files
into multiple sections, adding soundtracks and other operations can lead to many files
which may lead to confusion.
Video Editing with Microsoft Movie Maker
3 University of the Highlands and Islands 2016
In order to keep track of the video source and subsequent edits, it is important to create a
logical file structure to work in.
1. Right click on the desktop of your computer and create New > Folder.
2. Rename the folder: [your name] Filming Project.
3. Inside that folder create new folders for; Footage, Images, Audio, Misc.
4. Go to the Start menu and open Windows Movie Maker.
5. Create New Project.
6. Navigate to the folder you created on your desktop and Save Project As: [your name]
Presentation.
Microsoft Movie Maker – Creating a new project (41 secs). See the online resource for
video tutorial.
Importing footage Depending on the source of your video files, you may need to upload them to your
computer before editing.
Most USB flash based devices will allow you to drag and drop the file from the device to
your chosen location. If your video is contained on a digital tape device follow the steps
below.
Import from DV tape
• Connect your DV camera to your computer and then set the camera mode to play
recorded video (possibly labelled as VTR or VCR on a DV camera).
• A dialog box should ask if you would like to import video form the device. This will
allow you to set up a save location for the file/s.
• You may import video from your device as a single file either in a native format from
your device (such as AVI or DV-AVI), or as an encoded WMV (Windows Media Video)
file. The latter file will be able to import a long video and split by scene.
• The imported video will be saved to your chosen location, and the file will also
appear in Windows Photo Gallery (optional: - included in Windows essentials
download).

Video Editing with Microsoft Movie Maker
4 University of the Highlands and Islands 2016
You can also import files using Windows Movie Maker. Connect the device to your
computer, switch to playback mode then, in Windows Movie Maker, go to the File menu,
click Import from Digital Video Camera.
When importing footage to Movie Maker it may take some time to load, index and prepare
the files for editing. A progress bar will appear in the bottom left of the window.
Question
If I plug in my mobile phone or iPhone to my computer what will it look like? Will the
interface be the same?
Answer
Yes, you should be prompted with a list of options allowing you to import the files or view
the files on the device. Attaching the phone will also create a new drive on your computer
so you can navigate to the drive and locate the files on your device.
Microsoft Movie Maker – Importing footage (46 secs). See the online resource for video
tutorial.
Getting started On first starting the software you will be presented with the following window.

Video Editing with Microsoft Movie Maker
5 University of the Highlands and Islands 2016
Opening window of Movie Maker
To continue, import some footage from either a DV camera, or an existing video file on your computer or external device.
You can import files with the following extensions into Windows Movie Maker for use in your project:
• Video files: .asf, .avi, .dvr-ms, .m1v, .mp2, .mp2v, .mpe, .mpeg, .mpg, .mpv2, .wm,
and .wmv
• Audio files: .aif, .aifc, .aiff, .asf, .au, .mp2, .mp3, .mpa, .snd, .wav, and .wma
• Picture files: .bmp, .dib, .emf, .gif, .jfif, .jpe, .jpeg, .jpg, .png, .tif, .tiff, and .wmf
Editor view On loading some content, you will be presented with the following window.
Editor view
The ribbon toolbar across the top of the window is similar in operation to most of the
Microsoft Office suite, and allows access to all the operations, menus etc. of the program.
• Timeline: shows all clips currently added.

Video Editing with Microsoft Movie Maker
6 University of the Highlands and Islands 2016
• Play Bar: allows you to position the play head at specific positions for operations
such as trimming the video.
• Preview Window: shows the output video preview. This is updated once a clip is
added to the timeline.
• Time Code: allows you to note specific times for identifying the start/end points.
Editing a clip After you’ve imported files, you're ready to start the editing process. You can always import
further files (including multiples of the same clip) when you are ready for them, they will be
appended to the end of the current clips. Using Windows Movie Maker, you can edit clips in
a variety of different ways. You can split a long clip into shorter clips, combine clips or trim
the length of a clip.
If you require a visual cue for the audio on a clip, select view>waveforms from the top menu
bar. This will overlay the audio waveform inside the clip on the timeline. This will allow finer
tuning of trimming and splitting operations.
The view menu also allows zooming of a clip in the timeline window. Changing the zoom
level will alter the number of frames which are displayed in the timeline window which will
allow for greater accuracy when performing operations.
Using a combination of these operations can quickly create a sequence of clips ready for
export, however, the clips may jutter between the scenes so further editing may be
required.
Microsoft Movie Maker – Editing a clip (45 secs). See the online resource for video tutorial.
Splitting clips You can manually split clips into smaller clips to make your video easier to work with. For
example, if you have a video clip that has two different scenes, you might want to split the
video clip at the point where the one scene ends and the other begins, and then insert a
transition.
Video Editing with Microsoft Movie Maker
7 University of the Highlands and Islands 2016
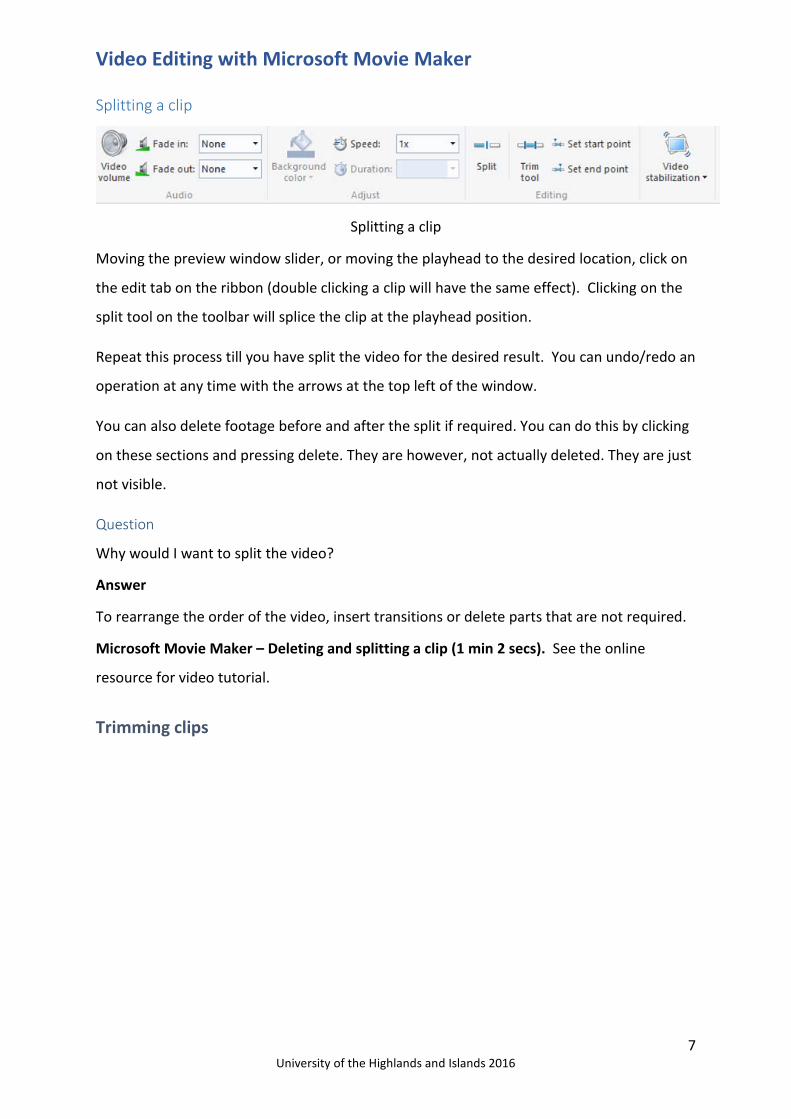
Splitting a clip
Splitting a clip
Moving the preview window slider, or moving the playhead to the desired location, click on
the edit tab on the ribbon (double clicking a clip will have the same effect). Clicking on the
split tool on the toolbar will splice the clip at the playhead position.
Repeat this process till you have split the video for the desired result. You can undo/redo an
operation at any time with the arrows at the top left of the window.
You can also delete footage before and after the split if required. You can do this by clicking
on these sections and pressing delete. They are however, not actually deleted. They are just
not visible.
Question
Why would I want to split the video?
Answer
To rearrange the order of the video, insert transitions or delete parts that are not required.
Microsoft Movie Maker – Deleting and splitting a clip (1 min 2 secs). See the online
resource for video tutorial.
Trimming clips
Video Editing with Microsoft Movie Maker
8 University of the Highlands and Islands 2016
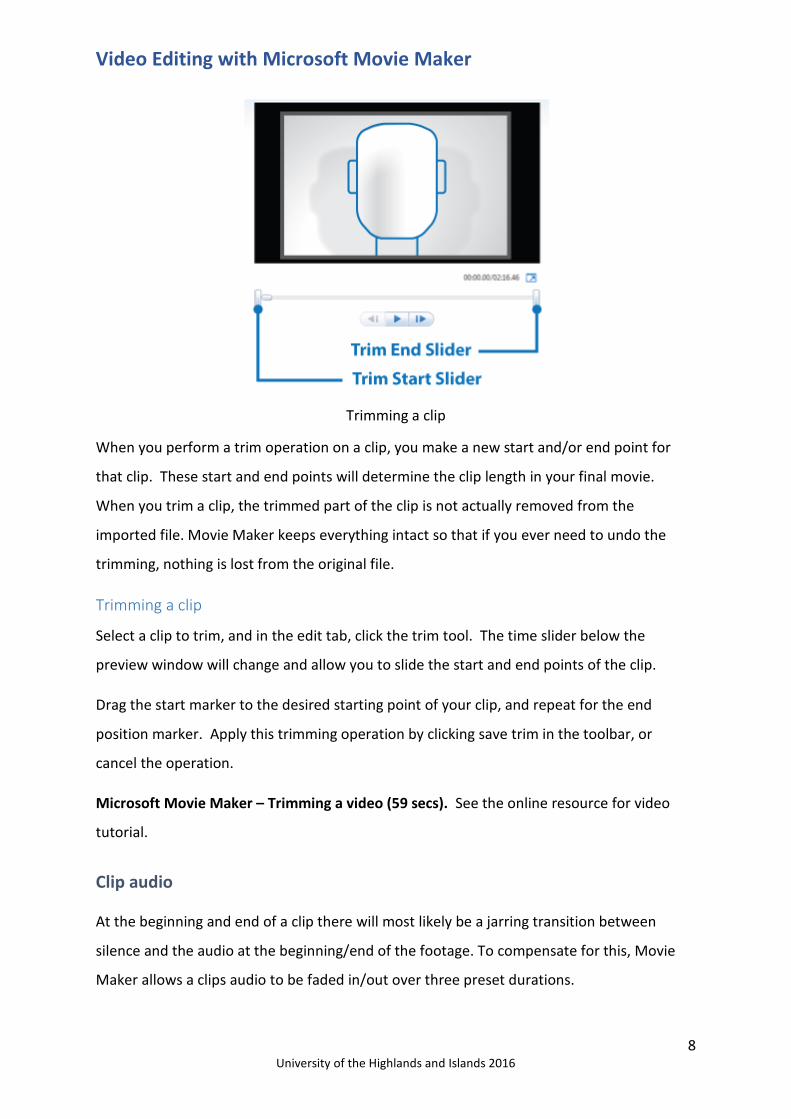
Trimming a clip
When you perform a trim operation on a clip, you make a new start and/or end point for
that clip. These start and end points will determine the clip length in your final movie.
When you trim a clip, the trimmed part of the clip is not actually removed from the
imported file. Movie Maker keeps everything intact so that if you ever need to undo the
trimming, nothing is lost from the original file.
Trimming a clip
Select a clip to trim, and in the edit tab, click the trim tool. The time slider below the
preview window will change and allow you to slide the start and end points of the clip.
Drag the start marker to the desired starting point of your clip, and repeat for the end
position marker. Apply this trimming operation by clicking save trim in the toolbar, or
cancel the operation.
Microsoft Movie Maker – Trimming a video (59 secs). See the online resource for video
tutorial.
Clip audio At the beginning and end of a clip there will most likely be a jarring transition between
silence and the audio at the beginning/end of the footage. To compensate for this, Movie
Maker allows a clips audio to be faded in/out over three preset durations.

Video Editing with Microsoft Movie Maker
9 University of the Highlands and Islands 2016
In the edit tab, select slow medium or fast, next to the Fade in and Fade out options for
each clip in your timeline if you wish. This will provide a smoother transition of the audio
between clips.
Fade in\out
Titles, captions and credits To obtain more professional results in the final exported video, you may add titles, captions
and credits to your movie.
These options are built into Movie Maker and provide an easy way to introduce the topic,
add captions at appropriate times within the video, and to credit all relevant people.
The titles scene also has a role as a spacer between scenes. If you delete the title text that is
generated when you add a title item, and move the title scene between two clips in the
timeline, it will provide a fixed length black screen (minimum 1 second), which can be faded
to and from between clips. This approach will allow you to space out the clips and create a
more natural feel between scenes. Titles could also be used in this way to prompt the
questions on screen that the interviewee is about to address.
Video Editing with Microsoft Movie Maker
10 University of the Highlands and Islands 2016
Adding titles
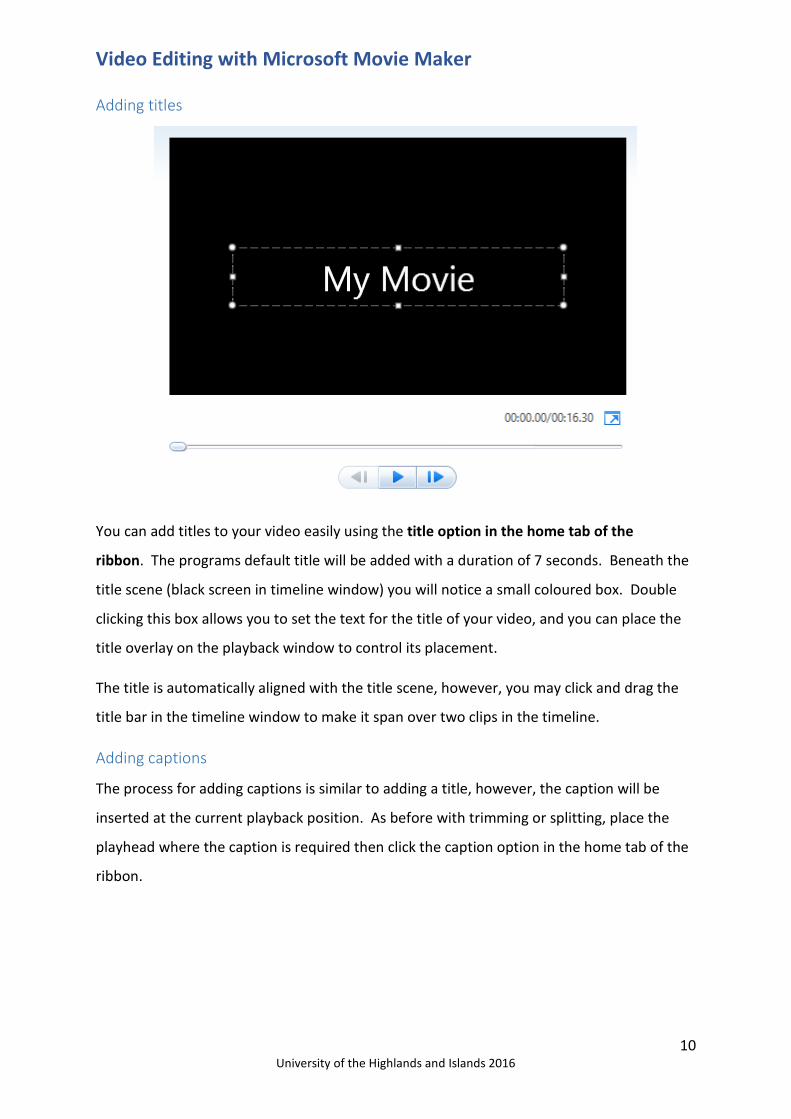
You can add titles to your video easily using the title option in the home tab of the
ribbon. The programs default title will be added with a duration of 7 seconds. Beneath the
title scene (black screen in timeline window) you will notice a small coloured box. Double
clicking this box allows you to set the text for the title of your video, and you can place the
title overlay on the playback window to control its placement.
The title is automatically aligned with the title scene, however, you may click and drag the
title bar in the timeline window to make it span over two clips in the timeline.
Adding captions
The process for adding captions is similar to adding a title, however, the caption will be
inserted at the current playback position. As before with trimming or splitting, place the
playhead where the caption is required then click the caption option in the home tab of the
ribbon.

Video Editing with Microsoft Movie Maker
11 University of the Highlands and Islands 2016
Adding credits
To add credits, click the credits dropdown menu from the home tab and select from one of
the predefined options. You may wish to chain a number of credit items together to achieve
a smooth flow through all credits. This approach may also be used with titles to introduce
subjects and topics.
Microsoft Movie Maker – Adding titles, captions and credits (1 min 34 secs). See the
online resource for video tutorial.

Video Editing with Microsoft Movie Maker
12 University of the Highlands and Islands 2016
Text tools When you insert a title, caption or credit item on the timeline, a new tab will appear at the
top of the window, to the right of the 'Edit' menu. The text tools allows you to add simple
transition effects to the selected item.
Text tool tab
When you hover over a transition you will be automatically shown a preview of the text
effect you are about to add. Caution is advised at this point, since transitions can actually
make your final movie look worse. The simple approach often produces the best results.
Background audio Adding a background audio track to your video composition can be useful for footage with
no, or noisy audio. Used with narrative videos, the audio also provides a nicer experience
when transitioning between scenes.
To add a background audio to your video, choose the add music dropdown option from the
Home menu tab. The first three options are links to some audio source websites. The
second option (Free Music Archive) has many free tracks to use in your projects. All that is
usually required, is an attribution for the original author of the work. The other two sites:
Vimeo and AudioMicro tend to have more purchaseable content.
Adding background audio

Video Editing with Microsoft Movie Maker
13 University of the Highlands and Islands 2016
You may also add existing audio from your PC if you wish. When an audio file is added to
the project, you will see a secondary line below the main clips. Selecting this item will show
the Music Tools menu item at the top of the window.
This menu will allow you to set the start and end point of the audio, essentially trimming
it. You can also drag the audio to a starting point in your timeline to play exactly the section
you want at the right time.
Microsoft Movie Maker – Importing audio (1 min 37 secs). See the online resource for
video tutorial.
Narration When working with still images, such as PowerPoint slides or a series of photographs, you
may wish to add narration at set points in the video timeline. To do this, ensure you have a
microphone set up with your pc (most webcams now contain one), and windows movie
maker will detect the audio input device.
The 'Record narration' option found in the home menu, is only enabled after a source video
or image has been placed on the timeline, so set up your video/slide footage first, then:
• Move the playhead to the starting point you would like your audio.
• Click 'record narration' and a start/stop/cancel option will appear. Click start to begin
recording.
• Click stop recording and choose a save location for this audio file.
Audio track added

Video Editing with Microsoft Movie Maker
14 University of the Highlands and Islands 2016
Narration tools
The narration tools tab will appear at the top of the ribbon bar, the audio will be
automatically added to your video timeline view below the main video track. You may now
edit this audio track to shorten, lengthen or re-position the track in relation to the video.
Editing tools
Remember it is important for your audio clarity to be of a high standard. Should your audio
narration recording be too noisy, or levels and balance sound off, you may wish to look into
other editing tools to clean up the recorded audio such as Audacity. You may find it useful to
experiment with microphone placement in a certain environment, or use of a headset.
Audio emphasis Placing emphasis on a certain track within your project will keep users focused on the
important information within. Windows movie maker allows you to place emphasis on the
narration, music or video audio tracks.
In the main ribbon bar, click on the 'Project' tab. This will show you the options to place the
emphasis on a certain audio element and change the volume levels of the other tracks.
When adding multiple items to the timeline, the audio elements within each source file will
overlap, so it is important to adjust the levels of each clip you add. Of course, splitting a clip
into multiple parts would allow you to change the emphasis of the audio on different parts
of the video.
The project tab also allows a global setting for aspect ratio. If you are using any newer
capture devices such as a mobile phone, webcam or small handi-cam, then you will most
probably be using a 16:9 ratio for your image. Terms such as 1080p and 720p have become
common place, but they all refer to a widescreen setup, however some older recording

Video Editing with Microsoft Movie Maker
15 University of the Highlands and Islands 2016
devices will use a square (4:3) resolution. The overall look of your final video output will be
determined by the equipment used and the subsequent source file.
Aspect ratio
If you are unsure of the size of your source video, you can check this in the file's properties,
or use a third party tool such as Mediainfo.
Further information on Aspect ratio's can be found on Wikipedia.
Webcam recording Similar to narration, webcam recording allows you to insert video within Movie Maker.
Providing you have a webcam installed on your system and properly configured, you will be
able to use the webcam to record video segments with audio (where functionality exists) to
add to your project.
When recording a video, the preview window on the left will change to show the webcams
input stream. Use this as your guide to correctly positioning yourself within the preview.
Should you not require the audio to be captured, just edit out the volume level of the clip
once recorded.
Ensure you give yourself plenty of time, pausing briefly if you make a mistake, as you will be
able to edit out any imperfections or errors you make afterwards. Contrary to the narration
feature, the webcam video will be saved in a location of your choice before being placed in
the timeline view at the end of the currently selected clip (as opposed to the playhead
position).
Animations and visual effects Windows Movie Maker contains a number of preset animations and visual effects which
may be applied to clips. Whilst most videos will not require effects added, they are a nice
addition and can be used to great effect.
As with title or caption animations, moving the mouse over the options will start a preview
of the effect in the left hand window. No animations or effects are applied to your movie
until they are selected by clicking on them. You may undo/redo all steps using the arrows at
the top right of the page.
Video Editing with Microsoft Movie Maker
16 University of the Highlands and Islands 2016
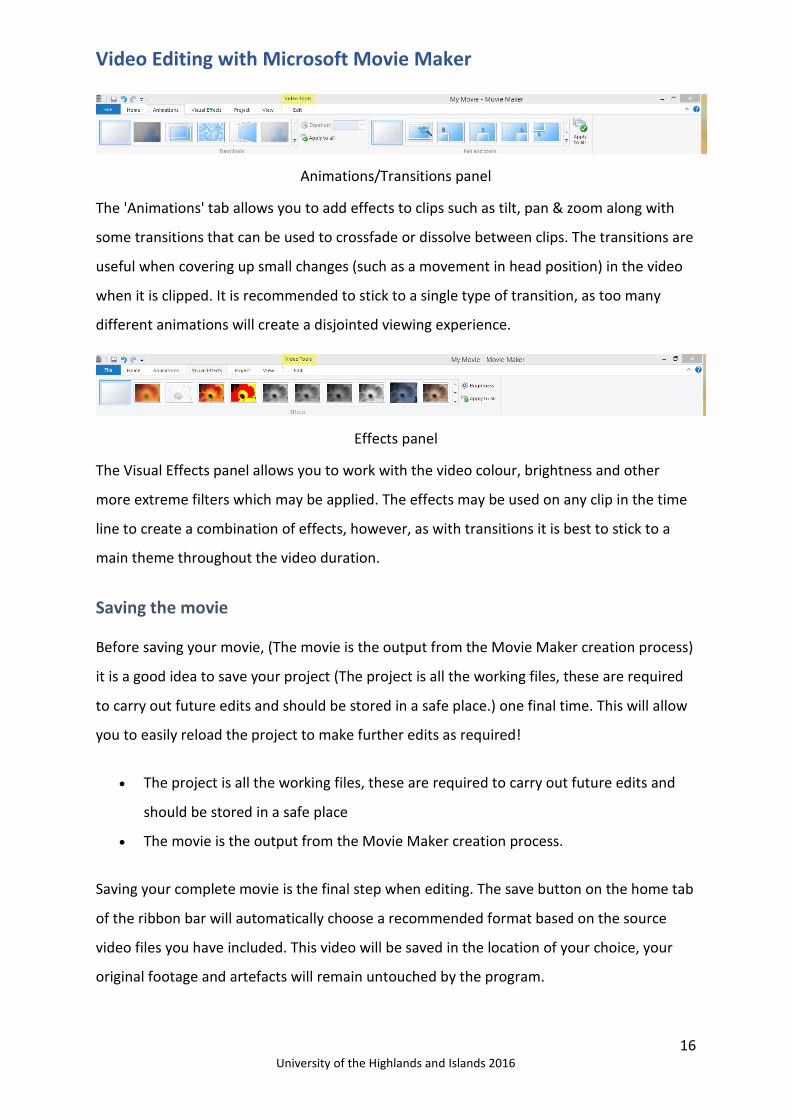
Animations/Transitions panel
The 'Animations' tab allows you to add effects to clips such as tilt, pan & zoom along with
some transitions that can be used to crossfade or dissolve between clips. The transitions are
useful when covering up small changes (such as a movement in head position) in the video
when it is clipped. It is recommended to stick to a single type of transition, as too many
different animations will create a disjointed viewing experience.
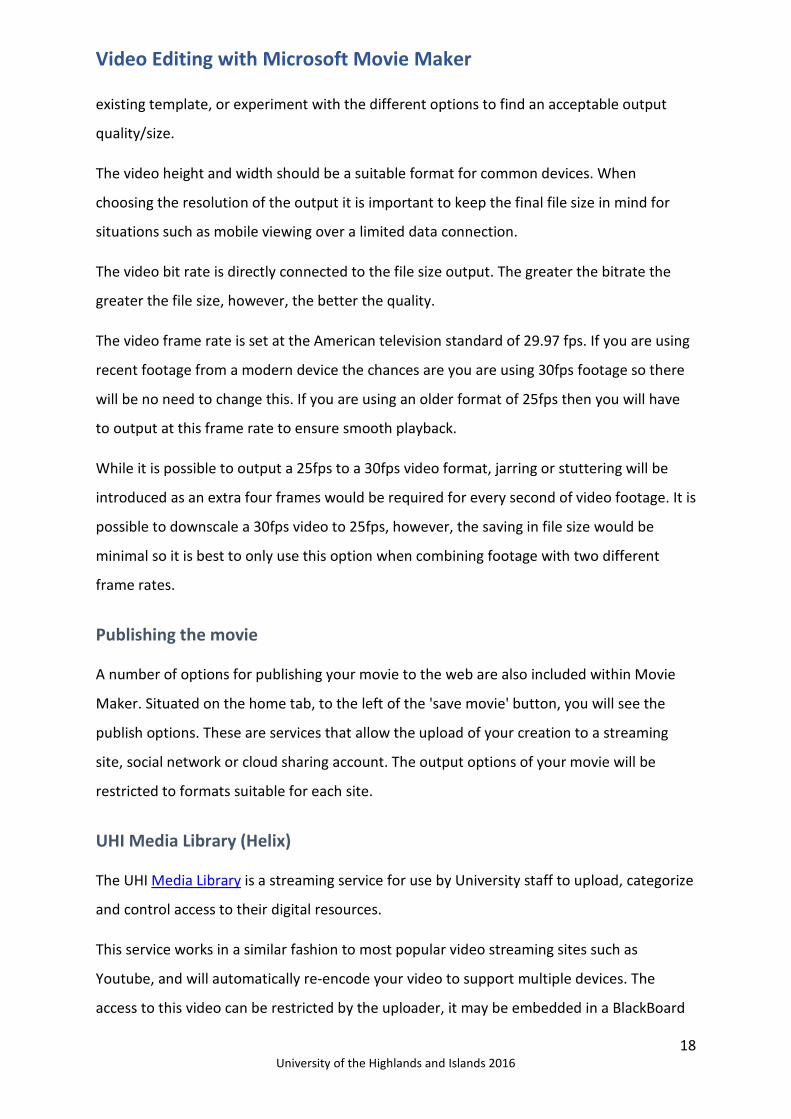
Effects panel
The Visual Effects panel allows you to work with the video colour, brightness and other
more extreme filters which may be applied. The effects may be used on any clip in the time
line to create a combination of effects, however, as with transitions it is best to stick to a
main theme throughout the video duration.
Saving the movie Before saving your movie, (The movie is the output from the Movie Maker creation process)
it is a good idea to save your project (The project is all the working files, these are required
to carry out future edits and should be stored in a safe place.) one final time. This will allow
you to easily reload the project to make further edits as required!
• The project is all the working files, these are required to carry out future edits and
should be stored in a safe place
• The movie is the output from the Movie Maker creation process.
Saving your complete movie is the final step when editing. The save button on the home tab
of the ribbon bar will automatically choose a recommended format based on the source
video files you have included. This video will be saved in the location of your choice, your
original footage and artefacts will remain untouched by the program.

Video Editing with Microsoft Movie Maker
17 University of the Highlands and Islands 2016
Digital movies are encoded in a selection of formats, resulting in a variety of file sizes. Most
movies on the web today are encoded as MPEG4 (mp4). This video format is supported by
the html standard so all modern browsers can play them. The quality and the size of a video
is determined by the video dimensions (height and width in pixels), its bit rate (number of
bits used to represent the video data per second), and the frame rate (number of images
shown per second).
Custom formats
Save Formats
The dropdown ‘Save Movie’ button at the top right of the ‘Home’ tab will allow you to
choose a pre-defined output format. These are useful if you know the target device the
videos will be displayed on. If you are unsure of the target device you may configure a
custom output setting (opposite).
This window will allow you to create a new template for the video output, along with giving
an estimate of the final file size. If you are unsure of these settings you can always use a pre-
Video Editing with Microsoft Movie Maker
18 University of the Highlands and Islands 2016
existing template, or experiment with the different options to find an acceptable output
quality/size.
The video height and width should be a suitable format for common devices. When
choosing the resolution of the output it is important to keep the final file size in mind for
situations such as mobile viewing over a limited data connection.
The video bit rate is directly connected to the file size output. The greater the bitrate the
greater the file size, however, the better the quality.
The video frame rate is set at the American television standard of 29.97 fps. If you are using
recent footage from a modern device the chances are you are using 30fps footage so there
will be no need to change this. If you are using an older format of 25fps then you will have
to output at this frame rate to ensure smooth playback.
While it is possible to output a 25fps to a 30fps video format, jarring or stuttering will be
introduced as an extra four frames would be required for every second of video footage. It is
possible to downscale a 30fps video to 25fps, however, the saving in file size would be
minimal so it is best to only use this option when combining footage with two different
frame rates.
Publishing the movie
A number of options for publishing your movie to the web are also included within Movie
Maker. Situated on the home tab, to the left of the 'save movie' button, you will see the
publish options. These are services that allow the upload of your creation to a streaming
site, social network or cloud sharing account. The output options of your movie will be
restricted to formats suitable for each site.
UHI Media Library (Helix)
The UHI Media Library is a streaming service for use by University staff to upload, categorize
and control access to their digital resources.
This service works in a similar fashion to most popular video streaming sites such as
Youtube, and will automatically re-encode your video to support multiple devices. The
access to this video can be restricted by the uploader, it may be embedded in a BlackBoard

Video Editing with Microsoft Movie Maker
19 University of the Highlands and Islands 2016
mashup or other website, and a download option may also be provided. When uploading to
Helix you should upload the highest quality movie you can as the Helix service will re-
encode it into the various other formats.
For help using the UHI streaming server or other aspects of video editing and source capture
see the Mahara help pages
Recommendations for video production for use in online material
If you are creating a video for use in online materials we suggest you use the following
recommendations:
Audibility Where video contains audio content, audio must be normalised using an application like Adobe Audition. In order to test the audio levels, make use of the BBC iPlayer: speech radio on the iPlayer can be a useful benchmark for recorded speech.
Captions Captions introducing speakers appear on the screen for 5 seconds in total. The caption should appear in full for 3 seconds, then subtly fade away over the final 2 seconds. Caption to include: Speaker, Subject, Video source and Video length. Caption wording: Speaker, Subject from Video Source (X minutes X seconds)
Embedding content
Due to problems with embedded content inside the VLE, videos should not be embedded in HTML content. Instead, a link to the video should be included along with iconography showing that the link is to a video.
Streaming server
The UHI streaming server is now in place; full guidance on uploading and embedding to follow. All videos should be stored in the streaming server to reduce learning material package file sizes. The streaming server can accept files of the following types and produces a variety of embed codes:
*.avi, *.flv, *.mov, *.mp3, *.mp4, *.mpg, *.wav, *.wma, *.wmv
When uploading files to the streaming server, users are prompted to attach additional associated files, such as transcripts, at the time of upload.
Note that when uploading video to the streaming server you must ensure you have the permission of all rights holders. Refer to the Recording of taught sessions policy for guidance.

Video Editing with Microsoft Movie Maker
20 University of the Highlands and Islands 2016
Titles Titles should include a subtle drop shadow or outline to ensure legibility when there is little contrast between background and foreground.
Transcript If video is considered core content, an accessible alternative must be supplied. When creating video resources for a project ensure time is allocated for creating transcripts. Transcript wording: 'Download a transcript of this summary.'
Transcripts should be uploaded to Helix and stored in any HTML resources. Where video recordings are included in resources such as Virtual Tours, the transcript should be contained inside the resource to ensure the resource is reusable.
Potential supporting materials Video tutorials
• UHI Centric - video and the flipped classroom
• Lynda.com - moviemaker
• Lynda.com - android
• Lynda.com - iPhone
Exercise
Activity
Please refer to the online resource to do this activity.