version 10.3 october 2018 - software ag
TRANSCRIPT

Using webMethods Mobile Designer
Version 10.3
October 2018

This document applies to webMethods Mobile Designer Version 10.3 and to all subsequent releases.
Specifications contained herein are subject to change and these changes will be reported in subsequent release notes or new editions.
Copyright © 2011-2020 Software AG, Darmstadt, Germany and/or Software AG USA Inc., Reston, VA, USA, and/or its subsidiaries and/orits affiliates and/or their licensors.
The name Software AG and all Software AG product names are either trademarks or registered trademarks of Software AG and/orSoftware AG USA Inc. and/or its subsidiaries and/or its affiliates and/or their licensors. Other company and product names mentionedherein may be trademarks of their respective owners.
Detailed information on trademarks and patents owned by Software AG and/or its subsidiaries is located athp://softwareag.com/licenses.
Use of this software is subject to adherence to Software AG's licensing conditions and terms. These terms are part of the productdocumentation, located at hp://softwareag.com/licenses and/or in the root installation directory of the licensed product(s).
This software may include portions of third-party products. For third-party copyright notices, license terms, additional rights orrestrictions, please refer to "License Texts, Copyright Notices and Disclaimers of Third Party Products". For certain specific third-partylicense restrictions, please refer to section E of the Legal Notices available under "License Terms and Conditions for Use of Software AGProducts / Copyright and Trademark Notices of Software AG Products". These documents are part of the product documentation, locatedat hp://softwareag.com/licenses and/or in the root installation directory of the licensed product(s).
Use, reproduction, transfer, publication or disclosure is prohibited except as specifically provided for in your License Agreement withSoftware AG.
Document ID: MD-UG-103-20191112

MTable of Contents
Using webMethods Mobile Designer Version 10.3 3
Table of Contents
About this Guide.......................................................................................................................................... 11
Document Conventions.................................................................................................................11
Online Information and Support.................................................................................................. 12
Data Protection.............................................................................................................................. 13
Getting Started............................................................................................................................................. 15
About Mobile Designer..................................................................................................................16webMethods Mobile Designer Overview.................................................................................. 16Mobile Designer Build-Time Component..................................................................................16Mobile Designer Cross Compiler and Run-Time Classes........................................................16Parameter-Driven Projects........................................................................................................17
Configuring Mobile Designer........................................................................................................17About Configuring Mobile Designer..........................................................................................17Updating the sdk.properties File to Configure Mobile Designer...............................................18Mobile Designer Configuration Properties (sdk.properties)......................................................18
JAD and Manifest Files..................................................................................................... 18Java Compiler Check........................................................................................................ 19KZip Property.....................................................................................................................207Zip Property..................................................................................................................... 20Localization Property......................................................................................................... 21Proguard Obfuscator Settings........................................................................................... 21Project Build Settings........................................................................................................ 23Proxy Settings................................................................................................................... 23Platform-Specific Properties.............................................................................................. 24
Environment Variable for Mobile Designer...............................................................................25Preparing Linux Systems for Mobile Designer.........................................................................25
Setting Up Platforms................................................................................................................................... 27
Supported SDK Versions.............................................................................................................. 28SDK Versions that Mobile Designer Supports..........................................................................28
Setting Up the Android Platform..................................................................................................28About Setting Up the Android Platform....................................................................................28Installing the Android Studio IDE............................................................................................. 29Configuring Mobile Designer for the Android SDK...................................................................30Setting Up an Android Virtual Device (Emulator).....................................................................31Starting the Android Virtual Device (Emulator)........................................................................ 32

MTable of Contents
Using webMethods Mobile Designer Version 10.3 4
Using the Android Emulator with a Proxy Server.....................................................................32
Setting Up the iOS Platform......................................................................................................... 33About Setting Up the iOS Platform.......................................................................................... 33Installing the Apple Xcode IDE................................................................................................ 34About Signing iOS Applications................................................................................................35
Using an Existing Signing Environment............................................................................ 35Importing the Signing Environment from Another Macintosh............................................35Creating a New Signing Environment............................................................................... 37
Configuring Mobile Designer for the iOS Platform................................................................... 37
Creating Mobile Application Projects........................................................................................................ 39
Setting Up a Mobile Application Project..................................................................................... 40About Mobile Application Projects............................................................................................40Sample Projects Provided with Mobile Designer..................................................................... 40
Expense Tracker................................................................................................................41Library JSON..................................................................................................................... 41NativeUI Asset Catalog..................................................................................................... 41NativeUI Contacts..............................................................................................................41NativeUI Credential Store..................................................................................................42NativeUI Database............................................................................................................ 42NativeUI Demo.................................................................................................................. 42NativeUI Exercise.............................................................................................................. 43NativeUI Hello World......................................................................................................... 43NativeUI JavaScript Map...................................................................................................43NativeUI JSON.................................................................................................................. 43NativeUI Location.............................................................................................................. 43NativeUI My Graphical Element........................................................................................ 44NativeUI My Native Element............................................................................................. 44NativeUI PDF Demo..........................................................................................................44NativeUI Push Notifications...............................................................................................44NativeUI SOAP..................................................................................................................44
Coding a Mobile Application........................................................................................................ 44Migrating to the New Run-Time Classes................................................................................. 44
Enabling the New Run-Time Classes............................................................................... 44Refactoring MyApplication.................................................................................................45Refactoring MyCanvas...................................................................................................... 45Refactoring Access to Handlers........................................................................................45Using CameraHandler in the New Run Time....................................................................45Using the ImagePicker Class............................................................................................46
Capturing Barcodes Using ImagePicker.................................................................... 47Live Barcode Scanning....................................................................................... 47
Binding MyCanvas with MyApplication..............................................................................48Replacing Deprecated or Removed Methods and Fields with New API........................... 49

MTable of Contents
Using webMethods Mobile Designer Version 10.3 5
Additional Steps.................................................................................................................49Mobile Designer-Provided Run-Time Classes..........................................................................49
Application and Parameter Classes.................................................................................. 50Run-Time Comms Classes................................................................................................51Run-Time Database Classes.............................................................................................51Run-Time Media Classes.................................................................................................. 52Run-Time Serializer Class.................................................................................................53Run-Time Storage Classes............................................................................................... 54Run-Time Utility Classes................................................................................................... 54
Image Caching..........................................................................................................................55Managing the Image Cache..............................................................................................55Disabling Image Caching for the Whole Application......................................................... 55Copying an Image for Drawing......................................................................................... 56
Asset Catalogs..........................................................................................................................56Creating Asset Catalogs for an Application...................................................................... 56
Creating Asset Catalogs using Mobile Development.................................................56Creating iOS Asset Catalogs Manually with Xcode................................................... 57Creating Android Asset Catalogs Manually............................................................... 57
Importing an Asset Catalog Using the Resource Handler................................................ 57Loading an Image from an Asset Catalog........................................................................ 58Android Auto-scaling..........................................................................................................58
Mobile Designer Logging API...................................................................................................58DateFormat API........................................................................................................................ 59File Management API...............................................................................................................59Connectivity Status API............................................................................................................61
Querying the Current Connection State............................................................................61Registering for Connection Status Notifications................................................................61
Permissions API....................................................................................................................... 61Determining Existing Permissions.....................................................................................62Requesting New Permissions........................................................................................... 62
Registering Applications for Data Sharing (custom URIs and MIME-types).............................62Defining Data Sharing for an Application..........................................................................63Handling Data Sharing Events.......................................................................................... 63Supported MIME-types......................................................................................................63
Credential and Isolated Storage API........................................................................................64Security Considerations.....................................................................................................65
Orientation API......................................................................................................................... 65Location API............................................................................................................................. 65
Location Updates in Background Mode............................................................................ 67Geocoding..........................................................................................................................67
Native Authentication API.........................................................................................................68Linking to External (3rd Party) Native Libraries/Frameworks................................................... 68
iOS..................................................................................................................................... 69Android...............................................................................................................................70
Using System.getProperty to Obtain Device Information......................................................... 70

MTable of Contents
Using webMethods Mobile Designer Version 10.3 6
Creating the User Interface...................................................................................................... 73
Defining Resources for a Mobile Application Project................................................................73About the Resource Handler....................................................................................................73Coding the Resource Handler..................................................................................................74
Using Resource Blocks and Resource Packs...................................................................75Storing Resource Files for the Project..................................................................................... 77Launch Screens for Applications..............................................................................................77Setting Project Properties for the Resource Handler............................................................... 78Managing Memory for Your Resource Handler and Resources...............................................79Accessing Resources in Your Application Code...................................................................... 79Compiling Resources Using the +Run-Reshandler Ant Target................................................ 80
Setting Properties and Parameters for a Mobile Application Project.......................................83About Properties and Parameters............................................................................................ 83Where You Set Properties........................................................................................................84Where You Set System Properties...........................................................................................84Project Properties..................................................................................................................... 85Setting Project Properties.........................................................................................................86Where You Define Parameters.................................................................................................87Setting Parameters in the _defaults_.xml and Target Device Files..........................................88Setting Parameters in the Resource Handler Code.................................................................89Using Parameters in Your Application Code............................................................................ 90
Adding Devices to a Mobile Application Project........................................................................91Devices that a Mobile Application Supports.............................................................................91Adding a Device to a Project................................................................................................... 91
Building Mobile Application Projects Using Jenkins...............................................................................95
Getting Started............................................................................................................................... 96About the Mobile Suite Jenkins Plugin.................................................................................... 96Jenkins Terminology................................................................................................................. 96Requirements............................................................................................................................97
Installing and Configuring Jenkins..............................................................................................98Installing Jenkins...................................................................................................................... 98Single-Computer Setup for iOS................................................................................................98
Creating the Default Keychain for the Jenkins User......................................................... 99Configuring Your Server After Installation................................................................................ 99
Adding an Ant Installation Through Global Tools..............................................................99Managing Signing Keys...................................................................................................100
Adding an Android Keystore.................................................................................... 100Exporting iOS Certificates and Private Keys to .p12 Files....................................... 100Adding an iOS .p12 File...........................................................................................101
Uploading Provisioning Profiles.......................................................................................101

MTable of Contents
Using webMethods Mobile Designer Version 10.3 7
Advanced Settings.......................................................................................................................102About.......................................................................................................................................102New Build Steps Provided by the Mobile Suite Plugin...........................................................102Creating New Build Jobs........................................................................................................102
Using the Jenkins-Create-Job Ant Task..........................................................................103Building Mobile Applications From Source Control......................................................... 104
Using the Jenkins-Multi-Build Ant Task.................................................................................. 105
Building and Compiling Mobile Application Projects Using Ant Targets.............................................109
Build Process Overview..............................................................................................................110Build Ant Target Summary..................................................................................................... 110Steps in the Multi-Build Process............................................................................................ 112
Building Mobile Applications..................................................................................................... 117About Building a Mobile Application Project.......................................................................... 117Before You Can Build a Mobile Application Project............................................................... 118
Setting Properties to Build for an iOS Device.................................................................118Setting Properties to Build for an Android Device...........................................................119
Building a Project for Multiple Target Devices........................................................................120Building a Project for the Last Target Devices.......................................................................121Building a Project from the Command Line........................................................................... 121Using Native Tools to Create the Final Binary....................................................................... 123Generating Javadocs for a Project.........................................................................................124
Customizing the Build Process..................................................................................................125About Customizing the Build Process.................................................................................... 125Creating Custom Ant Scripts to Run at Predefined Hook Points........................................... 125
Hook Point Reference..................................................................................................... 126Creating Patch Files to Apply to the Cross-Compiled Code.................................................. 129
Creating a Patch..............................................................................................................130
Installing and Testing Mobile Applications............................................................................................. 133
Using Phoney for Debugging Your Mobile Application........................................................... 134About Using Phoney to Debug Mobile Applications...............................................................134Phoney Ant Target Summary................................................................................................. 135Steps Performed for Phoney Ant Targets.............................................................................. 136Running Phoney from the Command Line.............................................................................138Installing Certificates on Phoney............................................................................................ 143Using Phoney to Monitor an Application’s Memory and Thread Usage................................. 143
Activating Devices....................................................................................................................... 147About Activating Devices........................................................................................................147Activate Devices Ant Summary..............................................................................................147Steps Performed to Activate Handsets.................................................................................. 148

MTable of Contents
Using webMethods Mobile Designer Version 10.3 8
Activating a Device.................................................................................................................150
Installing Applications on Devices............................................................................................ 151About Installing Applications on Devices............................................................................... 151Installing Applications on Android Devices............................................................................ 152
Installing an APK File to an Emulated or Physical Device Using the Android DebugBridge...............................................................................................................................152Installing an APK File to an Emulated or Physical Device Using the Built-in Emulator ofMobile Development........................................................................................................153
Installing Applications on iOS Devices...................................................................................153Installing to a Simulated or Physical Device Using the Apple Xcode IDE....................... 153Installing an Ad-Hoc Build to a Physical Device Using iTunes........................................154
Installing Custom SSL Certificates on Devices...................................................................... 155Installing Certificates on Android 4.0 and Later Physical Devices.................................. 156Installing Certificates on iOS Physical Devices...............................................................156
Project Properties Reference....................................................................................................................159
Android Project Properties......................................................................................................... 160
Build Results Properties............................................................................................................. 160
Build Script Properties................................................................................................................165
Code Conversion Properties...................................................................................................... 167
Cross-Compiler Properties......................................................................................................... 169Debugging...............................................................................................................................170Extra Libraries and Custom Code..........................................................................................170Java Classes.......................................................................................................................... 174Makefile Additions...................................................................................................................175Optimization............................................................................................................................ 178Screen and Display Handling.................................................................................................179Threading................................................................................................................................ 179Android....................................................................................................................................180iOS.......................................................................................................................................... 186
Cross-Product Integration Properties........................................................................................188
Device-Specific Properties..........................................................................................................189
Hook Point Properties................................................................................................................. 190
Multi-Build Selection Properties.................................................................................................193
Phoney Properties....................................................................................................................... 195
Project Language Properties......................................................................................................196

MTable of Contents
Using webMethods Mobile Designer Version 10.3 9
Resource Handler Properties..................................................................................................... 197
Run-Time Classes Properties.....................................................................................................201
Run-Time Code Compilation Properties....................................................................................203
Ant Target Summary..................................................................................................................................205
Ant Target Summary....................................................................................................................206

MEven Header
Using webMethods Mobile Designer Version 10.3 10

MOdd Header
Using webMethods Mobile Designer Version 10.3 11
About this Guide
This guide contains information about using webMethods Mobile Designer to createmobile applications for multiple device platforms.
With respect to processing of personal data according to the EU General Data ProtectionRegulation (GDPR), appropriate steps are documented in webMethods Mobile DevelopmentHelp, Managing Personal Data.
Document Conventions
Convention Description
Bold Identifies elements on a screen.
Narrowfont Identifies service names and locations in the formatfolder.subfolder.service , APIs, Java classes, methods, properties.
Italic Identifies:
Variables for which you must supply values specific to your ownsituation or environment.New terms the first time they occur in the text.References to other documentation sources.
Monospacefont
Identifies:
Text you must type in.Messages displayed by the system.Program code.
{ } Indicates a set of choices from which you must choose one. Typeonly the information inside the curly braces. Do not type the { }symbols.
| Separates two mutually exclusive choices in a syntax line. Typeone of these choices. Do not type the | symbol.
[ ] Indicates one or more options. Type only the information insidethe square brackets. Do not type the [ ] symbols.

MEven Header
Using webMethods Mobile Designer Version 10.3 12
Convention Description
... Indicates that you can type multiple options of the same type.Type only the information. Do not type the ellipsis (...).
Online Information and SupportSoftware AG Documentation Website
You can find documentation on the Software AG Documentation website at “hp://documentation.softwareag.com”. The site requires credentials for Software AG's ProductSupport site Empower. If you do not have Empower credentials, you must use theTECHcommunity website.
Software AG Empower Product Support Website
If you do not yet have an account for Empower, send an email to“[email protected]” with your name, company, and company email addressand request an account.
Once you have an account, you can open Support Incidents online via the eServicesection of Empower at “hps://empower.softwareag.com/”.
You can find product information on the Software AG Empower Product Supportwebsite at “hps://empower.softwareag.com”.
To submit feature/enhancement requests, get information about product availability,and download products, go to “Products”.
To get information about fixes and to read early warnings, technical papers, andknowledge base articles, go to the “Knowledge Center”.
If you have any questions, you can find a local or toll-free number for your countryin our Global Support Contact Directory at “hps://empower.softwareag.com/public_directory.asp” and give us a call.
Software AG TECHcommunity
You can find documentation and other technical information on the Software AGTECHcommunity website at “hp://techcommunity.softwareag.com”. You can:
Access product documentation, if you have TECHcommunity credentials. If you donot, you will need to register and specify "Documentation" as an area of interest.
Access articles, code samples, demos, and tutorials.
Use the online discussion forums, moderated by Software AG professionals, toask questions, discuss best practices, and learn how other customers are usingSoftware AG technology.
Link to external websites that discuss open standards and web technology.
MOdd Header
Using webMethods Mobile Designer Version 10.3 13
Data ProtectionSoftware AG products provide functionality with respect to processing of personal dataaccording to the EU General Data Protection Regulation (GDPR). Where applicable,appropriate steps are documented in the respective administration documentation.

MEven Header
Using webMethods Mobile Designer Version 10.3 14

MOdd Header
Getting Started
Using webMethods Mobile Designer Version 10.3 15
1 Getting Started
■ About Mobile Designer ................................................................................................................. 16
■ Configuring Mobile Designer ........................................................................................................ 17

MEven Header
Getting Started
Using webMethods Mobile Designer Version 10.3 16
About Mobile Designer
webMethods Mobile Designer OverviewwebMethods Mobile Designer provides a set of standardized coding abstraction layers,processes, and utilities that help you to develop mobile applications and port theapplications across multiple platforms.
Mobile Designer also includes a cross compiler that you can use to compile the samesource code so that it can run on a wide variety of platforms. You do not have to waituntil the post-development process to apply the requirements for all mobile platformsrequired. You can apply cross-compilation requirements throughout the developmentprocess and launch a multi-platform solution simultaneously.
Mobile Designer Build-Time ComponentThe Mobile Designer build-time component is a standard build script that each projectuses for each device to:
Compile and compact the resources including data-arrays, text, images, fonts, andpalees.
Create the parameters a specific build uses.
Replace (hot-swap) the generic code in the underlying run-time Mobile Designercode branches with code specific to the device.
Reference any project-specific code branches, compilation stubs, or inclusionlibraries.
Compile the code.
Optionally obfuscate the code.
Package, build, and sign the final binary.
Mobile Designer Cross Compiler and Run-Time ClassesIn Mobile Designer you can cross compile your mobile application's Java code into C++ or Java. Mobile Designer can then compile the application code using the native toolsthat were installed with the target platform’s SDKs. Mobile Designer then links thecompiled code to the libraries installed with the SDK. When building an application forthe target platform, the relevant target-platform SDKs must be installed and configured.For more information, see “Seing Up Platforms” on page 27.

MOdd Header
Getting Started
Using webMethods Mobile Designer Version 10.3 17
You can use the run-time classes described in the webMethods Mobile Designer JavaAPI Reference to provide a wide array of features found on mobile devices. To handledevice-specific differences, Mobile Designer provides the classes and abstraction layersto provide a consistent base for building your application. The abstraction layersprovide the ability to load images, detect interruptions, and handle text, as well as otherfunctions, such as to establish an HTTP connection.
Parameter-Driven ProjectsMobile Designer projects use parameters and properties to simplify the processof including and/or excluding features based on a target device. Mobile Designerpredefines some parameter and property values, for example, the profile seings fordevices. You can override the predefined seings for a specific mobile application projectand/or for a specific target device.
When creating an application, typically you have common logic that works for all targetdevices. However, you might require branches in the logic to address the needs of aspecific target device. For example, you might need to omit or alter a feature for a targetdevice, or you might need to position an image relative to the screen dimensions for atarget device. To accommodate device-specific logic, your application logic can branchbased on parameter values that are set using the device profile seings.
Properties and parameters also drive how Mobile Designer builds applications fora target device. Mobile Designer drives builds using a combination of properties,parameters, and paths, all of which you can customize and override. For example, theseproperties, parameters, and paths control stubs against which to compile, packagersto use when making the final binaries, details about screen dimensions, the soundAPIs, and seings that are most appropriate for a target device, and other general andapplication-specific seings.
Configuring Mobile Designer
About Configuring Mobile DesignerYou configure Mobile Designer by altering the properties located in the following file:
Mobile Designer_directory/sdk.properties
The properties in the sdk.properties file apply globally to all Mobile Designer projects.See the following for more information:
For instructions on how to update and add properties to the sdk.properties file, see “Updatingthe sdk.properties File to Configure Mobile Designer” on page 18.
For a description of the configuration properties, see “Mobile Designer ConfigurationProperties (sdk.properties)” on page 18.

MEven Header
Getting Started
Using webMethods Mobile Designer Version 10.3 18
Note: You can set properties for a project that override the seings in thesdk.properties file.
Updating the sdk.properties File to Configure MobileDesignerThe sdk.properties file is an ASCII text file that you can edit with any text editor. Updatethe sdk.properties file with name value pairs, using the following format:property =value
Note: The sdk.properties file contains default values for some properties. If thevalue you need to specify for a property is a path, a best practice is to usethe convention shown in the default unless you are working on a differentoperating system. For example, if a path uses c:\\a\\b\\c, it is best to specifythe path using that notation rather than c:/a/b/c. Although both notations aretechnically correct, some third-party tools might encounter issues.
When updating Windows paths, use a forward slash character (/) or anescaped slash character (\\) in the properties file.
To add or update properties in the sdk. properties file
1. Open the sdk.properties file in your Mobile Designer installation directory using atext editor.
2. Locate the property you want to update, or add a property if it does not alreadyexist. For more information about the properties you can specify and valid values,see “Mobile Designer Configuration Properties (sdk.properties)” on page 18.
3. Save and close the sdk.properties file.
Mobile Designer Configuration Properties (sdk.properties)The properties in the sdk.properties file are seings that apply globally to all MobileDesigner projects.
JAD and Manifest FilesUse the JAD and manifest files properties to configure the vendor name and URL thatMobile Designer uses when creating project and metadata files.
Although the JAD and manifest files properties have default values, you should setvalues for these properties to specify information for your own organization.
Tip: You can override the JAD and manifest files properties on a project-by-project basis, such as when creating ported builds on an application for a

MOdd Header
Getting Started
Using webMethods Mobile Designer Version 10.3 19
separate development company. To do so, specify the JAD and manifestfiles properties in your project's targets/_defaults_.xml file. For moreinformation about seing project properties, see “Seing Project Properties”on page 86.
project.jad.vendor.name
Specifies the vendor name included in project and/or application metadata files thatare bundled with the final binary. This is usually used as part of the data that uniquelyidentifies an application in an App store.
Value Vendor name.
Default Software AG
Example project.jad.vendor.name=My Company
project.jad.vendor.url
Specifies the URL to the vendor’s website.
Value URL
Default http://www.softwareag.com
Example project.jad.vendor.url=http://www.mycompany.com
Java Compiler CheckWhen Mobile Designer executes an Ant target, the Java compiler is usually required.Use the mobiledesigner.javac.detection.mode property to specify whether MobileDesigner checks for the Java compiler when executing an Ant target and the action totake if the Java compiler is not present.
mobiledesigner.javac.detection.mode
Specifies whether you want Mobile Designer to check whether the Java compiler ispresent in a user's currently configured version of Java when the user executes a MobileDesigner Ant target. Mobile Designer checks for javac.exe on Windows or javac onMacintosh.
Value One of the following:
fail if you want Mobile Designer to check for the Java compiler whena user executes an Ant target. If the Java compiler is not found, Mobile

MEven Header
Getting Started
Using webMethods Mobile Designer Version 10.3 20
Designer immediately stops the running Ant target with an errormessage.
warn if you want Mobile Designer to check for the Java compiler whena user executes an Ant target. If the Java compiler is not found, MobileDesigner displays a warning message and continues to execute the Anttarget.
none if you want Mobile Designer to execute the Ant target withoutchecking for the Java compiler.
Default warn
Example mobiledesigner.javac.detection.mode=fail
KZip PropertyYou can configure Mobile Designer to use KZip for JAR compression. When KZip is notavailable, Mobile Designer uses 7Zip as the default JAR packager if 7Zip is configured. If7Zip is not configured, Mobile Designer falls back to using 'jar'.
You can download the Windows version of KZip from “Ken Silverman’s Utility Page”.You can download the Linux and Mac OS X version from “JonoF’s Games and Stuff”.
j2me.packager.kzip
Specifies the location of the KZip executable.
Value Path to the installed KZip executable.
Default C:/Program Files/KZip/kzip.exe
Example j2me.packager.kzip=D:/Program Files/KZip/kzip.exe
7Zip PropertyYou can configure Mobile Designer to user 7Zip for JAR compression. When 7Zip is notavailable, Mobile Designer uses 'jar' as the default JAR packager. You can download7Zip for most platforms here: “hp://www.7-zip.org/download.html”.
j2me.packager.7zip
Specifies the location of the 7Zip executable.
Value Path to the installed 7Zip executable
MOdd Header
Getting Started
Using webMethods Mobile Designer Version 10.3 21
Default C:/Program Files/7-Zip/7z.exe
Example j2me.packager.7zip=D:/Program Files (x86)/7-Zip/7z.exe
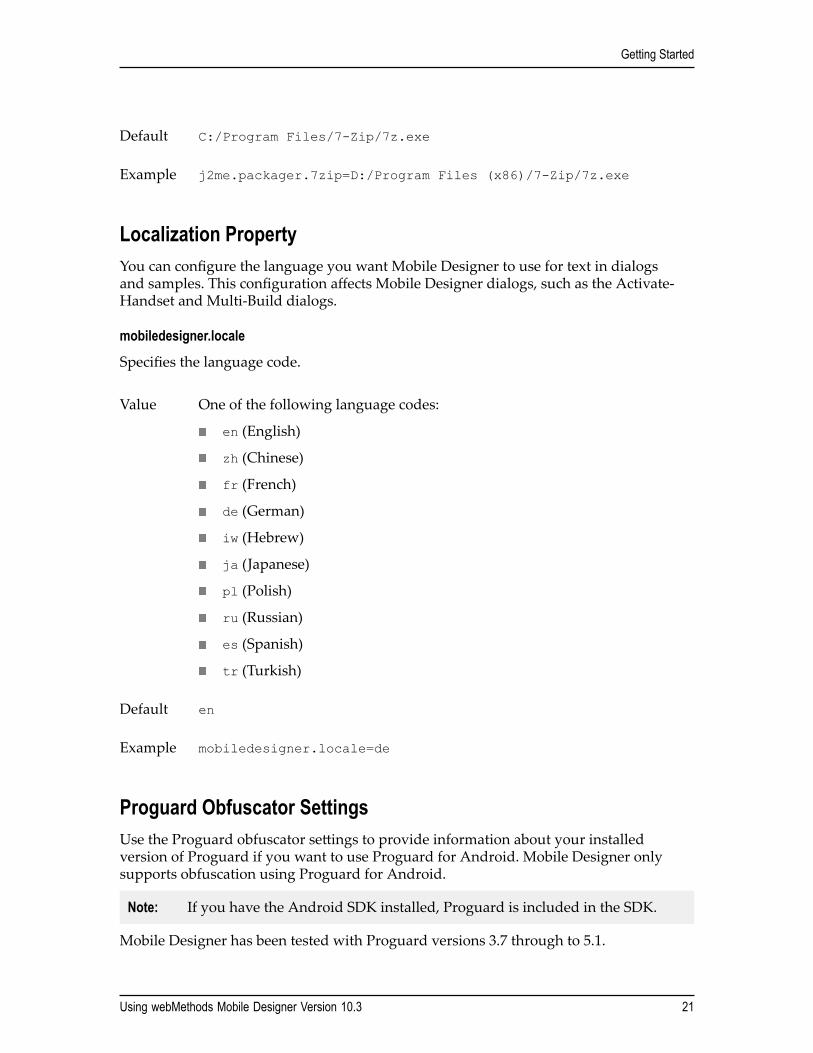
Localization PropertyYou can configure the language you want Mobile Designer to use for text in dialogsand samples. This configuration affects Mobile Designer dialogs, such as the Activate-Handset and Multi-Build dialogs.
mobiledesigner.locale
Specifies the language code.
Value One of the following language codes:
en (English)
zh (Chinese)
fr (French)
de (German)
iw (Hebrew)
ja (Japanese)
pl (Polish)
ru (Russian)
es (Spanish)
tr (Turkish)
Default en
Example mobiledesigner.locale=de
Proguard Obfuscator SettingsUse the Proguard obfuscator seings to provide information about your installedversion of Proguard if you want to use Proguard for Android. Mobile Designer onlysupports obfuscation using Proguard for Android.
Note: If you have the Android SDK installed, Proguard is included in the SDK.
Mobile Designer has been tested with Proguard versions 3.7 through to 5.1.

MEven Header
Getting Started
Using webMethods Mobile Designer Version 10.3 22
Caution: Proguard version 4.0.1 and later includes method collapsing. If yourapplication has collapsible methods, this might cause problems if a device hasbuilt in method size limits. If this is the case, you can change parameters touse an earlier version of Proguard or different execution parameters for thatparticular device.
proguard.library.root
Specifies the Proguard directory that contains the proguard.jar file.
Value Path to the Proguard directory.
Default None.
Example proguard.library.root=C:/Proguard/lib
obfuscator.proguard.version
Specifies the Proguard configuration and mapping you want to use.
Value Configuration and mapping from the Tools/Proguard folder.
Default One of the following:
Proguard version 4.7 if the version supplied with the Android SDK isavailable
Otherwise:
If building for the Android platform, Proguard version 4.3
If building for another platform, Proguard version 4.0.1
Example obfuscator.proguard.version=proguard_4.7
obfuscator.proguard.library.filename
Specifies the name of your Proguard library.
Value Proguard library name without the .jar extension.
Default None
Example obfuscator.proguard.library.filename=proguard

MOdd Header
Getting Started
Using webMethods Mobile Designer Version 10.3 23
obfuscator
Enables or disables use of the obfuscator.
Value proguard if you want to use Proguard as the obfuscator.
none to disable the obfuscator.
Default none
Example obfuscator=proguard
Project Build SettingsYou can specify the name of the project directory to use for the output of builds.
project.build.dir.rel.root
Specifies the name of the folder that you want to use for the output of builds. This folderis relative to a project’s base directory.
Value Folder name to use for the output of project builds.
Default Builds
Example project.build.dir.rel.root=Output
Proxy SettingsConfigure proxy seings if you need to use a proxy server to connect to the Internet.
Note: The Software AG Installer prompts for proxy seings during installation, andthe values provided at installation are saved to the sdk.properties file.
proxy.hostname
Specifies the proxy server host name.
Value Host name of the proxy server.
Default No default.
Example proxy.hostname=proxyserver

MEven Header
Getting Started
Using webMethods Mobile Designer Version 10.3 24
proxy.port
Specifies the proxy server port number.
Value Port number for the proxy server.
Default No default.
Example proxy.port=1080
proxy.username
Specifies the user name of a user with authority to connect to the proxy server.
Value User name
Default No default
Example proxy.username=Administrator
proxy.password
Specifies the password associated with the user name specified in the proxy.usernameproperty.
Value Password for the proxy server.
Default No default.
Example proxy.password=secret
Platform-Specific PropertiesYou must configure the location of the third-party SDKs and compilers that you wantMobile Designer to use when producing mobile application bundles. The following tablelists where you can find information about the required configuration for each platform.
Note: For a list of supported SDKs, see “Supported SDK Versions” on page 28.

MOdd Header
Getting Started
Using webMethods Mobile Designer Version 10.3 25
Platform Description
Android “Configuring Mobile Designer for the AndroidSDK” on page 30
iOS “Configuring Mobile Designer for the iOSPlatform” on page 37
Environment Variable for Mobile DesignerWith previous versions, Mobile Designer created an environment variable,MOBILE_DESIGNER, on the computer when Mobile Designer was installed. As a result,the installation process set the value of MOBILE_DESIGNER to the location of the latestMobile Designer installed instance. As of version 9.8, this environment variable isconsidered deprecated and is no longer created by default. However, you can continueto use it if you want. If you want to continue using this feature, you must create/alter the variable yourself in the indicated locations. If you do not want to use theMOBILE_DESIGNER environment variable any more, you can disable it. Then use thefollowing when calling Ant from the command line or IDE:-Denv.MOBILE_DESIGNER=Mobile Designer_dir
Mobile Designer uses the environment variable at run time to determine its location sothat it can locate Mobile Designer-specific information, for example, the sdk.propertiesfile.
If you have multiple Mobile Designer installations on a single machine, you can setthe MOBILE_DESIGNER environment variable to indicate the current instance of MobileDesigner to use.
The following indicates where you can find the environment variable:
On Windows, in System Properties > Advanced > Environment Variables in the Uservariables group
On Macintosh:
OSX 10.7 or earlier in the ~/.MacOSX/environment.plist file
Later versions in /etc/launchd.conf
Preparing Linux Systems for Mobile DesignerWhen installing Mobile Designer on 64-bit Linux installs, the 32-bit glibc package mustalso be provided. Depending on your distribution, it can be installed via one of thefollowing commands.

MEven Header
Getting Started
Using webMethods Mobile Designer Version 10.3 26
For RedHat Enterprise Linux, CentOS and Fedora users:
sudo dnf install glibc.i686
Users with older versions of Fedora, RedHat Enterprise Linux, and CentOS mayhave to use yum in place of dnf.
For SuSE Enterprise Linux, the glibc-32bit package must already be installed. This isbest checked by aempting to install it. Issue the command:
sudo zypper install glibc-32bit
If the package is already installed, the output indicates this.
Optionally, if the user wants to use Mobile Designer without the Mobile Developmentperspective of Software AG Designer, it is useful to install Ant and Gradle directly.
For RedHat Enterprise Linux, CentOS and Fedora users:
sudo yum install ant gradle
For SuSE Enterprise Linux:
sudo zypper install ant gradle
Note: Some Linux distributions may not have Gradle or Ant available through thestandard package repository. To install SDKMAN! and Gradle and/or Antmanually, refer to “hps://gradle.org/install/”.
Additionally, users can use the JDK provided by the Software AG Installer as defaultby issuing the following commands. For all platforms, it may be necessary to repeat thisprocess for javac and other commands.
For RedHat Enterprise Linux, CentOS and Fedora users:
sudo alternatives --install /usr/bin/java java [SAG_INSTALL_DIR]/jvm/jvm/bin/java
sudo alternatives --config java
Then select the new default.
For SuSE Enterprise Linux:
sudo alternatives --install /usr/bin/java java [SAG_INSTALL_DIR]/jvm/jvm/bin/java
sudo alternatives --config java
Then select the new default.

MOdd Header
Setting Up Platforms
Using webMethods Mobile Designer Version 10.3 27
2 Setting Up Platforms
■ Supported SDK Versions ............................................................................................................. 28
■ Setting Up the Android Platform .................................................................................................. 28
■ Setting Up the iOS Platform ........................................................................................................ 33

MEven Header
Setting Up Platforms
Using webMethods Mobile Designer Version 10.3 28
Supported SDK Versions
SDK Versions that Mobile Designer SupportsThe following table lists the SDK versions that Mobile Designer supports for eachplatform.
Platform SDK Supported versions
Android SDK 5.0 through 8.1
Note: The minimal SDK version you must use tocompile your project is 6.0 (API 23). However,you can still run your project on devices with alower API.
iOS SDK 8.3.2 through 11.4
Setting Up the Android Platform
About Setting Up the Android PlatformBefore you can use Mobile Designer to build applications for the Android platform, youmust set up your environment. The following table lists required and optional tasks toset up the environment.
Setup RequiredorOptional
Tasks
DevelopmentEnvironment
Required Install the Android Studio IDE along with theAndroid SDK.
For more information, see:
“Installing the Android Studio IDE” onpage 29.

MOdd Header
Setting Up Platforms
Using webMethods Mobile Designer Version 10.3 29
Setup RequiredorOptional
Tasks
MobileDesignerConfiguration
Required Update the Mobile Designer sdk.properties file toprovide information about the installed AndroidSDK.
For more information, see “Configuring MobileDesigner for the Android SDK” on page 30.
Optional Define Android emulators if you want to testAndroid applications on emulated devices.
For more information, see “Seing Up an AndroidVirtual Device (Emulator)” on page 31.
Emulators
Optional Specify a proxy server to use if the Androidemulator must access the Internet through a proxyserver.
For more information, see “Using the AndroidEmulator with a Proxy Server” on page 32.
The procedures in this documentation do not cover all possible setups and scenarios.Refer to the Android Developer website at “hp://developer.android.com/index.html”for further details.
Installing the Android Studio IDEUse this procedure to install Android Studio IDE along with Android SDK on Windows,Mac OS, or Linux so that you can use it with Mobile Designer.
To install the Android Studio IDE
1. Open the following webpage in a browser “hps://developer.android.com/studio/install”.
2. Follow the installation procedure for your platform.
3. After successful installation, in the Android SDK Manager, scroll down the listto Extras and select Google Cloud Messaging for Android Library (Obsolete), Google PlayServices, ConstraintLayout for Android, and Solver for ConstraintLayout.

MEven Header
Setting Up Platforms
Using webMethods Mobile Designer Version 10.3 30
Configuring Mobile Designer for the Android SDKIf you selected default location when installing Android SDK, you must configureMobile Designer to provide information about the Android Studio installation path.
To configure Mobile Designer for the Android SDK
1. Use a text editor to open the following file:
Mobile Designer_directory/sdk.properties
2. Locate the Android section of the file.
3. Set the values for the properties in the following table.
Note: When specifying paths in the sdk.properties file, use a forward slashcharacter ("/") or an escaped slash character ("\\") to separate folders, evenwhen specifying Window paths.
Property and Setting
android.studio.install.dir
Optional. Nominates the install directory for the Android Studio IDE. This willbe used to find templates and scripts used to create the Android Studio projectstructure. Set this property only if you changed the default installation location.The defaults are:
For Windows: C:/Program Files/Android/Android Studio
For Mac: /Applications/Android Studio.app/Contents
android.package
Set to the default package prefix that Mobile Designer uses when creating thefinal build for an Android device.
android.bin.dir.root
Optional. Set to the path of the location of the default Android SDK that youwant Mobile Designer to use to compile mobile applications for Androiddevices. Use this property only if you have to use standalone Android SDK. Bydefault, Android SDK installed with Android Studio will be used.
For Windows: C:/Users/<your username>/AppData/Local/Android/Sdk
For Mac: /Users/<your username>/Library/Android/sdk
android.studio.temp.build.dir

MOdd Header
Setting Up Platforms
Using webMethods Mobile Designer Version 10.3 31
Property and Setting
Optional (Windows only). With Windows PCs, the combination of file andfolder names created during the build process may go over the character limitallowed (approx. 240 characters). This will cause unexpected build failures. Usethe android.studio.temp.build.dir property to nominate a folder with ashort path that can be used as a temporary build directory. Use this propertyonly if you want to change the default value. The default is C:/mdtemp.
4. Optionally, if you want to override default values for a project, set the projectproperty project.android.sdk.version.override to the API number you wantto use.
Note: Using an API earlier than 23 may cause failed builds.
5. Optionally configure Proguard, which is included in the Android SDK. Forinformation about the properties you need to set to configure Proguard, see“Proguard Obfuscator Seings” on page 21.
6. Save and close the file.
Setting Up an Android Virtual Device (Emulator)You can define Android emulators that you can use to test mobile applications.
To create an Android Virtual Device (Emulator)
1. Open the project in Android Studio, and select Tools > Android > AVD Manager.
2. From the AVD Manager tool, select Tools > Manage AVDs.
The AVD Manager displays the virtual devices that you have defined.
3. Click New to create a new device.
4. Perform the following in the window for creating a new Android virtual device:
a. In the Name field, type a meaningful name for the device you are adding.
Tip: It is helpful to include the Android API level and screen size in thename.
b. Select the API level you want to emulate.
The selected API level determines the version of the Android operating systemthat runs on your virtual device, as well as default features for that device.
c. Set the remaining seings that you want to emulate. These seings include:Specifying and/or creating an SD Card imageAltering the screen size of the device (the "skin" section)

MEven Header
Setting Up Platforms
Using webMethods Mobile Designer Version 10.3 32
Adding any extra hardware features, such as GPS
5. Click Create AVD.
Starting the Android Virtual Device (Emulator)
Note: If the Android emulator must access the Internet through a proxy server,you must define proxy information. See “Using the Android Emulator with aProxy Server” on page 32.
To start an Android virtual device
1. Open the project in Android Studio, and select Tools > Android > AVD Manager.
2. Select the virtual device you want to start.
3. Click Start.
Using the Android Emulator with a Proxy ServerIf the Android emulator must access the Internet through a proxy server, you mustspecify the proxy server to use.
Proxy Information to Provide
To provide proxy server information, use one of the following formats based on whetherauthentication is required for the proxy server:
If user authentication is not required, use:proxyMachineName :port
If user authentication is required, use:username :password @proxyMachineName :port
Specifying the Proxy Information
You can specify the proxy server by either providing the proxy information whenstarting the emulator or by defining an environment variable.
To specify the proxy server when starting the emulator, start the Android Emulator usingthe -http-proxy proxy option, where proxy is the proxy information using one ofthe formats described above.
To specify using an environment variable, set the http_proxy to the value you wantto use for proxy, where proxy is the proxy information using one of the formatsdescribed above.
The Android emulator checks the value of the http_proxy environment variablewhen it starts up and uses the value if one is defined.
MOdd Header
Setting Up Platforms
Using webMethods Mobile Designer Version 10.3 33
Note: Launching the Android emulator with the -verbose flag displays the currenthost name and port used for the proxy.
Setting Up the iOS Platform
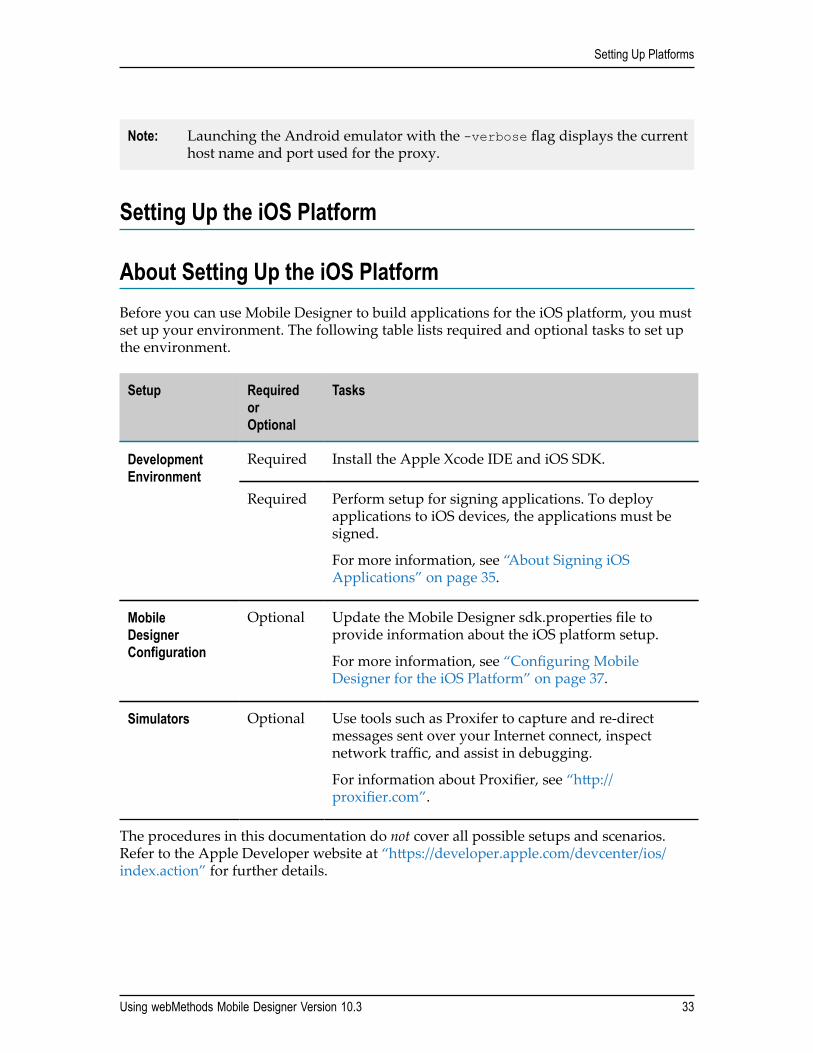
About Setting Up the iOS PlatformBefore you can use Mobile Designer to build applications for the iOS platform, you mustset up your environment. The following table lists required and optional tasks to set upthe environment.
Setup RequiredorOptional
Tasks
Required Install the Apple Xcode IDE and iOS SDK.DevelopmentEnvironment
Required Perform setup for signing applications. To deployapplications to iOS devices, the applications must besigned.
For more information, see “About Signing iOSApplications” on page 35.
MobileDesignerConfiguration
Optional Update the Mobile Designer sdk.properties file toprovide information about the iOS platform setup.
For more information, see “Configuring MobileDesigner for the iOS Platform” on page 37.
Simulators Optional Use tools such as Proxifer to capture and re-directmessages sent over your Internet connect, inspectnetwork traffic, and assist in debugging.
For information about Proxifier, see “hp://proxifier.com”.
The procedures in this documentation do not cover all possible setups and scenarios.Refer to the Apple Developer website at “hps://developer.apple.com/devcenter/ios/index.action” for further details.

MEven Header
Setting Up Platforms
Using webMethods Mobile Designer Version 10.3 34
Installing the Apple Xcode IDEMobile Designer supports Xcode 7.3.1 and later. For information about supported iOSSDK versions, see “SDK Versions that Mobile Designer Supports” on page 28.
Note: The iOS SDK is included as part of the Xcode installation. Be aware of thefollowing:
Use of Xcode 7.3.1 requires OS 10.11.5 El Capitan.Developing and testing applications that run on iOS 9 requires Xcode 7.Developing and testing applications that run on iOS 10 requires Xcode 8.Developing and testing applications that run on iOS 11 requires Xcode 9.
This section provides only the minimal information for installing the Apple XcodeIDE so that you can use it with Mobile Designer. For additional details, refer toinformation about the Apple Xcode IDE on the Apple Developer website at “hps://developer.apple.com/xcode”.
To install the Xcode IDE from the Mac App Store
1. Ensure that your environment meets the requirements for the Xcode IDE.
You can find the requirements at “hps://developer.apple.com/support/ios/ios-dev-center.html”
2. On your Macintosh, open the Mac App Store.
3. Search for Xcode.
Note: You can find Xcode in iTunes at: “hps://itunes.apple.com/us/app/xcode/id497799835?mt=12”. From iTunes, use the link to view Xcode in the MacApp Store.
4. Install Xcode from the Mac App Store.
Note: You might need to sign in with a user account that has membership in theiOS development program.
5. After installation, open Xcode.
6. On the System Component Installation screen, install Device Support.
7. When the installation completes, click Start Using Xcode.
8. Select Xcode > Preferences.
9. Select the Downloads tab.
10. Next to Command Line Tools, click Install.

MOdd Header
Setting Up Platforms
Using webMethods Mobile Designer Version 10.3 35
About Signing iOS ApplicationsTo deploy applications to iOS devices, the applications must be signed. Duringdevelopment, you can sign applications using a development certificate that is limited toa small set of devices. To deploy to the App Store, you must sign the application with adistribution certificate.
If you develop on a Macintosh for iOS, you can use your existing signing environmenton the same machine, or you can import an existing environment to another machine.If you do not have an existing signing environment, you must create a signingenvironment.
Using an Existing Signing EnvironmentIf you are already developing on a Macintosh for iOS and intend to use the samemachine for developing iOS applications with Mobile Designer, you can use yourexisting signing environment.
To use an existing signing environment on the same machine
1. Locate your .mobileprovision files and note the path to the following so that you willhave it available to configure Mobile Designer.
Ad-hoc profile you intend to use for development
Distribution profile, if you have one
You will need the path to the .mobileprovision files when you configure project-specific properties for signing, such as ios.provisioning.profile.appstore andios.provisioning.profile.adhoc. For more information, see “Seing Propertiesto Build for an iOS Device” on page 118.
2. Export your existing certificates using one of the following methods:
If you use Xcode to automatically manage your certificates, you can export yourexisting certificates using the Xcode Organizer.
Download your certificates from the iOS provisioning portal, at “hps://developer.apple.com/ios/manage/overview/index.action”.
Importing the Signing Environment from Another MacintoshTo use your existing signing setup on another Macintosh, you export signinginformation from an existing Macintosh and copy it to the Macintosh where you want todevelop iOS applications with Mobile Designer.

MEven Header
Setting Up Platforms
Using webMethods Mobile Designer Version 10.3 36
To import an existing signing environment to another machine
1. On the Macintosh with signing environment you want to use, start the KeychainAccess application, which is in the Applications/Utilities folder.
2. In the Keychain Access application, in the Keychains panel, ensure that login isselected.
3. In the Category panel, select Certificates.
4. Make a note of the following information:
Full name of your iPhone Developer certificate. The full name is typically:
iPhone Developer: Firstname Lastname
Full name of your iPhone Distribution certificate. The full name is typically:
iPhone Distribution: CompanyName
5. Export the private key associated with the developer certificate:
a. In the Category panel, select Keys.
b. Select the private key that is associated with the developer certificate. Select File >Export Items.
c. When prompted, create a password for exporting. You will need to supply thispassword when importing the private key to the target Macintosh.
Important: Do not use the password you use to login to your Macintosh.
d. When saving the private key, be sure to save in Personal Information Exchange (p12)format.
Important: You should keep a backup copy of your private key by copying the keyto removable media and storing it somewhere safe. If you lose yourprivate key, for example, due to a hardware failure, you will not be ableto deploy applications. This is particularly important when you want toupdate old versions of an application submied to the App Store. Appledoes not keep information about your private key.
6. Move the exported p12 key file to the Macintosh where you want to develop iOSapplications with Mobile Designer.
a. Copy the p12 key file to the target Macintosh and save in any location.
b. Double-click the p12 key file to begin the key import process.
c. When prompted for a password, supply the password you created whenexporting the private key.
The private key and required certificates are imported into the target Macintosh
7. Download the appropriate .mobileprovision files for ad-hoc and distribution fromthe developer portal, “hps://developer.apple.com/ios/manage/provisioningprofiles/

MOdd Header
Setting Up Platforms
Using webMethods Mobile Designer Version 10.3 37
index.action”, or copy the. mobileprovision files from your existing environment toan appropriate location from the target Macintosh.
Creating a New Signing EnvironmentIf you do not have a signing environment, you must set up your environment. You canfind setup instructions on the iOS Provisioning Portal at “hps://developer.apple.com/ios/manage/overview/index.action”.
The setup steps include the following:
Create and install iOS development certificates
Nominate device IDs for development
Nominate an App ID
Create a Development Provisioning Profile
Note: When your environment is ready to distribute iOS applications as Ad-Hocor App Store builds, you must create the appropriate .mobileprovision files.You configure Mobile Designer to specify where the .mobileprovision files arelocated.
Configuring Mobile Designer for the iOS PlatformAfter installing the Apple Xcode IDE and seing up your environment for signing iOSapplications, you can configure Mobile Designer to provide information about the iOSplatform setup.
To configure Mobile Designer for the iOS platform
1. Use a text editor to open the following file:
Mobile Designer_directory/sdk.properties
2. Locate the iOS section of the file.
3. Set the values for the properties in the following table.
Property and Setting
ios.bundle
Set to the prefix to use for the CFBundleIdentifier.
The CFBundleIdentifier is a unique identifier for your application bundle.For the prefix, it is recommended that you use your company's domainname, with each portion in reverse order. For example, for the domain namemycompany.com, the recommended identifier is “com.mycompany”. Anexample of seing the property for this identifier is:

MEven Header
Setting Up Platforms
Using webMethods Mobile Designer Version 10.3 38
Property and Settingios.bundle=com.mycompany.
Note: It is important to include a trailing period to act as a separator whenspecifying the ios.bundle property. Mobile Designer appends yourapplication's name directly to the ios.bundle value to create yourapplication's unique CFBundleIdentifier. For example, for an applicationnamed “MyApp”, the name is "com.mycompany.MyApp".
Note: If you have several Xcode versions installed on your system and want touse a specific one, run the following command in the terminal:
sudo xcode-select -s path_to_Xcode.app/contents/Develop
4. Save and close the file.

MOdd Header
Creating Mobile Application Projects
Using webMethods Mobile Designer Version 10.3 39
3 Creating Mobile Application Projects
■ Setting Up a Mobile Application Project ...................................................................................... 40
■ Coding a Mobile Application ........................................................................................................ 44
■ Defining Resources for a Mobile Application Project ................................................................... 73
■ Setting Properties and Parameters for a Mobile Application Project ........................................... 83
■ Adding Devices to a Mobile Application Project .......................................................................... 91

MEven Header
Creating Mobile Application Projects
Using webMethods Mobile Designer Version 10.3 40
Setting Up a Mobile Application Project
About Mobile Application ProjectsYou set up a mobile application project for each mobile application you want to develop.The project contains the application code, defines the devices you want the applicationto support, and references all the resources that the project requires.
Perform the following actions to set up a mobile application project:
Create the mobile application project as described in webMethods Mobile DevelopmentHelp, Creating a New Mobile Project.
Code your application using Java, specifically J2ME. Mobile Designer providesseveral run-time classes that you can use in your application. For more information,see “Coding a Mobile Application” on page 44 and webMethods Mobile DesignerJava API Reference.
Software AG recommend that you use the default UniversalResHandler implementationthat Mobile Development provides as a resource handler. The resouce handleridentifies the resources that your project requires. You can still code your ownresource handler though this is deprecated and not adviced. For more information,see “Defining Resources for a Mobile Application Project” on page 73.
Set properties for your project. Although there are numerous properties you candefine for a project, Mobile Designer provides initial seings and/or defaults formost. However, there are a few properties you must set for your project. For moreinformation, see “Seing Project Properties” on page 86.
Set parameters for your project. Parameters contain seings about devices andresources. Additionally, you can define your own application-specific parameters.In your application code, you use parameters to perform such tasks as loadingresources or branching the logic based on parameter values to address the needs ofspecific target devices. For more information, see “Where You Define Parameters” onpage 87.
Mobile Development will add devices that you want your application to supportto your project when you define launch configurations. For more information, seewebMethods Mobile Development Help, Building a Mobile Project. However, you cancontinue to add devices using Ant targets as described in “Adding Devices to aMobile Application Project” on page 91.
Sample Projects Provided with Mobile DesignerMobile Designer comes with the sample projects described in this section. The sampleprojects are located in the following directory:

MOdd Header
Creating Mobile Application Projects
Using webMethods Mobile Designer Version 10.3 41
Mobile Designer_directory/Samples
Expense TrackerThe Expense Tracker sample project uses many NativeUI objects. It demonstrates howto solve design and implementation difficulties when developing mobile applications.It features user interface conventions that are common requirements for mobileapplications, such as dynamic list population and display; data entry, storage andreporting mechanisms; handling for multiple device platforms and form factors.
Library JSONThe Library JSON sample project is an example of a library project. It demonstrates howyou can precompile parts of your codebase into separate libraries that you can thenreference in another project. Specifically, this project uses third-party JSON Java code.For more information about creating and using libraries, see “Linking to External (3rdParty) Native Libraries/Frameworks” on page 68.
You compile the project for the target platforms for which you want to use the library. Alibrary project’s build.xml references libtargets.xml rather than targets.xml. The targetlibraries for this sample project are J2ME (for Phoney), Android, and iOS. To use thissample project, you can import it, then cross-compile and build the library using the+Library-Build Ant task.
Note: For a sample of a project that references this library, see the NativeUI JSONsample project.
NativeUI Asset CatalogThe NativeUI Asset Catalog application demonstrates the use of a simple Asset Catalogsetup. A single image, "TheImage.png", is included at various resolutions for Androidand iOS devices.
NativeUI ContactsThe NativeUI Contacts application demonstrates the use of the Personal InformationManagement (PIM) APIs defined for JSR 75.
The sample demonstrates using the PIM APIs to:
Read information for contacts that already exist in a device’s address book. This canbe done for devices running on any platform.
Edit existing contacts in a device’s address book and adding new contacts to adevice’s address book. This can be done for devices running on platforms thatsupport editing the address book.

MEven Header
Creating Mobile Application Projects
Using webMethods Mobile Designer Version 10.3 42
NativeUI Credential StoreThe Native UI Credential Store application demonstrates the use of the APIs for theCredentialStore and IsolatedKeyValueStore classes. It is possible to load and store mappingsfor server URLs to user name/password credentials, and more generic key/value seingsthat may need to be held in isolated storage.
Note: For this sample application, no consideration is made to the underlyingsecurity model that backs up these classes. Care should be taken to ensurethat the implementation matches any storage requirements for this class ofdata.
NativeUI DatabaseThe NativeUI Database sample project demonstrates the use of databases on supportedplatforms.
NativeUI DemoThe NativeUI Demo application demonstrates the use of all the major native userinterface (NativeUI) classes in Mobile Designer.
The sample also demonstrates how to support tablet devices. It contains code todetermine whether it is running on a tablet based on the screen size of the device. Whenrunning on a tablet, the application uses multiple panes in the user interface. For moreinformation about using panes, see webMethods Mobile Designer Native User InterfaceReference.
Mobile Designer provides three versions of the NativeUI Demo.
_NativeUIDemo_ was hand coded using Mobile Designer functionality and uses theclassic run time.
_NativeUIDemoNew_ was hand coded using Mobile Designer functionality anduses the new run time. It showcases some additional features only available in thenew run time.
_NativeUIDemoX_ was created using Mobile Development.
This version of the sample illustrates how to use Mobile Development to create amobile application. In this sample, many of the user interface objects were addedexplicitly in the Outline Editor. For example, a buon was added using the MobileDevelopmentButton object. However, some objects were defined using the dynamicobjects that Mobile Development offers, for example, the DynamicDisplayObject object.The dynamic objects were used to illustrate how to use dynamic objects and how toprovide user code for dynamic objects.
Mobile Development provides a default resource handler that handles mostresources. However, this project also uses a custom resource handler to illustrate

MOdd Header
Creating Mobile Application Projects
Using webMethods Mobile Designer Version 10.3 43
handling cases when custom code/dynamic objects require resources that the defaultresource handler cannot accommodate.
Note: To use the _NativeUIDemoX_ version of the sample, you need to importthe sample project into Software AG Designer. The _NativeUIDemoX_sample project includes the information for the model. It also includes userlogic in the src folder (that is, the user space). However, before you canuse the project, you must use the Mobile DevelopmentGenerate Source Code> Application Model and API command to generate sources for the project.This command generates the logic to execute the model in the gen/srcfolder and the Mobile Development API in the gen/api-src folder. For moreinformation about generating sources, see webMethods Mobile DevelopmentHelp.
NativeUI ExerciseThe NativeUI Exercise sample project shows the process of creating a simple native userinterface voting application, complete with model answers for each of the steps.
NativeUI Hello WorldThe NativeUI Hello World sample project contains the bare minimum needed to displaysome text and transition between two views. You can copy this project to assist inlearning the native user interface classes in Mobile Designer.
NativeUI JavaScript MapThe NativeUI JavaScript Map sample project gives an example of how to send simplemessages into and out of a nUIWebView. The project is designed to be used with MobileDevelopment. The important code resides in the MyMapViewControllerImpl class.
NativeUI JSONThe NativeUI JSON sample project shows the interaction with a JavaScript ObjectNotation (JSON)-based server, fetch, and display data.
Note: This sample references the library created using the Library JSON sampleproject.
NativeUI LocationThe NativeUI Location sample project shows the use of the Location API with nativeuser interface classes to display the user's current location.

MEven Header
Creating Mobile Application Projects
Using webMethods Mobile Designer Version 10.3 44
NativeUI My Graphical ElementThe NativeUI My Graphical Element project demonstrates the use of a custom user-created native user interface element to draw a chart.
NativeUI My Native ElementThe NativeUI My Native Element project demonstrates how to add platform-specificnative code to create a new custom visual component that works along with theNativeUI objects that Mobile Designer provides.
NativeUI PDF DemoThe NativeUI PDF Demo sample project demonstrates the use of native platform codeinjection to display a PDF.
NativeUI Push NotificationsThe NativeUI Push Notifications sample project demonstrates the use of pushnotifications on supported platforms.
NativeUI SOAPThe NativeUI Soap sample project uses SOAP to communicate with a remote server,fetch data, and display it on the device.
Coding a Mobile Application
Migrating to the New Run-Time ClassesIf you use projects that were built with a version prior to 10.1, you must migrate theseprojects to use the new run-time classes provided with version 10.1.
Enabling the New Run-Time ClassesTo enable the new run-time classes
1. Enable the new run time by adding the following line to the _defaults_.xml:<property name="project.runtime.uses.nativeui.phoney" value="true"/>
Note: This step is not required if you use Mobile Development.
MOdd Header
Creating Mobile Application Projects
Using webMethods Mobile Designer Version 10.3 45
2. Re-activate the project to make the new run-time classes available. (Ignore compileerrors.)
3. Refresh the project in Software AG Designer.
Refactoring MyApplicationTo refactor the MyApplication class
1. Change the base class of the MyApplication class from Application to MDApplication.
2. Add implements IMDApplicationListener to the class declaration, andimplement all methods.
3. Remove setAppCanvas() method. The project specific initialization logic can beadded to the init() method. For detailed information, see “Binding MyCanvas withMyApplication” on page 48.
Refactoring MyCanvasTo refactor the MyCanvas class
1. To support previous event handling, remove extends CanvasNativeUI from theclass declaration and add implements nUIEventListener.
2. In the sizeChanged() method, remove the first line, super.sizeChanged().
Refactoring Access to HandlersThe instance field was removed from all handlers. Every direct access to the instancefield must be replaced with the getInstance() method.
To refactor access to handlers
1. Replace AudioHandler.instance with AudioHandler.getInstance().
2. Replace CameraHandler.instance with CameraHandler.getInstance().
3. Replace ImageHandler.instance with ImageHandler.getInstance().
4. Replace TextHandler.instance with TextHandler.getInstance().
5. Replace ResourceHandler.instance with ResourceHandler.getInstance().
Using CameraHandler in the New Run TimeThe CameraHandler class at com.softwareag.mobile.runtime.media is deprecated from version10.3 and is no longer recommended for use in applications. The new API to use is incom.softwareag.mobile.md.media and consists of the ImagePicker class and an IImagePickerCallbackinterface.

MEven Header
Creating Mobile Application Projects
Using webMethods Mobile Designer Version 10.3 46
Using the ImagePicker ClassThe ImagePicker exposes two public static methods for general use,pickFromCamera(IImagePickerCallback callback) and pickFromGallery(IImagePickerCallback callback).
Note: Activating the camera is a long-running task that can consume a lot ofresources. Because of this, the mobile operating system may backgroundor close applications. This includes the application that opened the camerain the first place. When control returns to the application, it will be via theIImagePickerCallback. Be aware that the application may not be in exactly thesame state as before.
You should create an implementation of IImagePickerCallback for yourself. When themobile operating system returns control to the application, either onImagePicked() oronImagePickingFailed() will be called. If the image picking has failed, the reason why will beindicated as an int value (currently one of error, user cancelled, or no permission), and aString with optional extra information that the operating system or the ImagePicker mayprovide. If no extra information is available, the String may be empty or null.
To create an IImagePickerCallback implementation, use the following code:
In a methodImagePicker.pickFromCamera(new MyImagePicker());
In a separate class or as an inner classclass MyImagePicker{ public onImagePicked(Image img) { System.out.println("Got an Image, " + img.getWidth() + "x" + img.getHeight()); //do something with the Image... } public onImagePickingFailed(int result, String error) { switch(result) { case STATUS_ERROR: System.out.println("An unexpected error occured. Further info :" + error); break; case STATUS_CANCELLED: System.out.println("The user closed the camera without taking a picture."); break; case STATUS_NO_PERMISSION: System.out.println( "The user / OS did not grant permission to use the camera in this app, Further info : " + error); break; } }}

MOdd Header
Creating Mobile Application Projects
Using webMethods Mobile Designer Version 10.3 47
Capturing Barcodes Using ImagePickerYou can use barcodes or QR-codes as a convenient way to get long URLs, configurationdata, product codes, etc. into an application. In order to support this, the ImagePickerharnesses the native capabilities of devices to detect barcodes in images.
Note: For iOS, iOS 11 or greater is required.
Barcodes may be detected in images already held in the device's gallery, using live videofrom the camera, or using static images captured by the camera. Barcode values detectedin the image are returned to a class conforming to IBarcodePickerCallback.if(use_camera){ ImagePicker.scanBarcodeFromCamera(new MyBarcodeCallback());}else{ ImagePicker.scanBarcodeFromGallery(new MyBarcodeCallback());}
The classMyBarcodeCallback can then be implemented as follows. Note that there may bemore than one barcode in the image, so onBarcode() returns an array of String values.class MyBarcodeCallback implements IBarcodePickerCallback{ public void onBarcode(String[] barcodes) { System.out.println("Got " + barcodes.length + " barcodes."); for (int i = 0; i < barcodes.length; i++) { System.out.println("You scanned : " + barcodes[i]); } } public void onBarcodeFailed(int result, String error) { System.out.println("Barcode scanning failed, error code : " + result + ", with message : " + error); }}
Note: As with other methods in ImagePicker, it is possible that the mobile OS mayhave backgrounded or closed and re-started your application during theimage selection process. This is important to bear in mind when your callbackreturns.
Furthermore, you can limit the types of barcodes detected using the following code://No 2D barcodes, please!ImagePicker.scanBarcodeFromGallery(new MyBarcodeCallback(), ImagePicker.BARCODE_TYPE_LINEAR_ALL);
Live Barcode Scanning
When scanning a barcode directly from live video feed, there are a few extraconsiderations. The live scanning methods also take a frame rate in their arguments.Devices pick a value that can be supported by the hardware that most closely matchesyour required frame rate. The frame rate should be carefully chosen. If the value is too

MEven Header
Creating Mobile Application Projects
Using webMethods Mobile Designer Version 10.3 48
high, this can cause the device to work too hard, draining the baery and slowing downthe UI. Similarly, if the frame rate is too slow, it gives a poor experience for the user.
Tip: Most handsets perform well with an update rate somewhere between15-20fps.
When scanning live video, your IBarcodePickerCallback must also implementwouldAcceptBarcode(). For each frame in which valid barcodes are detected, thecallback is asked if this frame's barcodes should stop the scanning process. Code inwouldAcceptBarcode() must be as performant as possible, and must make no changes tothe application state. The onBarcode() method is called as normal after wouldAcceptBarcode()signalled that the barcodes have been accepted.public boolean wouldAcceptBarcode(String[] barcodes){ if(barcodes != null && barcodes.length > 0) { for(int i = 0; i < barcodes.length; i++) { if(barcodes[i] != null && barcodes[i].startsWith("2345")) { return true; //This is our product, handle actions in onBarcode() } } } return false; //reject barcodes, keep scanning}
Binding MyCanvas with MyApplicationTo bind MyCanvas with MyApplication
1. Add the new private field private MyCanvas canvas to the MyApplication class.
2. Override the init() method.
a. Call super.init() to initialize Mobile Designer default specific bits.
b. Set application listener to receive Application events.
c. Create a new MyCanvas instance.
d. Register MyCanvas to receive all UI events from nUIController by callingnUIController.addEventListener(canvas, false).
3. Forward the information of the new size to the canvas instance in the onSizeChangedmethod.
4. Override the getMainWindow() method, and pass a new main window back.
MyApplication should now look like this :public class MyApplication extends MDApplication implements IMDApplicationListener { private MyCanvas canvas; public void init() { super.init();

MOdd Header
Creating Mobile Application Projects
Using webMethods Mobile Designer Version 10.3 49
// register for application events setApplicationListener(this); // create MyCanvas instance canvas = new MyCanvas(); // register canvas to receive all UI events. nUIController.addEventListener(canvas, false); } public nUIWindowDisplay getMainWindow() { // return a new main window instance return canvas.onCreateMainWindow(); } public void onSizeChanged(int width, int height) { // forward to the canvas instance. canvas.sizeChanged(width, height); } /// .... other methods
Replacing Deprecated or Removed Methods and Fields with New APITo replace deprecated or removed methods and fields
1. Replace CanvasDimensions.CURRENT_SCREEN_WIDTH withnUIController.getScreenWidth().
2. Replace CanvasDimensions.CURRENT_SCREEN_HEIGHT withnUIController.getScreenHeight().
3. Replace CanvasDimensions.CURRENT_SCREEN_PPI with nUIController.getScreenPPI().
4. Replace Canvas.getWidth() with nUIController.getScreenWidth().
5. Replace Canvas.getHeight() with nUIController.getScreenHeight().
Additional StepsThe following additional steps must be taken:
To finish migration
1. Optimize the import in all classes to ensure there are no references to the old runtime anymore.
2. Access the application instance from code by calling thecom.softwareag.mobile.runtime.RuntimeInfo.getApplication() method.
Mobile Designer-Provided Run-Time ClasseswebMethods Mobile Designer contains many run-time classes that provide an arrayof features that you can use in your application. For detailed information on run-timeclasses, see webMethods Mobile Designer Java API Reference.

MEven Header
Creating Mobile Application Projects
Using webMethods Mobile Designer Version 10.3 50
Application and Parameter Classescom.softwareag.mobile.runtime.core.MDApplication
The MDApplication class contains the minimal functionality to start an application. Youshould use it in all projects and refactor old projects which use the deprecated Applicationclass. For detailed information on migration, see “Migrating to the New Run-TimeClasses” on page 44. The MDApplication class is the application’s entry point. You mustsubclass it to start an application. You can override the init() method to initialize someresources or variables. This method is called only once just after the MDApplication instancewas created. If you override this method, you must call super.init() to initialize internal bitsby MDApplication.
To provide your own content, you must override the getMainWindow() method and returna new nUIWindowDisplay object with the views you want to show.
In contrast to the deprecated run time, the new run time does not spawn any additionalthread. Instead, it uses a native main thread in which the particular application wasstarted. All Mobile Designer callbacks are called on this main thread. You should returnas fast as possible to avoid UI freezes. All CPU-intensive tasks or tasks that wait forresponse should be executed asynchronously. To run tasks asynchronously, you can userunAsync methods provided in the MDApplication class.
The MDApplication class resides in the nativeUI library, and it assumes that nativeUIlibrary is used in the project.
com.softwareag.mobile.runtime.Parameters
When Mobile Designer runs the resource handler that you create for your project, itautomatically creates the Parameters static class, which contains the parameters thatdrive the Mobile Designer run-time code for a particular build. The Parameters class,com.softwareag.mobile.runtime.Parameters, contains information about the devices and project-specific parameters, such as resource, resource block, and text IDs.
Mobile Designer uses the following naming conventions for the parameter names:
PARAM_MD_*** defines parameters controlling Mobile Designer run-time source codefunctionality
PARAM_*** defines application-specific parameters
RESBLOCKID_*** defines identifiers for all the resource blocks
RESID_*** defines identifiers for all the individual resources
TEXTID_*** defines identifiers for all the lines of text
MENUID_*** defines identifiers for all the menus
When the remaining run-time classes are not used in a project, you can generate theParameters class by reference in third-party code.

MOdd Header
Creating Mobile Application Projects
Using webMethods Mobile Designer Version 10.3 51
Run-Time Comms Classescom.softwareag.mobile.runtime.comms.MessageConnectionHandler
Use the MessageConnectionHandler class to control the detection of incoming SMS messagesusing the Wireless Messaging API, to send SMS messages to other phones, and to handlePush Notifications.
Mobile Designer sets the default value for each device. Youcan override the value Mobile Designer sets seing themobiledesigner.runtime.core.class.comms.messageconnection project property to noneor wma.
Note: The MessageConnectionHandler implements the MessageListener class.
Note: The httpstream variant of HttpConnectionHandler allows HTTP DELETE messages tospecify an optional POST body.
Run-Time Database ClassesMobile platforms can support a database. For example, many platforms support theSQLite database. Mobile Designer provides the com.softwareag.mobile.runtime.database librarythat contains classes and methods you can use in your mobile applications to executeSQL statements. Using the database library allows your mobile application to accessdatabase information. The database library provides a uniform manner for using adatabase independent of the target platform and database system. For more informationabout the database library, see the webMethods Mobile Designer Java API Reference.
Note: Support for the database library is provided only for the following platforms:AndroidiOSPhoney
To use the database library in a mobile application, the project.handset.uses.Databaseproject property must be set to true (default).
For an example that illustrates how to use the database library, see the NativeUIDatabase sample.
Important: On most platforms, the Cursor class is a buffered cursor, which stores allquery results in memory. Use caution when querying database tables thatcontain data that uses the blob data type, for example, images.

MEven Header
Creating Mobile Application Projects
Using webMethods Mobile Designer Version 10.3 52
Run-Time Media Classescom.softwareag.mobile.runtime.media.AudioHandler
Use the AudioHandler class to control the sound and vibration functionality when writingfor the main common audio libraries available on mobile devices. The media classes try tokeep the phone's backlight on when possible for the selected device.
The Mobile DesignerAudioHandler class sets the value for each device.
com.softwareag.mobile.runtime.media.CameraHandler
Use the CameraHandler class to initialize a device’s camera, take snapshots, and stop thecamera.
Mobile Designer sets the values for the CameraHandler class for eachdevice. You can override the value Mobile Designer sets using themobiledesigner.runtime.core.class.camera project property.
com.softwareag.mobile.runtime.media.ImageBase
The ImageBase class provides the base level of the image creation and drawingfunctionality, including:
Decoders for the various image encoding methods that are part of the MobileDesigner resource handler
Image caching used with some devices that have problems freeing images frommemory
Multi-celled image support, stored as individual images at run time, or as a singleimage which is clipped and drawn
Transformations for all devices
Image dimension information to support any multi-cell images or transformations
You can access the ImageBase functionality through the ImageHandler class.
The DRAWIMAGETRANSFORM_*** values and the LOADIMAGETRANSFORM_*** values arenot interchangeable. The LOADIMAGETRANSFORM_*** values are used to cache multipleimages at load time. For more information, see the webMethods Mobile Designer Java APIReference.
com.softwareag.mobile.runtime.media.ImageHandler
Use the ImageHandler class to load, draw, and manage images. Mobile Designer sets thevalues for the ImageHandler class for each device.

MOdd Header
Creating Mobile Application Projects
Using webMethods Mobile Designer Version 10.3 53
com.softwareag.mobile.runtime.media.PngParser
The PngParser class provides a PNG-encoding method that can create an image frompixel and palee data. In Mobile Designer, you can create the image dynamically at runtime, or use image compression methods that exceed the default PNG format.
When opaque mutable images render faster on a device than immutable images, thePngParser makes adjustments to improve performance when rendering the image.
You can generate paleized (PNG-8) and true-color (PNG-24) PNG files using thePngParser methods when full pixel or paleized information is provided.
com.softwareag.mobile.runtime.media.TextHandler
The Mobile DesignerTextHandler class provides the following functionality:
Loads text files
Supports multi-languages
Stores hyphenation guidelines for text spliing
Dynamically splits text based on hyphenation guidelines
Injects text
Supports system and bitmap font
Draws proportional and fixed width font in all systems
Handles all the expected metric queries such as font height, Character width, andString width
Run-Time Serializer Classcom.softwareag.mobile.runtime.serialize.Serializer
The Serializer class provides the ability to serialize a Java class into a binary stream and todeserialize a binary stream back to a given Java class.
To enable a class to be serialized, you must ensure it implements thecom.softwareag.mobile.runtime.serialize.Serialzable interface (not the J2SE java.io.Serializableinterface). A class that implements the Serializable interface can then be passed to theSerializer class for serialization and deserialization.
Mobile Designer sets the values for the Serializer class for each device. You can overridethe value Mobile Designer sets by seing the mobiledesigner.runtime.core.class.serializeproject property to cldc11.

MEven Header
Creating Mobile Application Projects
Using webMethods Mobile Designer Version 10.3 54
Run-Time Storage Classescom.softwareag.mobile.runtime.storage.RecordStoreHandler
Use the Mobile DesignerRecordStoreHandler class to control saving data in the application'srecord store. The RecordStoreHandler class also determines whether saving the data isperformed immediately or is cached and saved on termination. Use the cache and saveoption with slow devices.
For access to the record store, call the derivatives of setRecordStoreData andgetRecordStoreData.
com.softwareag.mobile.runtime.storage.ResourceDataTypes
The ResourceDataTypes class contains a set of helper methods to retrieve primitive datatypes from your resources with the run-time ResourceHandler class. Two variants arepresent that enable including the float and double methods with Connected LimitedDevice Configuration (CLDC) 1.1 devices.
Mobile Designer sets the ResourceDataTypes value for each device. You can override thevalue Mobile Designer sets by seing the mobiledesigner.runtime.core.class.datatypesproject property to cldc11.
com.softwareag.mobile.runtime.storage.ResourceHandler
Use the ResourceHandler class to manage the loading and caching of resources, resourcepacks, and resource blocks.
Depending on parameter seings, devices can:Cache the entire resource packsCache individual blocksLoad only the resources that are individually stored in the application bundle
You must use clean-up methods to ensure that the mobile application handles memorymanagement in the most appropriate way for all devices.
Run-Time Utility Classescom.softwareag.mobile.runtime.utility.Maths
The Maths class is a fixed point math library that contains methods you can use in yourapplications for conversion to and from a fixed-point number, trigonometric functions,square and cube roots methods, and a random method. The random method is includedfor instances when your application relies on the random method returning the samevalue across all devices. Built-in JVM implementations can differ from one device toanother in their number handling. As a result, if you are porting your code to anythingother than Java, you could encounter differences in the output produced by the randomfunction.

MOdd Header
Creating Mobile Application Projects
Using webMethods Mobile Designer Version 10.3 55
The parameter PARAM_MD_MATHS_FP_SHIFT controls the accuracy of the mathperformed, with a fixed point value of 1 equal to 1 << PARAM_MD_MATHS_FP_SHIFT.
The Maths class is based on Connected Limited Device Configuration (CLDC) 1.1. TheMaths class does not contain references to the primitive types float or double.
com.softwareag.mobile.runtime.utility.PlatformRequest
Use the PlatformRequest class to launch the browser on devices that support it.
Image CachingMobile Designer supports caching of javax.microedition.lcdui.Image data. This happenstransparently, without your intervention. Calls to Image.loadImage() first check if the dataexists in the internal image cache. If it does, the previously created image instance isreturned. This behaviour is enabled by default. You can disable it, if required.
Note: Due to the way caching is performed, altering the image through the graphicsobject associated with it alters all references to the loaded file. If you want toalter a single instance of the image, you should create a copy of the imagebefore. For instructions, see “Copying an Image for Drawing” on page 56.
Managing the Image CacheIt can be necessary to remove images from the cache, for instance, if the applicationis about to perform a memory-intensive action or if an image is not needed for along period of time. The nUIController class provides additional static methods to clearthe image cache. nUIController.clearCache() removes all images from the image cache.nUIController.clearCache(String) removes a single image from the cache, with the path and filename provided that was entered when loading it initially.
Note: Although these methods are also available in the Image class itself, NativeUIperforms additional management. Therefore, you are recommended to use themethods in nUIController.
Disabling Image Caching for the Whole ApplicationFor certain applications, caching images is undesirable. You can disable the imagecache by calling the static method nUIController.enableCache(boolean enableCache) andpassing false as an argument. Ideally, this should be done as soon as possible after theapplication has started.

MEven Header
Creating Mobile Application Projects
Using webMethods Mobile Designer Version 10.3 56
Copying an Image for DrawingIn most cases, caching images is preferable. But if you want to alter a single instance ofan image that was created by an Image.loadImage() call, you should copy it to a separateinstance of the image before. This is shown in the following example that uses the non-null image "oldImage".//AARRGGBB dataint[] imageData = new int[oldImage.getWidth() * oldImage.getHeight()]; oldImage.getRGB(imageData, 0, oldImage.getWidth(), 0, 0, oldImage.getWidth(), oldImage.getHeight()); Image newImage = Image.createRGBImage(imageData, oldImage.getWidth(), oldImage.getHeight(), true);
Asset CatalogsMobile Designer supports loading images from native asset catalogs. Inside the catalog,an image can be provided at multiple sizes and referred to with one name. This allowsthe handset's operating system to select the most appropriate size of the image availablein the catalog with regard to the device's screen, taking pixel density, and resolution.
Creating Asset Catalogs for an ApplicationAsset catalogs can be created using webMethods Mobile Development, or usingplatform-specific IDEs such as Xcode, or they can be created manually. The NativeUIAsset Catalog sample project gives an example of an asset catalog.
Note: It is not mandatory for an asset catalog to define an image for all device/resolution combinations. The handset's operating system determines thenearest possible match according to the platform's guidelines.
You should create images that work with all devices at a given dpi,resolution, or scale. You are recommended to create handset-specificimages only when there is a need to do so. This facilitates codingapplications, reduces the number of assets to be created, and reduces thesize of the final build.
You are not recommended to create asset catalogs manually for iOS.
Creating Asset Catalogs using Mobile DevelopmentIf you want to create an asset catalog for a project created in Mobile Development, mostof the work required to build and import the catalog is done automatically. For furtherinformation about how to work with assets in Mobile Development, see webMethodsMobile Development Help.
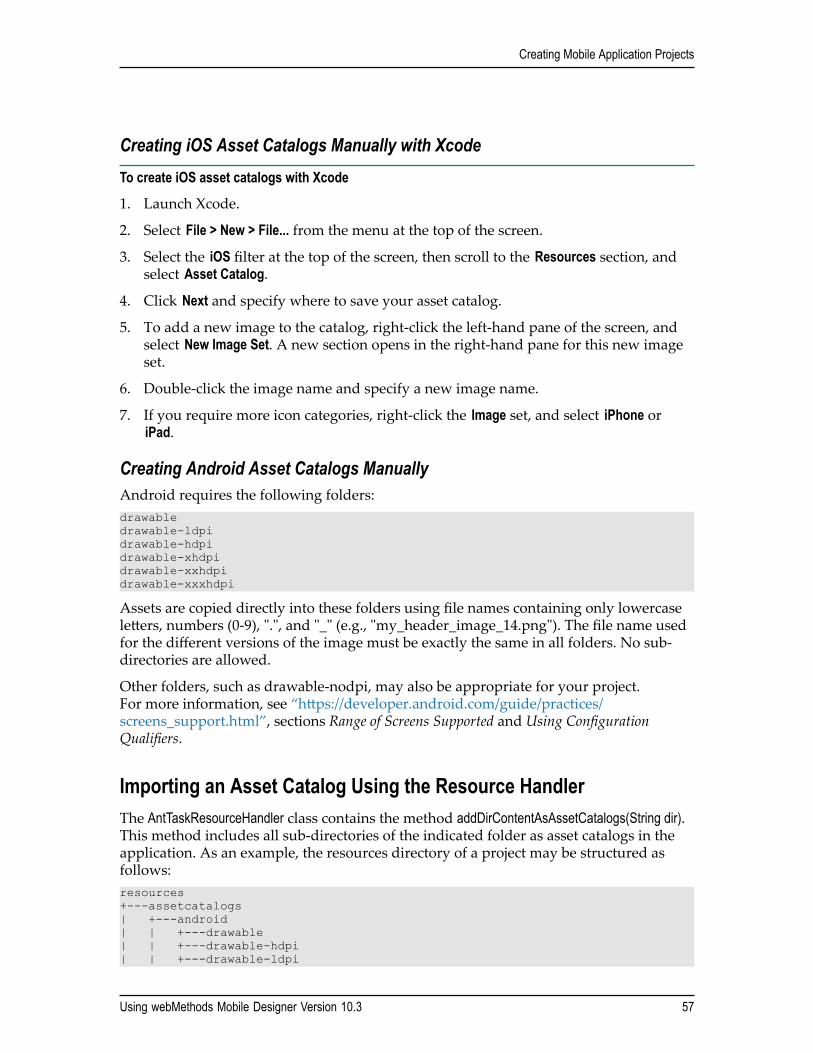
MOdd Header
Creating Mobile Application Projects
Using webMethods Mobile Designer Version 10.3 57
Creating iOS Asset Catalogs Manually with XcodeTo create iOS asset catalogs with Xcode
1. Launch Xcode.
2. Select File > New > File... from the menu at the top of the screen.
3. Select the iOS filter at the top of the screen, then scroll to the Resources section, andselect Asset Catalog.
4. Click Next and specify where to save your asset catalog.
5. To add a new image to the catalog, right-click the left-hand pane of the screen, andselect New Image Set. A new section opens in the right-hand pane for this new imageset.
6. Double-click the image name and specify a new image name.
7. If you require more icon categories, right-click the Image set, and select iPhone oriPad.
Creating Android Asset Catalogs ManuallyAndroid requires the following folders:drawabledrawable-ldpidrawable-hdpidrawable-xhdpidrawable-xxhdpidrawable-xxxhdpi
Assets are copied directly into these folders using file names containing only lowercaseleers, numbers (0-9), ".", and "_" (e.g., "my_header_image_14.png"). The file name usedfor the different versions of the image must be exactly the same in all folders. No sub-directories are allowed.
Other folders, such as drawable-nodpi, may also be appropriate for your project.For more information, see “hps://developer.android.com/guide/practices/screens_support.html”, sections Range of Screens Supported and Using ConfigurationQualifiers.
Importing an Asset Catalog Using the Resource HandlerThe AntTaskResourceHandler class contains the method addDirContentAsAssetCatalogs(String dir).This method includes all sub-directories of the indicated folder as asset catalogs in theapplication. As an example, the resources directory of a project may be structured asfollows:resources+---assetcatalogs| +---android| | +---drawable| | +---drawable-hdpi| | +---drawable-ldpi

MEven Header
Creating Mobile Application Projects
Using webMethods Mobile Designer Version 10.3 58
| | +---drawable-xhdpi| | +---drawable-xxhdpi| | \---drawable-xxxhdpi| +---ios| | \---AppAssets.xcassets
The following code would then add the asset catalog for an Android handset:rh.setResourceReadSubdirectory("assetcatalogs");rh.addDirContentAsAssetCatalogs("android");
Loading an Image from an Asset CatalogIn your application code, the class com.softwareag.mobile.nativeuiassetcatalog.AssetImageLoaderis available. This class contains a static method, loadImage(String image_name). Enter avalue for image_name that relates to the name of the resource you want to load, e.g."MyImage.png". No additional path is required.
To assist with cross-platform compatibility, the given file name is automaticallyconverted to lowercase on platforms that require it.
Android Auto-scalingWhen selecting a handset-appropriate version of your image from the asset catalog,most handsets select the image that best suits the current screen and use it directlywithout any further modification. Android devices, however, aempt to match theselected image to the screen as closely as possible by scaling the image during loading.
This auto-scaling feature on Android can be disabled by calling the following method:AssetImageLoader.setAndroidScaling(false);
Note: This is not available on other platforms (including Phoney) and must be doneas a native-injection.
Mobile Designer Logging APIMobile Designer provides a java.util.logging API that is based on the Java Logging APIstandard. The java.util.logging package that Mobile Designer provides contains classesand interfaces that are based on the Connected Limited Device Configuration (CLDC)8 standard. You can find information about this package in the javadocs for thejava.util.logging package provided with the CLDC 8 standard.
Note: The Mobile Designer version of java.util.logging does not include theLoggingPermission class.
The following table describes some limitations and differences in the Mobile Designerversion of the java.util.logging API based on platforms:

MOdd Header
Creating Mobile Application Projects
Using webMethods Mobile Designer Version 10.3 59
Platform Limitation or Difference
All Platforms The Logger class that Mobile Designer provides does not includea Logger.getGlobal() method. To access the global logger, use thefollowing:Logger.getLogger(Logger.GLOBAL_LOGGER_NAME)
Android When running applications on the Android platform, theapplication uses the Java Standard Edition (Java SE) LoggingAPI. It does not use the java.util.logging package that MobileDesigner provides.
When configuring loggers, take into consideration that the globallogger is not a root logger. The following code shows how toobtain the root logger in the logger’s hierarchy.Logger rootLogger = Logger.getLogger( Logger.GLOBAL_LOGGER_NAME); if (rootLogger.getParent() != null) { rootLogger = rootLogger.getParent(); }
iOS When running applications on the iOS platform, the applicationuses the java.util.logging API that Mobile Designer provides ratherthan the Java SE Logging API. The standard output for theConsoleHandler class is console in Xcode.
Phoney When running applications in the Mobile Designer Phoneyutility, the application uses the Java SE Logging API. It does notuse the java.util.logging package that Mobile Designer provides.
DateFormat APIMobile Designer provides an API to allow access to the internal date formaing logic ofthe mobile platform. This is provided through the com.softwareag.mobile.md.text.DateFormatclass. Methods are provided to format a java.util.Date as a String conforming to a givenformat, and to parse Strings with a specified format back to Date objects.
File Management APITo ensure data and file persistence on the device, an API is required to access,modify, and delete files locally from the device. To work with files and folders, thecom.softwareag.mobile.md.io.File class is available.

MEven Header
Creating Mobile Application Projects
Using webMethods Mobile Designer Version 10.3 60
Virtual file system
To provide a consistent way to work with files and directories on every mobile platform,a virtual file system is introduced. Every root folder of the virtual fily system is mappedto the best suited folder on the device.
Path separator
For separating folders, a slash symbol (“/”) is used.
Root folders
The root of the virtual file system is “/”. It contains the following root folders:
documents: for reading and writing access
resources: for reading access only
cache: for reading and writing access. The folder can be cleaned by system.
external_storage: for reading and writing access on external storage
Valid characters for file and directory names
To avoid inconsistency between different platforms, the acceptable characters arereduced to the following:
leers: A-Z, a-z
digits: 0-9
symbols: [-._]
If you use any other character, an IllegalArgumentException is thrown. However,the list() method can return names with any symbols that the particular native file systemallows. As a result, the method cannot be used to construct new file instances. Tooperate such files, you can use the listFiles() method.
Android root folders mapping
documents: mapped to /files
cache: mapped to /cache
resources: mapped to the Android Asset folder
external_storage: mapped to the external SD card if it exists. Additional permissionsmight be needed.
iOS root folder mapping
documents: mapped to /Documents/
cache: mapped to /Library/Caches
resources: mapped to [AppName.app]

MOdd Header
Creating Mobile Application Projects
Using webMethods Mobile Designer Version 10.3 61
external_storage: is not mapped.
Connectivity Status APIKnowing the status of the network connections on a mobile device is crucial for modernapplications. Aside from important gains with power-saving, it also allows for a muchbeer user experience. Knowing which types of network connections are availableallows you to make important decisions regarding data sync, costs, and priority ofinformation queues.
For each platform, status detection of the different connection types is supported, suchas WiFi, Bluetooth, WiMAX, wired Ethernet, or VPN.
To help manage this information, the com.softwareag.mobile.md.net.ConnectivityStatusRequesterclass is available.
Querying the Current Connection StateIf an application needs to know the connection state infrequently, it can be useful to pollfor it directly. The method getConnectivityStatus() returns true if any interface is connected.If a specific interface is required, you can use isWiFiConnected(), isCellularConnected(), orgetCurrentConnectivityTypes().
Registering for Connection Status NotificationsFor longer-term network traffic, for example a "background sync"-type situation, it isusually desirable to watch for notifications of network changes. You can register a classthat implements the interface com.softwareag.mobile.md.net.IConnectivityWatcher. Every timea network interface changes state, information is provided to your application throughthe onConnectivityChanged() method. This information includes the network type, the newstate that it has moved to, and the overall connectivity status of the device (connected toa network through at least one connection, or fully offline).
Permissions APIIn the past, mobile platforms would require an application to declare any requiredpermissions at install time. Nowadays, there are a much larger number of permissionsthat an application may ask for, and users have become more wary of blindly grantingthese permissions up front. It now makes sense for applications to ask for permission foran operation or resource at run time when it is needed. That way, the user can be madeaware of what the application is doing, and why it needs that particular permission. Tosupport this use case, Mobile Designer provides a class to ask for permissions at runtime, com.softwareag.mobile.md.permissions.PermissionsManager.

MEven Header
Creating Mobile Application Projects
Using webMethods Mobile Designer Version 10.3 62
The PermissionsManager class defines the permission types that may be queried. Althoughtheir names are self-explanatory in most cases, some have additional caveats:
PERMISSION_LOCATION_GENERAL - A rough estimate of location, usually through IPaddress lookup or nearest cell tower.
PERMISSION_LOCATION_PRECISE - GPS will be requested if available, otherwise thiswill fall back to the "general" permission.
PERMISSION_WRITE_EXT_STORAGE and PERMISSION_READ_EXT_STORAGE - Willalways be denied on devices that have no hardware provision for external storage.
Determining Existing PermissionsTo test if an application already has permission for a resource, the methodhasPermissionFor() can be used:if(PermissionsManager.hasPermissionFor(PermissionsManager.PERMISSION_CAMERA)){ //do something with the camera ...}
Requesting New PermissionsIn situations where the application needs to request a permission, the methodrequestPermissionFor() is used. This method may take a while to negotiate, and as such, isasynchronous. The following example shows how to create an myPermissionCallback objectwhich implements the IPermissionCallback interface in com.softwareag.mobile.md.permissions:PermissionsManager.requestPermissionFor(PermissionsManager.PERMISSION_CAMERA, myPermissionCallback);
If permission is allowed or denied, or if the application is interrupted, themyPermissionCallback object is notified. If the application is interrupted, you can request thepermission again (if it is appropriate).
Registering Applications for Data Sharing (custom URIs andMIME-types)Many mobile operating systems now allow you to register applications to handle certainURI schemas or file types. Mobile Designer provides a mechanism to define theseregistrations. Applications may register themselves as handlers for custom URIs, filetypes, or both.

MOdd Header
Creating Mobile Application Projects
Using webMethods Mobile Designer Version 10.3 63
Defining Data Sharing for an ApplicationTo register for data sharing, the registerDataSharing Ant task is used. Definitions should begiven in the project's targets/_defaults_.xml, and look like this:<registerDataSharing> <entry scheme="customurl"/> <!-- App will handle URIs starting "customurl:" --> <entry mimeType="application/pdf"/> <!-- App will accept PDFs --></registerDataSharing>
If you want to just handle audio files:<registerDataSharing> <entry mimeType="audio/*"/> <!-- App will accept any audio --></registerDataSharing>
You can find a list of currently supported MIME-types for files in the section below:“Supported MIME-types” on page 63.
If you want to just handle custom URIs:<registerDataSharing> <entry scheme="myurl"/> <!-- App will handle URIs starting "myurl:" --></registerDataSharing>
Handling Data Sharing EventsWhen the application is asked by the operating system to handle data sharing, eitherApplication.onStartAppFromURL(String scheme, String url) or Application.onStartAppFromFile(StringmimeType, String absolutePath) will be called. These calls react to user interaction comingfrom outside the application and may occur at any point in the application's lifecycle.
The default implementations of onStartAppFromURL() and onStartAppFromFile() store theincoming data and allow it to be queried through geers in the base Application class.
Alternatively, it is possible to override onStartAppFromURL and onStartAppFromFile from aclass that extends Application. Doing so will ensure that the application is notified directly.At this point, standard Java classes are available for use. If the application has beenstarted by the operating system, onCreateMainWindow() on the NativeUI side will not havebeen called yet.
Note: If the geer functionality in Application is still required, it is vital that anyoverriding method for onStartAppFromURL() or onStartAppFromFile() callssuper.onStartAppFromURL() or super.onStartAppFromFile(), respectively.
Supported MIME-typesThe following is a list of MIME-types recognised by Mobile Designer when defining thetype of content that can be handled.

MEven Header
Creating Mobile Application Projects
Using webMethods Mobile Designer Version 10.3 64
Note: In case of wild-cards (e.g., "audio/*"), the mobile operating system underneathwill likely have more specific MIME-types that can be defined to narrow therange of file types associated with the application.
application/octet-stream
application/pdf
application/vnd.ms-excel
application/vnd.ms-powerpoint
application/vnd.openxmlformats-officedocument.presentationml.presentation
application/vnd.openxmlformats-officedocument.spreadsheetml.sheet
application/vnd.openxmlformats-officedocument.wordprocessingml.document
application/x-zip-compressed
application/zip
application/zip-compressed
audio/*
image/*
multipart/x-zip
text/*
video/*
Credential and Isolated Storage APIIn order to store more sensitive data, most mobile platforms now have some concept ofisolated storage or protected storage. Mobile Designer provides an API to allow applicationsto make use of this kind of storage through the classes in the com.softwareag.mobile.md.iopackage. Default implementations are provided to store key/value pairs and server touser name/password mappings. In cases where a different security model is desired,youcan create your own classes conforming to the interfaces in this package.
Note: It is important to be aware of the limitations and concepts defined with eachplatform when dealing with sensitive data to ensure that the data is storedin an acceptable way. The following Security Considerations section givesinformation on the default classes provided and their native implementationsto assist in this regard.

MOdd Header
Creating Mobile Application Projects
Using webMethods Mobile Designer Version 10.3 65
Security ConsiderationsThe following table provides details about the APIs and classes used to store data for theCredentialStore and IsolatedKeyValueStore.
Platform CredentialStore IsolatedKeyValueStore
Android IsolatedKeyValueStore class android.content.SharedPreferences object
iOS Keychain Services NSData withNSDataWritingFileProtectionComplete andNSURLIsExcludedFromBackupKey set.
Phoney Flat File (unprotected) Flat File (unprotected)
Orientation APIAs of Mobile Designer 10.3, Fix 5, orientation mode can only be specified at runtime. Bydefault, screen orientation is not locked to one specific position and rotates together withthe device. To lock screen orientation to portrait mode, you can override the init() methodof the MDApplication class with the following code:IOrientationService orientationService = (IOrientationService) getService(IMDApplication.ORIENTATION_SERVICE);orientationService.lock(IOrientationService.ORIENTATION_PORTRAIT);
The Orientation API deprecates the following properties:
project.handset.landscape.mode
project.handset.orientation.limiter
project.handset.portrait.mode.orientation
Location APIMobile Designer provides an API to access the location services of the mobile device.This is provided through classes in the com.softwareag.mobile.md.location package. A classconforming to the ILocationManager interface can be obtained using the getService() methodof MDApplication as follows:ILocationManager locationManager = (ILocationManager)MyNewApplication.getInstance() .getService(IMDApplication.LOCATION_MANAGER_SERVICE);
Location updates are passed back through a class conforming to the ILocationWatcherinterface. This interface allows information about location updates, errors during use,

MEven Header
Creating Mobile Application Projects
Using webMethods Mobile Designer Version 10.3 66
and initial setup failures to be provided. The locationUpdatesEnded() method is calledat any time that location updates are stopped. This can happen normally throughILocationManager.stopLocationUpdates() or after an error occured. Calls to locationUpdatesEnded()do not happen if an initial setup failure occurs, since a failure at that level produces nolocation updates.class ResultHandler implements ILocationWatcher{ public void locationUpdate(Location location) { System.out.println("Location was updated at " + location.timestamp + "\n" + "Latitude : " + location.latitude + " +/- " + location.latitudeAccuracy + "\n" + "Longitude : " + location.longitude + " +/- " + location.longitudeAccuracy + "\n" + "Altitude : " + location.altitude + " +/- " + location.altitudeAccuracy); } public void locationUpdatesEnded() { System.out.println("Location updates ended."); } public void onError(int why, String description) { System.out.println("An error : " + why + " " + description); } public void onFailure(int why, String description) { System.out.println("A failure : " + why + " " + description); }}
To configure the location hardware, create a LocationSettings object and pass it to theappropriate call in the ILocationManager. The LocationSettings object encapsulates theapplication's preferences in terms of an accuracy/power consumption trade-off. It alsodetermines if the updates should come back to the application code at a preferred timeinterval or a preferred distance travelled.
Note: For both distances and times given, the operating system makes a best-effortaempt to get as close as possible to the requested value, but this is not exactdue to many factors (including GPS signal loss, operating system, power orCPU constraints, requests or interrupts from other applications, buffering,etc). Therefore, the application must not make any direct assumptions basedonly on the fact that an update happened.
Use the following code to configure the location hardware://prefer updates once per minute (average)LocationSettings settings = new LocationSettings(LocationSettings.PROFILE_HIGH_POWER_ACCURATE, 60000L);ILocationWatcher myLocationWatcher = new ResultHandler();locationManager.beginLocationUpdates(myLocationWatcher, settings);
It is important to consider that the one-shot getLocation() method also requires aLocationSettings object. This is because the location hardware may not already be in useand needs to be initialised fully in case it is needed elsewhere before the pending requestis served. The getLastKnownLocation() method does not need to switch any hardware on to

MOdd Header
Creating Mobile Application Projects
Using webMethods Mobile Designer Version 10.3 67
return a result and so does not need a LocationSettings object to function (and can thereforebe very useful in low-power situations).
Additionally, a CoordinateHelper class is available to provide some methods to assist incoordinate conversion to/from human-readable forms and measuring distances betweenLocation objects.
Location Updates in Background ModeTo receive location updates in background mode, you must enable them explicitly usingthe following Ant property:
<property name="project.handset.background.location.updates"value="true"/>
Note: Android 8.0 (API level 26) and later limits the amount of updates inbackground mode to only a few updates per hour.
GeocodingAs well as offering a few helpful methods for coordinating conversion and distancemeasuring, the CoordinateHelper class also has some methods that allow for geocoding,that is, conversion between street addresses and latitude/longitude pairs.
Before writing applications that employ geocoding, think carefully about how it willbe used. Geocoding relies on servers provided by Apple (for iOS devices) and Google(for Android). If you are considered to be "over-using" the service, you may find yourapplications rate limited or banned. A few good rules of thumb are:
Make at most one geocoding request per user action.
If the user could make multiple geocoding requests against the same location, it isworth caching the results. Doing so will make the application more responsive.
If the user is moving around and the application is using geocoding to update theuser's address, only send requests when the user has moved a significant distanceand a significant amount of time has passed. A request rate higher than 1 per minuteis likely to be frowned upon.
Do not start a geocoding request unless the result is seen immediately by the user.Applications running in the background should continue geting location updateswithout asking for new geocoding data until the application is brought to theforeground again.
Note: Not all handsets support geocoding. It is important to check the result ofcanUseGeocodingApi() before calling other geocoding methods.
To convert from a latitude/longitude pair to a street address, use the findPlacesBy()method:if(CoordinateHelper.canUseGeocodingApi())

MEven Header
Creating Mobile Application Projects
Using webMethods Mobile Designer Version 10.3 68
{ Location myLocation = new Location(); myLocation.latitude = myLatitude; //double value, defined elsewhere myLocation.longitude = myLongitude; CoordinateHelper.findPlacesBy(myLocation, 10, new GeoCallback()); }
The GeoCallback object has an array of Placemark objects passed back in its onPlacesFound()method, along with the original myLocation object. Usually, the results are ordered fromclosest to furthest match.
To get a set of coordinates from a street address, use the findLocationsBy() method:if(CoordinateHelper.canUseGeocodingApi()){ String address = "10 Downing Street, London, England"; CoordinateHelper.findLocationsBy(address, 10, new GeoCallback()); }
The GeoCallback object has an array of Location objects passed to it, indicating potentialmatches.
Native Authentication APIYou can use native authentication methods, like identification with a Touch orFingerprint ID, Face ID, PIN, or some other platform-specific methods, for somesecurity-critical tasks like login, showing sensible data, publishing data, etc.
Note: Before a particular authentication method can be used, it must be configuredon the user’s device.
Use the following code to request native authentication:IDeviceAuthenticator deviceAuthenticator = (IDeviceAuthenticator) MDApplication.getInstance().getService(IMDApplication.DEVICE_AUTHENTICATOR_SERVICE);deviceAuthenticator.authenticate("Authentication is required", "This action requires authentication.", this);
If you request native authentication, you must provide the IDeviceAuthenticationCallbackmethod. This method informs you if authentication was successful or not.Authentication fails if a device does not support native authentication or if it is not fully/correctly configured.
Linking to External (3rd Party) Native Libraries/FrameworksYou can link an application to an external native library or framework using theaddExtraLibs Ant task. This task may be used in _defaults_.xml or the individual handsettargets themselves. For <addExtraLibs>, you must set the platform aribute. Insidethis tag, libraries can be defined using <library>. You must specify a name aribute thatpoints to the name of the library or framework to be used. It must end with the correctfile extension: .framework for a framework, .dylib for a dynamic library, and .a for astatic library.

MOdd Header
Creating Mobile Application Projects
Using webMethods Mobile Designer Version 10.3 69
iOS
Note: Under iOS, a static library should be built as a FAT version. This file shouldcontain code for all the required architectures.
<addExtraLibs platform="ios-app"> <library name="MobileCoreServices.framework"/> <!-- using default path for Frameworks --> <library name="Twitter.framework"/> <library name="libz.1.2.5.dylib"/> <!-- using default path for libraries --></addExtraLibs>
Here, the default paths are used to import libraries. These default paths are determinedby the SDK that is currently used for the compilation, the device architecture, and thetarget build type. For iOS applications using an iOS 8.3 SDK, the default paths are:
For the simulator
Frameworks:
/Applications/Xcode.app/Contents/Developer/Platforms/iPhoneSimulator.platform/Developer/SDKs/iPhoneSimulator8.3.sdk/System/Library/Frameworks
Libraries
/Applications/Xcode.app/Contents/Developer/Platforms/iPhoneSimulator.platform/Developer/SDKs/iPhoneSimulator8.3.sdk/usr/lib
/Applications/Xcode.app/Contents/Developer/Platforms/iPhoneSimulator.platform/Developer/SDKs/iPhoneSimulator8.3.sdk/usr/include
For iOS 8.3 on devices
Frameworks:
/Applications/Xcode.app/Contents/Developer/Platforms/iPhoneOS.platform/Developer/SDKs/iPhoneOS8.3.sdk/Developer/SDKs/iPhoneSimulator.sdk/System/Library/Frameworks
Libraries
/Applications/Xcode.app/Contents/Developer/Platforms/iPhoneOS.platform/Developer/SDKs/iPhoneOS8.3.sdk/Developer/SDKs/iPhoneSimulator.sdk/usr/lib
/Applications/Xcode.app/Contents/Developer/Platforms/iPhoneOS.platform/Developer/SDKs/iPhoneOS8.3.sdk/Developer/SDKs/iPhoneSimulator.sdk/usr/include
The location of the default paths cannot be altered, but custom paths for libraries andincludes may be specified using the libPath and includePath aributes. Static librarieswill be used if they have their libPath and includePath set directly or if they arestored in a location pre-configured as a search path within Xcode.

MEven Header
Creating Mobile Application Projects
Using webMethods Mobile Designer Version 10.3 70
You can also import libraries from custom locations using the optional libPath andheaderPath aributes.<addExtraLibs platform="ios-app"><!-- use a custom path for libraries--> <library name="MyTestLib.1.2.dylib" libPath="/Users/libs" headerPath="/ Users/include"/> <library name="MyStatictLib.1.2.a" libPath="/Users/libs" headerPath="/ Users/include"/></addExtraLibs>
The libPath aribute gives the location of the actual library/framework file itself, andthe headerPath gives the location of any header files that can be used for compilation.
Note: Both the libPath and headerPath aributes must currently be a full path(e.g., /Users/your_name /your_project /path_to_libs ), not relative paths.
AndroidAndroid uses android-apk as seing for the platform aribute, and a .jar file as library.You can refer to a .jar file that is located inside the Android SDK's platforms folder whenyou specify the name aribute, or you can specify a custom location for a library usinglibPath.
For an example, see the following codeblock:<addExtraLibs platform="android-apk"> <library name="SomeDefaultLib.jar"/> <!-- Library will be found in appropriate sdk/platforms/android-X folder, where X is the current API level --> <library name="MyCustomLib.jar" libPath="C:/path_to_custom_libraries " /> <!-- a jar in a custom location --></addExtraLibs>
Using System.getProperty to Obtain Device InformationYou can use the Java System.getProperty(String) method to return system information for thedevice on which your application is running. The table below lists properties that youmight find useful.
When invoking the Java method, supply the property name as the String input variable.For example, if you want to use the mobiledesigner.device.name property, invokethe following:System.getProperty("mobiledesigner.device.name")
Property and Description
mobiledesigner.device.firmware

MOdd Header
Creating Mobile Application Projects
Using webMethods Mobile Designer Version 10.3 71
Property and Description
The System.getProperty method returns information that identifies the firmware of thedevice.
If you are running the application in Phoney, the System.getProperty method returnsthe full Mobile Designer version number including the build number, for example,“9.5.1.2.344”.
mobiledesigner.device.name
The System.getProperty method returns information that identifies the devicehardware, for example, “iPhone4S”.
If you are running the application in Phoney, the System.getProperty method returns“Phoney”.
mobiledesigner.device.uid
The System.getProperty method returns information that uniquely identifies thespecific device on which the application is running. This is typically a uniqueString.
mobiledesigner.display.ppi
The System.getProperty method returns the resolution of the device’s screen in pixelsper inch, for example, “240”.
mobiledesigner.domain.availability:domain_name
The System.getProperty method returns whether the device can connectto the domain specified by domain_name. For example, if you want todetermine whether the device can connect to www.softwareag.com, usemobiledesigner.domain.availability:www.softwareag.com.
The return values are one of the following:
true if the device can connect.
false if the device cannot connect.
mobiledesigner.locale
The System.getProperty method returns the language the device is currentlyconfigured to use. The language is returned in the following format:
language _COUNTRY
where:
language is the two-character, lowercase language code defined by ISO 639.
COUNTRY is the two-character, uppercase country code defined by ISO3166.

MEven Header
Creating Mobile Application Projects
Using webMethods Mobile Designer Version 10.3 72
Property and Description
Note: In some circumstances, the country code might not be returned, forexample, if the device does not grant access to the country information.In these circumstances, only the two-leer language code is returned, forexample, “en”.
mobiledesigner.online.availability
The System.getProperty method returns whether the device is connected to a network.The returned information is one of the following:
If the device is not connected to a network, the method returns false.
If the device is connected to a network, the return information is in the followingformat:
true:method
For example, if the device is connected to WiFi, the return information is“true:wifi”.
If the network interface details are not specified, method is “unknown”, forexample, “true:unknown”.
mobiledesigner.platform
The System.getProperty method returns the platform for the device. The platformname that the System.getProperty method returns matches how Mobile Designer listsplatforms, for example, “Android” or “iOS”.
If you are running the application in Phoney, the System.getProperty method returnsthe name of the platform you are simulating in Phoney.
mobiledesigner.android.display.dpi.class
Provides a DPI value based on the screen's display class. This will not follow the exactDPI of the device, but will give a value equivalent to a typical device in this class,be it low, medium, high, xhigh, etc. density. The values returned are based on thescaling factor given in Android's DisplayMetrics.density as applied to a 160 DPI screen.So, a device with relatively high DPI may have a DisplayMetrics.density value of 2.5,and therefore return a value of 400 (160 *2.5) for the DPI class.
mobiledesigner.android.display.capabilities
Will output a String enumerating some of the capabilities for the device. For now,the expected format of this String is screenlayout_size_category |display_is_long .This String may expand to include more data later, and will continue to usethe pipe character ("|") as a separator between fields. The values returnedare based on information obtained from the android.content.res.Configurationclass. For the screenlayout_size_category , current possible return values are

MOdd Header
Creating Mobile Application Projects
Using webMethods Mobile Designer Version 10.3 73
Property and DescriptionSIZE_SMALL, SIZE_NORMAL, SIZE_LARGE,SIZE_XLARGE and SIZE_UNKNOWN. Forthe display_is_long category, possible return values are LONG_YES, LONG_NO andLONG_UNDEFINED. A typical handset may return SIZE_XLARGE|LONG_YES.
Creating the User InterfaceTo create the user interface for your mobile application, use the Mobile Designer NativeUser Interface. For more information, see the webMethods Mobile Designer Native UserInterface Reference.
Defining Resources for a Mobile Application Project
About the Resource HandlerEach project requires its own resource handler. Software AG recommend that you usethe default UniversalResHandler implementation that Mobile Development provides. Thegoals of the resource handler are to:
Define all the resources to include with your mobile application, such as texts andgraphical assets.
Set parameters that define the identifiers for resources, text lines, menus, andresource blocks. Mobile Designer includes the parameters in the Parameters.java.For more information about the Parameters class, see “Application and ParameterClasses” on page 50.
You can store single resource files that your project requires, for example image files andtext files, in a location within your project’s folder. For more information, see “StoringResource Files for the Project” on page 77. When adding resources with MobileDevelopment, the resource files are automatically stored in the proper location.
Mobile Development automatically sets up project properties for the resource handler,for example, to specify the name and location of the resource files. However, fordebugging and testing purposes, you can set and modify these properties on your ownas described in “Seing Project Properties for the Resource Handler” on page 78.
After defining the resources for your project, you can use the resources in yourapplication code. For more information, see “Accessing Resources in Your ApplicationCode” on page 79.

MEven Header
Creating Mobile Application Projects
Using webMethods Mobile Designer Version 10.3 74
Coding the Resource HandlerDeprecated. It is still possible but not preferable to create the resource handler from thebeginning on your own.
Resource Handler Requirements
Your resource handler must extend com.softwareag.mobile.reshandler.ResourceHandler. Thisclass includes the projectResourceScript method.
In the resource handler, include all resource handling logic that your project requiresin the projectResourceScript method.
When building your project, Mobile Designer calls the resource handler’sprojectResourceScript method.
Methods that Mobile Designer Provides for the Resource Handler
Mobile Designer provides the com.softwareag.mobile.reshandler.AntTaskResourceHandler thatcontains methods you can use in your resource handler.
The com.softwareag.mobile.reshandler.ResourceHandler class, which your project’s resourcehandler must extend, includes the rh field that defines a link to AntTaskResourceHandler.As a result, you can easily execute the methods in the AntTaskResourceHandler using thefollowing format, where method is the AntTaskResourceHandler method you want to invoke:rh.method
For example, to use the AntTaskResourceHandleraddFile method to create a resource from afile, use the following:
rh.addFile
The types of actions you can accomplish using methods provided by theAntTaskResourceHandler include:
Add resources to the project.
Set and get IDs for resources, text lines, menus, and resource blocks.
Note: When the resource handler sets identifiers, Mobile Designer addscorresponding parameters to the Parameters.java class. For moreinformation, see “Seing Parameters in the Resource Handler Code” onpage 89.
Set application-specific parameters. For more information, see “Seing Parameters inthe Resource Handler Code” on page 89.
To learn about all the methods that Mobile Designer provides for a resource handler,see information about com.softwareag.mobile.reshandler.AntTaskResourceHandler in webMethodsMobile Designer Java API Reference.

MOdd Header
Creating Mobile Application Projects
Using webMethods Mobile Designer Version 10.3 75
Setup to Allow the Resource Handler and Application Code to Share Common Code
You can set up your project’s resource handler and the application code so that theyshare common code. For example, the resource handler and application code might usethe same set of constant values, or you might have common code that you want to use inboth the resource handler and the application code.
To use shared common code, place the shared code in a folder within your project. Thenwhen defining the project.runtime.project.src.path and project.reshandler.src.path Antpaths for your project, include <pathelement> tags to the location that contains theshared code. For example, if you placed shared code in the project’s src/shared_code_folder, you might define Ant paths like the following in your project’s _defaults_.xmlfile:<path id="project.runtime.project.src.path"> <pathelement path="${basedir}/src/core"/> <pathelement path="${basedir}/src/shared_code"/> </path> <path id="project.reshandler.src.path"> <pathelement path="${basedir}/reshandler"/> <pathelement path="${basedir}/src/shared_code"/> </path>
The _FunctionDemo_ sample application provides an example of this shared code setup.
Sample Resource Handler Code
You can find examples of basic and complex resource handler logic in all the samplesapplications provided with Mobile Designer.
Accessing Resources in Your Application Code
Your resource handler defines the resources available to your application. Forinformation about how to use the resources in your application code, see “AccessingResources in Your Application Code” on page 79.
Using Resource Blocks and Resource PacksYou can code your resource handler to put resources into resource blocks and resourcepacks.
Resource blocks are a group of resources. For example, you might bundle launchscreens into one block, and images into another block.
Resource Packs are bundles of resource blocks.
The use of resource blocks and packs is not required. Reasons to use them mightbe to save space and/or increase speed. A single larger file compresses beer thanmultiple smaller files. Opening one file can be faster than opening several smaller files.However, with current devices, space and speed are no longer major issues for mobileapplications. As a result, using resource bundles and packs for reasons of space andspeed is not typically needed.

MEven Header
Creating Mobile Application Projects
Using webMethods Mobile Designer Version 10.3 76
Another reason you might want to use resource blocks and packs is for beer security.When bundling resources, it is more difficult to determine names of resources and moredifficult to take malicious actions without having to rebuild the resource packs.
Defining Resource Blocks
To define resource blocks in the resource handler code, execute the startResourceBlockmethod that is in the com.softwareag.mobile.reshandler.AntTaskResourceHandler class. Forinformation about how to use an AntTaskResourceHandler method in your resource handler,see “Methods that Mobile Designer Provides for the Resource Handler” on page 74.
When you execute the startResourceBlock method, you assign a name to the resource block.You can assign any name to resource blocks that is appropriate for your application.When you execute the startResourceBlock method, the resource block you create becomesthe current resource block, and all subsequent resources you add are included in thecurrent block. For example, the following code sample shows how to start a resourceblock named "IMAGES" and add the file "logo.png" as the resource name "res_logo.png":public class ResHandler extends com.softwareag.mobile.reshandler.ResourceHandler { public void projectResourceScript() { . . . rh.startResourceBlock ("IMAGES"); rh.setResourceReadSubdirectory ("graphics")); rh.addFile ("res_logo.png", "logo.png"); . . . } }
To start a new resource block, execute the startResourceBlock method again.
Using resource blocks helps you to control the memory your application uses. When youbundle resources into a block, you can cache the block(s) your application needs basedon the application state. In other words, your application can load and unload blocks sothat only the resources that are required for a state in your application are loaded andtherefore the application is not using valuable memory space for unneeded resources.
Important: If your resource handler bundles resources into blocks, when yourapplication needs to use the resources that are in a block, be sure theapplication code caches the block into memory before loading its resources.
A best practice is to use the same resource blocks for all the platforms for which youbuild your application. However, if the devices on which your application runs havevarying memory and you are concerned that some devices cannot keep all the resourcesin memory, you might want to split your resources up in the application bundle forcompression, decompression, or run-time memory management. One approach you canuse is to bundle the blocks into packs.

MOdd Header
Creating Mobile Application Projects
Using webMethods Mobile Designer Version 10.3 77
Using Resource Packs
Resource packs are bundles of resource blocks. You can define several packs of differentcombinations of your resource bundles. You might customize packs for each of thedevices your application supports. For example, some devices might have the memorycapacity to cache all the blocks in memory at application load time, while other devicesmight only be able to cache one block at a time due to memory limitations.
To define resource packs in the resource handler code, execute theallocateResourceBlockToPack method that is in the AntTaskResourceHandler class. When youexecute the allocateResourceBlockToPack method, you identify a resource block and specifythe identifier for a resource pack. For example, the following line of code allocates theresource block named "IMAGES" to the pack with identifier “0”:rh.allocateResourceBlockToPack ("IMAGES", 0);
At build time when Mobile Designer runs the resource handlers, it creates an individualfile for each resource pack that your resource handler defines. When you use resourcebundles, your resource handler should define, at a minimum, at least one resourcepack that contains all the resource bundles. If a block is not included in a pack, MobileDesigner saves that block’s resources as individual resources in the final binary.
The resource packs you define in your resource handler are transparent to yourapplication code. When Mobile Designer runs the resource handler, it keeps a record ofeach resource pack along with the blocks that the pack contains. It also keeps track of theresources that are in each block. When your application code loads a resource block intomemory, Mobile Designer determines the appropriate pack to load for that block. As aresult, you can customize the packs for each device your application supports withoutbeing concerned about altering your application code.
Storing Resource Files for the ProjectWhen adding resource files within Mobile Development, they are automatically storedin the proper location.
However, you can continue to manually add resources that your project uses within theyour_project /resources folder.
Launch Screens for ApplicationsFor iOS, when defining the resources for your application, you should include a launchscreen image. A launch screen is a static image that a device displays when the userlaunches the mobile application. The purpose of the image is so that the user can see thatthe application is starting while the application initializes its initial window and views.
For more information about how to add a launch screen, see webMethods MobileDevelopment Help, Importing Images for App Icons and Launch Screens.

MEven Header
Creating Mobile Application Projects
Using webMethods Mobile Designer Version 10.3 78
Setting Project Properties for the Resource HandlerThe following table lists the resource handler project properties. The table specifies theproperties you can set to provide details about the resource handler for your project. Forinstructions about how to set properties, see “Where You Set Properties” on page 84and “Seing Project Properties” on page 86. For further details about the properties,see “Resource Handler Properties” on page 197.
Property and Description
project.java.reshandler.name
Required. Specifies the Java package/class name of the resource handler class.
project.reshandler.src.path
Required. Specifies the location of your project’s resource handler script and anyassociated classes.
project.resource.dir.root
Required. Specifies the location of the resource files (image files, etc.) for yourproject.
project.reshandler.additional.libs.path
Conditionally required. Specifies the location of classes that the resource handlerrequires. Required only if your resource handler requires additional classes.
debug.remember.resource.names
Optional. Specifies whether you want the Mobile Designer to record the names ofthe resources included in the build rather than the resource IDs.
By default, the resource IDs are recorded, not the resource names.
project.compiled.resources.info.format
Optional. Specifies whether you want the _compiled_resources file that MobileDesigner creates when it runs your resource handler to be in XML or text format.For more information, see “Managing Memory for Your Resource Handler andResources” on page 79.
By default, Mobile Designer creates a .txt format file.
MOdd Header
Creating Mobile Application Projects
Using webMethods Mobile Designer Version 10.3 79
Managing Memory for Your Resource Handler and ResourcesIf your mobile application project’s resource compilation is memory and resourceintensive, you can increase the amount of memory available for Ant to avoidencountering out-of-memory exceptions during the execution of the resource handler.To increase this memory, use a system property to set the amount of memory. Thefollowing shows examples:
On Windows: set ANT_OPTS=-Xmx256m
On Linux: export ANT_OPTS=-Xmx256m
Adjust the value, "256m", used in the example to reflect how much memory yourresource handling needs.
You can estimate the amount of memory your application will require when it runsusing the information in the _compiled_resources file, which resides in your project’s_temp_ folder. Mobile Designer creates this file when it runs your project’s resourcehandler. Use the project.compiled.resources.info.format project property to indicatewhether you want the _compiled_resources file to be in XML or text format. The_compiled_resources file contains information on the resources, as well as their resultantresource blocks, resource packs, and file sizes.
Accessing Resources in Your Application CodeTo access resources in your application code, Mobile Designer provides the followingrun-time classes:
Use in your application code to access and manage the audio resources. TheAudioHandler class includes the loadSound and unloadSound methods that you can use toload and unload audio resources.
and
Use in your application code to access and manage image resources. The ImageBaseclass includes the getImage, loadImageID, and unloadImageID methods that you can use toload and unload image resources.
Use in your application code to access and manage text line resources. The TextHandlerclass includes the getString method to get a text string.
If you use resource blocks and packs, use this class in your application code tomanage the blocks and packs. The ResouceHandler class includes the loadResourceBlockand unloadResourceBlock methods that you can use to load and unload resource blocks.
When using a method to load or unload a resource, you specify the resource’s identifier.When Mobile Designer runs your resource handler, it sets parameters for the resourcesin the com.softwareag.mobile.runtime.Parameters class. For example, if you want to load an

MEven Header
Creating Mobile Application Projects
Using webMethods Mobile Designer Version 10.3 80
audio resource with the identifier RESID_STARTUP, you can use the following methodcall:AudioHandler.loadSound (Parameters.RESID_STARTUP);
If your resource handler bundles resources into resource blocks and packs, in yourapplication code, you must load the resource bundle containing a resource beforeyou load the specific resource. Continuing with the previous example, suppose theRESID_STARTUP audio resource is included in the resource block with the identifierRESBLOCKID_AUDIO, you can use the following method calls:ResourceHandler loadResourceBlock (Parameters.RESBLOCKID_AUDIO); AudioHandler.loadSound (Parameters.RESID_STARTUP);
When the application is no longer using the resources in a block, it can use theunloadResourceBlock, which is also in the ResourceHandler class to unload the resource block.
Note: If you are using resource blocks and packs, your application code does notneed to load and unload resource packs. Mobile Designer keeps track of thepacks required for each resource block. When you load a resource block,Mobile Designer takes care of loading the appropriate pack that contains theresource block.
Compiling Resources Using the +Run-Reshandler Ant TargetUse the +Run-Reshandler Ant target if you want to compile the resources, such as text filesand images, for the current device without compiling the source code for the mobileapplication.
The following diagram shows the steps that Mobile Designer performs when you usethe +Run-Reshandler Ant target. See the table below the diagram for a description of thesteps. The table also indicates hook points where Mobile Designer can run custom Antscripts that you provide. For more information about hook points, see “Creating CustomAnt Scripts to Run at Predefined Hook Points” on page 125.

MOdd Header
Creating Mobile Application Projects
Using webMethods Mobile Designer Version 10.3 81
+Run-Reshandler Ant Target
1 Determine settings for target devices
Mobile Designer determines the seings for the device for which it isbuilding the application. It retrieves the seings from the following sourcesin the order listed.
Project-level device_name .xml files
Project-level _defaults_.xml file
Mobile Designer device database
Mobile Designer sdk.properties file
Mobile Designer uses the first seing it encounters. For example, if MobileDesigner encounters a seing in the project-level target device_name .xml fileand then again in the project-level _defaults_.xml file, Mobile Designer usesthe seing from the target device_name .xml file.
For more information about:
Project-level device files, see “Where You Set Properties” on page 84and “Seing Project Properties” on page 86

MEven Header
Creating Mobile Application Projects
Using webMethods Mobile Designer Version 10.3 82
Mobile Designer device database, see “Devices that a Mobile ApplicationSupports” on page 91
Mobile Designer sdk.properties file, see “Mobile Designer ConfigurationProperties (sdk.properties)” on page 18
hookpoint
PreBuildResources
If you have created an Ant script to run at the PreBuildResources hookpoint, Mobile Designer runs the Ant script.
2 Execute the resource handler
Mobile Designer runs the resource handler that you created for the project.When running the resource handler, Mobile Designer records all theresources required for your application. Mobile Designer also creates theclass. For more information about creating the resource handler, see “Aboutthe Resource Handler” on page 73. For more information about theParameters class, see “Application and Parameter Classes” on page 50.
At this point in the build process, Mobile Designer uses the followingproject properties:
project.reshandler.src.path for the location of the project’s resource handlerscript and any associated classes
project.java.reshandler.name for the name of the resource handler classyou created for your project
project.resource.dir.root for the location of the top-level folder thatcontains the resources (image files, etc.) for your project
project.reshandler.additional.libs.path for the location of additionallibraries that your project’s resource handler requires
For more information about these properties, see “Resource HandlerProperties” on page 197.
hookpoint
PostBuildResources
If you have created an Ant script to run at the PostBuildResources hookpoint, Mobile Designer runs the Ant script.

MOdd Header
Creating Mobile Application Projects
Using webMethods Mobile Designer Version 10.3 83
Setting Properties and Parameters for a Mobile ApplicationProject
About Properties and ParametersProperties and parameters are project seings used when building your project or at runtime.
Properties are build-time seings that your project’s build script can access whenbuilding your project. At build time, the build process can access property seings todetermine information, for example, the device for which your application is beingbuilt. As a result, you can set properties to manipulate how your application is builtfor specific platforms and/or specific target devices, including and/or excludingfeatures for the devices your mobile application supports.
Note: Your application code cannot reference property seings at run time. Useparameters for seings that are available to your application’s run-timecode.
Parameters are run-time aributes that you can use in your application code. Forexample, at run time your application can access parameters to retrieve informationabout the resources included in the application to perform such tasks as loadingresources. Another example is that your application code can access informationabout the device on which the application is running to branch the logic based on theneeds of that specific device. For more information, see “Using Parameters in YourApplication Code” on page 90.
When Mobile Designer builds a project, it runs the project’s resourcehandler before it compiles your application. The resource handler creates thecom.softwareag.mobile.runtime.Parameters class that includes all the parameters.
The Parameters.java includes:
Parameters that Mobile Designer defines and uses.
Application-specific parameters related to the resources in your project.
System Properties, like parameters, can be accessed at run time, but in contrast toparameters, they do not appear in the Parameters class. Instead, you can access themusing the System.getProperty method. Some system properties define default seings.For example, the system property ios.webview specifies which implementation ofWebview must be used internally, UIWebview or WKWebview. Other properties can beused for any purpose.

MEven Header
Creating Mobile Application Projects
Using webMethods Mobile Designer Version 10.3 84
Where You Set PropertiesProperties are generally set in the following files. When you set properties, be aware thatwhen Mobile Designer builds a project, it obtains properties from the files in the orderlisted and uses the first seing it encounters for a property.
Project-specific target device files (device_name .xml) that contain device-specificseings for devices that the project supports. For more information about targetdevice files, see “Devices that a Mobile Application Supports” on page 91 and“Adding a Device to a Project” on page 91.
Mobile Designer sets some properties in a target device file when you add adevice to a project. You can change and/or add additional project properties. Forinstructions, see “Seing Project Properties” on page 86.
Project-level _defaults_.xml file that contains default seings for all devices in aproject.
To start a project, you typically clone an existing project. As a result, your projectstarts with the seings in the cloned project. You can change and/or add additionalproperties. For more information, see “Seing Project Properties” on page 86.
If you want to override seings for your mobile application project, set projectproperties in the project’s target device files for the device. For instructions, see“Seing Project Properties” on page 86.
The Mobile Designer sdk.properties contains default property seings that affect allprojects. For more information, see “Updating the sdk.properties File to ConfigureMobile Designer” on page 18 and “Mobile Designer Configuration Properties(sdk.properties)” on page 18.
Where You Set System PropertiesDefault system properties are defined in the md.system.properties file which is locatedat your_installation_directory /Tools/Build/Runtime/v1.0.0.
Important: Do not modify this file as it is overridden by every update.
In the md.system.properties file, you can see which properties are used by MobileDesigner. To change the default seings, you must create a new system.properties file inthe root folder of your project. In this file, you can override the default values.
To use a specific system.properties file, specify the path and name of this file in the Antproperty custom.system.properties.
For example, you can insert the following line in your _defaults_.xml file to usethe release.system.properties file from your root project folder: <propertyname="custom.system.properties" value="release.system.properties"/>

MOdd Header
Creating Mobile Application Projects
Using webMethods Mobile Designer Version 10.3 85
Project PropertiesThe following table lists the properties that must be set for your project. MobileDevelopment handles these properties. However, for debbuging and testing reasons,you can still specify and modify them on your own. For information about how to setproperties, see “Seing Project Properties” on page 86.
Property
project.runtime.project.src.path
Required. Specifies the location of the run-time code for your mobile application.
project.runtime.additional.classes.path
Conditionally required. Specifies the location of classes required for building yourproject. Required only if your project requires additional precompiled classes tobuild the application.
project.runtime.additional.stubs.path
Conditionally required. Specifies the location of the stubs required for compilation.Required only if your project requires additional stubs to compile the application’srun-time source code.
project.langgroup.group_name
Required. Specifies the language(s) that you want your application to support.
project.jarname.format
Required. Specifies the file name format that you want Mobile Designer to usewhen naming your application’s final binary.
project.java.reshandler.name
Required. Specifies the Java package/class name of the resource handler class youcreated for your project.
project.reshandler.src.path
Required. Specifies the location of your project’s resource handler script and anyassociated classes.
project.resource.dir.root

MEven Header
Creating Mobile Application Projects
Using webMethods Mobile Designer Version 10.3 86
Property
Required. Specifies the location of the resource files (image files, etc.) for yourproject.
project.reshandler.additional.libs.path
Conditionally required. Specifies the location of classes that the resource handlerrequires. Required only if your resource handler requires additional classes.
mobiledesigner.buildscript.version
Required. Specifies the version of the Mobile Designer build scripting system to usewhen building your application.
mobiledesigner.runtime.version
Required. Specifies the version of the Mobile Designer run-time system to use foryour application.
project.java.midlet.name
Required. Specifies the name of the root MIDlet/Application class of your project'srun-time code. Typically this is the class that extends .
project.jar.name
Required. Specifies a text name you want your application to have when installedon a device.
Setting Project PropertiesFor a list the properties that must be set for a project, see “Project Properties” onpage 85.
To set a value or change a predefined value for your project, you can set property valueswithin the project’s targets folder.
Specify properties in the project’s _defaults_.xml file apply to the seings to alldevices that the application supports.
Specify properties in target device XML files to apply seings to a single devicethat the application supports. The properties you place in target device XML filesoverride seings in the _default_.xml file.
Note: The properties you specify for the project override seings you make for allprojects in the sdk.properties file.

MOdd Header
Creating Mobile Application Projects
Using webMethods Mobile Designer Version 10.3 87
To set project properties
1. In Software AG Designer, in the Project Explorer view, expand the Mobile Designerproject for which you want to define properties.
2. In the project’s targets folder, double-click the file to which you want to add aproperty:
To apply the seing to all the devices the application supports, double-click the_defaults_.xml file.
project_folder /targets/_defaults_.xml
To apply the seing to a single device that your application supports, add theproperty to the XML file for that device:
project_folder /targets/device_file .xml
For example, if your application supports IOS_Apple_UniversalRetina andyou want to apply the seings only to this device, add the seings to theIOS_Apple_UniversalRetina.xml file.
3. Locate the area of the file where you want to add the property. Refer to comments inthe file to find good location.
4. Add the property to the file using the following format:<property name="PropertyName " value="PropertyValue "/>
For example:<property name="cross.compiler.extractinners" value="true"/>
5. After adding properties, save the file.
Where You Define ParametersYou define application-specific parameters in the following files:
You define application-specific parameters related to the resources in your projectin the resource handler code. For more information, see “Seing Parameters in theResource Handler Code” on page 89.
You define general application-specific parameters in the following locations:
Project’s _defaults_.xml and target device files. For more information,see “Seing Parameters in the _defaults_.xml and Target Device Files” onpage 88.
If you still code your own resource handler, you set application-specificparameters in the resource handler that you created for a project. For moreinformation, see “Seing Parameters in the Resource Handler Code” onpage 89.
You can define any application-specific parameters you might need.

MEven Header
Creating Mobile Application Projects
Using webMethods Mobile Designer Version 10.3 88
Setting Parameters in the _defaults_.xml and Target DeviceFilesTo add parameters to the project’s _defaults_.xml or one of the project’s target devicefiles (device_name .xml), use the following format:<param name="ParameterName " value="ParameterValue "/>
You can also optionally include a comment when seing the parameter:<param name="ParameterName " value="ParameterValue " comment="comment "/>
Specifying the Parameter Name
For ParameterName specify the name you want to use. The name can be anything that isacceptable as a Java variable.
Specifying the Parameter Value
For ParameterValue use one of the formats specified in the following table.
For this type of value... Use this format to specify the value...
boolean boolean={"true" | "false"}
orbool={"true" | "false"}
byte byte=value
char char=value
double double=value
float float=value
int int=value
long long=value
short short=value
string string=value

MOdd Header
Creating Mobile Application Projects
Using webMethods Mobile Designer Version 10.3 89
Example
Suppose at run time your application code needs to determine whether to display alaunch screen. To set the default for all devices to display the launch screen, you can adda parameter named “DISPLAY_LAUNCH_SCREEN” to the _defaults_.xml file and setits value to “true”:<param name="DISPLAY_LAUNCH_SCREEN" bool="true"/>
The following shows the resulting parameter declaration in Parameters.java:public static final boolean PARAM_DISPLAY_LAUNCH_SCREEN = true;
Then for devices for which you do not want to display the launch screen, you can addthe parameter to the target device file for those devices and the parameter value tofalse:<param name="DISPLAY_LAUNCH_SCREEN" bool="false"/>
If you build your project for one of the devices for which the launch screen shouldnot be displayed, Mobile Designer reads the target device file, and as a result, uses thefollowing parameter declaration in Parameters.java:public static final boolean PARAM_DISPLAY_LAUNCH_SCREEN = false;
Setting Parameters in the Resource Handler CodeIf you still code the resource handler for your project, you can add application-specificparameters. Additionally, for each resource you add to the project and to which youassign an ID, an associated parameter is included in the Parameters.java class.
In your resource handler code, to define the parameters, you invokemethods that Mobile Designer provides. The methods are defined in thecom.softwareag.mobile.reshandler.AntTaskResourceHandler class. For information about howto use the AntTaskResourceHandler methods in your resource handler, see “Methods thatMobile Designer Provides for the Resource Handler” on page 74.
The following table lists:
The AntTaskResourceHandler method you use to define a parameter.
The naming convention that Mobile Designer uses for the parameter names. Inthe naming conventions, name is the name assigned to the parameter and id is theidentifier assigned to the parameter
Method Naming convention foradded parameter
Description
n/a PARAM_MD_name Parameters that Mobile Designer defines.These parameters are for internal use.The Mobile Designer run-time classesuse these parameters. For a descriptionof the run-time classes, see “ Mobile

MEven Header
Creating Mobile Application Projects
Using webMethods Mobile Designer Version 10.3 90
Method Naming convention foradded parameter
Description
Designer-Provided Run-Time Classes”on page 49.
setParam PARAM_name General application-specific parametersthat you define.
setResBlockID RESBLOCKID_name Parameters that define the identifiersfor resource blocks that you definedin your project. For more informationabout resource blocks, see “UsingResource Blocks and Resource Packs” onpage 75.
setResID RESID_name Parameters that define the identifiers forresources (for example, image files, etc.)that you added to your project.
setTextID TEXTID_name Parameters that define the identifiersfor lines of text that you added to yourproject.
The following list examples:
If you use the setParam method to add the application-specific parameter“DISPLAY_LAUNCH_SCREEN”, Mobile Designer includes the parameterPARAM_DISPLAY_LAUNCH_SCREEN in the Parameters.java class.
If you use the setResID method to assign an audio file the identifier “BEEP”, MobileDesigner includes the parameter RESID_BEEP in the Parameters.java class.
If you use the setResBlockID method to assign a resource block the identifier “AUDIO”,Mobile Designer includes the parameter RESBLOCKID_AUDIO in the Parameters.javaclass.
Using Parameters in Your Application CodeWhen creating an application, typically you have common logic that works for all targetdevices. However, you might require branches in the logic to address the needs of aspecific target device. For example, you might need to omit or alter a feature for a targetdevice, or you might need to position an image relative to the screen dimensions for atarget device. To accommodate device-specific logic, your application logic can branchbased on parameter values that are set using the device profile seings.
To use parameters in your application code, import thecom.software.mobile.runtime.Parameters class. You can then easily access parameter

MOdd Header
Creating Mobile Application Projects
Using webMethods Mobile Designer Version 10.3 91
values. For example, if you want to branch logic based on an application-specific“PARAM_DISPLAY_LAUNCH_SCREEN” parameter, you can use a statement like thefollowing:if (Parameters.PARAM_DISPLAY_LAUNCH_SCREEN)
You also use parameters that define identifiers for resources and resource blocks toload resources and resource blocks into memory, and unload them from memory, asnecessary.ResourceHandler.instance.loadResourceBlock (Parameters.RESBLOCKID_LAUNCHES); launch_screen_image_id = ImageHandler.instance.loadImageID (Parameters.RESID_LAUNCH_SCREEN_IMAGE, -1, -1, false); ResourceHandler.instance.unloadResourceBlock (Parameters.RESBLOCKID_LAUNCHES);
For more examples about how to use the parameters in application code, review thecode provided with sample projects that are provided with Mobile Designer.
Adding Devices to a Mobile Application Project
Devices that a Mobile Application SupportsMobile Designer has a device database that provides device profiles for many devices.You are encouraged to use the more generic devices and code for multi-resolution apps.
The device profiles are located in the following directory:
Mobile Designer_directory/Devices
In your mobile application project, you reference the subset of the devices your mobileapplication project will support. The project’s target folder contains an XML file for eachdevice that your mobile application supports. Mobile Designer creates the XML file andadds it to the project’s target folder when you execute the Add-Handset Ant target to add adevice to your project.
Mobile Development will add the devices that you want your application to supportto your project when you define launch configurations. For more information, seewebMethods Mobile Development Help, Building a Mobile Project. However, you cancontinue to add devices using Ant targets as described in “Adding a Device to a Project”on page 91.
Adding a Device to a ProjectTo add a device to a mobile application project, execute the Add-Handset Ant target fromyour project. When adding the device, you associate the device with a language orlanguage group.

MEven Header
Creating Mobile Application Projects
Using webMethods Mobile Designer Version 10.3 92
The Add-Handset Ant target adds an XML file for the device to your project’s targetsfolder. The following is a sample of the target XML file:<?xml version="1.0" encoding="UTF-8"?> <project> <property name="project.handset.AND_generic_Android3xAPI.langgroups" value="EFIGS"/> <property name="project.handset.AND_generic_Android3xAPI.mobiledesigner.handsetgroup" value="AND_generic_Android3xAPI"/> <target name="-Project.Handset.AND_generic_Android3xAPI"> <!-- properties, parameters and paths --> <!-- Load the global info for this project and the Mobile Designer --> <!-- handset group --> <call-mobiledesigner-handset-target handset="${selected.handset}"/> </target> </project>
To add a device to a project
1. In Software AG Designer, open the project’s build.xml file in the Ant view.
a. In the Project Explorer view, locate the project to which you want to add adevice.
b. Expand the project and drag its build.xml file to the Ant view.
2. In the Ant view, double-click Add-Handset.
Mobile Designer displays an Add Handset dialog.
3. In Add Handset dialog, select the platform on which the device runs from thePlatform Filter list.
4. Select the manufacturer that makes the device from the Manufacturer Filter list.
When you select a valid platform and manufacturer combination for which MobileDesigner has a device profile, Mobile Designer populates the Choose your handset listand displays a default device name in the Reference Name field.
If Mobile Designer does not have a device profile for the platform and manufacturercombination you specified:
Ensure you are specifying the information correctly by reviewing the informationin the following directory to determine the names of supported devices andplatforms:
Mobile Designer_directory/Devices
5. Select the device you want to add to the project from the Choose your handset list.
6. Accept the default name in the Reference Name field or update it if you want to useanother name.
7. In Language Groups, type a semicolon-separated list of language groups to specifythe languages that your mobile application will support for the device. You definelanguage groups using the project.langgroup.group_name property.
For example, if you have defined the language groups europe and asia and want tospecify those language groups, use the following:

MOdd Header
Creating Mobile Application Projects
Using webMethods Mobile Designer Version 10.3 93
europe;asia
8. Click Add Handset.

MEven Header
Using webMethods Mobile Designer Version 10.3 94

MOdd Header
Building Mobile Application Projects Using Jenkins
Using webMethods Mobile Designer Version 10.3 95
4 Building Mobile Application Projects Using Jenkins
■ Getting Started ............................................................................................................................. 96
■ Installing and Configuring Jenkins ............................................................................................... 98
■ Advanced Settings ..................................................................................................................... 102

MEven Header
Building Mobile Application Projects Using Jenkins
Using webMethods Mobile Designer Version 10.3 96
Getting Started
About the Mobile Suite Jenkins PluginMobile Designer provides a Jenkins plugin to allow for remote-building setups. Jenkinscreates an environment for very flexible and configurable build processes, allowing formany different types of tools and setups. This plugin follows on as a replacement tothe functionality previously provided with Mobile Administrator. This guide coversimportant points you should consider when installing and seing up Jenkins, along withthe functionality directly provided by Mobile Designer. Some more advanced topicsand building setups are also discussed. Advanced functionality and support is availablewithin the Mobile Development perspective of Software AG Designer. The functionalityin Software AG Designer is easy to use, and it is recommended to use the Jenkins pluginon a day to day basis within Mobile Development. For more information, see webMethodsMobile Development Help.
Jenkins TerminologyIf you are not already familiar with Jenkins, the following table explains a few importantterms to know when using Jenkins. Further information can be found online.
Term Explanation
JenkinsMaster
The Jenkins master is the term for the computer that managesall Jenkins build activity. It provides a web interface for usersto interact with, and it can delegate build activities to othercomputers (Jenkins slaves). One Jenkins master can be used tomanage many slaves.
Jenkins Slave A computer connected to the Jenkins master. This computerwill run build jobs for the master. Slave computers may all beconfigured the same, or some may be used to provide specifictools (e.g., those that can only run on one operating system, suchas Xcode), or different versions of the same tool that will not co-exist on the same computer.
Build Job A series of build steps executed one after the other in a singleworkspace in order to do something useful for the developer (e.g.,compile an application, generate a test report, etc.).

MOdd Header
Building Mobile Application Projects Using Jenkins
Using webMethods Mobile Designer Version 10.3 97
Term Explanation
Build Step This is the smallest unit of work in Jenkins. It comprises a singleaction (eg., launch Ant/Gradle/Maven with a target, run a batchscript, delete a file).
Workspace A folder in which a Jenkins job runs its build steps. This foldermay be on the Jenkins master or one of the Jenkins slaves, andit may be in a different place (or on a different computer) everytime the job runs.
Pipeline A collection of Jenkins jobs that are tied together to perform alarger workflow (e.g., compile > run tests > generate reports).Unlike build steps in a job, jobs in a pipeline can be executingsimultaneously.
Build Artifact The end product of a build job (e.g., an .apk or .app file forbuilding a mobile project).
RequirementsThe Mobile Suite Jenkins plugin requires a Jenkins server running at least version 2.7.3of Jenkins. It has been tested up to version 2.121.1 (the latest long-term support releaseat the time of writing). The plugin also requires the Jenkins Ant plugin to be installed.Versions 1.5-1.8 are acceptable and have been tested. Jenkins should automatically installthis dependency as part of the installation of the Mobile Suite plugin.
Computers acting as Jenkins slaves used for building mobile applications need to berunning MacOS El Capitan (10.11), Sierra (10.12) or High Sierra (10.13). Later versions ofMacOS are also expected to work.
All Jenkins slave computers must have Software AG Designer with the MobileDevelopment perspective and Mobile Designer installed and configured, along with anyplatform SDKs (Android Studio, Xcode) that you want to use.
Note: Single computer configurations are technically possible, if all requirementsfor the Jenkins slave and the Jenkins server can be met. There are additionalrequirements and configuration steps for single-computer setups, many ofwhich are covered in this documentation. However, it is not recommendedto use single-computer configurations. It is less secure, scales poorly withadditional users, and will make the Jenkins web UI less responsive duringbuilding.
Important: When installing Mobile Designer, Mobile Development and Platform SDKson a Jenkins build slave, be aware that the user account doing the installationmay not have the same rights and permissions as Jenkins does when

MEven Header
Building Mobile Application Projects Using Jenkins
Using webMethods Mobile Designer Version 10.3 98
building your application. It may be necessary to install files into "common"locations, and/or to adjust the access properties of files after installation.
Installing and Configuring Jenkins
Installing JenkinsIf you do a new Jenkins install, follow the instructions at “hps://jenkins.io/” todownload and install your server. Software AG recommend that you choose a version ofJenkins that is part of the stable long-term support branch.
Mobile Designer provides an installation bundle that you must upload to your Jenkinsserver.
Note: You may need to restart your Jenkins service as part of this process. If yourbuild server is constantly in use, you can check the Jenkins documentation onhow to stop the server from accepting new builds (the Quiet Down mode), seePrepare for Shutdown in the Manage Jenkins section.
To install the installation bundle
1. In a web browser, connect and log in to your local Jenkins server (withadministrative privileges, if required).
2. Click Manage Jenkins, and then click Manage Plugins.
3. Select the Advanced tab, then scroll down to the Upload Plugin section.
4. Click Browse and locate the your_mobile_designer_install /plugins/Jenkins/v1.0.0/mobile-suite-jenkins-plugin.hpi installation bundle on your machine. Click Upload.
The Jenkins server installs the plugin.
Note: You may need to restart your Jenkins server, especially if you are upgradingthe plugin from a previous install on an older version of Jenkins. Jenkins willoften provide a check box that can be selected as part of the plugin installprogress page. You can also use your normal procedure to restart the server.Ensure that all currently running build jobs finish before restarting the server.
Single-Computer Setup for iOSWhen seing up a Jenkins master with the intention of building for iOS on the samecomputer, the Jenkins user that is created will not have a default keychain to start with,and this will break the build process. You have two options: You can either change theuser that the Jenkins server runs as (see the Jenkins documentation for this), or you cancreate the default keychain for the Jenkins user.

MOdd Header
Building Mobile Application Projects Using Jenkins
Using webMethods Mobile Designer Version 10.3 99
Note: When creating .p12 files for a single-computer setup like this, keep in mindthat the Jenkins user does not have access to the associated keys you have onother user accounts. These must be included in the .p12 files you export, orplaced in the JenkinsDefault keychain by hand.
Creating the Default Keychain for the Jenkins UserTo create a default keychain
1. Log in to your computer with a user name and password that have administratorrights.
2. Open a terminal under /Applications/Utilities/Terminal.
3. Enter the following:sudo su Jenkinsyour_passwordcd ~/Librarymkdir Keychainscd Keychainssecurity create-keychain JenkinsDefault.keychainthe_new_passwordsecurity default-keychain -s JenkinsDefault.keychainexitsudo passwd Jenkinsthe_password_for_the_JenkinsDefault.keychain
4. Reboot your computer.
Configuring Your Server After InstallationUnder the Manage Jenkins section, the Mobile Suite Jenkins plugin will create two extrasections. They are used to manage Android and iOS signing keys, and iOS provisioningprofiles.
Adding an Ant Installation Through Global ToolsIf you are seing up a new server, or have never configured Apache Ant before, youmust configure this through the Global Tools section.
To add an Ant installation
1. On your Jenkins homepage, select Manage Jenkins > Global Tool Configuration.
2. Click Ant Installations... to expand the Global Tool Configuration section.
3. Click Add Ant.
4. In the Name field, enter a memorable name (eg., Ant_1_10_1).
5. Ensure that the Install Automatically check box is selected.

MEven Header
Building Mobile Application Projects Using Jenkins
Using webMethods Mobile Designer Version 10.3 100
6. Under Install from Apache, select an appropriate version of Ant from the drop-downlist for use with Mobile Designer. 1.9.x versions greater than 1.9.4 and 1.10.x versionsare expected to be compatible.
7. Click Save.
Managing Signing KeysIn order to ensure security for signing credentials, the files stored on the server areencrypted using the Jenkins master node's key. This key is randomly generated duringinstall and will be unique to your server.
Important: Do not use files held on the Jenkins server as your only copies of yourprivate keys. Once they are uploaded to the server, you cannot get them backin a usable form.
Adding an Android KeystoreTo add an Android keystore
1. On your Jenkins homepage, select Manage Jenkins > Mobile Signing Key Configuration.This page is used to manage iOS private keys and certificates, stored in .p12 files, andAndroid keystores.
2. At the top of the page, under Upload Android or iOS Signing Keys, click Browse.
3. Select the Android keystore file to upload, and provide the password used to unlockit.
4. Select Android from the platform drop-down list, and then click Upload.
The server will indicate if the file has been uploaded correctly, and it should appearin the Current Android Keys section below.
5. In the Current Android Keys section, add a meaningful description for this keystore.
6. Provide the key passwords for each key alias in the keystore.
7. At the boom of the Current Android Keys section, click Save.
Exporting iOS Certificates and Private Keys to .p12 FilesThe Jenkins plugin works with .p12 (Personal Information Exchange) files. Thesepassword-protected files contain the certificates and private keys that can be used to signyour build. .p12 files can be created by exporting certificates that are already installed ona Mac.
To export certificates and private keys to .p12 files
1. Open the Keychain Access application from /Applications/Utilities/Keychain Access.

MOdd Header
Building Mobile Application Projects Using Jenkins
Using webMethods Mobile Designer Version 10.3 101
2. Locate the certificates you want to export. The view can be filtered by selecting theCertificates or MyCertificates category.
Tip: Certificates for signing iOS builds will likely start with "iPhoneDeveloper:", "iOS Distribution:", or similar.
3. Each certificate you want to export will have a private key associated with it(indicated with a small grey triangle to the left of the certificate's icon). Click thistriangle to reveal the key.
4. Press SHIFT+CLICK or COMMAND+CLICK to select all the certificates you want toexport and their private keys.
5. Right-click the selection, and select Export n Items, where n is the number of items toexport.
6. Select an appropriate name and location for the file, and make sure the file format isPersonal Information Exchange (.p12). Then click Save.
You will be prompted for a password to lock this file with. Make a note of this passwordas you will need it again when the file is imported to your Jenkins server.
Adding an iOS .p12 FileTo add an iOS .p12 file
1. On your Jenkins homepage, select Manage Jenkins > Mobile Signing Key Configuration.
2. At the top of the page, under Upload Android or iOS Signing Keys, click Browse.
3. Select the iOS .p12 file to upload, and provide the password used to unlock it.
4. Select iOS from the platform drop-down list, and then click Upload.
The server will indicate if the file has been uploaded correctly, and it should appearin the Current iOS Keys section below.
5. In the Current iOS Keys section, add a meaningful description for this key.
6. At the boom of the Current iOS Keys section, click Save.
Uploading Provisioning ProfilesTo upload a provisioning profile
1. On your Jenkins homepage, select Manage Jenkins > Mobile Provisioning Profiles iOS.
2. At the top of the page, under Upload iOS Provisioning Profiles, click Browse.
3. Select the provisioning profile file to upload, and then click Upload.
The server will indicate if the file has been uploaded correctly, and it should appear inthe Current Provisioning Profiles section below.

MEven Header
Building Mobile Application Projects Using Jenkins
Using webMethods Mobile Designer Version 10.3 102
Advanced Settings
AboutJenkins is highly configurable, and the Mobile Suite plugin allows advanced usersto create build jobs and pipelines that work within their existing processes andinfrastructure.
New Build Steps Provided by the Mobile Suite PluginThe Mobile Suite Jenkins plugin provides four build steps that can be added to Jenkinsjobs. A small description of each is provided here. More help and information can befound through the Jenkins web UI itself when interacting with the build steps in a job.
Generate Mobile Designer Sources This build step is the equivalent of the menuoption Generate Source Code > Application Model and API in the Mobile Developmentperspective of Software AG Designer. Using the application model, it prepares allresources needed and creates the contents of the gen folder.
Decompress Mobile Designer Project This build step is designed to take a Mobile Suiteproject bundle (usually with the name "project.bundle.zip") that was passed as aparameter to the Jenkins job and decompress it. Optionally, it can check the projectbundle for metadata about the project and remove any old copies of that folder fromthe workspace before decompressing it.
Auto-Build Mobile Designer Project This build step uses the metadata that comes froma Mobile Suite project bundle to find out which build was specified by the user inSoftware AG Designer. It will then build them.
Build Mobile Designer Project This build step allows for more direct control over theparameters used to build the mobile application. You can use it if you want to buildyour application after checking out from source control.
You can specify the handset target, version number, language, etc. This build stepcan also be useful if you want to build multiple handset targets in the same job, asthis build step may be repeated as many times as required.
Creating New Build JobsThe automatic creation of build jobs through Jenkins with Mobile Development will beadequate for most use cases. However, you have a few additional options that may bemore appropriate for your development cycle.

MOdd Header
Building Mobile Application Projects Using Jenkins
Using webMethods Mobile Designer Version 10.3 103
Using the Jenkins-Create-Job Ant TaskYou can use the Jenkins-Create-Job Ant task from any mobile project that supports theJenkins plugin.
You must supply values for the following Ant properties:
Property Description
jenkins.server Required. The root page of the server toconnect to, eg: "hp://127.0.0.1:8080".
jenkins.job.name Required. The name of the Jenkins job tocreate. If the name is already taken, theprocess will not override it.
jenkins.project.root.folder Required. The name of the project's folder,e.g., "_NativeUIDemoNew_", "Cocktails".
jenkins.username Optional. The user name used to connectto the Jenkins server. This user must havepermission to create Jenkins jobs.
jenkins.password Optional. The password used to connect to theJenkins server. If jenkins.username is notdefined, this property will be ignored.
jenkins.sag.install.location Optional. If defined, this will instruct Jenkinsto look in this location for the SoftwareAG install to use (e.g., "/Applications/SoftwareAG103"). If this is not defined, thenthe default install location will be used.
jenkins.sign.ios Optional. Signs any iOS builds that thisJenkins job does with a key. If set to true, thenjenkins.ios.bundle.id must be specified.
jenkins.ios.bundle.id Optional. Defines the full iOS bundle ID forthis application. Wildcards are not allowedhere.
jenkins.set.android.package Optional. If set to true, the Android packageis overriden, and jenkins.android.packagemust be specified.

MEven Header
Building Mobile Application Projects Using Jenkins
Using webMethods Mobile Designer Version 10.3 104
Property Description
jenkins.android.package Optional. Defines a java package tocreate your Android build in (e.g.,"com.softwareag.mobile.someproject").
jenkins.needs.xss.protection Optional. Normally, Mobile Designerautomatically detects if your server uses CrossSite Request Forgery Protection. However, thismay not be possible in all cases. Set to true ifyour server uses Cross Site Request ForgeryProtection, but Mobile Designer cannot detectit.
jenkins.with.autogeneration.stepOptional. If set to false, the created build jobwill omit the Generate Mobile Designer Sourcesbuild step and assume that they are to beuploaded in the project bundle.
jenkins.force.build.node.to Optional. Forces the Jenkins job to run onlyon certain build nodes. Specify the name ofa Jenkins node or a label pointing to one (ormore) build nodes. The default is "".
Building Mobile Applications From Source ControlYou may want to build your application directly from source control, without userintervention, for example, as a common "nightly" build for testing, or when making aclean deployment to the App Store. In these cases, a build job can be created manually tosuit your needs.
Note: As requirements and infrastructure can vary greatly between organisations,this section is not a direct step-by-step set of instructions of what must bedone to get your application built. It provides as many common details anduseful hints as possible so that you can work with your existing infrastructureto get a result that works well for you.
First, check out your source into a folder into the workspace, seing things up so thatthe project is held directly in a folder named after the project. (e.g., for a project called"MyMobileProject", you want to have Jenkins_workspace_root /MyMobileProject withbuild.xml, src/, model/, etc. inside.). This step will vary a lot depending on your source-control system, how you connect to it, and which Jenkins plugin(s) you are using.
Tip: If your source control system sets files to read-only unless they are marked asopen for edit (e.g., Perforce), then you may need to unlock some files for editand revert them after the build process. To minimise this, it is recommended

MOdd Header
Building Mobile Application Projects Using Jenkins
Using webMethods Mobile Designer Version 10.3 105
that the gen, _temp_, .launch and Builds folders, along with the .classpath fileare kept out of source control, as these folders will often change during thebuild and/or activate processes. As long as this rule is adhered to, read-onlyfiles should not be a problem with most mobile projects.
After the project source is checked out, in most cases you will want to generate themobile sources, using the model to create the gen folder and all resources, source,etc. inside. This is done using the Generate Mobile Designer Sources build step. Enter theproject's name (e.g., "MyMobileProject") and optionally specify the location of yourSoftware AG install on the slave computer that you want to build with. If no value isgiven, Jenkins will try the default location.
After source code is generated, the next build step is Build Mobile Designer Project. Thisstep allows you to specify the handset target, version, language, and so on. This stepmay be repeated as many times as required to create the builds that are needed.
Tip: Creating more than one build in the same build job can be convenient.However, be aware that if one build fails, the Jenkins job will stop at thatpoint. It can often be beer to start by creating one Jenkins job, then copy itand make small changes to get other builds.
When all builds are finished, it is important to archive the built files in a post-buildaction. In most cases, you will have to capture the contents of the your_project /Buildsfolder.
Using the Jenkins-Multi-Build Ant TaskYou can start a Jenkins remote multi-build process by calling the Jenkins-Multi-Build Anttask from any mobile project that supports the Jenkins plugin.
The Jenkins-Multi-Build Ant task has similar properties as the +Target-Build Ant task, with afew additions. You must supply values for the following Ant properties:
Property Description
handset Required. The name of the target to build(e.g., "Android_generic_AndroidWVGA800").These correspond to the file names in yourproject's targets folder.
langgroup Required. The language group to build for.Most mobile projects developed with theMobile Development perspective of SoftwareAG Designer will use "I18N" here.
target Required. The type of build to create. ForAndroid builds, this can only be release or

MEven Header
Building Mobile Application Projects Using Jenkins
Using webMethods Mobile Designer Version 10.3 106
Property Descriptiondebug. For iOS builds, this can be appstore,enterprise, ad hoc, sim release, devrelease, or xcode project.
version Required. The version number of theapplication to build, e.g. "1.3.2".
jenkins.server Required. The root page of the server toconnect to, eg: "hp://127.0.0.1:8080".
jenkins.job.name Required. The name of the Jenkins job toexecute to create this build.
jenkins.username Optional. The user name used to connectto the Jenkins server. This user must havepermission to create Jenkins jobs.
jenkins.password Optional. The password used to connect to theJenkins server.
jenkins.bundle.zip.includes Optional. A semicolon delimited list of filesand folders to include in the bundle passedto the server. The default value is "", whichwill upload everything that is not excluded orignored.
jenkins.bundle.zip.excludes Optional. A semicolon delimited listof files and folders to exclude from thebundle passed to the server. The default is_temp_;bin;Builds.
jenkins.bundle.zip.ignores Optional. A semicolon delimited list of filesand folders to ignore when building thebundle for the server. This list is intended foruse to exclude source control metadata files(e.g., .svn folders). The default value is .svn.
jenkins.follow.console Optional. If set to true, the build process willnot detach from the Jenkins server after thebuild has started. Console output from theJenkins build job will be piped through to thelocal console. The default is true.

MOdd Header
Building Mobile Application Projects Using Jenkins
Using webMethods Mobile Designer Version 10.3 107
Property Description
jenkins.needs.xss.protection Optional. Normally, Mobile Designerautomatically detects if your server uses CrossSite Request Forgery Protection. However, thismay not be possible in all cases. Set to true ifyour server uses Cross Site Request ForgeryProtection, but Mobile Designer cannot detectit.
jenkins.skip.code.generation Optional. If set to true, the created build jobwill omit the Generate Mobile Designer SourcesThe default is false.

MEven Header
Using webMethods Mobile Designer Version 10.3 108

MOdd Header
Building and Compiling Mobile Application Projects Using Ant Targets
Using webMethods Mobile Designer Version 10.3 109
5 Building and Compiling Mobile Application ProjectsUsing Ant Targets
■ Build Process Overview ............................................................................................................. 110
■ Building Mobile Applications ...................................................................................................... 117
■ Customizing the Build Process .................................................................................................. 125

MEven Header
Building and Compiling Mobile Application Projects Using Ant Targets
Using webMethods Mobile Designer Version 10.3 110
Build Process Overview
Build Ant Target SummaryThe following diagram provides summary information about the process MobileDesigner performs to build a mobile application project. It shows:
The names of the Ant targets you can use to build a mobile application project.
The steps Mobile Designer performs in the build process. For details about each step,see “Steps in the Multi-Build Process” on page 112.
The hook points in the build process where Mobile Designer can run custom Antscripts that you provide. For more information about hook points, see “CreatingCustom Ant Scripts to Run at Predefined Hook Points” on page 125.
Note: For instructions on how to perform a build of your mobile application project,see “Building Mobile Applications” on page 117.

MOdd Header
Building and Compiling Mobile Application Projects Using Ant Targets
Using webMethods Mobile Designer Version 10.3 111
Multi-Build Ant Targets

MEven Header
Building and Compiling Mobile Application Projects Using Ant Targets
Using webMethods Mobile Designer Version 10.3 112
Steps in the Multi-Build ProcessThis section describes the steps that Mobile Designer performs when you run the +Multi-Build, +Multi-Build-Last, or +Target-Build Ant targets to build a mobile application project.
Note: You can use Mobile Development to execute a local multi-build or a remoteJenkins build. For more information, see webMethods Mobile Development Help,Building a Mobile Project.
The table also indicates hook points where Mobile Designer can run custom Ant scriptsthat you provide. For more information about hook points, see “Creating Custom AntScripts to Run at Predefined Hook Points” on page 125.
Note: For instructions on how to perform a build of your mobile application project,see “Building Mobile Applications” on page 117.
1 Display the Multi Build dialog
Mobile Designer displays the Multi Build dialog.
Note: Mobile Designer only displays the Multi Build dialog when you runthe +Multi-Build Ant target.
2 Determine settings for target devices
Mobile Designer determines the seings for the device for which it isbuilding the application. It retrieves the seings from the following sourcesin the order listed.
Project-level device_name .xml files
Project-level _defaults_.xml file
Mobile Designer device database
Mobile Designer sdk.properties file
Mobile Designer uses the first seing it encounters. For example, if MobileDesigner encounters a seing in the project-level target device_name .xml fileand then again in the project-level _defaults_.xml file, Mobile Designer usesthe seing from the target device_name .xml file.
For more information about:
Project-level device files, see “Where You Set Properties” on page 84 and“Seing Project Properties” on page 86
Mobile Designer device database, see “Devices that a Mobile ApplicationSupports” on page 91

MOdd Header
Building and Compiling Mobile Application Projects Using Ant Targets
Using webMethods Mobile Designer Version 10.3 113
Mobile Designer sdk.properties file, see “Mobile Designer ConfigurationProperties (sdk.properties)” on page 18
hookpoint
PreBuildResources
If you have created an Ant script to run at the PreBuildResources hookpoint, Mobile Designer runs the Ant script.
3 Execute the resource handler
Mobile Designer runs the resource handler that you created for the project.When running the resource handler, Mobile Designer records all theresources required for your application. Mobile Designer also createsthe class. For more information about creating the resource handler, see“Defining Resources for a Mobile Application Project” on page 73. Formore information about the Parameters class, see “Application and ParameterClasses” on page 50.
At this point in the build process, Mobile Designer uses the followingproject properties:
project.reshandler.src.path for the location of the project’s resource handlerscript and any associated classes
project.java.reshandler.name for the name of the resource handler classyou created for your project.
project.resource.dir.root for the location of the top-level folder thatcontains the resources (image files, etc.) for your project
project.reshandler.additional.libs.path for the location of additionallibraries that your project’s resource handler requires
For more information about these properties, see “Resource HandlerProperties” on page 197.
hookpoint
PostBuildResources
If you have created an Ant script to run at the PostBuildResources hookpoint, Mobile Designer runs the Ant script.
4 Cross compile the application for a device
Mobile Designer copies your project’s application code for the target deviceinto the project’s _temp_\_src_ folder. At this point in the build process,Mobile Designer uses the following project properties:
project.runtime.project.src.path for the location of your project’sapplication code
project.runtime.additional.classes.path for the location of additionalprecompiled classes that your application requires

MEven Header
Building and Compiling Mobile Application Projects Using Ant Targets
Using webMethods Mobile Designer Version 10.3 114
project.runtime.additional.stubs.path for the location of additional stubs touse when compiling your application code
For more information about these properties, see “Run-Time CodeCompilation Properties” on page 203.
Mobile Designer converts the mobile application source code into a neutrallanguage, for example, C++ or Java. The neutral language that MobileDesigner uses is the required neutral language for the target device. Youcan set the following code conversion properties to customize how MobileDesigner converts the application source code:
cpp.no.selfprotect for whether to add a safeguard to every method call
cross.compiler.extractinners for whether to extract inner classes includedin the Java source code
cross.compiler.nodatestamp for whether to include timestamps at the topof every generated C++ (CPP) and H file
cross.compiler.render.selfprotect for whether to add an extra line at the topof every non-static method
java.parser.retain.comments for whether to retain comments whencompiling
For more information about these properties, see “Code ConversionProperties” on page 167.
The neutral language code that Mobile Designer generates from convertingyour application code is easy-to-read and, by default, retains commentsfrom the original Java source code.
Note: When Mobile Designer generates C++ code for C++-based platforms(for example, iOS), the C++ code it generates will be the same formatfor all C++-based platforms. The generated C++ code is uniform,ANSI-compatible, and compiles against all target architectures (suchas x86, MIPS, and ARM processors).
5 Prepare platform-required source files
Mobile Designer gathers other source files that it requires to make the finalbinary. For example, additional platform-specific files might be needed forthe final binary.
hookpoint
PostCrossCompiler
If you have created an Ant script to run at the PostCrossCompiler hookpoint, Mobile Designer runs the Ant script.
6 Prepare resources

MOdd Header
Building and Compiling Mobile Application Projects Using Ant Targets
Using webMethods Mobile Designer Version 10.3 115
Mobile Designer gathers the resources that the project requires andprepares them for building the final binary. These includes, for example, theresources defined by your project’s resource handler, NativeUI resources,and resources that the specific platform might require.
hookpoint
PreMakefileGeneration
If you have created an Ant script to run at the PreMakefileGeneration hookpoint, Mobile Designer runs the Ant script.
7 Generate makefile and optional project
Mobile Designer creates the makefile that defines everything that is requiredto create the final binary.
Additionally, if appropriate for the target platform, Mobile Designer createsthe platform-specific project. For example, when building an applicationthat runs on the iOS platform, Mobile Designer creates an Xcode project orwhen building an application that runs on the Android platform, it createsan Eclipse project.
You can set the cross-compiler properties that affect this step in the buildprocess:
project.handset.custom.stubfolder for whether to override the makefileand project template files that are provided with Mobile Designer withmakefile and project template files that you supply
Several properties that customize the generation of the makefile. See“Makefile Additions” on page 175.
hookpoint
PrePatch
If you have created an Ant script to run at the PrePatch hook point, MobileDesigner runs the Ant script.
8 Apply patches
If you created patches, Mobile Designer applies the patches to the cross-compiled code. For more information about when to use patches and howto create patches, see “Creating Patch Files to Apply to the Cross-CompiledCode” on page 129.
Note: If you set the project.handset.skip.compilation property to true, MobileDesigner skips the following actions.
hookpoint
PreCompilation and PreObfuscation

MEven Header
Building and Compiling Mobile Application Projects Using Ant Targets
Using webMethods Mobile Designer Version 10.3 116
If you have created Ant script(s) to run at the PreCompilation and/orPreObfuscation hook points, Mobile Designer runs the Ant script(s).
9 Compile the application into binary
Mobile Designer executes the makefile it created in a previous step to createbinary for the target device. During this step, Mobile Designer requires theplatform-specific SDKs that you installed when seing up the platform. Formore information, see “Seing Up Platforms” on page 27.
hookpoint
PostCompilation and PreVerification
If you have created Ant script(s) to run at the PostCompilation and/orPreVerification hook points, Mobile Designer runs the Ant script(s).
10 Sign and package the final binary
Mobile Designer packages the output of the build so that is ready forinstallation on the target device. The packaging process varies fromplatform to platform. For example, for Android builds, the output is in anapplication package (apk) file.
Additionally, if required by the target platform, Mobile Designer signs thefinal build.
hookpoint
PostPackaging and PostVerification
If you have created Ant script(s) to run at the PostPackaging and/orPostVerification hook points, Mobile Designer runs the Ant script(s).
11 Copy final binary (optional cleanup temp files)
When Mobile Designer builds your project, it adds a Builds folder to yourproject folder. Within the Builds folder, Mobile Designer creates a folder forthe device for which it is building your application:
project /Builds/x.y.z /device
In the folder location above:
project is the name of your project.
x.y,z is the version number you specified for the build.
device is the name of the device for which Mobile Designer is building yourapplication.
The device folder contains a _temp_ folder. Mobile Designer storestemporary files in the _temp_ directory while it is building the application.After it creates the final binary, Mobile Designer copies the final binary fromwithin the _temp_ folder into the device folder.

MOdd Header
Building and Compiling Mobile Application Projects Using Ant Targets
Using webMethods Mobile Designer Version 10.3 117
Mobile Designer then optionally performs cleanup. If you clear the Retainoutput build files check box in the Multi Build dialog when you started thebuild, Mobile Designer cleans up the temporary files by deleting the _temp_folder.
Note: If you set the project.handset.skip.compilation property to true, MobileDesigner resumes processing with the following actions.
hookpoint
PostBuild
If you have created an Ant script to run at the PostBuild hook point, MobileDesigner runs the Ant script.
12 Perform build for the next device
If you select multiple devices/language combinations in the Multi Builddialog to have Mobile Designer build your application for multiple device/language combinations, Mobile Designer restarts the build process at step 2for the next device/language to build.
hookpoint
PostMultiBuild
If you have created an Ant script to run at the PostMultiBuild hook point,Mobile Designer runs the Ant script.
Building Mobile Applications
About Building a Mobile Application ProjectBefore you can build your project, you must ensure you have completed the requiredprerequisite tasks. For more information, see “Before You Can Build a MobileApplication Project” on page 118.
To build your project, including compiling your project into binary and packaging yourapplication for target devices, use the following Ant Targets:
+Multi-Build to build your project for multiple device/language combinations. For moreinformation, see “Building a Project for Multiple Target Devices” on page 120.
+Multi-Build-Last to rebuild your project for the last target device. For more information,see “Building a Project for the Last Target Devices” on page 121.
+Target-Build to build your project from the command line. For more information, see“Building a Project from the Command Line” on page 121.
If you want, you can use Mobile Designer to convert your mobile code into a neutrallanguage (for example, C++ or Java), but then use your own platform-specific, native

MEven Header
Building and Compiling Mobile Application Projects Using Ant Targets
Using webMethods Mobile Designer Version 10.3 118
tools to compile your project into binary and package the application for the targetdevice. For more information, see “Using Native Tools to Create the Final Binary” onpage 123.
For details about the actions that Mobile Designer performs to build your project, see“Build Process Overview” on page 110.
Before You Can Build a Mobile Application ProjectBefore you build your mobile application project, be sure you have completed thefollowing tasks:
Perform platform-specific setup on your machine
You must have the proper setup for the target platform(s). The setup requires thatyou have items such as compilers and SDK installed on your machine. For example,if you want to build an Android application, you must have the Android SDKinstalled on your machine.
In addition to installing platform-specific tools, you must also set properties in theMobile Designer sdk.properties file to indicate where the SDKs, compilers, and othertools are located.
For information about how to set up your platform, see “Seing Up Platforms” onpage 27.
Set required project properties
Mobile Designer requires that you set some project properties for your project.For example, you must set the project.runtime.project.src.path property tospecify the location of your project’s run-time code. For a list of the required projectproperties, see “Seing Project Properties” on page 86.
For information about iOS-specific seings, see “Seing Properties to Build for aniOS Device” on page 118.
For information about Android-specific seings, see “Seing Properties to Build foran Android Device” on page 119.
Setting Properties to Build for an iOS DeviceTo make AppStore, AdHoc, or Dev builds, you must provide an appropriateprovisioning profile. The following properties must be specified in your _defaults_.xmlfor the different builds:
AppStore<property name="ios.provisioning.profile.appstore" value="path_to_appstore_provisioning_profile "/>
Enterprise (Select AppStore in the Multi Build dialog.)<property name="ios.provisioning.profile.appstore" value="path_to_appstore_provisioning_profile "/>

MOdd Header
Building and Compiling Mobile Application Projects Using Ant Targets
Using webMethods Mobile Designer Version 10.3 119
<property name="ios.appstore.method" value="enterprise"/>
AdHoc<property name="ios.provisioning.profile.adhoc" value="path_to_adhoc_provisioning_profile "/>
Dev<property name="ios.provisioning.profile.appstore" value="path_to_appstore_provisioning_profile "/>
You can either specify the path to the provisioning profile, or you can specify thename, ID, or AppID of the provisioning profile. In the laer case, the search paernyou specified is applied to all provisioning profiles installed on your machine. For asuccessful build, exactly one match should be found.
You can check your search paern using an Ant task. The following example shows anID search paern:ant check -Dpprofile=4dc3a740-b922-4fe2-8529-595eecddb6bc
If a provisioning profile with this ID exists, the returned code looks similar to thefollowing example:[checkFeature] Searching for provisioning profiles in /Users/your_user_name / Library/MobileDevice/Provisioning Profiles[checkFeature] Path : /Users/your_user_name /Library/MobileDevice/ Provisioning Profiles/4dc3a740-b922-4fe2-8529-595eecddb6bc.mobileprovision[checkFeature] AppID : U6GS52HNZ5.com.softwareag.mobile.nativeuidemonew[checkFeature] ID : 4dc3a740-b922-4fe2-8529-595eecddb6bc[checkFeature] Name : nativeuidemonew.adhoc.profile[checkFeature] Method : ad-hoc[checkFeature] Expires on : 2019-03-02T09:38:20Z[checkFeature] Identity : iPhone Distribution: Software AG
To perform a build, the signing identity must be installed on your system. If it isnot installed yet, follow the instructions as described in “Importing the SigningEnvironment from Another Macintosh” on page 35 or “Creating a New SigningEnvironment” on page 37.
Alternatively, if you use Xcode 8 and later, you can use the auto signing feature of Xcodeby defining the following properties:<property name="ios.xcode.managed.signing" value="true"/><property name="ios.xcode.managed.signing.team.uid" value="your_team_id "/>
For the team ID, see “hps://developer.apple.com/account/#/membership”.
Setting Properties to Build for an Android DeviceAn optional property file can be provided to sign for an Android device. If it exists,it should point to a text file stored under project_root /android_signing.properties thatcontains the following four properties in standard key=value Java properties format(see the format used for sdk.properties). This file can be kept out of source control toprotect passwords and keyfiles.
android.release.keystore.file Location of the keystore file. It can either berelative or absolute to the project's root directory. Use "/" for path separators, even

MEven Header
Building and Compiling Mobile Application Projects Using Ant Targets
Using webMethods Mobile Designer Version 10.3 120
on Windows. This file can be kept out of source control to protect passwords andkeyfiles.
android.release.keystore.password Passphrase used to unlock the keystore.
android.release.key.alias Alias of the key for signing this build.
android.release.key.password Password used with this key alias.
Building a Project for Multiple Target DevicesTo build your mobile application project, you use the +Multi-Build Ant target. The+Multi-Build Ant target allows you to build your project for multiple device/languagecombinations.
For information about the actions that Mobile Designer performs to build your project,see “Build Process Overview” on page 110.
Note: Before you build your project, be sure you have completed the required setup.See “Before You Can Build a Mobile Application Project” on page 118.
To build a project for multiple targets
1. In Software AG Designer, open the project you want to build.
2. Click the Project Explorer view, expand the project, and drag the build.xml file to theAnt view.
3. In the Ant view, double-click +Multi-Build to launch the Multi Build dialog.
4. In the Multi Build dialog, select the device/language combinations for which youwant to build the project.
5. In the Version field, type the version number for the build.
6. Select or clear the Retain output build files check box.
Select the check box to retain the files from the build.
Mobile Designer retains the cross-compiled code it generated from your originalJava code, along with any project (for example, Xcode project for iOS) it mighthave generated.
Choose to retain the files if you need to create a patch for your project, if youwant to save the output for subsequent testing, or if you want to use nativeplatform tools to compile to create the final binary for your project.
Clear the check box if you do not need the files from the build.
7. Click Multi Build.

MOdd Header
Building and Compiling Mobile Application Projects Using Ant Targets
Using webMethods Mobile Designer Version 10.3 121
Building a Project for the Last Target DevicesIf you want to rebuild your project for the last target devices, use the +Multi-Build-Last Anttask. Mobile Designer rebuilds the project for all the devices you selected the last timeyou used the Multi-Build dialog.
For information about the actions that Mobile Designer performs to build your project,see “Build Process Overview” on page 110.
Note: Before you build your project, be sure you have completed the required setup.See “Before You Can Build a Mobile Application Project” on page 118.
To build a project for the last target
1. In Software AG Designer, open the project you want to build.
2. Click the Project Explorer view, expand the project, and drag the build.xml file to theAnt view.
3. In the Ant view, double-click +Multi-Build-Last.
Mobile Designer does not display a dialog. Mobile Designer rebuilds the project forthe last target device that was built, using the seings from the last build, includingany seing you might have made in a custom JPanel.
Building a Project from the Command LineYou can build your project from the command line using the +Target-Build Ant target.When using the +Target-Build Ant target, you can build for only a single device/languagecombination at a time. To execute the Ant target, from the command line navigate intothe project's folder.
For information about the actions that Mobile Designer performs to build your project,see “Build Process Overview” on page 110.
Note: Before you build your project, be sure you have completed the required setup.See “Before You Can Build a Mobile Application Project” on page 118.
Syntaxversion=x.y.z [retain={true | false}] handset=device langgroup=languageplatform=platform target=executable_type +Target-Build

MEven Header
Building and Compiling Mobile Application Projects Using Ant Targets
Using webMethods Mobile Designer Version 10.3 122
Options
Option Description
version=x.y.z Required. Specifies the version number for theapplication your are building.
[retain={true |false}]
Optional. Specifies whether you want MobileDesigner to retain the cross-compiled code itgenerated from your original Java code, alongwith any platform-specific project it might havegenerated
The default is true.
handset=device Required. Specifies the device for which you wantMobile Designer to build the application.
langgroup=language Required. Specifies the language(s) for which youwant Mobile Designer to build the application.
platform=platform Required. Specifies the platform for which youwant Mobile Designer to build the application.
target=executable_type Required. Specifies the type of executable you arebuilding. For example, you might specify releaseor debug.
pprofile Required. Defines the path to the provisioningprofile. The build type (eg., AppStore, Enterprise,AdHoc, or Dev) is deduced automatically.Alternatively, you can specify the name, ID, orAppId of the provisioning profile, see “SeingProperties to Build for an iOS Device” onpage 118.
Note: The appropriate signing identity must beinstalled on your system and be able toperform the application signing.
keychain Optional. Defines the path to the keychain.
buildnumber Optional. Specifies the specific build number.

MOdd Header
Building and Compiling Mobile Application Projects Using Ant Targets
Using webMethods Mobile Designer Version 10.3 123
Option Description
extraXcodeArgs Optional. Defines extra parameters for an Xcodebuild by generating an Xcode archive.
Example
The following code sample shows how to build version 2.0.3 of your project for theIOS_Apple_iPhone5 device, which runs on the iOS platform, for the language groupEFIGS to create an executable version for the Apple App Store.ant +Target-Build -Dversion=2.0.3 -Dbuildnumber=99 -Dretain=true -Dhandset=IOS_Apple_iPhone5 -Dlanggroup=EFIGS -Dplatform=IOS -Dtarget=appstore -Dpprofile="~/provisioning_profiles/appstore.mobileprovision"
Because retain is set to true, Mobile Designer retains the cross-compiled code itgenerated from your original Java code, along with any project (for example, Xcodeproject for iOS) it might have generated.
Using Native Tools to Create the Final BinaryIf you want to use platform-specific, native tools to create the final binary and packageyour application, you can use the Mobile Designer+Multi-Build or +Target-Build Ant targetto build your project, but have Mobile Designer skip compiling your project into binaryand packaging your application for the target device. You can move the cross-compiledcode and platform-specific project that Mobile Designer creates to the platform-specifictool to create the final binary.
For information about the actions that Mobile Designer performs to build your project,including the actions that Mobile Designer skips when you perform the followingprocedure, see “Build Process Overview” on page 110.
Note: Before you build your project, be sure you have completed the required setup.See “Before You Can Build a Mobile Application Project” on page 118.
To use native tools to create the final binary for your project
1. Set the project.handset.skip.compilation property to true to indicate that you wantMobile Designer to skip compiling your project into binary and packaging yourapplication for the target device. For instructions for how to set a property, see“Seing Project Properties” on page 86.
2. Start the build using one of the following Ant targets:
+Multi-Build Ant target. For instructions, see “Building a Project for Multiple TargetDevices” on page 120.
Be sure you select the Retain output build files in the Multi Build dialog.

MEven Header
Building and Compiling Mobile Application Projects Using Ant Targets
Using webMethods Mobile Designer Version 10.3 124
+Target-Build Ant target. For instructions, see “Building a Project from theCommand Line” on page 121.
Be sure you set the retain option to true.
3. After the build is complete, locate the cross-compiled code and platform-specificproject.
When Mobile Designer builds your project, it adds a Builds folder to your projectfolder. Within the Builds folder, Mobile Designer creates a _temp_ folder for eachdevice. The cross-compiled code and the platform-specific project reside within the_temp_ folder:
project /Builds/x.y.z /device /_temp_
In the folder location above:
project is the name of your project.
x.y,z is the version number you specified for the build.
device is the name of a device for which Mobile Designer built your application.
You can find the cross-compiled code and the platform-specific project in the_temp_/_language _ folder. If you created a patch file for the application, you canfind the patched versions in the _temp_/_language _edit_ folder. For example, foran Android build, you can find the cross-compiled code in the _temp_/_java_folder, and if a patch was applied, the patched version of the code is in the _temp_/_java_edit_ folder.
4. Copy the files you need to create the final binary to the platform-specific, native tool.Then use the native tool to create the final binary.
Generating Javadocs for a ProjectUse the Generate-Javadoc Ant target to generate javadocs for a project. The javadocs thatthe Generate-Javadoc Ant target generates are primarily javadocs for the customer’s projectcodebase. The javadocs also include Mobile Designer run-time methods and constants.
When you use the Generate-Javadoc Ant target, Mobile Designer adds a _temp_ folder toyour main project folder that contains the generated files.
To generate javadocs for a project
1. In Software AG Designer, in the Project Explorer view, locate the project for whichyou want to generate javadocs.
2. Expand the project and drag its build.xml file to the Ant view.
3. In the Ant view, double-click Generate-Javadoc.
Mobile Designer displays the Activate Handset dialog.

MOdd Header
Building and Compiling Mobile Application Projects Using Ant Targets
Using webMethods Mobile Designer Version 10.3 125
4. In the Activate Handset dialog, select the device for which you want generatejavadocs and the language group. Then click Activate Handset.
Mobile Designer places the results of the Generate-Javadoc Ant target in your project’s_temp_ folder.
Customizing the Build Process
About Customizing the Build ProcessMobile Designer provides the following features that you can use to customize thestandard build process:
Custom JPanels. Deprecated. (The feature will not be supported as of Mobile Designerversion 10.5.)
Hook points. You can create custom Ant scripts that you want Mobile Designer torun during the build process. Mobile Designer defines various points, called hookpoints, in the build process where it can run an Ant script that you provide. For moreinformation, see “Creating Custom Ant Scripts to Run at Predefined Hook Points”on page 125.
Patch files. You can create patch files that Mobile Designer applies to the cross-compiled code. Use patch files to correct issues that might prevent the cross-compiled code from compiling successfully. Additionally, some times the codemight cross-compile successfully, but the resulting code might not executeas expected. You might be able to correct the issue with a patch file. For moreinformation, see “Creating Patch Files to Apply to the Cross-Compiled Code” onpage 129.
Creating Custom Ant Scripts to Run at Predefined HookPointsTo customize the standard build process that Mobile Designer performs, you can createcustom Ant scripts that Mobile Designer runs at various predefined points, called hookpoints. For example, to automatically upload a build to an FTP server once the buildis created, you can use the PostBuild Hook Point, which Mobile Designer runs after itcompletes a build.
Mobile Designer provides several predefined hook points in the build process whereyou can inject a custom Ant script to perform custom actions. For example, you can haveMobile Designer run a custom Ant script before it runs the resource handler, or youcan have Mobile Designer run a custom Ant script after it runs the resource handler.For more information about the hook points you can use and when each occur in the

MEven Header
Building and Compiling Mobile Application Projects Using Ant Targets
Using webMethods Mobile Designer Version 10.3 126
build process, see “Hook Point Reference” on page 126 and “Ant Target Summary”on page 205.
To run a custom Ant script at a hook point:
You must add the associated hook point property to your project’s _defaults_.xmlfile. You use the property to provide the name of the custom Ant script that youwant Mobile Designer to run. For information about the properties, see “Hook PointProperties” on page 190.
You must create the custom Ant script. You can include the Ant script in your_defaults_.xml file directly after the property declaration.
Ant properties, parameters, and paths set in your custom Ant scripts do not flowthrough into the remaining build process. Your custom Ant scripts are separate Anttarget calls that branch off outside the normal build process flow.
Caution: Although invoking custom Ant scripts at the predefined hook points addsflexibility to the build process, be aware that Mobile Designer does notperform safety checking on custom Ant scripts before executing them.You should thoroughly test your custom Ant script's functionality beforeintegrating it into Mobile Designer.
Note: Use of hook points is optional. You can use none, one, or multiple hookpoints. Mobile Designer only aempts to run a custom Ant script at a hookpoint if your project’s _defaults_.xml file contains a hook point property thatprovides the name of a custom Ant script.
For an example that illustrates how you use hook points, see the NativeUI PDF Demosample project.
Hook Point ReferenceThe following sections describe the hook points that you can use for a project. Eachsection lists:
When the hook point occurs in the build process
Property that you specify in your project’s _defaults_.xml file to provide the name ofthe custom Ant script you want Mobile Designer to run at the hook point
Names of the Mobile Designer Ant targets that use the hook point
To see a diagram that shows where the hook points are in the build process, see “AntTarget Summary” on page 205.
PreBuildResources Hook Point
When you use this hook point, Mobile Designer invokes your custom Ant script before itruns your project’s resource handler.

MOdd Header
Building and Compiling Mobile Application Projects Using Ant Targets
Using webMethods Mobile Designer Version 10.3 127
Property project.hookpoint.target.prebuildresources
Ant targets +Run-Reshandler +Multi-Build +Multi-Build-Last +Target-Build ++Activate-Handset ++Re-Activate-Handset ++Run-Phoney-With-Re-Activation
PostBuildResources Hook Point
When you use this hook point, Mobile Designer invokes your custom Ant script after itruns your project’s resource handler.
Property project.hookpoint.target.postbuildresources
Ant targets +Run-Reshandler +Multi-Build +Multi-Build-Last +Target-Build ++Activate-Handset ++Re-Activate-Handset ++Run-Phoney-With-Re-Activation
PostCrossCompiler Hook Point
When you use this hook point, Mobile Designer invokes your custom Ant script after itconverts your project’s source to the build’s target language.
Note: Mobile Designer only calls this hook point for cross-compiled builds.
Property project.hookpoint.target.postcrosscompiler
Ant targets +Multi-Build +Multi-Build-Last +Target-Build
PreMakefileGeneration Hook Point
When you use this hook point, Mobile Designer invokes your custom Ant script beforeit generates the makefile and associated Microsoft Visual Studio or Apple Xcode projectfor a build.
Note: Mobile Designer only calls this hook point for cross-compiled builds.
Property project.hookpoint.target.premakefilegeneration
Ant targets +Multi-Build +Multi-Build-Last +Target-Build
PrePatch Hook Point
When you use this hook point, Mobile Designer invokes your custom Ant script before itapplies the patches to your code.

MEven Header
Building and Compiling Mobile Application Projects Using Ant Targets
Using webMethods Mobile Designer Version 10.3 128
Note: Mobile Designer only calls this hook point for cross-compiled builds.
Property project.hookpoint.target.prepatch
Ant targets +Multi-Build +Multi-Build-Last +Target-Build
PreCompilation Hook Point
When you use this hook point, Mobile Designer invokes your custom Ant script before itperforms platform-specific compilation for each build.
Property project.hookpoint.target.precompilation
Ant targets +Multi-Build +Multi-Build-Last +Target-Build ++Activate-Handset ++Re-Activate-Handset ++Run-Phoney-With-Re-Activation
PostCompilation Hook Point
When you use this hook point, Mobile Designer invokes your custom Ant script after itperforms platform-specific compilation for each build.
Property project.hookpoint.target.postcompilation
Ant targets +Multi-Build +Multi-Build-Last +Target-Build
PostPackaging Hook Point
When you use this hook point, Mobile Designer invokes your custom Ant script afterit generates the platform-specific build bundle. After executing this hook point, MobileDesigner performs code signing, if any, that is appropriate to the platform being built.
Note: Mobile Designer only calls this hook point for cross-compiled builds.
Property project.hookpoint.target.postpackaging
Ant targets +Multi-Build +Multi-Build-Last +Target-Build
PostBuild Hook Point
When you use this hook point, Mobile Designer invokes your custom Ant script after itpackages and signs the build.

MOdd Header
Building and Compiling Mobile Application Projects Using Ant Targets
Using webMethods Mobile Designer Version 10.3 129
Property project.hookpoint.target.postbuild
Ant targets +Multi-Build +Multi-Build-Last +Target-Build
PostMultiBuild Hook Point
When you use this hook point, Mobile Designer invokes your custom Ant script after itcreates all the builds you selected in the Multi Build dialog.
Property project.hookpoint.target.postmultibuild
Ant targets +Multi-Build +Multi-Build-Last +Target-Build
Creating Patch Files to Apply to the Cross-Compiled CodeA patch file is a standard difference (diff) file that you can create. Use patch files whenyou need to make changes to the code that the Mobile Designer cross compiler creates.For example:
You might need to correct issues that prevent the code from compiling.
You might need to correct issues when the code cross compiles correctly, but theresulting code does not execute as expected.
For example, in your source Java code, you use multiple post increments, such as i++ in one line of code:int rgb = (data[i++] << 16) + (data[i++] << 8) + (data[i++]);
This line of code can cross-compile to C++ fine, but cannot be guaranteed to executeas Java does. In some C++ compilers this type of code might result in “undefinedbehavior.” In this case, even though the code will convert to C++ and then compilesuccessfully, you might find the run-time execution is incorrect. For these typesof situations, it is usually a best practice to write a more compliant variant in yourJava code. Continuing this example, you might change the original Java code tosomething like the following:int rgb = (data[i] << 16) + (data[i + 1] << 8) + (data[i + 2]);
You create the patch file one time, and Mobile Designer automatically applies the fix toall future builds, even if you continue to make changes to your application’s originalJava code. For instructions about how to create a patch and where to store the patch file,see “Creating a Patch” on page 130.
When Mobile Designer builds your project, it adds a Builds folder to your project folder.Within the Builds folder, there are folders for each device for which your applicationwas built.

MEven Header
Building and Compiling Mobile Application Projects Using Ant Targets
Using webMethods Mobile Designer Version 10.3 130
project /Builds/x.y.z /device
In the folder location above:
project is the name of your project.
x.y,z is the version number you specified for the build.
device is the name of a device for which Mobile Designer built your application.
The device folder contains a _temp_/_language _ folder that contains the version of thecross-compiled code without a patch applied. If a patch file exists, Mobile Designerpatches the code and stores the resulting patched version of your project in the _temp_/_language _edit_ folder. For example, for Android, Mobile Designer generates a_java_edit_ folder along side the _java_ folder.
Creating a PatchMobile Designer provides patch and diff tools with sample scripts so that you can createpatch files. For an example of how to use the patch and diff tools, see the Function Demosample project.
To create a patch file
1. Build your project using one of the following Ant targets:
+Multi-Build Ant target. For instructions, see “Building a Project for Multiple TargetDevices” on page 120.
Be sure you select the Retain output build files in the Multi Build dialog.
+Target-Build Ant target. For instructions, see “Building a Project from theCommand Line” on page 121.
Be sure you set the retain option to true.
2. Locate your project’s Build folder, which Mobile Designer creates during the buildprocess.
3. In the Build folder, locate the cross-compiled version of your code.
Specifically, look for your code in the following folder:
project /Builds/x.y.z /device /_temp_/_language _edit_
In the folder location above:
project is the name of your project.
x.y,z is the version number you specified for the build.
device is the name of a device for which Mobile Designer built your application.
language is the language into which your application code was cross compiled,for example, java.

MOdd Header
Building and Compiling Mobile Application Projects Using Ant Targets
Using webMethods Mobile Designer Version 10.3 131
4. Review the cross-compiled code and make any minor code adjustments needed tocorrect the issues you are encountering so that your code compiles as expected onthe target platform.
5. Run the patch_maker script that Mobile Designer provides in the following projectfolder:
project /Builds/x.y.z /device /_temp_
When Mobile Designer builds your project, it places versions of the cross-compiledcode in both of the following project folders:
_language _ folder_language _edit_ folder
The version of the cross-compiled code in the _language _edit_ folder includes anypatch that you might have already applied.
When you run the patch_maker script, Mobile Designer generates a diff file with thedifferences between the two folders.
6. Save the diff file that the patch_maker script created in the project’s main folderusing the names specified in the following table.
Platform Patch Name
Android android_java.diff
iOS ios_cpp.diff
Note: If you want to give your diff file an alternate name, for example, if twotargets for the same platform require different diff files, you can use acustom name for a diff file. You still save the diff file to the project’s mainfolder. However, if you name your diff file differently from the namesspecified in the table above, you must add the patch.name property tothe target device file in the project’s targets folder. Set the value of thepatch.name property to the name of the diff file to use for the device.

MEven Header
Using webMethods Mobile Designer Version 10.3 132

MOdd Header
Installing and Testing Mobile Applications
Using webMethods Mobile Designer Version 10.3 133
6 Installing and Testing Mobile Applications
■ Using Phoney for Debugging Your Mobile Application .............................................................. 134
■ Activating Devices ...................................................................................................................... 147
■ Installing Applications on Devices ............................................................................................. 151

MEven Header
Installing and Testing Mobile Applications
Using webMethods Mobile Designer Version 10.3 134
Using Phoney for Debugging Your Mobile Application
About Using Phoney to Debug Mobile ApplicationsThe Mobile Designer utility, Phoney, is a phone simulator that is not platform-specific.You can test your application by running it in Phoney.
If you use the Mobile Designer NativeUI library to create the user interface for yourmobile application, the user interface is rendered using Phoney skins that MobileDesigner provides. Mobile Designer provides some platform-specific Phoney skinsthat aempt to mimic the look-and-feel of a platform. For platforms for which MobileDesigner does not provide a platform-specific Phoney skin, Mobile Designer provides ageneral graphical skin for the user interface. For more information about Phoney skins,see webMethods Mobile Designer Native User Interface Reference.
You run Phoney from Mobile Development. For instructions, see webMethods MobileDevelopment Help, Testing a Mobile Project with Phoney. Alternatively, you can runPhoney from the command line. For more information, see “Running Phoney from theCommand Line” on page 138.
You can also still use the ++Run-Phoney, ++Run-Phoney-With-Activation, or ++Run-Phoney-With-Re-Activation Ant targets to run a mobile application in the Phoney simulator. Forinformation about the actions Mobile Designer takes when you run Phoney, see “PhoneyAnt Target Summary” on page 135 and “Steps Performed for Phoney Ant Targets” onpage 136.
If a mobile application accesses services via the Internet and you want to use SSL tosecure the communications between Phoney and the service, install certificates onPhoney. For instructions, see “Installing Certificates on Phoney” on page 143.
You can use the Phoney Metrics panel to get an estimation of an application’s memoryand thread usage to help determine whether you might encounter issues with memoryand thread usage when running the application on physical devices. For moreinformation, see “Using Phoney to Monitor an Application’s Memory and ThreadUsage” on page 143.
Note: You can also test and debug by installing a mobile application on to a physicaldevice or a platform-specific emulator or simulator. See the providers’documentation for the latest instructions on how to install applications anduse emulators or simulators that they provide. This documentation includeslimited instructions for some platforms. For more information, see “InstallingApplications on Devices” on page 151.

MOdd Header
Installing and Testing Mobile Applications
Using webMethods Mobile Designer Version 10.3 135
Phoney Ant Target SummaryThe following diagram provides summary information about the process MobileDesigner performs when you use Phoney Ant targets. It shows:
The names of the Ant targets you can use to run Phoney.
The steps Mobile Designer performs. For details about each step, see “StepsPerformed for Phoney Ant Targets” on page 136.
The hook points in the process where Mobile Designer can run custom Ant scriptsthat you provide. For more information about hook points, see “Creating CustomAnt Scripts to Run at Predefined Hook Points” on page 125.
Note: For instructions on how to run Phoney, see webMethods Mobile DevelopmentHelp, Testing a Mobile Project with Phoney and “Running Phoney from theCommand Line” on page 138.

MEven Header
Installing and Testing Mobile Applications
Using webMethods Mobile Designer Version 10.3 136
Steps Performed for Phoney Ant TargetsThis section describes the steps that Mobile Designer performs when you run the ++Run-Phoney, ++Run-Phoney-With-Activation, and ++Run-Phoney-With-Re-Activation Ant targets to run amobile application in the Phoney simulator.
Note: For instructions on how to run Phoney, see webMethods Mobile DevelopmentHelp, Testing a Mobile Project with Phoney and “Running Phoney from theCommand Line” on page 138.

MOdd Header
Installing and Testing Mobile Applications
Using webMethods Mobile Designer Version 10.3 137
++Run-Phoney Ant Target
When you use the ++Run-Phoney Ant target, Mobile Designer performs only the RunPhoney step.
The Run Phoney step starts Phoney for the last activated device. You can specify Phoneystartup options using the phoney.base.params property.
++Run-Phoney-With-Activation and ++Run-Phoney-With-Re-Activation Ant Targets
Use the ++Run-Phoney-With-Activation Ant target to activate a device, then run Phoney.Use the ++Run-Phoney-With-Re-Activation Ant target to reactivate the last device, then runPhoney.
When you use the ++Run-Phoney-With-Activation or ++Run-Phoney-With-Re-Activation Ant target,Mobile Designer performs the steps in the following table. The table also indicates hookpoints where Mobile Designer can run custom Ant scripts that you provide. For moreinformation about hook points, see “Creating Custom Ant Scripts to Run at PredefinedHook Points” on page 125.
The first four steps and hook points are for reactivating the last device. For details aboutthese steps, see “Steps Performed to Activate Handsets” on page 148.
Step Description
1 Display the Activate Handset dialog
Mobile Designer displays the Activate Handset dialog.
Note: Mobile Designer only displays the Activate Handset dialog whenyou run the ++Run-Phoney-With-Activation Ant target.
2 Determine seing for target devices
hookpoint
Optional. Run a custom Ant script for the PreBuildResources hook point
3 Execute the resource handler
hookpoint
Optional. Run a custom Ant script for the PostBuildResources hook point
4 Prepare source (include Mobile Designer abstraction lib)
5 Create .classpath for Eclipse
6 Compiles the Java source

MEven Header
Installing and Testing Mobile Applications
Using webMethods Mobile Designer Version 10.3 138
Step Description
7 Run Phoney
Mobile Designer starts Phoney for the last activated device. You can specifyPhoney startup options using the phoney.base.params property.
Running Phoney from the Command LineYou can run Phoney from the command line using any of the Phoney Ant targets. Toexecute the Ant target, from the command line navigate into the project's folder.
Syntax[options ] ant_target
For ant_target, specify one of the Phoney Ant targets, for example, ++Run-Phoney. Theoptions you can use are listed in the table below.
Phoney Startup Options
Note: If you want to run Phoney from Software AG Designer, you can specify thestartup options in the phoney.base.params property.
Option and Description
{--accelerate_images | -ai}
Enables image acceleration, speeding up 32-bit images.
{--device | -fd} device_name
Forces Phoney to emulate the dimensions and keys of the specified device. Fordevice_name, specify the name you selected from the Choose your handset list in theAdd Handset dialog when you added the device to the project.
{--dimensions | -d} widthxheight
Specifies the canvas dimensions. The default is 176x220 pixels.
Note: If you also specify the {--device | -fd} option, the dimensions youspecify with the {--dimensions | -d} option override the dimensionspecified with the {--device | -fd} option. Other seings specified withthe {--device | -fd} option still apply.
{--fc_pim_roots | -rt} simulated_drives

MOdd Header
Installing and Testing Mobile Applications
Using webMethods Mobile Designer Version 10.3 139
Option and Description
Specifies one or more simulated drives that Phoney uses when executingFileConnection classes.
To specify a drive use the format:fake_root_name ,path
For example, to simulate the D:\ drive in C:\fake\d, use the followingD:\,C:\fake\d
Use a semicolon-separated list to specify multiple simulated drives. For example,to simulate the D:\ drive in C:\fake\d and the E:\drive in C:\fake\e, use thefollowingD:\,C:\fake\d;E:\,C:\fake\e
The default is the following:C:\,%FCDIR%/c/
For the default, %FCDIR% maps to the following directory:
Mobile Designer_directory\Tools\Phoney\FC_PIM_fake_roots
{--fixed_frame_rate | -ff}
Specifies that you want Phoney to create AVI files using fixed frame rate. If you donot specify this option, Phoney uses a variable rate.
{--frame_rate | -fr} rate
Specifies that you want Phoney to record everything that is displayed in the Phoneywindow in an AVI file. Specify rate to indicate the frame rate (frames per second)to use to record the movie. The default frame rate value is 25fps.
Using this option allows you to record a movie of your application, for example, touse as a demonstration video.
{--invert | -i}
Inverts the number pad so that it behaves like a phone keypad.
{--jad_param | -jp} parameters
Specifies Java Application Descriptor (JAD) parameters. If a JAD file is present, theparameters you specify override the parameters in the JAD file. You can specify the{--jad_param | -jp} startup option multiple times.
{--location_position | -lp} latitude;longitude;altitude
Specifies the default position returned by the Location API. The default is"51:30:26;-0:7:39;24" (London).

MEven Header
Installing and Testing Mobile Applications
Using webMethods Mobile Designer Version 10.3 140
Option and Description
{--max_scale | -ms}
Sets the scale of the current screen to the maximum that is allowable given thecurrent screen resolution.
{--metrics_mem_limit_kb | -mm} megabytes
Specifies the maximum number of kilobytes to use for memory before issuingwarnings. Phoney signals a warning if an application's memory usage isapproaching or exceeding configured limit. The default is 51200 KB (50 MB). Formore information, see “Using Phoney to Monitor an Application’s Memory andThread Usage” on page 143.
Note: It is recommended that you do not change the default. If you need tochange it, do so for specific devices rather than the entire project.
{--metrics_thread_limit | -mt} number
Specifies the maximum number of threads to use before issuing warnings. Phoneysignals a warning if an application's thread usage is approaching or exceedingconfigured limit. The default is 15 threads. For more information, see “UsingPhoney to Monitor an Application’s Memory and Thread Usage” on page 143.
Note: It is recommended that you do not change the default. If you need tochange it, do so for specific devices rather than the entire project.
{--no_connectivity | -nc}
Start Phoney up with all virtual network connections disabled. This can be used tosimulate a device in a no-coverage area, or in Airplane mode.
{--no_fake_fc_pim_roots | -fk}
Disables the behavior of the {--fc_pim_roots | -rt} startup option.
Caution: When you use {--no_fake_fc_pim_roots | -fk}, Phoney lists yourcomputer’s root devices directly. As a result, your mobile application hasdirect access to the root drives, for example, C:\.
{--no_file_connection | -fc}
Disables the FileConnection portion of FC-PIM. Use this option when you want tosimulate devices that do not support the FileConnection API.
{--no_menus | -nm}
Disables the menu bar.

MOdd Header
Installing and Testing Mobile Applications
Using webMethods Mobile Designer Version 10.3 141
Option and Description
{--no_pim | -np}
Disables the reading of the Phoney Contacts file.
{--no_settings | -ns}
Specifies that you want Phoney to only use the command-line options for userseings and ignore seings in user seings files.
By default, Phoney retains seings from previous sessions in a properties file sothey can be used again. Using this property ensures that Phoney does not usepreviously saved seings.
{--open_dialog | -od}
Shows the file open dialog so that you can have Phoney load a JAD or JAR file atstartup.
{--open_screenshot | -os}
Indicates that you want Phoney to automatically open any screen shot you takeusing F1. The screen shot is open using the system-defined application for viewingPNG images.
{--pim_root | -pr}
Specifies where to locate the Phoney Contacts file.
The default is the following:%PIMDIR%
For the default, %PIMDIR% maps to the following directory:
Mobile Designer_directory\Tools\Phoney\FC_PIM_Contacts
{--properties | -p} filename
Specifies you want Phoney to use device seings in the specified properties file.
Important: Be sure to specify this seing so that Phoney automatically represents theactivated device.
{--redirect_output | -ro}
Redirects all stdout and stderr text to an internal buffer that you can then view fromthe Phoney > Console menu item.
{--repaint_sleep | -rs} milliseconds

MEven Header
Installing and Testing Mobile Applications
Using webMethods Mobile Designer Version 10.3 142
Option and Description
Specifies the number of milliseconds the MIDP repaint calls sleeps, allowing timefor the paint thread to service the queue.
{--rms_files | -r}
Specifies that you want to store RMS data in files.
Phoney uses RMS files for the RecordStore class read/write processes. If you donot use file-based RMS, the save/load operations do not persist between Phoneysessions.
{--scale | -s} number
Specifies the window scale multiplier. The default is 1.
Note: While running Phoney, you can change the screen scale by pressing the '+'or '-' key to increase or decrease the scale.
{--single_keypress | -sk}
Disables multiple simultaneous key presses. By default, multiple simultaneous keypresses are enabled.
{--slow_rms | -sr} milliseconds
Specifies that you want to emulate a record store that performs slowly. Specify thenumber of milliseconds you want the RecordStore class to use to perform an add orset operation.
Note: This is mostly useful for legacy J2ME devices that sometimes had issueswriting to the RecordStore, causing a lag when trying to save too frequentlyor not allowing enough time for the write operations to complete. Bysimulating the time that the device takes, you can determine how theapplication will perform on devices that exhibit this issue.
{--softkeys | -k}
Forces a system soft-key area for LCDUI soft keys.
{--start_landscape | -sl}
Starts Phoney up and immediately rotates the device by 90 degrees (normallylandscape mode for most devices).
{--sound | -so}
Enables sound playback using the JDK 1.5 Java Sound API.

MOdd Header
Installing and Testing Mobile Applications
Using webMethods Mobile Designer Version 10.3 143
Option and Description
{--verbose | -v}
Specifies that you want verbose output.
{--verbose_mmapi | -vm}
Specifies that you want verbose debug information from the MMAPI code.
Installing Certificates on PhoneyPhoney makes use of the J2SE keychain. As a result, you can use X.509 v1, v2, and v3certificates and PKCS #7-formaed certificate chains consisting of certificates of thattype.
Note: The J2SE keychain details vary based on the VM you have installed. For moreinformation about the Oracle Java 7 keychain, see “hp://docs.oracle.com/javase/7/docs/technotes/tools/solaris/keytool.html”.
To install custom SSL certificates on Phoney
Use keytool to install the certificate.
The keytool is located in %JAVA_HOME%/bin.
Example:keytool -importcert -file %KEY_FILE_FOLDER%\%KEY_FILE% -alias %CERTIFICATE_ALIAS% -keystore "%JAVA_HOME%\jre\lib\security\cacerts
Using Phoney to Monitor an Application’s Memory andThread UsageYou can use Phoney to run applications on a simulated, generic device. When usingPhoney to run an application, you can view memory and thread usage information forthe simulated device in the Metrics panel. Use the metrics to determine:
Estimation of how much memory and threads an application uses.
When an application’s memory and thread use is at its highest.
The metrics can help determine whether you might encounter issues with memory andthread usage when running the application on physical devices.
Additionally, Phoney displays warnings if an application’s memory and/or thread useexceeds configured thresholds.

MEven Header
Installing and Testing Mobile Applications
Using webMethods Mobile Designer Version 10.3 144
Note: When running the application on a physical device, the metrics might differsomewhat from the values in the Metrics panel. For example, when runningthe application on a physical device, the memory usage might be a lile lessbecause the format of the application resources, such as, data, images, andsound, might be in a format beer suited for the physical device. NativeMobile Designer libraries used on physical devices might also differ slightlyin their usage of threads.
Also note that other applications accessing sound and video hardware cancause the JVM in which Phoney is running to create spurious threads. Forexample, web browsers displaying video, Flash, or other rich content mightcause the JVM in which Phoney is running to create spurious threads. You cansafely ignore these additional threads.
Metrics Panel
You can open the Metrics panel from Phoney by selecting Phoney > App Metrics, orby pressing CTRL+M on the keyboard. The Metrics panel displays the followinginformation:
Overall memory usage of an application
The Peak bar shows the highest recorded use of memory, as a proportion of thecurrent JVM's total size. The History graph shows the last 60 seconds of memoryusage.
Memory usage for Image classes within an application
Similar to the overall memory metrics, these metrics display a Peak bar that showsthe highest recorded use of memory for Image classes within the application. TheHistory graph shows the last 60 seconds of memory usage.

MOdd Header
Installing and Testing Mobile Applications
Using webMethods Mobile Designer Version 10.3 145
Because both the overall memory usage and the usage for Image classes use the samescale, you can determine the proportion of the overall memory that the applicationuses for Image classes.
Thread usage
For thread usage, the Metrics panel lists the number of threads that the applicationhas created. The History graph shows the last 60 seconds of thread usage.
Note: Even if the Metrics panel is closed, Phoney continues to monitor memory andthread usage and displays warnings if memory and/or threshold use exceedsconfigured thresholds.
Setting Warning Thresholds and How Warnings are Displayed
You can configure limits for when you want Phoney to signal a warning if anapplication's memory and/or thread usage is approaching or exceeding configuredlimits. To configure the limits, you specify options when you start Phoney. If you donot specify the startup options, Phoney uses default values. You can specify the startupoptions:
On the command line when you start Phoney.
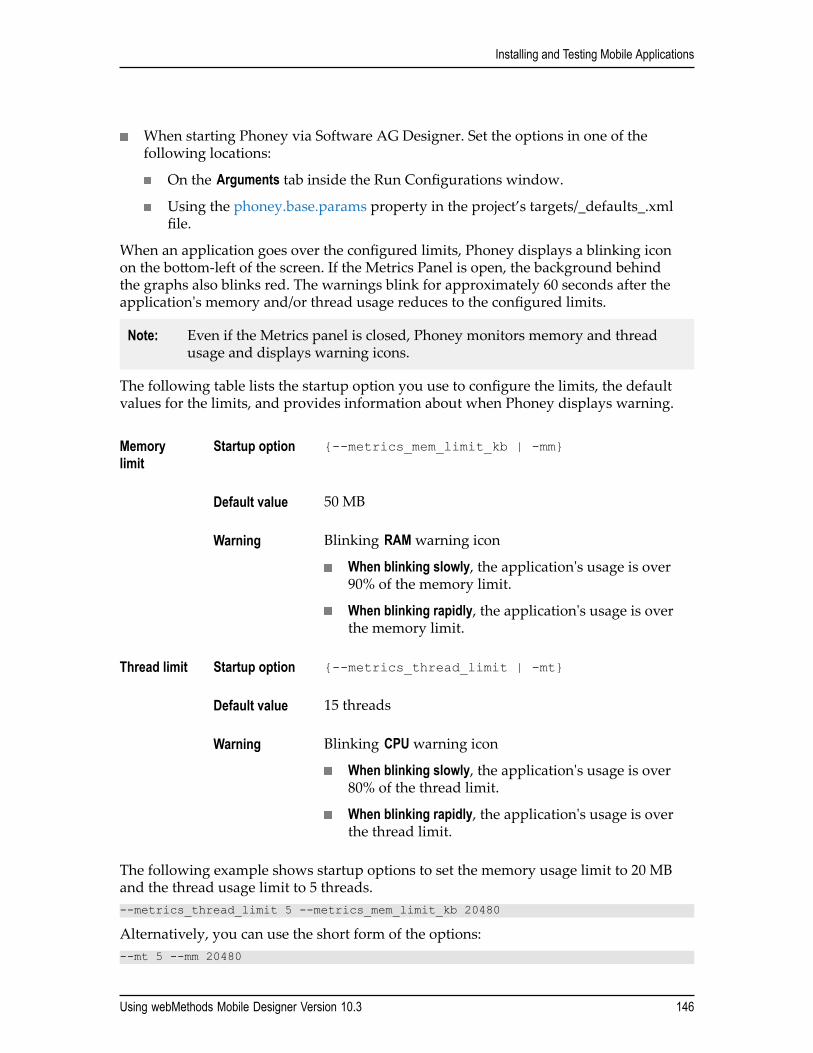
MEven Header
Installing and Testing Mobile Applications
Using webMethods Mobile Designer Version 10.3 146
When starting Phoney via Software AG Designer. Set the options in one of thefollowing locations:
On the Arguments tab inside the Run Configurations window.
Using the phoney.base.params property in the project’s targets/_defaults_.xmlfile.
When an application goes over the configured limits, Phoney displays a blinking iconon the boom-left of the screen. If the Metrics Panel is open, the background behindthe graphs also blinks red. The warnings blink for approximately 60 seconds after theapplication's memory and/or thread usage reduces to the configured limits.
Note: Even if the Metrics panel is closed, Phoney monitors memory and threadusage and displays warning icons.
The following table lists the startup option you use to configure the limits, the defaultvalues for the limits, and provides information about when Phoney displays warning.
Memorylimit
Startup option {--metrics_mem_limit_kb | -mm}
Default value 50 MB
Warning Blinking RAM warning icon
When blinking slowly, the application's usage is over90% of the memory limit.
When blinking rapidly, the application's usage is overthe memory limit.
Thread limit Startup option {--metrics_thread_limit | -mt}
Default value 15 threads
Warning Blinking CPU warning icon
When blinking slowly, the application's usage is over80% of the thread limit.
When blinking rapidly, the application's usage is overthe thread limit.
The following example shows startup options to set the memory usage limit to 20 MBand the thread usage limit to 5 threads.--metrics_thread_limit 5 --metrics_mem_limit_kb 20480
Alternatively, you can use the short form of the options:--mt 5 --mm 20480

MOdd Header
Installing and Testing Mobile Applications
Using webMethods Mobile Designer Version 10.3 147
Activating Devices
About Activating DevicesMobile Development will add devices that you want your application to support to yourproject when you define launch configurations. For more information, see webMethodsMobile Development Help, Building a Mobile Project.
However, you can continue to add devices using Ant targets as described in “AddingDevices to a Mobile Application Project” on page 91. When testing how your applicationruns on one of the devices, you need the run-time seings to be set for a specific device.To get the correct seings for a device, you can activate it. For example, if you want totest your application using Phoney, you might first activate the device for which youwant to test, then run Phoney to test your application.
When you activate a device, Mobile Designer
Hot-swaps in the required Mobile Designer run-time classes. For more information,see “ Mobile Designer-Provided Run-Time Classes” on page 49 and “Run-TimeClasses Properties” on page 201.
Sets up the project compile path appropriately by creating the .classpath file thatprovides information about how to compile the Java code.
Runs the project’s resource handler so that the class contains seings for the deviceyou activate.
Compiles the code.
For more information about the steps Mobile Designer takes when you activate a device,see “Activate Devices Ant Summary” on page 147 and “Steps Performed to ActivateHandsets” on page 148.
To activate a device, you use the ++Activate-Handset or ++Re-Activate-Handset Ant targets. Forinstructions, see “Activating a Device” on page 150.
Activate Devices Ant SummaryThe following diagram provides summary information about the process MobileDesigner performs when activating a device. It shows:
The names of the Ant targets you can use to activate devices.
The steps Mobile Designer performs. For details about each step, see “StepsPerformed to Activate Handsets” on page 148.

MEven Header
Installing and Testing Mobile Applications
Using webMethods Mobile Designer Version 10.3 148
The hook points in the process where Mobile Designer can run custom Ant scriptsthat you provide. For more information about hook points, see “Creating CustomAnt Scripts to Run at Predefined Hook Points” on page 125.
Note: For instructions on how to activate a device, see “Activating a Device” onpage 150.
Steps Performed to Activate HandsetsThis section describes the steps that Mobile Designer performs when you run the ++Activate-Handset or ++Re-Activate-Handset Ant targets to activate a device.

MOdd Header
Installing and Testing Mobile Applications
Using webMethods Mobile Designer Version 10.3 149
The table also indicates hook points where Mobile Designer can run custom Ant scriptsthat you provide. For more information about hook points, see “Creating Custom AntScripts to Run at Predefined Hook Points” on page 125.
Note: For instructions on how to activate a device, see “Activating a Device” onpage 150.
1 Display the Activate Handset dialog
Mobile Designer displays the Activate Handset dialog.
Note: Mobile Designer only displays the Activate Handset dialog when yourun the ++Activate-Handset Ant target.
2 Determine settings for target devices
Mobile Designer determines the seings for the device you are activating. Itretrieves the seings from the following sources in the order listed.
Project-level device_name .xml files
Project-level _defaults_.xml file
Mobile Designer device database
Mobile Designer sdk.properties file
Mobile Designer uses the first seing it encounters. For example, if MobileDesigner encounters a seing in the project-level target device_name .xml fileand then again in the project-level _defaults_.xml file, Mobile Designer usesthe seing from the target device_name .xml file.
For more information about:
Project-level device files, see “Where You Set Properties” on page 84 and“Seing Project Properties” on page 86
Mobile Designer device database, see “Devices that a Mobile ApplicationSupports” on page 91
Mobile Designer sdk.properties file, see “Mobile Designer ConfigurationProperties (sdk.properties)” on page 18
hookpoint
PreBuildResources
If you have created an Ant script to run at the PreBuildResources hookpoint, Mobile Designer runs the Ant script.
3 Execute the resource handler
Mobile Designer runs the resource handler that you created for the project.When running the resource handler, Mobile Designer records all theresources required for your application. Mobile Designer also creates

MEven Header
Installing and Testing Mobile Applications
Using webMethods Mobile Designer Version 10.3 150
the class. For more information about creating the resource handler, see“Defining Resources for a Mobile Application Project” on page 73. Formore information about the Parameters class, see “Application and ParameterClasses” on page 50.
At this point in the build process, Mobile Designer uses the followingproject properties:
project.reshandler.src.path for the location of the project’s resource handlerscript and any associated classes
project.java.reshandler.name for the name of the resource handler classyou created for your project.
project.resource.dir.root for the location of the top-level folder thatcontains the resources (image files, etc.) for your project
project.reshandler.additional.libs.path for the location of additionallibraries that your project’s resource handler requires
For more information about these properties, see “Resource HandlerProperties” on page 197.
hookpoint
PostBuildResources
If you have created an Ant script to run at the PostBuildResources hookpoint, Mobile Designer runs the Ant script.
4 Prepare source (include Mobile Designer abstraction lib)
Mobile Designer prepares the source by including the relevant run-timeclasses. For more information, see “ Mobile Designer-Provided Run-TimeClasses” on page 49 and “Run-Time Classes Properties” on page 201.
5 Create .classpath for Eclipse
Mobile Designer creates a classpath file in the project's root folder toreference the stubs that the device’s run-time code and that the resourcehandler requires. The Mobile Designer project is refreshed so that theclasspath changes are propagated through to the codebase.
6 Compile the Java source
Activating a DeviceTo activate a device, you use one of the following Ant targets:
++Activate-Handset to specify the device and the language combination that you wantto activate.

MOdd Header
Installing and Testing Mobile Applications
Using webMethods Mobile Designer Version 10.3 151
++Re-Activate-Handset to activate the last device that was activated.
Note: When you activate a device, Mobile Designer also creates a debug or runconfiguration. You can find the created .launch file in the project’s _temp_folder.
To activate a device
1. In Software AG Designer, click the Project Explorer view, expand the MobileDesigner project, and drag the build.xml file to the Ant view.
2. In the Ant view, double-click the Ant target you want to use:
Double-click ++Activate-Handset if you want to specify a device/languagecombination.
Mobile Designer displays an Activate Handset dialog. Continue with the nextstep to complete the procedure.
Double-click ++Re-Activate-Handset to re-activate the last device.
Mobile Designer does not display a dialog. It re-activates the last device and doesnot require you to perform further actions.
3. In Activate Handset dialog, select the device you want to activate from Choose yourhandset list.
4. Select the language group for which you want to test from Choose your language grouplist.
5. Click Activate Handset.
Installing Applications on Devices
About Installing Applications on DevicesAfter you use webMethods Mobile Designer to build an application, you can installthe final binary on the target devices. This documentation describes how to installapplications on the following commonly-used platforms:
AndroidiOS
The procedures in this documentation do not cover all possible setups and scenarios.Refer to the device provider's web pages for further details.
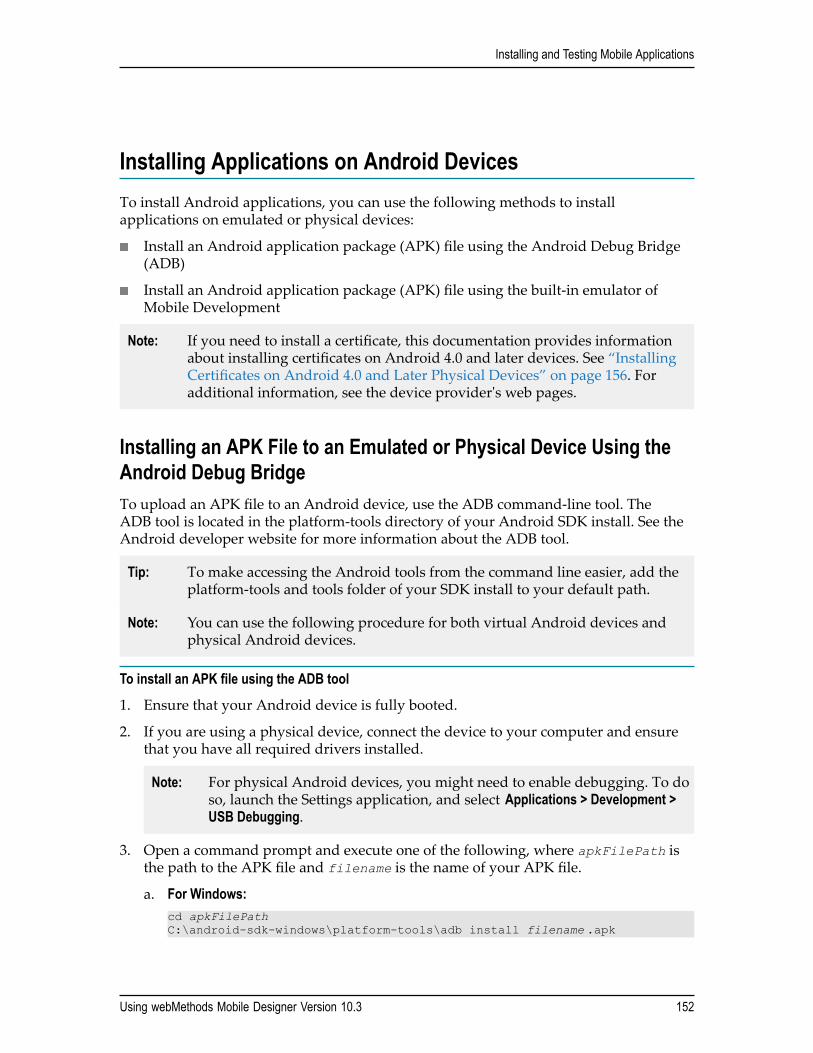
MEven Header
Installing and Testing Mobile Applications
Using webMethods Mobile Designer Version 10.3 152
Installing Applications on Android DevicesTo install Android applications, you can use the following methods to installapplications on emulated or physical devices:
Install an Android application package (APK) file using the Android Debug Bridge(ADB)
Install an Android application package (APK) file using the built-in emulator ofMobile Development
Note: If you need to install a certificate, this documentation provides informationabout installing certificates on Android 4.0 and later devices. See “InstallingCertificates on Android 4.0 and Later Physical Devices” on page 156. Foradditional information, see the device provider's web pages.
Installing an APK File to an Emulated or Physical Device Using theAndroid Debug BridgeTo upload an APK file to an Android device, use the ADB command-line tool. TheADB tool is located in the platform-tools directory of your Android SDK install. See theAndroid developer website for more information about the ADB tool.
Tip: To make accessing the Android tools from the command line easier, add theplatform-tools and tools folder of your SDK install to your default path.
Note: You can use the following procedure for both virtual Android devices andphysical Android devices.
To install an APK file using the ADB tool
1. Ensure that your Android device is fully booted.
2. If you are using a physical device, connect the device to your computer and ensurethat you have all required drivers installed.
Note: For physical Android devices, you might need to enable debugging. To doso, launch the Seings application, and select Applications > Development >USB Debugging.
3. Open a command prompt and execute one of the following, where apkFilePath isthe path to the APK file and filename is the name of your APK file.
a. For Windows:cd apkFilePathC:\android-sdk-windows\platform-tools\adb install filename .apk

MOdd Header
Installing and Testing Mobile Applications
Using webMethods Mobile Designer Version 10.3 153
b. For Macintosh:cd apkFilePath/android-sdk-macosx/platform-tools/adb install filename .apk
The ADB tool interacts with the device and installs your build.
4. Launch your application from the device and test it.
Note: From the command line, use adb logcat to monitor output from yourdevice. This can be useful when debugging your application.
Installing an APK File to an Emulated or Physical Device Using theBuilt-in Emulator of Mobile DevelopmentTo install an application to an emulated or physical device in Mobile Development,follow the instructions as described in webMethods Mobile Development Help, Installing anApplication on Android Using the Emulator.
Installing Applications on iOS DevicesTo install iOS applications, you can use the following methods:
To install to a simulator, you can install using Apple Xcode.
To install to a physical device, you can:
Install using the Apple Xcode IDE
Install an Ad-Hoc Build Using iTunes
Note: If you need to install a certificate, this documentation provides informationabout installing certificates on iOS devices. See “Installing Certificates on iOSPhysical Devices” on page 156. For additional information, see the deviceprovider's web pages.
Installing to a Simulated or Physical Device Using the Apple XcodeIDEThis method is useful when installing during the development process and when youwant to install to a simulated device.
To install to a simulated or physical device using Xcode
1. When building your project using the Mobile Designer +Multi-Build Ant task, be sure toselect the Retain output build files check box.

MEven Header
Installing and Testing Mobile Applications
Using webMethods Mobile Designer Version 10.3 154
When the build completes successfully, Mobile Designer retains a folder named_temp in the same folder as your build. The temp/_cpp_edit_ folder is an Xcodeproject (the .xcodeproj file) that you can use to access your cross-compiled source.
2. Double-click the .xcodeproj file.
Xcode starts.
3. Select the device to which you want to install the application:
To install to a simulated device, on the screen set the scheme to the simulated deviceto which you want to install.
To install to a physical device, aach the iOS device to your computer.
4. Click Run.
Xcode compiles your application, signs it with the development certificate, andinstalls it on the selected simulated or physical device.
Installing an Ad-Hoc Build to a Physical Device Using iTunesUse the following procedure to install an ad-hoc build to a physical iOS device.
To install an Ad-Hoc build using iTunes
1. Gather the build files you need for installation and make them available on themachine running iTunes.
a. Locate the application bundle in the project Builds folder.
After running the Mobile Designer+Multi-Build Ant task to create an ad-hoc devicebuild, Mobile Designer places the application bundle in this location.
b. Compress the application bundle on the Macintosh where you created the build.
If you want to distribute the build, for example, via an email message or uploadit to a server, you must compress the files before moving them. Distributingan uncompressed application bundle can cause issues, for example, missingsymbolic links and/or permissions set for the build.
Important: It is recommended that you use a program such as 7Zip, WinZip, orWinRar for the decompression. Using the built-in Extract All functionthat comes with Windows can damage the build when it is extracted.
c. Locate the ad-hoc mobile provision file used when signing the application.
Tip: This is the file specified in the ios.provisioning.profile.adhocproperty in the _defaults_.xml of your project.
d. Copy the compressed application bundle and the ad-hoc mobile provision file(.mobileprovision file) to the computer you want to use for the installation.

MOdd Header
Installing and Testing Mobile Applications
Using webMethods Mobile Designer Version 10.3 155
Place the files in an easy-to-find location, for example, the desktop.
2. Optionally, if the application already exists on the physical device, delete theapplication if you want to perform a clean installation.
3. Connect the physical iOS device to your computer.
4. Start iTunes.
5. Optionally, install the ad-hoc mobile provision file by dragging the .mobileprovisionfile into Library > Applications in iTunes.
Important: You must install the .mobileprovision file if:
This is the first time installing this application on the device.
The .mobileprovision file has changed since the last time you installedthe application.
6. Install the application bundle.
a. Extract the files from the compressed application bundle.
On Windows, the application is in a folder with the nameapplication_name .app
On Macintosh, the application is in a single file with a name that matches theapplication name.
b. Drag the application bundle (that is, the Windows folder or Macintosh file) intoLibrary > Applications in iTunes.
7. Select Library > Applications to verify that the new application is present.
8. Under Devices, select the iOS device to which you want to install the application.
9. Select the Applications tab.
10. Select Sync Applications and that the application you want to install is selected.
11. Select the Summary tab.
iTunes installs the application.
Installing Custom SSL Certificates on DevicesIf an application accesses services via the Internet and you want to use SSL to securethe communications between the device and the service, install certificates on thedevice. This documentation describes the supported certificate types and how to installcertificates for the following platforms:
Android 4.0 and later devices
iOS physical devices

MEven Header
Installing and Testing Mobile Applications
Using webMethods Mobile Designer Version 10.3 156
The procedures in this documentation do not cover all possible setups and scenario.Refer to the device provider's web pages for further details.
Installing Certificates on Android 4.0 and Later Physical DevicesAndroid 4.0 (Ice Cream Sandwich) and later supports DER-encoded X.509 certificatessaved in files with a .crt or .cer file extension.
Note: If you do not have a valid certificate installed, you will see the errorjavax.net.ssl.SSLHandshakeException: java.security.cert.CertPathValidatorException:Trust anchor for certification path not found.
To install custom SSL certificates on Android 4.0 and later physical devices
1. If your certificate file has a .der or other extension, change it to .crt or .cer.
2. Use the Android Debug Bridge (ADB) tool to send a copy of your certificate tothe SD card on the device. To do so, with the ADB running, execute the followingcommand, where certificate is the name of your certificate:adb push certificate .crt /sdcard/
3. On the Android device, select Settings > Location & Security Settings > Set up screen lockto ensure you have a password or screen lock for the device.
4. On the device, select Settings > Personal > Security > Credential Storage > Install from SDCard to install the custom certificate.
Installing Certificates on iOS Physical DevicesApple iOS supports DER or Base64-encoded X.509 certificates saved in files witha .crt, .cer, .der or .pem file extension.
Note: If you do not have a valid certificate installed, you might see an error on theconsole MD: ERROR: Can't reach url "…" and a java.io.IOException.
Important: You can only use the following procedure to install custom certificates on aphysical iOS device. The procedure will not work to install certificates to thekeychain that the iOS simulator uses.
To install custom SSL certificates on iOS physical devices
1. Send the certificate to your device by doing one of the following:
Send an email message with the certificate as an aachment. On the device, openthe email aachment.
Put the certificate on an accessible server. On the device, download the certificatefrom Safari.
When the device receives the certificate, it opens an Install Profile dialog.

MOdd Header
Installing and Testing Mobile Applications
Using webMethods Mobile Designer Version 10.3 157
2. In the Install Profile dialog, click Install.
3. Double-check the root certificate to ensure it is the one you want to install.
4. Click Install in the warning dialog.
5. Enter your passcode if you have one set up on your device.
On an iOS device, you can view and remove installed certificates selecting Settings >General > Profiles.

MEven Header
Using webMethods Mobile Designer Version 10.3 158
MOdd Header
Project Properties Reference
Using webMethods Mobile Designer Version 10.3 159
A Project Properties Reference
■ Android Project Properties ......................................................................................................... 160
■ Build Results Properties ............................................................................................................. 160
■ Build Script Properties ............................................................................................................... 165
■ Code Conversion Properties ...................................................................................................... 167
■ Cross-Compiler Properties ......................................................................................................... 169
■ Cross-Product Integration Properties ......................................................................................... 188
■ Device-Specific Properties ......................................................................................................... 189
■ Hook Point Properties ................................................................................................................ 190
■ Multi-Build Selection Properties ................................................................................................. 193
■ Phoney Properties ...................................................................................................................... 195
■ Project Language Properties ..................................................................................................... 196
■ Resource Handler Properties ..................................................................................................... 197
■ Run-Time Classes Properties .................................................................................................... 201
■ Run-Time Code Compilation Properties .................................................................................... 203
MEven Header
Project Properties Reference
Using webMethods Mobile Designer Version 10.3 160
Note: You are not required to define values for all the properties described inthis reference because Mobile Development defines values for most of theproperties. However, if you need to set a value or change a predefined valuefor your project, you can. For instructions, see “Seing Project Properties” onpage 86.
Android Project PropertiesThe Android properties customize how Mobile Designer build applications for Androiddevices.
project.android.sdk.version.override
Overrides the default Android SDK that Mobile Designer uses for the project.
Platforms Android
Value API number of the SDK you want to use.
Default 21
For more information about the sdk.properties, see “Configuring Mobile Designer forthe Android SDK” on page 30.
Build Results PropertiesThe build results properties customize how Mobile Designer creates the final binary forthe project.
packager
Specifies the packager that you want Mobile Designer to use to create the JAR for eachJ2ME device that your project supports.
Note: Mobile Designer does not use this property for platforms that do not use JARfiles, for example, iOS and Android.
If you are building your application for a platform that does use JAR files,be sure to set the property to a packager that creates JARs that the devices inyour project can run. Some devices might not be able to execute JARs createdby some packagers.
Platforms All

MOdd Header
Project Properties Reference
Using webMethods Mobile Designer Version 10.3 161
Value Specify one of the following values:
Value Meaning
jar Mobile Designer uses the built-in JAR packager that is part ofthe JDK.
zip Mobile Designer provides compression with WinZip.
7zip Mobile Designer provides compression with 7Zip.
To create the JAR Mobile Designer uses the followingcommand-line parameters when executing 7Zip:${packager.7zip.args1} "filename " * ${packager.7zip.args2}
The packager.7zip.args1 and packager.7zip.args2properties are defined in the bs-defaults.xml file, which is inthe following location:
Mobile Designer_directory/Tools/Build/BuildScript/v1.0.0/bs-defaults.xml
The following shows the default property seings in the bs-defaults.xml file:<property name="packager.7zip.args1" value="a -r -tzip"/> <property name="packager.7zip.args2" value="-mx=9 -mfb=255"/>
kzip Mobile Designer provides compression with Kzip.
To create the JAR Mobile Designer uses the followingcommand-line parameters when executing Kzip:${packager.kzip.args} "filename " *
The packager.kzip.args property is defined in the bs-defaults.xml file.
The following shows the default property seing in the bs-defaults.xml file:<property name="packager.kzip.args" value="-r -zl121"/>
Default kzip
If you do not have the KZip packager installed, at run time MobileDesigner uses 7Zip.

MEven Header
Project Properties Reference
Using webMethods Mobile Designer Version 10.3 162
project.handset.skip.compilation
Specifies whether you want Mobile Designer to skip the build step. You can have MobileDesigner skip the build step if you want to use native platform tools to compile andcreate the final binary.
Platforms All
Value true to skip the build.
Mobile Designer performs all the resource handling and cross-compiling (for platforms that require it), but does not compile thefinal binary.
Important: When you set this property to true, be sure to select Retainoutput build files in the Multi Build dialog. When you selectRetain output build files, Mobile Designer retains the cross-compiled code it generated from your original mobile code,along with any project (for example, Xcode project for iOS)it might have generated. You can then use the retained filesand the native platform tools to compile to create the finalbinary.
false to have Mobile Designer perform the build step to compile andcreate the final binary.
Mobile Designer performs all the resource handling, cross-compiling,and compiles the final binary.
Default false
project.jarname.format
Specifies the file name format that you want Mobile Designer to use when creating thefinal binary for a build of the project.
Platforms All
Value File name format that you define by specifying one or more of theparameters listed below. At run time, Mobile Designer replaces theparameters with the values listed below.
@PROJECT@
is replaced with: ${project.jar.name}
@LANGPROJECT@

MOdd Header
Project Properties Reference
Using webMethods Mobile Designer Version 10.3 163
is replaced with: ${project.jar.name.selected-langgroup}, if itexists, otherwise replace with the value of ${project.jar.name}
@HANDSET@
is replaced with:${mobiledesigner.handset.devicegroup.output.filename}
@LANGGROUP@
is replaced with: Selected language group
@VMAJOR@
is replaced with: X part of the project version number (X.y.z) that youspecify in the Multi Build dialog when building the project.
@VMINOR@
is replaced with: Y part of the project version number (x.Y.z) that youspecify in the Multi Build dialog when building the project.
@VMICRO@
is replaced with: Z part of the project version number (x.y.Z) that youspecify in the Multi Build dialog when building the project.
Example:<property name="project.jarname.format" value="@PROJECT@@HANDSET@@LANGGROUP@"/>
Note: The resulting file name must contain only valid characters arealphanumeric (A-Z, a-z, 0-9), period (.), and hyphen (-).
Default None.
Note: You must specify this property for a project.
project.jarname.format.override.device_name
Overrides the JAR file name format value specified in the project.jarname.formatproperty for a specific device.
When specifying the property, replace device_name with the name of the device forwhich you want to override the JAR file name. You can find the device name in theHandset field of the Multi Build dialog. For example, to specify the property for theApple iPhone 5 phone, use the following property, where the IOS_Apple_iPhone5portion of the property name is the device name for the Apple iPhone 5 phone:project.jarname.format.override.IOS_Apple_iPhone5
Platforms All

MEven Header
Project Properties Reference
Using webMethods Mobile Designer Version 10.3 164
Value See the value for the project.jarname.format property
Default No default.
Mobile Designer uses the value of project.jarname.formatfor all devices that you do not specifically override using theproject.jarname.format.override.device_name property.
project.multibuild.built.handset.list
Contains a semicolon-separated list of all the devices that Mobile Designer built whenbuilding the project. Mobile Designer sets this property.
Platforms All
Value Semicolon-separated list of all the builds that Mobile Designer created
Default n/a
project.output._temp_.folder
Overrides the default name for the project folder that contains the output data from abuild of the project.
Platforms All
Value Folder name that you define by specifying the one or more of theparameters listed below. At run time, Mobile Designer replaces theparameters with the values listed below.
Parameter Replace with the value of
@LANGGROUP@ ${selected.langgroup}
@PLATFORM@ ${selected.platform}
@TARGET@ ${selected.target}
Example:
If you want Mobile Designer to store the output data in a project foldernamed “_temp_EFIGS_j2me-jar_release_” for an English, French,Italian, German, Spanish (EFIGS) release J2ME build, specify thefollowing:<property name="project.output._temp_.folder"

MOdd Header
Project Properties Reference
Using webMethods Mobile Designer Version 10.3 165
value="_temp_@LANGGROUP@_@PLATFORM@_@TARGET@_"/>
Default project _temp_ folder
If you do not set this property, Mobile Designer stores the outputand compilation directories in a project _temp_ folder alongside thecompiled binary.
Build Script PropertiesThe build script properties are properties you are required to put in your project’sbuild.xml file.
additional.device.profiles.dir.root
Specifies the location of a folder that contains custom device profiles for your project.
You might want to create your own custom device profiles, but you do not want toinclude them in Mobile Designer device database. In this situation, set up a separatefolder to contain the your additional, custom device profiles, which must use the sameXML format that Mobile Designer uses for the device profiles it provides.
To use the custom device profiles for a project, include this property in the project’sbuild.xml file. You must place it in the build.xml file before the following line thatimports the targets.xml:<importxmldirectory location="${basedir}/targets"/>
Platforms All
Value Directory that contains custom device profiles
For example:<property name="additional.device.profiles.dir.root" value="${basedir}/device_info"/>
Default None.
Note: Mobile Designer does not use custom profiles if you do notinclude this property.
mobiledesigner.buildscript.version
Specifies the version of the Mobile Designer build scripting system to use when buildingyour application. Define this property in the project’s build.xml file.
Platforms All

MEven Header
Project Properties Reference
Using webMethods Mobile Designer Version 10.3 166
Value v1.0.0
Note: Currently the only supported value is v1.0.0.This property isfor backward compatibility in the event Mobile Designer uses adifferent build scripting system in the future.
Default None.
Note: You must specify this property for a project.
mobiledesigner.runtime.version
Specifies the version of the Mobile Designer run-time code to use for your application.Define this property in the project’s build.xml file.
Mobile Designer
Platforms All
Value v1.0.0
Note: Currently the only supported value is v1.0.0.This property isfor backward compatibility in the event Mobile Designer uses adifferent run-time code in the future.
Default None.
Note: You must specify this property for a project.
project.jar.name
Specifies a text name you want your application to have when installed on a device.Define this property in the project’s build.xml file.
Platforms All
Value Name for your project. Valid characters are alphanumeric (A-Z, a-z,0-9), period (.), and hyphen (-).
For example:<property name="project.jar.name" value="HelloWorld"/>
Default None.
Note: You must specify this property for a project.

MOdd Header
Project Properties Reference
Using webMethods Mobile Designer Version 10.3 167
project.java.midlet.name
Specifies the name of the root MIDlet/Application class of your project's run-time code. .Define this property in the project’s build.xml file.
Platforms All
Value For example:<property name="project.java.midlet.name" value="com.softwareag.mobile.helloworld.MyApplication"/>
Default None.
Note: You must specify this property for a project.
Code Conversion PropertiesThe code conversion properties configure how Mobile Designer creates the generated C++ or Java code for the project.
java.parser.retain.comments
Specifies whether to retain comments when compiling to Java or C++.
Platforms All
Values true retains comments when compiling to Java or C++.
Mobile Designer aempts to keep comments connected to the linewhere the comments are relevant, typically the line of code thatfollows the comment. However, due to the fundamental differencebetween Java, C# and C++, some comments might get misplaced orlost.
Note: If a project has been built without comments and theproperty is set to true, the cached parsed-Java files do notcontain comments to use. To resolve this issue, clear out theproject's _temp_\_bcdfs_cache_ folder.
false removes comments when compiling to Java or C++.
Default true
MEven Header
Project Properties Reference
Using webMethods Mobile Designer Version 10.3 168
cpp.no.selfprotect
Indicates whether to add a safeguard to every method call.
Platforms All
Values true indicates that you do not want to use the safeguard.
When set to false, the cross compiler might inject the macro line, butit does nothing.
false adds the safeguard to every method call using the injectedmacro line.
Caution: Adding the injected macro line to every method call addsoverhead to all methods and increases the output size.
Default false
cross.compiler.extractinners
Indicates whether to extract inner classes included in the Java source code.
Platforms All
Values true extracts the inner classes.
Note: The examination required to perform this action increases theprocessor time.
false does not extract the inner classes.
Default true
cross.compiler.nodatestamp
Specifies whether to exclude timestamps at the top of every generated C++ (CPP) and Hfile.
Platforms All
Values true indicates that timestamps are not included.
If you are storing the files in a source control system, omiing thisheader information reduces the file differences that occur with eachcross compilation.

MOdd Header
Project Properties Reference
Using webMethods Mobile Designer Version 10.3 169
false indicates that timestamps are included.
Default false
cross.compiler.render.selfprotect
Indicates whether to add an extra line at the top of every non-static method to preventself-destruction of the object during the method call.
Platforms All
Values true indicates that the extra line is added.
This is part of a fix needed to prevent object self-deletion on the rareoccasion that an object nulls all references to itself. The injected lineis a macro whose actual contents you can remove by the value of thecpp.no.selfprotect property.
false indicates that the extra line is not added.
Default true
Cross-Compiler PropertiesThe webMethods Mobile Designer cross-compiler libraries contain code to support theMobile Information Device Profile (MIDP) and Connected Limited Device Configuration(CLDC) standards and Java functionality. However, your application might not requirethe entire library, or you might want to override default values. In this case, you can usethe cross-compiler properties to customize your use of the cross-compiler library, forexample, to disable areas of the libraries or to override default functionality.
The following lists the types of cross-compiler project properties you can set.
“Debugging” on page 170
“Extra Libraries and Custom Code” on page 170
“Java Classes” on page 174
“Makefile Additions” on page 175
“Optimization” on page 178
“Screen and Display Handling” on page 179
“Threading” on page 179
“Android” on page 180
“iOS” on page 186

MEven Header
Project Properties Reference
Using webMethods Mobile Designer Version 10.3 170
Debuggingproject.handset.log.debug.filename
Provides the file name to use for the debug log file in which to log debug informationwhen the application uses the debug function call.
Note: To have debug statements wrien to an output file, you must set theproject.handset.log.debug.to.file property to true.
Platforms iOS
Value File name for the debug log file
Default LOG_debug.txt
project.handset.log.debug.to.file
Specifies whether you want the application to write debug statements to an output filewhen debugging the application through the Mobile Designer Multi Build dialog box.
Platforms iOS
Value true to write debug statements to an output file.
By default, the output file name is LOG_debug.txt. You can specifyan alternate name using the “project.handset.log.debug.filename” onpage 170 property.
false if you do not want the application to write debug statements toan output file.
Default false
Extra Libraries and Custom Codeproject.handset.hook.startup
Specifies whether you want Mobile Designer to invoke the startup hook, which is anative function, when the application is starting before the J2ME initialization occurs.
When creating the code to invoke, implement the following function in your native codeor patch in the created StubInfo.cpp file:void hookStartUp(void);

MOdd Header
Project Properties Reference
Using webMethods Mobile Designer Version 10.3 171
Caution: Mobile Designer invokes the native code before seing up the J2MEenvironment, for example, before initializing static data or generating systemoutput streams. Do not include code related to the J2ME library or to themobile application in the native code.
Platforms All
Value true to invoke native code before the J2ME application code isstarted.
Mobile Designer invokes hookStartUp() at the beginning of theapplication in these locations:
In iOS at the start of applicationDidFinishLaunching
On all other platforms at the start of main or its equivalent
false if you do not want Mobile Designer to invoke native codebefore the J2ME application code is started.
Default false
project.handset.push.notifications
Specifies whether the application receives push notifications.
Note: Use of this property requires the Wireless Messaging API (WMA) library forJ2ME and the project.handset.uses.WMA property set to true.
Platforms AndroidiOS
Value true if the application receives push notifications.
false if the application does not receive push notifications.
Default false
project.handset.uses.camera
Specifies whether the application uses Mobile Media API (MMAPI) to access the camerafunctionality.
Platforms All
Value true if the application uses MMAPI to access the camera.

MEven Header
Project Properties Reference
Using webMethods Mobile Designer Version 10.3 172
false if the application does not use MMAPI to access the camera.
Default false
project.handset.uses.Database
Specifies whether your mobile application uses the com.softwareag.mobile.runtime.databaseclasses, which Mobile Designer provides. For more information, see “Run-TimeDatabase Classes” on page 51.
Platforms All
Value true if your application uses the database classes.
false if your application does not use the database classes.
Default false
Note: If you specify a value for the mobilesupportclient.runtime.dir property, thevalue of this property is automatically set to true because the Mobile SupportClient library requires the com.softwareag.mobile.runtime.database classes.
project.handset.uses.FCPIM
Specifies whether your application uses the Personal Information Management (PIM)library for J2ME.
Platforms AndroidiOS
Value true if your application uses the PIM library.
When you set this property to true, necessary permissions orrequests are added to native builds.
false if your application does not use the PIM library.
Note: If your applications uses the PIM library, but you set thisproperty to false (or it defaults to false), your applicationwill fail to compile.
Default false

MOdd Header
Project Properties Reference
Using webMethods Mobile Designer Version 10.3 173
project.handset.uses.Location
Specifies whether an application requires the Location API library for J2ME to compileand that you want Mobile Designer to initialize static values for the library.
Platforms All
Value true if an application uses the Location library.
false if an application does not use the Location library. Specifyingfalse reduces the final size of your project’s binaries.
Important: If an application uses the Location library, and you set theproperty to false, Mobile Designer cannot compile theapplication.
Default true
project.handset.uses.Sensors
Specifies whether an application requires the Mobile Sensor API library for J2ME tocompile and that you want Mobile Designer to initialize static values for the library.
Platforms All
Value true if the application uses the Sensors library.
false if the application does not use the Sensors library. Specifyingfalse reduces the final size of your project’s binaries.
Important: If the application uses the Sensors library, and you set theproperty to false, Mobile Designer cannot compile theapplication.
Default true
project.handset.uses.WebServices
Specifies whether an application requires the Web Service API library.
Note: The JSON library is also part of the Web Service API library.
Platforms All
Value true if the application uses the Web Service API library.

MEven Header
Project Properties Reference
Using webMethods Mobile Designer Version 10.3 174
false if the application does not use the Web Service API library.
Default false
project.handset.uses.WMA
Specifies whether an application requires the Wireless Messaging API (WMA) libraryfor J2ME to compile and that you want Mobile Designer to initialize static values for thelibrary. WMA enables sending Short Message Service (SMS), Multimedia MessagingService (MMS), and Cell Broadcast Service (CBS) formats.
Platforms All
Value true if the application uses the WMA library.
false if the application does not use the WMA library. Specifyingfalse reduces the final size of your project’s binaries.
Important: If the application uses the WMA library, and you set theproperty to false, Mobile Designer cannot compile theapplication.
Default true
Java Classescpp.no.extraexceptions
Specifies whether you want the application to perform the Java-required NullPointerand ArrayIndexOutOfBounds exception checks for every array access.
Platforms All
Value true if an application code-base is safe and does not need Java-required NullPointer and ArrayIndexOutOfBounds exceptionchecks.
false if you want an application to perform the Java-requiredNullPointer and ArrayIndexOutOfBounds exception checks.
Default false

MOdd Header
Project Properties Reference
Using webMethods Mobile Designer Version 10.3 175
project.javac.encoding
Specifies the character encoding used in your application’s Java source code.
Note: Mobile Designer also supports other Java supported character sets such asUTF-8 and SJIS for the Shift-JIS, Japanese character set.
Platforms All
Value Character encoding
Default 8859_1 for ISO 8859-1, Latin Alphabet No. 1
Makefile Additions
Note: Makefiles are now deprecated and will be removed in a later version ofMobile Designer. At this point, Mobile Designer will instead make use ofthe generated project file to build the mobile application (i.e. Xcode for iOSbuilds).
Use the Makefile Additions properties to link to third-party native-platform librariesand/or to include more complex native alterations to your applications.
Note: Unless indicated otherwise, Mobile Designer duplicates your seings in thecorresponding Visual Studio or Xcode project.
project.cpp.additional.compiler.options
Specifies extra compiler flags or seings that you want Mobile Designer to include whencompiling an application.
Note: Mobile Designer does not include the flags and seings in the Visual Studio orXcode project.
Platforms All
Value Flags and seings as required by the specified makefile for the targetplatform
Default An empty String

MEven Header
Project Properties Reference
Using webMethods Mobile Designer Version 10.3 176
project.cpp.additional.defines
Specifies #define statements that you want Mobile Designer to use when compiling anapplication.
Platforms All
Value A semicolon-separated list of #define statements
Default An empty String
project.cpp.additional.includes.path
Identifies the name of an Ant path that includes a list of folders or files that you wantMobile Designer to reference for all C++ #include statements in a project.
Platforms All
Value Name of the Ant path
Default An empty String
project.cpp.additional.libs.path
Identifies the name of an Ant path that includes a list of folders containing additionallibraries used in a project.
Platforms All
Value Name of the Ant path
Default null
project.cpp.additional.libs.post
Identifies libraries to add to the end of the referenced library list in the makefile. Thelibraries you specify with this property are placed after the default libraries that MobileDesigner automatically includes.
Platforms All
Value A semicolon-separated list of libraries
MOdd Header
Project Properties Reference
Using webMethods Mobile Designer Version 10.3 177
Do not include file extensions or makefile-specific encoding. MobileDesigner will set the appropriate value for a platform. For example,if you set project.cpp.additional.libs.post to mylib1;mylib2,Mobile Designer might change the value to "-lmylib1 –lmylib2" on oneplatform, and "mylib1.lib mylib2.lib" on a different platform.
Default An empty String
project.cpp.additional.libs.pre
Identifies libraries to add to the beginning of the referenced library list in the makefile.The libraries you specify with this property are placed before the default libraries thatMobile Designer automatically includes.
Platforms All
Value A semicolon-separated list of libraries
When specifying the libraries, do not include file extensionsor makefile-specific encoding.Mobile Designer will set theappropriate value for a platform. For example, if you setproject.cpp.additional.libs.pre to mylib1;mylib2, MobileDesigner might change the value to "-lmylib1 –lmylib2" on oneplatform, and "mylib1.lib mylib2.lib" on a different platform.
Default An empty String
project.cpp.additional.linker.options
Specifies linker flags or seings that you want Mobile Designer to include whengenerating the final binary and linking the compiled code with the defined external C++libraries.
Note: Mobile Designer does not include the flags and seings that you specify in theMicrosoft Visual Studio or Apple Xcode project.
Platforms All
Value Flags and seings as required by the specified makefile for the targetplatform
Default An empty String

MEven Header
Project Properties Reference
Using webMethods Mobile Designer Version 10.3 178
project.handset.custom.stubfolder
Specifies a stub makefile and/or project template to override those that Mobile Designersupplies.
Platforms iOS
Value Path to the copy of the stub makefile and/or project template you wantto use
Default An empty String
Optimizationproject.in.code.manifest
Specifies whether you want Mobile Designer to delete the META-INF folder, whichdetermines how your application can access the manifest properties.
Platforms All
Value true to keep the META-INF folder. The application can manuallyaccess the manifest.mf file using the following path:
/META-INF/MANIFEST.MF
false if you want Mobile Designer to delete the META-INFfolder. The application can access the manifest properties using theMIDlet.getAppProperty method.
Default true
project.runtime.http.connection.timeout.ms
Specifies the number of milliseconds an application waits for an HTTP or HTTPSconnection before assuming a timeout has occurred.
Platforms AndroidiOS
Value Numeric value
Default The default value is based on the platform.

MOdd Header
Project Properties Reference
Using webMethods Mobile Designer Version 10.3 179
Platform Default
AndroidiOS
15000
Screen and Display Handlingproject.runtime.statusbar.visible
Specifies whether you want the application to leave room so that a device's status bardisplays. The status bar is where a device displays information, such as baery strength,signal strength, and the time.
Platforms AndroidiOS
Value true if you want the status bar visible.
false if you do not want the status bar visible.
Default Depends on whether the application uses the Native user interfacelibrary (com.softwareag.mobile.runtime.nui) for its user interface:
If an application uses the NativeUI library, the default is true.
If an application does not use the NativeUI library, the default isfalse.
Threadingproject.handset.thread.stacksize
Specifies the number of bytes to allocate for the stack when the application creates athread.
Platforms All
Value Numeric value
Default The default is based on the platform:
Platform Default

MEven Header
Project Properties Reference
Using webMethods Mobile Designer Version 10.3 180
iOS 524288
Other platforms 32768
Androidandroid.apk
Specifies a file name that Mobile Designer uses to override the name for the Androidapplication package file.
Platforms Android
Value File name for the Android application package file
Default File name as specified by the Multi Build dialog
android.backkey.valid
Specifies the action to take when the user presses the Back key, that is, whether to handlethe Back key like all other keys or to terminate the application.
Platforms Android
Value true to use the Back key like other keys.
false to terminate the application.
Default true
android.manifest.permissions
Specifies permissions that you want Mobile Designer to include in theAndroidManifest.xml file.
Platforms Android
Value A semicolon-separated list of permissions
Default An empty String

MOdd Header
Project Properties Reference
Using webMethods Mobile Designer Version 10.3 181
android.manifest.xml
Specifies an override for the default AndroidManifest.xml file that Mobile Designergenerates.
Platforms Android
Value The path to an alternate XML file to use instead of the defaultAndroidManifest.xml file
Default An empty String
android.min.sdk.version
Specifies the value that you want Mobile Designer to insert into theAndroidManifest.xml file for the minSdkVersion seing, which defines the Androidapplication programming interface (API) level.
Platforms Android
Value Value for minSdkVersion
Default 4
android.orientation.forced
Specifies whether you want the application to force the screen orientation to portraitor landscape, or whether you want the application to allow the screen to automaticallyrotate based on the device’s orientation.
Platforms Android
Value portrait to force the screen display to use portrait mode.
landscape to force the screen display to use landscape mode.
An empty string to allow the screen to automatically rotate.
Default An empty String
android.package
Specifies the name of the Java package that Mobile Designer uses for Android builds.
MEven Header
Project Properties Reference
Using webMethods Mobile Designer Version 10.3 182
Platforms Android
Value Name of the Java package to use for Android builds
Default com.softwareag.mobile.runtime
android.package.name
Specifies a String to override the name for the Android application package (APK) file.
Platforms Android
Value String to use for the APK file name
Default Value of the android.package property with the selected.jarnameappended to it
For example, if android.package iscom.softwareag.mobileruntime and selected.jarnameis myproject, the APK name would default tocom.softwareag.mobileruntime.myproject.
android.studio.gradle.android.plugin.version
Specifies the version of the Gradle plugin to use when building Android projects. If thisvalue is changed, it may also require a change in the version of Gradle that is used. Thiscan be set with the additional property android.studio.gradle.distribution.url.
Platforms Android
Value An appropriate version number (e.g. 1.3.2).
Default 2.2.2
android.studio.gradle.distribution.url
Indicates the URL of the Gradle version to use to build this Android Studioproject. Different versions of the Android builder for Gradle (set withandroid.studio.gradle.android.plugin.version) require different versions ofGradle. If the value is unset, then the value used in the project's gradle/wrapper/gradle.properties file is the default value specified by the current install of AndroidStudio.

MOdd Header
Project Properties Reference
Using webMethods Mobile Designer Version 10.3 183
Platforms Android
Value An appropriate URL.
Default unset. At the time of writing, this leads to Android Studio indicatinga value of https://services.gradle.org/distributions/gradle-2.14.1-all.zip.
android.studio.selected.buildtools.version
This property will automatically point to the highest version of Android build toolsprovided with the Android SDK. It will be autodetected at compile-time.
Platforms Android
Value Name of any valid folder in the build-tools folder delivered with theAndroid SDK. Usually of the form 25.0.1 or android-22.0.0.
Default Will be set to the highest value available, taking the target sdk versioninto account.
android.studio.support.dependencies.root.dir
Gives the relative path from the root of the Android SDK installation to the Androidsupport repository.
Platforms Android
Value Relative path pointing to the support folder.
Default extras/android/m2repository/com/android/support
android.studio.selected.dependency.version.appcompatv7
This property will automatically point to the highest version of the v7 appcompatibility library installed in the Android SDK. It will be autodetectedat compile-time, taking the android.target.sdk.version property intoaccount. So, if android.target.sdk.version is 23, possible values forandroid.studio.selected.dependency.version.appcompatv7 will be of the form23.x.y.
Platforms Android

MEven Header
Project Properties Reference
Using webMethods Mobile Designer Version 10.3 184
Value Name of any valid version folder in the appcompat-v7 repositorydelivered with the Android SDK. Usually of the form 23.4.0.
Default Will be set to the highest value available, taking the target sdk versioninto account.
android.studio.selected.dependency.version.design
This property will automatically point to the highest version of the designsupport library installed in the Android SDK. It will be autodetected atcompile-time, taking the android.target.sdk.version property intoaccount. So, if android.target.sdk.version is 23, possible values forandroid.studio.selected.dependency.version.design will be of the form 23.x.y.
Platforms Android
Value Name of any valid version folder in the design support repositorydelivered with the Android SDK. Usually of the form 23.4.0.
Default Will be set to the highest value available, taking the target sdk versioninto account.
project.additional.libs.path
Specifies the name of an Ant path that includes a list of folders or direct file locationswhere required native-shared libraries are located.
Platforms Android
Value Name of an Ant path
Default project.cpp.additional.libs.path
project.android.sdk.version.override
Specifies the version of the SDK that you want to use for compiling.
Platforms Android
Value Version of the version of the SDK you want to use for compiling
Default 21

MOdd Header
Project Properties Reference
Using webMethods Mobile Designer Version 10.3 185
android.push.additional.icon.pre21api
If set, nominates an additional icon that will be copied to the application as res/raw/pushiconpre21.png and used as the in-application notification icon for incoming PushMessages for devices with device API earlier than 21. If this parameter is unset (default),then the the icon set in "android.push.additional.icon" or the application's main icon willbe used instead.
Platforms Android
Value Icon res/raw/pushiconpre21.png
Default not set
android.push.message.key
Determines the most important key within an incoming Push Message. This isthe one that is returned to the application as the "primary message text" throughMessageConnectionHandler.receivedTextMessage().
Platforms Android
Value Primary message text
Default collapse_key
android.push.additional.icon
If set, nominates an additional icon that will be copied to the applicationas res/raw/pushicon.png and used as the in-application notification iconfor incoming Push Messages. If this parameter is unset, then the icon set in"android.push.additional.icon.pre21api" or the application's main icon will be usedinstead.
Platforms Android
Value Icon res/raw/pushicon.png
Default not set
android.push.icon.reference
This should not normally need to be set by the user. It will point to the icon used forPush Notifications within the application. Seing android.push.additional.icon will

MEven Header
Project Properties Reference
Using webMethods Mobile Designer Version 10.3 186
automatically change this value to "R.raw.pushicon". Advanced usage may include theuse of ternary operators or method calls to specify an int value from R.java.
Platforms Android
Value R.raw.pushicon
Default R.mipmap.icon
iOSios.app.delegate.name
Specifies the name of the application delegate that you want the application to use.
Platforms iOS
Value Name of an alternative delegate application
Default xyzApp
ios.background.music
Specifies whether the application allows users to continue playing their audio in thebackground while the application is running.
Platforms iOS
Value true to allow the user to play music, which is not a part of theapplication, in the background while the application is running.
Specifying true also ensures that the audio supports the iPhone'sRing/Silent switch seing.
false if you do not want to allow a user to play music while theapplication is running.
Default false
ios.deployment.target
Specifies the minimum iOS firmware version that the application supports.

MOdd Header
Project Properties Reference
Using webMethods Mobile Designer Version 10.3 187
Platforms iOS
Value Version number
When specifying a version, use the number only, such as 6.0.
Default 6.0
ios.info.plist.output.format
Specifies the format you want Mobile Designer to use for the final packaged Info.plist.
Platforms iOS
Value binary to maintain the Info.plist file in binary format.
xml to maintain the Info.plist file in XML format.
Default binary
ios.retained.png.list
Specifies a list of portable network graphic (PNG) files that you want Mobile Designer toretain a .png file rather than generated _png files.
Platforms iOS
Value A semicolon-separated list of PNG files
Default An empty String
ios.sdk.version
Specifies the version of the iOS SDK that you want Mobile Designer to use whencompiling the application.
Platforms iOS
Value Version number of the iOS SDK
Default Latest version of the SDK
Mobile Designer looks for the installed iOS SDK versions and selectsthe version with the highest version number

MEven Header
Project Properties Reference
Using webMethods Mobile Designer Version 10.3 188
ios.use.retina.display
Specifies whether the application supports the high-resolution retina display of an iOSdevice.
Platforms iOS
Value true if the application supports the high-resolution retina display.
false if the application does not support the high-resolution retinadisplay.
Default false
Cross-Product Integration PropertiesThe cross-product integration properties configure how Mobile Designer works withother products in the webMethods product suite.
mobilesupportclient.runtime.dir
Specifies whether to include the Mobile Support Client library in a mobile project. Themethods in this library facilitate data synchronization between mobile devices and back-end databases by initiating synchronization requests with webMethods Mobile Support.
For more information about webMethods Mobile Support, see Developing DataSynchronization Solutions with webMethods Mobile Support. For more information about theMobile Support Client library, see webMethods Mobile Support Client Java API Reference.
Note: The Mobile Support Client library requires thecom.softwareag.mobile.runtime.database classes. As a result, when you seta value for the mobilesupportclient.runtime.dir property, theproject.handset.uses.Database is automatically set to true to indicate that themobile application uses the com.softwareag.mobile.runtime.database classes.
Platforms All
Values Root directory where the Mobile Support Client librarymdlibrary.properties file and src folder reside.
Example:<property name=”mobilesupportclient.runtime.dir” value=”c:/SoftwareAG/Mobile/SupportClient” />
Default None.

MOdd Header
Project Properties Reference
Using webMethods Mobile Designer Version 10.3 189
Device-Specific PropertiesThe device-specific properties define information for specific devices in your project.Store these properties in your project’s targets folder in the target device file for thedevice to which the property pertains, device_name .xml.
project.handset.device_name .langgroups
Specifies one or more language groups that indicate the language(s) that your mobileapplication supports for the device indicated in the property name.
When specifying the property, replace device_name in the property name with thename of a specific device. The value for a specific device is the value that you selectedfrom the Choose your handset list in the Add Handset dialog when you added the deviceto the project. For example, for an Apple iPhone 5 phone, the property name is:project.handset.IOS_Apple_iPhone5.langgroup
When you added the device to the project, Mobile Designer automatically added thisproperty to the target device file in your project’s targets folder.
project_folder /targets/device_file .xml
Mobile Designer set the value of the property to the language groups you specified inthe Language Groups field of the Add Handset dialog. For more information, see “Addinga Device to a Project” on page 91.
You can update the property if you want to add, change, or remove language codes. Youcan specify the language groups you define with the project.langgroup.group_name property.
Platforms All
Value One or more language groups. To specify multiple language groups,create a semicolon-separated list.
Example
Suppose you use the project.langgroup.group_name property todefine the following language groups:<property name="project.langgroup.AMERICAN" value="en;fr;es"/> <property name="project.langgroup.EUROPEAN" value="en;fr;it;de;es"/> <property name="project.langgroup.ASIAN" value="zh;ja"/>
To specify that the application supports the American and Europeanlanguage groups for the IOS_Apple_iPhone5 device, use the following:<property name="project.handset.IOS_Apple_iPhone5.langgroup" value="AMERICAN;EUROPEAN"/>
Default No default.
MEven Header
Project Properties Reference
Using webMethods Mobile Designer Version 10.3 190
This property must have a value.
project.manifest
Specifies the location of the manifest.mf file for a device.
Platforms All
Value Absolute path to the manifest file.
Default The default is based on the specific device and is set in the device’sdevice profile. You can find the device profiles in the followinglocation:
Mobile Designer_directory/Devices
Hook Point PropertiesThe hook point properties provide the names of Ant targets that you create and that youwant Mobile Designer to execute when it is executing Ant targets that are provided withMobile Designer, for example, the +Multi-Build Ant target. Using hookpoints allows youto customize Mobile Designer processes. For more information about hookpoints, see“Creating Custom Ant Scripts to Run at Predefined Hook Points” on page 125.
project.hookpoint.target.prebuildresources
Specifies an Ant target that you created. Mobile Designer calls the Ant target you specifybefore it executes the Resource Handler while processing the executing the +Multi-Build,+Multi-Build-Last, +Activate-Handset, +Re-Activate-Handset, or +Run-Phoney-With-Re-Activation Anttasks.
Platforms All
Value Name of an Ant Target you defined
Default None. If you do not include this property, Mobile Designer does notinvoke a hook point.
project.hookpoint.target.postbuildresources
Specifies an Ant target that you created. Mobile Designer calls the Ant target you specifyafter it executes the Resource Handler while processing the +Multi-Build, +Multi-Build-Last,+Activate-Handset, +Re-Activate-Handset, or +Run-Phoney-With-Re-Activation Ant task.

MOdd Header
Project Properties Reference
Using webMethods Mobile Designer Version 10.3 191
Platforms All
Value Name of an Ant Target you defined
Default None. If you do not include this property, Mobile Designer does notinvoke a hook point.
project.hookpoint.target.precompilation
Specifies an Ant target that you created. Mobile Designer calls the Ant target you specifybefore it performs platform-specific compilation for each build while processing the +Multi-Build or +Multi-Build-Last Ant task.
Platforms All
Value Name of an Ant Target you defined
Default None. If you do not include this property, Mobile Designer does notinvoke a hook point.
project.hookpoint.target.postcompilation
Specifies an Ant target that you created. Mobile Designer calls the Ant target you specifyafter it performs platform-specific compilation for each build while processing the +Multi-Build or +Multi-Build-Last Ant task.
Platforms All
Value Name of an Ant Target you defined
Default None. If you do not include this property, Mobile Designer does notinvoke a hook point.
project.hookpoint.target.postcrosscompiler
Specifies an Ant target that you created. Mobile Designer calls the Ant target youspecify after the cross compiler has converted the project's source to your build's targetlanguage.
Note: Mobile Designer only calls this hook point for cross-compiled builds.
Platforms All

MEven Header
Project Properties Reference
Using webMethods Mobile Designer Version 10.3 192
Value Name of an Ant Target you defined
Default None. If you do not include this property, Mobile Designer does notinvoke a hook point.
project.hookpoint.target.premakefilegeneration
Specifies an Ant target that you created. Mobile Designer calls the Ant target you specifybefore it generates the makefile and platform-specific project. Examples of platform-specific projects are an Apple Xcode project for the iOS platform, or an Eclipse projectfor platforms like Android.
Note: Mobile Designer only calls this hook point for cross-compiled builds.
Platforms All
Value Name of an Ant Target you defined
Default None. If you do not include this property, Mobile Designer does notinvoke a hook point.
project.hookpoint.target.prepatch
Specifies an Ant target that you created. Mobile Designer calls the Ant target you specifyafter it applies the patches to your code.
Note: Mobile Designer only calls this hook point for cross-compiled builds.
Platforms All
Value Name of an Ant Target you defined
Default None. If you do not include this property, Mobile Designer does notinvoke a hook point.
project.hookpoint.target.postpackaging
Specifies an Ant target that you created. Mobile Designer calls the Ant target you specifyafter it generates a platform-specific build bundle.
The output of the packaging process varies from platform to platform. For example, forAndroid builds, the output is in an application package (apk) file.

MOdd Header
Project Properties Reference
Using webMethods Mobile Designer Version 10.3 193
After Mobile Designer executes the Ant target specified by theproject.hookpoint.target.postpackaging property, if appropriate for the platform,Mobile Designer performs any code signing.
Note: Mobile Designer only calls this hook point for cross-compiled builds.
Platforms All
Value Name of an Ant Target you defined
Default None. If you do not include this property, Mobile Designer does notinvoke a hook point.
project.hookpoint.target.postbuild
Specifies an Ant target that you created. Mobile Designer calls the Ant target you specifyafter it packages and signs a build.
Platforms All
Value Name of an Ant Target you defined
Default None. If you do not include this property, Mobile Designer does notinvoke a hook point.
project.hookpoint.target.postmultibuild
Specifies an Ant target that you created. Mobile Designer calls the Ant target you specifyafter it creates all the builds you selected in the Multi-Build dialog.
Platforms All
Value Name of an Ant Target you defined
Default None. If you do not include this property, Mobile Designer does notinvoke a hook point.
Multi-Build Selection PropertiesThe Multi-Build selection properties contain values that you selected when building theproject. Some of the properties are also set when you activate a device in the project.

MEven Header
Project Properties Reference
Using webMethods Mobile Designer Version 10.3 194
Mobile Designer sets these properties based on the selections you make in the MultiBuild or Activate Handset dialogs. The properties are not set in either the _defaults_.xmlfile or a target device file. The properties are not saved to any file. As a result, you cannotoverride the seings.
You can use the properties in your Ant scripts so that at run time it can determineinformation about the current build Mobile Designer is processing or the current devicebeing activated.
selected.handset
Specifies the device for which Mobile Designer is building the application or thedevice Mobile Designer is activating. In other words, the value is the name of thedevice you selected in the Multi Build or Activate Handset dialog, for example,IOS_Apple_iPhone5. Mobile Designer sets this property.
Platforms All
Value Device you selected in the Multi Build or Activate Handset dialog
Default n/a
selected.jarname
Specifies the name of the JAR file that is listed in the Filename field of the Multi Builddialog, for example, NativeUIDemo_iPhone5_DE. This is the JAR file name that MobileDesigner uses for the build. Mobile Designer sets this property.
Platforms All
Value JAR file name Mobile Designer is using for the build of the project
Default n/a
selected.langgroup
Specifies the language you selected in the Multi Build or Activate Handset dialog. Thisis the language for which Mobile Designer is building the application or activating adevice. Mobile Designer sets this property.
Platforms All
Value Language you selected in the Multi Build or Activate Handset dialog
Default n/a

MOdd Header
Project Properties Reference
Using webMethods Mobile Designer Version 10.3 195
selected.platform
Specifies the name of the platform that is listed in the Platform field of the Multi Builddialog, for example, ios-app. This is the platform for which Mobile Designer is creatingthe build. Mobile Designer sets this property.
Platforms All
Value Platform for which Mobile Designer is creating the build of the project
Default n/a
selected.target
Specifies the type of executable being built. Mobile Designer sets this property using thevalue from the Target field of the Multi Build dialog, for example, release.
Platforms All
Value Type of executable listed in the Target field in the Multi Build dialog
Default n/a
selected.version
Specifies the version number for the application that you specified in the Multi Builddialog, for example, 1.0.0. Mobile Designer sets this property.
Platforms All
Value Version number you specified in the Multi Build dialog
Default n/a
Phoney PropertiesThe Phoney properties customize the use of Phoney for the project.
phoney.base.params
Specifies Phoney startup options. The startup options you specify with this property areused when you start Phoney via Software AG Designer.

MEven Header
Project Properties Reference
Using webMethods Mobile Designer Version 10.3 196
Platforms All
Value One or more of the startup options. For a list of the startup options, see“Phoney Startup Options” on page 138.
Default -r -i -s 1 -rs 1 -so -ai -p ${project.temp.dir.root}/_build_info_.txt
Project Language PropertiesThe project definition properties define seings for your project.
project.langgroup.group_name
Defines a language group that specifies one or more languages that your applicationsupports. When specifying the property, replace group_name with the name you wantto give the language group. Set the value of the property to one or more language codesthat indicate the language(s) in the group. You can use this property multiple times todefine multiple language groups.
For example, you might want to set up three language groups to define languages fordifferent territories, an American territory, European territory, and Asian territory. Todo so, specify the following:<property name="project.langgroup.AMERICAN" value="en;fr;es"/> <property name="project.langgroup.EUROPEAN" value="en;fr;it;de;es"/> <property name="project.langgroup.ASIAN" value="zh;ja"/>
When displaying the Multi Build dialog for the project, Mobile Designer lists eachlanguage group. You can then select from those language groups to identify thelanguages for which you want to create a build.
When specifying the project.handset.device_name.langgroups property to identifythe language groups that a specific device supports, you set the value to one or morelanguage groups you define using this project.langgroup.group_name property.
Platforms All
Value One or more of the following language codes to define the languagesin the group. To specify multiple languages, use a semicolon-separatedlist.
Default None.
Note: You must specify this property for a project.

MOdd Header
Project Properties Reference
Using webMethods Mobile Designer Version 10.3 197
Resource Handler PropertiesThe resource handler properties provide information about the project’s resourcehandler. For more information about how you define the resource handler for a project,see “Defining Resources for a Mobile Application Project” on page 73.
debug.remember.resource.names
Specifies whether you want the Mobile Designer to record the names of the resourcesincluded in the build.
Platforms All
Value true if you want to record the names of the resources.
When the property is set to true, the Mobile Designer run-timedebug output references these names directly, instead of the IDnumbers.
Seing the property to true results in extra code and a larger datapool resulting from all the resource names that are stored in the finalbinary.
false if you do not want to record the names of the resources.
You should set the property to false when preparing a release build.
Default false
project.audio.file.extensions
Specifies the file extension required for the audio files that a device supports.
Platforms All
Value File extension for the audio, for example .mp3, .wav, or .mid.
Default The default is based on the specific device and is set in the device’sdevice profile. You can find the device profiles in the followinglocation:
Mobile Designer_directory/Devices
project.audio.spec
Specifies the style of audio that a device supports.

MEven Header
Project Properties Reference
Using webMethods Mobile Designer Version 10.3 198
Platforms All
Value Style of audio, for example mp3, wav, or midi.
Default The default is based on the specific device and is set in the device’sdevice profile. You can find the device profiles in the followinglocation:
Mobile Designer_directory/Devices
project.compiled.resources.info.format
Specifies the file format that you want Mobile Designer to use for the_compiled_resources file. Mobile Designer saves this file in a project’s _temp_ directory.
Note: Set this property in the project’s _default_.xml file, and not in a specific targetdevice file, target_name .xml.
Platforms All
Value txt if you want Mobile Designer to create a text formatcompiled_resources file (_temp_\_compiled_resources.txt).
xml if you want Mobile Designer to create an XML formatcompiled_resources file (_temp_\_compiled_resources.xml).
Default txt
project.jar.midlet.icon.spec
Specifies the icon(s) to use for the application’s MIDlet-icon for a specific device.
Platforms All
Value Name of the portable network graphic (.png) file(s) to use for theapplication’s MIDlet-icon.
Use this property to include the required icon(s) so that the icon foryour application when it is installed on the target devices meets yourcompany and/or application branding requirements. A best practiceis to name the icons so that the name includes the size of the icon, forexample icon-64x64-24bit.png. Store the image files in a subfolder thatyour resource handler can easily reference.

MOdd Header
Project Properties Reference
Using webMethods Mobile Designer Version 10.3 199
Default The default is based on the specific device and is set in the device’sdevice profile. You can find the device profiles in the followinglocation:
Mobile Designer_directory/Devices
In the device profiles that Mobile Designer provides, the providedicons are Software AG and Mobile Designer icons.
project.java.reshandler.name
Specifies the Java package/class name of the resource handler class you created for yourproject. For more information about creating a resource handler for your project, see“Coding the Resource Handler” on page 74.
Platforms All
Value Name the Resource Handler class name.
Default None.
Note: You must specify this property for a project.
project.reshandler.additional.libs.path
Specifies the Ant path to additional libraries that your project’s resource handlerrequires. This is not an Ant property. Use the following format to specify the Ant path:<path id="project.reshandler.additional.libs.path"> <pathelement path="path "/> </path>
For example:<path id="project.reshandler.additional.libs.path"> <pathelement path="${basedir}/reshandler/libs"/> </path>
Platforms All
Value Path to the additional libraries for the project’s resource handler
Default None.
Note: If you use additional libraries for the resource handler, you mustspecify this Ant path for a project.

MEven Header
Project Properties Reference
Using webMethods Mobile Designer Version 10.3 200
project.reshandler.src.path
Specifies the path to the project’s resource handler script and any associated classes. Inother words, the path to the Java class you specify with the project.java.reshandler.nameproperty.
This is not an Ant property. Use the following format to specify the Ant path:<path id="project.reshandler.src.path"> <pathelement path="path "/> </path>
For example:<path id="project.reshandler.additional.libs.path"> <pathelement path="${basedir}/reshandler"/> </path>
Platforms All
Value Path to the Java class specified by the project.java.reshandler.nameproperty
Default None.
Note: You must specify this Ant path for a project.
project.resource.dir.root
Specifies the path to the top-level folder that contains the resources (image files, etc.) foryour project. For example, you might have a resources folder that contains subfolderswith the resources:MyProject resources graphics icons text
For this example, set the property to point to the top-level folder, "${basedir}/resources".For more information about how to specify resources for your project, see “SeingProject Properties for the Resource Handler” on page 78.
Platforms All
Value Path to the top-level folder that contains the project resource files.
Default None.
Note: You must specify this property for a project.
MOdd Header
Project Properties Reference
Using webMethods Mobile Designer Version 10.3 201
Run-Time Classes PropertiesThe run-time classes properties customize how the project uses the run-time classes thatMobile Designer provides.
mobiledesigner.runtime.core.class.camera
Overrides the value that Mobile Designer sets for how mobile application uses a device’scamera.
Note: The com.softwareag.mobile.runtime.media.CameraHandler class uses this property. Formore information, see “Run-Time Media Classes” on page 52.
Platforms All
Value none if your application does not use the camera, or specific devicesthat your project supports do not support a camera.
jsr135 specifies your application uses the Mobile Media API(MMAPI) package for J2ME devices that support the camera.
Default The default is based on the specific device and is set in the device’sdevice profile. You can find the device profiles in the followinglocation:
Mobile Designer_directory/Devices
mobiledesigner.runtime.core.class.comms.messageconnection
Overrides the value that Mobile Designer sets for whether the application uses SMSmessaging.
Note: The com.softwareag.mobile.runtime.comms.MessageConnectionHandler class uses thisproperty. For more information, see “Run-Time Comms Classes” on page 51.
Platforms All
Value none if your application or specific devices that your project supportsare not support SMS messaging.
wma if your mobile application is using the J2ME Wireless MessagingAPI for SMS messaging.
MEven Header
Project Properties Reference
Using webMethods Mobile Designer Version 10.3 202
Default The default is based on the specific device and is set in the device’sdevice profile. You can find the device profiles in the followinglocation:
Mobile Designer_directory/Devices
mobiledesigner.runtime.core.class.datatypes
Overrides the value that Mobile Designer sets to determine which primitivedata types can be read when parsing your resources with the run-timecom.softwareag.mobile.runtime.storage.ResourceDataTypes class.
Note: The com.softwareag.mobile.runtime.storage.ResourceDataTypes class uses thisproperty. For more information, see “Run-Time Storage Classes” on page 54.
Platforms All
Value cldc11 specifies your mobile application uses CLDC 1.1.
CLDC 1.1 supports integer numbers, float and double.
Default The default is based on the specific device and is set in the device’sdevice profile. You can find the device profiles in the followinglocation:
Mobile Designer_directory/Devices
mobiledesigner.runtime.core.class.serialize
Overrides the value that Mobile Designer sets forcom.softwareag.mobile.runtime.serialize.Serializer class.
Note: The com.softwareag.mobile.runtime.serialize.Serializer class uses this property. Formore information, see “Run-Time Serializer Class” on page 53.
Platforms All
Value cldc11 specifies your mobile application uses CLDC 1.1.
CLDC 1.1 supports integer numbers, float and double.
Default The default is based on the specific device and is set in the device’sdevice profile. You can find the device profiles in the followinglocation:
Mobile Designer_directory/Devices

MOdd Header
Project Properties Reference
Using webMethods Mobile Designer Version 10.3 203
Run-Time Code Compilation PropertiesThe run-time code compilation properties customize how Mobile Designer compilesyour project.
project.runtime.additional.classes.path
Specifies the Ant path to additional precompiled classes to include when building theproject. This is not an Ant property. Use the following format to specify the Ant path:<path id="project.runtime.additional.classes.path"> <pathelement path="path "/> </path>
For example:<path id="project.runtime.additional.classes.path"> <pathelement path="${basedir}/src/classes"/> </path>
Platforms All
Value Path to the folder that contains the additional precompiled classes.
Default None.
Note: If you use additional precompiled classes, you must specify thisAnt path for a project.
project.runtime.additional.stubs.path
Specifies the Ant path to additional stubs that you want Mobile Designer to use whencompiling the run-time source code. This is not an Ant property. Use the followingformat to specify the Ant path:<path id="project.runtime.additional.stubs.path"> <pathelement path="path "/> </path>
For example:<path id="project.runtime.additional.stubs.path"> <pathelement path="${basedir}/stubs"/> </path>
Important: This path is used in combination with default classpath entries that MobileDesigner defines. If you set this Ant path, be careful to avoid any duplicateclass clashes.
Platforms All

MEven Header
Project Properties Reference
Using webMethods Mobile Designer Version 10.3 204
Value Path to the folder that contains the stubs.
Default None.
Note: If you want to use additional stubs, you must specify this Antpath for a project.
project.runtime.project.src.path
Specifies the Ant path to the run-time code to include in the build of the project. This isnot an Ant property. Use the following format to specify the Ant path:<path id="project.runtime.project.src.path"> <pathelement path="path "/> </path>
For example:<path id="project.runtime.project.src.path"> <pathelement path="${basedir}/src"/> </path>
Platforms All
Value Path to the folder that contains the run-time code.
Default None.
Note: You must specify this Ant path for a project.

MOdd Header
Ant Target Summary
Using webMethods Mobile Designer Version 10.3 205
B Ant Target Summary
■ Ant Target Summary .................................................................................................................. 206

MEven Header
Ant Target Summary
Using webMethods Mobile Designer Version 10.3 206
Ant Target SummaryThis section provides a diagram that shows the Ant targets you can use to compileresources, build a mobile application project, activate a device, and use Phoney.
For each Ant target, the diagram indicate the steps Mobile Designer performs foran Ant target. For example, for the ++Run-Phoney Ant target, Mobile Designer onlyperforms the “Run Phoney” step. Dashed lines indicate steps that Mobile Designer doesnot perform. For example, for the +Multi-Build Ant target, there is a dashed line for the“Display Activate Handset dialog” step because Mobile Designer does not perform thisstep when running the +Multi-Build Ant target. For more details about the steps, see one ofthe following:
For details about compiling resources only, see “Compiling Resources Using the+Run-Reshandler Ant Target” on page 80.
For details about the build process, see “Steps in the Multi-Build Process” onpage 112.
For details about the process to activate a device, see “Steps Performed to ActivateHandsets” on page 148.
For details about the actions taken when you run Phoney, see “Steps Performed forPhoney Ant Targets” on page 136.
Use this diagram to compare the actions performed for each Ant target.

MOdd Header
Ant Target Summary
Using webMethods Mobile Designer Version 10.3 207