vcloud automation center installation guide - vmware
TRANSCRIPT

vCloud Automation CenterInstallation Guide
vCloud Automation Center 5.2
This document supports the version of each product listed andsupports all subsequent versions until the document is replacedby a new edition. To check for more recent editions of thisdocument, see http://www.vmware.com/support/pubs.
EN-001223-02

VMware, Inc.3401 Hillview Ave.Palo Alto, CA 94304www.vmware.com
VMware, Inc.
vCloud Automation Center Installation Guide
ii
You can find the most up-to-date technical documentation on the VMware Web site at:
http://www.vmware.com/support/
The VMware Web site also provides the latest product updates.
If you have comments about this documentation, submit your feedback to:
Copyright © 2013 VMware, Inc. All rights reserved. This product is protected by U.S. and international copyright and intellectual property laws. VMware products are covered by one or more patents listed at http://www.vmware.com/go/patents.
VMware is a registered trademark or trademark of VMware, Inc. in the United States and/or other jurisdictions. All other marks and names mentioned herein may be trademarks of their respective companies.

1
Table of Contents
1 Overview of vCAC Deployment ..................................................1
Administration Portal Web Site........................................................................1
Reports Web Site ............................................................................................1
Model Manager ...............................................................................................2
vCloud Automation Center Service .................................................................2
vCAC Database...............................................................................................2
Distributed Execution Managers .....................................................................2
vCAC Agents...................................................................................................3Virtualization Proxy Agents .................................................................................. 3Integration Agents ................................................................................................ 3WMI Agent............................................................................................................ 3
2 Preparing for vCAC Installation ..................................................5
Licensing vCAC for Installation .......................................................................5
Authorization Store..........................................................................................5File-based Authorization Store ............................................................................. 5SQL-based Authorization Store............................................................................ 5Active Directory Authorization Store..................................................................... 5
Database Deployment .....................................................................................6
SSL Configuration ...........................................................................................6IIS Certificate Requirement .................................................................................. 6Adding the Batch Logon Right for vCAC Model Manager Web Service............... 6Adding the Service Logon Right for the vCAC Model Manager Web Service...... 7Security Passphrase ............................................................................................ 7
Firewall Configuration......................................................................................8
vCAC Installation Profiles ................................................................................8Core vCAC Components...................................................................................... 8Agents and DEM Workers.................................................................................... 9
Installation Prerequisite Checklist ...................................................................9Database Server Requirements ........................................................................... 9Web Server Requirements ................................................................................. 10vCAC Server Requirements ............................................................................... 11DEM Requirements ............................................................................................ 11
vCAC Prerequisite Checker ..........................................................................11
Users and Credentials Required for Installation............................................11
Users and Credentials Required for vCAC Services.....................................12
Installation Planner........................................................................................12

2
vCloud Automation Center Installation Guide
3 Installing vCAC......................................................................... 17
High-Level Installation Process..................................................................... 17
Downloading the vCloud Automation Center Installation Package............... 17Installation Package Contents ............................................................................17
Installing and Running the vCAC Prerequisite Checker ............................... 19Installing and Running the vCAC Prerequisite Checker .....................................19
Preparing the Authorization Store................................................................. 20Preparing a SQL-based Authorization Store ......................................................20Preparing an Active Directory–based Authorization Store..................................20
Creating the vCAC Database........................................................................ 21Verifying Database Installation Prerequisites .....................................................21Preparing an Empty Database for Installation ....................................................22Creating the vCAC Database by Using the Wizard ............................................23Creating the vCAC Database Manually ..............................................................24Creating a SQL-based Authorization Store Manually .........................................25Enabling Database Access from the Manager Service ......................................25
Running vCAC-Server-Setup........................................................................ 26Installing and Configuring vCAC by Using vCAC-Server-Setup .........................26Configuring vCAC by Using the Wizard..............................................................26
Installing the Web Components .................................................................... 27Verifying the Web Component Installation Prerequisites....................................27Installing the vCAC Web Components ...............................................................28
Installing the Manager Service (vCAC Server) ............................................. 31Verifying the Manager Service Installation Prerequisites ...................................31Installing the Manager Service ...........................................................................32Configuring the Manager Service .......................................................................32
Installing the Distributed Execution Managers.............................................. 35Verifying the Distributed Execution Manager Installation Prerequisites..............35Installing the DEM Orchestrator or Worker .........................................................36
Preserving the Passphrase Used for Installation .......................................... 37
Starting the Console ..................................................................................... 37
Installing and Configuring vCAC Components by Using the Command Line38Installing vCAC Components by Using the Command Line................................38Configuring vCAC by Using vCAC-Config.exe ...................................................39
Installation Troubleshooting .......................................................................... 44Installation of Model Manager Data Fails ...........................................................44Error Starting Administration Portal Website ......................................................44
Post-Installation Configuration ...................................................................... 45

3
Table of Contents
Specifying a Different SMTP Port....................................................................... 45
Installing in High Availability Mode ................................................................45About Installing the Failover vCAC Server ......................................................... 46About Installing Redundant Distributed Execution Managers ............................ 46About Installing Redundant Web Servers .......................................................... 46Failing Over to the Failover vCAC Server .......................................................... 47
Installing vCAC in Web Farm Configuration..................................................47Creating the Session State Database ................................................................ 48
4 Integrating with Provisioning Resources...................................51
DEM Worker Overview..................................................................................51Amazon EC2 Requirements............................................................................... 51KVM (RHEV) Requirements............................................................................... 51SCVMM Requirements....................................................................................... 51
vCAC Agent Overview...................................................................................53
Planning Your vCAC Proxy Agents ...............................................................54
Configuring Proxy Agents..............................................................................55
Enabling Remote WMI Requests on Windows Machines .............................55
Virtual Desktop Integration ............................................................................55
External Provisioning Integration...................................................................56
Using Visual Basic Scripts in Provisioning ....................................................56
vCAC Agent Relationships ............................................................................57
vCAC Agent Installation Location and Requirements ...................................58Hypervisor Proxy Agent Installation Requirements ............................................ 58WMI Agent Installation Requirements ................................................................ 60VDI Integration Agent Installation Requirements ............................................... 61EPI Agent Installation Requirements.................................................................. 62
Preparing Endpoints for vSphere Agents ......................................................64
Installing a vCAC Agent ................................................................................65
Using a Script to Install Multiple Agents ........................................................72
Modifying Proxy Agent Configurations ..........................................................72
5 Migrating to vCAC 5.2...............................................................75
Supported Migration Paths............................................................................75
Overview of the vCAC Migration Process .....................................................75
Verify the Current DCAC or vCAC Version ...................................................76
Create or Import SSL Certificates .................................................................76

4
vCloud Automation Center Installation Guide
Allow Machine-Related Operations to Complete .......................................... 76
Verify All Data Collections Are Completed and Successful .......................... 76
Record DEM, Agent, and Endpoint Information............................................ 77
Record All Service User Credentials............................................................. 78
Uninstall All Customizations.......................................................................... 79
Stop All vCAC Services ................................................................................ 79
Back Up Customization Files ........................................................................ 80
Back Up vCAC Component Hosts ................................................................ 80
Back Up the AzMan Store............................................................................. 80
Identify and Back Up the vCAC Database .................................................... 81
Upgrade the Database.................................................................................. 81
Uninstall DEMs, Agents, vCAC Designer, vCAC Self-Service Portal, and WinPE-Builder........................................................................................................... 82
Verify Installation Prerequisites..................................................................... 83
Install vCAC Release 5.2 .............................................................................. 83
Run the Migration Cleanup Tool ................................................................... 85
Install Distributed Execution Managers......................................................... 86
Install vCAC Agents ...................................................................................... 86
Install vCAC Components............................................................................. 86
Verify vCAC Services Are Running............................................................... 87
Start the Console .......................................................................................... 87
Post-Migration Steps..................................................................................... 88Merge Configuration Files...................................................................................88Restore File-Based AzMan Store .......................................................................88Initiate Data Collection........................................................................................88Rebuild WinPE Images.......................................................................................89Enable Amazon EC2 Reservations ....................................................................89Enable vCloud Director Blueprints ......................................................................90Verify License Information ..................................................................................92
6 Uninstalling and Reinstalling vCAC Components .................... 93
Uninstalling vCAC Server ............................................................................. 93
Modifying Installed Components................................................................... 93
About Reinstalling vCAC............................................................................... 93
Relocating the vCAC Instance ...................................................................... 94
Updating vCAC Licenses .............................................................................. 94Updating Your vCAC License .............................................................................94

5
Table of Contents
A Installing the Extensibility Toolkits ............................................95
Downloading the vCloud Automation Center Installation Package for Extensibility .............................................................95
Installation Package Contents............................................................................ 95
Installation Prerequisites ...............................................................................96
Installing vCloud Automation Center Designer..............................................96
Installing the vCloud Automation Center Development Kit............................97Add vCAC Workflow Activities to Visual Studio.................................................. 98Updating the CloudUtil Application Configuration .............................................. 98
Uninstalling the Extensibility Toolkits ............................................................99
Upgrading the Extensibility Toolkits ............................................................100
B Installing the vCAC Self-Service Portal Website ....................101
Downloading the vCAC Self-Service Portal Website...................................101Installation Package Contents.......................................................................... 101
Installation Prerequisites .............................................................................101Verifying Installation Prerequisites ................................................................... 102
Installing the vCAC Self-Service Portal Website .........................................102
Enabling the Connect Using SSH option for Linux Machines .....................103
Upgrading or Reinstalling the vCAC Self-Service Portal ...........................................................................................................104

6
vCloud Automation Center Installation Guide

iii
About This Book
This information describes the installation and initial configuration of VMware vCloud® Automation Cen-ter™ (vCAC) and its agents. It is intended for system administrators and operators who are responsible for preparing the installation environment and installing vCAC, the required vCAC agents and associated software.
Information on manually migrating to vCAC 5.2 from DCAC 4.5 or from vCAC 5.1 is also provided.
Three high-level tasks are involved in setting up vCAC:
1. Installing the core vCAC components and starting the vCloud Automation Center Service (com-monly called the Manager Service), then installing and starting at least one Distributed Execu-tion Manager (DEM) Orchestrator and one DEM Worker to create a working vCAC instance.
2. Configuring vCAC to communicate with the provisioning resources in your environment. This can include:
• Installing additional DEM Worker instances to manage provisioning
• Installing and configuring vCAC agents, including proxy agents for XenServer and Hyper-V hosts and vCenter Server instances
• Installing a Windows Management Instrumentation (WMI) agent to collect data from provi-sioned Windows machines
• Installing agents to integrate vCAC with external systems
• Installing the optional vCAC Self-Service Portal Website
3. Installing vCAC components depending on the needs of your deployment. Several components are described in the vCloud Automation Center Operating Guide.

iv

VMware Documentation 1 Release 5.2
Chapter 1 Overview of vCAC DeploymentThis information describes the essential elements of vCloud Automation Center. Figure 1 shows the ele-ments and their relationships to each other.
Figure 1 Elements of vCAC
Note: Chapter 2 provides important information about the configurations in which vCAC components can be deployed, including requirements for co-hosting some components.
Administration Portal Web SiteThe Administration web site provides access to the vCAC web console at https://web_server_hostname/vCAC. The console provides the user interface to vCAC. The web console communicates with the Model Manager, which provides it with updates from the DEM, proxy agents and database.
Reports Web SiteThe reports web site provides access to vCAC reports, available through a link in the vCAC console and at https://web_server_hostname/vCACReports. The reports web site includes reports on the machines managed by the vCAC server, the resources they use, vCAC elements and policies, and other topics.
Web ServerMicrosoft IIS Web Server
Administration Portal Web SiteReports Web SiteModel Manager Web Services
vCAC ServerWindows 2008 Server
Manager ServiceDEM Orchestrator
Database ServerMicrosoft SQL Server
vCAC Database
Various
Virtualization platformsServer managementCloud servicesThird-party integrationsExternal systems
vCAC Core Integration and Distributed Execution
Provisioning Infrastructure
AgentWindows 2008
vCAC Agent
DEMWindows 2008
DEM Worker

VMware Documentation 2 Release 5.2
vCloud Automation Center
Model ManagerThe Model Manager manages core vCAC and custom models. The Model Manager provides services and utilities for persisting, versioning, securing and distributing the different elements of the model and for communicating with the vCAC portal website and Distributed Execution Managers (DEMs). The Model Manager supports the creation, configuration, and deployment of new models without any code development or compilation. The Model Manager communicates with the database, the DEMs, and the portal website.
The Model Manager is divided into two separately installable components — the Model Manager Web Service and the Model Manager Data component.
Models are used to facilitate the integration of vCAC with external systems and databases and to imple-ment business logic to be executed by a DEM. Models are composed of:
• Secure Multi-Tenancy — Controls that can see what data and who can execute which business logic, leveraging existing authentication and business groupings
• Unified Data Model — Exposes data from the vCAC database and external databases within the model through a secure auto-generated REST API
• Editable Business Logic — Specifies the workflows and activities to be executed
• Execution Policies — Regulate when and where business logic is executed
vCloud Automation Center ServiceThe vCloud Automation Center service (commonly called the Manager Service) coordinates communi-cation between vCAC agents, the vCAC database, Active Directory and SMTP. The Manager Service communicates with the portal website through the Model Manager. This service requires administrative privileges to run.
The system hosting the Manager Service is typically called the vCAC Server.
vCAC DatabasevCAC uses a Microsoft SQL Server database to maintain information about the machines it manages and its own elements and policies. This database is typically created during vCAC installation.
Distributed Execution ManagersA Distributed Execution Manager (DEM) executes the business logic of custom models, interacting with the vCAC database and with external databases and systems as required. DEMs also manage cloud and physical machines for vCAC.
Each DEM instance performs one of two roles: Worker or Orchestrator. The Worker role is responsible for executing workflows, while the Orchestrator role is responsible for monitoring DEM Worker instances, pre-processing workflows for execution, and scheduling workflows.
The DEM Orchestrator performs the following tasks:
• Monitors the status of DEM Workers and ensures that if a Worker instance stops or loses its connection to the Model Manager, its workflows are put back in the queue for another DEM Worker to pick up.

Release 5.2 3 VMware Documentation
vCloud Automation Center Installation Guide
• Manages scheduled workflows by creating new workflow instances at the scheduled time.
• Ensures that only one instance of a particular scheduled workflow is running at a given time.
• Pre-processes workflows before execution, including checking preconditions for workflows (used in the implementation of the “RunOneOnly” feature) and creating the workflow execution history.
Exactly one DEM Orchestrator instance is designated as the active Orchestrator that performs the tasks listed above. The DEM Orchestrator is essential for the execution of workflows and therefore VMware strongly recommends that you install at least one additional Orchestrator instance on a separate machine for failover in the event that there is an issue with the machine on which the DEM Orchestrator is running or the Orchestrator loses its connection to the Model Manager. If a DEM Orchestrator is not the currently active Orchestrator, it monitors the active Orchestrator’s status so that it can take over as the active Orchestrator should the currently active Orchestrator go offline.
vCAC AgentsvCAC uses agents to integrate with external systems.
Virtualization Proxy AgentsThe virtual machines managed by vCAC are created on virtualization hosts. vCAC uses virtualization proxy agents to send commands to and collect data from ESX Server, XenServer, and Hyper-V virtualiza-tion hosts and the virtual machines provisioned on them.
A proxy agent:
• Typically requires administrator-level access to the virtualization platform it manages
• Communicates with the Manager Service
• Is installed separately with its own configuration file
Integration Agents Virtual desktop integration (VDI) PowerShell agents allow vCAC to integrate with external virtual desktop systems. Currently, virtual machines provisioned by vCAC can be registered with XenDesktop on a Citrix Desktop Delivery Controller (DDC) and their owners can access the XenDesktop Web Interface from within vCAC.
External provisioning integration (EPI) PowerShell agents allow vCAC to integrate external systems into the machine provisioning process. For example, integration with Citrix Provisioning Server enables provi-sioning of machines by on-demand disk streaming, and an EPI agent allows you to run Visual Basic scripts as extra steps during the provisioning process.
VDI and EPI agents require administrator-level access to the external systems with which they interact.
WMI AgentThe vCAC Windows Management Instrumentation (WMI) agent enables the collection of certain data from Windows machines managed by vCAC.
VMware Documentation 4 Release 5.2
vCloud Automation Center

VMware Documentation 5 Release 5.2
Chapter 2 Preparing for vCAC InstallationThis information guides you through the planning process for your vCloud Automation Center installation and provides a high-level overview of the installation process. Before you install vCAC, you should be aware of the following considerations. Depending on the details of your deployment, some of these may require additional setup or configuration.
Licensing vCAC for InstallationThe method of obtaining vCAC licenses is new in vCAC release 5.2. Before you can install vCAC 5.2, you must obtain the appropriate vCAC licenses from the VMware License Portal. At least one vCAC license is required.
Authorization StorevCAC uses Windows Authentication and the Windows Authorization Manager (AzMan) to authenticate and authorize users. During installation, you can select an authorization store type:
• File-based
• SQL-based
• Active Directory
Once you select an authorization store type, you cannot change it after installation.
File-based Authorization StoreFile-based authorization store is implemented as an XML file on the vCAC Server (Manager Service host). If selected, the vCAC installer automatically creates the authorization file.
This is the simplest type of authorization store and has no prerequisites, which is useful for quick instal-lations for evaluation purposes. However, file-based authorization is supported only if the Manager Ser-vice and the Model Manager components are co-hosted.
SQL-based Authorization StoreSQL-based authorization store uses the vCAC database to store authorization information. If selected, the vCAC installer provides an option to automatically create the authorization tables in the database. You can also create the authorization store manually in advance.
Aside from ensuring continuous access from the Manager Service and the Model Manager to the data-base, there are no prerequisites for this type of authorization store. However, this option is not available if you select SQL-based authentication for the database (rather than Windows authentication).
Active Directory Authorization StoreActive Directory authorization store is implemented using Active Directory (AD), or the Lightweight Direc-tory Services (LDS) component of AD. If selected, you must prepare the authorization store in AD or

vCloud Automation Center
VMware Documentation 6 Release 5.2
LDS before installation. For details about preparing an Active Directory authorization store, see "Prepar-ing an Active Directory–based Authorization Store," on page 20.
Database DeploymentWhen you install vCAC, you can select to connect to the database using SQL-based authentication or Windows authentication. VMware recommends that you deploy a dedicated server running Microsoft SQL Server to host the vCAC database.
The vCAC installer provides three options for creating the vCAC database:
• Automatically
• Manually
• By creating an empty database and using the installer to install the vCAC schema in the existing database
See "Creating the vCAC Database" on page 21 for more information.
SSL ConfigurationvCAC and its components are installed to use HTTPS as the transport protocol, which ensures secure communication between vCAC components. As a result, before beginning a vCAC installation, you must decide which type of SSL certificate you will use.
VMware recommends that you use a domain certificate from a trusted certificate authority if you are installing vCAC in a distributed or production environment.
IIS Certificate RequirementWhen you buy a certificate from an authority, the certificate typically does not include a friendly name, which is a name you can use to easily identify the certificate during installation. However, when you import the certificate, you can assign it a friendly name. Refer to the Microsoft documentation on config-uring SSL for IIS.
All host names provided during installation must be specified as fully qualified domain names.
Adding the Batch Logon Right for vCAC Model Manager Web ServiceThe vCAC Prerequisite Checker verifies that the identity of the current Windows logon identity is assigned the Log on as a batch job right (Windows Local Policy). This right is required for the domain user that you are planning to use as the IIS application pool identity for the Model Manager Web Ser-vice.
To add the Log on as a batch job right:
1. From the Control Panel, click System and Security.
2. Click Administrative Tools.
3. Double-click Local Security Policy.
4. Expand Local Policies, then select User Rights Assignment.
5. Double-click Log on as a batch job.

Release 5.2 7 VMware Documentation
vCloud Automation Center Installation Guide
6. Click Add User or Group.
7. In Enter the object names to select, type the name of the domain user that you plan to use as the IIS application pool identity for the Model Manager Web Service, and click OK.
8. Click OK.
If you want to assign the Log on as a batch job right to another identity, in the vCAC Prerequisite Checker:
1. Click Settings.
2. In Model Manager Web Application Pool Identity, type the name of the service account you want to use.
3. Rerun the vCAC Prerequisite Checker.
Adding the Service Logon Right for the vCAC Model Manager Web ServiceThe current Windows logon identity must be assigned the Log on as a service right (Windows Local Policy), which is required to start the Manager Service.
To add the Log on as a service right:
1. From the Control Panel, click System and Security.
1. Click Administrative Tools.
2. Double-click Local Security Policy.
3. Expand Local Policies, then select User Rights Assignment.
4. Double-click Log on as a service.
5. Click Add User or Group.
6. In Enter the object names to select, type the name of the domain user that you plan to use as the IIS application pool identity for the Model Manager Web Service, and click OK.
7. Click OK.
Ensure that the user you added is not assigned the Deny log on as a service right.
Security Passphrase A passphrase is required to configure vCAC components. A passphrase is a series of words used to cre-ate a phrase that generates the encryption key that is used to protect data while at rest in the database. The passphrase used must be the same for a distributed environment. The passphrase is required during an upgrade.
After you install vCAC, the passphrase is stored in the GeneratedPropertyFile file located in C:\Pro-gram Files (x86)\VMware\vCAC\Server\ConfigTool\. VMware recommends that you move the Gener-atedPropertyFile file from the file system to secure media and store it in a secure location.
Follow these guidelines when creating a security passphrase for the first time:
• Use a phrase that is greater than 8 characters and long enough to be hard to guess, but one you will remember
• Include uppercase, lowercase and numeric characters, and symbols

vCloud Automation Center
VMware Documentation 8 Release 5.2
• Avoid using common phrases found in literature or music
• Avoid using words found in the dictionary
• Avoid using your user name, real name, or company name
• Select one that is significantly different from previous passwords or passphrases
Firewall ConfigurationAll vCAC components (including DEMs and agents) and all virtualization hosts (KVM (RHEV), ESX Servers, XenServers, Hyper-V servers) managed by vCAC should be installed on the same network to avoid firewall interference with communication between components.
If firewalls exist between the systems that will host the components of your vCAC installation, you must ensure that the appropriate ports are open between the vCAC hosts. Table 1 describe the ports that must be open.
In addition to the ports listed in Table 1, you must enable Microsoft Distributed Transaction Coordinator Service (MS DTC) communication between all servers in the deployment. The vCAC Prerequisite Checker validates whether MS DTC is running and that the required ports are open.
Table 1 TCP Ports used by vCAC
vCAC Installation ProfilesThis information describes a typical deployment topology for vCAC. For information about hardware rec-ommendations and scalability considerations, refer to the vCloud Automation Center Reference Archi-tecture.
Core vCAC ComponentsTable 2 describes a typical server topology for the core vCAC components and the associated installer files.
Chapter 3 provides detailed installation steps for setting up each of these servers.
Source Component Target Component Protocol Port
Manager Service SQL Server instance containing vCAC database MSSQL 1433
Web componentsManager Service HTTPS 443
SQL Server instance containing vCAC database MSSQL 1433
proxy agentsManager Service HTTPS 443
virtualization host HTTPS 443
guest agents Manager Service HTTPS 443
DEMs Manager Service HTTPS 443

Release 5.2 9 VMware Documentation
vCloud Automation Center Installation Guide
Table 2 Core vCAC Components and Installers
Agents and DEM WorkersvCAC Agents and DEM Workers can be installed on the vCAC Server or any other server in your deploy-ment. The number and types of agents varies depending on the provisioning resources in your imple-mentation. Table 3 lists the vCAC component and the associated installer files.
Chapter 4 provides information about planning your vCAC Agents and DEM installations.
Table 3 vCAC Agent and DEM Installers
Installation Prerequisite ChecklistThis section describes the system configuration requirements for each installation profile that must be in place before you install vCAC. For operating system and high-level environment requirements, see the vCloud Automation Center Support Matrix.
Database Server Requirements TCP/IP protocol enabled for MSSQLSERVER
Microsoft Distributed Transaction Coordinator Service (MS DTC) enabled on all SQL nodes in the system
No firewalls between Database Server and the Web server or vCAC Server, or ports opened as described in Firewall Configuration
Server Role vCAC Components Installer File Name
all servers Prerequisite Checker vCAC-PrereqChecker-Setup.exe
Database Server vCAC Database(using vCAC installer) vCAC-Server-Setup.exe
(manual installation) DBInstall.zip
Web Server
Model Manager (Web and Data)
vCAC-Server-Setup.exePortal Website
Reports Website
vCAC ServerManager Service vCAC-Server-Setup.exe
DEM Orchestrator vCAC-Dem-Setup.exe
vCAC Component Installer File Name
DEM Worker
vCAC-Dem-Setup.exe
Note: VMware strongly recommends that you install and run the Prerequisite Checker (vCAC-PrereqChecker-Setup.exe) before installing the DEM.
vCAC Agent vCAC-Agent-Setup.exe

vCloud Automation Center
VMware Documentation 10 Release 5.2
If using SQL Server Express, the SQL Server Browser service must be running.
Web Server RequirementsThis section includes requirements for both the Web site components and the Model Manager Web Ser-vices.
Internet Information Services (IIS) modules:
WindowsAuthentication
StaticContent
DefaultDocument
ASPNET
ISAPIExtensions
ISAPIFilter
IIS Authentication:
Windows Authentication enabled
AnonymousAuthentication disabled
Negotiate Provider enabled
NTLM Provider enabled
Windows Authentication Kernel Mode enabled
Windows Authentication Extended Protection disabled
IIS Windows Process Activation Service roles:
ConfigurationApi
NetEnvironment
ProcessModel
WcfActivation
HttpActivation
NonHttpActivation
Other:
Microsoft Distributed Transaction Coordinator Service (MS DTC) enabled
No firewalls between the Web server and the Database Server or vCAC Server, or ports opened as described in Firewall Configuration
Log on as a batch job right for the domain user that you are planning to use as the IIS applica-tion pool identity for the Model Manager Web Service
Log on as a service right for the domain user that you are planning to use as the IIS application pool identity for the Model Manager Web Service
Release 5.2 11 VMware Documentation
vCloud Automation Center Installation Guide
vCAC Server Requirements Microsoft Distributed Transaction Coordinator Service (MS DTC) enabled
No firewalls between vCAC Server and Database Server or web server, or ports opened as described in Firewall Configuration
Manager Service’s time should match the database’s time
DEM RequirementsIn addition to the following general requirements for Distributed Execution Managers, DEM Worker instances may have additional requirements depending on the provisioning resources that they interact with. For more information on specific requirements for DEM Workers, see Chapter 4.
.NET Framework 4.5
Windows PowerShell version 2.0
SecondaryLogOnService running
No firewalls between DEM host and vCAC Server, or ports opened as described in Firewall Con-figuration
vCAC Prerequisite CheckerThe vCAC Prerequisite Checker helps you ensure that you have satisfied all installation prerequisites. When you run the vCAC Prerequisite Checker, it lists each system requirement and its status. For each requirement that is not satisfied, the tool provides further information including the recommended actions. VMware strongly recommends that you run the vCAC Prerequisite Checker before installing any of the core vCAC components as described in Chapter 3.
Users and Credentials Required for InstallationBefore installing vCAC, add the user under which you plan to execute the vCAC installation programs to the Administrator group on the installation host.
Additionally, the following considerations apply for the credentials that you provide when using the installer to create the vCAC database:
• The user must have the sysadmin role in SQL Server to be able to create and alter the size of the database.
• On the vCAC Database Connection Configuration page you have the option to Use Windows Authentication. If you select this option, the installer uses the credentials under which you exe-cuted the installer to create the database. If you do not select this option, you can provide the specific credentials to use for database creation.
• On the vCAC Database Configuration page you have the option to Use pre-created empty database. If you select this option, the user credentials that you provide need only have dbo privileges for the pre-created database and not the sysadmin role.
• If you use the installer to create a SQL-based authorization store (regardless of how you create the vCAC database), the user credentials you provide must have the sysadmin role.

vCloud Automation Center
VMware Documentation 12 Release 5.2
Users and Credentials Required for vCAC ServicesDuring vCAC installation, you are prompted to provide user credentials for various vCAC services and components. VMware recommends that you create users specifically for running vCAC services with the minimum required privileges and identify these user credentials before you begin installation.
Table 4 describes the required privileges for each service or component.
Table 4 Required Credentials for vCAC Services
Installation PlannerVMware recommends that you use the following tables to record important information before you install the vCAC components. You are prompted to provide these values at various times in the installation pro-cess for different components.
Authentication Store Information
Store type (circle one): SQL AD XML (not supported in distributed environment)
Details: _________________________________
Component Minimum User Privileges
WebsiteDomain user with local Administrator privileges on all hosts on which Model Manager Web is installed.
Reports Website Domain user.
Model Manager Web
Domain user with:
• Local Administrator privileges on host on which Model Manager Web is installed
Note: Full Administrator privileges are not required if the service user has modify privileges for C:\Windows\Temp
• dbo privileges for the vCAC database
Manager Service
Domain user with:
• Local Administrator privileges on host on which Manager Service is installed
• Local Administrator privileges on all hosts on which Model Manager Web is installed
• dbo privileges for the vCAC database
To authorize vCAC users in a particular Active Directory Domain, the Manager Service user must belong to the Windows Authorization Access group for that domain.
DEM
Domain user with:
• Local Administrator privileges on all hosts on which Model Manager Web is installed
Proxy Agent Domain user.

Release 5.2 13 VMware Documentation
vCloud Automation Center Installation Guide
SMTP Protocol
Circle one: SSL non-SSL
Table 5 License Information
Table 6 Database Information
Table 7 Security Information
Table 8 Web Site Configuration for HTTPS Port, Certificate, and Virtual Applications
Property Value
vCloud Automation Center (Desktop)
vCloud Automation Center (Server)
vCloud Suite
vCloud Automation Center Develop-ment Kit
Property Value
Database Instance name
Database name
Database user’s credentials
Database data directory
Database log directory
Property Value
Security passphrase
Property Value
Web site
HTTPS Port number
SSL Certificate type
Suppress certificate mismatch check-ing (Y/N)
vCAC IIS Virtual Applications and Applications Pools
vCAC name
Report name
Model Manager name

vCloud Automation Center
VMware Documentation 14 Release 5.2
Table 9 vCAC Service Account Information
Table 10 vCAC AzMan Authorization Store Type Information
Table 11 vCAC Model Manager Information
Application pool name
Application pool name
Application pool name
Property Value
User name in Domain\User format
Password
Property Value
File-based XML (Y/N)
MSSQL server (Y/N)
Active Directory (Y/N)
If creating MSSQL AzMan authoriza-tion store, AzMan AD connection string
Property Value
Host name (FQDN)
Use default log location (Y/N)
Log directory (or use default)
SMTP Configuration:
Enable SSL (Y/N)
vCAC administration Web site host name
SMTP server
From address
Use anonymous SMTP authoriza-tion Y/N)
User name in Domain\User format
Property Value

Release 5.2 15 VMware Documentation
vCloud Automation Center Installation Guide
Table 12 vCAC Server Information
Table 13 Email Server Information
Password
Property Value
Host name (FQDN)
Enable Web farm Support (Y/N)
Session state database name
Manager Service log directory
vCAC Web site log directory
Property Value
SMTP server host name
SMTP Port
Email address from which to send noti-fications
SMTP server user credentials
Property Value

vCloud Automation Center
VMware Documentation 16 Release 5.2

VMware Documentation 17 Release 5.2
Chapter 3 Installing vCAC
This chapter describes the procedures for installing the core vCAC components in a typical deployment topology. It assumes you familiarized yourself with the planning information in Chapter 2.
High-Level Installation ProcessThe high-level steps for installing the core vCAC components are:
• "Downloading the vCloud Automation Center Installation Package," on page 17
• "Installing and Running the vCAC Prerequisite Checker," on page 19
• "Preparing the Authorization Store," on page 20
• "Creating the vCAC Database," on page 21
• "Preparing the Authorization Store," on page 20
• "Installing the Web Components," on page 27
• "Installing the Manager Service (vCAC Server)," on page 31
• "Installing the Distributed Execution Managers," on page 35
• "Preserving the Passphrase Used for Installation," on page 37
After you install vCAC and verify your installation, you can proceed to configure vCAC to communicate with the provisioning resources in your environment, described in Chapter 4.
Optionally, you can install the vCAC Self-Service Portal or extensibility toolkits. For information about installing the Self-Service Portal, see the vCloud Automation Center Self-Service Portal Guide. For infor-mation about installing the extensibility toolkits, see Appendix A, Installing the Extensibility Toolkits.
Downloading the vCloud Automation Center Installa-tion PackageThe vCloud Automation Center installation package contains the installers for all vCAC components and associated support tools.
To download the vCloud Automation Center installation package:
1. Download the zip file for vCloud Automation Center from the VMware downloads page at http://www.vmware.com/download/.
2. Extract the files from the zip archive.
Installation Package ContentsTable 14 describes the contents of the primary vCloud Automation Center installation package. For infor-mation about the vCloud Automation Center installation packages for extensibility, see Appendix A.

vCloud Automation Center
VMware Documentation 18 Release 5.2
Table 14 Installation Package Contents
Directory Name Installer File Name Description
Database
DBInstall.zipScripts for manually creating the vCAC data-base and SQL-based authorization store.
DBUpgrade.zipScripts for upgrading the vCAC database to release 5.2.
LinuxGuestAgentPkgs all files in all subdirectories
Used in Red Hat Linux kickstart or SUSE autoYaST provisioning. For more information, see the vCloud Automation Center Operating Guide.
Setups
vCAC-Agent-Setup.exevCAC agents, including proxy agents, inte-gration agents, and the WMI agent.
VCACBulkOperationsClient-Installer.msi
Enables an enterprise administrator to per-form actions on multiple machines simultane-ously. For more information, see the vCloud Automation Center Operating Guide.
vCAC-Dem-Setup.exeThe Distributed Execution Manager, including Orchestrator and Worker instances.
vCAC-Server-Setup.exe
The core vCAC components, including the database, administration website, reports website, Model Manager, and Manager Ser-vice.
vCAC-WinPEBuilder-Setup.exe
Creates WinPE images. For more informa-tion, see the vCloud Automation Center Operating Guide.
GugentZip.zipUsed in WIM-based and SCCM-based provi-sioning. For more information, see the vCloud Automation Center Operating Guide.
Tools
AzmanUtil.zipCreates Active Directory-based authorization store.
vCAC-PrereqChecker-Setup.exe
Verifies that the system satisfies all installa-tion prerequisites for vCAC components.

Release 5.2 19 VMware Documentation
vCloud Automation Center Installation Guide
Installing and Running the vCAC Prerequisite CheckerWhen you run the vCAC Prerequisite Checker, it lists each system requirement and its status and ensures that you have satisfied all installation prerequisites. For each requirement that is not satisfied, the tool provides further information including the recommended actions. VMware strongly recommends that you run the vCAC Prerequisite Checker before installing any of the core vCAC components.
Installing and Running the vCAC Prerequisite Checker
Prerequisites
• Download the vCloud Automation Center installation package.
To install and run the vCAC Prerequisite Checker the first time:
1. Navigate to the directory where you extracted the installation zip archive, then navigate to the Tools subdirectory.
2. Right-click vCAC-PrereqChecker-Setup and select Run as administrator.
The first time you install vCAC-PrereqChecker-Setup, it installs and launches the vCAC Prereq-uisite Checker.
3. From the vCAC Prerequisite Checker you can:
a. Select the components you want to check before installation and configuration.
b. (Optional) Use the Settings tab to specify the following configuration, if different from the default:
• From the Web site list, choose the name of the Web site under which you are creating the vCAC Web application.
• Specify the Database Port for your SQL Server instance.
• Specify the domain and user name of the account under which to run the Model Man-ager Web Application Pool.
c. Click Run Checker.
The vCAC Prerequisite Checker displays the list of requirements for the selected component and the status of each one.
d. If any of the requirements do not have a check mark ( ) in the Status column, select that requirement and follow the instructions in the information pane to the right to resolve the problem.
e. (Optional) Save the vCAC Prerequisite Checker results.
4. Repeat step 3d until all requirements are satisfied.
5. Exit the vCAC Prerequisite Checker.
To run the vCAC Prerequisite Checker after it is installed, you can either:
• Click Start > vCAC Prerequisite Checker
• Click Start > All Programs > VMware > vCAC > vCAC Prerequisite Checker
vCloud Automation Center
VMware Documentation 20 Release 5.2
Preparing the Authorization StoreDepending on the type of AzMan authorization store you select, you may need to do some preparation before running the vCAC installation program.
If you select a file-based authorization store, no preparation is necessary. A file-based store is not rec-ommended for production use.
Preparing a SQL-based Authorization StoreIf you select a SQL-based authorization store, you must ensure continuous access to the authorization store by applying the Microsoft hot fix available at: http://support.microsoft.com/kb/975332 to the Man-ager Service host and all Model Manager Web component hosts.
The installer provides an option to create the authorization store automatically. This option requires that the user running the installer has the sysadmin role in SQL Server. VMware also provides scripts to cre-ate the authorization store manually. This must be done after creating the vCAC database. For details, see "Creating a SQL-based Authorization Store Manually," on page 25.
Preparing an Active Directory–based Authorization StoreIf you select an Active Directory store, you must prepare an appropriate and accessible store in AD or LDS before beginning installation. VMware provides a tool for creating an AD-based store.
Prerequisites
• Download the vCloud Automation Center installation package.
To create an Active Directory authorization store:
1. Navigate to the directory where you extracted the installation zip archive, then navigate to the Tools subdirectory.
2. Extract the AzManUtil.zip archive to a local directory.
3. Execute the application AzManUtil.exe.
4. Click Import.
5. To specify the Source file, click Browse, navigate to the location where you extracted the AzManUtil.zip file, and select the security.xml file.
6. Select Active Directory store.
7. Specify the LDAP connection string including the OU at which you want to create the store, for example, CN=AzManDataStore,OU=vCACAzManStore.
8. Click Import.
9. When the authorization store has been created, exit the AzManUtil application.
10. Grant the Model Manager Web service user administrative access to the AzMan store.
a. Launch the Authorization Manager administration tool (AzMan.msc).
b. In the navigation pane, right-click Authorization Manager and select Open Authorization Store.

Release 5.2 21 VMware Documentation
vCloud Automation Center Installation Guide
c. In the Open Authorization Store dialog, select Active Directory or Active Directory Application Model (ADAM).
d. In Store name, type the LDAP connection string that you specified in step 7.
e. Click OK.
f. Right-click the name of the authorization store you just opened and select Properties.
g. On the Security tab, ensure that Administrator is selected under Authorization Manager user role.
h. Click Add.
i. In the Select Users, Computers, or Groups dialog, specify the credentials for the Model Manager Web service user.
j. Click OK twice and exit the Authorization Manager tool.
Creating the vCAC DatabaseThe options for creating the vCAC database are:
• Create an empty database and use the vCAC Installation Wizard to install the vCAC schema in the existing database, as described on page 22.
• Use the vCAC Installation Wizard to create the vCAC database, as described on page 23.
• Create the database manually, as described on page 24.
Note: Database names must be at least four characters long.
Verifying Database Installation PrerequisitesBefore creating the vCAC database, confirm that your database server meets the installation prerequi-sites by using the vCAC Prerequisite Checker.
In addition, if you are using SQL Server Express, the SQL Server Browser service must be running.
To verify vCAC database server prerequisites:
1. If not already installed, install the vCAC Prerequisite Checker, see "Installing and Running the vCAC Prerequisite Checker," on page 19.
2. If it is already installed, click Start > Prereq Checker.
3. Under Core Install, select Database and clear the check boxes for the other components, including those under Core Upgrade, DEM Install, and vCAC Self-Service Portal Install.
4. If your SQL Server instance is not listening on the default port of 1433, specify the correct port for your instance:
• Click the Settings tab.
• In Database Port, specify the port number.
5. Click Run Checker.
The vCAC Prerequisite Checker displays the list of requirements for the selected component and the status of each one.

vCloud Automation Center
VMware Documentation 22 Release 5.2
6. If any of the requirements do not have a green check mark ( ) in the Status column, select that requirement and follow the instructions in the information pane to the right to resolve the prob-lem.
7. Repeat step 6 until all requirements are satisfied.
8. Exit the vCAC Prerequisite Checker.
Preparing an Empty Database for InstallationIf you choose to install the vCAC schema on an empty database, you must prepare it before you run the vCAC Installation Wizard.
If you are creating the database using the vCAC Installation Wizard or setting up the vCAC database manually, you can skip this procedure and see "Creating the vCAC Database by Using the Wizard," on page 23 or "Creating the vCAC Database Manually," on page 24.
Prerequisites
• Download the vCloud Automation Center installation package.
To prepare an empty database for use with vCAC:
1. Navigate to the directory where you extracted the installation zip archive, then navigate to the Database subdirectory.
2. Extract the DBInstall.zip archive to a local directory.
3. Log in to the database host as a user with sufficient rights to create and drop databases (sysadmin privileges) within the SQL Server instance.
4. Edit CreateDatabase.sql and replace all instances of the following variables with the appropri-ate values:
5. Review the settings in the DB Settings section of CreateDatabase.sql and edit them if desired.
Note: The settings in the script are the recommended settings for the vCAC data-base. Only ALLOW_SNAPSHOT_ISOLATION ON and READ_COMMITTED_SNAPSHOT ON are required by vCAC.
6. Open SQL Server Management Studio.
7. Click New Query.
A SQL Query window opens in the right-hand pane.
8. On the Query menu, ensure that SQLCMD Mode is selected.
9. Paste the entire modified contents of CreateDatabase.sql into the query window.
10. Click Execute.
Variable Value
$(DBName) Name of the database, such as vCAC.
$(DBDir) Path to the data directory for the database, excluding the final slash.
$(LogDir) Path to the log directory for the database, excluding the final slash.

Release 5.2 23 VMware Documentation
vCloud Automation Center Installation Guide
Creating the vCAC Database by Using the WizardYou can use the vCAC Installation Wizard to automatically create the vCAC database or to install the vCAC schema on an existing empty database.
Note: The installation host does not need to be the database host. You can run the vCAC Installation Wizard to set up the vCAC database remotely.
Prerequisites
• Download the vCloud Automation Center installation package.
If you already installed the required vCAC components:
• Click Start > vCAC Configuration Tool and go to step 10.
To install and configure the vCAC database:
1. Navigate to the directory where you extracted the installation zip archive, then navigate to the Setups subdirectory.
2. Right-click vCAC-Server-Setup and select Run as administrator.
3. On the Welcome page, click Next.
4. On the End-User License Agreement page, read the License Agreement, click I accept the terms in the License Agreement, then click Next.
5. On the Destination Folder page, select the folder you want to install to, then click Next.
6. On the Custom Setup page, select Database, and cancel the selection for all other features, then click Next.
7. On the Ready to Install the Program page, click Install.
The Wizard Complete page appears. All of the installation files reside on the destination folder you selected; however, vCAC is not configured yet.
8. Optionally, to view the Windows Installer log, select Show the Windows Installer log.
9. On the Wizard Complete page, click Finish.
The Welcome to the vCAC Software Configuration Wizard page appears.
10. On the Welcome to the vCAC Configuration Wizard page:
a. If you plan to use a SQL-based AzMan authorization store, select Create MSSQL AzMan Authorization store to create it as part of the initial database configuration. You only have to create the AzMan store once.
b. Click Next.
11. On the vCAC Database Configuration page:
a. In Database instance, type the name of the database server.
b. If you previously prepared an empty database to use for vCAC, select Use existing empty database to indicate that the installer should create the vCAC schema in the existing data-base.
c. In Database name, type the name of the database or use the default name of vCAC.

vCloud Automation Center
VMware Documentation 24 Release 5.2
d. VMware recommends that you select Use default data and log directories. To specify alternative locations for the data and log directories, clear the check box.
e. Select Use Windows identity of the current logged on user to create the vCAC data-base and its schema to use the credentials under which you are running the installer to create the database. Clear the check box to use SQL authentication and provide the cre-dentials with which to connect to the database.
f. Click Next.
12. On the Ready to Configure page, click Configure.
13. When the configuration completes, click Next, then Finish.
Creating the vCAC Database ManuallyIf you do not want to create the vCAC database using the installer, you can create the database manu-ally. VMware provides a set of scripts for this purpose.
The database scripts assume:
• .NET 4.5 is installed on the SQL Server host
• You are using Windows Authentication (rather than SQL Authentication) to connect to the data-base
If either of these are not true, edit the BuildDB.bat and DeployVMPS.xml files and make the needed modifications for your environment before creating the database.
Prerequisites
• Download the vCloud Automation Center installation package.
To create the vCAC database using the provided scripts:
1. Navigate to the directory where you extracted the installation zip archive, then navigate to the Database subdirectory.
2. Extract the DBInstall.zip archive to a local directory.
3. Log in to the database host as a user with sufficient rights to create and drop databases (sysadmin role) within the SQL Server instance.
4. Review the database deployment scripts as needed. In particular, review the settings in the DB Settings section of CreateDatabase.sql and edit them if desired.
Note: The settings in the script are the recommended settings for the vCAC data-base. Only ALLOW_SNAPSHOT_ISOLATION ON and READ_COMMITTED_SNAPSHOT ON are required by vCAC.
5. Execute the following command with the arguments described in the table:
BuildDB.bat /p:DBServer=db_server;DBName=db_name;DBDir=db_dir;
LogDir=[log_dir];ServiceUser=service_user;ReportLogin=web_user
Argument Name Description
DBServerThe SQL Server instance in the format hostname\instance name (or hostname if using the default instance). Default is localhost.

Release 5.2 25 VMware Documentation
vCloud Automation Center Installation Guide
Creating a SQL-based Authorization Store ManuallyIf you are using a SQL-based authorization store, you can create manually it after creating the vCAC database. The installer also provides an option to create the authorization store automatically.
Prerequisites
• Download the vCloud Automation Center installation package.
To create a SQL-based authorization store manually:
1. Navigate to the directory where you extracted the installation zip archive, then navigate to the Database subdirectory.
2. Extract the DBInstall.zip archive to a local directory.
3. Log in to the database host as a user with sufficient rights to create and drop databases (sysadmin role) within the SQL Server instance.
4. Execute the AzManStoreSchema.sql script:
a. Open the script in SQL Server Management Studio and examine its contents.
b. On the Query menu, ensure that SQLCMD Mode is selected.
c. Click Execute.
5. Repeat step 3 with AzManStoreExtSP.sql followed by AzManStoreData.sql.
6. Exit SQL Server Management Studio.
Enabling Database Access from the Manager ServiceWhen you install the vCAC database on a separate host from the Manager Service, you must run a script, which is provided with vCAC, on the database to enable the Manager Service to communicate with it. However, you should only run the script if the user name under which the Manager Service will run is not the owner of the vCAC database.
Note: If the user name under which the Manager Service will run is the owner of the vCAC database, this script is not required and should not be run.
Prerequisites
• Download the vCloud Automation Center installation package.
To enable the Manager Service to communicate with the vCAC database:
DBName Name of the vCAC database. Default is vCAC.
DBDir Path to the data directory for the database, excluding the final slash.
LogDir Path to the log directory for the database, excluding the final slash.
ServiceUser User name under which the vCAC Manager Service runs.
ReportLogin User name under which the vCAC Web services run.
Argument Name Description

vCloud Automation Center
VMware Documentation 26 Release 5.2
1. Navigate to the directory where you extracted the installation zip archive, then navigate to the Database subdirectory.
2. Extract the DBInstall.zip archive to a local directory.
3. Edit VMPSOpsUser.sql and replace all instances of $(ServiceUser) with the user name under which the vCloud Automation Center service (Manager Service) will run. Do not replace Servi-ceUser in the line ending with WHERE name = N'ServiceUser').
(See "Users and Credentials Required for vCAC Services" in Chapter 2 for information about Manager Service credentials.)
4. Open SQL Server Management Studio.
5. Select the vCAC database (vCAC by default) under Databases in the left-hand pane.
6. Click New Query.
A SQL Query window opens in the right-hand pane.
7. Paste the entire modified contents of VMPSOpsUser.sql into the query window.
8. Click Execute.
Running vCAC-Server-SetupWhen you run the vCAC-Server-Setup wizard, you select the components you want to install, the files are installed, and the wizard walks you through each step in configuring your environment.
Alternatively, you can install and configure vCAC core components in silent mode by using DOS com-mands. See "Installing and Configuring vCAC Components by Using the Command Line" on page 38 for more detail.
Installing and Configuring vCAC by Using vCAC-Server-SetupThe first time you run the vCAC-Server-Setup program, it installs the software and runs the vCAC Con-figuration wizard. After you install the files required for your environment, you can run the vCAC Config-uration Tool independently of the vCAC-Server-Setup program.
Prerequisites
• Download the vCloud Automation Center installation package.
To install and configure the vCAC components using vCAC-Server-Setup:
1. Navigate to the directory where you extracted the zip archive, then navigate to the Setups sub-directory.
2. Right-click vCAC-Server-Setup and select Run as administrator.
Configuring vCAC by Using the WizardIf you cancel or do not complete the vCAC configuration, you can bypass the vCAC-Server-Setup instal-lation wizard and run the vCAC Configuration Tool on its own. You can either:
• Click Start > vCAC Configuration Tool
• Click Start > All Programs > VMware > vCAC > vCAC Configuration Tool

Release 5.2 27 VMware Documentation
vCloud Automation Center Installation Guide
Installing the Web ComponentsThe Web components of vCAC include the Administration Website, Reports Website, and the Model Manager. The Model Manager consists of two installable components: Model Manager Web Service and Model Manager Data.
If you do not want to install vCAC within the default Web site, first create a Web site in IIS for use with vCAC, then proceed with the vCAC installation.
Verifying the Web Component Installation PrerequisitesTo verify the vCAC Web component prerequisites:
1. If not already installed, install the vCAC Prerequisite Checker, see "Installing and Running the vCAC Prerequisite Checker," on page 19.
2. Click Start > Prereq Checker.
3. Under Core Install, select Model Manager Web Services and Website and clear the check boxes for the other components, including those under Core Upgrade, DEM Install, and vCAC Self-Service Portal Install.
4. If you are not installing the Web components in the Default Web Site in IIS, specify the Web site to validate:
• Click the Settings tab.
• From the Web site list, choose the name of the Web site under which you are creating the vCAC Web application.
5. If the user credentials under which the Model Manager will run are not the same as the current user:
• Click the Settings tab.
• In Model Manager Web Application Pool Identity, specify the Model Manager user in DOMAIN\username format.
6. Click Run Checker.
The vCAC Prerequisite Checker displays the list of requirements for the selected component and the status of each one.
7. If any of the requirements do not have a green check mark ( ) in the Status column, select that requirement and follow the instructions in the information pane to the right to resolve the prob-lem.
8. Repeat step 7 until all requirements are satisfied.
9. If the vCAC Prerequisite Checker detects that IIS is not installed, you must reregister ASP.NET 4.5 after installing IIS to avoid an error when starting the Administration Website.
To reregister ASP.NET with IIS, type:
C:\Windows\Microsoft.NET\Framework64\v4.0.30319\aspnet_regiis.exe -iru
IISReset

vCloud Automation Center
VMware Documentation 28 Release 5.2
For more information on ASP.NET and IIS, see http://msdn.microsoft.com/en-us/library/aa751792.aspx.
10. Exit the vCAC Prerequisite Checker.
Installing the vCAC Web ComponentsThe Web components consist of the Model Manager (Web Service and Data) and both Website compo-nents.
Note: All host names specified during the installation process must be fully qualified domain names (FQDN).
Prerequisites
• Download the vCloud Automation Center installation package.
• If you have not already reregistered ASP.NET with IIS, type:
C:\Windows\Microsoft.NET\Framework64\v4.0.30319\aspnet_regiis.exe -iru
ISReset
For more information on ASP.NET and IIS, see http://msdn.microsoft.com/en-us/library/aa751792.aspx.
If you already installed the required vCAC components:
• Click Start > vCAC Configuration Tool and go to step 10.
To install the vCAC Web Components:
1. Navigate to the directory where you extracted the installation zip archive, then navigate to the Setups subdirectory.
2. Right-click vCAC-Server-Setup and select Run as administrator.
3. On the Welcome page, click Next.
4. On the End-User License Agreement page, read the License Agreement, click I accept the terms in the License Agreement, then click Next.
5. On the Destination Folder page, select the folder you want to install to, then click Next.
6. On the Custom Setup page, select Model Manager Web Service, Model Manager Data, Administration Portal Website, and Reports Website. Cancel the selection for all other fea-tures, then click Next.
7. On the Ready to Install the Program page, click Install.
The Wizard Complete page appears. All of the installation files reside on the destination folder you selected; however, vCAC is not configured yet.
8. (Optional) To view the Windows Installer log, select Show the Windows Installer log.
9. On the Wizard Complete page, click Finish.
The Welcome to the vCAC Configuration Wizard page appears.
10. On the Welcome to the vCAC Configuration Wizard page, click Next.

Release 5.2 29 VMware Documentation
vCloud Automation Center Installation Guide
11. If license keys are not detected, the vCAC License Configuration page appears.
a. Type a valid vCAC Server license key. You can add all of your license keys at the same time.
b. If you have a license for the vCloud Automation Center Development Kit and you have not previously added it, you should do so now, since you will not be prompted for it when you install the vCloud Automation Center Development Kit.
12. On the vCAC Database Configuration page:
a. In Database instance, type the name of the server or click Scan to discover all available servers and select one from the list.
b. In Database name, type the name of the database (default value is vCAC).
c. Select Use Windows identity of the currently logged on user to perform configuration tasks that involve database operations to use the credentials under which you are running the installer to connect to the database. Clear the check box to use SQL authentication and provide the credentials with which to connect to the database.
d. Click Next.
13. On the vCAC Security Information page:
a. Read the guidelines on the page.
b. If you already installed components in this environment, type the same passphrase you already created; otherwise, type a new passphrase.
A passphrase is a series of words used to create a phrase that generates the encryption key that is used to protect data while at rest in the database and for data recovery.
The passphrase you create during installation must be used across the entire IaaS deploy-ment so that each component has the same encryption keys.
c. Retype to confirm your passphrase.
d. To view the passphrase in text, select Show passphrase.
Note: The passphrase might be required during an upgrade; therefore, you should store it in a secure location or memorize it.
14. On the vCAC Web Site Configuration page:
a. In Available Web sites, select a Web site from the list or select to use Default Web Site.
b. In Port number, type an available port number or select to use 443.
c. Click Test Binding to confirm that the port number is available for use.
d. Click Generate Self-Signed Certificate only if you:
• Do not already have an available certificate and want to create a new one
• If installing in a distributed environment, VMware recommends that you use a domain certificate.
The generated certificate appears in the list of available certificates.

vCloud Automation Center
VMware Documentation 30 Release 5.2
e. In Available certificates, select the certificate you want to use.
• If you imported a certificate after you began the vCAC Configuration Wizard, click Refresh so that it appears in the list of available certificates.
• If you imported a certificate that does not have a friendly name, and it does not appear in the list of available certificates, clear Display certificates using certificates friendly name to display the certificate by using its thumbprint.
f. To ensure you selected the correct certificate, click View selected certificate to view more information.
g. If you are deploying in a distributed environment and plan to use a single domain certificate for the load balancer (instead of individual certificates for each server in the pool), and the certificate is not a wildcard certificate that also covers the individual servers, select Sup-press mismatch certificate checking.
h. Click Next.
15. On the vCAC Service Account Configuration page, specify the user name and password of the service account user who has access the database and is the owner of the selected data-base, or click Add Current User.
16. On the vCAC AzMan Authorization Store Type page, select the type of AzMan authorization store you want to use.
• Select File-based XML only if Manager Service and Model Manager Web Service reside on the same host.
• If you select MSSQL Server, and you do not already have an AzMan authorization store you created manually or during a previous installation, one will be created for you.
• If you select Active Directory, provide the AzMan Active Directory connection string to the authorization store that you previously created.
17. Click Next.
18. On the vCAC Model Manager Configuration page:
a. Type the host name of the Model Manager Web Service.
b. VMware recommends that you select Use default log location. To specify an alternative location for the log directory, clear the check box.
c. Select Enable SSL to communicate with the email server using SSL.
d. In vCAC administration Web site host name, specify the fully qualified domain name of the Web server or Web cluster. This information is used to build the base URL for vCAC Console links in notification emails. For example, if you type vCAC-web-cluster.exam-ple.com, the base URL for email links is https://vCAC-web-cluster.example.com/vCAC.
e. In SMTP server, specify the host name of the SMTP server.
f. In From address, specify the email address that should appear in the From: address of vCAC notification emails (typically the domain administrator email).
g. If you do not want to use anonymous authentication with the SMTP server, clear Use anon-ymous SMTP authentication and specify the user credentials with which to authenticate with the SMTP server.

Release 5.2 31 VMware Documentation
vCloud Automation Center Installation Guide
h. Click Next.
19. On the vCAC Web Site Configuration page, leave Enable Web farm support unselected, then click Next.
This option enables tracking of user session information in a shared session state database. For information about Web farm-based installation, see "Installing vCAC in Web Farm Configura-tion," on page 47.
20. On the Ready to Configure page, click Configure.
21. At any time while the Configuration Wizard is in process, you can click View configuration log file to view the progress up to the time you opened the log file.
22. When the configuration completes, click Next, then Finish.
For information about setting up additional Web servers, see "About Installing Redundant Web Servers," on page 46.
Installing the Manager Service (vCAC Server)The Manager Service host is often referred to as the vCAC Server.
If you do not want to install the vCAC application within the Default Web Site, first create a Web site in IIS for use with vCAC, then proceed with the vCAC installation.
Verifying the Manager Service Installation PrerequisitesTo verify the Manager Service prerequisites:
1. If not already installed, install the vCAC Prerequisite Checker, see "Installing and Running the vCAC Prerequisite Checker," on page 19.
2. Click Start > Prereq Checker.
3. Under Core Install, select Manager Service and clear the check boxes for the other compo-nents, including those under Core Upgrade, DEM Install, and vCAC Self-Service Portal Install.
4. If you are not installing the Manager Service in the Default Web Site in IIS, specify the Web site to validate:
• Click the Settings tab.
• From the Web site drop-down list, choose the name of the Web site under which you are creating the vCAC Web application.
5. Click Run Checker.
The vCAC Prerequisite Checker displays the list of requirements for the selected component and the status of each one.
6. If any of the requirements do not have a green check mark ( ) in the Status column, select that requirement and follow the instructions in the information pane to the right to resolve the prob-lem.

vCloud Automation Center
VMware Documentation 32 Release 5.2
Note: If the vCAC Prerequisite Checker detects that IIS is not installed, you must reregister ASP.NET 4.5 after installing IIS to avoid an error when starting the Administration Portal Website. For details, see "Error Starting Administration Portal Website," on page 44.
7. Repeat step 6 until all requirements are satisfied.
8. Exit the vCAC Prerequisite Checker.
Installing the Manager Service
Note: All host names specified during the installation process must be fully qualified domain names (FQDN).
Prerequisites
• Download the vCloud Automation Center installation package.
To install the Manager Service:
1. Navigate to the directory where you extracted the installation zip archive, then navigate to the Setups subdirectory.
2. Right-click vCAC-Server-Setup and select Run as administrator.
3. On the Welcome page, click Next.
4. On the End-User License Agreement page, read the License Agreement, click I accept the terms in the License Agreement, then click Next.
5. On the Destination Folder page, select the folder you want to install to, then click Next.
6. On the Custom Setup page, select Manager Service. Cancel the selection for all other fea-tures, then click Next.
7. On the Ready to Install the Program page, click Install.
The Wizard Complete page appears. All of the installation files reside on the destination folder you selected; however, vCAC is not configured yet.
8. To view the Windows Installer log, select Show the Windows Installer log.
9. On the Wizard Complete page, click Finish.
The Welcome to the vCAC Configuration Wizard page appears.
10. To continue to configure vCAC, click Next and go to "Configuring the Manager Service".
11. To cancel, click Cancel.
Configuring the Manager ServiceWhen configuring the Manager Service, you must have already run vCAC-Server-Setup and installed the required files, as described in "Installing the Manager Service".
To configure the Manager Service:
1. Click Start > vCAC Configuration Tool.

Release 5.2 33 VMware Documentation
vCloud Automation Center Installation Guide
The configuration tool launches automatically when you complete the vCAC-Server-Setup wiz-ard.
2. On the Welcome to the vCAC Configuration Wizard page, click Next.
3. On the vCAC Database Information page:
a. In Database instance, type the name of the database instance you typed when you set up your database.
b. In Database name, type the name of the database.
c. Select Use Windows identity of the currently logged on user to perform configuration tasks that involve database operations to use the credentials under which you are running the installer to connect to the database. Clear the check box to use SQL authentication and provide the credentials with which to connect to the database.
d. Click Next.
4. On the vCAC Security Information page:
a. Read the guidelines on the page.
b. If you already installed components in this environment, type the same passphrase you already created; otherwise, type a new passphrase..
A passphrase is a series of words used to create a phrase that generates the encryption key that is used to protect data while at rest in the database and for data recovery.
The passphrase you create during installation must be used across the entire vCAC deploy-ment so that each component has the same encryption keys.
c. Retype to confirm your passphrase.
d. To view the passphrase in text, select Show passphrase.
Note: The passphrase might be required during an upgrade; therefore, you should store it in a secure location or memorize it.
5. On the vCAC Web Site Configuration page:
a. In Available Web sites, select a Web site from the list or select to use Default Web Site.
b. In Port number, type a port number or select to use 443.
c. Click Test Binding to confirm that the port number is available for use.
d. Click Generate Self-Signed Certificate only if you:
• Are not installing in a distributed environment
If installing in a distributed environment, a domain certificate is required.
• Do not already have an available certificate and want to create a new one
The generated certificate appears in the list of available certificates
e. In Available certificates, select the certificate you want to use.
• If you imported a certificate after you began the vCAC Configuration Wizard, click Refresh so that it appears in the list of available certificates.

vCloud Automation Center
VMware Documentation 34 Release 5.2
• If you imported a certificate that does not have a friendly name, and it does not appear in the list of available certificates, clear Display certificates using certificates friendly name to display the certificate by using its thumbprint.
f. To ensure you selected the correct certificate, click View selected certificate to view more information.
g. If you are deploying in a distributed environment and plan to use a single domain certificate for the load balancer (instead of individual certificates for each server in the pool), and the certificate is not a wildcard certificate that also covers the individual servers, select Sup-press mismatch certificate checking.
h. Click Next.
6. On the vCAC Service Account Configuration page, type the user name and password of the service account user who has access the database and is the owner of the selected database, or click Add Current User, then click Next.
7. On the vCAC AzMan Authorization Store Type page, select the type of AzMan authorization store you want to use.
• Select File-based XML only if Manager Service and Model Manager Web Service reside on the same host.
• If you select MSSQL Server, and you do not already have an AzMan authorization store you created manually or during a previous installation, one will be created for you.
• If you select Active Directory, provide the AzMan Active Directory connection string to the authorization store that you previously created.
8. Click Next.
9. On the vCAC Manager Service Configuration page:
a. Type the host name of the Model Manager Web Service. VMware recommends that you click Test to force the installer to test connectivity to the Model Manager host before pro-ceeding.
b. Select Active node with startup type set to automatic to start the vCloud Automation Center service automatically when the installation completes.
c. If you select Disaster Recovery cold standby node, the vCloud Automation Center ser-vice is installed in Manual startup mode rather than Automatic. Select this option when configuring this Manager Service as a standby node in an HA setup.
d. VMware recommends that you select Use Default Log Location. To specify an alternative location for the log directory, clear the check box.
e. Click Next.
10. On the Ready to Configure page, click Configure.
11. At any time while the Configuration Wizard is in process, you can click View configuration log file to view the progress up to the time you opened the log file.
12. When the configuration completes, click Next, then Finish.
For information about setting up additional vCAC servers, see "About Installing the Failover vCAC Server," on page 46.
Release 5.2 35 VMware Documentation
vCloud Automation Center Installation Guide
Installing the Distributed Execution ManagersThe Distributed Execution Manager application can be installed as one of two roles: DEM Orchestrator or DEM Worker. At least one DEM instance must be present for each role.
Only one DEM Orchestrator instance is active at any time. The Orchestrator should be installed on a machine with strong network connectivity to the Model Manager host (typically the same machine as the Manager Service). VMware strongly recommends that you install a second DEM Orchestrator on a differ-ent machine for failover.
DEM Workers can be installed on any machine in your deployment architecture. As with the DEM Orchestrator, it is important for DEM Workers to have network connectivity to the Model Manager host. Additional DEM instances can be added for redundancy and scalability, including multiple instances on the same machine.
The installation procedure is the same for both the DEM Orchestrator and Worker roles.
Verifying the Distributed Execution Manager Installation Prerequi-sitesTo verify the DEM prerequisites:
1. If not already installed, install the vCAC Prerequisite Checker, see "Installing and Running the vCAC Prerequisite Checker," on page 19.
2. Click Start > Prereq Checker.
3. Under DEM Install, select Worker and Orchestrator Services and clear the check boxes for the other components, including those under Core Install, Core Upgrade, and vCAC Self-Ser-vice Portal Install.
4. Click Run Checker.
The vCAC Prerequisite Checker displays the list of requirements for the selected component and the status of each one.
5. If any of the requirements do not have a check mark ( ) in the Status column, select that requirement and follow the instructions in the information pane to the right to resolve the prob-lem.
6. Repeat step 5 until all requirements are satisfied.
7. Exit the vCAC Prerequisite Checker.
Note: Some DEM Worker instances may have additional requirements depending on the types of workflows that they are intended to execute. For more details, see Chapter 4.

vCloud Automation Center
VMware Documentation 36 Release 5.2
Installing the DEM Orchestrator or Worker
Prerequisites
• Download the vCloud Automation Center installation package.
To install the DEM Orchestrator or Workers:
1. Navigate to the directory where you extracted the installation zip archive, then navigate to the Setups subdirectory.
2. Right-click vCAC-Dem-Setup.exe and select Run as administrator.
3. On the Welcome page, click Next.
4. On the End-User License Agreement page, read the License Agreement, click I accept the terms in the License Agreement, then click Next.
5. On the DEM Instance Configuration page:
a. In the DEM Instance Name box, provide a name that uniquely identifies this instance in your deployment.
The DEM instance name must not contain spaces and has a maximum length of 128 char-acters.
b. In the DEM Description box, provide an optional description for this instance.
c. Select the role that this instance of the DEM should perform.
• Worker Role — As a worker, the DEM executes workflows.
• Orchestrator Role — As an orchestrator, the DEM oversees the DEM worker’s activi-ties, including scheduling and pre-processing workflows, and checking the DEM’s online status.
d. Click Next.
6. On the Custom Setup page, click Next.
7. On the Manager Service and Model Manager Web Service Host Configuration page:
a. In the Manager Service Hostname:Port box, type the host name of the Manager Service host and the port on which the DEM connects to the Manager Service. The port is typically 443.
b. In the Model Manager Service Hostname:Port box, specify the host name of the Model Manager host and the port on which the Model Manager is listening. The port is typically 443.
c. Specify the user credentials under which the Model Manager Web service is running.
d. Select Validate Manager Service service endpoint to test the connection.
e. Click Next.
8. On the Service Configuration page:
a. Select Start Distributed Execution Manager Service to start the DEM service automati-cally when the installation completes.
b. Specify the user credentials under which to run the DEM service.

Release 5.2 37 VMware Documentation
vCloud Automation Center Installation Guide
c. Click Next.
9. On the Ready to Install vCAC DEM page, click Install.
10. At any time while the Configuration Wizard is in process, you can click View configuration log file to view the progress up to the time you opened the log file.
Preserving the Passphrase Used for InstallationAfter you install vCAC, the passphrase you entered during the installation is stored in the Generated-PropertyFile file located in C:\Program Files (x86)\VMware\vCAC\Server\ConfigTool\. The pass-phrase is required during an upgrade, and therefore, you must preserve the passphrase for future use.
VMware recommends that you:
1. Copy GeneratedPropertyFile to secure media and store it in a secure location.
2. Delete GeneratedPropertyFile from the file system.
Starting the ConsoleWhen the database, Web component, Manager Service, and DEM installations are complete, you can verify your installation by starting the vCAC Console.
Before accessing the vCAC Console, verify that the following services are running:
• VMware vCloud Automation Center
• VMware DEM-Orchestrator - InstanceName
• VMware DEM-Worker - InstanceName
Note: Scripting and cookies must be enabled in your browser in order to use the vCAC Console. If you are using Internet Explorer, active scripting must be enabled.
To access the vCAC Console:
1. Launch a Web browser and navigate to: https://vCAC_portal_hostname/vCAC.
2. When prompted, provide Windows credentials for a user with local administrator privileges on the Manager Service host.

vCloud Automation Center
VMware Documentation 38 Release 5.2
The vCAC Console appears.
All local administrators are granted vCAC administrator access by default. From here, you can complete vCAC setup, including adding users to vCAC. For information about vCAC user role and rights assign-ments, see the vCloud Automation Center Operating Guide.
If your credentials when you open the console are the same as the ones the Manager Service is running under, you may see additional activity groups in the activity pane.
Installing and Configuring vCAC Components by Using the Command LineThis information provides the procedures you can use to install and configure vCAC components by using the command line.
Installing vCAC Components by Using the Command LineYou can use vCAC-Server-Setup program to install vCAC components from the command line. The examples shown here use the /WAIT option, which can be omitted should you want to return to the com-mand line before the vCAC-Server-Setup program completes.
To install selected vCAC components, type:
start /WAIT vCAC-Server-Setup /s /w /V"/qn ADDLOCAL=componentname,compo-
nentname"
where componentname can be:
ManagerService, ModelManagerWeb, ModelManagerData, Website, ReportWebsite, or Database.

Release 5.2 39 VMware Documentation
vCloud Automation Center Installation Guide
For example, to install the Model Manager Web Service and Model Manager Data, type:
start /WAIT vCAC-Server-Setup /s /w /V"/qn ADDLOCAL=ModelManagerWeb,Model-
ManagerData"
To install all vCAC components, type:
start /WAIT vCAC-Server-Setup /s /w /V"/qn ADDLOCAL=All"
The Database, Administration Portal Website, Reports Website, Model Manager Web Service, Model Manager Data, and Manager Service are installed.
Configuring vCAC by Using vCAC-Config.exeBefore you can configure vCAC by using the vCAC-Config.exe program, you must create a property file, vCAConfigProperty.xml, that contains all of the key/pair information required to complete the configura-tion. You can:
• Use the property file that was created during a previous vCAC configuration
• Edit the sample property file supplied by VMware
• Run the vCAC-Config.exe program by using the /Gen option
Getting Help for Using vCAC-Config.exe
To see all available options for vCAC-Config.exe, type:
vCAC-Config.exe /Help
Creating the vCAConfigProperty.xml
To create the vCAConfigProperty.xml file by running the vCAC-Server-Setup program:
• Run the vCAC-Server-Setup to install and configure vCAC.
The vCAConfigProperty.xml file is created in Program Files (86)\VMware\vCAC\Server\Config-Tool\GeneratedPropertyFile and contains all of the key/value pairs required to replicate the con-figuration. A date and time stamp is appended to the file name so that you can identify the correct file.
You must edit the resulting vCAConfigProperty.xml file with the correct license keys, certificate, passphrase, and password for the service user.
To create the vCAConfigProperty.xml file by running the vCAC-Config.exe program:
• Run the vCAC-Config.exe program by using the /Gen option to generate the vCAConfigProp-erty.xml file for any installable component.
To create a vCAConfigProperty.xml file for all vCAC components, type:
vCAC-Config.exe /Gen
The Database, Administration Portal Website, Reports Website, Model Manager Web Ser-vice, Model Manager Data, and Manager Service are included in the vCAConfigProperty.xml file.
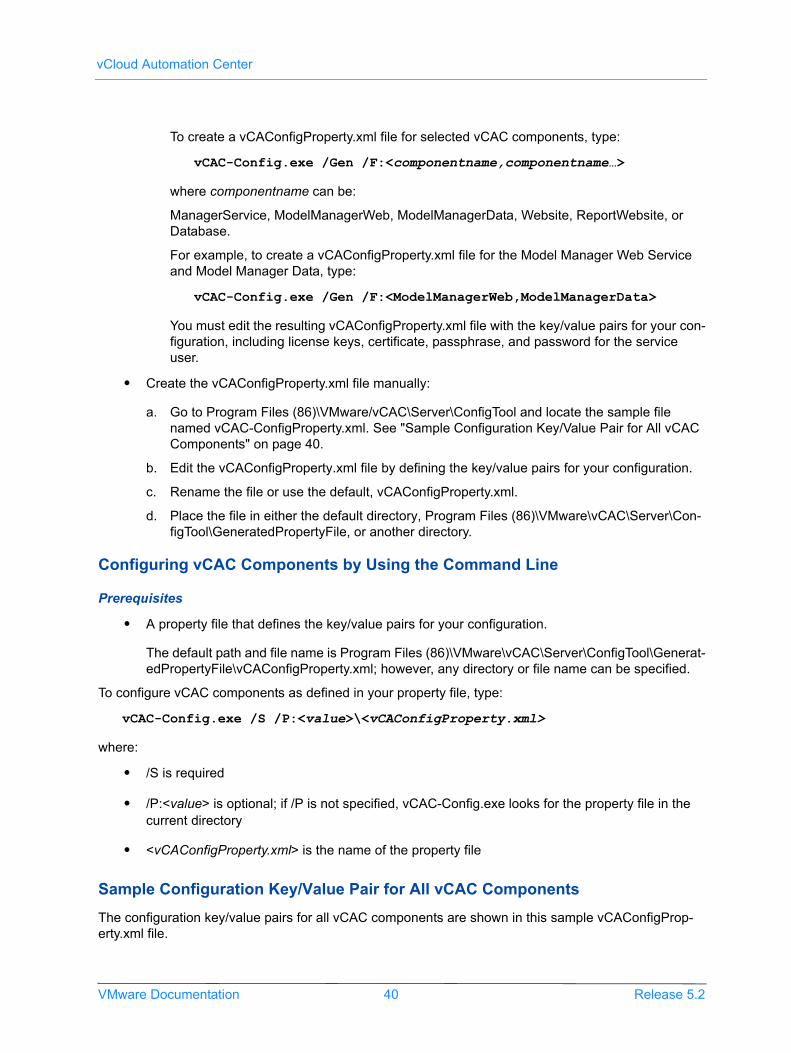
vCloud Automation Center
VMware Documentation 40 Release 5.2
To create a vCAConfigProperty.xml file for selected vCAC components, type:
vCAC-Config.exe /Gen /F:<componentname,componentname…>
where componentname can be:
ManagerService, ModelManagerWeb, ModelManagerData, Website, ReportWebsite, or Database.
For example, to create a vCAConfigProperty.xml file for the Model Manager Web Service and Model Manager Data, type:
vCAC-Config.exe /Gen /F:<ModelManagerWeb,ModelManagerData>
You must edit the resulting vCAConfigProperty.xml file with the key/value pairs for your con-figuration, including license keys, certificate, passphrase, and password for the service user.
• Create the vCAConfigProperty.xml file manually:
a. Go to Program Files (86)\VMware/vCAC\Server\ConfigTool and locate the sample file named vCAC-ConfigProperty.xml. See "Sample Configuration Key/Value Pair for All vCAC Components" on page 40.
b. Edit the vCAConfigProperty.xml file by defining the key/value pairs for your configuration.
c. Rename the file or use the default, vCAConfigProperty.xml.
d. Place the file in either the default directory, Program Files (86)\VMware\vCAC\Server\Con-figTool\GeneratedPropertyFile, or another directory.
Configuring vCAC Components by Using the Command Line
Prerequisites
• A property file that defines the key/value pairs for your configuration.
The default path and file name is Program Files (86)\VMware\vCAC\Server\ConfigTool\Generat-edPropertyFile\vCAConfigProperty.xml; however, any directory or file name can be specified.
To configure vCAC components as defined in your property file, type:
vCAC-Config.exe /S /P:<value>\<vCAConfigProperty.xml>
where:
• /S is required
• /P:<value> is optional; if /P is not specified, vCAC-Config.exe looks for the property file in the current directory
• <vCAConfigProperty.xml> is the name of the property file
Sample Configuration Key/Value Pair for All vCAC Components
The configuration key/value pairs for all vCAC components are shown in this sample vCAConfigProp-erty.xml file.

Release 5.2 41 VMware Documentation
vCloud Automation Center Installation Guide
<?xml version="1.0" encoding="UTF-8"?>
-<vCACProperties> -<common>
<!-- Database instance name. Use hostname\named_instance if not default instance -->
<DATABASE_INSTANCE>localhost</DATABASE_INSTANCE>
<!-- Database name to be created -->
<DATABASE_NAME>vCAC</DATABASE_NAME> </common> -<webServiceCommon>
<!-- passphrase for ManagerService and or Model Manager Web -->
<SECURITY_PASSPHRASE>passphrase</SECURITY_PASSPHRASE>
<!-- Website where vCAC virtual applications will be created under -->
<WEBSITE_NAME>Default Web Site</WEBSITE_NAME>
<!-- If HTTPS_FLAG is true then specify https port here -->
<HTTPS_PORT>443</HTTPS_PORT>
<!-- Certificate string can be its friendly name or its thumbprint. Leave it empty to
use self-signed certificate -->
<CERTIFICATE/> <SUPPRESS_CERTIFICATE_MISMATCH_FLAG/>
<!-- Service user in domain\user format. This service user is used to run Manager Ser-
vice, Website, ReportWebsite and Model Manager Web services -->
<SERVICE_USER>domain\user</SERVICE_USER>
<!-- Service user password -->
<SERVICE_USER_PASSWORD>password</SERVICE_USER_PASSWORD>
<!-- Model manager web hostname. FQDN is required if Https is used -->
<MODEL_MANAGER_WEB_HOSTNAME>FQDN</MODEL_MANAGER_WEB_HOSTNAME>
<!-- Set to true to create AzMan store in Msql. Value: true or false. Not in effect if
AzMan store is already created -->
<CREATE_MSSQL_AZMAN_STORE_FLAG>true</CREATE_MSSQL_AZMAN_STORE_FLAG>
<!-- AzMan store type. Value: MSSQL, XML (file based), or AD -->
<AZMAN_STORE_TYPE>MSSQL</AZMAN_STORE_TYPE>
<!-- Leave it empty if XML or MSSQL. Connection string is required if AzMan store type
is AD -->
<AZMAN_CONNECTION_STRING/> </webServiceCommon> -<database>
<!-- Leave it empty to use Mssql default data path. If custom data path is used it must
exist first -->
<DATABASE_DATA_PATH/>
<!-- Leave it empty to use Mssql default log path. If custom log path is used it must

vCloud Automation Center
VMware Documentation 42 Release 5.2
exist first -->
<DATABASE_LOG_PATH/>
<!-- Set to true to use Windows Identity of the Windows account that runs the configu-
ration tool to perform database operation (database creation, schema creation, Model
Manager Data deployment. -->
<!-- If set to true the Windows account must already exist under Security Logon of the
Sql server with 'sysadmin' privilege -->
<!-- Set to false to use Sql authentication -->
<WINDOWS_AUTHEN_DATABASE_INSTALL_FLAG>true</WINDOWS_AUTHEN_DATABASE_INSTALL_FLAG>
<!-- Sql user to perform database operation if WINDOWS_AUTHEN_DATABASE_INSTALL_FLAG is
set to false -->
<!-- Note: Sql authentication is not supported if AZMAN_STORE_TYPE is MSSQL -->
<DATABASE_INSTALL_SQL_USER/>
<!-- Sql user password -->
<DATABASE_INSTALL_SQL_USER_PASSWORD/>
<!-- Set to true if you wish to use an existing empty vCAC database. Value: true or
false -->
<!-- The existing vCAC database must not have any vCAC schema created -->
<PRECREATED_DATABASE_FLAG>false</PRECREATED_DATABASE_FLAG>
<!-- Set to true to create AzMan store in Msql. Value: true or false. Not in effect if
AzMan store is already created -->
<CREATE_MSSQL_AZMAN_STORE_FLAG>true</CREATE_MSSQL_AZMAN_STORE_FLAG> </database> -
<managerService>
<!-- Manager service hostname. Use FQDN if https -->
<MANAGER_SERVICE_HOSTNAME>FQDN</MANAGER_SERVICE_HOSTNAME>
<!-- Set to true to set service to auto and start once configuration is completed.
Value: true or false -->
<MANAGER_SERVICE_SERVICESTART_FLAG>true</MANAGER_SERVICE_SERVICESTART_FLAG>
<!-- Set to false during HA setup so that Manager service Windows service will be set
to manual -->
<MANAGER_SERVICE_SERVICESTANDBY_FLAG>false</MANAGER_SERVICE_SERVICESTANDBY_FLAG> </
managerService> <modelManagerWeb> </modelManagerWeb> -<modelManagerData>

Release 5.2 43 VMware Documentation
vCloud Automation Center Installation Guide
<!-- Multiple license keys can be entered, separated by semin-colon (;). It's required
during Model manager data deployment -->
<LICENSE_KEYS/>
<!-- Model manager web hostname -->
<MODEL_MANAGER_WEB_HOSTNAME>FQDN</MODEL_MANAGER_WEB_HOSTNAME>
<!-- If HTTPS_FLAG is true then specify https port here -->
<HTTPS_PORT>443</HTTPS_PORT>
<!-- AzMan store type. Value: MSSQL, XML (file based), or AD -->
<AZMAN_STORE_TYPE>MSSQL</AZMAN_STORE_TYPE>
<!-- Leave it empty if XML or MSSQL. Connection string is required if AzMan store type
is AD -->
<AZMAN_CONNECTION_STRING/>
<!-- Value: true or false -->
<SMTP_ENABLE_SSL_FLAG>False</SMTP_ENABLE_SSL_FLAG>
<!-- Hostname of the vCAC website. Do not use localhost string in a distributed setup -
->
<SMTP_WEBSITE_CONSOLE_HOSTNAME/>
<!-- Smtp server -->
<SMTP_SERVER/>
<!-- Smtp from address -->
<SMTP_FROM_ADDRESS/>
<!-- Set to true to use anonymous smtp. If set to false then smtp user and smtp user
password are required -->
<SMTP_ANONYMOUS_AUTHEN_FLAG>True</SMTP_ANONYMOUS_AUTHEN_FLAG>
<!-- Specify smtp user if SMTP_ANONYMOUS_AUTHEN_FLAG is set to false -->
<SMTP_USER/>
<!-- Specify smtp user password if SMTP_ANONYMOUS_AUTHEN_FLAG is set to false -->
<SMTP_USER_PASSWORD/> </modelManagerData> -<website>
<!-- Set to true if session state database is used to store user session in a distrib-
uted environment. Value: true or false -->
<!-- We recommend users to use sticky-session under the Load Balancer over the use of
session state database -->
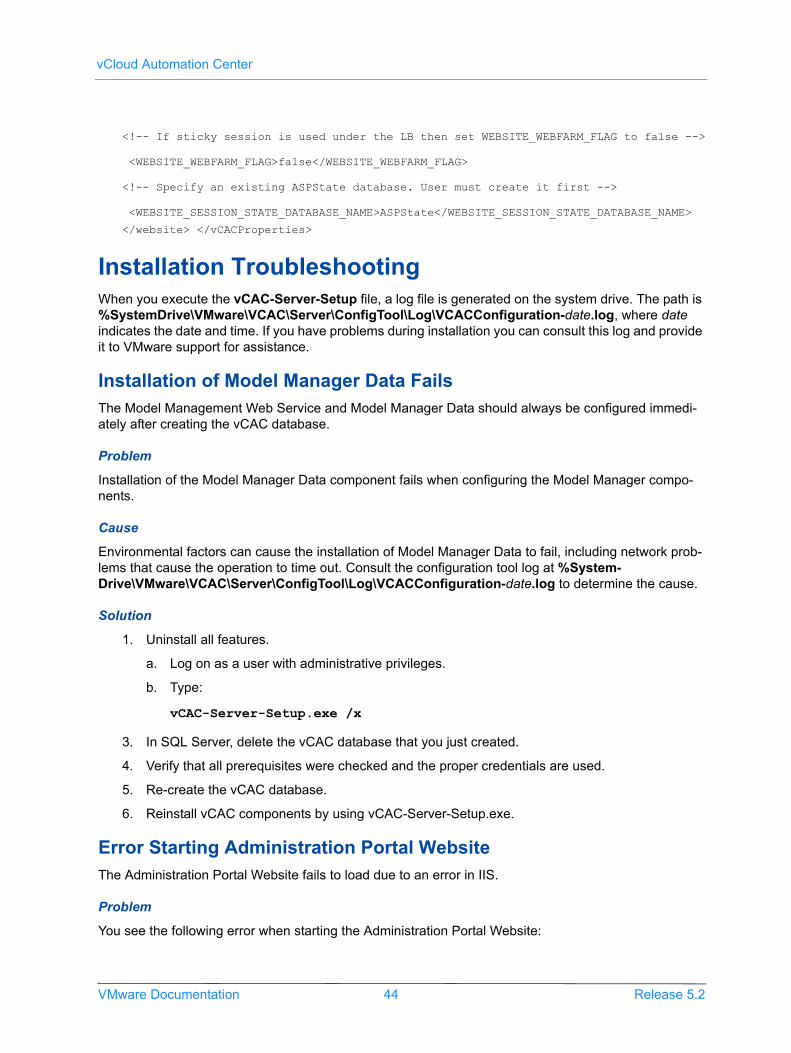
vCloud Automation Center
VMware Documentation 44 Release 5.2
<!-- If sticky session is used under the LB then set WEBSITE_WEBFARM_FLAG to false -->
<WEBSITE_WEBFARM_FLAG>false</WEBSITE_WEBFARM_FLAG>
<!-- Specify an existing ASPState database. User must create it first -->
<WEBSITE_SESSION_STATE_DATABASE_NAME>ASPState</WEBSITE_SESSION_STATE_DATABASE_NAME>
</website> </vCACProperties>
Installation TroubleshootingWhen you execute the vCAC-Server-Setup file, a log file is generated on the system drive. The path is %SystemDrive\VMware\VCAC\Server\ConfigTool\Log\VCACConfiguration-date.log, where date indicates the date and time. If you have problems during installation you can consult this log and provide it to VMware support for assistance.
Installation of Model Manager Data FailsThe Model Management Web Service and Model Manager Data should always be configured immedi-ately after creating the vCAC database.
Problem
Installation of the Model Manager Data component fails when configuring the Model Manager compo-nents.
Cause
Environmental factors can cause the installation of Model Manager Data to fail, including network prob-lems that cause the operation to time out. Consult the configuration tool log at %System-Drive\VMware\VCAC\Server\ConfigTool\Log\VCACConfiguration-date.log to determine the cause.
Solution
1. Uninstall all features.
a. Log on as a user with administrative privileges.
b. Type:
vCAC-Server-Setup.exe /x
3. In SQL Server, delete the vCAC database that you just created.
4. Verify that all prerequisites were checked and the proper credentials are used.
5. Re-create the vCAC database.
6. Reinstall vCAC components by using vCAC-Server-Setup.exe.
Error Starting Administration Portal WebsiteThe Administration Portal Website fails to load due to an error in IIS.
Problem
You see the following error when starting the Administration Portal Website:

Release 5.2 45 VMware Documentation
vCloud Automation Center Installation Guide
Could not load type 'System.ServiceModel.Activation.HttpModule' from
assembly 'System.ServiceModel, Version=3.0.0.0, Culture=neutral,
PublicKeyToken=b77a5c561934e089'.
You see the following error in the installation log file:”
Integrated has a bad module ManagedPipelineHandlee in its module list
Managed handler is used; however, ASP.NET is not installed or is not installed com-
pletely
Install ASP.NET if you are using managed handler.
Cause
There is a conflict between the Microsoft WCF HTTP Activation Feature and ASP.NET 4.5.
Solution
Run the following commands to reinstall ASP.NET 4.5:
C:\Windows\Microsoft.NET\Framework64\v4.0.30319\aspnet_regiis.exe -iru
IISReset
For more information on ASP.NET and IIS, see http://msdn.microsoft.com/en-us/library/aa751792.aspx.
Post-Installation ConfigurationThis section describes additional configuration that may be necessary after installation.
Specifying a Different SMTP PortIf the SMTP server you specified during installation is not on port 25 (for example, if you use SMTP over SSL), you need to configure vCAC to use the correct port.
To change the SMTP port:
1. Log into the vCAC Console as a vCAC Administrator.
2. Click vCAC Administrator > Global Properties.
3. Update the value of the SMTP Port property.
a. Click the pencil icon next to the name of the property.
b. Specify the SMTP port on the server specified in the SMTP Server property.
c. Click the Save button.
4. Restart the vCloud Automation Center service.
Installing in High Availability ModevCAC can be installed and configured in high availability (HA) mode, in which clustered instances of the vCAC Server provide a failover capability.
In this high availability configuration, components are deployed in the following manner:

vCloud Automation Center
VMware Documentation 46 Release 5.2
• The Manager Service is installed on two hosts behind a load balancer: the primary vCAC Server and a failover vCAC Server to be activated in the event of a failure on the primary.
• A failover instance of the DEM Orchestrator is installed on a different host from the primary Orchestrator and redundant DEM Worker instances are installed.
• Web components are installed on multiple hosts behind a load balancer.
Note: Installing the vCAC Web components and Manager Service on the same machine is not supported in a high availability configuration. If you have a use case that requires such a configuration, contact VMware support.
About Installing the Failover vCAC ServerInstalling the failover vCAC Server follows the same procedure as installing the primary vCAC Server with the following differences:
• On the Server Configuration page:
a. Clear the selection for Active node with startup type set to automatic and select Disas-ter Recovery cold standby node.
b. Type the Manager Service credentials you provided when installing the primary server.
Note: Any changes made to the ManagerService.exe.config file after installation must be made to the files on both the failover and the primary vCAC servers.
When using multiple vCAC instances for high availability, install identical sets of identically configured agents on each vCAC server. For information about installing vCAC Agents, see Chapter 4.
About Installing Redundant Distributed Execution ManagersExactly one DEM Orchestrator instance is designated as the active Orchestrator. VMware strongly rec-ommends that you install at least one additional Orchestrator instance on a separate machine for failover in the event that there is an issue with the machine on which the DEM Orchestrator is running or the Orchestrator loses its connection to the Model Manager. If a DEM Orchestrator is not the currently active Orchestrator, it monitors the active Orchestrator’s status so that it can take over as the active Orchestrator should the currently active Orchestrator go offline.
If you have any workflows that require prerequisites for the DEM Worker instance that need to execute them, ensure that you have more than one Worker that is capable of executing any given workflow for redundancy.
About Installing Redundant Web ServersVMware recommends that you install redundant Web servers behind a load balancer with session affin-ity (sticky sessions). If you do not want to enable session affinity on your load balancer, you can install the Web components in Web Farm configuration, which uses a session state database to track session information across requests. For information about using a session state database, see "Installing vCAC in Web Farm Configuration," on page 47.
When installing additional Web servers:

Release 5.2 47 VMware Documentation
vCloud Automation Center Installation Guide
• Do not select Model Manager Data. This component should only be installed on one server in your deployment.
• If you are using a SQL-based authorization store, do not select Create MSSQL AzMan authori-zation store on the AzMan Authorization Store Type page; the store was created when you installed the first Web server with the Model Manager Data component.
• To prevent a lookback from occurring when the website queries the local repository through the load balancer, users should configure the Website to look for the repository by using the fully qualified domain name of the local machine.
Failing Over to the Failover vCAC ServerIn the event of a system failure on the Manager Service host, follow these steps to fail over to the sec-ondary server:
1. If the primary vCAC Server is still running:
a. Select Start > Administrative Tools > Services.
b. Stop any vCloud Automation Center Agent services, then stop all VMware DEM services and vCloud Automation Center services.
c. Change the Startup Type of the vCloud Automation Center service from Automatic to Man-ual.
Note: If the primary server is not running, be sure to change the vCloud Automation Center service to manual startup once it is back up.
2. Deactivate the primary server on the load balancer.
3. Activate the failover vCAC Server on the load balancer.
4. On the failover server, select Start, right-click Command Prompt and select Run as adminis-trator. In the command window, issue the command iisreset.
5. Restart the vCAC services on the failover server.
a. Select Start > Administrative Tools > Services.
b. Start the vCloud Automation Center service, the Distributed Execution Manager services and any vCloud Automation Center Agent services (see Chapter 4).
c. Change the Startup Type of the vCloud Automation Center service from Manual to Auto-matic.
Installing vCAC in Web Farm ConfigurationThe Enable Web farm support option in the vCAC installer enables the vCAC Web servers to use a shared session state database. In this configuration, the session state database is used to track session information regardless of load balancer settings for session affinity. For performance reasons, VMware recommends that you use a load balancer with session affinity to manage sessions across Web servers instead of deploying a session state database.
If you want to use a database to track Web server sessions, the high-level process is:
1. Create the session state database. See "Creating the Session State Database" on page 48.
vCloud Automation Center
VMware Documentation 48 Release 5.2
2. Prepare the authorization store if necessary. See "Preparing a SQL-based Authorization Store" on page 20.
3. Install the vCAC database. See "Creating the vCAC Database" on page 21.
4. Install the Web components in a Web farm configuration by selecting Web Farm Support on the vCAC Web Site Configuration page. See "Installing the Web Components" on page 27.
5. Install the Manager Service. See "Installing the Manager Service (vCAC Server)" on page 31.
6. Install the Distributed Execution Managers. See "Installing the Distributed Execution Managers" on page 35.
Note: For successful operation of vCAC, the Web site machine key must be the same across all Web servers in a Web server cluster. See http://msdn.microsoft.com/en-us/library/ff649308.aspx.
Creating the Session State DatabaseYou can use a SQL Server database to store ASP.NET session state across the Web servers in the cluster throughout a user’s visit. This database should be created in the SQL Server instance containing the vCAC database before the Web components of a Web farm configuration are installed.
Note: For performance reasons, VMware recommends that you use a load balancer with session affinity to track user sessions instead of a session state database.
Prerequisites
• Download the vCloud Automation Center installation package.
To create a session state database for use with vCAC:
1. Open a command prompt.
2. Create the session state database using the aspnet_regsql.exe command, for example:
aspnet_regsql.exe -S databaseinstance -E -ssadd -sstype p -d databasename
where databaseinstance is either localhost or the database server and instance name in the format server\instance and databasename is the name of the session state database, which is optional. The default name for the database if you omit the -d argument is ASPState.
For more information about the ASP.NET SQL Server Registration Tool (aspnet_regsql.exe), see the Microsoft documentation: http://msdn.microsoft.com/en-us/library/ms229862(v=vs.80).aspx.
3. If the user under which the Manager Service will run is not the owner of the session state data-base, you must run a script to grant that user access to the session state database.
a. Navigate to the directory where you extracted the installation zip archive, then navigate to the Database subdirectory.
b. Extract the DBInstall.zip archive to a local directory.
c. Edit GrantAspSessionStateUserPermission.sql and replace all instances of $(Servi-ceUser) in the script with the user name under which the vCloud Automation Center service (Manager Service) will run. (For information about Manager Service credentials, see "Users

Release 5.2 49 VMware Documentation
vCloud Automation Center Installation Guide
and Credentials Required for vCAC Services".) Do not replace ServiceUser in the line end-ing with WHERE name = N'ServiceUser').
d. Open SQL Server Management Studio.
e. Select the session state database under Databases in the left-hand pane.
f. Click New Query.
A SQL Query window opens in the right-hand pane.
g. Paste the entire modified contents of GrantAspSessionStateUserPermission.sql into the query window.
h. Click Execute.

vCloud Automation Center
VMware Documentation 50 Release 5.2
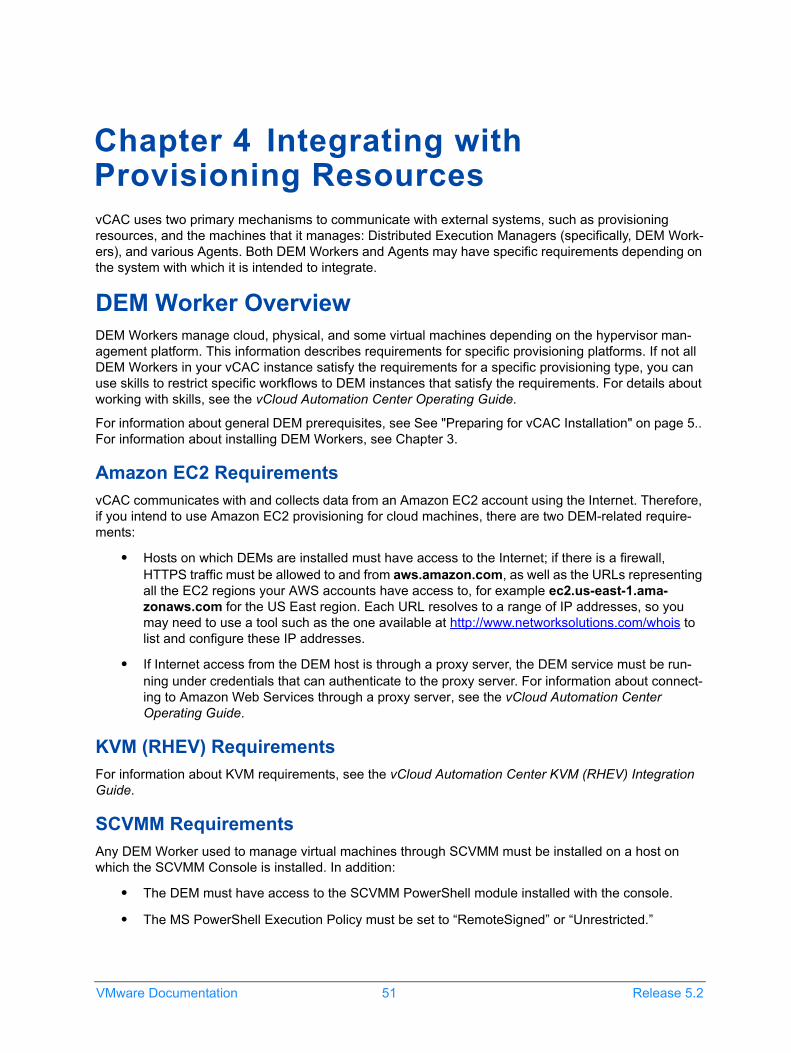
VMware Documentation 51 Release 5.2
Chapter 4 Integrating with Provisioning ResourcesvCAC uses two primary mechanisms to communicate with external systems, such as provisioning resources, and the machines that it manages: Distributed Execution Managers (specifically, DEM Work-ers), and various Agents. Both DEM Workers and Agents may have specific requirements depending on the system with which it is intended to integrate.
DEM Worker OverviewDEM Workers manage cloud, physical, and some virtual machines depending on the hypervisor man-agement platform. This information describes requirements for specific provisioning platforms. If not all DEM Workers in your vCAC instance satisfy the requirements for a specific provisioning type, you can use skills to restrict specific workflows to DEM instances that satisfy the requirements. For details about working with skills, see the vCloud Automation Center Operating Guide.
For information about general DEM prerequisites, see See "Preparing for vCAC Installation" on page 5.. For information about installing DEM Workers, see Chapter 3.
Amazon EC2 RequirementsvCAC communicates with and collects data from an Amazon EC2 account using the Internet. Therefore, if you intend to use Amazon EC2 provisioning for cloud machines, there are two DEM-related require-ments:
• Hosts on which DEMs are installed must have access to the Internet; if there is a firewall, HTTPS traffic must be allowed to and from aws.amazon.com, as well as the URLs representing all the EC2 regions your AWS accounts have access to, for example ec2.us-east-1.ama-zonaws.com for the US East region. Each URL resolves to a range of IP addresses, so you may need to use a tool such as the one available at http://www.networksolutions.com/whois to list and configure these IP addresses.
• If Internet access from the DEM host is through a proxy server, the DEM service must be run-ning under credentials that can authenticate to the proxy server. For information about connect-ing to Amazon Web Services through a proxy server, see the vCloud Automation Center Operating Guide.
KVM (RHEV) RequirementsFor information about KVM requirements, see the vCloud Automation Center KVM (RHEV) Integration Guide.
SCVMM RequirementsAny DEM Worker used to manage virtual machines through SCVMM must be installed on a host on which the SCVMM Console is installed. In addition:
• The DEM must have access to the SCVMM PowerShell module installed with the console.
• The MS PowerShell Execution Policy must be set to “RemoteSigned” or “Unrestricted.”

VMware Documentation 52 Release 5.2
vCloud Automation Center
For information on PowerShell Execution Policy issue one of the following commands at Power-Shell command prompt:
help about_signing
help Set-ExecutionPolicy
• If all DEM Workers within the vCAC instance are not on compute resources meeting these requirements, Skills must be used to direct all SCVMM-related workflows to those that are. For information about using skills to associate workflows with DEM instances, see the vCloud Auto-mation Center Extensibility Guide.
The following additional requirements apply to SCVMM:
• Each SCVMM instance must be joined to the domain containing the vCAC server.
• The credentials used to manage the endpoint representing an SCVMM instance must have Administrator privileges on the SCVMM server. These credentials must also have Administrator privileges on the Hyper-V servers within the instance.
• Hyper-V servers within an SCVMM instance to be managed by vCAC must be Windows 2008 Servers with Hyper-V installed. The processor must be equipped with the necessary virtualiza-tion extensions .NET Framework 4.5 must be installed and Windows Management Instrumenta-tion (WMI) must be enabled.
• To provision machines on an SCVMM compute resource, a user must be added in at least one security role within the SCVMM instance, for example the Self-Service role.
Configuring the DEM to Connect to SCVMM on a Nonstandard Installation Path
By default the DEM Worker configuration file (DynamicOps.DEM.exe.config) points to the standard installation path of the SCVMM Console: {ProgramFiles}\Microsoft System Center 2012\Virtual Machine Manager\bin.
If the SCVMM Console has been installed in another location, the configuration file of the DEM Worker (located in %SystemDrive%\Program Files (x86)VMware\vCAC\Distributed Execution Man-ager\<InstanceName>\DynamicOps.DEM.exe.config must be updated to change the default path in the assemblyLoadConfiguration section to point to the new folder:
<assemblyLoadConfiguration>
<assemblies>
<!-- List of required assemblies for Scvmm -->
<add name="Errors" path="{ProgramFiles}\Microsoft System Center 2012\Virtual
Machine Manager\bin" />
[...]
</assemblies>
</assemblyLoadConfiguration>
After updating the DEM configuration file, restart the DEM to apply the changes.

Release 5.2 53 VMware Documentation
vCloud Automation Center Installation Guide
Virtual Provisioning on SCVMM
When setting up a virtual machine template in SCVMM, a Guest OS Profile can be added directly to a Windows template using SCVMM Console. See "Preparing for Virtual Provisioning by Cloning" in the vCloud Automation Center Operating Guide for more information on Windows and Linux template config-uration.
Some restrictions apply to SCVMM template and hardware profile names. Specifically, these names can-not start with the following words:
• TemporaryTemplate
• Temporary Template
• TemporaryProfile
• Temporary Profile
• Profile
Because of naming conventions that SCVMM and VMware use for temporary templates and hardware profiles, these words are ignored during data collection.
A compute resource running under SCVMM can have multiple paths in the placement section that are collected and exposed to be assigned in a reservation.
On a Hyper-V cluster under SCVMM management, data collection is for Shared Volumes only since a work load can only be provisioned on a shared resource of a cluster.
• View the SCVMM Console, then right-click your Hyper-V cluster to select properties. Browse to the Shared Volumes section to view the storage properties.
When running data collection on Standalone hosts for storage used in the reservation, vCAC collects the default virtual machine paths. This can be configured through SCVMM Console under the Placement section.
View the SCVMM Console, then right-click your Hyper-V standalone host to select properties. Browse to the Placement section to view the storage properties.
vCAC Agent OverviewvCAC server relies on four types of agents:
• Hypervisor proxy agents
• Windows Management Instrumentation (WMI) agents
• Virtual desktop infrastructure (VDI) integration agents
• External provisioning infrastructure (EPI) integration agents
These agents are all installed using the same procedure, as described later in this chapter.

VMware Documentation 54 Release 5.2
vCloud Automation Center
Planning Your vCAC Proxy AgentsThe vCAC Server uses proxy agents to communicate with virtualization platforms such as vCenter Server instances, Citrix XenServers, and Microsoft Hyper-V servers, to discover available work, fetch host information, and report completed work items and host status changes.
Once a vCAC server proxy agent is managing a virtualization host, the vCAC Server can collect data about that host, including its characteristics, the physical memory and storage it provides, and the amount of these resources that are in use, and any unmanaged virtual machines (provisioned outside vCAC server) that exist on the host.
A single instance of vCAC server can support multiple XenServers, Hyper-V servers and vCenter Server instances. The proxy agent that manages each host must have certain privileges on it. Therefore the number of proxy agents you install depends on the number needed to ensure that at least one will have the required access to each of the hosts you want to add to vCAC server. On this basis, one uniquely named proxy agent must be installed for:
• Each vSphere endpoint representing all discoverable ESX Servers within a single vCenter Server instance
• Each set of credentials used by the agent to access one or more XenServers
• Each set of credentials used by the agent to access one or more Hyper-V servers
You may want to fully prepare the credentials the agents will need before installing the agents. For vSphere agents, you need to create a vSphere endpoint containing these credentials as well as install-ing the agent. For Xen and Hyper-V agents, you need to install enough agents to cover all of the required credentials. For example, if you add half of your Hyper-V hosts to one domain and half to another, and within each domain prepare a set of administrator-level credentials for the proxy agents to use, you will need to install two Hyper-V agents—one for each domain. You will also need to collect the configuration information for each agent—the entities to be managed and the credentials required to manage them—before installing the agents. For these reasons, you will likely find it very helpful to pre-pare ahead of time a plan of the agents you need including the instances and hosts to be managed and the credentials to be used. An example is shown in the following table.
Table 15 Proxy Agent Installation Table
Note: If you installed clustered instances of vCAC for high availability, as described in Chapter 3, install identical sets of agents on the primary and failover vCAC servers.
vCAC Server Agent Type Agent NameServiceUsername vCenter Server URL or Hostname
vcac-1vSphere vsphere20 vc20 https://vsphere-20/sdk
vSphere vsphere27 vc27 https://vsphere-27/sdk
vcac-2
Hyper-V hv1 hv1 hv-217 through hv-225
Xenxen1 xen1 xen-11, xen-17, xen-25
xen2 xen2 xen-14, xen-19, xen-20-22
Release 5.2 55 VMware Documentation
vCloud Automation Center Installation Guide
Configuring Proxy Agents The way in which a proxy agent is configured for the virtualization hosts it manages depends on the type of host involved.
• A vSphere proxy agent is configured when installed for a vSphere endpoint specifying the loca-tion of the vCenter Server instance it is to manage and the credentials it will use to do so. The endpoint, which is created using the vCAC Administrator > Endpoints activity in the vCAC con-sole (as described in the vCloud Automation Center Operating Guide) must exist and contain valid information before the agent is installed (or at least before the agent service is started). Use your agent list to create the needed endpoints and then install the corresponding vSphere agents.
• A Xen or Hyper-V proxy agent is installed with only the credentials used to gain access to the hosts it will manage and not the names of the host themselves. For this reason, each Xen and Hyper-V agent must be configured for each XenServer or Hyper-V host it is to manage. This is done using the vCAC Administrator > Agent Configuration activity in the vCAC console, as described in the vCloud Automation Center Operating Guide, and can be done after the agent is installed and running. Once a host is configured using this function and placed in an enterprise group, data collection begins automatically. Use your agent list to install the needed Xen and Hyper-V agents and then configure the agents for the corresponding hosts.
Enabling Remote WMI Requests on Windows MachinesA Windows Management Instrumentation (WMI) agent is required to collect certain data from a Windows machine managed by vCAC, for example the Active Directory status of a machine’s vCAC owner. To ensure successful management of Windows machines, you must enable all WMI agents to collect data from Windows machines.
To enable the WMI agent to collect this data from Windows machines:
1. In each domain to which Windows virtual machines provisioned and managed by vCAC may be joined, create an Active Directory group and add to it the service credentials of the WMI agents that may need to execute remote WMI requests on the provisioned machines.
2. Enable remote WMI requests for the Active Directory group(s) containing the agent credentials on each Windows machine provisioned. Procedures for this are discussed in Chapter 2 of the vCloud Automation Center Operating Guide.
Virtual Desktop IntegrationvCAC uses virtual desktop integration (VDI) PowerShell agents to register the machines it provisions with external desktop management systems and to communicate with those systems. The VDI integration agent currently supports registration of machines with XenDesktop and provides the owners of registered machines with a direct connection to XenDesktop Web Interface from the vCAC Console. A VDI agent can be installed as a dedicated agent to interact with a single Desktop Delivery Controller or as a general agent that can interact with multiple DDCs. You can combine dedicated and general agents as needed given your particular configuration, throughput, availability and load balancing considerations.

VMware Documentation 56 Release 5.2
vCloud Automation Center
External Provisioning IntegrationExternal provisioning integration (EPI) PowerShell agents allow vCAC to integrate external provisioning technologies into its machine provisioning process. The EPI integration agent currently supports integra-tion of vCAC with Citrix Provisioning Server, which provides on-demand streaming of the disk images from which machines boot and run.
An EPI agent can be installed as a dedicated agent to interact with a single external provisioning server or as a general agent that can interact with multiple external provisioning servers of the same type. (Only the former configuration is supported for Citrix Provisioning Server.) You can combine dedicated and general agents as needed given your particular configuration, throughput, availability and load bal-ancing considerations.
Using Visual Basic Scripts in Provisioning vCAC allows you to specify Visual Basic (VB) scripts to be run outside vCAC as additional steps in the provisioning process, before or after provisioning a machine. You can also run a script when unprovi-sioning (destroying) a machine. The desired script(s) are specified in the blueprint from which machines will be provisioned. Such scripts have access to all the custom properties associated with the machine and can even update their values; the next step in the workflow then has access to these new values. For example, you could use a script to generate certificates or security tokens before provisioning and then use them in provisioning the machine. (See the vCloud Automation Center Operating Guide for information about custom properties.)
To enable VB scripts in provisioning, you must install a specific type of EPI agent and place the scripts you want to use on the system on which the agent is installed.
When executing a VB script, the EPI agent passes all machine custom properties as arguments to the script. To return updated property values to vCAC, you must place these properties in a dictionary and call a function provided by vCAC.
A sample VB script that you can use as a template is included in the scripts subdirectory of the EPI agent installation directory. This script contains a header to load all arguments into a dictionary, a body in which you can include your function(s) and a footer to return updated custom properties values to vCAC.
See the vCloud Automation Center Operating Guide for more information about adding VB scripts to the provisioning process.
Note: You can install multiple EPI/VBScripts agents on multiple servers and provision using a specific agent and the Visual Basic scripts on that agent’s host, but not using the vCAC agent installer and the provisioning procedures described in the vCloud Automation Center Operating Guide. If you have a need for this capability, contact VMware customer support

Release 5.2 57 VMware Documentation
vCloud Automation Center Installation Guide
vCAC Agent RelationshipsvCAC agents and their relationships to vCAC, virtualization platforms, and other external systems are shown in the following diagram. Each blue double arrow in the diagram represents a proxy agent; for example, the arrow labeled hvC represents the proxy agent communicating with Hyper-V servers C1 and C2, both accessed using credentials C.
The diagram also shows VDI and EPI agents (in green) and the servers with which they interact. The WMI agent is not shown. Cloud and physical provisioning infrastructure are also not shown in this dia-gram.
Figure 2 vCAC Agents for vCenter Server, XenServer and Hyper-V Plus VDI and EPI
Note: vCAC does not support multiple machines with the same name within a single vCenter Server instance, XenServer or Hyper-V server. This can occur if a sin-gle instance or provisioning host is being managed by multiple instances of vCAC through multiple agents, as each instance will validate new names only against the names of machines it is managing, not against names of those man-aged by other instances. You can prevent this problem by customizing each instance of vCAC to validate machine names against DNS and/or Active Direc-tory; see Chapter 5 of the vCloud Automation Center Operating Guide for more information.

VMware Documentation 58 Release 5.2
vCloud Automation Center
vCAC Agent Installation Location and RequirementsvCAC agents are typically installed on the same host as the vCAC server they communicate with (with the exception of EPI agents interacting with Citrix Provisioning Server 5.1, as described below). If an agent is installed on another host, the network configuration must be such that the agent can communi-cate with the vCAC server host.
A vCAC agent can be installed on any Windows Server 2008 SP2 (32 or 64-bit) or Windows Server 2008 R2 system with Microsoft .NET Framework 4.5 installed. .NET Framework 4.5 can be obtained from http://msdn.microsoft.com/en-us/netframework/aa569263.aspx.
Each agent is installed under a unique name in its own directory, Agents\agentname, under the vCAC install directory (typically %SystemDrive%\Program Files (x86)\VMware\vCAC), with its configuration stored in the file VRMAgent.exe.config in that directory.
Hypervisor Proxy Agent Installation RequirementsHypervisor proxy agent installation requires that you provide the following:
• Credentials under which to run the agent service; these must have administrative access to the installation host (typically the vCAC server host).
• If a Xen agent or Hyper-V agent, one set of administrator-level credentials for all XenServer or Hyper-V instances on the hosts to be managed by the agent.
Note: By default, Hyper-V is not configured for remote management. A vCAC Hyper-V proxy agent cannot communicate with a Hyper-V server unless remote man-agement has been enabled. To configure Hyper-V for remote management, see http://technet.microsoft.com/en-us/library/cc794756.aspx or other Micro-soft documentation.
• If a vSphere agent, the URL of the vCenter Server instance and credentials for the instance, which must have permission to modify custom attributes.
In some cases, the use of an administrator-level account for this purpose may conflict with established policy or practice. The following table shows the detailed permissions the vSphere agent account must have to enable the agent to manage a vCenter Server instance for vCAC.
Note: When creating the endpoint representing the vCenter Server instance to be managed by a vSphere agent, you can choose to have the agent use the cre-dentials the service is running under to interact with vCenter Server. See "Pre-paring Endpoints for vSphere Agents" for more information.
Be sure to disable or reconfigure any third-party software that might automati-cally change the power state of virtual machines outside of vCAC. Such changes can interfere with vCAC’s management of the machine’s lifecycle and cause errors.

Release 5.2 59 VMware Documentation
vCloud Automation Center Installation Guide
Table 16 Permissions Required for vSphere Agent to Manage vCenter Server Instance
Attribute Type VirtualCenter 2.5 vCenter Server 4.0/4.1/5.0/5.1
GlobalManage Custom Attributes Manage Custom Attributes
Set Custom Attribute Set Custom Attribute
FolderCreate Folder Create Folder
Delete Folder Delete Folder
DatastoreBrowse Datastore Browse Datastore
Allocate Space
Virtual Machine
Inventory
Create Create from existing
Move Create New
Remove Move
Remove
Interaction
Power On Power On
Power Off Power Off
Suspend Suspend
Reset Reset
Device Connection Device Connection
Configure CD Media Configure CD Media
Tools Install Tools Install

VMware Documentation 60 Release 5.2
vCloud Automation Center
WMI Agent Installation RequirementsTypically, one WMI agent is installed for each vCAC instance. WMI agent installation requires that you provide credentials with administrative access to the installation host (typically the vCAC server host).
The credentials under which you install the WMI agent must also have the right to execute remote WMI requests on Windows machines managed by vCAC. See "Enabling Remote WMI Requests on Windows Machines", earlier in this chapter, for more information.
Virtual Machine
Configuration
Rename Rename
Add Existing Disk Add Existing Disk
Add New Disk Add New Disk
Remove Disk Remove Disk
Change CPU Count Change CPU Count
Memory Memory
Add or Remove Device Add or Remove Device
Settings Settings
Change Resource Change Resource
Advanced Advanced
Swap Placement Swap Placement
Modify Device Settings Modify Device Settings
Disk Change Tracking
Set Annotation (5.0 and 5.1 only)
Provisioning
Customize Customize
Clone Clone
Deploy Template Deploy Template
Read Customization Specs Read Customization Specs
State
Create Snapshot
Remove Snapshot
Revert to Snapshot
ResourceAssign VM to Res Pool Assign VM to Res Pool
Migrate Migrate
PermissionsModify Permission Modify Permission
Assign Network
Attribute Type VirtualCenter 2.5 vCenter Server 4.0/4.1/5.0/5.1

Release 5.2 61 VMware Documentation
vCloud Automation Center Installation Guide
VDI Integration Agent Installation RequirementsThe following requirements apply to VDI Agents:
• XenDesktop DDC servers to be integrated with vCAC must be running XenDesktop 4 or later. When installing a VDI agent for XenDesktop you must choose whether to install for XenDesktop 4 or XenDesktop 5; see "Installing a vCAC Agent".
Note: A XenDesktop 4 VDI agent cannot be installed on a 64-bit host, such as a Win-dows Server 2008 R2 system. If the vCAC server is a 64-bit host, install any XenDesktop 4 VDI agents on other hosts in an appropriate network configura-tion.
• The credentials under which the agent will run must have administrative access to all XenDesk-top DDC servers with which it will interact.
• A general VDI agent can interact with multiple servers. If installing one dedicated agent per server for load balancing or authorization reasons, you must provide the name of the XenDesk-top DDC server when installing the agent. A dedicated agent can handle only registration requests directed to the server specified in its configuration.
• The following software must be installed on the installation host prior to agent installation:
Microsoft PowerShell. The version required depends on the installation host’s operating sys-tem and may have been installed with that operating system. Visit http://support.microsoft.com for more information.
Citrix XenDesktop SDK. The version depends on which version of XenDesktop you have installed. The SDK for XenDesktop 5 or 5.5 is included on the XenDesktop installation disc. For XenDesktop 4, version 2.1.2327 is required; you can download this software from these loca-tions:
• http://support.citrix.com/article/CTX118973
• http://support.citrix.com/servlet/KbServlet/download/18540-102-19308/XdsControllerSDK-2_1_2327-E.zip
• MS PowerShell Execution Policy must be set to “RemoteSigned” or “Unrestricted.”
For information on PowerShell Execution Policy issue one of the following commands at Power-Shell command prompt:
help about_signing
help Set-ExecutionPolicy
• In XenDesktop 5.x, the name given to the XenServer Host on your XenDesktop 5.x server must match the UUID of the Xen Pool in XenCenter. If no XenPool is configured, it must match the UUID of the XenServer itself.
a. In Citrix XenCenter, select your XenPool or standalone XenServer and click the General tab. Record the UUID.
b. When adding your XenServer Pool or standalone host to XenDesktop, type the UUID that was recorded in the previous step for the Connection name.

VMware Documentation 62 Release 5.2
vCloud Automation Center
• Each XenDesktop 5 DDC server with which you intend to register machines must be configured as follows:
• The group/catalog type must be Existing for use with vCAC.
• The name of a vCenter Server host on a DDC server must match the name of the vCenter Server instance as entered in the vCAC vSphere endpoint, without the domain. For exam-ple, if the address in the endpoint is https://virtual-center27.domain/sdk, the host’s name on the DDC server must be set to virtual-center27.
• If XenDesktop will be used with Citrix Provisioning Server, PVS 5.6 or higher must be in use.
• Each XenDesktop 4 DDC server with which you intend to register machines must be configured as follows:
• The group type must be Assigned > Pre-Assigned for use with vCAC.
• ly, Citrix MFCOM can be registered for each DDC server. This is not typically required but you may want to forestall errors during XenDesktop registration of provisioned machines by using the following procedure. Details are available at http://support.citrix.com/article/CTX120649.
a. Log into the host as a user with administrative access. Open a command window and change to the directory C:\Program files\Citrix\Desktop Delivery Controller\Power-shell.
b. Type:
mfreg.exe DDC_server_name
where DDC_server_name is the fully-qualified hostname of each XenDesktop DDC server with which you intend to register machines.
EPI Agent Installation RequirementsEPI agents can be used to integrate vCAC with Citrix Provisioning Server and to enable the use of Visual Basic scripts in the provisioning process.
EPI Agent for Citrix Provisioning Server Installation Requirements
The following requirements apply to installing an EPI agent to interact with Citrix Provisioning Server:
• For Citrix Provisioning Services (PVS) 5.1 instances, the EPI agent must be installed on the PVS host. For PVS 5.6 instances, the EPI agent can be installed on the same host or a remote host.
• You must apply one of the following hot patches to Citrix Provisioning Services.
For PVS 5.1, see:
• http://support.citrix.com/article/CTX125103
For PVS 5.6, see:
• http://support.citrix.com/article/CTX128245

Release 5.2 63 VMware Documentation
vCloud Automation Center Installation Guide
• Although an EPI agent can generally interact with multiple servers, Citrix Provisioning Server requires a dedicated EPI agent. You must install one EPI agent for each Citrix Provisioning Server instance, providing the name of the server hosting it. The credentials under which the agent will run must have administrative access to the Citrix Provisioning Server instance.
• On a XenDesktop 5 DDC server, Citrix PVS 5.6 or higher must be installed and used with XenDesktop
• The following software must be installed on the installation host prior to agent installation:
Citrix Provisioning Services SDK. The following versions of the SDK must be installed depending on the PVS version installed.
Table 17 Citrix Provisioning Services SDK Versions
Microsoft PowerShell. The version required depends on the installation host’s operating sys-tem and may have been installed with that operating system. Visit http://support.microsoft.com for more information.
You must also ensure that the PowerShell Snap-In is installed. The following instructions are quoted from the PowerShell Programmer’s Guide available at http://support.citrix.com/article/CTX121334:
• The PowerShell snap-in (McliPSSnapIn.dll) can be installed using the Provisioning Server Console install.
• If the snap-in later needs to be registered in PowerShell, this can be manually done by exe-cuting the following command at a DOS command prompt, in the directory containing McliPSSnapIn.dll:
%systemroot%\Microsoft.NET\Framework\v2.0.50727\installutil.exe \
McliPSSnapIn.dll
You must be in the Citrix Provisioning Server directory in which the snap-in is located.
• Another way to register the snap-in is by running this command at the PowerShell command prompt:
$installutil = $env:systemroot + \ '\Microsoft.NET\Frame-
work\v2.0.50727\installutil.exe' &$installutil \ McliPSSnapIn.dll
Note: On a 64-bit installation host, substitute \Microsoft.Net\Framework64 for \Microsoft.Net\Framework in the above commands.
• MS PowerShell Execution Policy must be set to “RemoteSigned” or “Unrestricted.”
PVS Version SDK Version
5.1 5.1.0.2933
5.6 5.6.0.1028
5.6 SP1 5.6.1.1045
5.6 SP2 5.6.2.1313
6.0 6.0.0.1026

VMware Documentation 64 Release 5.2
vCloud Automation Center
For information on PowerShell Execution Policy issue one of the following commands at Power-Shell command prompt:
help about_signing
help Set-ExecutionPolicy
EPI Agent for Visual Basic Scripting Installation Requirements
The following requirements apply to installing an EPI agent to enable the use of Visual Basic scripts in the provisioning process:
• The credentials under which the agent will run must have administrative access to the installa-tion host.
• Microsoft PowerShell must be installed on the installation host prior to agent installation: The version required depends on the installation host’s operating system and may have been installed with that operating system. Visit http://support.microsoft.com for more information.
• MS PowerShell Execution Policy must be set to “RemoteSigned” or “Unrestricted.”
For information on PowerShell Execution Policy issue one of the following commands at Power-Shell command prompt:
help about_signing
help Set-ExecutionPolicy
Preparing Endpoints for vSphere AgentsA vSphere agent is configured during installation for an endpoint containing information about the vCen-ter Server instance it is to manage. Because this endpoint must exist and contain valid information before the agent service is started, you have two options:
• Create all needed endpoints first, using the vCAC console and the instructions provided in Chapter 3 of the vCloud Automation Center Operating Guide, then install and start the corre-sponding vSphere agents.
• Install the needed vSphere agents without starting them, then create the corresponding end-points, then start the agents.
If you want to create the endpoints before installing agents, you must use the vCAC console in the vCAC administrator role. Start the console (as described in Chapter 3) either as a member of the local Administrators group or as a user who has been given the vCAC administrator role by a member of the group. Details are provided in the vCloud Automation Center Operating Guide, but the following is a very brief summary of the procedure for creating a generic endpoint.
1. Select vCAC Administrator > Endpoints.
2. Move the pointer over the New Endpoint link at the right-hand end of the title bar and choose vSphere from the hover menu to display the New Endpoint - vSphere page.
3. Enter the endpoint name (typically this indicates the vCenter Server instance the endpoint is for) and a more detailed description and enter the URL of the vCenter Server instance (for example https://vsphereA/sdk),
4. Click the button next to Credentials to display the Credentials grid.

Release 5.2 65 VMware Documentation
vCloud Automation Center Installation Guide
5. Click the New Credentials link at the right-hand end of the title bar. Enter credentials for the vCenter Server instance the agent will manage, along with a useful name and a more detailed description. (See "Hypervisor Proxy Agent Installation Requirements" for information about vCenter Server permissions required for vSphere agents.)
Alternatively, you can choose to have the vSphere agent interact with vCenter Server using the credentials under which the which the agent service will be running (you provide these during agent installation). To do so, select the predefined credentials Integrated for the endpoint.
Click the Save button to save the credentials. Select them and click OK to return to the New Endpoint page.
6. Click the Save button.
7. Repeat this procedure for all the needed endpoints.
Installing a vCAC Agent
Prerequisites
• Download the vCloud Automation Center installation package.
To install a vCAC proxy, WMI, VDI or EPI agent:
1. Navigate to the directory where you extracted the installation zip archive, then navigate to the Setups subdirectory.
2. Right-click vCAC-Agent-Setup.exe and select Run as administrator.
3. On the Welcome page, click Next.
4. On the End-User License Agreement page, read the License Agreement, click I accept the terms in the License Agreement, then click Next.
Note: If the vCAC agent installer detects existing vCAC agents installed on the host, it provides you with the option to upgrade those agents to the current version of vCAC. See Chapter 5 for procedures for upgrading vCAC and vCAC agents.
5. On the Agent Name page:
a. In the Agent name box, provide a unique name for the agent.
b. In the vCloud Automation Center Hostname:Port box, specify the host name and port of the vCAC Server. The default port is 443.
c. In the Model Manager Web Service Hostname:Port box, specify the host name and port of the Model Manager server. The default port is 443.
Note: Maintain a careful record of each proxy agent’s name, the credentials entered for it and the virtualization platform instance it is intended for so that when a Hyper-V or XenServer host is added to the agent configuration the administrator performing the operation has this information readily available.
Agent names must not be duplicated unless the agent configurations are identi-cal.

VMware Documentation 66 Release 5.2
vCloud Automation Center
6. On the Agent Selection page, select the type of agent you want to install. You can change the default installation location for the agent (%SystemDrive%\Program Files (x86)\VMware\vCAC Agents) by using the Browse button.
Select Test for a test agent that will not interact with any virtualization platform or other entity.
The procedure for configuring the agent differs depending on the agent type.
For a vSphere Agent
• On the Service Configuration page, indicate whether you want to register and start the agent service as part of installation. Both are required for the proxy agent to function, but if you have not prepared a valid endpoint for the agent, do not select Start Agent Service; you must create the endpoint before starting the agent. (Starting the agent if the endpoint does not exist or does not have valid information generates repeated error messages until the service is stopped.)
On the same page, enter the credentials to be used by the agent service. See "Hypervisor Proxy Agent Installation Requirements" for a detailed discussion of permissions required for vSphere agent credentials.
Note: If you selected or will select the predefined Integrated credentials for the vSphere endpoint you are going to specify on the vSphere Endpoint Configura-tion page (see "Preparing Endpoints for vSphere Agents"), the credentials you enter for the agent service must have the permissions listed in "Hypervisor Proxy Agent Installation Requirements" for the vCenter Server instance speci-fied in the endpoint.
Throughout this procedure, when you specify a domain user you must enter the username in domain format, for example ENGINEERING\jsmith.
Do not select Use Local System Account for a vSphere agent.

Release 5.2 67 VMware Documentation
vCloud Automation Center Installation Guide
You can also choose whether to change the location for the agent logs. You may want to do this, for example, to place the log files on a dedicated partition separate from the one hosting the operating system. This prevents the increase in space devoted to log files from affecting the operating system or vCAC. To change from the default location, uncheck Use Default Log Location and enter the log file location you want in the Agent Log Location box.
• On the vSphere Agent Configuration page, enter the credentials you entered for the Model Manager Web service on the Model Manager Configuration page when installing vCAC. The agent installer validates the combination of Model Manager Web host and service creden-tials; if they are valid, you can continue with installation. If an error is returned, you must determine the correct combination of repository host and credentials before proceeding.

VMware Documentation 68 Release 5.2
vCloud Automation Center
• On the vSphere Endpoint Configuration page, enter the name of the generic endpoint you prepared containing the URL of the vCenter Server instance and appropriate credentials for the instance.
Remember, if you have not yet created a valid endpoint, you should not start the agent ser-vice. Return to the Service Configuration page unselect Start Agent Service. After you have created the endpoint you configured for the agent, you can start the agent service by selecting Start > Administrative Tools > Services and then starting the vCloud Automa-tion Center Agent – agentname service.)
Note: The agent installer cannot validate the virtualization platform credentials con-tained in the endpoint. If this information is entered incorrectly, the agent is not able to log into the instance and the error is recorded in the log file in the agent directory (%SystemDrive%\Program Files (x86)\VMware\vCAC Agents\agentname). After you correct the endpoint data, the agent automati-cally picks up the new credentials.
For a Xen or Hyper-V Agent

Release 5.2 69 VMware Documentation
vCloud Automation Center Installation Guide
• On the Agent Configuration page enter credentials that provide administrator-level access to XenServer or Hyper-V on all hosts that will be managed by the agent.
Note: A Hyper-V proxy agent installed on a Hyper-V server will connect to the local instance of Hyper-V using the service credentials it is running under as entered on the Service Configuration page described below, not the credentials entered on the Agent Configuration page.
The agent installer cannot validate the virtualization platform credentials you enter. If the information is entered incorrectly for a Hyper-V or Xen agent, the agent will not discover the intended host when configured for one (see the vCloud Automation Center Operating Guide). See "Modifying Proxy Agent Con-figurations", below, for instructions for correcting the credentials.
For a VDI PowerShell Agent
• On the Agent Configuration page, select the type of virtual desktop infrastructure (currently locked to XenDesktop) and choose XenDesktop 4 or XenDesktop 5 (see "VDI Integration Agent Installation Requirements" for important information). Then enter the name of a XenDesktop DDC server at the VDI Server prompt or leave the field blank to let the agent interact with multiple servers. The server with which a VDI agent interacts depends on the value of a required custom property in the blueprint from which you provision virtual machines with XenDesktop integration, VDI.Server.Name (see the vCloud Automation Cen-ter Operating Guide). Therefore,
• If you install a dedicated VDI agent by specifying a server name during installation, only machines whose VDI.Server.Name property specifies exactly the same server name as that configured for the agent can be registered with or provisioned by that server.
• If you install a general VDI agent by not specifying a server name during installation, a machine can be registered with or provisioned by any server specified in its VDI.Server.Name property (assuming the agent can contact that server).

VMware Documentation 70 Release 5.2
vCloud Automation Center
Note: A XenDesktop 4 VDI agent cannot be installed on a 64-bit host, such as a Win-dows Server 2008 R2 system. If the vCAC server is a 64-bit host, install any XenDesktop 4 VDI agents on other hosts in an appropriate network configura-tion.
The agent installer checks to see whether the Citrix XenDesktop SDK version required for the agent version you selected is installed on the installation host; if it is not, you are alerted and informed of what is required, but the agent installa-tion continues.
For an EPI PowerShell Agent
• On the Agent Configuration page, select a type of CitrixProvisioning or VBScripts. For EPI/CitrixProvisioning, you must specify a server name at the EPI Server prompt, as you must install a dedicated EPI agent for each Citrix Provisioning Server instance you want vCAC to interact with. The blueprint you create for provisioning with Citrix Provisioning Server must specify the name of a server for which an EPI/CitrixProvisioning agent is con-figured in the EPI.Server.Name custom property (see the vCloud Automation Center Oper-ating Guide). Do not enter a server name for an EPI/VBScripts agent.
Note: To interact with a Citrix Provisioning Server 5.1 instance, an EPI agent must be installed on the CPS host. For PVS 5.6 instances or higher, it can be installed on the same host or a different host.
When you select CitrixProvisioning, the agent installer checks to see whether the required Citrix Provisioning SDK version (see "EPI Agent Installation Requirements") is installed on the installation host; if it is not, you are alerted and informed of what is required, but the agent installation continues.
If you install multiple general EPI/VBScripts agents using the vCAC agent installer, the agent is chosen at random when a blueprint calls a Visual Basic script, so you must install the same scripts on the servers hosting all such agents or results will be inconsistent.
For more information on provisioning machines with VDI integration and EPI integration, including installing an EPI agent for provisioning with BMC BladeLogic or HP Software Automation (formerly Opsware SAS), see the vCloud Automation Center Operating Guide.
For a Guest, WMI or Test Agent
• The installer directly skips to the Service Configuration page.

Release 5.2 71 VMware Documentation
vCloud Automation Center Installation Guide
7. For all agents types except vSphere, the Service Configuration page follows agent configuration.
On this page, indicate whether you want to register and start the agent service as part of installa-tion. Both are required for the proxy agent to function. If you want to delay starting the service for any reason, you can easily start it manually later. (Select Start > Administrative Tools > Ser-vices and then start the vCloud Automation Center Agent – agentname service.)
On the same page, enter the credentials to be used by the agent service. As noted, this user must have administrative access to the machine the agent is being installed on. For VDI agents, the user must have administrative access to all VDI servers with which the agent will interact. For EPI/CitrixProvisioning agents, the user must have administrative access to Citrix Provisioning Server on the host it is installed on.
You can select Use Local System Account to run the agent service under the Local System account. If you do, you do not need to enter service credentials.
Note: The agent installer cannot validate the agent service credentials you enter. If this information is entered incorrectly or is not valid, installation fails.
A Hyper-V proxy agent installed on a Hyper-V server will connect to the local instance of Hyper-V using the service credentials entered on this page, not the credentials entered previously on the Agent Configuration page. Therefore these credentials must have administrator level access to the local Hyper-V instance as well as to the local host.
As noted in Enabling Remote WMI Requests earlier in this chapter, service cre-dentials for proxy agents and WMI agents must belong to an Active Directory group in each domain to which provisioned virtual machines may be joined. This allows the credentials to be enabled for remote WMI requests on those machines. For this reason, if you choose to run a proxy or WMI agent under the Local System account, the installation host must belong to all such domains and be added to the remote WMI request Active Directory group..

VMware Documentation 72 Release 5.2
vCloud Automation Center
This page also allows you to change the location for the agent service logs. You may want to do this, for example, to place the log files on a dedicated partition separate from the one hosting the operating system. This prevents the increase in space devoted to log files from affecting the operating system or vCAC. To change from the default location, uncheck Use Default Log Location and enter the log file location you want at the bottom of the page.
8. On the Ready to Install page, click Install.
When installation is complete and vSphere proxy agent service is started, all ESX Server hosts in the vCenter Server instance specified by the endpoint the agent is configured for are automatically discov-ered. Remember that you must configure XenServer and Hyper-V hosts for the hosts they are to man-age (using vCAC Administrator > Agent Configuration in the vCAC console, as described in the vCloud Automation Center Operating Guide) before information about them can be collected by vCAC.
Using a Script to Install Multiple AgentsBy using the VrmAgentInstaller.msi file, which can be extracted from the agent installer vCAC-Agent-Setup.exe, you can use a script to execute “silent” agent installations with no manual interaction required. The following is an example of such a script, installing a vSphere agent called VC-1, config-ured for the endpoint VC1Endpoint. The italicized values in the script refer to the input required when manually installing an agent, as described in the last section. TRANSFORMS keeps track of the agent instances.
To install another vSphere agent named VC-2 with endpoint VC2Endpoint on the same host, you would create another script with those values and TRANSFORMS set to AgentInstanceId02. A series of such scripts could be executed by a shell script to install as many agents as desired.
msiexec /i "VrmAgentInstaller.msi" /qb /norestart /l* Install-Agent.log
AGENT_TYPE=vSphere AGENT_NAME=VC-1 VRM_SERVER_NAME=manager_service_host
SERVICE_USER_NAME=agent_service_username SERVICE_USER_PASSWORD=agent_service_password
REPOSITORY_USER=manager_service_username
REPOSITORY_USER_PASSWORD=manager_service_password
VSPHERE_AGENT_REPOSITORY_HOSTNAME=model_manager_web_host ADDLOCAL=CoreAgent,vSphere-
Agent
VSPHERE_AGENT_ENDPOINT=Vc1Endpoint MSINEWINSTANCE=1 TRANSFORMS=:AgentInstanceId01
Modifying Proxy Agent ConfigurationsAt some time following the installation of a vCAC proxy agent, you may need to modify an agent config-uration setting you specified during installation. In particular, if the credentials provided for a XenServer or Hyper-V server are entered incorrectly, the proxy agent will not be able to connect to the virtualization platform; in this case you would need to update the agent configuration with the correct credentials. (When this happens the failed login attempt is recorded in the log file in the agent directory.)
The installation configurations are encrypted in the agent configuration file. However, a proxy agent con-figuration utility can be used to make such modifications. The utility also allows you to change vCAC’s machine deletion policy for the virtualization platform with which the agent communicates.
To display the current agent configuration (except the password you provided during install) using the utility, log into the vCAC Server as a user with administrator-level credentials and change to the direc-tory %SystemDrive%\Program Files (x86)\VMware\vCAC Agents\agent_name, where agent_name

Release 5.2 73 VMware Documentation
vCloud Automation Center Installation Guide
is the directory containing the proxy agent, which is also the name under which the agent was installed (see the previous procedure, "Installing a vCAC Agent"). Then issue the command
DynamicOps.Vrm.VRMencrypt.exe VRMAgent.exe.config get
For a vSphere agent, the output of the command looks like this:
managementEndpointName: vc227endpoint
doDeletes: True
For a Hyper-V or Xen agent:
Username: XS49admin
To change one of the configuration properties, issues the command
DynamicOps.Vrm.VRMencrypt.exe VRMAgent.exe.config set property value
where property is one of the following:
Table 18 Proxy Agent Configuration Properties
If you omit value, the utility prompts you for the new value. This is useful for entering passwords because your entry for this property is not echoed to the screen.
For example, to change the administrator level credentials for the virtualization platform specified during the agent install, issue these commands:
DynamicOps.Vrm.VRMencrypt.exe VRMAgent.exe.config set username jsmith
DynamicOps.Vrm.VRMencrypt.exe VRMAgent.exe.config set password
Please enter the value for password:
Please confirm the value for password:
To cause vCAC to place machines in a vCenter Server folder called VRMDeleted when they are destroyed in vCAC, instead of immediately deleting them in vCenter Server (the default), issue this com-mand:
DynamicOps.Vrm.VRMencrypt.exe VRMAgent.exe.config set doDeletes false
To switch vCAC back to the original behavior, immediate deletion, issue this command:
DynamicOps.Vrm.VRMencrypt.exe VRMAgent.exe.config set doDeletes true
property descriptionz
managementEndpointNameThe name of the generic endpoint for which the agent was configured at installation. Changing this property renames the generic endpoint within vCAC, rather than changing endpoints. (vSphere agents only.)
doDeletesDetermines whether machines are deleted from vCenter Server when destroyed in vCAC, or instead moved to the VRMDeleted folder. (vSphere agents only)
usernameThe username representing administrator-level credentials for the XenServer or Hyper-V server the agent communicates with. (Xen-Server and Hyper-V agents only.)
passwordThe password for the above username. (XenServer and Hyper-V agents only.)

VMware Documentation 74 Release 5.2
vCloud Automation Center
After changing an agent’s configuration, restart the agent service by by selecting Start > Administrative Tools > Services and then restarting the vCloud Automation Center Agent – agentname service.)
Note: The DynamicOps.Vrm.VRMencrypt.exe command can be used to change the configuration of proxy agents only.

VMware Documentation 75 Release 5.2
Chapter 5 Migrating to vCAC 5.2
This information presents the procedure required to migrate your existing implementation to vCAC 5.2.
Note: The migration process has changed from previous releases. Upgrading to vCAC 5.2 is not an automated process and requires manual steps to complete.
Supported Migration PathsThis guide describes how to migrate a DCAC 4.5 or vCAC 5.1 implementation to vCAC 5.2. To upgrade from DCAC 4.1 or DCAC 4.1 SP1, first upgrade to DCAC 4.5 as described in the DCAC 4.5 Installation Guide.
This guide refers to the existing DCAC or vCAC instance as vCAC. If you are upgrading from DCAC 4.5, you may have to substitute DCAC in component names or DCAC Console elements.
Overview of the vCAC Migration ProcessTo migrate an existing DCAC 4.5 or vCAC 5.1 instance to release 5.2:
1. Verify that you are upgrading from DCAC 4.5 or vCAC 5.1.
2. Create or import trusted certificates if you do not currently have them.
3. Allow all current machine provisioning and disposing operations to complete.
4. Verify that all data collections are completed and successful.
5. Record the names of all installed agents, DEMS, and endpoints associated with agents.
6. Record service usernames prior to migration.
7. Uninstall all customizations applied to the core product.
8. Stop all vCAC services on the Manager Service host and all DEM and proxy agent hosts.
9. Back up any files that may be changed as a result of the migration.
10. Create a snapshot or full backup of all systems hosting vCAC components.
11. Back up your Active Directory–based AzMan store, if applicable.
12. In your SQL instance, backup your previous release database.
13. Use the provided upgrade scripts to upgrade the existing vCAC database.
14. Uninstall all DEMs, agents, and components such as vCloud Automation Center Designer, vCAC Self-Service Portal, and WinPEBuilder.
15. Verify that the 5.2 installation prerequisites are met on each installation host.
16. Execute the vCAC 5.2 installer to begin the migration process.
17. Run the migration cleanup tool to clean up vSphere agent configuration and apply security updates.

VMware Documentation 76 Release 5.2
vCloud Automation Center
18. Install the vCAC 5.2 release of all DEMs.
19. Install the vCAC 5.2 release of all Agents.
20. Install the vCAC 5.2 release of all components.
21. Verify that the vCAC services are running.
22. Start the vCAC Console.
23. Perform required post-upgrade steps as described in this guide.
Verify the Current DCAC or vCAC VersionVerify the version of the currently installed vCAC instance by selecting the About link in the upper right of the vCAC console. The version displayed must be 4.5 Build 81, 5.1.1 Build 56, or 5.1.2 Build 282.
Create or Import SSL CertificatesIn release 5.2, vCAC and all its components are installed to use HTTPS as the transport protocol, which ensures secure communication between vCAC components.
As a result, before beginning a vCAC migration, you must decide which type of SSL certificate you will use. See "SSL Configuration" on page 6 for more information about certificate requirements.
Note: After migration, the Repository, vCAC, and vCACReports applications in IIS have Require SSL selected.
Allow Machine-Related Operations to CompleteEnsure that all machine provisioning, reprovisioning, and disposing (destroying/decommissioning) oper-ations have been completed and that no further machine-related operations will be initiated until upgrade is complete. All workflows should be completed or canceled. Additionally, all pending requests must be resolved prior to migration, such as Lease Extension requests, Approvals and Reclamation Requests.
Verify All Data Collections Are Completed and Suc-cessfulFor endpoint data collection:
1. Log in to the vCAC Console as a vCAC administrator.
2. Click vCAC Administrator > Endpoints.
3. For all physical endpoints, and any cloud or virtual endpoint that uses the DEM instead of a proxy agent to communicate with the provisioning platform (Amazon EC2, SCVMM, or vCloud Director), point to the name of the endpoint and click Data Collection.
4. Verify that the status of the most recent data collection is succeeded.
• If the data collection has been requested, wait for it to complete.
• If the data collection status is failed, consult the logs to resolve the issue, then click Start to initiate data collection.

Release 5.2 77 VMware Documentation
vCloud Automation Center Installation Guide
For compute resource data collection:
1. Log in to the vCAC Console as an enterprise administrator.
2. Click Enterprise Administrator > Compute Resources.
3. For each compute resource in the list, point to the name of the compute resource and click Data Collection.
4. For each type of data collection, verify that the status is Succeeded.
• If the data collection In Progress, wait for it to complete.
• If the data collection status is Failed, consult the logs to resolve the issue, then click Request Now to initiate data collection.
5. If your hosts belong to multiple enterprise groups with different administrators, repeat the above steps for each enterprise administrator.
Record DEM, Agent, and Endpoint InformationMake a record of the configuration settings for all DEMs and Agents and set it aside. When you install release 5.2 of the DEMs and agents, you must provide the same configuration.
To view the names and hosts of existing DEMs:
1. Log in to the vCAC Console as a vCAC administrator.
2. Click vCAC Administrator > Distributed Execution Status.
3. For each Distributed Execution Manager, note the following information:
• Name
• Host name (Machine)
• Role
• Skills, if any
To view the names of existing vCAC agents:
1. Log on to the vCAC Server.
2. Navigate to the agent installation location, typically %SystemDrive%\Program Files (x86)\DynamicOps\DCAC Agents.
3. For each subdirectory in this folder:
a. Note the directory name. This is the agent’s instance name.
b. Navigate to the agent directory, open a command prompt, and type:
DynamicOps.Vrm.VRMencrypt.exe VRMAgent.exe.config get
c. Note the value for managementEndpointName.
4. Repeat these steps for any other host on which agents may be installed.

VMware Documentation 78 Release 5.2
vCloud Automation Center
Record All Service User CredentialsVMware recommends that you use the same service user credentials for release 5.2 as for your existing implementation. This information may not be preserved when migrating to release 5.2, so you should record it before you begin the migration process.
To determine the vCAC service user credentials:
1. Log on to the vCAC Server as a user with full administrative access.
2. Select Start > Administrative Tools > Services.
3. Note the value under Log On As for the following services:
• Each VMware vCloud Automation Center Agent – agentname service (DynamicOps Cloud Automation Center Agent if upgrading from DCAC 4.5)
• Each VMware DEM-role - instancename service (DynamicOps Cloud Automation Center DEM if upgrading from DCAC 4.5)
• The VMware vCloud Automation Center service (DynamicOps Cloud Automation Center if upgrading from DCAC 4.5) — Manager Service host only
• Repeat these steps for any other host on which agents or DEMs may be installed.
4. To obtain the username for the Report Service, select Application Pools within IIS and make a note of the Identity shown for DcacReportAppPool, as shown in Figure 3.

Release 5.2 79 VMware Documentation
vCloud Automation Center Installation Guide
Figure 3 DCACReport Service Username
Uninstall All CustomizationsUninstall any customizations that you have made with the vCAC extensibility toolkits. For details, see the vCloud Automation Center Extensibility Guide.
If your implementation includes customizations performed by VMware, contact your Professional Ser-vices team for assistance.
Stop All vCAC ServicesBefore you create backups of your existing implementation, stop all vCAC services.
When stopping services, first stop all services on all DEM and agent hosts other than the vCAC Server (Manager Service host), then stop the services on the vCAC Server.
To stop the DCAC services:
1. Log on as a user with full administrative access.
2. Select Start > Administrative Tools > Services.
3. Stop:
• Each VMware vCloud Automation Center Agent – agentname service (DynamicOps Cloud Automation Center Agent if upgrading from DCAC 4.5)
• Each VMware DEM-Worker - instancename service; wait 90 seconds and then stop each VMware DEM-Orchestrator - instancename service (DynamicOps Cloud Automation Center DEM if upgrading from DCAC 4.5)

VMware Documentation 80 Release 5.2
vCloud Automation Center
• The VMware vCloud Automation Center service (DynamicOps Cloud Automation Center if upgrading from DCAC 4.5) — Manager Service host only
Note: Wait at least two minutes after stopping all vCAC services before continuing, to allow time for any current workflow instances to terminate.
4. Confirm that all workflows have stopped.
a. Log in to the vCAC Console as a vCAC administrator.
b. Click vCAC Administrator > Distributed Execution Status.
c. Verify that the Workflows Executing value for all DEM workers is 0.
Back Up Customization FilesBefore proceeding with migration, make a backup of the following files and store them in a safe place:
1. Application configuration files, including:
a. ManagerService.exe.config, located in %SystemDrive%\Program Files (x86)\Dynami-cOps\DCAC Server
b. DynamicOps.DEM.exe.config, located in %SystemDrive%\Program Files (x86)\Dynam-icOps\Distributed Execution Manager\instance_name
c. VRMAgent.exe.config, located in %SystemDrive%\Program Files (x86)\Dynami-cOps\Agents\instance_name
2. Email templates located in %SystemDrive%\Program Files (x86)\DynamicOps\DCAC Server\Templates
3. Workflow configuration XML files located in %SystemDrive%\Program Files (x86)\Dynami-cOps\DCAC Server\ExternalWorkflow\xmldb
Back Up vCAC Component HostsVMware recommends that you make a snapshot or a full backup of each vCAC component host (other than a standalone database host) for use in the unlikely event of a failed upgrade that does not roll back correctly. This includes systems hosting the Manager Service and Model Manager Data and the web components, if they are separate. In web farm configuration, back up each host in the web cluster. In high availability mode, back up both Manager Service hosts.
Back Up the AzMan StoreRecord your AzMan store settings and, if necessary, create a backup of your AzMan store prior to migrating.
To back up your AzMan store:
1. Open the ManagerService.exe.config file, located in %SystemDrive%\Program Files (x86)\DynamicOps\DCAC Server.
2. Search for authorizationStore.
3. Record the value of the authorizationStore attribute.

Release 5.2 81 VMware Documentation
vCloud Automation Center Installation Guide
• If the value begins with msxml://, back up the XML file in that location and store it in a safe place.
• If the file begins with msldap://, back up your Active Directory–based authorization store. See the Microsoft documentation for details.
• If the file begins with mssql://, you have a SQL-based authorization store and do not need to back it up separately. (It is backed up as part of backing up the vCAC database.)
Identify and Back Up the vCAC DatabaseTo identify and back up the current vCAC database:
1. Log into the vCAC Server as a user with full administrative access.
2. Record the name and location of the current vCAC database. By default, the name is DCAC and the location is localhost, but these may have been specified differently during installation.
Note: If in doubt, search the file ManagerService.exe.config in the vCAC server installation directory (typically %SystemDrive%\Program Files (x86)\Dynami-cOps\DCAC Server) for Initial Catalog= ... which shows the name of the vCAC database, and Data Source= ... which shows the server it is located on.
3. Make a backup of the current vCAC database in SQL Server, verifying that the backup com-pletes successfully.
Caution: DO NOT proceed without backing up the database.
Store the database files in a secure location in which they cannot be acci-dentally destroyed.
Upgrade the DatabaseThe vCAC 5.2 installation file DBUpgrade.zip contains the files required to upgrade the existing vCAC database, including the DBUpgrade.exe program.
DBUpgrade.exe takes as arguments the SQL Server instance and name of the vCAC database and either a flag to use Windows authentication to access the database or credentials to do so. An arguments indicates the path to the log file for the operation (by default it is dbupgrade.log in the same directory). Run the program with no arguments to display this usage information:
DBUpgrade {-S sql_instance} {-d dbname} {-E || {-U sql_login -P login_password}} [-l
upgrade_logfile]
Use -E for trusted connection (using Windows Authentication)
Use -l to specify full path name to upgrade log file. Otherwise dbupgrade.log is
assumed.
For example, to update the database DCAC in the default SQL Server instance on the local host, using your current Windows credentials for authentication and authorization, type:
DBUpgrade –S localhost –d DCAC –E

VMware Documentation 82 Release 5.2
vCloud Automation Center
To update the database DCAC45 in the SQL Server instance DCACInstance on host dbhost, using SQL authentication and a nondefault location for the log file, type:
DBUpgrade –S dbhost\DCACInstance –d DCAC45 –U SqlUser
–P SqlPassword –l %SystemDrive%\DCACDBUpgrade\DCACDBUpgradeLog_31Dec.log
Prerequisites
• Back up the existing vCAC database.
• Download the vCloud Automation Center installation package.
To upgrade an existing database to vCAC 5.2:
1. Navigate to the directory where you extracted the installation zip archive, then navigate to the Database subdirectory.
2. Extract the DBUpgrade.zip archive to a local directory or to another location with network access to the database host.
3. From a command prompt, navigate to the directory where you extracted the DBUpgrade.zip archive.
4. Execute the program DBUpgrade.exe to upgrade your database.
Your database is now upgraded to vCAC 5.2.
Uninstall DEMs, Agents, vCAC Designer, vCAC Self-Service Portal, and WinPEBuilderBefore proceeding with the migration, uninstall all Distributed Execution Managers, agents, and compo-nents such as vCloud Automation Center Designer, vCAC Self-Service Portal, and WinPEBuilder, if installed.
Caution: Do not uninstall the 4.5 DynamicOps Cloud Automation Center or the 5.1 VMware vCloud Automation Center Server if you want to preserve your existing configuration during migration.
To uninstall vCAC components:
1. Log on as user with administrative privileges.
2. Click Start > Control Panel > Programs > Uninstall a program.
3. Select the VMware vCloud Automation Center component you want to uninstall and click Unin-stall.
4. Repeat steps 1-3 for all vCAC components except VMware vCloud Automation Center Server on all systems within your existing vCAC deployment.
5. After removing all vCAC components, ensure that the Manager Service is not running:
• Open a command prompt, and type:
iisreset

Release 5.2 83 VMware Documentation
vCloud Automation Center Installation Guide
Verify Installation PrerequisitesVerify that release 5.2 installation requirements, as described in Chapter 2, are met on each host on which you will be upgrading a vCAC component by running the vCAC Prerequisite Checker.
Note: In addition to the requirements listed in the vCAC Prerequisite Checker, you must also ensure that Microsoft .NET Framework 4.5 is installed on all hosts.
Prerequisites
• Download the vCloud Automation Center installation package.
To verify prerequisites before upgrading vCAC:
1. Install the vCAC Prerequisite Checker.
a. Navigate to the directory where you extracted the installation zip archive, then navigate to the Tools subdirectory.
b. Right-click vCAC-PrereqChecker-Setup and select Run as administrator.
The first time you install vCAC-PrereqChecker-Setup, it installs and launches the vCAC Pre-requisite Checker.
2. Under Core Install, select the components that you are migrating on the current host.
3. If you are migrating a DEM instance, select DEM under Core Upgrade.
4. If you are not installing the web components in the Default Web Site in IIS, specify the Web site to validate:
a. Click the Settings tab.
b. From the Web site drop-down list, choose the name of the Web site under which you are creating the vCAC web application.
6. Click Run Checker.
The Prerequisite Checker displays the list of requirements for the selected component and the status of each one.
7. If any of the requirements do not have a green check mark ( ) in the Status column, select that requirement and follow the instructions in the information pane to the right to resolve the prob-lem.
8. Repeat Step 7 until all requirements are satisfied.
9. Exit the Prerequisite Checker.
Install vCAC Release 5.2The vCAC-Server-Setup wizard copies the required files onto the system and launches the vCAC Config-uration Tool to complete the migration process.
If your vCAC components are installed on more than one host, run the installer on each host in turn, starting with the systems hosting the web components.
If migration is successful, the installer uninstalls your previous release version of vCAC.

VMware Documentation 84 Release 5.2
vCloud Automation Center
Caution: You must back up and upgrade the existing vCAC database before migrat-ing the vCAC instance.
To migrate an existing vCAC instance to vCAC 5.2:
1. Run the vCAC installer as described in Chapter 3.
2. On the Custom Setup page, select the components that you had previously installed on the current host.
Note: Do not select the Database component when migrating your instance, but instead provide the location of your existing database.
3. On the Wizard Complete page, click Finish to launch the Configuration Tool.
The Welcome to the Configuration Wizard page appears. If there is an existing installation on the machine that can be migrated to 5.2, it enters migration mode and populates the values in the wizard based on the settings that it can detect from your existing instance.
4. When you migrate the first Model Manager host, the vCAC License Configuration page appears.
a. Type a valid vCAC Server license key. You can add all of your license keys at the same time.
b. If you have a license for the vCloud Automation Center Development Kit and you have not previously added it, you should do so now, since you will not be prompted for it when you upgrade the vCloud Automation Center Development Kit.
5. On the vCAC Database Information page, review the information about your existing database and click Next.
6. On the vCAC Security Information page:
a. Read the guidelines on the page.
b. If you already installed components in this environment, type the same passphrase you already created; otherwise, type a new passphrase.
A passphrase is a series of words used to create a phrase that generates the encryption key that is used to protect data while at rest in the database and for data recovery.
The passphrase you create during installation must be used across the entire IaaS deploy-ment so that each component has the same encryption keys.
c. Retype to confirm your passphrase.
d. To view the passphrase in text, select Show passphrase.
Note: The passphrase might be required during an upgrade to a future release of vCAC; therefore, you should store it in a secure location or memorize it.
7. On the Web Site Configuration page:
a. Click Test Binding to verify that the HTTPS port is not in use. If the port is in use, remove the binding manually in IIS if the port was used by your existing vCAC instance, or select a different port.

Release 5.2 85 VMware Documentation
vCloud Automation Center Installation Guide
b. You must select a certificate, regardless of whether you used HTTP or HTTPS in your previ-ous instance.
c. Click Next.
8. On the vCAC Service Account Configuration page, provide the password for the current ser-vice user account, or change the service user credentials.
9. On the vCAC AzMan Authorization Store type, select the same type of AzMan store as in your existing instance.
10. On the vCAC Model Manager Configuration page, review the email configuration information and update it if necessary.
11. On the vCAC Manager Service Configuration page, review the configuration and update it if necessary.
12. On the vCAC Web Site Configuration page, review the configuration and update it if necessary.
13. On the Ready to Configure page, click Configure.
Caution: There is no way to cancel the upgrade after you click Configure.
14. When the configuration completes, click Next, then Finish.
15. If you received a message stating that there was an issue with the licenses, verify your license information as described in "Start the Console," on page 87.
Run the Migration Cleanup ToolAfter you have completed the migration of the core components and uninstalled the agents, run the migration cleanup tool before proceeding.
Prerequisites
• Download the vCloud Automation Center installation package.
To run the migration cleanup tool:
1. Navigate to the directory where you extracted the installation zip archive, then navigate to the Database subdirectory.
2. Extract the DBUpgrade.zip archive to a local directory.
3. Navigate to the directory where you extracted the DBUpgrade.zip archive, then navigate to the vcacMigrationCleanUp subdirectory.
4. Edit the vcacMigrationCleanUp.exe.config file.
a. Locate the following line:
<add name="DB" connectionString="Integrated Security=SSPI;Data
Source=localhost;Initial Catalog=DCAC"/>
b. Edit the connectionString with the details of your vCAC database:
• Use Integrated Security to log in to the database with your current user credentials using Windows authentication. For SQL-based authentication, specify User ID and Password attributes instead.

VMware Documentation 86 Release 5.2
vCloud Automation Center
• For Data Source, specify the SQL Server instance.
• For Initial Catalog, specify the database name (DCAC by default).
c. Locate the following line within appSettings:
<add key="repositoryAddress" value="https://localhost/repository/"/>
d. Replace localhost with the fully qualified domain name of the Model Manager host.
e. Save and close the file.
5. Run the vcacMigrationCleanUp.exe tool.
6. Select Migration Clean Up > vSphere Agent.
7. Confirm the database settings and click Yes.
8. For each agent, confirm that you want to delete unneeded settings by clicking Yes.
9. Select Migration Clean Up > Security Changes.
10. Confirm the repository settings and click Yes.
The status bar reads Updating security while the updates are in progress.
11. Click OK.
12. Exit the migration cleanup tool.
Install Distributed Execution ManagersYou must reinstall the 5.2 release of the Distributed Execution Managers.
To install the 5.2 DEMs after upgrading:
1. Refer to the information you recorded about the DEMs in your environment prior to upgrade.
2. On each host where you had one or more DEMs, install the 5.2 release as described in "Install-ing the Distributed Execution Managers," on page 35, taking care to specify the same Name and Role as in your pre-upgrade environment.
3. If any DEM instance had skills associated with it in your pre-upgrade environment, reapply those skills using the vCAC Designer or CloudUtil tool. For details about working with skills, see the vCloud Automation Center Extensibility Guide.
Install vCAC AgentsYou must reinstall the 5.2 release of vCAC agents.
To install the 5.2 agents after upgrading:
1. Refer to the information you recorded about agents in your environment prior to upgrade.
2. On each host where you had one or more agents, install the 5.2 release as described in "Install-ing a vCAC Agent," on page 65, taking care to specify the same Name (and, for vSphere agents, Endpoint) as in your pre-upgrade environment.
Install vCAC ComponentsIf you had any components in your deployment, reinstall them now.

Release 5.2 87 VMware Documentation
vCloud Automation Center Installation Guide
• For information about installing the extensibility toolkits, see Appendix A.
• For information about installing the vCAC Self-Service Portal, see the vCloud Automation Center Self-Service Portal Guide.
• For information about WinPEBuilder and other components, see the vCloud Automation Center Operating Guide.
Verify vCAC Services Are RunningThe vCAC Manager, DEM, and Agent services should start automatically after migration and installation.
To verify that vCAC services are running:
1. Log on to the vCAC Server (Manager Service host) as a user with full administrative access.
2. Select Start > Administrative Tools > Services.
3. Locate each of the following services and verify that the status is Started.
• The VMware vCloud Automation Center service (Manager Service host only)
• Each VMware DEM-role - InstanceName service
• Each VMware vCloud Automation Center Agent – agentname service
4. Repeat these steps for any other host on which DEMs or agents may be installed.
Start the ConsoleOnce all the services are running after upgrade, verify that your upgrade was successful by starting the vCAC Console.
To access the vCAC Console:
1. If you are using Internet Explorer, clear your browser cache prior to accessing the vCAC Console for the first time after upgrade.
Note: The following instructions are for Internet Explorer 9. The steps may be different for earlier versions of IE.
a. From the Tools menu, select Safety > Delete browsing history.
b. In the Delete Browsing History dialog box, select Temporary Internet files.
c. If the vCAC Console is in your Favorites list, clear the selection for Preserve Favorites Web site data.
d. Click Delete.
When the files are deleted, the “Internet Explorer has finished deleting the selected browsing history.” notification appears.
2. Navigate to: https://vCAC_portal_hostname/vCAC.
3. When prompted, provide your Windows credentials.
The vCAC Console appears.
4. Before you begin to use vCAC, you must verify that your licenses are correct:

VMware Documentation 88 Release 5.2
vCloud Automation Center
a. In the vCAC Console, select vCAC Administrator > License Info.
b. Verify that the license information is correct and make changes as required.
Post-Migration StepsThis section describes required post-migration tasks you must complete before the migrated instance is considered fully operational.
Merge Configuration FilesIf you made changes to any application configuration files, workflow configuration files, or email tem-plates, merge your changes into the 5.2 version of the files.
Caution: Do not overwrite the 5.2 configuration files with your pre-upgrade files. You must manually merge your changes. If you require assistance, contact VMware support.
Additionally, if you are upgrading from release 4.5 and have customized any email templates that use the ServiceUriBase parameter, you should update your templates to use the new WebsiteURI parame-ter, which is based on the new Web site URI global property. For more information, see the vCloud Automation Center Operating Guide.
Restore File-Based AzMan StoreIf you are using a file-based authorization store and uninstalled the vCloud Automation Center Server prior to migration, then you need to restore the backup that you made of the AzMan store.
If you did not uninstall the vCloud Automation Center Server before migrating to release 5.2, your file-based authorization store is preserved after migration and you can ignore this step.
To restore your file-based AzMan store from backup:
1. On the vCAC Server, navigate to %SystemDrive%\Program Files (x86)\VMware\vCAC\Server\Store.
2. Copy the security.xml file that you backed up from your instance pre-migration to this location, overwriting the current file.
Initiate Data CollectionYour upgraded vCAC instance is not fully operational until the first post-upgrade data collection for each of the compute resources and endpoints under vCAC management is completed.
To initiate endpoint and compute resource data collection:
1. Log in to the vCAC Console as a vCAC administrator.
2. Select vCAC Administrator > Endpoints to list all known endpoints.
3. For all physical endpoints, and any cloud or virtual endpoint that uses the DEM instead of a proxy agent to communicate with the provisioning platform (Amazon EC2, SCVMM, or vCloud Director):
a. Point to the name of the endpoint and click Data Collection.
b. Click Start to initiate data collection.

Release 5.2 89 VMware Documentation
vCloud Automation Center Installation Guide
4. Verify that all endpoint data collection completed successfully by pointing to each endpoint name and clicking Data Collection.
5. Log in to the vCAC Console as an enterprise administrator.
6. Select Enterprise Administrator > Compute Resources to list all known virtualization hosts that belong to the enterprise groups of which you are administrator.
7. For each compute resource:
a. Point to the name of the compute resource and click Data Collection.
b. In the Inventory section, click Request Now to initiate inventory data collection.
c. When inventory data collection has completed successfully, in the State section, click Request Now to initiate state data collection.
8. Verify that all compute resource data collection completed successfully by pointing to each com-pute resource name and clicking Data Collection.
9. If your hosts belong to multiple enterprise groups with different administrators, repeat steps 5-8 for each enterprise administrator.
Alternatively, you can wait for the next scheduled (usually daily) data collection from all managed hosts and endpoints to be completed.
Rebuild WinPE ImagesIf you use vCAC for WIM-based provisioning, you must regenerate your WinPE images after upgrading to release 5.2.
To rebuild WinPE images:
1. Update the guest agent in your WinPE image using one of the following methods:
• Install the 5.2 WinPEBuilder utility and generate a new ISO file.
• Insert the 5.2 guest agent executable into a WinPE image created using another method.
For details about generating WinPE images for use with vCAC, see the vCloud Automation Cen-ter Operating Guide.
2. Optionally, update existing blueprints and build profiles to remove the VirtualMachine.Admin.EncryptPasswords property. This property has no effect if you are using a 5.2 WinPE image.
Enable Amazon EC2 ReservationsIf you use vCAC to manage Amazon EC2 reservations, you must re-enable them after upgrading.
To re-enable Amazon EC2 reservations:
1. Start the vCAC console as a user in the enterprise administrator role.
2. Select Enterprise Administrator > Reservations.
3. Point to the name of a cloud reservation and click Edit.
4. On the Reservation Information tab, select Enabled.
5. On the Resources tab, select one or more security groups from the Security groups list.
6. Click OK.
VMware Documentation 90 Release 5.2
vCloud Automation Center
Enable vCloud Director BlueprintsIn release 5.2, vCloud Director support has been enhanced to enable management of the component machines in a vApp in addition to the vApp as a whole. If you used release 5.1 to provision vApps, you must update your vCloud Director blueprints after upgrading.
vApps in release 5.1 were provisioned using a single blueprint and managed as if they were single vir-tual machines. Release 5.2 introduces vApp blueprints that represent the vApp container and vApp component blueprints that represent the machines within a vApp. Existing vCloud Director blueprints must be updated to the new model before you can provision new vApps in vCAC 5.2.
For more information about vCloud Director integration in release 5.2, see the vCloud Automation Cen-ter Multi-Machine Guide.
Prerequisites
• Endpoint and compute resource data collection must be successfully completed after upgrade.
• The migration cleanup tool must be configured with the correct information for the vCAC data-base.
To enable vCloud Director blueprints after upgrading:
1. Navigate to the directory where you extracted the DBUpgrade.zip archive, then navigate to the vcacMigrationCleanUp subdirectory.
2. Run the vcacMigrationCleanUp.exe tool.
3. Select Migration Clean Up > vCloud Director Endpoints.
4. Confirm the database settings and click Yes.
5. Click OK.
6. Exit the migration cleanup tool.
7. Log in to the vCAC Console as a user with both enterprise administrator and provisioning group manager roles.
8. Click Enterprise Administrator > Global Blueprints or Provisioning Group Manager > Blueprints.
9. (Optional) Filter the list of blueprints by Platform Type = vApp (vCloud Director).
10. (Optional) For each vApp blueprint, note the vApp component blueprints that it requires.
a. Point to the name of the blueprint and click Edit.
b. On the Build Information tab, note the Name of each entry under Component machines.
11. Create component blueprints for each type of virtual machine that is part of a vApp.
a. Click New Blueprint > Cloud > vApp Component (vCloud Director)
b. On the Blueprint Information tab, specify blueprint details as you would for any blueprint.
c. On the Build Information tab:
• Select the Blueprint type. Your selection must match the type of license used to install vCAC: Desktop or Server.
• The Provisioning workflow must be vAppCloneWorkflow.

Release 5.2 91 VMware Documentation
vCloud Automation Center Installation Guide
• In the Clone from field, click the ellipsis to select a virtual machine template.
d. (Optional) Specify custom properties and security options.
e. Click OK.
f. Repeat these steps for each type of virtual machine that is included in a vApp.
12. For each vCloud Director blueprint:
a. Point to the name of the blueprint and click Edit.
b. On the Blueprint Information tab, select Enabled.
c. Click the Build Information tab.
d. For each row in Component machines, click the Edit button and select a component blue-print for that machine.
e. Click OK.
13. Click Discovery > Infrastructure Organizer.
14. Click Next.
15. Select any vCloud Director compute resources that contain vApps that you want to import, and click Next.
16. For each compute resource you selected in the previous page:
a. Click the Edit button.
b. Select one or more enterprise groups.
c. (Optional) Specify a cost profile.
d. Click the Save button.
17. Click Next.
18. For each existing vApp that you want to import:
a. Click the Edit button.
b. Select a provisioning group.
c. Click the Save button.
19. Click Next.
20. For each vApp you configured in the previous page:
a. Click the Edit button.
b. Click the ellipsis (...) button next to Blueprint.
c. In the Select Blueprint dialog, the first machine is the vApp that you previously provisioned. Select a vApp blueprint to assign to this machine.
d. Select the appropriate vApp component blueprint to assign to each virtual machine within the vApp.
e. Click OK.
f. Select a reservation.
g. Select the owner for the machine.

VMware Documentation 92 Release 5.2
vCloud Automation Center
h. Click the Save button.
21. Click Next.
22. Review the summary and click Finish to import the vApps.
23. Click Enterprise Administrator > Enterprise Machines.
The vApps appear in the list of managed machines. You can perform operations on the vApps or view and manage the component machines by pointing to a vApp name and clicking View Components.
Verify License InformationTo verify that your license information is correct:
1. Log in to the vCAC Console as a vCAC administrator.
2. Select vCAC Administrator > License Info.
3. Verify that the license information is correct and make changes as required.

VMware Documentation 93 Release 5.2
Chapter 6 Uninstalling and Reinstalling vCAC ComponentsThis information contains procedures for uninstalling and reinstalling vCAC and related activities.
Uninstalling vCAC ServerIf you have changed any vCAC configuration files, you may want to save these files before uninstalling vCAC in case you reinstall vCAC and want to restore your configuration.
To uninstall vCAC:
1. Log on as a user with administrative privileges.
2. Click Start > Control Panel > Programs > Uninstall a program.
3. Select VMware vCloud Automation Center Server and click Uninstall.
Modifying Installed ComponentsYou can add or remove selected vCAC components by using the command line.
To add or remove selected vCAC components:
1. Navigate to the directory where you extracted the zip archive, then navigate to the Setups sub-directory and type:
vcac-server-setup.exe /f
2. Select Modify and click Next.
3. On the Custom Setup page, select the components you want to remove or install.
Depending on your selections, a series of confirmation dialog boxes appear.
4. Click No in each dialog box that appears.
About Reinstalling vCACBefore you reinstall the same version of vCAC that you have previously uninstalled:
• Delete HTTPS binding in IIS
• Delete the database or use a new database name
• Reuse the previous certificate or create a new one
For information about upgrading to a new version of vCAC, see Chapter 5.

vCloud Automation Center
VMware Documentation 94 Release 5.2
Relocating the vCAC InstanceThis section describes how to relocate vCAC components after the initial installation.
Note: In the event that you need to relocate your vCAC database to another server some time after installation and initial use, contact VMware support.
If the vCAC Server (the Manager Service host) is moved to a new Active Directory domain, authorization problems are likely to result. The best practice is to use the procedure in Creating the vCAC Database Manually to install a new vCAC instance in the desired domain using the existing vCAC database, rather than moving the existing vCAC Server to a new domain. In brief,
1. Gather and preserve information about existing modifications to the Manager Service configura-tion on the vCAC server, typically by preserving the existing ManagerServerice.exe.config file in %SystemDrive%\Program Files x86\VMware\vCAC\Server (or the vCAC server install directory if different); see the vCloud Automation Center Operating Guide for more information.
2. Gather information about all vCAC agent configurations (see Chapter 4) so that these can be applied to the new vCAC server and agents.
3. Install vCAC in the new domain with the existing database as described in Chapter 3.
4. Update the Manager Service configuration to match the existing vCAC server, typically by copy-ing the preserved ManagerService.exe.config file to the vCAC install directory, and restart the VMware vCloud Automation Center service.
5. Install agents to match the all the agents in the existing vCAC installation; see Chapter 4 for more information.
6. Verify that the new vCAC installation functions properly, then uninstall the old vCAC agents and server.
Updating vCAC LicensesWhen you reinstall vCAC components, you can use the same license key you used during installation. Please contact VMware Customer Support for all license-related queries and problems.
Updating Your vCAC LicenseYou must provide a valid vCAC license key when installing vCAC.
To update your license:
1. Log in to the vCAC Console as a vCAC administrator.
2. Select vCAC Administrator > License Info.
3. Click Add License.
The Add License dialog appears.
4. In License key, type a valid license key.
5. Click OK.
If the new license is not valid, a warning banner appears stating the reason for vCAC administrators, Enterprise Administrators and PGMs that machines can no longer be provisioned within your site. After you replace the invalid license, operation is restored.

VMware Documentation 95 Release 5.2
Appendix A Installing the Extensibility ToolkitsThe VMware extensibility toolkits consist of vCAC Designer and the vCloud Automation Center Develop-ment Kit (vCAC Development Kit).
With vCloud Automation Center Designer, you can customize workflows provided in the Model Manager and also associate workflows with DEM workers using skills. For an additional license, the vCAC Devel-opment Kit provides advanced extensibility tools, including the Workflow Generator Visual Studio plugin that enables you to create your own custom workflows and install them in the Model Manager.
Downloading the vCloud Automation Center Installation Package for ExtensibilityThe vCloud Automation Center installation package for extensibility contains the installers for the vCAC extensibility toolkits.
To download the vCloud Automation Center installation package for extensibility:
1. Download the zip file for vCloud Automation Center extensibility or the vCloud Automation Cen-ter Development Kit from the VMware downloads page at http://www.vmware.com/download/.
2. Extract the files from the zip archive.
Installation Package ContentsTable 19 describes the two installer options for the extensibility toolkits. Choose only one of the following depending on your situation:
Table 19 Installer Options for Extensibility Toolkits
In addition, the installation package for extensibility includes the installer for the vCAC Self-Service Por-tal. For information about this component, see Appendix B "Installing the vCAC Self-Service Portal Web-site".
Installation package Installer Executable Description
vCAC-52-Extensibility.zip DesignCenter-Setup.exeDoes not require an additional license.
Installs vCloud Automation Center Designer and basic CloudUtil commands.
vCAC-52-DK-Installa-tion.zip
CDK-Setup.exe
Requires a vCAC Development Kit license.
Installs vCloud Automation Center Designer, the full set of CloudUtil commands and the Workflow Generator plugin.

VMware Documentation 96 Release 5.2
vCloud Automation Center
Installation PrerequisitesThe extensibility toolkits are typically installed on a development machine rather than a server. This sec-tion describes the system configuration requirements that must be in place before you install the exten-sibility toolkits. For operating system and high-level environment requirements, see the vCloud Automation Center Support Matrix.
• .NET Framework 4.5 must be installed.
• The vCAC Designer or vCAC Development Kit host must have network access to the Model Manager host (specifically, the Model Manager Web component).
• To support the Workflow Generator Visual Studio plugin (vCAC Development Kit only), Visual Studio 2010 or 2012 must be installed.
Installing vCloud Automation Center Designer
Prerequisites
• Download the vCloud Automation Center installation package for extensibility.
To install vCAC Designer:
1. Navigate to the directory where you extracted the installation zip archive, then navigate to the Setups subdirectory.
2. Right-click DesignCenter-Setup.exe and select Run as administrator.
Note: When installing on a Windows XP system, right-click DesignCenter-Setup.exe and select Run as, then either select Current user and clear the selection for Protect my computer and data from unauthorized program activity, or select The following user and enter the credentials with administrator access to the system.
3. On the Welcome page, click Next.
4. On the End-User License Agreement page, read the License Agreement, click I accept the terms in the License Agreement, then click Next.
5. On the Custom Setup page, click Next.
6. On the Model Manager Web Service Host Name page:
a. Specify the fully qualified domain name and port of the system hosting the Model Manager Web instance that you want the extensibility tools to interact with.
b. Specify the user credentials under which the Model Manager is running.
c. Click Next.
The installer validates the combination of Model Manager host and credentials by attempt-ing to access to the Model Manager; if it succeeds, you can continue with installation. If an error is returned, you must determine the correct combination of Model Manager host and credentials before proceeding.
7. On the Ready to Install page, click Install.

Release 5.2 97 VMware Documentation
vCloud Automation Center Installation Guide
Installing the vCloud Automation Center Development KitThe vCAC Development Kit installation includes vCloud Automation Center Designer.
Prerequisites
• Download the vCloud Automation Center installation package for the vCAC Development Kit.
• If you previously installed the vCloud Automation Center Designer without the vCAC Develop-ment Kit, first uninstall the vCloud Automation Center Designer, then proceed with the vCAC Development Kit installation.
To install vCAC Designer and the vCAC Development Kit:
1. Navigate to the directory where you extracted the installation zip archive, then navigate to the Setups subdirectory.
2. Right-click CDK-Setup.exe and select Run as administrator.
Note: When installing on a Windows XP system, right-click DesignCenter-Setup.exe and select Run as, then either select Current user and clear the selection for Protect my computer and data from unauthorized program activity, or select The following user and enter the credentials with administrator access to the system.
3. On the Welcome page, click Next.
4. If you previously installed the vCloud Automation Center Designer without installing the vCAC Development Kit, and you did not uninstall it before installing the vCAC Development Kit:
a. click Remove on the Change or remove installation page.
b. Click Remove.
c. Click Finish, return to step 1, then skip step 4.
5. On the Custom Setup page, select vCAC Designer to install the vCloud Automation Center Designer console and the extended CloudUtil command-line tool. Select Visual Studio 2010 or 2012 Addin to also install the Workflow Generator Visual Studio plugin.
Note: The Visual Studio 2010 or 2012 Addin option cannot be selected if the installer determines that Visual Studio is not installed. If both Visual Studio 2010 and Visual Studio 2012 are installed, the Addin is installed for Visual Studio 2012.
6. Click Next.
7. On the Model Manager Web Service Host Name page:
a. Specify the fully qualified domain name and port of the system hosting the Model Manager Web instance that you want the extensibility tools to interact with.
b. Specify the user credentials under which the Model Manager is running.
c. Click Next.

VMware Documentation 98 Release 5.2
vCloud Automation Center
The installer validates the combination of Model Manager host and credentials by attempt-ing to access to the Model Manager; if it succeeds, you can continue with installation. If an error is returned, you must determine the correct combination of Model Manager host and credentials before proceeding.
8. On the Ready to Install page, click Install.
9. To enable the full functionality of the vCAC Development Kit, you must provide a vCAC Devel-opment Kit license key. If you did not enter the license key during the Model Manager installa-tion and you did not added the license key in the vCAC console, you must:
a. Log in to the vCAC Console as a vCAC administrator.
b. Select vCAC Administrator > License Info.
c. Click Add License.
d. The Add License dialog appears.
e. In License key, type a valid license key.
f. Click OK.
Add vCAC Workflow Activities to Visual StudioAfter installing the vCAC Developer Kit, you may want to add the vCAC workflow activities to the Visual Studio toolbox to use in custom workflows.
Note: The vCenter Orchestrator activities cannot be imported into Visual Studio. You must use vCAC Designer to access the activities that invoke vCenter Orches-trator workflows.
To add the vCAC activities to the toolbox:
1. Create a new Visual Studio project or open an existing project.
2. Ensure that the Toolbox is displayed. If it is hidden, open it.
3. Right-click in the Toolbox and select Add Tab.
4. Specify a name for the new tab, such as vCAC.
5. With the vCAC tab selected, select Tools > Choose Toolbox Items.
6. Browse to %SystemDrive%\Program Files x86\VMware\vCAC\Design Center\Addin\Tem-plates\version\DynamicOps.Cdk.Activities.dll and click OK.
7. Repeat step 5 for DynamicOps.Repository.dll.
8. Click OK.
Updating the CloudUtil Application ConfigurationThe CloudUtil application configuration file, CloudUtil.exe.config, contains connection information for the Model Manager and databases that support any custom models you create with the vCloud Automa-tion Center Development Kit.

Release 5.2 99 VMware Documentation
vCloud Automation Center Installation Guide
To update the CloudUtil application configuration:
1. Navigate to the vCloud Automation Center Designer installation directory, where the CloudU-til.exe executable is located. (In a typical installation, this is %SystemDrive%\Program Files x86\VMware\vCAC\Design Center.)
2. Edit the file CloudUtil.exe.config.
3. Within the appSettings element, you can define properties by adding an entry in the following format:
<add key="keyName" value="keyValue" />
The valid properties for CloudUtil are as follows:
4. You can also update the log location. By default, CloudUtil logs are located in %APP-DATA%\VMware\vCloud Automation Center Designer\Logs\CloudUtil_All.log. You can change this by editing the following line:
<loggingConfiguration name="Logging Application Block" tracingEnabled="true"
defaultCategory="Error" logWarningsWhenNoCategoriesMatch="false">
<listeners>
<add name="LogFileListener" ... fileName="%APPDATA%\VMware\vCloud
Automation Center Designer\Logs\CloudUtil_All.log" ... />
...
</listeners>
...
</loggingConfiguration>
5. Save and close the file.
Uninstalling the Extensibility ToolkitsYou can uninstall the extensibility toolkits using the Windows Control Panel. The following steps are for Windows 7 or Windows Server 2008 R2; they may differ slightly depending on your version of Windows.
To uninstall the extensibility toolkits:
1. Click Start > Control Panel.
2. Click Uninstall a program.
Key Value
repositoryAddressThe default root URI of the Model Manager. The initial value is set based on the value for the Model Manager Web host name speci-fied in the installer.
Default Sql UserThe default SQL user name to use to authenticate to the SQL instance where the data specified by custom model resides.
Default Sql PasswordThe default SQL password to use to authenticate to the SQL instance where the data specified by custom model resides.

VMware Documentation 100 Release 5.2
vCloud Automation Center
3. From the list of installed programs, select VMware vCloud Automation Center Designer (the name is the same regardless of whether you have installed the full vCAC Development Kit).
4. Click Uninstall.
Alternatively, you can run the installation program, DesignCenter-Setup.exe or CDK-Setup.exe, on the machine on which the extensibility toolkit is installed. The installer detects that you have an existing vCAC Designer or vCloud Automation Center Development Kit installation and you can click Remove to uninstall the toolkit.
Upgrading the Extensibility ToolkitsIf you have upgraded your vCloud Automation Center installation, you must upgrade your extensibility toolkits to maintain compatibility with your upgraded vCAC instance.
To upgrade the extensibility toolkits:
1. Uninstall the previous version of the VMware vCloud Automation Center Designer program.
2. Delete each user’s cache, which can be found at %SystemDrive%\Users\username\AppData\Roaming\VMware\vCloud Automation Center Designer\AssemblyCache.
3. Install the version of vCAC Designer or the vCloud Automation Center Development Kit that matches the version of your vCAC instance.

VMware Documentation 101 Release 5.2
Appendix B Installing the vCAC Self-Service Portal WebsiteThe vCAC Self-Service Portal Website is a standalone interface that streamlines a user’s ability to request access to virtual, cloud or physical machines. This portal is not the same as the Self-Service option that is available from the vCAC Console.
When any user accesses the vCAC Self-Service Portal Website, all of the policies controlling machine specifications, provisioning, approval, management and disposal have been completed by the adminis-trator in the vCAC Console, thereby enabling the user to request and manage machines for their own use according to these policies. The vCloud Automation Center Operating Guide provides details on using the vCAC Self-Service Portal Website.
Downloading the vCAC Self-Service Portal WebsiteThe vCloud Automation Center installation package for extensibility contains the installer for the vCAC Self-Service Portal Website.
To download the vCloud Automation Center installation package for extensibility:
1. Download the zip file for vCloud Automation Center extensibility or the vCloud Automation Cen-ter Development Kit from the VMware downloads page at http://www.vmware.com/download/.
2. Extract the files from the zip archive.
Installation Package ContentsTable 1 describes the installer options for the vCAC Self-Service Portal Website.
Table 1 Installer for vCAC Self-Service Portal Website
Note: As a precaution, always make a backup copy of your system and database before installing any new software on your systems.
Installation PrerequisitesThis section provides you with the information about what software needs to be installed before you install the vCAC Self-Service Portal Website and instructions on how to verify that the prerequisite soft-ware is installed.
Before you begin installing the vCAC Self-Service Portal Website, you must install the core vCAC com-ponents are installed and configure according to your business needs and logic. For more information, see Chapter 3 Installing vCAC.
Prior to installing the vCAC Self-Service Portal, these components must be installed:
• IIS Server
Installation package Installer Executable Description
vCAC-52-Extensibility.zipvCAC-SelfService-Setup.exe
vCAC Self-Service Portal Website installation program.

VMware Documentation 102 Release 5.2
vCloud Automation Center
• IIS Server Anonymous Authentication Status
• IIS Server ASPNET Module
• IIS Server Default Document Module
• IIS Server HTTP Redirect Module
• IIS Server ISAPI Extensions Module
• IIS Server ISAPI Filter Module
• IIS Server Windows Authentication Module
• IIS Server Static Content Module
• IIS Server Windows Authentication Status
Verifying Installation PrerequisitesYou can confirm that the components for the vCAC Self-Service Portal Website are available and meet the installation prerequisites using the vCAC Prerequisite Checker.
To verify installation prerequisites:
1. Navigate to the directory where you extracted the vCloud Automation Center installation pack-age, then navigate to the Tools subdirectory.
2. Right-click vCAC-PrereqChecker-Setup and select Run as administrator.
The first time you install vCAC-PrereqChecker-Setup, it installs and launches the vCAC-Prereq-uisite Checker.
3. Select vCAC Self-Service Portal Website and clear the check boxes for the other compo-nents.
4. Click Run Checker.
The vCAC Prerequisite Checker displays the list for requirements and the status of each one. If
any of the requirements do not have a green check mark ( ) in the Status column, select that requirement and follow the instructions in the information pane to the right to resolve the prob-lem.
5. (Optional) Save the vCAC Prerequisite Checker results.
6. Click Run Checker.
7. Exit the vCAC Prerequisite Checker.
Installing the vCAC Self-Service Portal WebsiteThis section provides detailed instructions on installing the vCAC Self-Service Portal Website. The vCloud Automation Center installation package for extensibility contains the installer for the vCAC Self-Service Portal.
To install the vCAC Self-Service Portal Website:
1. Navigate to the directory where you extracted the vCAC-52-Extensibility.zip file, then navigate to the Setups subdirectory.

Release 5.2 103 VMware Documentation
vCloud Automation Center Installation Guide
2. Copy the vCAC-SelfService-Setup.exe file to the installation host.
3. Right-click vCAC-SelfService-Setup.exe and select Run as administrator.
The Setup Wizard appears.
4. On the Welcome page, click Next.
5. Review and accept the terms of the license agreement and click Next.
6. On the Destination Folder page, select the folder you want to install to, then click Next.
7. On the Ready to Install the Program page, click Install.
8. On the Wizard Complete page, click Finish.
The Welcome to the vCAC Software Configuration Wizard page appears.
9. Click Next.
10. On the Welcome screen, click Next.
11. On the vCAC Database Information page:
a. In Database instance, type the name of the database instance you typed when you set up your database.
b. In Database name, type the name of the database (default value is vCAC).
c. Select Use Windows identity of the currently logged on user to perform configuration tasks that involve database operations to use the credentials under which you are running the installer to connect to the database. Clear the check box to use SQL authentication and provide the credentials with which to connect to the database.
d. Click Next.
12. On the Self Service Portal Model Manager Information page:
a. In Service User Account, type the user name of the service account user who has access the database and is the owner of the selected database, or click Add Current User., then type and confirm the password.
b. In Model Manager Configuration, type the host name of the Model Manager Web Service, type the name of the account that was used to install vCAC, then type and confirm the pass-word.
c. VMware recommends that you click Test to test connectivity to the Model Manager host before proceeding.
13. On the Ready to Configure page, click Configure.
14. Click Finish.
Congratulations! You’ve successfully installed the vCAC Self-Service Portal Website.
Enabling the Connect Using SSH option for Linux MachinesThe Connect Using SSH option can be made available for Linux machines provisioned in vCAC. Enabling this option requires additional system configuration after installing the Self-Service Portal as well as per-blueprint configuration.

VMware Documentation 104 Release 5.2
vCloud Automation Center
To enable the use of the Connect Using SSH option:
1. On the vCAC Manager Service host, edit the file C:\Program Files (86)\DynamicOps\Self-Ser-vice Portal\Web.config.
2. At the end of the <appSettings> section, before </appSettings>, insert:
<add key="ShowConnectUsingSsh" value="true" />
3. Execute an IIS reset and restart the Manager Service.
4. Add the custom property Machine.SSH with a value of true to a blueprint or a build profile incorporated to each blueprint for which to you want to enable the option.
For any powered on machine provisioned from the blueprint, the Connect Using SSH menu option appears. When you select it the browser attempts to load the URL ssh://machine_name, which requires an SSH URL handler to be installed on the system on which you clicked the link. SSH must also be enabled on the guest operating system.
Upgrading or Reinstalling the vCAC Self-Service PortalYou must uninstall the VMware vCloud Automation Center Self-Service Portal instance before an upgrade or reinstall.