using styles and templates in calc - apache openoffice - the
TRANSCRIPT

Calc Guide
Chapter 4 Using Styles and Templates in Calc
Bringing uniformity to your spreadsheets
This PDF is designed to be read onscreen, two pages at a time. If you want to print a copy, your PDF viewer should have an option for printing two pages on one sheet of paper, but you may need to start with page 2 to get it to print facing pages correctly. (Print this cover page separately.)

CopyrightThis document is Copyright © 2006–2010 by its contributors as listed in the section titled Authors. You may distribute it and/or modify it under the terms of either the GNU General Public License, version 3 or later, or the Creative Commons Attribution License, version 3.0 or later.
All trademarks within this guide belong to their legitimate owners.
AuthorsAndy BrownT. J. FrazierPeter KupferNikita TelangJean Hollis Weber
FeedbackPlease direct any comments or suggestions about this document to: [email protected]
AcknowledgmentsPart of the material on page styles is adapted from articles written by Bruce Byfield and first published on the Linux Journal website; used with permission.
Publication date and software versionPublished 16 March 2009. Based on OpenOffice.org 3.2.
You can download an editable version of this document from
http://oooauthors.org/english/userguide3/published/

ContentsCopyright...............................................................................................2
What is a template?................................................................................5
What are styles?.....................................................................................5
Types of styles in Calc............................................................................6
Cell styles............................................................................................6
Page styles..........................................................................................7
Accessing styles.....................................................................................7
Applying cell styles................................................................................8
Using the Styles and Formatting window...........................................8
Using Fill Format mode......................................................................9
Using the Apply Style list....................................................................9
Assigning styles to shortcut keys......................................................10
Applying page styles............................................................................10
Modifying styles...................................................................................10
Style organizer..................................................................................10
Cell style options...............................................................................12
Numbers........................................................................................12
Font................................................................................................ 12
Font effects....................................................................................12
Alignment......................................................................................12
Borders..........................................................................................12
Background....................................................................................12
Cell protection...............................................................................12
Page style options.............................................................................12
Page...............................................................................................13
Borders..........................................................................................14
Background....................................................................................14
Header...........................................................................................14
Footer............................................................................................14
Sheet..............................................................................................14
Creating new (custom) styles...............................................................15
Using Styles and Templates in Calc 3

Creating a new style using the Style dialog......................................15
Creating a new style from a selection...............................................15
Creating a new style by dragging and dropping...............................16
Copying and moving styles...................................................................16
Deleting styles......................................................................................18
Creating a spreadsheet from a template..............................................18
Creating a template.............................................................................19
Editing a template................................................................................20
Updating a spreadsheet from a changed template...........................21
Adding templates using the Extension Manager..................................22
Setting a default template....................................................................23
Setting a custom template as the default..........................................23
Resetting the default template..........................................................24
Associating a spreadsheet with a different template...........................24
Organizing templates...........................................................................25
Creating a template folder................................................................25
Deleting a template folder................................................................25
Moving a template............................................................................26
Deleting a template...........................................................................26
Importing a template........................................................................26
Exporting a template........................................................................27
4 Using Styles and Templates in Calc

What is a template?A template is a model that you use to create other documents. For example, you can create a template for invoices that has your company’s logo and address at the top of the page. New spreadsheets created from this template will all have your company’s logo and address on the first page.
Templates can contain anything that regular documents can contain, such as text, graphics, styles, and user-specific setup information such as measurement units, language, the default printer, and toolbar and menu customization.
All documents—text, spreadsheets, presentations, drawings—in OpenOffice.org are based on templates. You can create, or download and install, as many templates as you wish. When you start a new spreadsheet without choosing a specific template (as described in “Creating a spreadsheet from a template“ on page 18), the new spreadsheet is based on the default template for spreadsheets. If you have not specified a default template, OOo uses the blank spreadsheet template that is installed with OOo. See “Setting a default template” on page 23.
This chapter describes how to create, use, modify, and organize templates. We begin by describing styles and their use, as styles are a major component of templates.
What are styles?A style is a set of formats that you can apply to selected elements in a document to quickly change their appearance. When you apply a style, you apply a whole group of formats at the same time.
Many people manually format spreadsheet cells and pages without paying any attention to styles. They are used to formatting documents according to physical attributes. For example, for the contents of a cell you might specify the font family, font size, and any formatting such as bold or italic.
Styles are logical attributes. Using styles means that you stop saying “font size 14pt, Times New Roman, bold, centered”, and you start saying “Title” because you have defined the “Title” style to have those characteristics. In other words, styles means that you shift the emphasis from what the text (or page, or other element) looks like, to what the text is.
What are styles? 5

Styles help improve consistency in a document and can greatly speed up formatting. They also make major formatting changes easy. For example, you may decide to change the appearance of all subtotals in your spreadsheet to be 10 pt. Arial instead of 8 pt. Times New Roman after you have created a 15-page spreadsheet; you can change all of the subtotals in the document by simply changing the properties for the subtotal style.
Page styles assist with printing, so you don’t need to define margins, headers and footers, and other printing attributes each time you print a spreadsheet.
This chapter describes the styles OOo Calc offers, what they might be used for, and how to apply styles, change existing styles, and create new styles.
Types of styles in CalcWhile some components of OOo offer many style types, Calc offers only two:
• Cell styles include fonts, alignment, borders, background, number formats (for example, currency, date, number), and cell protection.
• Page styles include margins, headers and footers, borders and backgrounds, and the sequence for printing sheets. The page size, orientation, and other attributes of a page style apply only when a spreadsheet is printed; they are not displayed onscreen.
Cell stylesSimilar to paragraph styles in OOo Writer, cell styles are the most basic type of style in Calc. You can apply a cell style to a cell and that cell will follow the formatting rules of the style. Five cell styles are supplied with OOo: Default, Heading, Heading1, Result, and Result2.
Initially, the styles are configured so that if you change the font family of Default, then all of the other styles will change to match. We will discuss how to set this up in “Creating new (custom) styles” on page 15. The five standard styles can be seen in use in Figure 1.
6 Using Styles and Templates in Calc

Figure 1: Calc cell style types
Page stylesPage styles in Calc are applied to sheets. Although one sheet may print on several pages (pieces of paper), only one page style can be applied to a sheet. If a spreadsheet file contains more than one sheet, the different sheets can have different page styles applied to them. So, for example, a spreadsheet might contain one sheet to be printed in landscape orientation (using the Default page style) and another sheet to be printed in portrait orientation (using the Report page style).
Two page styles are supplied with Calc: Default and Report. The major difference between these two styles is that Report is portrait-oriented and Default is landscape-oriented. You can adjust many settings using page styles. You can also define as many page styles as you wish.
Because spreadsheets are primarily used onscreen and not printed, Calc does not display the page style on the screen. If you want a spreadsheet to fit on a certain page size, you have to carefully control the column width and row height, with only File > Page Preview to guide you.
Despite this limitation, it’s well worth defining page styles for any spreadsheets that you are likely to print. Otherwise, if a need for printing does arise, you may lose time to trial and error.
Accessing stylesThe main way to access styles is through the Styles and Formatting window (shown in Figure 2). You can open this window in several ways.
• Keyboard: Press the F11 key.• Menu: Choose Format > Styles and Formatting.
Accessing styles 7

• Toolbar: Click the icon on the far left of the Formatting toolbar.
The Styles and Formatting window can be docked at the left or right of the main Calc window. To dock or undock the window, hold down the Ctrl key and double-click a gray part of the window next to the icons at the top.
The first button on the top left of the window, , is for cell styles and
the second, , is for page styles.
Figure 2: Styles and Formatting window
Applying cell stylesCalc provides several ways to apply cell styles:
• Using the Styles and Formatting window• Using Fill Format mode• Using the Apply Style list• Assigning styles to shortcut keys
Using the Styles and Formatting window1) Ensure the Styles and Formatting window is open by pressing
F11 or by selecting Format > Styles and Formatting. Choose
the Cell Styles list by clicking the icon.2) Highlight the cell or group of cells to which the styles should be
applied.3) Double-click on the cell style name.
8 Using Styles and Templates in Calc

Using Fill Format modeThis method is quite useful when you need to apply the same style to many scattered cells.
1) Open the Styles and Formatting window and select the style you want to apply.
2) Click the Fill Format mode icon . The mouse pointer changes to this icon.
3) Position the moving icon on the cell to be styled and click the mouse button.
4) To quit Fill Format mode, click the Fill Format mode icon again or close the Styles and Formatting window.
CautionWhen this mode is active, a right-click anywhere in the document undoes the last Fill Format action. Be careful not to accidentally right-click and thus undo actions you want to keep.
Using the Apply Style listYou can also add an Apply Style drop-down list to the Formatting toolbar and select a style from the list to apply it to the selected cells:
1) Click the down-arrow at the right-hand end of the Formatting toolbar. On the drop-down menu, click Visible Buttons.
Figure 3: Adding an Apply Style list to the Formatting toolbar
Applying cell styles 9

2) On the submenu, click Apply Style. The menus close and the Apply Style list now appears on the toolbar between the Styles and Formatting icon and the Font Name list.
Assigning styles to shortcut keysYou can create keyboard shortcuts to apply commonly-used cell or page styles, including custom styles that you have created. See Chapter 14 (Setting up and Customizing Calc) for instructions.
Applying page styles1) Select the sheet to be styled (click on its sheet tab at the bottom
of the screen).2) In the Styles and Formatting window, choose the Page Styles list
by clicking the icon. Double-click on the required page style.
To find out which page style is in use for a selected sheet, look in status bar.
Figure 4: Status bar showing location of page style information below the sheet tabs.
Modifying stylesTo modify a style, right-click on its name in the Styles and Formatting window and choose Modify. Make the changes in the Style dialog and click OK to save the changes.
You can also modify a current cell style by selecting an already formatted cell and clicking the Update Style button on the top right hand corner of the Styles and Formatting window.
Style organizerRight click on the name of a style in the Styles and Formatting window and click Modify to open a Style dialog similar to the one shown in Figure 5.
10 Using Styles and Templates in Calc

The Style dialog has several tabs. The Organizer tab, shown in Figure5 for cell styles, is found in all components of OOo. It provides basic information about the style. The Organizer tab for page styles is similar to the one shown for cell styles.
Figure 5: Organizer tab of Cell Style dialog
NameThis is the style’s name. You cannot change the name of a built-in style, but you can change the name of a custom style.
Linked withThis option is only available for cell styles; page styles cannot be linked. If you link cell styles, then when you change the base style (for example, by changing the font from Times to Helvetica), all the linked styles will change as well. Sometimes this is exactly what you want; other times you do not want the changes to apply to all the linked styles. It pays to plan ahead.
For example, you can make a new style called red, in which the only change you want to make is for the cell text to be red. In order to make sure that the rest of the text characteristics are the same as the default style, you can link red with default. Then, any changes you make to default will be automatically applied to red.
CategoryIn Calc, the only option in this drop-down box is Custom styles.
Modifying styles 11

Cell style optionsWhen editing or creating cell styles, you can set several options, which are similar to those for directly formatting cells. A more detailed coverage of cell formatting is given in Chapter 2 (Entering, Editing, and Formatting Data). A brief summary is provided here.
NumbersOn the Numbers tab, you can control the behavior of the data in a cell with this style. This includes specifying the type of data, the number of decimal places, and the language.
FontUse the Font tab to choose the font for the cell’s contents..
Font effectsThe Font Effects tab offers more font options including underlining, strikethrough, and color.
AlignmentUse the Alignment tab to set the horizontal and vertical alignment for the data in the cells, and rotate the text.
BordersUse the Borders tab to set the borders for the cells, along with a shadow.
BackgroundUse the Background tab to choose the background color for a cell.
Cell protectionUse the Cell Protection options to protect cells against certain types of editing.
Page style optionsSeveral of the page style options are described in more detail in Chapter 6 (Printing, Exporting, and E-mailing), because manually formatting a sheet at print time (using Format > Page) actually modifies the page style.
12 Using Styles and Templates in Calc

PageUse the Page tab to edit the overall appearance of the page and its layout. The available options are shown in Figure 6.
Figure 6: Page Style: Page tab
Paper formatHere you can set a generic paper type to be used. Letter or A4 are most common, but you can also use legal, tabloid, envelope sizes, or user-defined paper types. You can also define the orientation of the page and which print tray for the paper to come from (if your printer has more than one tray).
MarginsHere you can set the margins for the page.
Layout settings: Page layoutHere you can specify whether to apply the formatting to right (odd) pages only, left (even) pages only, or both right and left pages that use the current page style.
Mirrored formats the pages as if you want to bind the printed pages like a book.
The first page of a document is assumed to be an odd page.
Modifying styles 13

Layout settings: FormatThis area specifies the page numbering style for this page style.
Layout settings: Table alignmentThis option specifies the alignment options for the cells on a printed page, either horizontal or vertical.
BordersThe Border and Background tabs for pages duplicate the tabs of the same name on cell styles, and are over-ridden by the cell style or manual settings. You may choose to ignore the Border and Background tabs altogether in page styles. Both tabs are illustrated with helpful diagrams.
Similar to formatting a cell style, use the Borders tab to choose whether the page should have borders, how large the borders should be, and how far the text will be from the borders.
BackgroundUse this tab to specify the background for this page style. You can apply either a solid color or a picture as a background.
HeaderUse this tab to design and apply the header for this page style. For more detailed instructions on how to format the header, see Chapter 6 (Printing, Exporting, and E-mailing).
FooterUse this tab to design and apply the footer for this page style. For more detailed instructions on how to format the footer, see Chapter 6.
SheetBy far the most important settings for Calc page styles are on the Sheet tab. Although the Sheet tab includes an option that sets the first page option, most of its settings involve exactly how your spreadsheet will print. See Chapter 6.
14 Using Styles and Templates in Calc

Creating new (custom) stylesYou may want to add some new styles. You can do this in two ways:
• Creating a new style using the Style dialog• Creating a new style from a selection
Note
New styles apply only to this document; they are not be saved in the template. To save new styles in a template, see “Copying and moving styles“ on page 16 and “Creating atemplate” on page 19.
Creating a new style using the Style dialogTo create a new style using the Style dialog, right-click in the Styles and Formatting window and choose New from the pop-up menu.
(Cell styles only) If you want your new style to be linked with an existing style, first select that style and then right-click and choose New.
If you link styles, then when you change the base style (for example, by changing the font from Times to Helvetica), all the linked styles will change as well. Sometimes this is exactly what you want; other times you do not want the changes to apply to all the linked styles. It pays to plan ahead.
The dialogs and choices are the same for defining new styles and for modifying existing styles.
Creating a new style from a selectionYou can create a new cell style by copying an existing manual format.
1) Open the Styles and Formatting window and choose the type of style you want to create.
2) In the document, select the formatted cell that you want to save as a style.
3) In the Styles and Formatting window, click on the New Style from Selection icon .
4) In the Create Style dialog, type a name for the new style. The list shows the names of existing custom styles of the selected type. Click OK to save the new style.
Creating new (custom) styles 15
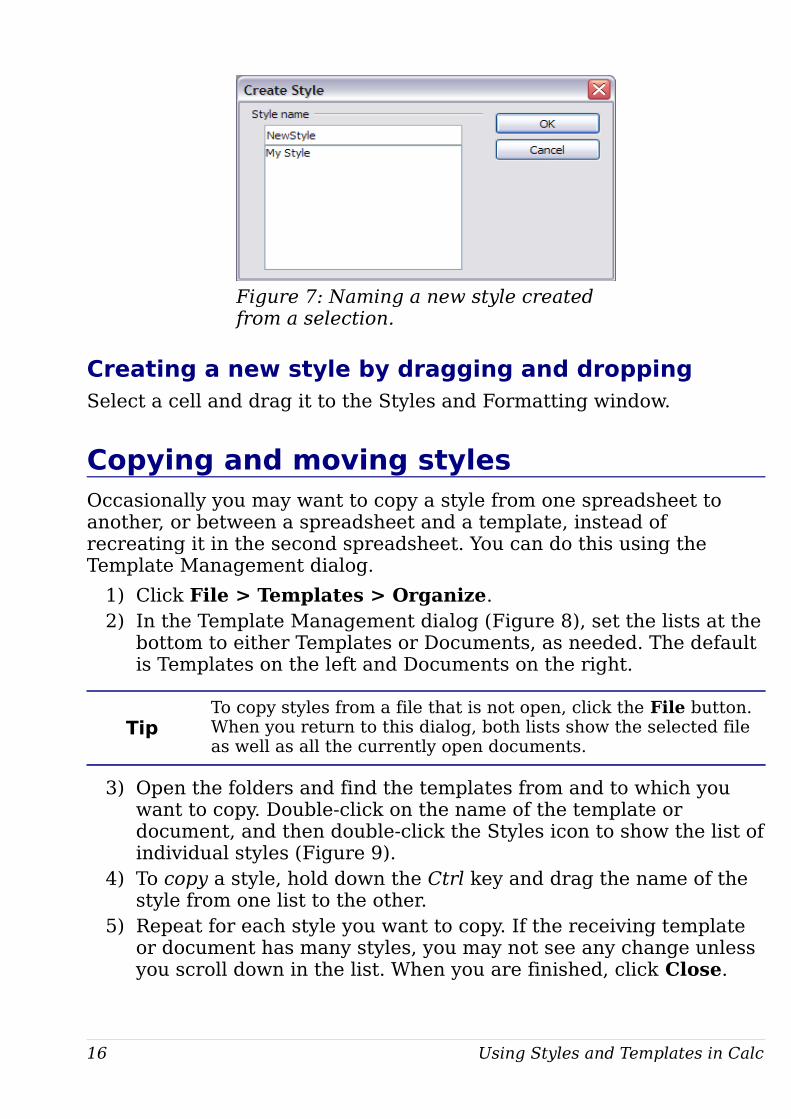
Figure 7: Naming a new style created from a selection.
Creating a new style by dragging and droppingSelect a cell and drag it to the Styles and Formatting window.
Copying and moving stylesOccasionally you may want to copy a style from one spreadsheet to another, or between a spreadsheet and a template, instead of recreating it in the second spreadsheet. You can do this using the Template Management dialog.
1) Click File > Templates > Organize.2) In the Template Management dialog (Figure 8), set the lists at the
bottom to either Templates or Documents, as needed. The default is Templates on the left and Documents on the right.
TipTo copy styles from a file that is not open, click the File button. When you return to this dialog, both lists show the selected file as well as all the currently open documents.
3) Open the folders and find the templates from and to which you want to copy. Double-click on the name of the template or document, and then double-click the Styles icon to show the list of individual styles (Figure 9).
4) To copy a style, hold down the Ctrl key and drag the name of the style from one list to the other.
5) Repeat for each style you want to copy. If the receiving template or document has many styles, you may not see any change unless you scroll down in the list. When you are finished, click Close.
16 Using Styles and Templates in Calc
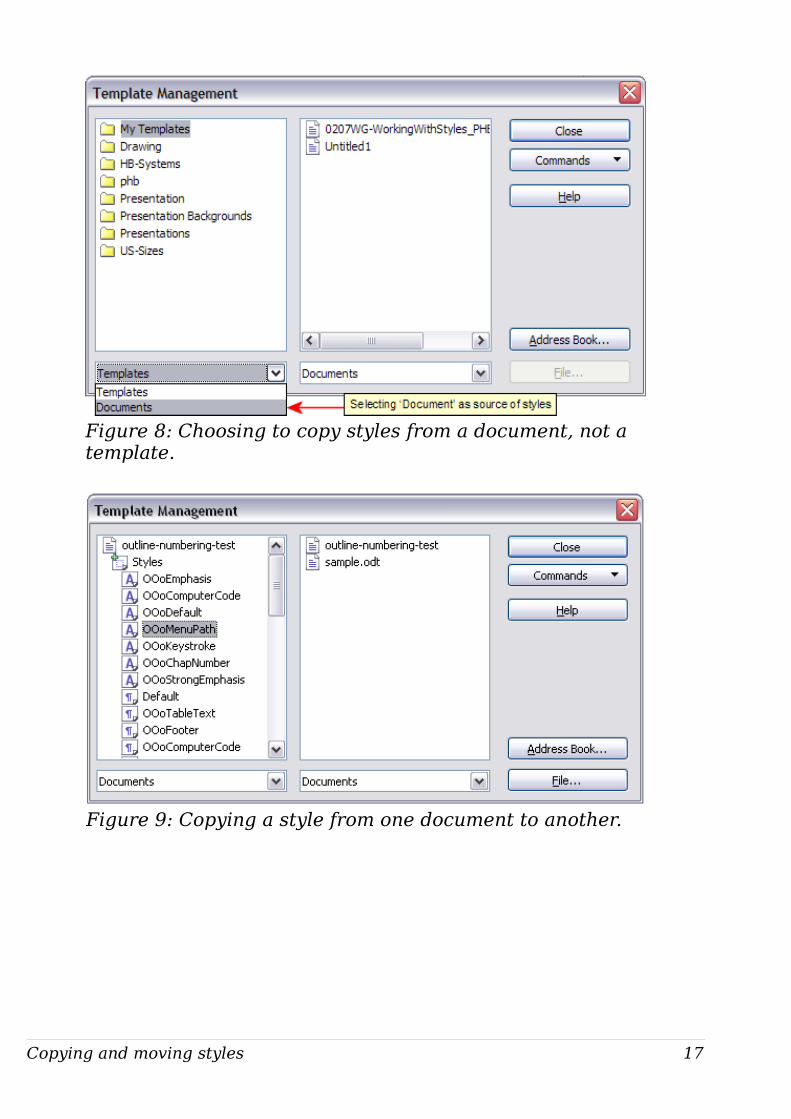
Figure 8: Choosing to copy styles from a document, not a template.
Figure 9: Copying a style from one document to another.
Copying and moving styles 17

Deleting stylesYou cannot remove (delete) any of Calc’s predefined styles, even if you are not using them.
You can remove any user-defined (custom) styles; but before you do, you should make sure the styles are not in use. If an unwanted style is in use, you will want to replace it with a substitute style.
Replacing styles (and then deleting the unwanted ones) can be very useful if you are dealing with a spreadsheet that has been worked on by several people.
To delete unwanted styles, right-click on them (one at a time) in the Styles and Formatting window and click Delete on the pop-up menu. Choose Yes in the confirmation pop-up.
Creating a spreadsheet from a templateTo create a spreadsheet from a template:
1) From the main menu, choose File > New > Templates and Documents. The Templates and Documents dialog opens. (See Figure 10 for the Windows version of this dialog.)
2) In the box on the left, click the Templates icon if it is not already selected. A list of template folders appears in the center box.
3) Double-click the folder that contains the template that you want to use. A list of all the templates contained in that folder appears in the center box.
4) Select the template that you want to use. You can preview the selected template or view the template’s properties:• To preview the template, click the Preview icon. A preview of
the template appears in the box on the right.• To view the template’s properties, click the Document
Properties icon. The template’s properties appear in the box on the right.
5) Click Open. The Templates and Documents dialog closes and a new document based on the selected template opens in Calc. You can then edit and save the new document just as you would any other document.
18 Using Styles and Templates in Calc

Figure 10: Templates and Documents dialog.
Creating a templateYou can create a template from a document:
1) Open a new or existing document of the type you want to make into a template (text document, spreadsheet, drawing, presentation).
2) Add the content and styles that you want.3) From the main menu, choose File > Templates > Save. The
Templates dialog opens (see Figure 11).4) In the New template field, type a name for the new template.5) In the Categories list, click the category to which you want to
assign the template. The category you choose has no effect on the template itself; it is simply the folder in which you save the template. Choosing an appropriate folder (category) makes it easier to find the template when you want to use it. You may wish to create a folder for Calc templates.To learn more about template folders, see “Organizing templates” on page 25.
6) Click OK to save the new template.
Creating a template 19

Figure 11: Saving a new template
Any settings that can be added to or modified in a document can be saved in a template. For example, below are some of the settings (although not a full list) that can be included in a Calc document and then saved as a template for later use:
• Printer settings: which printer, single sided / double sided, and paper size, and so on
• Cell and page styles to be usedTemplates can also contain predefined text, saving you from having to type it every time you create a new document. For example, an invoice template might contain your company’s name, address and logo.
You can also save menu and toolbar customizations in templates; see Chapter 14 (Setting up and Customizing Calc) for more information.
Editing a templateYou can edit a template’s styles and content, and then, if you wish, you can reapply the template’s styles to documents that were created from that template. (Note that you can only reapply styles. You cannot reapply content.)
To edit a template:
1) From the main menu, choose File > Templates > Organize. The Template Management dialog opens.
20 Using Styles and Templates in Calc

Figure 12: Template management dialog
2) In the box on the left, double-click the folder that contains the template that you want to edit. A list of all the templates contained in that folder appears underneath the folder name.
3) Select the template that you want to edit.4) Click the Commands button and choose Edit from the drop-
down menu.5) Edit the template just as you would any other document. To save
your changes, choose File > Save from the main menu.
Updating a spreadsheet from a changed templateThe next time you open a spreadsheet that was created from the changed template, the following message appears.
Figure 13: Update styles message
Click Update Styles to apply the template’s changed styles to the spreadsheet. Click Keep Old Styles if you do not want to apply the template’s changed styles to the spreadsheet (but see Caution notice below).
Editing a template 21

Caution
If you choose Keep Old Styles in the message box shown in Figure 13, that message will not appear again the next time you open the document after changing the template it is based on. You will not get another chance to update the styles from the template, although you can use the macro given in the Note below to re-enable this feature.
Note To re-enable updating from a template:
1) Use Tools > Macros > Organize Macros > OpenOffice.org Basic. Select the document from the list, click the +, and select Standard. If Standard has a + beside it, click that and select a module.
2) Name the macro. For example, you could call it FixDocument. If the Edit button is active, click it. If the Edit button is not active, click New, type a module name in the pop-up dialog, and click OK.
3) In the Basic window, enter the following:Sub FixDocV3 ' set UpdateFromTemplate oDocSettings = ThisComponent.createInstance( _ "com.sun.star.document.Settings" ) oDocSettings.UpdateFromTemplate = True End Sub 'FixDocV3
4) Click the Run BASIC icon, then close the Basic window.
5) Save the document.
Next time when you open this document you will have the update from template feature back.
Adding templates using the Extension ManagerThe Extension Manager provides an easy way to install collections of templates, graphics, macros, or other add-ins that have been “packaged” into files with a .OXT extension. See Chapter 14 (Setting Up and Customizing Calc) for more about the Extension Manager.
This Web page lists many of the available extensions: http://extensions.services.openoffice.org/.
To install an extension, follow these steps:1) Download an extension package and save it anywhere on your
computer.
22 Using Styles and Templates in Calc

2) In OOo, choose Tools > Extension Manager from the menu bar. In the Extension Manager dialog, click Add.
3) A file browser window opens. Find and select the package of templates you want to install and click Open. The package begins installing. You may be asked to accept a license agreement.
4) When the package installation is complete, the templates are available for use through File > New > Templates and Documents and the extension is listed in the Extension Manager.
Figure 14: Newly-added package of templates.
Setting a default templateIf you create a document by choosing File > New > Text Document (or Spreadsheet, Presentation, or Drawing) from the main menu, OOo creates the document from the Default template for that type of document. You can, however, set a custom template to be the default. You can reset the default later if you choose.
Setting a custom template as the defaultYou can set any template to be the default, as long as it is in one of the folders displayed in the Template Management dialog.
Setting a default template 23

To set a custom template as the default:1) From the main menu, choose File > Templates > Organize. The
Template Management dialog opens.2) In the box on the left, select the folder containing the template
that you want to set as the default, then select the template.3) Click the Commands button and choose Set As Default
Template from the drop-down menu. The next time that you create a document by choosing File > New, the document will be created from this template.
Although many important settings can be changed in the Options dialog (see Chapter 14), for example default fonts and page size, more advanced settings (such as page margins) can only be changed by replacing the default template with a new one.
Resetting the default templateTo re-enable OOo’s default template for a document type as the default:
1) In the Template Management dialog, click any folder in the box on the left.
2) Click the Commands button and choose Reset Default Template > Spreadsheet from the drop-down menu.
The next time that you create a spreadsheet by choosing File > New, it will be created from OOo’s default template for spreadsheets.
Associating a spreadsheet with a different templateAt times you might want to associate a spreadsheet with a different template, or perhaps you’re working with a spreadsheet that did not start from a template but you now want it associated with a template.
One of the major advantages of using templates is the ease of updating styles in more than one document, as described on page 21. If you update styles by copying them from a different template (as described on page 16), the document has no association with the template from which the styles were loaded—so you cannot use this method. What you need to do is associate the document with the different template.
For best results, the names of styles should be the same in the existing document and the new template. If they are not, you will need to use Search and Replace to replace the old styles with new ones. See
24 Using Styles and Templates in Calc

Chapter 2 (Entering, Editing, and Formatting Data) for more about replacing styles using Find and Replace.
1) Use File > New > Templates and Documents. Choose the template you want. A new file, based on the template, opens. If the template has unwanted text or graphics in it, delete them.
2) Open the spreadsheet you want to change. (It opens in a new window.) Press Control+A to select everything in the spreadsheet.
3) Switch to the window containing the blank spreadsheet created in step 1, and paste the content into that spreadsheet.
4) Save the file under a new name.
Organizing templatesOOo can only use templates that are in OOo template folders. You can create new OOo template folders and use them to organize your templates, and import templates into those folders. For example, you might have one template folder for report templates and another for letter templates. You can also export templates.
To begin, choose File > Templates > Organize from the main menu. The Template Management dialog opens.
NoteAll the actions made by the Commands button in the Template Management dialog can be made as well by right-clicking on the templates or the folders.
Creating a template folderTo create a template folder:
1) In the Template Management dialog, click any folder.2) Click the Commands button and choose New from the drop-
down menu. A new folder called Untitled appears.3) Type a name for the new folder, and then press Enter. OOo saves
the folder with the name that you entered.
Deleting a template folderYou cannot delete template folders supplied with OOo or installed using the Extension Manager; you can only delete template folders that you have created.
Organizing templates 25

To delete a template folder:
1) In the Template Management dialog, select the folder that you want to delete.
2) Click the Commands button and choose Delete from the drop-down menu. A message box appears and asks you to confirm the deletion. Click Yes.
Moving a templateTo move a template from one template folder to another template folder:
1) In the Template Management dialog, double-click the folder that contains the template you want to move. A list of the templates contained in that folder appears underneath the folder name.
2) Click the template that you want to move and drag it to the desired folder. If you do not have the authority to delete templates from the source folder, this action copies the template instead of moving it.
Deleting a templateYou cannot delete templates supplied with OOo or installed using the Extension Manager; you can only delete templates that you have created or imported.
To delete a template:1) In the Template Management dialog, double-click the folder that
contains the template you want to delete. A list of the templates contained in that folder appears underneath the folder name.
2) Click the template that you want to delete.3) Click the Commands button and choose Delete from the drop-
down menu. A message box appears and asks you to confirm the deletion. Click Yes.
Importing a templateIf the template that you want to use is in a different location, you must import it into an OOo template folder.
To import a template into a template folder:1) In the Template Management dialog, select the folder into which
you want to import the template.
26 Using Styles and Templates in Calc

2) Click the Commands button and choose Import Template from the drop-down menu. A standard file browser window opens.
3) Find and select the template that you want to import and click Open. The file browser window closes and the template appears in the selected folder.
4) If you want, type a new name for the template, and then press Enter.
Exporting a templateTo export a template from a template folder to another location:
1) In the Template Management dialog, double-click the folder that contains the template you want to export. A list of the templates contained in that folder appears underneath the folder name.
2) Click the template that you want to export.3) Click the Commands button and choose Export Template from
the drop-down menu. The Save As window opens.4) Find the folder into which you want to export the template and
click Save.
Organizing templates 27