user’s manual myphusionf3... · user’s manual end the confusion myphusion.com 39700 manual...
TRANSCRIPT

USER’S MANUAL
END
TH
E C
ON
FUSI
ON
myphusion.commyphusion.com
39700 Manual cover 206 X 150 mm
© VTECHPrinted in China
91-1375-010

Table of Contents Page.........................................................................................................
Copyright ....................................................................................................... 1Disclaimer and Limitation of Liability ................................................... 1
1 INTRODUCTION1.1 Phusion™ Components ........................................................ 21.2 Touchpad Layout ..................................................................... 61.3 Battery Installation ................................................................... 81.4 Adjusting the Clock After Battery Replacement ........... 81.5 How to Use the Action Menu ............................................. 9
2 DIGITAL CAMERA2.1 Digital Camera: What is it? ................................................. 102.2 Commands .............................................................................. 102.3 Using the Digital Camera ................................................... 112.4 Adjust the Picture Contrast and Brightness .................. 112.5 How to Use the Schedule Photo Taking Function ..... 112.6 How to Use Timer Photo Taking ...................................... 12
3 PHOTO BROWSER3.1 Photo Browser: What is it? ................................................. 133.2 Commands .............................................................................. 133.3 Using the Photo Browser .................................................... 143.4 Deleting a Photo .................................................................... 143.5 Show or Hide the Date & Time ........................................ 153.6 Viewing Photos from Schedule Photo Taking ............. 153.7 Viewing Today’s Photos ....................................................... 15
4 MY PHOTO GALLERY4.1 My Album ................................................................................ 164.1.1 My Album: What is it? ......................................................... 164.1.2 Commands .............................................................................. 164.1.3 Using My Album ................................................................... 18
contents/a 6/7/00, 2:05 AM1
Table of Contents Page.........................................................................................................
4.1.4 Creating a New Album ....................................................... 184.1.5 Deleting an Album................................................................ 194.1.6 Playing an Album as a Slide Show ................................. 204.1.7 Viewing Photos in an Album ............................................ 204.1.8 Arranging the Order of the Photos in an Album ...... 204.1.9 Attaching a Note to Your Photos .....................................214.1.10 Deleting a Photo from an Album .................................... 214.1.11 Adding More Photos to an Album ................................ 224.1.12 Adding Album Cover and End Pages ........................... 224.1.13 Deleting a Cover or End Page ......................................... 234.2 Photo Maker .......................................................................... 234.2.1 Photo Maker: What is it? ................................................... 234.2.2 Commands ............................................................................. 234.2.3 Using Photo Maker .............................................................. 244.2.4 Adding Effects to a Photo .................................................. 254.2.5 Adding Special Effects to a Photo ................................... 254.2.6 Deleting Photos with Effects ............................................. 264.2.7 Editing Photos with Effects ................................................ 274.2.8 Editing a Photo with a Special Effect .............................. 274.2.9 Viewing a Photo Full Screen ............................................. 284.2.10 Replacing a Photo ................................................................ 284.3 Slide Show Maker ................................................................ 284.3.1 Slide Show Maker: What is it? ......................................... 284.3.2 Commands ............................................................................. 294.3.3 Using the Slide Show Maker .............................................314.3.4 Creating a New Slide Show ............................................... 314.3.5 Deleting a Slide Show ......................................................... 324.3.6 Viewing a Slide Full Screen ............................................... 324.3.7 How to Play an Album as a Slide Show ....................... 334.3.8 How to Play a Slide Show .................................................. 334.3.9 Excluding a Photo from a Slide Show ........................... 334.3.10 Changing the Order of the Photos
in a Slide Show ...................................................................... 34
contents/a 6/12/00, 9:17 PM2

Table of Contents Page.........................................................................................................
4.3.11 Adding the Transition and Sound Effect ....................... 344.3.12 Adding Cover and End Slides .......................................... 354.3.13 Adding More Photos to a Slide Show ........................... 354.4 Card Maker ............................................................................ 364.4.1 Card Maker: What is it? ..................................................... 364.4.2 Commands ............................................................................. 364.4.3 Using Card Maker ............................................................... 374.4.4 Creating a New Card .......................................................... 384.4.5 Editing a Card ........................................................................ 394.4.6 Deleting a Card ..................................................................... 404.4.7 Viewing a Card Full Screen ............................................... 404.4.8 Replacing a Photo ................................................................ 404.4.9 Inserting Clip Art ...................................................................414.4.10 Inserting Text from the Word List .................................... 41
5 MY ORGANIZER5.1 My Mailbox ............................................................................ 425.1.1 My Mailbox: What is it? ..................................................... 425.1.2 Folders in My Mailbox ........................................................ 425.1.3 Commands ............................................................................. 435.1.4 Using My Mailbox ............................................................... 445.1.5 Creating a New Message .................................................. 445.1.6 Editing a Message ................................................................ 445.1.7 Saving a Message to the Drafts Folder ......................... 445.1.8 Sending a Message to the Outbox ................................ 445.1.9 Adding an Address .............................................................. 455.1.10 Viewing Message Information ......................................... 455.1.11 Viewing an Attachment ...................................................... 455.1.12 Deleting a Message ............................................................. 455.1.13 Spell Checking ...................................................................... 455.1.14 Inserting a Photo ................................................................... 465.1.15 Inserting a Sentence ............................................................ 465.1.16 Inserting a Smiley Icon ....................................................... 46
contents/a 6/7/00, 2:05 AM3

Table of Contents Page.........................................................................................................
5.2 My Address Book ................................................................. 465.2.1 My Address Book: What is it? .......................................... 465.2.2 Commands ............................................................................. 475.2.3 Using My Address Book .................................................... 475.2.4 Finding an Address Book Entry ....................................... 485.2.5 Creating an Address Book Entry ..................................... 485.2.6 Creating a Personal Address Book Entry ...................... 485.2.7 Creating a Group Address Book Entry ......................... 495.2.8 Editing an Address Book Entry ........................................ 495.2.9 Deleting Address Book Files ............................................. 505.3 My Calendar ...........................................................................515.3.1 My Calendar: What is it? ....................................................515.3.2 Commands ..............................................................................515.3.3 Using My Calendar .............................................................. 525.3.4 Adding an Event ................................................................... 525.3.5 Calendar View Shortcuts .................................................... 535.3.6 Viewing a Specific Date ...................................................... 535.3.7 Deleting All the Events on a Specific Day .................... 545.4 My Memo Pad ...................................................................... 545.4.1 My Memo Pad: What is it? ............................................... 545.4.2 Commands ............................................................................. 545.4.3 Using My Memo Pad ......................................................... 555.4.4 Creating and Editing Memos ........................................... 555.4.5 Deleting .................................................................................... 555.4.6 Inserting a Smiley Icon ....................................................... 565.5 My Money Manager ........................................................... 565.5.1 My Money Manager: What is it? .................................... 565.5.2 Commands ............................................................................. 565.5.3 Viewing My Money Manager ......................................... 575.5.4 Renaming the Folder ........................................................... 585.5.5 Creating a New Entry ......................................................... 585.5.6 Viewing Another Folder ..................................................... 59
contents/a 6/7/00, 2:05 AM4

Table of Contents Page.........................................................................................................
5.5.7 Viewing a Statement ........................................................... 595.6 My Database .......................................................................... 605.6.1 My Database: What is it? ................................................... 605.6.2 Commands ............................................................................. 605.6.3 Viewing My Database ......................................................... 605.6.4 Adding a Record ....................................................................615.6.5 Creating a New Database .................................................. 615.6.6 Deleting a Record ................................................................. 625.6.7 Deleting a Database ............................................................ 625.7 School Subjects ..................................................................... 625.7.1 School Subjects: What is it? .............................................. 625.7.2 Commands ............................................................................. 635.7.3 Viewing School Subjects .................................................... 635.7.4 Creating a New School Subjects Table ......................... 635.7.5 Deleting Contents in the School SubjectsTable ......... 645.8 To Do List ................................................................................ 655.8.1 To Do List: What is it? ......................................................... 655.8.2 Commands ............................................................................. 655.8.3 Symbols Displaying the Status of Tasks
in the To Do List. ................................................................... 665.8.4 Using the To Do List ............................................................ 665.8.5 Creating a New Task ........................................................... 665.8.6 Viewing the To Do List Index Screen ............................ 675.8.7 Viewing the Content of the To Do List ......................... 675.8.8 Editing a Task ......................................................................... 675.8.9 Deleting Task Contents ....................................................... 675.8.10 Deleting a Task ...................................................................... 675.8.11 Setting Task Options ........................................................... 685.8.12 Setting Date Options ........................................................... 68
contents/a 6/7/00, 2:05 AM5

Table of Contents Page.........................................................................................................
6 MY ACCESSORIES6.1 Clock ......................................................................................... 696.1.1 Clock: What is it? .................................................................. 696.1.2 Commands ............................................................................. 696.1.3 Viewing the Clock ................................................................ 696.1.4 Changing the Clock Settings ............................................ 706.1.5 Changing the Date & Time Format ............................... 706.2 City Locator ............................................................................. 716.2.1 City Locator: What is it? ...................................................... 716.2.2 Commands .............................................................................. 716.2.3 Viewing the City Locator .................................................... 716.2.4 Viewing City Info. ................................................................. 726.3 Mini-Calculator ...................................................................... 736.3.1 Mini-Calculator: What is it? ............................................... 736.3.2 Using Mini-Calculator ......................................................... 736.3.3 Touchpad Keys and their Mini-Calculator Function . 746.4 Unit Conversion .................................................................... 756.4.1 Unit Conversion: What is it? ............................................. 756.4.2 Using Unit Conversion ....................................................... 756.5 Birthday List ............................................................................ 766.5.1 Birthday List: What is it? ..................................................... 766.5.2 Commands ............................................................................. 766.5.3 Using the Birthday List ....................................................... 766.5.4 Birthday List Alarm Setting ................................................ 766.6 My Profile ................................................................................ 776.6.1 My Profile: What is it? ......................................................... 776.6.2 Commands ............................................................................. 776.6.3 Using My Profile ................................................................... 77
contents/a 6/7/00, 2:05 AM6

Table of Contents Page.........................................................................................................
7 ENTERTAINMENT7.1 Photo Puzzle .......................................................................... 787.1.1 Photo Puzzle: What is it? ................................................... 787.1.2 Commands ............................................................................. 787.1.3 Playing Photo Puzzle ........................................................... 787.1.4 Game Settings ....................................................................... 797.2 Photo Tic-Tac-Toe .................................................................. 797.2.1 Photo Tic-Tac-Toe: What is it? ........................................... 797.2.2 Commands ............................................................................. 807.2.3 Playing Photo Tic-Tac-Toe ................................................... 807.2.4 Game Settings ....................................................................... 807.3 Trivia ...........................................................................................817.3.1 Trivia: What is it? ....................................................................817.3.2 Commands ..............................................................................817.3.3 Playing Trivia ...........................................................................817.3.4 Selecting a Skill Level .......................................................... 827.4 Pegged ..................................................................................... 827.4.1 Pegged: What is it? .............................................................. 827.4.2 Commands ............................................................................. 837.4.3 Playing Pegged ...................................................................... 837.4.4 Selecting Different Puzzles ................................................ 847.5 Word Chamber ..................................................................... 847.5.1 Word Chamber: What is it? .............................................. 847.5.2 Commands ............................................................................. 847.5.3 Playing Word Chamber ...................................................... 857.5.4 Game Settings ....................................................................... 857.6 Phortune Cookies ................................................................. 867.6.1 Phortune Cookies: What is it? .......................................... 867.6.2 Commands ............................................................................. 867.6.3 Playing Luck Today .............................................................. 867.6.4 Playing Friendship ................................................................ 88
contents/a 6/7/00, 2:05 AM7

Table of Contents Page.........................................................................................................
8 WORDS & MATH8.1 Math Games .......................................................................... 898.1.1 Tangrams ................................................................................. 898.1.1.1 Tangrams: What is it? .......................................................... 898.1.1.2 Commands ............................................................................. 898.1.1.3 Playing Tangrams ................................................................. 898.1.1.4 Rotating Shapes .................................................................... 908.1.1.5 Flipping Shapes ..................................................................... 908.1.1.6 Selecting Different Puzzles ................................................ 908.1.1.7 Using Hints ..............................................................................918.1.2 Mathimage ..............................................................................918.1.2.1 Mathimage: What is it? .......................................................918.1.2.2 Commands ............................................................................. 928.1.2.3 Playing Mathimage .............................................................. 928.1.3 Grid Grad ................................................................................ 938.1.3.1 Grid Grad: What is it? ......................................................... 938.1.3.2 Commands ............................................................................. 938.1.3.3 Playing Grid Grad ................................................................ 938.1.3.4 Erasing Points Plotted on the Grid ................................. 948.1.3.5 Selecting a Skill Level .......................................................... 948.2 Word Games .......................................................................... 958.2.1 Word Puzzle ........................................................................... 958.2.1.1 Word Puzzle: What is it? .................................................... 958.2.1.2 Commands ............................................................................. 968.2.1.3 Playing Word Puzzle ........................................................... 968.2.1.4 Selecting a Skill Level .......................................................... 968.2.2 Clue Counter ......................................................................... 978.2.2.1 Clue Counter: What is it? .................................................. 978.2.2.2 Commands ............................................................................. 978.2.2.3 Playing Clue Counter .......................................................... 988.2.3 Analogies ................................................................................. 988.2.3.1 Analogies: What is it? .......................................................... 988.2.3.2 Commands ............................................................................. 988.2.3.3 Playing Analogies ................................................................. 99
contents/a 6/7/00, 2:05 AM8

Table of Contents Page.........................................................................................................
8.2.3.4 Selecting a Skill Level .......................................................... 998.3 Translator ............................................................................... 1008.3.1 Translator: What is it? ........................................................ 1008.3.2 Using Translator .................................................................. 1008.4 Spell Checker ........................................................................1018.4.1 Spell Checker: What is it? .................................................1018.4.2 Commands ............................................................................1018.4.3 Using Spell Checker ...........................................................1018.4.4 Customizing the Spell Checker ..................................... 102
9 TOOLS9.1 My Setup ............................................................................... 1039.1.1 Memory Manager .............................................................. 1039.1.1.1 Memory Manager: What is it? ....................................... 1039.1.1.2 Commands ........................................................................... 1039.1.1.3 Using the Memory Manager ......................................... 1039.1.1.4 Deleting Files ........................................................................ 1049.1.1.5 How to Reset Memory ..................................................... 1049.1.2 Changing the Sound Setup ............................................ 1059.1.2.1 Sound Setup: What is it? ................................................. 1059.1.2.2 How to Use the Sound Setup ........................................ 1059.1.3 Auto Shut-Off Time ........................................................... 1069.1.3.1 Auto Shut-Off Time: What is it? .................................... 1069.1.3.2 Using Auto Shut-Off Time .............................................. 1069.1.4 Date & Time Format .......................................................... 1079.1.4.1 Date & Time Format: What is it? ................................... 1079.1.4.2 Using Date & Time Format ............................................. 1079.1.5 User Mode ............................................................................ 1089.1.5.1 User Mode: What is it? ..................................................... 1089.1.5.2 Using User Mode ............................................................... 1089.1.6 Locking the Unit ................................................................. 1099.1.6.1 Lock Unit: What is it? ........................................................ 1099.1.6.2 Using Lock Unit .................................................................. 109
contents/a 6/7/00, 2:05 AM9
Table of Contents Page.........................................................................................................
9.2 Phusion™ Tutor ...................................................................1109.2.1 Phusion™ Tutor: What is it? ............................................ 1109.2.2 Using Phusion™ Tutor ...................................................... 1109.3 VTech® PC Link Software ................................................ 110
Appendix: Smiley Icons ....................................................................... 111Appendix: Battery Notices ...................................................................112VTech® Phusion™ ON-LINE ............................................................112FCC NOTICE ........................................................................................... 114
contents/a 6/7/00, 2:05 AM10

1
Copyright
Copyright® 2000 VTech Industries, LLC All rights reserved. VTechand the VTech logo are registered trademarks. Phusion™ and thePhusion™ logo are trademarks of VTech Industries, LLC.
Disclaimer and Limitation of Liability
VTech Industries, LLC and its suppliers assume no responsibility forany damage or loss resulting from the use of this handbook. VTechIndustries, LLC and its suppliers assume no responsibility for anyloss or claims by third parties that may arise through the use ofthis software. VTech Industries, LLC and its suppliers assume noresponsibility for any damage or loss caused by deletion of dataas a result of malfunction, dead battery, or repairs. Be sure to makebackup copies of important data on other media to protect againstdata loss.
Important!
Please read the VTech® End User Software LicenseAgreement before using the accompanying softwareprogram(s). Using any part of the software indicates thatyou accept the terms of the Phusion™ End User SoftwareLicense Agreement.
This manual was prepared during software development. Somescreens in this manual may not appear exactly as the screens foundin the final product.
VTech® Phusion™ PC Link software is supplied on 3.5" disks. Ifyou do not have access to a 3.5" floppy disk drive for yourcomputer, you can download the VTech® Phusion™ PC Linksoftware on-line from www.myphusion.com.
397 I/M (1,41)a 6/8/00, 12:21 AM1

2
Welcome to the Phusion™ digital camera organizer. This guide isdesigned to help you set up and run your digital camera organizer.It describes all you need to know about how to use your Phusion™digital camera organizer and the applications that come with it.
1.1 Phusion™ Components
Front
1 INTRODUCTION
397 I/M (1,41)a 6/8/00, 12:21 AM2

3
Important Buttons and Features
Digital Camera With Phusion™’s Digital Camera, youcan take up to 25 black and white digitalpictures. Use the LCD screen to see whatthe Digital Camera sees in real-time, soyou can always get the perfect shot. Also,you’ll never need film or film developing.You can take a picture and see the resultsinstantly. Each picture is instantly storedin Phusion™’s Photo Browser. For evengreater flexibility, you can rotate theDigital Camera 180° for more picturetaking fun.
Photo Button Press the button to capture the photosthat appear in the Digital Camera.
Power Button Turns your Phusion™ on or off. If yourPhusion™ is turned off, pressing thePower button turns the unit on. If yourPhusion™ is turned on, pressing thePower button turns the unit off.
Contrast Control You can adjust the appearance of theLCD screen for the clearest display.Depending on the lighting conditions ortemperature of the environment whereyou use your digital camera organizer,you may need to adjust the contrast.
To adjust the contrast, rotate the Controlup or down to increase or decrease thecontrast.
397 I/M (1,41)a 6/8/00, 12:21 AM3

4
Stylus and Stylus Slot The stylus slides in and out of the slot.To use the stylus, remove it from the slotand hold it as you would a pen or pencil.Use the stylus to press the keys on theTouchpad or to press the Directional Padand other buttons.
Touchpad The Touchpad is very similar to a computerkeyboard. Use the stylus to press the keyson the Touchpad. See the section,“Touchpad Layout” for more informationon each key.
Cancel Button Press Cancel to return to the previousscreen.
OK Button Press OK to move the cursor to the nextline, or to confirm an action or command.
Menu Button Press Menu to launch the Action menu.The Action menu contains additionalcommands for your Phusion™ digitalcamera organizer.
Directional Pad Press the Directional Pad to move thecursor up, down, left or right on thescreen. Also, the Directional Pad can beused to adjust the settings on yourPhusion™ digital camera organizer.
On menu screens such as the Mainmenu, press Right to move the cursorcouter-clockwise. Press Left to move thecursor clockwise.
397 I/M (1,41)a 6/8/00, 12:21 AM4

5
Back
Cradle Connector This port connects to the cradle, whichis connected to the serial port on yourPC. Place the Phusion™ into the cradleto backup data or transfer data to andfrom your PC.
Battery Cover Covers the batteries that power yourPhusion™ digital camera organizer.
Reset Button Under normal use, you should not haveto use the Reset button. If your Phusion™digital camera organizer stops responding,press Reset to restart.
397 I/M (1,41)a 6/8/00, 12:21 AM5
6
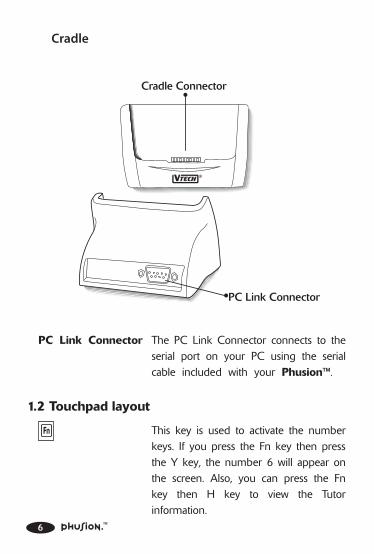
Cradle
PC Link Connector The PC Link Connector connects to theserial port on your PC using the serialcable included with your Phusion™.
1.2 Touchpad layout
This key is used to activate the numberkeys. If you press the Fn key then pressthe Y key, the number 6 will appear onthe screen. Also, you can press the Fnkey then H key to view the Tutorinformation.
397 I/M (1,41)a 6/8/00, 12:21 AM6

7
Press this key before pressing the letterkeys to type capital letters.
Cap Press this key if you want to type allletters as capital letters. Press this keyagain to continue typing in lower caseletters.
Space Press this key to insert a space betweenwords or letters.
Arrow keys Press these keys to move the cursor up,down, left or right.
Press this key to move the cursor to thenext line or confirm an action.
Press this key to delete any character tothe left of the cursor.
AC/C Used in the Mini-Calculator. Press thiskey once to clear your most recent entry.Press the key again to clear all entriesin the Mini-Calculator.
397 I/M (1,41)a 6/8/00, 12:21 AM7

8
1.3 Battery Installation
Two (2) AA size batteries power your Phusion™ digital cameraorganizer. Here is how to install them:
1. Be sure your Phusion™ digitalcamera organizer is turned off.
2. Open the battery cover on theback of your Phusion™ digitalcamera organizer.
3. Insert two (2) new AA sizebatteries as shown.
4. Close the battery cover.
If your Phusion™ digital camera organizer stops working orif the screen appears dim, make sure the batteries are freshand installed properly.
1.4 Adjusting the Clock After Battery Replacement
The internal clock stops when the batteries are removed. Youwill be asked to adjust the time on your Phusion™.
1. If you need to adjust the clock, choose Yes.
2. Then adjust the time on the following screen.
3. After adjusting each of the clock settings, your changeswill be saved automatically.
397 I/M (1,41)a 6/8/00, 12:21 AM8

9
1.5 How to Use the Action Menu
Press the Menu button on your Phusion™ digital cameraorganizer to view the Action menu.
The Action menu is arranged in across section that allows you toaccess commands using the fewestbutton presses. Use the DirectionalPad to select a command, thenpress OK to continue.
397 I/M (1,41)a 6/8/00, 12:21 AM9

10
2.1 Digital Camera: What is it?
The pictures you take can be used in some of the learningactivities and games. You can add pictures to your addressbook, too. You can even transfer pictures to and from yourPC. Each picture is instantly stored in Phusion™‘s PhotoBrowser.
Where is it?
You can open the Digital Camera from the Main menu ofyour Phusion™ digital camera organizer. The Digital Cameracan also be accessed from other applications that use yourdigital pictures.
2.2 Commands
(Schedule Photo Taking) Automatically take a series of
photos over a set time.
(Timer Photo Taking) Automatically take a photo after
10 seconds.
(Show Date & Time) Display the date and time when
a photo was taken.
(Hide Date & Time) Hide the date and time when a
photo was taken.
(Delete This Photo) Delete the current photo.
2 DIGITAL CAMERA
397 I/M (1,41)a 6/8/00, 12:21 AM10
11
2.3 Using the Digital Camera
1. Use the Directional Pad to select (Digital Camera)from the Main menu and press OK.
2. On the LCD screen, you can instantly see what theDigital Camera sees in real-time.
3. Press the Photo button to take a picture.
2.4 Adjust the Picture Contrast and Brightness
1. You can adjust the contrast and brightness of each pictureusing the Directional Pad.
2. Press Up and Down to adjust the picture contrast.
3. Press Left or Right to adjust the brightness of the picture.
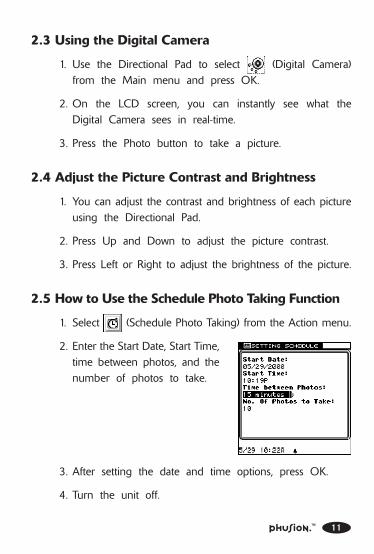
2.5 How to Use the Schedule Photo Taking Function
1. Select (Schedule Photo Taking) from the Action menu.
2. Enter the Start Date, Start Time,time between photos, and thenumber of photos to take.
3. After setting the date and time options, press OK.
4. Turn the unit off.
397 I/M (1,41)a 6/8/00, 12:21 AM11

12
2.6 How to Use Timer Photo Taking
1. Select (Timer Photo Taking) from the Actionmenu.
2. Once Timer Photo Taking is active, Phusion™ will takea picture in 10 seconds.
397 I/M (1,41)a 6/8/00, 12:21 AM12

13
3.1 Photo Browser: What is it?
The Photo Browser is a collection of digital photos taken byyou. Once a picture is taken, it is automatically stored in thePhoto Browser. Your Phusion™ digital camera organizer storesup to 25 digital pictures.
Where is it?
You can find Photo Browser in the Main menu.
3.2 Commands
(Delete) Delete the current photo or all photos.
(This File) Delete the selected photo.
(All Files) Permanently delete all photos.
(View Today’s Photos) View the photos taken today.
(View Scheduled Photos) View the photos taken during
Schedule Photo Taking.
(Hide Date & Time) Hide the date and time when a
photo was taken.
(Show Date & Time) Display the date and time when
a photo was taken.
(Go Back) Go back to the previous menu.
3 PHOTO BROWSER
397 I/M (1,41)a 6/8/00, 12:21 AM13

14
3.3 Using the Photo Browser
1. Select (Photo Browser) fromthe Main menu and press OK.
2. Use the Directional Pad to selecta photo and press OKto view it.
3.4 Deleting a Photo
1. Select Photo Browser from the Main menu and press OKto open it.
2. Select a photo you want to delete using the DirectionalPad and select (Delete) from the Action menu.
3. A sub-menu will pop up. From this sub-menu, you canselect (This File) to delete the selected photo or (All Files) to delete all the photos in the Photo Browser.
397 I/M (1,41)a 6/8/00, 12:21 AM14

15
3.5 Show or Hide the Date & Time
1. Select (Show Date & Time) from the Action menuafter you have opened the Photo Browser.
2. If the date and time isn’t shown,press OK. The date and timeof when each photo was takenwill appear on screen.
3. Select (Hide Date & Time)and press OK again to hide thedate and time of when eachphoto was taken.
3.6 Viewing Photos from Schedule Photo Taking
1. At the Photo Browser, use the Directional Pad to select (View Scheduled Photos) from the Action menu.
2. Press OK. The photos taken during the Schedule PhotoTaking mode will be displayed on screen.
3.7 Viewing Today’s Photos
1. At the Photo Browser, use theDirectional Pad to select (View Today’s Photos) from theAction menu.
2. Press OK. Photos taken duringthe current day will be displayedon screen.
397 I/M (1,41)a 6/8/00, 12:21 AM15

16
4 MY PHOTO GALLERY
Use My Photo Gallery to organize your photos! In My Photo Gallery,you can create slide shows and photo albums. You can even addspecial effects or Clip Art to your pictures.
4.1 My Album
4.1.1 My Album: What is it?
My Album helps you store, organize and add notes to yourphotos. You can re-order or create Cover and End Pages forthe album.
Where is it?
You can find My Album in the My Photo Gallery folder.
4.1.2 Commands
(New) Create a new album.
(Delete) Delete the current album or all albums.
(This File) Delete the selected album.
(All Files) Permanently delete all albums.
(Edit) Edit the selected album.
(Play Album) Play the selected album as a slide show.
(Re-Order) Arrange the order of the photos in the
album.
397 I/M (1,41)a 6/8/00, 12:21 AM16
17
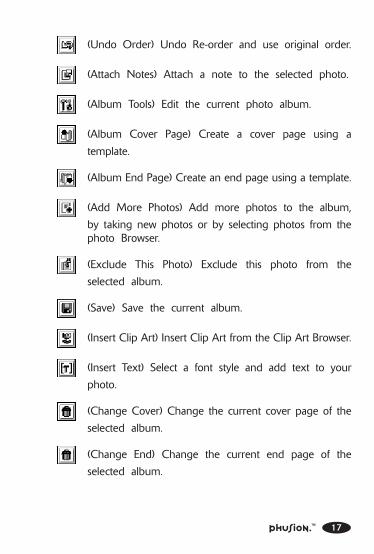
(Undo Order) Undo Re-order and use original order.
(Attach Notes) Attach a note to the selected photo.
(Album Tools) Edit the current photo album.
(Album Cover Page) Create a cover page using a
template.
(Album End Page) Create an end page using a template.
(Add More Photos) Add more photos to the album,
by taking new photos or by selecting photos from thephoto Browser.
(Exclude This Photo) Exclude this photo from the
selected album.
(Save) Save the current album.
(Insert Clip Art) Insert Clip Art from the Clip Art Browser.
(Insert Text) Select a font style and add text to your
photo.
(Change Cover) Change the current cover page of the
selected album.
(Change End) Change the current end page of the
selected album.
397 I/M (1,41)a 6/8/00, 12:21 AM17

18
4.1.3 Using My Album
1. Select (My Photo Gallery) from the Main menu usingthe Directional Pad.
2. Select (My Album) using the Directional Pad and pressOK.
3. You are now in the mainalbum screen.
4. To edit an album, select thealbum, then select (Edit)from the Action menu.
5. After you have edited or created a new album, choose (Save) to save your changes.
4.1.4 Creating a New Album
1. From the main album screen, select (New) from theAction menu.
2. Type in the name of the newalbum using the Touchpad.
397 I/M (1,41)a 6/8/00, 12:21 AM18
19
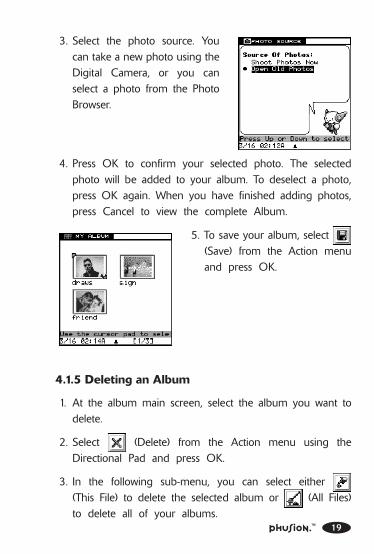
3. Select the photo source. Youcan take a new photo using theDigital Camera, or you canselect a photo from the PhotoBrowser.
4. Press OK to confirm your selected photo. The selectedphoto will be added to your album. To deselect a photo,press OK again. When you have finished adding photos,press Cancel to view the complete Album.
5. To save your album, select (Save) from the Action menuand press OK.
4.1.5 Deleting an Album
1. At the album main screen, select the album you want todelete.
2. Select (Delete) from the Action menu using theDirectional Pad and press OK.
3. In the following sub-menu, you can select either (This File) to delete the selected album or (All Files)to delete all of your albums.
397 I/M (1,41)a 6/8/00, 12:21 AM19

20
4.1.6 Playing an Album as a Slide Show
1. At the album main screen, select (Play Album) fromthe Action menu.
4.1.7 Viewing Photos in an Album
1. Use the Directional Pad toselect the album you want toview and press OK.
2. Use the Directional Pad to select a photo you want toview and press OK.
4.1.8 Arranging the Order of the Photos in an Album
1. At the album main screen, select (Edit) from the Actionmenu.
2. Select (Re-Order) from theAction menu and press OK.
3. To undo the last move, select (Undo Order) and press
OK.
4. Select the photos in the order you want, then select (Save) to save your changes.
397 I/M (1,41)a 6/8/00, 12:21 AM20
21
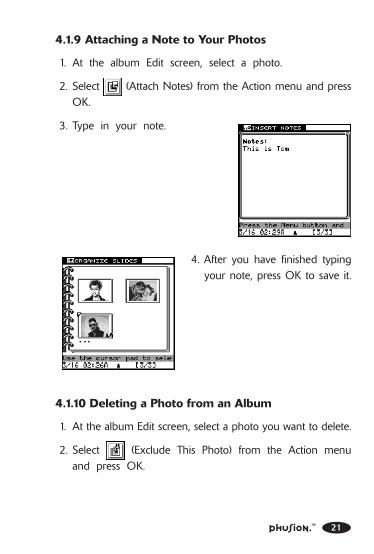
4.1.9 Attaching a Note to Your Photos
1. At the album Edit screen, select a photo.
2. Select (Attach Notes) from the Action menu and pressOK.
3. Type in your note.
4. After you have finished typingyour note, press OK to save it.
4.1.10 Deleting a Photo from an Album
1. At the album Edit screen, select a photo you want to delete.
2. Select (Exclude This Photo) from the Action menuand press OK.
397 I/M (1,41)a 6/8/00, 12:21 AM21

22
4.1.11 Adding More Photos to an Album
1. At the album Edit screen, select (Album Tools) fromthe Action menu.
2. Select (Add More Photos) and press OK.
3. Select the photo source. Youcan take a new photo using theDigital Camera, or you canselect a photo from the PhotoBrowser.
4. The selected photos will beadded to the albumautomatically.
4.1.12 Adding Album Cover and End Pages
1. Select (Album Tools) from the Action menu and pressOK.
2. Select (Album Cover Page) or (Album End Page)from the sub-menu and press OK.
3. In the following screen, you willsee templates you can use tocreate your cover or end page.
4. Select a photo and press OKto edit it.
397 I/M (1,41)a 6/8/00, 12:21 AM22

23
5. Select (Insert Clip Art) from the Action menu to addClip Art or select (Insert Text) to add text to the photo.
6. Select (Save) to save the photo.
4.1.13 Deleting a Cover or End Page
If you want to delete a cover or end page, select (Exclude
this Photo).
4.2 Photo Maker
4.2.1 Photo Maker: What is it?
The Photo Maker allows you to add effects, hairstyles orbackgrounds to your photos.
Where is it?
You can find Photo Maker in the My Photo Gallery folder.
4.2.2 Commands
(New) Add a new effect to a photo.
(Delete) Delete current file or all files.
(This File) Delete the selected file.
(All Files) Permanently delete all files.
(Edit) Edit the selected photo.
(Insert Clip Art) Insert Clip Art from the Clip Art Browser.
397 I/M (1,41)a 6/8/00, 12:21 AM23

24
(Insert Text) Add text to a photo.
(Save) Save the current photo.
(Undo Effect) Undo the last photo effect.
(Replace Photo) Select a new photo.
4.2.3 Using Photo Maker
1. Select (My Photo Gallery) from the Main menu usingthe Directional Pad.
2. Select (Photo Maker) using the Directional Pad.
3. You are now in the Photo Maker main screen. Twotemplates are provided. Select a template and press OK.
4. Now you can choose fromdifferent effects. Select (New) from the Action menuto create a new photo and addeffects.
5. To edit a photo, select the photo and choose (Edit)from the Action menu.
6. After you have edited or created a new photo, choose (Save) to save your changes.
397 I/M (1,41)a 6/8/00, 12:21 AM24

25
4.2.4 Adding Effects to a Photo
1. Open Photo Maker and select the Photo Effects template,then press OK to enter the Photo Effects screen.
2. Select (New) from theAction menu.
3. Select the photo source. Youcan take a new photo using theDigital Camera, or you canselect a photo from the PhotoBrowser.
4. Select a photo effect and press OK to confirm yourselection.
5. Select (Save) from theAction menu to save yourchanges.
4.2.5 Adding Special Effects to a Photo
1. Open Photo Maker and select the Special Effects template.
2. Select (New) from the Action menu.
397 I/M (1,41)a 6/8/00, 12:21 AM25

26
3. Select a hairstyle or backgroundtemplate from the templatePhoto Browser and press OK.
4. Select the photo source. Youcan take a new photo using theDigital Camera, or you canselect a photo from the PhotoBrowser.
5. Select (Save) from theAction menu to save yourchanges.
4.2.6 Deleting Photos with Effects
1. Select the photo you want to delete in the Photo Effectsor Special Effects screen.
2. Select (Delete) from the Action menu using theDirectional Pad and press OK.
3. In the following sub-menu, you can select (This File)to delete the selected photo. Selecting (All Files) will deleteall the photos in the Browser.
397 I/M (1,41)a 6/8/00, 12:21 AM26

27
4.2.7 Editing Photos with Effects
1. Select a photo you want to editfrom the Photo Effect screen.
2. Select (Edit) from the Actionmenu and press OK to enterthe Edit screen.
3. At the Edit screen, select (Insert Clip Art) from Actionmenu to insert Clip Art or select (Insert Text) to addtext.
4. Select (Save) to save your changes.
4.2.8 Editing a Photo with a Special Effect
1. Select a photo you want to editfrom the Special Effects screen.
2. Select (Edit) from the Action menu and press OK toenter the Edit screen.
3. At the Edit screen, select a special effect.
4. Select a background or hairstyle.
5. Select (Save) to save your changes.
397 I/M (1,41)a 6/8/00, 12:21 AM27
28
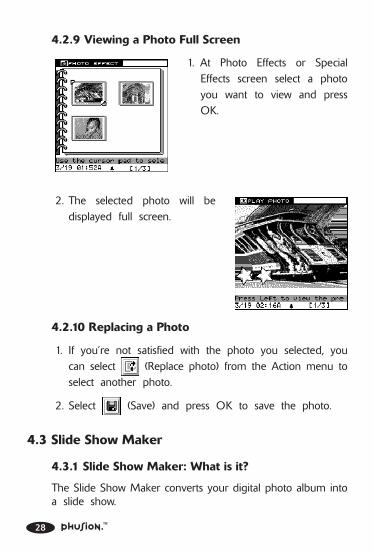
4.2.9 Viewing a Photo Full Screen
1. At Photo Effects or SpecialEffects screen select a photoyou want to view and pressOK.
2. The selected photo will bedisplayed full screen.
4.2.10 Replacing a Photo
1. If you’re not satisfied with the photo you selected, youcan select (Replace photo) from the Action menu toselect another photo.
2. Select (Save) and press OK to save the photo.
4.3 Slide Show Maker
4.3.1 Slide Show Maker: What is it?
The Slide Show Maker converts your digital photo album intoa slide show.
397 I/M (1,41)a 6/8/00, 12:21 AM28
29
Where is it?
You can find Slide Show Maker in the My Photo Gallery folder.
4.3.2 Commands
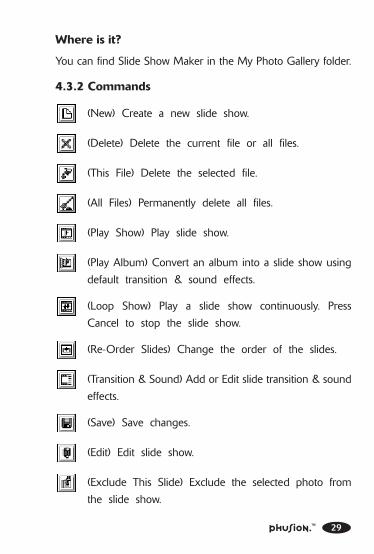
(New) Create a new slide show.
(Delete) Delete the current file or all files.
(This File) Delete the selected file.
(All Files) Permanently delete all files.
(Play Show) Play slide show.
(Play Album) Convert an album into a slide show using
default transition & sound effects.
(Loop Show) Play a slide show continuously. Press
Cancel to stop the slide show.
(Re-Order Slides) Change the order of the slides.
(Transition & Sound) Add or Edit slide transition & sound
effects.
(Save) Save changes.
(Edit) Edit slide show.
(Exclude This Slide) Exclude the selected photo from
the slide show.
397 I/M (1,41)a 6/8/00, 12:21 AM29

30
(Slide Tools) Create a slide cover page and end page,
or add more slides to your show.
(Slide Cover Page) Create a cover slide using the
provided templates.
(Slide End Page) Create an end slide using the provided
templates.
(Add More Slides) Add more slides to the show by
taking new photos or by selecting saved photos.
(Undo Order) Undo the Re-Order and use previous
order.
(Save Order) Save changes in the slide order.
(Insert Clip Art) Insert Clip Art from the Clip Art Browser.
(Insert Text) Add text to the current slide.
(Change Cover) Change the current cover page.
(Change End) Change the current end page.
397 I/M (1,41)a 6/8/00, 12:21 AM30

31
4.3.3 Using the Slide Show Maker
1. Select (My Photo Gallery) from the Main menu usingthe Directional Pad.
2. Select (Slide Show Maker)using the Directional Pad, andpress OK.
3. Select (New) from the Action menu to create a newslide show, or select (Edit) to enter the Slide ShowEdit screen.
4. To view a slide show, select (Play Show) from theAction menu.
4.3.4 Creating a New Slide Show
1. Select (New) from the Action menu.
2. Type in a name for the newslide show. Then select the slideshow source.
3. You can add photos using theDigital Camera or selectphotos from the Photo Browser.
397 I/M (1,41)a 6/8/00, 12:21 AM31

32
4. Use the Directional Pad to placethe cursor over a photo. PressOK to add it to the Slide Show.To deselect a photo, place thecursor over the photo, andpress OK again.
5. When you have finished adding photos, press Cancel toview the photos in the show.
4.3.5 Deleting a Slide Show
1. Select the slide show you want to delete.
2. Select (Delete) from the Action menu and press OK.
3. You can select either (This File) to delete the selectedslide show or (All Files) to delete all of the slide shows.
4.3.6 Viewing a Slide Full Screen
1. Select the slide show you want to view using the DirectionalPad, and press OK.
2. On the next screen, you cansee all the slides in the selectedslide show.
397 I/M (1,41)a 6/8/00, 12:21 AM32
33
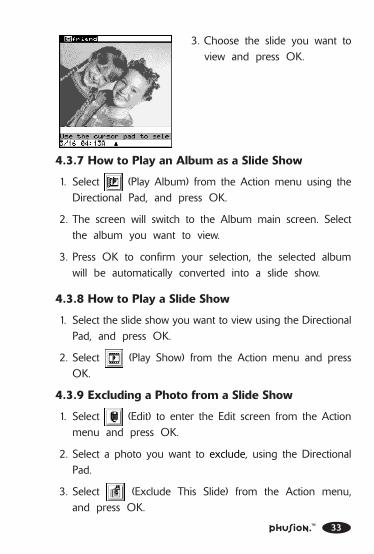
3. Choose the slide you want toview and press OK.
4.3.7 How to Play an Album as a Slide Show
1. Select (Play Album) from the Action menu using theDirectional Pad, and press OK.
2. The screen will switch to the Album main screen. Selectthe album you want to view.
3. Press OK to confirm your selection, the selected albumwill be automatically converted into a slide show.
4.3.8 How to Play a Slide Show
1. Select the slide show you want to view using the DirectionalPad, and press OK.
2. Select (Play Show) from the Action menu and pressOK.
4.3.9 Excluding a Photo from a Slide Show
1. Select (Edit) to enter the Edit screen from the Actionmenu and press OK.
2. Select a photo you want to exclude, using the DirectionalPad.
3. Select (Exclude This Slide) from the Action menu,and press OK.
397 I/M (1,41)a 6/8/00, 12:21 AM33

34
4.3.10 Changing the Order of the Photos in a Slide Show
1. Select the slide show you want to edit using the DirectionalPad.
2. Select (Edit) from the Action menu to enter the SlideShow Edit screen.
3. Select (Re-Order) from the Action menu and pressOK.
4. Select a slide you want to moveusing the Directional Pad, thenpress OK. Place the slide in thenew position using theDirectional Pad, then press OKto confirm the move.
5. Once you have finished editing the order of the slides,press (Save) to save your changes.
4.3.11 Adding the Transition and Sound Effects
1. Select the slide show you want to edit using the DirectionalPad.
2. Select (Edit) from the Action menu to enter the SlideShow Edit screen.
397 I/M (1,41)a 6/8/00, 12:21 AM34

35
3. To edit the slide transition andsound effect, select (Transition & Sound) from theAction menu, and press OK.
4. Use the Directional Pad to select a transition or sound effect.Press OK or Enter to confirm your selections.
5. Select (Save) to save your changes.
4.3.12 Adding Cover and End Slides
1. At the Slide Show Edit screen, select (Slide Tools) fromthe Action menu.
2. Select (Slide Cover Page) or (Slide End Page)from the Action menu, and press OK.
3. Choose a slide template from the template menu, and press OK.
4. On the next screen, you can select (Insert Clip Art)to insert Clip Art or select (Insert Text) to add textto the slide.
5. After you have finished editing the slides, select (Save)to save your changes.
4.3.13 Adding More Photos to a Slide Show
1. At the Slide Show Edit screen, select (Slide Tools) fromthe Action menu.
2. Select (Add More Slides) from the sub-menu and pressOK.
397 I/M (1,41)a 6/8/00, 12:21 AM35

36
3. Select a photo source. You canadd photos using the DigitalCamera or select photos fromthe Photo Browser.
4. After selecting the photos, press OK to add the photosto the current slide show.
4.4 Card Maker
4.4.1 Card Maker: What is it?
With Card Maker and pictures from the Digital Camera, youcan create greeting cards, invitations, and more. Card Makeralso includes different styles of borders and Clip Art to helpyou design the perfect card. To print your card, you cantransfer your card files to your PC using the VTech®
Phusion™ PC Link.
Where is it?
You can find Card Maker in the My Photo Gallery folder.
4.4.2 Commands
(New) Create a new card.
(Use Template 1) Create a card with a template.
(Use Template 2) Create a card with a template.
397 I/M (1,41)a 6/8/00, 12:21 AM36
37
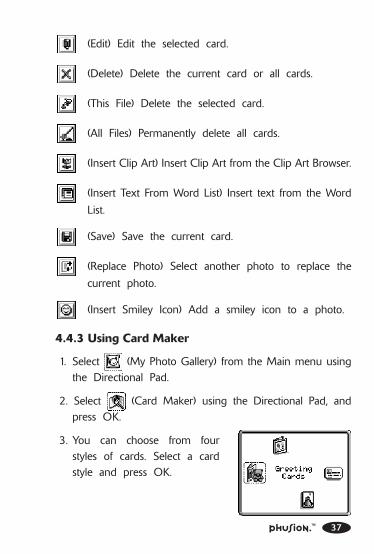
(Edit) Edit the selected card.
(Delete) Delete the current card or all cards.
(This File) Delete the selected card.
(All Files) Permanently delete all cards.
(Insert Clip Art) Insert Clip Art from the Clip Art Browser.
(Insert Text From Word List) Insert text from the Word
List.
(Save) Save the current card.
(Replace Photo) Select another photo to replace the
current photo.
(Insert Smiley Icon) Add a smiley icon to a photo.
4.4.3 Using Card Maker
1. Select (My Photo Gallery) from the Main menu usingthe Directional Pad.
2. Select (Card Maker) using the Directional Pad, andpress OK.
3. You can choose from fourstyles of cards. Select a cardstyle and press OK.
397 I/M (1,41)a 6/8/00, 12:21 AM37

38
4. Select a card template andpress OK to go to edit youcard.
5. Select (New) from the Action menu to create a newcard. Also you can select (Use Template 1) or
(Use Template 2) to create a card using a template.
6. To edit a card, select the card, then select (Edit) fromthe Action menu.
7. Choose (Save) to save your changes.
4.4.4 Creating a New Card
1. Select (New) from the Action menu to create a newcard. Also you can select (Use Template 1) or (Use Template 2) to create a card using a template.
2. Type in a name for your new card, then press OK.
3. If you’re creating a greetingcard, select the border, andpress OK.
4. Select a photo source. You canadd photos using the DigitalCamera or select photos fromthe Photo Browser.
397 I/M (1,41)a 6/8/00, 12:21 AM38

39
5. Press OK to confirm your photo choice and go to theCard Maker Edit screen.
6. At the Edit screen, you can select (Insert Clip Art)from Action menu to insert Clip Art or select (InsertText From Word List) to insert text from the Word List.
7. Once you have finished theediting, select (Save) fromthe Action menu and press OKto save your card.
4.4.5 Editing a Card
1. Select a card you want to edit in the Card Maker Browser.
2. Select (Edit) from the Actionmenu and press OK to enterthe Edit screen.
3. At the Edit screen, select (Insert Clip Art) from the Actionmenu to insert Clip Art orselect (Insert Text FromWord List) to insert text fromthe Word List.
4. Once you have finished editing, select (Save) fromthe Action menu and press OK to save your card.
397 I/M (1,41)a 6/8/00, 12:21 AM39
40
4.4.6 Deleting a Card
1. Select the card you want to delete in the Card MakerBrowser.
2. Select (Delete) from the Action menu using theDirectional Pad and press OK.
3. In the following sub-menu, you can select (This File)to delete the selected card, or (All Files) to deleteall of the cards in the Card Maker Browser.
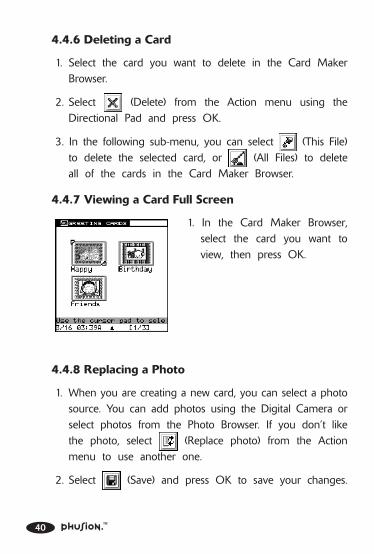
4.4.7 Viewing a Card Full Screen
1. In the Card Maker Browser,select the card you want toview, then press OK.
4.4.8 Replacing a Photo
1. When you are creating a new card, you can select a photosource. You can add photos using the Digital Camera orselect photos from the Photo Browser. If you don’t likethe photo, select (Replace photo) from the Actionmenu to use another one.
2. Select (Save) and press OK to save your changes.
397 I/M (1,41)a 6/8/00, 12:21 AM40

41
4.4.9 Inserting Clip Art
1. At the Edit screen, select (Insert Clip Art) from theAction menu.
2. A Clip Art box will appear.
3. Choose a Clip Art design usingthe Directional Pad.
4. Press OK to add the selected Clip Art design to the photo.
4.4.10 Inserting Text from the Text List
1. At the Card Maker Edit screen, select (Insert Text FromWord List) from the Action menu.
2. Select a text message from theText List, then press OK tocontinue.
397 I/M (1,41)a 6/8/00, 12:21 AM41

42
My Organizer provides different applications that will help youmanage your daily life.
5.1 My Mailbox
5.1.1 My Mailbox: What is it?
My Mailbox allows you to write messages. Using the VTech®
Phusion™ PC Link software, you can transfer your messagesto your PC. If you already have an e-mail address and InternetService Provider, you can transfer your messages to your PC,copy the messages into your own e-mail software, then sendthe messages from your PC.
Where is it?
You can find My Mailbox in the My Organizer folder.
5.1.2 Folders in My Mailbox
There are three folders in My Mailbox. Each folder servesa separate purpose. Here’s an introduction to each of thefolders:
Write Message
You can compose a new message by selecting the (Write
Message).
Outbox
All of the messages that you have finished, but have not yettransferred to your PC are stored in your (Outbox).To read a message in the Outbox, use the Directional Padto select a message in the list, then press OK.
5 MY ORGANIZER
397 I/M (42,77)a 6/8/00, 12:25 AM42

43
Drafts
You can save a message that you have not yet finished inthe (Drafts) box. To read a message, use the DirectionalPad to select a message in the list, then press OK.
5.1.3 Commands
(Write Message) Create a new message.
(Edit Message) Edit the current message.
(Place in Outbox) Send this message to the Outbox.
(Delete) Delete the selected message.
(View Attachment) Show the attached file.
(View More Info) View address information.
(Save as Drafts) Save your message in the Drafts folder.
(Add Address) Search the Address Book for addressesand automatically add them to the address list.
(Spell Checker) Check the spelling of a word.
(Insert Photo) Insert a photo into your message.
(Insert Sentence) Insert a sentence into your message.
(Insert Smiley Icon) Insert a smiley icon into yourmessage.
397 I/M (42,77)a 6/8/00, 12:26 AM43
44
5.1.4 Using My Mailbox
1. Select (My Mailbox) in the My Organizer folder usingthe Directional Pad and press OK.
2. You will now see three folders: Write Message, Outboxand Drafts. Select one using the Directional Pad.
5.1.5 Creating a New Message
You can write a new message by selecting
(Write Message) from the (My Mailbox) folder.
5.1.6 Editing a Message
Press Menu to open the Action menu then select (EditMessage) to edit the current message.
5.1.7 Saving a Message to the Drafts Folder
You can save a message that you have not yet finished writingin the Drafts folder.
1. Create a new message or edit a selected message in theCompose screen.
2. Press Menu to open the Action menu then select (Save as Drafts) to save your message to the Drafts folder.
5.1.8 Sending a Message to the Outbox
After you finish typing a new message or editing an old one,you can press Menu to open the Action menu then select
(Place in Outbox) to send this message to the Outbox.
397 I/M (42,77)a 6/8/00, 12:26 AM44
45
5.1.9 Adding an Address
Press Menu to open the Action menu then select (AddAddress) to search the Address Book for addresses andautomatically add them to the address list. Names and e-mailaddresses of both Personal and Group categories will beshown. Personal address entries will be displayed followed byGroup address entries.
5.1.10 Viewing Message Information
Press Menu to open the Action menu then select (ViewMore Info) to see all information.
5.1.11 Viewing an Attachment
Press Menu to open the Action menu then select (ViewAttachment) to see the photo attachment.
5.1.12 Deleting a Message
Press Menu to open the Action menu then select (Delete)to delete the selected message.
5.1.13 Spell Checking
The Spell Checker helps you check for any typing mistakes.Place the cursor next to the word you want to check. PressMenu to open the Action menu, then select (SpellChecker).
397 I/M (42,77)a 6/8/00, 12:26 AM45

46
5.1.14 Inserting a Photo
You can attach an image to your message when editing orcreating a new message. Press Menu to open the Action menuthen select (Insert Photo). The attached photo will appearin the upper right-hand corner of the screen.
5.1.15 Inserting a Sentence
You can insert a sentence into your message when editingor creating a new message. Place the cursor in the positionyou want to insert the sentence. Press Menu to open the Actionmenu then select (Insert Sentence).
5.1.16 Inserting a Smiley Icon
You can insert the smiley icon into your message when editingor creating a new message. Place the cursor in the positionyou want to insert the icon. Press Menu to open the Actionmenu then select (Insert Smiley Icon).
5.2 My Address Book
5.2.1 My Address Book: What is it?
My Address Book on your VTech® Phusion™ helps youorganize and store all of your friends’ addresses, telephonenumbers and e-mail addresses, either by individual (Personalfiles) or by group list (Group files). You can use My AddressBook to quickly access a telephone number of a friend orfamily member.
Where is it?
You can find My Address Book in the My Organizer folder.
397 I/M (42,77)a 6/8/00, 12:26 AM46

47
5.2.2 Commands
(New File) Create a new Personal file.
(New Group) Create a new Group file.
(Edit) Modify the current file.
(Change View) View Personal files, Group files, or Allfiles.
(Group Only) Display Group files only.
(Personal Only) Display Personal files only.
(All Files) Display all files.
(Delete) Delete the current file or all files.
(All Files) Permanently delete all files.
(This File) Delete the selected file.
(Insert Photo) Add a photo to this file.
(Add Recipient) Insert e-mail address from the Personalfile when creating Group file.
5.2.3 Using My Address Book
Select (My Address Book) inthe My Organizer folder using theDirectional Pad. Then press OK.
397 I/M (42,77)a 6/8/00, 12:26 AM47

48
5.2.4 Finding an Address Book Entry
Select the entry you would like to view from the list, thenpress OK to view the selected record.
If you want to locate a specific Address Book entry withoutscrolling through the list of files, you can type the first fewletters of a person’s name in the ‘Find by Name’ field, MyAdress Book will automatically find matching entries.
5.2.5 Creating an Address Book Entry
Choose (New File) from the Action menu to add a newentry.
My Address Book contains two different types of files. Anindividual’s address is stored in your Address Book as aPersonal entry. A Group entry is a group of addresses.
5.2.6 Creating a Personal Address Book Entry
1. After you have opened your Address Book, select (New File) from the Action menu. This will open the MyAddress Book Edit screen.
2. At the Edit screen, you cantype in the person’s name,telephone number, e-mailaddress, birthday, home or workaddress.
3. Select (Save) from the Action menu to save your entry.
397 I/M (42,77)a 6/8/00, 12:26 AM48
49
5.2.7 Creating a Group Address Book Entry
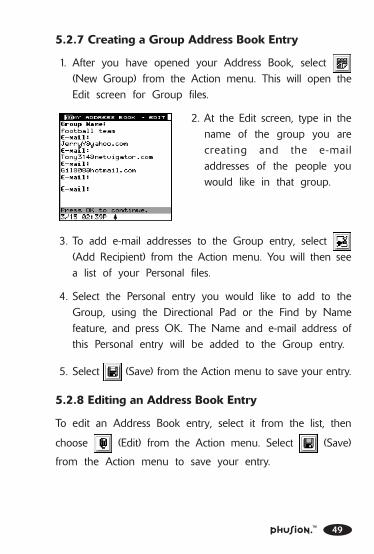
1. After you have opened your Address Book, select (New Group) from the Action menu. This will open theEdit screen for Group files.
2. At the Edit screen, type in thename of the group you arecreating and the e-mailaddresses of the people youwould like in that group.
3. To add e-mail addresses to the Group entry, select (Add Recipient) from the Action menu. You will then seea list of your Personal files.
4. Select the Personal entry you would like to add to theGroup, using the Directional Pad or the Find by Namefeature, and press OK. The Name and e-mail address ofthis Personal entry will be added to the Group entry.
5. Select (Save) from the Action menu to save your entry.
5.2.8 Editing an Address Book Entry
To edit an Address Book entry, select it from the list, then
choose (Edit) from the Action menu. Select (Save)
from the Action menu to save your entry.
397 I/M (42,77)a 6/8/00, 12:26 AM49
50
5.2.9 Deleting Address Book Files
There are two ways to delete files from your Address Book.
To delete a single Address Book entry:
1. After you have opened My Address Book, select the entryyou want to delete.
2. Choose (Delete) from the Action menu.
3. Then choose (This File) from the Action menu.
4. The entry will be removed from My Address Book.
To delete all of the files in your Address Book:
1. After you have opened My Address Book, choose (Delete) from the Action menu.
2. Select (All Files) from the Action menu and press OK.
3. All of the files in your Address Book will be deleted.
Important!
If you choose to delete all files when you are viewing thePersonal files in your Address Book, only the Personal fileswill be deleted. If you choose to delete all files when youare viewing the Group files in your Address Book, only theGroup files will be deleted.
397 I/M (42,77)a 6/8/00, 12:26 AM50

51
5.3 My Calendar
5.3.1 My Calendar: What is it?
My Calendar helps you keep track of special events, partiesand exams. You can view your schedule in either daily ormonthly formats. You can use My Calendar any time you wantto keep track of an event that you need to remember.
Where is it?
My Calendar is located in the My Organizer folder.
5.3.2 Commands
(New) Create a new event.
(Edit) Edit the current event.
(Delete) Delete event(s).
(All Events) Permanently delete all events from theCalendar.
(This Event) Delete the selected event.
(Full Day Events) Delete all events in a day.
(Save) Save all changes.
(View Today) View the current day’s schedule.
(Go To Date) Go to a specified date.
(Daily View) View the selected date.
(Monthly View) View the selected month.
(Date & Time Format) Change the date and time formatused in the Calendar.
397 I/M (42,77)a 6/8/00, 12:26 AM51

52
(Previous Day) Go to the previous day’s schedule.
(Next Day) Go to the following day’s schedule.
5.3.3 Using My Calendar
1. Select (My Calendar) in the My Organizer folder.
2. The next screen is the “MonthlyView” of the current month.Dots will appear next to thedates that have a scheduledevent.
3. To view all of the events forthat day, select a day, thenpress OK.
5.3.4 Adding an Event
1. To add an event to a specificday in the Daily View, you canchoose (New) fromthe Action menu.
2. Enter the Event Date and Time. Set how far in advanceyou want to be reminded of the event. Finally, enter thename of the event (for example, "football game").
3. Choose (Save) from the Action menu to save yourevent.
397 I/M (42,77)a 6/8/00, 12:26 AM52

53
Important!
If the small dot seen on “Monthly View” is near the topof the date box, then the event on that day is scheduledbefore 12:00pm. If the small dot is near the bottom of thedate box, then the event on that day is scheduled after12:00pm.
5.3.5 Calendar View Shortcuts
In the “Monthly View” of My Calendar, there are a fewshortcuts that can be used to change what day, week or monthyou are viewing.
Try these quick My Calendar touchpad shortcuts:
Up arrow key Moves the cursor to the same day ofthe previous week.
Down arrow key Moves the cursor to the same day ofthe next week.
Left arrow key Moves the cursor to the previous day.
Right arrow key Moves the cursor to the next day.
Enter key or OK Displays the Daily View of the selectedday.
5.3.6 Viewing a Specific Date
1. Select (Go To Date) from the Action menu.
2. Type in the date that you would like to view.
3. Press OK.
397 I/M (42,77)a 6/8/00, 12:26 AM53

54
5.3.7 Deleting All the Events on a Specific Day
1. In the Daily View, select (Delete) from the Actionmenu.
2. Choose (Full Day Events) to delete all of the eventson that day.
5.4 My Memo Pad
5.4.1 My Memo Pad: What is it?
My Memo Pad is an application that allows you to type aquick note or reminder.
Where is it?
My Memo Pad is located in the My Organizer folder.
5.4.2 Commands
(New) Create a new memo.
(Edit) Edit the selected memo.
(Save) Save the memo.
(Delete This File) Delete the selected file.
(Delete) Delete the current memo or all memos.
(This File) Delete the selected memo.
(All Files) Permanently delete all memos.
(Insert Smiley Icon) Insert a smiley icon.
397 I/M (42,77)a 6/8/00, 12:26 AM54

55
5.4.3 Using My Memo Pad
1. Select (My Memo Pad) inthe My Organizer folder.
2. Select a memo to view it.
5.4.4 Creating and Editing Memos
1. Choose (New) from the Action menu to create a newmemo.
2. Select (Edit) to edit the selected memo.
3. When you have finished typing or editing your memo,choose (Save) to save it.
5.4.5 Deleting
1. If you want to delete the contents of the current memo,at the Edit screen of the memo, choose (Delete ThisFile) from the Action menu.
397 I/M (42,77)a 6/8/00, 12:26 AM55

56
2. If you want to delete the selected memo, at the Indexscreen of the memo, choose (Delete), then select (This File) from the sub-menu.
3. If you want to delete all the memos, choose (Delete),then select (All Files) from the sub-menu.
5.4.6 Inserting a Smiley Icon
1. At the Edit screen of the memo, place the cursor whereyou would like to insert a smiley icon, then choose (Insert Smiley Icon) from the Action menu.
2. Choose a Smiley icon from the list using the DirectionalPad.
5.5 My Money Manager
5.5.1 My Money Manager: What is it?
My Money Manager helps you track your allowance, earningsand your spending. You can also create folders to categorizeyour income and expenses.
Where is it?
My Money Manager is located in the My Organizer folder.
5.5.2 Commands
(New) Create a new file.
(Edit) Edit the selected file.
(Save) Save changes.
397 I/M (42,77)a 6/8/00, 12:26 AM56

57
(Delete This File) Delete the current file.
(Delete) Delete the current file or all files.
(This File) Delete the selected file.
(All Files) Permanently delete all files.
(Statement) View Statements from the current orprevious month.
(This Month) Show the net income for the currentmonth.
(Last Month) Show the net income for the previousmonth.
(Rename Folder) Change the name of an existing folder.
(Change Folder) Switch to another folder.
5.5.3 Viewing My Money Manager
There are 5 folders in My Money Manager. By default, theyare numbered Folder 1 through Folder 5.
1. Select (My Money Manager) in the MyOrganizer folder.
2. The first folder you will see isFolder 1. If you have used thisapplication before, you will seethe last folder you have used.
397 I/M (42,77)a 6/8/00, 12:26 AM57
58
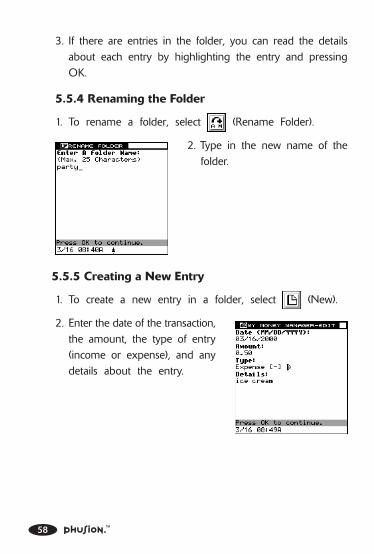
3. If there are entries in the folder, you can read the detailsabout each entry by highlighting the entry and pressingOK.
5.5.4 Renaming the Folder
1. To rename a folder, select (Rename Folder).
2. Type in the new name of thefolder.
5.5.5 Creating a New Entry
1. To create a new entry in a folder, select (New).
2. Enter the date of the transaction,the amount, the type of entry(income or expense), and anydetails about the entry.
397 I/M (42,77)a 6/8/00, 12:26 AM58

59
5.5.6 Viewing Another Folder
1. Select (Change Folder) tolist all of the folders.
2. Select the folder you want to view.
5.5.7 Viewing a Statement
A statement is a brief summary of the income and expensesfrom all of your folders. You can choose to view the statementof the current month or the previous month.
1. While you are viewing a folder, select Menu to open theAction menu.
2. Choose (Statement) from the Action menu.
3. To view the current month’sstatement, choose (ThisMonth) from the sub-menu. Toreview the last month’sstatement, choose (LastMonth)
397 I/M (42,77)a 6/8/00, 12:26 AM59

60
5.6 My Database
5.6.1 My Database: What is it?
My Database allows you to create and maintain your ownsimple database. With this database you can keep a recordof nearly everything - all of your personal items, collections,CDs, or games.
Where is it?
My Database is located in the My Organizer folder.
5.6.2 Commands
(Create New Database) Create a new database.
(Delete Database) Delete the selected database.
(Add Record) Add a new record to the database.
(Delete Record) Delete the selected record from the
current database.
5.6.3 Viewing My Database
1. Select (My Database) inthe My Organizer folder.
397 I/M (42,77)a 6/8/00, 12:26 AM60

61
2. Select the name of the database using the Directional Padand press OK to view the contents of the database.
3. There are 2 fields or columnsin each database. Each entryinto a database is called arecord.
5.6.4 Adding a Record
1. To add a new record to an existing database, select
(Add Record) and press OK.
2. Type in the data you want to add and press OK.
5.6.5 Creating a New Database
1. At the main screen of My Database, select (Create
New Database) and press OK.
2. Enter the name of the newdatabase, and the titles for eachcolumn.
397 I/M (42,77)a 6/8/00, 12:26 AM61

62
3. After creating the structure ofthe new database, you caninput your data.
5.6.6 Deleting a Record
1. At the index screen of an existing database, select therecord you want to delete.
2. Choose (Delete Record) from the Action menu and
press OK.
5.6.7 Deleting a Database
1. On the main screen of My Database, select the databaseyou want to delete.
2. Choose (Delete Database) from the Action menu and
press OK.
5.7 School Subjects
5.7.1 School Subjects: What is it?
Use School Subjects to list your classes for each day of theweek.
Where is it?
School Subjects is located in the My Organizer folder.
397 I/M (42,77)a 6/8/00, 12:26 AM62
63
5.7.2 Commands
(New) Clear the School Subjects table.
(Edit) Change the content of the selected cell.
(Delete) Clear the content of the selected cell.
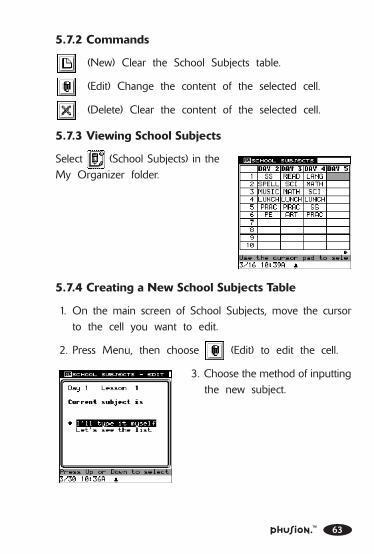
5.7.3 Viewing School Subjects
Select (School Subjects) in theMy Organizer folder.
5.7.4 Creating a New School Subjects Table
1. On the main screen of School Subjects, move the cursorto the cell you want to edit.
2. Press Menu, then choose (Edit) to edit the cell.
3. Choose the method of inputtingthe new subject.
397 I/M (42,77)a 6/8/00, 12:26 AM63

64
4. If you choose “Let’s see the list”,you can choose the new subjectfrom a list of common schoolsubjects.
5. If you choose “I’ll type it myself”,you can enter the name of asubject not on the list. Eachsubject name can be up to 5characters in length.
5.7.5 Deleting Contents in the School SubjectsTable
To clear the contents of a selected cell, move the cursor tothat cell, press Menu then choose (Delete). To clear thetable, choose (New) from the Action menu.
397 I/M (42,77)a 6/8/00, 12:26 AM64

65
5.8 To Do List
5.8.1 To Do List: What is it?
To Do List helps you prioritize and assign due dates toassignments or common tasks. It’s a great tool that helps youkeep track of all the things you need to do! The To Do Listdisplays each task in priority order with the high priority itemslisted first. High priority items are marked “1”. Low priorityitems are marked ”3". If a task has a medium priority, it ismarked with a “2”.
Where is it?
To Do List is located in the My Organizer folder.
5.8.2 Commands
(New) Enter a new task.
(Edit) Edit or modify a task.
(Save) Save your changes to the task.
(Delete This File) Delete the selected task.
(Delete) Delete current task or all tasks.
(This File) Delete this task.
(All Files) Delete all tasks.
(Date Option) Hide or show start date and due dateof tasks.
(Task Option) Sort and automatically delete tasksaccording to your preferences.
397 I/M (42,77)a 6/8/00, 12:26 AM65

66
C key Change the status (complete or incomplete) ofa task.
5.8.3 Symbols Displaying the Status of Tasks in theTo Do List.
This symbol means that the task has been completed.
This symbol means that the task is overdue.
5.8.4 Using the To Do List
1. Select (To Do List) in theMy Organizer folder.
2. Select a task from the list using the Directional Pad, toview the task status, start date, due date, priority, anddetails.
5.8.5 Creating a New Task
1. Choose (New) from theAction menu to create a newtask.
2. When you have finishedentering your task, choose (Save) from the Action menuand press OK.
397 I/M (42,77)a 6/8/00, 12:26 AM66

67
5.8.6 Viewing the To Do List Index Screen
1. Open the (To Do List) inthe My Organizer folder.
2. Each task is arranged by priority.
5.8.7 Viewing the Content of the To Do List
1. Select a task in the index screen and press OK.
2. You can see the status, start date, due date, priority anddetails of the selected task.
5.8.8 Editing a Task
If you want to create a new task or edit an old one, youcan use the Edit screen to edit the selected record.
1. Choose (Edit) button from the Action menu to editthe selected task.
2. The next screen will allow you to edit your task.
5.8.9 Deleting Task Contents
1. At the Edit screen of the task, choose (Delete ThisFile) from the Action menu and press OK.
5.8.10 Deleting a Task
1. At the Index screen of the To Do List, choose (Delete),then select (This File) from the sub-menu.
397 I/M (42,77)a 6/8/00, 12:26 AM67

68
2. If you want to delete all of the tasks in the To Do List,choose (Delete), then select (All Files) from thesub-menu.
5.8.11 Setting Task Options
You can auto-delete completed tasks or sort tasks using avariety of methods. You can also select the viewing range oftasks in your To Do List.
1. At the Index screen of the To Do List., choose (TaskOption) from the Action menu.
2. A screen will appear asking youto select how you want toarrange your To Do List.
3. Press OK to confirm yourchoices and continue.
5.8.12 Setting Date Options
1. Choose (Date Option) from the Action menu whenyou are creating a task.
2. A screen will appear asking ifyou want to input a Start Dateor Due Date.
3. Press OK to confirm yourchoices and continue.
397 I/M (42,77)a 6/8/00, 12:26 AM68

69
6.1 Clock
6.1.1 Clock: What is it?
The Clock program displays the current date and time. Youcan use the Clock program when you need to set the timeand date or change how they are displayed. You can alsoset the clock for Daylight Savings Time, choose a home city,or set the built-in alarm clock.
Where is it?
The Clock program is located in the My Accessories folder.
6.1.2 Commands
(Edit) Change the date and the time.
(Change Date & Time Format) Change the format inwhich the date and time are displayed.
(Save) Save current settings and format.
6.1.3 Viewing the Clock
1. Select (Clock) in the MyAccessories folder.
6 MY ACCESSORIES
397 I/M (42,77)a 6/8/00, 12:26 AM69

70
6.1.4 Changing the Clock Settings
1. While in the Clock program, choose (Edit) from theAction menu.
2. Use the Directional Pad to setthe date, time, Home City,Daylight Savings Time and thealarm.
3. Select (Save) to save the settings.
6.1.5 Changing the Date & Time Format
1. While in the Clock program, choose (Change Date
& Time Format) from the Action menu.
2. Use the Directional Pad tochange the format in which thedate and time are displayed.
397 I/M (42,77)a 6/8/00, 12:26 AM70

71
6.2 City Locator
6.2.1 City Locator: What is it?
City locator allows you to view the location of more than 50cities around the globe on Phusion’s world map. The selectedcity is highlighted on the world map by a flashing square.
Where is it?
City locator is located in the My Accessories folder.
6.2.2 Commands
(City Info.) Show information about the selected city.
6.2.3 Viewing the World Clock
1. Select (City Locator) in theMy Accessories folder.
2. Press Right to open the pull down menu, then choosethe World City you would like to display.
397 I/M (42,77)a 6/8/00, 12:26 AM71

72
6.2.4 Viewing City Info.
1. While in the City Locator program, select (City Info.).
2. To exit this screen, press the Cancel button.
397 I/M (42,77)a 6/19/00, 10:34 PM72

73
6.3 Mini-Calculator
6.3.1 Mini-Calculator: What is it?
Mini-Calculator provides simple calculation features to help yousolve numerical problems of addition, subtraction, multiplicationand division.
Where is it?
Mini-Calculator is located in the My Accessories folder.
6.3.2 Using Mini-Calculator
1. Select (Mini-Calculator) inthe My Accessories folder.
2. On the next screen, you cantype in the digits and calculationsymbols ( , , , ) byselecting the correspondingtouchpad keys.
397 I/M (42,77)a 6/8/00, 12:26 AM73

74
6.3.3 Touchpad Keys and their Mini-CalculatorFunction:
Key Function
Q 1
W 2
E 3
R 4
T 5
Y 6
U 7
I 8
O 9
P 0
K
L
M
▲
Enter =
▲
AC/C
397 I/M (42,77)a 6/8/00, 12:26 AM74
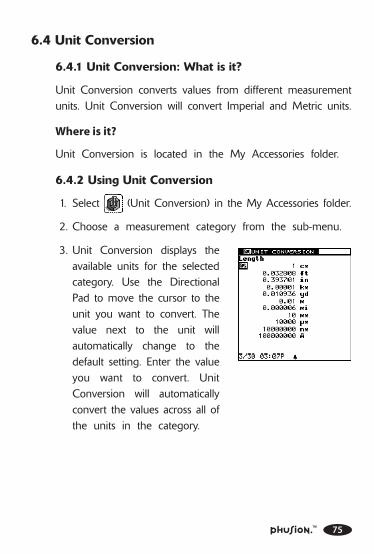
75
6.4 Unit Conversion
6.4.1 Unit Conversion: What is it?
Unit Conversion converts values from different measurementunits. Unit Conversion will convert Imperial and Metric units.
Where is it?
Unit Conversion is located in the My Accessories folder.
6.4.2 Using Unit Conversion
1. Select (Unit Conversion) in the My Accessories folder.
2. Choose a measurement category from the sub-menu.
3. Unit Conversion displays theavailable units for the selectedcategory. Use the DirectionalPad to move the cursor to theunit you want to convert. Thevalue next to the unit willautomatically change to thedefault setting. Enter the valueyou want to convert. UnitConversion will automaticallyconvert the values across all ofthe units in the category.
397 I/M (42,77)a 6/8/00, 12:26 AM75

76
6.5 Birthday List
6.5.1 Birthday List: What is it?
Birthday List keeps a record of your friends’ birthdays, andalerts you to upcoming birthdays.
Where is it?
You can find Birthday List in the My Accessories folder.
6.5.2 Commands
(Alarm) Set the alarm to remind you of an upcomingbirthday.
6.5.3 Using the Birthday List
1. Open (Birthday List) fromthe My Accessories folder.
2. The birthday entries recordedin the Address Book will bedisplayed.
6.5.4 Birthday List Alarm Setting
1. Choose (Alarm) from the Action menu.
2. Set how far in advance theBirthday List should notify youof upcoming birthdays.
397 I/M (42,77)a 6/8/00, 12:26 AM76

77
6.6 My Profile
6.6.1 My Profile: What is it?
My Profile stores your personal information.
Where is it?
You can find My Profile in the My Accessories folder.
6.6.2 Commands
(Save) Save changes.
6.6.3 Using My Profile
1. Highlight (My Profile) in the My Accessories folderusing the Directional Pad and press OK.
2. Type in your personal information.
3. When you have finished creating or editing My Profile,Press Menu to open the Action menu and choose (Save).
397 I/M (42,77)a 6/8/00, 12:26 AM77

78
7.1 Photo Puzzle
7.1.1 Photo Puzzle: What is it?
The object of this game is to arrange the tiles to form a picturewith the empty square in the lower right hand corner of thescreen.
Where is it?
You can find Photo Puzzle in the Entertainment folder.
7.1.2 Commands
(New) Begin a new game.
(Settings) Set the skill level and select a puzzle picture.
(Undo) Undo the last move.
(Hints) Show the original picture.
7.1.3 Playing Photo Puzzle
1. First, study the photo carefully,then press OK to start thetimer and begin solving thepuzzle.
2. Use the Directional Pad to arrange the tiles.
3. Press Cancel to quit the game at any time.
7 ENTERTAINMENT
397 I/M (78,114)a 6/8/00, 12:32 AM78

79
7.1.4 Game Settings
1. Choose (Settings) from the Action menu.
2. Select a skill level using the Directional Pad, then pressOK.
3. Next, you’ll need to select a picture source. You can:
• Take a new picture using theDigital Camera.
• Use a picture from the PhotoBrowser.
• Use a picture from the PuzzleLibrary.
• Or use the current picture.
4. Press OK to continue.
7.2 Photo Tic-Tac-Toe
7.2.1 Photo Tic-Tac-Toe: What is it?
The object of this game is to be the first player to line upthree of your own pictures vertically, horizontally, or diagonally.
Where is it?
You can find Photo Tic-Tac-Toe in the Entertainment folder.
397 I/M (78,114)a 6/8/00, 12:32 AM79

80
7.2.2 Commands
(New) Begin a new game.
(Settings) Modify the game settings.
(Undo) Undo the last move.
7.2.3 Playing Photo Tic-Tac-Toe
1. Select (Photo Tic-Tac-Toe) from the Entertainmentfolder.
2. Press OK to start the game, usethe Directional Pad to placeyour picture, then press OK.The current player is displayedat the bottom of the screen.
7.2.4 Game Settings
1. Choose (Settings) from theAction menu.
2. Choose an opponent. You canplay against Phusion™ oragainst a friend.
3. Decide who will move first.
397 I/M (78,114)a 6/8/00, 12:32 AM80

81
4. Next, you’ll need to select a picture source. You can:
• Take a new picture using the Digital Camera.
• Use a picture from the Photo Browser.
• Use a picture from the Game Piece Library.
5. Press OK or Enter to continue.
7.3 Trivia
7.3.1 Trivia: What is it?
Test your knowledge with 1,000 questions from five differenttopics: Food, Sports, People, Nature, and Entertainment. Eachgame is made up of five questions. You have 60 secondsto answer each question.
Where is it?
You can find Trivia in the Entertainment folder.
7.3.2 Commands
(Select Level) Select the skill level.
7.3.3 Playing Trivia
1. Select (Trivia) in theEntertainment folder.
2. Choose a topic using theDirectional Pad, then press OKto continue.
397 I/M (78,114)a 6/8/00, 12:32 AM81
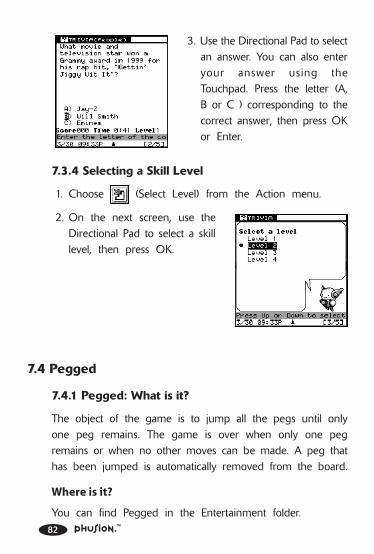
82
3. Use the Directional Pad to selectan answer. You can also enteryour answer using theTouchpad. Press the letter (A,B or C ) corresponding to thecorrect answer, then press OKor Enter.
7.3.4 Selecting a Skill Level
1. Choose (Select Level) from the Action menu.
2. On the next screen, use theDirectional Pad to select a skilllevel, then press OK.
7.4 Pegged
7.4.1 Pegged: What is it?
The object of the game is to jump all the pegs until onlyone peg remains. The game is over when only one pegremains or when no other moves can be made. A peg thathas been jumped is automatically removed from the board.
Where is it?
You can find Pegged in the Entertainment folder.
397 I/M (78,114)a 6/8/00, 12:32 AM82

83
7.4.2 Commands
(Restart) Begin a new game.
(Level) Set the skill level.
7.4.3 Playing Pegged
1. Select (Pegged) from theEntertainment folder.
2. Use the Directional Pad to selecta peg, and press OK. Theselected peg will appear gray.
3. To select another peg, place thecursor over a new peg, thenpress OK.
4. Use the Directional Pad to select a space to place the peg.
• A peg can only jump one peg at a time.
• A peg can only jump adjacent pegs.
• A peg must land in an open space directly on the otherside of the jumped peg.
• Only horizontal and vertical jumps are allowed- youcannot jump pegs diagonally.
5. Keep jumping pegs until there is only one peg left onthe board, or until no other moves can be made.
6. Press Cancel to quit the game at any time.
7. Select Restart from the Action menu to start over, or selectLevel to select a new puzzle.
397 I/M (78,114)a 6/8/00, 12:32 AM83
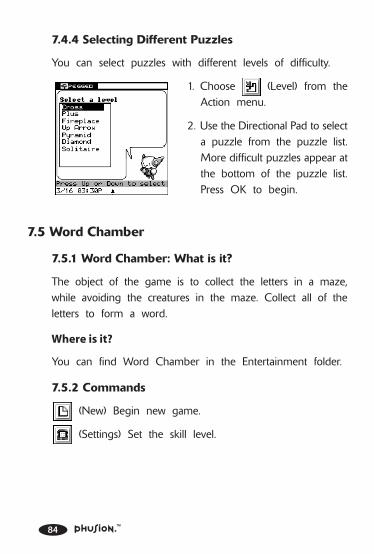
84
7.4.4 Selecting Different Puzzles
You can select puzzles with different levels of difficulty.
1. Choose (Level) from theAction menu.
2. Use the Directional Pad to selecta puzzle from the puzzle list.More difficult puzzles appear atthe bottom of the puzzle list.Press OK to begin.
7.5 Word Chamber
7.5.1 Word Chamber: What is it?
The object of the game is to collect the letters in a maze,while avoiding the creatures in the maze. Collect all of theletters to form a word.
Where is it?
You can find Word Chamber in the Entertainment folder.
7.5.2 Commands
(New) Begin new game.
(Settings) Set the skill level.
397 I/M (78,114)a 6/8/00, 12:32 AM84

85
7.5.3 Playing Word Chamber
1. Select (Word Chamber)from the Entertainment folder.
2. Use the Directional Pad to movethe character around the maze.Move over a letter to get it.
3. Collect all of the letters to win.
4. Press Cancel to quit the game at any time.
7.5.4 Game Settings
1. Choose (Settings) from the Action menu.
2. Use the Directional Pad to selecta skill level, then press OK tostart.
397 I/M (78,114)a 6/8/00, 12:32 AM85

86
7.6 Phortune Cookies
7.6.1 Phortune Cookies: What is it?
Phortune Cookies uses your digital photo and a personalinformation profile to calculate your fortune. Phortune Cookieshas two modes of play: Luck Today and Friendship. In LuckToday, you’ll see what the day may hold in store for you.Phortune Cookies will also reveal your lucky number and luckycolor. In Friendship, you can check the status of your friendshipwith a pal, or you can see what the future holds for twofriends.
Important!
If this is your first time playing Phortune Cookies, you mustfirst complete your personal information profile in LuckToday.
Where is it?
You can find Phortune Cookies in the Entertainment folder.
7.6.2 Commands
(New) Begin a new game.
(Edit) Change the photo and fill in your personalinformation.
7.6.3 Playing Luck Today
1. Choose (Phortune Cookies) from the Entertainmentfolder.
397 I/M (78,114)a 6/8/00, 12:32 AM86

87
2. If this is your first time playingPhortune Cookies, you mustfirst enter your personalinformation in Luck Today.
3. At the Luck Today screen, select (Edit) from the Action
menu to choose a photo ofyourself and enter your personalinformation profile. After youhave completed your personalinformation profile, press OK tocontinue.
4. Your fortune for today willappear on screen instantly.
5. Press Cancel to continue.
397 I/M (78,114)a 6/8/00, 12:32 AM87

88
7.6.4 Playing Friendship
Important!
If this is your first time playing Phortune Cookies, you mustfirst complete your personal information profile in LuckToday.
1. Use the Directional Pad to select Friendship, then pressOK.
2. Friendship has two modes of play:
• To see how you rate with a friend, select With a Friend.
• To see what’s in store for two of your friends, selectFriend Vs. Friend.
3. If this is your first time playing Phortune Cookies, you mustfirst enter your personal information in Luck Today. SeeLuck Today for additional information.
4. If you are playing the With a Friend mode:
• After you have completed your friend’s personalinformation profile, press OK to continue.
• Phortune Cookies will reveal a friendship rating anddetailed message.
5. If you are playing the Friend Vs. Friend mode:
• After you have completed both of your friend’s personalinformation profiles, press OK to continue.
• Phortune Cookies will reveal a friendship rating anddetailed message.
397 I/M (78,114)a 6/8/00, 12:32 AM88

89
8.1 Math Games
Your VTech® Phusion™ includes three fun math games!
8.1.1 Tangrams
8.1.1.1 Tangrams: What is it?
Tangrams is an ancient Chinese puzzle that uses geometricshapes to create silhouettes of animals or everyday shapes.There are seven geometric shapes. Choose a silhouette andtry to recreate it. Each shape can be flipped or rotated, butyou must use all seven shapes, and none of the shapes mayoverlap.
Where is it?
You can find Tangrams in Math Games folder, which is locatedin the Words & Math folder.
8.1.1.2 Commands
(Rotate Shape) Rotate the selected shape clockwise.
(Flip Shape) Flip the selected shape vertically.
(Change Puzzle) Select a new puzzle.
(Hide/Show Puzzle) Display or hide a puzzle.
(Solution) Show puzzle solution.
8.1.1.3 Playing Tangrams
1. The silhouette you have to recreate will appear in the top-left corner of the screen.
8 WORDS & MATH
397 I/M (78,114)a 6/8/00, 12:32 AM89
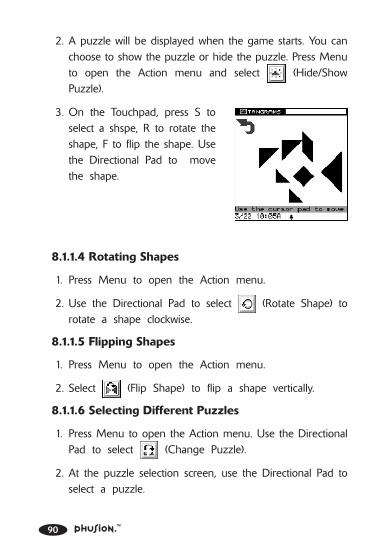
90
2. A puzzle will be displayed when the game starts. You canchoose to show the puzzle or hide the puzzle. Press Menuto open the Action menu and select (Hide/ShowPuzzle).
3. On the Touchpad, press S toselect a shspe, R to rotate theshape, F to flip the shape. Usethe Directional Pad to movethe shape.
8.1.1.4 Rotating Shapes
1. Press Menu to open the Action menu.
2. Use the Directional Pad to select (Rotate Shape) torotate a shape clockwise.
8.1.1.5 Flipping Shapes
1. Press Menu to open the Action menu.
2. Select (Flip Shape) to flip a shape vertically.
8.1.1.6 Selecting Different Puzzles
1. Press Menu to open the Action menu. Use the DirectionalPad to select (Change Puzzle).
2. At the puzzle selection screen, use the Directional Pad toselect a puzzle.
397 I/M (78,114)a 6/8/00, 12:32 AM90

91
3. Press OK to confirm yourselection and go back to theTangrams main screen.
8.1.1.7 Using Hints
While playing the game, if you need help, you can use theHint function. Press Menu to open the Action menu and select
(Solution). A pop-up box will show you how to createthe puzzle. Press Cancel or OK to return to the main gamescreen.
8.1.2 Mathimage
8.1.2.1 Mathimage: What is it?
Mathimage randomly selects a digital picture and covers thepicture with a grid. Within each grid square is a mathematicalequation that must be solved. If solved, the piece of the picturebeneath the grid square is uncovered. The object of the gameis to solve all of the equations in the grid to uncover thepicture, within a set time limit.
Where is it?
You can find Mathimage in Math Games folder, which islocated in Words & Math folder.
397 I/M (78,114)a 6/8/00, 12:32 AM91

92
8.1.2.2 Commands
(Select Level) Select skill level.
(New) Begin a new game.
8.1.2.3 Playing Mathimage
1. At the beginning of each gameyou can choose one of fourskill levels.
2. You have three attempts to answer each question. If youfail to answer a question correctly after the third attempt,the answer to the problem is shown, but you will lose15 seconds on the timer.
3. Solve a question from a square with a clock icon , and
time will be extended by 1 minute.
4. To change the skill level, open the Action menu and thenselect (Select Level). Press OK to confirm yourselection.
397 I/M (78,114)a 6/8/00, 12:32 AM92

93
8.1.3 Grid Grad
8.1.3.1 Grid Grad: What is it?
In Grid Grad, you will learn how to plot points on a grid.In math terms it’s called a coordinate plane. A coordinate planehas two axes. The first axis is the x-axis, or the horizontalaxis. It runs left and right across the screen. The second axisis the y-axis, or vertical axis. It runs up and down across thescreen. Points on the grid are known as coordinates.
A coordinate is made up of two numbers. The first numberrepresents where along the x-axis a point will be plotted. Thesecond number represents where along the y-axis the samepoint will be plotted. If the coordinate is (0,0), the point willbe plotted where the x-axis and y-axis intersect, or cross.
Where is it?
You can find Grid Grad in the Math Games folder, whichis located in the Words & Math folder.
8.1.3.2 Commands
(Clear Point) Clear the point plotted.
(Hide/Show Axis) Hide or show the axis.
(Select Level) Select skill level.
8.1.3.3 Playing Grid Grad
1. On the main screen you willsee a grid. You can entercoordinates to plot a point onthe grid.
397 I/M (78,114)a 6/8/00, 12:32 AM93

94
• When a point is plotted successfully, it will flash twice.
• If the coordinate entered is out of the range of thegrid, a pop-up box will tell you that the point is outof that range. If this happens, you will have to entera new point.
8.1.3.4 Erasing Points Plotted on the Grid
You can erase points plotted on the grid using one of twoways:
1. If you enter coordinates to a point already plotted on thegrid, the point will be erased.
2. You can also erase points using the Action menu. Openthe Action menu then select (Clear Point).
To hide the lines representing the x-axis and the y-axis, pressMenu to open the Action menu then select (Hide/ShowAxis).
8.1.3.5 Selecting a Skill Level
You can select from different skill levels, to adjust the levelof difficulty.
1. Press Menu to open the Actionmenu. Use the Directional Pad
to select (Select Level) and
press OK.
397 I/M (78,114)a 6/8/00, 12:32 AM94

95
2. At the Select Level screen, use the Directional Pad to selecta level.
3. Press OK to confirm your selection and go back to themain game screen.
• In Level One, you will learn how to plot points usinga single, positive pair of numbers.
• In Level Two, you will learn how to plot points usingmultiple, positive number pairs.
• In Level Three, you will learn how to plot points usinga single, positive or negative pair of numbers.
• In Level Four, you will learn how to plot points usingmultiple, positive or negative pairs of numbers.
8.2 Word Games
Your Phusion™ digital camera organizer includes three funand intelligent word games.
8.2.1 Word Puzzle
8.2.1.1 Word Puzzle: What is it?
Word Puzzle challenges your vocabulary as you try to completea crossword-like puzzle. Each word is checked with the SpellChecker. Words must be spelled correctly, and fit into thesquares given. Think quickly - the puzzle must be completedbefore the timer runs out.
Where is it?
You can find Word Puzzle in the Word Games folder, whichis located in the Words & Math folder.
397 I/M (78,114)a 6/8/00, 12:32 AM95

96
8.2.1.2 Commands
(Select Level) Select a skill level.
8.2.1.3 Playing Word Puzzle
1. At the start of each game, apuzzle grid will appear onscreen. To start you off, a wordwill be displayed in a randomposition in the puzzle.
2. Use the Directional Pad to select a horizontal or verticalrow. Enter letters into puzzle squares using the Touchpad.Press OK when you have completed the puzzle.
8.2.1.4 Selecting a Skill Level
You can select from different skill levels, to adjust the levelof difficulty.
1. Press Menu to open the Actionmenu. Choose (SelectLevel) and press OK.
2. At the Select Level screen,select a skill level and timelimit.
3. Press OK or Enter to go back to the game screen andbegin a new game.
397 I/M (78,114)a 6/8/00, 12:32 AM96

97
8.2.2 Clue Counter
8.2.2.1 Clue Counter: What is it?
Clue Counter is a challenging and fun word puzzle game.The object of the game is to guess the word or topic usingthe fewest number of word clues before time runs out.
Each game has five words or topics. The number of blankspaces on screen represents the number of letters in eachguess word. One letter from the guess word is chosen atrandom and placed in its correct position. Clue words appearat the bottom of the screen.
Clues appear on screen every ten seconds. Press OK to stopthe clues to type in a word, then press Enter to confirm. Ifcorrect, you’ll score points. If incorrect, clues will continue toappear. The timer never stops. You have 90 seconds to solveeach word or topic.
There is only one correct answer. You can keep guessing untiltime runs out. When the timer reaches zero, you won’t scoreany points, but advance to the next word or topic.
Where is it?
You can find Clue Counter in the Word Games folder, whichis located in the Words & Math folder.
8.2.2.2 Commands
(New) Begin a new game.
397 I/M (78,114)a 6/8/00, 12:32 AM97
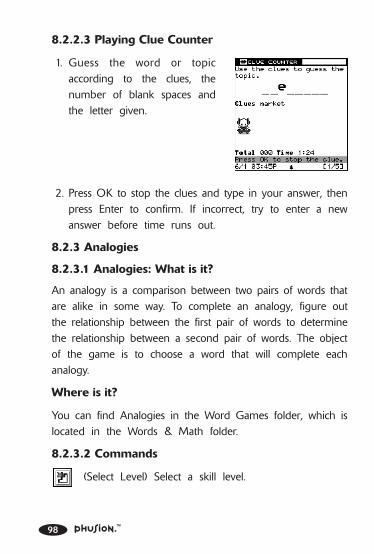
98
8.2.2.3 Playing Clue Counter
1. Guess the word or topicaccording to the clues, thenumber of blank spaces andthe letter given.
2. Press OK to stop the clues and type in your answer, thenpress Enter to confirm. If incorrect, try to enter a newanswer before time runs out.
8.2.3 Analogies
8.2.3.1 Analogies: What is it?
An analogy is a comparison between two pairs of words thatare alike in some way. To complete an analogy, figure outthe relationship between the first pair of words to determinethe relationship between a second pair of words. The objectof the game is to choose a word that will complete eachanalogy.
Where is it?
You can find Analogies in the Word Games folder, which islocated in the Words & Math folder.
8.2.3.2 Commands
(Select Level) Select a skill level.
397 I/M (78,114)a 6/8/00, 12:32 AM98

99
8.2.3.3 Playing Analogies
1. Each analogy is displayed on screen with three words tochoose from. Choose the word that best completes eachanalogy. You have 60 seconds to solve each analogy.
2. To answer, type in the lettercorresponding to the correctword, or use the DirectionalPad to highlight the word, andthen press OK to confirm yourselection.
8.2.3.4 Selecting a Skill Level
You can select from different skill levels, to adjust the levelof difficulty.
1. Press Menu to open the Action menu. Use the DirectionalPad to select (Select Level) and press OK.
2. At the Select Level screen, usethe Directional Pad to select askill level.
3. Press OK or Enter to confirm your choice and return tothe main game screen.
397 I/M (78,114)a 6/8/00, 12:32 AM99

100
8.3 Translator
8.3.1 Translator: What is it?
Translator is a database of over 5,000 words translated intoSpanish and French. You can use Translator to check theSpanish or French translation of a word.
Where is it?
You can find the Translator in the Words & Math folder.
8.3.2 Using Translator
1. Select (Translator) in the (Words & Math) folder.
2. Select a Translator using the Directional Pad. The row underthe title bar will show you the Translator you have selected.
3. Enter the word you want to check and press OK to begin.
• If Translator doesn’t find the word you’re looking for,it will suggest the similar words. Use the DirectionalPad to select a suggested word, then press OK to seethe translation. Press Cancel to enter another word.
• If Translator can’t find similar words, a message boxwill appear. Press Cancel to close the message box andclear the input line to begin searching for another word.
397 I/M (78,114)a 6/8/00, 12:32 AM100

101
8.4 Spell Checker
8.4.1 Spell Checker: What is it?
Spell Checker is a database of over 72,000 words. You canuse Spell Checker to check the spelling of word.
Where is it?
You can find Spell Checker in the Words & Math folder.
8.4.2 Commands
(Customize) Customize the Spell Checker list.
(Add Word) Add a new word to the Spell Checker list.
(Delete Word) Delete a word in the Spell Checker list.
8.4.3 Using Spell Checker
1. Select (Spell Checker) in the (Words & Math)folder.
2. At the Spell Checker screen,enter a word you want tocheck. The Spell Checker willdisplay up to 5 suggestions.
397 I/M (78,114)a 6/8/00, 12:32 AM101

102
8.4.4 Customizing the Spell Checker
The Spell Checker includes a custom list of words. You canadd up to 20 custom words to the Spell Checker’s customlist.
1. To customize Spell Checker, press Menu to open the Actionmenu, then choose (Customize).
2. Press the Menu button to open the Action menu. Choose (Add Word) to add a new word. Choose (Delete
Word) to delete a word.
397 I/M (78,114)a 6/8/00, 12:32 AM102

103
9.1 My Setup
In My Setup, you can customize each of the settings on yourPhusion™ digital camera organizer.
9.1.1 Memory Manager
9.1.1.1 Memory Manager: What is it?
Memory Manager allows you to check the amount of memoryused and the available memory in your Phusion™ digitalcamera organizer. You can also check the number of files usedin each application.
Where is it?
You can find Memory Manager in the My Setup section ofthe Tools folder.
9.1.1.2 Commands
(Delete) Delete the current file or all files.
(This File) Delete the currently selected file.
(All Files) Delete all of your files in the applications listedin Memory Manager.
(Reset Memory) Clear all of your files in your Phusion™digital camera organizer.
9.1.1.3 Using the Memory Manager
1. From the Tools folder, select (My Setup) using theDirectional Pad and press OK.
9 TOOLS
397 I/M (78,114)a 6/8/00, 12:32 AM103

104
2. At the main My Setup screen,select (Memory Manager)using the Directional Pad andpress OK.
9.1.1.4 Deleting Files
1. At the Memory Manager screen, open the Action menuby pressing the Menu button.
2. Use the Directional Pad to select (Delete) and pressOK.
3. A sub-menu will appear, you can choose (This File)to delete the selected file from a specified application.
4. Choose (All Files) to delete all of your files from theapplications listed in the Memory Manager.
9.1.1.5 How to Reset Memory
Resetting memory will delete all of your saved files in yourPhusion™ digital camera organizer.
1. At the Memory Manager screen, open the Action menuby pressing the Menu button.
2. Use the Directional Pad to select (Reset Memory) andpress OK.
397 I/M (78,114)a 6/8/00, 12:32 AM104

105
9.1.2 Changing the Sound Setup
9.1.2.1 Sound Setup: What is it?
You can use the Sound Setup tool to adjust the sound inyour Phusion™ digital camera organizer.
Where is it?
You can find Sound Setup in the My Setup section of theTools folder.
9.1.2.2 How to Use the Sound Setup
1. At the Tools folder, use the Directional Pad to select MySetup and press OK.
2. Now you are in the main My Setup screen, select (Sound Setup) using the Directional Pad and press OK.
3. Adjust the volume. Select Muteto mute all sound effects,including any alarms. SelectLevel 5 to play sound effectsloud.
4. Press OK to save your changes or press the Cancel buttonto exit.
397 I/M (78,114)a 6/8/00, 12:32 AM105
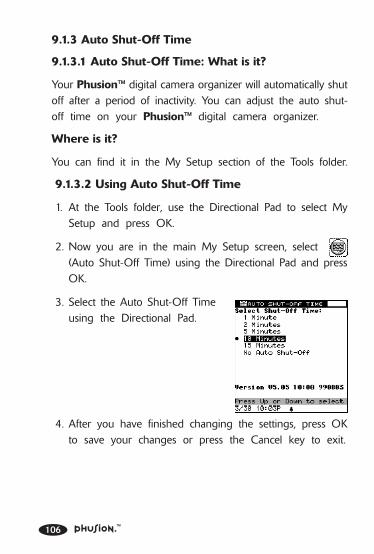
106
9.1.3 Auto Shut-Off Time
9.1.3.1 Auto Shut-Off Time: What is it?
Your Phusion™ digital camera organizer will automatically shutoff after a period of inactivity. You can adjust the auto shut-off time on your Phusion™ digital camera organizer.
Where is it?
You can find it in the My Setup section of the Tools folder.
9.1.3.2 Using Auto Shut-Off Time
1. At the Tools folder, use the Directional Pad to select MySetup and press OK.
2. Now you are in the main My Setup screen, select (Auto Shut-Off Time) using the Directional Pad and pressOK.
3. Select the Auto Shut-Off Timeusing the Directional Pad.
4. After you have finished changing the settings, press OKto save your changes or press the Cancel key to exit.
397 I/M (78,114)a 6/8/00, 12:32 AM106

107
9.1.4 Date & Time Format
9.1.4.1 Date & Time Format: What is it?
You can use the Date & Time Format tool to adjust the waythe date and time is displayed on your Phusion™ digitalcamera organizer.
Where is it?
You can find Date & Time Format in the My Setup sectionof the Tools folder.
9.1.4.2 Using Date & Time Format
1. At the Tools folder, use the Directional Pad to select MySetup and press OK.
2. Now you are in the main My Setup screen, select (Date & Time Format) using the Directional Pad and pressOK.
3. On the next screen, you canset the date and time formatsyou prefer.
4. After you have finished changing the settings in Date &Time Format, press OK to save your changes or press theCancel button to exit.
397 I/M (78,114)a 6/8/00, 12:32 AM107

108
9.1.5 User Mode
9.1.5.1 User Mode: What is it?
Select User Mode to choose between Beginner mode andAdvanced mode. In Beginner mode, tips on how to use yourPhusion™ digital camera organizer will appear on the bottomof the screen. In Advanced mode, the hints will not appear.
Where is it?
You can find User Mode in the My Setup section of the Toolsfolder.
9.1.5.2 Using User Mode
1. At the Tools folder, use the Directional Pad to select MySetup and press OK.
2. Now you are in the main My Setup screen, select (User Mode) using the Directional Pad and press OK.
3. On the next screen, you canselect Beginner or Advancedmode. Press OK to save yourchanges or press the Cancelbutton to exit.
397 I/M (78,114)a 6/8/00, 12:32 AM108

109
9.1.6 Locking the Unit
9.1.6.1 Lock Unit: What is it?
This screen allows you to lock and unlock your Phusion™digital camera organizer. Use Lock Unit when you want tokeep your data away from prying eyes.
Where is it?
You can find Lock Unit in the My Setup section of the Toolsfolder.
9.1.6.2 Using Lock Unit
1. In the Tools folder, use the Directional Pad to select MySetup and press OK.
2. At the My Setup screen, select (Lock Unit) using the
Directional Pad and press OK.
3. Select Locked or Unlock. If you have already locked theunit, you will be asked to enter your password.
4. You will be prompted to enter a question that will helpyou remember your password, just in case you forget it.Once the unit is locked, you will be asked to enter yourpassword the next time you turn on the unit.
5. After you have finished changing the settings, press OKto save your changes or press the Cancel button to exit.
397 I/M (78,114)a 6/8/00, 12:32 AM109
110
Important!
If you have forgotten your password, use the ForgottenPassword Hints to help you remember your password. Ifyou still can’t remember, you can reset your Phusion™ todelete your password AND ALL OF YOUR SAVED DATA.You can restore your data if you have already createdbackup files on your PC.
9.2 Phusion™ Tutor
9.2.1 Phusion™ Tutor: What is it?
Phusion™ Tutor is your on-line help. If you're not sure whatan application does, open Phusion™ Tutor and select theapplication. Phusion™ Tutor will give you a brief explanationof the application and its commands.
Where is it?
You can find Phusion™ Tutor in the Tools Folder. You canalso access help from an application by pressing the Fn keyfollowed by the H key.
9.2.2 Using Phusion™ Tutor
1. Open Phusion™ Tutor.
2. Select the application you want to learn about.
9.3 VTech® PC Link Software
To learn how to transfer data between your Phusion™ digitalcamera organizer and your PC, see the VTech® PC LinkInstruction Manual.
397 I/M (78,114)a 6/8/00, 12:32 AM110

111
Appendix: Smiley Icons
:-) happy :-> really happy
;-) winking smile :-( sad
:-| not good :-P silly face
:-& tongue tied 8-) wears glasses
{:-) wears a toupee :-# wears braces
[:-) wears headphone \-o bored
:-9 yummy (-: left handed
:-@ screaming :-(0) yelling
:-O surprise :’-( crying
:-D laugh B:-) sunglasses
:-~) have cold :-(*) nauseous
*=):-) Santa Claus 8:-) girl with bow
<:-( dunce -=*:-) wizard
:-)X man with bow-tie -:-) punk rocker
:+) big nose :-)) double chin
:-{) moustache [:] robot
:-[ vampire O:-) angel
3:] pet —;-{@ rose
397 I/M (78,114)a 6/8/00, 12:32 AM111

112
Appendix: Battery Notices
Important!
You must replace the batteries in your VTech® Phusion™within one minute, or the information stored inside maybe permanently lost.
• Do not use rechargeable batteries with this unit.
• Install batteries correctly observing the correct polarity(+,-) signs to avoid leakage.
• Do not mix old and new batteries.
• Do not use different types of batteries.
• Remove batteries from the unit if you are not goingto use the unit for a prolonged period.
• Do not dispose of batteries in fire.
• Do not attempt to recharge ordinary batteries.
VTech® Phusion™ ON-LINE
http://www.myphusion.com
Visit our web site for tips on how to use your Phusion™digital camera organizer, get VTech® PC Link softwareupdates, and buy accessories.
397 I/M (78,114)a 6/8/00, 12:32 AM112

113
Important!
We make every effort to ensure the accuracy of theinformation that forms the value of our products. However,errors sometimes can occur. It is important for you to knowthat we stand behind our products and encourage you tocall our Consumer Services Department at 1-800-521-2010in the U.S. or 1-800-267-7377 in Canada with any problemsand/or suggestions that you might have. A servicerepresentative will be happy to help you.
397 I/M (78,114)a 6/8/00, 12:32 AM113

114
FCC NOTICEThis equipment generates and uses radio frequency energy andif not installed and used properly, that is, in strict accordance withthe manufacturers instructions, it may cause interference to radioand television reception. It has been type tested and found tocomply within the limits for a Class B computing device inaccordance with the specifications in Subpart J of Part 15 FCC Rules,which are designed to provide reasonable protection against suchinterference in a residential installation. However, there is noguarantee that interference will not occur in a particular installation.If this equipment does cause interference to radio or televisionreception, which can be determined by turning the equipment offand on, the user is encouraged to try to correct the interferenceby one or more of the following measures:
• Reorient the receiving antenna
• Relocate this product with respect to the receiver
• Move this product away from the receiver.
• Consult the dealer or an experienced radio/TV technicianfor help.
The use of shielded I/O cables is required when connecting thisequipment to any and all optional peripherals or host devices. Failureto do so may violate FCC rules.
COMPANY: VTech Industries, LLC
ADDRESS: 101 East Palatine Road, Wheeling, IL 60090-6500 USA
TEL NO.: (847) 215-9700
397 I/M (78,114)a 6/8/00, 12:32 AM114

USER’S MANUALEN
D T
HE
CO
NFU
SIO
N
myphusion.commyphusion.com
39700 Manual cover 206 X 150 mm
© VTECHPrinted in China
91-1375-010