user manual - p4c.philips.com€¦ · 10 home menu 38 10.1 about the home menu 38 10.2 open the...
TRANSCRIPT

Register your product and get support at 6101 serieswww.philips.com/welcome
User Manual43PUS610149PUS610155PUS6101

Contents
1 TV tour 41.1 Smart TV 41.2 App gallery 41.3 Rental videos 41.4 Ultra HD TV 41.5 Pause TV and recordings 41.6 Smartphones and tablets 4
2 Setting up 52.1 Read safety 52.2 TV stand and wall mounting 52.3 Tips on placement 52.4 Power cable 52.5 Antenna cable 62.6 Satellite dish 6
3 Network 73.1 Network and Internet 7
4 Connect devices 114.1 About connections 114.2 CAM with smart card - CI+ 154.3 Receiver - Set-Top Box 154.4 Home Theatre System - HTS 164.5 Smartphones and tablets 184.6 Blu-ray disc player 184.7 DVD player 184.8 Headphones 194.9 Game console 194.10 USB hard drive 204.11 USB keyboard 214.12 USB mouse 214.13 USB flash drive 224.14 Photo camera 224.15 Camcorder 224.16 Computer 23
5 Switching On and Off 245.1 On or standby 245.2 Keys on TV 245.3 Sleep timer 245.4 Switch off timer 24
6 Remote control 266.1 Key overview 266.2 IR sensor 276.3 Batteries 276.4 Cleaning 27
7 Channels 287.1 Install Channels 287.2 Switch channels 287.3 Channel lists 287.4 Select a list filter 297.5 Watching channels 297.6 Text / Teletext 317.7 Interactive TV 32
8 TV Guide 348.1 What you need 348.2 TV guide data 348.3 Using the TV guide 34
9 Recording and Pause TV 369.1 Recording 369.2 Pause TV 37
10 Home menu 3810.1 About the Home menu 3810.2 Open the Home menu 38
11 Utilities 39
12 Netflix 40
13 Sources 4113.1 Switch to a device 4113.2 Options for a TV Input 4113.3 Scan connections 4113.4 Game or computer 41
14 Videos, photos and music 4214.1 From a USB connection 4214.2 From a computer 4214.3 Menu bar and sorting 4214.4 Play your videos 4214.5 View your photos 4214.6 Play your music 43
15 Smartphones and tablets 4415.1 Philips TV Remote App 4415.2 Miracast 4415.3 MHL 4515.4 Smart TV 45
16 Multi room 4916.1 About Multi room 4916.2 What you need 4916.3 Using Multi room 49
17 Settings 5017.1 Quick settings 5017.2 Picture 5017.3 Sound 5417.4 Eco settings 5617.5 General settings 5717.6 Clock and language 5917.7 Universal access 62
18 Networks 64
19 Channel installation 6519.1 Antenna/cable installation 6519.2 Satellite installation 6719.3 Channel list copy 70
20 Software 7220.1 Update software 7220.2 Software version 7220.3 Local updates 7220.4 Look for OAD updates 7220.5 Open source software 7320.6 Open source license 73
21 Specifications 8421.1 Environmental 8421.2 Power 8421.3 Reception 8521.4 Display type 8521.5 Display input resolution 8521.6 Dimensions and Weights 8521.7 Connectivity 8521.8 Sound 85
2

21.9 Multimedia 86
22 Help and support 8722.1 Register your TV 8722.2 Using help 8722.3 Troubleshooting 8722.4 Online help 8922.5 Consumer care / Repair 89
23 Safety and care 9023.1 Safety 9023.2 Screen care 91
24 Terms of use 92
25 Copyrights 9325.1 MHL 9325.2 Ultra HD 9325.3 HDMI 9325.4 Dolby Digital Plus 9325.5 DTS 2.0 + Digital Out ™ 9325.6 DTVi 9325.7 Java 9325.8 Microsoft 9325.9 Wi-Fi Alliance 9425.10 Kensington 9425.11 MHEG software 9425.12 Other trademarks 94
26 Disclaimer regarding services and/orsoftware offered by third parties 95
Index 96
3

1
TV tour1.1
Smart TVConnect this Philips Smart LED TV to the Internetand discover a new world of television. You can makea wired connection to your router or you can link upwirelessly with Wi-Fi.
With the TV connected to your home network, asmartphone can show a photo on TV, you can playvideos stored on your computer or control the TV withyour tablet.
With your TV connected to the Internet, you canwatch a rental video from an online video store, readthe online TV guide or record your favourite TV showon a USB Hard Drive.
The Smart TV Apps add to the fun with all sorts ofentertainment and convenient services.
In Help, press Keywords and look up SmartTV for more information.
1.2
App galleryOpen the App gallery in Smart TV to browse theApps, the collection of tailored websites for TV.
There are Apps to rent a video from an online videostore and Apps for watching programmes youmissed.
If the App gallery does not hold what you arelooking for, try the World Wide Web and surf theInternet on TV.
In Help, press Keywords and look up Appgallery for more information.
1.3
Rental videosTo watch a rental video, you don't need to leaveyour home. Simply rent the latest movie from yourregional online video store.
Start Smart TV and add the video store App to theSmart TV start page.
Open the video store App, create your personalaccount, select the movie and press play. No fusswith downloading, you can watch themovie immediately*.
In Help, press Keywords and look up Rentalvideos for more information.
* Depending on the video streaming service of theselected video store.
1.4
Ultra HD TVThis TV has an Ultra HD display. Its resolution is fourtimes as much as normal HD displays. Ultra HDmeans 8 million pixels for the most refined and lifelikepicture on TV.
On top, the new Ultra Pixel HD Engine continuouslyconverts any incoming TV signal into Ultra HDresolution. So you can enjoy this stunning picturequality the moment you switch on the TV. Or you canwatch native Ultra HD videos through an HDMIconnection. Ultra HD offers TV viewing that is crispand sharp even on a big screen.
1.5
Pause TV and recordingsIf you connect a USB Hard Drive, you can pause andrecord a broadcast from a digital TV channel.
Pause your TV and answer that urgent phone call orsimply take a break during a sports match, while theTV stores the broadcast on the USB Hard Drive. Youcan watch it again later. With a USB Hard Driveconnected, you can also record digital broadcasts.You can record while you are watching a programmeor schedule a recording of an upcoming programme.
For more information, in Help, press the colourkey Keywords and look up PauseTV or Recording.
1.6
Smartphones and tabletsDownload and install the Philips TV Remote App. It'sfree and available for Android and iOS.
With the TV Remote App on your smartphone ortablet, you master your media around you. Sendphotos, music or videos to your big TV screen orwatch any of your TV channels live on your tablet orphone. Open the TV Guide and schedule a recordingfor tomorrow. Your TV at home will do the job. Withthe TV Remote App you are in control. You mightconsider to simply lower the TV volume.
4

2
Setting up2.1
Read safetyRead the safety instructions first before you use theTV.
To read the instructions, in Help, press the colourkey Keywords and look up Safety instructions.
2.2
TV stand and wall mounting
TV stand
You can find the instructions for mounting the TVstand in the Quick Start Guide that came with the TV.In case you lost this guide, you can download itfrom www.philips.com.
Use the model number of the TV to look forthe Quick Start Guide to download.
Wall mounting
Your TV is also prepared for a VESA-compliant wallmount bracket (sold separately).Use the following VESA code when purchasing thewall mount . . .
• 43PUx6101VESA MIS-F 200x200, M6• 49PUx6101VESA MIS-F 400x200, M6• 55PUx6101VESA MIS-F 400x200, M6
Preparation
First remove the 4 plastic screw caps out of thethreaded bushes on the back of the TV.Make sure that the metal screws, to mount the TV tothe VESA-compliant bracket, go about 10mm deepinside the threaded bushes of the TV.
Caution
Wall mounting the TV requires special skills and
should only be performed by qualified personnel. TheTV wall mounting should meet safety standardsaccording to the TVs weight. Also read the safetyprecautions before positioning the TV.TP Vision Europe B.V. bears no responsibility forimproper mounting or any mounting that results inaccident or injury.
2.3
Tips on placement• Position the TV where light does not shine directlyon the screen.• Position the TV up to 15 cm away from the wall.• The ideal distance to watch TV is 3 times its diagonalscreen size. When seated, your eyes should be levelwith the centre of the screen.
2.4
Power cable• Insert the power cable into the POWER connectoron the back of the TV.• Make sure the power cable is securely inserted inthe connector.• Make sure that the power plug, in the wall socket, isaccessible at all times.• When you unplug the power cable, always pull theplug, never pull the cable.
For 5362 series
5

Although this TV has a very low standby powerconsumption, unplug the power cable to save energyif you do not use the TV for a long period of time.
For more information, in Help, press the colourkey Keywords and look up Switching on formore information.
2.5
Antenna cableInsert the antenna plug firmly intothe Antenna socket at the back of the TV.
You can connect your own antenna or an antennasignal from an antenna distribution system. Use anIEC Coax 75 Ohm RF antenna connector.
Use this antenna connection for DVB-T and DVB-Cinput signals.
For 5362 series
2.6
Satellite dishAttach the satellite F-type connector to the satelliteconnection SAT at the back of the TV.
For 5362 series
6

3
Network3.1
Network and Internet
Home network
To enjoy the full capabilities of your Philips TV, yourTV must be connected to the Internet.
Connect the TV to a home network with a high-speedInternet connection. You can connect your TVwirelessly or wired to your network router.
Connect to network
Wireless connection
What you need
To connect the TV to the Internet wirelessly, you needa Wi-Fi router with a connection to the Internet.
Use a high-speed (broadband) connection to theInternet.
Make the connection
Wireless
To make a wireless connection…
1 - Make sure that the router of your wireless networkis switched on.2 - Press , select Network and press (right) toenter the menu.3 - Select Connect to network and press OK.4 - Select Wireless and press OK.5 - In the list of found networks, select on yourwireless network. If your network is not in the listbecause the network name is hidden (you switchedoff the SSID broadcast of the router), select Manualentry to enter the network name yourself.6 - Depending on the type of router, enter yourencryption key - WEP, WPA or WPA2. If you enteredthe encryption key for this network before, you can
select Done to make the connection immediately.If your router supports WPS or WPS PIN, youselect WPS, WPS PIN or Standard. Select yourchoice and press OK.7 - A message will be shown when the connection issuccessful.
WPS
If your router has WPS, you can directly connect tothe router without scanning for networks. If you havedevices in your wireless network that use the WEPsecurity encryption system, you cannot use WPS.
1 - Press , select Network and press (right)to enter the menu.2 - Select Connect to network and press OK.3 - Select WPS then press OK.4 - Go to the router, press the WPS button and returnto the TV within 2 minutes.5 - Select Connect to make the connection.6 - A message will be shown when the connection issuccessful.
WPS with PIN code
If your router has WPS with a PIN code, you candirectly connect to the router without scanning fornetworks. If you have devices in your wirelessnetwork that use the WEP security encryption system,you cannot use WPS.
1 - Press , select Network and press (right) toenter the menu.2 - Select Connect to network and press OK.3 - Select WPS with PIN code and press OK.4 - Write down the 8-digit PIN code shown onscreen and enter it in the router software on your PC.Consult the router manual on where to enter the PINcode in the router software.5 - Select Connect to make the connection.6 - A message will be shown when the connection issuccessful.
Problems
Wireless network not found or distorted • Microwave ovens, DECT phones or other Wi-Fi802.11b/g/n devices in your proximity might disturbthe wireless network.• Make sure that the firewalls in your network allowaccess to the TV's wireless connection.• If the wireless network does not work properly inyour home, try the wired network installation.
Internet does not work • If the connection to the router is OK, check therouter connection to the Internet.
The PC and Internet connection are slow
7

• Look in your wireless router's user manual forinformation on indoor range, transfer rate and otherfactors of signal quality.• Use a high-speed (broadband) Internet connectionfor your router.
DHCP • If the connection fails, you can check the DHCP(Dynamic Host Configuration Protocol) setting of therouter. DHCP should be switched on.
Wired connection
What you need
To connect the TV to the Internet, you need anetwork router with a connection to the Internet.
Use a high-speed (broadband) connection to theInternet.
Make the connection
To make a wired connection…
1 - Connect the router to the TV with a network cable(Ethernet cable**).2 - Make sure that the router is switched on.3 - Press , select Network and press (right)to enter the menu.4 - Select Connect to network and press OK.5 - Select Wired and press OK. The TV constantlysearches for the network connection.6 - A message will be shown when the connection issuccessful.
If the connection fails, you can check the DHCPsetting of the router. DHCP should be switched on.
**To fulfill EMC regulations, use a shielded FTP Cat.5E Ethernet cable.
Network settings
View network settings
You can view all current network settings here. TheIP and MAC address, signal strength, speed,encryption method, etc.
To view the current network settings…
1 - Press , select Network and press (right) toenter the menu.2 - Select View network settings and press OK.3 - Press (left) repeatedly if necessary, to closethe menu.
Network configuration
If you are an advanced user and want to install yournetwork with Static IP addressing, set the TV to StaticIP.
To set the TV to Static IP…
1 - Press , select Network and press (right) toenter the menu.2 - Select Network configuration and press OK.3 - Select Static IP and press OK to enable StaticIP configuration.4 - Select Static IP configuration and configure theconnection.5 - You can set the number for IPaddress, Netmask, Gateway, DNS 1, or DNS 2.6 - Press (left) repeatedly if necessary, to closethe menu.
Switch On with Wi-Fi (WoWLAN)
You can switch this TV on from your smartphone ortablet if the TV is in Standby. The setting Switch Onwith Wi-Fi (WoWLAN) must be switched on.
To switch on WoWLAN…
1 - Press , select Network and press (right) toenter the menu.2 - Select Switch on with Wi-Fi (WoWLAN) andpress OK.3 - Select On and press OK.4 - Press (left) repeatedly if necessary, to closethe menu.
Digital Media Renderer - DMR
If your media files do not play on your TV, make surethat the Digitial Media Renderer is switched on. As afactory setting, DMR is switched on.
To switch on DMR…
1 - Press , select Network and press (right) to
8

enter the menu.2 - Select Digital Media Renderer - DMR andpress OK.3 - Select On and press OK.4 - Press (left) repeatedly if necessary, to closethe menu.
Switch on Wi-Fi connection
You can switch on or off Wi-Fi connection on yourTV.
To switch on Wi-Fi…
1 - Press , select Network and press (right) toenter the menu.2 - Select Wi-fi On/Off and press OK.3 - Select On and press OK.4 - Press (left) repeatedly if necessary, to closethe menu.
Switch on Wi-Fi Miracast
Switch on Wi-Fi Miracast to share the screen of yoursmartphone, tablet or computer on the TV.
To switch on Miracast…
1 - Press , select Network and press (right) toenter the menu.2 - Select Wi-Fi Miracast and press OK.3 - Select On and press OK.4 - Press (left) repeatedly if necessary, to closethe menu.
For more information, in Help, press the colourkey Keywords and look up Miracast™, switchon.
Reset Wi-Fi Miracast connections
Clear the list of connected and blocked devices thatare used with Miracast.
To clear Miracast connections…
1 - Press , select Network and press (right) toenter the menu.2 - Select Reset Wi-Fi Miracast connections andpress OK.3 - Select Clear all and press OK.4 - Press (left) repeatedly if necessary, to closethe menu.
Wi-Fi smart screen
To watch digital TV channels on your smartphone ortablet with the Philips TV Remote App, you mustswitch on Wi-Fi Smart Screen. Some scrambledchannels might not be available on your mobile
device.
To switch on Wi-Fi Smart Screen…
1 - Press , select Network and press (right) toenter the menu.2 - Select Wi-Fi smart screen and press OK.3 - Select On and press OK.4 - Press (left) repeatedly if necessary, to closethe menu.
TV network name
If you have more than one TV in your home network,you can give the TV a unique name.
To change the TV name…
1 - Press , select Network and press (right) toenter the menu.2 - Select TV network name and press OK.3 - Enter the name with the on-screen keyboard.4 - Select Done to confirm the change.5 - Press (left) repeatedly if necessary, to closethe menu.
Netflix settings
With Netflix settings, you can view ESN number ordeactive Netflix device.
To enter Netflix settings…
1 - Press , select Network and press (right)to enter the menu.2 - Select Netflix settings and press OK.3 - Press (left) repeatedly if necessary, to closethe menu.
Clear Internet memory
With Clear Internet Memory, you can clear allInternet files and logins stored on your TV, such aspasswords, cookies, and history.
To clear the Internet memory…
1 - Press , select Network and press (right) toenter the menu.2 - Select Clear Internet memory and press OK.3 - Select OK to confirm.4 - Press (left) repeatedly if necessary, to closethe menu.
9

File sharing
The TV can connect to other devices in your wirelessnetwork, like your computer or smartphone. You canuse a computer with Microsoft Windows or Apple OSX.
On this TV, you can open photos, music and videosstored on your computer.
10

4
Connect devices4.1
About connections
Connectivity guide
Always connect a device to the TV with the highestquality connection available. Also, use good qualitycables to ensure a good transfer of picture andsound.
When you connect a device, the TV recognizes itstype and gives each device a correct type name. Youcan change the type name if you wish. If a correcttype name for a device is set, the TV automaticallyswitches to the ideal TV settings when you switch tothis device in the Sources menu.
If you need help to connect several devices to the TV,you can visit the Philips TV connectivity guide. Theguide offers information on how to connect andwhich cables to use.
Go to www.connectivityguide.philips.com
Antenna port
If you have a Set-top box (a digital receiver) orRecorder, connect the antenna cables to run theantenna signal through the Set-top box and/orRecorder first before it enters the TV. In this way, theantenna and the Set-top box can send possibleadditional channels to the Recorder to record.
For 5362 series
HDMI ports
HDMI quality
An HDMI connection has the best picture and soundquality. One HDMI cable combines video and audiosignals. Use an HDMI cable for TV signal.
For best signal quality transfer, use a High speedHDMI cable and do not use an HDMI cable longerthan 5 m.
For 5362 series
Copy protection
HDMI cables support HDCP (High-bandwidth DigitalContent Protection). HDCP is a copy protection signalthat prevents copying content from a DVD disc or Blu-ray Disc. Also referred to as DRM (Digital RightsManagement).
HDMI ARC
Only HDMI 1 on the TV have HDMI ARC (AudioReturn Channel).
If the device, typically a Home Theatre System (HTS),also has the HDMI ARC connection, connect itto HDMI 1 connection on this TV. With the HDMIARC connection, you do not need to connect theextra audio cable that sends the sound of the TVpicture to the HTS. The HDMI ARC connectioncombines both signals.
11

HDMI MHL
With HDMI MHL, you can send what you see on yourAndroid smartphone or tablet to a TV screen.
The HDMI 4 connection on this TVincorporates MHL 2.0 (Mobile High-Definition Link).
This wired connection offers great stability andbandwidth, low latency, no wireless interference andgood quality sound reproduction. On top of that, theMHL connection will charge the battery of yoursmartphone or tablet. Although connected, yourmobile device will not be charging when the TV is onstandby.
Inform yourself about what passive MHL cable issuited for your mobile device. In particular, with theHDMI connector for the TV on one side, the type ofconnector you need to connect to your smartphoneor tablet.
MHL, Mobile High-Definition Link and the MHL Logoare trademarks or registered trademarks of the MHL,LLC.
HDMI Ultra HD
This TV can display Ultra HD signals. Some devices -connected with HDMI - do not recognise a TV withUltra HD and might not work correctly or showdistorted picture or sound. To avoid themalfunctioning of such a device, you can set thesignal quality to a level the device can handle. If thedevice is not using Ultra HD signals, you can switchoff Ultra HD for this HDMI connection.
The setting UHD 4:4:4/4:2:2 allows UHD YCbCr 4:4:4/ 4:2:2 signals. The setting UHD 4:2:0 allows UHDYCbCr 4:2:0 signals.
To set the signal quality…
1 - Press , select General settings andpress (right) to enter the menu.2 - Select HDMI Ultra HD > HDMI 3 & 4 andpress OK.3 - Select UHD 4:4:4/4:2:2, UHD4:2:0 or UHD Off and press OK.4 - Press (left) repeatedly if necessary, to closethe menu.
HDMI CEC - EasyLink
EasyLink
An HDMI connection has the best picture and soundquality. One HDMI cable combines video and audiosignals. Use an HDMI cable for High Definition (HD)TV signals. For best signal quality transfer, use a Highspeed HDMI cable and do not use an HDMI cablelonger than 5 m.
For 5362 series
EasyLink HDMI CEC
If your devices are connected with HDMI and haveEasyLink, you can operate them with the TV remotecontrol. EasyLink HDMI CEC must be switched On onthe TV and the connected device.
With EasyLink you can operate a connected devicewith the TV remote control. EasyLink uses HDMI CEC(Consumer Electronics Control) to communicate withthe connected devices. Devices must support HDMICEC and must be connected with an HDMIconnection.
EasyLink setup
The TV comes with EasyLink switched on. Make surethat all HDMI CEC settings are properly set up on theconnected EasyLink devices. EasyLink might not workwith devices from other brands.
HDMI CEC on other brands
The HDMI CEC functionality has different names ondifferent brands. Some examples are: Anynet, AquosLink, Bravia Theatre Sync, Kuro Link, Simplink andViera Link. Not all brands are fully compatible withEasyLink.
Example HDMI CEC branding names are property oftheir respective owners.
12

Operate devices
To operate a device connected to HDMI and set upwith EasyLink, select the device or its activity in thelist of TV connections. Press SOURCES , select adevice connected to an HDMI connection andpress OK.
Once the device is selected, the TV remote controlcan control the device. However thekeys Home and OPTIONS and some otherTV keys, are not forwarded to the device.
If the key you need is not on the TV remote control,you can select the key in the Options menu.Press OPTIONS and select Controls in themenu bar. On the screen, select the device key youneed and press OK.Some very specific device keys might not be availablein the Controls menu.
Only devices that support EasyLink RemoteControl function will respond to the TV remotecontrol.
EasyLink On or Off
You can switch EasyLink on or off. The TV comes withthe EasyLink settings switched on.
To switch off EasyLink completely…
1 - Press , select General settings and press (right) to enter the menu.2 - Select EasyLink, press (right) andselect EasyLink one step further.3 - Select Off.4 - Press (left) repeatedly if necessary, to closethe menu.
EasyLink remote control
If you want devices to communicate but you don'twant to operate them with the TV remote control, youcan switch off EasyLink Remote Control separately.
To switch EasyLink Remote Control on or off…
1 - Press , select General settings and press (right) to enter the menu.2 - Select EasyLink > EasyLink remote control andpress OK.3 - Select On or Off and press OK.4 - Press (left) repeatedly if necessary, to closethe menu.
Pixel Plus Link
Some devices, a DVD or Blu-ray Disc player, mighthave their own picture quality processing. To avoidbad picture quality caused by interference with theTV processing, the picture processing of these devicesshould be disabled. The TV comes with Pixel Plus Linkswitched on and disables the picture qualityprocessing of recent Philips devices connected to theTV.
To switch Pixel Plus Link on or off…
1 - Press , select General settings andpress (right) to enter the menu.2 - Select EasyLink > Pixel Plus Link andpress OK.3 - Select On or Off and press OK.4 - Press (left) repeatedly if necessary, to closethe menu.
Auto switch off devices
You can set the TV to switch off the connecting HDMI-CEC compliant devices if they are not the activesource. The TV switches the connected device tostandby after 10 minutes of inactivity.
DVI to HDMI
If you still own a device that only has a DVIconnection, you can connect the device to any ofthe HDMI connection with a DVI to HDMI adapter.
Use a DVI to HDMI adapter if your device only has aDVI connection. Use one of the HDMI connectionsand add an Audio L/R cable (mini-jack 3.5mm) toAudio In for sound, on the back of the TV.
Copy protection
DVI and HDMI cables support HDCP (High-bandwidthDigital Content Protection). HDCP is a copy protectionsignal that prevents copying content from a DVD discor Blu-ray Disc. Also referred to as DRM (DigitalRights Management).
13
Y Pb Pr - Component
Y Pb Pr - Component Video is a high qualityconnection.
The YPbPr connection can be used for High Definition(HD) TV signals. Next to the Y, Pb and Pr signals addthe Audio Left and Right signals for sound.
Match the YPbPr (green, blue, red) connector colourswith the cable plugs when you connect.Use an Audio L/R cinch cable if your device also hassound.
For 5362 series
CVBS - Audio L R
CVBS - Composite Video is a high qualityconnection. Next to the CVBS signal adds the AudioLeft and Right signals for sound.
• Y shares the same jack with CVBS.• Component and Composite share audio jacks.
For 5362 series
Scart
SCART is a good quality connection.
The SCART connection can be used for CVBS andRGB video signals but cannot be used for HighDefinition (HD) TV signals. The SCART connectioncombines video and audio signals. The SCARTconnection also supports NTSC playback.
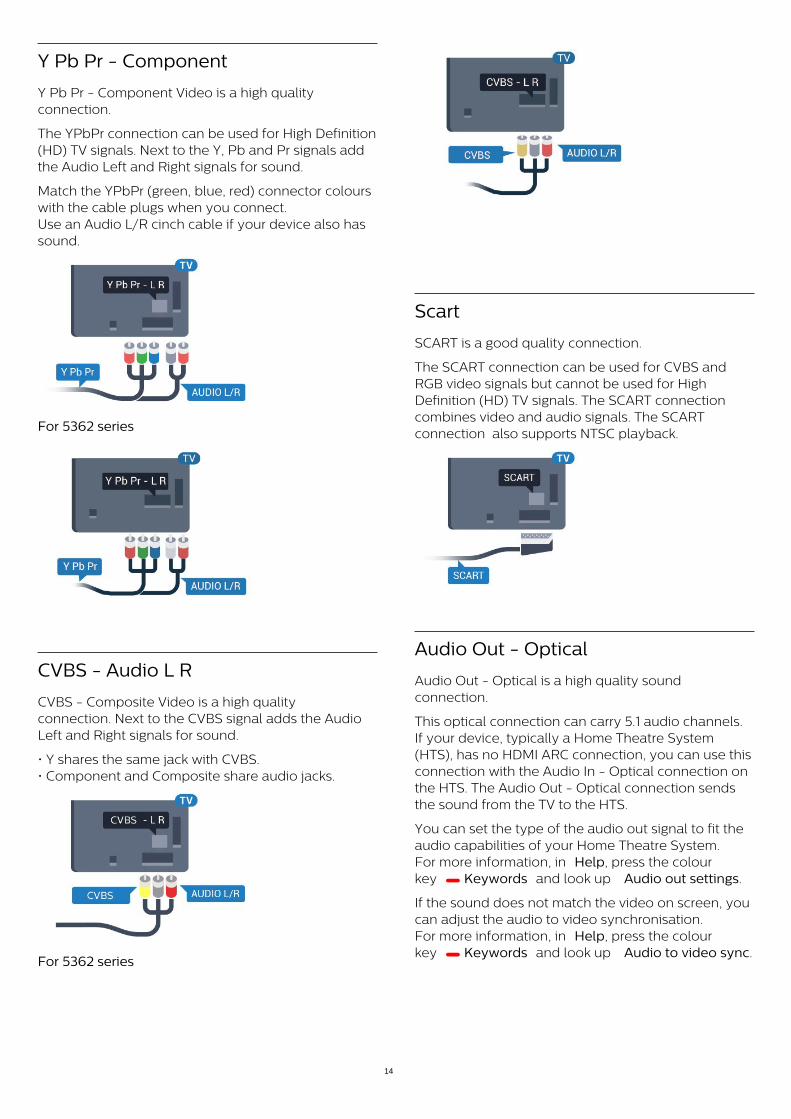
Audio Out - Optical
Audio Out - Optical is a high quality soundconnection.
This optical connection can carry 5.1 audio channels.If your device, typically a Home Theatre System(HTS), has no HDMI ARC connection, you can use thisconnection with the Audio In - Optical connection onthe HTS. The Audio Out - Optical connection sendsthe sound from the TV to the HTS.
You can set the type of the audio out signal to fit theaudio capabilities of your Home Theatre System.For more information, in Help, press the colourkey Keywords and look up Audio out settings.
If the sound does not match the video on screen, youcan adjust the audio to video synchronisation.For more information, in Help, press the colourkey Keywords and look up Audio to video sync.
14

For 5362 series
4.2
CAM with smart card - CI+
CI+
This TV is ready for the CI+ Conditional Access.
With CI+ you can watch premium HD programmes,like movies and sports, offered by digital TV operatorsin your region. These programmes are scrambled bythe TV operator and descrambled with a prepaid CI+module.Digital TV operators provide a CI+ module(Conditional Access Module - CAM) and anaccompanying smart card, when you subscribe totheir premium programmes. These programmes havea high level of copy protection.
Contact a digital TV operator for more information onterms & conditions.
Smart card
Digital TV operators provide a CI+ module(Conditional Access Module - CAM) and anaccompanying smart card, when you subscribe totheir premium programmes.
Insert the smart card into the CAM module. See the
instruction you received from the operator.
To insert the CAM in the TV…
1 - Look on the CAM for the correct method ofinsertion. Incorrect insertion can damage the CAMand TV.2 - While looking at the back of the TV, with the frontof the CAM facing towards you, gently insert the CAMinto the slot COMMON INTERFACE.3 - Push the CAM in as far as it will go. Leave it in theslot permanently.
When you switch on the TV, it may take a few minutesbefore the CAM is activated. If a CAM is inserted andsubscription fees are paid (subscription methods candiffer), you can watch the scrambled channelssupported by the CAM smart card.
The CAM and smart card are exclusively for your TV. Ifyou remove the CAM, you will no longer be able towatch the scrambled channels supported by theCAM.
For 5362 series
Passwords and PIN codes
For some CAMs, you must enter a PIN code to watchits channels. When you set the PIN code for the CAM,we recommend you to use the same code you areusing to unlock the TV.
To set the PIN code for the CAM…
1 - Press SOURCES .2 - Select the channel type you are using the CAMfor.3 - Press OPTIONS and select CommonInterface.4 - Select the TV operator of the CAM. The followingscreens come from the TV operator. Follow the on-screen instruction to look up the PIN code setting.
15

4.3
Receiver - Set-Top Box
Cable box
Use 2 antenna cables to connect the antenna to theSet-top box (a digital receiver) and the TV.
Next to the antenna connections, add an HDMI cableto connect the Set-top box to the TV.Alternatively, you can use a SCART cable if the Set-top box has no HDMI connection.
Switch Off Timer
Switch off this automatic timer, if you only use theremote control of the Set-top box. Switch this timeroff to prevent the TV from switching off automaticallyafter a 4 hour period without a key press on theremote control of the TV.
For more information, in Help, press the colourkey Keywords and look up Switch off timer formore information.
Satellite tuner
Connect the dish antenna cable to the Satellitereceiver.
Next to the antenna connection, add an HDMI cableto connect the device to the TV.Alternatively, you can use a SCART cable if the devicehas no HDMI connection.
Switch Off Timer
Switch off this automatic timer, if you only use theremote control of the Set-top box. Switch this timeroff to prevent the TV from switching off automaticallyafter a 4 hour period without a key press on theremote control of the TV.
For more information, in Help, press the colourkey Keywords and look up Switch off timer formore information.
4.4
Home Theatre System - HTS
Connect with HDMI ARC
Use an HDMI cable to connect a Home TheatreSystem (HTS) to the TV. You can connect a PhilipsSoundbar or an HTS with a built-in disc player.
HDMI ARC
If your Home Theatre System has an HDMI ARCconnection, you can use HDMI 1 on the TV toconnect. With HDMI ARC, you do not need toconnect the extra audio cable. The HDMI ARCconnection combines both signals.HDMI 1 on the TV can offer the Audio ReturnChannel (ARC) signal. But once you have connectedthe Home Theatre System, the TV can only send theARC signal to this HDMI connection.
Audio to video synchronisation (sync)
If the sound does not match the video on screen, youcan set a delay on most Home Theatre Systems witha disc player to match the sound with the video.
For more information, in Help, press the colourkey Keywords and look up Audio to video sync.
16

Connect with HDMI
Use an HDMI cable to connect a Home TheatreSystem (HTS) to the TV. You can connect a PhilipsSoundbar or an HTS with a built-in disc player.
If the Home Theatre System has no HDMI ARCconnection, add an optical audio cable (Toslink) tosend the sound of the TV picture to the Home TheatreSystem.
For 5362 series
Audio to video synchronisation (sync)
If the sound does not match the video on screen, youcan set a delay on most Home Theatre Systems witha disc player to match the sound with the video.
For more information, in Help, press the colourkey Keywords and look up Audio to video sync.
Audio out settings
Audio out delay
With a Home Theatre System (HTS) connected to theTV, the picture on TV and the sound from the HTSshould be synchronised.
Automatic audio to video sync
With recent Philips Home Theatre Systems, the audioto video sync is done automatically and alwayscorrect.
Audio sync delay
For some Home Theatre Systems you might need toadjust the audio sync delay to synchronise the audioto the video. On the HTS, increase the delay valueuntil there is a match between picture and sound. A
delay value of 180ms may be required. Read the usermanual of the HTS. With a delay value set up on theHTS, you need to switch off Audio Out Delay on theTV.
To switch off Audio Out Delay…
1 - Press , select Sound and press (right) toenter the menu.2 - Select Advanced > Audio out delay andpress OK.3 - Select Off.4 - Press (left) repeatedly if necessary, to closethe menu.
Audio out offset
If you cannot set a delay on the Home TheatreSystem, you can set the TV to sync the sound. Youcan set an offset that compensates for the timenecessary for the Home Theatre System to processthe sound of the TV picture. You can set the value insteps of 5ms. Maximum setting is -60ms.
The Audio out delay setting should be switched on.
To synchronise the sound on the TV…
1 - Press , select Sound and press (right) toenter the menu.2 - Select Advanced > Audio out offset andpress OK.3 - Use the slider bar to set the sound offset andpress OK.4 - Press (left) repeatedly if necessary, to closethe menu.
Audio out format
If you have a Home Theatre System (HTS)with multichannel sound processing capabilities likeDolby Digital, DTS® or similar, set the Audio OutFormat to Multichannel. With Multichannel, the TVcan send the compressed multichannel sound signalfrom a TV channel or connected player to the HomeTheatre System. If you have a Home Theatre Systemwithout multichannel sound processing, select Stereo.
To set Audio out format…
1 - Press , select Sound and press (right) toenter the menu.2 - Select Advanced > Audio out format andpress OK.3 - Select Multichannel, Stereo (uncompressed) orMultichannel (by pass), then press OK.4 - Press (left) repeatedly if necessary, to closethe menu.
17

Audio out levelling
Use the Audio Out Levelling setting to level thevolume (loudness) of the TV and the Home TheatreSystem when you switch over from one to another.Volume differences can be caused by differences insound processing.
To level the difference in volume…
1 - Press , select Sound and press (right) toenter the menu.2 - Select Advanced > Audio out levelling andpress OK.3 - Select More, Medium, or Less, then press OK.
4 - If the volume difference is large, select More. Ifthe volume difference is small, select Less.5 - Press (left) repeatedly if necessary, to closethe menu.
Audio Out Levelling affects both the Audio Out -Optical and HDMI ARC sound signals.
Problems with HTS sound
Sound with loud noise
If you watch a video from a plugged in USB flash driveor connected computer, the sound from your HomeTheatre System might be distorted. This noise is heardwhen the audio or video file has DTS sound but theHome Theatre System has no DTS sound processing.You can fix this by setting the Audio out format ofthe TV to Stereo (uncompressed).
Press for Sound > Advanced > Audio outformat.
No sound
If you cannot hear the sound from the TV on yourHome Theatre System, check if you connected theHDMI cable to an HDMI1 ARC connection on theHome Theatre System.
4.5
Smartphones and tabletsTo connect a smartphone or tablet to the TV, you canuse a wireless or wired connection.
Wireless
For a wireless connection, on your smartphone ortablet download the Philips TV Remote App fromyour favourite app store.
Wired
For a wired connection, use the HDMI 4 MHLconnection on the back of the TV. In Help, press the
colour key Keywords and look up HDMIMHL for more information.
4.6
Blu-ray disc playerUse a High speed HDMI cable to connect the Blu-ray Disc player to the TV.
For 5362 series
If the Blu-ray Disc player has EasyLink HDMI CEC,you can operate the player with the TV remotecontrol.
4.7
DVD playerUse an HDMI cable to connect the DVD player to theTV.Alternatively, you can use a SCART cable, if thedevice has no HDMI connection.
If the DVD player is connected with HDMI and hasEasyLink CEC, you can operate the player with the TVremote control.
For more information on EasyLink, in Help, press thecolour key Keywords and look up EasyLink
18

HDMI CEC.
4.8
HeadphonesYou can connect a set of headphones tothe connection on the back of the TV. Theconnection is a mini-jack 3.5mm. You can adjust thevolume of the headphones separately.
For 5362 series
To adjust the volume…
1 - Press , select Sound > Headphonesvolume and press OK.2 - Press the arrows (up) or (down) to adjustthe value.3 - Press (left) repeatedly if necessary, to closethe menu.
4.9
Game console
HDMI
For best quality, connect the game console with aHigh speed HDMI cable to the TV.
For 5362 series
Y Pb Pr - Component
Connect the game console with a component videocable (Y Pb Pr) and an audio L/R cable to the TV.
For 5362 series
19

CVBS - Audio L R
CVBS - Composite Video is a high qualityconnection. Next to the CVBS signal adds the AudioLeft and Right signals for sound.
• Y shares the same jack with CVBS.• Component and Composite share audio jacks.
Scart
Connect the game console to the TV with acomposite cable (CVBS) and an audio L/R cable tothe TV.
If your game console only has Video (CVBS) andAudio L/R output, use a Video Audio L/R to SCARTadapter (sold separately) to connect to the SCARTconnection.
Best setting
Before you start playing a game from a connectedgame console, we advice you to set the TV in theideal setting Game.
When you finish playing a game and start watchingTV again, remember to switch the Game orComputer setting back to Off.
To set the TV to the ideal setting…
1 - Press , select Picture and press (right) toenter the menu.2 - Select Advanced > Game or Computer, andselect the device type you want to use. To switchback to TV, select Off.3 - Press (left) repeatedly if necessary, to closethe menu.
4.10
USB hard drive
What you need
If you connect a USB Hard Drive, you can pause orrecord a TV broadcast. The TV broadcast must be adigital broadcast (DVB broadcast or similar).
To Pause
To pause a broadcast, you need a USB compatibleHard Drive with a minimum of 4GB disk space.
To Record
To pause and record a broadcast, you need aminimum of 250GB disk space. If you want to record
a broadcast with TV guide data from the Internet, youneed to have the Internet connection installed onyour TV before you install the USB Hard Drive.
For more information on how to install a USB HardDrive, in Help, press the colourkey Keywords and look up USB hard drive,installation.
Installation
Before you can pause or record a broadcast, youmust connect and format a USB Hard Drive.Formatting removes all files from the USB Hard Drive.
1 - Connect the USB Hard Drive to one ofthe USB connections on the TV. Do not connectanother USB device to the other USB ports whenformatting.2 - Switch on the USB Hard Drive and the TV.3 - When the TV is tuned to a digital TV channel,press (Pause). Trying to pause will start theformatting.
Follow the instructions on screen.
When the USB Hard Drive is formatted, leave itconnected permanently.
For 5362 series
Warning
The USB Hard Drive is formatted exclusively for thisTV, you cannot use the stored recordings on anotherTV or PC. Do not copy or change recording files onthe USB Hard Drive with any PC application. This willcorrupt your recordings. When you format anotherUSB Hard Drive, the content on the former will be lost.A USB Hard Drive installed on your TV will needreformatting for use with a computer.
20

Formatting
Before you can pause or record a broadcast, youmust connect and format a USB Hard Drive.Formatting removes all files from the USB HardDrive. If you want to record broadcasts with TV Guidedata from the Internet, you must setup the Internetconnection first before you install the USB Hard Drive.
Warning
The USB Hard Drive is formatted exclusively for thisTV, you cannot use the stored recordings on anotherTV or PC. Do not copy or change recording files onthe USB Hard Drive with any PC application. This willcorrupt your recordings. When you format anotherUSB Hard Drive, the content on the former will be lost.A USB Hard Drive installed on your TV will needreformatting for use with a computer.
To format a USB Hard Drive…
1 - Connect the USB Hard Drive to one of the USBconnections on the TV. Do not connect another USBdevice to the other USB ports when formatting.2 - Switch on the USB Hard Drive and the TV.3 - When the TV is tuned to a digital TV channel,press (Pause). Trying to pause will start theformatting. Follow the instructions on screen.4 - The TV will ask if you want to use the USB HardDrive to store apps, agree to the question if you do.5 - When the USB Hard Drive is formatted, leave itconnected permanently.
For 5362 series
4.11
USB keyboard
Connect
Connect a USB keyboard (USB-HID type) to enter texton your TV.
Use one of the USB connections to connect.
Configure
To install the USB keyboard, switch on the TV andconnect the USB keyboard to one ofthe USB connections on the TV. When the TVdetects the keyboard for the first time, you can selectyour keyboard lay-out and test your selection. If youselect a Cyrillic or Greek keyboard layout first, youcan select a secondary Latin keyboard layout.
To change the keyboard layout setting when a layoutwas selected…
1 - Press , select General settings andpress (right) to enter the menu.2 - Select USB keyboard settings, and press OK tostart the keyboard setup.
Special keys
Keys for entering text • Enter key = OK• Backspace = delete character before cursor• Arrow keys = navigate within a text field• To switch between keyboard layouts, if a secondarylayout is set, press the Ctrl + Spacebar keyssimultaneously.
Keys for apps and Internet pages • Tab and Shift + Tab = Next and Previous• Home = scroll to the top of the page• End = scroll to the bottom of the page• Page Up = jump one page up• Page Down = jump one page down• + = zoom in one step• - = zoom out one step• * = fit the web page to the screen width
21
4.12
USB mouse
Connect USB mouse
You can connect a USB mouse (USB-HID type) tonavigate pages on the Internet.
On an Internet page, you can select and click on linksmore easily.
Connect the mouse
Switch the TV on and connect the USB mouse to oneof the USB connections on the TV. You can alsoconnect the USB mouse to a connected USBkeyboard.
Mouse clicks • Left click = OK
You can use the scroll wheel to scroll pages up anddown.
Mouse speed
To install the USB keyboard, switch on the TV andconnect the USB keyboard to one ofthe USB connections on the TV. When the TVdetects the keyboard for the first time, you can selectyour keyboard lay-out and test your selection. If youselect a Cyrillic or Greek keyboard layout first, youcan select a secondary Latin keyboard layout.
To change the keyboard layout setting when a layoutwas selected…
1 - Press , select General settings andpress (right) to enter the menu.2 - Select Mouse settings, and press OK to startthe keyboard setup.
4.13
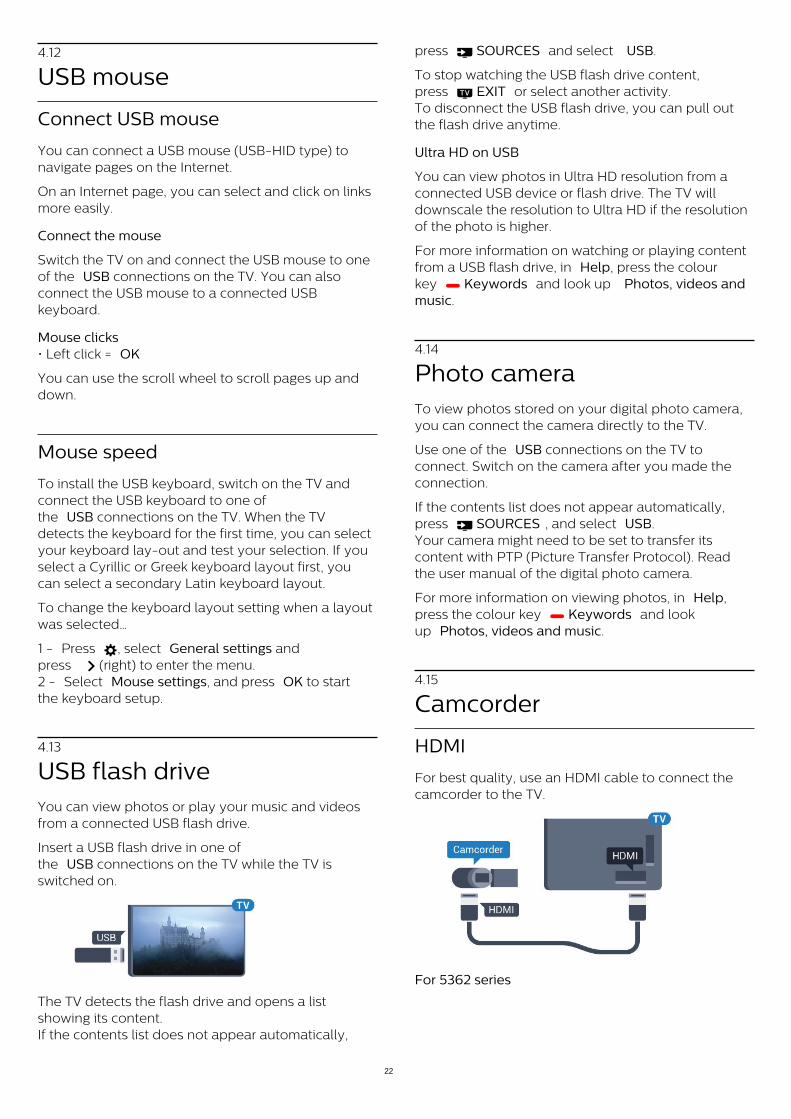
USB flash driveYou can view photos or play your music and videosfrom a connected USB flash drive.
Insert a USB flash drive in one ofthe USB connections on the TV while the TV isswitched on.
The TV detects the flash drive and opens a listshowing its content.If the contents list does not appear automatically,
press SOURCES and select USB.
To stop watching the USB flash drive content,press EXIT or select another activity.To disconnect the USB flash drive, you can pull outthe flash drive anytime.
Ultra HD on USB
You can view photos in Ultra HD resolution from aconnected USB device or flash drive. The TV willdownscale the resolution to Ultra HD if the resolutionof the photo is higher.
For more information on watching or playing contentfrom a USB flash drive, in Help, press the colourkey Keywords and look up Photos, videos andmusic.
4.14
Photo cameraTo view photos stored on your digital photo camera,you can connect the camera directly to the TV.
Use one of the USB connections on the TV toconnect. Switch on the camera after you made theconnection.
If the contents list does not appear automatically,press SOURCES , and select USB.Your camera might need to be set to transfer itscontent with PTP (Picture Transfer Protocol). Readthe user manual of the digital photo camera.
For more information on viewing photos, in Help,press the colour key Keywords and lookup Photos, videos and music.
4.15
Camcorder
HDMI
For best quality, use an HDMI cable to connect thecamcorder to the TV.
For 5362 series
22

Audio Video LR / Scart
You can use an HDMI, YPbPr or SCART connection toconnect your camcorder. If your camcorder only hasVideo (CVBS) and Audio L/R output, use a VideoAudio L/R to SCART adapter (sold separately) toconnect to the SCART connection.
4.16
Computer
Connect
You can connect your computer to the TV and usethe TV as a PC monitor.
With HDMI
Use an HDMI cable to connect the computer to theTV.
With DVI to HDMI
Alternatively, you can use a DVI to HDMI adapter(sold separately) to connect the PC to HDMI and an
audio L/R cable (mini-jack 3.5mm) to AUDIO IN L/Ron the back of the TV.
Ideal setting
If you connect a computer, we advice you to give theconnection, on which the computer is connected, thecorrect device type name in the Source menu. If youthen switch to Computer in the Source menu, the TVis set to the ideal Computer setting automatically.
You can manually switch the ideal setting to Off forwatching TV or Game for playing a game from aconnected game console (remember to switch backto Off when you stop playing a game).
If you switch to a source and change the Game orComputer setting, it will be stored for this selectedsource.
To set the TV to the ideal setting…
1 - Press , select Picture and press (right) toenter the menu.2 - Select Advanced > Game or computer, andpress OK.3 - Select Game (for gaming) orselect Computer (for watching a movie). 4 - Press (left) repeatedly if necessary, to closethe menu.
Remember to set Game or computer settingto Off when you stop playing the game.
23
5
Switching On andOff5.1
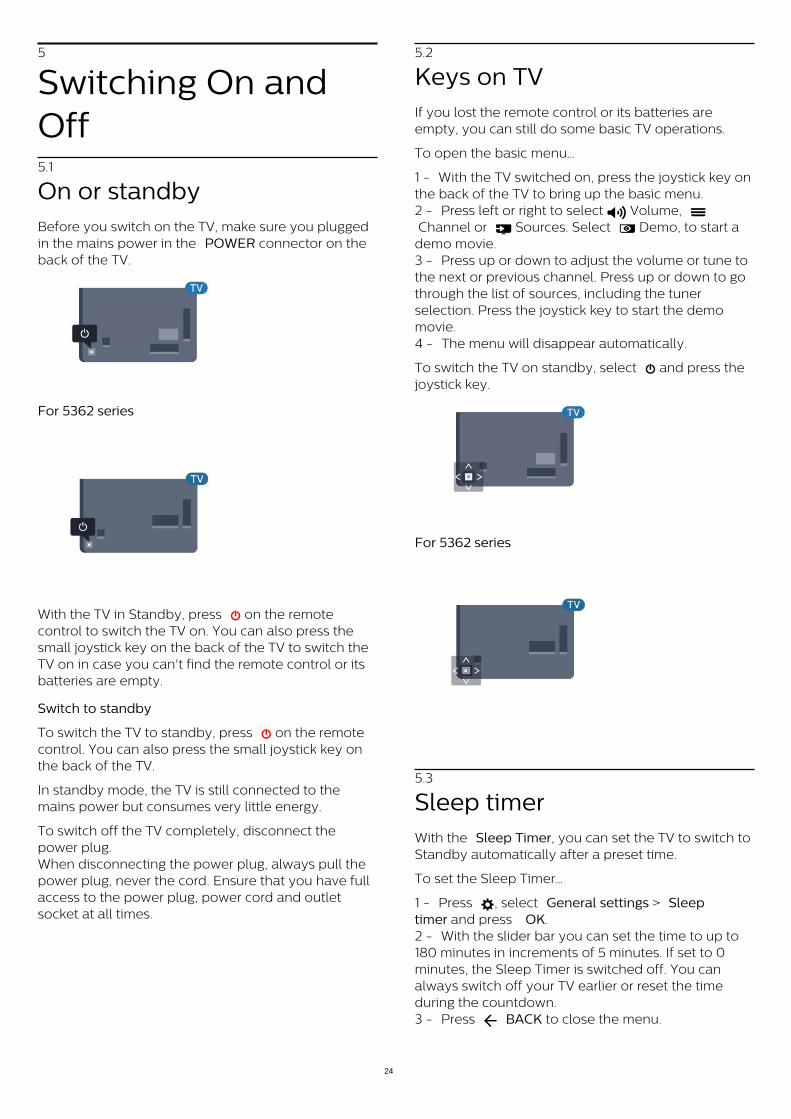
On or standbyBefore you switch on the TV, make sure you pluggedin the mains power in the POWER connector on theback of the TV.
For 5362 series
With the TV in Standby, press on the remotecontrol to switch the TV on. You can also press thesmall joystick key on the back of the TV to switch theTV on in case you can't find the remote control or itsbatteries are empty.
Switch to standby
To switch the TV to standby, press on the remotecontrol. You can also press the small joystick key onthe back of the TV.
In standby mode, the TV is still connected to themains power but consumes very little energy.
To switch off the TV completely, disconnect thepower plug.When disconnecting the power plug, always pull thepower plug, never the cord. Ensure that you have fullaccess to the power plug, power cord and outletsocket at all times.
5.2
Keys on TVIf you lost the remote control or its batteries areempty, you can still do some basic TV operations.
To open the basic menu…
1 - With the TV switched on, press the joystick key onthe back of the TV to bring up the basic menu.2 - Press left or right to select Volume, Channel or Sources. Select Demo, to start ademo movie.3 - Press up or down to adjust the volume or tune tothe next or previous channel. Press up or down to gothrough the list of sources, including the tunerselection. Press the joystick key to start the demomovie.4 - The menu will disappear automatically.
To switch the TV on standby, select and press thejoystick key.
For 5362 series
5.3
Sleep timerWith the Sleep Timer, you can set the TV to switch toStandby automatically after a preset time.
To set the Sleep Timer…
1 - Press , select General settings > Sleeptimer and press OK.2 - With the slider bar you can set the time to up to180 minutes in increments of 5 minutes. If set to 0minutes, the Sleep Timer is switched off. You canalways switch off your TV earlier or reset the timeduring the countdown.3 - Press BACK to close the menu.
24

5.4
Switch off timerIf the TV receives a TV signal but you don't press akey on the remote control during a 4 hour period, theTV switches off automatically to save energy. Also, ifthe TV does not receive a TV signal nor a remotecontrol command for 10 minutes, the TV switches offautomatically.
If you use the TV as a monitor or use a digital receiverto watch TV (a Set-Top Box - STB) and you do notuse the remote control of the TV, you shoulddeactivate this automatic switch off.
To deactivate the Switch Off Timer …
1 - Press , select Eco settings andpress (right) to enter the menu.2 - Select Switch off timer and press OK.3 - Press the arrows (up) or (down) to adjustthe value. The value 0 deactivates the automaticswitch off.4 - Press (left) repeatedly if necessary, to closethe menu.
For more information on environmentally friendly TVsettings, in Help, press the colourkey Keywords and look up Eco settings.
25

6
Remote control6.1
Key overview
Top
1 - Standby / OnTo switch the TV on or back to Standby.
2 - Playback and Record• Play , to playback.• Pause , to pause playback• Stop , to stop playback• Rewind , to rewind• Fast forward , to go fast forward• Record , to start recording
3 - Picture FormatTo open or close the Picture Format menu.
4 - TV GUIDETo open or close the TV Guide.
5 - SearchTo open the searches page.
6 - SettingsTo open the Settings menu.
7 - SOURCESTo open the Sources menu.
8 - LISTTo open or close the channel list.
Middle
1 - Home To open the Home menu.
2 - SMART TVTo open the Smart TV start page.
3 - Colour keysDirect selection of options. Blue key , opens Help.
4 - INFOTo open or close programme info.
5 - BACKTo switch back to the previous channel you selected.To close a menu without changing a setting.To go back to the previous App/Internet page.
6 - - EXITTo switch back to watch TV. To stop an interactive TVapplication.
7 - OPTIONSTo open or close the Options menu.
8 - OK keyTo confirm a selection or setting. To open the channellist while watching TV.
9 - Arrow / navigation keysTo navigate up, down, left or right.
10 - MULTIVIEWTo open an extra small screen.
Bottom
26

1 - To open the Netflix App directly. With the TV switchedon or from standby.
2 - VolumeTo adjust the volume level.
3 - Number keysTo select a channel directly.
4 - SUBTITLETo switch subtitles on, off or to show automatically.
5 - ChannelTo switch to the next or previous channel in thechannel list. To open the next or previous page inText/Teletext. To start the next or previous chapter ona disc.
6 - MuteTo mute the sound or to restore it.
7 - TEXTTo open or close Text/Teletext.
6.2
IR sensorThe TV can receive commands from a remote controlthat uses IR (infrared) to send commands. If you usesuch a remote control, always make sure you pointthe remote control at the infrared sensor on the frontof the TV.
Warning
Do not put any objects in front of IR sensor of the TV,it may block the IR signal.
6.3
BatteriesIf the TV does not react on a key press on the remotecontrol, the batteries might be empty.
To replace the batteries, open the batterycompartment on the back of the remote control.
1 - Slide the battery door in the direction shown bythe arrow.2 - Replace the old batteries with 2type AAA-R03-1.5V batteries. Make sure the + andthe - ends of the batteries line up correctly.3 - Reposition the battery door and slide it back untilit clicks.
Remove the batteries if you are not using the remotecontrol for a long time.Safely dispose of your old batteries according to theend of use directions.
For more information, in Help, press the colourkey Keywords and look up End of use.
6.4
CleaningYour remote control is treated with a scratch-resistantcoating.
To clean the remote control, use a soft damp cloth.Never use substances such as alcohol, chemicals orhousehold cleaners on the remote control.
27
7
Channels7.1
Install ChannelsFor more information, in Help, press the colourkey Keywords and look up Channel, Antennainstallation, Channel, Cable installation or Channel,Satellite installation.
7.2
Switch channels• To watch TV channels, press . The TV tunes tothe TV channel you last watched.• Alternatively, press Home to open the Homemenu and select Channels and press OK.• To switch channels, press + or -. If youknow the channel number, type in the number withthe number keys. Press OK after you entered thenumber to switch channels.• To switch back to the previously tuned channel,press BACK .
To switch to a channel from a channel list
While watching a TV channel, press LIST to openthe channel lists.
The channel list can have several pages withchannels. To view the next or previous page,press + or -.
To close the channel lists without switching channels,press LIST again.
Radio channels
If digital broadcasting is available, digital radiostations are installed during installation. Switch to aradio channel just like you switch to a TV channel.
7.3
Channel lists
About channel lists
When the satellite installation is completed, allsatellite channels are put in the channel list. You canview the list of all channels or filter the list down toshow the favourite channels only or the radio stationsonly. Or, after a channel update, you can find thenewly added channels in the list of new channels.
From any list, you can directly tune to a channel. Thelist you select in the channel list, determines thechannels you tune to with the + and - keys.
You can only reorder channels in the list of favouritechannels.
Tune from the channel list
To tune to a channel from the channel list . . .
1 - In the channel list, select or in the menubar to select the TV or Satellite channel list.2 - Select a list.3 - Select a channel in any of the lists and press OK.The TV will tune to the selected channel.
Favourite satellite channels
Favourite channels
You can mark channels as favourite channels. Yourfavourite satellite channels are collected inthe Favourites list of the satellite channel list.
Watching favourite channels
Set up a favourite channel list to easily switchbetween the channels you want to watch.To only switch between your favourite channelswith + and -, select the Favourites list in thechannel list and close the channel list again.
There are two favourite lists, one for TV channels andone for satellite channels.
Set up your favourites list
To compose a list of your favourite channels . . .
1 - While watching a channel, press LIST toopen the channel list.2 - In the menu bar, select for satellite channels.3 - Select the Favourites list.4 - The TV will ask you to start adding channelsimmediately. Press OK. To avoid a lot of reorderinglater, select the channels in the order you want themin the list.5 - To add a channel to the Favourites list, select thechannel and press OK. You can then select anotherchannel to add as a favourite.6 - To finish, press BACK .
Add or remove favourite channels
To add or remove favourites list . . .
1 - While watching a TV channel, press LIST toopen the channel list.2 - Select All to view all channels.3 - Select the channel, and press to mark asfavourite.
28

4 - The selected channel is marked with a .5 - To finish, press BACK . The channels areadded to the Favourites list.
To remove a channel from the favourites list,press to unmark as favourite.
Reorder favourite channels
You can only reorder channels in the Favourites list.
1 - In the channel list Favourites, highlight thechannel you want to reposition.2 - Press .3 - Select the channel to reorder and press OK.4 - Press the Navigation buttons to move thehighlighted channel to another location andpress OK.5 - Once complete, press EXIT to exit fromthe Favourite channel list.
7.4
Select a list filterThe list you select in the channel list, determines thechannels you tune to withthe + and keys.
To select a channel list . . .
1 - Press Home and select Satellite andpress OK.2 - Press LIST to open the channel list. The listappears with the current channel selected.3 - Navigate up to select All or a list filter.The lists Radio or New are only shown when radiostations are available or new channels were foundwith a channel update.
7.5
Watching channels
Tune to a channel
To start watching TV channels, press . The TVtunes to the channel you last watched.
Switch Channels
To switch channels, press or -.If you know the channel number, type in the numberwith the number keys. Press OK after you enteredthe number to switch immediately.
Previous channel
To switch back to the previously tuned channel,press BACK.
Lock a channel
Lock and unlock a channel
To prevent children from watching a channel, you canlock a channel. To watch a locked channel, you mustenter the 4 digit Child Lock PIN code first. Youcannot lock programmes from connected devices.
To lock a channel…
1 - Press .2 - Press OK to open the channel list. If necessarychange the channel list.3 - Select the channel you want to lock.4 - Press OPTIONS and select Lockchannel and press OK.5 - Enter your 4 digit PIN code if the TV asks for it. Alocked channel is marked with a (lock).6 - Press (left) to go back one step orpress BACK to close the menu.
To unlock a channel…
1 - Press .2 - Press OK to open the channel list. If necessarychange the channel list.3 - Select the channel you want to unlock.4 - Press OPTIONS and select Unlockchannel and press OK.5 - Enter your 4 digit PIN code if the TV asks for it.6 - Press (left) to go back one step orpress BACK to close the menu.
If you lock or unlock channels in a channel list, youonly have to enter the PIN code just once until youclose the channel list.
For more information, in Help, press the colourkey Keywords and look up Child lock for moreinformation.
Parental rating
To prevent children from watching a programme notsuitable for their age, you can set an age rating.
Digital channels can have their programmes agerated. When the age rating of a programme is equal toor higher than the age you have set as age rating foryour child, the programme will be locked. To watch alocked programme, you must enter the Parentalrating code first.
To set an age rating…
1 - Press , select Child Lock > Parentalrating and press OK.2 - Enter a 4-digit Child lock code. If you did not seta code yet, select Set code in Child lock. Enter a4-digit Child lock code and confirm. Now you can setan age rating.3 - Back in Parental rating, select the age and
29

press OK.4 - Press (left) repeatedly if necessary, to closethe menu.
To switch off the parental age rating, select None.However, in some countries you must set an agerating.
For some broadcasters/operators, the TV only locksprogrammes with a higher rating. The parental agerating is set for all channels.
Channel options
Open options
While watching a channel, you can set some options.
Depending on the type of channel you are watching(analogue or digital) or depending on the TV settingsyou made, some options are available.
To open the options menu…
1 - While watching a channel, press OPTIONS.2 - Press OPTIONS again to close.
Universal access
In Help, press Keywords and look up Universalaccess for more information.
Video selection
Digital TV channels can offer multi video signals (multi-feed broadcast), different camera viewpoints orangles of the same event or different programmes onone TV channel. The TV shows a message if any suchTV channels are available.
Subtitles
Switch on
To switch on Subtitles, press SUBTITLE.
You can switch subtitles On or Off. Alternativelyyou can select Automatic.
Automatic
If language information is part of the digital broadcastand the broadcasted programme is not in yourlanguage (the language set on TV), the TV can showsubtitles automatically in one of your preferredsubtitle languages. One of these subtitle languagesmust also be part of the broadcast.
You can select your preferred subtitle languages
in Subtitle language.
Subtitles from Text
If you tune to an analogue channel, you need tomake the subtitles available for each channelmanually.
1 - Switch to a channel and press TEXT to openText.2 - Enter the page number for subtitles, usually 888.3 - Press TEXT again, to close Text.
If you select On in the Subtitle menu when watchingthis analogue channel, subtitles will be shown ifavailable.
To know if a channel is analogue or digital, switch tothe channel and press INFO .
Subtitle Language
Preferred subtitle languages
A digital broadcast can offer several subtitlelanguages for a programme. You can set a preferredprimary and secondary subtitle language. If subtitlesin one of these languages are available, the TV willshow the subtitles you selected.
To set the primary and secondary subtitle language…
1 - Press , select Generalsettings > Languages > Primarysubtitles or Secondary subtitles.2 - Select the language you need and press OK.3 - Press (left) to go back one step orpress BACK to close the menu.
Select a subtitle language
If none of the preferred subtitle languages areavailable, you can select another subtitle language ifavailable. If no subtitle languages are available, youcannot select this option.
To select a subtitle language when none of yourpreferred languages are available…
1 - Press OPTIONS.2 - Select Subtitle language and select one of thelanguages as subtitles temporarily.
Audio language
Preferred audio language
A digital broadcast can offer several audio languages(spoken languages) for a programme. You can set apreferred primary and secondary audio language. If
30

audio in one of these languages is available, the TVwill switch to the audio language.
To set the primary and secondary audio language…
1 - Press , select General settings andselect Languages > Primary audio or Secondaryaudio.2 - Select the language you need and press OK.3 - Press (left) to go back one step orpress BACK to close the menu.
Select an audio language
If none of the preferred audio languages areavailable, you can select another audio language ifavailable. If no audio languages are available, youcannot select this option.
To select an audio language when none of yourpreferred languages are available…
1 - Press OPTIONS.2 - Select Audio language and select one of thelanguages as audio temporarily.
Dual I-II
If an audio signal contains two audio languages butone language or both has no language indication, thisoption is available.
Common Interface
If you installed a CAM in one of the CommonInterface slots, you can view the CAM and operatorinformation or do some CAM related settings.
To view the CAM information…
1 - Press SOURCES.2 - Select the channel type you are using the CAMfor Watch TV or Watch satellite.3 - Press OPTIONS and select CommonInterface.4 - Select the appropriate Common Interface slotand press (right).5 - Select the TV operator of the CAM and press OK.The following screens come from the TV operator.
HbbTV on this channel
If you want to avoid access to HbbTV pages on aspecific channel, you can block the HbbTV pages forthis channel only.
1 - Tune to the channel of which you want to blockthe HbbTV pages.2 - Press OPTIONS and select HbbTV on thischannel and press (right).
3 - Select Off and press OK.4 - Press (left) to go back one step orpress BACK to close the menu.
To block HbbTV on TV completely…
1 - Press , select General settings > HbbTV.2 - Select Off and press OK.3 - Press (left) to go back one step orpress BACK to close the menu.
MHP applications
Enable or disable the MHP applications.
Mono / Stereo
You can switch the sound of an analogue channel toMono or Stereo.
To switch to Mono or Stereo…
1 - Tune to an analoge channel.2 - Press OPTIONS, select Mono/Stereo andpress (right).3 - Select Mono or Stereo and press OK.4 - Press (left) to go back one step orpress BACK to close the menu.
Status
Select Status to view technical information on thechannel (if it is analogue or digital) or a connecteddevice you are watching.
Share
Enables the user to communicate his activity with hissocial networks (such as Twitter or email).
7.6
Text / Teletext
Text pages
To open Text/Teletext press TEXT, while you arewatching TV channels.To close Text, press TEXT again.
Select a Text page
To select a page . . .
1 - Enter the page number with the number keys.2 - Use the arrow keys to navigate.3 - Press a colour key to select a colour-codedsubject at the bottom of the screen.
Text sub-pages
31

A Text page number can hold several subpages. Thesubpage numbers are shown on a bar next to themain page number.To select a subpage, press or .
T.O.P. Text pages
Some broadcasters offer T.O.P. Text.To open T.O.P. Text pages within Text,press OPTIONS and select T.O.P. overview.
Text options
In Text/Teletext, press OPTIONS to select thefollowing…
• Freeze pageTo stop the automatic rotation of subpages.• Dual screen / Full screenTo show the TV channel and Text alongside eachother.• T.O.P. overviewTo open T.O.P. Text.• EnlargeTo enlarge the Text page for comfortable reading.• RevealTo unhide hidden information on a page.• Cycle subpagesTo cycle subpages when these are available.• LanguageTo switch the group of characters that Text uses todisplay correctly.• Text 2.5To activate the Text 2.5 for more colours and bettergraphics.
Text setup
Text language
Some digital TV broadcasters have several Textlanguages available.To set your primary and secondary Text language . . .
1 - Press , select General settings andpress (right) to enter the menu. 2 - Select Language > Primary text or Secondarytext and press OK.3 - Select your preferred Text languages.4 - Press (left) repeatedly if necessary, to closethe menu.
Text 2.5
If available, Text 2.5 offers more colours and bettergraphics. Text 2.5 is activated as a standard factorysetting.To switch off Text 2.5…
1 - Press TEXT.2 - With Text/Teletext open on screen,
press OPTIONS.3 - Select Text 2.5 > Off.4 - Press (left) repeatedly if necessary, to closethe menu.
7.7
Interactive TV
About iTV
With interactive TV, some digital broadcasterscombine their normal TV programme with informationor entertainment pages. On some pages, you canrespond to a programme or vote, do online shoppingor pay for a video-on-demand programme.
HbbTV, MHEG, . . .
Broadcasters use various interactive TV systems :HbbTV (Hybrid Broadcast Broadband TV) or iTV(Interactive TV - MHEG). Interactive TV is sometimesreferred to as Digital Text or Red button. But eachsystem is distinct.
Visit the broadcaster's Internet website for moreinformation.
What you need
Interactive TV is only available on digital TV channels.To enjoy the full benefits of Interactive TV, you needa high-speed (broadband) Internet connection to theTV.
HbbTV
If a TV channel offers HbbTV pages, you must firstswitch on HbbTV in the TV settings to view the pages.
1 - Press , select General settings > Advanced> HbbTV and press OK.2 - Select On.3 - Press (left) repeatedly if necessary, to closethe menu.
If you want to avoid access to HbbTV pages on aspecific channel, you can block the HbbTV pages forthis channel only.
1 - Tune to the channel of which you want to blockthe HbbTV pages.2 - Press OPTIONS and select HbbTV on thischannel.3 - Select Off.
32

Use iTV
Open iTV pages
Most channels that offer HbbTV or iTV invite you topress the colour key (red) or OK key to opentheir interactive programme.
Navigate iTV pages
You can use the arrow and colour keys, the numberkeys and the BACK key to navigate the iTVpages.You can use the (Play), (Pause) and (Stop)keys to watch videos within iTV pages.
Digital Text (UK only)
To open Digital Text, press TEXT. To close,press BACK .
Close iTV pages
Most iTV pages inform you which key to use to close.To force an iTV page to close, switch to the next TVchannel and press BACK.
About interactive TV
With interactive TV, some digital broadcasterscombine their normal TV programme with informationor entertainment pages.
Note:
• You cannot download files to your TV with thisfeature.• Not all TV programmes, commercials and featuresinclude closed captioning information.• You cannot respond to the digital content.
Visit the broadcaster's Internet website for moreinformation.
33

8
TV Guide8.1
What you needWith the TV Guide you can view a list of the currentand scheduled TV programmes of your channels.Depending on where the TV guide information (data)is coming from, analogue and digital channels or onlydigital channels are shown. Not all channels offer TVGuide information.
The TV can collect TV Guide information for thechannels that are installed on the TV. The TV cannotcollect the TV Guide information for channels viewedfrom a digital receiver or decoder.
8.2
TV guide dataThe TV Guide receives information (data) frombroadcasters or from the Internet. In some regionsand for some channels, TV Guide information mightnot be available. The TV can collect TV Guideinformation for the channels that are installed on theTV. The TV cannot collect the TV Guide informationfrom channels viewed from a digital receiver ordecoder.
The TV comes with the information set to From thebroadcaster.
If TV Guide information comes from the Internet, theTV Guide can also list analogue channels next to thedigital channels. The TV Guide menu also shows asmall screen with the current channel.
From the Internet
If the TV is connected to the Internet, you can set theTV to receive the TV Guide information from theInternet.
To set the TV Guide information…
1 - Press , select General Settings > TVGuide > From the Internet and press OK.2 - Press (left) repeatedly if necessary, to closethe menu.
Alternatively, you can access the TV Guide via Utilities.
Missing recordings
When some recordings seem to have disappearedfrom the list of recordings, the TV Guide info (data)might have changed. Recordings made with thesetting From the broadcaster become invisible inthe list if you switch the setting to From the
Internet or vice versa. The TV might have switchedto From the Internet automatically.To make the recordings available in the list ofrecordings, switch to the setting that was selectedwhen the recordings were made.
8.3
Using the TV guide
Open the TV guide
To open the TV Guide, press TV GUIDE. The TVGuide shows the channels of the selected tuner.
Press TV GUIDE again to close.
The first time you open the TV Guide, the TV scans allTV channels for programme information. This maytake several minutes. TV Guide data is stored on TV.
Tune to a programme
From the TV Guide, you can tune to a currentprogramme.
To switch to the programme (channel), select theprogramme and press OK.
View programme details
To call up the details of the selected programme…
1 - Press INFO.2 - Press BACK to close.
Change day
The TV guide can show scheduled programmes forthe upcoming days (maximum up to 8 days).
If the TV guide information comes from thebroadcaster, you can press + to view theschedule of one of the next days. Press - to goback to the previous day.Alternatively, you can press OPTIONS andselect Change day.Select Previous day, Today or Next day andpress OK, to select the day of the schedule.
The TV guide can show scheduled programmes forthe upcoming days (maximum up to 8 days).
f the TV guide information comes from thebroadcaster, you can press + to view theschedule of one of the next days. Press - to goback to the previous day.
To change day…
1 - Press TV GUIDE.2 - Press OPTIONS.
34

3 - Select Change day, select Previousday, Today or Next day and press OK.4 - Press BACK to close the menu.
Set a reminder
You can set reminders that alert you of the start of aprogramme with a message on screen.
• To set a reminder, select the programme in theschedule and press for Set reminder. Theprogramme is marked with a clock.• To cancel the reminder, press the for Clearreminder.• To view a list of all reminders you have set,press OPTIONS, and select All reminders.
Search by genre
If the information is available, you can look upscheduled programmes by genre like movies, sports,etc.
To search for programmes by genre…
1 - Press TV GUIDE.2 - Press OPTIONS.3 - Select Search by genre and press OK.4 - Select the genre you want and press OK. A listwith the found programmes appears.5 - You can set reminders or schedule a recording ona selected programme.6 - Press BACK to close the menu.
Set a recording
You can set a recording in the TV Guide*.
To see the recording list, press Recordings , aprogramme set to be recorded is marked witha (red dot) on the front of the programme name.
To record a programme…
1 - Press TV GUIDE and select a future orongoing programme.2 - Press the colour key Record .3 - Press BACK to close the menu.
To cancel a recording…
1 - Press TV GUIDE and select the programmeset for recording.2 - Press the colour key Clear Recording .3 - Press BACK to close the menu.
35

9
Recording andPause TV9.1
Recording
What you need
You can record a digital TV broadcast and watch itlater.
To record a TV programme you need…
• a connected USB Hard Drive formatted on this TV• digital TV channels installed on this TV• to receive channel information for the on screen TVGuide• a reliable TV clock setting. If you reset the TV clockmanually, recordings may fail.
You cannot record when you are using Pause TV.
Some digital TV operators do not allow the recordingof channels.
For more information on installing a USB Hard Drive,in Help, press the colour key Keywords andlook up USB hard drive, installation.
Note: Recording function is only for digital TV broadcast. Itis not possible to record content from externaldevices (e.g. HDMI).
Record a programme
Record now
To record the programme you are watching right now,press (Record) on the remote control. Therecording will start immediately.
To stop the recording, press (Stop).
When TV Guide data is available, the programme youare watching will be recorded from the moment youpressed the recording key until the programme ends.
• If you receive TV guide information from theInternet, you can adjust the end time of the recordingin the pop-up window before you confirm therecording.• If you receive TV guide information from thebroadcaster, the recording starts immediately. Youcan adjust the end time of the recording in the list ofrecordings.
Schedule a recording
You can schedule a recording of an upcomingprogramme for today or a few days from today(maximum of 8 days away).
1 - To schedule a recording, press TV Guide .On the TV guide page, select the channel andprogramme you wish to record.You can enter the channel number to jump to thechannel in the list.Press (Right) or (Left) to scroll through theprogrammes of a channel.To change the date of the list,press OPTIONS and select Change day. In thelist, select the day you want and press OK. If the TVguide comes from the Internet, you can select thedate at the top of the page and press OK.2 - With the programme highlighted,press Record . The TV adds some time buffer atthe end of the programme. You can add some extrabuffer if needed.3 - Select Schedule and press OK. The programmeis scheduled for recording. A warning will appear / willbe shown automatically when overlappingrecordings are scheduled.If you plan to record a programme in your absence,remember to leave the TV switched to standby andthe USB Hard Drive switched on.
List of recordings
To view the list of recordings and scheduledrecordings, press Home , select Utilities> Recordings and press OK.
In this list, you can select a recording to watch,remove recorded programmes, adjust the end time ofan ongoing recording or check the free disk space.Also in this list, if the TV guide comes from theInternet, you can schedule a recording for which youset the beginning and end time yourself, as a timedrecording not linked to a programme. To set a timedrecording, select Schedule recording at the top ofthe page and press OK. Set the channel, date andtime span. To confirm the recording,select Schedule and press OK.
Remove a scheduled recording
Select the scheduled recording,press Remove and press OK.
Specifics
• While recording a programme, you can watch apreviously recorded programme.• While recording, you cannot switch TV channels.• While recording, you cannot pause the TVbroadcast.
36

• To Record, broadcasters need a reliable clocksetting. If you reset the TV clock manually, recordingsmay fail.• The Audio Description audio (commentary) for thevisually impaired cannot be recorded.• You can record the digital (DVB) subtitles of channel.You cannot record subtitles that come from Textservices. To check if digital (DVB) subtitles areavailable, tune to the TV channel andpress OPTIONS , select Subtitle language toopen the list of Subtitles. You can only record asubtitle language preceded by a DVB icon.
Watch a recording
To watch a recording . . .
1 - Press Home ,select Utilities > Recordings and press OK.2 - In the list, select the recording andpress (Play) to start the playback. You can usethe (Forward), (Rewind), (Pause)or (Stop) keys on the remote control.
Expired recording
Broadcasters can limit the number of days a recordingcan be viewed. A recording in the list can show thenumber of days before it expires.
Failed recording
When a scheduled recording was prevented by thebroadcaster or when the broadcast was interrupted, arecording is marked as Failed.
Delete a recording
To delete a made recording, select the recording inthe list, press Remove and press OK.
For more information, press Keywords and lookup Record a programme.
9.2
Pause TVYou can pause a TV broadcast and resume watchingit later. Only digital TV channels can be paused. Youmust connect a USB Hard Drive to buffer thebroadcast. You can pause a broadcast for a maximumtime span of 90 minutes.For more information, press Keywords and lookup USB hard drive.
Pause or resume a broadcast
To pause a broadcast, press (Pause). A progressbar appears briefly on screen.To call up the progress bar, press (Pause) again.To resume watching, press (Play). The icon onscreen indicates you are watching a paused
broadcast.
Back to the actual TV broadcast
To switch back to the actual TV broadcast,press (Stop).
The moment you switch to a digital channel, the USBHard Drive starts buffering the broadcast. When youswitch to another digital channel, the broadcast of thenew channel is buffered and the broadcast of theformer channel is cleared. When you switch to aconnected device (a Blu-ray Disc player or digitalreceiver) the USB Hard Drive stops buffering and thebroadcast is cleared. Also when you switch the TV tostandby the broadcast is cleared.
Whilst recording a programme on the USB Hard Drive,you cannot pause a broadcast.
Instant replay
Whilst watching a broadcast from a digital TVchannel, you can easily instant replay the broadcast.To replay the last 10 seconds of a broadcast,press (Pause) and press (Left).You can press repeatedly until you reach the startof the broadcast buffer or the maximum time span.
Progress bar
With the progress bar on screen, press (Rewind)or press (Forward) to select from where you wantto start viewing the paused broadcast. Press thesekeys repeatedly to change speed.
37

10
Home menu10.1
About the Home menu
Channels
This row contains all channles.
Sources
This row contains available sources in this TV.
Utilities
This row contains TV functions which are available foruser.
Quick settings
This row contains settings which are available foruser.
10.2
Open the Home menuTo open the Home menu and open an item…
1 - Press Home .2 - Select an item and press OK to open or start it.3 - Press BACK to close the Home menuwithout starting anything.
38

11
UtilitiesSmart TV
Open Smart TV page.
TV guide
For more information, in Help, press the colourkey Keywords and look up TV guide.
Recording
For more information, in Help, press the colourkey Keywords and look up Recording.
Channel
View channel list.
Update software
For more information, in Help, press the colourkey Keywords and look up Update software.
Demo Me
View Demo Me for demo on this TV.
Help
Open Help page.
39

12
NetflixIf you have a Netflix membership subscription, youcan enjoy Netflix on this TV. Your TV must beconnected to the Internet.
To open Netflix, press to open the NetflixApp. You can open Netflix immediately from a TV instandby.
www.netflix.com
40

13
Sources13.1
Switch to a deviceFrom the list of Sources, you can switch to any of theconnected devices. You can switch to a tuner towatch TV, open the content of a connected USB FlashDrive or see the recordings you made on a connectedUSB Hard Drive. You can switch to your connecteddevices to watch their programme, a digital receiver ora Blu-ray Disc player.
To switch to a connected device…
1 - Press SOURCES to open the Sources menu.2 - Select one of the item in the source list andpress OK. The TV will show the programme orcontent of the device.3 - Press SOURCES again to close the menu.
One Touch Play
With the TV in standby, you can switch on a discplayer with your TV remote control.To switch on both disc player and TV from standbyand start playing the disc immediately,press (play) on the TV remote control. The devicemust be connected with an HDMI cable and both TVand device must have HDMI CEC switched on.
13.2
Options for a TV InputSome TV input devices offer specific settings.
To set the options for a specific TV input…
1 - Press SOURCES.2 - Select the TV input in the list and press OK.3 - Press OPTIONS. You can set the options forthe selected TV input here.4 - Press OPTIONS again to close the Optionsmenu.
Possible options…
Controls
With this option you can operate the connecteddevice with the TV remote control. The device mustbe connected with an HDMI cable and both TV anddevice must have HDMI CEC switched on.
Device Info
Open this option to view information on theconnected device.
13.3
Scan connectionsTo rescan connections and update the Sources menu,press Scan connections. (if key is availableon the bottom of the screen.)
13.4
Game or computerThe device type determines picture and sound styles,resolution values and other specifics. You don't haveto worry about the ideal settings.
For some devices the type of the device is not thatclear. A game console can have a built-in Blu-rayDisc player and the type is set to Player because it isused as a disc player most of the time. For this kind ofdevices, you can temporarily switch to the idealsettings for gaming. Or alternatively, switch to theideal settings for a connected computer.
You can only use the setting Game orComputer when you switch to a connected device inthe Sources menu. The Game or Computer setting isstored for the selected device.
To switch to the ideal settings for gaming or computermanually…
1 - Press , select Picture > Advanced andpress OK.2 - Select Game or computer and press OK. 3 - Select Game, Computer or Off.4 - Press (left) to go back one step orpress BACK to close the menu.
Remember to set this setting back to Off when youstop playing the game.
41

14
Videos, photos andmusic14.1
From a USB connectionYou can view your photos or play your music andvideos from a connected USB flash drive or USB HardDrive.
With the TV switched on, plug in a USB flash drive or aUSB Hard Drive to one of the USB connections. TheTV detects the device and will list your media files.
If the list of files does not appear automatically…
1 - Press SOURCES, select USB andpress OK.2 - Select USB Devices and press (right) toselect the USB device you need.3 - You can browse your files in the folder structureyou have organised on the drive.4 - To stop playing videos, photos and music,press EXIT.
Warning
If you try to pause or record a programme with a USBHard Drive connected, the TV will ask you to formatthe USB Hard Drive. This formatting will delete allcurrent files on the USB Hard Drive.
14.2
From a computerIf the TV and the computer are in the same network,the TV can browse and play files stored on yourcomputer.
On your computer, you need to install media serversoftware like Twonky™ to share your files with the TV.The TV shows your files and folders as they areorganised on your computer.
To browse the files on your computer,press SOURCES , select Browse network andpress OK.
14.3
Menu bar and sortingWith a USB device connected, the TV sorts the files bytype. Navigate to the menu bar and select the type offile you are looking for.If you browse files from a computer, you can onlybrowse the files and folders as they are organized on
the computer.
The menu bar
Navigate to the menu bar and select the type of fileyou want to watch or play.Select Photos , Music or Movie or Videos .Alternatively, you can open the Folders viewand browse your folders to look for a file.
Sorting
To browse your photos by date, month, year oralphabetically by name, press Sort .To browse your music by album, artist, genre oralphabetically by name, press Sort .Videos are sorted alphabetically.
14.4
Play your videos
Play videos
• To play a video, select Movie or Videos in themenu bar, select a video and press OK.• If there are more videos in the same folder,press Play all to play all videos in this folder.• To jump to the next or previousvideo, press + or - .• To pause the video, press OK. Press OK again tocontinue.• To make a 10-second jump forward or backward in avideo, press or .• To rewind or go fast forward, press or . Pressthe keys several times to speed up - 2x, 4x, 8x, 16x,32x.• To stop the video playback, press (Stop).
Info
To view info on a video (playhead position, duration,title, date, etc.), select the video and press INFO .Press again to hide the info.
Video options
During the video playback, press OPTIONS to…
• Subtitles – If available, you can switchsubtitles On, Off or On during mute.• Shuffle – Play your files in a random order.• Repeat – Plays all videos in this folder once orcontinuously.
42

14.5
View your photos
View photos
To view photos, select Photos in the menu bar,select a photo thumbnail and press OK.If there are several photos in the same folder, select aphoto and press Slide show to start a slide showof all photos in this folder.To jump to the next or previous photo,press + or - .To stop the slide show or close the photo,press (Stop).
Info
To view info on a photo (size, creation date, file path,etc.), select a photo and press INFO .Press again to hide the info.
Slideshow with music
You can watch a slideshow of your photos and listento your music at the same time. You must start themusic before you start the photo slideshow.
To play music with the slide show…
1 - Select a song or a folder with songs andpress OK.2 - Press INFO to hide the browser list.3 - Press BACK .4 - Now use the navigation arrows to select thefolder with photos.5 - Select the folder with photos and press PlayAll.6 - To stop the slideshow, press BACK .
Photo options
With a photo on screen, press OPTIONS to…
• Shuffle – Play your files in a random order.• Repeat – Play the slide show once or continuously.• Slide show speed – Set the speed of the slideshow.• Slide show transition – Set the style of the phototransitions.
14.6
Play your music
Play music
• To play music, select Music in the menu bar, selecta song and press OK.• If there are more songs in the same folder,press Play all to play all songs in this folder.• To jump to the next or previous song, press + or - .• To pause the music, press OK. Press OK again tocontinue.• To make a 10-second jump in a song or 10-secondjump back, press or .• To rewind or fast forward, press or . Press thekeys several times to speed up - 2x, 4x, 8x, 16x, 32x.• To stop the music playback, press (Stop).
Info
To view song info (title, artist, duration, etc.), selectthe song and press INFO .Press again to hide the info.
Music options
Options for playing music...
• Shuffle – Play your files in a random order.• Repeat – Plays all songs in this folder once orcontinuously.
43
15
Smartphones andtablets15.1
Philips TV Remote AppThe new Philips TV Remote App on your smartphoneor tablet is your new TV buddy.
With the TV Remote App, you master your mediaaround you. Send photos, music or videos to your bigTV screen or watch any of your TV channels live onyour tablet or phone. Look up what you want towatch on the TV Guide and watch it on your phone orTV. With the TV Remote App you can use your phoneas a remote control.
Download the Philips TV Remote App from yourfavourite app store today.
The Philips TV Remote App is available for iOS andAndroid and is free of charge.
Wi-Fi Smart Screen
To watch digital TV channels on your smartphone ortablet with the Philips TV Remote App, you mustswitch on Wi-Fi Smart Screen. For more information,in Help, press the colour key Keywords and lookup Wi-Fi smart screen.
15.2
Miracast
About Wi-Fi Miracast
You can view your photos or play your music andvideos from a mobile device on your TV with Wi-FiMiracast™. The mobile device and the TV should bewithin range, which usually means being in the sameroom.
Check if your mobile device is ready for Miracast.
Your TV is a Wi-Fi CERTIFIED Miracast™ device.With Miracast™, you can watch and share the screenof your smartphone, tablet or computer on your TVscreen wirelessly. You can stream videos (audio andvideo), share photos or anything else that's on screenof the device. No need to connect the device to yourhome network. Both the TV and the device must beWi-Fi CERTIFIED Miracast™ devices and haveMiracast switched on.
Miracast on this TV is subject to the HDCP protocoland cannot display copy-protected premium contentsent by a device. The maximum video resolutionsupported is 720p for 2.4GHz Wi-Fi or 1080p for 5GHz
Wi-Fi.
For more information on Wi-Fi CERTIFIED Miracast™go to www.wi-fi.org
Wi-Fi®, the Wi-Fi CERTIFIED logo, the Wi-Fi logo areregistered trademarks of the Wi-Fi Alliance. Wi-FiCERTIFIED Miracast™, Miracast™ are trademarks ofthe Wi-Fi Alliance.
Switch on Miracast
Make sure Wi-Fi Miracast is switched on.
1 - Press , select Network and press (right) toenter the menu.2 - Select Wi-Fi Miracast and press OK.3 - Select On and press OK.4 - Press (left) repeatedly if necessary, to closethe menu.
Share a screen on TV
To share the screen of your smartphone, tablet orcomputer on the TV…
1 - Switch on the TV.2 - On the device, in the settings menu, set thedevice to cast or mirror its display. Miracast uses Wi-FiDirect™.3 - On the device scan for the available Miracastdevices and select the TV to connect.4 - On the TV, agree to the request to connect. Youmight be asked to enter a PIN code from the deviceon the TV - enter the numbers with the digit keys onthe remote control. Alternatively, you might be askedto enter a PIN code on the device. If the connection ismade, the TV will show the screen of the device.5 - On the device, select the videos, photos or filesyou want to watch on TV.
* Miracast is supported by WiDi 3.5 onwards.
You might find the Wi-Fi connection (e.g.'DIRECT_tvname') also in lists of available networkson other network devices, e.g. your laptop computer.However, this connection can only be used by Wi-FiMiracast devices.
Stop sharing
You can stop sharing a screen from the TV or from themobile device.
From the device
With the application you use to start Miracast, youcan disconnect and stop watching the screen of thedevice on TV. The TV will switch back to the lastselected programme.
44

From the TV
To stop watching the screen of the device on TV, youcan . . .
• press EXIT to watch a TV broadcast• press Home to start another activity on TV• press SOURCES to open the Sources menuand select a connected device.
Block a device
The first time you receive a request to connect from adevice, you can block the device. The request fromthis device and all its requests in the future, will beignored.
To block a device…
Select Block… and press OK.
Unblock all devices
All previously connected and also blocked devicesare stored in the Wi-Fi Miracast list of connections. Ifyou clear this list, all blocked devices will beunblocked.
To unblock all blocked devices…
1 - Press , select Network and press OK.2 - Select Reset Wi-Fi Miracast connections andpress OK. The list is cleared.3 - Press (left) repeatedly if necessary, to closethe menu.
Blocking a previously connected device
If you want to block a device that you previouslyconnected, you need to clear the Wi-Fi Miracastconnections list first. If you clear this list, you will haveto confirm or block the connection for every deviceagain.
Screen delay
The normal delay when sharing a screen withMiracast is about 1 second. The delay might be longerif you are using older devices with less processingpower.
15.3
MHLThis TV is MHL™ compliant.
If your mobile device is also MHL compliant, you canconnect your mobile device with a MHL cable to theTV. With the MHL cable connected you can sharewhat's on your mobile device on the TV screen. Yourmobile device charges its battery at the same time.
The MHL connection is ideal for watching movies orplaying games from your mobile device on TV for alonger time.
Charging
With the MHL cable connected, your device willcharge while the TV is switched on (not in standby).
MHL Cable
You need a passive MHL cable (HDMI to Micro USB)to connect your mobile device to the TV. You mightneed an extra adapter to connect to your mobiledevice. To connect the MHL cable to the TV usethe HDMI 4 MHL connection.
MHL, Mobile High-Definition Link and the MHL Logoare trademarks or registered trademarks of the MHL,LLC.
In Help, press Keywords and look up HDMIMHL for more information.
15.4
Smart TV
About Smart TV
Connect this TV to the Internet and discover a newworld of television. You can make a wired connectionto your router or you can link up wirelessly with Wi-Fi.
With the TV connected to your home network, asmartphone can show a photo on TV, you can playvideos stored on your computer or control the TV withyour tablet.
With your TV connected to the Internet, you canwatch a rental video from an online video store, readthe online TV guide or record your favourite TV showon a USB Hard Drive. The Smart TV Apps add to thefun with all sorts of entertainment and convenientservices.
What you need
To enjoy Smart TV Apps you must connect the TV toa router with a high-speed (broadband) connectionto the Internet. You can use a home networkconnected to the Internet. You do not need acomputer.
For more information, press Keywords and lookup Network.
45

Tip
To enter text or to navigate an Internet page moreeasily, you can consider to connect a USB keyboardand a USB mouse to the TV.For more information, press Keywords and lookup USB keyboard or USB mouse.
Setup Smart TV
The first time you open Smart TV, you need toconfigure your connection. Read and agree to theterms and conditions to continue. If you do not wantto set up Smart TV, press BACK.
Parental control
To lock Adult 18+ rated apps . . .
1 - Switch on Smart TV parental control byselecting Enable and then press OK.2 - Enter an unlock PIN code of your choice.3 - Confirm your PIN code.Adult 18+ rated apps are now locked. To open alocked app, select the app and press OK. The TV willask you to enter your 4-digit code.
Smart TV Apps
Open Smart TV
The Smart TV start page is your link to the Internet.You can rent movies online, read newspapers, watchvideos and listen to music, also shop online, or watchTV programmes when it suits you with Online TV.
To do this, you open Apps - Internet sites which aretailored for TV. With your TV connected to theInternet, you can open Smart TV.
Open Smart TV
To open the Smart TV start page, press Smart TV .Alternatively, you can press Home > Utilities,select Smart TV and press OK.
The TV connects to the Internet and opens the SmartTV start page. This may take a few seconds.
Close Smart TV
To close the Smart TV start page,press Home and select another activity.
TP Vision Europe B.V. bears no responsibilityregarding the content and the quality of the contentprovided by the content service providers.
Smart TV start page
1 - Now on your TV2 - Your Apps3 - App gallery4 - Internet5 - Recommended Apps6 - Search7 - Colour keys for control
Your Apps
You start Apps from the Smart TV start page. If thestart page does not hold any Apps yet, you can addApps from the App gallery.
App gallery
In the App gallery you find all available Apps.
Internet
The Internet App opens the World Wide Web on yourTV.On your TV, you can view any Internet website butmost of them are not tailored for a TV screen.- Some plug-ins (e.g. to view pages or videos) are notavailable on your TV.- Internet pages are shown one page at a time andfull screen.
Recommended Apps
In this window, Philips presents a range ofrecommended Apps for your country, Apps for OnlineTV or a selection of rental movies from Video stores.You can select and open them from theRecommended Apps window.
Search
With Search, you can search the App gallery forrelevant Apps.Enter a keyword in the text field, select andpress OK to start searching. You can enter names,titles, genres and description keywords to search.Alternatively, you can leave the text field empty andsearch for the most popular searches/keywords for arange of categories. In the list of found keywords,select a keyword and press OK to search for itemswith that keyword.
Open an App
To open an App, you must add it to your list of Appsin the Smart TV start page first.You can add Apps toyour list from the App gallery.The list of your Apps on the Smart TV start page canbe several pages long. Use the arrow keys to go to thenext or previous page.
Open an App
To open an App . . .
46

1 - Press Home > Utilities > Smart TV .2 - On the start page, select an App icon andpress OK.In an App, press BACK to go back 1 step or page.
Close an App
To close an App and return to the Smart TV startpage, press Smart TV .
Reload an App page
If an App page did not load properly,press OPTIONS and select Reload to reloadthe page.
Zoom
To zoom in on an App page . . .1 - Press OPTIONS and select Zoom page.2 - Use the slider bar to set the zoom level.3 - Return to normal view by resetting the slider bar.
View security info
You can check the security level of an App page.On an App page, press OPTIONS andselect Security info. If a lock is shown next to theloading animation on the bottom of the screen whileloading a page, the transfer is secured.
Feedback on an App
Select the App and press Feedback to select a'like' or 'don't like' button and send a suggestion orremark to us. You can also report an App malfunction.
Manage your Apps
In the list of Apps on the Smart TV start page you can. . .• Remove an AppTo remove an App from the list, select the App iconand press Remove . The App is still available inthe App gallery.• Move an AppTo reposition an App in the list, select the App icon,press Move and use the arrow keys to repositionthe App. Press OK to confirm the position.• Manage an AppTo manage an App from the list, select the App iconand press Manage .
App gallery
Open the App gallery in Smart TV to browse theApps, the collection of tailored websites for TV.
Find the App for YouTube videos, a nationalnewspaper, an online photo album, etc. There areApps to rent a video from an online video store andApps for watching programmes you missed. If theApp gallery does not hold what you are looking for,
try the World Wide Web and surf the Internet on TV.
Rental video Apps
With the video store Apps in Smart TV, you can rentyour favourite movie from an online rental videostore. You can pay securely with your credit card.
Rent a movie 1 - Open a Video store App in your list of Apps orselect a recommended video on the Smart TV startpage.2 - Select a movie.3 - Make the online payment.4 - Start watching. You can use the (Play)and (Pause) keys.
Most Video stores ask you to create a login account.
Streaming video
With this TV, you can watch rental movies sent as astreaming video format. You can almost instantlywatch the movie. You might need a USB Hard Drive tostore some video buffer. If you have a USB HardDrive connected, you can also download rentalmovies from video stores that offer moviedownloading only. You can pause or restart adownloaded rental movie. Consult the video storeregarding the rental duration of rental movies.
Internet traffic
Streaming or downloading many videos may exceedyour monthly Internet traffic limit.
Online TV
With the Online TV App on the Smart TV start page*,you can watch TV programmes you missed or watchprogrammes whenever it suits you best.
Open Online TV
To open the Online TV App . . .
1 - Press Smart TV .2 - On the start page, select the Online TV iconand press OK.3 - Select a programme on the page andpress OK to start watching. You can usethe (Play) and (Pause) keys.
List per broadcaster
To view the Online TV programmes ordered bybroadcaster, press All broadcasters .Select a broadcaster and press OK.
* If available in your region.
47

Multi View
While you are on a Smart TV App or the Internet, youcan watch the current TV channel. Multi view opensa small screen for the TV channel next to the SmartTV screen.
To open Multi view…
1 - Press SMART TV to open Smart TV.2 - Open an app.3 - Press MULTI VIEW to open the small screen.4 - Press + or – to change the TV channelin the small screen.
Reset Smart TV
To reset your connection with Smart TV, clear theInternet memory on the TV.You will clear your Philips Smart TV registration andparental rating setting, your video store app logins, allSmart TV app favourites, Internet bookmarks andhistory.
To clear the Internet memory…
1 - Press , select Network and press (right)to enter the menu.2 - Select Clear Internet memory and press OK.3 - Select OK to confirm.4 - Press (left) repeatedly if necessary, to closethe menu.
48

16
Multi room16.1
About Multi roomWith Multi Room you can watch a TV programme thatcomes from another TV in your home. Theprogramme is streamed from one TV to the other. Youcan stream a programme to a TV that has no antennaconnection or has no Smart card subscription of itsown. You can also stream a recorded programmefrom a TV with a connected Hard Drive.
The TV that streams the programme to the other TV,must be switched on and must tune to the channel orplay the recording.
Streaming a TV programme with Multi Room willreduce the picture resolution to 720p maximum. Youcannot stream radio channels. Some broadcastersprotect their programmes to prevent this kind ofstreaming.
16.2
What you needTo stream a TV programme from one TV to another,the programme must come from a digital TV channel.
Both TVs must be connected to your wireless homenetwork. For more information,press Keywords and look up Wireless Network.
Make sure that both TVs have the setting Switch onwith Wi-Fi (WoWLAN) switched on in the TV setup.
To check this setting on this TV…
1 - Press , select Network and press (right)to enter the menu.2 - Select Switch on with Wi-Fi (WoWLAN) andpress OK.3 - Select On and press OK.4 - Press (left) repeatedly if necessary, to closethe menu.
16.3
Using Multi room
First time use
When you start Multi room for the first time, switch onboth TVs.
Once this TV made a connection with the other TV,the other one will appear automatically inthe Browse network menu even when it's in
standby.
Stream a TV channel
With Multi room, you can watch the current TVchannel or open the channel list of the other TV. Ifyou select a channel from the list, the other TV willalso switch to the channel you selected. If the otherTV has a build-in satellite tuner with installedchannels or a connected Hard Disc Drive (HDD) withrecordings*, you can also watch these on this TV. Youcannot switch channels while the other TV isrecording or in Pause TV mode.
To watch a TV channel from the other TV . . .1 - Make sure the other TV is switched on.2 - On this TV, press SOURCES , select Browsenetwork and press OK.3 - If the TV is not yet connected to your homenetwork, the network installation will startautomatically. If the TV is already connected, go tostep 4.4 - In the Browse network menu, select the nameof the other TV and press OK. If you have several TVsin your home, you might want to change the name ofthe other TV. You can do that on the TV itself.5 - Select what you want to watch from the other TV. . .• to watch the current channel of the other TV,select Current channel and press OK.• to open the channel list of the other TV,select Watch TV and press (Right).• to open the satellite channel list of the other TV,select Watch satellite and press (Right).• to open the list of recordings* on the other TV,select Watch recordings and press (Right).• you can switch channels with + and -. Youcannot switch channels when the other TV isrecording or in Pause TV mode.
TV network name
If you have more than one TV in your home network,you can give the TV a unique name.
To change the TV name…
1 - Press , select Network and press (right)to enter the menu.2 - Select TV network name and press OK.3 - Enter the name with the on-screen keyboard.4 - Select Done to confirm the change.5 - Press (left) repeatedly if necessary, to closethe menu.
49

17
Settings17.1
Quick settings
Enter Quick settings menu
Press SETUP key on the remote control to findfrequently used settings in Quick settings menu.
Eco settings
For more information, in Help, press the colourkey Keywords and look up Eco settings.
Picture style
For more information, in Help, press the colourkey Keywords and look up Picture style.
Picture format
For more information, in Help, press the colourkey Keywords and look up Picture format.
Sound style
For more information, in Help, press the colourkey Keywords and look up Sound style.
Headphones volume
For more information, in Help, press the colourkey Keywords and look up Headphonesvolume.
Speakers
For more information, in Help, press the colourkey Keywords and look up TV speakers.
Clock
Display clock on the right-top corner TV screen.
Sleep timer
For more information, in Help, press the colourkey Keywords and look up Sleep timer.
17.2
Picture
Picture style
Select a style
For easy picture adjustment, you can select a presetPicture Style.
1 - While watching a TV channel, press .2 - Select Picture > Picture style, and select one ofthe styles in the list.3 - Press (left) repeatedly if necessary, to closethe menu.
The available styles are…
• Personal - The picture preferences you set duringthe first start up.• Vivid - Ideal for daylight viewing• Natural - Natural picture settings• Standard - Most energy conscious setting - Factorysetting• Movie - Ideal for watching movies• Photo - Ideal for viewing photos
Customise a style
Any picture setting you adjust, like Colour or Contrast,is stored in the currently selected Picture style. Itallows you to customise each style.Only the style Personal can save its settings foreach connected device in the Sources menu.
Restore a style
The selected style will store the changes you made.We recommend to adjust the picture settings for thestyle Personal only. The Picture Style - Personal cansave its settings for each individual connected devicein Sources menu.
To restore the style to its original setting…
1 - While watching a TV channel, press .2 - Select Picture > Picture style, and select thePicture Style you want to restore.
50

3 - Press the colour key Restore style , and pressOK. The style is restored.4 - Press (left) repeatedly if necessary, to closethe menu.
Home or Shop
If the Picture style is switched back to Vivid everytime you switch on the TV, the TV location is setto Shop. A setting meant for in-store promotion.
To set the TV for Home use…
1 - Press , select General settings andpress (right) to enter the menu.2 - Select Location > Home and press OK.3 - Press (left) repeatedly if necessary, to closethe menu.
Picture settings
Colour
With Colour, you can adjust the colour saturation ofthe picture.
To adjust the colour…
1 - Press , select Picture and press (right) toenter the menu.2 - Select Colour and press (right) .3 - Press the arrows (up) or (down) to adjustthe value.4 - Press (left) repeatedly if necessary, to closethe menu.
Contrast
With Contrast, you can adjust the contrast of thepicture.
To adjust the contrast…
1 - Press , select Picture and press (right) toenter the menu.2 - Select Contrast and press (right).3 - Press the arrows (up) or (down) to adjustthe value.4 - Press (left) repeatedly if necessary, to closethe menu.
Sharpness
With Sharpness, you can adjust the level ofsharpness in fine detail of the picture.
To adjust the sharpness…
1 - Press , select Picture and press (right) toenter the menu.
2 - Select Sharpness and press (right).3 - Press the arrows (up) or (down) to adjustthe value.4 - Press (left) repeatedly if necessary, to closethe menu.
Advanced picture settings
Game or computer
When you connect a device, the TV recognizes itstype and gives each device a correct type name. Youcan change the type name if you wish. If a correcttype name for a device is set, the TV automaticallyswitches to the ideal TV settings when you switch tothis device in the Sources menu.
If you have a game console with a built-in Blu-rayDisc player, you might have set the type name to Blu-ray Disc. With Game or computer you can switch tothe ideal settings for gaming manually. Don't forget toswitch the Game or Computer setting off, when youreturn to watch TV.
To switch to the ideal settings for gaming or computermanually…
1 - Press , select Picture > Advanced andpress OK.2 - Select Game or computer and press OK.3 - Select Game, Computer or TV.4 - Press (left) to go back one step orpress BACK to close the menu.
Colour settings
Colour enhancement
With Colour enhancement, you can enhance thecolour intensity and the details in bright colours.
To adjust the level…
1 - Press , select Picture and press (right) toenter the menu.2 - Select Advanced > Colour > Colourenhancement and press OK.3 - Select Maximum, Medium, Minimum or Off.4 - Press (left) repeatedly if necessary, to closethe menu.
Colour temperature
With Colour temperature, you can set the picture to apreset colour temperature or select Custom to set atemperature setting yourself with Custom colourtemperature. Colour Temperature and Custom ColourTemperature are settings intended for expert users.
To select a preset…
51

1 - Press , select Picture and press (right) toenter the menu.2 - Select Advanced > Colour > Colourtemperature and press OK.3 - Select Normal, Warm or Cool. Orselect Custom if you want to customise a colourtemperature yourself.4 - Press (left) repeatedly if necessary, to closethe menu.
Custom colour temperature
With Custom colour temperature, you can set acolour temperature yourself. To set a custom colourtemperature, first select Custom in the ColourTemperature menu. Custom Colour Temperature is asetting intended for expert users.
To set a custom colour temperature…
1 - Press , select Picture and press (right) toenter the menu.2 - Select Advanced > Colour > Custom colourtemperature and press OK.3 - Press the arrows (up) or (down) to adjustthe value.4 - Press (left) repeatedly if necessary, to closethe menu.
Contrast settings
Contrast modes
With Contrast Mode, you can set the level at whichpower consumption can be reduced by dimming theintensity of the screen. Choose for the best powerconsumption or for the picture with the best intensity.
To adjust the level…
1 - Press , select Picture and press (right) toenter the menu.2 - Select Advanced > Contrast > Contrastmode and press OK.3 - Select Standard, Best power, Best picture,or Off.4 - Press (left) repeatedly if necessary, to closethe menu.
Dynamic contrast
With Dynamic Contrast, you can set the level atwhich the TV automatically enhances the details inthe dark, middle and light areas of the picture.
To adjust the level…
1 - Press , select Picture and press (right) toenter the menu.2 - Select Advanced > Contrast > Dynamic
contrast and press OK.3 - Select Maximum, Medium, Minimum or Off.4 - Press (left) repeatedly if necessary, to closethe menu.
Brightness
With Brightness, you can set the level of brightnessof the picture signal. Brightness is a setting intendedfor expert users. We recommend non-expert users toadjust the brightness of the picture withthe Contrast setting.
To adjust the level…
1 - Press , select Picture and press (right) toenter the menu.2- Select Advanced > Contrast > Brightness, andpress OK.3 - Press the arrows (up) or (down) to adjustthe value.4 - Press (left) repeatedly if necessary, to closethe menu.
Video contrast
With Video Contrast, you can decrease the range ofthe video contrast.
To adjust the level…
1 - Press , select Picture and press (right) toenter the menu.2 - Select Advanced > Contrast > Videocontrast, and press OK.3 - Press the arrows (up) or (down) to adjustthe value.4 - Press (left) repeatedly if necessary, to closethe menu.
Gamma
With Gamma, you can set a non-linear setting forpicture luminance and contrast. Gamma is a settingintended for expert users.
To adjust the level…
1 - Press , select Picture and press (right) toenter the menu.2 - Select Advanced > Contrast > Gamma, andpress OK.3 - Press the arrows (up) or (down) to adjustthe value.4 - Press (left) repeatedly if necessary, to closethe menu.
52

Sharpness settings
Ultra Resolution
With Ultra Resolution, you switch on a superiorsharpness in line edges and contours.
To switch on or off…
1 - Press , select Picture and press (right) toenter the menu.2 - Select Advanced > Sharpness > UltraResolution, and press OK.3 - Select On or Off.4 - Press (left) repeatedly if necessary, to closethe menu.
Noise reduction
With Noise reduction, you can filter out and reducethe level of image noise.
To adjust the noise reduction…
1 - Press , select Picture and press (right) toenter the menu.2 - Select Advanced > Sharpness > Noisereduction, and press (right) to enter the menu.3 - Select Maximum, Medium, Minimum or Off.4 - Press (left) repeatedly if necessary, to closethe menu.
MPEG artefact reduction
With MPEG artefact reduction, you can smoothenthe digital transitions in the picture. MPEG artefactsare mostly visible as small blocks or jagged edges inimages.
To reduce the MPEG artefacts…
1 - Press , select Picture and press (right) toenter the menu.2 - Select Advanced > Sharpness > MPEGartefact reduction, and press (right) to enter themenu.3 - Select Maximum, Medium, Minimum or Off.4 - Press (left) repeatedly if necessary, to closethe menu.
Natural motion
With Natural motion, you can reduce the motionjudder, visible in movies on TV. Natural Motion makesany movement smooth and fluent.
To adjust the motion judder…
1 - Press , select Picture and press (right) toenter the menu.2 - Select Advanced > Motion > Natural
motion, and press OK.3 - Select Maximum, Medium, Minimum or Off.4 - Press (left) repeatedly if necessary, to closethe menu.
Picture format
Fill the screen settings
If the picture is not filling the whole screen, if blackbars are showing on the top or bottom or at bothsides, you can adjust the picture to fill the screencompletely.
To select one of the basic settings to fill the screen…
1 - Press , select Picture and press (right) toenter the menu.2 - Select Picture format and press (right).3 - Select Fill screen, Fit to screen or Widescreen, and press OK.4 - Press BACK to close the menu.
• Fill screen – automatically enlarges the picture tofill the screen. Picture distortion is minimal, subtitlesremain visible. Not suitable for PC input. Someextreme picture formats can still show black bars.• Fit to screen – automatically zooms in the pictureto fill the screen without distortion. Black bars may bevisible. Not suitable for PC input.
Advanced
If the two basic settings are inadequate to format thepicture you want, you can use the advanced settings.With the advanced settings you manually format thepicture on your screen.
You can zoom, stretch and shift the picture until itshows what you need – e.g. missing subtitles orscrolling text banners . If you format the picture for aspecific Source – like a connected game console –you can return to this setting the next time you usethe game console. The TV stores the last setting youdid for each connection.
To format the picture manually…
1 - Press , select Picture and press (right) toenter the menu.2 - Select Picture format and press (right).3 - Select Advanced and press OK.4 - Use Last setting, Shift, Zoom, Stretch or Original to adjust the picture. Select Undo to returnto the setting the picture had when youopened Picture Format.• Last setting – Select to return to the last setting.• Shift – Select on the arrows to shift the picture. Youcan only shift the picture when it is zoomed in.• Zoom – Select on the arrows to zoom in.
53

• Stretch – Select on the arrows to stretch thepicture vertically or horizontally.• Original – Shows the original format of theincoming picture. This is a 1:1 pixel on pixel format.Expert mode for HD and PC input.• Undo – Select to return to the picture format youstarted with.
17.3
Sound
Sound style
Select a style
For easy sound adjustment, you can select a presetsetting with Sound Style.
1 - While watching a TV channel, press .2 - Select Sound and press (right) to enter themenu.3 - Select Sound style, and select one of the stylesin the list.4 - Press (left) repeatedly if necessary, to closethe menu.
The available styles are…
• Personal - The sound preferences you set duringthe first start up.• Original - Most neutral sound setting• Movie - Ideal for watching movies• Music - Ideal for listening to music• Game - Ideal for gaming• News - Ideal for speech
Restore a style
With a Sound Style selected, you can adjust anysound setting in Setup > Sound…
The selected style will store the changes you made.We recommend to adjust the sound settings for thestyle Personal only. The Sound Style - Personal cansave its settings for each individual connected devicein Sources menu.
To restore the style to its original setting…
1 - While watching a TV channel, press .2 - Select Sound and press (right) to enter themenu.3 - Select Sound style , and select the Sound Styleyou want to restore.4 - Press the colour key Restore style . The styleis restored5 - Press (left) repeatedly if necessary, to closethe menu.
Sound settings
Bass
With Bass, you can adjust the level of low tones inthe sound.
To adjust the level…
1 - Press , select Sound and press (right) toenter the menu.2 - Select Bass and press (right).3 - Press the arrows (up) or (down) to adjustthe value.4 - Press (left) repeatedly if necessary, to closethe menu.
Treble
With Treble, you can adjust the level of high tones inthe sound.
To adjust the level…
1 - Press , select Sound and press (right) toenter the menu.2 - Select Treble and press (right).3 - Press the arrows (up) or (down) to adjustthe value.4 - Press (left) repeatedly if necessary, to closethe menu.
Surround mode
With Surround Mode, you can set the sound effect ofthe TV speakers.
To set the surround mode…
1 - Press , select Sound and press (right) toenter the menu.2 - Select Surround mode and press (right) toenter the menu.3 - Select Stereo or Incredible surround.4 - Press (left) repeatedly if necessary, to closethe menu.
Advanced sound settings
Auto volume levelling
With Auto Volume Levelling, you can set the TV toautomatically level out sudden volume differences.Typically at the beginning of adverts or when you areswitching channels.
To switch on or off…
1 - Press , select Sound and press (right) toenter the menu.2 - Select Advanced and press (right) to enter
54

the menu.3 - Select Auto volume levelling andpress (right) to enter the menu.4 - Select On or Off.5 - Press (left) repeatedly if necessary, to closethe menu.
Delta volume
With Delta volume, you can set the TV toautomatically level out sudden volume differences.
To adjust the value…
1 - Press , select Sound and press (right) toenter the menu.2 - Select Advanced and press (right) to enterthe menu.3 - Select Delta volume and press (right) toenter the menu.4 - Press the arrows (up) or (down) to adjustthe value.5 - Press (left) repeatedly if necessary, to closethe menu.
TV speakers
You can send the TV sound to a connected audiodevice - a Home Theatre System or audio system.
You can select where you want to hear the TV soundand how you want to control it.• If you select TV speakers > Off, you permanentlyswitch off the TV speakers.• If you select TV speakers > On, the TV speakersare always on.
With an audio device connected with HDMI CEC, youcan use one of the EasyLink settings.• If you select EasyLink, the TV sends the TV soundto the audio device. The TV will switch off the TVspeakers when the device is playing the sound.• If you select EasyLink autostart, the TV will switchon the audio device, send the TV sound to the deviceand switch off the TV speakers.With EasyLink or EasyLink Autostart selected, you canstill switch to TV speakers if necessary.
To set the TV speakers…
1 - Press , select Sound and press (right) toenter the menu.2 - Select Advanced and press (right) to enterthe menu.3 - Select TV speakers and press (right) toenter the menu.4 - Select On, Off, EasyLink,or EasyLink autostart .5 - Press (left) repeatedly if necessary, to closethe menu.
To switch to speakers directly…
1 - While watching TV, press .2 - Select Quick settings > Speakers andselect TV or Amplifier (audio system).3 - Press (left) repeatedly if necessary, to closethe menu.
Clear sound
With Clear Sound, you improve the sound forspeech. Ideal for news programmes. You can switchthe speech improvement on or off.
To switch on or off…
1 - Press , select Sound and press (right) toenter the menu.2 - Select Advanced > Clear sound and press OK.3 - Select On or Off, then press OK.4 - Press (left) repeatedly if necessary, to closethe menu.
Audio out format
For more information, in Help, press the colourkey Keywords and look up Audio out format.
Audio out levelling
For more information, in Help, press the colourkey Keywords and look up Audio out levelling.
HDMI 1 - ARC
To switch on or off…
1 - Press , select Sound and press (right) toenter the menu.2 - Select Advanced > HDMI 1 - ARC andpress OK.3 - Select On or Off, then press OK.4 - Press (left) repeatedly if necessary, to closethe menu.
Audio out delay
If you set an Audio sync delay on your Home TheatreSystem, to synchronise the sound with the picture,you must switch off Audio Out Delay on the TV.
To switch off Audio Out Delay…
1 - Press , select Sound and press (right) toenter the menu.2 - Select Advanced > Audio out delay andpress OK.3 - Select Off.4 - Press (left) repeatedly if necessary, to closethe menu.
55

For more information, in Help, press the colourkey Keywords and look up Audio out delay.
Audio out offset
If you cannot set a delay on the Home TheatreSystem, you can set a delay on the TV with AudioOut Offset.
To synchronise the sound on the TV…
1 - Press , select Sound and press (right) toenter the menu.2 - Select Advanced > Audio out offset andpress OK.3 - Use the slider bar to set the sound offset andpress OK.4 - Press (left) repeatedly if necessary, to closethe menu.
For more information, in Help, press the colourkey Keywords and look up Audio out offset.
Headphone volume
With Headphones Volume, you can set the volumeof a connected headphone separately.
To adjust the volume…
1 - Press , select Sound and press (right) toenter the menu.2 - Select Headphones volume and press OK.3 - Press the arrows (up) or (down) to adjustthe value.4 - Press (left) repeatedly if necessary, to closethe menu.
TV placement
As part of the first installation, this setting is set toeither On a TV stand or On the wall. If you havechanged the placement of the TV since then, adjustthis setting accordingly for best sound reproduction.
1 - Press , select Sound and press (right) toenter the menu.2 - Select TV placement and press OK.3 - Select On a TV stand or On the wall.4 - Press (left) repeatedly if necessary, to closethe menu.
17.4
Eco settings
Energy saving
Eco settings bundles the settings that help theenvironment.
Energy Saving
If you select Energy Saving, the TV switches to PictureStyle - Standard automatically, the most ideal energyconscious setting for the picture.
To set the TV in Energy Saving…
1 - Press , select Eco settings andpress (right) to enter the menu.2 - Select Energy saving, the Picture style is set to Standard automatically.3 - Press (left) repeatedly if necessary, to closethe menu.
Screen off
If you only listen to music, you can switch off the TVscreen to save energy.
To only switch off the TV screen…
1 - Press , select Eco settings andpress (right) to enter the menu.2 - Select Screen off.3 - Press (left) repeatedly if necessary, to closethe menu.
To switch the screen back on, press any key on theremote control.
Switch off timer
If the TV receives a TV signal but you don't press akey on the remote control during a 4 hour period, theTV switches off automatically to save energy. Also, ifthe TV does not receive a TV signal nor a remotecontrol command for 10 minutes, the TV switches offautomatically.
If you use the TV as a monitor or use a digital receiverto watch TV (a Set-Top Box - STB) and you do notuse the remote control of the TV, you shoulddeactivate this automatic switch off.
To deactivate the Switch Off Timer …
1 - Press , select Eco settings andpress (right) to enter the menu.2 - Select Switch off timer and press OK.3 - Press the arrows (up) or (down) to adjustthe value. The value 0 deactivates the automaticswitch off.
56
4 - Press (left) repeatedly if necessary, to closethe menu.
For more information on environmentally friendly TVsettings, in Help, press the colourkey Keywords and look up Eco settings.
17.5
General settings
Languages
In Help, press Keywords and lookup Language settings for more information.
Clock
In Help, press Keywords and look up Clocksettings for more information.
Sleep timer
For more information, in Help, press the colourkey Keywords and look up Sleep timer.
Switch off timer
For more information, in Help, press the colourkey Keywords and look up Switch off timer.
EasyLink
EasyLink
To switch off EasyLink completely…
1 - Press ,select General settings and press (right) toenter the menu.2 - Select EasyLink, press (right) andselect EasyLink one step further.3 - Select Off.4 - Press (left) repeatedly if necessary, to closethe menu.
EasyLink remote control
To switch off EasyLink remote control…
1 - Press , select General settings andpress (right) to enter the menu.2 - Select EasyLink > Easylink remote control, and
press OK.3 - Select Off.4 - Press (left) repeatedly if necessary, to closethe menu.
HDMI Ultra HD
This TV can display Ultra HD signals. Some devices -connected with HDMI - do not recognise a TV withUltra HD and might not work correctly or showdistorted picture or sound. To avoid themalfunctioning of such a device, you can set thesignal quality to a level the device can handle. If thedevice is not using Ultra HD signals, you can switchoff Ultra HD for this HDMI connection.
The setting UHD 4:4:4/4:2:2 allows UHD YCbCr 4:4:4/ 4:2:2 signals. The setting UHD 4:2:0 allows UHDYCbCr 4:2:0 signals.
To set the signal quality…
1 - Press , select General settings andpress (right) to enter the menu.2 - Select HDMI Ultra HD > HDMI 3 & 4 andpress OK.3 - Select UHD 4:4:4/4:2:2, UHD4:2:0 or UHD Off and press OK.4 - Press (left) repeatedly if necessary, to closethe menu.
USB keyboard settings
To install the USB keyboard, switch on the TV andconnect the USB keyboard to one ofthe USB connections on the TV. When the TVdetects the keyboard for the first time, you can selectyour keyboard lay-out and test your selection. If youselect a Cyrillic or Greek keyboard layout first, youcan select a secondary Latin keyboard layout.
To change the keyboard layout setting when a layoutwas selected…
1 - Press , select General settings andpress (right) to enter the menu.2 - Select USB keyboard settings, and press OK tostart the keyboard setup.
Mouse settings
To Adjust the motion speed of the USB mouse.…
1 - Press , select General settings andpress (right) to enter the menu.2 - Select Mouse settings, and press OK to startthe mouse speed setup.
57

Home or Shop
If the TV is installed in a shop, you can set the TV todisplay an in store promotion banner. Picturestyle is set to Vivid automatically. Switch offtimer is switched off.
To set the TV to Shop location…
1 - Press , select General settings andpress (right) to enter the menu.2 - Select Location > Shop, and press OK.3 - Press (left) repeatedly if necessary, to closethe menu.
If you use the TV at home, set the TV in Homelocation.
Shop setup
If the TV is set to Shop, you can set the availablility ofa specific demo for in store use.
1 - Press , select General settings andpress (right) to enter the menu.2 - Select Shop setup and press (right) to enterthe menu.3 - Select banner, and select Commercial banneror Promotional banner as in store demo.4 - Press (left) repeatedly if necessary, to closethe menu.
TV Guide
For more information, in Help, press the colourkey Keywords and look up TV guide, data andinformation.
Channel logos
In some countries, the TV can show the channellogos.If you do not want these logos to appear, you canswitch them off.
To switch off the logos…
1 - Press , select General settings andpress (right) to enter the menu.2 - Select Channel logos and press (right) toenter the menu.3 - Select Off and press OK.4 - Press (left) repeatedly if necessary, to closethe menu.
HbbTV
If a TV channel offers HbbTV pages, you must firstswitch on HbbTV in the TV settings to view the pages.
1 - Press , select General settings andpress (right) to enter the menu.2 - Select HbbTV, and press OK.3 - Select On or Off.4 - Press (left) repeatedly if necessary, to closethe menu.
If you want to avoid access to HbbTV pages on aspecific channel, you can block the HbbTV pages forthis channel only.
1 - Tune to the channel of which you want to blockthe HbbTV pages.2 - Press OPTIONS and select HBB TV on thischannel and press OK.3 - Select Off and press OK.
Factory settings
You can set the TV back to the original TV settings(the factory settings).
To switch back to the original settings…
1 - Press , select General settings andpress (right) to enter the menu.2 - Select Factory settings and press OK.3 - Press (left) repeatedly if necessary, to closethe menu.
Reinstall TV
You can redo a full TV installation. The TV iscompletely reinstalled.
To redo a full TV installation…
1 - Press , select General settings andselect Reinstall TV.2 - Follow the instructions on screen. The installationmay take a few minutes.
Channel list copy
For more information, in Help, press the colourkey Keywords and look up Channel List Copy,copy.
58
Satellite list copy
For more information, in Help, press the colourkey Keywords and look up Satellite List Copy,copy.
CAM settings
Switch on operator profile
To switch on operator profile for CI+/CAM for easychannel installation and updates...
1 - Press , select General settings andpress (right) to enter the menu.2 - Select CAM Operator profile and press OK.3 - Select Enable and press OK4 - Press (left) repeatedly if necessary, to closethe menu.
View CAM profile name
To display profile name of the CAM card connected...
1 - Press , select General settings andpress (right) to enter the menu.2 - Select CAM profile name and press OK.3 - Press (left) repeatedly if necessary, to closethe menu.
Universal access
For more information, in Help, press the colourkey Keywords and look up Universal access.
Child lock
Parental rating
To set a minumum age to watch rated programmes...
1 - Press , select Childlock and press (right) to enter the menu.2 - Select Parental rating, and select one of the agein the list.3 - Press (left) repeatedly if necessary, to closethe menu.
Set code / Change code
The Child Lock PIN code is used to lock or unlockchannels or programmes.
To set the lock code or to change the current code…
1 - Press , select Child Lock and press (right)to enter the menu.
2 - Select Set code or Change code andpress OK.3 - Enter a 4 digit code of your choice. If a code is setalready, enter the current Child Lock code and thenenter the new code twice.4 - Press (left) repeatedly if necessary, to closethe menu.
The new code is set.
Forgotten your Child Lock PIN code?
If you forgot your PIN code, you can override thecurrent code and enter a new code.
1 - Press , select Childlock and press (right) to enter the menu.2 - Select Change code and press OK.3 - Enter the overriding code 8888.4 - Now enter a new Child Lock PIN code and enter itagain to confirm.5 - Press (left) repeatedly if necessary, to closethe menu.
The new code is set.
CAM PIN
For more information, in Help, press the colourkey Keywords and look up CAM PIN.
17.6
Clock and language
Menu language
To change the language of the TV menus andmessages…
1 - Press , select Generalsettings > Language > Menu language andpress OK.2 - Select on the language you need.3 - Press (left) repeatedly if necessary, to closethe menu.
Language preferences
Audio language settings
Digital TV channels can broadcast audio with severalspoken languages for a programme. You can set apreferred primary and secondary audio language. Ifaudio in one of these languages is available, the TVwill switch to this audio.
If none of the preferred audio languages is available,you can select another audio language which isavailable.
59

To set the primary and secondary audio language…
1 - Press , select General settings > Languages > Primary audio or Secondaryaudio and press OK.2 - Select on the language you need.3 - Press (left) repeatedly if necessary, to closethe menu.
To select an audio language when none of yourpreferred audio language is available…
1 - Press OPTIONS .2 - Select Audio language and select on the audiolanguage you want temporarily.
Subtitles
Switch on
To switch on Subtitles, press SUBTITLE.
You can switch subtitles On, Off or On duringmute.Or to show subtitles automatically when thebroadcasted programme is not in language – thelanguage set for the TV – select Automatic. Thissetting will also show Subtitles automatically whenyou mute the sound.
Subtitle language settings
Digital channels can offer several subtitle languagesfor a programme. You can set a preferred primary andsecondary subtitle language. If subtitles in one ofthese languages are available, the TV will show thesubtitles you selected.
If none of the preferred subtitle languages areavailable, you can select another subtitle languagewhich is available.
To set the primary and secondary subtitle language…
1 - Press , select Generalsettings > Languages > Primarysubtitles or Secondary subtitles and press OK.2 - Select on the language you need.3 - Press (left) repeatedly if necessary, to closethe menu.
To select a subtitle language when none of yourpreferred languages are available…
1 - Press OPTIONS .2 - Select Subtitle language and select on thelanguage you want temporarily.
Subtitles from Text
If you tune to an analogue channel, you need tomake the subtitles available for each channelmanually.
1 - Switch to a channel and press TEXT to openText.2 - Enter the page number for subtitles, usually 888.3 - Press TEXT again, to close Text.
If you select On in the Subtitle menu when watchingthis analogue channel, subtitles will be shown ifavailable.
To know if a channel is analogue or digital, switch tothe channel and open ChannelInfo in OPTIONS.
Text / Teletex Languages
Text pages
To open Text/Teletext press TEXT, while you arewatching TV channels.To close Text, press TEXT again.
Select a Text page
To select a page . . .
1 - Enter the page number with the number keys.2 - Use the arrow keys to navigate.3 - Press a colour key to select a colour-codedsubject at the bottom of the screen.
Text sub-pages
A Text page number can hold several subpages. Thesubpage numbers are shown on a bar next to themain page number.To select a subpage, press or .
T.O.P. Text pages
Some broadcasters offer T.O.P. Text.To open T.O.P. Text pages within Text,press OPTIONS and select T.O.P. overview.
Favourite pages
The TV makes a list of the last 10 Text pages youopened. You can easily reopen them again in theFavourite Text pages column.
1 - In Text, select the star in the top left corner ofthe screen to show the column of favourite pages.2 - Press (down) or (up) to select a pagenumber and press OK to open the page.You can clear the list with the option Clear favouritepages.
Search Text
You can select a word and scan Text for alloccurences of this word.
60
1 - Open a Text page and press OK.2 - Select a word or number with the arrow keys.3 - Press OK again to jump immediately to the nextoccurence of this word or number.4 - Press OK again to jump to the subsequentoccurence.5 - To stop searching, press (up) until nothing isselected.
Text from a connected device
Some devices that receive TV channels can also offerText.To open Text from a connected device . . .
1 - Press , select the device and press OK.2 - While watching a channel on the device,press OPTIONS , select Show device keys andselect the key and press OK.3 - Press BACK to hide the device keys.4 - To close Text, press BACK again.
Digital Text (UK only)
Some digital broadcasters offer dedicated Digital Textor interactive TV on their digital TV channels. Thisincludes normal Text using the number, colour andarrow keys to select and navigate.
To close Digital Text, press BACK.
Text options
In Text/Teletext, press OPTIONS to select thefollowing…
• Freeze pageTo stop the automatic rotation of subpages.• Dual screen / Full screenTo show the TV channel and Text alongside eachother.• T.O.P. overviewTo open T.O.P. Text.• EnlargeTo enlarge the Text page for comfortable reading.• RevealTo unhide hidden information on a page.• Cycle subpagesTo cycle subpages when these are available.• LanguageTo switch the group of characters that Text uses todisplay correctly.• Text 2.5To activate the Text 2.5 for more colours and bettergraphics.
Text setup
Text language
Some digital TV broadcasters have several Textlanguages available.To set your primary and secondary Text language . . .
1 - Press , select Generalsettings > Language > Primary text or Secondarytext and press OK.2 - Select your preferred Text languages.3 - Press (left) repeatedly if necessary, to closethe menu.
Text 2.5
If available, Text 2.5 offers more colours and bettergraphics. Text 2.5 is activated as a standard factorysetting.To switch off Text 2.5…
1 - Press TEXT.2 - With Text/Teletext open on screen,press OPTIONS.3 - Select Text 2.5 > Off.4 - Press (left) repeatedly if necessary, to closethe menu.
Clock
Date and time
Automatic
In some countries, digital broadcasts do not send UTC- Coordinated Universal Time information. Thedaylight saving change might be ignored and the TVmight show an incorrect time.
When you record programmes - scheduled in the TVGuide, we recommend not to change the time anddate manually. In some countries, for some networkoperators, the Clock setting is hidden to avoid anincorrect clock setting.
To correct the TV clock automatically...
1 - Press , select Generalsettings > Clock > Auto clock mode, andselect Country dependent.2 - Select Daylight savings and select theappropriate setting.3 - Press (left) repeatedly if necessary, to closethe menu.
Manual
To set the TV clock manually…
1 - Press , select Generalsettings > Clock > Auto clock mode, andselect Manual.2 - Select Date and Time to adjust.3 - Press (left) repeatedly if necessary, to closethe menu.
61

Time zone
To set the time zone…
1 - Press , select Generalsettings > Clock > Time zone, and press OK.2 - Select one of the time zones.3 - Press (left) repeatedly if necessary, to closethe menu.
Manual time offset
To adjust time offset…
1 - Press , select Generalsettings > Clock > Manual time offset, andpress OK.2 - Press the arrows (up) or (down) to adjustthe value.3 - Press (left) repeatedly if necessary, to closethe menu.
17.7
Universal access
Switch on
With Universal access switched on, the TV isprepared for use for the deaf, hard of hearing, blind orpartially sighted people.
Switch on
If you did not switch on Universal access during theinstallation, you can still switch it on in Universalaccess menu.To switch on Accessibility…
1 - Press , select Universalaccess and press (right) to enter the menu.2 - Select Universal access one step further.3 - Select On and press OK.4 - Press (left) repeatedly if necessary, to closethe menu.
With Universal access switched on, theoption Universal access is added in the Optionsmenu.
Hard of hearing
Some digital TV channels broadcast special audio andsubtitles adapted for the hard of hearing or deafpeople. With Hearing impaired switched on, the TVautomatically switches to the adapted audio andsubtitles, if available. Before you can switchon Hearing impaired, you have to switchon Universal access.
To switch on Hearing impaired…
1 - Press , select Universalaccess and press (right) to enter the menu.2 - Select Hearing impaired and press (right) toenter the menu.3 - Select On and press OK.4 - Press (left) repeatedly if necessary, to closethe menu.
To switch on Hearing impaired while watching TV...
1 - While watching a TV channel,press OPTIONS , select Universal access andpress OK.2 - Select Hearing impaired, and select On.
To check whether a hearing impaired audio languageis available, press OPTIONS , select AudioLanguage and look for an audio language markedwith a .
If Accessibility does not appear in the Options menu,switch on Universal access in setup menu.
For more information, in Help, press the colourkey Keywords and look up Universal access.
Audio description
Switch on
Digital TV channels can broadcast special audiocommentary describing what is happening onscreen. To be able to set the visually impaired audio andeffects, you have to switch on Audiodescription first. Also, before you can switch on Audio description, youhave to switch on Universal access in setup menu.
With Audio Description, a narrator's commentary isadded to the normal audio.To switch on the commentary (if available)…
To switch on Audio Description…
1 - Press , select Universalaccess and press (right) to enter the menu.2 - Select Audio description and press (right)to enter the menu.3 - Select Audio description one step further4 - Select On and press OK.5 - Press (left) repeatedly if necessary, to closethe menu.
To switch on Audio description while watching TV...
1 - While watching a TV channel,press OPTIONS , select Universal access andpress OK.2 - Select Audio description, and select On.
You can check if an audio commentary is available.In the Options menu, select Audio language and
62

look for an audio language marked with a .
Speakers/Headphones
With Speakers/Headphones, you can select whereyou want to hear the audio commentary. On the TV speakers only, on the headphones only oron both.
To set Speakers/Headphones…
1 - Press , select Universal access and press (right) to enter the menu.2 - Select AudioDescription > Speakers/Headphones and press OK.3 - Select Speakers, Headphones or Speakers +Headphones and press OK.4 - Press (left) repeatedly if necessary, to closethe menu.
Mixed volume
You can mix the volume of the normal audio with theaudio commentary.
To mix the volume…
1 - Press , select Universalaccess and press (right) to enter the menu.2 - Select Audio Description > Mixed volume andpress OK.3 - Press the arrows (up) or (down) to adjustthe value.4 - Press (left) repeatedly if necessary, to closethe menu.
Audio effect
Some audio commentary can hold extra audioeffects, like stereo or fading sound.
To switch on Audio effects (if available)…
1 - Press , select Universalaccess and press (right) to enter the menu.2 - Select Audio description > Audio effects andpress OK.3 - Press (left) repeatedly if necessary, to closethe menu.
Speech
The audio commentary can also hold subtitles for thewords which are spoken.
To switch on these subtitles (if available) . . .
1 - Press , select Universalaccess and press (right) to enter the menu.2 - Select Audio description > Speech and press
OK.3 - Select Descriptive or Subtitles and press OK.4 - Press (left) repeatedly if necessary, to closethe menu.
63

18
NetworksFor more information, in Help, press the colourkey Keywords and look up Network, for moreinformation on connecting the TV to a network.
64

19
Channel installation19.1
Antenna/cable installation
Update channels
Automatic channel update
If you receive digital channels, you can set the TV toautomatically update the list with new channels.Alternatively, you can start a channel update yourself.
Automatic channel update
Once a day, at 6 AM, the TV updates the channelsand stores new channels. New channels are stored inthe All channels list but also in the New channels list.Empty channels are removed.If new channels are found or if channels are updatedor removed, a message is shown at TV start up. TheTV must be in standby to automatically updatechannels.
To switch off the message at start up . . .
1 - Press , select Antenna/cable installation andpress OK.2 - Enter your PIN code if necessary.3 - Select Automatic channel update andpress OK.4 - Select Off and press OK.5 - Press BACK to close the menu.
When new channels are found or if channels areupdated or removed, a message is shown at TV startup. To avoid this message to appear after everychannel update, you can switch it off.
To switch off the message…
1 - Press , select Antenna/cable installation andpress OK.2 - Enter your PIN code if necessary.3 - Select Channel update message and press OK.4 - Select Off and press OK.5 - Press BACK to close the menu.
In certain countries, the Automatic channel update isdone while watching TV or on any moment when theTV is in standby.
Manual channel update
You can always start an channel update yourself.
To start a channel update manually…
1 - Press , select Antenna/cable installation andpress OK.2 - Enter your PIN code if necessary.
3 - Select Search for channels and press OK.4 - Select Start now and press OK.5 - Select Update channels and press OK.6 - Press BACK to close the menu.
Reinstall channels
Reinstall all channels
You can reinstall all channels and leave all other TVsettings untouched.
If a PIN code is set, you will need to enter this codebefore you can reinstall channels.
To reinstall channels…
1 - Press , select Antenna/cable installation andpress OK.2 - Enter your PIN code if necessary.3 - Select Search for channels and press OK.4 - Select Start now and press OK.5 - Select Re-install channels and press OK.6 - Select the country where you are now andpress OK.7 - Select Antenna (DVB-T) or Cable (DVB-C) .8 - Select Start and press OK to update channels.This can take a few minutes.9 - Press BACK to close the menu.
Reinstall TV
You can redo a full TV installation. The TV iscompletely reinstalled.
To redo a full TV installation…
1 - Press , select General settings > ReinstallTV and press OK.2 - Enter your PIN code if necessary.3 - Select Yes and press OK to confirm.4 - The TV will reinstall completely. All settings willbe reset and installed channels will be replaced. Theinstallation can take a few minutes.5 - Press BACK to close the menu.
DVB-T or DVB-C
DVB settings
Access DVB settings
1 - Press , select Antenna/cable installation andpress OK.2 - Enter your PIN code if necessary.3 - Select Search for channels and press OK.4 - Select Start now and press OK.5 - Select Re-install channels, select Next andpress OK.
65

6 - Select the country where you are now andpress OK.7 - Select Cable (DVB-C).8 - Select Start to search channels, orselect Settings for DVB-C settings .9 - Press BACK to close the menu.
Network frequency mode
If you intend to use the fast Quick scan methodin Frequency scan to search for channels,select Automatic. The TV will use 1 of the predefinednetwork frequencies (or HC - homing channel) asused by most cable providers in your country.
If you received a specific network frequency value tosearch for channels, select Manual.
Network frequency
With the Network frequency mode set to Manual,you can enter the network frequency value receivedfrom your cable provider here. To enter the value,use the number keys.
Frequency scan
Select the method of searching for channels. You canselect the faster Quick scan method and use thepredefined settings used by most cable providers inyour country.
If this results in having no channels installed or ifsome channels are missing, you can select theextended Full scan method. This method will takemore time to search for and install channels.
Frequency step size
The TV searches for channels in steps of 8MHz.
If this results in having no channels installed or ifsome channels are missing, you can search in smallersteps of 1MHz. Using the 1MHz steps will take moretime to search for and install channels.
Digital channels
If you know your cable operator is not offering digitalchannels, you can skip searching for digital channels.
Analogue channels
If you know your cable operator is not offeringanalogue channels, you can skip searching foranalogue channels.
Free / Scrambled
If you have a subscription and a CAM - ConditionalAccess Module for pay TV services, select Free +Scrambled. If you did not subscribe to pay TVchannels or services, you can select FreeChannels Only .
For more information, in Help, press the colourkey Keywords and look up CAM, conditionalaccess module.
Reception quality
You can check the quality and signal strength of adigital channel. If you have your own antenna, youcan reposition the antenna to try and improve thereception.
To check the reception quality of a digital channel…
1 - Tune to the channel.2 - Press , select Antenna/Cable installation andpress OK. Enter your PIN code if necessary.3 - Select Digital: Reception Test and press OK.
The digital frequency is shown for this channel. If thereception is poor, you can reposition your antenna.To check the signal quality of this frequency again,select Search and press OK.To enter a specific digital frequency yourself, use theremote control digit keys. Alternatively, select thefrequency, position the arrows on a numberwith and and change the numberwith and . To check the frequency,select Search and press OK.
If you use DVB-C to receive channels, theoption Symbol rate mode is available. For Symbolrate mode, select Automatic, unless your cableprovider gave you a specific symbol rate value. Toenter the symbol rate value, use the number keys.
Manual installation
Analogue TV channels can be manually installed,channel by channel.
To install analogue channels manually…
1 - Press , select Antenna/Cable installation andpress OK. Enter your PIN code if necessary.2 - Select Analogue: Manual Installation and
66

press OK.• SystemTo set up the TV system, select System.Select your country or the part of the world whereyou are now and press OK.
• Search ChannelTo find a channel, select Search Channel andpress OK. You can enter a frequency yourself to finda channel or let the TV search for a channel.Press (right) to select Search and press OK tosearch for a channel automatically. The foundchannel is shown on screen and if the reception ispoor, press Search again. If you want to store thechannel, select Done and press OK.
• Fine tuneTo fine tune a channel, select Fine tune andpress OK. You can fine tune the channelwith or .If you want to store the channel found,select Done and press OK.
• StoreYou can store the channel on the current channelnumber or as a new channel number.Select Store Current Channel or Store as NewChannel and press OK. The new channel number isshown briefly.
You can redo these steps until you have found allavailable analogue TV channels.
19.2
Satellite installation
About installing satellites
This TV has two built-in satellite DVB-S/DVB-S2tuners.
Up to 4 Satellites
You can install up to 4 satellites (4 LNBs) on this TV.Select the exact number of satellites you wish toinstall at the start of the installation. This will speed upthe installation.
Unicable
You can use a Unicable system to connect theantenna dish to the TV. You can select Unicable for 1or for 2 satellites at the start of the installation.
MDU - Multi-Dwelling-Unit
The built-in satellite tuners support MDU on the Astrasatellites and for Digiturk on the Eutelsat satellite.
MDU on Türksat is not supported.
Start the installation
Make sure your satellite dish is connected correctlyand is perfectly aligned before you start theinstallation.
To start the satellite installation…
1 - Press , select Satellite installation andpress OK. Enter your PIN code if necessary.2 - Select Search for Satellite and press OK.3 - Select Search and press OK. TV will search forsatellites.4 - Select Install and press OK. The TV shows thecurrent satellite installation setup.If you want to change this setup, select Settings.If you don't want to change the setup, select Search.Go to step 5.
5 - In Installation System, select the number ofsatellites you want to install or select one of theUnicable systems. When you select Unicable, youcan choose the User Band Numbers and enter theUser Band Frequencies for each tuner. In somecountries, you can adjust some expert settings foreach LNB in More Settings.6 - The TV will search for the satellites available onthe alignment of your antenna dish. This may take afew minutes. If a satellite is found, its name andreception strength are shown on screen.7 - When the TV found the satellites you need,select Install.8 - If a satellite offers Channel Packages, the TV willshow the available packages for that satellite. Selectthe package you need. Some packages offera Quick or Full install for their available channels,select one or the other. The TV will install the satellitechannels and radio stations.9 - To store the satellite setup and installed channelsand radio stations, select Finish.
Satellite installation settings
The satellite installation settings are preset accordingyour country. These settings determine how the TVsearches and installs satellites and its channels. Youcan always change these settings.
To change the satellite installation settings…
1 - Start the satellite installation.2 - On the screen where you can start searching forsatellites, select Settings and press OK.3 - Select the number of satellites you want to installor select one of the Unicable systems. When youselect Unicable, you can choose the User BandNumbers and enter the User Band Frequencies for
67

each tuner.4 - When you're done, select Next and press OK.5 - On the Settings menu, press the colourkey Done to return to the screen to startsearching for satellites.
Homing Transponder and LNB
In some countries, you can adjust the expert settingsfor homing transponder and each LNB. Only use orchange these settings when a normal installation fails.If you have non-standard satellite equipment, youcan use these settings to overrule the standardsettings. Some providers might give you sometransponder or LNB valeus which you can enter here.
Satellite CAMs
If you use a CAM – a Conditional Access Module witha smart card – to watch satellite channels, werecommend to do the satellite installation with theCAM inserted in the TV.
Most CAMs are used to descramble channels.
Newest generation CAMs (CI+ 1.3 with OperatorProfile), can install all the satellite channels bythemselves on your TV. The CAM will invite you toinstall its satellite(s) and channels. These CAMs notonly install and descramble the channels but alsohandle regular channel updates.
Channel packages
About channel packages
Satellites can offer channel packages that bundle freechannels (free-to-air) and offer a sorting that suits acountry. Some satellites offer subscription packages -a collection of channels you pay for.
If you choose a subscription package, the TV mightask you to select a Quick or Full installation.Select Satellite operator channels only to install thechannels of the package only or select All satellitechannels to install the package and all otheravailable channels too. We recommend a Quickinstallation for subscription packages. If you haveadditional satellites that are not part of yoursubscription package, we recommend a Fullinstallation. All installed channels are put in thechannels list All.
Update channel packages
With Update channel package, you can bring backsatellite channels that were in the satellite channel listbefore but are now missing. The missing channelswere repositioned on the transponder by the satellite
operator. The TV must be updated with the latestversion of the channel package.
To download the latest version of the channelpackage . . .1 - Go to the Philips supportwebsite www.philips.com/support and enter thetype number of your TV.2 - Click on Software and drivers and look for thefile : PredefinedSortingList3 - Download the file on your computer and copythe file on the root directory of a USB flash drive, notin a folder (if necessary, unzip the file first).4 - Plug the USB flash drive into the TV Press ,select Satellite Installation and press OK.5 - Select Satellite settings > Channelinstallation > Update channel package andpress OK.6 - The TV will copy the file and ask you to start achannel update immediately. Select Yes andpress OK. This may take a few minutes. If you wantto postpone the channel update, you can do it laterwith Setup > Search for satellite > Updatechannels.7 - After the channel update is done, the missingchannels should be back at their former position inthe satellite channel list.
Unicable setup
The unicable system
You can use a Single Cable system, MDU or Unicablesystem to connect the antenna dish to the TV. ASingle Cable system uses one cable to connect thesatellite dish to all satellite tuners in its system. ASingle Cable system is typically used in apartmentbuildings. If you use a Unicable system, the TV will askyou to assign a user band number and correspondingfrequency during the installation. You can install 1 or 2satellites with Unicable on this TV.
If you notice some missing channels after a Unicableinstallation, another installation might have beendone at the same moment on the Unicable system.Do the installation again to install the missingchannels.
User band number
In a Unicable system, each connected satellite tunermust be numbered (e.g. 0, 1, 2 or 3 etc.).
You can find the available user bands and theirnumber on the Unicable switchbox. User band issometimes shortened as UB. There are Unicableswitchboxes that offer 4 or 8 user bands. If you selectUnicable in the settings, the TV will ask you to assignthe unique user band number for each built-in
68

satellite tuners. A satellite tuner cannot have the sameuser band number as another satellite tuner in theUnicable system.
User band frequency
Next to the unique user band number, the built-insatellite receiver needs the frequency of the selecteduser band number. These frequencies are mostlyshown next to the user band number on a Unicableswitchbox.
Add a satellite
You can add an additional satellite to your currentsatellite installation. The installed satellites and theirchannels remain untouched. Some satellite operatorsdo not allow adding a satellite.
The additional satellite should be seen as an extra, itis not your main satellite subscription or not the mainsatellite of which you use its channel package.Typically, you would add a 4th satellite when youhave 3 satellites already installed. If you have 4satellites installed, you might consider removing onefirst to be able to add a new satellite.
Setup
If you currently have only 1 or 2 satellites installed, thecurrent installation settings might not allow adding anextra satellite. If you need to change the installationsettings, you must redo the complete satelliteinstallation. You cannot use Add satellite if a changeof settings is needed.
To add a satellite…
1 - Press , select Satellite installation andpress OK.2 - Select Search for satellite and press OK.3 - Select Add Satellite and press OK. The currentsatellites are shown.4 - Select Add and press OK. The TV will search fornew satellites.5 - If the TV has found one or more satellites,select Install and press OK. The TV installs thechannels of the found satellites.6 - To store the channels and radio stations,select Finish and press OK.
Remove a satellite
You can remove one or more satellites from yourcurrent satellite installation. You remove the satelliteand its channels. Some satellite operators do notallow removing a satellite.
To remove satellites…
1 - Press , select Satellite installation andpress OK.2 - Select Search for satellite and press OK.3 - Select Remove Satellite and press OK. Thecurrent satellites are shown.4 - Use the arrows keys to select the satellite youwant to remove.5 - Press OK to mark a satellite to remove.Press OK again to unmark.6 - Select Remove, press OK and confirm. Thesatellites are removed.7 - Select Exit and press OK to close Removesatellite.
Manual installation
Manual Installation is intended for expert users.
You can use Manual Installation to quickly add newchannels from a satellite transponder. You need toknow the frequency and polarization of thetransponder. The TV will install all channels of thattransponder. If the transponder was installed before,all its channels - the former and the new ones - aremoved to the end of the channel list All.You cannot use Manual installation if you need tochange the number of satellites. If this is needed, youhave to do a complete installation with InstallSatellites.
To install a transponder…
1 - Press , select Satellite installation andpress OK.2 - Select Manual Installation and press (right)to enter the menu.3 - If you have more than 1 satellite installed, select LNB for which you want to add channels.4 - Set the Polarisation you need. If you setthe Symbol Rate Mode to Manual, you can enterthe symbol rate in Symbol Rate manually.5 - Press the arrows (up) or (down) to adjustthe frequency, and select Done.6 - Select Search and press OK. The signalstrenght is shown on screen.7 - If you want to store the channels of a newtransponder, select Store and press OK.8 - Press (left) repeatedly if necessary, to closethe menu.
Reorder and rename channels
You can reorder and rename satellite channels.
Reorder
You can only reorder channels in the Favourites list.For more information on Reordering satellitechannels, press Keywords and look up Satellite,reorder channels.
69

Rename channels
You can rename channels in the channel list.1 - Select the channel you want to rename in one ofthe channel lists - All, Favourites, Radio or New.2 - Press Rename . You can enter text with theremote control keyboard or open the on-screenkeyboard.
With the on-screen keyboard
• To open the on-screen keyboard, place the cursor inthe name text field and press OK.• To delete the character in front of the cursor,press Backspace .• To enter a character, select the character with thearrow keys and press OK.• To select uppercase letters, press .• To select numbers or special characters, press .• When you are ready, press BACK to close theon-screen keyboard.• To finish renaming, select Done and press OK.
Homing transponder and LNB
In some countries, you can adjust the expert settingsfor homing transponder and each LNB. Only use orchange these settings when a normal installation fails.If you have non-standard satellite equipment, youcan use these settings to overrule the standardsettings. Some providers might give you sometransponder or LNB valeus which you can enter here.
LNB Power
By default, LNB Power is set to On.
22 kHz Tone
By default, the Tone is set to Auto.
Low LO Frequency / High LO Frequency
The local oscillator frequencies are set to standardvalues. Adjust the values only in case of exceptionalequipment that needs different values.
Problems
The TV cannot find the satellites I want or the TV
installs the same satellite twice
• Make sure that the correct number of satellites is setin Settings at the start of the installation. You can setthe TV to search for One, Two or 3/4 satellites.
A dual head LNB cannot find a second satellite
• If the TV finds one satellite but cannot find a secondone, turn the dish a few degrees. Align the dish to getthe strongest signal on the first satellite. Check thesignal strength indicator of the first satellite on screen.
With the first satellite set at the strongest signal, selectSearch again to find the second satellite.• Make sure the settings are set to Two Satellites.
Changing the installation settings did not solve my
problem
• All settings, satellites and channels are only storedat the end of the installation when you finish.
All satellite channels are gone
• If you use a Unicable system, make sure youassigned two unique user band numbers for bothbuilt-in tuners in the Unicable settings. It might bethat another satellite receiver in your Unicable systemis using the same user band number.
Some satellite channels seem to have disappeared
from the channel list
• If some channels seem to be gone or displaced, thebroadcaster might have changed the transponderlocation of these channels. To restore the channelpositions in the channel list, you can try an update ofthe channel package.
I cannot remove a satellite
• Subscription packages do not allow removing asatellite. To remove the satellite, you have to do acomplete installation again and select anotherpackage.
Sometimes the reception is poor
• Check if the satellite dish is solidly mounted. Strongwinds can move the dish.• Snow and rain can degrade the reception.
19.3
Channel list copy
Introduction
Channel List Copy is intended for dealers and expertusers. In some countries, Channel List Copy is onlyavailable for copying satellite channels.
With Channel List Copy, you can copy the channelsinstalled on one TV onto another Philips TV of thesame range. With Channel List Copy, you avoid thetime-consuming channel search by uploading apredefined channel list on a TV. Use a USB flash driveof minimum 1 GB.
Conditions • Both TVs are from the same year range.• Both TVs have the same hardware type. Check thehardware type on the TV type plate on the back ofthe TV. Typically noted as Q . . . LA• Both TVs have compatible software versions.
Current software version
70

To check the cuurent version of the TV software…
1 - Press , select Update Software and press (right) to enter the menu.2 - Select Current Software Info and press OK.3 - The version, release notes and creation date areshown. Also, the Netflix ESN Number is shown ifavailable.4 - Press (left) repeatedly if necessary, to closethe menu.
Copy a channel list
To copy a channel list…
1 - Switch on the TV. This TV should have channelsinstalled.2 - Plug in a USB flash drive.3 - Press , select General settings > Channel listcopy and press OK.4 - Select Copy to USB and press OK. You mightbe asked to enter the Child Lock PIN code to copy thechannel list.5 - When copying is done, unplug the USB flashdrive.6 - Press (left) repeatedly if necessary, to closethe menu.
Now you can upload the copied channel list ontoanother Philips TV.
Channel list version
Check the current version of the channel list...
1 - Press , select General settings > Channel listcopy and press OK.2 - Select Current version, then press OK.3 - Press (left) repeatedly if necessary, to closethe menu.
Upload a channel list
To not installed TVs
Depending on whether your TV is already installed ornot, you must use a different method to upload achannel list.
To a TV that is not yet installed 1 - Plug in the power plug to start the installation andselect language and country. You can skip thechannel search. Finish the installation.2 - Plug in the USB flash drive that holds the channellist of the other TV.3 - To start the channel list upload, press ,select General settings and press OK.4 - Select Channel List Copy > Copy to TV and
press OK. Enter your PIN code if necessary.5 - The TV notifies you if the channel list is copied tothe TV successfully. Unplug the USB flash drive.
To installed TVs
Depending on whether your TV is already installed ornot, you must use a different method to upload achannel list.
To an already installed TV 1 - Verify the country setting of the TV. (To verify thissetting, see chapter Reinstall All Channels. Start thisprocedure until you reach the country setting.Press BACK to cancel the installation.)If the country is correct continue with step 2.If the country is not correct, you need to start areinstallation. See chapter Reinstall All Channels andstart the installation. Select the correct country andskip the channels search. Finish the installation. Whendone, continue with step 2.2 - Plug in the USB flash drive that holds the channellist of the other TV.3 - To start the channel list upload, press ,select General settings and press OK.4 - Select Channel List Copy > Copy to TV andpress OK. Enter your PIN code if necessary.5 - The TV notifies you if the channel list is copied tothe TV successfully. Unplug the USB flash drive.
71

20
Software20.1
Update software
Update from Internet
If the TV is connected to the Internet, you may receivea message from TP Vision to update the TV software.You need a high-speed (broadband) Internetconnection.
If you receive this message, we recommend you carryout the update.Select Update. Follow the instructions on screen.
You can also look for new updates yourself.To look for an update . . .
1 - Press , select Update software > Search forupdates, then press OK.2 - Select Internet, then press OK. Follow theinstructions on screen.
When the update is complete, the TV switches off andback on again automatically.Wait for the TV to switch itself back on.
Update from USB
It might be necessary to update the TV software. Youneed a computer with an high-speed Internetconnection and a USB memory device to upload thesoftware on the TV. Use a USB memory device with512MB free space. Make sure that write protection isswitched off.
1 - Start the update on TVPress , select Update software > Search forupdates, then press OK.Select USB and press OK.2 - Identify the TVInsert the USB memory into one of the USBconnections of the TV.Select Start and press OK. An identification file iswritten on the USB memory device.3 - Download the TV softwareInsert the USB memory into your computer.On the USB memory device, locate thefile update.htm and double click it.Click on Send ID.If new software is available, download the .zip file.After the download, unzip the file and copy thefile autorun.upg onto the USB memory device. Do not place this file in a folder.4 - Update the TV softwareInsert the USB memory into the TV again. The updatestarts automatically.
The TV switches itself off for 10 seconds and thenback on again. Please wait.
Do not . . .
• use the remote control• remove the USB memory device from the TV
If a power cut occurs during the update, neverremove the USB memory device from the TV. Whenthe power returns, the update will continue.At the end of the update, the message Operationsuccessful appears on screen. Remove the USBmemory device and press on the remote control.
Do not . . .
• press twice• press the power switch on the TVThe TV switches itself off (for 10 seconds) and thenback on again. Please wait.
The TV software has been updated. You can use theTV again.To prevent an accidental update of the TV software,delete the autorun.upg file from the USB memorydevice.
20.2
Software versionTo view the current TV software version…
1 - Press , select Update Software > CurrentSoftware Info and press OK.2 - The version, Release Version is shown. Also, theNetflix ESN Number is shown if available.3 - Press (left) repeatedly if necessary, to closethe menu.
20.3
Local updatesFor dealers and expert users…
1 - Press , select Update Software > Localupdates and press OK.2 - Follow the on-screen instruction.3 - Press (left) repeatedly if necessary, to closethe menu.
20.4
Look for OAD updatesSearch for an Over-the-air software update…
1 - Press , select Update Software > Look forOAD updates and press OK.2 - Select Start now. Follow the on-screeninstruction.
72

3 - Press (left) repeatedly if necessary, to closethe menu.
20.5
Open source softwareThis television contains open source software. TPVision Europe B.V. hereby offers to deliver, uponrequest, a copy of the complete correspondingsource code for the copyrighted open sourcesoftware packages used in this product for which suchoffer is requested by the respective licences.
This offer is valid up to three years after productpurchase to anyone in receipt of this information.To obtain the source code, please write in English to .. .
20.6
Open source license
About open source license
Acknowledgements and License Texts for any opensource software used in this Philips TV.
This is a document describing the distribution of thesource code used on the Philips TV, which fall eitherunder the GNU General Public License (the GPL), orthe GNU Lesser General Public License (the LGPL), orany other open source license. Instructions to obtainsource code for this software can be found in the usermanual.
PHILIPS MAKES NO WARRANTIES WHATSOEVER,EITHER EXPRESS OR IMPLIED, INCLUDING ANYWARRANTIES OF MERCHANTABILITY OR FITNESSFOR A PARTICULAR PURPOSE, REGARDING THISSOFTWARE. Philips offers no support for thissoftware. The preceding does not affect yourwarranties and statutory rights regarding any Philipsproduct(s) you purchased. It only applies to thissource code made available to you.
Open source
Freetype (2.4.3) FreeType is a software font engine that is designed tobe small, efficient, highly customizable, and portablewhile capable of producing high-quality output(glyph images). This piece of software is made available under theterms and conditions of the FreeType Project license,which can be found below.
Source: http://freetype.sourceforge.net
zlib (1.2.3) The 'zlib' compression library provides in-memorycompression and decompression functions, includingintegrity checks of the uncompressed data. This piece of software is made available under theterms and conditions of the zlib license, which can befound below. Source: http://www.zlib.net/
Fraunhofer AAC Ecnoder (3.3.3) AAC Ecnoder. Source: Android JB source code
unicode (3.2) This library is used to perform UNICODE stringmanipulation. This piece of software is made available under theterms and conditions of the ICU license, which can befound below. Source: http://www.icu-project.org/
libpng (1.2.43) PNG decoder. This piece of software is made available under theterms and conditions of the libpng license, which canbe found below. Source: http://www.libpng.org/pub/png/libpng.html
libjpg (6b) This library is used to perform JPEG decoding tasks. This piece of software is made available under theterms and conditions of the libjpg license, which canbe found below. Source: http://www.ijg.org/
libmng (1.0.10) libmng -THE reference library for reading, displaying,writing and examining Multiple-Image NetworkGraphics.MNG is the animation extension to thepopular PNG image-format. This piece of software is made available under theterms and conditions of the libmng license, which canbe found below. Source:http://sourceforge.net/projects/libmng/files/
u-Boot loader (1.3.4) Used by boot loader and only linked with bootloader, GPL license. This piece of software is made available under theterms and conditions of the u-Boot loader license,which can be found below. Source: http://sourceforge.net/projects/u-boot/files/u-boot/U-Boot-1.1.4/u-boot-1.1.4.tar.bz2/download
Libcurl (7.21.7) HTTP client;libcurl is a free and easy-to-use client-side URL transfer library, supporting FTP, FTPS, HTTP,
73
HTTPS, SCP, SFTP, TFTP, TELNET, DICT, LDAP,LDAPS, FILE, IMAP, SMTP, POP3 and RTSP. libcurlsupports SSL certificates, HTTP POST, HTTP PUT, FTPuploading, HTTP form based upload, proxies, cookies,user+password authentication (Basic, Digest, NTLM,Negotiate, Kerberos4), file transfer resume, http proxytunneling and more! This piece of software is made available under theterms and conditions of the Libcurl license, which canbe found below. Source: http://curl.haxx.se/
c-ares (1.7.4) c-ares is a C library that performs DNS requests andname resolves asynchronously. This piece of software is made available under theterms and conditions of the c-ares license, which canbe found below. Source: http://c-ares.haxx.se/c-ares-1.7.1.tar.gz
openssl (1.0.0d) OpenSSL is an open source implementation of theSSL and TLS protocols. The core library (written in theC programming language) implements the basiccryptographic functions and provides various utilityfunctions. Wrappers allowing the use of the OpenSSLlibrary in a variety of computer languages areavailable. This piece of software is made available under theterms and conditions of the 1.7.4 license, which can befound below. Source:http://www.openssl.org/source/openssl-1.0.0.tar.gz
Expat (2.01) xml paser; Expat is an XML parser library written in C.It is a stream-oriented parser in which an applicationregisters handlers for things the parser might find inthe XML document (like start tags). An introductoryarticle on using. This piece of software is made available under theterms and conditions of the Expat license, which canbe found below. Source: http://expat.sourceforge.net/
DirectFB include SAWMAN (1.4.0) It is a software library for GNU/Linux/UNIX basedoperating system with a small memory footprint thatprovides graphics acceleration, input device handlingand abstraction layer, and integrated windowingsystem with support for translucent windows andmultiple display layers on top of the Linuxframebuffer without requiring any kernelmodifications. This piece of software is made available under theterms and conditions of the DirectFB license, whichcan be found below. Source: http://sourceforge.net/projects/jointspace/files/remote_applications_SDK/remote_spplications_SDK_v1.3.1/DirectFB141_source_1.3.1.7z/download
SAWMAN SquashFS is a compressed read-only file system forLinux. SquashFS compresses files, inodes anddirectories, and supports block sizes up to 1 MB forgreater compression. SquashFS is also the name offree/open software, licensed under the GPL, foraccessing SquashFS filesystems. Source: http://squashfs.sourceforge.net/
Linux Kernel (3.0) The Linux kernel is an operating system kernel usedby the Linux family of Unix-like operating systems. This piece of software is made available under theterms and conditions of the Linux Kernel license,which can be found below. Source: http://www.kernel.org
SQLite (3.7.2) SQLite is a in-process library that implements a self-contained, serverless, zero-configuration,transactional SQL database engine. This piece of software is made available under theterms and conditions of the SQLite license, which canbe found below. Source: http://www.sqlite.org/download.html
SquashFS (3.4) SquashFS is a compressed read-only file system forLinux. SquashFS compresses files, inodes anddirectories, and supports block sizes up to 1 MB forgreater compression. SquashFS is also the name offree/open software, licensed under the GPL, foraccessing SquashFS filesystems. This piece of software is made available under theterms and conditions of the SquashFS license, whichcan be found below. Source: http://squashfs.sourceforge.net/
glibc (2.6.1) Any Unix-like operating system needs a C library: thelibrary which defines the ``system calls'' and otherbasic facilities such as open, malloc, printf, exit...TheGNU C library is used as the C library in the GNUsystem and most systems with the Linux kernel This piece of software is made available under theterms and conditions of the glibc license, which canbe found below. Source: http://www.gnu.org/software/libc/
mtd-utils (1) The aim of the system is to make it simple to providea driver for new hardware, by providing a genericinterface between the hardware drivers and the upperlayers of the system. Hardware drivers need to knownothing about the storage formats used, such as FTL,FFS2, etc., but will only need to provide simpleroutines for read, write and erase. Presentation of thedevice's contents to the user in an appropriate formwill be handled by the upper layers of the system. This piece of software is made available under the
74

terms and conditions of the mtd-utils license, whichcan be found below. Source: http://www.linux-mtd.infradead.org/index.html
libusb (1.0.6) This is the home of libusb, a library that gives userlevel applications uniform access to USB devicesacross many different operating systems. libusb is anopen source project licensed under the GNU LesserGeneral Public License version 2.1.Many participantsin the libusb community have helped and continue tohelp with ideas, implementation, support andimprovements for libusb. This piece of software is made available under theterms and conditions of the libusb license, which canbe found below. Source: http://libusb.wiki.sourceforge.net http://www.libusb.org/
libusb-compat (0.1.3) Library to enable user space application programs tocommunicate with USB devices. This piece of software is made available under theterms and conditions of the libusb-compat license,which can be found below. Source:http://libusb.wiki.sourceforge.net/LibusbCompat0.1
NTFS-3G Read/Write Driver (2010.5.22) NTFS-3G is an open source cross-platformimplementation of the Microsoft Windows NTFS filesystem with read-write support. NTFS-3G often usesthe FUSE file system interface, so it can rununmodified on many different operating systems. It isrunnable on Linux, FreeBSD, NetBSD, OpenSolaris,BeOS, QNX, WinCE, Nucleus, VxWorks,Haiku,MorphOS, and Mac OS X It is licensed undereither the GNU General Public License or aproprietary license. It is a partial fork of ntfsprogs andis under active maintenance and development. This piece of software is made available under theterms and conditions of the NTFS-3G Read/WriteDriver license, which can be found below. Source: http://www.tuxera.com
WPA Supplicant (0.5.10 & 0.6.7) These packages are used to provide WiFi access.Thesupplier for these tools is Atheros.These pieces ofsoftware are made available under the terms andconditions of the GPL v2 license, which can be foundbelow. This piece of software is made available under theterms and conditions of the WPA Supplicant license,which can be found below. Source: http://hostap.epitest.fi/wpa_supplicant/
ntfsprogs (2.0.0) Some useful tool for ntfs file sytem.
This piece of software is made available under theterms and conditions of the ntfsprogs license, whichcan be found below. Source: http://sourceforge.net/projects/linux-ntfs
fuse (2.8.4) Fuse is a simple interface for userspace programs toexport a virtual filesystem to the linux kernel. This piece of software is made available under theterms and conditions of the fuse license, which canbe found below. Source: http://fuse.sourceforge.net/
libiconv (1.11.1) This library provides an iconv() implementation, foruse on systems which don't have one, or whoseimplementation cannot convert from/to Unicode. . This piece of software is made available under theterms and conditions of the libiconv license, whichcan be found below. Source: http://ftp.gnu.org/pub/gnu/libiconv
electric-fence (2.1.13) Used for memory corruption detection. This piece of software is made available under theterms and conditions of the electric-fence license,which can be found below. Source: http://perens.com/FreeSoftware/ElectricFence/electric-fence_2.1.13-0.1.tar.gz
liveMedia When Wifi Display or streaming RtspPlayer areenabled. This piece of software is made available under theterms and conditions of the electric-fence license,which can be found below. Source: www.live555.com
QT (4.7.0) Netflix skpe besttv pandora picasa? will use QT. This piece of software is made available under theterms and conditions of the QT license, which can befound below. Source: http://qt.nokia.com/
e2fsprogs (1.41.14) e2fsprogs provides the filesystem utilities for use withthe ext2 filesystem, it also supports the ext3 and ext4filesystems. This piece of software is made available under theterms and conditions of the e2fsprogs license, whichcan be found below. Source: http://e2fsprogs.sourceforge.net/
alsa (1.0.24.1) Advanced Linux Sound Architecture (ALSA). This piece of software is made available under theterms and conditions of the alsa license, which can befound below. Source: http://www.alsa-project.org
75
lvm2 (2.02.89) DM_VERITY. This piece of software is made available under theterms and conditions of the lvm2 license, which canbe found below. Source:ftp://sources.redhat.com/pub/lvm2/releases/
encfs (1.3.2) A library provides an encrypted filesystem in user-space. Source: http://www.arg0.net/encfs
boost (1.15.0) A library provides free peer-reviewed portable C++source libraries is used for encfs. Source: http://www.boost.org
rlog (1.4) A library that provides a flexible message loggingfacility for C programs and libraries is used for encfs. Source: http://www.arg0.net/rlog
iptables (1.4.15) For Cross connection. Source: http://www.netfilter.org/projects/iptables/
bash (3.2.48) Bash is the shell, or command language interpreter,that will appear in the GNU operating system. Bash is an sh-compatible shell that incorporatesuseful features from the Korn shell (ksh) and C shell(csh). It is intended to conform to the IEEE POSIXP1003.2/ISO 9945.2 Shell and Tools standard. It offers functional improvements over sh for bothprogramming and interactive use. In addition, most sh scripts can be run by Bashwithout modification. Source: http://www.gnu.org/software/bash/
coreutils (6.9) The GNU Core Utilities are the basic file, shell and textmanipulation utilities of the GNU operating system. These are the core utilities which are expected toexist on every operating system. Source: http://www.gnu.org/software/coreutils/
findutils (4.2.31) The GNU Find Utilities are the basic directorysearching utilities of the GNU operating system. These programs are typically used in conjunction withother programs to provide modular and powerfuldirectory search and file locating capabilities to othercommands. Source: http://www.gnu.org/software/findutils/
gawk (3.1.5) If you are like many computer users, you wouldfrequently like to make changes in various text files
wherever certain patterns appear, or extract data fromparts of certain lines while discarding the rest. To write a program to do this in a language such as Cor Pascal is a time-consuming inconvenience thatmay take many lines of code. The job is easy with awk, especially the GNUimplementation: gawk. Source: http://www.gnu.org/software/gawk/
grep (2.5.1a) The grep command searches one or more input filesfor lines containing a match to a specified pattern. Bydefault, grep prints the matching lines. Source: http://www.gnu.org/software/grep/
gzip (1.3.12) GNU Gzip is a popular data compression programoriginally written by Jean-loup Gailly for the GNUproject. Mark Adler wrote the decompression part. Source: http://www.gnu.org/software/gzip/
inetutils (1.4.2) Inetutils is a collection of common networkprograms. Source: http://www.gnu.org/software/inetutils/
iputils (s20101006) The iputils package is set of small useful utilities forLinux networking. It was originally maintained byAlexey Kuznetsov. Source: http://www.skbuff.net/iputils/
module-init-tools (3.12) Provides developer documentation for the utilitiesused by Linux systems to load and manage kernelmodules (commonly referred to as "drivers"). Source: https://modules.wiki.kernel.org/index.php/Main_Page
ncurses (5.7) The Ncurses (new curses) library is a free softwareemulation of curses in System V Release 4.0, andmore. It uses Terminfo format, supports pads and color andmultiple highlights and forms characters and function-key mapping, and has all the other SYSV-cursesenhancements over BSD Curses. Source: http://www.gnu.org/software/ncurses/
net-tools (1.6) The Net-tools?package is a collection of programs forcontrolling the network subsystem of the Linuxkernel. Source: http://www.linuxfromscratch.org/blfs/view/6.3/basicnet/net-tools.html
procps (ps, top) (3.2.8) procps is the package that has a bunch of smalluseful utilities that give information about processesusing the /proc filesystem.
76

The package includes the programs ps, top, vmstat, w,kill, free, slabtop, and skill. Source: http://procps.sourceforge.net/index.html
psmisc (22.13) This PSmisc package is a set of some small usefulutilities that use the proc filesystem. We're not aboutchanging the world, but providing the systemadministrator with some help in common tasks. Source: http://psmisc.sourceforge.net/
sed (4.1.5) sed (stream editor) isn't an interactive text editor.Instead, it is used to filter text, i.e., it takes text input,performs some operation (or set of operations) on it,and outputs the modified text. sed is typically used for extracting part of a file usingpattern matching or substituting multiple occurrencesof a string within a file. Source: http://www.gnu.org/software/sed/
tar (1.17) GNU Tar provides the ability to create tar archives, aswell as various other kinds of manipulation. For example, you can use Tar on previously createdarchives to extract files, to store additional files, or toupdate or list files which were already stored. Source: http://www.gnu.org/software/tar/
util-linux-ng (2.18) Various system utilities. Source: http://userweb.kernel.org/~kzak/util-linux-ng/
udhcpc (0.9.8cvs20050303-3) Udhcpc is a very small?DHCP?client gearedtowards?embedded systems. Source: http://udhcp.sourcearchive.com/downloads/0.9.8cvs20050303-3/
Libxml2 (2.7.8) The "libxml2" library is used in AstroTV as a supportfor the execution of NCL application. This library wasdeveloped for the GNOME software suite and isavailable under a "MIT" license. Source: http://www.xmlsoft.org
uriparser (0.7.7) For MPEG-DASH Source: http://uriparser.sourceforge.net/
xerces-c++ (3.1.1) For MPEG-DASH Source: http://xerces.apache.org/
webp (0.2.1) For Netflix Source: https://code.google.com/p/webp/
wget (1.10.2)
GNU Wget is a free software package for retrievingfiles using HTTP, HTTPS and FTP, the most widely-used Internet protocols. It is a non-interactive commandline tool, so it mayeasily be called from scripts,?cron?jobs, terminalswithout X-Windows support, etc. Source:http://ftp.gnu.org/gnu/wget/wget-1.10.2.tar.gz
wireless_tools (0.29) The Wireless Tools (WT)?is a set of tools allowing tomanipulate the Wireless Extensions. They use a textual interface and are rather crude, butaim to support the full Wireless Extension. Source: http://www.hpl.hp.com/personal/Jean_Tourrilhes/Linux/Tools.html
ezxml (0.8.6) ezXML is a C library for parsing XML documents. Usedinside Philips libraries. Source: http://sourceforge.net/projects/ezxml/
SQLite (3.7.7.1) SQLite is a in-process library that implements a self-contained, serverless, zero-configuration,transactional SQL database engine. Source: http://www.sqlite.org/download.html
AES (aes-src-29-04-09.zip) Advanced Encryption Standard (AES) is aspecification for the encryption of electronic data.Used inside Philips libraries. Source: http://gladman.plushost.co.uk/oldsite/AES/
microhttpd (libmicrohttpd-0.9.9.tar.gz) GNU libmicrohttpd is a small C library that issupposed to make it easy to run an HTTP server aspart of another application. The original download site for this software is :http://www.gnu.org/software/libmicrohttpd/Thispiece of software is made available under the termsand conditions of the LGPL v2.1 license Source: http://ftp.gnu.org/gnu/libmicrohttpd/libmicrohttpd-0.9.9.tar.gz
yajl (lloyd-yajl-2.0.1-0-gf4b2b1a.tar.gz) YAJL is a small event-driven (SAX-style) JSON parserwritten in ANSI C, and a small validating JSONgenerator. YAJL is released under the ISC license. The original download site for this software is :http://lloyd.github.com/yajl/This piece of software ismade available under the terms and conditions of theISC license Source: http://pkgs.fedoraproject.org/repo/pkgs/yajl/lloyd-yajl-2.0.1-0-gf4b2b1a.tar.gz/df6a751e7797b9c2182efd91b5d64017/lloyd-yajl-2.0.1-0-gf4b2b1a.tar.gz
HMAC-SHA1 (0.1) keyed-hash message authentication code (HMAC) is
77

a specific construction for calculating a messageauthentication code (MAC) involving a cryptographichash function in combination with a secretcryptographic key. As with any MAC, it may be used to simultaneouslyverify both the data integrity and the authenticationof a message. Any cryptographic hash function, such as MD5 orSHA-1, may be used in the calculation of an HMAC;the resulting MAC algorithm is termed HMAC-MD5 orHMAC-SHA1 accordingly. Source:http://www.deadhat.com/wlancrypto/hmac_sha1.c
gSoap (2.7.15) The gSOAP toolkit is an open source C and C++software development toolkit for SOAP/XML Webservices and generic (non-SOAP) C/C++ XML databindings. Part of the software embedded in this product isgSOAP software. Portions created by gSOAP areCopyright 2000-2011 Robert A. van Engelen, Geniviainc. All Rights Reserved. Source: http://sourceforge.net/projects/gsoap2/
jquery (1.10.2) jQuery is a fast and concise JavaScript Library thatsimplifies HTML document traversing, event handling,animating, and Ajax interactions for rapid webdevelopment. Source: http://jquery.com/
Libupnp (1.2.1) The Linux* SDK for UPnP* Devices (libupnp) providesdevelopers with an API and open source code forbuilding control points, devices, and bridges that arecompliant with Version 1.0 of the UPnP DeviceArchitecture Specification. Source: http://upnp.sourceforge.net/
mDNSResponder (mDNSResponder-320.10.80) The mDNSResponder project is a component ofBonjour, Apple's ease-of-use IP networkinginitiative:<http://developer.apple.com/bonjour/> In our project, Bonjour is used for the automaticdiscovery of devices and services Source: http://developer.apple.com/bonjour/Acknowledgements and License Texts for any open sourcesoftware used in this Philips TV.
This is a document describing the distribution of thesource code used on the Philips TV, which fall eitherunder the GNU General Public License (the GPL), orthe GNU Lesser General Public License (the LGPL), orany other open source license. Instructions to obtainsource code for this software can be found in the usermanual.
PHILIPS MAKES NO WARRANTIES WHATSOEVER,
EITHER EXPRESS OR IMPLIED, INCLUDING ANYWARRANTIES OF MERCHANTABILITY OR FITNESSFOR A PARTICULAR PURPOSE, REGARDING THISSOFTWARE. Philips offers no support for thissoftware. The preceding does not affect yourwarranties and statutory rights regarding any Philipsproduct(s) you purchased. It only applies to thissource code made available to you.
Freetype (2.4.3) FreeType is a software font engine that is designed tobe small, efficient, highly customizable, and portablewhile capable of producing high-quality output(glyph images). This piece of software is made available under theterms and conditions of the FreeType Project license,which can be found below. Source: http://freetype.sourceforge.net
zlib (1.2.3) The 'zlib' compression library provides in-memorycompression and decompression functions, includingintegrity checks of the uncompressed data. This piece of software is made available under theterms and conditions of the zlib license, which can befound below. Source: http://www.zlib.net/
Fraunhofer AAC Ecnoder (3.3.3) AAC Ecnoder. Source: Android JB source code
unicode (3.2) This library is used to perform UNICODE stringmanipulation. This piece of software is made available under theterms and conditions of the ICU license, which can befound below. Source: http://www.icu-project.org/
libpng (1.2.43) PNG decoder. This piece of software is made available under theterms and conditions of the libpng license, which canbe found below. Source: http://www.libpng.org/pub/png/libpng.html
libjpg (6b) This library is used to perform JPEG decoding tasks. This piece of software is made available under theterms and conditions of the libjpg license, which canbe found below. Source: http://www.ijg.org/
libmng (1.0.10) libmng -THE reference library for reading, displaying,writing and examining Multiple-Image NetworkGraphics.MNG is the animation extension to thepopular PNG image-format. This piece of software is made available under the
78

terms and conditions of the libmng license, which canbe found below. Source:http://sourceforge.net/projects/libmng/files/
u-Boot loader (1.3.4) Used by boot loader and only linked with bootloader, GPL license. This piece of software is made available under theterms and conditions of the u-Boot loader license,which can be found below. Source: http://sourceforge.net/projects/u-boot/files/u-boot/U-Boot-1.1.4/u-boot-1.1.4.tar.bz2/download
Libcurl (7.21.7) HTTP client;libcurl is a free and easy-to-use client-side URL transfer library, supporting FTP, FTPS, HTTP,HTTPS, SCP, SFTP, TFTP, TELNET, DICT, LDAP,LDAPS, FILE, IMAP, SMTP, POP3 and RTSP. libcurlsupports SSL certificates, HTTP POST, HTTP PUT, FTPuploading, HTTP form based upload, proxies, cookies,user+password authentication (Basic, Digest, NTLM,Negotiate, Kerberos4), file transfer resume, http proxytunneling and more! This piece of software is made available under theterms and conditions of the Libcurl license, which canbe found below. Source: http://curl.haxx.se/
c-ares (1.7.4) c-ares is a C library that performs DNS requests andname resolves asynchronously. This piece of software is made available under theterms and conditions of the c-ares license, which canbe found below. Source: http://c-ares.haxx.se/c-ares-1.7.1.tar.gz
openssl (1.0.0d) OpenSSL is an open source implementation of theSSL and TLS protocols. The core library (written in theC programming language) implements the basiccryptographic functions and provides various utilityfunctions. Wrappers allowing the use of the OpenSSLlibrary in a variety of computer languages areavailable. This piece of software is made available under theterms and conditions of the 1.7.4 license, which can befound below. Source:http://www.openssl.org/source/openssl-1.0.0.tar.gz
Expat (2.01) xml paser; Expat is an XML parser library written in C.It is a stream-oriented parser in which an applicationregisters handlers for things the parser might find inthe XML document (like start tags). An introductoryarticle on using. This piece of software is made available under theterms and conditions of the Expat license, which canbe found below.
Source: http://expat.sourceforge.net/
DirectFB include SAWMAN (1.4.0) It is a software library for GNU/Linux/UNIX basedoperating system with a small memory footprint thatprovides graphics acceleration, input device handlingand abstraction layer, and integrated windowingsystem with support for translucent windows andmultiple display layers on top of the Linuxframebuffer without requiring any kernelmodifications. This piece of software is made available under theterms and conditions of the DirectFB license, whichcan be found below. Source: http://sourceforge.net/projects/jointspace/files/remote_applications_SDK/remote_spplications_SDK_v1.3.1/DirectFB141_source_1.3.1.7z/download
SAWMAN SquashFS is a compressed read-only file system forLinux. SquashFS compresses files, inodes anddirectories, and supports block sizes up to 1 MB forgreater compression. SquashFS is also the name offree/open software, licensed under the GPL, foraccessing SquashFS filesystems. Source: http://squashfs.sourceforge.net/
Linux Kernel (3.0) The Linux kernel is an operating system kernel usedby the Linux family of Unix-like operating systems. This piece of software is made available under theterms and conditions of the Linux Kernel license,which can be found below. Source: http://www.kernel.org
SQLite (3.7.2) SQLite is a in-process library that implements a self-contained, serverless, zero-configuration,transactional SQL database engine. This piece of software is made available under theterms and conditions of the SQLite license, which canbe found below. Source: http://www.sqlite.org/download.html
SquashFS (3.4) SquashFS is a compressed read-only file system forLinux. SquashFS compresses files, inodes anddirectories, and supports block sizes up to 1 MB forgreater compression. SquashFS is also the name offree/open software, licensed under the GPL, foraccessing SquashFS filesystems. This piece of software is made available under theterms and conditions of the SquashFS license, whichcan be found below. Source: http://squashfs.sourceforge.net/
glibc (2.6.1) Any Unix-like operating system needs a C library: thelibrary which defines the ``system calls'' and otherbasic facilities such as open, malloc, printf, exit...The
79

GNU C library is used as the C library in the GNUsystem and most systems with the Linux kernel This piece of software is made available under theterms and conditions of the glibc license, which canbe found below. Source: http://www.gnu.org/software/libc/
mtd-utils (1) The aim of the system is to make it simple to providea driver for new hardware, by providing a genericinterface between the hardware drivers and the upperlayers of the system. Hardware drivers need to knownothing about the storage formats used, such as FTL,FFS2, etc., but will only need to provide simpleroutines for read, write and erase. Presentation of thedevice's contents to the user in an appropriate formwill be handled by the upper layers of the system. This piece of software is made available under theterms and conditions of the mtd-utils license, whichcan be found below. Source: http://www.linux-mtd.infradead.org/index.html
libusb (1.0.6) This is the home of libusb, a library that gives userlevel applications uniform access to USB devicesacross many different operating systems. libusb is anopen source project licensed under the GNU LesserGeneral Public License version 2.1.Many participantsin the libusb community have helped and continue tohelp with ideas, implementation, support andimprovements for libusb. This piece of software is made available under theterms and conditions of the libusb license, which canbe found below. Source: http://libusb.wiki.sourceforge.net http://www.libusb.org/
libusb-compat (0.1.3) Library to enable user space application programs tocommunicate with USB devices. This piece of software is made available under theterms and conditions of the libusb-compat license,which can be found below. Source:http://libusb.wiki.sourceforge.net/LibusbCompat0.1
NTFS-3G Read/Write Driver (2010.5.22) NTFS-3G is an open source cross-platformimplementation of the Microsoft Windows NTFS filesystem with read-write support. NTFS-3G often usesthe FUSE file system interface, so it can rununmodified on many different operating systems. It isrunnable on Linux, FreeBSD, NetBSD, OpenSolaris,BeOS, QNX, WinCE, Nucleus, VxWorks,Haiku,MorphOS, and Mac OS X It is licensed undereither the GNU General Public License or aproprietary license. It is a partial fork of ntfsprogs andis under active maintenance and development.
This piece of software is made available under theterms and conditions of the NTFS-3G Read/WriteDriver license, which can be found below. Source: http://www.tuxera.com
WPA Supplicant (0.5.10 & 0.6.7) These packages are used to provide WiFi access.Thesupplier for these tools is Atheros.These pieces ofsoftware are made available under the terms andconditions of the GPL v2 license, which can be foundbelow. This piece of software is made available under theterms and conditions of the WPA Supplicant license,which can be found below. Source: http://hostap.epitest.fi/wpa_supplicant/
ntfsprogs (2.0.0) Some useful tool for ntfs file sytem. This piece of software is made available under theterms and conditions of the ntfsprogs license, whichcan be found below. Source: http://sourceforge.net/projects/linux-ntfs
fuse (2.8.4) Fuse is a simple interface for userspace programs toexport a virtual filesystem to the linux kernel. This piece of software is made available under theterms and conditions of the fuse license, which canbe found below. Source: http://fuse.sourceforge.net/
libiconv (1.11.1) This library provides an iconv() implementation, foruse on systems which don't have one, or whoseimplementation cannot convert from/to Unicode. . This piece of software is made available under theterms and conditions of the libiconv license, whichcan be found below. Source: http://ftp.gnu.org/pub/gnu/libiconv
electric-fence (2.1.13) Used for memory corruption detection. This piece of software is made available under theterms and conditions of the electric-fence license,which can be found below. Source: http://perens.com/FreeSoftware/ElectricFence/electric-fence_2.1.13-0.1.tar.gz
liveMedia When Wifi Display or streaming RtspPlayer areenabled. This piece of software is made available under theterms and conditions of the electric-fence license,which can be found below. Source: www.live555.com
QT (4.7.0) Netflix skpe besttv pandora picasa? will use QT. This piece of software is made available under theterms and conditions of the QT license, which can be
80

found below. Source: http://qt.nokia.com/
e2fsprogs (1.41.14) e2fsprogs provides the filesystem utilities for use withthe ext2 filesystem, it also supports the ext3 and ext4filesystems. This piece of software is made available under theterms and conditions of the e2fsprogs license, whichcan be found below. Source: http://e2fsprogs.sourceforge.net/
alsa (1.0.24.1) Advanced Linux Sound Architecture (ALSA). This piece of software is made available under theterms and conditions of the alsa license, which can befound below. Source: http://www.alsa-project.org
lvm2 (2.02.89) DM_VERITY. This piece of software is made available under theterms and conditions of the lvm2 license, which canbe found below. Source:ftp://sources.redhat.com/pub/lvm2/releases/
encfs (1.3.2) A library provides an encrypted filesystem in user-space. Source: http://www.arg0.net/encfs
boost (1.15.0) A library provides free peer-reviewed portable C++source libraries is used for encfs. Source: http://www.boost.org
rlog (1.4) A library that provides a flexible message loggingfacility for C programs and libraries is used for encfs. Source: http://www.arg0.net/rlog
iptables (1.4.15) For Cross connection. Source: http://www.netfilter.org/projects/iptables/
bash (3.2.48) Bash is the shell, or command language interpreter,that will appear in the GNU operating system. Bash is an sh-compatible shell that incorporatesuseful features from the Korn shell (ksh) and C shell(csh). It is intended to conform to the IEEE POSIXP1003.2/ISO 9945.2 Shell and Tools standard. It offers functional improvements over sh for bothprogramming and interactive use. In addition, most sh scripts can be run by Bashwithout modification. Source: http://www.gnu.org/software/bash/
coreutils (6.9) The GNU Core Utilities are the basic file, shell and textmanipulation utilities of the GNU operating system. These are the core utilities which are expected toexist on every operating system. Source: http://www.gnu.org/software/coreutils/
findutils (4.2.31) The GNU Find Utilities are the basic directorysearching utilities of the GNU operating system. These programs are typically used in conjunction withother programs to provide modular and powerfuldirectory search and file locating capabilities to othercommands. Source: http://www.gnu.org/software/findutils/
gawk (3.1.5) If you are like many computer users, you wouldfrequently like to make changes in various text fileswherever certain patterns appear, or extract data fromparts of certain lines while discarding the rest. To write a program to do this in a language such as Cor Pascal is a time-consuming inconvenience thatmay take many lines of code. The job is easy with awk, especially the GNUimplementation: gawk. Source: http://www.gnu.org/software/gawk/
grep (2.5.1a) The grep command searches one or more input filesfor lines containing a match to a specified pattern. Bydefault, grep prints the matching lines. Source: http://www.gnu.org/software/grep/
gzip (1.3.12) GNU Gzip is a popular data compression programoriginally written by Jean-loup Gailly for the GNUproject. Mark Adler wrote the decompression part. Source: http://www.gnu.org/software/gzip/
inetutils (1.4.2) Inetutils is a collection of common networkprograms. Source: http://www.gnu.org/software/inetutils/
iputils (s20101006) The iputils package is set of small useful utilities forLinux networking. It was originally maintained byAlexey Kuznetsov. Source: http://www.skbuff.net/iputils/
module-init-tools (3.12) Provides developer documentation for the utilitiesused by Linux systems to load and manage kernelmodules (commonly referred to as "drivers"). Source: https://modules.wiki.kernel.org/index.php/Main_Page
ncurses (5.7) The Ncurses (new curses) library is a free software
81

emulation of curses in System V Release 4.0, andmore. It uses Terminfo format, supports pads and color andmultiple highlights and forms characters and function-key mapping, and has all the other SYSV-cursesenhancements over BSD Curses. Source: http://www.gnu.org/software/ncurses/
net-tools (1.6) The Net-tools?package is a collection of programs forcontrolling the network subsystem of the Linuxkernel. Source: http://www.linuxfromscratch.org/blfs/view/6.3/basicnet/net-tools.html
procps (ps, top) (3.2.8) procps is the package that has a bunch of smalluseful utilities that give information about processesusing the /proc filesystem. The package includes the programs ps, top, vmstat, w,kill, free, slabtop, and skill. Source: http://procps.sourceforge.net/index.html
psmisc (22.13) This PSmisc package is a set of some small usefulutilities that use the proc filesystem. We're not aboutchanging the world, but providing the systemadministrator with some help in common tasks. Source: http://psmisc.sourceforge.net/
sed (4.1.5) sed (stream editor) isn't an interactive text editor.Instead, it is used to filter text, i.e., it takes text input,performs some operation (or set of operations) on it,and outputs the modified text. sed is typically used for extracting part of a file usingpattern matching or substituting multiple occurrencesof a string within a file. Source: http://www.gnu.org/software/sed/
tar (1.17) GNU Tar provides the ability to create tar archives, aswell as various other kinds of manipulation. For example, you can use Tar on previously createdarchives to extract files, to store additional files, or toupdate or list files which were already stored. Source: http://www.gnu.org/software/tar/
util-linux-ng (2.18) Various system utilities. Source: http://userweb.kernel.org/~kzak/util-linux-ng/
udhcpc (0.9.8cvs20050303-3) Udhcpc is a very small?DHCP?client gearedtowards?embedded systems. Source: http://udhcp.sourcearchive.com/downloads/0.9.8cvs20050303-3/
Libxml2 (2.7.8)
The "libxml2" library is used in AstroTV as a supportfor the execution of NCL application. This library wasdeveloped for the GNOME software suite and isavailable under a "MIT" license. Source: http://www.xmlsoft.org
uriparser (0.7.7) For MPEG-DASH Source: http://uriparser.sourceforge.net/
xerces-c++ (3.1.1) For MPEG-DASH Source: http://xerces.apache.org/
webp (0.2.1) For Netflix Source: https://code.google.com/p/webp/
wget (1.10.2) GNU Wget is a free software package for retrievingfiles using HTTP, HTTPS and FTP, the most widely-used Internet protocols. It is a non-interactive commandline tool, so it mayeasily be called from scripts,?cron?jobs, terminalswithout X-Windows support, etc. Source:http://ftp.gnu.org/gnu/wget/wget-1.10.2.tar.gz
wireless_tools (0.29) The Wireless Tools (WT)?is a set of tools allowing tomanipulate the Wireless Extensions. They use a textual interface and are rather crude, butaim to support the full Wireless Extension. Source: http://www.hpl.hp.com/personal/Jean_Tourrilhes/Linux/Tools.html
ezxml (0.8.6) ezXML is a C library for parsing XML documents. Usedinside Philips libraries. Source: http://sourceforge.net/projects/ezxml/
SQLite (3.7.7.1) SQLite is a in-process library that implements a self-contained, serverless, zero-configuration,transactional SQL database engine. Source: http://www.sqlite.org/download.html
AES (aes-src-29-04-09.zip) Advanced Encryption Standard (AES) is aspecification for the encryption of electronic data.Used inside Philips libraries. Source: http://gladman.plushost.co.uk/oldsite/AES/
microhttpd (libmicrohttpd-0.9.9.tar.gz) GNU libmicrohttpd is a small C library that issupposed to make it easy to run an HTTP server aspart of another application. The original download site for this software is :http://www.gnu.org/software/libmicrohttpd/Thispiece of software is made available under the terms
82

and conditions of the LGPL v2.1 license Source: http://ftp.gnu.org/gnu/libmicrohttpd/libmicrohttpd-0.9.9.tar.gz
yajl (lloyd-yajl-2.0.1-0-gf4b2b1a.tar.gz) YAJL is a small event-driven (SAX-style) JSON parserwritten in ANSI C, and a small validating JSONgenerator. YAJL is released under the ISC license. The original download site for this software is :http://lloyd.github.com/yajl/This piece of software ismade available under the terms and conditions of theISC license Source: http://pkgs.fedoraproject.org/repo/pkgs/yajl/lloyd-yajl-2.0.1-0-gf4b2b1a.tar.gz/df6a751e7797b9c2182efd91b5d64017/lloyd-yajl-2.0.1-0-gf4b2b1a.tar.gz
HMAC-SHA1 (0.1) keyed-hash message authentication code (HMAC) isa specific construction for calculating a messageauthentication code (MAC) involving a cryptographichash function in combination with a secretcryptographic key. As with any MAC, it may be used to simultaneouslyverify both the data integrity and the authenticationof a message. Any cryptographic hash function, such as MD5 orSHA-1, may be used in the calculation of an HMAC;the resulting MAC algorithm is termed HMAC-MD5 orHMAC-SHA1 accordingly. Source:http://www.deadhat.com/wlancrypto/hmac_sha1.c
gSoap (2.7.15) The gSOAP toolkit is an open source C and C++software development toolkit for SOAP/XML Webservices and generic (non-SOAP) C/C++ XML databindings. Part of the software embedded in this product isgSOAP software. Portions created by gSOAP areCopyright 2000-2011 Robert A. van Engelen, Geniviainc. All Rights Reserved. Source: http://sourceforge.net/projects/gsoap2/
jquery (1.10.2) jQuery is a fast and concise JavaScript Library thatsimplifies HTML document traversing, event handling,animating, and Ajax interactions for rapid webdevelopment. Source: http://jquery.com/
Libupnp (1.2.1) The Linux* SDK for UPnP* Devices (libupnp) providesdevelopers with an API and open source code forbuilding control points, devices, and bridges that arecompliant with Version 1.0 of the UPnP DeviceArchitecture Specification. Source: http://upnp.sourceforge.net/
mDNSResponder (mDNSResponder-320.10.80)
The mDNSResponder project is a component ofBonjour, Apple's ease-of-use IP networkinginitiative:<http://developer.apple.com/bonjour/> In our project, Bonjour is used for the automaticdiscovery of devices and services Source: http://developer.apple.com/bonjour/
83

21
Specifications21.1
Environmental
European Energy Label
The European Energy Label informs you on theenergy efficiency class of this product. The greenerthe energy efficiency class of this product is, thelower the energy it consumes.On the label, you can find the energy efficiency class,the average power consumption of this product in useand the average energy consumption for 1 year. Youcan also find the power consumption values for thisproduct on the Philips website for your countryat www.philips.com/TV
Product Fiche
43PUx6101 • Energy Efficiency Class : A+• Visible Screen Size : 108 cm / 43 inch• On Mode Power Consumption (W) : 47 W• Annual Energy Consumption (kWh) * : 68 kWh • Standby Power Consumption (W) **: 0.30 W• Display Resolution (Pixels) : 3840 x 2160p
49PUx6101 • Energy Efficiency Class : A+• Visible Screen Size : 123 cm / 49 inch• On Mode Power Consumption (W) : 66 W• Annual Energy Consumption (kWh) * : 96 kWh • Standby Power Consumption (W) **: 0.30 W• Display Resolution (Pixels) : 3840 x 2160p
55PUx6101 • Energy Efficiency Class : A+• Visible Screen Size : 139 cm / 55 inch• On Mode Power Consumption (W) : 62 W• Annual Energy Consumption (kWh) * : 91 kWh • Standby Power Consumption (W) **: 0.30 W• Display Resolution (Pixels) : 3840 x 2160p
* Energy consumption kWh per year, based on thepower consumption of the television operating 4hours per day for 365 days. The actual energyconsumption depends on how the television is used.
** When the TV is turned off with the remote controland no function is active.
End of use
Disposal of your old product and batteries
Your product is designed and manufactured with highquality materials and components, which can berecycled and reused.
When this crossed-out wheeled bin symbol isattached to a product it means that the product iscovered by the European Directive 2012/19/EU.
Please inform yourself about the local separatecollection system for electrical and electronicproducts.
Please act according to your local rules and do notdispose of your old products with your normalhousehold waste. Correct disposal of your oldproduct helps to prevent potential negativeconsequences for the environment and humanhealth.
Your product contains batteries covered by theEuropean Directive 2006/66/EC, which cannot bedisposed with normal household waste.
Please find out for yourself about the local rules onseparate collection of batteries because correctdisposal will help to prevent negative consequencesfor the environment and human health.
21.2
PowerProduct specifications are subject to change withoutnotice. For more specification details of this product,see www.philips.com/support
Power • Mains power : AC 220-240V +/-10%• Ambient temperature : 5°C to 35°C• Power saving features : Eco mode, Picture mute (forradio), Auto switch-off timer, Eco settings menu.
For power consumption information, seechapter Product Fiche.
The power rating stated on the product typeplate is
84

the power consumption for this product duringnormal household use (IEC62087). The maximumpower rating, stated between brackets, is used forelectrical safety (IEC60065).
21.3
Reception• Aerial input : 75 ohm coaxial (IEC75)• Tuner bands : Hyperband, S-Channel, UHF, VHF• DVB : DVB-T2, DVB-C (cable) QAM• Analogue video playback : SECAM, PAL• Digital video playback : MPEG2 SD/HD (ISO/IEC13818-2), MPEG4 SD/HD (ISO/IEC 14496-10)• Digital audio playback (ISO/IEC 13818-3)• Satellite aerial input : 75 ohm F-type• Input frequency range : 950 to 2150MHz• Input level range : 25 to 65 dBm• DVB-S/S2 QPSK, symbol rate 2 to 45M symbols,SCPC and MCPC• LNB : DiSEqC 1.0, 1 to 4 LNBs supported, Polarityselection 14/18V, Band selection 22kHz, Tone burstmode, LNB current 300mA max
21.4
Display type
Diagonal screen size • 43PUx6101 : 108 cm / 43 inch• 49PUx6101 : 123 cm / 49 inch• 55PUx6101 : 139 cm / 55 inch
Display resolution • 3840 x 2160p
21.5
Display input resolution
Video formats
Resolution — Refresh rate
• 480i - 60 Hz• 480p - 60 Hz• 576i - 50 Hz• 576p - 50 Hz• 720p - 50 Hz, 60 Hz• 1080i - 50 Hz, 60 Hz• 1080p - 24 Hz, 25 Hz, 30 Hz• 2160p - 24 Hz, 25 Hz, 30 Hz, 50 Hz, 60 Hz
Computer formats
Resolutions (amongst others)
• 640 x 480p - 60 Hz• 800 x 600p - 60 Hz• 1024 x 768p - 60 Hz• 1280 x 768p - 60 Hz
• 1360 x 765p - 60 Hz• 1360 x 768p - 60 Hz• 1280 x 1024p - 60 Hz• 1920 x 1080p - 60 Hz• 3840 x 2160p - 24 Hz, 25 Hz, 30 Hz, 50 Hz, 60 Hz
21.6
Dimensions and Weights
43PUx6101 • without TV stand:Width 968.2 mm - Height 575.7 mm - Depth 81.8 mm- Weight ± 9.25 kg• with TV stand:Width 968.2 mm - Height 623.3 mm - Depth 201.8mm - Weight ± 9.73 kg
49PUx6101 • without TV stand:Width 1099.2 mm - Height 631.9 mm - Depth 86.7mm - Weight ± 11.03 kg• with TV stand:Width 1099.2 mm - Height 699.7 mm - Depth 210.5mm - Weight ± 11.85 kg
55PUx6101 • without TV stand:Width 1239.2 mm - Height 724.7 mm - Depth 87.9 mm- Weight ± 15.5 kg• with TV stand:Width 1239.2 mm - Height 779.4 mm - Depth 228.8mm - Weight ± 16 kg
21.7
Connectivity
TV Side • HDMI 3 in• HDMI 4 in - MHL• USB 2• USB 3• 1x Common Interface slot: CI+/CAM • Headphones - Stereo mini-jack 3.5mm
TV Rear • Audio In (DVI to HDMI) - Stereo mini-jack 3.5mm• SCART: Audio L/R, CVBS in, RGB• CVBS/Y Pb Pr : CVBS/Y Pb Pr, Audio L/R
TV Bottom • HDMI 1 in - ARC• HDMI 2 in• USB 1• Audio out - Optical Toslink• Network LAN - RJ45• Antenna (75 ohm)• Satellite tuner
85

21.8
Sound• HD Stereo• Output power (RMS) : 16W• Dolby® Digital Plus• DTS 2.0+ Digital out ™
21.9
Multimedia
Connections • USB 2.0 / USB 3.0• Ethernet LAN RJ-45• Wi-Fi 802.11b/g/n (built-in)
Supported USB file systems • FAT 16, FAT 32, NTFS
Playback formats • Containers : 3GP, AVCHD, AVI, MPEG-PS, MPEG-TS,MPEG-4, Matroska (MKV), Quicktime (MOV, M4V,M4A), Windows Media (ASF/WMV/WMA)• Video Codecs : MPEG-1, MPEG-2, MPEG-4 Part 2,MPEG-4 Part 10 AVC (H.264), VC-1, WMV9• Audio Codecs : AAC, HE-AAC (v1/v2), AMR-NB,Dolby Digital, Dolby Digital Plus, DTS 2.0 + DigitalOut™, MPEG-1/2/2.5 Layer I/II/III (includes MP3),WMA (v2 to v9.2), WMA Pro (v9/v10)• Subtitles :– Formats : SAMI, SubRip (SRT), SubViewer (SUB),MicroDVD (TXT), mplayer2 (TXT), TMPlayer (TXT)– Character encodings : UTF-8, Central Europe andEastern Europe (Windows-1250), Cyrillic(Windows-1251), Greek (Windows-1253), Turkish(Windows-1254), Western Europe (Windows-1252)• Image Codecs : JPEG• Limitations :– Maximum supported total bit rate for a media file is30Mbps.– Maximum supported video bit rate for a media fileis 20Mbps.– MPEG-4 AVC (H.264) is supported up to HighProfile @ L4.1.– VC-1 is supported up to Advanced Profile @ L3.
Wi-Fi Certified
This TV supports Miracast certified devices.
Supported media server software (DMS) • You can use any DLNA V1.5 certified media serversoftware (DMS class).• You can use the Philips TV Remote app (iOS andAndroid) on mobile devices.
Performance may vary, depending on the capabilitiesof the mobile device and the software used.
86

22
Help and support22.1
Register your TVRegister your TV and enjoy a range of benefitsincluding full support (including downloads),privileged access to information about new products,exclusive offers and discounts, the chance to winprizes and even participate in special surveys aboutnew releases.
Go to www.philips.com/welcome
22.2
Using helpOpen Help
Press the key (blue) to open Help immediately.Help will open on the chapter that is most relevant towhat you are doing or what is selected on TV. To lookup topics alphabetically, press the colourkey Keywords .
To read the Help as a book, select Book.
Before you execute the Help instructions, close Help.To close Help, press the colour key Close .
For some activities, like Text (Teletext), the colourkeys have specific functions and cannot open Help.
TV Help on your tablet, smartphone or computer
To carry out extended sequences of instructions moreeasily, you can download the TV Help in PDF formatto read on your smartphone, tablet orcomputer. Alternatively, you can print the relevantHelp page from your computer.To download the Help (user manual) goto www.philips.com/support
22.3
Troubleshooting
Switch on and remote control
The TV does not switch on • Disconnect the power cable from the power outlet.Wait for one minute then reconnect it.• Make sure that the power cable is securelyconnected.
Creaking sound at startup or switch off
When you are turning the TV on, off or to standby,you hear a creaking sound from the TV chassis. The
creaking sound is due to the normal expansion andcontraction of the TV as it cools and warms up. Thisdoes not affect performance.
TV does not respond to the remote control
The TV requires some time to start up. During thistime, the TV does not respond to the remote controlor TV controls. This is normal behaviour.If the TV continues to be unresponsive to the remotecontrol, you can check if the remote control is workingby means of a mobile phone camera. Put the phonein camera mode and point the remote control to thecamera lens. If you press any key on the remotecontrol and you notice the infra red LED flickerthrough the camera, the remote control is working.The TV needs to be checked.If you do not notice the flickering, the remote controlmight be broken or its batteries are low.This method of checking the remote control is notpossible with remote controls which are wirelesslypaired with the TV.
The TV goes back to standby after showing the
Philips startup screen
When the TV is in standby, a Philips startup screen isdisplayed, then the TV returns to standby mode. Thisis normal behaviour. When the TV is disconnectedand reconnected to the power supply, the startupscreen is displayed at the next startup. To switch onthe TV from standby, press on the remote control orthe TV.
The standby light keeps on blinking
Disconnect the power cable from the power outlet.Wait 5 minutes before you reconnect the powercable. If the blinking reoccurs, contact Philips TVConsumer Care.
Channels
No digital channels found during the installation
See the technical specifications to make sure thatyour TV supports DVB-T or DVB-C in your country. Make sure that all cables are properly connected andthat the correct network is selected.
Previously installed channels are not in the channel
list
Make sure that the correct channel list is selected.
87

Picture
No picture / distorted picture • Make sure that the antenna is properly connected tothe TV.• Make sure that the correct device is selected as thedisplay source.• Make sure that the external device or source isproperly connected.
Sound but no picture • Make sure that the picture settings are set correctly.
Poor antenna reception • Make sure that the antenna is properly connected tothe TV.• Loud speakers, unearthed audio devices, neonlights, high buildings and other large objects caninfluence reception quality. If possible, try to improvethe reception quality by changing the antennadirection or moving devices away from the TV.• If reception on only one channel is poor, fine-tunethis channel with Manual Installation.
Poor picture from a device • Make sure that the device is connected properly.• Make sure that the picture settings are set correctly.
Picture settings change after a while
Make sure that Location is set to Home . You canchange and save settings in this mode.
A commercial banner appears
Make sure that Location is set to Home.
Picture does not fit the screen
Change to a different picture format.
Picture format keeps changing with different
channels
Select a non 'Auto' picture format.
Picture position is incorrect
Picture signals from some devices may not fit thescreen correctly. Check the signal output of theconnected device.
Computer picture is not stable
Make sure that your PC uses the supported resolutionand refresh rate.
Sound
No sound or poor sound quality
If no audio signal is detected, the TV automaticallyswitches the audio output off — this does not indicatemalfunction.
• Make sure that the sound settings are correctly set.• Make sure that all cables are properly connected.
• Make sure that the volume is not muted or set tozero.• Make sure that the TV audio output is connected tothe audio input on the Home Theatre System. Sound should be heard from the HTS speakers.• Some devices may require you to manually enableHDMI audio output. If HDMI audio is already enabled,but you still do not hear audio, try changing the digitalaudio format of the device to PCM (Pulse CodeModulation). Refer to the documentationaccompanying your device for instructions.
HDMI and USB
HDMI • Note that HDCP (High-bandwidth Digital ContentProtection) support can delay the time taken for a TVto display content from an HDMI device.• If the TV does not recognise the HDMI device andno picture is displayed, switch the source from onedevice to another and back again.• If the picture and sound of a device connected withHDMI is distorted, check if a different HDMI UltraHD setting can solve this problem. In Help, press thecolour key Keywords and look up HDMI UltraHD. • If there are intermittent sound disruptions, makesure that output settings from the HDMI device arecorrect.• If you use an HDMI-to-DVI adapter or HDMI-to-DVIcable, make sure that an additional audio cable isconnected to AUDIO IN (mini-jack only), if available.
HDMI EasyLink does not work • Make sure that your HDMI devices are HDMI-CECcompatible. EasyLink features only work with devicesthat are HDMI-CEC compatible.
No volume icon shown • When an HDMI-CEC audio device is connected andyou use the TV Remote Control to adjust the volumelevel from the device, this behaviour is normal.Photos, videos and music from a USB device do not
show • Make sure that the USB storage device is set to MassStorage Class compliant, as described in the storagedevice's documentation.• Make sure that the USB storage device is compatiblewith the TV.• Make sure that the audio and picture file formats aresupported by the TV.
Choppy playback of USB files • The transfer performance of the USB storage devicemay limit the data transfer rate to the TV whichcauses poor playback.
88
Wi-Fi and Internet
Wi-Fi network not found or distorted • Microwave ovens, DECT phones or other Wi-Fi802.11b/g/n devices in your proximity might disturbthe wireless network.• Make sure that the firewalls in your network allowaccess to the TV's wireless connection.• If the wireless network does not work properly inyour home, try the wired network installation.
Internet does not work • If the connection to the router is OK, check therouter connection to the Internet.
The PC and Internet connection are slow • Look in your wireless router's user manual forinformation on indoor range, transfer rate and otherfactors of signal quality.• Use a high-speed (broadband) Internet connectionfor your router.
DHCP • If the connection fails, you can check the DHCP(Dynamic Host Configuration Protocol) setting of therouter. DHCP should be switched on.
Wrong menu language
Wrong menu language
Change the language back to your language.
To change the language of the TV menus andmessages…
1 - Press , select Generalsettings > Language > Menu Language andpress OK.2 - Select on the language you need.3 - Press (left) repeatedly if necessary, to closethe menu.
22.4
Online helpTo solve any Philips TV related problem, you canconsult our online support. You can select yourlanguage and enter your product model number.
Go to www.philips.com/support .
On the support site you can find your country'stelephone number to contact us as well as answers tofrequently asked questions (FAQs). In some countries,you can chat with one of our collaborators and askyour question directly or send a question by email.You can download new TV software or the manual toread on your computer.
22.5
Consumer care / RepairFor support and repair, call the Consumer Carehotline in your country. Find the telephone number inthe printed documentation that came with the TV.Or consult our website www.philips.com/support .
TV model number and serial number
You might be asked to provide the TV product modelnumber and serial number. Find these numbers onthe packaging label or on the type label on the backor bottom of the TV.
Warning
Do not attemp to repair the TV yourself. This maycause severe injury, irrepairable damage to your TVor void your warranty.
89

23
Safety and care23.1
Safety
Important
Read and understand all safety instructions beforeyou use the TV. If damage is caused by failure tofollow instructions, the warranty does not apply.
Risk of electric shock or fire
• Never expose the TV to rain or water. Never placeliquid containers, such as vases, near the TV. If liquids are spilt on or into the TV, disconnect the TVfrom the power outlet immediately. Contact Philips TV Consumer Care to have the TVchecked before use.• Never expose the TV, remote control or batteries toexcessive heat. Never place them near burningcandles, naked flames or other heat sources,including direct sunlight.• Never insert objects into the ventilation slots or otheropenings on the TV.• Never place heavy objects on the power cord.• Avoid force coming onto power plugs. Loose powerplugs can cause arcing or fire. Ensure that no strain isexerted on the power cord when you swivel the TVscreen.• To disconnect the TV from the mains power, thepower plug of the TV must be disconnected. Whendisconnecting the power, always pull the power plug,never the cord. Ensure that you have full access tothe power plug, power cord and outlet socket at alltimes.
Risk of injury or damage to the TV
• Two people are required to lift and carry a TV thatweighs more than 25 kg or 55 lbs.• If you mount the TV on a stand, only use thesupplied stand. Secure the stand to the TV tightly. Place the TV on a flat, level surface that can supportthe weight of the TV and the stand.• When wall mounted, ensure that the wall mount cansafely bear the weight of the TV set. TP Vision bearsno responsibility for improper wall mounting thatresults in accident, injury or damage.• Parts of this product are made of glass. Handle withcare to avoid injury or damage.
Risk of damage to the TV !
Before you connect the TV to the power outlet,
ensure that the power voltage matches the valueprinted on the back of the TV. Never connect the TVto the power outlet if the voltage is different.
Risk of injury to children
Follow these precautions to prevent the TV fromtoppling over and causing injury to children:
• Never place the TV on a surface covered by a clothor other material that can be pulled away.• Ensure that no part of the TV hangs over the edge ofthe mounting surface.• Never place the TV on tall furniture, such as abookcase, without anchoring both the furniture andTV to the wall or a suitable support.• Teach children about the dangers of climbing onfurniture to reach the TV.
Risk of swallowing batteries !
The remote control may contain coin-type batterieswhich can easily be swallowed by small children.Keep these batteries out of reach of children at alltimes.
Risk of overheating
Never install the TV in a confined space. Always leavea space of at least 10 cm or 4 inches around the TVfor ventilation. Ensure curtains or other objects nevercover the ventilation slots on the TV.
Lightning storms
Disconnect the TV from the power outlet and antennabefore lightning storms. During lightning storms, never touch any part of theTV, power cord or antenna cable.
Risk of hearing damage
Avoid using earphones or headphones at highvolumes or for prolonged periods of time.
Low temperatures
If the TV is transported in temperatures below 5°C or41°F, unpack the TV and wait until the TV temperaturereaches room temperature before connecting the TVto the power outlet.
90

Humidity
In rare occasions, depending on temperature andhumidity, minor condensation can occur on the insideof the TV glass front (on some models). To preventthis, do not expose the TV to direct sunlight, heat orextreme humidity. If condensation occurs, it willdisappear spontaneously while the TV is playing for afew hours. The condensation moisture will not harm the TV orcause malfunction.
23.2
Screen care• Never touch, push, rub or strike the screen with anyobject.• Unplug the TV before cleaning.• Clean the TV and frame with a soft damp cloth andwipe gently. Never use substances such as alcohol,chemicals or household cleaners on the TV.• To avoid deformations and colour fading, wipe offwater drops as quickly as possible.• Avoid stationary images as much as possible.Stationary images are images that remain onscreenfor extended periods of time. Stationary imagesinclude onscreen menus, black bars, time displays,etc. If you must use stationary images, reduce screencontrast and brightness to avoid screen damage.
91

24
Terms of use2016 © TP Vision Europe B.V. All rights reserved.
This product was brought to the market by TP VisionEurope B.V. or one of its affiliates, hereinafter referredto as TP Vision, which is the manufacturer of theproduct. TP Vision is the warrantor in relation to theTV with which this booklet was packaged. Philips andthe Philips Shield Emblem are registered trademarksof Koninklijke Philips N.V.
Specifications are subject to change without notice.Trademarks are the property of Koninklijke Philips N.Vor their respective owners. TP Vision reserves the rightto change products at any time without being obligedto adjust earlier supplies accordingly.
The written material packaged with the TV and themanual stored in the memory of the TV ordownloaded from the Philipswebsite www.philips.com/support are believed tobe adequate for the intended use of the system.
The material in this manual is believed adequate forthe intended use of the system. If the product, or itsindividual modules or procedures, are used forpurposes other than those specified herein,confirmation of their validity and suitability must beobtained. TP Vision warrants that the material itselfdoes not infringe any United States patents. Nofurther warranty is expressed or implied. TP Visioncannot be held responsible neither for any errors inthe content of this document nor for any problems asa result of the content in this document. Errorsreported to Philips will be adapted and published onthe Philips support website as soon as possible.
Terms of warranty - Risk of injury, damage to TV orvoid of warranty!Never attempt to repair the TV yourself. Use the TVand accessories only as intended by themanufacturer. The caution sign printed on the back ofthe TV indicates risk of electric shock. Never removethe TV cover. Always contact Philips TV CustomerCare for service or repairs. Find the telephone numberin the printed documentation that came with theTV. Or consult ourwebsite www.philips.com/support and select yourcountry if needed. Any operation expressly prohibitedin this manual, or any adjustments and assemblyprocedures not recommended or authorised in thismanual, shall void the warranty.
Pixel characteristicsThis LCD/LED product has a high number of colourpixels. Although it has effective pixels of 99.999% ormore, black dots or bright points of light (red, green orblue) may appear constantly on the screen. This is astructural property of the display (within commonindustry standards) and is not a malfunction.
CE complianceHereby, TP Vision Europe B.V. declares that thistelevision is in compliance with the essentialrequirements and other relevant provisions ofDirectives 2014/53/EU (RED), 2009/125/EC (EcoDesign), 2010/30/ EU (Energy Labelling) and2011/65/EC (RoHS).
Compliance with EMFTP Vision manufactures and sells many productstargeted at consumers which, like any electronicapparatus, in general have the ability to emit andreceive electromagnetic signals. One of TP Vision’sleading business principles is to take all necessaryhealth and safety measures for our products, tocomply with all applicable legal requirements and tostay well within the Electro Magnetic Field (EMF)standards applicable at the time of producing theproducts.
TP Vision is committed to developing, producing andmarketing products that cause no adverse healtheffects. TP Vision confirms that, as long as its productsare handled properly for their intended use, they aresafe to use according to scientific evidence availabletoday. TP Vision plays an active role in thedevelopment of international EMF and safetystandards, enabling TP Vision to anticipate furtherdevelopments in standardisation for early integrationin its products.
92

25
Copyrights25.1
MHLMHL, Mobile High-Definition Link and the MHL Logoare trademarks or registered trademarks of the MHL,LLC.
25.2
Ultra HDThe DIGITALEUROPE UHD Display Logo is atrademark of DIGITALEUROPE.
25.3
HDMIThe terms HDMI and HDMI High-DefinitionMultimedia Interface, and the HDMI Logo aretrademarks or registered trademarks of HDMILicensing LLC in the United States and othercountries.
25.4
Dolby Digital PlusManufactured under license from Dolby Laboratories.Dolby and the double-D symbol are trademarks ofDolby Laboratories.
25.5
DTS 2.0 + Digital Out ™For DTS patents, see http://patents.dts.com.Manufactured under license from DTS LicensingLimited. DTS, the Symbol, & DTS and the Symboltogether are registered trademarks, and DTS2.0+Digital Out is a trademark of DTS, Inc. © DTS, Inc.All Rights Reserved.
25.6
DTViThe DTVi brand and logo are registered marks ofPontifical Catholic University of Rio de Janeiro (PUC-Rio) and the Federal University of Paraíba (UFPB).
25.7
JavaJava and all Java based trademarks are registeredtrademarks of Oracle and/or its affiliates, in the UnitedStates and other countries.
25.8
Microsoft
Windows Media
Windows Media is either a registered trademark ortrademark of Microsoft Corporation in the UnitedStates and/or other countries.
Microsoft PlayReady
Content owners use Microsoft PlayReady™ contentaccess technology to protect their intellectualproperty, including copyrighted content.This device uses PlayReady technology to access
93

PlayReady-protected content and/or WMDRM-protected content. If the device fails to properlyenforce restrictions on content usage, content ownersmay require Microsoft to revoke the device's ability toconsume PlayReady-protected content. Revocationshould not affect unprotected content or contentprotected by other content access technologies.Content owners may require you to upgradePlayReady to access their content. If you decline anupgrade, you will not be able to access content thatrequires the upgrade.
25.9
Wi-Fi AllianceWi-Fi®, the Wi-Fi CERTIFIED logo, the Wi-Fi logo areregistered trademarks of the Wi-Fi Alliance.
25.10
KensingtonKensington and Micro Saver are registered UStrademarks of ACCO World Corporation with issuedregistrations and pending applications in othercountries throughout the world.
25.11
MHEG softwareThe copyright in MHEG software ("the Software")comprised in this television ("this product") andincluded to enable you to use interactive televisionfeatures is owned by S&T CLIENT SYSTEMS LIMITED("the Owner"). You are permitted to use the Softwareonly in conjunction with this product.
25.12
Other trademarksAll other registered and unregistered trademarks arethe property of their respective owners.
94

26
Disclaimer regardingservices and/orsoftware offered bythird partiesServices and/or software offered by third parties maybe changed, suspended, or terminated without priornotice. TP Vision does not bear any responsibility inthese sorts of situations.
95
Index
AAge Rating 29Antenna connection 6Antenna, Manual Installation 66App gallery 47Audio commentary 62Audio Description 62Audio Language 30Audio Language, Primary 30Audio Language, Secondary 30Audio Out - Optical, tips 14Audio Out Delay 17Audio Out Format 17Audio Out Levelling 18Audio Out Offset 17Audio Out Settings 17Audio to Video Sync 17Auto Volume Levelling 54Automatic Channel Update 65Automatic switch off 25
BBacklight Contrast 51Bass 54Blu-ray Disc player, connect 18
CCable, Manual Installation 66CAM PIN 15CAM, Conditional Access Module 15Camcorder, connect 22Channel 28Channel List Copy 70Channel List Copy, copy 71Channel List Copy, current version 71Channel List Copy, upload 71Channel logos 58Channel Update Message 65Channel, age rating 29Channel, Antenna installation 65Channel, Automatic Channel Update 65Channel, Cable Installation 65Channel, Channel List 28Channel, Channel List, about 28Channel, Channel List, filter 29Channel, Channel List, open 28Channel, Manual channel update 65Channel, Options 30Channel, Radio stations 28Channel, Reinstall 65Channel, Satellite installation 67Channel, switch to a channel 29Channel, TV guide 34Child Lock 59CI+ 15Clear Internet Memory 9Clear Miracast connection 9Clear Sound 55Clock settings 61Colour 51Colour, Colour enhancement 51Colour, colour temperature 51
Colour, custom colour temperature 52Common Interface Slot 15Computer, connect 23Connect, USB Flash Drive 22Connectivity Guide 11Consumer Care 89Contact Philips 89Contrast 51Contrast, Contrast Mode 52Contrast, Dynamic Contrast 52Contrast, Gamma 52Contrast, Video Contrast 52
DDigital Text 31Disposal of TV or batteries 84DMR, Digital Media Renderer 8DVB (Digital Video Broadcast) 65DVD player 18
EEasyLink 12EasyLink, On or Off 13EasyLink, Remote control 13EasyLink, settings 13Eco settings 56End of use 84European Ecolabel 84
FFrequency Scan 66Frequency Step Size 66
GGame Console, connect 19Game or Computer 41Game or Computer, setting 51Gamma 52
HHard of hearing 62HbbTV 32HDMI MHL 12HDMI Ultra HD 57HDMI, ARC 11HDMI, DVI connection 13Headphones Volume 56Headphones, connect 19Hearing impaired 62Home Menu 38Home Theatre System, Multichannel 17Home Theatre System, problems 18Home Theatre System, volume levelling 18
IIncredible Surround 54Interactive TV 33Interactive TV, about 32
IiTV 32
KKeys on TV 24
96

LLanguage settings 59
MMedia 42Media files, from a computer or NAS 42Media files, from a USB drive 42Miracast™, switch on 44MPEG Artefact Reduction 53
NNetwork Frequency 66Network Frequency Mode 66Network installation 7Network, Clear Wi-Fi Miracast connection 9Network, connect 7Network, problem 7Network, settings 8Network, static IP 8Network, Switch on Wi-Fi 9Network, TV Network Name 9Network, view settings 8Network, Wi-Fi Smart Screen 9Network, wired 8Network, wireless 7Network, WoWLAN 8Network, WPS 7Network, WPS with PIN code 7Noise Reduction 53
OOn a TV stand, TV Placement 56On the wall, TV Placement 56Online support 89Open Source software 73Options on a Channel 30
PParental Rating 29Partially sighted 62Pause TV 37Photo camera, connect 22Photos, videos and music 42Picture Format 53Picture Format, advanced 53Picture Format, basic 53Picture Style 50Picture, Backlight Contrast 51Picture, Colour 51Picture, Sharpness 51Pixel Plus link 13Placement, TV placement 5Placement, viewing distance 5Power connection 5Problems 87Problems, Channels 87Problems, Connection, HDMI 88Problems, Connection, Internet 89Problems, Connection, USB 88Problems, Connection, Wi-Fi 89Problems, Menu language 89Problems, Picture 88Problems, Remote control 87Problems, Sound 88Product Fiche 84
RReception Quality 66
Recording 36Recording, TV Guide data 34Register your product 87Reinstall TV 65Remote control and batteries 27Rental videos 47Repair 89
SSafety instructions 90Satellite CAMs 68Satellite connection 6Satellite, Add Satellite 69Satellite, Channel packages 68Satellite, Manual Installation 69Satellite, Remove Satellite 69Satellite, Unicable 68SCART connection, tips 14Screen care 91Sharpness 51Sharpness, MPEG Artefact Reduction 53Sharpness, Noise reduction 53Sharpness, Ultra Resolution 53Sleep Timer 24Smart Card, CAM 15Smart TV 45Software, Update 72Sound Style 54Sound, Auto Volume Levelling 54Sound, Bass 54Sound, Clear Sound 55Sound, Headphones Volume 56Sound, surround mode 54Sound, Treble 54Subtitle 30Subtitle Language 30Subtitle Language, Primary 30Subtitle Language, Secondary 30Support, online 89Surround Mode 54Switch off timer 25Switching on 24Synchronise Audio and Video 17
TTeletext 31Test Reception 66Text 31Text language, Primary 32Text language, Secondary 32Treble 54TV Guide 34TV Guide, data and information 34TV Guide, Reminder 35TV Installation 65
UUnicable 68Universal access 62Universal access, Hard of hearing 62Universal Access, Speakers/Headphones 63USB Hard Drive, disk space 20USB Hard Drive, Installation 20USB Keyboard 21USB Keyboard, connect 21
VVideo Selection 30
97

Visually impaired 62
WWatch TV 29Wi-Fi 7Wired network 8Wireless network 7WoWLAN 8
YYPbPr connection, tips 14
98
