user manual - appliances onlinemanuals.appliancesonline.com.au/westinghouse-dualfuel...3 please read...
TRANSCRIPT

ELEVATED COOKING APPLIANCES
USER MANUALPEK1370W, PEK1350W, GEK1235W, GEK1385W
Important safety warnings ................................................................... 3
Description of your appliance ............................................................. 5
Before operating your appliance for the first time ............................... 7
Parts of your electric cooker................................................................ 8
The parts of your gas cooker ............................................................... 9
Using your oven ................................................................................ 10
Get to know your oven ....................................................................... 12
Oven cooking guide ........................................................................... 13
Handling baking problems ................................................................. 14
Using your grill ................................................................................. 15
Using your hotplates ......................................................................... 16
Choosing utensils ............................................................................. 17
Using the timer and clock ................................................................. 18
Operating the programmable clock .................................................... 18
Cleaning the cooker .......................................................................... 19
Solving problems .............................................................................. 22
Installing the electric cooker ............................................................. 23
Installing the gas cooker ................................................................... 24
Testing the operation of the cooker ................................................... 26
Warranty ............................................................................................ 27
Dear customer,Congratulations on the purchase of your new oven.Follow the instructions below to ensure that you install your oven safely and that it runs efficiently.To avoid the risks that are always present when you use an electric appliance, it is important that the appliance is installed correctly and that you read the safety instructions carefully to avoid misuse and hazards.We recommend that you keep this instruction booklet for future reference and pass it on to any future owners.After unpacking the appliance, please check it is not damaged. If in doubt, do not use the appliance but contact your local customer care centre.
Record model and serial number here:Model:.................................................Serial No:.............................................
CONTENTSCONGRATULATIONS
CONTENTS

3
Please read the user manual carefully and store in a handy place for later reference. The symbols you will see in this booklet have these meanings:
WARNINGThis symbol indicates information concerning your personal safety
CAUTIONThis symbol indicates information on how to avoid damaging the appliance
TIPS & INFORMATIONThis symbol indicates tips and information about use of the appliance
ENVIRONMENTAL TIPSThis symbol indicates tips and information about economical and ecological use of the appliance
This symbol indicates never to do this
This symbol indicates always do this
TIPS & INFORMATIONIMPORTANT – CHECK FOR ANY DAMAGES OR MARKSIf you find the oven is damaged or marked, you must report it within 7 days if you wish to claim for damage/marks under the manufacturers warranty. This does not affect your statutory rights.
ENVIRONMENTAL TIPSINFORMATION ON DISPOSAL FOR USERS• Mostofthepackingmaterialsarerecyclable.
Please dispose of those materials through your local recycling depot or by placing them in appropriate collection containers.
• Ifyouwishtodiscardthisproduct,pleasecontactyour local authorities and ask for the correct method of disposal.
WARNING• Thisapplianceisnotintendedforusebypersons
(including children) with reduced physical, sensory or mental capabilities, or lack of experience and knowledge, unless they have been given supervision or instruction concerning use of the appliance by a person responsible for their safety. Children should be supervised to ensure that they do not play with appliance.
• DONOTallowyoungchildrentousethecooker.• DONOTusethecookerasaheater.• Duringuse,thisappliancebecomeshot.Careshould
be taken to avoid touching hot surfaces, e.g. oven door, heating elements.
• Thisappliancemustnotbeusedasaspaceheater.• Inordertoavoidafire,theappliancemustbekept
clean and vents kept unobstructed.• Donotsprayaerosolsinthevicinity
of the appliance during operation.• Donotstoreflammablematerialsin
or under the appliance, e.g. Aerosols.• Accessiblepartswillbecomehotwheninuse.
To avoid burns and scalds children should be kept away.• Donotlinethebottomoftheovenorgrillwithfoilor
cookware. It will damage the enamel.• Thisappliancemustnotbeinstalledonaboxor
in a closed cupboard.• Ovenglovesshouldbewornwhenaccessing
hot internal parts.• Iftheelectricalsupplycordisdamaged,itmustbe
replaced by a suitably qualified individual in order to avoid a hazard.
• Donotmodifythisappliance.
IMPORTANT SAFETY INSTRUCTIONS
SAFETY

WARNINGCOOKTOPS
Do not allow pots to boil dry, as damage to both pan and cooktop may result.
Do not operate the cooktop for an extended period of time without a utensil on the hot plate.
Do not allow large cookware to overhang the cooktop onto the adjacent benchtop. This will cause scorching to the benchtop surface.
If the ceramic glass is accidentally cracked, switch off the appliance to avoid the possibility of electric shock.
Do not place heat resistant mats, wire mats or aluminium foil under pots or pans.
Do not cook food directly on the ceramic glass surface.
Do not allow cooking utensils to intrude into the area which is close to the controls.
Ensure burner caps are in their proper positions.
Do not use round bottom woks, wok stands or similar utensils that could lead to over heating of hotplates and possible damage to the cooking surface.
Do not use the ceramic cooktop as extra bench space or as a cutting board.
INSTALLATION, CLEANING AND SERVICING
An authorised person must install and service this appliance. (Certificate of Compliance to be retained)
Do not install gas models in marine craft, caravans or mobile homes because these products are not fitted with a flame safeguard on each burner.
Before using the appliance, ensure that all packing materials are removed from the appliance.
In order to avoid any potential hazard, the enclosed installation instructions must be followed.
Ensure that all specified vents, openings and airspaces are not blocked.
Where the appliance is built into a cabinet, the cabinet material must be capable of withstanding 85°C.
Always ensure the appliance is switched off before cleaning or replacing parts.
If this appliance is gas operated it contains aluminium fittings. Do not use caustic based cleaners.
Do not use steam cleaners, as this may cause moisture build up.
Always clean the appliance immediately after any food spillage.
To maintain safe operation, it is recommended that the product be inspected every five years by an authorised service person.
This appliance must be earthed.
WARNINGGRILL
The grill door must be left fully open whilst grilling in a separate grill wall oven.
The grill drawer must be left approximately two finger widths ajar whilst grilling in a separate grill underbench oven.
Always turn the grill off immediately after use as fat left there may catch fire.
Do not cover the insert with foil, as fat left there may catch fire.
Always keep the grill dish clean as any fat left may catch fire.
Do not leave the grill on unattended.
To avoid a fire, ensure that grill trays and fittings are always inserted into the appliance in accordance with the instructions.
Do not place thick portions of food under the grill. Foods may curl, catch and ignite.
Do not store flammable materials in the grill.
If the burner is not lit in eight seconds, turn the control knob to off and allow 15 seconds for the gas to clear.
Accessible parts may become hot when grill is in use. Children should be kept away.
OVEN
During use the appliance becomes hot. Care should be taken to avoid touching the hot surfaces inside the oven.
Switch the appliance off before removing the oven light glass for globe replacement.
To avoid an accident, ensure that oven shelves and fittings are always inserted into the appliance in accordance with the instructions.
Do not use the door as a shelf.
Do not push down on the open oven door.
Do not use harsh abrasive cleaners or sharp metal scrapers to clean the oven door glass since they can scratch the surface, which may result in shattering of the glass.
SAFETY

5
DESCRIPTION OF YOUR APPLIANCE
DESCRIPTION1. Hotplate Control Knob• Adjuststemperatureofhotplate.
Can be rotated in either direction.
2. Hotplate Indicator Lamp• Comesonwhenahotplateisturnedon.
3. Oven light switch• Locatedonoventemperaturecontrolknob.
4. 2 Hour Cut-Off Timer• Setsbaking/grillingremindertime.• Setsautomaticbakingcut-offtime.
(See page 17 for more information).
5. Grill Temperature Control Knob• Setsgrillingtemperatureforseparategrill.
Can be rotated in either direction (See page 14 for more information).
6. Grill Indicator Lamp• Comesonwhengrilling.
7. Oven Temperature Control Knob• Setstemperatureforbaking.
(See page 10 for more information)
8. Oven Indicator Lamp• Comesonwhentheoventemperaturecontrolknobis
operated. Cycles on and off automatically when baking.
9. Programmable Clock• Setsbaking/grillingremindertimes.• Setsautomaticcookingdurationandstoptime. Note: Clock time must be set before oven can
operate. (See page 17 for more information).
PEK1350W
PEK1370W9
6 5 8 7
1
62 5 8 7
1
4

DESCRIPTIONDESCRIPTION OF YOUR APPLIANCE
GEK1235W
GEK1385W
1. Hotplate Burner Control Knob• Setsthehotplatecookingtemperature.
(See pg 16 for more information).
2. Grill Burner Control Knob• Setsthegrillingtemperature.
(See pg 14 for more information).
3. Oven Burner Control Knob• Setsthebakingtemperature.
(See pg 10 for more information). Note: Diagram depicts right hand version.
4. Electronic Igniter Switch • Ignitesthehotplateburners,grillburnerand
oven burner. Note: the appropriate burner control knob has to be set first.
5. Fan Switch • Turnsovenfanon/off.
6. Light Switch• Turnsovenlighton/off.
7. 60 Minute Ringer Timer• Setsremindertime.
(See pg 17 for more information).
8. Manual Grill Igniter Button• Ignitesthegrillburner.
Note: the grill burner control knob has to be set to “High” first. (see pg 14 for more information).
9. Manual Oven Igniter Button• Ignitestheovenburner.
Note: the oven burner control knob has to be held down first (see pg 11 for more information).

7
BEFORE OPERATING YOUR APPLIANCE FOR THE FIRST TIME
TIPS & INFORMATION
SETTING THE TIMEIf you have purchased a model fitted with a 3 button programmable timer, you MuST set the time of day before you can operate your appliance.
ELECTRONIC CLOCK• Aftertheappliancehasbeenelectricallyconnected
“12.00” will be displayed and the “clock” indicator will flash.
• Tosetthetimeofday,press–or+.5secondsafterthe last change, the “clock” indicator will disappear, confirming the time has been set.
• Note: the clock has a 24-hour display.
PREPARING YOUR APPLIANCE FOR THE FIRST TIME• Pleaseremoveallinternalboxesandbagsfrom
the oven & remove visible labels from surfaces before operation.
• Pleasewipeouttheoveninteriorpriortooperationwith warm soapy water and polish dry with a soft clean cloth. Do not close the oven door until the oven is completely dry.
• Newappliancescanhaveanodourduringfirstoperation. It is recommended to ‘run in’ your oven before you cook for the first time. Run the oven at 180ºCfor2-4hoursandensurethattheroomis well ventilated.
• DONOTlinetheovenwithfoil,itwilldamage the enamel.
• Ifyourapplianceisfittedwitha2-hour“AutoOff”timer,makesureitissettothe‘O’markerfor manual operation.
• Ifyourapplianceisfittedwithsolidhotplates, turn heat setting to high for 3 minutes to fully harden the coating. When cooled, apply a thin coating of cooking oil to seal the surface.
FITTING OVEN SHELVES• Ensureshelforientationiscorrect(referpicture).• Slideintoovenatanangleuntilraisedbackofshelf
is past the stop on side runners.• Lowerfrontofshelfandpushinuntilstopisreached.• Note: the top ledge is not a shelf position.
NOTE the orientation of the side and rear features.
OPERATION
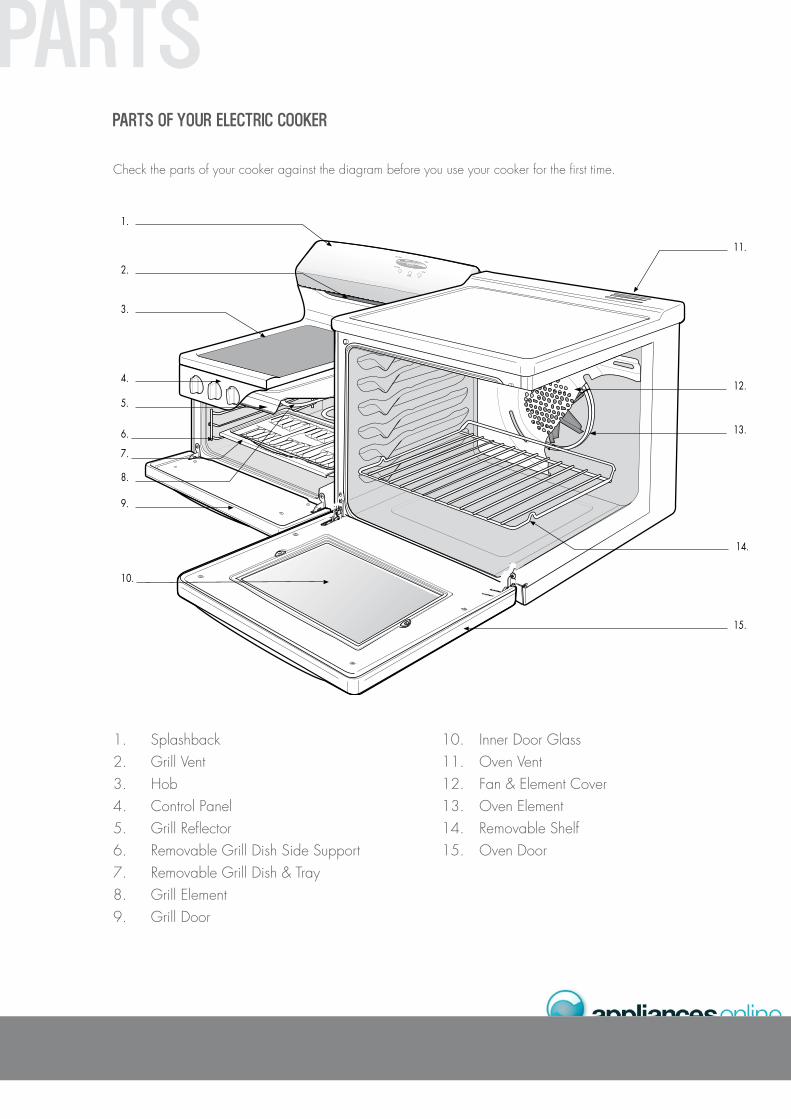
PARTS OF YOUR ELECTRIC COOKER
PARTSCheck the parts of your cooker against the diagram before you use your cooker for the first time.
1. Splashback2. Grill Vent3. Hob 4. Control Panel5. Grill Reflector6. Removable Grill Dish Side Support7. Removable Grill Dish & Tray8. Grill Element9. Grill Door
10. Inner Door Glass11. OvenVent12. Fan & Element Cover13. OvenElement14. Removable Shelf15. OvenDoor

9
PARTS OF YOUR GAS COOKER
Check the parts of your cooker against the diagram before you use your cooker for the first time.
1. Splashback2. Grill Flue Vent3. Removable Hotplate Burner 4. Removable Trivet5. Control Panel6. Removable Grill Dish Side Support7. Removable Grill Dish and Tray8. Grill Burner9. Grill Door
10. Inner Door Glass11. OvenFlueVent12. Fan Cover (fan forced ovens only)13. OvenBurnerCover14. Removable Shelf 15. OvenDoor

USING YOUR OVEN
OVEN SAFETY WARNINGS
WARNING• ALWAYSfollowtheinstructionsforputtingtheshelves
and fittings into the oven, to avoid accidents.• DONOTlinetheovenwithfoil.• DONOTusepolyunsaturatedoilwhencookinginthe
oven. This type of oil can cause heavy deposits inside the oven.
• DONOTtouchthehotsurfacesorheatingelementsinside the oven.
• DONOTusetheovendoorasashelf.• DONOTpushdownontheopenovendoor.• DONOTplacecookwareoranythingelseonthe
bottom of conventional model oven.• DONOTplaceshelvesontopofuppermostshelf
runner as there are no stops for shelf withdrawal.
5
4
3
2
1
Not a shelf position
5 Position Rack
OVEN SHELF LOCATION
USING THE OVEN OF YOUR ELECTRIC COOKER
Fan Baking (Fan forced oven models)• Withfanforcedovens,heatcomesfromtheelement
surrounding the fan (see diagram below).• Thefancirculatesthehotairandsothetemperature
is more even throughout the oven.• Fanbaking: –Cooksfasterandatlowertemperaturesthan
conventional baking –Isgoodwhenyouarecookingfoodon
different shelves at the same time.Note: Some variation in browning is normal with a fan forced oven.Note: 3 Button timer models MUSt have the clock set after a power outage to operate oven!
Preheating the ovenWe recommend that you preheat your oven before you put the food in to be cooked.1. Set the required temperature.2. When the indicator light goes out, put the food
in the oven, close the door and set the timer.
USAGE
11
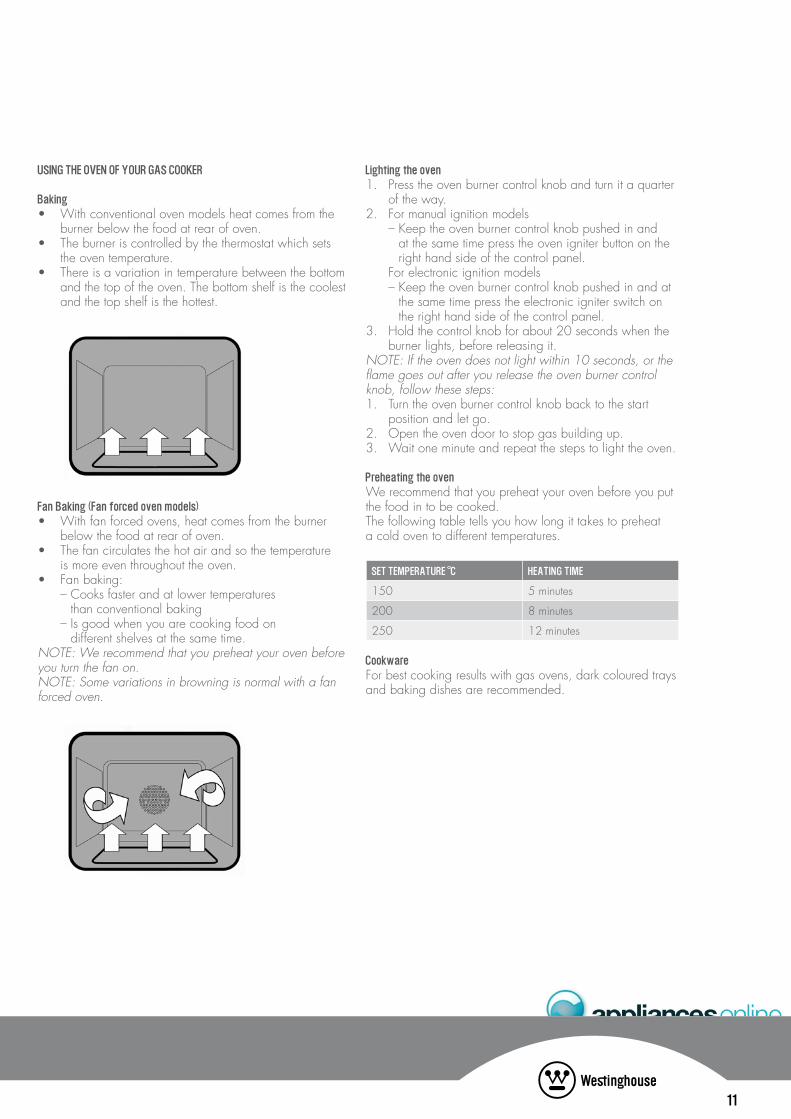
USING THE OVEN OF YOUR GAS COOKER
Baking• Withconventionalovenmodelsheatcomesfromthe
burner below the food at rear of oven.• Theburneriscontrolledbythethermostatwhichsets
the oven temperature.• Thereisavariationintemperaturebetweenthebottom
and the top of the oven. The bottom shelf is the coolest and the top shelf is the hottest.
Fan Baking (Fan forced oven models)• Withfanforcedovens,heatcomesfromtheburner
below the food at rear of oven.• Thefancirculatesthehotairandsothetemperature
is more even throughout the oven.• Fanbaking: –Cooksfasterandatlowertemperatures
than conventional baking –Isgoodwhenyouarecookingfoodon
different shelves at the same time.Note: We recommend that you preheat your oven before you turn the fan on.Note: Some variations in browning is normal with a fan forced oven.
Lighting the oven1. Press the oven burner control knob and turn it a quarter
of the way.2. For manual ignition models –Keeptheovenburnercontrolknobpushedinand
at the same time press the oven igniter button on the right hand side of the control panel.
For electronic ignition models –Keeptheovenburnercontrolknobpushedinandat
the same time press the electronic igniter switch on the right hand side of the control panel.
3. Hold the control knob for about 20 seconds when the burner lights, before releasing it.
Note: If the oven does not light within 10 seconds, or the flame goes out after you release the oven burner control knob, follow these steps:1. Turn the oven burner control knob back to the start
position and let go.2. Opentheovendoortostopgasbuildingup.3. Wait one minute and repeat the steps to light the oven.
Preheating the ovenWe recommend that you preheat your oven before you put the food in to be cooked.The following table tells you how long it takes to preheat a cold oven to different temperatures.
SET TEMPERATURE C HEATING TIME
150 5 minutes
200 8 minutes
250 12 minutes
CookwareFor best cooking results with gas ovens, dark coloured trays and baking dishes are recommended.

KNOW YOUR OVENGET TO KNOW YOUR OVEN
Get to know your new oven with this ‘Simple Test Cake’Although we strive for a perfect performing oven, it’s possible that there will be some variation in colour when baking. Therefore, we suggest this simple, easy and delicious to make Simple Test Cake, it can help you understand your new oven. All ovens do sometimes have hot or cold spots, therefore it is important to judge with your eye as you may require to rotate during baking.
‘Simple Test Cake’125g butter, softened to room temperature1 cup caster sugar1 teaspoon pure vanilla essence4 large eggs2cupsself-raisingflourpinch of salt4tablespoons(80mL)full-creammilk
Method:1. Butterbaseandsidesoftwo,20cmstraight-sided
round or square cake pans. Then line the base with grease proof or baking paper.
2. Preheat oven to moderate ‘180ºC’ (170ºC fan forced)and ensure oven shelf is in the centre position of oven.
3. Cream softened butter and sugar until light in colour.4. Add vanilla essence.5. Then eggs one at a time, beating well after
each addition.6. Sift flour and salt into the mixture and beat until
well combined.7. Add milk and beat or stir to combine.8. Spoon mixture equally between prepared cake pans.9. Bake in preheated oven, middle shelf for about 25 to
35 minutes or until when tested with a fine cake skewer it comes out clean or the edges of the cakes have come away slightly from the sides of the cake pans.
10. Remove from oven to wire cake rack and rest for 5 minutes before removing from cake pans. Cool completely.
To Serve: sandwich together with your favourite jam or conserve, and dust top with pure icing sugar.
Note: If desired substitute butter for either margarine or olive oil spread.
Recipe is based on the Australian standard metric 250mLcupand20mLtablespoonsets.

13
OVEN COOKING GUIDE
The following is intended as a guide and experience may show some slight variation to be necessary to meet individual requirements.
FOOD CONVENTIONAL OVEN FAN FORCED OVEN
Temperature in °C Oven Shelf Position* Time in minutes Temperature in °C Oven Shelf Position* Time in minutes
Scones
Plain or Fruit 220 2 (3) 10–15 210 Any 10–15
Biscuits
Rolled 170 (180) 2 10–15 150 (170) Any 10–15
Spooned 190 2 12–15 180 Any 12–15
Shortbread Biscuits
160 1 or 2 30–35 150 Any 30–35
Meringues
Hard–individual 110 2 90 100 Any 90
Soft–Individual 180 2 15–20 165 Any 15–20
Pavlova–6egg 110 (120) 1 75 100 Any 75
Cakes
Patty cakes 190 3 (4) 15–20 180 Any 15–20
Sponge–4egg 180 2 20–30 170 Any 20–30
Plain Butter Cake 180 2 30–40 170 Any 30–40(25)
Rich Fruit Cake 140 (150) 2 180 130 Any 180
Pastry–Shortcrust
Cornish Pasties 200 (200/180) 2 40–45(10/30) 180 (180/160) Any 40–45(10/30)
Custard Tart 200/180 (220/180)
1 (3) 10/20–30(10/35)
190/170 (200/180)
Any 20–30(10/25)
Pastry Choux
Cream Puffs 210 2 25–30 200 Any 25–30
YeastGoods
Bread 210 1 25–30 200 Any 25–30
* Shelf position is counted from the bottom shelf up ie. Bottom shelf position is 1Where the gas models vary from electric, details for gas cooking is shown in brackets
MEAT PREFERRED TEMPERATURE °C MINUTES PER KG
Beef 200°C Rare 35–40minutes
Medium 45–50minutes
Well Done 55–60minutes
Lamb 200°C Medium 40 minutes
Well Done 60 minutes
Veal 180°C Well Done 60 minutes
Pork 200°C Well Done 60 minutes
POULTRY OR FISH PREFERRED TEMPERATURE °C MINUTES PER KG
Chicken 180°C 40–45minutes
Duck 180–200°C 60–70minutes
Turkey 180°C 35–40minutes(lessthan10kg)
40–45minutes(morethan10kg)
Fish 180°C 20 minutes
COOKING GUIDE

HANDLING BAKINGHANDLING BAKING PROBLEMS
PROBLEM POSSIBLE CAUSE WHAT TO DO
unevencooking •Incorrectshelfposition•Oventraytoolarge•Traynotincentreofoven•Airflowinovenuneven
•Selectshelfwhichputsfoodincentreofoven•Tryothertraysordishes•Puttraysincentreofoven•Turnfoodduringcooking
Baked products too brown on top
•Ovennotpre-heated•Aluminiumfoilinoven•Bakingtinstoolargeforrecipe•Bakingtinsnotevenlyspaced
•Foodnotevenlysizedorplacedontrays
•Foodplacedtooclosetotopofoven
•Pre-heatuntilindicatorlightgoesoff•Removefoil•usecorrectsizetins•Placebakingtinssothatthereisatleast3cms
between tins and oven walls •Makefoodsamesizeandshapeandspread
evenly on trays •Placefoodinmiddleoronalowershelf
Baked products too brown on bottom
•Bakingtemperaturetoohigh•Bakingtinstoolargeforrecipe•Bakingtinsaredarkmetalorglass
•Foodtoolowinoven•Ovendooropenedtoofrequently
during cooking
•Lowertemperature•usecorrectsizetins•Changetoshiny,lighttinsorlowertemperature
by 10ºC•Cookoneshelfhigher•Donotopendooruntilhalfwaythrough
cooking time
Cakes have cracked thick crust
•Bakingtemperaturetoohigh•Foodtoohighinoven•Cakebatterovermixed•Pantoodeep•Bakingtinstoodark
•Lowertemperature•Cookoneshelflower•Mixjustlongenoughtocombineingredients•Checksizeofpananduserecommendedsize•Changetoshinytins
Baking products are pale, flat and under cooked
•Bakingtemperaturetoolow•Foodtoolowinoven•Bakingtimetooshort•Incorrecttinsize
•Raisetemperature•Cookoneshelfhigher•Increasecookingtime•usecorrectsizetin
Cakes fallen in centre •Bakingtemperaturetoolow•Bakingtimetooshort•Measurementofingredientsiswrong•Dooropenedtooearly
•Raisetemperature•Increasecookingtime•Checkrecipe•Donotopendooruntilthreequarters(¾)of
way through cooking time
Crusts too thick •Incorrectingredients •Checkrecipe
Meatandpotatoesnotbrowning in fan oven
•Poorcirculation •Putfoodontoaracktoallowairtocirculate
Juices running out of meat •Donotpiercemeatwithforkbutturnwithtongs
* Note: Condensation on oven door is normal
15
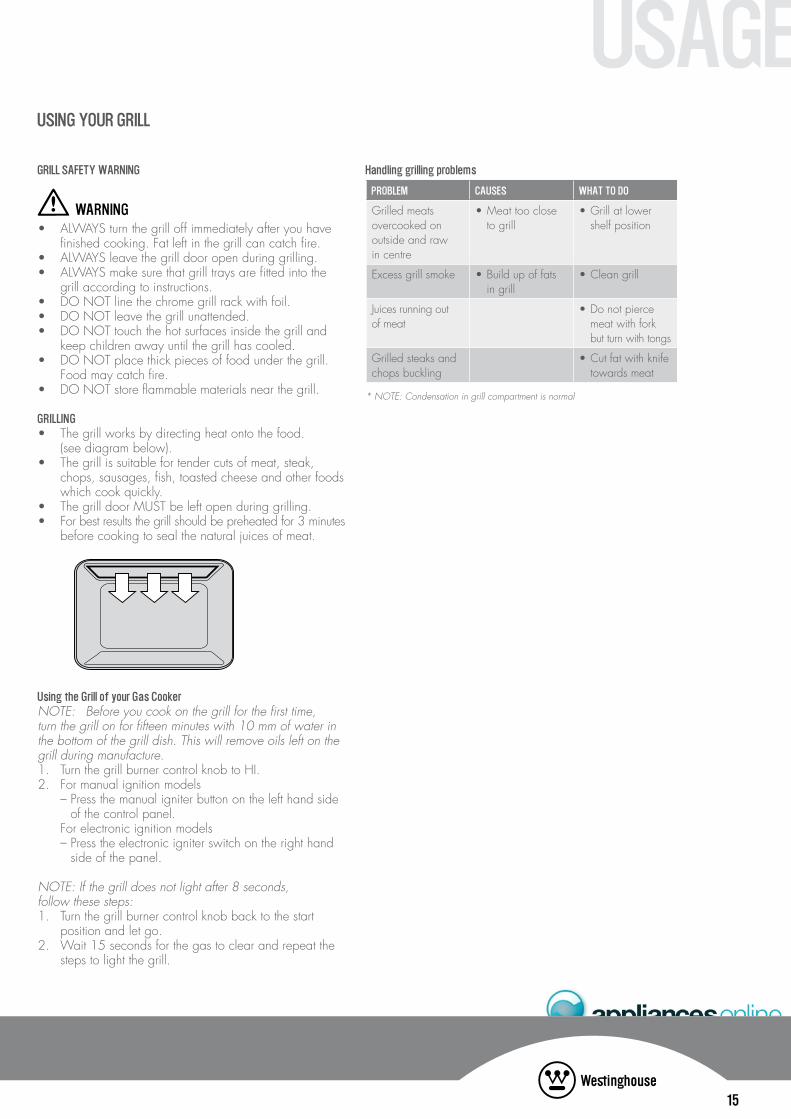
Handling grilling problems
PROBLEM CAUSES WHAT TO DO
Grilled meats overcooked on outside and raw in centre
•Meattoocloseto grill
•Grillatlowershelf position
Excess grill smoke •Buildupoffatsin grill
•Cleangrill
Juices running out of meat
•Donotpiercemeat with fork but turn with tongs
Grilled steaks and chops buckling
•Cutfatwithknifetowards meat
* Note: Condensation in grill compartment is normal
USING YOUR GRILL
GRILL SAFETY WARNING
WARNING• ALWAYSturnthegrilloffimmediatelyafteryouhave
finished cooking. Fat left in the grill can catch fire.• ALWAYSleavethegrilldooropenduringgrilling.• ALWAYSmakesurethatgrilltraysarefittedintothe
grill according to instructions.• DONOTlinethechromegrillrackwithfoil.• DONOTleavethegrillunattended.• DONOTtouchthehotsurfacesinsidethegrilland
keep children away until the grill has cooled.• DONOTplacethickpiecesoffoodunderthegrill.
Food may catch fire.• DONOTstoreflammablematerialsnearthegrill.
GRILLING• Thegrillworksbydirectingheatontothefood.
(see diagram below).• Thegrillissuitablefortendercutsofmeat,steak,
chops, sausages, fish, toasted cheese and other foods which cook quickly.
• ThegrilldoorMuSTbeleftopenduringgrilling.• Forbestresultsthegrillshouldbepreheatedfor3minutes
before cooking to seal the natural juices of meat.
Using the Grill of your Gas CookerNote: Before you cook on the grill for the first time, turn the grill on for fifteen minutes with 10 mm of water in the bottom of the grill dish. this will remove oils left on the grill during manufacture.1. Turn the grill burner control knob to HI.2. For manual ignition models –Pressthemanualigniterbuttononthelefthandside
of the control panel. For electronic ignition models –Presstheelectronicigniterswitchontherighthand
side of the panel.
Note: If the grill does not light after 8 seconds, follow these steps:1. Turn the grill burner control knob back to the start
position and let go.2. Wait 15 seconds for the gas to clear and repeat the
steps to light the grill.
USAGE

USAGEHOTPLATE SAFETY WARNING
WARNING• DONOTleavethehotplateonwithnopotorpanontop.• DONOTusepotsandpanswhichareunsteady,as
these could overbalance.• DONOTuseasbestosmatsorheatdiffusers.
Thesewillcauseatemperaturebuild-upwhichcandamage the cooktop.
• DONOTallowpotsorpanstoboildry.Thiscoulddamage the hotplate and/or the cooktop.
• DONOTletcookingutensilsgettooclosetothehotplate control knobs.
• DONOTusethecooktopasakitchenbench.• DONOTletchildrenonornearthecooktop.• ALWAYSmakesurethatgasburnersareinthe
right position.
Using the Hotplates of your Electric CookerCheck the hotplates on your cooker against the diagrams and instructions below before you use your cooker for the first time.
Solid hotplatesCoated hotplates are strong, solid cast hotplates that give a wide contact with pots and pans for fast efficient cooking.
The hotplates are sealed all round with stainless steel trim rings, food spills can’t penetrate to make cleaning easier. The hotplates featuring a red dot in the centre indicatethehotplatetemperature.Oncethehotplate is heated the red dot turns darker.
Ceramic hotplates• Thecooktopismadefromceramicglass,atough,
durable material that withstands heating and cooling without breaking. It is strong enough to hold the heaviest utensil. However, it must be remembered that asitisGLASS,itmaybreak.Treatitaccordingly!
• Thesmoothglasssurfacehasapatterntoshowwherethe elements under the glass are located (see diagram below).
• Whenahotplateison,thehotsurfacewarninglight(see diagram below), will come on. When the hotplate is turned off this light will continue to glow until the temperature of the hotplate drops below 60°C.
Ceramic hotplates
WARNING• ALWAYSswitchthecookeroffiftheceramicglasstop
is cracked or broken.• DONOTusealuminiumfoilontheceramichotplates. Note: Stored heat in the hotplate can be used for the last few minutes of cooking. Simply turn off the control.
USING YOUR HOTPLATES

17
Manual ignition Models To light these hotplates:1. Choose the hotplate you want to use.2. Turn the hotplate burner control knob to “Hi”.3. Lightwithahandheldlightere.g.match.
Electronic ignition ModelsTo light these hotplates:1. Choose the hotplate you want to use.2. Turn the hotplate burner control knob to “Hi”.3. Press electronic igniter switch to release sparks
to the burner.
Lookatthisdiagramabovewhichshowsyouwhichutensilstouseonthehotplatesandwhichutensilsshouldnotbeused.• ALWAYSusepotsandpanswithflatbottoms.unevenorthinbottomswillwasteelectricityandcookslowly.• ALWAYSusepotsandpanswhichareslightlylargerthanthehotplate.Smallpanswasteelectricity.• ALWAYSputpotsandpanswhicharedryonthehotplates.• DONOTusepotsandpanswhicharetoolarge.
Pans which overhang the hotplate more than 50mm can damage enamel cooktops.
USING HOTPLATE BURNERS
Using the Burners of your Gas CookerCheck the hotplates on your cooker against the diagram below before you use your cooker for the first time.
Note: to save gas, place pots and pans centrally over the burners and adjust gas so that flames do not go past edges.
WHAT IT IS WHAT IT IS USED FOR
1Lowheatburner5.1MJ/h • usedforsimmering
•usedwithsmallpots and pans
2 & 3Mediumheatburners9.0MJ/h
•usedfornormalcooking•usedwithmiddlesize
pots & pans
4High heat burner 12.0MJ/h
•usedforfastheating•usedwithlargesize
pots & pans
CHOOSING UTENSILS
GOOD BAD(moisture on hotplate)
BAD(convex base)
BAD(oversize)
BAD(recessed base)
BAD(undersiz e)
BAD(no utensil)

USAGEUsing the 60 minute ringer timerTo set the timer:1. Turn the knob clockwise to the required number of
minutes. When the time has elapsed the timer will give a short ring.
Note: For times below 20 minutes, turn the knob past 20 minutes and then back to the required number of minutes.
Using the 2 hour cut-off timer
Manual operationThetimerneedstobesetatthe“O”markersothattheovencan be used manually.
Automatic operationThe 2 hour timer features an automatic oven “cut off”. This means that a cooking period of up to 120 minutes can be set.1. SettheOvenTemperatureControlKnobtothe
required temperature.2. Turnthecut-offtimerclockwisetotherequirednumber
of minutes. For timer settings of less than 20 minutes, turn the knob past 20 minutes and then back to the requirednumberofminutes.(Purpose–tosetaudibleringer.)
3. Whenthetimerreturnsto“AutoOff”,thetimergives a short ring and the oven will be switched off.
4. The oven will not operate again until you turn the timer backtothe“O”marker.
Note: It is not recommended to use this timer for short duration, e.g. boiling eggs.
TIMER
OVEN TIMER
WARNING• TheClockMuSTbesettooperateoven.
General featuresYour3buttonprogrammabletimerhasthefollowingfeatures:• Timer–your3buttonprogrammabletimerallowsyou
to set a countdown time that will beep when the set time has elapsed.
• Cookingduration–Youcansetacookingduration.A timer will count down the preset cooking time, beep when the time has elapsed and turn the oven off.
• Endcookingtime–youcansetacookingfinishtime.A timer will count down the preset cooking time, beep when the finish time has been reached and turn the oven off.
• Delayedstartcookingtime–Youcancombinethecooking duration and cooking end time to switch the oven on and off at a specific time during the day.
Note: Your 3 button programmable timer only operates with your oven.
Change the time of day (Daylight saving)1. Press the “mode” button until the “clock” indicator
begins flashing.2. Pressthe–or+buttonstochangethetime.5seconds
after the last change, the “clock” indicator will disappear, confirming the time has been set.
Setting the timer1. Press the “mode“ button until the “timer” indicator
begins flashing.2. Setthecountdowntimeyouwantbyusingthe–and+
buttons. 5 seconds after the last change the “timer” indicator will stop flashing, confirming the timer has been set.
3. To stop the beeper, press any button.
Setting the cooking duration1. Check the clock displays the correct time of day.2. Set the oven to the desired temperature. The oven
indicator light will glow and the oven will come on.3. Press the “mode“ button until the “cook time” indicator
begins flashing.4. Setthecookingdurationyouwantbyusingthe–or
+buttons.5secondsafterthelastchange,the“cooktime” indicator will stop flashing, and the time of day will be displayed.
Note: Do not forget to add preheating time if necessary.
USING THE TIMER AND CLOCK OPERATING THE PROGRAMMABLE CLOCK

19
Setting the cooking end time1. Check the clock displays the correct time of day.2. Select the desired oven function temperature. The oven
indicator light will glow and the heating source will come on.
3. Press the “mode“ button until the “end time” indicator begins flashing.
4. Enter the time of day you want to finish cooking by pressingthe–or+buttons.5secondsafterthelastchange, the “end time” indicator will stop flashing and the current time of day will be displayed.
Setting the delayed start cooking time1. Program the “cook time” and “end time” as described
intherelevantsections.Onceboththe“cooktime”and“end time” have been set, the “cook time” and “end time” indicators will stop flashing and the current time of day will be displayed.
To check or cancel settings1. To check your settings, press the mode button until
the setting you want is displayed. A red light will flash next to the mode (cook time, end time etc) that is currently on display.
2. To cancel “delayed start” press the mode button until alightflashesnextto“endtime”.Pressandholdthe–button until the clock no longer reverses (you will hear a beep). If you have left the temperature knob at a setting the oven will start once the “end time” light stops flashing.
3. To cancel “auto shut off” press the mode button until a light flashes next to “cook time”. Press and hold the –buttonuntiltheclocknolongerreversesat(“0:00”and you will hear a beep). This automatically cancels “delayed start”. If you have left the temperature knob at a setting, the oven will start once the “cook time” light stops flashing. Because you have cancelled “auto off” the oven will continue to heat until you manually turn it off.
On completion of cookingThe heat source will turn off, the timer will beep and the “end time” and/or “cook time” indicators will flash.1. Turn the temperature control to the off position. 2. Press any button to stop the timer from beeping.
WARNING
Safety Warnings about cleaning• ALWAYSmakesurethatthecookeristurnedoff
before cleaning.• ALWAYScleancookerimmediatelyafteruse.• DONOTusesteamcleaners.Thesemaycause
moisturebuild-up.• DONOTusecausticbasedcleaners.Thesewill
damage aluminium parts.
Cleaning the enamel• Keepenamelcleanbywipingitwithasoftcloth
dipped in warm soapy water.• Rubdifficultstainswithanylonscoureror
creamed cleanser.• DONOTuseabrasivecleaners,powdercleaners,
steel wool or wax polishes.• Ifyouuseanovencleaner,followtheinstructions
on the product carefully.
Cleaning the control panel• MakesurecontrolknobsareinOFFposition.• Removeknobsfromcontrolpanelbypullingtowardsyou.• DONOTusetoomuchwaterwhencleaningcontrolpanel.
CLEANING THE GAS COOKTOP1. Remove the trivets (see diagram below) by lifting
them from hob.2. Remove the burner caps and crowns (see diagram below).3. Wash hob with warm soapy water.4. Ifcrownsandcapsareheavilysoileduseanon-
abrasive cleaning compound.
WARNINGDONOTuseabrasiveorcausticbasedcleaners.DONOTwashinadishwasher.DONOTdroptrivetontohob.Thismaydamage the enamel surface.
OPERATING THE PROGRAMMABLE CLOCK (continued)
CLEANING THE COOKER
OPERATION
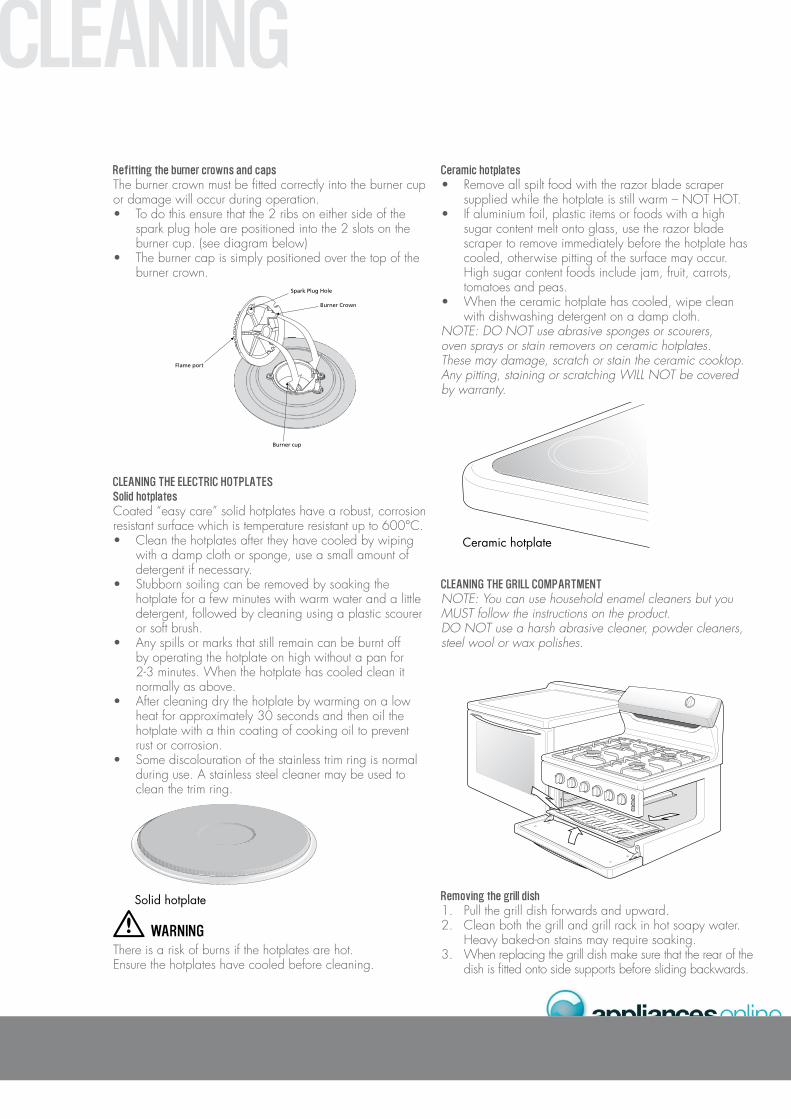
CLEANING Refitting the burner crowns and capsThe burner crown must be fitted correctly into the burner cup or damage will occur during operation.• Todothisensurethatthe2ribsoneithersideofthe
spark plug hole are positioned into the 2 slots on the burner cup. (see diagram below)
• Theburnercapissimplypositionedoverthetopoftheburner crown.
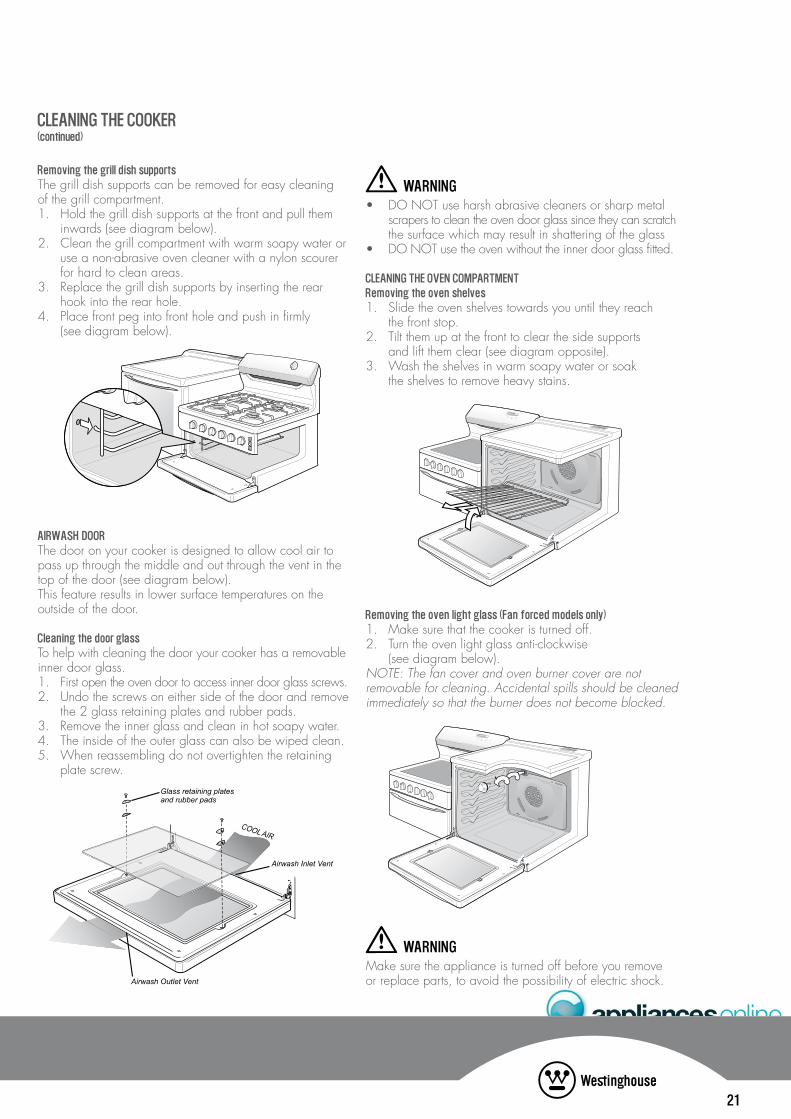
CLEANING THE ELECTRIC HOTPLATESSolid hotplatesCoated “easy care” solid hotplates have a robust, corrosion resistant surface which is temperature resistant up to 600°C.• Cleanthehotplatesaftertheyhavecooledbywiping
with a damp cloth or sponge, use a small amount of detergent if necessary.
• Stubbornsoilingcanberemovedbysoakingthehotplate for a few minutes with warm water and a little detergent, followed by cleaning using a plastic scourer or soft brush.
• Anyspillsormarksthatstillremaincanbeburntoffby operating the hotplate on high without a pan for 2-3minutes.Whenthehotplatehascooledcleanitnormally as above.
• Aftercleaningdrythehotplatebywarmingonalowheat for approximately 30 seconds and then oil the hotplate with a thin coating of cooking oil to prevent rust or corrosion.
• Somediscolourationofthestainlesstrimringisnormalduring use. A stainless steel cleaner may be used to clean the trim ring.
Solid hotplate
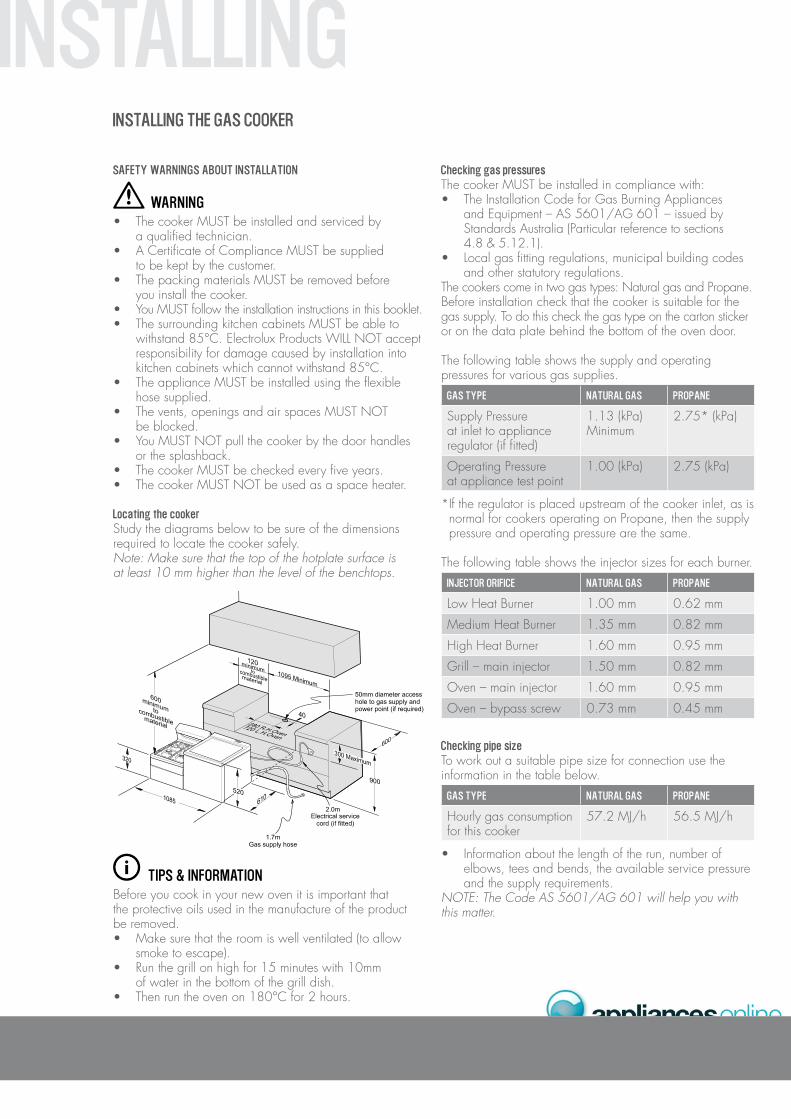
Ceramic hotplate
WARNINGThere is a risk of burns if the hotplates are hot. Ensure the hotplates have cooled before cleaning.
Ceramic hotplates• Removeallspiltfoodwiththerazorbladescraper
suppliedwhilethehotplateisstillwarm–NOTHOT.• Ifaluminiumfoil,plasticitemsorfoodswithahigh
sugar content melt onto glass, use the razor blade scraper to remove immediately before the hotplate has cooled, otherwise pitting of the surface may occur. High sugar content foods include jam, fruit, carrots, tomatoes and peas.
• Whentheceramichotplatehascooled,wipecleanwith dishwashing detergent on a damp cloth.
Note: Do Not use abrasive sponges or scourers, oven sprays or stain removers on ceramic hotplates. these may damage, scratch or stain the ceramic cooktop. Any pitting, staining or scratching WILL Not be covered by warranty.
Solid hotplate
Ceramic hotplate
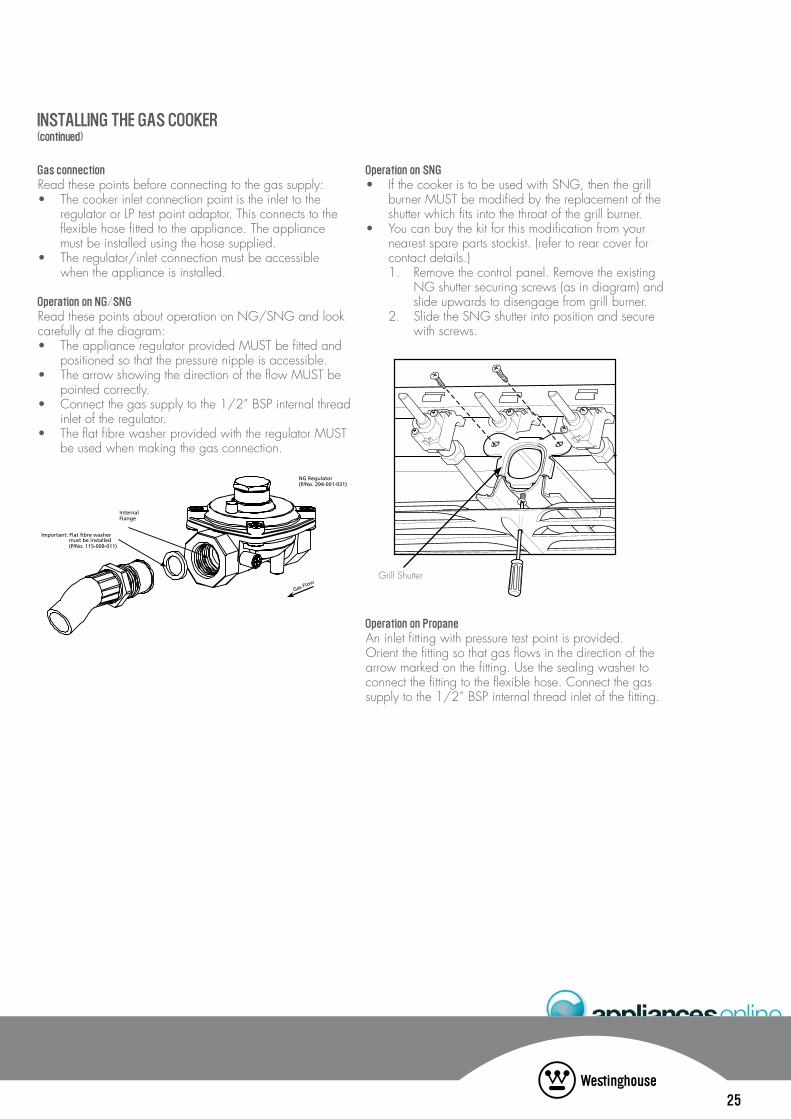
CLEANING THE GRILL COMPARTMENTNote: You can use household enamel cleaners but you MUSt follow the instructions on the product.Do Not use a harsh abrasive cleaner, powder cleaners, steel wool or wax polishes.
Removing the grill dish1. Pull the grill dish forwards and upward.2. Clean both the grill and grill rack in hot soapy water.
Heavybaked-onstainsmayrequiresoaking.3. When replacing the grill dish make sure that the rear of the
dish is fitted onto side supports before sliding backwards.
21
WARNING• DONOTuseharshabrasivecleanersorsharpmetal
scrapers to clean the oven door glass since they can scratch the surface which may result in shattering of the glass
• DONOTusetheovenwithouttheinnerdoorglassfitted.
CLEANING THE OVEN COMPARTMENTRemoving the oven shelves1. Slide the oven shelves towards you until they reach
the front stop.2. Tilt them up at the front to clear the side supports
and lift them clear (see diagram opposite).3. Wash the shelves in warm soapy water or soak
the shelves to remove heavy stains.
Removing the oven light glass (Fan forced models only)1. Makesurethatthecookeristurnedoff.2. Turntheovenlightglassanti-clockwise
(see diagram below).Note: the fan cover and oven burner cover are not removable for cleaning. Accidental spills should be cleaned immediately so that the burner does not become blocked.
WARNINGMakesuretheapplianceisturnedoffbeforeyouremove or replace parts, to avoid the possibility of electric shock.
Removing the grill dish supportsThe grill dish supports can be removed for easy cleaning of the grill compartment.1. Hold the grill dish supports at the front and pull them
inwards (see diagram below).2. Clean the grill compartment with warm soapy water or
useanon-abrasiveovencleanerwithanylonscourerfor hard to clean areas.
3. Replace the grill dish supports by inserting the rear hook into the rear hole.
4. Place front peg into front hole and push in firmly (see diagram below).
AIRWASH DOORThe door on your cooker is designed to allow cool air to pass up through the middle and out through the vent in the top of the door (see diagram below).This feature results in lower surface temperatures on the outside of the door.
Cleaning the door glassTo help with cleaning the door your cooker has a removable inner door glass.1. First open the oven door to access inner door glass screws.2. undothescrewsoneithersideofthedoorandremove
the 2 glass retaining plates and rubber pads.3. Remove the inner glass and clean in hot soapy water.4. The inside of the outer glass can also be wiped clean.5. When reassembling do not overtighten the retaining
plate screw.
CLEANING THE COOKER(continued)

SOLVING PROBLEMS
PROBLEM POSSIBLE CAUSE WHAT TO DO
Nosparkobtainedwhenelectronicigniteris pressed (gas cooker only)
•Powernotturnedon•Householdfuseblown•Circuitbreakertripped•Sparkplugiswetordirty
•Switchonelectricity•Checkfuses•Checkcircuitbreaker•Dryorcleansparkplug
Nosparkobtainedwhenmanualigniter is pressed (gas cooker only)
•Sparkplugiswetordirty •Dryorcleansparkplug
Burner will not light even though igniter is working (gas cooker only)
•Gassupplyvalveisturnedoff•Portblockageinignitionarea
•Turnongassupply•Makesurethatportsandignitionarea
are clean and dryOvenorgrillnotworking (electric cooker only)Note: if the household fuse continues to blow, call the Service Centre
•Clocknotset•Powernotturnedon•Householdfuseblown•Controlsincorrectlyset•Circuitbreakertripped
•Refertoclockinstructionspg17•Switchonelectricity•Checkfuses•Resetcontrols•Checkcircuitbreaker
Ovennotworking(electriccookeronly)Note: if the household fuse continues to blow, call the Service Centre
•Clockprogramset•Householdfuseblown
•Cancelprogram,seepg18•Checkfuses
OvenlightnotworkingNote: if the household fuse continues to blow, call the Service Centre
•Powernotturnedon•Householdfuseblown•Circuitbreakertripped•Lampblownorlooseinsocket
•Switchonelectricity•Checkfuses•Checkcircuitbreaker•Replaceortightenglobepg20
Ovennotheatingenough •Foilortraysonbottomofoven•Heatescapingthroughincorrectly
sealed door•Thesetoventemperatureisincorrect
•Removefoilortrays•Checkdoorisproperlyclosed
•ChangesetoventemperatureElectronic clock flashing on display (electric cooker only)Note: if the household fuse continues to blow, call the Service Centre
•Powerfailureorinterruption•Householdfuseblownorpowersupply
is off
•Resettimeofday•Checkfuses,powersupply
unitsmokingwhenfirstused •Protectiveoilsbeingremoved •Turngrillonhighfor10minutes•Turnovenonhighfor10minutes
Condensation building up •Toomuchwaterusedwhencooking •Reduceamountofwater•Leavedooropenaftercooking,iffood
is to be left in oven to keep warmOdoursonfirstuseofoven •Thisisnormal60 minute timer not audible •Timernotwoundsufficiently •Turntimerknobpast15minutemarkthento
the required number of minutes, see pg 17Ovenshelftight •Ovenshelfnotinsertedcorrectly,
may be upside down or back to front•Removeshelfandinsertas
per diagram pg 7Clock display offNote: if the household fuse continues to blow, call the Service Centre
•Displayswitchedoff•Householdfuseblownorpowersupply
is off
•Toswitchdisplayonrefertopg18•Checkfuses,powersupply
Note: only authorised service centres should carry out servicing. otherwise warranty may be void.
If you have a problem with your appliance, check the table belowbeforecallingservice.Youmaybeabletoavoidaservice callbyfixingtheproblemyourself–andsocontinuecooking.Note: You may be charged for the service call even in the guarantee period if the problem is due to the causes listed below.
If you need information, service or replacement parts please:Quote 1.ModelNumber,2.SerialNumberYoucanfindtheseonthedataplatewhichcanbeseenwhen the oven door is open.
If you need more information, please contact the Customer Care Centre on:
Australia 1300 363 640 (Centreisopen8am–5pmMondaytoFridayEST)or
NewZealand095732384 (Centreisopen8am–5pmMondaytoFriday)If you have a warranty or spare parts enquiry, you should call the number listed on the back page.
SOLVING PROBLEMS

23
SAFETY WARNINGS ABOUT INSTALLATION
WARNING• ThecookerMuSTbeinstalledandservicedby
a qualified technician.• ACertificateofComplianceMuSTbesupplied
to be kept by the customer.• ThepackingmaterialsMuSTberemovedbefore
you install the cooker.• YouMuSTfollowtheinstallationinstructionsinthisbooklet.• ThesurroundingkitchencabinetsMuSTbeableto
withstand85°C.ElectroluxProductsWILLNOTacceptresponsibility for damage caused by installation into kitchen cabinets which cannot withstand 85°C.
• Thevents,openingsandairspacesMuSTNOT be blocked.
• YouMuSTNOTpullthecookerbythedoorhandles or the splashback.
• ThecookerMuSTbecheckedeveryfiveyears.
Locating the cookerStudy the diagrams below to be sure of the dimensions required to locate the cooker safely.Note: Make sure that the top of the hotplate surface is at least 10 mm higher than the level of the benchtops.
TIPS & INFORMATIONBefore you cook in your new oven it is important that the protective oils used in the manufacture of the product be removed.• Makesurethattheroomiswellventilated(toallow
smoke to escape).• Runthegrillonhighfor30minutes,withoutgrilldish.• Thenruntheovenon180°Cfor2hours.
Wiring requirementsThecookerMuSTbeinstalledincompliancewith• WiringconnectionsinAS/NZS3000WiringRules• Localregulations,municipalbuildingcodesandother
statutory regulations
Data plate •gives information about rating•islocatedontheinsidepanel
of the grill door
Circuit diagram •islocatedonthebackpanel of the control panel
• AnallpoledisconnectfunctionalswitchMuSTbeprovided near the appliance in an accessible position (AS/NZS3000–Clause4.7.1).
• WiringMuSTbeprotectedagainstmechanicalfailure(AS/NZS3000–Clause3.9).
• Ameansofdisconnectionwithacontactseparation ofatleast3mmMuSTbesuppliedinthefixedwiring.
Note: to gain access to the terminal block, remove the rear panel by unscrewing the two assembly screws.
WARNINGWhenconnectionsaremadetoamulti-phase240Vsupply,the bridge piece should be removed from between the active connections.
INSTALLING THE ELECTRIC COOKER
INSTALLING
INSTALLINGSAFETY WARNINGS ABOUT INSTALLATION
WARNING• ThecookerMuSTbeinstalledandservicedby
a qualified technician.• ACertificateofComplianceMuSTbesupplied
to be kept by the customer.• ThepackingmaterialsMuSTberemovedbefore
you install the cooker.• YouMuSTfollowtheinstallationinstructionsinthisbooklet.• ThesurroundingkitchencabinetsMuSTbeableto
withstand85°C.ElectroluxProductsWILLNOTacceptresponsibility for damage caused by installation into kitchen cabinets which cannot withstand 85°C.
• TheapplianceMuSTbeinstalledusingtheflexiblehose supplied.
• Thevents,openingsandairspacesMuSTNOT be blocked.
• YouMuSTNOTpullthecookerbythedoorhandles or the splashback.
• ThecookerMuSTbecheckedeveryfiveyears.• ThecookerMuSTNOTbeusedasaspaceheater.
Locating the cookerStudy the diagrams below to be sure of the dimensions required to locate the cooker safely.Note: Make sure that the top of the hotplate surface is at least 10 mm higher than the level of the benchtops.
TIPS & INFORMATIONBefore you cook in your new oven it is important that the protective oils used in the manufacture of the product be removed.• Makesurethattheroomiswellventilated(toallow
smoke to escape).• Runthegrillonhighfor15minuteswith10mm
of water in the bottom of the grill dish.• Thenruntheovenon180°Cfor2hours.
Checking gas pressuresThecookerMuSTbeinstalledincompliancewith:• TheInstallationCodeforGasBurningAppliances
andEquipment–AS5601/AG601–issuedbyStandards Australia (Particular reference to sections 4.8 & 5.12.1).
• Localgasfittingregulations,municipalbuildingcodesand other statutory regulations.
Thecookerscomeintwogastypes:NaturalgasandPropane. Before installation check that the cooker is suitable for the gas supply. To do this check the gas type on the carton sticker or on the data plate behind the bottom of the oven door.
The following table shows the supply and operating pressures for various gas supplies.
GAS TYPE NATURAL GAS PROPANE
Supply Pressureat inlet to appliance regulator (if fitted)
1.13 (kPa) Minimum
2.75* (kPa)
OperatingPressureat appliance test point
1.00 (kPa) 2.75 (kPa)
* If the regulator is placed upstream of the cooker inlet, as is normal for cookers operating on Propane, then the supply pressure and operating pressure are the same.
The following table shows the injector sizes for each burner.
INJECTOR ORIFICE NATURAL GAS PROPANE
LowHeatBurner 1.00 mm 0.62 mm
MediumHeatBurner 1.35 mm 0.82 mm
High Heat Burner 1.60 mm 0.95 mm
Grill–maininjector 1.50 mm 0.82 mm
Oven–maininjector 1.60 mm 0.95 mm
Oven–bypassscrew 0.73 mm 0.45 mm
Checking pipe sizeTo work out a suitable pipe size for connection use the information in the table below.
GAS TYPE NATURAL GAS PROPANE
Hourly gas consumption for this cooker
57.2MJ/h 56.5MJ/h
• Informationaboutthelengthoftherun,numberofelbows, tees and bends, the available service pressure and the supply requirements.
Note: the Code AS 5601/AG 601 will help you with this matter.
INSTALLING THE GAS COOKER
25
Operation on SNG• IfthecookeristobeusedwithSNG,thenthegrill
burnerMuSTbemodifiedbythereplacementoftheshutter which fits into the throat of the grill burner.
• Youcanbuythekitforthismodificationfromyournearest spare parts stockist. (refer to rear cover for contact details.)
1. Remove the control panel. Remove the existing NGshuttersecuringscrews(asindiagram)andslide upwards to disengage from grill burner.
2. SlidetheSNGshutterintopositionandsecure with screws.
Grill Shutter
Operation on PropaneAn inlet fitting with pressure test point is provided. Orientthefittingsothatgasflowsinthedirectionofthearrowmarkedonthefitting.usethesealingwashertoconnect the fitting to the flexible hose. Connect the gas supply to the 1/2” BSP internal thread inlet of the fitting.
Gas connectionRead these points before connecting to the gas supply:• Thecookerinletconnectionpointistheinlettothe
regulatororLPtestpointadaptor.Thisconnectstotheflexible hose fitted to the appliance. The appliance must be installed using the hose supplied.
• Theregulator/inletconnectionmustbeaccessiblewhen the appliance is installed.
Operation on NG/SNGReadthesepointsaboutoperationonNG/SNGandlookcarefully at the diagram:• TheapplianceregulatorprovidedMuSTbefittedand
positioned so that the pressure nipple is accessible.• ThearrowshowingthedirectionoftheflowMuSTbe
pointed correctly.• Connectthegassupplytothe1/2”BSPinternalthread
inlet of the regulator. • TheflatfibrewasherprovidedwiththeregulatorMuST
be used when making the gas connection.
INSTALLING THE GAS COOKER(continued)

Checking the Function of the RegulatorThe operation of the regulator can be confirmed by connecting a manometer to the pressure test point located on the side of the regulator body adjacent to the outlet. With the appliance operating check the outlet pressure: 1. When all burners of the appliance are operating
at maximum, 2. When the smallest burner of the appliance is operating
at minimum.undertheseconditionstheoutletpressureshouldnotvaryfrom the nominal outlet pressure by more than ±20% of thenominaloutletpressure(ie±0.20kPaforNaturalGas).If the regulator appears to not be performing satisfactorily then check the following points.1. If the outlet pressure is consistently too low then the
inlet pressure may be too low and adjustment of an upstream regulator may be needed, or an upstream regulator or valve with insufficient flow capacity may be present in the gas supply line. If this is suspected then it may be necessary to repeat the checks whilst measuring both the inlet and outlet pressure to determine iftheinletpressureisintherange1.13–5kPa.
2. Check that the regulator has been fitted to the gas supply line in the correct orientation, the arrow on the base of the body indicates the direction of gas flow.
Oncethesecheckshavebeencompleted,iftheregulatorstill fails to perform in a satisfactory manner it should be replaced.
TESTING THE OPERATION OF THE GAS COOKER
Testing appliance operation(Apparatus: manometer and connecting tube)After installation, test the appliance and ensure that it operates correctly, before handing it over to the customer.The following procedure is recommended:• Checkthatthemanometerzeropointiscorrect;then
connect the manometer to the appliance pressure test point.ThisislocatedontheRegulatororL.P.G.InletFitting behind the kick panel (or under the Storage Drawer where fitted).
• Turnonthegassupplyandelectricity(ifapplicable)and attempt ignition. (For correct procedure, refer to the IgnitionInstructions.)Notethatadditionaltimeneedsto be allowed for the initial lighting as air has to be purged from the pipes.
• Checktheoperatingpressurefortheparticular gas-type,asgivenintheTableonpage23.
ForL.P.G.appliances,theregulatorinquestionmayberemote from the appliance.
For Natural Gas appliancesRegulatorsaresuppliedpre-adjustedandconfiguredbythecomponentmakerforusewithNaturalGas.Theapplianceinstaller is not required to make an adjustment to obtain the correct outlet pressure setting.An arrow on the base of the regulator indicates the direction of gas flow when the inlet and outlet of the regulator are orientated correctly. When the regulator has been fitted check for leaks from the connections with soapy water.
TESTING

27
WarrantyFOR SALES IN AUSTRALIA AND NEW ZEALAND APPLIANCE: WESTINGHOUSE 540mm Upright Oven
Important NoticeBefore Calling a Service Technician please check carefully the operating instructions, service booklet and the warranty terms and conditions.
FOR SERVICE or to find the address of your nearest
state service centre in Australia PlEaSE Call 13 13 49
For the cost of a local call (Australia only)
SERVICE aUSTRalIa
ELECTROLUX HOME PRODUCTSwww.electrolux.com.au
FOR SPaRE PaRTS or to find the address of your nearest state spare parts centre in Australia
PlEaSE Call 13 13 50 For the cost of a local call (Australia only)
FOR SERVICE or to find the address of your nearest
authorised service centre in New Zealand FREE Call 0800 10 66 10
(New Zealand only)
SERVICE NEW ZEalaND
ELECTROLUX HOME PRODUCTSwww.electrolux.co.nz
FOR SPaRE PaRTS or to find the address of your nearest
state spare parts centre in New Zealand FREE Call 0800 10 66 20
(New Zealand only)
This document sets out the terms and conditions of product warranties for Electrolux branded appliances. It is an important document. Please keep it with your proof of purchase documents in a safe place for future reference should you require service for your Electrolux appliance.
General Terms and Conditions1. In this warranty (a)‘Electrolux’meansElectroluxHomeProductsPtyLtdABN51004762
341inrespectofAppliancespurchasedinAustraliaandElectrolux(NZ)LimitedinrespectofAppliancespurchasedinNewZealand;
(b) ‘Appliance’ means any Electrolux product purchased by you accompaniedbythisdocument;
(c) ‘Warranty Period’ means (i) where you use the Appliance for personal, domestic or household
purposesinAustraliatheperiodof‘24’monthsandinNewZealandtheperiodof‘24’months;
(ii) where you use the Appliance for commercial purposes, in Australia the periodof‘3’monthsandinNewZealandtheperiodof‘3’months,(if the period stated is 0 months you are not covered by this product warranty)followingthedateoforiginalpurchaseoftheAppliance;
(d) ‘you’ means the purchaser of the Appliance not having purchased the applianceforre-sale,and‘your’hasacorrespondingmeaning.
2. This warranty only applies to Appliances purchased and used in Australia orNewZealandandisinadditionto(anddoesnotexclude,restrict, ormodifyinanyway)anynon-excludablestatutorywarrantiesinAustralia orNewZealand.
3. Electrolux warrants that, when dispatched from an Electrolux warehouse, the Appliance is free from defects in materials and workmanship for the Warranty Period.
4. During the Warranty Period Electrolux or its Authorised Service Centre will, at no extra charge if your appliance is readily accessible without special equipment, and subject to these terms and conditions, repair or replace any parts which it considers to be defective. Electrolux or its ASC may use reconditionedpartstorepairyourappliance.YouagreethatanyreplacedAppliances or parts become the property of Electrolux. This warranty does not apply to light globes, batteries, filters or similar perishable parts.
5. Parts and Appliances not supplied by Electrolux are not covered by this warranty.
6. Where you are within an Electrolux service area, this warranty covers the cost of transport of the Appliance to and from Authorised Service Centres of Electrolux and travelling costs for representatives of the Authorised Service Centre to and from your home or business. If you are outside an Electrolux service area, you will bear these costs. For information about whether you are within an Electrolux service area, please phone 13 13 49 in Australia, or0800106610inNewZealand.
7. Proof of purchase is required before you can make a claim under this warranty. 8. Youmaynotmakeaclaimunderthiswarrantyunlessthedefectclaimedis
due to faulty or defective parts or workmanship. Electrolux is not liable in the following situations (which are not exhaustive):
(a) The Appliance is damaged by: (i) accident (ii) misuse or abuse, including failure to properly maintain or service (iii) normal wear and tear (iv) power surges, electrical storm damage or incorrect power supply (v) incomplete or improper installation (vi) incorrect, improper or inappropriate operation (vii) insect or vermin infestation. (b) The Appliance is modified without authority from Electrolux in writing. (c) The Appliance’s serial number or warranty seal has been removed
or defaced. (d) The Appliance was serviced or repaired by anyone other than Electrolux
or its Authorised Service Centres.9. This warranty, the contract to which it relates and the relationship between
you and Electrolux are governed by the law applicable in the Australian State wheretheAppliancewaspurchasedorthelawapplicableinNewZealandiftheAppliancewaspurchasedinNewZealand.WheretheAppliancewaspurchasedinNewZealandforbusinesspurposestheConsumerGuaranteeAct does not apply.
limitation of liability10. To the extent permitted by law: (a) Electrolux excludes all warranties other than as contained in this
document; (b) Electrolux shall not be liable for any loss or damage whether direct or
indirectorconsequentialarisingfromyourpurchase,useornon-useof the Appliance.
11. Provisions of the Trade Practices Act and State consumer legislation in Australia, and the Consumer Guarantees Act, the Sale of Goods Act and theFairTradingActinNewZealand,implywarrantiesorconditions,orimpose obligations, upon Electrolux which cannot be excluded, restricted or modified. To the extent permitted by law, the liability of Electrolux (if any) arising out of or in relation to the Appliance or any services supplied by Electrolux shall be limited (where it is fair and reasonable to do so),:
(a) in the case of Appliances, at its option, to the replacement or repair of the Appliances or the supply of equivalent products or the payment of the cost of replacing the Appliances or having the Appliances repaired orofacquiringequivalentAppliances.uponbeingreplaced,partsandAppliancesbecomethepropertyofElectrolux;or
(b) in the case of services, at its option, to the supply of the services again orthepaymentofthecostofhavingtheservicesre-supplied;
andinthecaseofAppliancesorservicessuppliedinNewZealand,lossordamage whether direct or indirect or consequential that is reasonably foreseeable.
Privacy Youacknowledgethatintheeventthatyoumakeawarrantyclaimitwillbe necessary for Electrolux and its Authorised Service Centres to exchange information in relation to you to enable Electrolux to meet its obligations under this warranty.

AUSTRALIAphone: 1300 363 640fax: 1800 350 067email: [email protected]: www.westinghouse.com.au
NEW ZEALANDphone: 09 573 2384fax: 0800 363 600email: [email protected]: www.westinghouse.co.nz
For more information on all Westinghouse appliances, or for dimension and installation information, call into your retailer, phone or email our customer care team or visit our website:
TOP SERVICE Top Service encompasses the after sales service provided by The Electrolux Group to consumers including delivery, home service and spare parts.
Westinghouse. We are part of the Electrolux family. Share more of our thinking at www.electrolux.com
©2009ElectroluxHomeProductsPtyLtdABN51004762341 Printcode:WMAN_540mmuprightIssueDate:Nov09P/No.342–1–546ECN09A060A