ulc deployment guide - canoo
TRANSCRIPT

ULC Deployment Guide
ULC
Deployment
Guide
Canoo RIA Suite Update 5

ULC Deployment Guide
Canoo Engineering AG
Kirschgartenstrasse 5
CH-4051 Basel
Switzerland
Tel: +41 61 228 9444
Fax: +41 61 228 9449
http://ulc.canoo.com/
Copyright 2000-2011 Canoo Engineering AG
All Rights Reserved.
DISCLAIMER OF WARRANTIES
This document is provided “as is”. This document could include technical inaccuracies or typographical
errors. This document is provided for informational purposes only, and the information herein is subject
to change without notice. Please report any errors herein to Canoo Engineering AG. Canoo Engineering
AG does not provide any warranties covering and specifically disclaim any liability in connection with
this document.
TRADEMARKS
Java and all Java-based trademarks are registered trademarks of Sun Microsystems, Inc.
IBM and WebSphere are trademarks or registered trademarks of International Business Machines
Corporation.
All other trademarks referenced herein are trademarks or registered trademarks of their respective
holders.

ULC Deployment Guide
Contents
1 Overview 4
2 Client Deployment 5
2.1 Overview .............................................................................................. 5
2.2 Security Aspects .................................................................................. 5
2.2.1 Issue ........................................................................................... 5
2.2.2 Solutions .................................................................................... 5
2.3 Deployment with JNLP ......................................................................... 6
2.3.1 JNLP Client Module.................................................................... 6 2.3.2 Deploying the Default JNLP Application Client ........................... 7 2.3.3 Deploying a Customized JNLP Application Client ...................... 8
2.3.4 Signing a JNLP Application Client ............................................ 10 2.3.5 Using HTTPS ........................................................................... 12
2.4 Deployment as Applet ........................................................................ 12
2.4.1 The Applet Client Module ......................................................... 13
2.4.2 Deploying the Default Applet Application Client ....................... 13 2.4.3 Deploying a Customized Applet Client ..................................... 15
2.4.4 Customizing the Splash Screen ............................................... 16 2.4.5 Deploying a Partially Signed Applet Application Client ............. 16
2.4.6 Using HTTPS ........................................................................... 17 2.4.7 Interacting with the Enclosing HTML Page ............................... 17
2.5 Deployment as a Standalone Client ................................................... 19
2.5.1 Standalone Client Module ........................................................ 19 2.5.2 Distributing the Client ............................................................... 19
2.5.3 Deploying a Default Standalone Application Client .................. 20 2.5.4 Deploying a Customized Standalone Application Client ........... 20
2.6 Advanced Features ............................................................................ 20
2.6.1 Running Multiple Sessions within the Same Process ............... 20 2.6.2 Installing a Message Service to Start Client Sessions.............. 21
3 Server Deployment 22
3.1 Overview ............................................................................................ 22
3.2 Servlet Container ............................................................................... 22
3.2.1 Overview .................................................................................. 22 3.2.2 Components ............................................................................. 23
3.2.3 Deployment Descriptor ............................................................. 23 3.2.4 Deployment Key ....................................................................... 24 3.2.5 Packaging ................................................................................ 24 3.2.6 Deployment .............................................................................. 25 3.2.7 Advanced Configuration ........................................................... 25

ULC Deployment Guide
4 Standalone or Offline Deployment 27
4.1 Overview ............................................................................................ 27
4.2 Local Container .................................................................................. 27
References 30

ULC Deployment Guide 4
1 Overview
Canoo RIA Suite is based on ULC technology that provides components to build Rich
Internet Applications (RIA) in Java. Use this standard Java library to develop rich,
responsive graphical user interfaces (GUIs) for enterprise web applications within Java
EE and Java SE infrastructures.
This edition of the ULC Deployment Guide accompanies Canoo RIA Suite ULC. It
describes the procedures and scenarios required to deploy ULC applications. It is
assumed that the reader is familiar with Java programming and has some familiarity
with the Java Swing widget set. Since ULC applications are pure Java applications, they
can be built using any suitable Java 2 compatible development environment (JRE 1.5 or
higher).
Organization
The ULC Deployment Guide is divided into two chapters:
Chapter 2 discusses the various options available to deploy an ULC application on the
client side.
Chapter 3 discusses the various options available to deploy an ULC application on the
server.
Chapter 3 discusses how to run an ULC application as a standalone, desktop Java
application.

ULC Deployment Guide 5
2 Client Deployment
2.1 Overview
The following sections describe how to deploy your ULC applications on the client.
ULC is an application development framework, where only the application specific
code is deployed on the server. In general, the client is application-independent.
Nevertheless it must be deployed on the client’s machine. Deployment consists of two
aspects, namely distribution of the code and integration into the client’s environment.
There are several options for both the distribution and the integration. Integration into
the client environment may be accomplished by configuring one of the default launchers
or by writing a customized launcher. There are a large variety of possible deployment
scenarios ranging from a customized client for a single application (e.g., with special
splash screens, banners and icons) deployed as a JNLP application or as an applet up to
an organization-wide universal client installation (integrating into the organization’s
security infrastructure). This chapter discusses typical deployment scenarios to help you
to choose and customize the appropriate deployment strategy for your setting.
2.2 Security Aspects
2.2.1 Issue
The UI Engine (running on the client) connects to a ULC application server and
presents the user interface (UI) of the ULC application. This is conceptually similar to a
web browser connecting to a web server. However, responses received from a ULC
application server are requests which are interpreted by the client half objects to execute
commands on the client. Although most commands are used to create or change GUI
components, there are also half objects which can be controlled by a ULC application to
access the client’s file system. It is obvious that the user's system faces security risks
when such operations are triggered by untrusted server applications. There are basically
three kinds of security risks which must be considered:
1. A malicious ULC application may misuse the provided functionality of the client
base framework to execute undesired operations like reading or writing files or
accessing resources such as system properties and clipboard.
2. Untrusted ULC extensions may cause damage to the user's system by executing
malicious Java code.
3. Connecting to an unauthenticated server and communicating over an unencrypted
channel allows a third party to snoop on and observe the data exchanged between
the UI Engine and the ULC application.
Others, like denial of service attacks, are not ULC-specific.
2.2.2 Solutions
ULC uses the infrastructure provided by the Java Security Architecture (see [8]).
Most functionality of a standard ULC application client can be performed when the
client code is executed within a default sandbox. It is thus a good practice to run a ULC
application client which does not use security relevant functionality within the default
sandbox (e.g., deploy the client as an unsigned applet or using JNLP without signing). If

ULC Deployment Guide 6
security relevant functionality is required by an application (e.g., reading/writing files
on the client) the following scenarios should be considered:
The ULC application client is operated in a trusted environment, i.e., a trusted
installation is guaranteed and the client is restricted to connect to trusted hosts only.
This situation may be found in a company’s Intranet environment.
The client is signed by a trusted entity, for some deployment scenarios, this will
allow it to break out of the sandbox. The specific modules of the client, where
operations needing more permissions are implemented, must be signed. Consider the
case of freely reading/writing files on the client. Those operations are implemented
and delivered within the client module ulc-base-trusted.jar (for which you have
the source code). If you need to read or write files on the client, you need to deploy
and sign this module on the client.
Use the Java Security Architecture to restrict access to minimal requirements of an
application, e.g., if an application needs to read/write specific files or directories,
you may consider granting this right to an untrusted application.
Tips
To prevent a ULC application client from connecting to unauthenticated servers,
restrict the client to use secure communication protocols (e.g., HTTPS), which
enable server authentication.
If an application operates on security relevant data, ensure that the communication
channel uses encryption (e.g., HTTPS), regardless whether the client runs in a
sandbox or not.
2.3 Deployment with JNLP
The recommended mechanism for distributing and deploying ULC application clients is
through a JNLP client, e.g., Java Web Start (JWS). With JWS, end users just click on a
hyperlink in a web page, which points to a file (with extension .jnlp) describing the
configuration of a Java program. The specified resources are transparently downloaded
and the program is started. JWS comes with support for many attractive features like:
Multiple JREs
Code-signing
Sandboxing
Versioning and incremental updates
Desktop integration
Users must have an appropriate version of the JWS client installed on their machine,
however, JWS is part of the standard Java platform since JDK 1.4. For more
information on JWS please refer to [2].
2.3.1 JNLP Client Module
The JNLP client module (ulc-jnlp-client.jar) included in the standard distribution of
ULC contains the following components:
A JNLP based implementation of the client services (browser and file service)
An abstract JNLP launcher implementing basic lifecycle management.

ULC Deployment Guide 7
A default implementation of a JNLP launcher that uses a Servlet connector to
communicate with the Servlet container hosting the ULC application. The URL, the
keep-alive interval and the user parameters can be specified by command line
arguments. The arguments must have the following syntax:
DefaultJnlpLauncher url-string=<urlString>
[keep-alive-interval=<keepAliveInterval>]
[log-level=<logLevel>]
[data-stream-provider=<streamProviderClassName>]
[carrier-stream-provider=<streamProviderClassName>]
[client-coder-registry-provider=<registryProviderClassName>]
{<key>=<value>}
In the following, some typical deployment scenarios for JWS are outlined. It is assumed
that JWS has been installed on the client system and the extension .jnlp has been
assigned to the JWS client.
Note that the use of the parameters data-stream-provider, carrier-stream-provider and
client-coder-registry-provider is discussed in Section 2.2 of the ULC Architecture
Guide and in Section 4 of the ULC Extension Guide.
2.3.2 Deploying the Default JNLP Application Client
The simplest way to deploy a JNLP-based ULC application client is to deploy the
default client implementation provided in the JNLP module of the ULC release. The
default JNLP client configures the client environment adapter in the following way:
It installs browser and file service implementations which are based on the
appropriate service defined by the JNLP specification.
It terminates the client when the session is terminated.
It provides default dialogs for error situations.
The following JNLP file demonstrates, how to configure the default client. The first two
arguments specify the URL and the keep-alive interval required for the Servlet
connector to set up the connection to the appropriate Servlet container which operates
the ULC application. Additional key value pairs specify the user parameters which are
passed to the application upon startup. Reading these parameters in the application code
is done by using the ClientContext.getUserParameter() API (see the Chapter about
Accessing the Client Environment in the ULC API documentation). The listed example
assumes that the following files are available in the directory referenced by the URL http://www.acme.com/demo/teammembers/:
.../demo/teammembers/
teammembers.gif -- image displayed by Java Web Start
teammembers.jnlp -- the actual JNLP file
ulc-jnlp-client.jar -- JNLP client module classes
ulc-base-client.jar -- base framework classes
ulc-servlet-client.jar -- servlet connector classes

ULC Deployment Guide 8
The Servlet serving the ULC application is assumed to be mapped to the URL
http://www.acme.com/demo/teammembers/application/. The following listing shows the
content of the teammembers.jnlp file.
<xml version="1.0" encoding="utf-8"?>
<jnlp spec="1.0+"
codebase="http://www.acme.com/demo/teammembers/"
href="teammembers.jnlp">
<information>
<title>Team Members</title>
<vendor>ACME</vendor>
<homepage href="http://www.acme.com/"/>
<icon href="teammembers.gif"/>
</information>
<resources>
<j2se version="1.5+"/>
<jar href="ulc-jnlp-client.jar"/>
<jar href="ulc-base-client.jar"/>
<jar href="ulc-servlet-client.jar"/>
</resources>
<application-desc main-class=
"com.ulcjava.environment.jnlp.client.DefaultJnlpLauncher">
<argument>url-string=
http://www.acme.com/demo/teammembers/application/
</argument>
<argument>keep-alive-interval=900</argument>
<argument>user=scott</argument>
</application-desc>
</jnlp>
2.3.3 Deploying a Customized JNLP Application Client
In some cases it may be desirable to customize a ULC application client, e.g., to
configure the client environment adapter, to customize message dialogs or to brand the
client by displaying a splash screen at startup.
In the following example a splash screen is shown during application startup. This is
done by adapting a launcher such that a splash screen handler is created and gets
installed as a message service on the client. In this approach as soon as the main
application is shown a message will be send to the client, notifying the client to hide the
splash screen.
public class FancyJnlpTeamMembersClient {
public static void main(String[] args) throws MalformedURLException {
SplashScreenHandler splashScreenHandler = new
SplashScreenHandler(new SplashScreen());
ClientEnvironmentAdapter.setMessageService(splashScreenHandler);
splashScreenHandler.showSplashScreen();
DefaultJnlpLauncher.main(args);
}
}
ULC Deployment Guide 9
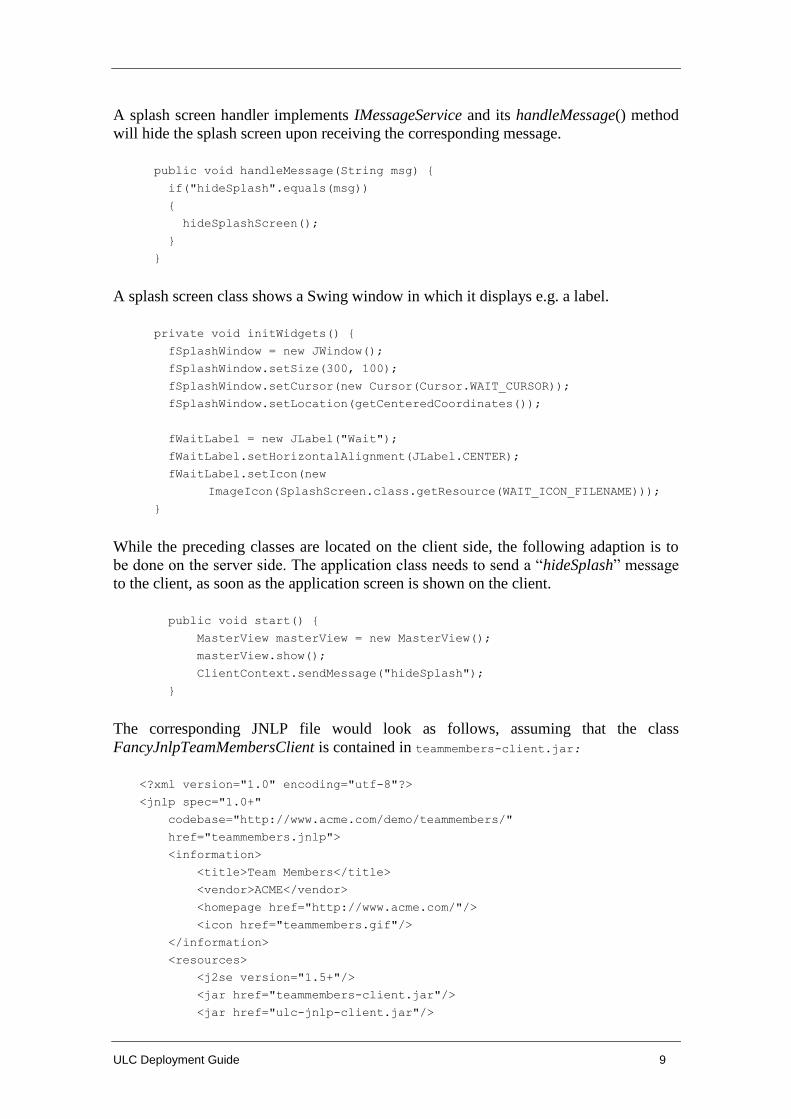
A splash screen handler implements IMessageService and its handleMessage() method
will hide the splash screen upon receiving the corresponding message.
public void handleMessage(String msg) {
if("hideSplash".equals(msg))
{
hideSplashScreen();
}
}
A splash screen class shows a Swing window in which it displays e.g. a label.
private void initWidgets() {
fSplashWindow = new JWindow();
fSplashWindow.setSize(300, 100);
fSplashWindow.setCursor(new Cursor(Cursor.WAIT_CURSOR));
fSplashWindow.setLocation(getCenteredCoordinates());
fWaitLabel = new JLabel("Wait");
fWaitLabel.setHorizontalAlignment(JLabel.CENTER);
fWaitLabel.setIcon(new
ImageIcon(SplashScreen.class.getResource(WAIT_ICON_FILENAME)));
}
While the preceding classes are located on the client side, the following adaption is to
be done on the server side. The application class needs to send a “hideSplash” message
to the client, as soon as the application screen is shown on the client.
public void start() {
MasterView masterView = new MasterView();
masterView.show();
ClientContext.sendMessage("hideSplash");
}
The corresponding JNLP file would look as follows, assuming that the class
FancyJnlpTeamMembersClient is contained in teammembers-client.jar:
<?xml version="1.0" encoding="utf-8"?>
<jnlp spec="1.0+"
codebase="http://www.acme.com/demo/teammembers/"
href="teammembers.jnlp">
<information>
<title>Team Members</title>
<vendor>ACME</vendor>
<homepage href="http://www.acme.com/"/>
<icon href="teammembers.gif"/>
</information>
<resources>
<j2se version="1.5+"/>
<jar href="teammembers-client.jar"/>
<jar href="ulc-jnlp-client.jar"/>

ULC Deployment Guide 10
<jar href="ulc-base-client.jar"/>
<jar href="ulc-servlet-client.jar"/>
</resources>
<application-desc main-class=example.FancyJnlpTeamMembersClient">
<argument>url-string=
http://www.acme.com/demo/teammembers/application/
</argument>
<argument>keep-alive-interval=900</argument>
<argument>user=scott</argument>
</application-desc>
</jnlp>
2.3.4 Signing a JNLP Application Client
In general it is recommended to execute a ULC application client in the JNLP sandbox.
However, there are situations where functionality not allowed by the standard sandbox
is required, e.g., accessing the system clipboard or granting file access without asking
the user. In such situations the client classes must be signed. Note that whenever the
sign client code is signed, it must be ensured that the signed code cannot be misused by
malicious ULC applications.
It is possible to sign all client jar files, but it is better practice to sign only those files
that contain functions which need more permissions.
If permission is required for file or browser access, without asking the user to grant
access, the proposed solution forces the developer to sign a single jar file (ulc-base-
trusted.jar). This source code is part of the release.
The file access functions are isolated in the library ulc-base-trusted.jar, which
contains the classes AllPermissionsFileService and AllPermissionsBrowserService. The
source of these classes is part of the ULC release, so you can see and evaluate exactly
what the single signed functions do in the client local file system.
All functions within the trusted-client.jar granting full browser and file service
permissions are isolated within a so called “privilege block” defined in the class
AccessController provided by the Java SDK.
The fact that the file access functions are specified within a privilege block means that
only the privilege code within the block needs to be signed, not the whole call stack. In
this way you only need to sign the code that you really trust, and are not forced to sign
every client jar file.
Background
All code shipped as part of the SDK is considered system code. System code
automatically has all permissions ([8]).
Each applet or application runs in a domain determined by its code source. In order for
an applet or a JNLP client (or whatever application is running under a security manager)
to be allowed to perform a security action, such as reading or writing a file, it must be
granted permission for that particular action. Whenever a resource access is attempted,
the code traversed by the execution thread up to that point (the call stack) must have
permission for that resource access, unless some code on the thread has been marked as
“privileged”. In that case only the code within the privilege block needs to have
permissions.
ULC Deployment Guide 11
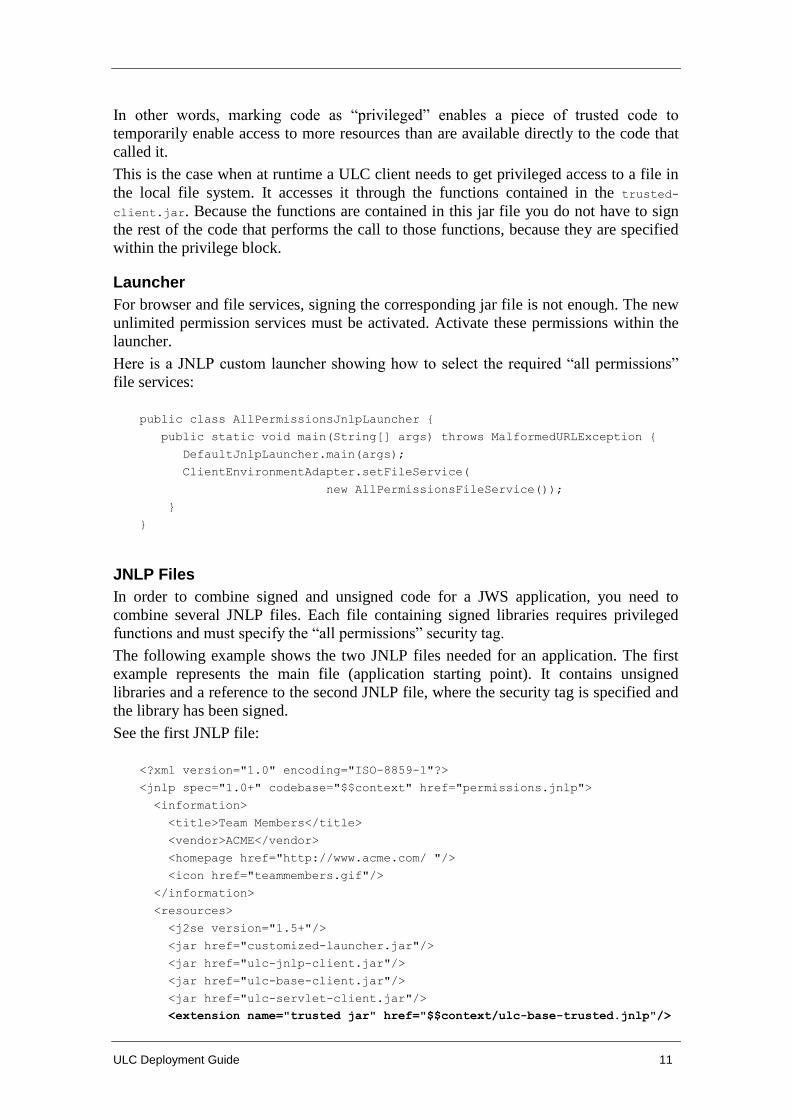
In other words, marking code as “privileged” enables a piece of trusted code to
temporarily enable access to more resources than are available directly to the code that
called it.
This is the case when at runtime a ULC client needs to get privileged access to a file in
the local file system. It accesses it through the functions contained in the trusted-
client.jar. Because the functions are contained in this jar file you do not have to sign
the rest of the code that performs the call to those functions, because they are specified
within the privilege block.
Launcher
For browser and file services, signing the corresponding jar file is not enough. The new
unlimited permission services must be activated. Activate these permissions within the
launcher.
Here is a JNLP custom launcher showing how to select the required “all permissions”
file services:
public class AllPermissionsJnlpLauncher {
public static void main(String[] args) throws MalformedURLException {
DefaultJnlpLauncher.main(args);
ClientEnvironmentAdapter.setFileService(
new AllPermissionsFileService());
}
}
JNLP Files
In order to combine signed and unsigned code for a JWS application, you need to
combine several JNLP files. Each file containing signed libraries requires privileged
functions and must specify the “all permissions” security tag.
The following example shows the two JNLP files needed for an application. The first
example represents the main file (application starting point). It contains unsigned
libraries and a reference to the second JNLP file, where the security tag is specified and
the library has been signed.
See the first JNLP file:
<?xml version="1.0" encoding="ISO-8859-1"?>
<jnlp spec="1.0+" codebase="$$context" href="permissions.jnlp">
<information>
<title>Team Members</title>
<vendor>ACME</vendor>
<homepage href="http://www.acme.com/ "/>
<icon href="teammembers.gif"/>
</information>
<resources>
<j2se version="1.5+"/>
<jar href="customized-launcher.jar"/>
<jar href="ulc-jnlp-client.jar"/>
<jar href="ulc-base-client.jar"/>
<jar href="ulc-servlet-client.jar"/>
<extension name="trusted jar" href="$$context/ulc-base-trusted.jnlp"/>

ULC Deployment Guide 12
</resources>
<application-desc main-class="example.AllPermissionsJnlpLauncher">
<argument>url-string=$$context/application</argument>
<argument>keep-alive-interval=60</argument>
</application-desc>
</jnlp>
And here is the second JNLP file, containing signed code, referenced by the first one:
<?xml version="1.0" encoding="ISO-8859-1"?>
<jnlp spec="1.0+" codebase="$$context" href="ulc-base-trusted.jnlp">
<information>
<title>Trusted Code</title>
<vendor>ACME</vendor>
<homepage href="http://www.acme.com/ "/>
</information>
<resources>
<jar href="signed-ulc-base-trusted.jar"/>
</resources>
<security>
<all-permissions/>
</security>
</jnlp>
See samples/trusted in the release for a sample application that shows how to use the
trusted browser and file system services.
2.3.5 Using HTTPS
If a ULC application client uses an encrypted communication channel, then the HTTPS
protocol may be used. Since ULC requires JRE 1.5 or higher, the servlet connector can
use the JSSE implementation included in the JRE, by specifying the appropriate URL
protocol, e.g., https://www.acme.com/demo/teammembers/application/. Since in this
case the application is run in the sandbox, even the default JNLP launcher may be used.
2.4 Deployment as Applet
The UI Engine can be deployed and executed as an applet running in the Java Plug-in of
a web browser. There are two ways to deploy the applet: either embedded in an HTML
page or outside the HTML page in a separate frame.
1. Embedded: The ULCAppletPane widget allows the applet pane to be used as a
window container. This is the preferred way for ULC applications deployed as
applets, since otherwise there is no visual feedback on the HTML page which
encapsulates the applet. Note that clicking the back button or closing the window
immediately stops the applet and thus also the ULC application client is stopped. In
some situations, this may be very confusing for users. Alternatively, appropriate
JavaScript code could hide the enclosing window to prevent the user from closing it.
2. Outside: If a ULCFrame is used as the root pane instead of the ULCAppletPane, the
applet will not be embedded in the HTML page but run in its own frame out side the
HTML page.

ULC Deployment Guide 13
To use the Java Plug-in, you must use the Java Plug-in tag (OBJECT or EMBED) instead of
the APPLET tag in an HTML page. With Internet Explorer on Windows platforms, use
the OBJECT tag. In Netscape Navigator 3 or 4 on Windows platforms, or Solaris
operating environments, use the EMBED tag. There are ways to activate the Java Plug-in
for both Navigator and Internet Explorer browsing the same HTML page (see [10]).
Using the Java Plug-in 1.5, the HTML APPLET tag may be used to launch applets with
the installed Java Plug-in. Users may configure their browsers such that Sun's JRE is the
default runtime environment for handling APPLET tags (see [11]).
2.4.1 The Applet Client Module
The applet client module (ulc-applet-client.jar) included in the standard distribution
of ULC contains the following components:
An implementation of the browser service, using the applet context to open a
document with the browser in which the applet is running.
The client half object implementation of the applet pane container (UIAppletPane),
which may use the applet pane as a window container for ULC widgets.
An abstract applet launcher implementing the basic lifecycle management. User
parameters may be specified by applet parameters.
A default implementation of an applet launcher using a servlet connector to
communicate with the servlet container hosting the ULC application. The url, the
keep-alive-interval, the log-level and user parameters can be specified by the applet
parameters.
2.4.2 Deploying the Default Applet Application Client
The simplest way to deploy a ULC application client as an applet is to deploy the
default applet client provided in the applet client module of the ULC release. The
default applet client configures the client environment adapter in the following way:
It installs a browser service implementation which uses the appropriate API of the
applet context to open documents in a browser.
It initializes the client-side implementation of the applet pane widget, to use the
applet pane as a window container.
It terminates the client session (notification is sent to server session), when the
applet is stopped.
It provides default dialogs for error situations.
The following HTML file demonstrates how to invoke and configure the default applet
client. The applet parameters url-string and the keep-alive-interval are required for the
servlet connector to set up the connection to the appropriate servlet container operating
the actual ULC application. The names of all user parameters to be passed to the
application must be specified in a comma-separated list in the applet parameter user-
parameter-names. The actual values of the user parameters may then be specified with
corresponding applet parameters. These user parameters may be accessed by the
application code using the ClientContext.getUserParameter() API (see Accessing the
Client Environment in the ULC API documentation).
The listed example illustrates how to invoke the default applet launcher with the Java
Plug-in for Internet Explorer and Netscape browsers within the same HTML document

ULC Deployment Guide 14
(OBJECT and EMBED tag). It is assumed that the following files are available in the
directory referenced by the URL http://www.acme.com/demo/teammembers/:
.../demo/teammembers/
teammembers.html -- the actual HTML file
ulc-applet-client.jar -- applet client module classes
ulc-base-client.jar -- base framework classes
ulc-servlet-client.jar -- servlet connector classes
The servlet serving the ULC application is assumed to be mapped to the URL
http://www.acme.com/demo/teammembers/applicationApplet/.
<!DOCTYPE HTML PUBLIC "-//W3C//DTD HTML 4.0 Transitional//EN">
<HTML>
<HEAD>
<TITLE>Canoo RIA Suite: Team Members Sample</TITLE>
</HEAD>
<BODY>
<OBJECT classid="clsid:8AD9C840-044E-11D1-B3E9-00805F499D93"
WIDTH = "100%" HEIGHT = "100%"
<PARAM NAME = "archive" VALUE = "ulc-base-client.jar,ulc-applet-client.jar,
ulc-servlet-client.jar" >
<PARAM NAME = "type" VALUE = "application/x-java-applet">
<PARAM NAME = "codebase" VALUE = "." >
<PARAM NAME = "code" VALUE =
"com.ulcjava.environment.applet.client.DefaultAppletLauncher.class">
<PARAM NAME = "url-string" VALUE = "http://www.acme.com/demo/
teammembers/applicationApplet/">
<PARAM NAME = "keep-alive-interval" VALUE = "900">
<PARAM NAME = "user-parameter-names" VALUE = "user,role">
<PARAM NAME = "user" VALUE = "scott">
<PARAM NAME = "role" VALUE = "sales">
<COMMENT>
<EMBED WIDTH = "100%" HEIGHT = "100%"
type = "application/x-java-applet"
codebase = "."
archive = "ulc-base-client.jar,ulc-applet-client.jar,
ulc-servlet-client.jar"
code = "com.ulcjava.environment.applet.client.
DefaultAppletLauncher.class"
url-string ="http://www.acme.com/demo/
teammembers/applicationApplet/"
keep-alive-interval = "900"
user-parameter-names = "user,role"
user = "scott"
role = "sales"
pluginspage = "http://java.sun.com/products/plugin/" >
<NOEMBED>No JDK 1.5 support for APPLET!</NOEMBED>
</EMBED>
</COMMENT>
</OBJECT>
</BODY>
</HTML>

ULC Deployment Guide 15
In addition to the applet parameters shown above, developers can specify names of
custom provider classes for data stream, carrier stream and client coder registry. The use
of parameters data-stream-provider, carrier-stream-provider and client-coder-registry-
provider is discussed in Section 2.2 of the ULC Architecture Guide and in Section 4 of
the ULC Extension Guide.
2.4.3 Deploying a Customized Applet Client
If ULC application clients are only used for specific ULC applications, an application
specific applet may be deployed. The basic initialization of the client environment
adapter, the user parameter handling and a default error handling can be inherited from
the AbstractAppletLauncher class, which is an applet. The application specific
implementation must at least implement the abstract method createConnector(). If
desired, the lifecycle methods can be overridden, e.g., to give feedback in the applet
pane about the client session state, as outlined in the following code fragment
public class AppletTeamMembersClient extends AbstractAppletLauncher {
private static final long serialVersionUID = VersionInfo.sSerialVersionUID;
private static String APPLICATION_URL =
"http://www.canoo.com/demo/teammembers/applicationApplet/";
@Override
protected IConnector createConnector() {
return new ServletConnector(new AppletRequestPropertyStore(), createURL(),
900);
}
private static URL createURL() {
try {
return new URL(APPLICATION_URL);
} catch (MalformedURLException e) {
throw new CheckedExceptionTunnel(e);
}
}
@Override
public void start() {
super.start();
getSession().addSessionStateListener(new MySessionStateListener());
}
//
// Helper classes
//
private class MySessionStateListener implements ISessionStateListener {
public void sessionEnded(UISession session) {
addLabel("Application terminated.");
}
public void sessionStarted(UISession session) {
addLabel("Application started.");
}

ULC Deployment Guide 16
public void sessionError(UISession session, Throwable reason) {
}
private void addLabel(String text) {
Container contentPane = getContentPane();
contentPane.removeAll();
contentPane.setLayout(new BorderLayout());
contentPane.add(BorderLayout.CENTER, new JLabel(text));
contentPane.validate();
}
}
}
2.4.4 Customizing the Splash Screen
Customizing the splashscreen can be a quick alternative in order to customize the start
screen while the application is loading.
Within the source folder of the generated project in the subpackage resources there is a
file named <Name of Main Application class>.properties. This file contains a property
Application.splash, which references an image file. This image is displayed while the
application is loading. By default, this image shows the Canoo RIA Suite logo. Just put
your own image file into the icons package and let Application.splash point to it.
Supported image types are gif (even animated) and png.
2.4.5 Deploying a Partially Signed Applet Application Client
In general it is sufficient and recommended to execute a ULC application client in the
applet sandbox, however there are situations where functionality not allowed by the
standard sandbox is required, e.g., an application would like to access files on the client
machine. In contrast to JNLP there is no support for file access for applets running in
the sandbox. A customized applet launcher could install an appropriate file service
using standard java.io.* classes to access files on the client.
As for the JNLP clients, you may use some privileged services, available as single jar
file (ulc-base-trusted.jar). The source code is part of the release.
The file access functions are part of the library ulc-base-trusted.jar, which contains
the classes AllPermissionsFileService and AllPermissionsBrowserService. The source of
these classes is part of the ULC release. Have a look at this sample to see and evaluate
exactly what the single signed functions do in the client local file system.
All functions within ulc-base-trusted.jar granting full browser and file service
permissions are isolated within a so called “privilege block”, defined in the class
AccessController provided by the Java SDK.
File access functions are specified within a privilege block. This means that only the
privileged code within the block needs to be signed, not the whole call stack. This
allows you to sign only the code that you really trust, without forcing you to sign every
client jar file.
Launcher
For browser and file services, signing the corresponding jar file is not enough. The new
unlimited permission services must be activated. It is necessary to activate the
permissions within the launcher.

ULC Deployment Guide 17
Here is an applet custom launcher showing how to select the needed “all permissions”
file services:
public class AllPermissionsAppletLauncher extends DefaultAppletLauncher{
public void init(){
super.init();
ClientEnvironmentAdapter.setFileService(
new AllPermissionsFileService());
}
}
The selected implementation of the file service uses methods that check for
FilePermissions, calling these methods throws a security exception for unsigned
applets, unless the user grants the appropriate permissions to the applet’s code base in
the policy file. In general this cannot be assumed, therefore the applet must be signed.
Because all functions within the classes in ulc-base-trusted.jar are isolated in
privilege blocks, only the ulc-base-trusted.jar must be signed.
To grant permissions in a more fine-grained manner and to avoid prompting the user to
grant permissions, the usePolicy permission was introduced with JDK 1.3. If the
following entry is added to the policy file, the Java Plug-in classloader automatically
assigns the permissions granted to the applet’s code base to the loaded classes. Further
information can be found in [12].
grant {
permission java.lang.RuntimePermission "usePolicy";
};
2.4.6 Using HTTPS
As the Java Plug-in uses the browser’s infrastructure when using
URL.openConnection() the servlet connector is automatically enabled to communicate
using the HTTPS protocol.
2.4.7 Interacting with the Enclosing HTML Page
To integrate a ULC application in a web application, some interaction between the
HTML page and the applet application client might be required. There are solutions for
either direction: The HTML page may contain JavaScript code, which may call methods
on the enclosed applets. Using LiveConnect the applet may execute JavaScript code in
the enclosing document. For more information please refer to [13] and [14].
The following example outlines how an HTML document may interact with a ULC
application client. The JavaScript code, which is attached to the HTML button Set User
reads the content of the text field, and passes this value to the ULC application client by
calling a method on the applet launcher. The launcher may send this value as a message
to the actual application (running on the server) triggering updates in the GUI. The
application must implement the handleMessage() callback of the IApplication interface.

ULC Deployment Guide 18
Enclosing HTML fragment:
<!DOCTYPE HTML PUBLIC "-//W3C//DTD HTML 4.0 Transitional//EN">
<HTML>
<HEAD>
<TITLE>Ultra Light Client: Team Members Sample</TITLE>
</HEAD>
<BODY>
<FORM NAME="form1">
<OBJECT classid="clsid:8AD9C840-044E-11D1-B3E9-00805F499D93"
WIDTH = "100%" HEIGHT = "100%" ID = "TeamMembersClient"
codebase=".">
<PARAM NAME = "archive" VALUE = "ulc-base-client.jar,
ulc-applet-client.jar,ulc-servlet-client.jar" >
<PARAM NAME = "type" VALUE = "application/x-java-applet;version=1.2.2">
<PARAM NAME = "codebase" VALUE = "." >
<PARAM NAME = "code" VALUE = "example.AppletTeamMembersClient.class" >
</OBJECT>
...
<INPUT TYPE="text" SIZE="20" NAME="user">
<INPUT TYPE="button" VALUE="Set User" onClick=
"document.TeamMembersClient.setUser(document.form1.user.value)"
>
...
</BODY>
</HTML>
Customized applet launcher fragment:
public class AppletTeamMembersClient extends AbstractAppletLauncher {
...
public void setUser(String user) {
getSession().sendMessage("setUser:" + user);
}
...
ULC application fragment, reacting on messages:
public class TeamMembers extends AbstractApplication {
private static final String SET_USER_MSG = "setUser:";
private MasterView fMasterView;
public void start() {
fMasterView = new MasterView();
fMasterView.show();
}
public void handleMessage(String message) {
if (message.startsWith(SET_USER_MSG)) {
String user = message.substring(SET_USER_MSG.length());
fMasterView.setUser(user);
}

ULC Deployment Guide 19
}
...
2.5 Deployment as a Standalone Client
2.5.1 Standalone Client Module
The standalone client module (ulc-standalone-client.jar) which is included in the
standard distribution of ULC contains the following components:
Implementations of the client browser service (using java.io.* classes) and the file
service (using Runtime.exec()).
An abstract standalone launcher, implementing the basic lifecycle management.
A default implementation of a standalone launcher using a servlet connector to
communicate with the servlet container hosting the ULC application. The url, the
keep-alive interval and user parameters can be specified by command line
arguments. The arguments must have the following syntax:
DefaultStandaloneLauncher url-string=<urlString>
[keep-alive-interval=<keepAliveInterval>]
[log-level=<logLevel>]
[data-stream-provider=<streamProviderClassName>]
[carrier-stream-provider=<streamProviderClassName>]
[client-coder-registry-provider=<registryProviderClassName>]
{<key>=<value>}
The use of the parameters data-stream-provider, carrier-stream-provider and client-
coder-registry-provider is discussed in Section 2.2 of the ULC Architecture Guide
and in Section 4 of the ULC Extension Guide.
2.5.2 Distributing the Client
In contrast to JNLP and applet deployment, the distribution of the client is fully
decoupled from its integration. There are several distribution options ranging from
manually copying files to using an enterprise wide distribution system. To automate the
installation on the user’s machine, an installer program may be included in the
distribution package. Such an installer package could be downloaded by the user or
distributed on a CD. Upon execution, the installer program will typically:
copy the UI Engine jar files on to the user’s machine.
copy a helper program, along with a configuration file, that starts the UI Engine
using one of the launcher classes.
configure system environment variables (path etc.) and for Windows platforms,
registry entries (e.g., ULC-specific file extensions).
set up desktop and toolbar shortcuts for starting the UI Engine.
There are many installer generator programs. e.g. InstallAnywhere [15] and
InstallShield [16].

ULC Deployment Guide 20
2.5.3 Deploying a Default Standalone Application Client
The simplest way to deploy a ULC application client is to deploy the default standalone
client provided in the standalone client module of the ULC release. The default
standalone client configures the client environment adapter in the following way:
It installs the file service and the browser service implementations provided in the
standalone client module.
It terminates the client when the session is terminated.
It provides default dialogs for error situations.
The command below demonstrates how to configure the default standalone client. The
first two arguments specify the URL and the keep-alive interval required for the servlet
connector to set up the connection to ULC application. Additional key value pairs
specify the user parameters which are passed to the application upon startup.
If the servlet serving the ULC application is mapped to the URL
http://www.acme.com/demo/teammembers/application/ the appropriate command to
start the standalone client looks like:
java com.ulcjava.environment.standalone.client.DefaultStandaloneLauncher
http://www.acme.com/demo/teammembers/application/ 900 –user scott
-role sales
For this command, the following files are assumed to be on the class path:
ulc-standalone-client.jar -- standalone client module classes
ulc-base-client.jar -- base framework classes
ulc-servlet-client.jar -- servlet connector classes
2.5.4 Deploying a Customized Standalone Application Client
As for application specific JNLP clients, a customized standalone client could make use
of an abstract implementation variant. This class implements the initialization of the
client environment adapter, a basic lifecycle management and alerts for error conditions.
An application specific client could also be deployed as part of a fat client Java
application.
2.6 Advanced Features
2.6.1 Running Multiple Sessions within the Same Process
ULC application clients are not restricted to a single application session. While in the
deployment scenarios mentioned so far, the application to connect to was already
specified at startup time, a launcher allowing multiple sessions must be able to start
sessions at some later point in time. There are various ways how starting a new session
can be triggered:
A client-side GUI can offer the functionality.

ULC Deployment Guide 21
An applet-based client can interact with its environment using JavaScript code.
Clicking on links or HTML buttons triggers the client to start new sessions.
A standalone client can be triggered by another process (using interprocess
communication) to start a new session.
A launcher can install the message service to start a new client session upon
messages sent by an application.
A client serving multiple sessions must implement some kind of session management.
Terminating the client upon session termination must be disabled. Instead the client
process only terminates when the last session is terminated or even resides until it is
explicitly terminated by the user, e.g., using a GUI.
2.6.2 Installing a Message Service to Start Client Sessions
As discussed in the previous section, it might be desirable to run multiple sessions
within the same process, and starting new sessions could be triggered by ULC
applications. The following code fragment outlines a simple implementation of a
message service, which allows a ULC application to start new client sessions by sending
messages to the client.
private static final String START_CMD = "start:";
public static void main(String[] args) {
...
final AbstractJnlpLauncher launcher = new AbstractJnlpLauncher() {
public void sessionStarted(UISession session) {
// register session
}
public void sessionEnded(UISession session) {
// unregister session
// terminate on last session ended
}
};
ClientEnvironmentAdapter.setMessageService(new IMessageService() {
public void handleMessage(String msg) {
if (msg.startsWith(START_CMD)) {
String url = msg.substring(START_CMD.length());
launcher.start(new ServletConnector(
new CookieRequestPropertyStore(),
url, 900),
null);
}
}
});
...
To start a session within a ULC application use the following code:
ClientContext.sendMessage(
"http://www.acme.com/demo/teammembers/application/");

ULC Deployment Guide 22
3 Server Deployment
3.1 Overview
The following sections describe how to deploy your ULC applications on the server as a
Servlet in a Servlet container.
This chapter discusses typical deployment scenarios to help you to choose and
customize the appropriate deployment strategy for your setting.
3.2 Servlet Container
A Servlet engine (or Servlet container) is the preferred deployment and runtime
environment for ULC applications (see [19] for an introduction to the servlet
technology). The UI Engine connects to applications deployed in this way using HTTP
or HTTPS as the transport protocol. The advantage of this deployment mode is not only
the wide acceptance and popularity of Servlet engines but also the fact that HTTP(S) is
widely used in today’s networks. Firewalls are typically configured to accept HTTP(S)
requests.
Note that ULC supports Servlet engines that implement Servlet specification 2.4 or
higher. The following sections will use the terminology as defined by Servlet
specification 2.2 ([20]). See [21] for a general introduction to the J2EE platform.
Figure 1 shows a ULC application running in a servlet engine.
Figure 1: ULC application deployed as servlet
3.2.1 Overview
To deploy a ULC application in a Servlet engine, a special ULC Servlet
(ServletContainerAdapter) is installed as the controller for all communication from UI
Engines to application sessions. This Servlet is responsible for managing application
sessions and dispatching ULC communication. See the chapter on Servlet Container
Adapter in the ULC Architecture Guide for an in-depth discussion of this Servlet.
The following sections discuss the process of creating a simple web application
containing this Servlet along with the required components. Note that your Servlet
container may provide tools that support certain steps in this process.

ULC Deployment Guide 23
3.2.2 Components
As a first step, the runtime components of the application must be assembled. The
following JAR files provided in the ULC release are required for deployment:
File Description
ulc-base-server.jar Contains the server base framework components.
ulc-servlet-server.jar Contains the servlet container adapter classes and
resources.
ulc-applet-server.jar Only required if the application uses the content
pane of the applet as a window container
(ULCAppletPane).
Additionally, all classes and resources of the application to be deployed (including other
external libraries required by the application) must be provided, either in an open
directory structure or as JAR files.
3.2.3 Deployment Descriptor
The deployment descriptor for the web application must contain the following
information:
A servlet entry declaring the servlet container adapter Servlet (class
com.ulcjava.container.servlet.server.ServletContainerAdapter).
The servlet entry must contain an init-param entry (param-name=application-class)
defining the ULC application main class (i.e., the class that implements the
com.ulcjava.base.application.IApplication interface). Optionally a log level value
(param-name=log-level) can be specified.
The scope of the log level affects all ULC sessions, which are controlled by the
given servlet. It does not affect any ULC sessions, which might be controlled via
other servlets. Moreover, there is a single, global scope for logging messages which
are written on the servlet level itself (but outside of a ULC session). The log level of
the latter scope can be configured by means of a properties file.
A corresponding servlet-mapping element entry, defining the URL pattern for the
servlet container adapter. This defines the URL that UI Engines must connect to.
The following XML file shows a typical example for a deployment descriptor file used
to deploy a ULC application. For this application, UI Engines will need to connect to
the URL http://<host>:<port>/<context-name>/MyApplication/.
<?xml version="1.0" encoding="ISO-8859-1"?>
<!DOCTYPE web-app PUBLIC
"-//Sun Microsystems, Inc.//DTD Web Application 2.2//EN"
"http://java.sun.com/j2ee/dtds/web-app_2.2.dtd">
<web-app>
<servlet>

ULC Deployment Guide 24
<servlet-name>MyApplication</servlet-name>
<servlet-class>
com.ulcjava.container.servlet.server.ServletContainerAdapter
</servlet-class>
<init-param>
<param-name>application-class</param-name>
<param-value>com.acme.ulc.MyApplication</param-value>
</init-param>
<init-param>
<param-name>db-url</param-name>
<param-value>jdbc:mysql://somehost/test</param-value>
</init-param>
</servlet>
<servlet-mapping>
<servlet-name>MyApplication</servlet-name>
<url-pattern>/MyApplication/</url-pattern>
</servlet-mapping>
<!-- Additional configuration information -->
<!-- ... -->
</web-app>
3.2.4 Deployment Key
To deploy the ULC application, the .jar file /license/ulc-deployment-key.jar must be
included in the application deployment.
3.2.5 Packaging
To package all the components, create a web application (either as a .war file or in an
open directory structure) with the following contents:
File Description
/WEB-INF/web.xml Web application deployment descriptor as
described in [20].
/WEB-INF/lib/ulc-base-server.jar Base application classes.
/WEB-INF/lib/ulc-servlet-server.jar Servlet deployment.classes.
/WEB-INF/lib/ulc-applet-server.jar Applet deployment classes.
/WEB-INF/lib/*.jar JAR files containing application code and
resources or external libraries required by the
application.
/WEB-INF/classes/* ULC Deployment key, application class files,
and resources that are not included in above
JAR files.

ULC Deployment Guide 25
3.2.6 Deployment
As a last step, install the web application as described in the Servlet container’s
documentation.
See the chapter on Servlet Connector in the ULC Architecture Guide for information on
how to use the Servlet connector component and how to configure the client to connect
to the running ULC application.
3.2.7 Advanced Configuration
HTTPS
The deployment procedure described above is independent of your choice of security
mechanisms. To use HTTPS as the transport protocol (with server authentication or
client authentication), you need to set up the Servlet container accordingly (see the
Servlet container’s documentation).
Session Timeout
The session timeout of the web application must be configured to be compatible with
the server environment (e.g., load balancing mechanisms) and with the client
configuration (e.g. using “keep-alive” requests, see the chapter on Servlet Connector in
the ULC Architecture Guide).
Installation of ULC HttpSessionListener
com.ulcjava.container.servlet.server.HttpSessionListener notifies ULC applications
after the HTTP session has been destroyed (e.g. because of a HTTP session timeout).
When the HTTP session is destroyed, HTTPSessionListener gets ULCSessions from the
SessionStore and calls on it sessionDestroyed() which in turn calls IApplication.stop()
thus terminating the ULC application.The installation of HTTPSessionListener requires
servlet specification 2.3 and the following listener tag added to the web.xml of the ULC
application:
<DOCTYPE web-app PUBLIC "-//Sun Microsystems, Inc.//DTD Web Application
2.3//EN" "http://java.sun.com/dtd/web-app_2_3.dtd">
<web-app>
<listener>
<listener-class>
com.ulcjava.container.servlet.server.HttpSessionListener
</listener-class>
</listener>
<servlet>
...
</web-app>
Authentication
The ApplicationContext.getUserPrincipal() method returns authentication information
provided by the Servlet container. The ULC Servlet container adapter returns the
information as provided by the getUserPrincipal() method of

ULC Deployment Guide 26
javax.servlet.http.HttpRequest. Please see your Servlet container’s documentation for
information on how to set up user principal support.
Authorization
The method ApplicationContext.isUserInRole() returns a boolean value indicating
whether the authenticated user is included in the specified logical role. Roles and role
membership must be specified in the deployment descriptor (see [20]).
Possible issues
Depending on the Servlet container used, you might get following exception:
java.lang.UnsupportedOperationException: Protocol 'xxx' unsupported.
This means that the default IPackageNameLister implementation (DefaultPackage-
NameLister) is not suitable for the current Servlet container. Please specify a more
suitable implementation via PackageUtilities.setPackageNameLister. Have a look at
ULC Application Development Guide to see an example with JBoss.

ULC Deployment Guide 27
4 Standalone or Offline Deployment
4.1 Overview
Sometime there is a requirement to distribute and run an ULC application as a
standalone Java application on the desktop and not as a server centric application that is
deployed in a J2EE conatiner. ULC allows you to run the same ULC application either
as a standalone Java application or as a server-side application (as a servlet) without
making any changes to your ULC application code. The following section describe how
you can deploy your ULC application in standalone mode.
4.2 Local Container
The Local Container enables a ULC application to run as a standalone Java application
on the desktop. Thus, with the Local Container you can run your ULC applications in
offline mode. In this mode, the ULC client and the ULC application run within a single
Java VM. Note that you will require the free ULC Deployment License ulc-deployment-
key.jar on the classpath.
The Local Container is different from the DevelopmentRunner that is used to run an
ULC Application in standalone mode within a development environment, e.g. an IDE.
The DevelopmentRunner requires the ULC Development License on the class path. You
cannot distribute your ULC application with the DevelopmentRunner because the
Development License is not distributable. On the other hand, the Local Container only
requires the free ULC Deployment License ulc-deployment-key.jar on the classpath.
This allows you to distribute your ULC application to your clients by giving them the
free ULC Deployment License ulc-deployment-key.jar.
An ULC application is deployed in the Local Conatiner with the help of the class
com.ulcjava.container.local.server.LocalContainerAdapter. To run an ULC application
within a Local Container you will require in the classpath your application classes and
resources and the following ULC jar files:
File Description
ulc-base-client.jar Contains the client base framework components.
ulc-base-server.jar Contains the server base framework components.
ulc-base-trusted.jar Contains the trusted Browser and File Service
classes
ulc-local-server.jar Contains the Local Container classes
ulc-deployment-key.jar The Deployment License
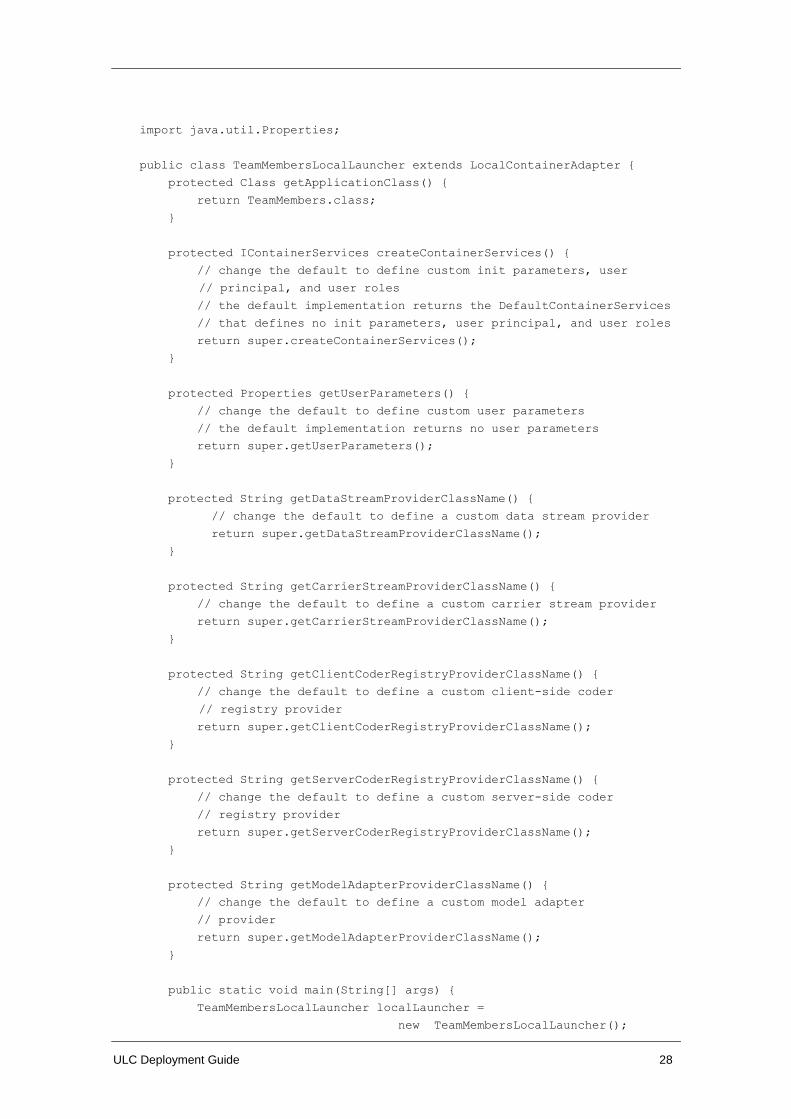
The following code shows how you can deploy the TeamMembers sample application
in standalone, offline mode:
import com.ulcjava.base.server.IContainerServices;
import com.ulcjava.container.local.server.LocalContainerAdapter;
import com.ulcjava.sample.teammembers.TeamMembers;
ULC Deployment Guide 28
import java.util.Properties;
public class TeamMembersLocalLauncher extends LocalContainerAdapter {
protected Class getApplicationClass() {
return TeamMembers.class;
}
protected IContainerServices createContainerServices() {
// change the default to define custom init parameters, user
// principal, and user roles
// the default implementation returns the DefaultContainerServices
// that defines no init parameters, user principal, and user roles
return super.createContainerServices();
}
protected Properties getUserParameters() {
// change the default to define custom user parameters
// the default implementation returns no user parameters
return super.getUserParameters();
}
protected String getDataStreamProviderClassName() {
// change the default to define a custom data stream provider
return super.getDataStreamProviderClassName();
}
protected String getCarrierStreamProviderClassName() {
// change the default to define a custom carrier stream provider
return super.getCarrierStreamProviderClassName();
}
protected String getClientCoderRegistryProviderClassName() {
// change the default to define a custom client-side coder
// registry provider
return super.getClientCoderRegistryProviderClassName();
}
protected String getServerCoderRegistryProviderClassName() {
// change the default to define a custom server-side coder
// registry provider
return super.getServerCoderRegistryProviderClassName();
}
protected String getModelAdapterProviderClassName() {
// change the default to define a custom model adapter
// provider
return super.getModelAdapterProviderClassName();
}
public static void main(String[] args) {
TeamMembersLocalLauncher localLauncher =
new TeamMembersLocalLauncher();

ULC Deployment Guide 29
localLauncher.start();
}
}


ULC Deployment Guide 30
References [1] Jakarta Tomcat servlet container
http://jakarta.apache.org/tomcat/
[2] Java Web Start
http://java.sun.com/products/javawebstart/
[3] J2EE tutorial on web application archives
http://java.sun.com/j2ee/tutorial/doc/WCC3.html
[4] Eclipse
http://www.eclipse.org/
[5] Jakarta ORO regular expression package
http://jakarta.apache.org/oro/
[6] HTML 4.0.1 specification
http://www.w3.org/TR/html4/
[7] Java Secure Socket Extension (JSSE) 1.0.3
http://java.sun.com/products/jsse/index-103.html
[8] Java Security Architecture
http://java.sun.com/j2se/1.3/docs/guide/security/index.html
http://java.sun.com/j2se/1.4.1/docs/guide/security/index.html
[9] JNLP forum thread describing the protocol handler workaround
http://forum.java.sun.com/thread.jsp?forum=38&thread=71335
[10] Java Plug-In tags
http://java.sun.com/products/plugin/1.3/docs/tags.html
http://java.sun.com/products/plugin/versions.html
[11] Using the conventional APPLET tag with Java Plug-In 1.3.1 and 1.4
http://java.sun.com/products/plugin/1.3.1_01a/faq.html
http://java.sun.com/j2se/1.4/docs/guide/plugin/developer_guide/applet_tag.html
[12] "usePolicy" Permission
http://java.sun.com/products/plugin/1.3/docs/netscape.html#use
[13] LiveConnect
http://developer.netscape.com/docs/technote/javascript/liveconnect/
liveconnect_rh.html
[14] Calling an applet from Java Script
http://java.sun.com/products/plugin/1.3/docs/jsobject.html.
[15] InstallAnywhere
http://www.installanywhere.com/
[16] InstallShield
http://www.installshield.com/
[17] Initializing an initial context with applet parameters
http://java.sun.com/j2se/1.3/docs/api/javax/naming/Context.html#APPLET
[18] Canoo Engineering AG contact address

ULC Deployment Guide 31
[19] Introduction to servlet technology
http://java.sun.com/products/servlet/index.html
[20] Servlet specifications
http://java.sun.com/products/servlet/download.html
[21] J2EE Tutorial
http://java.sun.com/j2ee/tutorial/index.html
[22] Packaging J2EE applications
http://java.sun.com/j2ee/tutorial/doc/Overview4.html