tsi-13-12-10: exhaust manifold ring seal replacement
TRANSCRIPT
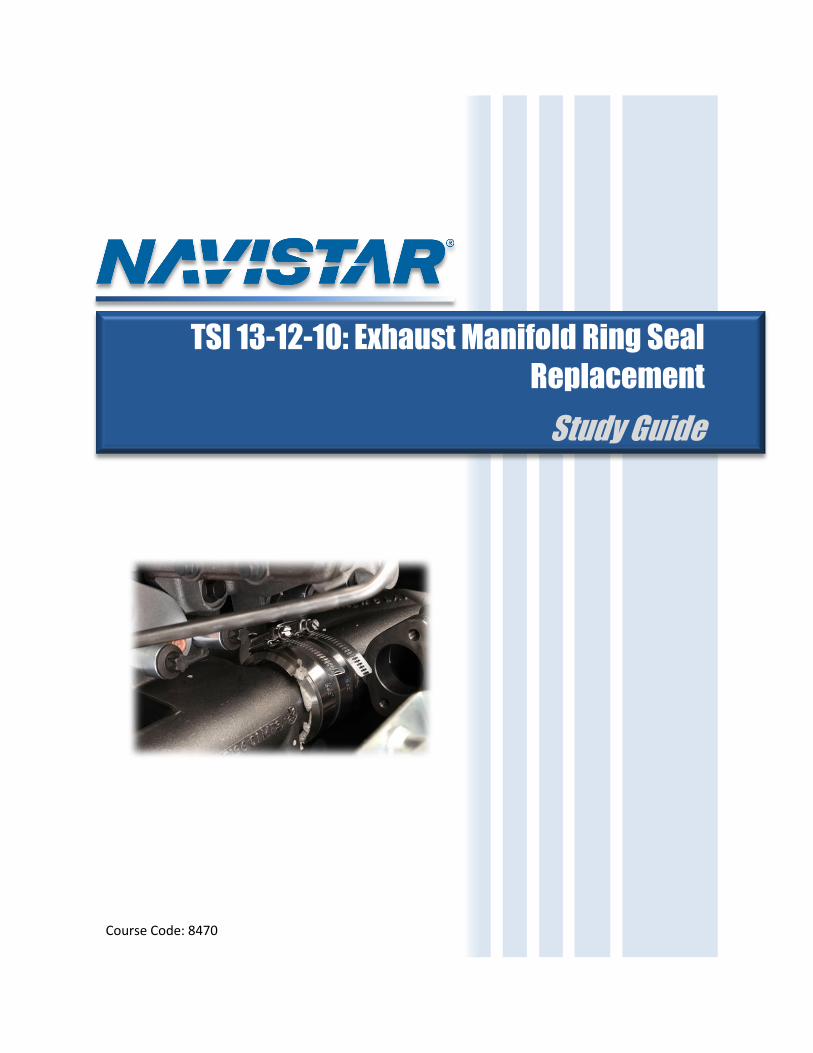
TSI 13-12-10: Exhaust Manifold Ring Seal
Replacement
Study Guide
Course Code: 8470

TSI-13-12-10: Exhaust Manifold Ring Seal Replacement • © 2013 Navistar, Inc. All rights reserved. All marks are trademarks of their respective owners.
1 TSI-13-12-10: Exhaust Manifold Ring Seal Replacement | Study Guide
©2013 Navistar, Inc. 2701 Navistar Drive, Lisle, IL 60532.
All rights reserved.
No part of this publication may be duplicated or stored in an information retrieval system without the express written permission of
Navistar, Inc.

TSI-13-12-10: Exhaust Manifold Ring Seal Replacement • © 2013 Navistar, Inc. All rights reserved. All marks are trademarks of their respective owners.
2 TSI-13-12-10: Exhaust Manifold Ring Seal Replacement | Study Guide
Table of Contents Introduction .................................................................................................................................................. 5
FRONT RING SEAL DISASSEMBLY .................................................................................................................. 5
Tool List ..................................................................................................................................................... 5
Prepare Vehicle for Service ....................................................................................................................... 6
Step 1: Remove Inner Fender ................................................................................................................... 6
Step 2: Remove Air Inlet Duct ................................................................................................................... 6
Step 3: Remove High-Pressure CAC Pipe .................................................................................................. 6
Step 4: Disconnect and Re-position Wiring Harness................................................................................. 6
Step 5: Remove High-Pressure Turbocharger Outlet Duct ....................................................................... 7
Step 6: Remove Low-Pressure Turbocharger Inlet Duct ........................................................................... 7
Step 7: Reposition Coolant Tubes ............................................................................................................. 7
Step 8: Remove High-Pressure Turbocharger Inlet Duct Bolts ................................................................. 7
Step 9: Reposition Air Control Valve ........................................................................................................ 8
Step 10: Remove CCOS Housing Outlet Hose ........................................................................................... 8
Step 11: Remove CCOS Sensor Connector ................................................................................................ 8
Step 12: Re-position Crankcase Breather tube Assembly......................................................................... 8
Step 13: Remove CCOS Housing ............................................................................................................... 8
Step 14: Remove EGR Cooler L-Bracket .................................................................................................... 9
Step 15: Remove Exhaust Manifold Heat Shield ....................................................................................... 9
Step 16: Remove and Discard Failed Front Exhaust Manifold Ring Seal .................................................. 9
FRONT RING SEAL ASSEMBLY ....................................................................................................................... 9
Step 17: Install New Exhaust Manifold Ring Seal ...................................................................................... 9
Step 18: Install Exhaust Manifold Heat Shield ........................................................................................ 10
Step 19: Install EGR Cooler L-bracket...................................................................................................... 10
Step 20: Inspect O-rings and Seal ........................................................................................................... 10
Step 21: Install New CCOS Housing ......................................................................................................... 10
Step 22: Secure Crankcase Breather Tube Assembly ............................................................................. 10
Step 23: Connect CCOS Housing Sensor Connector................................................................................ 10
Step 24: Connect CCOS Housing Outlet Hose ......................................................................................... 11
Step 25: Install ACV ................................................................................................................................. 11

TSI-13-12-10: Exhaust Manifold Ring Seal Replacement • © 2013 Navistar, Inc. All rights reserved. All marks are trademarks of their respective owners.
3 TSI-13-12-10: Exhaust Manifold Ring Seal Replacement | Study Guide
Step 26: Secure High-Pressure Turbocharger Inlet Duct ........................................................................ 11
Step 27: Secure Coolant Tubes ............................................................................................................... 11
Step 28: Install Low-Pressure Turbocharger Inlet ................................................................................... 11
Step 29: Install High-Pressure Turbocharger Outlet Duct ....................................................................... 11
Step 30: Connect Wiring Harness ........................................................................................................... 11
Step 31: Install HPCAC Pipe ..................................................................................................................... 12
Step 32: Install Air Inlet Duct .................................................................................................................. 12
Step 33: Install Inner Fender ................................................................................................................... 12
REAR RING SEAL DISASSEMBLY ................................................................................................................... 12
Step 1: Drain the Coolant ........................................................................................................................ 12
Step 2: Remove Passenger’s Seat ........................................................................................................... 12
Step 3: Remove Driver’s Seat .................................................................................................................. 13
Step 4: Remove Scuff Plates ................................................................................................................... 14
Step 5: Remove Left Kick Panel ............................................................................................................... 14
Step 6: Remove Steering Column Trim Panel ......................................................................................... 14
Step 7: Remove Shifter ........................................................................................................................... 15
Step 8: Remove Cup Holder Assembly .................................................................................................... 15
Step 9: Remove Right Kick Panel ............................................................................................................. 15
Step 10: Remove Floor Mat .................................................................................................................... 15
Step 11: Remove Engine Cover ............................................................................................................... 16
Step 12: Remove HCI Coolant Supply Tube ............................................................................................ 17
Step 13: Remove Heat Shield .................................................................................................................. 17
Step 14: Remove EGR Inlet Tube (Cylinders 1-3) .................................................................................... 18
Step 15: Remove Exhaust Ring Seal ........................................................................................................ 19
Step 16: Install Exhaust Ring Seal ........................................................................................................... 19
Step 17: Install EGR Inlet Tube (Cylinders 1-3) ....................................................................................... 20
Step 18: Install Exhaust Heat Shield ........................................................................................................ 20
Step 19: Install HCI Coolant Supply Tube ................................................................................................ 20
Step 20: Install Engine Cover .................................................................................................................. 21
Step 21: Install Floor Mat ........................................................................................................................ 21
Step 22: Install Cup Holder Assembly ..................................................................................................... 21
Step 23: Install Right Kick Panel .............................................................................................................. 22

TSI-13-12-10: Exhaust Manifold Ring Seal Replacement • © 2013 Navistar, Inc. All rights reserved. All marks are trademarks of their respective owners.
4 TSI-13-12-10: Exhaust Manifold Ring Seal Replacement | Study Guide
Step 24: Install Steering Column Cover ................................................................................................... 22
Step 25: Install Left Kick Panel ................................................................................................................ 22
Step 26: Install Scuff Plates ..................................................................................................................... 22
Step 27: Install Shifter ............................................................................................................................. 23
Step 28: Install Front Seats ..................................................................................................................... 23
Before Returning the Vehicle to Service... .................................................................................................. 23
Step 29: Fill Cooling System .................................................................................................................... 23
CONCLUSION ............................................................................................................................................... 24
NOTES.......................................................................................................................................................... 25

TSI-13-12-10: Exhaust Manifold Ring Seal Replacement • © 2013 Navistar, Inc. All rights reserved. All marks are trademarks of their respective owners.
5 TSI-13-12-10: Exhaust Manifold Ring Seal Replacement | Study Guide
Introduction Welcome to the Navistar training course for TSI-13-12-10: Exhaust Manifold Ring Seal Removal /
Installation. This course is intended to guide you through the replacement procedure of the Exhaust
Manifold Ring Seals on MaxxForce® 11 and 13 (EPA 10), Navistar® N13, and 2013 MaxxForce® 13 HDOBD
engines.
If you have questions or concerns regarding the playback of this program, please contact Navistar
Service Education by submitting a case file (Dealer Personnel); or by calling 1-800-365-0088.
FRONT RING SEAL DISASSEMBLY
Tool List To complete this repair, the following tools and components are required:
• 3/8 in. Drive 8mm Deep Socket • 90° Pick • 3/8 in. Drive 8mm Shallow Socket • 1/4 in. Drive T20 Torx® Socket • 3/8 in. Drive 10mm Shallow Socket • 1/4 in. Drive 8mm Shallow Socket • 3/8 in. Drive 13mm Deep Socket • 1/4 in. Drive 10mm Shallow Socket
• 3/8 in. Drive 13mm Shallow Socket • 1/4 in. Drive 13mm Shallow Socket • 3/8 in. Drive 15mm Deep Socket • 1/4 in. Drive 6 in. Extension • 3/8 in. Drive 3/8 in. Socket • 1/4 in. Drive 14 in. Extension • 3/8 in. Drive 3/16 in. Allen Socket • 1/4 in. Hex To 1/4 in. Square Adaptor • 3/8 in. Drive T20 Torx® Socket • 1/4 in. Drive Swivel • 3/8 in. Drive T50 Torx® Socket • 1/4 in. Drive Ratchet • 3/8 in. Drive 18mm Crow’s Foot Socket • 11/16 in. Combination Wrench • 3/8 in. Drive 3 in. Extension • 10mm Combination Wrench • 3/8 in. Drive 6 in. Extension • 14mm Combination Wrench • 3/8 in. Drive 12 in. Extension • 13mm Combination Wrench • 3/8 in. Drive Ratchet • 17mm Combination Wrench • 3/8 in. Drive 6 in. Spinner Handle • 18mm Combination Wrench • 3/8 in. Drive Swivel • Slip Joint Pliers • 3/8 in. Drive lb-ft Torque Wrench • Flashlight • Torque Screwdriver • P-80® Lubricant or equivalent
THE INFORMATION PROVIDED WITHIN THIS COURSE IS FOR TRAINING PURPOSES ONLY.
ALWAYS CONSULT THE LATEST SERVICE, DIAGNOSTIC, AND TOOL INFORMATION, LOCATED ON
NAVISTAR’S SERVICE PORTAL, PRIOR TO PERFORMING SERVICE ON NAVISTAR ENGINES,
VEHICLES, AND EQUIPMENT.

TSI-13-12-10: Exhaust Manifold Ring Seal Replacement • © 2013 Navistar, Inc. All rights reserved. All marks are trademarks of their respective owners.
6 TSI-13-12-10: Exhaust Manifold Ring Seal Replacement | Study Guide
• 3/8 in. Drive lb-in Torque Wrench • Clean Shop Towel • 3/8 in. To ¼ in. Drive Adaptor • Navistar Cap Kit (ZTSE4296) • Claw Pick-up Tool • KL5007NAV – Navistar® Coolant
Management Tool
Prepare Vehicle for Service Before performing this procedure the vehicle must be parked on a level surface with the transmission
shifted to park or neutral. The parking brake must be engaged and the wheels chocked. The hood will
need to be opened and the front bumper should be flipped forward.
Step 1: Remove Inner Fender For ease of access to the components that you will service during this procedure, it is recommended
that the passenger side inner fender be removed. Start by removing the seven bolts holding the fender
in place and then lift the fender from the vehicle.
Step 2: Remove Air Inlet Duct Loosen the hose clamp securing the air inlet duct to the low-pressure turbocharger inlet and separate
the two components.
Next, reposition the spring clamp holding the compressor hose to the port on the air inlet duct and
remove the hose from the port.
Loosen the hose clamp securing the air inlet duct to the air filter housing boot and completely remove
the inlet duct from the vehicle.
Be sure to insert caps on the air filter housing boot, compressor hose and low-pressure turbocharger
inlet to prevent contamination.
Step 3: Remove High-Pressure CAC Pipe Now the high-pressure charge air cooler (HPCAC) pipe must be removed. In order to remove the pipe
you must first remove the nut and bolt securing the A/C hoses to the clamp on the pipe.
Loosen the hose clamps holding the HPCAC pipe to the high-pressure turbo outlet and the charge-air-
cooler and remove the pipe from the vehicle. Be sure to install a cap on the HPCAC to prevent
contamination.
Step 4: Disconnect and Re-position Wiring Harness Next Disconnect the engine harness connectors at the Mass Air Flow sensor, Air Inlet Temperature
sensor, and the Turbocharger 2 Compressor Inlet Pressure sensor. After disconnecting the sensors,
position the harness out of the way.

TSI-13-12-10: Exhaust Manifold Ring Seal Replacement • © 2013 Navistar, Inc. All rights reserved. All marks are trademarks of their respective owners.
7 TSI-13-12-10: Exhaust Manifold Ring Seal Replacement | Study Guide
Step 5: Remove High-Pressure Turbocharger Outlet Duct To remove the high-pressure turbocharger outlet duct, first remove the two bolts securing it to the low-
pressure turbocharger inlet duct.
Once the mounting bolts have been removed, pull the outlet duct down until it is completely disengaged
from the high-pressure turbocharger and remove it from the vehicle. Discard the high-pressure
turbocharger outlet duct O-ring.
Step 6: Remove Low-Pressure Turbocharger Inlet Duct Next you must remove the low-pressure turbocharger inlet duct. Start by removing the two mounting
bolts. After removing the mounting bolts, completely remove the low-pressure turbocharger inlet duct
from the vehicle.
Remove and discard the O-ring from the low-pressure turbocharger inlet duct and install caps on the
low-pressure turbocharger inlet and the high-pressure turbocharger outlet to prevent contamination.
Step 7: Reposition Coolant Tubes
Now remove the two bolts from the P-clamps securing the cab heater coolant return tube and the low-
pressure charge-air-cooler coolant supply tube.
Next, carefully position both coolant tubes out of the way.
Step 8: Remove High-Pressure Turbocharger Inlet Duct Bolts
Remove the two bolts securing the air inlet duct to the high-pressure turbocharger.
DO NOT DISCONNECT THE COOLANT TUBES OR DRAIN THE ENGINE COOLANT.
THE LOWER HIGH-PRESSURE TURBOCHARGER INLET DUCT BOLT MAY NOT COME ALL THE WAY
OUT DUE TO INTERFERENCE WITH THE WASHER FLUID RESERVOIR. REMOVAL OF THE
RESERVOIR IS NOT REQUIRED.

TSI-13-12-10: Exhaust Manifold Ring Seal Replacement • © 2013 Navistar, Inc. All rights reserved. All marks are trademarks of their respective owners.
8 TSI-13-12-10: Exhaust Manifold Ring Seal Replacement | Study Guide
Step 9: Reposition Air Control Valve Now you must disconnect the air supply line from the Air Control Valve (ACV) and position it out of the
way.
Once you have the air supply line out of the way, remove the three bolts securing the ACV in place and
then position the ACV out of the way.
Step 10: Remove CCOS Housing Outlet Hose Before removing the Crankcase Oil Separator (CCOS) housing you must first disconnect the CCOS outlet
hose.
Step 11: Remove CCOS Sensor Connector Then remove the CCOS sensor connector.
Step 12: Re-position Crankcase Breather tube Assembly Next, remove the bolt holding the crankcase breather tube assembly clamp and position the assembly
out of the way.
Step 13: Remove CCOS Housing
In order to remove the CCOS housing you must remove the three hex bolts from the oil filter module.
While pulling out on the high-pressure turbocharger inlet duct, remove the CCOS housing from the oil
jet plate.
THERE ARE TWO STYLES OF ACV ATTACHMENT TO THE EGR COOLER. ONE STYLE HAS TWO
BOLTS SECURING THE ACV TO THE COOLER, AND ONE BOLT SECURING THE EXHAUST BACK
PRESSURE VALVE (EBPV) ACTUATOR LINE TO THE EGR COOLER. THE OTHER STYLE USES THREE
BOLTS TO SECURE THE ACV TO THE EGR COOLER AND THE ACTUATOR LINE IS NOT SUPPORTED.
DO NOT REMOVE THE FOUR TORX BOLTS FOR THE OIL JET PLATE. THE OIL JET PLATE WILL NOT
BE REMOVED DURING CCOS HOUSING REPLACEMENT.

TSI-13-12-10: Exhaust Manifold Ring Seal Replacement • © 2013 Navistar, Inc. All rights reserved. All marks are trademarks of their respective owners.
9 TSI-13-12-10: Exhaust Manifold Ring Seal Replacement | Study Guide
Before continuing, cover the CCOS mount openings with a clean shop towel to avoid contamination.
Step 14: Remove EGR Cooler L-Bracket Next you will need to remove the four bolts holding the EGR cooler L-bracket into place and remove the
bracket from the vehicle.
Step 15: Remove Exhaust Manifold Heat Shield Now remove the fastener securing the exhaust manifold heat shield to the manifold, and then remove
the heat shield from the engine.
Step 16: Remove and Discard Failed Front Exhaust Manifold Ring Seal
To remove the failed exhaust manifold ring seal, start by loosening the two ring seal clamps. After
loosening the clamps, position them out of the way and remove and discard the ring seal shields. Then,
remove and discard the ceramic wrap.
Next you must remove the ring seal packing from the groove in the exhaust manifold. Discard the
packing.
Finally make sure to completely remove and discard the two ring seal clamps from the manifold.
FRONT RING SEAL ASSEMBLY
Step 17: Install New Exhaust Manifold Ring Seal Now wrap the new seal packing around the exhaust manifold ring joint and align it so that the seal ends
meet at the top of the manifold. Be sure to press the seal packing tightly into the joint with your fingers.
Next, wrap the manifold and the seal packing with the ceramic mat wrap making sure to cover the seal
packing with the thick side of the ceramic mat. Align the ends of the ceramic wrap with the midpoint of
the manifold.
VEHICLES PRODUCED BEFORE A CERTAIN PRODUCTION DATE MAY NOT BE EQUIPPED WITH AN
EXHAUST RING SEAL FROM THE FACTORY. IF THE VEHICLE TOU ARE WORKING ON HAS A
LEAKING EXHAUST FEY RING SEAL AND IS NOT EQUIPPED WITH A RING SEAL SKIP TO STEP 17.
DO NOT REPLACE THE FAILED FEY RING SEAL.

TSI-13-12-10: Exhaust Manifold Ring Seal Replacement • © 2013 Navistar, Inc. All rights reserved. All marks are trademarks of their respective owners.
10 TSI-13-12-10: Exhaust Manifold Ring Seal Replacement | Study Guide
Install the two shield halves around the ceramic wrap with the beveled flange on the seal packing end
(right side). Align the joints of the two shield halves with the midpoint of the manifold. While holding
the shield halves in place install ring seal clamp #1 on the seal packing end (right side) and snug into
place.
Now install ring seal clamp #2 around the ring seal shields.
Alternately tighten the ring seal clamps until the shields are snug. Make sure to keep the shields aligned
with the midpoint of the manifold while tightening the clamps.
With both clamps snug and everything in alignment, torque the clamps to 70 lb/in (8 N·m).
Step 18: Install Exhaust Manifold Heat Shield Install the manifold heat shield and torque the M8 retaining bolt to 23 Lb / ft. (31 N·m).
Step 19: Install EGR Cooler L-bracket Now install the EGR cooler L-bracket and fasten it into place with the four retaining bolts. Torque the L-
bracket bolts to 23 Lb/ft. (31 N·m).
Step 20: Inspect O-rings and Seal After removing the shop towel, inspect the oil jet plate O-rings and the oil jet plate seal for damage.
Discard and replace as necessary.
Step 21: Install New CCOS Housing While pulling on the high-pressure turbocharger inlet duct, install the CCOS housing onto the oil jet
plate. Secure the CCOS housing to the jet plate with three new housing bolts. Torque the bolts to 79
in/lbs. (8.9 N·m).
Step 22: Secure Crankcase Breather Tube Assembly Next secure the crankcase breather tube assembly with the previously removed P-clamp and mounting
bolt. Torque the mounting bolt to 115 in/lb. (13 N·m).
Step 23: Connect CCOS Housing Sensor Connector Connect the CCOS housing sensor connector.
VERIFY THAT THE RING SEAL SHIELDS COMPLETELY COVER THE CERAMIC MAT WRAP AND
THAT THE CERAMIC WRAP OVERLAPS THE SEAL PACKING.

TSI-13-12-10: Exhaust Manifold Ring Seal Replacement • © 2013 Navistar, Inc. All rights reserved. All marks are trademarks of their respective owners.
11 TSI-13-12-10: Exhaust Manifold Ring Seal Replacement | Study Guide
Step 24: Connect CCOS Housing Outlet Hose Connect the CCOS housing outlet hose.
Step 25: Install ACV Now move the Air Control Valve to its original position and secure it into place with the three previously
removed ACV mounting bolts. Torque the three ACV mounting bolts to 23 ft/lbs. (31 N·m). If applicable,
the M6 bolt should be torqued to 115 lb-in (13 N·m).
After securing the ACV, connect the air supply line. Use a back-up wrench to hold the fitting on the ACV
in place and tighten the fitting on the air supply line.
Step 26: Secure High-Pressure Turbocharger Inlet Duct Next, secure the high-pressure turbocharger inlet duct into place by installing the two mounting bolts.
Torque the bolts to 45 ft/lbs. (62 N·m).
Step 27: Secure Coolant Tubes Position the coolant return tube and coolant supply tube back into place and secure them with the two
previously removed P-clamps. Torque the bolts securing the P-clamps to 23 ft/lbs. (31 N·m).
Step 28: Install Low-Pressure Turbocharger Inlet Remove the caps from the low-pressure turbocharger inlet and the high-pressure turbocharger outlet.
Before installing the low-pressure turbocharger inlet duct, be sure to lubricate a new O-ring with P80®
and install it onto the low-pressure turbocharger compressor housing.
Then install the inlet duct onto the low-pressure turbocharger and secure it into place using the two
previously removed mounting bolts. Torque the lower M10 bolt to 45 lb-ft (62 N·m) and the upper M8
bolt to 23 lb-ft (31 N·m).
Step 29: Install High-Pressure Turbocharger Outlet Duct Before installing the high-pressure turbocharger outlet duct you must install a new O-ring lubricated
with P80®.
With a new O-ring installed, push the outlet duct up into the high-pressure turbocharger. Secure the
duct into place with the two previously removed mounting bolts and torque them to 45 ft/lbs. (62 N·m).
Step 30: Connect Wiring Harness Place the engine harness back to its original position and connect the connectors at the Mass Air Flow,
Air Inlet Temperature, and the Turbocharger-2 Compressor Inlet Pressure sensors.

TSI-13-12-10: Exhaust Manifold Ring Seal Replacement • © 2013 Navistar, Inc. All rights reserved. All marks are trademarks of their respective owners.
12 TSI-13-12-10: Exhaust Manifold Ring Seal Replacement | Study Guide
Step 31: Install HPCAC Pipe Before installing the high-pressure charge-air-cooler pipe, remove the cap from the HPCAC. Then, slip
the pipe couplers over the high-pressure turbocharger outlet and over the inlet of the HPCAC.
Tighten the clamps on both ends of the HPCAC pipe to between 71 and 80 in/lbs (8-9 N·m).
Now secure the A/C lines to the HPCAC pipe using the previously removed nut and bolt. Torque the bolt
to 115 lb-in. (13 N·m).
Step 32: Install Air Inlet Duct Next, remove the caps from the low-pressure turbocharger inlet, the air filter housing boot, and the
compressor hose.
Install the air inlet duct to the air filter housing boot and the low-pressure turbocharger inlet. Tighten
the clamps on both ends of the duct starting with the one on the turbo inlet and then the one on the air
filter housing boot.
Install the compressor hose onto the port on the air inlet duct and secure it into place with the spring
clamp.
Step 33: Install Inner Fender If it was removed prior to performing this procedure, reinstall the passenger side inner fender with the
seven previously removed mounting bolts. Torque the bolts to 23 lb-ft (31 N·m).
REAR RING SEAL DISASSEMBLY
Step 1: Drain the Coolant Part of this process requires that you open the cooling system. The engine coolant will have to be
drained using the Navistar Coolant Management Tool, part number KL5007NAV.
Step 2: Remove Passenger’s Seat Start by removing the four bolts from the right front seat. Then move the seat forward to allow easy
access to the seatbelt mounting bolts. Now remove the seatbelt bolts from both sides of the seat. Then
disconnect any air lines from the passenger seat as applicable. With the assistance of another
technician, remove the seat from the vehicle.

TSI-13-12-10: Exhaust Manifold Ring Seal Replacement • © 2013 Navistar, Inc. All rights reserved. All marks are trademarks of their respective owners.
13 TSI-13-12-10: Exhaust Manifold Ring Seal Replacement | Study Guide
Step 3: Remove Driver’s Seat Next, if equipped, remove the fire extinguisher from the driver's side of the vehicle. Then remove the
bolts securing the fire extinguisher bracket to the floor and remove the bracket from the vehicle. To
remove the left front seat, repeat the procedure used to remove the passenger side seat. Again, with
the assistance of another technician, remove the seat from the vehicle.

TSI-13-12-10: Exhaust Manifold Ring Seal Replacement • © 2013 Navistar, Inc. All rights reserved. All marks are trademarks of their respective owners.
14 TSI-13-12-10: Exhaust Manifold Ring Seal Replacement | Study Guide
Step 4: Remove Scuff Plates Shown here is a diagram highlighting the location of all of the bolts you will need to remove to access
the engine cover once the seats are out.
Remove the four screws from each of the scuff plates along the bottom of the door frame. Remove the
seatbelt guides from the scuff plates and then remove the plates from the vehicle.
Step 5: Remove Left Kick Panel Next, remove the two bolts and one screw from the left kick panel, and then remove the kick panel from
the vehicle.
Step 6: Remove Steering Column Trim Panel You will now need to remove the ten screws from the trim panel below the steering column, and then
remove the trim panel from the vehicle.

TSI-13-12-10: Exhaust Manifold Ring Seal Replacement • © 2013 Navistar, Inc. All rights reserved. All marks are trademarks of their respective owners.
15 TSI-13-12-10: Exhaust Manifold Ring Seal Replacement | Study Guide
Step 7: Remove Shifter
Next, if equipped, remove the manual transmission shifter lever. Start by pulling the dust boot up the
shaft of the lever. With the dust boot out of the way disconnect the red and black air lines at the quick
disconnect fittings. Then remove the retaining nut and bolt from the shift lever. After removing the bolt,
lift the lever up and remove it from the vehicle.
Step 8: Remove Cup Holder Assembly Now remove the three screw caps from the cup holder assembly, as well as the three screws securing
the assembly into place. Unclip the cup holder assembly from the interior module trim cover and
disconnect the 12V accessory port and floor light electrical connectors. Once the assembly is
disconnected, remove it from the vehicle.
Step 9: Remove Right Kick Panel Next remove the bolt securing the right kick panel, and remove the kick panel from the vehicle.
Step 10: Remove Floor Mat
Start removing the floor mat by unhooking it from under the interior module trim cover, as well as from
under the pedal assemblies. If servicing a vehicle with a sleeper cab, also separate the front floor mat
from the sleeper floor mat. Remove the front floor mat from the vehicle once it is completely free.
IF THE VEHICLE IS EQUIPPED WITH A PUSH-BUTTON SHIFTER, REMOVE THE SHIFTER PANEL WITH
THE FOLLOWING PROCEDURE:
REMOVE THE SCREWS ON THE PANEL, PULL THE PANEL OUT, AND THEN DISCONNECT THE
ELECTRICAL CONNECTOR BEHIND THE PANEL.
TO AVOID TEARING AND DAMAGING THE FLOOR MAT, BE CAREFUL WHEN YOU REMOVE IT. THIS
IS ESPECIALLY TRUE FOR MATS THAT MAY BE GLUED TO THE ENGINE COVER.

TSI-13-12-10: Exhaust Manifold Ring Seal Replacement • © 2013 Navistar, Inc. All rights reserved. All marks are trademarks of their respective owners.
16 TSI-13-12-10: Exhaust Manifold Ring Seal Replacement | Study Guide
Step 11: Remove Engine Cover
The bolts for the engine cover on the vehicle used in this course have been highlighted to show their
location.
To remove the engine cover, start by removing the bolts securing the rear of the cover to the floor. Then
using a 10mm ratcheting wrench remove the engine cover bolt located below the interior module trim
cover, and then remove the two top bolts located on the left and right side of the cover. Once all of the
engine cover bolts have been removed, lift the rear of the cover up and pull it towards the back of the
vehicle to remove it.
FOR THE EXACT BOLT LOCATIONS FOR THE ENGINE COVER, REFER TO THE APPROPRIATE SERVICE
MANUAL FOR THE VEHICLE BEING SERVICED.

TSI-13-12-10: Exhaust Manifold Ring Seal Replacement • © 2013 Navistar, Inc. All rights reserved. All marks are trademarks of their respective owners.
17 TSI-13-12-10: Exhaust Manifold Ring Seal Replacement | Study Guide
Step 12: Remove HCI Coolant Supply Tube Now that you have access to the rear of the engine, it is time to remove the Hydrocarbon Injector (HCI)
Coolant Supply tube. Use two wrenches to loosen the fitting, and install a cap onto each of the lines.
Step 13: Remove Heat Shield Shown here is a diagram highlighting the location of all five bolts securing the heat shield to the engine.

TSI-13-12-10: Exhaust Manifold Ring Seal Replacement • © 2013 Navistar, Inc. All rights reserved. All marks are trademarks of their respective owners.
18 TSI-13-12-10: Exhaust Manifold Ring Seal Replacement | Study Guide
To remove the exhaust heat shield, start by removing the three bolts at the rear of the shield as well as
the bolt on the bottom of the shield. The bolt at the front of the shield only needs to be loosened
because the shield is slotted to allow easy removal. After loosening the bolt, the heat shield can then be
removed from the vehicle.
Step 14: Remove EGR Inlet Tube (Cylinders 1-3) Shown here is a diagram highlighting the bolts securing the cylinder one through three EGR inlet tube to
the engine.
Take out the two bolts securing the top of the EGR inlet tube (Cylinders 1-3) to the EGR valve. Take care
not to drop the inlet tube gasket. Next, remove the two bolts securing the bottom of the inlet tube to
the exhaust manifold. With the four bolts and both gaskets removed, remove the EGR inlet tube.

TSI-13-12-10: Exhaust Manifold Ring Seal Replacement • © 2013 Navistar, Inc. All rights reserved. All marks are trademarks of their respective owners.
19 TSI-13-12-10: Exhaust Manifold Ring Seal Replacement | Study Guide
Step 15: Remove Exhaust Ring Seal Shown here is a close up of the ring seal assembly when installed on the vehicle.
In order to remove the old manifold ring seal, start by loosening the two clamps. Position the clamps out
of the way and remove the two shield halves. Then remove and discard the ceramic wrap from the
manifold, as well as the seal packing. Because the clamps will not be reused, remove and discard both
ring seal clamps.
Step 16: Install Exhaust Ring Seal
To install a new exhaust ring seal, begin by wrapping the seal packing around the manifold and aligning
it so that the seal packing ends meet at the top of the manifold. Press the seal packing tightly into the
joint with your fingers. Place the ceramic mat wrap around the manifold and seal packing so that the
thick end of the mat is covering the seal packing. Ensure that the ceramic mat wrap is aligned with the
VERIFY THE SHIELD COMPLETELY COVERS THE CERAMIC MAT WRAP ON BOTH SIDES, AND THAT
THE CERAMIC MAT WRAP OVERLAPS THE SEAL PACKING.
RING SEAL CLAMP ALIGNMENT MUST MATCH THE CLAMP ALIGNMENT SHOWN IN THIS COURSE
TO PREVENT PROBLEMS WHEN INSTALLING THE EGR INLET TUBE (CYLINDERS 1-3).

TSI-13-12-10: Exhaust Manifold Ring Seal Replacement • © 2013 Navistar, Inc. All rights reserved. All marks are trademarks of their respective owners.
20 TSI-13-12-10: Exhaust Manifold Ring Seal Replacement | Study Guide
manifold midpoint. Install both ring seal shields around the mat wrap with the beveled flange covering
the seal packing end. Install a clamp around the two shields to hold them in place. Install the second ring
seal clamp, and tighten both clamps alternately. Once both clamps are snug around the shields, tighten
the two clamps to the specified value.
Step 17: Install EGR Inlet Tube (Cylinders 1-3) Before installing the EGR inlet tube for cylinders one through three, pre-assemble the tube's lower
gasket and a bolt. Install the tube and gasket assembly and then install the second lower bolt. Next,
install the upper bolts and gasket. Tighten all of the bolts so the inlet tube is snug, and then tighten the
bolts to the specified torque value.
Step 18: Install Exhaust Heat Shield Reinstall the exhaust heat shield, and then secure it into place with the five mounting bolts. Torque each
of the bolts to the specified torque value.
Step 19: Install HCI Coolant Supply Tube Reinstall the coolant supply line for the Hydrocarbon Injector, and tighten the line to the specified
torque value. Ensure that the line is not kinked after it is properly tightened.

TSI-13-12-10: Exhaust Manifold Ring Seal Replacement • © 2013 Navistar, Inc. All rights reserved. All marks are trademarks of their respective owners.
21 TSI-13-12-10: Exhaust Manifold Ring Seal Replacement | Study Guide
Step 20: Install Engine Cover Begin reassembling the interior by installing the engine cover and securing it with the previously
removed bolts. Then torque each of the engine cover bolts to the specified torque value.
Step 21: Install Floor Mat After bringing the floor mat back into the vehicle, ensure the mat is properly aligned with the floor of
the cab. If servicing a vehicle with a sleeper cab, secure the front rubber floor mat to the sleeper mat by
locking the channels together.
Step 22: Install Cup Holder Assembly Position the cup holder assembly in the vehicle, and reconnect the 12V accessory port and floor light
electrical connectors.

TSI-13-12-10: Exhaust Manifold Ring Seal Replacement • © 2013 Navistar, Inc. All rights reserved. All marks are trademarks of their respective owners.
22 TSI-13-12-10: Exhaust Manifold Ring Seal Replacement | Study Guide
After lining up the mounting hardware, engage the pressure clips on the right side of the cup holder and
install the three screws. Using a torque screwdriver, tighten the screws to the specified torque value.
Next, reinstall the covers for each of the screws holding the cup holder assembly in place.
Step 23: Install Right Kick Panel Now install the right kick panel by pressing the clip into the interior module trim cover and installing the
mounting bolt. Tighten the bolt to the specified torque value.
Step 24: Install Steering Column Cover Next, install the steering column trim panel and secure it with the previously removed screws. Once all
of the screws are in place, tighten them to the specified torque value.
Step 25: Install Left Kick Panel Install the left kick panel by installing the two lower bolts and the screw at the top. Each of the fasteners
must be torqued to the specified torque value.
Step 26: Install Scuff Plates On each side of the cab, install the seat belts and their guides into the scuff plates. Then attach the scuff
plates to the cab with the previously removed screws. Tighten the screws to the specified torque value.

TSI-13-12-10: Exhaust Manifold Ring Seal Replacement • © 2013 Navistar, Inc. All rights reserved. All marks are trademarks of their respective owners.
23 TSI-13-12-10: Exhaust Manifold Ring Seal Replacement | Study Guide
Step 27: Install Shifter
Next reinstall the shifter lever. Secure the lever with the retaining nut and bolt removed earlier in this
procedure. Then tighten the retaining nut and bolt assembly to the specified torque value. Re-connect
the red and black air line quick disconnect fittings, and fit the shifter boot into its original position.
Step 28: Install Front Seats After placing the front seats in the vehicle with the help of an assistant, reconnect the air supply lines
where applicable.
Before moving the seat into its normal position, mount the seatbelts onto both sides of the seat. Tighten
the bolts to the specified torque value. Next, slide the seat backwards into place and install the four
mounting bolts. The seat mounting bolts must be torqued in an X pattern to the specified torque value.
If the vehicle is equipped with a fire extinguisher, reinstall the fire extinguisher bracket, and the
previously removed bolts. Then secure the fire extinguisher to the mounting bracket with the band
clamp.
Before Returning the Vehicle to Service...
Step 29: Fill Cooling System Now use the Navistar Coolant Management Tool KL5007NAV to refill the engine coolant and verify
proper operation of the vehicle. Before returning the vehicle to service, be sure to remove the drain
pan, close and properly secure the hood, and remove the wheel chocks.
IF THE VEHICLE IS EQUIPPED WITH A PUSH BUTTON SHIFTER, REINSTALL THE SHIFTER PANEL
WITH THE FOLLOWING PROCEDURE:
RECONNECT THE ELECTRICAL CONNECTOR BEHIND THE PANEL, INSTALL THE PANEL, AND
REINSTALL THE SCREWS ON THE PANEL. TIGHTEN THE SCREWS TO THE SPECIFIED TORQUE VALUE.
USE ALL NEW MOUNTING HARDWARE WHEN INSTALLING SEATS TO ENSURE PROPER TORQUE
REQUIREMENTS CAN BE MET.

TSI-13-12-10: Exhaust Manifold Ring Seal Replacement • © 2013 Navistar, Inc. All rights reserved. All marks are trademarks of their respective owners.
24 TSI-13-12-10: Exhaust Manifold Ring Seal Replacement | Study Guide
CONCLUSION You have now completed the Exhaust Manifold Ring Seal Replacement Procedure for TSI-13-12-10.
Thank you for your participation.

TSI-13-12-10: Exhaust Manifold Ring Seal Replacement • © 2013 Navistar, Inc. All rights reserved. All marks are trademarks of their respective owners.
25 TSI-13-12-10: Exhaust Manifold Ring Seal Replacement | Study Guide
NOTES _____________________________________________________________________________________
_____________________________________________________________________________________
_____________________________________________________________________________________
_____________________________________________________________________________________
_____________________________________________________________________________________
_____________________________________________________________________________________
_____________________________________________________________________________________
_____________________________________________________________________________________
_____________________________________________________________________________________
_____________________________________________________________________________________
_____________________________________________________________________________________
_____________________________________________________________________________________
_____________________________________________________________________________________
_____________________________________________________________________________________
_____________________________________________________________________________________
_____________________________________________________________________________________
_____________________________________________________________________________________
_____________________________________________________________________________________
_____________________________________________________________________________________
_____________________________________________________________________________________
_____________________________________________________________________________________
_____________________________________________________________________________________
_____________________________________________________________________________________