third edition - oup.com.pk whiz/teaching... · whiz’s files is a list of chapters in the book...
TRANSCRIPT

3 Third Edition
1
An Introduction to Computers
Teaching Guide


Introduction vi
Introduction to the Teaching Guides viGuidelines 1
Chapter 1 2Whiz Looks Back Teaching objectives 2 Learning outcomes 2 Lesson plans 2 Answers 3 Whiz’s Tasks 5 Additional Activity 6
Chapter 2 7Evolution of Computers Teaching objectives 7 Learning outcomes 7 Lesson plans 7 Answers 9 Whiz’s Tasks 10 Additional Activity 11
Whiz’s Files
iii1

Chapter 3 12Interacting with the Computer Teaching objectives 12 Learning outcomes 12 Lesson plans 12 Answers 13 Whiz’s Tasks 15 Additional Activity 16
Chapter 4 17Input and Output Devices Teaching objectives 17 Learning outcomes 17 Lesson plans 17 Answers 19 Whiz’s Tasks 21 Additional Activity 22
Chapter 5 23Fun with Keys Teaching objectives 23 Learning outcomes 23 Lesson plans 23 Answers 24 Whiz’s Tasks 26 Additional Activity 27
Chapter 6 28Paint with Whiz Teaching objectives 28 Learning outcomes 28 Lesson plans 28 Answers 29
iv 1

Chapter 7 30Word Processing with Whiz Teaching objectives 30 Learning outcomes 30 Lesson plans 30 Answers 31 Whiz’s Tasks 33
Chapter 8 34Whiz Practises Typing Teaching objectives 34 Learning outcomes 34 Lesson plans 34 Answers 35
Chapter 9 37Multimedia with Whiz Teaching objectives 37 Learning outcomes 37 Lesson plans 37 Answers 39 Whiz’s Tasks 40 Additional Activity 41
v1
IntroductionComputers have become an integral part of our everyday lives. We use computers everywhere. Hence, a clear understanding of basic computer concepts and applications is vital.
The Computer Whiz (Third Edition) series provides students with detailed basic knowledge of computers at the primary level. The computer is presented to children through Whiz, the mascot, to create interest and visual appeal. Varied activities reinforce their understanding of the different concepts. The new features, fresh layout, and stimulating exercises added to this edition will help develop computer skills and enhance student learning.
Whiz’s Files is a list of chapters in the book with teaching objectives and learning outcomes.
Word Whiz consists of activities involving the use of new words introduced in each chapter.
Whiz’s Commands includes tips on conduct, etiquette, and safety while using the computer and the Internet.
Whiz Bytes provides interesting facts about computers to students.
Explore with Whiz consists of interesting and challenging exercises/activities that review the concepts that have been learnt in the chapter.
Whiz’s Tasks comprise of worksheets provided in the Teaching Guides for classroom practice.
Whiz through Lab encourages the children to do practical work and helps develop their skills on the computer.
Whiz through Projects promotes intellectual and social skills and encourages teamwork.
Whiz’s Notes at the end of each chapter offers a summary of the important points.
Whiz’s Word File at the end of each book is a glossary. It is a list of computer terms with clear definitions.
Introduction to the Teaching Guides
The Teaching Guides provide helpful tips, lesson plans, and worksheets with engaging activities that support learning. They act as a framework to help you develop your own lesson plans and teaching strategies.
Each chapter has a list of objectives and learning outcomes. You must try to realize these objectives at the end of each lesson. Sample lesson plans have been provided on the basis of which you can develop your own plans.
A good lesson plan consists of a starter activity for 3-5 minutes which introduces the concepts being taught followed by a 20-minute activity that encourages students to interact with each other. Please engage the quieter children too. This may be followed by feedback of the discussion in larger groups on which you can spend about 10 minutes. Reinforcement of the entire lesson, summarizing, and time for assigning
vi 1

homework should be at the end of each period for about 2-3 minutes. Students should be taken to the computer lab as required. The more practical experience on the computer, the more proficient the students become at using computers.
GuidelinesWhile students are working at the computer, discuss the importance of maintaining good posture. Students will probably spend a lot of time at the PC, barely moving, and with their eyes fixed on the screen. Extended use of the computer can have serious consequences on a child’s health; a child can develop weak eyesight and severe back problems. It is very important to make students aware that they should not use computers for hours on end. It is important for you as well as your students to be aware of what they should do and things they should avoid doing while using the computer.
Dos and Don’tsDo…• have your chair at the right height so that your eyes are level with the computer
screen• have your computer screen directly in front of you• make sure your chair has a good backrest• keep your shoulders and back relaxed• make sure that your wrists rest on the desk• let your feet be flat on the floor• take regular breaks• adjust the position of the computer so that there is no glare on the screen• make sure you have a protection screen on top of the monitor screen.
Don’t…• fix your eyes on the screen continuously• lift your shoulders while you type or move the mouse• twist your body to reach out for computer hardware• use your PC in poor lighting.
11

Chapter Whiz Looks Back1
Teaching objectives
The objectives of this chapter are to:• briefly discuss the history of computers• discuss how computers have changed over the years.
Learning outcomes
By the end of the chapter, the students should be able to:• elaborate on the different devices• summarize the development of computers.
Suggested number of periods: 2
Period 1
Sample lesson plan for a 40-minute period
Starter activity (5 minutes)Bring in a tablet and a stylus (or pictures of the two if the devices cannot be arranged) to the classroom. Ask the children if they have seen these devices. Explain that a tablet computer, or simply a tablet, is a mobile computer with a camera, microphone, and touch screen. A finger or a stylus replaces the computer mouse and keyboard. Tablets may have buttons to control basic features such as speaker volume and to charge the battery. An on-screen, pop-up, virtual keyboard is used for typing. Tablets are typically larger than smartphones.
Discussing the timeline and abacus (25 minutes)Discuss the timeline on pages 2 and 3. Explain how to read timelines. A timeline is a visual means of displaying a list of events in chronological order. It is typically a graphic design showing a long bar labelled with dates alongside.
Show pictures of pulleys, levers, hammers, wheels, ploughs, etc. (machines that need physical power to work) and other electronically-operated machines (which may include other machines/engines that need power, other than human and animal, to work). Ask students to identify the main difference between these two sets.
Expected responses: One group is operated by muscle power—human or animal; the other by power generated through other means.
Assign the Word Whiz activity to be completed in class.
Now discuss the text on page 4. Ask the students to recall how they were taught to count when they were younger (expected response: on the fingers). Explain that this is exactly how primitive man learnt to count. Ask what the limitations of using body parts in counting and measuring are. (Expected responses: large numbers cannot be handled easily; there are greater chances of inaccuracy, etc.)
2 1

Ask students if they have seen an abacus. Mount a picture of an early computer on the board alongside that of a microcomputer and give each a caption.
Let the students come up with differences between the two.
Expected responses: The two computers are different in size; thus the size of storage space varies, the amount of electricity used also varies, many more people are required to man the larger computer, etc.
Write these on the board around the two pictures.
Alternatively, students can answer the following question in their notebooks:
What differences can you find between the computers shown? Which one would you choose to use? Why?
Mechanical calculators (10 minutes)Mount enlarged photocopies of the Pascaline, Leibniz calculator, and a modern day calculator. Discuss the similarities and differences between them. Students can answer the question on page 5 of the textbook. Discuss the difference and analytical engines developed by Charles Babbage.
Period 2
Sample lesson plan for a 40-minute period
Electronic computers (20 minutes)Discuss the invention of electricity in the 20th century and its impact on the development of computers. Introduce the Mark I computer as one of the first electronic computers. Follow this with a discussion of the various electronic computers discussed on pages 6 and 7 of the textbook.
Exercise (5 minutes)Assign the question on page 6 of the textbook to be completed in the classroom. This should take another 5 minutes.
Classroom work (15 minutes)Assign the Explore with Whiz and Whiz’s Tasks activities to be completed in the classroom.
Answers
Word Whiz (page 3)history (the study of past events); timeline (a visual representation of historical events)
Exercise (page 5)A present day calculator does not have wheels or a hand crank. They have buttons.
The Leibniz calculator did not have a screen. It was much slower than a modern calculator.
31

Exercise (page 6)Three reasons why the present day computer is better than the Mark I:1. It is much lighter than the Mark I which weighed 30 tonnes.2. It does not occupy an entire room like the Mark I.3. It uses less electricity than the Mark I.4. It does not break down as often as the Mark I.5. It can be used to do more things than the Mark I.
Explore with Whiz (page 8)Picture 1:In this picture, a caveman is counting on his fingers and his toes.
Picture 2:In this picture, a boy is using an abacus to add, subtract, multiply, and divide.
Draw a line from the date of each invention to its name.For the teacher: Direct the students to look closely at the timeline and the text for answers. The answer for UNIVAC is in the timeline.
1642: Pascaline1694: Leibniz calculator1940: Mark I1946: ENIAC1951: UNIVAC
Answers to Additional Activity
(1) (b), (2) (b), (3) (a), (4) (b)
4 1
Whiz’s Tasks
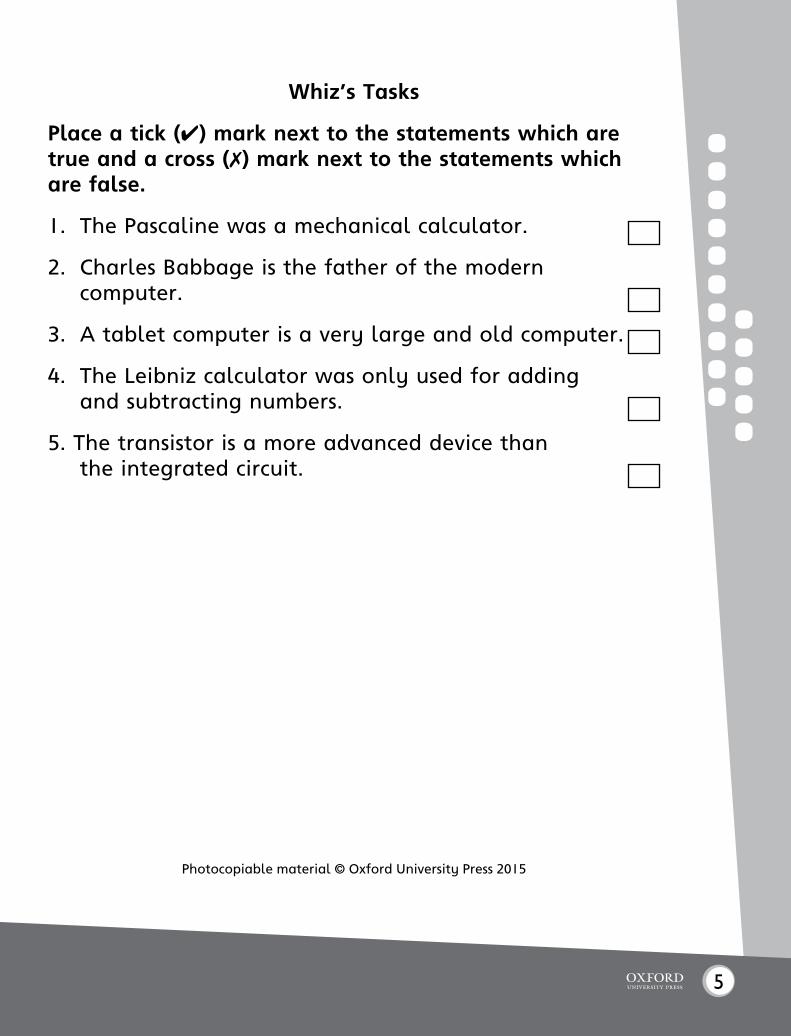
Place a tick (4) mark next to the statements which are true and a cross (7) mark next to the statements which are false.
1. The Pascaline was a mechanical calculator.
2. Charles Babbage is the father of the modern computer.
3. A tablet computer is a very large and old computer.
4. The Leibniz calculator was only used for adding and subtracting numbers.
5. The transistor is a more advanced device than the integrated circuit.
Photocopiable material © Oxford University Press 2015
51

Additional Activity
I. Trace the evolution of computers by ticking the correct statement.
(1) (a) In the Stone Age, people used machines powered by electricity.
(b) In the Stone Age, people used simple machines to lift heavy things.
(2) (a) The Leibniz was one of the first machines that helped to count.
(b) The Pascaline was one of the first machines that helped to count.
(3) (a) In 1833, Charles Babbage tried to make a machine similar to the present day computer.
(b) In 1833, Charles Cabbage tried to make a simple machine.
(4) (a) In the 1950s, computers were made with microchips.
(b) In the 1950s, computers were made with transistors.
Photocopiable material © Oxford University Press 2015
6 1
Chapter Evolution of Computers2
Teaching objectives
The objectives of this chapter are to:• introduce the integrated circuit (IC) and highlight its impact on the computer
industry• discuss the role of the Internet and its significance.
Learning outcomes
By the end of the chapter, the students should be able to:• explain how the invention of the IC helped computers to evolve• elaborate on the importance of the Internet.
Suggested number of periods: 2
Period 1
Sample lesson plan for a 40-minute period
Starter activity (2 minutes)Show students a picture of an integrated circuit. Ask them if they can name the device or explain what it is used for.
The integrated circuit (8 minutes)Read the text on page 10 of the textbook and explain the function of an integrated circuit. An integrated circuit is also called an IC, a chip, or a microchip. It is generally made with silicon and is very compact. An IC houses several billion transistors and other electronic components in an area the size of a fingernail. The integrated circuit led to the invention of the microprocessor which is an integral part of all computers today. The microprocessor is a silicon chip that contains a CPU. Microprocessors control most digital devices.
Assign the question on page 10 to be completed in class.
The Internet (10 minutes)Introduce the concept of the Internet while discussing the text on page 11 of the textbook. Explain that computers connected to the Internet are joined by satellites. Discuss the types of networks, e.g. LAN and WAN. Local Area Network is sometimes called LAN.
Assign the question on page 11 to be completed in class.
Search engines and email (20 minutes)Discuss the use of the Internet for communication and research. Introduce the concept of search engines explained on page 12 of the textbook. A search engine is a software system that helps us find information on the World Wide Web. Explain the interface of a search engine with the help of the screenshot on page 12.
71

Next, discuss the role of email in electronic communication. Discuss the concepts on page 13 of the textbook. Ask students to write an email as stated on page 13 of the textbook.
Safety on the Internet is a very important topic to discuss with the students. It is important to know how to stay safe when using the Internet. Students should never give out personal information when they are online to people they do not know in real life, no matter who they may think they are talking to. They should always keep in mind that Internet users can pretend to be someone that they are not. They can lie about their age, their interests, and whether they are male or female. No matter how long they have been chatting with them, students should remember that they are still strangers. Social networks are a great way of staying in touch but we must think carefully before adding someone to our list of online friends or posting information that we would not be happy with other people seeing.
Remember:• Once you have shared something online you have no control over it.• People may still be able to see things we have posted online days, months, or
years later,• Some people may use what we have posted online in ways we do not like.• Some people may share things about us which may upset us.• We should tell an adult if someone has upset us or made us feel uncomfortable.• We should tell a teacher or a parent if we need help dealing with a bully online.
Remember:• If we receive an email asking for our financial details, we should never reply.• We must never share any of our online passwords, and if you have, we must
change them immediately.• We must create strong passwords that have a mix of letters, symbols, and
numbers.• We should not lie about our age to buy things online.• When you have finished working online, we must log out properly, especially if
we use a shared computer.
Period 2
Sample lesson plan for a 40-minute period
Starter activity (10 minutes)Ask students if they have ever worked on Microsoft Windows. If they have, ask them why the Windows system is named so. After collecting their responses, explain that Microsoft Windows offers a unique user interface in the form of windows which makes it easier to work on the computer.
User interface (15 minutes)Introduce the concept of user interface. Discuss how the development of the graphical user interface assisted the development and widespread use of personal computers. Read through the text on page 14 of the textbook and ask students to
8 1

respond to the question given on that page. Ask students to think deeply and write their answers in the given space.
Classroom exercise (15 minutes)Assign the Explore with Whiz exercise and Whiz’s Tasks to be completed in the classroom.
Answers
Exercise (page 10)Which modern devices use integrated circuits?Expected responses: computers, mobile phones, microwave ovens, wristbands for theme parks, wearable identification tags, TVs, stereo systems, cameras, telephones, cars, refrigerators, electric ovens, children’s electronic toys; almost everything that uses electricity these days probably has a microchip in it.
Exercise (page 11)How does the Internet help us in our daily life?The Internet helps us in our daily life in many ways.
The Internet allows us to communicate with our friends and family. We can find information on any topic on the Internet. The Internet provides us with news from different parts of the world. We can play games and listen to music on the Internet.
Exercise (page 14)Answers can vary depending on the students’ creativity.
Explore with Whiz (page 15)Write the answers to the given clues.email, microprocessor, pointer/menu, Internet, microprocessor, email address, wide area network/WAN
Underline the correct answer.Computers on the Internet are joined by satellites/wheels.
WAN stands for wide area/worldwide area network.
The Internet/satellite is a global system of interconnected computer networks.
A computer network within a home is called a local/large area network.
Search networks/engines help us find information on the Internet.
Electronic/electrical mail enables us to send messages through the Internet.
Answers to Additional Activityintegrated circuit, microprocessor, microcomputer, graphical user interface, email
91

Whiz’s Tasks
Fill in the blanks on the given worksheet.
1. A is a small-sized computer that is used at home and in school.
2. The is a large network of computers.
3. We use a to search for information on the Internet.
4. The first email message was sent by .
5. GUI uses and pointers.
Photocopiable material © Oxford University Press 2015
10 1

Additional Activity
Identify these important developments that took place during the 1970s and 1980s.
Photocopiable material © Oxford University Press 2015
111

Chapter Interacting with the Computer3
Teaching objectives
The objectives of this chapter are to:• explain how the computer works• discuss different devices that are used to interact with the computer.
Learning outcomes
By the end of the chapter, the students should be able to:• define input, output, and processing• differentiate between input and output devices.
Suggested number of periods: 1
Period 1
Sample lesson plan for a 40-minute period
Starter activity (5 minutes)• Draw three columns on the board and write the words INPUT, PROCESSING, and
OUTPUT—one in each column.• Give the students a minute to think and then ask them to call out words or
phrases that come to their minds—remind them that they are thinking about these words in relation to computers. Accept all relevant responses and explain the connection where not obvious. Jot these down in the appropriate columns. Encourage students to come up with the meanings of the words by breaking the compound words into their simple components (IN+PUT; OUT+PUT).
Expected responses:
INPUT: putting something in, entering, typing information into the computer, feeding data into the computer.
OUTPUT: taking something out, giving out, anything that comes out of a computer, can be meaningful information or meaningless, can appear in a variety of forms, etc.
PROCESSING: converting from one form to another, changing, converting data into information or knowledge, etc.
Functions of the computer (10 minutes)Discuss the meanings of the terms input, processing, and output while reading pages 18 and 19 of the textbook. Support the discussion with various examples of input and output operations from real life. Encourage students to come up with as many examples as possible. In some examples, the three functions may not be clearly identifiable. Help students understand each stage in the examples they provide.
12 1

Input and output devices (10 minutes)Ask students to recall the input and output devices they learned about in earlier classes. Discuss the input and output devices mentioned on pages 19 and 21 to refresh their memories.
In groups of three, ask the students to write down all the input and output devices they can think of that can help in performing the three functions discussed above.
In the relevant columns on the board, write down what the students suggest.
Expected responses: Input devices: keyboard, mouse, scanner, joystick, display screens; Output devices: printer, speaker.
Exercise (10 minutes)Ask students to complete the exercises given on pages 20 and 21 in the classroom.
Whiz’s Tasks (5 minutes)Ask students to complete the Whiz’s Tasks activity in the classroom.
Assign the Explore with Whiz exercises on page 22 as homework.
Answers
Match the input devices to their names. (page 20)keyboard, mouse, touch screen, microphone, joystick
Which output devices are shown here? (page 21)printer, speakers, monitor
Word Whiz (page 21)Input: data that is entered into the computerOutput: processed data that is displayed on the monitor
Explore with Whiz (page 22)Write short answers.1. What are the basic functions of a computer? The basic functions of a computer are input, processing, and output.
2. Why is the mouse called an input device? The mouse is called an input device because it is used to enter data and
instructions into the computer.
3. What is the process of changing computer data into information called? The process of changing computer data into information is called processing.
4. Define output. Output is information or processed data that is presented through the monitor
and other output devices.
131

State whether the statements are true or false.1. False.2. True.3. False.4. True.
Answers Additional Activity
I. 1. processing 2. input 3. output 4. input devices
II. Answers will vary.
III. Processing is an important function of a computer because it makes raw data meaningful for the user.
14 1

Whiz’s Tasks
I. Give three examples of input, processing, and output from your daily routine.
Photocopiable material © Oxford University Press 2015
151

Additional Activity
I. Underline the correct terms for the given statements.
1. The process by which the computer converts data into
information is called . converting/displaying/processing
2. The data that we enter into the computer is called . input/output/keyboard
3. Processed data displayed on the monitor is called . document/text/output
4. The devices that help us to enter data into the computer
are called . monitors/input devices/speakers
II. Think of a scenario (plot/plan) where data is fed into the computer, processed by it, and finally displayed as output. Write it down, in steps, as clearly as you can.
III. Why is processing an important function of a computer?
Photocopiable material © Oxford University Press 2015
16 1

Chapter Input and Output Devices4
Teaching objectives
The objectives of this chapter are to:• discuss input and output devices in detail• introduce the microphone, stylus, joystick, touch screen, and graphics tablet.
Learning outcomes
By the end of the chapter, the students should be able to:• explain the functions of input and output devices• highlight their importance.
Suggested number of periods: 2
Period 1
Sample lesson plan for a 40-minute period
Practical class in the computer labThe keyboard (10 minutes)Ask students to sit at computers that have blank Microsoft Word documents open on their screens.
Ask them to type the following sentence:We should think for ourselves and not depend on others to think for us.Instruct them to experiment with the Enter, space bar, Shift, and Backspace keys. Ask them to note their observations.
Expected responses:The Enter key in a document ends one line of text and starts a new line.The space bar moves the cursor one space to the right to create spaces between words. It can also move an entire word/sentence to the right, one space at a time.The Shift key, when used with other keys, is used to type capital letters or symbols.The Backspace key moves the cursor backwards and erases data from the page one letter at a time.
Assign the exercises on page 24 to be completed in the lab.
The mouse (10 minutes)Ask the students to jot down the functions of a mouse. They can first experiment on the Word document they have created for the previous exercise. They can experiment on the desktop with the mouse, each time noting down the functions it performs.
Expected responses: moves pointer to the desired place, file, folder; selects the button or icon the user wants to access; opens the desired file, folder, or program; highlights the selected word or icon; drags the desired file, folder, or icon; the clicking of a mouse on a document enables the user to start writing, editing, or moving around on the document; the scroll wheel on some mouse devices gives greater flexibility in
171

manoeuvering up or down a page and making text larger or smaller; clicking the right button opens up the command menu, etc.
Assign the exercise on page 25 to be completed in the lab.
Microphone, graphics tablet, and stylus (15 minutes)Where possible, let the children speak into a microphone so they can observe how a microphone works. Ask them where and how microphones may be used. Bring in a tablet and a stylus to the lab to demonstrate how the stylus is used with a tablet. Explain that styluses are also used with smartphones.
Assign the exercise on page 27 to be completed in the lab.
Additional information for the teacherA graphics tablet is also called a digitizer. It is an input device that enables a user to draw images, animation, and graphics similar to the way a person draws images with a pencil and paper. It can also be used to trace an image from a piece of paper. The graphics tablet consists of a flat surface upon which the user may draw or trace an image using a stylus. A stylus looks like a pen. Some tablets may be used as a replacement for the mouse as a pointing and navigation device.
Caution the students that they should not type on the computer extensively over a prolonged period of time in an inefficient manner. Carpal tunnel syndrome (CTS) is a stress-related injury caused by repetitive movement of joints, especially the wrist. It has become common among computer professionals due to poorly placed computer parts and extensive typing.
The joystick (5 minutes)If a joystick is available, demonstrate its different functions through a computer game. Alternatively, you could ask the students to state the functions of a joystick after telling them how it is used (preferably by showing a picture of a joystick).
Assign the colouring activity given on page 28 of the textbook.
Period 2
The scanner (10 minutes)If a scanner is available, demonstrate how it is used by placing a typed page on it and scanning it to the computer. Alternatively, you could ask the students if they know what a scanner is used for or have seen one in use (show them a picture of a scanner).
Assign the activity given on page 29 of the textbook.
The touch screen (10 minutes)If available, demonstrate how a touch screen monitor works. You may bring in pictures of different touch screens used in ATMs and other devices. You could bring in a smartphone to demonstrate the use of a touch screen.
Assign the exercise on page 30 to be completed in the lab.
18 1

Additional information for the teacherA touch screen is a computer display screen that is also an input device. The screens are sensitive to pressure. The user interacts with the computer by touching pictures or words on the screen. Some touch screens even support the use of a stylus as well as the fingertips.
Touch screens are frequently used for information kiosks, automated teller machines (ATMs), airline electronic ticketing terminals, and customer self-service stations in retail stores, libraries, and fast food restaurants.
The monitor, printer, and speakers (20 minutes)Identify the different monitors, printers, and speakers located in the computer lab. Ask students to explain why they are called output devices. Once students have responded, read through pages 31 to 33 of the textbook and explain the different types of monitors and speakers. Explain the difference between hard copy and soft copy.
Assign the exercises given on pages 31 to 33 of the textbook.
Assign the Explore with Whiz exercises on pages 34 and 35 as homework.
Answers
Label the keys in the given boxes. (page 24)space bar (orange key)Backspace (green key)Enter (pink key)Shift (blue key)
What commands do these special keys give to the computer? (page 24)Enter: to enter data into the computerSpace bar: to insert a space between two wordsShift: to type capital letters or symbolsBackspace: to erase typed text
Underline the correct answers. (page 25)1. An image of a computer command or function is a/an pointer/icon.2. The keyboard is an output/input device.3. An example of a pointing device is a mouse/button.4. The alphabet/Enter key is a special key.5. To choose an activity from the command menu, we click on the right/left mouse
button.6. We point/drag the mouse to move an icon on the screen.7. We can type text with the help of a mouse/keyboard.8. We double-click the left/right button to select an icon.
Look at the pictures and answer the questions. (page 27)What is the lady using the microphone for?The lady is using it to speak to someone on the computer.
191

What is the graphics tablet being used for?The graphics tablet is being used to draw on the computer.
What is the stylus being used with?The stylus is being used with a touch screen on a smartphone.
Name the devices where touch screens are being used. (page 30)Clockwise starting from top-left: ATM, digital video camera, tablet, smartphone, tablet
Fill in the blanks. (page 31)1. hard2. output3. liquid crystal display4. compact, thin
Word Whiz (page 32)compact: smallthin: narrow
Word Whiz (page 33)transmit, receive
Explore with Whiz (pages 34-35)Label the devices and state whether they are input or output devices.scanner, input deviceprinter, output devicemouse, input devicekeyboard, input devicetouch screen, input devicemonitor, output device
Name the devices corresponding to the given clues.1. joystick 5. printer2. touch screen 6. mouse3. scanner 7. microphone4. keyboard 8. monitor
Answers to Whiz’s Tasks
I. 1. Yes 5. Yes 2. No 6. Yes 3. Yes 7. No 4. Yes 8. No
Answers to Additional Activity
1. (a), 2. (b), 3. (b), 4. (a), 5. (b), 6. (c)
20 1

Whiz’s Tasks
I. What is each part of the computer used for? Colour the correct answers.
1. The keyboard is used to type text and give commands.
Yes No
2. The mouse is not used to move the pointer around the screen.
Yes No
3. The light pen is used to point at objects.
Yes No
4. The scanner is used to transfer text and images to the computer.
Yes No
5. The touch screen responds to a touch on its surface.
Yes No
6. The monitor displays information to the user on the screen.
Yes No
7. Hard copy is information displayed on the screen.
Yes No
8. Speakers do not transmit audio messages to the computer.
Yes No
Photocopiable material © Oxford University Press 2015
211

Additional Activity
I. Identify the correct input/output device from the clues given below.
1. is used to give commands (a) keyboard (b) printer (c) scanner
2. a pointing device (a) microphone (b) light pen (c) scanner
3. is used to input voice messages (a) mouse (b) microphone (c) light pen
4. controls the movement of the pointer on the screen (a) joystick (b) scanner (c) microphone
5. responds to a touch on its surface (a) mouse (b) touch screen (c) monitor
6. sends audio messages as output (a) microphone (b) monitor (c) speakers
Photocopiable material © Oxford University Press 2015
22 1

Chapter Fun with Keys5
Teaching objectives
The objectives of this chapter are to:• discuss the use of the keyboard in detail• explain the functions of the different keys of the keyboard.
Learning outcomes
By the end of the chapter, the students should be able to:• summarize the different uses of the keyboard• discuss the use of the special keys and function keys
Suggested number of periods: 1
Period 1
Sample lesson plan for a 40-minute period
Starter activity (5 minutes)By Class 3, students should be familiar with the basic functions of a keyboard. However, you should refresh their memories by asking them about the functions of the alphabet, number, and punctuation keys.
The primary keys of the keyboard (10 minutes)Read through page 38 and discuss the different types of keys on the keyboard. Explain where these sets are located on the keyboard. Assign the colouring and labelling activity to be completed in the classroom.
The function keys (10 minutes)Read through page 39 and explain the role of the function keys. Assign the labelling and Word Whiz exercise to be completed in the classroom.
Discuss the answers and resolve any problems or confusions the students express.
Arrow keys, Home and End keys, Ctrl, Alt, and Delete keys (15 minutes)Mount an enlarged printout of a keyboard on the board and give a smaller one to each student. Indicate the different keys and their location on the keyboard. Point to the numeric keypad, alphanumeric keys, punctuation keys, and special keys.
Identify the arrow keys and the Home and End keys. Explain their functions in navigating on a page or document on the screen.
Assign the exercise on page 40 to be completed in the classroom.
Identify the Ctrl, Alt, and Delete keys and explain their role in shutting down or restarting the computer.
Assign the exercise on page 41 to be completed in the classroom.
Assign the Explore with Whiz exercise on page 42 as homework.
231

Answers
Identify and label the groups in the given boxes. Colour the alphanumeric keys yellow, the punctuation keys blue, and the special keys red. (page 38)Labelling from left to right: special keys (to be coloured red), alphanumeric keys (to be coloured yellow), punctuation keys (to be coloured blue)
special keys alphanumeric keys punctuation keys
Label the function keys on the keyboard. (page 39)
F12F8F4 F11F7F3 F10F6F2 F9F5F1
Word Whiz (page 39)function: task; command: order
Match the keys to the tasks they perform. (page 40)moving the cursor to the end of the line: Endreaching the end of the document: Ctrl + Endmoving to the next line: Enter
24 1

exiting the document: Escbringing the cursor to the top of the page: Ctrl + Home
Circle the correct key in the following statements. (page 41)The arrow/function keys work as shortcuts for specific functions.The End/arrow key helps us to move to the middle of a document.We press the Ctrl and Home/Ctrl, Alt, and Delete keys together to shut down the computer.
Explore with Whiz (page 42)Which key(s) would you use to do the following?Esc, End, F1, Caps Lock, Ctrl + Alt + Delete, alphanumeric keys
Tick the correct answers to the questions.1. a2. a3. b4. a
Answers to Whiz’s Tasks
1. keyboard2. function3. arrow4. cursor5. Esc6. End
Answers to Additional Activity
1. (a), 2. (b), 3. (c), 4. (c), 5. (a)
251

Whiz’s Tasks
I. Fill in the blanks with the correct answers.
1. The has a set of keys that enable us to enter data into a computer.
2. The keys act as shortcuts to perform certain functions.
3. The keys help move the cursor around in a document.
4. The is a line that we see blinking on the computer screen.
5. The key helps us to exit a program.
6. The key moves the cursor to the end of the sentence.
Photocopiable material © Oxford University Press 2015
26 1

Additional Activity
I. Identify the group to which the given keys belong.
1. A, 7, P (a) alphanumeric keys (b) punctuation keys (c) special keys
2. F1, F2, F3 (a) special keys (b) function keys (c) alphanumeric keys
3.
(a) special keys (b) function keys (c) cursor control keys
4. , . ; (a) function keys (b) alphanumeric keys (c) punctuation keys
5. Caps Lock, Alt, Esc (a) special keys (b) arrow keys (c) function keys
Photocopiable material © Oxford University Press 2015
271

Chapter Paint with Whiz6
Teaching objectives
The objectives of this chapter are to:• outline the uses of different tools of the Paint program• discuss how pictures can be selected, edited, and flipped.
Learning outcomes
By the end of the chapter, the students should be able to:• describe the functions of the different tools of the Paint program• select, copy, cut, paste, delete, and flip a picture.
Suggested number of periods: 2
Period 1
Sample lesson plan for a 40-minute period
This lesson should be conducted in the computer lab.
Starter activity (10 minutes)Before students begin practice on the computers, ask them to complete the exercise on page 45 of the textbook.
The Select tool (15 minutes)In order to gain fluency and develop skill with the Microsoft Paint program, students should be allowed to practise individually.
Ask students to open the Paint program by following this path: Start menu, All Programs, Accessories, Paint. They should then draw an image and practise the tools they identified in the starter activity, i.e. Magnifier, Text, Color picker, Pencil, Fill with color, Eraser, and Pencil tools. Ask students to make the following changes to their drawings once they are done.
Read through pages 46 and 47 with the students and demonstrate the use of the Select tool for selecting regular as well as irregularly-shaped parts of the picture. Give students sufficient time to develop fluency with the use of the Select tool before proceeding further. Assign the activity on page 47 as homework.
The Resize and Skew tools (15 minutes)
Read through page 48 and explain the concepts of resizing (making bigger or smaller) and skewing (making a picture appear slanted at an angle). Identify the tools on the Paint Ribbon and demonstrate their use by applying them to a drawing. Allow students to practise the tools as they would be using these for the first time.
Period 2
Sample lesson plan for a 40-minute periodThis lesson should be conducted in the computer lab.
28 1

The Copy and Paste commands (15 minutes)Read through pages 49 and 50 of the textbook and explain the concepts of copying, cutting, and pasting. Identify the Cut, Copy, and Paste buttons on the Paint Ribbon and demonstrate their use with different pictures. You may need to demonstrate with two or three examples before students understand the steps required to use the Cut, Copy, and Paste features. Explain the role of the Select tool in the entire process. Students may then be asked to do the drawing and colouring activity on page 50 if time permits.
The Rotate feature (15 minutes)Read through page 51 of the textbook and explain the meaning of the word flip. Indicate the Rotate feature on the Ribbon and explain how it may be used. Demonstrate the various rotate options such as rotating to the left and right and flipping vertically and horizontally. Give students sufficient time to practise the different options on their pictures. Students may be asked to attempt the activity on page 51 if time permits.
Exercises (10 minutes)Assign the Explore with Whiz exercises on pages 52 and 53 to be completed in the classroom.
Answers
Label each tool and state its function. (page 45)Magnifier: to make an object appear bigger or smallerText: to insert typed text in the pictureColor picker: to select a colour from the paletteFill with color: to fill an enclosed area with the selected colourEraser: to erase part of a picturePencil: to draw freehand
Explore with Whiz (pages 52 and 53)Solve the crossword puzzle with the help of the clues.Across2. edit4. palette5. icons
Down1. resize3. skew4. pencil
What are these tools used for? (page 53)Select: to rearrange images or to make changes in a pictureCrop: to get rid of parts of a pictureResize: to make images bigger or smallerRotate: to change the direction of a pictureFlip: To flip a picture
291

Chapter Word Processing with Whiz7
Teaching objectives
The objectives of this chapter are to:• summarize the role of the word processing tools• introduce the Select, Cut, and Paste functions.
Learning outcomes
By the end of the chapter, the students should be able to:• select text• use different tools to edit and format documents.
Suggested number of periods: 2
Period 1
Sample lesson plan for a 40-minute period
This lesson should be conducted in the computer lab.
Prior to the class, create a file containing the text from page 55 in the textbook or with text of your own, containing errors that the students can identify and correct. Save the file on the desktop.
Editing a document (20 minutes)Instruct the students to open the Word file you had saved earlier. Ask students how they would correct the mistakes in the text. Give these instructions if necessary, e.g. take the pointer to the file and double-click the left button on the mouse.
Next, ask students to look closely at the text and figure out why some words are underlined in red.
Expected response: Misspelt words have been underlined by the computer to indicate the error.
Teach the students to correct these words by running a spell check in the following way:Bring the cursor to the beginning of the misspelt word and click the right button of the mouse. A list of suggestions appears. Select the correct option from the list. The misspelt word is replaced with the correct word.
After all the underlined words have been corrected in this manner, ask the students to recheck for any remaining errors that the computer might not have highlighted. Once the students have pointed them out, ask them why the computer did not underline them as mistakes.
Expected response: These are correctly spelt words but used incorrectly in the context of the sentence.
30 1

Help the students recall how such mistakes are corrected (by using either the Delete key or the Backspace key).
Students may perform the exercise on page 55 in the textbook.
Copying and moving text (20 minutes)Guide students through the process of identifying, selecting, cutting, and pasting an incorrectly positioned sentence. Demonstrate the two ways of selecting the concerned sentence. For example, click where you want to begin, hold down the left button on the mouse, and drag the cursor over the text you wish to select; or, click where you want to begin, hold down the Shift key, and simultaneously press the arrow keys.
Demonstrate the use of the Copy and Cut features to copy and move the selected sentence to another position. Teach students how to access the Copy and Cut features from the Clipboard on the Ribbon as well as by right-clicking the mouse.
Demonstrate the use of the Paste feature to insert the cut text in the new location. This feature can also be accessed from the Clipboard and by right-clicking the mouse. Give students ample time to practise the use of the Copy, Cut, and Paste features.
Period 2
Sample lesson plan for a 40-minute period
This lesson should be conducted in the computer lab.
Spelling and grammar check (15 minutes)Demonstrate the process of conducting a spelling and grammar check for a document. Guide the students through the spelling and grammar check exercise on page 58 of the textbook. Alternatively, you could prepare a document with the text and save it on the desktop. Ask students to rewrite the paragraph with the correct spelling of the words. If sufficient time is not available, assign this as homework. Encourage the students to explore the grammar check option independently. Explain that grammatical errors are indicated with a green line whereas spelling errors are indicated by a red line.
Practice (25 minutes)Assign the activities under Whiz through Lab on page 60 of the textbook to be completed in the lab. Students may be divided into two groups and each group may be assigned one of the two tasks.
Answers
Edit these lines. Correct the mistakes. (page 55)Keep your fingers, pens, and pencils off the screen.Do not spill food or drink on the keyboard.Always keep an extra copy of all your important data.Print on both sides of the paper.
Where should the underlined sentence be in the passage? (page 57)The underlined sentence should be the last sentence of the paragraph.
311

In the following paragraph, pretend to be the Spelling & Grammar feature. Circle all the spelling mistakes. (page 58)
The mousse tels the computerr what to do. It points at things anid
shows us where wee are on the screin . The smal arroww that
moeves when we moeve the mouse is called a poiniter . The flashing
line thatt we see in a doccument is called a currsor .
Explore with Whiz (page 59)
Tick the correct statement.1. c2. b3. c4. c
Make a list of three ways in which we can edit a document.1. We can correct our mistakes using the Backspace or the Delete key.2. We can cut text and move it to another place in the document.3. We can correct spelling by running a spell check.
32 1

Whiz’s Tasks
Underline the spelling mistakes with a red pencil. Then rewrite the paragraph with the correct spelling of the words.
Niights passed and dayys but fatther did not come back. dur jamala was very sad. She roameed in the peach orcards all day long with alam Gul. When Father was home, Alam Gul was sennt to the moosque every day.
Photocopiable material © Oxford University Press 2015
331
Chapter Whiz Practises Typing8
Teaching objectives
The objectives of this chapter are to:• teach students the correct use of a QWERTY keyboard• help students to quickly and easily learn the correct use of the letter keys• train students to type with speed and precision through practice.
Learning outcomes
By the end of the lesson, the students should be able to:• practise correct finger placement on a QWERTY keyboard• apply the methods taught to type quickly and accurately.
Suggested number of periods: 2
Period 1
Sample lesson plan for a 40-minute period
This lesson should be conducted in the computer lab.
Correct posture (10 minutes)Instruct the students to be very careful about their posture when using a computer. Many computer users develop back problems due to bad posture. Ask students to keep the following things in mind when they work at the computer. These should almost become a mental checklist in their minds:
• Sit straight in a comfortable chair.• The table must be at the correct height.• The keyboard should be below or at the same level with your elbows.• The computer should be centered in front of you.• Your eyes should be above the top of the monitor so you do not strain your neck.
Assign the exercise on page 62.
Finger positioning (5 minutes)Ask students to recall the names of the fingers and their placement on the keyboard from Book 2. In case students need help, demonstrate the placement of the fingers on the ASDF and JKL; keys. Go over the diagram and the photograph on page 53 to support the demonstration.
Pressing the upper row keys (10 minutes)Help students revise the pressing of the upper row keys from Book 2. They should use the correct fingers to press the Q, W, E, R, T, Y, U, I, O, and P keys. Give students sufficient time to practise typing these letters.
34 1

Pressing the bottom row keys (15 minutes)Demonstrate the finger movements shown on pages 64 and 65 of the textbook. Have students observe and replicate your finger movements on the keyboard. You may need to help some students by guiding their fingers if they cannot stretch adequately. Give students sufficient time to practise pressing the V, B, N, M, C, and comma (,) keys.
Period 2
Sample lesson plan for a 40-minute period
This lesson should be conducted in the computer lab.
Pressing the bottom row keys (20 minutes)Revise the typing techniques from the previous lesson. Once students are ready to learn new techniques, demonstrate the finger movements shown on pages 66 and 67 of the textbook. Extend the left ring finger to press the X key and the right ring finger to type a full stop (.). Extend the left little finger to press the Z key and the right little finger to type a slash (/). Give students sufficient time to practise these keys and others they have learned about.
The Shift key (20 minutes)Introduce the Shift key and explain its function. Indicate the two Shift keys on either side of the alphabet keys. Explain that the Shift keys are used to type the characters shown on the upper part of the number and punctuation keys, for example, !, @, #, $, %, ^, &, *, (, and ) on the number keys 1 through 0. Explain that the Shift keys are also used to type capital letters. Demonstrate this by pressing the Shift key with the little finger of one hand and pressing any letter key with the other hand. Remind students to press the space bar with the thumb to insert spaces between words.
Encourage students to practise these techniques as much as possible to increase speed and accuracy.
Assign the Explore with Whiz exercises on page 69 of the textbook as homework.
Answers
Explore with Whiz (page 69)Which finger do we use to type the following?1. left index finger2. left ring finger3. left index finger4. right index finger5. left middle finger6. little finger of left hand, little finger of right hand
351

All Programs
Search programs and files Shut Down
Calculator
Paint
Notepad
Sound Recorder
Microsoft Word 2010
Whiz
Documents
Pictures
Music
Computer
Control Panel
Devices and Printers
Deault Programs
Help and Support
Sitting straight in a comfortable chair with a backrest.
Whiz sitting with computer centered in front of him, Whiz sitting with computer on a low table.
Mark the images with correct posture with a (4) and those with incorrect posture with a (7). (page 62)
36 1

Chapter Multimedia with Whiz9
Teaching objectives
The objective of this chapter is to:• discuss Microsoft PowerPoint in detail.
Learning outcomes
By the end of the chapter, the students should be able to:• use different tools in Microsoft PowerPoint• combine text, graphics, and audio for an effective presentation.
Suggested number of periods: 2
Period 1
Sample lesson plan for a 40-minute period
This lesson should be conducted in the computer lab.
Starter activity (5 minutes)Ask the students if they know what PowerPoint presentations are and what they are used for. Expected responses: PowerPoint presentations are slides prepared on the computer using Microsoft PowerPoint; they present information with brief text and audio/visual displays to a group of people; they are presentations in a dynamic slide show format, etc.
Opening Microsoft PowerPoint (5 minutes)Demonstrate the steps in opening Microsoft PowerPoint on the computer. Go to Start
All Programs Microsoft Office Microsoft Office PowerPoint 2010. Ask students to do the same on their computers.
The PowerPoint layout (15 minutes)Explain the concepts of templates, slide, and orientation on the Microsoft PowerPoint opening screen. Read through pages 72 and 73 of the textbook. Demonstrate how templates can be accessed and encourage students to select a template they like for their presentation.
Ask them to click on the arrow next to New Slide for a window with several templates. Choose a slide from the given templates or a blank slide. Ask them if they remember what a template is. It is a pre-formatted page layout used to make new pages with a similar design, pattern, or style. Explain that the Slide templates feature allows them to choose a pre-formatted design for their presentation.
Explain the procedure to add new slides to a presentation. Ask students to add 5-6 slides for their presentation.
Discuss the Portrait and Landscape orientations and demonstrate how the Slide orientation feature is accessed from the Design tab. The students should click on the
371

arrow next to Slide orientation in the Themes group on the Design Tab to choose between Portrait (vertical) and Landscape (horizontal) orientation.
Inserting text (15 minutes)Ask students to think about a topic for a presentation and write up text related to it. The text should be in the form of bulleted sentences instead of lengthy paragraphs. Demonstrate the procedure for inserting text in the placeholder as well as by inserting a text box. Allow students to insert their text onto their PowerPoint slides.
Period 2
Sample lesson plan for a 40-minute period
This lesson should be conducted in the computer lab.
Inserting a text box (10 minutes)Explain the procedure for creating a text box on a PowerPoint slide. Students should click on the Insert tab and then on Text Box in the Text group. By dragging the mouse across the slide, they can adjust the size of the text box. Once a text box is created, point to the Format tab with Drawing Tools that appears on the Ribbon. Direct students to click on Text Effects to create special effects in the text. A menu listing options to add a shadow, reflection, or glow to the text appears. Similarly, describe the function and usage of the Text Outline and Text Fill features. Ask students to apply appropriate text effects and outlines to their slides.
Inserting graphics (20 minutes)Explain the purpose of using graphics in a presentation. Graphics used in the form of clip art or SmartArt are effective tools used in slides. Explain the difference between clip art and SmartArt and how they aid understanding and retention of the information contained in the slides. Help students search relevant clip art for their presentations. Next, encourage them to insert appropriate SmartArt such as charts or cycle diagrams on their slides.
Inserting audio (10 minutes)Explain the role of inserting audio files in a presentation. Explain the process of inserting audio files given on page 76 of the textbook. Explain that they can add audio in the form of music or sounds from a CD, the computer library, or from online files. In order to do this, they must click on Audio in the Media group.
Ask students to insert relevant audio files from the computer library in their presentations.
Assign the exercises on pages 76 to 78 as homework.
Answers
What are the people in the pictures using multimedia presentations for? (page 71)In the first picture, the young man is educating students in a classroom by showing them a presentation on different parts of a computer. In the second picture, the man is using multimedia to explain a graph to people in an office.
38 1

Which sound clips would you use in the following presentations? (page 76)Answers will vary depending on the interests and preferences of the students.
Explore with Whiz (pages 77 and 78)What are these tools used for?1. b2. b3. b4. b
Define the following terms:1. Multimedia is the integration of different media.2. Integration is the process of combining two or more things to form a whole.3. A template is a pre-formatted page layout with a similar style.4. Transition is the movement from one slide to another.
Answers to Additional Activity
1. b2. a3. b4. b
391

Whiz’s Tasks
Arrange the slides to make an effective presentation on the life cycle of butterflies. Use chronological order. Discuss what content should be included in slides for presentations on different aspects of butterflies, such as different kinds of butterflies in other parts of the world or threats to their existence.
Photocopiable material © Oxford University Press 2015
40 1

Additional Activity
How do the following tools help us?
1. Slide Orientation . (a) allows us to choose the design (b) allows us to choose horizontal/vertical slides
2. Slide Template . (a) allows us to choose a design that we want to use (b) allows us to open a slide show
3. The Format tab . (a) helps us create a text box (b) helps us create special effects in the text
4. Text Outline . (a) adds colours (b) helps decide what colour and design the text outline should
be in
Photocopiable material © Oxford University Press 2015
411
Notes
42 1