the pixie challenge - · pdf fileelektor sdr and hdsdr software, display using argo software....
TRANSCRIPT

The Pixie ChallengeBuild a CW Transceiver
Make a QSO

Pixie is a low cost 7023kHz
transceiverYou have a
complete kit
Provide your own Solder, soldering iron, side cutters/strippers
1
2
Except 1 & 2

History• The transceiver is made from 3 parts
• An xtal oscillator
• A PA, also used on receive as a product detector
• An audio amplifier
• The use of the PA as a mixer was proposed by GM3OXX in SPRATT 1983!
• The keying method was implemented by RV3GM in 1992
• The audio stage was implemented using LM386 in 1995

The circuit basics
OscillatorPA & RX Mixer
Audio AmpRIT
9-12V
Audio Amp muting diode
LPF

The Challenge
• Time allowed: two club constructor nights
• You cannot take the anything home, you must build it at the club
• RX: you must receive and read 100% a CW message, which will repeat every 10 sec
• TX: you must make a valid QSO

Read CW• A secret message will be
transmitted in the club room
• On 7023kHz, slow 5 WPM morse
• You must read it 100% accurately
• First to come up with the message wins the RX Prize

Your QSO
• Call CQ with your own call sign
• Listen for reply, read calling sign
• Exchange reports (e.g. 599)
• Exchange your secret codes
• End QSO
Chaos and QRM is very likely, try to be nice

Outline of a CW QSO Simon

Building the Pixie

The kit• Fixed resistors
• Adjustable resistor
• Chokes/coils
• Capacitors
• Diodes, Transistors, IC LM386
• Xtal & Connectors

Your complete kit• Audio amplifier, USB charged,
3.5mm audio connection
• 3.5mm connection cables
• Mouse connector, and button
• Pixie kit
• 6 x AA battery box with switch
• Battery connector
• Antenna connector
• Antenna/Ground wire (2 x 2m)Buy your own batteries
6 x AA

Building the Pixie
• Sort out and identify ALL the components
• Solder them on the board
• Take care not to short out close connections!
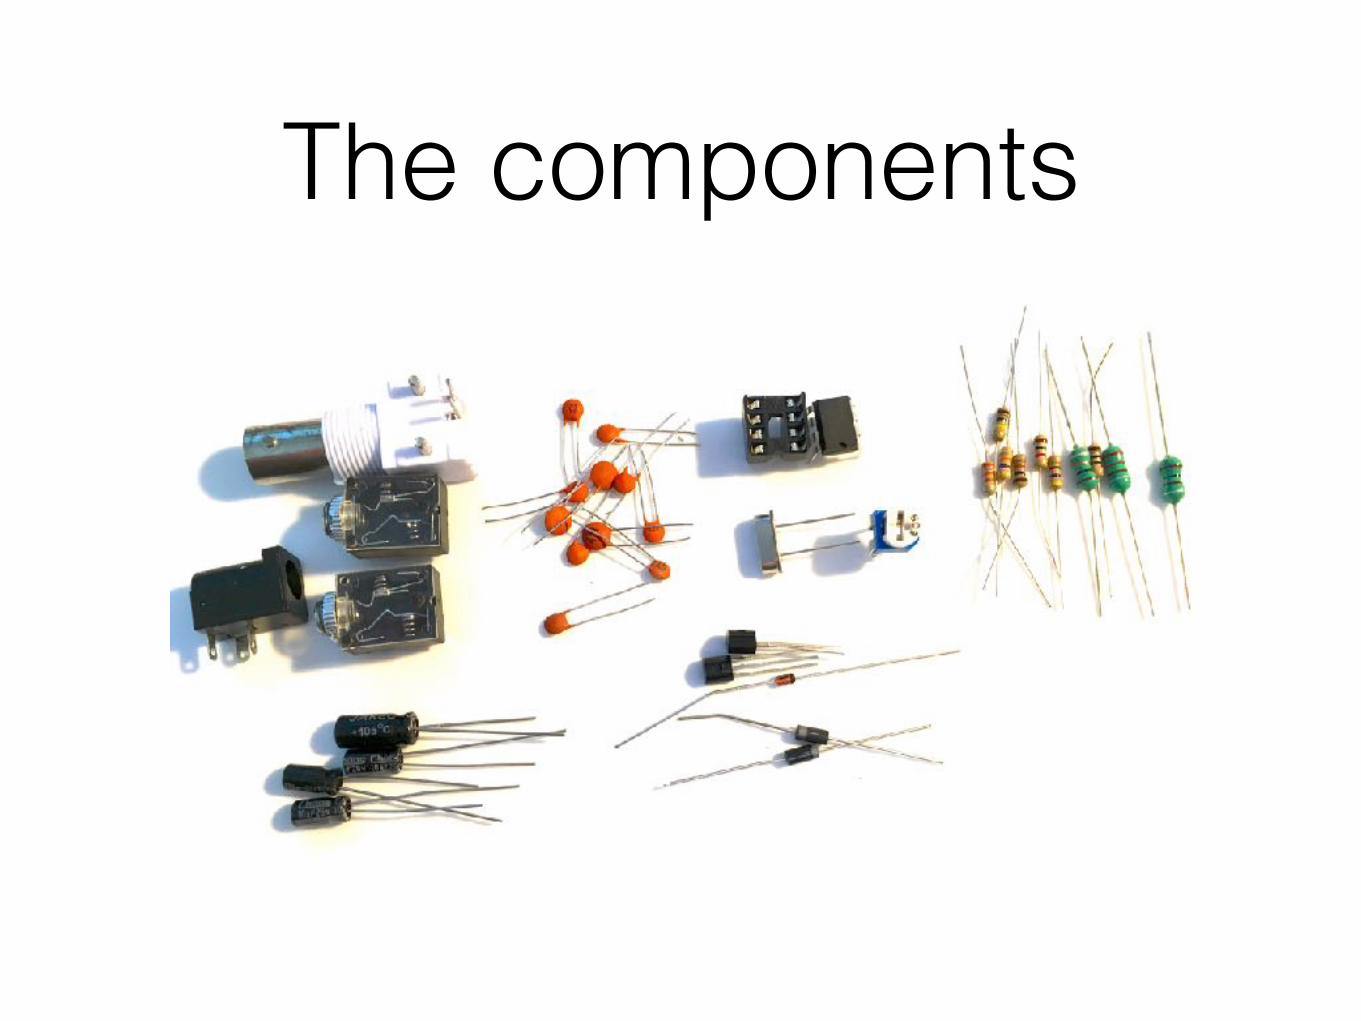
The components

The PCB layout

Sort out the components

Mount the resistors

Mount the coils

Mount the capacitors
Ceramics Electrolitics

Mount the diodes & transistors

Mount the LM386 & the connectors
You can use the LM386 8 pin
socket

Finally add the variable resistor (for RIT adjustment) and the xtal
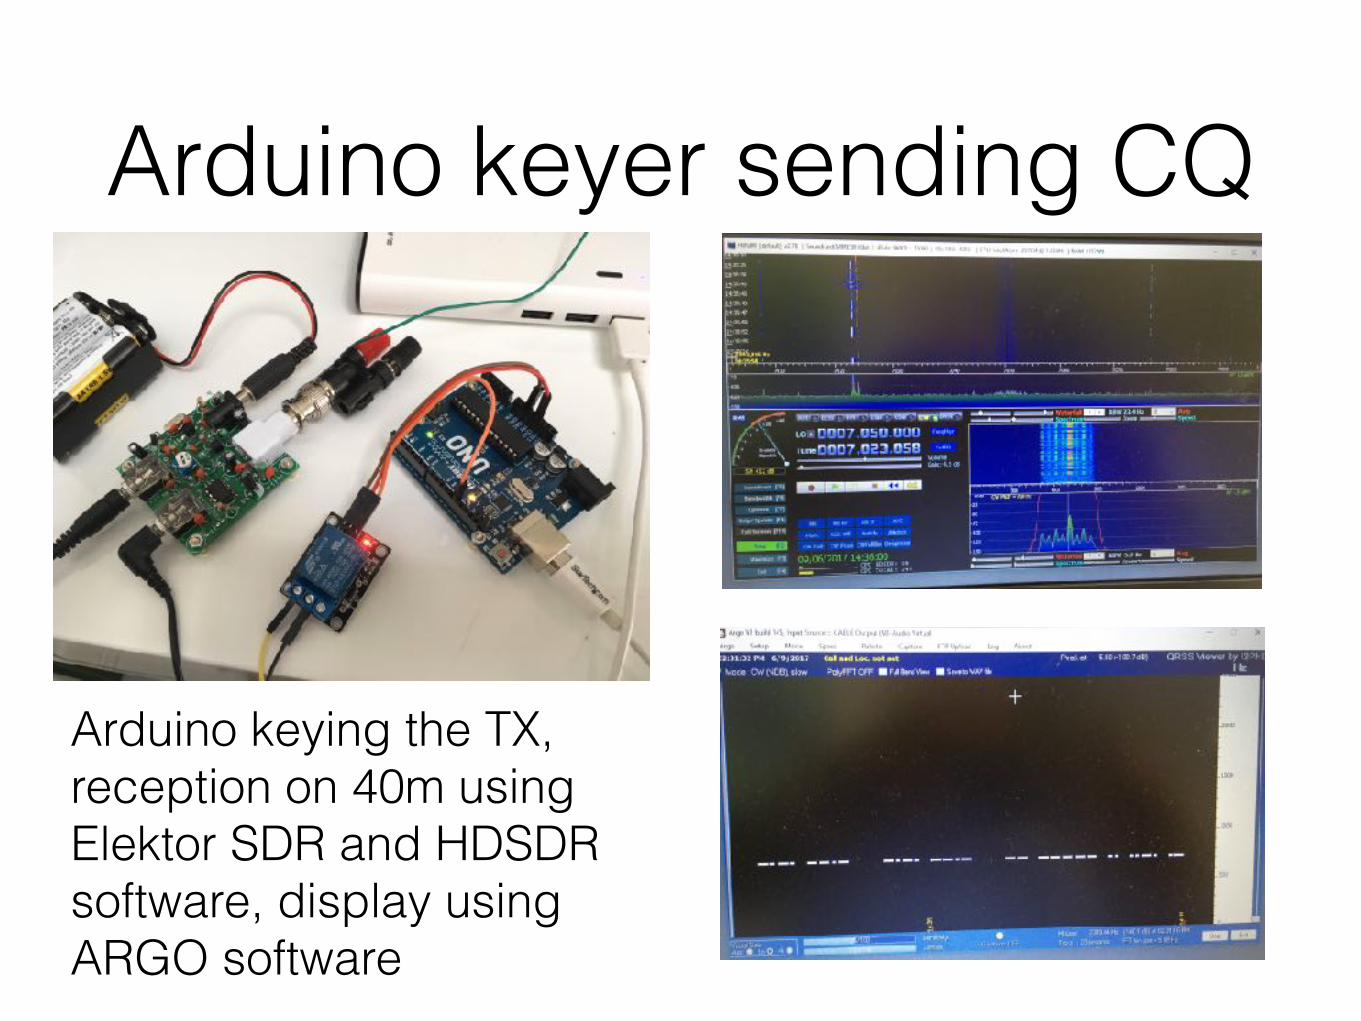
Arduino keyer sending CQ
Arduino keying the TX, reception on 40m using Elektor SDR and HDSDR software, display using ARGO software

Connect up• Wire the button for the morse
key
• Wire the battery box to the plug, put in the batteries (polarities!)
• Cut your antenna and ground wires & attach to connector
• Plug in the “morse key”, audio amplifier, battery connector and antenna connector
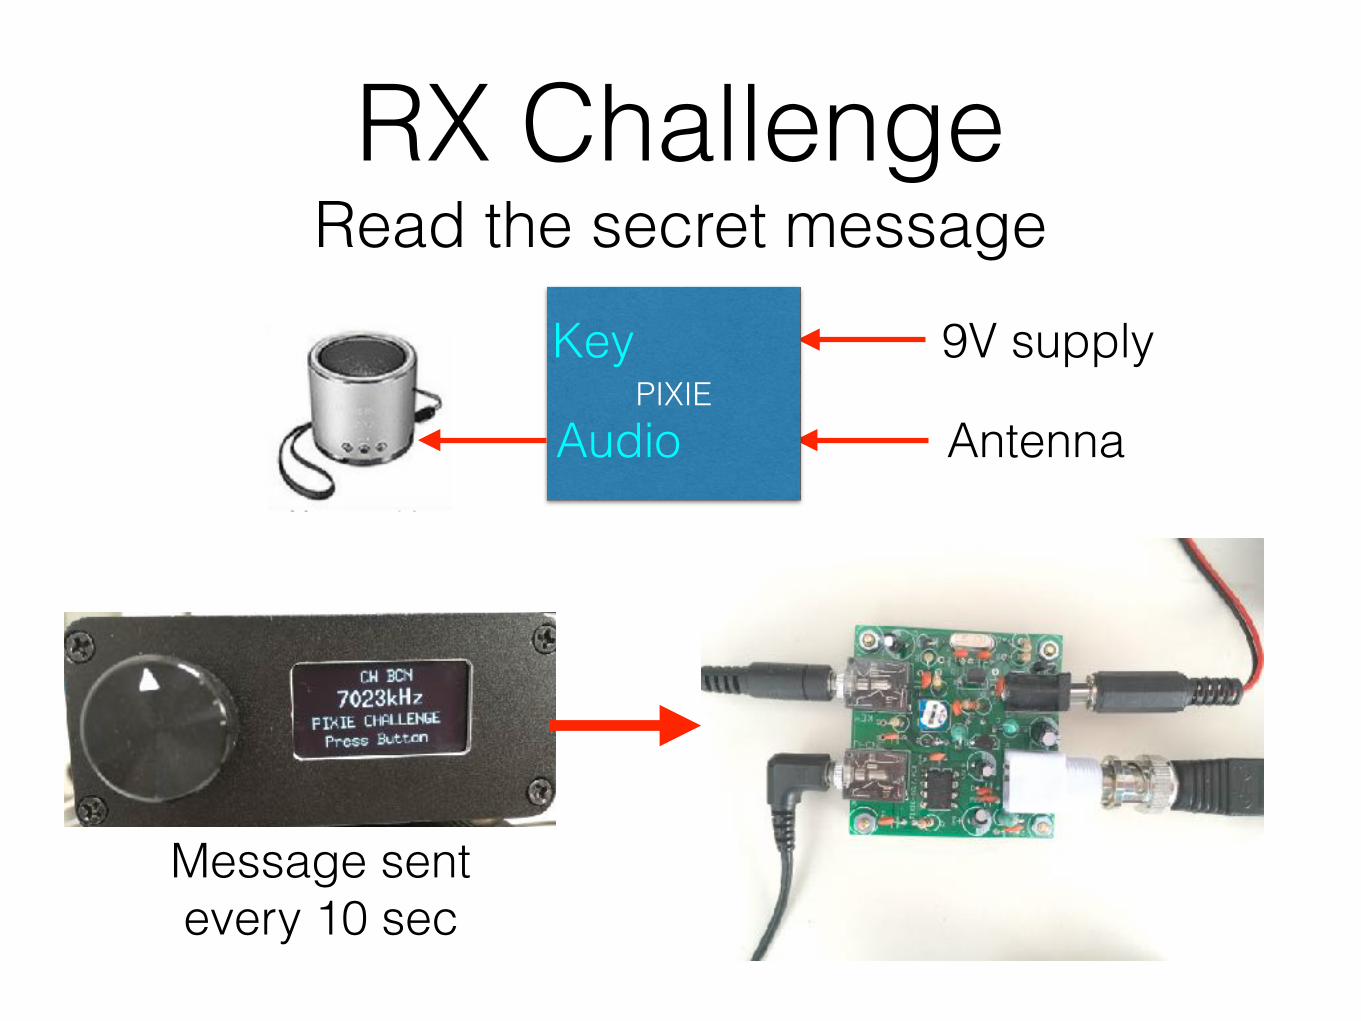
RX Challenge Read the secret message
PIXIE9V supply
Audio Antenna
Key
Message sent every 10 sec

TX Challenge Make a QSO
PIXIE9V supply
Audio Antenna
Key
LS
Key

Ready, Steady GO!