the microscope - yayscienceyayscience.net/static/media/uploads/6th...
TRANSCRIPT

The Microscope
Akimel 6th Grade Science

Microscope A microscope is an instrument for viewing
objects that are too small to be seen easily by the naked eye.
Micro - means very small.
Scope - is a device to look at something.
Uses more than one lens - the image magnified by one lens can be further magnified by another.
Molecular Expressions Photo Gallery

How to Make a Simple Microscope
Get 2 magnifying glasses and a sheet of printed paper.
Hold one magnifying glass a short distance above the paper. The image will look a bit larger.
Place the second magnifying glass between your eye and the first magnifying glass.
Move the second glass up or down until the print comes into sharp focus.

Examples of Magnification
Types of Microscopes Compound Microscope
– Containing two or more lenses
– Uses light to magnify
– High magnification/Low resolution
– Most commonly used microscope
– $150 - $1,500
Transmission Electron Microscope (TEM)– Used to study parts inside cells
– Uses electron beams used to magnify
– High magnification/High resolution
– $50,000

Microscope Terms
Magnify–To make an object look bigger
Reflect–To throw back light rays that strike a
surface Refraction
–The bending of light rays as they pass through one substance to another


A. Eyepiece
Contains the ocular lens you look through
Top part of the microscope

J. Course Adjustment Knob
Moves the stage up and down for focusing
Moves the objective lenses toward or away from the specimen being viewed

I. Fine Adjustment Knob
Moves the stage slightly to sharpen the image
Used after first using the coarse adjustment knob

B. Nosepiece
Holds the high and low power objective lenses
Can be rotated to change magnification

C. Objective Lenses
Magnification ranges from 10x to 40x
The lens that first receives the light rays from the object to be viewed.

E. Stage
Supports the slide being viewed

D. Stage Clips
Hold the slide in place

H. Diaphragm
Regulates the amount of light on the specimen
Generally a five-holed disc under the stage

F. Light Source
Projects light upwards through the diaphragm, the specimen and the lenses

K. Arm
Used to support the microscope when carried
Connects the tube to the base
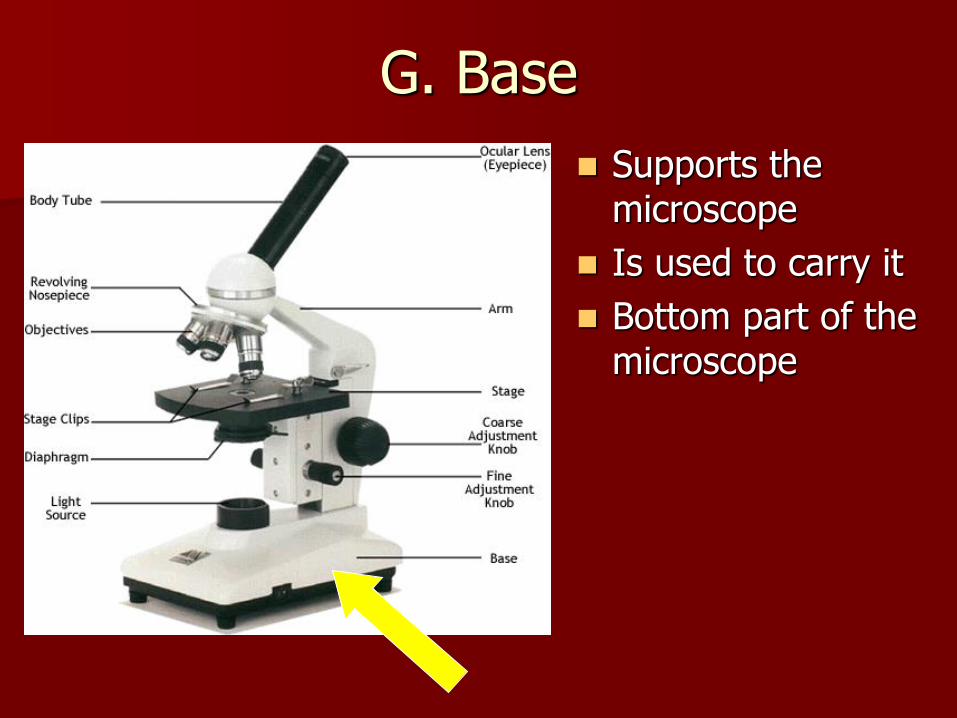
G. Base
Supports the microscope
Is used to carry it
Bottom part of the microscope

Using the Microscope
When carrying a microscope, grasp the arm with one hand and put your other hand under the base. You will NOT move the microscopes in the lab.
Start by adjusting the nosepiece to the lowest power objective tube (the shortest one)
Make sure your slide is on the stage. Looking through the eyepiece, slowly adjust the
coarse adjustment knob until the specimen comes into focus
Make sure the lens does not hit the slide Slowly adjust the fine adjustment knob until the
specimen comes into focus