table of contents - cruise america
TRANSCRIPT


FOUR WINDS LIMITED WARRANTY ............................................................................................. 4 ACKNOWLEDGEMENTOFRECEIPTOFWARRANTY....................................................... 7
GENERAL INFORMATION .............................................................................................................. 10 DISCLAIMER........................................................................................................................................ 11 SYMBOLS............................................................................................................................................. 11 MANUFACTURER’SWARRANTIES..................................................................................................... 12 VENDORCONTACTINFORMATION................................................................................................. 12 MOTORHOMELOADLIMITS.............................................................................................................. 13 VEHICLEWEIGHINGPROCEDURES............................................................................................... 14
IDENTIFICATION AND SAFETY ..................................................................................................... 16 REPORTINGSAFETYDEFECTS........................................................................................................ 16 LAWSOFTHEROAD........................................................................................................................... 16 MOTORHOMESERIALNUMBERDECALANDDATAPLATES......................................................... 17 SAFETYREGULATIONSFORPROPANEGASSYSTEMSANDAPPLIANCES................................ 17 FIRESAFETY........................................................................................................................................ 18 FIREEXTINGUISHER.......................................................................................................................... 19 CARBONMONOXIDEANDSMOKEDETECTORS............................................................................. 19 PROPANEGASDETECTOR................................................................................................................ 21 CHEMICALSENSITIVITY..................................................................................................................... 23 SEATBELTS......................................................................................................................................... 23 EGRESSWINDOW............................................................................................................................... 25 TRAILERTOWING................................................................................................................................ 25
CHASSIS.......................................................................................................................................... 26 EMERGENCYSTOPPING.................................................................................................................... 26 ENGINEANDDRIVETRAIN............................................................................................................... 26 FUELINGTHEMOTORHOME............................................................................................................. 27 TRAVELPREPARATION....................................................................................................................... 28
CONTROLS AND OPERATIONS .................................................................................................... 30 DASHCONTROLS-GAS.................................................................................................................... 30 DASHCONTROLSANDINSTRUMENTPANELS-DIESEL............................................................... 31 SHIFTERPANELSWITCHES............................................................................................................... 33 DASHPANELSWITCHES.................................................................................................................... 34 PASSENGERARMRESTSWITCHES.................................................................................................. 35 STEERINGWHEELADJUSTMENT...................................................................................................... 36 TURNSIGNAL/LANECHANGE/HIGH-LOWBEAM/HAZARDSLEVER.............................................. 36 SMARTSTEERINGWHEEL................................................................................................................. 37 SPOTLIGHT.......................................................................................................................................... 38 REARVISIONSYSTEM........................................................................................................................ 38 DASHRADIO........................................................................................................................................ 39 ECLIPSEGPSNAVIGATIONSYSTEMOPTIONDIESEL.................................................................... 41 KEYPADKEYLESSENTRYSYSTEM.................................................................................................. 42 AUTOMATICHYDRAULICPOWERLEVELERS.................................................................................. 43 SLIDEOUTS......................................................................................................................................... 46 WINDOWS............................................................................................................................................. 50 DOORS,DRAWERSANDSTORAGECOMPARTMENTS................................................................... 50 SLEEPNUMBERBED.......................................................................................................................... 50 ELEVATEDBEDSANDELECTRICBEDLIFTSYSTEMS................................................................... 51 FURNITURE.......................................................................................................................................... 52
TABLE OF CONTENTS

ENTRYDOOR....................................................................................................................................... 55 ENTRYSTEP........................................................................................................................................ 55 STORAGECOMPARTMENTS.............................................................................................................. 56 REARLADDER/ROOFACCESS.......................................................................................................... 56 AWNINGS.............................................................................................................................................. 56 GARAGEAREA(AVAILABLEONSELECTMODELS)......................................................................... 58
HEATING AND AIR CONDITIONING .............................................................................................. 59 DASHPANELHEATERANDAIRCONDITIONER............................................................................... 59 ROOFMOUNTEDAIRCONDITIONER................................................................................................ 60 FURNACE............................................................................................................................................. 61 THERMOSTATS.................................................................................................................................... 61 CEILINGVENTS................................................................................................................................... 61
ELECTRICAL SYSTEMS................................................................................................................. 63 SHORECORD...................................................................................................................................... 63 BATTERIES........................................................................................................................................... 64 POWERCONVERTER.......................................................................................................................... 67 POWERINVERTER-DIESEL.............................................................................................................. 67 GROUNDFAULTCIRCUITINTERRUPTER........................................................................................ 68 12VOLTSYSTEMFUSES-GAS......................................................................................................... 69 CIRCUITBREAKERS............................................................................................................................ 69 CLASSAANDCLASSC-GASSYSTEMPANELS............................................................................. 70 12VOLTSYSTEMFUSES-DIESEL................................................................................................... 71 DASHFUSES........................................................................................................................................ 72 CHASSISALTERNATOR...................................................................................................................... 72 GENERATOR........................................................................................................................................ 73
WATER SYSTEMS........................................................................................................................... 74 FRESHWATERSYSTEM..................................................................................................................... 74 MONITORPANEL................................................................................................................................. 77 WASTEWATERSYSTEM.................................................................................................................... 77 TOILETS................................................................................................................................................ 80 WATERSYSTEMWINTERIZATION..................................................................................................... 81 WATERSYSTEMMAINTENANCE...................................................................................................... 82 SYSTEMSCOMPARTMENT-DIESEL................................................................................................. 83
PROPANE GAS SYSTEMS ............................................................................................................. 84 PROPANEGASTANK.......................................................................................................................... 84 PROPANEGASHOSESPIPESTUBESANDFITTINGS.................................................................... 86 PROPANEGASSAFETYPRECAUTIONS........................................................................................... 87
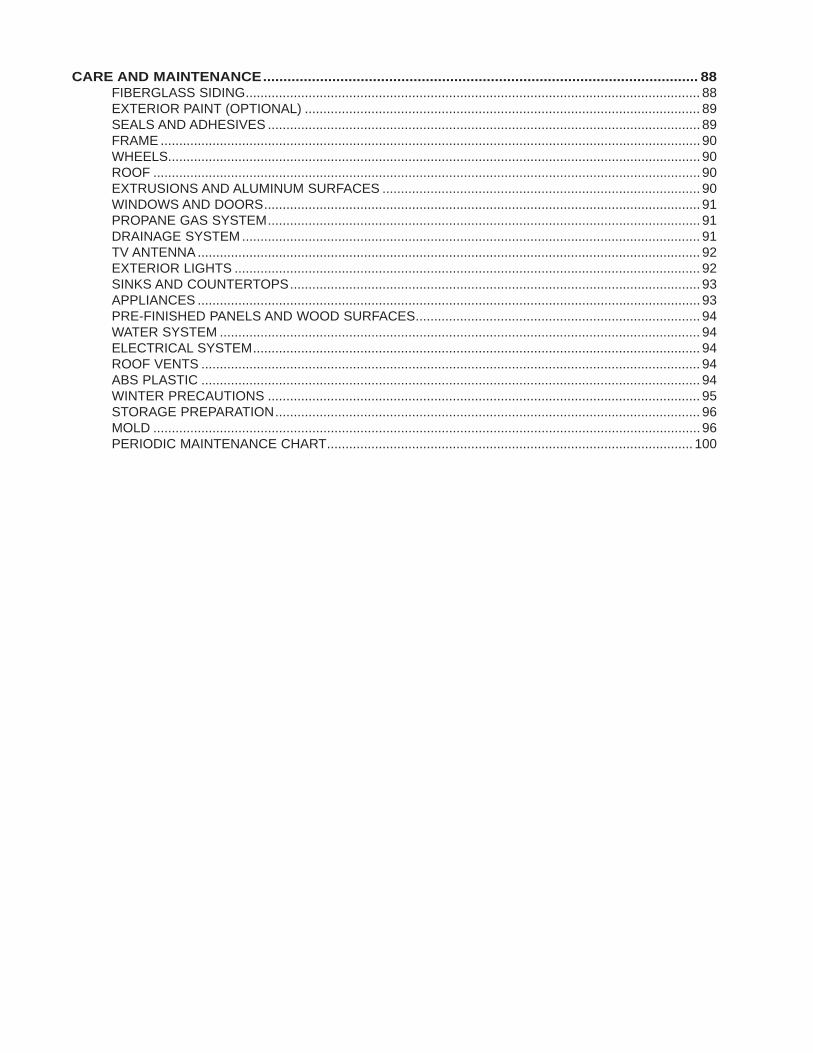
CARE AND MAINTENANCE ........................................................................................................... 88 FIBERGLASSSIDING........................................................................................................................... 88 EXTERIORPAINT(OPTIONAL)........................................................................................................... 89 SEALSANDADHESIVES..................................................................................................................... 89 FRAME.................................................................................................................................................. 90 WHEELS................................................................................................................................................ 90 ROOF.................................................................................................................................................... 90 EXTRUSIONSANDALUMINUMSURFACES...................................................................................... 90 WINDOWSANDDOORS...................................................................................................................... 91 PROPANEGASSYSTEM..................................................................................................................... 91 DRAINAGESYSTEM............................................................................................................................ 91 TVANTENNA........................................................................................................................................ 92 EXTERIORLIGHTS.............................................................................................................................. 92 SINKSANDCOUNTERTOPS............................................................................................................... 93 APPLIANCES........................................................................................................................................ 93 PRE-FINISHEDPANELSANDWOODSURFACES............................................................................. 94 WATERSYSTEM.................................................................................................................................. 94 ELECTRICALSYSTEM......................................................................................................................... 94 ROOFVENTS....................................................................................................................................... 94 ABSPLASTIC....................................................................................................................................... 94 WINTERPRECAUTIONS..................................................................................................................... 95 STORAGEPREPARATION................................................................................................................... 96 MOLD.................................................................................................................................................... 96 PERIODICMAINTENANCECHART................................................................................................... 100

FOUR WINDS INTERNATIONAL
LIMITED WARRANTY
4
FOUR WINDS LIMITED WARRANTY
WHAT THE PERIOD OF COVERAGE IS:ThisLimitedWarrantyprovidedbyFourWinds®(“Warrantor”)coversthosecomponents,assembliesandsystemsofyournewmotorhomenotexcludedunderthesection“WhatisNotCovered”,whensoldbyanauthorizeddealer.Thedurationofthelimitedwarrantyendstwelve(12)months after you first take delivery of the motor home from an authorized dealership or after the odometer reaches 15,000 miles, whichever occurs first. However, this Limited Warranty provided by Warrantor covers the steel or aluminum frame structure, only, of the sidewalls (excluding slide outs), roof, and rear and front walls for twenty-four (24) months from the original retail purchase date or the first 24,000 miles of use, whichever occurs first.
If the motor home is not of the current or prior model year when you take deliver of the motor home OR you register your new motor home in a businessnameoruseyourmotorhomeforanyrental,commercialorbusinesspurposeswhatsoever,thedurationofthelimitedwarrantyendsninety (90) days after you first take delivery of the motor home or after the odometer reaches 5,000 miles, whichever occurs first. The duration oftheLimitedWarrantycoveringthesteeloraluminumframestructure,only,ofthesidewalls(excludingslideouts),roof,andrearandfrontwalls ends twelve (12) months after you first take delivery of the motor home or after the odometer reaches 15,000 miles, whichever occurs first. A conclusive presumption that your motor home has been used for commercial and/or business purposes arises if you have filed a federal or state tax form claiming any business tax benefit related to your ownership of the motor home.
LIMITATIONS AND DISCLAIMER OF IMPLIED WARRANTIESIMPLIED WARRANTIES, IF ANY, ARISING BY WAY OF STATE LAW, INCLUDING ANY IMPLIED WARRANTY OFMERCHANTABILITY AND ANY IMPLIED WARRANTY OF FITNESS FOR A PARTICULAR PURPOSE, ARE LIMITED INDURATION TO THE TERM OF THIS LIMITED WARRANTYANDARE LIMITED IN SCOPE OF COVERAGE TO THOSEPORTIONSOFTHEMOTORHOMECOVEREDBYTHISLIMITEDWARRANTY.WARRANTORDISCLAIMSALLIMPLIEDANDEXPRESSWARRANTIES,INCLUDINGTHEIMPLIEDWARRANTYOFMERCHANTABILITYANDTHEIMPLIEDWARRANTYOFFITNESSFORAPARTICULARPURPOSE,ONCOMPONENTSANDAPPLIANCESEXCLUDEDFROMCOVERAGEASSETFORTHBELOW.ThereisnowarrantyofanynaturemadebyWarrantorbeyondthatcontainedinthisLimitedWarranty.Nopersonhasauthoritytoenlarge,amendormodifythisLimitedWarranty.ThedealerisnottheWarrantor’sagentbutisanindependententity.Warrantoris not responsible for any undertaking, representation or warranty made by any dealer or other person beyond those expressly set forth in this LimitedWarranty.Somestatesdonotallowlimitationsonhowlonganimpliedwarrantylasts,sotheabovelimitationmaynotapplytoyou.
WHAT THE WARRANTY COVERSWarrantor’s Limited Warranty covers only defects in the workmanship performed and/or materials used to assemble those portionsofyourmotorhomecoveredbythelimitedwarranty.Seealsothesection“WhattheWarrantyDoesNotCover”setoutbelow. “Defect” means the failure of the workmanship performed and/or materials used to conform to Warrantor’s design and manufacturing specification and tolerances.
WHAT WE WILL DO TO CORRECT PROBLEMSWarrantor’ssoleandexclusiveobligationistorepairand/orreplace,atitsoption,anycovereddefectif:(1)younotifyWarrantororoneofitsauthorizedservicingdealersofthedefect,whichisdiscoveredwithinthewarrantycoverageperiod,withinten(10)daysofdiscoveringthedefect;and(2)youdeliveryourMotorhometoWarrantororWarrantor’sauthorizedservicingdealeratyourcostandexpense.Itisreasonabletoexpectsomeserviceitemstooccurduringthewarrantyperiod.Theperformanceofwarrantyrepairsshallnotextendtheoriginalwarrantycoverage period. Further, any performance of repairs after the warranty coverage period has expired or any performance of repairs tocomponentpartsandappliancesthatareexcludedfromcoverageshallbeconsidered“goodwill”repairs,whichshallnotaltertheexpresstermsofthislimitedwarranty.IftherepairorreplacementremedyfailstosuccessfullycureadefectafterWarrantorreceivedareasonableopportunitytocurethedefect(s),yoursoleandexclusiveremedyshallbelimitedtoWarrantorpayingyouthecostofhavinganindependentthirdpartyperformrepairstothedefect(s).Warrantormayusenewand/orremanufacturedpartsand/orcomponentsofsubstantiallyequalqualitytocompleteanyrepair.Defectsand/ordamagetointeriorandexteriorsurfaces,trim,upholsteryandotherappearanceitemsmayoccuratthefactoryduringmanufacture,duringdeliveryofthemotorhometothesellingdealeroronthesellingdealer’slot.Normally,anysuchdefectordamageisdetectedandcorrectedatthefactoryorbythesellingdealerduringtheinspectionprocessperformedbytheWarrantorand the selling dealer. If, however, you discover any such defect or damage when you take delivery of the motor home, you must notify your dealerorWarrantorwithintendaysofthedateofpurchasetohaverepairsperformedtothedefectatnocosttoyouasprovidedbythisLimitedWarranty.Iftwounsuccessfulrepairattemptshavebeenmadetocorrectanycovereddefectthatyoubelievesubstantiallyimpairsthevalue,useorsafetyofyourmotorhome,orrepairstoanycovereddefect(s),whichyoubelievesubstantiallyimpairsthevalue,useorsafetyofyourmotor home, have taken 20 or more days to complete, you must, to the extent permitted by law, notify Warrantor directly in writing of the failure to successfully repair the defect(s) so that Warrantor can become directly involved in exercising a final repair attempt for the purpose of performing a successful repair to the identified defect(s).
Minoradjustments,suchasadjustmentstothe interiororexteriordoors,drawers, latchesbywayofexampleandnotby limitationwillbeperformedbyyoursellingdealerduringthefirstninety(90)daysofwarrantycoverage.Thereafter,suchadjustmentsaretheowner’sexclusiveresponsibilityasnormalmaintenance.
FOUR WINDS LIMITED WARRANTY
FOUR WINDS INTERNATIONAL
LIMITED WARRANTY
5
HOW TO GET SERVICEThe “Acknowledgement of Receipt of Warranty/Product Information” form must be returned to Warrantor promptly upon purchase to assure proper part replacement and repair of your motor home. Failure to return the “Acknowledgement of Receipt of Warranty/Product Information” formwillnotaffectyourrightsundertheLimitedWarrantysolongasyoucanfurnishproofofpurchase.ForwarrantyservicesimplycontactoneofWarrantor’sauthorizedservicecentersforanappointment,thendeliveryourmotorhome(atyourexpense)totheservicecenter.
Ifyouneedassistanceinlocatinganauthorizedwarrantyservicefacility,contactWarrantor’sWarrantyDepartment.
WHAT THE WARRANTY DOES NOT COVERThisLimitedWarrantydoesnotcover:anymotorhomesoldorregisteredoutsideoftheUnitedStatesorCanada;itemswhichareaddedor changed after the motor home leaves Warrantor’s possession; items that are working as designed but with which you are unhappy with becauseofthedesign;normalwearandusage,suchasfadingordiscolorationoffabrics,ortheeffectsofmoistureinsidethemotorhome;defacing,scratching,dentsandchipsonanysurfaceorfabricofthemotorhome,notcausedbyWarrantor;ownermaintenance,includingbyway of example replacement of wiper blades, bulbs, filters, wheel alignments and resealing exterior sealant areas (see Care and Maintenance SectionofOwner’sManual);theautomotivechassisandpowertrain,including,bywayofexampletheengine,drive-train,steering,rideandhandling, braking, wheel balance, muffler, tire wear or failure, tubes, batteries and gauges; appliances and components covered by their own manufacturer’s warranty including, by way of example the microwave, refrigerator, ice maker, stove, oven, generator, roof air conditioners, hydraulic jacks, VCR, television(s), water heater, furnace, stereo, radio, compact disc player, washer, dryer, inverter and cellular phone; or flaking, peeling and chips or other defects or damage in or to the exterior or finish caused by rocks or other road hazards, the environment includingchemicaloff-gassing,airbornepollutants,salt,treesapandhailcausinganydamageincludingbutnotlimitedtocorrosion.ComponentpartandappliancemanufacturersissuelimitedwarrantiescoveringthoseportionsofthemotorhomenotcoveredbytheLimitedWarrantyissued by Warrantor. To learn more on what specific component parts and appliances are excluded from the Limited Warranty issued by Warrantor please contact your selling dealership or Warrantor directly or review the warranty packet inside the Motor home.
EVENTS DISCHARGING WARRANTOR FROM OBLIGATION UNDER WARRANTYMisuse or neglect, accidents, unauthorized alteration, failure to provide reasonable and necessary maintenance (see Owner’s Manual),damage caused by off road use, collision, fire, theft, vandalism, explosions, overloading in excess of rated capacities, and odometer tampering shalldischargeWarrantorfromanyexpressorimpliedwarrantyobligationtorepairanyresultingdefect.
DISCLAIMER OF CONSEQUENTIAL AND INCIDENTAL DAMAGES THEORIGINALPURCHASEROFTHEMOTORHOMEANDANYPERSONTOWHOMTHEMOTORHOMEISTRANSFERRED,ANDANYPERSONWHOISANINTENDEDORUNINTENDEDUSERORBENEFICIARYOFTHEMOTORHOME,SHALLNOTBEENTITLEDTORECOVERFROMWARRANTORANYCONSEQUENTIALORINCIDENTALDAMAGESRESULTINGFROMANYDEFECTINTHEMOTORHOME,INCLUDINGBYWAYOFEXAMPLEFUELANDTRANSPORTATIONEXPENSESTODELIVERTHEPRODUCTTOTHESERVICINGDEALER,HOTELROOMS,LOSTWAGESANDMOISTUREDAMAGESUCHASMOLDANDMILDEW.THEEXCLUSIONOFCONSEQUENTIALANDINCIDENTALDAMAGESSHALLBEDEEMEDINDEPENDENTOF,ANDSHALLSURVIVE,ANYFAILUREOFTHEESSENTIALPURPOSEOFANYLIMITEDREMEDY.Somestatesdonotallowtheexclusionorlimitationofconsequentialorincidentaldamages,sotheaboveexclusionsmaynotapplytoyou.
LEGAL REMEDIESTHIS LIMITED WARRANTY DOES NOT “EXTEND TO FUTURE PERFORMANCE”. ANY ACTION TO ENFORCE THISLIMITEDWARRANTYORANYIMPLIEDWARRANTIESSHALLNOTBECOMMENCEDMORETHAN90DAYSAFTERTHEEXPIRATION OFTHE WARRANTY COVERAGE PERIOD DESIGNATEDABOVE. IFYOUR MOTOR HOME IS NOT OFTHECURRENTORPRIORMODELYEARWHENYOUTAKEDELIVERYOFTHEMOTORHOMEORYOUUSEYOURMOTORHOMEFORCOMMERCIALORBUSINESSPURPOSES,ANYACTIONTOENFORCETHISLIMITEDWARRANTYORANYIMPLIEDWARRANTIESSHALLNOTBECOMMENCEDMORETHANONEYEARAFTERTHEEXPIRATIONOFTHEWARRANTYCOVERAGEPERIODDESIGNATEDABOVE.THEPERFORMANCEOFREPAIRSSHALLNOTSUSPENDTHIS LIMITATIONS PERIOD FROM EXPIRING. Some states do not allow the reduction in the statute of limitations, so the abovereductioninthestatuteoflimitationsmaynotapplytoyou.
WarrantorparticipatesintheConsumerArbitrationProgramforRecreationalVehicles(CAP-RV).Thisthird-partydisputeresolutionprogramisavailable at no charge to you to settle unresolved warranty disputes. To find out more about the program or to request an application/brochure, please call the Arbitration Administration Office toll free (800) 279-5343. For motor homes purchased in California, the CAP-RV Program operatesunderthereviewoftheCaliforniaArbitrationProgram.Youmustutilizethisprogrambeforeclaimingrightsconferredby15USCSection2310(MagnusonMossWarrantyAct)orCivilCodeSection1793.22(b)(SongBeverlyWarrantyAct).YouarenotrequiredtousethisProgram if you choose to seek redress by pursing rights and remedies not conferred by these laws.
THISWARRANTYGIVESYOUSPECIFICLEGALRIGHTS.YOUMAYALSOHAVEOTHERRIGHTS,WHICHVARYFROMSTATETOSTATE.
JulianDate:042810
Thetollfreephonenumberis:877-TLK-2-TMS or 877-855-2867
Themailingaddressis:P.O. Box 1486
Elkhart, Indiana 46515-1486

FOUR WINDS INTERNATIONAL
LIMITED WARRANTY
6
SINGLE PAGE WARRANTYWHAT THE PERIOD OF COVERAGE IS:This Limited Warranty provided by Four Winds® (“Warrantor”) covers those components, assemblies and systems of your new motor home not excluded under the section “What is Not Covered”, when sold by an authorized dealer. The duration of the limited warranty ends twelve (12) months after you first take delivery of the motor home from an authorized dealership or after the odometer reaches 15,000 miles, whichever occurs first. However, this Limited Warranty provided by Warrantor covers the steel or aluminum frame structure, only, of the sidewalls (excluding slide outs), roof, and rear and front walls for twenty-four (24) months from the original retail purchase date or the first 24,000 miles of use, whichever occurs first.If the motor home is not of the current or prior model year when you take deliver of the motor home OR you register your new motor home in a business name or use your motor home for any rental, commercial or business purposes whatsoever, the duration of the limited warranty ends ninety (90) days after you first take delivery of the motor home or after the odometer reaches 5,000 miles, whichever occurs first. The duration of the Limited Warranty covering the steel or aluminum frame structure, only, of the sidewalls (excluding slide outs), roof, and rear and front walls ends twelve (12) months after you first take delivery of the motor home or after the odometer reaches 15,000 miles, whichever occurs first. A conclusive presumption that your motor home has been used for commercial and/or business purposes arises if you have filed a federal or state tax form claiming any business tax benefit related to your ownership of the motor home.LIMITATION AND DISCLAIMER OF IMPLIED WARRANTIES:IMPLIED WARRANTIES, IF ANY, ARISING BY WAY OF STATE LAW, INCLUDING ANY IMPLIED WARRANTY OF MERCHANTABILITY AND ANY IMPLIED WARRANTY OF FITNESS FOR A PARTICULAR PURPOSE, ARE LIMITED IN DURATION TO THE TERM OF THIS LIMITED WARRANTY AND ARE LIMITED IN SCOPE OF COVERAGE TO THOSE PORTIONS OF THE MOTOR HOME COVERED BY THIS LIMITED WARRANTY. WARRANTOR DISCLAIMS ALL IMPLIED AND EXPRESS WARRANTIES, INCLUDING THE IMPLIED WARRANTY OF MERCHANTABILITY AND THE IMPLIED WARRANTY OF FITNESS FOR A PARTICULAR PURPOSE, ON COMPONENTS AND APPLIANCES EXCLUDED FROM COVERAGE AS SET FORTH BELOW. There is no warranty of any nature made by Warrantor beyond that contained in this Limited Warranty. No person has authority to enlarge, amend or modify this Limited Warranty. The dealer is not the Warrantor’s agent but is an independent entity. Warrantor is not responsible for any undertaking, representation or warranty made by any dealer or other person beyond those expressly set forth in this Limited Warranty. Some states do not allow limitations on how long an implied warranty lasts, so the above limitation may not apply to you.WHAT THE WARRANTY COVERS:Warrantor’s Limited Warranty covers only defects in the workmanship performed and/or materials used to assemble those portions of your motor home covered by the limited warranty. See also the section “What the Warranty Does Not Cover” set out below. “Defect” means the failure of the workmanship performed and/or materials used to conform to Warrantor’s design and manufacturing specification and tolerances.WHAT WE WILL DO TO CORRECT PROBLEMS:Warrantor’s sole and exclusive obligation is to repair and/or replace, at its option, any covered defect if: (1) you notify Warrantor or one of its authorized servicing dealers of the defect, which is discovered within the warranty coverage period, within ten (10) days of discovering the defect; and (2) you deliver your Motor home to Warrantor or Warrantor’s authorized servicing dealer at your cost and expense. It is reasonable to expect some service items to occur during the warranty period. The performance of warranty repairs shall not extend the original warranty coverage period. Further, any performance of repairs after the warranty coverage period has expired or any performance of repairs to component parts and appliances that are excluded from coverage shall be considered “good will” repairs, which shall not alter the express terms of this limited warranty. If the repair or replacement remedy fails to successfully cure a defect after Warrantor received a reasonable opportunity to cure the defect(s), your sole and exclusive remedy shall be limited to Warrantor paying you the cost of having an independent third party perform repairs to the defect(s). Warrantor may use new and/or remanufactured parts and/or components of substantially equal quality to complete any repair. Defects and/or damage to interior and exterior surfaces, trim, upholstery and other appearance items may occur at the factory during manufacture, during delivery of the motor home to the selling dealer or on the selling dealer’s lot. Normally, any such defect or damage is detected and corrected at the factory or by the selling dealer during the inspection process performed by the Warrantor and the selling dealer. If, however, you discover any such defect or damage when you take delivery of the motor home, you must notify your dealer or Warrantor within ten days of the date of purchase to have repairs performed to the defect at no cost to you as provided by this Limited Warranty. If two unsuccessful repair attempts have been made to correct any covered defect that you believe substantially impairs the value, use or safety of your motor home, or repairs to any covered defect(s), which you believe substantially impairs the value, use or safety of your motor home, have taken 20 or more days to complete, you must, to the extent permitted by law, notify Warrantor directly in writing of the failure to successfully repair the defect(s) so that Warrantor can become directly involved in exercising a final repair attempt for the purpose of performing a successful repair to the identified defect(s).Minor adjustments, such as adjustments to the interior or exterior doors, drawers, latches by way of example and not by limitation will be performed by your selling dealer during the first ninety (90) days of warranty coverage. Thereafter, such adjustments are the owner’s exclusive responsibility as normal maintenance.HOW TO GET SERVICE:The “Acknowledgement of Receipt of Warranty/Product Information” form must be returned to Warrantor promptly upon purchase to assure proper part replacement and repair of your motor home. Failure to return the “Acknowledgement of Receipt of Warranty/Product Information” form will not affect your rights under the Limited Warranty so long as you can furnish proof of purchase. For warranty service simply contact one of Warrantor’s authorized service centers for an appointment, then deliver your motor home (at your expense) to the service center.If you need assistance in locating an authorized warranty service facility, contact Warrantor’s Warranty Department (877-TLK 2 TMS or 877-855-2867). The mailing address is: P.O. Box 1486 Elkhart, Indiana 46515-1486WHAT THE WARRANTY DOES NOT COVER:This Limited Warranty does not cover: any motor home sold or registered outside of the United States or Canada; items which are added or changed after the motor home leaves Warrantor’s possession; items that are working as designed but with which you are unhappy with because of the design; normal wear and usage, such as fading or discoloration of fabrics, or the effects of moisture inside the motor home; defacing, scratching, dents and chips on any surface or fabric of the motor home, not caused by Warrantor; owner maintenance, including by way of example replacement of wiper blades, bulbs, filters, wheel alignments and resealing exterior sealant areas (see Care and Maintenance Section of Owner’s Manual); the automotive chassis and power train, including, by way of example the engine, drive-train, steering, ride and handling, braking, wheel balance, muffler, tire wear or failure, tubes, batteries and gauges; appliances and components covered by their own manufacturer’s warranty including, by way of example the microwave, refrigerator, ice maker, stove, oven, generator, roof air conditioners, hydraulic jacks, VCR, television(s), water heater, furnace, stereo, radio, compact disc player, washer, dryer, inverter and cellular phone; or flaking, peeling and chips or other defects or damage in or to the exterior or finish caused by rocks or other road hazards, the environment including chemical off-gassing, airborne pollutants, salt, tree sap and hail causing any damage including but not limited to corrosion. Component part and appliance manufacturers issue limited warranties covering those portions of the motor home not covered by the Limited Warranty issued by Warrantor. To learn more on what specific component parts and appliances are excluded from the Limited Warranty issued by Warrantor please contact your selling dealership or Warrantor directly or review the warranty packet inside the Motor home.EVENTS DISCHARGING WARRANTOR FROM OBLIGATION UNDER WARRANTY:Misuse or neglect, accidents, unauthorized alteration, failure to provide reasonable and necessary maintenance (see Owner’s Manual), damage caused by off road use, collision, fire, theft, vandalism, explosions, overloading in excess of rated capacities, and odometer tampering shall discharge Warrantor from any express or implied warranty obligation to repair any resulting defect.DISCLAIMER OF CONSEQUENTIAL AND INCIDENTAL DAMAGES:THE ORIGINAL PURCHASER OF THE MOTOR HOME AND ANY PERSON TO WHOM THE MOTOR HOME IS TRANSFERRED, AND ANY PERSON WHO IS AN INTENDED OR UNINTENDED USER OR BENEFICIARY OF THE MOTOR HOME, SHALL NOT BE ENTITLED TO RECOVER FROM WARRANTOR ANY CONSEQUENTIAL OR INCIDENTAL DAMAGES RESULTING FROM ANY DEFECT IN THE MOTOR HOME, INCLUDING BY WAY OF EXAMPLE FUEL AND TRANSPORTATION EXPENSES TO DELIVER THE PRODUCT TO THE SERVICING DEALER, HOTEL ROOMS, LOST WAGES AND MOISTURE DAMAGE SUCH AS MOLD AND MILDEW. THE EXCLUSION OF CONSEQUENTIAL AND INCIDENTAL DAMAGES SHALL BE DEEMED INDEPENDENT OF, AND SHALL SURVIVE, ANY FAILURE OF THE ESSENTIAL PURPOSE OF ANY LIMITED REMEDY. Some states do not allow the exclusion or limitation of consequential or incidental damages, so the above exclusions may not apply to you.LEGAL REMEDIES:THIS LIMITED WARRANTY DOES NOT “EXTEND TO FUTURE PERFORMANCE”. ANY ACTION TO ENFORCE THIS LIMITED WARRANTY OR ANY IMPLIED WARRANTIES SHALL NOT BE COMMENCED MORE THAN 90 DAYS AFTER THE EXPIRATION OF THE WARRANTY COVERAGE PERIOD DESIGNATED ABOVE. IF YOUR MOTOR HOME IS NOT OF THE CURRENT OR PRIOR MODEL YEAR WHEN YOU TAKE DELIVERY OF THE MOTOR HOME OR YOU USE YOUR MOTOR HOME FOR COMMERCIAL OR BUSINESS PURPOSES, ANY ACTION TO ENFORCE THIS LIMITED WARRANTY OR ANY IMPLIED WARRANTIES SHALL NOT BE COMMENCED MORE THAN ONE YEAR AFTER THE EXPIRATION OF THE WARRANTY COVERAGE PERIOD DESIGNATED ABOVE. THE PERFORMANCE OF REPAIRS SHALL NOT SUSPEND THIS LIMITATIONS PERIOD FROM EXPIRING. Some states do not allow the reduction in the statute of limitations, so the above reduction in the statute of limitations may not apply to you. Warrantor participates in the Consumer Arbitration Program for Recreational Vehicles (CAP-RV). This third-party dispute resolution program is available at no charge to you to settle unresolved warranty dis-putes. To find out more about the program or to request an application/brochure, please call the Arbitration Administration Office toll free (800) 279-5343. For motor homes purchased in California, the CAP-RV Program operates under the review of the California Arbitration Program. You must utilize this program before claiming rights conferred by 15 USC Section 2310 (Magnuson Moss Warranty Act) or Civil Code Section 1793.22(b) (Song Beverly Warranty Act). You are not required to use this Program if you choose to seek redress by pursing rights and remedies not conferred by these laws.THIS WARRANTY GIVES YOU SPECIFIC LEGAL RIGHTS. YOU MAY ALSO HAVE OTHER RIGHTS, WHICH VARY FROM STATE TO STATE. Julian Date: 042810

FOUR WINDS INTERNATIONAL
Registration And Acknowledgement of Receipt of Warranty and Product Information
7
5. Operate plumbing facilities including water faucet's, shower and toilet 6. Observe or check to assure that all wheel lugs are tight and tire pressure is correct 7. Review operation of manual or automatic Propane Gas regulator 8. Operate all air conditioners, radio, entertainment system and televisions (if so equipped) 9. Complete review of owner’s manual by dealer with owner10. Test drive11. Odometer reading as observed by customer is: _______________________ Miles or KiloMeters
1. Exterior and interior finish2. Operate all appliances (electrical and gas) a. Furnace and thermostat (lighting and maintenance) b. Range and oven (lighting and maintenance) c. Water heater (lighting and maintenance) d. Refrigerator (operation and maintenance)3. Operate 120 Volt generator (if so equipped) 4. Operate all doors and windows including locks
IMPORTANT:THECUSTOMERISREQUIREDTOREADTHISDOCUMENTBEFORESIGNINGIT.We have listed several items which will help acquaint you with your new recreation vehicle. You the purchaser, should not submit this form until (1) you have received and reviewed the Limited Warranty and owner’s manual; (2) you have had the opportunity to inspect and operate the vehicle; (3) all items have been demonstrated and/or explained to you; (4) the dealer has answered any questions you may have, and; (5) you find the vehicle in good condition. The dealer is not authorized to deliver this vehicle until this has been done and both you and the dealer have signed this form.
Owner/DealerInspection
I have completed the above inspection on this recreation vehicle and have taken the test drive at the time of purchase. I noted the following issues:
I received and read the final stage manufacturer's 1 page Limited Warranty, published within the Owner's Manual, and the Chassis Limited Warranty, both of which were made available to me, before I purchased the vehicle and agreed to the terms and conditions therein. I understand that the vehicle is to be used only for travel on improved roads. I also understand that the selling dealer is not an agent for the final stage manufacturer but is an independent company with no authority to make any representation or promise for the final stage manufacturer.
I acknowledge that the chassis, component parts and appliances that are separately covered by another manufacturer’s warranty are excluded from coverage under the Manufacturers Limited Warranty. I understand that this form is for product registration purposes and failure to return this form does not diminish my warranty rights during the warranty period.
__________________________________________ __________________ _________________________________________ __________________ Purchaser signature Date Dealer signature Date
I have inspected, or been given the opportunity to inspect the vehicle; taken a test drive of the vehicle and, I have made notations of defects I discovered in the space provided.
____________________________________________________ ____________________________________________________________________ sales Person last naMe sales Person First naMe
______________________________________________________________________________________________________ __________________ seller Dealer Date
DealeristoensurethisformisproperlycompletedandreturnedtoThorMotorizedServiceswithinfifteen(15)daysafterdelivery.Return this page to: Thor Motorized Services, 701 C.R. 15, Elkhart, Indiana 46517 • E-mail: [email protected] • Fax: 574-294-3618
___________________________________________________ _______________________________________________________________________ ProDuct line serial nuMber
_________________ |____|____|____|____|____|____|____|____|____|____|____|____|____|____|____|____|____| Year Vin nuMber
___________________________________________________ _______________________________________________________________________ owner's last naMe owner's First naMe
______________________________________________________________________ ____________________________________________________ street aDDress citY
___________ _______________________ ______________________________ ____________________________________________________ state ZiP countrY Phone
_______________________________________________________________________ ________________________ owner's eMail retail DeliVerY Date
THORMotorizedS e r v i c e s
ACKNOWLEDGEMENT OF RECEIPT OF WARRANTY

FOUR WINDS INTERNATIONAL
Registration And Acknowledgement of Receipt of Warranty and Product Information
8
THISPAGEISINTENTIONALLYLEFTBLANK

FOUR WINDS INTERNATIONAL
For Owner's Notes

FOUR WINDS INTERNATIONAL
GENERAL INFORMATION
10
GENERAL INFORMATION
CONGRATULATIONS!
Congratulationsonyour recentpurchaseofaFourWinds InternationalRecreationalVehicle.Wesincerelythank you for choosing Four Winds, and we would like you to know that your satisfaction is of great importance tous.
In the next coming weeks you will receive a courtesy call by our Concierge Connection, your personal service advocate.The concierge will explain your warranty, answer any questions you might have, supply contactinformationonyourlocaldealer,andmoreimportantlyfollowupwithyouinthreemonths.
ThorMotorizedServicesistheservicesupportforFourWindsInternational.TMSwasdevelopedtostreamlinetechnical assistance, warranty claims, authorization requests, and parts for our dealer network and owners. Thisrelationshipwillgreatlyimproveourpartnershipwithyou,andthedealers.Inaddition,wevalueyouandyourinput.Pleasefeelfreetocontactusandshareyourthoughts.
Thismanualdescribesmanyfeaturesofyourmotorhome,andprovidesaguidetooperatingprocedures,sothat you can obtain the best performance. Like all automotive equipment, your motor home will require care, and regular maintenance, in order to retain its maximum performance characteristics, and help you enjoymanymilesandyearsof recreational living.The instructionmanualsand literatureprovidedby the leadingappliance manufacturers and the chassis operator’s manual located in your owner’s bag, will provide a working knowledge of your unit and how to care for it. If you have any questions regarding operation, maintenance, or service,pleasecontactyourlocaldealer,orThorMotorizedServicesdirectat(877)TLK-2-TMSor [email protected].
Exceeding Expectations Building Relationships Fostering Loyalty
THORMotorizedS e r v i c e s
FOUR WINDS INTERNATIONAL
GENERAL INFORMATION
11
ABOUT THIS OWNER'S MANUAL Thefollowinginformationreflectsproductdesign,fabrication,andcomponentpartsatthetimeofprinting.FourWinds International Corporation reserves the right, at anytime, to make changes in product design, material orcomponentspecificationsatitssoleoptionwithoutnotice.Thisincludesthesubstitutionofcomponentsofdifferentbrandormanufacturername,whichresultsincomparableperformance.
Youractualmotorhomemayvaryfromthisdocumentasaresultofoptionalequipmentofferedonthismodelandyearofmotorhome.Inthecasethatyouarenottheinitialretailownerofthisunit,thisdocumentwillnotreflectmodificationsthatmayhavebeenperformedbypreviousowners.Photographs,lineart,anddiagramscontainedhereinmayreflectbothstandardandoptionalequipmentatthetimeofprinting.
All information printed in this Owner's Manual is subject to change after the date of printing. Due to product improvements and changes during the model year, information represented within this Owner's Manual may not be accurate at the time of your purchase. If certain information is significant to your purchasing decision or in the performance of a repair, please confirm the accuracy of the information with your dealership or the manufacturer before relying upon the information within this Owner's Manual.
SYMBOLSThefollowingsafetyalertsymbolsareusedthroughoutthismanualtocallattentiontowarningswherepossiblepersonalinjuryorvehicledamagemaybeinvolved.
DANGERindicatesanhazardoussituationwhich,ifnotavoided,willresultindeathorseriousinjury.
WARNINGindicatesahazardoussituationwhich,ifnotavoided,couldresultindeathorseriousinjury.
CAUTION indicatesahazardoussituationwhich,ifnotavoided,mayresultinminorormoderateinjury.
NOTICEindicatesahazardoussituationwhich,ifnotavoided,mayresult inpropertydamage.
GAS ONLYindicatesinstructionsthatarespecifictocoacheswithagasoline engine.
DIESEL ONLYindicatesinstructionsthatarespecifictocoacheswithadiesel engine.
NOTICE
CAUTION

FOUR WINDS INTERNATIONAL
GENERAL INFORMATION
12
MANUFACTURERS WARRANTIESThe following list of components has been compiled to help you know which products on your motor home may have their own warranties. If you have any of these components on your motor home, be sure to check the literaturesuppliedby themanufacturer tosee if theyrequire thatyouregisteryourpurchasewith themtovalidatetheirwarranty.Werecommendthatyousendthevariouswarrantyregistrationcardsimmediatelybefore any time constraints on registration expire. Manufacturer’s literature is contained in a separate packet furnishedwiththeowner’smanualonnewlydeliveredunits.Onlythoseproductsandoptionswhichareonyour motor home will be included in this packet. You should go over this literature with your dealer during the pre-deliveryinspection.Anyshortagesofliteratureshouldbereportedtothedealeratthattime.
VENDOR CONTACT INFORMATION
AppliancesAirConditioner(Roof)Awnings Back-up MonitorCentralVacuumDVDPlayerFireplaceFurnaceHomeTheaterSystem Ice MakerMicrowaveRadios Range and Cooktop
RefrigeratorRoofVentsWater & DrainageToiletWasher/DryerComboWaterFaucetsWaterFilterWaterHeaterWaterPumpChassisAirConditionerBatteriesCruiseControl
Leveling JacksPropane Propane Gas TankRegulatorElectricalBatteryConverterElectricalEntryStepGeneratorGFCIReceptsInverter Propane Gas Leak Detector
Allison Transmission800-524-2303
www.allisontransmission.comASA Electronics
800-688-3135www.asaelectronics.com
Atwood Mobile Products, Inc.800-825-4328
www.atwoodmobile.comCaterpillar
877-777-3126www.cat.comCoach-Net
877-801-0333www.coach-net.com
Cobra Electronics Corp.773-889-3087
www.cobra.comCummins
800-343-7357www.mantank.com
Detroit Diesel800-445-1980
www.detroitdiesel.comDometic
800-544-4881www.dometicusa.com
Evans Tempcon800-878-7147
www.evanstempcon.comEqualizer Systems
574-264-3437www.equalizersystems.com
Fantastic Vent800-521-0298
www.fantasticvent.com
First Alert800-323-9005
www.firstalert.comFlair Interiors574-534-2163
www.flairinteriors.comFlexsteel Industries
574-831-4050www.flexsteel.comFour Winds Int.(877)TLK-2-TMS
www.fourwinds-rv.comFord
800-392-3673www.Ford.comFreightliner
800-385-4357www.freightlinerchassis.com
GM800-353-3867
www.gmfleet.comGood Year
800-321-2136www.goodyear.com
Hehr International, Inc.574-935-5122
www.hehr-international.comHWH Corporation
800-494-3213www.hwhcorp.com
Intellitec800-251-2408
www.intellitec.comKIB Enterprises
800-250-7051www.kibenterprises.com
KVH Industries, Inc.401-847-3327www.kvh.com
Kwikee Products Co. Inc.800-736-9961
www.kwikee.comLippert Components
574-534-0001www.lci1.com.comMagnum Energy
425-353-8833www.magnumenergy.com
Manchester Tank 800-877-8265
www.mantank.comMichelin
800-847-3435www.michelin.com
Mor/ryde574-293-1581
www.morryde.comMTI Industries, Inc.
800-383-0269www.mtiindustries.com
Norcold800-543-1219
www.norcold.comOnan
800-888-6626www.onan.com
Scope Technologies574-295-0229
www.scopetechnologies.comSelect Comfort888-580-9237
www.selectcomfort.com
Sharp800-237-4277
www.sharpusa.comSHURflo, LLC800-854-3218
www.shurflo.comSplendide
800-356-0766www.splendide.com
TDI Products866-713-1489
www.tdiproducts.comThetford
800-521-3032www.thetford.com
TriMark Corp.800-431-8616
www.trimarkcorp.comVelvac
800-783-8871www.velvac.com
Viracon800-533-0482
www.viracon-autoglass.comVisteon Corp.800-847-8366
www.visteon.comWinegard Co.800-288-8094
www.winegard.comWorkhorse
800-877-294-6773www.workhorse.com

FOUR WINDS INTERNATIONAL
GENERAL INFORMATION
13
MOTOR HOME OCCUPANT AND CARGO CARRYING CAPACITYVIN# 1FDXE4##########
THE COMBINED WEIGHT OF OCCUPANTS AND CARGO SHOULD NEVER EXCEED:970 kg or 2140 lbs
Safety belt equipped seating capacity: 7CAUTION:
A full load of water equals 173 kg or 382 lbs of cargo @ 1kb/L (8.3 lb/gal) and thetongue weight of a towed trailer counts as cargo
MOTOR HOME LOAD LIMITS
Occupant And Cargo Carrying CapacityYourmotorhomeisdesignedtocarrytheloadsdefinedbytheGross Axle Weight Rating(GAWR-thevaluespecifiedby thechassismanufacturer as the loadcarryingcapacityofasingleaxlesystem,asmeasuredatthetire/groundinterface.)TheGross Vehicle Weight Rating(GVWR-themaximumpermissibleloadedweight of the motor home) is shown on the vehicle information sticker posted near the driver's side front window or inside the driver's side door jam. These ratings are for a fully loaded vehicle including passengers andnormalbelongings
EXCEEDING THE GAWR OR GVWR OF YOUR MOTOR HOME CAN CAUSE UNDESIRABLE HANDLING CHARACTERISTICS and may even create a safetyhazard. Modificationofyourvehicletocarryadditionalequipmentorvehicles isnotrecommendedandmayvoidyourwarranty.
Note: Besuretheweightofpassengers,equipmentandsuppliesdoesnotcauseyour motorhometoexceedaxleloadsandoverallvehicleloadsforwhichitwas designed.Ifindoubt,weighthevehicleatapublicscale.Keepinmindthenumber ofsafetybeltsinaunitaretherefortheconvenienceanduseoftheowner. Carryingthenumberofpeopleequaltothenumberofseatbeltsmayexceedthe weightratings.Amotorhomehasthepotentialtobeoverloadedandremoval orredistributionofweightmaybenecessaryfromtimetotimetostaywithin weightratings.Yourmotorhomeincludesa"WeightInformationLabel."This labelprovidesspecificweightinformationforyourmotorhomeasaguideline sothatyoucandeterminetheloadcarryingcapabilities.
TheFourWindsMotorHome WEIGHTSPECIFICATIONSyellow label concisely states theoccupant andcargocarryingcapacityofyourmotorhome(pertherequirementsof49CFRpart571.120asissuedbytheNationalHighwayTrafficSafetyAdministration-NHTSA).
TheyellowMOTORHOMEOCCUPANTANDCARGOCARRYINGCAPACITYweight label isaffixedtotheinteriorsideoftheforward-mostdoorofyourmotorhomeonthepassengersideThislabelindicatedhowmuchweightyoucansafelycarrywithinthevehicle.
ForaClassC: Thelabelisaffixeddirectlytothedoorfrontdoorjamb. ForaClassA: Thelabelisaffixedtotheentrancedoor,directlybelowthewindowscreen ForaDiesel: Thelabelisaffixedtotheentrancedoor,directlybelowthewindowscreen
Thetotalweightofpassengers,cargo,trailertongueweight,andwatershouldneverexceedthevalueshownonthelabel.
Atypicalexampleofthislabelisshownbelowforreferencepurposesonly.Thenumbersshownonthispagemaynotbeapplicabletoyourvehicle.PleasereferencetheYellowlabelaffixeddirectlytothedoorofyourmotorhomeforyouractualOccupantandCargoCarryingCapacity:

FOUR WINDS INTERNATIONAL
GENERAL INFORMATION
14
DO NOT OVERLOAD THE MOTOR HOME.
When loading your cargo, be sure it is distributed evenly to prevent overloading front to back and side to side.Heavyitemsshouldbeplacedlowandasclosetotheaxlepositionsasreasonable.Toomanyitemsononesidemayoverloadatire.
VEHICLE WEIGHING PROCEDURES Periodically weigh the motor home at a public scale to determine axle loads. The following procedure issuggested,althoughanymethodrecommendedbythescaleoperatorwhichcorrectlydeterminesweightvalueis acceptable. During all measurements, it is important to keep the vehicle as level as possible.
Where To Weigh Your Motor HomeToweighyourmotorhomecorrectly,measurethefullyloadedvehicleaxlebyaxleandwheelpositionbywheelposition.Youcanfindseveralcertifiedpublicorcommercialscalesatmovingandstoragelots,farmsupplierswith grain elevators, gravel pits, recycling companies and large commercial truck stops. You can also look in the telephone book under "weighers" or "weighing". Allow adequate time, since the entire weighing process can take up to 30 minutes. There may be a small fee for each weight taken, but the expense is a worth while investmenttowardthesafeandeconomicaloperationofyourmotorhome.
How To Weigh Your Motor HomeYourmotorhomemustbeweighedfullyloaded.Thatiswithpassengers,food,clothing,fuel,water,propane,supplies etc. Any towed vehicle (car/pickup, boat, or trailer ) or item loaded on brackets on the back of the motorhomeshouldalsobeincludedintheweighing.
1.Thefollowingstepsaresuggestedwhenusingalongplatformscale: a. Pullontothescalesothatonlythefrontaxleisontheplatform(withtheendofthe scalemidwaybetweenthefrontandrearaxles)andrecordthescaledweight. b. Pullforwarduntilthefullunitisonthescaleandrecordtheweight. c. Pullforwardsothatonlytherearaxleisonthescaleandrecordtheweight. d. Ifaboat,trailerorothervehicleisbeingtowed,itshouldbeweighedandcombinedwith the towing vehicle's weight to ensure the total weight does not exceed the GCWR.
Note: Even though the weight of the total axle may be within the axle's rating, it may beoverloadedononeside.Thiscausesonewheelpositiontobeoverloaded. Therefore,side-to-sideweighingshouldbedone.
Toobtaintheindividualwheelpositionweights,repeatthisprocesswithonlyonesideofthemotorhomeonthescale.Todetermineindividualwheelpositionweights,itisnecessarytorepeatthepreviousthreesteps(1a,1b,and1c),butthistime,useonlyonesideofthescale.Tocalculatetheoppositesideofthevehiclewheelposition weight, subtract this side's weights from the weights recorded in steps 1a, 1b, and 1c.
NOTICE

FOUR WINDS INTERNATIONAL
GENERAL INFORMATION
15
Your motor home must remain as level as possible on the scale, even though an axle or side is not physically on the scale.Toobtaintheside-to-sideweights,theremustbeenoughspaceoneithersideofthescaletoallowthemotorhometobepartiallyoffthescale.Individualwheelpositionweightsmustnotexceedthemaximumtireloadcapacity.
Maximumtireloadcapacitycanonlybeachievedbyutilizingthemaximumallowablepressure(psi)aslistedonthesidewallofthetire.
Note: The above information is provided by the Tire Industry Safety Council Rubber Manufacturer's Association.Usedwithpermission.(http://www.rma.org/tire_safety/)
2. Forimprovedaccuracy,FourWindsrecommendsusingasegmented4-padscale,when possible,todetermineindividualwheelweights.Thecornerweightsshouldnotexceed halfoftherespectiveGrossAxleWeightRating(GAWR)orthemaximumloadrating forthetireorsetofdualtiresattherear,whicheverisless.Themaximumloadrating for the tire can be found embossed on the tire's sidewall. If any of the corner weights exceedhalfofthelistedGAWRortireratings,relocatethepassengersandredistribute orremoveaportionofthecargountiltheweightiswithintheproperlimitsforallfour cornersofthevehicle.
Note: Additionalcargocarryingcapacitycanbeobtainedbyreducingtheamountoffresh watercarriedwhiledriving.
Check vehicle weight periodically to obtain optimum mileage from tires and improve handling. Tires should always be inflated as recommended in the chassis manufacturer's instructions or on the tire sidewall. See your chassisoperatorsmanual.
Improperweightdistributionortoomuchweightonyourmotorhomessuspensionsystemcancausespring,shock absorber, or brake failure, handling or steering problems, irregular tire wear, tire failure or other damage.
An overloaded motor home is hard to drive and hard to stop. In cases of serious overloading, brakes can fail completely,particularlyonsteephills.Theloadatirewillcarrysafelyisacombinationofthesizeoftire,itsloadrange,andcorrespondinginflationpressure.
Weight TermsThefollowingisanexplanationofcommonlyusedweightabbreviations.
• Gross Vehicle Weight Rating (GVWR)isthemaximumpermissibleweightofthismotor home. • Unloaded Vehicle Weight (UVW)istheweightofthismotorhomeasmanufacturedatthe factorywithfullfuel,engineoil,andcoolants. • Occupant and Cargo Carrying Capacity (OCCC)isequaltotheGVWRminusUVWandLP. Inotherwords,OCCCishowmuchweightinoccupants,cargo,waterandtrailertongue weightthatcanbeaddedtothemotorhomewithoutexceedingtheGVWR. • Gross Combined Weight Rating (GCWR)meansthemaximumallowableloadedweightof thisrecreationvehiclewithitstowedtrailerortowedvehicle. • Gross Axle Weight Rating (GAWR)isthevaluespecifiedastheloadcarryingcapacityofa singleaxlesystem,asmeasuredatthetire-groundinterfaces.
CAUTION

FOUR WINDS INTERNATIONAL
IDENTIFICATION AND SAFETY
16
IDENTIFICATION AND SAFETY
REPORTING SAFETY DEFECTSIfyoubelievethatyourmotorhomehasadefectwhichcouldcauseacrashorcouldcauseinjuryordeath,youshouldimmediatelyinformtheNationalHighwayTrafficSafetyAdministration(NHTSA)inadditiontonotifyingFourWindsInternational.
IfNHTSAreceivessimilarcomplaints,itmayopenaninvestigation,andifitfindsthatasafetydefectexistsinagroupofvehicles,itmayorderarecallandremedycampaign.However,NHTSAcannotbecomeinvolvedinindividualproblemsbetweenyou,yourdealer,orFourWindsInternational.
TocontactNHTSA,youmayeithercalltheAutoSafetyHotlinetoll-freeat1-888-327-4236(TTY:1-800-424-9153);gotohttp://www.safecar.gov;orwriteto: Administrator, NHTSA, 1200 New Jersey Avenue, S.E., Washington, DC 20590.
Youcanalsoobtainotherinformationaboutmotorvehiclesafetyfromhttp://www.safecar.gov.
LAWS OF THE ROADItisadvisabletocontacttheDepartmentofMotorVehiclesineachrespectivestate,forup-to-dateinformationregardingoperationandlicensingrequirementsforyourparticularmotorhome.
ThestateofCaliforniacurrently requiresoperatorsofmotorhomesover40 feet in length toobtainanon-commercial class B license. California has also enacted legislation limiting use of motor homes in excessof40feet,toapprovedroadways.YoumaycontactCaltransatwww.dot.ca.govor916-654-5741forcurrentinformationregardingtheseCaliforniastatues.

FOUR WINDS INTERNATIONAL
IDENTIFICATION AND SAFETY
17
MOTOR HOME SERIAL NUMBER DECAL AND DATA PLATES
Themotorhomeserialnumberlabelismountedontheinsidewallnexttothedriver’sseatonaClassAmotorhomeandontheinsideofthedriver’sdoorpostonaMinimotorhome.Refertothechassisowner’smanualforthelocationofthechassisvehicleidentificationnumberonallmotorizedmotorhomes.
Note: Alwaysgivemodel,year,andtheV.I.N.numberinformationwhenorderingparts. Also, we recommend that you keep a copy of this information separate from the motorhomeintheeventtheftorvandalismrequiresyoutosupplyacopytothe authorities.
Decalsanddataplatesused throughout themotorhomeaid in itssafeandefficientoperation;othersgiveserviceinstructions.Readalldecals,data,andinstructionplatesbeforeoperatingyourmotorhome.
Note: Whenanydecal,data,orinstructionplateisdamaged,paintedover,removed,etc.; theitemshouldbereplacedimmediately.
SAFETY REGULATIONS FOR PROPANE GAS SYSTEMS AND APPLIANCES
ThefollowingwarningsarepostedthroughoutthemotorhometoprovideinformationonPropanesafety.Theyhavebeeninstallednotonlybecauseoftherequirementtodoso,butalsoasaconstantremindertooccupantsofthemotorhometoexercisepropercautionwhenusingorbeingaroundPropaneappliancesandequipment.We are listing them here so you may study them and make sure that you and your family understand and followthem.
It is not safe to use cooking appliances for comfort heating. Cooking appliances need fresh air for safe operation.
To ensure proper ventilation before operating a propane appliances you should open overhead vents, turn on the exhaust fan, and open a window.
Warning labels are located in the cooking area to remind you to provide an adequate supply of fresh air for combustion. Unlike homes, the amount of oxygen supply is limited due to the size of the motor home, and proper ventilation when using the cooking appliances will avoid dangers of asphyxiation.
Over-filling the Propane gas tank can result in uncontrolled gas flow which can cause fire or explosion. A properly filled tank will contain approximately 80% of its volume as liquid Propane. An 80% automatic shut-off valve is installed on the Propane gas tank which will automatically prevent further filling when the gas volume has reached 80% of tank capacity.

FOUR WINDS INTERNATIONAL
IDENTIFICATION AND SAFETY
18
This tank is equipped with an automatic valve designed to close at 80% liquid full. Always open 20% fixed liquid level bleeder gauge while filling. Stop filling if liquid appears before valve shuts off.
All Propane gas is contained under pressure. Due to the dangerous potential of any compressed gas, it is mandatory that the following requirements for the use of this tank be followed: Tanks are to be installed, fueled and maintained in accordance with the state and local codes, rules, regulations or laws and in accordance with the NFPA Pamphlet 58, division IV.
OnlypersonneltrainedinthehandlingofPropanemayfill,testorrepairthePropanegassystem.
If you smell gas, extinguish any open flames, pilot lights, and all smoking materials. DO NOT touch electrical switches. Shut off the gas supply at the tank valve(s) or gas supply connection. Open doors and other ventilation openings. (do not use the range hood) Leave the area until the odor clears and have the system checked by a trained professional before using again.
Propanegasregulatorsmustalwaysbeinstalledwiththediaphragmventfacingdownward.Regulatorsthatare not in compartments have been equipped with a protective cover. Make sure that the regulator vent faces downward and the cover is kept in place to minimize vent blockage which could result in excessive gas pressurecausingfireorexplosion
Portable fuel burning equipment including wood or charcoal burning grills and stoves should not be used inside the motor home because they may cause fire or asphyxiation.
FIRE SAFETYFire safety is an important part of owning a motor home. Make sure that everyone traveling in the motor homeisfamiliarwiththelocationofexits,includingemergencyexitwindowsshouldanemergencyarise.Thefollowingbasicrulesoffirepreventioncanhelpeliminatethepossibilityofafire.
• Never store flammable liquids within the motor home • Keep cooking surfaces clean • Never clean with a flammable liquid • Never leave cooking food unattended • Never smoke in bed, and always use an ashtray • Never allow children to play with Propane gas or electrical equipment • Never use an open flame as a flashlight • Always repair faulty or damaged wiring and electrical components • Never overload electrical circuits • Locate and repair Propane gas leaks immediately • Don’t allow rubbish to accumulate • Spray fabrics annually with a flame retardant
If a fire does start, make sure to follow these basic rules of safety: 1. Have everyone evacuate the motor home as quickly as possible 2. After everyone is clear, check the fire to see if you can attempt to put it out. If it is too large, orthefireisfuelfed,getclearofthemotorhomeandhavethefiredepartmenthandlethe emergency. 3. DO NOTattempttousewatertoputoutthefire.Watercanspreadsometypesoffire,and electrocutionispossiblewithanelectricalfire.
DO NOT store Propane containers inside the motor home. Propane containers are equipped with safety devices which relieve excessive pressure by discharging gas to the atmosphere. Failure to comply could result in
explosion resulting in death or serious injury.
CAUTION

FOUR WINDS INTERNATIONAL
IDENTIFICATION AND SAFETY
19
FIRE EXTINGUISHERUnderwriterLaboratoriesclassifyfiresintothreetypes:Class A: Firesinwood,paper,fabric,rubber,andcertainplasticsClass B: Flammable liquids such as grease, cooking oils, gasoline, or keroseneClass C:Electricalfiresstartedfromliveelectricalwires,fromshortcircuitsmotorsorswitches
The fireextinguisher,which is locatedby theentrydoorof themotorhome, isachemical typesuitable forextinguishingsmall firesof theclassBorC type. Extinguishersaredesigned toputout fires in the initialstage,notwhenitisblazingoutofcontrol.Ifafirecannotbeapproachedwithin10’,theextinguisherwillnotbeeffective.
Tofightafirewithanextinguisher,firstremovethetampertapewhichcoversthedischargepushbutton.Holdituprightandstandsixtotenfeetfromthefirewithaclearpathtoanexit.Pressthebuttondownalltheway,aimed at the base of the fire and spray with quick motions from side to side.
Avoidinhalingthedrychemicals.Althoughnontoxic,theycouldcausetemporaryirritationandvomiting.Whenthefireisout,cleanuptheareaassoonaspossible.Thedrychemicalsarenon-corrosive,butsomeresiduemaycausesurfacedamageiflefttoolong.
Inthecaseofanelectricalfire,disconnectthebatteryandthrowoffthemaincircuitintheunit.Itisimportantthat everyone knows where to find the main circuit and how it operates. If the shoreline power cord is connected,disconnectit.
To keep the fire extinguisher in proper operating conditions:
1. Check Pressure monthly or more often. Check the nozzle for obstruction. Press the green pin below the nozzle. If it returns and sticks out from the extinguisher, it is operable. If the pin does not come back, discard extinguisher. Refillable models have a pressure gauge to check. 2. Check the Tamper Tape to make sure it is intact. DO NOT test the extinguisher. Even a partial discharge may cause leakage. 3. When checking the extinguisher for pressure, enter the date checked on the Inspection Tag furnishedwiththemotorhome.Regularinspectionswillhelpinsurethecondition. 4. Agitate Dry Chemical every six (6) months, by inverting the bottle and lightly shaking for severalseconds.Thiswillhelppreventthedrychemicalfromsettlingduetoinmotion vibrations.
CARBON MONOXIDE AND SMOKE DETECTORSBoth the Smoke Alarm and the Carbon Monoxide alarm cannot operate without a 9 Volt battery. Removing the battery for any reason, or failing to replace the battery at the end of it's service life, removes your protection. Refer to the manufacturers owner’s manual for proper replacement batteries.
Both the Smoke Alarm and the Carbon Monoxide alarm cannot operate without a 9Voltbattery.Removingthebatteryforanyreason,orfailingtoreplacethebatteryat the end of it's service life, removes your protection. Refertothemanufacturersowner’smanualforproperreplacementbatteries.
The smoke alarmwillonly indicate thepresenceofsmoke that reaches the sensor. The smoke alarm is not designed to sense gas, heat or flames. The
COalarmisnotdesignedtodetectfireoranyothergas.ItwillonlyindicatethepresenceofCOgasatthesensor.COmaybepresentinotherareas.For instruction on programming the alarm refer to the Smoke Alarm User’s

FOUR WINDS INTERNATIONAL
IDENTIFICATION AND SAFETY
20
Testing ProcedureDO NOT stand close to the alarm when the horn is sounding. Exposure at close range may be harmful to your hearing. When testing, step away when the horn starts sounding.
Never use an open flame of any kind to test this unit. The built-in test switch accurately tests the unit’s operation as required by Underwriters Laboratories, Inc. (UL).
TEST: It is important to test this unit every week to make sure it is working properly. Using the test button is the recommended way to test this Smoke Alarm. Press and hold the test button on the cover of the unit until thealarmsounds(theunitmaycontinuetoalarmforafewsecondsafteryoureleasethebutton).Ifitdoesnotalarm, make sure the unit is receiving power and test it again. If it still does not alarm, replace it immediately. Duringtestingyouwillhearaloud,repeatinghornpattern:3beeps,pause,3beeps,pause;andtheRedLEDwillflashrapidly.
Note: If the unit does not alarm, make sure the batteries are correctly installed, and test again.Iftheunitstilldoesnotalarm,replaceitimmediately.
Regular MaintenanceThisunithasbeendesigned tobeasmaintenance freeaspossible,but therearea fewsimple thingsyoumust do to keep it working properly. Use only the replacement batteries listed below. The unit may not operateproperlywithotherbatteries.Neveruserechargeablebatteriessincetheymaynotprovideaconstantcharge. • Test it at least once a week. • Clean the Smoke Alarm at least once a month; gently vacuum the outside of the Smoke Alarm using your house hold vacuum’s soft brush attachment. Test the Smoke Alarm. Never use water,cleanersorsolventssincetheymaydamagetheunit. • If the Smoke Alarm becomes contaminated by excessive dirt, dust and/or grime, and cannot becleanedtoavoidunwantedalarms,replacetheunitimmediately. • Relocate the unit if it sounds frequent unwanted alarms. See product manual under “Locations to Avoid for Smoke Alarms” for details. • When the battery becomes weak, the Smoke Alarm unit will “chirp” about once a minute (the lowbatterywarning).Thislowbatterywarningshouldlast7days,butyoushouldreplace the battery immediately to continue your protection. Note: If locking pin is engaged see "Locking Feature" section for unlocking instructions.
Choosing a replacement battery:Your Smoke Alarm requires one standard 9V battery. The following batteries are acceptable as replacements: Duracell #MN1604, (Ultra) #MX1604; Eveready (Energizer) #522. You may also use a Lithium battery like the UltralifeU9VL-Jforlongerservicelifebetweenbatterychanges.
Carbon Monoxide Safety PrecautionsDO NOT alter or modify any component of the exhaust system at any time. Inspect the exhaust system at regular intervals for damage. If you suspect or locate damage to the system, have it repaired immediately by a qualified service facility.
Never sleep while the engine or generator is running. Be aware of carbon monoxide poisoning and its symptoms: Dizziness, Severe Headache, Vomiting, Weakness, Sleepiness, Muscular Twitching, and Throbbing in Temples. If anyone in the motor home experiences any of these symptoms, shut off the engine, and immediately go outside into fresh air. Get medical attention as soon as possible.

FOUR WINDS INTERNATIONAL
IDENTIFICATION AND SAFETY
21
Carbon Monoxide cannot be seen or smelled and can kill you. If alarm sounds: Turn off appliances, as well asothersourcesofcombustionatonce(furnace,waterheater,stove,motorhome,automobile,etc.)andcallthefiredepartment.Getfreshairintothepremisesorvehicle.Havetheproblemcorrectedbeforestartinganyappliancesorthevehicle.
Neverruntheengineorgeneratorunlessyouaresurethatexhaustgaseswillbesafelydispersed into theatmosphere. Always be sure that exhaust tail pipes remain unblocked and windows near the exhaust are closed.
PROPANE GAS DETECTORThePropaneGasDetector ispoweredatall timeswhen thecoachbatterydisconnect switch is in the ON position. When power is supplied to thedetectorthegreenindicatorlightwillilluminate.After60seconds,thedetectorwillbeginmonitoringtheair in themotorhomeforcombustiblevapors.ThePropane you use to cook, refrigerate, and heat is combustible. Should a leak occur,thedetectorwillproduceapulsatingalertsoundwhenthegasreachesthedetector.Thisalertwillcontinuetosounduntilthegashasdissipatedoruntiltheresetbuttonispressed.Whenthealertsounds,openalldoorsandmajor windows to air out the motor home and turn the gas off at the tank. Donotreenterthemotorhomeuntil thealertstopssounding. If thealertsounds a second time after the gas is turned back on, leave the gas off and have a qualified Propane Dealer or Motor Home Service Center make the necessaryrepairs.Theresetbuttononlystopsthealertfromsoundingfor60seconds.ThisdeviceisintendedfordetectionofPropanegasONLY.
MaintenanceNEVER USE WATER, CLEANERS OR SOLVENTS TO CLEAN THE DETECTOR.
The following maintenance steps should be taken to ensure proper function of the detector.
• Test the detector at least once per week. • Clean the detector at least once a month; gently vacuum the outside of the detector using the vacuum's soft brush attachment. • If detector becomes contaminated by excessive dirt, dust and/or grime, and cannot be cleaned toavoidunwantedalarms,replacetheunitimmediately.
How To TestNEVER USE AN OPEN FLAME OF ANY KIND TO TEST THIS UNIT. The built-in test switch accurately tests the unit's operation as required by Underwriters Laboratories, Inc. (UL)
Simplypress the TESTswitchany timeduring thewarm-upcycleorwhile innormaloperation. TheLEDshouldflashredandthealarmshouldsound.Releasetheswitch.Thisistheonlywayyoushouldtestyourdetector. The test feature checks the full operation of the detector. If this detector does not test properly return itimmediatelyforrepairorreplacement.
TEST: This test procedure should be repeated every week or every time the motor home is taken on a trip.
Note: RefertothedetectormanufacturerifyouhaveanyquestionsaboutthePropaneGas Detector.
NOTICE
FOUR WINDS INTERNATIONAL
IDENTIFICATION AND SAFETY
22
Checking the Propane System for LeaksRoad vibration can loosen Propane fittings. It is important to check the Propane system for leaks at least every 5,000 miles, and whenever the tank is filled. It is also a good idea to have the entire Propane system checked annually by a qualified Propane service representative.
Use the following steps when checking the system for leaks:
1. Openallthewindowsandvents. 2. Open the gas tank service valve. 3. Use non-ammoniate, non-chlorinated soap solution, or an approved leak detection solution on all line connections (ammoniate soap solutions can cause cracking on copper or brass lines andfittings). 4. If a leak is detected, tighten the connection with two open end wrenches until bubbling stops. DO NOT over tighten, or use excessive force. If the leak continues, contact the motor home dealer,oraqualifiedPropaneservicerepresentativetohavean11"WaterColumnTest performed.
About the Propane Gas DetectorLiquefiedPetroleumGas(Propane)isheavierthanairandwillsettletothelowestpointwhichisgenerallythefloorofthemotorhome.Thedetectorisalsosensitivetootherfumessuchashairsprayofwhichmostcontainbutane as the propellant. Butane, like Propane, is heavier than air and will settle to the floor level where it will bedetected.Whenthisoccurs,presstheresetbuttontostopthealertsoundfor60seconds.
ThePropaneGasDetector ispoweredbythemotorhomecoachbatteriesand/ortheinverter.Thedetectorwilloperateproperlyuntilthebatteryisdraineddownto10volts(alowbatteryconditionis10.4volts).Ifthepowersource(batteryand/or inverter) isdisconnected,or if thepower isotherwiseinterrupted,thedetectorwillnotoperate.
The Propane Gas Detector has a self check circuit which runs at all times when the detector is powered. In the eventthatthecircuitryfails,afailurealarmwillsound.Itisacontinuousseriesofshortbeeptonesbetweenlongintervalsandisdistinctivelydifferentfromthealertsound.
Most Common Causes of Apparent Malfunction
Note: ThePropaneGasDetectorentersacleaningandinitializingmodeeverytimeitis powered.IfturnedOFFforlessthan15minutes,thePropaneGasDetectormay produceseveralshort“chirps”withinthefirst80secondsofoperation.Thisisa normalfunctionoftheLPGasDetector.
SeeyourFourWindsInternationalDealeroraqualifiedPropaneServiceCentershouldserviceberequired.Iftheyarenotfamiliarwiththisproduct,havethemcallthedetectormanufacturerforassistance.Ifserviceisnotavailableinyourarea,callMTIIndustries.
New Coach Odor: Thegluesandothermaterialsusedinmanufacturingthecoachproducevaporswhichmaybedetectedwhenthecoachisclosedup.Airoutthemotorhomethoroughly.Keeps Beeping: Thegasdetectorbeepsaboutonceeveryminute,evenwhenitisturnedoff.Theproblemis a weak battery in the smoke detector, similar to the alertsoundofthePropaneGasDetector.Hair Spray Triggers the Detector:Mostaerosolhairsprays use butane gas as the propellant. Butane, like Propane, is heavier than air and will settle to the floor levelwhereitwillbedetected.
Other Gases: Other gases which can cause thedetector to respond with an alert include the vaporsfrom any fuel, liquor, alcohol, deodorants, colognes,perfumes,wine,adhesives,lacquer,andmostcleaningagents.Slow Beep Rate:Thiscouldbethefailurealarmandwill occur in the event that the circuitry fails. It is acontinuous seriesof short beep tonesbetween longintervals and is distinctively different from the alertsound.If the problem still exists:ContactMTIIndustriesforassistance.

FOUR WINDS INTERNATIONAL
IDENTIFICATION AND SAFETY
23
CHEMICAL SENSITIVITYAfteryou firstpurchaseyournewmotorhomeandsometimesafter ithasbeenclosedup foranextendedperiod of time you may notice a strong odor and chemical sensitivity. This is not a defect in your motorhome. Like your home, there are many different products used in the construction of motor homes such as carpet,linoleum,plywood,insulation,upholstery,etc.Formaldehydeisalsotheby-productofcombustionandnumeroushouseholdproducts, suchas, somepaints, coatingsandcosmetics.However,motorhomesaremuchsmallerthanyourhomeandthereforetheexchangeofairinsideamotorhomeissignificantlylessthanahome.Theseproducts,whenneworwhenexposedtoelevatedtemperaturesand/orhumidity,may"off-gas"differentchemicals, includingformaldehyde.Thisoff-gassing, incombinationwiththeminimalairexchange,maycauseyoutoexperienceirritationoftheeyes,nose,andthroatandsometimesheadache,nausea,anda variety of asthma-like symptoms. Elderly persons and young children, as well as anyone with a history of asthma,allergies,orlungproblems,maybemoresusceptibletotheeffectsofoff-gassing.
FormaldehydeMost of the attention regarding chemical off-gassing surrounds formaldehyde. Formaldehyde is a naturallyoccurring substance. It is also a key industrial chemical used in the manufacture of the numerous consumer productswhichwereferredtoaboveandusedintheconstructionofmotorhomes.Tracelevelsofformaldehydeare also released from smoking, cooking, use of soaps and detergents such as carpet shampoos, cosmetics, andmanyotherhouseholdproducts.Somepeopleareverysensitivetoformaldehydewhileothersmaynothaveanyreactiontothesamelevelsofformaldehyde.Amountsreleaseddecreaseovertime.
VentilationToreduceorlessenexposuretochemicalsfromoff-gassingitisofutmostimportancethatyouventilateyourmotor home. Ventilation should occur frequently after purchase and at times when the temperatures andhumidityareelevated.Rememberoff-gassing isacceleratedbyheatandhumidity.Openwindows,exhaustvents, and doors. Operate ceiling and/or other fans, roof air conditioners, and furnaces and use a fan toforce stale air out and bring fresh air in. Decreasing the flow of air by sealing the motor home increasesthe formaldehyde level in the indoor air. Please also follow the recommendations contained in “CareANDMaintenance”sectionregardingtipstoavoidcondensationproblems.
Note: We recommend that you do not smoke inside your motor home. In addition to causing damage to your motor home, tobacco smoke releases formaldehyde and othertoxicchemicals.
Note: Ifyouhaveanyquestionsregardingthehealtheffectsof formaldehyde,pleaseconsultyourdoctororlocalhealthdepartment.
Note: Chemicaloff-gassingisnotadefectinyourmotorhomeandisnotcoveredbythe LimitedWarranty.Pleasefollowtherecommendationinthissectiontoaddressthis concern.
SEAT BELTSDo not occupy beds or any other seats that are not equipped with safety seat belts while the motor home is in motion. Do not use a seat belt on more than one person.
Pilot and co-pilot seats must be locked in a forward facing position with seat belts fastened while the motor homeisinmotion.Avoidseatrotationwhileintransit.

FOUR WINDS INTERNATIONAL
IDENTIFICATION AND SAFETY
24
The sleeping accommodations in this vehicle are designed for occupancy only while the vehicle is parked. All occupantsinthisvehiclemustbeseatedatadesignatedseatingpositionandmustwearseatbeltsatalltimeswhilethisvehicleisinmotion.
Safetybeltsandseatscanbecomehotinavehiclethathasbeenclosedupinsunnyweather;theycouldburna small child. Check seat covers and buckles before you place a child anywhere near them.
Seat Belt OperationAll occupants must be furnished with and use seat belts while the motor home is moving. However, it isnot intendedforallseatstobesimultaneouslyoccupiedwhilethevehicle is inmotionwithoutregardtothetotal loaded weight of the vehicle. Insert the belt tongue into the proper buckle (the buckle closest to the direction the tongue is coming from) until you hear a snap and feel it latch. Make sure the tongue is securely fastened in the buckle. Adjust the belt to the proper position; snug and as low as possible around the hips, not around the waist. To unfasten, push the release button and remove the tongue from the buckle.
MaintenanceFAILURE TO INSPECT AND IF NECESSARY REPLACE THE SAFETY BELT UNDER THE ABOVE CONDITIONS COULD RESULT IN SEVERE PERSONAL INJURIES IN THE EVENT OF A COLLISION.
Inspect the safety belts periodically to make sure they work properly and are not damaged. Inspect the safety belts to make sure there are no nicks, tear or cuts. Replace if necessary. A qualified service technician should inspectallsafetybeltassembliesafteracollision.FourWinds International recommendsthatallsafetybeltassembliesusedinvehiclesinvolvedinacollisionbereplaced.
Child RestraintsIfyourchildrequiresachildsafetyrestraintsystem(seat),FourWindsrecommendsinstallingthechildsafetyseatintheforwardfacingboothdinetteposition.Forrear-facingchildseatsandinfantcarriers,thedinettetablecanbeplacedinthe"down"positiontoallowadequateroomfortherearfacingchildseat.Ifyourmotorhomeisnotequippedwithaforwardfacingboothdinetteseat,werecommendthatsmallchildrenthatrequireachildseatnotbetransportedinamotorhome.PleaseNote: • Rear-facing child seats or infant carriers should never be placed in the front seats. • Never let a passenger hold a child on his or her lap while the vehicle is moving. • You are required by law to use safety restraints for children in the U.S. and Canada. If small children (generally children who are four years old or younger and who weigh 18 kg [40lbs]orless)rideinyourvehicle,youmustputtheminsafetyseatsmadeespeciallyfor children.
Note: Check your local and state or provincial laws for specific requirements regarding the safetyofchildreninyourvehicle.
Note: Alwaysfollowtheinstructionsandwarningsthatcomewithanyinfantorchild restraintyoumightuse.
Ifthechildisthepropersize,restrainthechildinasafetyseat.Childrenwhoaretoolargeforchildsafetyseats(asspecifiedbyyourchildsafetyseatmanufacturer)shouldalwayswearsafetybelts.
Iftheshoulderbeltportionofacombinationlapandshoulderbeltcanbepositionedsoitdoesnotcrossorrestin front of the child's face or neck, the child should wear the lap and shoulder belt.
Never use pillows, books, or other objects to boost a child.

FOUR WINDS INTERNATIONAL
IDENTIFICATION AND SAFETY
25
EGRESS WINDOWAn egress window is designated for use asan exit in the case of an emergency. Insidethemotor home theegresswindow is easilyidentified by the red locking handles. There aretwocommonstylesof latches,determinethe style of locking handle you have and refer tothefollowingillustrationsforoperation.Itisalso marked as an “EXIT”.Theglasssliderintheegresswindowoperates thesameasallotherwindows;
TEST:Theegresswindowshouldbeopenedtwiceayeartoensureproperoperation.Overtime, the rubber seal will tend to stick to the egresswindow.Occasionaloperationwillhelpprevent the rubber seal from sticking.
TRAILER TOWINGA separate functioning brake system is required for any towed vehicles or trailers weighing more than 1000 lbs when fully loaded. NEVER exceed the GVWR, or the GAWR specified on the motor home certification label. Also NEVER exceed the weight ratings of the trailer hitch installed on the motor home. Failure to heed any part of this warning could result in loss of control of the motor home and towed vehicle or trailer and may cause an accident and serious injury. For specific towed vehicle braking requirements, consult the chassis owners manual.
The motor home fully loaded and the trailer, or towed vehicle, must not exceed the motor home chassis’ Gross Combination Weight Rating (GCWR). Consult with your selling dealer to determine the GCWR of the motor home. Do not exceed the motor home Gross Combined Weight Rating (GCWR) or the hitch rating. The tongue weight, the weight pushing down on the hitch, must not exceed 10% of the hitch capacity.
Alwaysusesafetychainsbetweenthemotorhomeandthetowedtrailerorvehicle.Crosschainsunderthetrailer tongue and allow slack for turning corners. Connect safety chains to the trailer or vehicle frame or hook retainers. Never attach chains to the bumper of a vehicle.
Towbarsorcardolliesgenerallyaremadetotravelinaforwarddirectiononly.Mosttowingequipmentofthis type is not designed for backing. Never attempt short back up distances with a tow bar or tow dolly. Damagetothemotorhome,towedvehicleortowingdevicewillresult.
Note: FourWindsInternationalacceptsnoresponsibilityfordamagetothechassisandother componentsresultingfromtowingloadsgreaterthanitsdesignatedclassspecifications. Alsoconsiderthegrosscombinedweightratingofthemotorhomebeforetowingatrailer orvehicle.Towinganobjectsuchasaboatandtraileroravehiclebehindthemotorhome resultsinaddeddrivingconsiderationsthatyoumustcontendwith.

FOUR WINDS INTERNATIONAL
CHASSIS OPERATIONS AND PROCEDURES
26
CHASSIS
Note: Allissuesregardingthechassiswarranty,partsandserviceshouldbedirectedto thechassismanufacturer.
Thefollowingsectionisforreferenceonly.Fordetailedinformationregardingproductinformationandpropermaintenanceofthechassis,refertothechassismanufacturesowner’smanual.
You as the owner are responsible for taking the proper precautions when attempting any repair or maintenance. If you are not sure what action to take, or uncomfortable with performing a maintenance or repair function, contact your dealer, or a designated chassis manufacturer servicing dealer. Check information supplied by chassismanufacturerforaservicedealernearyou.
Special procedures or schedules for “breaking-in” your new motor home are minimal. Make sure to follow the recommendations as outlined in the chassis owner’s manual to ensure proper future performance andeconomy.
Note: Make sure to read all chassis information supplied by the chassis manufacturer, payingparticularattentiontoprecautionarynotesandwarnings,aswellasall maintenanceproceduresandschedules.
EMERGENCY STOPPINGIFANEMERGENCYEVERREQUIRESYOUTOBESTOPPED,BESURETOFOLLOWTHESEGUIDELINES: 1. Pullofftheroadasfaraspossible. 2. Select the Park position on a gas motor home and the neutral position on a diesel motor home on the shift selector and apply the Parking Brake. 3. Turnonthehazardwarningflashers. 4. Usethreeredwarningindicatorssuchasflares,reflectors,orlanternsasrequiredbythe UniformVehicleCodeandModelTrafficOrdinanceasfollows: a. Placethefirstindicatoronthetrafficsideofthevehicle,directedatthenearest approachingtraffic. b. Placethesecond100feetbehindthemotorhomeinthecenterofthelaneand towardapproachingtraffic. c. Placethethird100feetinfrontofthemotorhomeinthecenterofthelaneand awayfromthetrafficapproachingfrombehind. 5. Alwaysstandofftheroad.
Note: Curvesand/orhillsmayeffectthesafeplacementofwarningindicators.
ENGINE AND DRIVE TRAINFulloperatingandserviceinformationmaybeobtainedbyconsultingtheengineanddrivetrainoperatingandservicemanualsprovidedbythechassismanufacturer.Formaximumengineefficiencyandlongservicelife,alwaysfollowrecommendations,asoutlinedbythechassismanufacturer.Regularvisualinspectionscanhelpdetectminoradjustmentsandneededmaintenance.Allothercomponentsofthechassisshouldbeinspectedregularlypertheschedulessetbythechassismanufacturer.

FOUR WINDS INTERNATIONAL
CHASSIS OPERATIONS AND PROCEDURES
27
Engine Access - Gas If the engine cover is not seated correctly, exhaust gases may leak into the motor home, creating a dangerous and potentially lethal situation.
Themotorhomeenginecanbeaccessedforservicefrominsidethemotorhome.Theenginecoverbetweenthedriverandpassengerseatscanberemoved.
When reinstalling the engine cover, make sure that it is seated correctly without obstruction from carpet, floor mats,etc.
Engine Access - Diesel The engine fluid level checks which are located at the exterior rear of the motor home, can be accessed by lifting the tophalfof theenginegrate.Forservicepersonnel,additionalaccessareasare located in thebedroom.Thefirstlocationisinthewardrobeclosetonthefloor,removethefourscrewstoremovetheaccesspanel.Thesecondaccesspanelislocatedonthebedroomfloorbetweenthebedandthewardrobecloset.Removethefourmountingscrewstoremovetheaccesspanel.
FUELING THE MOTOR HOMEBe extremely careful when fueling the motor home. Always shut off the engine, do not smoke, or use cellular phonesandshutoffallpilotlightsbeforeaddingfuel.Fuelspillsrepresentaseriousfirehazard,andshouldbecleanedupimmediately.Neverrestarttheengine,orrelightpilotlightswhilerawfuelispresent.Whenweathergetscoldorthemotorhomehasnotbeenusedforawhile,afuelanti-geladditivewillbeneeded.
Foryourconveniencetheremaybetwofuelfillsonthemotorhome.Ifsoequipped,theyarelocatedonbothsidesofthemotorhome,towardsthefrontoftheunit.Thisallowsaccessintofillingstationsfromeithersideofthemotorhome.
Note: Ifyoushouldloseyourfuelcap,itshouldbereplacedassoonaspossible,witha capofthesametype.
Note: Alwaysremovethefuelcapslowlyandpaycloseattentiontothefuel recommendationsoutlinedinthechassisliterature.
Ford Fuel Pump Collision Shut-off SwitchIfyourmotorhomeisinvolvedinacollision,itispossiblethataninertiaswitchinthefuelpumpcircuitwillopen,shutting down the flow of fuel to the engine. This is a safety feature designed to help keep raw fuel from spilling outandcreatingadditionaldanger.Whenthisinertiaswitchhasbeentripped,itisnecessarytomanuallyresetitbeforethemotorhomecanberestartedandmoved.Reviewyourchassisowner’smanualforthelocationoftheswitchandinstructionsforresetting.
FOUR WINDS INTERNATIONAL
CHASSIS OPERATIONS AND PROCEDURES
28
TRAVEL PREPARATIONChassis ChecksLike any vacation trip, pre-planning will pay big dividends. In addition to routine trip preparations such as having newspaperdeliverystoppedandmailheldatthepostoffice,therearenowmorevehicle-relatedpreparationsthantherearewithanautomobile.
• Fluid levels (oil, power steering, radiator, transmission, windshield washer, etc.) • Belts (tension and condition) • Battery (electrolyte level if applicable, connections, charge) • Hoses (clamps tight, condition, leakage) • Seals, gaskets (leaks)
Note: RefertotheChassisManufacturer’sOwner’sManualformoreinformation.
Exterior Checks • Tire pressure/condition and lug nut torque • Headlights, running and safety marker lights including brake and turn signal and also any trailerlightconnections • Security of any auxiliary equipment such as TV and awning, etc. • Windshield wiper blades • Generator compartment • Fresh and waste water connections/drains and supplies such as high pressurehose • Propane compartment/tank
Undercarriage Checks • Brakes, including lines, pads/shoes, seals • Engine area for pan gasket or other leaks • Anything unusual hanging or tangled with road debris such as tree limbs • Tank condition (gas, fresh water, waste water)
Operational Checks • Check operation of all systems, including: Wipers, windshield, horn, brakes, steering, transmission,heater,defroster,airconditioner,andseatadjustment. • Also idle engine long enough to check cooling system and alternator operation. Be sure to turnonheadlightsandclimatecontrolstoseeifalternatorhandlestheadditionaldrainonthe electricalsystem(shouldnotshowdischarge).
Note: RefertotheChassisManufacturer’sOwner’sManualformoreinformation.

FOUR WINDS INTERNATIONAL
CHASSIS OPERATIONS AND PROCEDURES
29
Pre-Trip ChecklistPaycarefulattentiontowhereandwhattypeofflammablematerialsyoustore.CertainstorageareasareclearlylabeledDO NOT STORE COMBUSTIBLE MATERIALS. Examples of spark producing areas, depending on the motor home model, are: base kitchen cabinets, front dinette base, exterior refrigerator service compartment, as wellasrefrigeratorcabinet.Pleaseusediscretionastowhatpotentiallydangerousproductsyourmotorhomecontains while traveling. Be sure all canisters and bottle tops are secure and leak free.
The following checklist will assist your preparing the living quarters for a trip
• In winter make sure that the fresh water tank system is freeze protected. • Make sure that all storage items are secured and that heavy items are stored low so they don’tfall. • Check operation of stove and refrigerator. • Check that you have proper paperwork such as owners registration card, vehicle registration, proofofinsurance,andvaliddriver’slicense. • When preparing for your trip, always consider vehicle weight when loading the motor home.

FOUR WINDS INTERNATIONAL
CONTROLS AND OPERATIONS
30
CONTROLS AND OPERATIONS
FOGLIGHTS
DASH CONTROLS - GAS IMPORTANT:ThedashcontrolsandinstrumentpanelsprovidedwithinthemotorhomeareinstalledbyeitherthechassismanufacturerorFourWindsInternationalandmaynotappearexactlyaspictured.Foritemsnotdescribed within this manual, refer to the chassis manufacturer's operations manual.
Note: Theappearanceorplacementofthegauges,instrumentsandcontrols maynotexactlymatchtheillustrationswithinthechassismanufacturer’soperations manualhowever,theinstructionsfortheirusewillstillapply.
Mirror Control ButtonUsedtoadjustoutsidemirrorsforvisibility.Pushthesideselectorlefttoadjusttheroadsideexteriormirror,orrighttoadjustthecurbsideexteriormirror.Alwaysadjustmirrorsforpropervisionbeforestartingandmovingthemotorhome.
Mirror HeatActivatesheatingelementtodefrosttheoutsiderearviewmirrors.
Fog LightsThefoglightsswitchcontrolstheon/offoperationofthefoglights.
Emergency StartHoldingthisswitchdownwhileturningtheignitionswitchwillallowtheauxiliary“house”battery(s)tobeusedtostarttheengineintheeventtheautomotivebatteryis lowordead.Thisfeatureisdesignedtobeusedmomentarilytostarttheengine.DO NOTholdtheswitchdownforextendedperiodsoftime.
Generator Remote StartControls the remote ON/OFF operation of the generator. Refer to the manufacturer’s operationmanual.Depressandholdthetopoftheswitchtostartthegenerator.Depressthebottomoftheswitch tostop thegenerator.Depressandhold thebottomof theswitch toprime thegeneratorpriortostarting.
Note: Refertothegeneratoroperationsmanualfordetailedinformationregardingthe properusage,andserviceprocedureforthegenerator.
EMERGENCYSTART
GENSTART
PRIMESTOP

FOUR WINDS INTERNATIONAL
CONTROLS AND OPERATIONS
31
Windshield FansDO NOT REMOVE THE PROTECTIVE CAGE FROM THE FAN. DO NOT PLACE FINGERS OR OTHER OBJECTS INTO THE PROTECTIVE CAGE.
The fanswitch turn thepowerONorOFF to theoverheaddefroster fans.Each fancanbeoperatedseparatelywithindividualswitchesonthedash,ifthisswitchisintheOFF/HIGH/LOWposition.Thepurposeofthewindshieldfanistoaidindefrostingthewindshield. Turning the fans toward the cockpit area may cause visibility issues and mayalsocomeincontactwithotheroverheadcomponents.
DASH CONTROLS AND INSTRUMENT PANELS - DIESEL
Transmission Control Push Button Shift SelectorIMPORTANT: The Chassis Owner's Manual furnished with the motor home has complete information for operatingandmaintainingthechassisfunctions.Theappearanceofthegaugesmaynotmatchthediagramsbutisintendedforreference.
Operation: 1. Starttheengine. 2. Use Reverse (R) to back the vehicle. Completely stop the vehicle before shifting from a forwardgeartoReverse(R)orfromReverse(R)toaforwardgear.ThereisonlyoneReverse (R)gear. 3. SelectDrive(D)forallnormaldrivingconditions.ThevehiclewillstartoutinFirst(1)gear,and asspeedincreases,thetransmissionwillupshiftthrougheachgearautomatically.As thevehicleslowsdown,thetransmissionwilldownshifttothecorrectgearautomatically.The pressureofyourfootontheacceleratorpedalinfluencestheautomaticshifting.Whenthe pedalisfullydepressed,thetransmissionwillautomaticallyupshiftnearthegovernedspeed oftheengine.Apartiallydepressedpositionof thepedalwillcausetheupshiftstooccurata lowerenginespeed. 4. Occasionallytheroad,load,ortrafficconditions make it desirable to restrict the automatic shiftingtoalowerrange.Thelowerthegear range, the greater the engine braking power. Usetheupordownarrowbuttonsontheshift selectortoreachthedesiredgear. 5. Use Neutral (N) and apply the parking brake when the vehicle is parked with the engine running.
Note: SeetheAllisonTransmissionOwner’s Manualformoreinformationon3000and 4000MHtransmissionoperation.
Note: Inthelowergearranges,the transmissionwillnotupshiftabovethe highestgearselectedunlesstheengine governedspeedisexceeded.
CAUTION

FOUR WINDS INTERNATIONAL
CONTROLS AND OPERATIONS
32
Keypad Push Button Shift SelectorThe Allison keypad push button shift selector has six buttons on the keypad that cause the following transmissionoperationstooccur:
• R:Presstoselectreverse • N:Presstoselectneutral • D:PresstoselectDrive • 5(Upshift)Arrow:Presstoselectthenexthigherforwardrange • 6(Downshift)Arrow:Presstoselectthenextlowerforwardrange • MODE: Multi-functional use.The 5(Upshift)Arrow and 6(Downshift)Arrow are only functional while in a forward range, and not in N(Neutral)orR(Reverse).
Freightliner Only Information Message Center
f611067
STOPCHECKABS
1 2 3 4 5 6 7 8
9 10 11 3121 14 15 1609/23/2009
1. Check Engine Indicator2. High Exhaust System
Temperature (HEST) Lamp3. Stop Engine Warning4. Dash Driver Display Screen5. ABS Indicator
6. Check Transmission Indicator7. Engine Brake Engaged Indicator8. Cruise On Indicator9. Left-Turn Signal Arrow10. Diesel Particulate Filter (DPF)
Lamp
11. Shift Inhibit Indicator12. Headlight High-Beam Indicator13. Parking Brake Indicator14. Low Air Pressure Indicator15. Wait to Start Indicator16. Right-Turn Signal Arrow
Freightliner ONLY Information Message Center

FOUR WINDS INTERNATIONAL
CONTROLS AND OPERATIONS
33
SHIFTER PANEL SWITCHESMirror Control ButtonUsedtoadjustoutsidemirrorsforvisibility.Pushthesideselectorlefttoadjusttheroadsideexteriormirror,orrighttoadjustthecurbsideexteriormirror.Alwaysadjustmirrorsforpropervisionbeforestartingandmovingthemotorhome.
Mirror HeatActivatesheatingelementtodefrosttheoutsiderearviewmirrors.
Engine BrakeEnables or disables the engine braking aid. Refer to the Chassis Owner's Manual for detailed information.
Air HornActivatesairhornsystem(presshornpadonsteeringwheeltosoundairhorn).Whenswitchisintheoffposition,onlythechassissuppliedhornwillsound.Whenswitchisintheonposition,boththechassisandairhornwillsound.
Sun VisorRaisesor lowersthedriversidevisor. Thevisor isequippedwithadualrangemotorfordrivingsafety.WhentheignitionswitchisON,thevisorwillonlytravelapredetermineddistancewhichdoes not impede the driver's field of vision. When the ignition switch is in the OFF position, the visorwillfullyextend.
ENGINEBRAKE
HIGH
LOW
AIRHORN
VISORUP
DOWN

FOUR WINDS INTERNATIONAL
CONTROLS AND OPERATIONS
34
DOCKLIGHTS
ADJUSTPEDALS
Privacy ShadeRaisesor lowers theprivacyshade. Theshade isequippedwithadual rangemotor fordrivingsafety.WhentheignitionswitchisON,theshadewillonlytravelapredetermineddistancewhichdoes not impede the driver's field of vision. When the ignition switch is in the OFF position, the shadewillfullyextend.
Tag Dump ( Tag Axle Only)Dumpsairfromthetagaxletolowerorraisetheaxleduringtravel.RefertoChassisManualforfurtherinstructions.
Windshield FansDO NOT REMOVE THE PROTECTIVE CAGE FROM THE FAN. DO NOT PLACE FINGERS OR OTHER OBJECTS INTO THE PROTECTIVE CAGE.
The fanswitch turn thepowerONorOFF to theoverheaddefroster fans.Each fancanbeoperatedseparatelywithindividualswitchesonthedash,ifthisswitchisintheOFF/HIGH/LOWposition.Thepurposeofthewindshieldfanistoaidindefrostingthewindshield. Turning the fans toward the cockpit area may cause visibility issues and mayalsocomeincontactwithotheroverheadcomponents.
PedalsAdjust the brake and accelerator pedals forward and rearward for driver comfort.
DASH PANEL SWITCHESBlock HeatActivates the motor home engine block heater ( for use in cold weather). The block heater operates on120VoltACprovidedbythegeneratororshorepower.
Docking LightsSwitches side docking lights on or off which are located on the rear wheel wells.
PRIVACY SHADE
UP
DOWN
TAGDUMPAUTO
DISABLE
MANUAL
CAUTION
BLOCKHEAT

FOUR WINDS INTERNATIONAL
CONTROLS AND OPERATIONS
35
Battery BoostTemporarily connects the coach and chassis batteries if either bank of batteries goes dead for somereason.Thisfeatureisdesignedtobeusedmomentarilytostarttheengine.DONOTholdthe switch down for extended periods of time, overheating will occur causing serious electricalfailureanddamagetoelectricalcomponents.
Light Control KnobThe control knob for the headlights, side marker lights, taillights, parking lights, license plate lights, fog lights and panel lights is located on the instrument panel. Control knob positions are as follows:
1. OFF:Allexteriorlightsareoff. 2. PARKLIGHTS:Allexteriorlights,excludingtheheadlightsareilluminated. 3. HEADLIGHTS:Allexteriorlightsareilluminated. 4. FOG LIGHTS: Headlights must be illuminated, then pull the control knob out to illuminate the foglights.
Panel Light Dimmer Control WheelTo increase or decrease the level of light intensity for the dash panel, rotate thecontrolwheeluptoincrease,ordowntodecrease.
PASSENGER ARMREST SWITCHESPorch LightControlstheexteriorlightonthedoorsideofthemotorhome.
Step LightControlstheentrystepcourtesylighting.
Step CoverExtendsandretractstheentrystepwellcover.
BATTERYBOOST
MONITOR
RESET
PORCHLIGHT
STEPLIGHT
STEPCOVER

FOUR WINDS INTERNATIONAL
CONTROLS AND OPERATIONS
36
MAINAWNING
DOORAWNING
Main AwningExtendsorretractsthemainpatioawning.
Door AwningExtendsorretractstheentrydoorawning.
Ceiling LightControlsthefrontceilinglights.Combinedwith3-wayswitchinhallway.Canbeoperatedfromeitherswitch.
STEERING WHEEL ADjUSTMENTTiltTo tilt the steering wheel, depress the adjustment pedal (located at the base of thesteeringcolumn)andmovethesteeringwheeltowhereyouwantit.Releasethepedaland the steering wheel will lock in the new position.
TelescopeTotelescopethesteeringwheel,depresstheadjustmentpedal(locatedatthebaseofthesteeringcolumn)andmovethesteeringwheelupordown.Whenthedesiredpositionis obtained, release the pedal and the steering wheel will lock in the new position.
TURN SIGNAL/LANE CHANGE/HIGH-LOW BEAM/HAZARDS LEVER
Theleverontheleftsideofthesteeringcolumncontrolstheturnsignalwithlanechangefeature,aswellastheHeadlamphigh/lowbeamtoggleandtheHazardLights.
Theturnsignal leverhastwooff-centerpositions,onepositionsupward(forright)andonedownward(forleft).Tosignalaturn,movetheleverallthewayupordown.Theseare latchingpositions.The leverwillstay inone of these positions until the steering wheel returns back to center (off) astheturniscompleted.
Tochangetheheadlampsfromlowtohighbeams,pull thesameleverusedforturnsignaloperationuptowardthedriverandreleasethelever.This isaself-returningaction.Repeating this toggleactionwill return tothelowbeams.
Toengagethehazardlights,pulltheredhazardswitchoutawayfromthesteeringcolumn.Thiswillactivatethehazardlightflashsequence.Todisengagethesequenceraiseorlowertheturnsignallevertoalatchingposition, then manually return the lever back to center (as if signaling a lane change).
CEILINGLIGHT
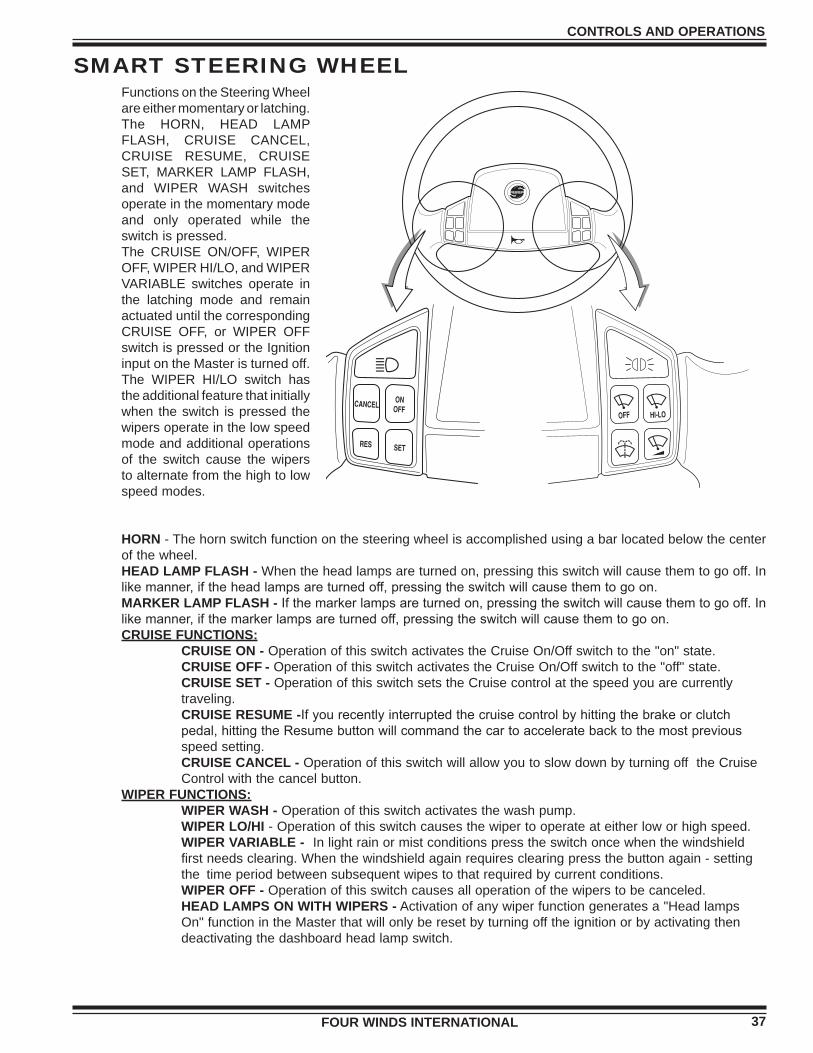
FOUR WINDS INTERNATIONAL
CONTROLS AND OPERATIONS
37
SMART STEERING WHEELFunctionsontheSteeringWheelareeithermomentaryorlatching.The HORN, HEAD LAMPFLASH, CRUISE CANCEL,CRUISE RESUME, CRUISESET, MARKER LAMP FLASH,and WIPER WASH switchesoperateinthemomentarymodeand only operated while theswitchispressed.The CRUISE ON/OFF, WIPEROFF,WIPERHI/LO,andWIPERVARIABLE switches operate inthe latching mode and remainactuateduntilthecorrespondingCRUISE OFF, or WIPER OFFswitchispressedortheIgnitioninputontheMasteristurnedoff.The WIPER HI/LO switch hastheadditionalfeaturethatinitiallywhen theswitch ispressed thewipersoperateinthelowspeedmodeandadditionaloperationsof the switch cause the wiperstoalternatefromthehightolowspeedmodes.
HORN-Thehornswitchfunctiononthesteeringwheelisaccomplishedusingabarlocatedbelowthecenterofthewheel.HEAD LAMP FLASH - Whentheheadlampsareturnedon,pressingthisswitchwillcausethemtogooff.Inlike manner, if the head lamps are turned off, pressing the switch will cause them to go on. MARKER LAMP FLASH - If the marker lamps are turned on, pressing the switch will cause them to go off. In like manner, if the marker lamps are turned off, pressing the switch will cause them to go on.CRUISE FUNCTIONS: CRUISE ON - OperationofthisswitchactivatestheCruiseOn/Offswitchtothe"on"state. CRUISE OFF - OperationofthisswitchactivatestheCruiseOn/Offswitchtothe"off"state. CRUISE SET - OperationofthisswitchsetstheCruisecontrolatthespeedyouarecurrently traveling. CRUISE RESUME -If you recently interrupted the cruise control by hitting the brake or clutch pedal, hitting the Resume button will command the car to accelerate back to the most previous speedsetting. CRUISE CANCEL - OperationofthisswitchwillallowyoutoslowdownbyturningofftheCruise Controlwiththecancelbutton.WIPER FUNCTIONS: WIPER WASH - Operationofthisswitchactivatesthewashpump. WIPER LO/HI -Operationofthisswitchcausesthewipertooperateateitherloworhighspeed. WIPER VARIABLE - Inlightrainormistconditionspresstheswitchoncewhenthewindshield firstneedsclearing.Whenthewindshieldagainrequiresclearingpressthebuttonagain-setting thetimeperiodbetweensubsequentwipestothatrequiredbycurrentconditions. WIPER OFF - Operationofthisswitchcausesalloperationofthewiperstobecanceled. HEAD LAMPS ON WITH WIPERS -Activationofanywiperfunctiongeneratesa"Headlamps On"functionintheMasterthatwillonlyberesetbyturningofftheignitionorbyactivatingthen deactivatingthedashboardheadlampswitch.

FOUR WINDS INTERNATIONAL
CONTROLS AND OPERATIONS
38
SPOTLIGHTThespotlightmountedontopofthemotorhomecanbecontrolledbyusingtheincludedremote.Usingtheremotecontrol, turnonthe lightusingtheON/OFFswitch.Withthefourwayswitchontheremotecontrol,adjustyourlighttothedesiredlocation.Dependinguponconditions,theremotemaybeusedupto150feetfromthespotlight.Thespeedofthelightrotationcanbecontrolledbydepressingthe+/-buttononetimeandbydepressingitagaintorestoretheoriginalspeed.
Thespotlight runson12VoltDCpower,which issuppliedby thehousebatteries.Beawareof thehousebatterycharge,donotdrainthebatteriesbyaccidentallyleavingthespotlightON.
Programming The Transmitter: 1. Disconnect power to the spotlight by turning the ignition key "on". Power is removed from spotlight when the key is on for safety. 2. Remove the battery cover from the back of the remote. 3. Setthe7dipswitchestoaselectionofyourchoice.Thereare3positionsoneach;positive, negative,andneutral.Useasmallscrewdriverandselectapositionforeachdipswitch. 4. InsertbothMN21batterieswiththe+/-inthesamedirection.Besurebatterieshave adequatecharge. 5. Replacethebatterycover. a. DepresstheON/OFFbuttonandholditdown.TheredLEDwillilluminate. b. WhileholdingtheON/OFFbuttondown,turntheignitionoff. c. KeepyourfingerontheON/OFFbutton.Inafewsecondsthelightbulbwillflash.This willtellyoutheprocessisfinished.BULB REPLACEMENT: ThespotlightutilizesaCr5Pentabeambulb,whichmaybepurchasedthroughGolight,Inc.308-278-3131or800-557-0098.
REAR VISION SYSTEMThis system gives a televised view of what is behind the motor home. It is used as an aid in backing the motor home,andcanalsobeusedforgreaterfieldofvisionwhendrivinginheavytraffic.Pictureisrepresentationonly. Actual system may look different than that pictured.
Make sure to check the mirrors when driving and backing, for a more complete field of vision. The camera is equipped with a wide angle lens that can initially present an image that may be deceiving. Make sure to practice backing in a safe place, using the monitor to become accustom to it’s operation.
RearVisionSystemsvarywithinourmotorhomes.TheClassCmotorhome(except forSprinters)comeequipped with a dash radio with a motorized video screen that pops up and displays the back up camera image.
Listedbelowarea fewof thebasiccommandsused. PleaseconsultyourRearVisionsystemmanualfordetailedoperatinginstructions
1. POWER ON/OFF:PressonceturnsunitON.Press againforOFF.
2. SELECT:Pressingbuttonsequencessourceinput modesfromCH1TOCH3.
3. DAY/NIGHT: Pressing button sequenced day/night back light.
4. MENU:Pressingbuttongivesaccesstoanonscreendisplaymenuandthesetupmenu.
5. VOLUME: Pressing button decreases or increases speaker volume.
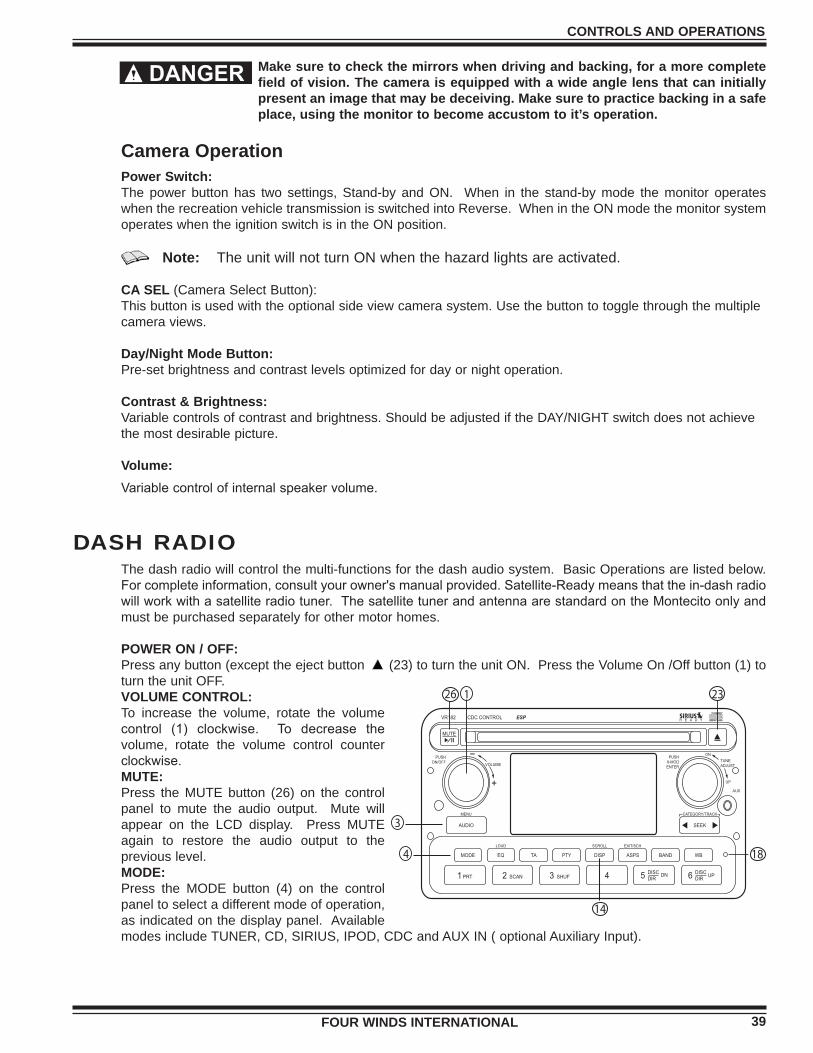
FOUR WINDS INTERNATIONAL
CONTROLS AND OPERATIONS
39
Make sure to check the mirrors when driving and backing, for a more complete field of vision. The camera is equipped with a wide angle lens that can initially present an image that may be deceiving. Make sure to practice backing in a safe place, using the monitor to become accustom to it’s operation.
Camera OperationPower Switch:The power button has two settings, Stand-by and ON. When in the stand-by mode the monitor operateswhentherecreationvehicletransmissionisswitchedintoReverse.WhenintheONmodethemonitorsystemoperateswhentheignitionswitchisintheONposition.
Note: TheunitwillnotturnONwhenthehazardlightsareactivated.
CA SEL (CameraSelectButton):Thisbuttonisusedwiththeoptionalsideviewcamerasystem.Usethebuttontotogglethroughthemultiplecameraviews.
Day/Night Mode Button:Pre-setbrightnessandcontrastlevelsoptimizedfordayornightoperation.
Contrast & Brightness:Variablecontrolsofcontrastandbrightness.ShouldbeadjustediftheDAY/NIGHTswitchdoesnotachievethemostdesirablepicture.
Volume:Variable control of internal speaker volume.
DASH RADIOThedashradiowillcontrolthemulti-functionsforthedashaudiosystem.BasicOperationsarelistedbelow.For complete information, consult your owner's manual provided. Satellite-Ready means that the in-dash radio will work with a satellite radio tuner. The satellite tuner and antenna are standard on the Montecito only and mustbepurchasedseparatelyforothermotorhomes.
POWER ON / OFF:Pressanybutton(excepttheejectbutton (23)toturntheunitON.PresstheVolumeOn/Offbutton(1)toturntheunitOFF.VOLUME CONTROL:To increase the volume, rotate the volumecontrol (1) clockwise. To decrease the volume, rotate the volume control counterclockwise.MUTE: Press the MUTE button (26) on the controlpanel to mute the audio output. Mute willappear on the LCD display. Press MUTEagain to restore the audio output to thepreviouslevel.MODE:Press the MODE button (4) on the controlpaneltoselectadifferentmodeofoperation,asindicatedonthedisplaypanel.AvailablemodesincludeTUNER,CD,SIRIUS,IPOD,CDCandAUXIN(optionalAuxiliaryInput).
26 1 23
3
4
14
18
FOUR WINDS INTERNATIONAL
CONTROLS AND OPERATIONS
40
Note: CDC, IPOD or SIRIUS mode will be skipped if the module is not installed.
ADJUSTING THE CLOCK (DISP): ThecurrenttimeisdisplayedinthelowerrighthandcorneroftheLCDdisplay. To adjust the clock: 1. PresstheDISPbutton(14)untilthehourflashesintheLCD. 2. RotatetheVOLUMEcontrol(1)within5secondstoadjustthehours. 3. PresstheDISPbuttonagainandtheminuteswillflash. 4. RotatetheVOLUMEcontrolwithin5secondstoadjusttheminutes. 5. PresstheDISPagaintoexittimesetmode.After5seconds,timesetmodewillexit automatically.
Note: Ifthetimemodeissetto12HOURinthesetupmenu,continueturningthe VOLUMEcontroltochangebetweenAM(A)andPM(P).
Note: If P-CLOCK ON is selected in the setup menu, the clock will be displayed inthecenteroftheLCDinlargecharacterswhentheunitisturnedoffwhile theACC.ison.
RESET: UseaballpointpenorthinmetalobjecttopresstheRESETbutton(18).Theunitwillreturntothefactorydefault settings. The reset button should be activated for the following reasons: Function buttons do notoperate,orerrorsymbolisonthedisplay.Torecoverfactorydefaultsettings,pressandholdtheMODEbutton(4)formorethan3seconds.TheLCDwilldisplayEEP-INITandallsettingswillreturntotheoriginalfactoryvalues.
AUDIO MENU:PresstheAUDIO/MENUbutton(3)onthecontrolpaneltoaccesstheAudioMenu.You cannavigate through theAudioMenu itemsbypressing theAUDIO /MENUbutton repeatedly.Oncethedesiredmenu itemappearson thedisplay,adjust thatoptionby turning theVOLUMEcontrol (1)within5seconds.TheunitwillautomaticallyexittheAudioMenuafter5secondsofinactivity.Thefollowingmenuitemscanbeadjusted:
BASE LEVEL: UsethevolumecontroltoadjusttheBasefrom-6to+6.
TREBLE LEVEL: UsethevolumecontroltoadjusttheTreblelevelrangefrom-6to+6.
BALANCE:Use the volume control to adjust the Balance between the left and right speakers from 12L (full left) to 12F (fullfront).
FADER: Use the volume control to adjust the Fader between the rear and front speakers from 12L (full left) to12F(fullfront).
VOLUME LEVEL:Usethevolumecontroltoadjustthevolumelevelfrom0to46.

FOUR WINDS INTERNATIONAL
CONTROLS AND OPERATIONS
41
ECLIPSE GPS NAVIGATION SYSTEM OPTION DIESEL
Alwaysoperatethevehicleinasafemanner.Donotbedistractedbythenavigationsystemwhiledriving.Failuretodosocouldresultinanaccidentorcollision,resultingindeathorinjury.
1. [Source/pwr] Button -Briefpressingswitchestheitemsintheaudiomode.Pressingmore thanonesecondturnstheaudiomodeOFF.Pressingmorethan5secondsturnsthepower completelyOFF. 2. [MODE] Button - Brief pressing switches to the preset channel select mode or CD track selectmode. 3. [MUTE] Button-Activatesanddeactivatesmute. 4. [BAND] Button-Switchesradiobands. 5. [ENTER] Button-Entersselecteditem. 6. [SELECT Right/Left} Button - Selecting radio station and CD tracks. Select setting items infunctionmode. 7. [VOL] Rotary Knob - Adjusts volume in preset channel select mode or track select mode, selectitemyouwant. 8. [SELECT Upper/Lower] Button-SelectsthefolderinCD{MP3/WMA}mode. 9. [ OPEN/EJECT] Button-Briefpressingejectsdiscoropens/closesthefrontpanel. Longerpressingtiltsthefrontpanelbyonestepateachpressingofthebutton. 10. [FUNC] Button-BriefpressingswitchesitemsintheFUNCTIONmodeateachpressingof thebutton. 11. [TEXT] Button-BriefpressingswitchestitledisplayofAudiodisplay. 12. [SCREEN] Button-BriefpressingswitchesPNDdisplaybetweennavigationfunctionsand audiofunctions.LongerpressingturnsthePNDoff. 13. [RELEASE] Button-DetachestherightendofthePNDdisplayoff. 14. [RESET] Button -Resetstheunit.
Audio Display
1
8
4
9 10 11 12 3 14 Microphone
7 5 2 6
PND Display
USB Connector

FOUR WINDS INTERNATIONAL
CONTROLS AND OPERATIONS
42
KEYPAD KEYLESS ENTRY SYSTEM Programming The Keyless Entry System Transmitter
3 Button Transmitter Programming Note: Thismodewillonlyretainthelast4remotetransmittersprogrammed. Ifthetransmittermemoryisexceeded,thesecuritysystemwillstartdeleting transmittersfrommemoryinchronologicalorder.
1. TurntheignitiontotheONposition. 2. Within 15 seconds, push the Program Button located on the back of the housing 3 times.TheonboardLEDwillbeflashingandthebeeperwillemitalongchirptoindicate thesystemisinTransmitterProgrammingmode. 3. PressandholdanybuttononthetransmitteruntiltheonboardLEDturnsonfor2seconds andthebeeperrespondswithaconfirmingchirp,indicatingthesignalhasbeenstored intomemory 4. Ifyouhaveadditionaltransmitters(upto4)thatneedtobeprogrammed,repeatstep3for eachtransmitter.
EXIT:TurntheignitionswitchtotheOFFpositionorleaveitfor15seconds.TheonboardLEDturnsoffandthebeeperwillemit3longchirpstoconfirmexit.
4 Button Transmitter Programming Note: Thismodewillonlyretainthelast4remotetransmittersprogrammed. Ifthetransmittermemoryisexceeded,thesecuritysystemwillstartdeleting transmittersfrommemoryinchronologicalorder.
1. TurntheignitiontotheONpositionwithin15seconds.. 2. Push the Program Button located on the back of the housing 5 times. The on-board LED willbeflashingandthebeeperwillemitalongchirptoindicatethesystemisinTransmitter Programmingmode. 3. PressandholdanybuttononthetransmitteruntiltheonboardLEDturnsonfor2seconds andthebeeperrespondswithaconfirmingchirp,indicatingthesignalhasbeenstoredinto memory 4. Ifyouhaveadditionaltransmitters(upto4)thatneedtobeprogrammed,repeatstep3for eachtransmitter.
EXIT:TurntheignitionswitchtotheOFFpositionorleaveitfor15seconds.TheonboardLEDturnsoffandthebeeperwillemit3longchirpstoconfirmexit.
Programming The Keypad Button Chirp On / Off 1. Entertheusercode. 2. Within5seconds,pressandholdtheLOCKbuttonfor threeseconds.
1 Beep from the keypad = Keypad chirp ON 3 Beeps from the keypad = Keypad chirp OFF

FOUR WINDS INTERNATIONAL
CONTROLS AND OPERATIONS
43
Programming The User Code Note: Thedefaultusercodeis"54321"
Note: Thismodewillonlyretainthelast4remotetransmittersprogrammed.Ifthe transmittermemoryisexceeded,thesecuritysystemwillstartdeletingtransmitters frommemoryinchronologicalorder.
1. Enter the program code "12345" on the keypad. The beeper will emit a long chirp to confirm thecorrectcodewasentered. 2. Enter a new 4 to 6 user code on the keypad. Do not use "1234". 3. Finish by pressing the LOCK key on the keypad. 1 long beep with 2 short beeps will confirm thenewusercodehasbeenstoredintomemory. 4. Ifyouhaveadditionalusercodes(upto4)thatneedtobeprogrammed,repeatsteps2and3 foreachnewusercode.
Exit: Press and hold the LOCK key for 1 second or if 15 seconds of inactivity occurs during the above steps, the unit will revert back to the last successfully stored code. 3 long beeps confirm exit.
Note: For complete operational instructions, please consult the owner's manual provided forthisproduct.
AUTOMATIC HYDRAULIC POWER LEVELERSWithanyhydraulicapplication,holdingpositiononacylindermustbedonewithsafetyinmind.Failure inthesystemmaycausetheleg(s)toretractorextendonitsown.When working under or near the motor home, always use jack stands of appropriate ratingtosupporttheweightofthemotorhome.
Readtheentireoperatorsmanualandallprecautionspriortooperatingthisequipment.
Do not use the jacks to change the tires. The system is designed as a leveling and stabilizing system and is notmeanttoliftthemotorhomeofftheground.
Donotoperateanysystemfunctionswhileanyoneisunderthemotorhome.
Donotattempttooperatethesystemwhilethemotorhomeisinmotion.
Never place hands or other parts of the body near hydraulic leaks. Oil may penetrate skin causing severe injury.Wearsafetyglasseswheninspectingorservicingthesystemtoprotecteyesfromdirt,metalchips,orleaks, etc. Follow all other applicable shop safety practices.
The motor home should be parked on a fairly level surface. Ensure that there are no obstructions in the extend or retract paths of the jacks. If the surface is soft due to saturation or heat, place boards under the jacks to distribute the weight over a larger area. Using a board which measures approximately 2' wide by 2' in length isrecommended.Ensurethefronttiresarepointingforwardandnottotheleftorright.
Note: Refertomanufacturer’soperationsmanualbeforeoperating.
The automatic hydraulic power leveling system allows quick and easy leveling of the motor home from the driver’s seat by utilizing the system touch panel. The following instructions are general operatinginstructions.

FOUR WINDS INTERNATIONAL
CONTROLS AND OPERATIONS
44
Automatic Leveling And Retraction ProcedureMake sure there are no obstructions in the extend or retract paths of the jacks. Keep all people clear of the vehicle while operating the leveling system.
DonotallowexcessivemotioninthemotorhomeduringtheAuto-Leveloperation.Thiscouldcausethesystemtolevelimproperly.
1. TURN ON POWER.Thepowertotheunitmustbeturnedon.Youneedtohavetheignition key in the ON position and the parking brake must be set to turn the control panel on. Push thePOWERtouchpadtoengagepower.Thepowertouchpadshouldbelitwhenpoweris on.
2.. PRESS THE AUTO-LEVEL TOUCH PAD.Thesystemwillautomaticallylevelyour vehicle. The control panel will send out a series of beeps to let you know that AUTO-LEVELisoperating.Whencompleted,thepanelwillsignalasuccessfulAutoLevel. Aftertenminutes,thepanelwillentersleepmode.
3. RETRACTING THE JACKS. YourEqualizerSystemprovidesyouwiththeabilitytoretract the jacks using the ALL RETRACT feature or the UP touch pads for each jack. Press and release ALL RETRACT touch pad. All jacks will automatically retract. The jacks are retracted when all of the LED'S have gone out. Depending on the vehicle, full retraction may take up to 90seconds.
Note: Thenull,orlevelpositionhasbeenpresetatthefactory.However,ifyouwantto changethesetting,orifthemotorhomehasbeendormantformorethan60days you may need to reset the null. Refer to the automatic hydraulic levelers owner's manualfordetailedinformationregardingtheproperprocedurestodothis.
TURN ON POWER PRESS AUTO-LEVEL TOUCH PAD RETRACTING THE JACKS
CAUTION

FOUR WINDS INTERNATIONAL
CONTROLS AND OPERATIONS
45
Emergency Retraction ProcedureFollowing manual override operation, failure to return all valves to normal position may result in one or more jack legs drifting down from their retracted (stowed) position. For cartridge valves, rotate the center screw fully counter-clockwise.
In the event of electrical failure, the jack leg(s) may be retracted manually by following the procedure below.
ManualOverrideforMTEBi-Rotational*StylePumps(Thesecanbeidentifiedbythepresenceof2motorsolenoidsand2motorleads)
1. Theindividualcartridgevalvesareclusteredtogetheronthesideofthepumpmanifold. (Theyarelabeled1thru4)Locatethescrewsontheappropriatecartridgevalve(s). Using a small flat blade screwdriver, turn the screw(s) clockwise until all the way in.
Note: Thenormaloperatingpositionofthescrewinthecartridgevalveisthe counter-clockwise ‘out’ position. The only time the valve should be shifted manually is when attempting to operate jack(s) via manual override.
2. Remove the black plastic cap from the top of the motor. Use a small flat head screwdriver. Place the drill with the 7/16" ( 1 1 mm) socket on the manual override shaft located at the topofthemotor. 3. To retract your jack(s) run the drill in the counter-clockwise direction. 4. To extend your jack(s), run the drill in the clockwise direction. 5. Whenmanualoverrideiscomplete,returnthecartridgevalve(s)tothenormalpositions. Reinstall black plastic cap on motor.
Hydraulic Pump Function WiringLOCATION EXTEND T RETRACT BJack #1 left front............Brown.................... Brown/BlackJack #2 right front..........White..................... White/BlackJack #3 left rear.............Orange................... Orange/Blackjack #4 right rear............Yellow.................... Yellow/Black
CAUTION
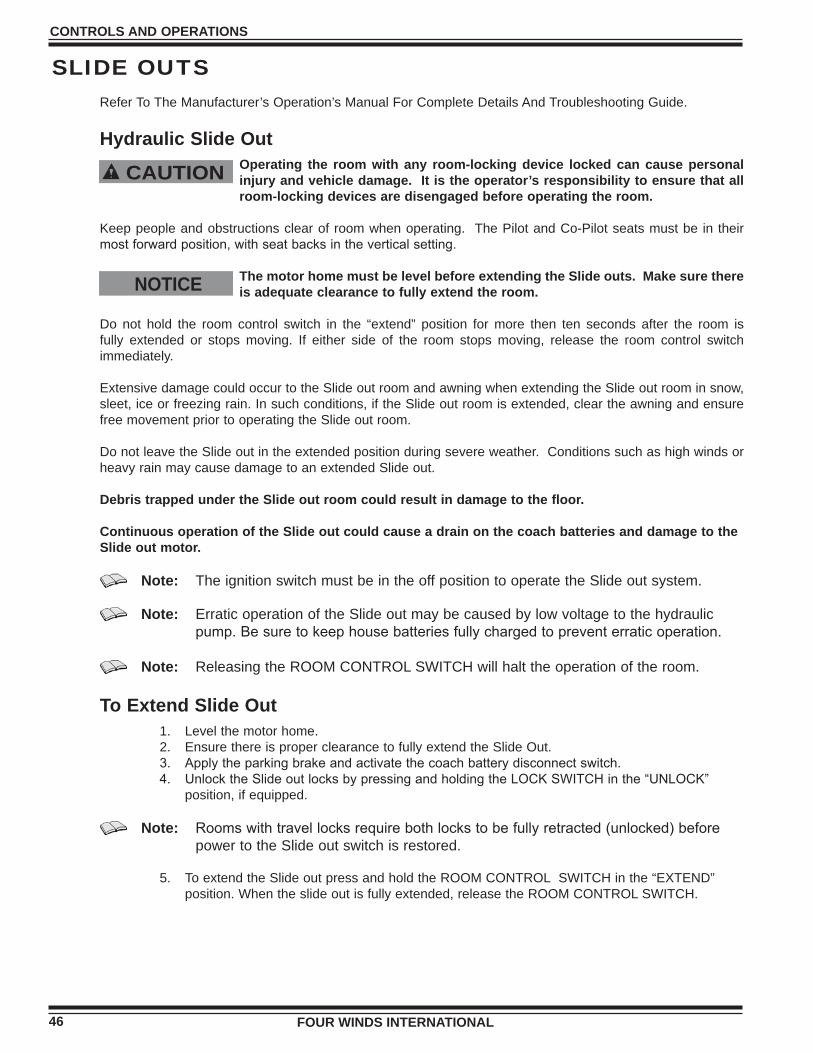
FOUR WINDS INTERNATIONAL
CONTROLS AND OPERATIONS
46
SLIDE OUTSReferToTheManufacturer’sOperation’sManualForCompleteDetailsAndTroubleshootingGuide.
Hydraulic Slide OutOperating the room with any room-locking device locked can cause personal injury and vehicle damage. It is the operator’s responsibility to ensure that all room-locking devices are disengaged before operating the room.
Keeppeopleandobstructionsclearofroomwhenoperating.ThePilotandCo-Pilotseatsmustbeintheirmost forward position, with seat backs in the vertical setting.
The motor home must be level before extending the Slide outs. Make sure there is adequate clearance to fully extend the room.
Do not hold the room control switch in the “extend” position for more then ten seconds after the room isfully extended or stops moving. If either side of the room stops moving, release the room control switchimmediately.
ExtensivedamagecouldoccurtotheSlideoutroomandawningwhenextendingtheSlideoutroominsnow,sleet,iceorfreezingrain.Insuchconditions,iftheSlideoutroomisextended,cleartheawningandensurefreemovementpriortooperatingtheSlideoutroom.
DonotleavetheSlideoutintheextendedpositionduringsevereweather.ConditionssuchashighwindsorheavyrainmaycausedamagetoanextendedSlideout.
Debris trapped under the Slide out room could result in damage to the floor.
Continuous operation of the Slide out could cause a drain on the coach batteries and damage to the Slide out motor.
Note: TheignitionswitchmustbeintheoffpositiontooperatetheSlideoutsystem.
Note: ErraticoperationoftheSlideoutmaybecausedbylowvoltagetothehydraulic pump. Be sure to keep house batteries fully charged to prevent erratic operation.
Note: ReleasingtheROOMCONTROLSWITCHwillhalttheoperationoftheroom.
To Extend Slide Out 1. Levelthemotorhome. 2. EnsurethereisproperclearancetofullyextendtheSlideOut. 3. Apply the parking brake and activate the coach battery disconnect switch. 4. Unlock the Slide out locks by pressing and holding the LOCK SWITCH in the “UNLOCK” position,ifequipped.
Note: Rooms with travel locks require both locks to be fully retracted (unlocked) before powertotheSlideoutswitchisrestored.
5. ToextendtheSlideoutpressandholdtheROOMCONTROLSWITCHinthe“EXTEND” position.Whentheslideoutisfullyextended,releasetheROOMCONTROLSWITCH.
CAUTION
NOTICE

FOUR WINDS INTERNATIONAL
CONTROLS AND OPERATIONS
47
To Retract Slide Out 1. EnsureproperclearancebyclearinganyobstructionintheSlideoutarea. 2. Apply the parking brake. 3. ToretracttheSlideout,pressandholdtheROOMCONTROLSWITCHinthe“RETRACT” position.WhentheSlideoutisfullyretracted,releasetheROOMCONTROLSWITCH.
Note: WhenretractingSlideouts,adelaymaybepresentuntilthehydraulicpumpbuilds enoughpressuretopulltheroomin.Justcontinuetopresstheswitchuntilthe roomretracts.
4. Lock the Slide out locks by pressing and holding the LOCK SWITCH in the "LOCK" position, ifequipped.
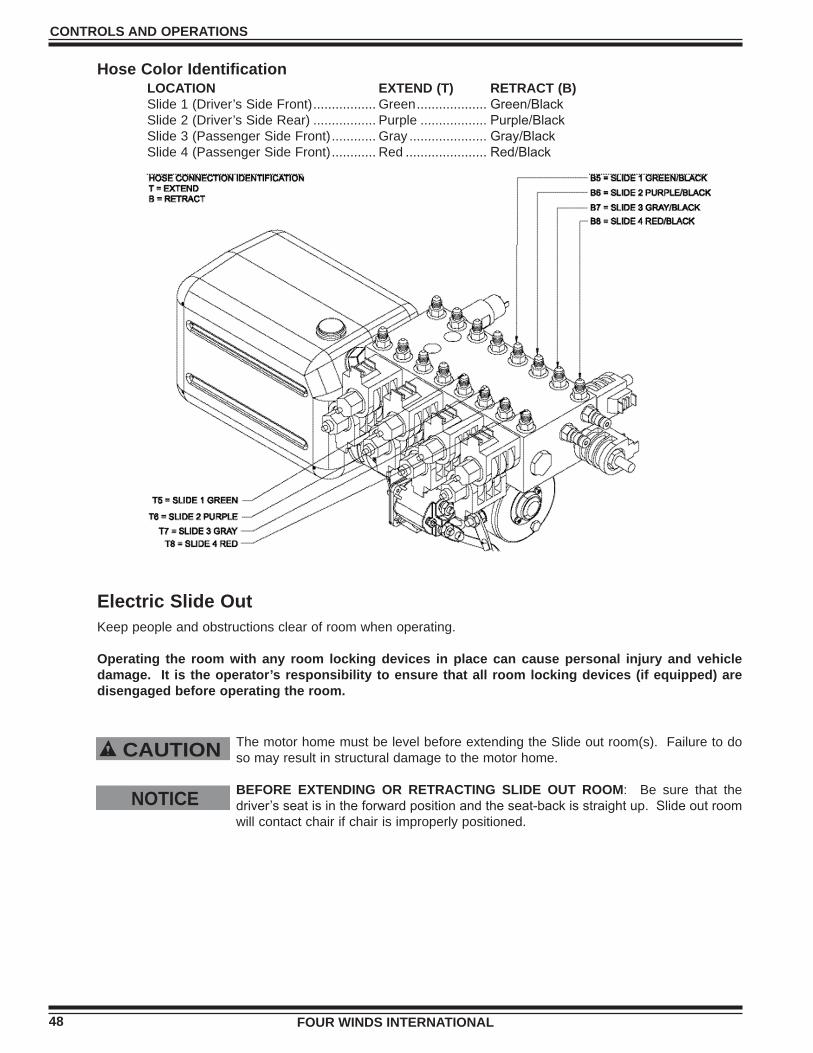
FOUR WINDS INTERNATIONAL
CONTROLS AND OPERATIONS
48
Hose Color Identification
Electric Slide OutKeeppeopleandobstructionsclearofroomwhenoperating.
Operating the room with any room locking devices in place can cause personal injury and vehicle damage. It is the operator’s responsibility to ensure that all room locking devices (if equipped) are disengaged before operating the room.
ThemotorhomemustbelevelbeforeextendingtheSlideoutroom(s).Failuretodosomayresultinstructuraldamagetothemotorhome.
BEFORE EXTENDING OR RETRACTING SLIDE OUT ROOM: Be sure that thedriver’s seat is in the forward position and the seat-back is straight up. Slide out room willcontactchairifchairisimproperlypositioned.
NOTICE
CAUTION
LOCATION EXTEND (T) RETRACT (B)Slide1(Driver’sSideFront)................. Green................... Green/BlackSlide2(Driver’sSideRear)................. Purple.................. Purple/BlackSlide3(PassengerSideFront)............ Gray..................... Gray/BlackSlide4(PassengerSideFront)............ Red...................... Red/Black

FOUR WINDS INTERNATIONAL
CONTROLS AND OPERATIONS
49
To Extend Slide Out Note: Make sure that there is adequate clearance to fully extend the room.
1. Apply the parking brake 2. Toextendtheroom,pressandholdtheROOMCONTROLSWITCHinthe“OUT”position. Whentheroomisfullyextended,releasetheROOMCONTROLSWITCH.
Note: ReleasingtheROOMCONTROLSWITCHwillhalttheoperationoftheroom.
To Retract Slide Out 1. Make sure to clear any obstruction in the slide-out area, and set the parking brake. 2. Toretracttheroom,pressandholdtheROOMCONTROLSWITCHinthe“IN”position. Whentheroomisfullyretracted,releasetheROOMCONTROLSWITCH. 3. Install the room locking devices if equipped. 4. Iftheroomwillnotretract,refertothe“ManualRetractProcedure”.
Electric Slide Out - Manual Room Retraction Procedure Note: PleaseconsultThorMotorizedServicesforinformationregardingthisprocedure.

FOUR WINDS INTERNATIONAL
CONTROLS AND OPERATIONS
50
WINDOWSTo avoid exhaust gas entry into the motor home, keep windows closed when the chassis or generator engines are running.
All the windows that open in the motor home are operated by sliding them back and forth. To operate, pivot the latch to release it from the locked position, and slide the window to open. When closing, slide the window fully closed, and pivot the latch back to the fully locked position. The screens will also slide open and closed ifrequiredforanemergencyexit.
Note: Check window sealant during normal washing and per the Care And Maintenance sectionofthismanual.
DOORS, DRAWERS AND STORAGE COMPARTMENTSMake sure before operating the motor home, that all cabinet doors and drawers are closed, and cabinet contents are secure. Retract and secure sliding doors in the bath area, as well as the bath door, to prevent noise and/or damage while traveling.
Store items in the areas designated for storage. DO NOT store anything in the area reserved for the converter and electrical panels or the water tank and pump.
Cabinetandclosetdoorsinthemotorhomehavedoorfasteners,orpneumaticstops,whichpreventthemfromaccidentally opening during travel. Drawers throughout the motor home have travel stops which keep them fromslidingoutwheninmotion(undernormaldrivingconditions).
Bed Storage (Some Models)Use caution when lowering the bed to keep hands and fingers at the end ledge provided; and not on the side or further back than necessary, where you may encounter pinch points.
SLEEP NUMBER BEDSleepNumberBedbySelectComfort™usesuniqueairchambersdesignedtoprovideagentlecushionofsupport.BothsidesofthebedcanbeindividuallyadjustedtotheprecisecomfortleveleachpartnerprefersbyusingtheFirmnessControlSystem™.
FluctuationsoftheSleepNumber®arenormal,andmayoccurwithanyofthefollowing: • Changes in body position on the bed (lying down vs. sitting up). • Changes in the amount of weight on the bed (one person or two people). • Changes in barometric pressure or temperature.
Note: It is important to be lying on the bed, in your normal sleep position, when checking or making changes to your Sleep Number®.
Note: ThecoachmustbepluggedintotheShorePowerorInverterPowersuppliedif equipped,forthesleepnumberbedtofunction.
CAUTION

FOUR WINDS INTERNATIONAL
CONTROLS AND OPERATIONS
51
Using the Firmness Control System™: • The Firmness Control System™ is designed to make changes to one side atatime.WhentheSleepNumber®disappearsfromthewiredremote display,changesmaybemadetotheotherside. • To adjust the mattress to a firmer setting, push the UP arrow on the wired remote. • To adjust the mattress to a softer setting, push the DOWN arrow on the wiredremote. • Some Firmness Control System™ pump models may cycle ON and OFF severaltimesastheyfindtheSleepNumber®.Dependingonwhich digital remote you have, a flashing or blank display means adjustments are stillinprocess. • The Firmness Control System™ may be heard while making changes to the SleepNumber®.
Note: Fordetailedinformationregardingtheoperationandmaintenanceof the Select Comfort Mattress, refer to the manufacturer's operations guide.
ELEVATED BEDS AND ELECTRIC BED LIFT SYSTEMSEach vehicle with elevated beds has a warning label listing the maximum loadcapacity.Failuretocomplywiththeloadcapacitycouldcausebedfailurewhichmayresult in injury.Elevatedbedsmaypresenta fallhazardwhichmay result in injury.PleaseconsulttheOwner’sManualformoreinformationregardingelevatedbedsandtheuseofbedrails.
Standard Elevated Beds–VariousFourWindsproductsareequippedwithstandardbuilt-inelevatedbedsorbedloftareas.Thesebedscanbeupwardsof4to5feetabovethefloorlevelandareoftenenclosedonone,two,orthreesidesandsometimesevenpartiallyonafourthside.Becausetherearesomanypotentialusersanddifferenttypesofelevatedbeddesigns,elevatedbedsarenotequippedwithbedrails.
Use of Bed Rails–Wefeelthatyou,asthecustomer,arebestequippedtodetermineifabedrailsystemisnecessaryorbestforyoubasedonyourintendeduses,theactualusersoftheelevatedbeds,andthecomfortleveloftheusers.
For thosecustomerswhowouldpreferusinganelevatedbedwithabed rail, therearenumerousbed railstyles,sizes,heights,anddesignsavailable,eveninthestyleofbumpers,whichcanbepurchasedatvariousretaillocationsand/orontheinternet.
When installing a bed rail please make sure that you follow the manufacturer’s installation instructions carefully and that you take in to account the size and height of the mattress (either originally installed by Four Winds or laterreplacedbyyou)sothattherailsaretheappropriateheightabovethetopofthemattress.This isimportant because residential mattresses differ in size from the RV mattresses originally installed by FourWinds. Please also make sure that the bed rail you select allows for adequate room to get in and out of the elevatedbedafterinstallation,especiallyintheeventofanemergency.
Tips for Safe Usage: • Please use sound judgment when allowing children to sleep in any style of elevated bed. Generally,itisnotsuitableforchildrenundertheageof6tosleepinanelevatedbedorbed loftarea. • No more than one person should be in an elevated bunk bed at once and make sure you follow the weight restrictions posted on the warning label near the bunk beds. No more thantwopeopleshouldbeinafrontcaboverbed(onlyavailableonClassCmotorhomes).
35
CAUTION

FOUR WINDS INTERNATIONAL
CONTROLS AND OPERATIONS
52
Tips for Safe Usage: • Discuss proper usage of any elevated bed/electric bed lift system with your children and make suretheyaresupervisedifplayinginthebedroom/sleepingareaofthemotorhomewith elevatedbeds.Pleasedonotallowhorseplayonorundertheelevatedbedsandnoitems such as hooks, belts, jump ropes, or towels should hang from any part of the elevated bed. • Place a night light in the bedroom/sleeping area so users can see at night when getting in and outofthebeds. • Do not allow children to operate the rear cargo area electric bed lift systems in Toy Haulers. Theloweringandraisingoftheelectricbedsshouldbeonlyconductedbyanadult.No personshouldbeontheelectricbedswhenbeingloweredorraised.
Ifyouhaveanyquestionsaboutelevatedbeds,ToyHaulerelectricbedliftsystems,orbedrailspleasecontactThorMotorizedServicesCustomerServiceDepartment.
FURNITUREDo not occupy beds or any other seats that are not equipped with safety seat belts while the motor home is in motion. Do not use a seat belt on more than one person.
The sleeping accommodations in this motor home are designed for occupancy only while the motor home is parked. All occupants in this motor home must be seated at a designated seating position and must wear seat belts at all times while this motor home is in motion. Failure to do so may result in serious injury.
Safety belts and seats can become hot in a vehicle that has been closed up in sunny weather; they could burn a small child. Check seat covers and buckles before you place a child anywhere near them.
Jack Knife SofaSOFA TO SLEEPER • Unlatch and remove sofa arms ( if equipped). • Raise the sofa seat base until the seat base and backrest form a “V” shape by lifting up from the centerofthesofajustbelowtheseatcushions. • Pull out and push down on the seat base until the seat base is flat. • Fold the seat belts out of the way.
SLEEPER TO SOFA • Lift the seat base up until the seat and back rest from a “V” shape. • Push back and down on the seat base. • Position the seat belts for use. • Replace the back rest cushions.
FOUR WINDS INTERNATIONAL
CONTROLS AND OPERATIONS
53
Space Saver SofaSOFA TO SLEEPER • Unlatch and remove sofa arms ( if equipped). • Raise the sofa seat base until the seat base and backrest form a “V” shape by lifting up from thecenterofthesofajustbelowtheseatcushions. • Pull out and push down on the seat base until the seat base is flat. • Fold the seat belts out of the way.
SLEEPER TO SOFA • Lift the seat base up until the seat and back rest from a “V” shape. • Push back and down on the seat base. • Position the seat belts for use. • Replace the back rest cushions.
Hide -A- Bed SofaSOFA TO SLEEPER • Grasp the front metal bar and lift up, pulling out on the bar slightly until the leg of the bed is restingonthefloor. • Fold the seat belts out of the way. • When the legs of the bed are on the floor another lifting bar will be exposed, grasping and pullingtheliftbarwillopenthebedfully.
SLEEPER TO SOFA • Remove all bedding from the hide-a-bed. • Grasping the foot of the hide-a-bed in the center using the metal lifting bar, lift the front portion of the lifting bar to raise and then lower the hide-a-bed back into the sofa base. • Position the seat belts for use. • Replace the seat cushions.
Air Hide A Bed Sofa ( Drawer Storage Below) • Pull back rest section of sofa out and over seat cushions. • Fold legs up. • Rotate till legs rest on floor. • Unfold air mattress, plug in, fill with air.
Note: Donotfoldtheairmattressupinthesofa.Damagewilloccur.
Air Hide A Bed ( No Drawer Storage Below) • Remove back rest cushions. • Pull seat cushion section up and out • Rotate bottom of seat cushion out and fold legs down. • Fold back rest down to create platform. • Unfold air mattress, plug in, fill with air.
Note: Donotfoldtheairmattressupinthesofa.Damagewilloccur.
Barrel ChairThe barrel chair has controls on the bottom right and left sides under the chair skirt that controls the swivel andsidetosideactionofthechair.

FOUR WINDS INTERNATIONAL
CONTROLS AND OPERATIONS
54
Euro Recline With OttomanTo recline, sit down, grasp the armrest’s and lean back to recline. Since a seat belt is not provided, do not use theeuroreclinerwhileintransit.
DinetteBoothThedinettewillseatfourpeople.Storageand/orvarioussystemscomponentscanbeaccessedfromabovebyremovingtheseatcushionsandliftingtheseatsupports.Free StandingSincethefreestandingdinettechairsarenotsecuredtothefloor,andnotequippedwithseatbelts,theyshouldnotbeoccupiedwhilethemotorhomeisinmotion.Thesechairsshouldbestoredsecurelywhilethevehicleisinmotion.PedestalThedinettecanalsobeconvertedintoanadditionalbedifrequired.Toconvert,liftthetabletopoffofthetwosupportposts.Removethesupportpostsfromthefloorandlaythemdownbetweentheseats.Insertthetabletopbetweentheseatsontheledgesprovided.LoosentheseatcushionfromtheVelcrofastenersandslideeachtogethertoformthebed.Reversethisprocesswhenreconvertingtothedinetteconfiguration.Wall MountedThisdinettecanalsobeconvertedintoanadditionalbed.Lifttheaislesideofthetableandpinchinthepinsonthe table leg to collapse the leg. Unhook from side wall and swing into place. The table supports on the dinette base.LoosentheseatcushionfromtheVelcrofastenersandslideeachtogethertoformthebed.Reversethisprocesswhenreconvertingtothedinetteconfiguration.
Lounge TableThistableisstoredinafoldedpositionnexttothebarrelchair.Toraiseforuse,pulloutonthebottomtoreleaseitfromitssecuringcatch,andswingup.Whenraised,reachunderthetableandswingthesupportinglegdownuntil it locks into position. Adjust the length of the support leg, so that the table will be level when resting on it. To adjust the support leg length, pull back on the spring clip, releasing the detent from the adjustment hole it is presently in. While holding the spring clip back, slide the leg to the desired length, then release the spring, allowing the detent to lock into the new hole.
To fold back for storage, reverse the previous procedure; shortening the support leg, and folding the leg up againstthebottomofthetabletop.Lowerthetabletop,andpushinonthebottomtosecureitintothecatchthat keeps the table from moving while traveling.
Pilot And Co-Pilot SeatsPilot and Co-Pilot seats must be locked in a forward facing position with seat belts fastened while the motor home is in motion. Avoid seat rotation while in transit.
Reclining BackA control lever on the left or right side of seat controls the angle of the back rest. Lift up on the lever, lean back to position seat and then release the lever to lock the back rest in place. To return the backrest to upright position, liftuponthecontrol lever.Itwillautomaticallyreturntoitsnormaluprightposition.To prevent damage, be sure to return the seat back to it's upright position before operating the slide out rooms.Seat Swivel Acontrolleveronthesideofseatcontrolstheswivelfunction.Pushtheleverforwardtoreleasethedetentonthe swing mechanism. Once the lock is released, the seat may be rotated either left or right.Forward And Back AdjustmentThe forward and back sliding action is controlled by a lever on the lower left side of the seat. To adjust, pull the lever outward to release the latch, and slide the seat to the desired position. Make sure the seat locks into the positionyouhaveselected.Arm RestsArmrestscanberotatedupandoutofthewaywhennotrequired.

FOUR WINDS INTERNATIONAL
CONTROLS AND OPERATIONS
55
Note: Itmaybenecessarytoadjusttheslidingpositionoftheseatandthetiltof the back, to enable the seat to be rotated without obstruction from sidewalls oritemstotherear.Somemodelsdonotallowcompleteseatrotation.
ENTRY DOORTheentrydoorconsistsofbothanexteriordoorandascreendoorusedforventilationwhenthemotorhomeis parked.
DO NOT attempt to drive the motor home with the doors open. DO NOT drive the motor home with the outer door open and the screen door closed. The doors may be damaged, and it is a safety hazard.
When driving, it is a good idea to keep the door locked to prevent uninvited entrance from the outside when stopped. Two types of locks may be provided with the outer door. The handle lock for normal security, and a dead bolt lock for additional security. The dead bolt must be locked while driving.
Thescreendoorcanbeattachedtotheouterdoor.Aslidingpanelonthescreendoorpermitsaccesstothehandle on the outer door to prevent unnecessary handling of both doors. Separate keys are provided for both types of door locks. It is a good idea to keep a record of the key numbers in a safe place, should it become necessary to have duplicate keys made.
ENTRY STEPMake sure before exiting the motor home, that the step is activated and/or extended. Due to the height of the motor home, you may accidentally slip or fall if attempting to exit without use of the step. If the step will not operate, use extra care when exiting. Never activate the step when someone is using it, and be sure to keep hands, feet, children, and pets away from the mechanism when activated.
If the motor home is driven with the step in the extended position, there is the possibility of causing major damage to both the step and the motor home.
The entry step features amber lighting under the step, and automatic retraction with the ignition key in the ON position.Thepowerswitchfortheentrystepislocatedonthepassengerarmrest.
STEP OPERATION: 1. Withtheentrancedooropen,turntheoverrideswitchtotheOFFposition.Close the door. The step should retract and lock in the ‘up’ position. 2. Open the door. The step should extend and lock in the ‘down’ position with the understeplightilluminated.
THE UNDER STEP LIGHT OPERATION: 1. ThelightisONwhenthestepisextended. 2. ThelightisOFFwhenthestepisretracted. 3. TurntheoverrideswitchtotheONposition.Thestepshouldremainintheextendedposition withtheundersteplightOFFwhenthedoorisclosed. 4. WiththeoverrideswitchturnedON,thestepextended,andtheentrancedoorclosed,turn thevehicleignitionON.Theignitionoverridesystemwillgointoeffectandthestepwill automaticallyretract. 5. Turn the vehicle ignition OFF and open the door. The step will extend and lock in the ‘down’ position. This is the ‘Auto Extend’ feature. When the vehicle ignition is turned ON, the step will alwaysactivatewiththedoormovement,regardlessoftheoverrideswitchposition.
Note: IftheoverrideswitchisOFFandthestepisextendedandthedoorisleftopen, thelightwillturnOFFafterfiveminutes.Theundersteplightisnotavailableonall stepmodels.
NOTICE
STEP
CAUTION

FOUR WINDS INTERNATIONAL
CONTROLS AND OPERATIONS
56
Note: Iftheyellowwirefromthefour-wayconnectorisnotconnectedtoanignition powersource,theignitionsafetysystemwillbeinoperativeandthestepwillremain intheextendedposition.Inthiscase,theoverrideswitchmustbeturnedOFFforthestep toretract.
STORAGE COMPARTMENTSWhen closing the storage doors make sure that hands and fingers are clear of pinch points. Make sure all compartment doors are completely closed, latched and contents are secure prior to moving the motor home.
The motor home is equipped with numerous outside storage compartments. Each door can be locked for security,exceptforthePropaneGascompartment.
Note: Ensureproperclearanceisavailableforthedoortoopen.
When storing items within the compartment bays, do not overload them with heavy densely packed items, remember thatanyweightadded to themotorhomeaffects theoverallweightof thevehicle. Ensure thatside-to-sideweightiscomparabletodistributetheloadevenly.
REAR LADDER/ROOF ACCESSDo not climb on or walk on the roof while wet. The roof could be very slippery causing you to fall, which can result in serious injury or death. Do not use the roof as an observation platform or storage area, as it is not designed for these purposes.
Theexteriorrearladderprovidesaccesstotheroofformaintenanceoftheroofandroofmounteditemsonly.Whenascendinganddescendingtheladder,ensuretheladderisclearofdebris,suchaswater,iceandotherslipperysubstances.Alwayswearshoesthatprovidegoodtraction,anddonotwearsandalsorothertypesofslip-onfootwearwhenascendingordescendingtheladder.
Note: Therearladdermaximumweightcapacityis250lbs.
AWNINGSIf threatening weather approaches, you need to retract all awnings. If the awnings are rolled up wet, open them back up as soon as possible to allow them to dry. Also, do not drive during periods of high winds.
Slide Out AwningTheSlideoutTopperwillautomaticallyopenandcloseastheslideoutroomopensandcloses.Becausetheawningislevel,watermaypuddleontopofthecanopy.Astheslideoutroomisclosedandtheawningrollsup,thesepuddlesmayspilloverthesidesoftheawning.
Note: FordetailedinformationregardingtheSlideoutTopperAwningrefertotheA&E Systems,SlideTopperInstallationAndOperatingInstructionsManual.
CAUTION
CAUTION

FOUR WINDS INTERNATIONAL
CONTROLS AND OPERATIONS
57
Manual Patio AwningExtend the Awning • Release both travel clamps (one on each arm, about midway up) • Using the provided awning rod, rotate the Safe-T-Lock lever up to the UNLOCK/OPEN position. • Hook the awning rod into the pull strap loop securely and pull the awning out. Once extended, slidethepullstraptotherightandwrapthestraparoundtheawningarm.
Note: Priortoclosing,removetiedownsandscreenifused.Ensurethatthetravelstrap and buckle are clear of the back channel.
Retract the Awning • Unwrap the pull strap from the awning arm and slide it slightly to theleft. • With one hand, firmly grip the awning pull strap and gently pull down,whileatthesametime,usingtheawningrodtorotatethe Safe-T-Lock to the UNLOCK/CLOSE position. • While holding the pull strap firmly, hook the awning rod into the pull straploopandslowlyallowtheawningtoretract,controllingthe speedwiththeawningrodinhand. • Once the awning has fully retracted, reconnect the travel clamps.
Automatic Patio AwningIn the event of power loss or awning motor failure the Automatic Patio Awning can be retracted as explained below. If you do not feel comfortable performing this procedure, contact the nearest authorized service center for assistance. Do not drive the motor home with the awning in the extended position.
Extend the Awning • Press and hold the remote switch (located near the entrance door) in the extend position until theawningisfullyopenorutilizetheremotecontrol,ifequipped.
Note: Donotpressmorethanone“EXTEND”buttonatthesametime.Awningwillnot work and/or may cause control box fuse to blow.
Note: Notallawningshaveacontrolbox.
Retract the Awning• Press and hold the remote switch in the retract position. When awning is fully closed release the switch.
Note: Donotpressmorethanone“RETRACT”buttonatthesametime.Awningwillnot work and/or may cause control box fuse to blow.
Manually Closing The Automatic Awning:Please consult your owner's manual for complete instructions or a qualified service technician.
Note: Theawningmustbeservicedbyaqualifiedservicetechnicianbeforeattemptingto opentheawningafterthisprocedurehasbeenperformed.
CAUTION

FOUR WINDS INTERNATIONAL
CONTROLS AND OPERATIONS
58
GARAGE AREA (AVAILABLE ON SELECT MODELS)Any motorized vehicle or any motorized equipment powered with flammable liquid can cause FIRE AND EXPLOSION OR ASPHYXIATION if stored or transported within the motor home.
To Reduce The Risk Of Fire, Explosion Or Asphyxiation: 1. Donotallowpassengerstorideinsidetheinternalcombustionenginevehiclestoragearea whilevehiclesarepresent. 2. Donotallowoccupantstosleepinthevehiclestorageareawhilevehiclesarepresent. 3. Doorsandwindowsinwallsofseparation(ifinstalled)mustbeclosedwhilevehiclesare present. 4. Run fuel out of engine after shutting off fuel at the tank. 5. Donotstoreortransportsupplementarymotorfuelwithinthisvehicle. 6. Ventilate the interior of the vehicle to reduce the risk of fire, explosion or asphyxiation. 7. Donotoperategasappliances,pilotlights,orelectricalequipmentwhenmotorizedvehiclesor motorizedequipmentareinsidethevehicle. 8. Donotoperatemotorizedvehicleswhilethereardoorisclosed.
Failure to comply could result in an increased risk of fire, explosion, asphyxiation, death or serious injury.
Loadinganinternalcombustionengineorothermaterialsinsideofcargostorageareawillaffecttheweightdistributionofthemotorhome.Addingweighttotheunitbehindtherearaxlewillreduceweighttothefrontaxle.Thismayadverselyaffecthandlingofmotorhomewhileintransit.Addingtheweightbehindtherearaxlealsoaddstotheweightloadontherearaxle.Donotoverloadtherearaxleweightrating.
Cohabitingwithaninternalcombustionenginevehiclecanbehazardoustoyourhealth.Fumesfromfuelcancausefire,explosion,orasphyxiation.
Fold-Down RampKeep all personnel clear of ramp working area while raising or lowering. Keep all objects clear of pinch points when raising and lowering platform.
Keepthe loadingareacleanandfreeofclutteranddebris.Keeptherampandfloordrybycleaningupallspilledwater,oilandfuelassoonaspossible.
Thefold-downrampgivescompleteaccesstothecargoarea.Whenlowered,therampallowseasyloadingofrollingcargo,bicycles,motorcycles,ATV’sandothersmallvehicles.
When loading and unloading always walk items up and down the ramp. Never ride a vehicle or bicycle on the ramp.
Alwayswearshoesthatprovidegoodtraction,anddonotwearsandalsorothertypesofslip-onfootwearwhenascendingordescendingtheramp.
Note: Refertothefold-downrampmanufacturer’soperationsmanualfordetailed informationregardingtheproperusageofthefold-downramp.
CAUTION

FOUR WINDS INTERNATIONAL
HEATING AND AIR CONDITIONING
59
HEATING AND AIR CONDITIONING
DASH PANEL HEATER AND AIR CONDITIONERTheairconditioningsystemcontainsrefrigerant134aunderhighpressureandshouldbeservicedbyqualifiedpersonnelonly.Improperservicemethodscouldcauseseriouspersonalinjury.
Themotorhome isequippedwithan integratedheating/airconditioningsystem.While thissystem ismuchmorepowerful than thoseused inpassengercars, it isnotcapableofheatingandcooling theentiremotorhome.Thissystemisdesignedtoprovidewindshielddefrostaswellasheatingandcoolingforthefrontseatoccupantsonly.Byfollowingtheoperatinginstructionsandtips,thisheater/airconditionerwillprovidemanyyearsofcomfortanddependableservice.
Theheater/airconditionerunitislocatedbeneaththedashonthepassengersideofthevehiclewithheatingand cooling coils located on the outside of the fire wall. In most modes of operation the unit takes fresh air fromoutside,andheatsorcoolsitbeforedischargingintothemotorhome.OnlywhenoperatedintheMAXA/C mode does the system take air from inside the motor home.
Control PanelThecontrolpanelenablesthedrivertocontrolthetemperature,volumeanddirectionoftheairdischargedfromtheheating/airconditioningsystem.
Oneofthebestwaysofcontrollingtemperatureisbychangingthe speed of the blower. The blower knob (left of center) provides 4 speeds in any mode except OFF. The center knob controls the temperature of the discharge air. Turn the knob to theright(redarea)forwarmerair,andtotheleft(bluearea)forcoolerair.
Operating FeaturesTheairconditioningsystemisdesignedtooperateinallmodesexceptVENT,FLOORandOFF.Thisprovidessignificantmoisture,dustandpollenremovalforenhancedpassengercomfort.UseMAXA/CandHIblowerfor quick cool down. A lower blower speed produces cooler air. To assist with cooling, close all windows and ventstohot,humidoutsideair.
Note: TheA/Cwillnotfunctioniftheoutsideairtemperatureisbelowapproximately40° Fahrenheit.
Note: Intheeventcontrolvacuumislost,thesystemisdesignedtodischargethroughthe defrostvents.
Toachievethemaximumcomfortinthemotorhome,theairmustbedirectedwhereitisneeded.Themodeswitch(rightofcenter)givesthedrivertheabilitytoselectwheretheairwillflow.
Keepthecondenserandradiatorfreeofbugsanddebris.Duringperiodsoflittleuse,operatetheA/Csystemmonthly to keep the compressor lubricated. Periodically inspect belts and hoses for wear and proper tension.
FOUR WINDS INTERNATIONAL
HEATING AND AIR CONDITIONING
60
Warranty/ServiceIfrepairsarenecessaryduringthetermsofthemotorhomewarranty,pleasecontactthenearestauthorizedFourWinds Internationaldealer forservice. In theevent repairsarenecessaryduring transit, contactFourWindsCustomerService.Certain individual partsof theHeatingandAirConditioningSystemsuchas thecompressor,dryerandcondenserarecoveredunderthechassismanufacturerwarranty.
Note: ComponentscoveredundertheFourWindsInternationalLimitedWarrantymust be Original Equipment Manufacturer (OEM) parts. The installation of after market components,orunauthorizedrepairsmayvoidthewarranty.
ROOF MOUNTED AIR CONDITIONERThemotorhomeisequippedwitharoofmountedairconditioner.Thisairconditioneroperatesfrom120VoltAConly,either fromshorepoweror theon-boardgenerator.Airconditioner functionsarecontrolledby thecomfortcontrolpanel.
Performance CharacteristicsYoucanexpecttoseeupto15to20degreedifferencesintemperaturebetweentheclosestA/Coutletventandthereturnairinletgrillundermostoperatingconditions.
Factors that can affect the performance of the cooling system:
• Use window and patio awnings when outside ambient temperature is above 95° F to help deflecttheSunloadduringtheheatoftheday.Ifwindowawningsarenotinstalledthenuse shadesorblindstodeflecttheSun. • Try to avoid using the cook top or oven when the ambient temperature is over 95° F. • Keep windshield covered when facing the afternoon Sun when parked. • The number of windows within the slide outs and the number of cold air registers to handle heatgainwhenfacingtheafternoonSun.
Return Air FiltersDO NOT USE HARSH CHEMICALS OR SOLVENTS TO CLEAN THE FILTER.
Cleanthereturnairfiltersasneededfortheenvironmentinwhichtheyoperate.Thereturnairfiltersareinside the air intake vent covers located on the motor home ceiling. Never operate the air conditioners withoutthereturnairfiltersinplace.Doingsomayresultinthebuild-upofdirtontheevaporatorcoreaffectingtheperformanceoftheairconditioner.
TO CLEAN: Removetheventcoverandfilterandwashinwarmsoapywater.RinsethefilterandcoverthoroughlywithfreshwaterandAllowtodry.Reinstallthefilterandcover.
NOTICE

FOUR WINDS INTERNATIONAL
HEATING AND AIR CONDITIONING
61
FURNACEThis appliance is equipped with an electric ignition device which automatically lights the burner. Do not try to light the burner by hand.
Furnace Operation Instructions 1. The propane tank must be filled and the house batteries should be fully charged. 2. The propane valve located on the propane tank must be in the open position. The valve shouldonlybeopenedorclosedbyhand.Ifthevalvecannotbeturnedbyhand,havethe valve checked by a qualified service technician. 3. All power to the appliance should be on. Breaker and 12 Volt fuse locations vary depending onfloorplan. 4. Setthethermostattothedesiredfunctionandtemperaturesetting.
Note: FordetailedinformationregardingtheFurnacerefertothemanufacturer’soperating instructionsmanual.
THERMOSTATS Note: Fordetailedinformationregardingthethermostat refertothemanufacturer’soperatinginstructions manual.
Certainroofmountedairconditionershaveselfcontainedthermostatsandcontrolswhicharelocatedatthereturnairgrill.
ACool,FanandHeatthermostat,withamanual,“Cool”,"Fan"and“Off”and"HEAT"comfortswitch.Thethermostatcanbeoperatedinbothmanual(ON)andautomaticmode(AUTO),oneitherhighorlow.Setyourtemperaturewithaneasyslidetemperatureselector.
CEILING VENTSVentsareprovidedinthemotorhometocirculatefreshairandexhaustodors.
Exhaust VentThe power vent includes a 12 VDC powered fan. A hand crank controls opening and closing and adjustment of the vent cover, while a push button turns theexhaust fan ON and OFF. Make sure to turn the fan OFF before closing the vent.Alsobesuretoremoveanydebristhatfallsintotheventthatmayrestrictoperation.
Note: Forbestresults,closeallotherroofventsandopenone window,ordoorthegreatestdistancefromtheexhaust vent.
Note: Thedomemustbeopenpriortooperatingthefanmotor.
Note: Refertotheoperationmanualforproperlongtermstorageprocedures.
CAUTION

FOUR WINDS INTERNATIONAL
HEATING AND AIR CONDITIONING
62
Attic Fan - Fantastic VentThe fan isa three-speed fanwhichcanextractair from themotorhome.Tooperatethefanusethefollowingguidelines: • Turn the fan speed control dial to the desired performance level (0-Off,1-Low,2-Medium,3-High).Byselectingthe“0” setting,thefanactsasaventonly. • Slightly open a window for maximum air flow. • Set your interior temperature on the wall mounted thermostat between 60° F and 90° F. Whentheinteriortemperatureiswarmerthansetting,thedomeopensautomaticallyandthe fanbladeturnsontothepre-selectedspeed. • If your vent is supplied with a rain sensor, no other action is necessary on your part in the eventthattherainsensorhasmoistureonit. • Manual Dome Operation: Use the dome hand crank knob only in an emergency of for dome adjustment. Pull the knob to the desired dome placement. Push the knob back upward. Ensure that the knob is locked in place.
Note: AventcoverisnotrecommendedorfoamfilterisnotrecommendedonFantastic Vent.
Note: Refer to the owner's manual for complete instructions and proper long term storage procedures.
Attic Fan - Create A BreezeThefanhasthreespeeds.
• Open dome approximately 3 inches or more by turning the hand crank. The fan has a built in safety switchthatwillnotallowmotortooperateunless domeispartiallyopen. • Turn 3 speed knob to desired performance level (0-Off,1-Low,2-Medium,3-High) • Slightly open window of your choosing for maximum airflow.
Recommendations:YoumayuseyourCreateABreezewhiledrivingorinwindyconditions.Inthiscasekeep your dome fully open.
Note: Aventcoverorfoamfilterisnotrecommendedonvent.
Note: Refer to the owner's manual for complete instructions and proper long term storage procedures.

FOUR WINDS INTERNATIONAL
ELECTRICAL SYSTEMS
63
ELECTRICAL SYSTEMS
The electrical system is engineered and tested for safety. Circuit breakers and fuses protect the electrical circuits from overloading. If you plan to make modifications or additions to the electrical system, Four Winds International strongly recommends consulting a certified electrician for assistance to ensure continued integrity and safety of the electrical systems. Please note that any modifications may void the Limited Warranty.
Theelectricalpowersupplyprovidedforthemotorhomeisadualsystem,operatingwith120/240voltACandor12VoltDC.The120Voltpowermaybeprovidedbyeitherconnectingthemotorhometoanoutsidepowersource when parked, or by use of a motor home generator. When the 120 Volt system is operational, power alsopassesthroughasystemconverter,allowingthefulluseofall12Voltfunctionsinthemotorhome.
120 Volt appliances in the motor home include the refrigerator, ice maker, roof mounted air conditioner(s), TVs, DVDplayer,microwaveoven,converterandthewaterheater.Therefrigeratoralsohastheoptionofrunningonpropanegaswhen120Voltpowerisnotavailable.Allotherelectricalfunctionsinthemotorhomearesuppliedwith12Voltpower.
Whenitisnotpossibletoaccess120voltpower,the12Voltsystemfunctionscanbesuppliedbytheauxiliarybatteries.Thechassisbatteryisprotectedbyabatteryisolatorcontrollertopreventdischargefromexcessiveelectricalconsumptionwhenthemotorhomeisnotrunning.Theauxiliarybatteriesarerechargedbythepowerconverterwhenthemotorhomeisattachedtoanoutside120voltpowersource,orbythegeneratorwhenitisrunning,andbythechassisalternatorwhenthechassisengineisrunning.
SHORE CORDCONNECTING THE SHORE CORD TO A NON-GROUNDED OR IMPROPERLY GROUNDED POWER SOURCE CAN RESULT IN DANGEROUS AND POSSIBLY FATAL ELECTRIC SHOCK. DUE TO THE POTENTIAL DANGER IN FAILING TO HEED THIS WARNING, THE MOTOR HOME MANUFACTURER CANNOT BE RESPONSIBLE SHOULD DAMAGE, INJURY, OR DEATH RESULT FROM FAILURE TO CONNECT THE POWER CORD TO A PROPERLY GROUNDED POWER SOURCE.
If shore power service is limited to 15 or 20 amps, use of light duty extension cords and electrical adapters will create a Voltage loss through the cord and at each electrical connection. Line Voltage loss and the resistance at each electrical connection can be a hazardous combination. Damage to sensitive electronic equipment may result.
30 Amp Shore PowerThe motor home is designed to be connected to a 30 amp service which provides 120 Volts. The motor home should never be connected to any power source that will provide anything more than 120 Volts. Failure to follow this will result in serious damage to internal items that are plugged in.
A30ampshorelinepowercord isprovided toattach themotorhome toagroundedpowersource. Whenconnecting or disconnecting from a grounded external power source, always turn off the shore power breaker to the power supply outlet. This will prevent accidental shock and flashing of electrical contacts.
NOTICE

FOUR WINDS INTERNATIONAL
ELECTRICAL SYSTEMS
64
50 Amp Shore PowerThe motor home is designed to be connected to a 50 amp service which provides a combined total of 240 Volts. The 240 Volts comes from two separate 120 Volt lines that are in the shore power cord. The motor home should never be connected to any power source that will provide anything more then 120 Volts on either line coming in. Failure to follow this will result in serious damage to internal items that are plugged in.
A50ampshorelinepowercord isprovidedtoattachthemotorhometoagroundedpowersource. Whenconnecting or disconnecting from a grounded external power source, always turn off the shore power breaker to the power supply outlet. This will prevent accidental shock and flashing of electrical contacts.
Note: Thesethreeshorepoweroutletsaremostcommonlyusedthroughoutthe UnitedStates:
BATTERIESThechassisandorauxiliarybatteriesofamotorhomemaybelocatedbehindthefronthoodofthemotorhomeorinanexteriorcompartment.
It is important to make sure that batteries are kept charged. Take time to turn off all lights or other 12 Volt convenienceswhennotinuse.Connectthemotorhometoa120voltpowersupplywhenpossible,insteadofdraining the batteries. The charge condition of the batteries can be checked with the monitor panel. To check, pressandholdmonitortestswitchwhilereadingthechargelevelonthebatterygauge.Chargelevelsindicatedare divided into sections from weak through fully charged.
Battery SafetyBATTERIES CAN EXPLODE! Always wear splash proof safety glasses when working near batteries. Do not smoke or expose any battery to electric sparks
or flame. Batteries, when charging or discharging, generate hydrogen. Hydrogen and air is a very explosive mixture.
Do not short across the battery terminals. The spark could ignite the gases. Do not wear metal jewelry or a watch when working on a battery.
Before doing ANY work on electrical system, disconnect battery cable and the 120 volt power cord. Do not reconnect the cables until all work has been completed. This will avoid the possibility of shorting or causing damage to electrical components or shock to the servicing person.
Battery electrolyte is a corrosive, poisonous, sulfuric acid. Avoid contact with skin, eyes, clothing, or any painted surface.
Sulfuric acid in the batteries can cause severe injury or death. Sulfuric acid can cause permanent damage to eyes, burn skin and eat holes in clothing. Always wear splash-proof safety goggles and gloves when working around the battery. If battery electrolyte solution is splashed in the eyes, or on the skin, immediately flush with clean water for 15 minutes. In case of eye contact, seek immediate medical treatment. Never add acid to a battery once the battery has been placed in service. Doing so may result in hazardous splattering of electrolyte solution.

FOUR WINDS INTERNATIONAL
ELECTRICAL SYSTEMS
65
Battery MaintenanceBattery maintenance is important. Checking the condition of a battery at regular intervals will help insure its proper operation. Here are some recommendations for checking and servicing batteries:
Note: Theseinstructionsonlyapplytobatteriesotherthanmaintenance-freebatteries.Do not open or break seals on maintenance-free batteries.
1. Keepthebatterymountedsecurely.Vibrationcausesearlyfailureofmanybatteries. 2. Check the electrolyte level of the auxiliary batteries at regular intervals. Keep each cell filled tojustabovetheplateswithdistilledwater.Oncetheplateshavedriedout,theycannotbe reactivated,andthecapacityofthebatteryisreducedindirectproportiontotheareaofplate surface that has become dry. This kind of damage can occur quickly; usually it can happen overnight.Ifthefluidlevelislow,simplyadddistilledwater. 3. Keep the battery clean. Corroded terminals make poor contact and do not allow the chassis alternatorortheconvertertobringthebatteryuptofullcharge.Batterysulfationoccurs whenthebatteryhasbeenstandinginadischargedconditionoveralongperiodoftime, orwhenthebatteryhasbeenoperatedcontinuallyinastateofpartialdischarge.Usea baking soda solution to neutralize the acid accumulations on the battery top. Do not allow the soda solution to enter the battery. Make sure the vent caps are secure. Flush with water. Thoroughlydryallcablesandterminals,reinstall,anduseaplasticignitionspraytoprotectthe terminals. 4. Check the outside condition of the battery. Look for cracks in the case or vent plugs. If the case is cracked, the battery must be replaced. If the vent plugs are cracked, they must be replaced. 5. Watchforovercharging.Threeindicationsofoverchargingare: a. Active material on the vent cap (heavy deposit of black lead-like material on the undersideoftheventcap). b.Excessiveuseofwater. c.Voltageregulatoroutput. 6. Make sure the battery hold downs and carrier are kept clean and free of corrosion.
Whenremovingabattery,disconnectthegroundbatteryclampfirst.Wheninstallingabattery,alwaysconnectthegroundedbatteryclamplast.
When a battery needs to be replaced, make sure to replace it with a battery of the same characteristics as the originalequipment.Consultyourdealerforadviceonbatteryreplacement.
Battery Isolator ControllerWhen the motor home engine is not running, the chassis and auxiliary batteries are kept separated from each otherwithintheelectricalsystemthroughtheuseofabatteryisolatingcontroller.Thecontrollerpreventstheauxiliary batteries from discharging the chassis battery when the motor home is parked.
Some additional characteristics of the isolator system include: 1. Delaysconnectingtheauxiliarybatteriestothechargingsystemforapproximately15seconds, toallowthealternatortimetoreachfullchargingability. 2. Afterthisinitialtimedelay,ifthealternatorhascomeuptofullchargingability,(13.2Volts)the isolatorwillelectricallyconnecttheauxiliaryandchassisbatteriestogetherforcharging. 3. Ifthechargingvoltagedropsbelow13.2Voltsforaperiodof4secondsduetolowidlespeed andorexcessiveload,theisolatorwilldisconnecttheauxiliarybatteriesuntilthevoltage returnstoalevelof13.2voltsforabout10seconds. 4. Intheeventtheautomotivebatteryisdischarged,itwillbenecessarytopressandholdthe StartSwitchlocatedinthedash.

FOUR WINDS INTERNATIONAL
ELECTRICAL SYSTEMS
66
Note: Whenoperating12Voltequipmentfrombattery,reduceequipmentinuseto conservebattery.Gradualdimmingoflights,andslowingofmotorsindicateslow batteryvoltage.
Battery Disconnect SwitchThebatterydisconnectswitchallowsyou toeasilydisconnect theauxiliarybatteries fromelectricalcircuits,preventingunwanteddischargeduringextendednon-use.Theswitch(s)is/aremountedonapanelneartheentrancedoor.
There are two main uses of the battery disconnect:
1. Preventunwanteddischargingofbatteriesduringextendedperiodsofstorage. 2. Prevent shorts or fire hazard while working on the 12 Volt electrical system.
Whenactivating,placetheswitchforthedesiredbatterysystemintheONposition.Thisbatterysystemwillnowbeoperational.ThedisconnectswitchmustbeintheONpositionwhilepluggedintoshorelinepowertochargethebattery(s).PlacetheswitchintheOFFpositiontodisconnect12Voltcircuits.
Note: If 12 Volt functions are not working, be sure to check that the battery disconnect switchhasbeenplacedintheONposition.
Battery ChargingALWAYS WEAR SPLASH PROOF SAFETY GLASSES WHEN WORKING WITH BATTERIES.
Theconverter/inverteralsooperatesasabatterychargerwhenitisconnectedtoa120Vpowersource.Ifthebatteryisbelowitsfullcharge,theconverter/inverterchargerwillbeginoperationataratethatreflectsthelevelof discharge. When the battery is again fully charged, the converter charger drops its charging level back to a maintenance level to keep the battery fully charged.
If for any reason you charge a battery with a source outside the motor home, make sure to follow the rules ofbatterymaintenanceandsafetyoutlined in thissection.Alsoobserve theseadditionalsafetyprecautionsrelatedtobatterycharging:
1. Disconnectthebatteryfromthemotorhome. 2. Check electrolyte before charging. Be sure each cell is properly filled with distilled water. 3. Make sure to use care when connecting and disconnecting the cables from chargers. A poor connectioncancauseanelectricalarc,whichcanresultinanexplosion. 4. Remove the battery vent caps before charging, and make sure that the electrolyte does not splash out as a result of charging too quickly. 5. Check literature supplied by battery manufacturer, and follow warnings or cautions outlined.

FOUR WINDS INTERNATIONAL
ELECTRICAL SYSTEMS
67
POWER CONVERTERThe converter is used to switch 120V electricity from an external supply, or from the generator, to 12 Voltelectricity to power interior lights and 12 Volt accessories. The converter requires no maintenance undernormalcircumstances.
Iftheconverterdoesnothavea120Vsupplytoconvertto12Volt,itautomaticallyswitchesthebatteriesintotheelectricalcircuittopower12Voltfunctions.Whenreconnectedtoa120Vsupply,itwillagainoperatefromthispowersource.
Theconverterwillrunwarmandthisisnormal.If,however, itgetstoohot, itwill turnitselfoff.Afteritcoolsdown, it will come back on. In most cases, when this happens it is because something has been put around or too near the converter preventing it from receiving adequate ventilation. Make sure not to put anything near theconverterthatcouldobstructventilation.
Aslighthumduringoperationisalsonormalfortheconverter,ifyoudonothave12Voltpowerandnohum,check to see if 120 volt power to the converter has been interrupted.
POWER INVERTER - DIESELThe inverter takes 12 Volt DC from the house batteries and turns it into 120 Volt AC. It also takes 120 Volt AC whenthemotorhomeisconnectedtoshorepowerandtransformsit into12VoltDCtorechargethehousebatteries.
There are two modes of operation associated with an inverter/charger:
1. Inverter Mode:12VoltDCfromthecoachbatteriesistransformedinto120VoltACforuse withhouseholdelectricalappliances. 2. Charger Mode: 120 Volt AC is taken directly from shore power (or other AC sources) and passeddirectlytohouseholdappliances.Atthesametime,theincoming120VoltACisalso convertedto12VoltDCtorechargethehousebatteries.
Remote ControlAremotecontrollocatedabovetheentrydoorallowsyoutocustomizetheoperatingparametersoftheinverter/charger,thusmaximizingperformanceandincreasingthelifeofthebatteries.Theremotealsocontrolsalloftheoperating and programming functions. The inverter/charger owner's manual outlinesallofthefunctionsinaneasytouseformat.
The following is a brief overview of the remote control:
Rotary Knob: Used to move between menus to select program options. Turn clockwise to increase selections and counterclockwise to decrease selections. Push the knob to “save” the selection displayed in theLCDscreen.
Inverter ON/OFF:UsedtoswitchtheinverterfunctionONandOFF.Thegreen“INVERTER”LEDturnsONandOFFwiththeswitch.
Charger ON/OFF:UsedtoswitchthechargerfunctionONandOFF.Thegreen“CHARGER”LEDturnsONandOFFwiththeswitch.
Note: Formoreinformationrefertothemanufacturer’soperation’smanual.
PWR
FAULT
CHG
INV
SHORE AGS METER SETUP TECH
SELECT
INVERTER
ON/OFF
ON/OFF
CHARGER

FOUR WINDS INTERNATIONAL
ELECTRICAL SYSTEMS
68
SOFT KEYS:Press the soft keys to access the required function. Then use the rotary knob to scroll through the selections. Press the rotary knob to save the selection.
Options include:>Shore: Sets the appropriate breaker size for the incoming shore power and is used to control the amountofACampsthebatterychargerusesfromHOT1IN.Selectionoptionsare5,10,15, 20,30,and50amps.>Setup:Configurestheinverter/charger. Options include: • Search:Usedtosetthewattsatwhichtheinverterwillcomeoutof sleepmode. • LBCO: (LowBatteryCutOut)-UsedtosettheDCVoltageleveltoshutdownthe invertertoprotectthebatteriesfromoverdischarge. • Battery Size: Used to select the approximate battery bank capacity. • Battery Charge Rate: Used to set the maximum charge rate during bulk, absorption or floatcharge. • Battery Type: Usedtoselectbatterytypeforthebatterychargeprofile. • Contrast: UsedtoadjusttheLCDcontrast. • AC Dropout Voltage:UsedtoselecttheACthreshold(60,90,and100VoltAC)where theinvertertransfersfromAClinetoinvertermode.
Note: Additionalinformationfor“SETUP”isinthemanufacturer’soperation’smanual.
GROUND FAULT CIRCUIT INTERRUPTEREvenwithGFCIprotection,personswithsevereheartorotherhealthproblemsmaystill be seriously affected by an electrical shock. The GFCI outlet is not a substitute forgoodelectricalsafety.ItDOESNOTprotectagainstcontactofthehotandneutralwireatthesametime.
The 120 volt outlet in the kitchen and/or bath and outside recepts are equipped with a protective circuit interrupter. The ground fault circuit interrupter (GFCI), is designed to break the flow of current to the protected outlet when an imbalance of current is detected. Imbalances include electrical leakage in an appliance such as a shaver or hair dryer that have developed a weak spot in electrical insulation. The possibility of electrocution existswhenusingafaultyappliance,whileatthesametimebeingincontactwithanelectricalgroundsuchaswater,plumbing,ortheearth.
Ifanimbalanceisdetected,theGFCIwilltripandshutoffpowertotheoutlet.
It also does not protect against short circuits or system overloads. Circuit breakers in the main panel which supplypowertothecircuit,willtripifeitheroftheseconditionsexist.
The GFCI receptacle should be tested initially when the motor home is purchased, and at least monthlythereafter.
To test the circuit, use the following procedure:
1. Make sure power is on to the circuit. A test light or 120 volt lamp will work. 2. Pushthetestbutton. 3. Theredresetbuttonshouldpopout. 4. AllpowershouldbeinterruptedtooutletsprotectedbytheGFCI. 5. Verifybyplugginginalightattheseoutlets,andpushingintheresetbutton. Iftheredresetbuttondoesnotpopoutafterpushingthetestbutton,orGFCI circuitcontinuestotrip,orifthepowerisnotinterruptedtothetestlight, immediately turn off power at the circuit breaker panel and have a qualified electrician check it out.
FOUR WINDS INTERNATIONAL
ELECTRICAL SYSTEMS
69
Note: TheGFCIdoesnotprotectanycircuitotherthantheonetowhichitisconnected.
12 VOLT SYSTEM FUSES - GASInteriorA 12 Volt DC distribution panel is located next to the 120 Volt circuit breakers. The panel contains circuits with replaceable fuses for protection of motor home 12 Volt lines. If any line is shorted, the fuse will ‘"blow". Replace thefusewiththesamesizefuse.DONOTreplacewithalargerfusethanindicated.
Ifthisactiondoesnotsolvetheproblem,theremaybea"short"somewherealongthe12Volt line,oratanon-fused 12 Volt component on the line. Check the 12 Volt line and any components along the line. Locate the “short” and take necessary steps to repair it. If you cannot locate the problem, have a qualified electrician check it out.
It is a good idea to keep additional fuses on hand in the motor home. Replacement fuses are available at filling stations, hardware stores, or automotive supply stores. Remember that the replacement fuse must be thesameamperageratingastheoriginal.
AutomotiveYourmotorhomechassisisequippedwithanautomotive12Voltfusepanellocatedbelowthedashnearthesteeringcolumnand/orunderthehood.Youshouldrefertothechassisowner’smanualfordetailsonthesefuses.
TheClassAmotorhomealsohasa12Voltfusepanel,electricaldistributionbox,locatedonthefirewallunderthehood.ThesefusesprotecttheautomotivefeatureswhichareinstalledbyFourWindsInternational.Thereis a complete breakdown on the various fuses printed on the backside of this fuse panel cover. The class C fuse panel can be located under the bed, in the dinette base or kitchen base, depending on the model of your motorhome.
CIRCUIT BREAKERSThe 120 Volt system is protected by circuit breakers which automatically shut the circuit off if the circuit load is too heavy, or a short circuit occurs. If a circuit breaker has been tripped, do not reset the breaker until the causeoftheproblemisidentifiedandcorrected.
The generator also has one or two AC circuit breakers, and a DC fuse on the generator control panel. If an interruption in generator operations occurs, check to see if any of these have been tripped. Consult the manualsprovidedwiththegeneratorbeforeattemptingmaintenanceonthegenerator.
Note: Some electrical appliances may have their own circuit breakers. If there is an interruptioninelectricalserviceofanappliance,consultthemanualforthat appliance to determine what action to take.

FOUR WINDS INTERNATIONAL
ELECTRICAL SYSTEMS
70
CLASS A AND CLASS C - GAS SYSTEM PANELS Note: Please use this information as a guide. Check your motor home for the sticker with theexactcallouts.
110V For Units With 50 Amp Service
110V For Units With 30 Amp Service And No Electric Water Heater
Converter Fuse Panel

FOUR WINDS INTERNATIONAL
ELECTRICAL SYSTEMS
71
BCC Fuse Panel
Note: Shouldyoulose12VoltpowerinsideyourClassAgasmotorhome,thereisa50 AmpResetButtonintheBatteryControlCenter,locatedunderthehood.Remove cover from the black box to access.
12 VOLT SYSTEM FUSES - DIESELInverter Bay Fuse PanelTheexterior12voltsystemsfusepanelislocatedintheinvertercompartmentbay.Thesixslotsmightnotallbeused,dependingonequippedoptions.
Bed Base Fuse Panel
P1-1 AUXSTARTSWITCHP1-2 F35RADIOP1-3 F36ANTENNABOOSTP1-4 F39RADIOMEMORY
P2-1 F27SOLARPANELP2-2 F280/SRADIOMEMP2-4 F30OUTSIDERADIOP2-5 F31CARGOLIGHTSPS-6 F32CARGOLIGHTS
P3-1 F21STEPS/AWNINGP3-2 F20FOGLIGHTSP3-4 F24STEPSWITCHP3-5 F25DOCKLIGHTSP3-6 CB3DRIVERSEAT
P4-1 CB1DRIVERSHADEP4-2 CB2PASSSHADEP4-3 F16MAPLIGHTSP4-4 F17POWERPOINTP4-6 FOGLIGHTRELAY
P5-1 ACCESSORYRELAYP5-2 F9HVACBLOWERP5-3 F11DASHFANSP5-4 F12MIRRORHEATP5-5 F13JACKSPOWERP5-6 F15MIRRORS
P6-1 F2SPAREP6-2 F4JACKSDOWNP6-3 F5TVCUTOFFP6-4 F6REARVISIONP6-5 IGNITIONRELAY
FOUR WINDS INTERNATIONAL
ELECTRICAL SYSTEMS
72
DASH FUSESThe dash fuse panel is located under the dash on the wall. A circuit board with blade type fuses and breakers will be visible. The fuse and breaker locations are labeled below.
CHASSIS ALTERNATORTheautomotivechassis12voltsystemalternatorsuppliespowertoboththeautomotivesystemsaswellasanyauxiliarybatteryanddirectlytothemotorhomelivingquarterswhilethevehicle’smotorisrunning.
Thealternatorcompensatesforelectricalusageinthevehicle,thepowerdrawnbytheappliances,lights,fansandother12voltpowereditemsaswellasthechargingoftheautomotiveandauxiliarybatteries.
If the alternator isn’t keeping pace with the draw on the unit’s electrical system, while driving down the road, it means you’re working in a negative mode: more power is being used than the unit is putting out.
This means that you are taking power out of the batteries. If you draw too much power from the batteries there maynotbeenoughpowerleftinthebatterytostartthemotorhomeorrunanyoftheapplianceswhenyoustop for a break or for the night.
Thealternatorwillchargeatahigherraterightafterthevehicle’sbeenstarted,replacingthepowerusedtostart the vehicle, but the charging should quickly go back to “normal” and hold its own even when you turn on lightsorappliances.
Whenstoppedatacampsitethatallowsyouuseoftheshoreline,the120voltelectricalsystemwillrechargeyourauxiliarybattery.
Under heavy usage in warm weather, check the fluid level of those batteries that require attention to fluids quite often.Lowbatteryfluidlevelisveryharmfultothebattery’slongevity.
Ifthealternatorshowsadischargewhilethemotorisrunning,turnoffappliancesandlightstoseeifachargecomesonorifthealternatorindicates“neutral”.Thenapplyadrainonthesystemtoseeifadischargereturns.Ifadischargepersists,contactyourdealer.

FOUR WINDS INTERNATIONAL
ELECTRICAL SYSTEMS
73
GENERATORCARBON MONOXIDE IS POISONOUS AND CAN CAUSE UNCONSCIOUSNESS AND DEATH.
Note: Make sure to read and understand the generator owner’s manual before operating thegenerator.Observealloperatinginstructionsandwarningsaswellasall recommendedmaintenanceschedulesandprocedures.
Theonboardgeneratorallowsthemotorhometobefullyself-contained.Itprovidesaccessto120VoltA/Cwhen shore power is unavailable, but keep in mind that when in use the generator exhausts deadly carbon monoxide gas!NEVERsleep in themotor home with thegenerator running! Before you start and use thegeneratorinspecttheexhaustsystem.Donotusethegeneratoriftheexhaustsystemisdamaged.Testthecarbonmonoxidedetectoreverytimeyouusethemotorhome.Knowwhatthesymptomsofcarbonmonoxidepoisoningare:
• Dizziness • Vomiting • Nausea • Muscular twitching • Intense headache • Throbbing in the temples • Weakness and sleepiness • Inability to think coherently
Ifyouoranyoneelseexperienceanyofthesesymptomsgettofreshairimmediately.Shutthegeneratordownand do not operate it until it has been inspected and repaired by a professional. If the symptoms persist seek medicalattention!
1. DO NOToperatethegeneratorwhilesleeping.Youwouldnotbeawareofexhaustentering themotorhome,oralerttosymptomsofcarbonmonoxidepoisoning. 2. NEVER store anything in the generator compartment. Always keep the compartment clean anddry. 3. DO NOToperatethegeneratorinanenclosedbuildingorinapartlyenclosedareasuchasa garage. 4. REVIEWthesafetyprecautionsforfuelandexhaustfumeselsewhereinthismanual. 5. DO NOT operate the generator when the motor home is parked in high grass or brush. Heat fromtheexhaustcouldcaseafireindryconditions. 6. NEVERoperatethechassisorgeneratorengine,ortheengineofanyvehicle,longerthan necessary when the vehicle is parked. 7. DO NOTsimultaneouslyoperategeneratorandaventilatorwhichcouldresultintheentryof exhaustgas. 8. When parked, position the motor home so that the wind will carry the exhaust away from themotorhome.DO NOTopennearbywindows,ventilators,ordoorsintothepassenger compartment,particularlythosewhichcanbe“downwind”,evenpartofthetime. 9. DO NOT operate the generator when parked in close proximity to vegetation, snow, buildings, vehicles,oranyotherobjectwhichcoulddeflecttheexhaustunderorintothemotorhome. 10.DO NOTtouchthegeneratorwhenrunning,orimmediatelyaftershuttingoff.Heatfromthe generatorcancauseburns.Allowthegeneratortocoolbeforeattemptingmaintenanceor service.
The generator draws fuel from the motor home chassis fuel tank. The fuel supply line for the generator is placed higher in the fuel tank than that of the fuel supply line for the chassis engine, this prevents the generator from draining all the fuel from the fuel tank.
Note: Somemodelsmayrequireyoutoplugthe30ampshorelineintothegenerator outletprovidedintheshorelinestoragecompartment.
Tostartthegeneratorlocatethegeneratorstartswitch,whichislocatedatoneofthefollowinglocations:
• Generator Control Panel • Kitchen Base Cabinet • Remote Dash Switch

FOUR WINDS INTERNATIONAL
WATER SYSTEMS
74
WATER SYSTEMS
Themotorhomeplumbingsystemhasthedualabilitytobeself-containedwithon-boardstorage,orusefacilitiesprovided by an external pressurized source. In either case, the components of the system operate like those in your home.Componentsoftheplumbingsystemconsistofstrong,lightweight,corrosion-resistantmaterialsthatprovidelonglife,andeasycleaning.Byfollowingtheinstructionsoutlinedhere,youcanexpectefficientoperationwithaminimumofmaintenance.
Motorhomeplumbingcanbedividedintotwoseparatesystems.Thefreshwatersystemconsistsofthoseitemswhichareusedtodeliverwaterforyouruse,whilethewastewatersystemismadeupofthedrainsandtanks which store and remove water that has been used.
FRESH WATER SYSTEMFresh water is provided from an external pressurized source, or from the fresh water storage tank.
External Hook-upWaterprovidedfromoutsidethemotorhomeispressurizedbythesystemfromwhichitisdelivered.Whenyouconnectyourmotorhometoanoutsidesource,thefreshwatertank and the water pump are kept separate from the remainder of the system by in-line check valves.
To connect the motor home to an outside source of water:
1. Removethecapfromthefreshwaterinletonthesideofthe motorhomeandattachoneendofthefreshwaterhosetothe outsidesourceofwater. 2. Connecttheotherendofthehosetothemotorhomecitywater inlet. 3. TurntheoutsidesourceofwaterONandopenthevariousfaucetsinthe motorhomegraduallytocleartheairfromthelines.Closethefaucetswhenthe waterflowsfreely.
Note: Donotturnthewaterpumponwhenusingwaterfromanexternalsupply.
To disconnect from the outside source of supply:
1. Shutofftheoutsidesourceofwateranddisconnectthehosefromthevalveandvehicleinlet. 2. Re-reelthehoseandreinstallthecaponthemotorhomeinlet.
Fresh Water Tank With Gravity FillWhen an outside source of water is unavailable, water can be drawn from the fresh water storage tank for use in the motor home. The tank is filled through a gravity controlled water fill spout on the side of the motor home.
To fill the fresh water tank: 1. Remove the water fill spout cap and fill directly to the tank. 2. Use a clean hose or bucket from a clean, safe source of water. 3. Be sure to replace the fill spout cap after the tank is filled.
Note: Never leave the hose unattended while you are filling the fresh water tank.

FOUR WINDS INTERNATIONAL
WATER SYSTEMS
75
Note: Water will overflow through the vent located at the top of the fresh water tank If the tank is filled beyond capacity.
When traveling, you may want to drain the tank, or keep the quantity of water in it to a minimum. This reduces the total weight of the motor home for travel. Make sure when draining the tank, that the water pump has been turned off. The fresh water tank drain valve is located below and near the fresh water fill spout. Water in the tank can be drained by turning the drain cock perpendicular to the motor home body. To close the valve, turn theleverparalleltothemotorhomebody.
Note: When trying to drain the entire on-board fresh water system, make sure to open faucets,waterheaterdrain,andsystemlowpointdrainstoremoveallfreshwater fromthesystem.
Fresh Water Tank Without Gravity FillWhen an outside source of water is unavailable, water can be drawn from the fresh water storage tank for use inthemotorhome.
To fill a fresh water tank: 1. Attachapotablewaterhosetotheinletinsidethewatersystemspanelarea,andanoutside watersupply. 2. Turn the lever on the by-pass valve to the fresh tank position and begin filling. 3. When the tank is full turn off the water supply. View reading on the monitor panel.
Note: Never leave the hose unattended while you are filling the fresh water tank.
Note: There is an overflow vent located at the top of the fresh water tank. If the tank is filledbeyondcapacitywaterwillflowoutthroughthisventontotheground.
Note: Always fill the tank with clean potable water from a known safe source. Make sure to close the fill spout when the tank is filled.
Water PumpWhen using water from the fresh water tank, the system must be pressurized. A self-priming 12V DC pump is providedtohandlethisfunction.ApumpON/OFFswitchislocatedonthemonitorpanel.
When initially starting up the self contained water system, follow this procedure: 1. Make sure the tank is filled with water. 2. Openallthefaucetsinthemotorhome,bothhotandcold. 3. PlacethepumpcontrolswitchintheONposition. 4. Allow time for the hot water tank to fill. Shut off each faucet as the flow becomes steady and freeofair.Whenthelastfaucetisshutoff,thepumpshouldalsoshutoff. 5. Thesystemisnowreadyforuse.
Note: When filling the system, you may want to add additional water to the tank to replace the water used when filling the hot water tank and water lines.
Theselfcontainedwatersystemisademandsystem.Thismeansthatthewaterpumpwillrunwheneverthereis a need for water. If the pump runs while all faucets are closed, there may be a leak in the system. Ask your dealerforassistance.
Note: Thelowpointdrainsarelocatedinthewaterlinesonthefloorofthemotorhome excepttheWindsportandDieselbrandmotorhomes.Specificlocationsalongthe waterlineswillvarydependingonthemodelofyourmotorhome.Thelow pointdrainsfortheWindsportandDieselmodelsaretheoutsideshowerwhichis locatedinanexteriorcompartment,belowthefloor.

FOUR WINDS INTERNATIONAL
WATER SYSTEMS
76
Sanitizing the Fresh Water SystemSanitizethesystembeforeinitialuse,afterextendedperiodsofnon-use,atleastonceayearduringcontinuoususe,andwheneverthereissuspicionthatthesystemhasbeencontaminated.
To sanitize the system with a gravity fill, use the following procedure:
1. Prepareachlorinesolutionusingagallonofwaterand¼cupofliquidhouseholdbleach (5% sodium hypochlorinate solution). Use one gallon of solution for each 15 gallons of tank capacity. 2. With tank empty, and all faucets and drains closed, pour the solution into fresh water tank. 3. Complete filling the tank with fresh water. 4. Switchonthewaterpump.Openallfaucetsoneatatimeuntilallairispurged,andthewater flowsfreely. 5. Again add fresh water to the tank until the water level reaches the fill spout. 6. Drain the system by opening all faucets, and the fresh water tank drain valve, while flushing the system with water of drinking quality. 7. Continueflushingthesystem,allowingthewatertoflowforseveralminutes. 8. Close the tank drain valve and faucets. Refill the system with water of known drinking quality.
Note: Aslightchlorinetastemaylinger.Ifthisisobjectionable,mixasolutionof1quart Vinegar to 5 gallons of water and add to the tank. Repeat process above, but withoutthebleach.
To sanitize the system without a gravity fill, use the following procedure:
Items needed: 1-Batterypowereddrill(donotuseanelectricdrill) 1-Drillpoweredwaterpump 1 - 5 gallon bucket to prepare solution 2-4footsectionsof½inchinsidediameterhose 2-Femalehoseendsfor½inchhosewith¾inchthreadedend(compressionstyle) 1-Malehoseendfor½inchhosewith¾inchthreadedend(compressionstyle) 1-1cupofhouseholdbleach
1. Installonemaleandonefemalehoseendtooneofthe4footsectionsofhose.When completed,thesectionofhosewillhaveamalehoseendononesideandafemalehoseend ontheotherside. 2. Connect this hose to the outlet side (usually marked with an arrow) of the pump. The other endofthehosewillgetconnectedtothecitywaterfillonthecoach.Priortoattachingthe hosetothecitywaterfill,removethepressureregulatorfirst,otherwisethepumpwillnotbe abletopushthewaterpasttheregulator.Thehosewillattachtowheretheregulatoruse tobe. 3. Installonefemalehoseendtotheother4footsectionofhose. 4. Connectthishosetotheinletsideofthepump.Theendofthehosethatdoesnothavehose end will go into the five gallon bucket to pump out the sanitizing solution. 5. Fill the bucket half full with water and add one cup of household bleach. Attach battery drill to the pump making sure that the drill rotation matches the rotation needed to work the pump. 6. Using the drill, pump the solution from the bucket into the fresh water tank until solution is gone. Remove the pump/drill apparatus and complete filling the tank with water. 7. Switchonthewaterpump.Openallfaucetsoneatatimeuntilallairispurged,andthewater flows freely. Once the tank is half empty turn off the water pump. 8. Again, add water to the tank until it is full. Allow the system to stand undisturbed for at least 15minutes. 9. Turn the water pump on to drain the system by opening all faucets, and the fresh water tank drainvalve,whileflushingthesystemwithpotablewater. 10.Continueflushingthesystem,allowingthewatertoflowforseveralminutes,andthenturnoff the water pump. Close the tank valve and faucets. Refill the system with potable water.

FOUR WINDS INTERNATIONAL
WATER SYSTEMS
77
MONITOR PANELThe monitor panel allows you to quickly check the levels in the fresh water and waste water tanks. Electrical sensors at various points on the tanks send signals to the monitor panel. To check fluid levels, press and hold the test switch designated for the tanks, and read the level indicators on the panel. The indicator is proportioned in thirds with each light being lit up to the level that the tank contains.
Sometimes, residue on the sides of a tank, or water with a low mineral content will give a false reading. Check the levels occasionally when you are sure of a tank’s contents to double check the accuracy of the monitor panel.
Tank CapacitiesThe monitor panel allows you to quickly check the levels in the fresh water and waste water tanks. Electrical sensors at various points on the tanks send signals to the monitor panel. To check fluid levels, press and hold the test switch designated for the tanks, and read the level indicators on the panel. The indicator is proportioned in thirds with each indicator lightilluminating to the level that the tank contains. Indicator lights andtheirmeanings:
Inaccurate Holding Tank Level ReadingsThe accuracy of two wire holding tank monitoring systems can be adversely affected by dirty tanks or unusual mineralcontentinthewater.Theseconditionscancausethemonitoringsystemtohaveoversensitive(readshigherthanactuallevel)orundersensitive(readslowerthanactuallevel)readings.
Over Sensitive ReadingsOversensitive readings can occur as a result of scum build up on the tank walls, or abnormally high mineral contentinthewater.Inthesesituations,themonitoringsystemindicateshigherlevelsthanareactuallypresentin the holding tank. Certain cleaning products and food by-products can build up on the inside walls of the holding tanks, producing a layer of scum that can cause the monitoring system to read higher than the actual level. To correct this problem, the holding tanks should be cleaned periodically (consult dealer for cleaning instructions).
Under Sensitive ReadingsUnder sensitive readings canoccur if themineral content of thewater is abnormally low. In this case, themonitoring system indicates lower levels than are actually present in the holding tank. This problem can be correctedbymovingthegroundprobeclosertotheotherprobes.
WASTE WATER SYSTEMThewastewatersysteminthemotorhomecanbedescribedastwoseparatesystems.Agraywatersystemthat consists of the drain lines and holding tank for waste water from the sinks and tub, and a black water system which includes the holding tank and drain for toilet wastes. In some cases the bathroom lavatory may drain into the black tank to make sure there is adequate water to prevent solid build up. Each system is self-contained,andallowsdisposalofwastewateratdesignateddumpstationsatyourconvenience.
Components of the gray water system have drain traps, and both tanks are vented to equalize air pressure and disperse odors caused by drain water and wastes outside. Sometimes, the rocking movement of the motor home while driving may empty the drain traps of their water, and allow the odors of the gray water tank to come into the coach. Residue in the drain water lines can also produce odors. To combat gray water holding tank odors,anapproveddeodorizingagentshouldbeused.Anagentthatdissolvesgreaseandfatsandcontainsa detergent will help keep tank and drain lines clean and free-flowing.

FOUR WINDS INTERNATIONAL
WATER SYSTEMS
78
Holding TanksMOST CHEMICAL MIXTURES FOR HOLDING TANK ODOR CONTROL ARE POISONOUS. FOLLOW THE PRODUCT MANUFACTURER’S DIRECTIONS AND WARNING WHEN USING ANY HOLDING TANK ADDITIVE.
Drain valves and drain hose storage are located on the driver’s side. Each tank has a separate drain line and dump valve, which permits dumping tanks individually or together. Each tank should be emptied at a dump stationdesignated for thispurpose.Mostnational, state,andprivatecampgroundshavedumping facilities.Many have hookups on the campsite, while some have portable dump collectors. Many service stations, particularlyalong interstatehighways,alsohave these facilities.Manycampgrounddirectories listdumpingstationlocationsacrossthenation.
If possible, dump holding tanks before a trip, to reduce the gross vehicle weight. Enough water should be kept in the black water tank to cover the bottom, to prevent hardening of any residue that may remain.
Do not dump black water tank until it is 3/4 full. This practice makes sure that enough water is in tank to flush all wastes into sewer lines. If necessary, fill tank to the 3/4 mark with additional water before draining.
Never put anything in the holding tanks other than normal drain water, wastes, and biodegradable products. Paperwrappers,gum,cigarettes,etc.,nomatterhowsmalltheymaybe,shouldneverbeplacedintoeitherthe gray or black tanks.
Note: Itisimportanttonotethatharmfulandtoxicmaterialscanaccumulateiftheholding tanks are not regularly drained and thoroughly rinsed. It is also important to use holding tank deodorizing and cleaning agents in the waste water tanks to reduce odors and keep the lines open and free-flowing.
Note: Thediagrambelowshowsatypicalwastewatersystemterminationvalvelayout.
TERMINATIONVALVES
TERMINATIONVALVE
(SOME MODELS)
Gas
Diesel
Termination Valves

FOUR WINDS INTERNATIONAL
WATER SYSTEMS
79
Emptying the Holding Tanks 1. Removethesewerdrainhosefromitsstoragecompartmentonthesideofthecoach. 2. Removethecapfromthesewagedrain,andconnectthedrainhosetoit. 3. Attach the other end of the flexible drain line to the dump station inlet. Make sure both ends of theflexibledrainlinearesecurelyattached. 4. Drain the black water tank first, by pulling the termination valve handle toward you. Make sure to allow sufficient time for the tank to completely drain, then rinse the tank with several gallonsofwaterbydepressingthestoolpedal.Closethevalveonthestoolandletitfillbefore releasing the tank. This creates additional force to flush the tank more completely. 5. Drain the gray water tank by pulling the termination valve handle toward you. Draining the gray water tank last, with its soapy water helps to further rinse the drain and flexible hose, 6. When tanks are emptied, close termination valves by pushing handles back to closed positions. 7. Removeflexibledrainhoseandwashitthoroughlywithcleanwater.Removetheotherend fromthedumpstationinlet,andreplaceitinitsstoragecompartment.Securethesewerhose storagecover,andreplacethecapsonboththemotorhomeoutletanddumpstationinlet.
The following guidelines will help to ensure trouble free operation: • Never put anything in black water tank other than toilet paper especially for motor home systems. • Do not put automotive antifreeze, household toilet cleaners or drain cleaners, or any solid materialintothewastewatersystem. • Always use chemicals in the black water system that are made especially for this purpose. • When cleaning components of waste water system, use cleaners made for motor home systems. • Always keep the drain cap in place, and termination valves closed. • After every third time the holding tanks are emptied, fill and flush both tanks with clean fresh water a couple of times to keep them clear and clean.
Note: Ifconnectingtoacampsitesewerinlet,DONOTopenterminationvalvesuntil tanks are 3/4 full. DO NOT keep black water valve open while parked. Wastes are NOTflusheddirectlyintosewersystem.Onlyliquidwasteisdrained,therefore, water must accumulate, and chemicals in tank need time to break down solids before they can be released. If draining gray water tank directly into sewer inlet while parked, make sure to close termination valve for a period of time before leaving, allowing some water to accumulate in tank to use for flushing drain line and flexiblehose.
Note: Alwaysremembertocleanupthedumpsitebeforeleaving.NEVERemptyyour holding tanks directly on the ground, a roadway, river or stream. DO NOT POLLUTE.

FOUR WINDS INTERNATIONAL
WATER SYSTEMS
80
TOILETSThe toilet installed in the motor home is connected to the pressurized fresh water system. The two mostcommonstyleoftoiletsuseeitherafootpedalorhandlevertoflushandaddwatertothebowl.
Hand Lever Style:To flush the hand lever style, pull the lever forward(clockwise) until rinse clears the bowl. Be sure to release the lever slowly. Movement of the flush leveropensthewastevalveandallowsthewatertopassintothe holding tank.
To add water to the bowl, pull the lever forward(clockwise) approximately half way. This will open the watervalveandleavetheflushleverclosed.
Foot Pedal Style:Toflushthefootpedalstyle,depressthelargepedalonthelefthandsideuntilrinseclearsthebowl.Besuretorelease the lever slowly. Movement of the flush leveropensthewastevalveandallowsthewatertopassintothe holding tank.
Toaddwatertothebowl,depressthesmallpedalontherighthandside.Thiswillopenthewatervalveandleavetheflushleverclosed.
Note: Unnecessary frequent flushing of the stool will quickly deplete your fresh water supply and fill your holding tank. If the black water tank becomes full, you will no longer be able to flush the stool until the tank can be drained.
Note: Followthetoiletmanufacturer’srecommendationssuppliedwiththetoiletfor cleaningandmaintenance.Ifyouhaveatoiletthatdiffersfromthedescriptiongiven here, make sure to follow the manufacturer’s advice for operation.
Aria Deluxe IITheThetfordtoiletinstalledinthemotorhomeisconnectedtothepressurizedfreshwatersystem.Therearetwo flush modes available, controlled by the mode selector switch located at the back of the toilet. Up is user control/watersavermodeanddownisresidentialmode.For residential mode touch the large button once and walk away. For user control mode hold down large button for as long as you’d like to flush. Unnecessary frequent flushing of the stool will quickly deplete your fresh water supply and fill your holding tank. If the black water tank becomes full, you will no longer be able to flush the stool until the tank can be drained. If 12 Volt power is lost for some reason, turn the black knob on the rear of the toilet to flush.

FOUR WINDS INTERNATIONAL
WATER SYSTEMS
81
TECMA ToiletTheTecma toilet is connected to the pressurized fresh water system, and has two flush modes available.Unnecessary frequent flushing of the stool will quickly deplete the fresh water supply and will also fill the holding tank. If the black water tank becomes full, you will no longer be able to flush the stool until the tank canbedrained.
• Water Saver Flush:Pressandreleasethebuttontoflushliquids. • Normal Flush: Pressandreleasetoflushsolidsandtoiletpaper. • Empty Bowl:Pressbothbuttonssimultaneouslyandreleasetoemptybowland leaveitdryfortravel.Presseitherbuttononcetoreturntonormaluse.
Note: TheTECMAtoiletoperatinginstructionsarelocatedonalabelontheundersideof theseatcover.Refertothislabelwhenprogrammingthewaterlevel.
WATER SYSTEM WINTERIZATIONIfyouintendtostoreyourmotorhomethroughperiodsofsubfreezingweatherinanunheatedenvironment,itwillbenecessarytowinterizethewatersystem.Damagetowatersystemcomponentswillresult ifproperwinterization steps are not taken:
Note: FourWindsrecommendsthisbedonebyaqualifiedtechnicianordealer.
Class A Water System Winterization 1. Leveltheunitforgoodsystemdrainage. 2. Drain the waste water tanks (black then grey following drainage guidelines) and fresh water tank. 3. Turnthewaterpumpswitchoff. 4. Openallfaucets,andwaterheaterdrain. 5. Openlowpointdrainsonthewaterlines,includingtheoutsideshower. 6. When all lines are drained, close water tank valve, all faucets, water heater drain, and low pointdrainsonwaterlines. 7. Turn water heater bypass valve on to prevent tank from filling with antifreeze. 8. Removewaterfilter(ifinstalled)andreplacewithbypasscaptoprotectfilter. 9. If unit is equipped with an ice maker, turn off the water valve. 10.Positionantifreezesosiphonhosecanbeconnectedtothewinterizingconnection. 11.Turnvalvetopositionwhichwillallowthewaterpumptopumpfromantifreezecontainer. 12.Turnonthewaterpumpandleteachfaucetrununtilantifreezeflowsfreelyfrombothhotand coldlines.Alsoruntheshowerandtoiletuntilantifreezeisvisible. 13.Ifunitisequippedwithawasher/dryerturnonandletrununtilantifreezeisvisibleand continuetorunfor15-20seconds.Turncycleselectortorinsecycletoensuretheantifreeze getsintothepumptoprotectit. 14.Turnoffwaterpump. 15.PouronecupofantifreezeineverydraintoprotecttheP-traps.

FOUR WINDS INTERNATIONAL
WATER SYSTEMS
82
Class C Water System Winterization 1. Leveltheunitforgoodsystemdrainage. 2. Drain the waste water tanks (black then grey following drainage guidelines). 3. Turnthewaterpumpswitchoff. 4. Openallfaucets,andwaterheaterdrain. 5. Openlowpointdrainsonthewaterlines(pullupandtwistvalve)andtheoutsideshowertolet waterdrain. 6. Drain the fresh water tank using outside spigot type drains. 7. When all lines are drained, close water tank valve, all faucets, water heater drain, and low pointdrainsonwaterlines. 8. Turn water heater bypass valve on to prevent tank from filling with antifreeze. 9. Removewaterfilter(ifinstalled)andreplacewithbypasscaptoprotectfilter. 10. Remove water pump line at fresh water tank location and attach siphon hose to fitting. 11. Turnonwaterpumpandleteachfaucetrununtilantifreezeflowsfreelyfrombothhotandcold lines.Alsoruntheshowerandtoiletuntilantifreezeisvisible. 12. Turnoffwaterpump. 13. PouronecupofantifreezeineverydraintoprotecttheP-traps.
Beforeusingthesystemagaininwarmerweather,completelyflushthesystemwithwater,flushthetoilet,andsanitize the entire fresh water system. When using the motor home during cold weather and water in a tank or drain line should happen to freeze, you should take immediate steps to thaw it before damage to the system occurs.DONOTcontinuetousewatersystemcomponentsifsuchaconditionexists.Ifdamagehasoccurred,make sure to have it repaired before using again.
WATER SYSTEM MAINTENANCEAs with any mechanical system, your plumbing is subject to the development of problems. Most of theseproblemscanbegreatlyreducedifnotaltogethereliminatedbyfollowingascheduleofplannedinspectionsandmaintenance.Neglectofpropermaintenanceproceduresistheusualcauseofmostwatersystemproblems.
Road vibrations and shocks, as well as excessive pressure from some city water sources are the main physical causes of water system damage. It is important to inspect all plumbing joints and fittings often for cracks and leaks. Water leaking from a plumbing joint can cause considerable damage if left unchecked.
A leak somewhere in the fresh water system should be suspected whenever the pump is running and all faucets and valves are closed. When the leaking fitting has been identified, attempt to stop the leak by tightening. DO NOT over tighten. Plastic fittings rarely need to be tightened with a wrench. If these fittings leak after tightening by hand, disconnect the fitting and check for dirt, scale, or other foreign substances which may be causing the leak. Clean the fitting thoroughly and reinstall. If leaking persists, shut off the water supply until the fitting can be properly replaced. Check with your dealerforcorrectmethodofreplacement,andreplacementparts.
Proper winterization procedures of plumbing systems will normally be all that is necessary to prevent thedamagecausedbyfreezing.Freezingdamagecanharmanycomponentofthesystem,includingthewatertanks, toilet, pump, and all piping. Be sure to follow the winterization procedures outlined in this manual. Also be sure to discuss any additional precautions that should be taken to winterize your motor home’s plumbing systemwithyourdealer.Localclimatesvary;andwintermaintenanceneedsmaybeeffected.
Besuretoreadtheliteraturesuppliedwithplumbingcomponents,suchasthepump,fortroubleshootingtips.Also remember that it is possible for an electrical problem to cause water system problems. Lack of power to thepumpcanbecausedbyavarietyofreasons.Ifyouareunsureofhowtolocateandorrepairaplumbingproblem,itisbesttohaveyourdealeroraqualifiedplumberhandlethejob.

FOUR WINDS INTERNATIONAL
WATER SYSTEMS
83
SYSTEMS COMPARTMENT - DIESEL
Exterior Shower: Provideshotorcoldwatertotheexteriorofthemotorhome.
Cable/TV/Phone Jack Hook-up: Whenavailable,providescableandorsatellitetointeriorofmotorhome.
120 Volt Outlets: Provides120voltelectricitytotheexteriorofthemotorhome.
Water Heater Bypass Valve:Divertswaterflowaroundthewaterheaterforwinterizationprocess.
City/Fresh Tank Water Fill Valve:Twowaydirectionalvalvewhichcontrolscitywaterbetweenfillingthe fresh water tank and direct interior usage.
San-T-Flush Inlet: Used to clean the black and gray holding tanks of waste and debris.
Compartment Light:Providespowertothecompartmentlight.
Water Heater Switch:Providespowertothewaterheater.
Water Pump Switch:Providespowertowaterpump.
Sewer Hose Storage:Placethesewerhoseherewhennotinuse.
Fresh Water Tank Monitor Panel: Check the fresh water tank level by pressing the level test switch.
Liquid Soap Dispenser: Fill with soap for easy clean-up after working within the compartment.
Paper Towel Holder: Fill with paper towels for easy clean-up after working within the compartment.
Bay Heater (Optional):Usedtomaintaincompartmentambienttemperatureabovefreezing.
Fresh Tank Drain Valve: Turn handle to the left to drain excess water from the fresh tank.
Black Tank Dump Valve: Pull T-handle out to dump solid waste from the black tank.
Gray Tank Dump Valve: Pull T-handle out to dump waste water from the gray tank.
Winterization Inlet: Antifreezeinletforwinterization.
Winterization Valve: Towinterize,rotatethehandleonthevalvesothatitisperpendiculartothewaterline. Refertowinterizationprocedureforwinterizing.
WATER PUMPSWITCH
WATERPUMP

FOUR WINDS INTERNATIONAL
PROPANE GAS SYSTEMS
84
PROPANE GAS SYSTEMS
PROPANE GAS IS HIGHLY VOLATILE AND EXTREMELY EXPLOSIVE. Do not use matches or a flame to test for leaks. Use only approved Propane gas leak testing solutions for leak detection. Unapproved solutions can damage copper tubing and brass fittings. Never attempt to adjust propane gas regulators. Only qualified personnel should perform any maintenance or repair to the propane gas system.
The propane gas system furnishes the fuel for cooking, heating, and hot water. Propane gas can also be used asanalternateenergysourceforrefrigeration.Propaneisaclean,efficient,safeformofenergywhenproperhandlingandsafetyprecautionsareobserved.
ThePropaneGassystemisdesignedtoaccepteitherPropaneorButane.However,sinceButanevaporizesatabout32°F,itcanonlybeusedinareaswhereyoucanbesureofhighertemperatures.Propanevaporizesatapproximately-40°F.ThereareblendsofPropaneandButaneavailable,whichwillvaryinthetemperatureat which it vaporizes. When filling the tank, select a Propane Gas that has a boiling point about 40° lower than temperaturesyouexpecttotravelin.Consultwithyourdealer,orlocalPropaneGassupplieraboutwhatyoushouldbeusing.
PROPANE GAS TANKThe gas is stored under extreme pressure in the tank, with space in the tank to allow for expansion into vapor. Thisvapor is reduced inpressurebypassing througha regulator.This reduction inpressure isa twostepprocesswhichassuresconsistentpressureforuse,regardlessofoutsidetemperatures,weather,oraltitude.
Note: Fordetailedinformationregardingpropanegasandit’suse,consultaqualified propaneservicerepresentative.
Filling the TankMAKE SURE THAT THE TANK IS NOT FILLED BEYOND THE 80% LIQUID LEVEL. Even though the tank is equipped with an automatic 80% shut-off which prevents over-filling beyond 80% tank capacity, it is a good idea to have the supplier monitor the 20% liquid gauge, and stop the filling process if liquid does appear. If the tank has been over-filled, make sure the Propane supplier bleeds out the excess. Over-filling the propane gas container does not allow for the necessary 20% vapor expansion space that can result in uncontrolled gas flow which can cause a fire or explosion.
Note: Make sure the tank service valve is accessible at all times. In an emergency, it may be necessary to shut off the valve quickly.
1. Before entering the propane bulk plant or service station, make sure all pilot lights are extinguished.Shutoffgastoallappliancesbyfirstturningoffeachappliance,thenclosethe propanegasmainshut-offvalve. 2. Extinguish open flames and smoking materials. 3. Never remove the propane gas tank from the motor home. Always drive the motor home to the gassuppliertofill. 4. Have the supplier connect the fill nozzle to the tank fill connection. 5. Always remember to close the supply valve, and open the 20% liquid level valve.

FOUR WINDS INTERNATIONAL
PROPANE GAS SYSTEMS
85
6. Never use a wrench to close the service or the 20% liquid level valve. If when closing by hand, leaking occurs, have the valve repaired or replaced. 7. Driveatleastonemilefromthepropanegassupplierbeforerelightingpilotlightsor appliances. This will allow any minimal leakage which occurred while filling the tank to dissipate.DONOTlightpilotlightsifyoucontinuetosmellpropanegas.ShutofftheSupply Valve.Allowthemotorhometoventilatefor30minutes.Ifyoustilldetectpropaneodor,have the source of the leak located and repaired.
Never use any other tank than the one furnished with the motor home. If the tank must be replaced, check with your dealer for correct tank specifications and replacement procedure.
Propane Gas RegulatorNEVER ALTER THE POSITIONING OF THE REGULATOR. Propane gas regulators must always be installed with the diaphragm vent facing downward. Also make sure to keep the regulator cover in place to minimize vent blockage which could result in excessive gas pressure causing fire or explosion. Do not rely upon being able to smell propane gas leaks, as the odor may not be sufficiently strong enough to detect.
The regulator reduces the pressure of the propane gas vapor from the pressure in the tank, to the pressure required for use at the appliances. This reduction in pressure is performed by a two-stage regulator. Tworegulators are used in the same body to reduce the pressure of the propane gas in the tank for use by the appliancesinthemotorhome.Theregulatorseldomrequiresservice,butitshouldalwaysbeprotectedfromtheelementsandextremesofhotandcold.
The high pressure regulator (first stage) is used to reduce the pressure to approximately 10 to13 PSI before sending it along to the low pressure regulator (second stage). This second stageregulator reduces the pressure further to 11 inches water column, or 6.35 ounces per squareinch. The two stages regulator does not have to work as hard since the second stage receives consistentpressureratherthaninletpressurewhichvaries.Theresultisanefficientsafersystemthathelpstoeliminateproblemssuchasfreezeupandpilotoutage.
Theregulatorhasbeenpresetbythemanufactureroftheregulator,andadjustmentshouldnotbenecessary.Ifadjustmentshouldberequiredhowever,DONOTattempt toadjust ityourself.Adjustmentmustbemadewith special equipment by a qualified propane gas service technician. Have the regulator checked annually, or wheneveryoususpectaproblem.Thecorrectlinepressureshouldbe6¼oz.or11inchesofwatercolumn.
Because air is required for proper operation of the regulator, it is very important that the regulator vent is kept clean and free of dirt and debris. This is why it is necessary to keep the vent facing downward and the regulator coveredtoprotectiffromcontamination.Atoothbrushcanbeusedtocleantheventifitbecomescloggedbyforeignmatter.
Regulator Freeze-UpDuring cold weather, it is important to keep ice from forming in the regulator, which will shut off the flow of propane gas to the appliances. Have the supplier add a hydrous Methanol when filling the tank for use during cold weather. Regulator freeze-up can occur in any weather if there is moisture in the tank, or if the tank has been over-filled. Always use moisture-free propane gas, and make sure the tank has not been filled beyond 80% of capacity. If moisture has entered the tank, have the tank purged, or have hydrous methanol added by anauthorizedpropanegassupplier.
Ifyoubelievearegulatorhasbeendamagedorotherwiseisnotfunctioning,haveitreplacedbyaqualifiedpropanegasservicerepresentative.

FOUR WINDS INTERNATIONAL
PROPANE GAS SYSTEMS
86
Thetermregulatorfreeze-upisamisleadingone.Regulatorsandpropanegasdonotfreeze.However,themoisture that can be contained in the gas will freeze as the gas expands and cools passing through theregulator. This freezing of the moisture in the gas can build up and partially or totally block the passage of the gasthroughtheregulator.Freezingcanalsooccurwhenoutsidetemperaturesarelowenoughtocontributetothefreezingofthemoistureinthegas.
The source of the moisture is varied. It can occur at the refinery or gas bulk plant, in the rail cars used to transport the gas, or even within the motor home propane gas tank. Moisture in an propane gas tank can occur when a tank service valve is left open, allowing moist air to enter and become trapped.
Atwo-stagedregulatorhelpstoreducethepossibilityoffreeze-upbecauseof itslargerorificesize,andthefactthatheatistransferredthroughthewallsoftworegulatorsinsteadofjustone.
Take these steps to inhibit or prevent this from happening:
1. Make sure that the propane gas tank is free of moisture before refilling 2. DO NOT overfill the propane gas tank. 3. Make sure to keep the service valve on an empty tank closed. 4. If freezing has occurred, have your propane gas dealer purge the propane gas tank before refilling. 5. Addahydrousmethanolorotherapprovedpropanegasantifreezeorde-icingagenttothe propane gas tank. 6. Keeptheregulatorcoveredatalltimes.
Note: IF FREEZE-UP DOES OCCUR, shut off the propane gas at the tank. A frozen regulator may permit propane gas to flow at high pressure, resulting in leaks atappliancesorinthelines.Iffreeze-updoesoccur,NEVERattempttothaw with an open flame. Once thawed, be sure to take the proper steps to prevent a reoccurrence. Have the system checked by your propane gas supplier if freeze-up continues.
Rememberthatasoutsidetemperaturesdrop,theBTUvalueofthepropanegasislessened,sincethecolderliquid propane in the tanks requires the heat from the surrounding air to vaporize. This lowering of BTU value can significantly affect the performance of the system. You can help insure proper performance by keeping the propane gas tank as full as possible in cold weather, and reviewing the BTU/hr plates on propane gas appliancesforproperpropanemanagement.
PROPANE GAS HOSES PIPES TUBES AND FITTINGSThehoses,pipes,tubes,andfittingsusedinthepropanegassystemaredesignedtowithstandpressuresfarexceedingthoseofthepropanesystem.However,becauseenvironmentandtimecanbothcontributetothedeteriorationofthesecomponents,theymustbeinspectedforwearatregularintervals.Besuretoinspectthehose before each season and when having the tank refilled. Look for signs of deterioration such as cracks or loss of flexibility. When replacing the hose or other propane components, make sure to always replace them with components of the same type and rating (check with your dealer).

FOUR WINDS INTERNATIONAL
PROPANE GAS SYSTEMS
87
PROPANE GAS SAFETY PRECAUTIONSDO NOT STORE PROPANE GAS CONTAINERS INSIDE THE Motor home. Propane Gas containers are equipped with safety devices which relieve excessive pressure by discharging gas to the atmosphere. Failure to comply could result in explosion resulting in death or serious injury.
If you smell propane gas:
1. Extinguish any open flames, pilot lights and all smoking materials. 2. DO NOTtouchanyelectricalswitches. 3. Shut off the gas supply at the tank valve(s) or gas supply connection. 4. Openalldoorsandotherventilatingopenings.(DO NOT USE THE RANGE HOOD). 5. Leavetheareauntiltheodorclears. 6. Have the system checked by a trained professional before using again.
Be careful when doing any work or maintenance in the motor home, that you do not puncture a gas line with anail,screw,ordrillbit.
Warning labels and decals are used throughout the motor home in locations where the potential for adangeroussituation ispresent.Theyhavebeeninstallednotonlybecauseof therequirementtodoso,butalsoasaconstantremindertooccupantsofthemotorhometoexercisepropercautionwhenusingorbeingaround propane gas appliances and equipment. Make sure that you and your family understand and follow all of them. Never remove these warning labels and decal's. If one should be lost, it should be replaced as soon aspossible.

FOUR WINDS INTERNATIONAL
CARE AND MAINTENANCE
88
CARE AND MAINTENANCE
Periodic maintenance and cleaning of your motor home is necessary to retain the dependability, safety,andappearance thatwill provideyouwithmanymilesof trouble freeoperation,aswell asprotectingyourinvestment.
Make sure to read and follow all the maintenance tips and schedules that appear not only in this manual, butalsointhemanualsprovidedbythechassismanufacturerandvariouscomponentmanufacturers.Keepgood records of maintenance functions performed, and make sure to perform all owner obligations as may be required by the chassis manufacturer to keep your warranty in force.
Itisalsoimportanttonotethatoperatingconditionswilleffectservicetimetables.Drivinginextremeconditionssuchasheavydust,continuousshorttrips,orstartandstopheavytrafficmeansthatservicedurationswillbeshortened.Discussservicetimetableswithbothyourdealerandchassisservicerepresentative.Preventativemaintenancewillpayforitselfmanytimesoverbycatchingorpreventingproblemsbeforetheyoccur.Manyrepaircostsaregreatlyincreasedduetothefactasmallproblemcanbegintoeffectotherpartsandsystemsofthemotorhomeifleftunattended.
If a situation arises involving a maintenance or cleaning activity for which you are not sure of the properprocedure,donothesitatetocontactyourdealer,orchassisservicerepresentativeforinformation.
Note: PerformingperiodicmaintenanceisnotcoveredundertheFourWindsLimited Warranty.
FIBERGLASS SIDINGThe care of fiberglass siding is essentially the same as any automotive finish. Wash your motor home atleast once a month. Use warm water and a mild detergent to clean the finish. Take care to avoid spraying waterdirectly intorefrigeratorandfurnaceventswhenwashingthemotorhome.Removebirdandtreesapdroppings,insects,andtarassoonaspossibletoavoidstainingofthefinish.
Itisimportanttonotethatanyfinishwilldeterioratewithtime.Dullingandfadingcanbeincreasedbyexposuretoextremesunlight,airpollutants,andexcessivemoisture.Surfaceweatheringoffiberglassdoesnotchangethestrengthofthefiberglass.Regularwashingandwaxingofexteriorsurfacesisthebestinsuranceagainstsurface deterioration such as fading, yellowing, or chalking. If surface deterioration has occurred, check with yourdealerforthestepsrequiredtorestorethefinish.Buffingmaybenecessaryinextremecases.
Wax fiberglass surfaces at least once a year with a standard liquid or paste wax. Make sure to follow the directions for use as outlined by the product manufacturer. Make sure to wash and wax your unit out of the hotsunwhenexteriorsurfacesarecool.Storageofthemotorhomeoutofdirectsunisalsoaprimarywaytohelppreservefiberglassfinishes.
Physical damage to fiberglass should be taken care of immediately to avoid moisture from entering through breaks and causing problems with interior walls and components. Cover breaks in the fiberglass with plastic, sealingtheedgeswithtapeuntilproperrepairscanbemade.
Note: DO NOTuserubbingcompoundoranyabrasivecleanerorclothonthemotor home. If using a tar and insect remover, make sure it is safe for use on painted surfacesandstripingdecals.
Note: Theexteriorpaintedfinishonthemotorhomeisofthefinestquality.Proper maintenancewillassurealonglastingdurablefinish.Do not wax or polish the exterior for the first 60 days.

FOUR WINDS INTERNATIONAL
CARE AND MAINTENANCE
89
EXTERIOR PAINT (OPTIONAL)Pressure WashingExtremecautionshouldbeusedwhenusingapressurewashertowashthemotorhome,asseveredamagetothepaintcouldresult.Thetipofthepressurewashershouldneverbeadjustedtoa"pinpoint"typespray.Afantypespraywhichdisbursesthewateroveralargerareashouldbeused.Also,ifthepressureisadjustable,setittothelowestsetting.Thespraytipshouldremainaminimumof30"awayfromthesurfaceofthemotorhometoensuresafecleaning.
Note: Ifusingatarand/orinsectremover,insureitissafeforpaintedsurfacesanddecals.
Precautionary Measures • Avoid parking under trees or near ocean salt spray. • Ice or snow should not be scraped from the painted surface. Brush off. • If the vehicle sets more than 24 hours, remove any front protective covering (bra) while not beingdriven. • Commercial washes should be avoided. Wash with cold water using a mild liquid soap. Dry wipingwithadryclothisnotrecommended. • When driving, avoid gravel roads. • Anti-freeze, gasoline, or window solvent spilled on painted surfaces should be rinsed off with waterimmediately. • Rinse off bugs and bird droppings daily with water.
Anyexterior finishwilldeterioratewith time.Dullingand fadingcanbe increasedbyprolongedexposure toextreme sunlight, air pollutants, and excessive moisture. Surface weathering of fiberglass will not diminishstructuralintegrity.Regularmonthlywashingandpolishingofexteriorsurfacesisthebestinsuranceagainstsurface deterioration such as fading, yellowing, or chalking. Take care to avoid spraying water directly into refrigeratorandfurnaceventswhenwashingthemotorhome.
If surface deterioration is apparent, contact a Four Winds International dealer for assistance with finishrestoration. Physical damage to the fiberglass, such as cracks, holes, and chips, must be attended to immediatelytoavoidmoisturefromenteringandcausingproblemswithinteriorwallsandcomponents.Covertheseareaswithplastic,sealingtheedgeswithtapeuntilproperrepairscanbemade.
SEALS AND ADHESIVESFailuretomaintainsealsthroughregularmaintenancecanleadtodamageofmotorhomecomponents,andmaybeconsideredabusivetreatmentundertermsofyourmotorhomewarranty.
Itisimportanttomaintainthesealsandadhesivesofyourmotorhometopreventmoisturefromenteringanddestroyingmotorhomecomponents.Whenwashingyourmotorhome,inspectthesealsforsignsofdryingoutandwear.Beawarethatweather,sun,androadvibrationwillhaveaneffectonseals,causingthemtodry,crack, or separate. If you are unsure what to look for, have your dealer instruct you, and also show you the correct method for renewing the seals. All exterior seals should be checked and resealed as needed at least everysixmonths.
Note: It is especially important to check the seals before and after periods of extended storageornon-use.Fallandspringinspectionsarerecommended.
Note: Be aware that moisture can accumulate in locks and hinges of windows and doors, causingdamageorfaultyoperation.Donotforcetheoperationofthesecomponents insub-freezingweather.

FOUR WINDS INTERNATIONAL
CARE AND MAINTENANCE
90
FRAMECheck the condition of the frame regularly. Keep it clean, and repaint as necessary to help avoid rust. It is especially important to keep under-body components clean, when driving the motor home in the winter in areas whereroadsaltsareused.
WHEELSTo keep the rims of the motor home looking their best, follow these simple steps:
1. Rinsethewheelwithhigh-pressurewatertoremoveanydebris,gritordirtparticles. 2. Use a 100% cotton cloth dipped in a mild soap solution to help remove stuck on dirt and grease. 3. Rinsetheremainingsoapresiduefromthewheel. 4. Dry the wheel thoroughly with a 100% cotton cloth.
Note: Inareaswherehotsunconstantlybeatsdownonthemotorhome,shadingthetires or covering can reduce tire sidewall cracks from forming.
ROOFInspection of roof components at least twice a year is very important to make sure seals are not cracked or worn. Proper maintenance of seals is necessary to keep moisture from entering and causing severe damage such as rot, mold, or mildew. If you encounter drying, cracked, or weathered seals, make sure to reseal as necessary. Check with your dealer for the type of caulking required for roofs and correct methods of resealing. Special sealers are also required for the skylights.
It is especially important to check the seals before and after periods of extended storage or non-use. Fall and spring inspections are recommended. Four Winds International recommends all roof maintenance beperformedbyyourdealer.
Note: Ifyourroofshouldsomehowbepunctured,coverthepuncturetosealoutmoisture, and have it repaired as soon as possible (check with your dealer).
EXTRUSIONS AND ALUMINUM SURFACESClean and wax all extrusions when waxing motor home sidewalls, to help avoid surface pitting. Specialaluminum cleaners are available to restore the original luster to aluminum surfaces. Make sure to follow the instructions for use as outlined on the product package.
Chromesurfacescanberestoredwithspecialchromepolishifregularcleaningmethodsarenotsuccessful.Again, make sure to follow product instructions for use.
FOUR WINDS INTERNATIONAL
CARE AND MAINTENANCE
91
WINDOWS AND DOORSCheck the seals around the windows at regular intervals. Follow previous instructions for checking the condition ofsealsandrepairingasnecessary.
Make sure that windows remain operative by adjusting and lubricating latches and moving parts annually. Also check the condition and operation of the door locks, adjusting and lubricating as necessary. Use powdered graphiteorlightoiltolubricatemovingpartsondoorsandwindows.
Vinyl seals around windows and doors should be cleaned regularly, and kept supple by use of a silicone spray (make sure to follow the directions on the product).
Keepscreensandwindowslidescleanandfreeofdebris,tomaintainproperoperation,andavoidcomponentroad damage. Test the operation of all windows occasionally to make sure they are working properly, including closing flush and locks holding tight.
Check with your dealer if you are unsure about the correct methods of lubrication and adjustment.
Note: Be aware that moisture can accumulate in locks and hinges of windows and doors, causingdamageorfaultyoperation.Donotforcetheoperationofthesecomponents insub-freezingweather.
PROPANE GAS SYSTEMThe Propane Gas system should be checked regularly for leaks and damage. Follow the lines, looking for kinks orflattenedspotsthatcouldhaveoccurredduringtravelormaintenanceonthemotorhome.Theentiresystem,including regulator pressure, should be checked annually, or whenever you suspect a problem, by a qualified Propane Gas service technician using proper equipment. The method of checking the system for leaks, and PropaneGassafetyprecautionscanbefoundelsewhereinthismanual.
Note: Line pressure for Propane Gas appliances should be checked at least every six months. Most Propane Gas suppliers have equipment to make the test for you. The correctlinepressureforallofthePropaneGasappliancesis11"ofwatercolumn pressure.
DRAINAGE SYSTEMThe drainage system, including the tanks and associated drain piping should be periodically inspected for road damage.Anydeteriorationofthesealantaroundjointsandfittingsshouldberepairedimmediately.
Check the operation of the termination valves. If they pull or close with effort, lubricate the shaft and slide valve with spray silicone. Termination valves that leak should be repaired or replaced as soon as possible.
Sometimes,abuildupofpaperorothermaterialintheinsidegrooveoftheterminationvalvecanobstructthevalveandcauseittoseatimproperly.Ifyoususpectthatthisisoccurring,thevalvecanberemovedfromthedrainagelinebyremovingthefourscrewsthatholditinplaceandslidingitout.Thevalvegroovemaythenbecleanedoutwithascrewdriverorsimilartool.Replacethevalveinthelineandreinstallthescrewstosecureitinplace.

FOUR WINDS INTERNATIONAL
CARE AND MAINTENANCE
92
TV ANTENNATo lubricate the elevating gear, apply aliberal amount of silicone spray lubricant tothe elevating gear with the lift in the downposition.Runtheliftupanddownafewtimestodistributethelubricantoverthegears.
If rotating the antenna becomes difficult,normal operation can be restored bylubricating thebearingsurfacebetween therotating gear housing and the base plate.Any spray type silicone lubricant may beused.
Elevatetheantennaandremovethesetscrewfromtherotatinggearhousing(seeillustration).Spraylubricantinto hole and around the edges of the gear housing. Rotate the gear housing until the lubricant coats thebearingsurfacesandtheantennarotatesfreely.
EXTERIOR LIGHTSMake sure to check the operation of all exterior lights often. Check identification, clearance, turn signal, brake, and backup lights to make sure they are working correctly. Replace burnt out bulbs as soon as possible.
Head lamp CondensationCondensationoccurswhentheairinsidethelampassembly,throughatmosphericchanges,reachesthe“dewpoint”. When this takes place, the moisture in the air within the lamp assembly condenses, creating a fine mist orwhitefogontheinsidesurfaceofthelamplensorchromereflectorsurfaces.Theheadlampsaredesignedtoremoveaccumulatedmoisturevaporbyexpellingitthroughaventsystemasthelightwarmsup.Theventsystemoperatesatalltimes,howeveritismosteffectivewhenthelampsareonandthevehicleisinmotion.Since most motor homes are parked for long periods of time, they have a greater chance of condensation build-up.
Note: Check head lamp regularly for condensed water drops (daily in high humidity areas).
Ifsmalldropsofcondensedwaterarenoted,drivethemotorhomewithheadlamps“ON”or just turn“ON”the head lamps. This will evaporate the condensed water drops and will avoid water being accumulated.Dependingonthesize,shapeandlocationofthelamponthemotorhome,andtheatmosphericconditionsoccurring,theamountoftimerequiredtoclearthelampmayvary.
Check the head lamp vent tubes, this will be a small rubber hose or plastic cap located on the back of the light, make sure that they are free of dirt and the rubber is not cracked or dried out. If the vent tubes are clogged, cracked or dried out the vent system will not work correctly, allowing condensation to build up in the lamp. If the tube is cracked or dried out please replace it, replacement parts can be acquired from your motor home Dealer.
Head lamp MaintenanceCleaningisthemosteffectivemaintenancethatyoucanperformonyourlights,dirtandroadgrimebuildupcan cut light output by 40% or more.
Whencleaningyourheadlamps,pleaseobservethefollowing:donotrubthemdry,andneveruseabrasivesor strong solvents. Remove dirt and contamination, such as insects, by soaking with shampoo and then rinsing withplentyofwater.Alwaysuseade-icerspraytoremoveaccumulatediceandsnow;neveruseascraper.

FOUR WINDS INTERNATIONAL
CARE AND MAINTENANCE
93
Headlampsealsshouldnotbedirectlysprayedwithhighpressure(homeorindustrial)washsystems.Damageto the seal can occur, causing the housing to leak water.
Chemicals: Composite head lamps have a polycarbonate lens, which is very sensitive to a variety ofchemicals. Contact with certain chemicals can cause crazing, softening or cracking of the lens, which would requirereplacementoftheentirelamphousing.Thefollowingchemicalsaresuspectedtocausesimilarresults.Mildsoapandwaterisrecommendedforthecleaningofyourlamps.
DO NOT USE THE FOLLOWING TO CLEAN THE HEAD LAMP LENS:
Acetone Gasoline Oils Agitene® Kleenol Plastics Pink Lux® (phosphate free) Benzyl Lemon Joy® (phosphate free) Stanisol Naphtha® Carbon Tetrachloride Lestoil® Texiz-8006, 8129, 8757 Chlorinated Liquid Cleaner - 8211 Toluol Citrus Orange Cleaners Liquid Detergents Tricholor Corrosive or Caustic Cleaners Lysol® Triclene® Diversol® Methyl Ethyl Keyton (MEK)
Head lamp Bulb Replacement Note: Damagetothelampassemblybythesechemicalsisnotcoveredunderthe manufacturer’swarranty.
TO PREVENT INJURIES AND DAMAGE, COMPLY WITH ANY INSTRUCTIONS PROVIDED BY THE BULB MANUFACTURER.
Whenever working on any electrical system, switch off the electrical accessory you are working on or refer to the electrical system section of your owner’s manual. Failure to do this could result in short circuits.
Whenreplacingthehalogenbulbdonottouchtheglassportionofthebulbwithyourbarehandssinceevensmallamountsofimpuritiesburnintothesurfaceandreducethe service life of the bulb. Use a clean cloth, paper napkin, or similar material to hold thebulbduringinstallation.Withmostbulbsyouwillnotneedtotouchtheglassparttoinstallthebulb.
SINKS AND COUNTER TOPSCleanwithhotsoapywateroragoodliquidcleaner.Avoidusingabrasivecleaners.Neverusesteelwoolonstainless steel, since the steel particles left in the sink can rust and become unsightly. Also, when cleaning stainlesssteelwithamildcleanser,rubgentlywiththegrain,andrinsewell.Rinseaftereachuseandwipedry.
APPLIANCESMake sure to read all literature provided with each of the appliances, and follow the maintenance instructions included.Payparticularattentiontoanycautionsorwarningsincluded.Eachapplianceinthemotorhomeiswarrantedbytheirrespectivemanufacturer.
NOTICE

FOUR WINDS INTERNATIONAL
CARE AND MAINTENANCE
94
Propane Gas Appliances And EquipmentFollowtheinstructionsandwarningnotedintheapplianceandequipmentowner’smanualaswellastheoneslistedbelow:
• Annual maintenance should be conducted on the Propane Gas appliances and equipment by anauthorizeddealerorrepairfacility. • Insects can build nests in the burners of the various appliances and equipment. The burner andburnerorificeofthePropaneGasappliancesandequipmentshouldbecleanedoutbyan authorizeddealerorrepairfacilityanytimecircumstancesorconditionswarrant,butnoless frequentlythanonanannualbasis.
PRE-FINISHED PANELS AND WOOD SURFACESTreatcabinetryandwoodsurfacesasyouwouldany fine furnitureproduct inyourhome.Propercareandmaintenance of wood products will keep them looking like new for many seasons of use.
Cleanpre-finishedpanelswithaspray-typefurniturepolish.Avoidgettingwoodsurfaceswet.Wipeoffanddryimmediately if thisoccurs.Donotuseabrasivecleansersaroundwoodfinishes.Cleanregularlywithasoftclothandcleanerdesignedforwoodproductssuchaslemonoiloranyoilbasedwoodcleaningproduct.Avoidconstantexposuretodirectsunlightwhichcancausefadinganddryingofwoodsurfaces.
WATER SYSTEMCheck all hoses, fittings, and connections regularly for leaks and signs of wear. Make sure to keep the system sanitized, and take care to winterize during cold weather (see instructions elsewhere in this manual). Do not allowwatertoremaininsystemforextendedperiodsorafteratrip.
ELECTRICAL SYSTEMTheelectricalsystemrequiresminimalmaintenanceundernormalcircumstances.Mostelectricalmaintenancein the motor home involves the chassis and auxiliary batteries. Keeping the batteries properly maintainedwill help to eliminate many frustrating electrical problems. Make sure to refer to the index for the location of electricalandbatterymaintenanceelsewhereinthismanual.
Thegenerator isanotherareainwhichsimplepreventivemaintenancecan“headoff”problemsbeforetheyhappen.Read themanualsuppliedwith thegenerator for thecareandmaintenance requiredona regularbasis. If you experience electrical problems with your motor home, make sure to have it checked by a qualified electrician.
ROOF VENTSCheck roof vents regularly for debris that may block air flow or jam the cranking mechanism. Lubricate the cranking.
ABS PLASTICAVOID ABRASIVE CLEANSERS (even the liquid and cream types), alcohol based products, and solvents such as acetone and MEK. Gasoline and kerosene should not be used because of the damaging effect they have on the plastic surface, as well as the fire hazard they present. Often the damage caused by solvents, alcohol, citrus based and oil based products may not be immediately noticeable, but the plastic is made weaker, and prone to stress cracking.
NOTICE

FOUR WINDS INTERNATIONAL
CARE AND MAINTENANCE
95
Manycomponentsofthemotorhomeareconstructedofstrong, lightweightABSplastic.Sometimes, itmaybenecessarytoremovestains,orgenerallyclean.Amildsolutionofsoapandwaterwillcleanmanystains,andshouldbeused initially.Tougherstainsmayrequirestrongercleaners,butbesure to read the label todetermineiftheproductisrecommendedforuseonplastics.
WINTER PRECAUTIONSWater SystemIf the fresh water storage tank is located inside the coach, the normal heating of the coach during moderately coldweathershouldbeenough to insure itsnot freezing. Inseverecoldhowever, it iswise tomonitor thewater temperature in the tank, and take appropriate steps to drain and winterize if necessary. In severe cold it may be necessary to open lower cabinet doors at night in both the bath and kitchen areas to keep warmer air circulatingaroundwaterfixtures.
Ifyouaregoingtohavetoleavethecoachunheatedforanylengthoftimeinseverecoldconditions,itisbestnot to keep water in the fresh water tank. It may work best to carry cooking and drinking water with you in plasticjugsinstead.
Ifyouwillbeusingyourmotorhomewhenconditionsfallbelowthefreezinglevel,itwillbenecessarytoprotectthedrainagesystemcomponentsfromdamagebytheadditionofanapprovedantifreezesolutionasoutlinedontheproductdirections.Drainlineswhichareexposedoutsidethemotorhomeareespeciallysusceptibletofreezing, and steps should be taken to protect them from damage.
Food StorageIntheeventthemotorhomeisleftforaperiodoftimewithoutthefurnaceinoperation,cannedgoodsandotherfoods packed in water should be stored as high as possible, since heat rises. They might also be stored in the refrigeratorasinsulationagainstthecold.Storedryfoods,andotheritemsthatarenotdamagedbyfreezinginthelowerstorageareas.
Propane Gas SystemMake sure to use a Propane Gas that will vaporize properly in the colder temperatures. Check with your PropaneGasrepresentativefortheproperfuel,andreadtheinformationonPropaneselectioninthePropaneGas section of this manual (check the Index for the location).
Note: ItisimportanttorememberthatheatingwithPropaneconsumesgasrapidly,so refill tank immediately when low, to avoid running out completely.
HeatingNEVER USE THE RANGE FOR HEATING. ASPHYXIATION COULD RESULT. Use ONLY the furnace to heat the motor home. It is properly vented to the outside.

FOUR WINDS INTERNATIONAL
CARE AND MAINTENANCE
96
STORAGE PREPARATIONWhenstoringthemotorhomeforthewinter(orotherextremeconditions),certainprecautionsneedtobemadeto protect it until you open it again for use. Make sure to talk with your local dealer concerning any special requirementsforstorageinyourparticulargeographicarea.Thefollowingstepsaregeneral,andyourdealercanhelpyouchoosethosethataremostappropriateforyourneeds.
1. Make sure to park the motor home on a level surface. 2. Make sure to winterize the chassis as outlined in the chassis owner’s manual, and also the 120Vgenerator(Ifsoequipped)asoutlinedinthegeneratorowner’smanual. 3. Cleanthemotorhomethoroughly,bothinsideandout,aspreviouslyoutlinedincludingthe refrigerator. 4. Make sure all electrical switches and appliances are turned off. 5. Closeallthedrapesandcurtains,andprotectthecurtainsfromsunfadingbyplacingfoil,or paperbetweenthewindowsandthescreens. 6. Make sure all windows, doors, and vents are closed securely. Cover exterior vents on appliancestopreventmoistureandinsectsfromenteringduringstorage. 7. Check the interior of the motor home periodically while in storage to make sure leaks have notdeveloped,orcondensationformedthatcancausedamagetointeriorcomponents. Condensationcanmostreadilybeobservedasmoistureaccumulationonwindowsand mirrors. To reduce condensation, make sure to air the motor home out occasionally during storage. 8. Besurethatboththechassisandauxiliarybatterieshavetheproperelectrolytelevel and that they are fully charged (12.7 Volts). A discharged battery will freeze and crack the case,ruiningthebattery.Instorage,abatterywilllosechargegraduallyovera30to45 dayperiod,evenwhendisconnectedbyuseofthebatterydisconnectswitch.Werecommend that at least monthly the batteries be checked for charge. If the charge is 80% (12.5 Volts) or less,itmustberecharged.
• You may wish to remove the batteries from the motor home and store them in aheatedarea.However,evenwhenwarm,thebatterychargelevelmuststillbe maintained,awarmbatteryacceptschargemuchmorereadilyhowever,thana coldone. • Make sure to follow all precautions associated with battery care and maintenance outlinedintheelectricalsectionofthismanual.
9. Store with as much fuel as possible in the fuel tank to limit condensation buildup. 10. Check engine coolant, making sure antifreeze is sufficient for local temperature extremes. 11. Make sure the tires are inflated to correct pressures. 12. Storethewindshieldwiperarmsandbladesinsidethemotorhome. 13. Lettheenginerunforaperiodoftimeuntilitiswarm.Changetheoilandoilfilter. 14. Run the air conditioner during this final engine warm up to make sure the compressor seal is lubricated. 15. Ifsnowaccumulatesonthemotorhome,trytoremoveitasoftenasyoucan. 16. A primary concern when winterizing the motor home is to make sure the water systems are protectedagainstdamagecausedbyfreezing.Followthewatersystemwinterizingprocedure outlined in the Water and Drainage section of this manual (check the Index for location).
Note: Besuretoreadtherestofthismanual,andfollowanyadditionalinformationon storage,cleaning,andwinterizingprocedures.
MOLDMoldsaremicroscopicorganismsthatnaturallyoccurinvirtuallyeveryenvironment,indoorsandout.Outdoors,mold growth is important in the decomposition of plants. Indoors, mold growth is unfavorable. Left unchecked, molds break down natural materials, such as wood products and fabric. Knowing the potential risks is important foranownertoprotecttheirinvestment.

FOUR WINDS INTERNATIONAL
CARE AND MAINTENANCE
97
AccordingtotheCenterforDiseaseControl,exposuretodampandmoldyenvironmentsmaycauseavarietyofhealtheffects,ornoneatall.Somepeoplearesensitivetomolds.Forthesepeople,moldscancausenasalstuffiness, throat irritation, coughing or wheezing, eye irritation, or, in some cases, skin irritation. People with moldallergiesmayhavemoreseverereactions.Immune-compromisedpeopleandthosewithchroniclungillnesses,suchasobstructivelungdisease,maygetseriousinfectionsintheirlungswhentheyareexposedtomold.
Factors Contributing to Mold GrowthFormoldgrowthtooccur,temperatures,indoororoutdoors,mustbebetween40degreesand100degreesFahrenheitandalsohaveasourceofmoisture,suchashumidity,standingwater,dampmaterials,etc.Indoors,themostrapidgrowthoccurswithwarmandhumidconditions.
Inhibiting Mold GrowthBycontrollingrelativehumidity,thegrowthofmoldandmildewcanbeinhibited.Inwarmclimates,useoftheairconditioner will reduce the relative humidity. Vents are located in the bathing and cooking areas and constant useisadvisedduringfoodpreparationandbathing,evenduringcolderweather.Additionally,openingawindowduringtheseactivitieswillassist inventilation. Inextremelyhumidconditions, theuseofadehumidifiercanbehelpful.
Note: Ifusingadehumidifier,pleasereadandfollowallmanufacturerinstructionsand recommendationstotheuseandcleaningofthedehumidifier.
Ideally, relative humidity should be at 60% or less. Relative humidity can be monitored utilizing a portable hygrometer,asmalldevice thatmeasures temperatureand relativehumidity.Hygrometer’sareavailableatelectronicsorbuildingsupplystoresforminimalcost.
Note: In cold climates, relative humidity may need to be at 35% or less to avoid window condensation.
Frequentuseofthemotorhomeorcleaningregularlyisanimportantpreventivemeasure.Further,anyspillsshould be wiped up quickly and dried as soon as possible. Avoid leaving damp items lying about. On safe surfaces, use mold or mildew killing cleaning products. Check sealants regularly, and reseal when necessary to avoid water leaks. Proper preventive maintenance to the motor home and its accessories, as described both inthismanualandinaccompanying
Effects of Prolonged OccupancyYourmotorhomewasdesignedprimarilyforrecreationaluseandshort-termoccupancy.Ifyouexpecttooccupythemotorhomeforanextendedperiod,bepreparedtodealwithcondensationandthehumidconditionsthatmay be encountered.The relatively small volume and tight compact construction of modern motor homesmeanthatthenormallivingactivitiesofevenafewoccupantswillleadtorapidmoisturesaturationoftheaircontainedinthemotorhomeandtheappearanceofvisiblemoisture,especiallyincoldweather.
Moisturecancondenseontheinsidesurfacesofthemotorhomeduringcoldweatherwhenrelativehumidityoftheinteriorairishigh.Insulatedwallsofamotorhomearemuchthinnerthanhousewalls.Estimatesindicatethat a family of four can vaporize up to three gallons of water daily through breathing, cooking, bathing, and washing. Unless the water vapor is carried outside by ventilation, or condensed by a dehumidifier, it willcondenseontheinsideofthewindowsandwallsasmoisture,orincoldweatherasfrostorice.Itmayalsocondenseoutofsightwithinthewallsortheceilingwhereitwillmanifestitselfaswarpedorstainedpanels.Appearanceoftheseconditionsawayindicateaseriouscondensationproblem.Whenyourecognizethesignsof excessive moisture and condensation in the motor home, action should be taken to minimize their effects.
Note: Yourmotorhomeisnotdesigned,norintended,forpermanenthousing. Useofthisproductforlongtermorpermanentoccupancymayleadtopremature deterioration.Long-termoccupancymaynotbeconsiderednormal,andmay underthetermsofthewarrantyconstitutemisuse,abuseorneglect,and voidcertainwarrantyprotections.

FOUR WINDS INTERNATIONAL
CARE AND MAINTENANCE
98
Tips to Controlling CondensationTo avoid condensation problems, try to follow these tips to help alleviate excess moisture:
• Allow excess moisture to escape to the outside when bathing, washing dishes, hair drying, laundering,andusingappliancesandnon-ventedgasburners. • Always use the vent hood when cooking. • Keep the bathroom door closed and the vent or window open when bathing and for a period of timeafteryouhavefinished. • Do not hang wet clothes in the vehicle to dry. • In hot weather, start the air conditioner early as it removes excess humidity from the air while loweringthetemperature. • Keep the temperature as reasonably cool during cold weather as possible. The warmer the vehicle,themorecoldexteriortemperaturesandwarminteriortemperatureswillcollideon wallsurfaces,thuscreatingcondensation. • Use a fan to keep air circulation inside the vehicle so condensation and mildew cannot form indeadairspaces.Allowairtocirculateinsideclosetsandcabinets(leavedoorspartially open). Please keep in mind that a closed cabinet full of stored goods prevents circulation and allowtheexteriortemperaturetocausecondensation. • The natural tendency would be to close the vehicle tightly during cold weather. This will actuallycompoundtheproblem.Simplyput,youneedtoremovesomeofthewarmair, andallowsomecooloutsideairtogetinsidethevehicle,sothefurnacewillnotrecyclethe humidinteriorair. • Use fluorescent ceiling lights and minimize prolonged use of incandescent lights, which produceheatandcontributetocondensationintheroofabovetheceilinglights.
Avoid Drastic Thermostat SetbacksCoolersurface temperatures increase thepotential forcondensationandsurfacemoldgrowth.Tominimizetheopportunityforcondensationtoformoninteriorsurfaces,maintainacomfortabletemperatureinthemotorhome, and avoid nighttime setbacks of 10° or more. Drastic setbacks that reduce the indoor air temperature quickly can increase the chance for airborne moisture to condense on cool surfaces such as windows. If youareawayfromthemotorhomeforanextendednumberofdays,werecommendthatyoudonotsetthetemperature back without taking other measures to manage relative humidity, including operating a dehumidifier withacontinuousdrain.
Carpet Care And Moisture ManagementThecarpetshouldbecleanedwhenitshowssignsofdiscolorationortrafficpatterns.Theuseofaprofessionalsteamcleaningsystemisrecommendedforcleaningthecarpet,unlessotherwisenoted.Tomanagemoisturefromthecleaningprocess,thecleaningsystemneedstobecapableofextractingtheexcesswaterfromthecarpetafterithasbeencleaned.Important:Besurethecarpetisthoroughlydrybeforeclosingthemotorhomeforstorage.Waterfromthecleaningprocesscancausesignificantdamagetothemotorhomeifthecarpetisnotcompletelydrybeforeclosingupthemotorhomeforanextendedperiod.
Exterior Care of the Motor HomeTheexteriorshellof themotorhomeistheprimaryweatherandmoisturebarrier.Overthelifeofthemotorhome, theshellwill require regularcareandmaintenance.Theshell includes the roof,sidewalls,windows,doors and under carriage of the motor home. Particular attention needs to be devoted to ensure thesecomponents are maintained to ensure a tight barrier against bulk water intrusion.
The shell should be inspected periodically for tears, gaps, and condition of sealants. Areas that requiremaintenanceshouldberesealedutilizingaproven,highqualitysealantofsimilarcharacteristicsastheoriginalsealant.
Particularattentionshouldbedevotedtoensuretheslideoutsarefunctioningproperly.Eachtimeaslideoutis used, it should be inspected to ensure proper operation and sealing. The slide out gaskets should also be inspectedtoensurepropersealingwhentheslideoutisoperated.

FOUR WINDS INTERNATIONAL
CARE AND MAINTENANCE
99
Storage of the Motor HomeDuring those periods when the motor home is not in use, care must be taken to ensure moisture sources are addressed.Idealstorageofthemotorhomewouldbeinanenclosedclimatecontrolledenvironment.Whenthis is not possible, the following steps should be taken to ensure moisture is controlled:
• Turn off all water sources. • Turn off all combustion appliances. • Drain all holding tanks. • Drain the water heater. • Open all closets, cabinet doors and drawers. • Close all windows and entrance doors. • Open a vent enough to allow for some limited ventilation air flow, but not so far as to allow snoworraintoenter. • When storing the motor home high humidity climates (ambient relative humidity is greater than 60% year round), add a dehumidifier drained to the exterior to control humidity inside the recreationalvehicleduringstorage.
Areas that are exposed to water spills or leaks should be dried as soon as possible and definitely within 24-48 hours. Drying areas quickly minimizes the chance for moisture damage and possible mold growth, which can begintoformcoloniesin48hours.Avarietyofmethodscanbeusedtohelpthedryingprocess:
• Remove excess water with an extraction vacuum. • Use a dehumidifier to air drying. • Use portable fans to move air across the surface. • Because moisture is key to mold issues, treat all signs of condensation and spills seriouslyanddealwithpromptly.Failuretodealwithamoistureissuepromptlymaycause more severe issues where none initially existed, or may make a small problem much worse. • Learn to recognize signs of mold - don’t paint over or cover up suspicious discolorationuntilyouaresureitisnotmold.Theaffectedsurfacemustfirstbecleanedand dried;residualstainingmaybepainted. • Be sure to understand and eliminate the source of moisture accumulation as a part of the clean-up. • Small amounts of mold should be cleaned as soon as it appears. Small areas of mold should becleanedusingadetergent/soapysolutionoranappropriatehouseholdcleaner.Gloves shouldbewornduringcleaning.Thecleanedareashouldthenbethoroughlydried.Disposeof anyspongesorragsusedtocleanmold.

FOUR WINDS INTERNATIONAL
CARE AND MAINTENANCE
100
PERIODIC MAINTENANCE CHARTForyourconvenience,aMaintenanceChart ispresentedbelow.Fordetailed information regardingspecificproductserviceandmaintenanceprocedures,refertotheproductsrespectiveowner’smanual.
Note: Thefollowingchartisaguideonly.Serviceandmaintenanceintervalsmayverydepending onproductperformance,usage,and/orenvironmentalconditions.
Fiberglass Exterior
ITEM EACHTRI
M
P
ONTHLY
EVERY 3 MONTHS
EVERY 6 M
Y
ONTHS
EARLY
AS REQUIR
ED
PROCEDUREFiberglass Exterior ▲ Wash with Warm Water & Mild Detergent
▲ Wax with Liquid or Paste Wax
Roof & Roof Components▲ Inspect & Reseal as Needed
▲ Lubricate Roof Vent Mechanism with Light Oil & Clean▲ Lubricate Roof Antenna with Silicone Lubricant Spray
Windows & Doors
▲ Check Vinyl Seals when Washing Exterior▲ Check Seals for Damage & Repair as Needed▲ Lubricate Door Hinges & Step Components
▲ Adjust & Lube Window Latches
▲ Lubricate Door Locks & Strike Pocket, Include Exterior Storage Doors
Seals & Adhesives ▲ Inspect & Reseal as Needed
LP Gas System ▲ Check for Leaks & Road Damage▲ Qualified Service Technician Inspection
Water Drainage
▲ Check Hoses, Fittings & Connections for Leaks & Signs of Wear
▲ Check Drainage System for Leaks & Road Damage▲ Sanitize Fresh Water System
▲ Winterize System Depending on Local Seasonal Conditions
Electrical System
▲ Check GFCI Circuits
▲ Generator Maintenance as Outlined in Generator Manual
▲ Check & Service Batteries
Appliances
▲ Remove Food & Ice from Refrigerator
▲ Clean Fan Blades & Wash Filter on Range Exhaust Hood
▲ Check for Obstructions & Dirt on Exterior Appliance Vents
Safety Equipment▲ Clean CO, Smoke & LP Detectors
▲ Test All Detectors▲ Check Fire Extinguisher Pressure & Condition
Carpeting ▲ Vacuum▲ Clean
Wood Surfaces ▲ Clean Pre-Finished Panels & Wood
Seats▲ Lubricate all Mechanisms & Inspect for Proper Operation
▲ Check all Seat Belt Buckles, Release Mechanisms & Belt Webbing
Chassis Components ▲ Follow Chassis Lubrication & Maintenance Procedures & Schedules
Weight & Distribution ▲ Properly Load and Verify Specified Load Limits & Weight Distribution

12 VOLT SYSTEM FUSES - DIESEL ......................................................................................................71BedBaseFusePanel..................................................................................................................................71InverterBayFusePanel..............................................................................................................................71
12 VOLT SYSTEM FUSES - GAS ...........................................................................................................69Automotive...................................................................................................................................................69Interior..........................................................................................................................................................69
AABS PLASTIC .........................................................................................................................................94ACKNOWLEDGEMENT OF RECEIPT OF WARRANTY ......................................................................... 7APPLIANCES ..........................................................................................................................................93
PropaneGasAppliancesAndEquipment....................................................................................................94AUTOMATIC HYDRAULIC POWER LEVELERS ................................................................................... 43
AutomaticLevelingAndRetractionProcedure............................................................................................44EmergencyRetractionProcedure................................................................................................................45HydraulicPumpFunctionWiring..................................................................................................................45
AWNINGS ................................................................................................................................................56AutomaticPatioAwning...............................................................................................................................57ExtendtheAwning.......................................................................................................................................57ManuallyClosingTheAutomaticAwning.....................................................................................................57ManualPatioAwning....................................................................................................................................57RetracttheAwning.......................................................................................................................................57SlideOutAwning..........................................................................................................................................56
BBATTERIES .............................................................................................................................................64
BatteryCharging..........................................................................................................................................66BatteryDisconnectSwitch...........................................................................................................................66BatteryIsolatorController............................................................................................................................65BatteryMaintenance....................................................................................................................................65BatterySafety...............................................................................................................................................64
CCARBON MONOXIDE AND SMOKE DETECTORS ............................................................................... 19
CarbonMonoxideSafetyPrecautions.........................................................................................................20RegularMaintenance...................................................................................................................................20TestingProcedure........................................................................................................................................20
CEILING VENTS ......................................................................................................................................61AtticFan-CreateABreeze.........................................................................................................................62AtticFan-FantasticVent.............................................................................................................................62ExhaustVent................................................................................................................................................61
CHASSIS ALTERNATOR ........................................................................................................................72CHEMICAL SENSITIVITY .......................................................................................................................23
Formaldehyde..............................................................................................................................................23Ventilation.....................................................................................................................................................23
CIRCUIT BREAKERS .............................................................................................................................69CLASS A AND CLASS C - GAS SYSTEM PANELS ............................................................................. 70
110VForUnitsWith30AmpServiceAndNoElectricWaterHeater.........................................................70110VForUnitsWith50AmpService...........................................................................................................70BCCFusePanel..........................................................................................................................................71ConverterFusePanel..................................................................................................................................70
INDEX

DDASH CONTROLS - GAS ................................................................................................................. 30
EmergencyStart....................................................................................................................................30FogLights..............................................................................................................................................30GeneratorRemoteStart.........................................................................................................................30MirrorControlButton..............................................................................................................................30MirrorHeat.............................................................................................................................................30WindshieldFans.....................................................................................................................................31
DASH CONTROLS AND INSTRUMENT PANELS - DIESEL ........................................................... 31FreightlinerOnlyInformationMessageCenter......................................................................................32KeypadPushButtonShiftSelector........................................................................................................32TransmissionControlPushButtonShiftSelector.................................................................................31
DASH FUSES .................................................................................................................................... 72DASH PANEL HEATER AND AIR CONDITIONER .......................................................................... 59
ControlPanel.........................................................................................................................................59OperatingFeatures................................................................................................................................59Warranty/Service....................................................................................................................................60
DASH PANEL SWITCHES ................................................................................................................ 34BatteryBoost..........................................................................................................................................35Block Heat ..............................................................................................................................................34Docking Lights ........................................................................................................................................34LightControlKnob.................................................................................................................................35PanelLightDimmerControlWheel........................................................................................................35
DASH RADIO 39DOORS, DRAWERS AND STORAGE COMPARTMENTS .............................................................. 50
BedStorage(SomeModels)..................................................................................................................50DRAINAGE SYSTEM ........................................................................................................................ 91
E
ECLIPSE GPS NAVIGATION SYSTEM OPTION DIESEL ............................................................... 41EGRESS WINDOW ........................................................................................................................... 25ELECTRICAL SYSTEM ..................................................................................................................... 94ELEVATED BEDS AND ELECTRIC BED LIFT SYSTEMS .............................................................. 51
TipsforSafeUsage...............................................................................................................................52ENTRY DOOR ................................................................................................................................... 55ENTRY STEP ..................................................................................................................................... 55EXTERIOR LIGHTS ........................................................................................................................... 92
HeadlampBulbReplacement...............................................................................................................93HeadlampCondensation.......................................................................................................................92HeadlampMaintenance........................................................................................................................92
EXTERIOR PAINT (OPTIONAL) ....................................................................................................... 89PrecautionaryMeasures........................................................................................................................89PressureWashing..................................................................................................................................89
EXTRUSIONS AND ALUMINUM SURFACES .................................................................................. 90

FFIBERGLASS SIDING ....................................................................................................................... 88FIRE EXTINGUISHER ....................................................................................................................... 19FIRE SAFETY .................................................................................................................................... 18FOUR WINDS LIMITED WARRANTY ................................................................................................. 4FRAME ............................................................................................................................................... 90FRESH WATER SYSTEM ................................................................................................................. 74
External Hook-up ...................................................................................................................................74Fresh Water Tank With Gravity Fill ........................................................................................................74Fresh Water Tank Without Gravity Fill ...................................................................................................75SanitizingtheFreshWaterSystem........................................................................................................76WaterPump...........................................................................................................................................75
FURNACE .......................................................................................................................................... 61FurnaceOperationInstructions..............................................................................................................61
FURNITURE ....................................................................................................................................... 52AirHideABed(NoDrawerStorageBelow).........................................................................................53AirHideABedSofa(DrawerStorageBelow).......................................................................................53BarrelChair............................................................................................................................................53Dinette....................................................................................................................................................54EuroReclineWithOttoman...................................................................................................................54Hide-A-BedSofa..................................................................................................................................53Jack Knife Sofa ......................................................................................................................................52LoungeTable..........................................................................................................................................54PilotAndCo-PilotSeats........................................................................................................................54SpaceSaverSofa..................................................................................................................................53
GGARAGE AREA (AVAILABLE ON SELECT MODELS) ................................................................... 58
Fold-DownRamp...................................................................................................................................58Reduce The Risk Of Fire, Explosion Or Asphyxiation ...........................................................................58
GENERATOR ..................................................................................................................................... 73GROUND FAULT CIRCUIT INTERRUPTER ..................................................................................... 68
KKEYPAD KEYLESS ENTRY SYSTEM .............................................................................................. 42
3ButtonTransmitterProgramming........................................................................................................424ButtonTransmitterProgramming........................................................................................................42ProgrammingTheKeylessEntrySystemTransmitter...........................................................................42ProgrammingTheKeypadButtonChirpOn/Off..................................................................................42ProgrammingTheUserCode................................................................................................................43
LLAWS OF THE ROAD ....................................................................................................................... 16

M
MANUFACTURERS WARRANTIES ................................................................................................. 12MOLD ................................................................................................................................................. 96
Avoid Drastic Thermostat Setbacks .......................................................................................................98CarpetCareAndMoistureManagement...............................................................................................98EffectsofProlongedOccupancy............................................................................................................97ExteriorCareoftheMotorHome...........................................................................................................98FactorsContributingtoMoldGrowth.....................................................................................................97InhibitingMoldGrowth...........................................................................................................................97StorageoftheMotorHome....................................................................................................................99TipstoControllingCondensation...........................................................................................................98
MONITOR PANEL ............................................................................................................................. 77Inaccurate Holding Tank Level Readings ...............................................................................................77OverSensitiveReadings........................................................................................................................77UnderSensitiveReadings......................................................................................................................77
MOTOR HOME LOAD LIMITS .......................................................................................................... 13OccupantAndCargoCarryingCapacity................................................................................................13
MOTOR HOME SERIAL NUMBER DECAL & DATA PLATES ........................................................ 17
PPERIODIC MAINTENANCE CHART ............................................................................................... 100POWER CONVERTER ...................................................................................................................... 67POWER INVERTER - DIESEL .......................................................................................................... 67
RemoteControl......................................................................................................................................67PRE-FINISHED PANELS AND WOOD SURFACES ........................................................................ 94PROPANE GAS DETECTOR ............................................................................................................ 21
AboutthePropaneGasDetector...........................................................................................................22Checking the Propane System for Leaks ..............................................................................................22HowToTest............................................................................................................................................21Maintenance...........................................................................................................................................21MostCommonCausesofApparentMalfunction....................................................................................22
PROPANE GAS HOSES PIPES TUBES AND FITTINGS ................................................................ 86PROPANE GAS SAFETY PRECAUTIONS ...................................................................................... 87PROPANE GAS SYSTEM ................................................................................................................. 91PROPANE GAS TANK ...................................................................................................................... 84
Filling the Tank .......................................................................................................................................84PropaneGasRegulator.........................................................................................................................85RegulatorFreeze-Up..............................................................................................................................85
RREAR LADDER/ROOF ACCESS ...................................................................................................... 56REAR VISION SYSTEM .................................................................................................................... 38
CameraOperation..................................................................................................................................39REPORTING SAFETY DEFECTS ..................................................................................................... 16ROOF ................................................................................................................................................. 90ROOF MOUNTED AIR CONDITIONER ............................................................................................ 60
PerformanceCharacteristics..................................................................................................................60ReturnAirFilters....................................................................................................................................60
ROOF VENTS .................................................................................................................................... 94

S
SAFETY REGULATIONS FOR PROPANE GAS SYSTEMS AND APPLIANCES ........................... 17SEALS AND ADHESIVES ................................................................................................................. 89SEAT BELTS ..................................................................................................................................... 23
ChildRestraints......................................................................................................................................24Maintenance...........................................................................................................................................24SeatBeltOperation................................................................................................................................24
SHIFTER PANEL SWITCHES ........................................................................................................... 33AirHorn..................................................................................................................................................33CeilingLight...........................................................................................................................................36DoorAwning...........................................................................................................................................36Engine Brake ..........................................................................................................................................33MainAwning...........................................................................................................................................36MirrorControlButton..............................................................................................................................33MirrorHeat.............................................................................................................................................33PorchLight.............................................................................................................................................35PrivacyShade........................................................................................................................................34StepCover.............................................................................................................................................35StepLight...............................................................................................................................................35SunVisor................................................................................................................................................33TagDump(TagAxleOnly)....................................................................................................................34WindshieldFans.....................................................................................................................................34
SHORE CORD ................................................................................................................................... 6330AmpShorePower.............................................................................................................................6350AmpShorePower.............................................................................................................................64
SINKS AND COUNTERTOPS ........................................................................................................... 93SLEEP NUMBER BED ...................................................................................................................... 50
UsingtheFirmnessControlSystem™...................................................................................................51SLIDE OUTS ...................................................................................................................................... 46
ElectricSlideOut....................................................................................................................................48ElectricSlideOut-ManualRoomRetractionProcedure......................................................................49HoseColorIdentification........................................................................................................................48HydraulicSlideOut................................................................................................................................46ToExtendSlideOut.........................................................................................................................46,49ToRetractSlideOut.........................................................................................................................47,49
SMART STEERING WHEEL ............................................................................................................. 37SPOTLIGHT ....................................................................................................................................... 38
ProgrammingTheTransmitter................................................................................................................38STEERING WHEEL ADJUSTMENT ................................................................................................. 36
Telescope...............................................................................................................................................36Tilt3...........................................................................................................................................................6
STORAGE COMPARTMENTS .......................................................................................................... 56STORAGE PREPARATION ............................................................................................................... 96SYMBOLS ...........................................................................................................................................11SYSTEMS COMPARTMENT - DIESEL ............................................................................................. 83

T
THERMOSTATS ................................................................................................................................ 61TOILETS ............................................................................................................................................ 80
AriaDeluxeII..........................................................................................................................................80TECMAToilet..........................................................................................................................................81
TRAILER TOWING ............................................................................................................................ 25TRAVEL PREPARATION ................................................................................................................... 28
Chassis Checks .....................................................................................................................................28Exterior Checks ......................................................................................................................................28Operational Checks ................................................................................................................................28Pre-Trip Checklist ...................................................................................................................................29Undercarriage Checks ...........................................................................................................................28
TURN SIGNAL/LANE CHANGE/HIGH-LOW BEAM/HAZARDS LEVER ........................................ 36TV ANTENNA .................................................................................................................................... 92
V
VEHICLE WEIGHING PROCEDURES .............................................................................................. 14HowToWeighYourMotorHome...........................................................................................................14WeightTerms.........................................................................................................................................15WhereToWeighYourMotorHome.......................................................................................................14
VENDOR CONTACT INFORMATION ............................................................................................... 12
WWASTE WATER SYSTEM ................................................................................................................. 77
Emptying the Holding Tanks ...................................................................................................................79Holding Tanks .........................................................................................................................................78
WATER SYSTEM ............................................................................................................................... 94WATER SYSTEM MAINTENANCE ................................................................................................... 82WATER SYSTEM WINTERIZATION ................................................................................................. 81
ClassAWaterSystemWinterization......................................................................................................81ClassCWaterSystemWinterization.....................................................................................................82
WHEELS ............................................................................................................................................ 90WINDOWS ......................................................................................................................................... 50WINDOWS AND DOORS .................................................................................................................. 91WINTER PRECAUTIONS .................................................................................................................. 95
FoodStorage.........................................................................................................................................95Heating...................................................................................................................................................95PropaneGasSystem.............................................................................................................................95WaterSystem.........................................................................................................................................95
051410
