subscription management tool guide - suse · a keyboard • file, file > save as: menu items,...
TRANSCRIPT

www.suse.com
Subscription Management Tool Guide

Subscription Management Tool Guideby Jakub Friedl, Florian Nadge, and Tomáš Bažant
Copyright © 2006– 2018 SUSE LLC and contributors. All rights reserved.
Permission is granted to copy, distribute and/or modify this document under the terms of the GNUFree Documentation License, Version 1.2 or (at your option) version 1.3; with the Invariant Sectionbeing this copyright notice and license. A copy of the license version 1.2 is included in the sectionentitled “GNU Free Documentation License”.
For SUSE trademarks, see http://www.suse.com/company/legal/. All other third-party trademarksare the property of their respective owners. Trademark symbols (®, ™ etc.) denote trademarks ofSUSE and its affiliates. Asterisks (*) denote third-party trademarks.
All information found in this book has been compiled with utmost attention to detail. However, thisdoes not guarantee complete accuracy. Neither SUSE LLC, its affiliates, the authors nor the transla-tors shall be held liable for possible errors or the consequences thereof.
ContentsAbout This Guide vii1 Overview ............................................................................................. vii
2 Additional Documentation and Resources ................................................ viii
3 Feedback ............................................................................................ viii
4 Documentation Conventions ..................................................................... ix
1 SMT Installation 11.1 Installation During the Initial Installation Process ...................................... 2
1.2 Installation on Top of an Already Installed System ..................................... 2
1.3 SMT Configuration Wizard ................................................................... 3
1.4 Update of SMT From Previous Versions .................................................. 4
1.5 Migration between SUSE Customer Center and Novell Customer Center ....... 6
1.6 Enabling SLP Announcements ............................................................... 7
2 SMT Server Configuration 92.1 Activating and Deactivating SMT with YaST .......................................... 10
2.2 Setting NU Credentials with YaST ........................................................ 11
2.3 Setting SMT Database Password with YaST ........................................... 13
2.4 Setting E-mail Addresses to Receive Reports with YaST ........................... 14
2.5 Setting the SMT Job Schedule with YaST .............................................. 14
3 Mirroring Repositories on the SMT Server 173.1 Mirroring Credentials .......................................................................... 17

3.2 Managing Software Repositories with SMT Command Line Tools .............. 19
3.3 The /srv/www/htdocs Structure for SLE 11 ............................................. 24
3.4 Using the Test Environment ................................................................. 26
3.5 Testing and Filtering Update Repositories with Staging ............................. 27
4 Managing Repositories with YaST SMT ServerManagement 314.1 Starting SMT Management Module ....................................................... 31
4.2 Viewing and Managing Repositories ...................................................... 32
4.3 Staging Repositories ............................................................................ 33
4.4 Checking the Client Status ................................................................... 35
5 Managing Client Machines with SMT 375.1 Listing Registered Clients .................................................................... 37
5.2 Deleting Registrations .......................................................................... 37
5.3 Manual Registration of Clients at Novell Customer Center ........................ 38
5.4 Scheduling Periodic Registrations of Clients at Novell Customer Center ...... 38
6 SMT Reports 416.1 Report Schedule and Recipients ............................................................ 41
6.2 Types of SMT Reports ........................................................................ 42
6.3 Report Output Formats and Targets ....................................................... 42
7 SMT Tools and Configuration Files 457.1 Important Scripts and Tools ................................................................. 45
7.2 SMT Configuration Files ..................................................................... 61
7.3 Server Certificates .............................................................................. 71
8 Configuring Clients to Use SMT 778.1 Using Kernel Parameters to Access an SMT Server .................................. 78
8.2 Configuring Clients with AutoYaST Profile ............................................ 80

8.3 Configuring Clients with the clientSetup4SMT.sh Script in SLE 11 ............ 81
8.4 Configuring Clients with YaST ............................................................. 82
8.5 Registering SLE11 Clients Against SMT Test Environment ....................... 83
8.6 Listing Accessible Repositories ............................................................. 84
8.7 How to Update Red Hat Enterprise Linux with SMT 11 ........................... 84
9 Backup of the SMT Server 919.1 Configuration Files and Repositories ..................................................... 91
9.2 The Database ..................................................................................... 92
A SMT REST API 93


About This GuideSubscription Management Tool (SMT) for SUSE Linux Enterprise 11 helps customersto manage their SUSE Linux Enterprise software updates while maintaining corpo-rate firewall policy and regulatory compliance requirements. SMT is a package proxysystem that is integrated with the Novell® Customer Center and provides key NovellCustomer Center capabilities locally at the customer site. It provides a repository andregistration target that is synchronized with the Novell Customer Center, thus main-taining all the capabilities of the Novell Customer Center while allowing a more se-cure centralized deployment.
1 OverviewThe Subscription Management Tool Guide is divided into the following chapters:
SMT InstallationThis chapter introduces the SMT installation process and the SMT ConfigurationWizard. You can install the SMT add-on together with your base system duringthe installation process or on top of an already installed base system. The SMTConfiguration Wizard guides you through the individual installation steps.
SMT Server ConfigurationThis chapter introduces the YaST configuration module SMT Server. You can setand configure organization credentials, SMT database passwords, and e-mail ad-dresses to send SMT reports, or set the SMT job schedule, and activate or deacti-vate the SMT service.
Mirroring Repositories on the SMT ServerThis chapter introduces the option to mirror the installation and update sourceswith YaST.
Managing Repositories with YaST SMT Server ManagementThis chapter introduces the option to register client machines on Novell CustomerCenter. The Client machines must be configured to use SMT.
SMT ReportsThis chapter introduces generated reports based on SMT and Novell CustomerCenter data. Generated reports contain statistics of all registered machines andproducts used and of all active, expiring, or missing subscriptions.

SMT Tools and Configuration FilesThis chapter introduces the most important scripts, configuration files and certifi-cates shipped with SMT.
Configuring Clients to Use SMTThis chapter introduces the option to configure any client machine to registeragainst SMT and download software updates from there instead of communicat-ing directly with the Novell Customer Center and the NU servers.
2 Additional Documentation andResourcesChapters in this manual contain links to additional documentation resources that is ei-ther available on the system or on the Internet.
For an overview of the documentation available for your product and the latest docu-mentation updates, refer to http://www.suse.com/documentation.
3 FeedbackSeveral feedback channels are available:
Bugs and Enhancement RequestsTo report bugs for a product component, or to submit enhancement requests,please use https://bugzilla.suse.com/. For documentation bugs, submit a bug reportfor the component Documentation of the respective product.
If you are new to Bugzilla, you might find the following articles helpful:
• http://en.opensuse.org/openSUSE:Submitting_bug_reports
• http://en.opensuse.org/openSUSE:Bug_reporting_FAQ
Bugs and Enhancement RequestsFor services and support options available for your product, refer to http://www.suse.com/support/.
To report bugs for a product component, log into the Novell Customer Centerfrom http://www.suse.com/support/ and select My Support > Service Request.
viii Subscription Management Tool Guide

User CommentsWe want to hear your comments about and suggestions for this manual and theother documentation included with this product. Use the User Comments fea-ture at the bottom of each page in the online documentation or go to http://www.suse.com/documentation/feedback.html and enter your comments there.
MailFor feedback on the documentation of this product, you can also send a mail [email protected]. Make sure to include the document title, the productversion and the publication date of the documentation. To report errors or suggestenhancements, provide a concise description of the problem and refer to the re-spective section number and page (or URL).
4 Documentation ConventionsThe following typographical conventions are used in this manual:
• /etc/passwd: directory names and filenames
• placeholder: replace placeholder with the actual value
• PATH: the environment variable PATH
• ls, --help: commands, options, and parameters
• user: users or groups
• Alt, Alt + F1: a key to press or a key combination; keys are shown in uppercase as ona keyboard
• File, File > Save As: menu items, buttons
• #amd64 em64t ipf: This paragraph is only relevant for the architectures amd64,em64t, and ipf. The arrows mark the beginning and the end of the text block. ◄
• Dancing Penguins (Chapter Penguins, ↑Another Manual): This is a reference to achapter in another manual.
About This Guide ix


SMT Installation 1SMT is an add-on product for SUSE Linux Enterprise Server 11 systems. You can ei-ther install the SMT add-on together with your SUSE Linux Enterprise Server basesystem during the initial installation process, or on top of an already-installed basesystem at any later time. SMT can be obtained free of charge from https://down-load.suse.com/.
If you install SMT on top of SLES with the latest maintenance patches applied, youmay get dependency errors in some cases if you do not also use the latest SMT patch-es. To avoid those dependency errors, re-run Novell Customer Center (Novell Cus-tomer Center) Configuration in YaST right after you have added the SMT installationrepository to your system, but before you install any packages from SMT. This waythe SMT update repository will be properly available to your system.
It is recommended to to check for SMT updates available immediately after installingthe product. SUSE continuously releases maintenance updates for SMT, and newerpackages are likely to be available compared to those installed from media, for exam-ple using the zypper patch command.
NOTE: Installation Scope
SMT is a LAMP (Linux, Apache, MySQL, PHP) based application. Dur-ing the installation, Apache and MySQL will automatically be installed ifmissing.
SMT Installation 1

1.1 Installation During the InitialInstallation ProcessTo install the SMT add-on together with your base system during the initial installationprocess, follow these steps:
1 Start the SUSE Linux Enterprise Server 11 installation as usual. For more informa-tion, see the SUSE Linux Enterprise Server documentation coming with the baseproduct.
2 To include the SMT add-on product, check the I would like to install an additionalAdd On product option during the installation and, if you are installing SMT from alocal ISO image, select Local ISO Image as the media type (repository). If you areinstalling from a different source, such as CD, NFS, or HTTP, choose the appropri-ate type. Then click Next.
3 If you are installing from a CD, insert the SMT add-on product CD. If you are in-stalling from a different source, provide the necessary repository information.
4 Confirm the SMT license agreement and click Next.
5 The SMT add-on product is displayed in the overview. Continue with the installa-tion as usual. Make sure that the SMT: Subscription Management Tool for SLE instal-lation pattern is selected automatically and do not remove it.
6 A two-step SMT Configuration Wizard is shown during the final steps of the instal-lation workflow. Configure SMT as described in Section 1.3, “SMT ConfigurationWizard” and continue with the SUSE Linux Enterprise Server installation as usual.
1.2 Installation on Top of anAlready Installed SystemTo install SMT on top of an already-installed base system, follow these steps:
1 Start YaST and select Software > Add-On Product. Then click Add.
2 If you are installing SMT from a local ISO image, select Local ISO Image as themedia type (repository). If you are installing from a different source, such as CD,NFS, or HTTP, choose the appropriate type. Then click Next.
2 Subscription Management Tool Guide

3 If you are installing from a CD, insert the SMT add-on product CD. If you are in-stalling from a different source, provide the necessary repository information.
4 Confirm the SMT license agreement and click Next.
5 Click Accept to install the SMT: Subscription Management Tool for SLE pattern.
Depending on the scope of already installed packages, the software manager willadd more packages to resolve all dependencies. Confirm these Automatic Changesto perform the installation.
6 The SMT Configuration Wizard is launched. See Section 1.3, “SMT ConfigurationWizard”.
1.3 SMT Configuration WizardDuring the installation of SMT the two-step SMT Configuration Wizard is launched,regardless of the used installation method. Configure SMT using this wizard. You areable to change the configuration later using the YaST SMT Server Configuration mod-ule— see Chapter 2, SMT Server Configuration.
1 The Enable Subscription Management Tool service (SMT) option is checked by de-fault. Uncheck it only if you want to disable the installed SMT.
If the firewall is enabled, check Open Port in Firewall to allow access to the SMTservice from remote computers.
Enter your Novell Customer Center organization credentials in User and Password.If you do not know your Novell Customer Center credentials, refer to Section 3.1,“Mirroring Credentials”. Test the entered credentials by pressing the Test button.SMT will connect to the Customer Center server using the provided credentials anddownload some testing data.
Enter the e-mail address you have used for the Novell Customer Center registrationinto NCC E-mail Used for Registration.
Your SMT Server URL should contain the URL of the SMT server being configured.It is populated automatically.
Press Next to continue to the second configuration step.
SMT Installation 3

2 For security reasons, SMT requires a separate user to connect to the database. Withthe Database Password for smt User widget set the database password for that user.Confirm it in the following field.
Enter all e-mail addresses that SMT should send reports to using the Add button.You are also able to Edit or Delete any incorrect or obsolete addresses.
Then click Next.
3 If the current MySQL root password is empty—as in any freshly installed system—you will be asked to enter a New MySQL Root Password.
1.4 Update of SMT From PreviousVersionsThis section contains the information about upgrading from the previous versions ofSMT.
1.4.1 Update from SubscriptionManagement Tool 11 SP2There are two ways of upgrading SMT 11 SP2 to SMT 11 SP3:
• Perform the on-line migration, using the wagon tool. For more information, referto the general documentation for SUSE Linux Enterprise Server.
• When upgrading SLES 11 to SP3 via booting the installation media, add the SMTadd-on product. This will make sure that the SMT packages get updated togetherwith SLES 11.
1.4.1.1 MySQL Database MigrationSLES11-SP3 introduces the upgrade of the MySQL database to version 5.5. This up-grade involves a change of the database format and the database needs to be convertedaccordingly.
After the MySQL database is upgraded, the database engine is not running. The data-base needs to be converted and MySQL started to continue using SMT. To migrate theMySQL database, run following commands as root:
4 Subscription Management Tool Guide

touch /var/lib/mysql/.force_upgradercmysql restart
We strongly recommend to back up the database before migrating it.
1.4.2 Update from SubscriptionManagement Tool 10In general, the update from SMT 10 is not supported. This is a list of issues that mightoccur if the update is performed:
1.4.2.1 Configuration ChangesAuthentication of Access
There is a new optional value requiredAuthType in /etc/smt.conf tospecify if authentication should be required to access the update repositories. Ifthe value is not present in /etc/smt.conf, behavior is unchanged from SMT10. See the SMT 11 manual for further details.
Registration URL Specific for SMT 11SMT 11 does not use the registration URL from /etc/suseRegister.confanymore, but reads the value [NU] NURegUrl from /etc/smt.conf. If thevalue is not present in /etc/smt.conf, the value from /etc/suseRegister.conf is used as a fallback.
Update of apache2 ConfigurationThe installed version of /etc/apache2/conf.d/nu_server.conf and/etc/apache2/conf.d/smt_mod_perl.conf will be replaced with anewer version.
1.4.2.2 Changes Related to Dropping Privileges bySMT Scriptssmt User
By default, all SMT scripts run under a new, unprivileged user named smt. Theuser can be defined in smt.conf.
SMT Installation 5

Permissions of Files and RepositoriesIn SMT 10, all files and repositories were owned by root. In SMT 11, the smtuser needs write access to these repositories. To fix up the permissions, use thechangeSMTUserPermissions.sh script shipped as part of the SMT pack-age.
Proxy SettingsThe YaST proxy module writes the proxy information to /root/.curlrc. InSMT 11 the scripts are running with privileges dropped, therefore the .curlrcfile in the home directory of the used user (smt by default) must be edited. Oth-erwise use smt.conf to define the proxy settings.
1.5 Migration between SUSECustomer Center and NovellCustomer CenterSMT can talk to only one registration service (SUSE Customer Center, Novell Cus-tomer Center, alternatively also SUSE Lifecycle Management Server). The switch be-tween the registration servers can be done either via a YaST module or command-linetools.
Before performing the switch between customer centers, make sure that the target cus-tomer center serves all products that are registered against SMT. Both YaST and thecommand-line tools perform a check to find out whether all products can be servedwith the new registration server. If it is not possible, the only option is to install twoparallel SMT instances and to synchronize products from both SUSE Customer Centerand Novell Customer Center.
To perform the migration to SUSE Customer Center via command-line, use:
smt ncc-scc-migration
If you need to revert back from SCC to NCC, use:
smt scc-ncc-migration
6 Subscription Management Tool Guide

The migration itself is time-consuming and during the migration process the SMTserver may not be able to serve clients that are already registered.
The migration process itself changes the registration server and the proper type of APIin the configuration files. No further (configuration) changes are needed on the SMT.
To migrate between Novell Customer Center and SUSE Customer Center via YaST,use the YaST smt-server module.
After migration is done, it is needed to re-synchronize SMT with the customer center.It is recommended to assure that the repositories are up-to-date. This can be done us-ing the following commands:
smt sync smt mirror
1.6 Enabling SLP AnnouncementsSMT already includes the SLP service description file (/etc/slp.reg.d/smt.reg). In order to enable SLP announcements of the SMT service, open respec-tive ports in your firewall and enable the SLP service.
sysconf_addword /etc/sysconfig/SuSEfirewall2 FW_SERVICES_EXT_TCP "427"sysconf_addword /etc/sysconfig/SuSEfirewall2 FW_SERVICES_EXT_UDP "427"insserv slpdrcslpd start
SMT Installation 7


SMT Server Configuration 2This chapter introduces the YaST configuration module for the SMT server. You canset and configure mirroring credentials, SMT database passwords, and e-mail address-es to send SMT reports to. It also lets you set the SMT job schedule, and activate ordeactivate the SMT service.
To configure SMT with SMT Server Configuration, follow these steps:
1 Start the YaST module SMT Server Configuration from the YaST control center orby running yast smt-server on the command line.
2 To activate SMT, check the Enable Subscription Management Tool Service (SMT)option in the Customer Center Access tab. If you want to disable SMT, uncheck thisoption. For more information about activating SMT with YaST, see Section 2.1,“Activating and Deactivating SMT with YaST”.
3 If the firewall is enabled, check Open Port in Firewall.
4 In the Customer Center Configuration section of the Customer Center Access tab,choose which service should be used (Novell Customer Center or SUSE CustomerCenter) and, if necessary, set the custom server URLs. Set and test credentials forthe NU (Novell Update) service. Correct credentials are necessary to enable mir-roring from NU and determine the products that should be mirrored. Also set thee-mail address used for the registration and the URL of your SMT server and yourSMT server URL. For more information, see Section 2.2, “Setting NU Credentialswith YaST”.
SMT Server Configuration 9

5 In the Database and Reporting tab, set the password for the SMT user in theMySQL database and enter the e-mail addresses where reports should be sent. Formore information, see Section 2.3, “Setting SMT Database Password with YaST”and Section 2.4, “Setting E-mail Addresses to Receive Reports with YaST”.
6 In the Scheduled SMT Jobs tab, set a schedule of periodic SMT jobs, such as syn-chronization of updates, Novell Customer Center registration, and SMT report gen-eration. For more information, see Section 2.5, “Setting the SMT Job Schedulewith YaST”.
7 If satisfied with the configuration, click OK. YaST adjusts the SMT configurationand starts or restarts necessary services.
If you want to abort the configuration and cancel any changes, click Cancel.
NOTE
When the SMT Configuration applies configuration changes, it checksfor the existence of the common server certificate. If the certificatedoes not exist, you will be asked if the certificate should be created.
2.1 Activating and DeactivatingSMT with YaSTYaST provides an easy way to activate or deactivate the SMT service. To activateSMT with YaST, follow these steps:
1 Open the Customer Center Access tab of the SMT Configuration .
2 Check the Enable Subscription Management Tool service (SMT) option.
NOTE
If not already configured, organization credentials should be config-ured before activating SMT. For more information about how to set or-ganization credentials with YaST, see Section 2.2, “Setting NU Cre-dentials with YaST”.
3 Click Finish to apply the changes and leave the SMT Configuration.
10 Subscription Management Tool Guide

To deactivate SMT with YaST, follow these steps:
1 Open the Customer Center Access tab of the SMT Configuration.
2 Uncheck the Enable Subscription Management Tool service (SMT) option.
3 Click Finish to apply the changes and leave the SMT Configuration.
When activating SMT, the following important operations are performed by YaST:
• The Apache configuration is changed by creating symbolic links in the /etc/apache2/conf.d/ directory. Links to the /etc/smt.d/nu_server.confand /etc/smt.d/smt_mod_perl.conf files are created there.
• The Apache Web server is started (or reloaded if already running).
• The MySQL server is started (or reloaded if already running). The smt user and allnecessary tables in the database are created as needed.
• The schema of the SMT database is checked. If the database schema is outdated, theSMT database is upgraded to conform to the current schema.
• Cron is adjusted by creating a symbolic link in the /etc/cron.d/ directory. Alink to the /etc/smt.d/novell.com-smt file is created there.
When deactivating SMT, the following important operations are performed by YaST:
• Symbolic links created upon SMT activation in the /etc/apache2/conf.d/and /etc/cron.d/ directories are deleted.
• The Cron daemon, the Apache server and the MySQL database daemon are re-loaded. Neither Apache nor MySQL are stopped, because they may be used for oth-er purposes than the SMT service.
2.2 Setting NU Credentials withYaSTYaST provides an interface to set and test NU credentials and the URL of the NU ser-vice. To do so, follow these steps:
SMT Server Configuration 11

Figure 2.1: Setting NU Credentials with YaST
1 Open the Customer Center Access tab of the SMT Configuration (NU Configura-tion). If the credentials have been already set with YaST or the /etc/smt.confconfiguration file, they appear in the dialog. Otherwise, the User and Passwordfields are blank.
2 If you do not have your credentials, visit Novell Customer Center to obtain them.For more details, see Section 3.1, “Mirroring Credentials”.
3 Enter your NU username in User and the corresponding password in Password.
4 Click Test to check the credentials. YaST will try to download a list of availablerepositories with the provided credentials. If the test succeeds, the last line of the
12 Subscription Management Tool Guide

test results will read Test result: success. If the test fails, check the pro-vided credentials and try again.
Figure 2.2: Successful Test of NU Credentials
5 Enter the NCC E-mail Used for Registration. This should be the address you used toregister to Novell Customer Center.
Enter Your SMT Server URL if it has not been detected automatically.
6 Click OK or continue with other configurations.
2.3 Setting SMT DatabasePassword with YaSTFor security reasons, SMT uses its own user in the database. YaST provides an inter-face for setting up or changing the SMT database password. To set or change the SMTdatabase password with YaST, follow these steps:
1 Open the Database and Reporting tab of the SMT Configuration module.
2 Enter the SMT Database Password for SMT User. Confirm the password by reen-tering it and click OK, or continue with other configurations.
SMT Server Configuration 13

2.4 Setting E-mail Addresses toReceive Reports with YaSTYaST SMT provides an interface for setting up a list of e-mail addresses to whichSMT reports will be sent. To edit this list of addresses, follow these steps:
1 Open the Database and Reporting tab of the SMT Configuration.
2 The list of e-mail addresses is shown in the table. You can Add, Edit, or Delete ad-dresses with the relevant buttons.
3 Click OK or continue with other configurations.
The comma-separated list of addresses for SMT reports is written to the re-portEmail option of the /etc/smt.conf configuration file.
2.5 Setting the SMT Job Schedulewith YaSTThe SMT Configuration module provides an interface to schedule periodical SMTjobs. YaST uses cron to schedule configured jobs. If needed, cron can be used di-rectly. Five types of periodical jobs can be set:
Synchronization of UpdatesSynchronizes with Novell Customer Center, updates repositories, and downloadsnew updates.
Generation of ReportsGenerates and sends SMT Subscription Reports to addresses defined in Sec-tion 2.4, “Setting E-mail Addresses to Receive Reports with YaST”.
NCC RegistrationRegisters all clients to Novell Customer Center that are not already registered orthat changed their data since the last registration.
Job Queue CleanupCleans up queued jobs. It will remove finished or failed jobs from the job queuethat are older than 8 days and remove job artifacts that remained in the databaseas result of an error.
14 Subscription Management Tool Guide

Uploading Support ConfigsUploading support configs is only available, when the SMT-support package is in-stalled and manually added. To add it, click Add, then select Uploading SupportConfigs from the Job to Run list.
Figure 2.3: SMT Job Schedule Configuration
To configure the schedule of SMT jobs with YaST, follow these steps:
1 Open the Scheduled SMT Jobs tab of the SMT Configuration. The table contains alist of all scheduled jobs, their type, frequency, date, and time to run. You can add,delete or edit these scheduled events.
2 If you want to add a scheduled SMT job, click Add. The Adding New SMT Sched-uled Job dialog opens.
Choose the synchronization job to schedule. You can choose between Synchroniza-tion of Updates, Report Generation, NCC Registration, Job Queue Cleanup, and Up-loading Support Configs.
Choose the Frequency of the new scheduled SMT job. Jobs can be performed Dai-ly, Weekly, Monthly, or Periodically (every n-th hour or every m-th minute).
SMT Server Configuration 15

Set the Job Start Time by entering Hour and Minute. In case of periodical frequen-cy, enter the relevant periods. For weekly and monthly schedules, select Day of theWeek or Day of the Month.
click Add.
3 If you want to edit a scheduled SMT job (for example, change its frequency, time,or date), select the job in the table and click Edit. Then change the desired parame-ters and click OK.
4 If you want to cancel a scheduled job and delete it from the table, select the job inthe table and click Delete.
5 Click OK to apply the settings and quit the SMT Configuration, or continue withother configurations.
16 Subscription Management Tool Guide

Mirroring Repositories onthe SMT Server 3On the SMT server you can mirror the installation and update repositories locally.This allows you to bypass per-machine downloads and the bandwidth use that goeswith it.
3.1 Mirroring CredentialsBefore you create a local mirror of the repositories, you need appropriate organiza-tion credentials. You can get the credentials from Novell Customer Center or SUSECustomer Center, they are identical. To get the credentials from the Novell CustomerCenter, follow these steps:
1 Visit Novell Customer Center at http://www.novell.com/center and log in.
2 Click on My Products. The list of product families is shown.
3 Expand any product family by clicking on its name. You can also expand all prod-uct families by clicking on the icon showing the arrow with two converse arrow-heads (with the Expand All Product Families tool tip). Products in the expandedfamilies are shown.
4 Double click on any specific product in the list to show detailed information aboutthe product.
5 In the Downloads section, click on the Mirror Credentials link.
Mirroring Repositories on the SMT Server 17

6 If necessary (for example if you are accessing the page for the first time), click onthe Generate button.
7 The credentials and mirror sites will be listed. These values are the same for allusers and subscriptions for a specific company.
Figure 3.1: NU Credentials in Novell Customer Center
To get the credentials from SUSE Customer Center, follow these steps:
1 Visit SUSE Customer Center at http://scc.suse.com and log in.
2 Click on Organization in the top menu.
3 Click on the Organizational credentials tab.
4 To show the password, click on Show password.
18 Subscription Management Tool Guide

The obtained credentials should be set with the YaST SMT Server Configuration mod-ule or manually written to the /etc/smt.conf file. For more information aboutthe /etc/smt.conf file, see Section 7.2.1, “/etc/smt.conf”
To request a merge, the customer or their sales rep send an email to mailto:[email protected] (for EMEA-based customers only—Europe, the Middle Eastand Africa) with the applicable customer and site IDs. The EMEA PIC team will veri-fy the records. The contact for NALAAP is mailto:[email protected] (North America,Latin America, and Asia Pacific).
3.2 Managing SoftwareRepositories with SMT CommandLine ToolsThis section describes tools and procedures for viewing information about softwarerepositories available through SMT, configuring these repositories and setting up cus-tom repositories on the command line. For details on the YaST SMT Server Manage-ment module, see Chapter 4, Managing Repositories with YaST SMT Server Manage-ment.
3.2.1 Updating the local SMT databaseThe local SMT database needs to be updated periodically with the information down-loaded from Novell Customer Center. These periodical updates can be configuredwith the SMT Management module, as described in Section 2.5, “Setting the SMT JobSchedule with YaST”.
To update the SMT database manually, use the smt-sync command. For more in-formation about the smt-sync command, see Section 7.1.2.7, “smt-sync”.
3.2.2 Enabled Repositories andRepositories that Can Be MirroredThe database installed with SMT contains information about all software repositoriesavailable on Novell Customer Center. However, the used mirror credentials determine
Mirroring Repositories on the SMT Server 19

which repositories can really be mirrored. For more information about getting and set-ting organization credentials, see Section 3.1, “Mirroring Credentials”.
The mirrorability of repositories is determined by retrieving https://nu.novell.com/re-po/repoindex.xml using the provided organization credentials. Repositories that canbe mirrored have the MIRRORABLE flag set in the repositories table in the SMT data-base.
The fact that a repository can be mirrored does not mean that it has to be mirrored.Only repositories with the DOMIRROR flag set in the SMT database will be mir-rored. For more information about setting up, which repositories should be mirrored,see Section 3.2.4, “Selecting Repositories to be Mirrored”.
3.2.3 Getting Information AboutRepositoriesUse the smt-repos command to list available software repositories and additionalinformation. Using this command without any options lists all available repositories,including repositories that cannot be mirrored. In the first column, the enabled reposi-tories (repositories set to be mirrored) are marked with Yes. Disabled repositories aremarked with No. The other columns show ID, type, name, target, and description ofthe listed repositories. The last columns show whether the repository can be mirroredand staging is enabled.
Use the --verbose option, to get additional information about the URL of therepository and the path it will be mirrored to.
The repository listing can be limited to only repositories that can be mirrored or to en-abled repositories. To list only repositories that can be mirrored, use the -m or --on-ly-mirrorable option: smt-repos -m.
To list only enabled repositories, use the -o or --only-enabled option: smt-repos -o (see Example 3.1, “Listing All Enabled Repositories”).
Example 3.1: Listing All Enabled Repositories
tux:~ # smt-repos -o.---------------------------------------------------------------------------------------------------------------------.| Mirr| ID | Type | Name | Target | Description | Can be M| Stag|+-----+----+------+-------------------------+---------------+-----------------------------------------+---------+-----+| Yes | 1 | zypp | ATI-Driver-SLE11-SP2 | -- | ATI-Driver-SLE11-SP2 | Yes | Yes || Yes | 2 | zypp | nVidia-Driver-SLE11-SP2 | -- | nVidia-Driver-SLE11-SP2 | Yes | No || Yes | 3 | nu | SLED11-SP2-Updates | sle-11-x86_64 | SLED11-SP2-Updates for sle-11-x86_64 | Yes | No |
20 Subscription Management Tool Guide

| Yes | 4 | nu | SLES11-SP1-Updates | sle-11-x86_64 | SLES11-SP1-Updates for sle-11-x86_64 | Yes | Yes || Yes | 5 | nu | SLES11-SP2-Core | sle-11-x86_64 | SLES11-SP2-Core for sle-11-x86_64 | Yes | No || Yes | 6 | nu | SLES11-SP2-Updates | sle-11-i586 | SLES11-SP2-Updates for sle-11-i586 | Yes | No || Yes | 7 | nu | WebYaST-Testing-Updates | sle-11-i586 | WebYaST-Testing-Updates for sle-11-i586 | Yes | No |'-----+----+------+-------------------------+---------------+-----------------------------------------+---------+-----'
You can also list only repositories with a particular name or show information abouta repository with a particular name and target. To list repositories with a particularname, use the smt-repos repository_name command. To show informationabout a repository with a particular name and target, use the smt-repos reposi-tory_name target command.
To get a list of installation repositories from remote, see Section 8.6, “Listing Accessi-ble Repositories”.
3.2.4 Selecting Repositories to beMirroredOnly enabled repositories can be mirrored. In the database, the enabled repositorieshave the DOMIRROR flag set. Repositories can be enabled or disabled using the smt-repos command.
To enable one or more repositories, follow these steps:
1 If you want to enable all repositories that can be mirrored or just choose one reposi-tory from the list of all repositories, run the smt-repos -e command.
You are able to limit the list of repositories by using the relevant options. To lim-it the list to only repositories that can be mirrored, use the -m option: smt-re-pos -m -e. To limit the list to only repositories with a particular name, use thesmt-repos -e repository_name command. To list only a repository witha particular name and target, use the command smt-repos -e reposito-ry_name target.
If you want to enable all repositories belonging to a certain product, use the --en-able-by-prod or -p option followed by the name of the product and, optional-ly, its version, architecture, and release:smt-repos -p product[,version[,architecture[,release]]]
For example, to enable all repositories belonging to SUSE Linux Enterprise Server10 SP4 for PowerPC architecture, use the following command:smt-repos -p SUSE-Linux-Enterprise-Server-SP4,10,ppc
Mirroring Repositories on the SMT Server 21

The list of known products can be obtained with the smt-list-productscommand.
2 If more than one repository is listed, choose the one you want to enable by specify-ing its ID listed in the repository table and pressing Enter. If you want to enable allthe listed repositories, use a and press Enter.
To disable one or more repositories, follow these steps:
1 If you want to disable all enabled repositories or just choose one repository fromthe list of all repositories, run the smt-repos -d command.
If you want to choose the repository to be disabled from a shorter list, or if youwant to disable all repositories from a limited group, you can use any of the avail-able options to limit the list of the repositories. To limit the list to only enabledrepositories, use the -o option: smt-repos -o -d. To limit the list to on-ly repositories with a particular name, use the smt-repos -d reposito-ry_name command. To list only a repository with a particular name and target,use the smt-repos -d repository_name target command.
2 If more than one repository is listed, choose which one you want to disable by spec-ifying its ID listed in the repository table shown and pressing Enter. If you want todisable all the listed repositories, use a and press Enter.
3.2.5 Deleting Mirrored RepositoriesYou can delete mirrored repositories that are no longer used. If you delete a repository,it will be physically removed from the SMT storage area.
To delete a repository with a particular name, use the smt-repos --deletecommand. To delete the repository in a namespace, specify the --namespacedirname option.
--delete lists all repositories, and by entering the ID number or by entering thename and target you can delete the specified repositories. If you want to delete allrepositories, enter a.
NOTE: Detecting Repository IDs
Every repository has a sha1sum that you can use as an ID. You can getthe repository's sha1sum by calling smt-repos -v.
22 Subscription Management Tool Guide

3.2.6 Mirroring Custom RepositoriesUsing SMT you can also mirror repositories that are not available at the Novell Cus-tomer Center. Those repositories are called “custom repositories”. Use the smt-setup-custom-repos command for this purpose. Custom repositories can alsobe deleted.
When adding a new custom repository, smt-setup-custom-repos adds a newrecord in the database, and sets the mirror flag to true by default. If needed, you candisable mirroring later.
To set up a custom repository to be available through SMT, follow these steps:
1 If you do not know the ID of the product the new repositories should belong to, usesmt-list-products to get the ID. For the description of the smt-list-products, see Section 7.1.2.4, “smt-list-products”.
2 Runsmt-setup-custom-repos --productid product_id \--name repository_name --exturl repository_url
In this command product_id is the ID of the product the repository belongsto, repository_name represents the name of the repository and reposi-tory_url is the URL the repository is available at. In case the added repositoryneeds to be available for more than one product, specify the IDs of all products thatshould use the added repository.
For example, to set My repository available at http://exam-ple.com/My_repository to the products with the IDs 423, 424, and 425,use the following command:smt-setup-custom-repositories --productid 423 --productid 424 \--productid 425 --name 'My_repository' \--exturl 'http://example.com/My_repository'
NOTE: Mirroring Unsigned Repositories
In its default configuration, SUSE Linux Enterprise 10 does not allow theuse of unsigned repositories. Therefore, if you want to mirror unsignedrepositories and use them on client machines, you have to allow this ex-plicitly by executing the following command on the client machines:
Mirroring Repositories on the SMT Server 23
rug set security-level checksum
To remove an already-set custom repository from the SMT database, use smt-set-up-custom-repositories --delete ID, where ID represents the ID of therepository to be removed.
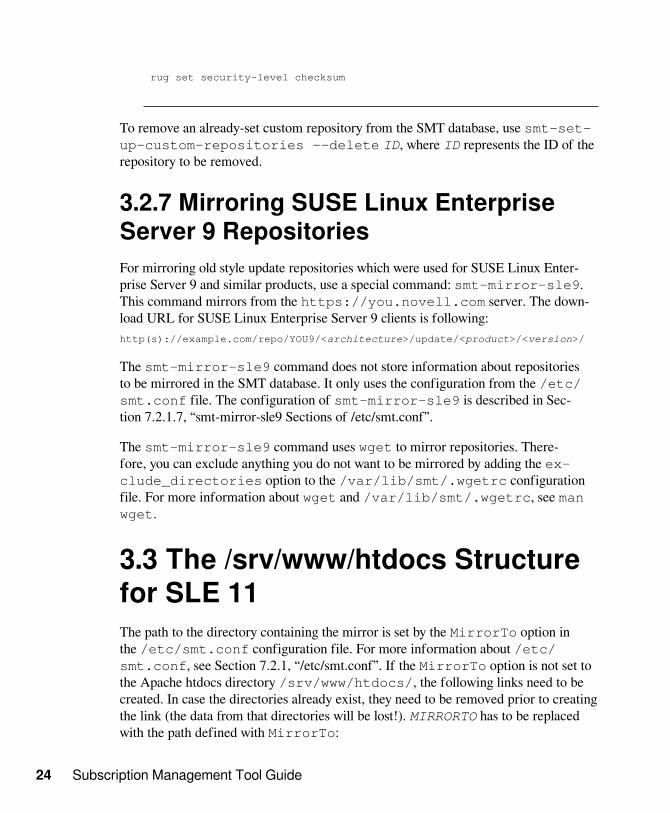
3.2.7 Mirroring SUSE Linux EnterpriseServer 9 RepositoriesFor mirroring old style update repositories which were used for SUSE Linux Enter-prise Server 9 and similar products, use a special command: smt-mirror-sle9.This command mirrors from the https://you.novell.com server. The down-load URL for SUSE Linux Enterprise Server 9 clients is following:http(s)://example.com/repo/YOU9/<architecture>/update/<product>/<version>/
The smt-mirror-sle9 command does not store information about repositoriesto be mirrored in the SMT database. It only uses the configuration from the /etc/smt.conf file. The configuration of smt-mirror-sle9 is described in Sec-tion 7.2.1.7, “smt-mirror-sle9 Sections of /etc/smt.conf”.
The smt-mirror-sle9 command uses wget to mirror repositories. There-fore, you can exclude anything you do not want to be mirrored by adding the ex-clude_directories option to the /var/lib/smt/.wgetrc configurationfile. For more information about wget and /var/lib/smt/.wgetrc, see manwget.
3.3 The /srv/www/htdocs Structurefor SLE 11The path to the directory containing the mirror is set by the MirrorTo option inthe /etc/smt.conf configuration file. For more information about /etc/smt.conf, see Section 7.2.1, “/etc/smt.conf”. If the MirrorTo option is not set tothe Apache htdocs directory /srv/www/htdocs/, the following links need to becreated. In case the directories already exist, they need to be removed prior to creatingthe link (the data from that directories will be lost!). MIRRORTO has to be replacedwith the path defined with MirrorTo:
24 Subscription Management Tool Guide

• /srv/www/htdocs/repo/$RCE should point to MIRRORTO/repo/$RCE/
• /srv/www/htdocs/repo/RPMMD to MIRRORTO/repo/RPMMD/
• /srv/www/htdocs/repo/testing to MIRRORTO/repo/testing/ and
• /srv/www/htdocs/repo/full to MIRRORTO/repo/full/
The directory specified by the option MirrorTo and the subdirectories listed abovemust exist. Files and directories in /MirrorTo as well as the links need to belong tothe user smt and the group www.
For example, if the MirrorTo is set to /mirror/data:
l /srv/www/htdocs/repo/total 16lrwxrwxrwx 1 smt www 22 Feb 9 14:23 $RCE -> /mirror/data/repo/$RCE/drwxr-xr-x 4 smt www 4096 Feb 9 14:23 ./drwxr-xr-x 4 root root 4096 Feb 8 15:44 ../lrwxrwxrwx 1 smt www 23 Feb 9 14:23 RPMMD -> /mirror/data/repo/RPMMD/lrwxrwxrwx 1 smt www 22 Feb 9 14:23 full -> /mirror/data/repo/full/drwxr-xr-x 2 smt www 4096 Feb 8 11:12 keys/lrwxrwxrwx 1 smt www 25 Feb 9 14:23 testing -> /mirror/data/repo/testing/drwxr-xr-x 2 smt www 4096 Feb 8 14:14 tools/
The links can be created using the ln -s commands. For example:cd /srv/www/htdocs/repo/for LINK in \$RCE RPMMD full testing; do ln -s /mirror/data/repo/${LINK}/ && chown -h smt.www ${LINK}done
IMPORTANT: The /srv/www/htdocs/repo Directory
The /srv/www/htdocs/repo directory must not be a symbolic link.
IMPORTANT: Apache and Symbolic Links
By default Apache on SUSE Linux Enterprise is configured to not followsymbolic links. To enable symblic links for /srv/www/htdocs/repo/add the following snippet to /etc/apache2/default-server.conf(or the respetive virtual host configurtion in case you are running SMT ona virtual host):<Directory "/srv/www/htdocs/repo">
Mirroring Repositories on the SMT Server 25

Options FollowSymLinks</Directory>
After having made the change, test the syntax and reload the Apacheconfiguration files to activate the change:rcapache2 configtest && rcapache2 reload
3.4 Using the Test EnvironmentYou can mirror repositories to a test environment instead of the production environ-ment. The test environment can be used with a limited number of client machines be-fore the tested repositories are moved to the production environment. The test envi-ronment can be run on the main SMT server.
The testing environment uses the same structure as the production environment, but itis located in the /srv/www/htdocs/repo/testing/ subdirectory.
To mirror a repository to the testing environment, you can use the Staging tab in theYaST SMT Management module, or the command smt-staging.
To register a client in the testing environment, modify the /etc/suseRegister.conf on the client machine by setting:register = command=register&namespace=testing
To move the testing environment to the production environment, manually copy ormove it using the cp -a or mv command.
You can enable “staging” for a repository in the Repositories tab of the SMT Manage-ment module or with the smt-repos command. The mirroring happens automati-cally to repo/full/.
If you have a SLE11-based Update repository with patches, SMT tools can help youwith the management. With these tools you can select patches and create a snapshotand copy it into repo/testing/. After tests are finished you can copy the contentsof repo/testing into the production area /repo.
SLE10-based Update repositories are not supported by SMT tools. Not all of theserepositories support selective staging. In this case you must mirror the complete pack-age.
26 Subscription Management Tool Guide

Recommended work flow:repo => repo/full,repo/full => repo/testing,repo/testing => repo
3.5 Testing and Filtering UpdateRepositories with StagingYou can test repositories on any clients with smt-staging before moving them tothe production environment. You can select new update repositories manually to beinstalled on clients.
For staging, you can either use the smt-staging command, or use the YaST SMTManagement module. For more details, see Section 4.3, “Staging Repositories”.
Repositories with staging enabled are mirrored to the /MirrorTo/repo/fullsubdirectory. This subdirectory is usually not used by your clients. Incoming new up-dates are not automatically visible to the clients before you get a chance to test them.Later you can generate a testing environment of this repository, which goes to /MirrorTo/repo directory.
If you have a SLE11 based Update repository with patches, SMT tools can help youwith the management. With these tools you can select patches and create a snapshotand put it into repo/testing/. After tests are finished you can put the content ofrepo/testing into the production area /repo. repo/testing/ and /repo iscalled the “default” staging group. You can create additional staging groups as neededwith the smt-staging creategroup command.
NOTE: SLE 10 Based Update Repositories
SLE 10 based Update repositories are not supported by SMT tools. Notall of these repositories support selective staging. In this case you needto mirror the complete package.
Enabling StagingTo enable or disable the staging use the smt-repos command with --en-able-staging or -s:smt-repos --enable-staging
Mirroring Repositories on the SMT Server 27
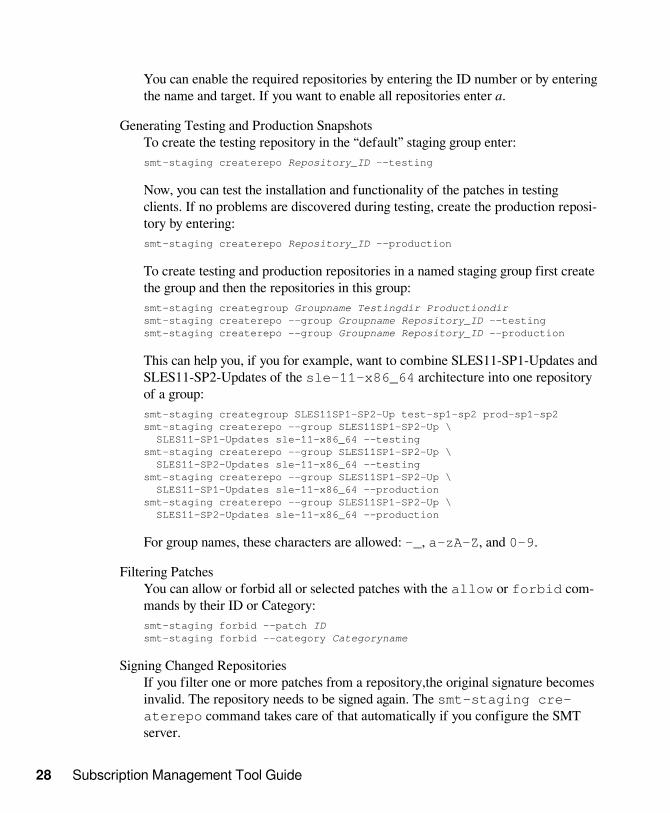
You can enable the required repositories by entering the ID number or by enteringthe name and target. If you want to enable all repositories enter a.
Generating Testing and Production SnapshotsTo create the testing repository in the “default” staging group enter:smt-staging createrepo Repository_ID -–testing
Now, you can test the installation and functionality of the patches in testingclients. If no problems are discovered during testing, create the production reposi-tory by entering:smt-staging createrepo Repository_ID --production
To create testing and production repositories in a named staging group first createthe group and then the repositories in this group:smt-staging creategroup Groupname Testingdir Productiondirsmt-staging createrepo --group Groupname Repository_ID -–testingsmt-staging createrepo --group Groupname Repository_ID -–production
This can help you, if you for example, want to combine SLES11-SP1-Updates andSLES11-SP2-Updates of the sle-11-x86_64 architecture into one repositoryof a group:smt-staging creategroup SLES11SP1-SP2-Up test-sp1-sp2 prod-sp1-sp2smt-staging createrepo --group SLES11SP1-SP2-Up \ SLES11-SP1-Updates sle-11-x86_64 --testingsmt-staging createrepo --group SLES11SP1-SP2-Up \ SLES11-SP2-Updates sle-11-x86_64 --testingsmt-staging createrepo --group SLES11SP1-SP2-Up \ SLES11-SP1-Updates sle-11-x86_64 --productionsmt-staging createrepo --group SLES11SP1-SP2-Up \ SLES11-SP2-Updates sle-11-x86_64 --production
For group names, these characters are allowed: -_, a-zA-Z, and 0-9.
Filtering PatchesYou can allow or forbid all or selected patches with the allow or forbid com-mands by their ID or Category:smt-staging forbid --patch IDsmt-staging forbid --category Categoryname
Signing Changed RepositoriesIf you filter one or more patches from a repository,the original signature becomesinvalid. The repository needs to be signed again. The smt-staging cre-aterepo command takes care of that automatically if you configure the SMTserver.
28 Subscription Management Tool Guide

In order to enable signing of changed metadata, the admin needs to generate anew signing key. This can be done with GPG like this:mkdir some_dirgpg --gen-key --homedir some_dirsudo mv some_dir /var/lib/smt/.gnupgsudo chown smt:users -R /var/lib/smt/.gnupgsudo chmod go-rwx -R /var/lib/smt/.gnupg
Then, the ID of the newly generated key as seen in the gpg --gen-key com-mand output, must be written into /etc/smt.conf, option signingKeyID.
At this point the clients do not know about this new key. In order to import thenew key to clients during their registration, the following can be done:sudo -u smt gpg --homedir /var/lib/smt/.gnupg \ --export -a signingKeyID \ > /MirrorTo/repo/keys/smt-signing-key.key
In this example, MirrorTo stands for the base directory where repositorieswill be mirrored. Once done, clients can import this key during the registrationprocess.
Registering Clients in the Testing EnvironmentTo register a client in the testing environment, modify the /etc/suseRegister.conf on the client machine by setting:register = command=register&namespace=testing
Mirroring Repositories on the SMT Server 29


Managing Repositorieswith YaST SMT ServerManagement 4You can use the YaST SMT Server Management module for day-to-day management.SMT Server Management enables and disables the mirroring of repositories, the stag-ing flag for repositories, and performs the mirroring and staging.
4.1 Starting SMT ManagementModuleSMT Management is a YaST module. To start the module, do one of the following:
• Start YaST and select Network Services, then SMT Server Management.
• Enter yast2 smt in the command line as root.
The SMT Management application window opens with the Repositories tab active.
Managing Repositories with YaST SMT Server Management 31

Figure 4.1: List of Repositories
4.2 Viewing and ManagingRepositoriesIn the Repositories tab, you can see the list of all available package repositories forSMT. For each repository, the list shows the repository's name, target product and ar-chitecture, mirroring and staging flag, date of last mirroring, and a short description.You can sort the list by clicking on the relevant column's header, and scroll the listitems using the scrollbars on the window's right side.
4.2.1 Filtering RepositoriesYou can also filter out groups of repositories with the Filter drop-down list in the up-per left part of the window. The filter list items are collected and assembled dynami-cally from the first word of the repositories' names. If you use a filter to limit the num-ber of displayed repositories, you can always go back and view all of them by selectingAll from the Filter drop-down list. You can also use more than one filter in sequence.
32 Subscription Management Tool Guide

4.2.2 Mirroring RepositoriesBefore you can start to offer package repositories, you need to create a local mirror oftheir packages. To do this, follow the procedure:
1 From the list, select the line containing the name of the repository you want to mir-ror.
2 Click on the selected line highlighting it.
3 Click on the Toggle Mirroring button in the lower left part of the window. In theMirroring column of the selected repository, a check mark appears. If the reposito-ry was already selected for mirroring before, the check mark will disappear, and therepository will not be mirrored anymore.
4 Hit the Mirror Now button and the repository will be mirrored immediately.
5 A pop-up window appears with the information about mirroring status and result.
6 Click OK and the original window with the list of repositories will be refreshed.
Figure 4.2: Status of Mirroring Process
4.3 Staging RepositoriesAfter the mirroring is finished, you can stage the mirrored repositories. In SMT, stag-ing is a process where you create either testing or production repositories based on the
Managing Repositories with YaST SMT Server Management 33

mirrored ones. The testing repository helps you examine the repository and its pack-ages before you make them available in a production environment. To make reposito-ries available for staging, do the following:
1 From the repository list, select the line containing the name of the repository youwant to manage.
2 Click on the selected line, highlighting it.
3 Click on the Toggle Staging button in the lower left part of the window next to theToggle Mirroring button. In the Staging column of the selected repository, a checkmark appears. If the repository was already selected for staging before, the checkmark will disappear, and the repository will not be available for staging.
4 Repeat steps 1 to 3 for all directory whose staging flag you wish to change.
IMPORTANT: Toggle Staging Button Not Active
You can only stage the repositories that were previously selected for mir-roring. If it is not the case, the Toggle Staging button will not be active.
Once you mirror the repositories and make them available for staging, click on theStaging tab. In the upper left part of the window, there is a Repository Name drop-down list of all repositories which are available for staging. There the repository nameshave the name of the staging group attached in parentheses. Select the one you wantto stage and a list of packages of this repository appears below. Information about thepatch name, its version and category, testing and production flags, and a short summa-ry is available for each patch.
Next to the Repository Name drop-down list, there is a Patch Category filter. It helpsyou to list only the patches that belong to one of the predefined categories.
If the selected repository allows for patch filtering, you can toggle the status flag forindividual patches. Do so by clicking on the Toggle Patch Status button in the lowerleft part of the window.
Before creating a repository of packages that are available in the production environ-ment, you need to create and test the testing repository. Click on the Create Snapshotdrop-down menu and select From Full Mirror to Testing menu item. A small pop-upwindow appears informing you about the staging process. After the testing repositorysnapshot is created, the relevant check marks in the Testing column will be displayed.
34 Subscription Management Tool Guide

Figure 4.3: Testing Snapshot Created
IMPORTANT: Creating a Production Snapshot
After you enable staging for an update repository, you have to create itsproduction snapshot to make it available to the clients. Otherwise theclients will not be able to find the update repository.
After you have examined the newly created testing repository, you can safely create aproduction one. Click on the Create Snapshot drop-down menu and select From Test-ing to Production menu item. A small pop-up window appears informing you about thelinking the testing repository to the production one. After the production snapshot iscreated, the relevant check marks in the Production column will be displayed. Also, agreen check mark appears in the Repository Name drop-down list.
4.4 Checking the Client StatusThe third tab called Clients Status contains the status information about all the clientsthat use the repositories on your SMT server. It is divided into two main parts: the listof the clients and the detailed information.
You can read the client's host name, the date and time of the last network contact withthe SMT server, and its update status. The update status can be one of the following:
Managing Repositories with YaST SMT Server Management 35

Up-to-dateThe client packages are updated to their last version available in the productionrepository.
Updates availableThis status means that there are updates available for the client that are either op-tional or recommended.
CriticalEither security patches or package manager patches are available for theclient.
In the lower part of the window, more detailed information about the highlightedclient is available. It usually consists of extended status information and detailed infor-mation about the number and types of available updates.
Figure 4.4: Clients Status
36 Subscription Management Tool Guide

Managing Client Machineswith SMT 5SMT lets you register and manage client machines on Novell Customer Center. Clientmachines must be configured to use SMT. For information about configuring clientsto use SMT, see Chapter 8, Configuring Clients to Use SMT.
5.1 Listing Registered ClientsTo list SMT-registered client machines, use the smt-list-registrationscommand. The following information is listed for each client: its Unique ID, Host-name, date and time of Last Contact with the SMT server, and the Software Productthe client uses.
5.2 Deleting RegistrationsTo delete a registration from SMT and Novell Customer Center, use the followingcommand. To delete multiple registrations, the option -g can be used several times.smt-delete-registration -g Client_ID
The ID of the client machine to be deleted can be determined from the output of thesmt-list-registrations command.
Managing Client Machines with SMT 37

5.3 Manual Registration of Clientsat Novell Customer CenterThe smt-register command registers clients at Novell Customer Center. Allclients that are currently not registered or whose data has changed since the last regis-tration are registered.
To register clients whose registration has failed, use the --reseterror option. Thisoption resets the NCC registration error flag and tries to submit failed registrationsagain.
5.4 Scheduling PeriodicRegistrations of Clients at NovellCustomer CenterSMT module allows for the easy scheduling of client registrations. In the default con-figuration, registrations are scheduled to repeat every 15 minutes. To create or modifya new registration schedule, follow these steps:
1 Start YaST SMT Configuration module (yast2 smt-server).
2 Go to the Scheduled SMT Job.
3 Select any NCC Registration job and click Edit if you want to change its schedule.
To create a new registration schedule, click Add and select NCC Registration as Jobto Run.
4 Choose the Frequency of the scheduled SMT job. You can perform jobs Daily,Weekly, Monthly, or Periodically (every n-th hour or every m-th minute).
Set the Job Start Time by entering Hour and Minute, or, in case of periodical fre-quency, the relevant periods. For weekly and monthly schedules, select the Day ofthe Week or the Day of the Month the mirroring should occur.
38 Subscription Management Tool Guide

NOTE: Lowest Registration Frequency
Do not set the frequency lower than 10 minutes, because the maxi-mum value of the rndRegister is 450 (7.5 minutes). If the frequencyis lower, it may occur that the started process is still sleeping when thenext process starts. In this case, the second request will exit.
5 Click either OK or Add and Finish.
Scheduling of SMT jobs in general is covered in Section 2.5, “Setting the SMT JobSchedule with YaST”.
YaST uses cron to schedule Novell Customer Center registrations and other SMTjobs. If you do not want to use YaST, use cron directly.
To disable automatic registration, change the forwardRegistration value in the[LOCAL] section of the /etc/smt.conf configuration file to false.
Managing Client Machines with SMT 39


SMT Reports 6This chapter introduces reports based on the SMT and Novell Customer Center data.The reports contain statistics of all the registered machines, products used and all ac-tive, expiring or missing subscriptions.
NOTE: Assignment of Reports
If you are using more than one SMT server in your environment, generat-ed reports may not represent all of the SMT servers or machines in yourenvironment. For the complete statistics of all your registered machines,refer to the information in the Novell Customer Center.
6.1 Report Schedule andRecipientsGenerated SMT reports can be sent to a defined list of e-mail addresses periodically.To create or edit this list, and to set the frequency of the reports, use the YaST SMTConfiguration module. How to configure this list is described in Section 2.4, “SettingE-mail Addresses to Receive Reports with YaST”. Configuration of the report sched-ule is described in Section 2.5, “Setting the SMT Job Schedule with YaST”.
The list can also be edited manually in the reportEmail option of the /etc/smt.conf configuration file. For more information about editing the list of address-es directly, see Section 7.2.1.6, “[REPORT] Section of /etc/smt.conf”. To set the fre-quency of reports manually, you can directly edit the smt-gen-report lines of the
SMT Reports 41

crontab in /etc/cron.d/novell.com-smt. For more information about thecrontab format, see man 5 crontab.
Reports, including those created as a scheduled SMT job, are created by the smt-report command. This command has various parameters. To edit parameters usedwith scheduled commands, edit the /etc/smt.d/smt-cron.conf configurationfile. For more information, see Section 7.2.2, “/etc/smt.d/smt-cron.conf”.
6.2 Types of SMT ReportsTwo types of reports can be created with the smt-report command:
--localIf the --local option is used, the created report is based solely on local SMTdata.
--nccIf the --ncc option is used, the created report is based on Novell Customer Cen-ter data.
If neither --local nor --ncc is used, the type of report is determined by for-wardRegistration in the /etc/smt.conf configuration file. If the optionis set to true, the report is based on Novell Customer Center data. If it is set tofalse, the report is based on local SMT data.
If you are creating a report based on local SMT data and you do not want local data tobe synchronized with the Novell Customer Center at all, use the --nonccsync op-tion together with --local option.
6.3 Report Output Formats andTargetsSMT reports can be printed to the standard output, exported to one or multiple files(in CSV format) as well as mailed to the defined list of e-mail addresses. Use the fol-lowing options for the smt-report command:
--quiet or -qSuppress output to STDOUT and run smt-report in quiet mode.
42 Subscription Management Tool Guide

--file or -FExport report to one or several files. By default, the report will be written to a sin-gle file, rendered as tables. Optionally, the filename or whole path may be speci-fied after the parameter: --file filename. If no filename is specified, a de-fault filename containing a timestamp is used. However, SMT will not check ifthe file or files already exist.
In CSV (Comma-Separated Value) mode the report will be written to multiplefiles, therefore the specified filename will expand to [path/]filename-reportname.extension for every report.
--csv or -cThe report will be exported to multiple files in CSV format. The first line of each*.csv file consists of the column names, the data starts on line two. It is recom-mended to use the --csv parameter together with the --file parameter. If thespecified filename contains a .csv extension, the report format will be CSV (asif the --csv parameter was used).
--mail or -mActivate mailing of the report to the addresses configured with the YaST SMTConfiguration module and written in /etc/smt.conf. The report will be ren-dered as tables.
--attach or -aAttach the report to the mails in CSV format. This option should only be used to-gether with the --mail option.
--pdfThe report will be exported to multiple files in pdf format.
--xmlThe report will be exported to multiple files in xml format.
NOTE: Disabling Sending Attachments
If you want to disable sending CSV attachments with report mails, ed-it the /etc/smt.d/smt-cron.conf configuration file as follows: re-move the --attach option from the REPORT_PARAMS value. The de-fault line reads: REPORT_PARAMS="--mail --attach -L /var/log/smt-report.log". To disable CSV attachments, change it to:REPORT_PARAMS="--mail -L /var/log/smt-report.log".
SMT Reports 43

If you have disabled CSV attachments but need them occasionally, youcan send them manually with the smt-report --mail --attach -L /var/log/smt-report.log command.
44 Subscription Management Tool Guide

SMT Tools andConfiguration Files 7This chapter describes the most important scripts, configuration files and certificatesshipped with SMT.
7.1 Important Scripts and ToolsThere are two important groups of SMT commands: The smt command with its sub-commands is used for managing the mirroring of updates, registration of clients, andreporting. The rcsmt script is used for starting, stopping, restarting SMT services,and for checking their status.
7.1.1 SMT JobQueueSince SUSE Linux Enterprise version 11, there is a new SMT service called SMTJobQueue. It is a system to delegate jobs to the registered clients.
To enable JobQueue, the smt-client package needs to be installed on the SMTclient. The client then pulls jobs from the server via a cron job (every 3 hours by de-fault). The list of jobs is maintained on the server. Jobs are not pushed directly to theclients and processed immediately, but the client asks for them. Therefore, a delay ofseveral hours may occur.
Every job can have its parent job, which sets a dependency. The child job only runsafter the parent job successfully finished. Job timing is also possible: a job can havea start time and an expiration time to define its earliest execution time or the time thejob will expire. A job may also be persistent. It is run repeatedly with a delay. For
SMT Tools and Configuration Files 45

example, a patch status job is a persistent job that runs once a day. For each client,a patch status job is automatically generated after it registers successfully against anSMT 11 server. The patchstatus information can be queried with the smt-clientcommand. For the already registered clients, you can add the patchstatus jobs manual-ly with the smt-job command.
You can manipulate, list, create or delete the jobs. For this reason, the command linetool smt-job was introduced. For more details on smt-job, see Section 7.1.2.3,“smt-job”.
NOTE: Overriding the Automatic Creation of Patch Status Job
When creating a software push or an update job, normally a non-per-sistent patch status job will be added automatically with the parent idset to the id of the new job. To disable this behavior, use the --no-au-topatchstatus option.
SMT is not intended to be a system to directly access the clients or to immediately re-port the results back. It is rather a longtime maintenance and monitoring system than alive interaction tool.
NOTE: Job Time Lag Limitation
The client will process one job at a time, report back the result, and thenask for the next job. If you create a persistent job with a time lag of only afew seconds, it will be repeated forever and block other jobs of this client.Therefore, adding jobs with a time lag smaller than one minute is not sup-ported.
7.1.2 /usr/sbin/smt CommandsThe main command to manage the SMT is smt (/usr/sbin/smt). The smt com-mand should be used together with various sub-commands described in this section. Ifthe smt command is used alone, it prints out a list of all available sub-commands. Toget help for individual sub-commands, use smt subcommand --help.
The following sub-commands are available:
• smt-client
• smt-delete-registration
46 Subscription Management Tool Guide

• smt-job
• smt-list-products
• smt-list-registrations
• smt-mirror
• smt-ncc-sync
• smt-register
• smt-report
• smt-repos
• smt-scc-sync
• smt-setup-custom-repos
• smt-staging
• smt-support
• smt-sync
• smt-mirror-sle9
There are two syntax types you can use with the smt command: either use smt fol-lowed by a sub-command or use a single command (composed of smt, dash, and thesub-command of choice). For example, it is possible to use either smt mirror orsmt-mirror, as both have the same meaning.
NOTE: Conflicting Commands
Depending on your $PATH environment variable, the SMT smt command(/usr/sbin/smt) may collide with the smt command from the starpackage (/usr/bin/smt). Either use the absolute path /usr/sbin/smt, create an alias, or set your $PATH accordingly.
Another solution is to always use the smt- subcommand syntax (con-nected with a minus sign) instead of smt subcommand (separated by aspace).
SMT Tools and Configuration Files 47

7.1.2.1 smt-clientThe smt-client command shows information about registered clients. The infor-mation includes:
• guid
• hostname
• patch status
• timestamps of the patch status
• last contact with the SMT server
The smt-client understands the following options:
--verbose or -vShow detailed information about the client. The last contact date is shown as well.
--debug or -dEnable debugging mode.
--logfile or -L fileSpecify the file the log will be written to.
--hostname or -h nameOnly the entries whose hostname begins with name will be listed.
--guid or -g guidOnly the entries whose GUID is guid will be listed.
--severity or -s levelFilter the result by the patch status information. The value level can be one of'packagemanager', 'security', 'recommended' or 'optional'. Only those entries arelisted which have patches of the respective level.
7.1.2.2 smt-delete-registrationThe smt-delete-registration command deletes one or more registrationsfrom SMT and Novell Customer Center. It will deregister machines from the system.The following options are available:
48 Subscription Management Tool Guide

--guid ID or -g IDDelete the machine with the guid ID from the system. You can use this optionmultiple times.
--debug or -dEnable debugging mode.
7.1.2.3 smt-jobThe smt-job script manages jobs for individual SMT clients. You can list, create,edit, or delete jobs with it. The following options are available:
--list or -lList all client jobs. This is the default if the operation mode switch is omitted.
--verbose or -v levelShow detailed information about a job or jobs in a list mode. The level valuecan be a number from 0 to 3. The bigger the value, the more verbose the com-mand is.
--create or -cCreate a new job.
--edit or -eEdit an existing job.
--delete or -dDelete an existing job.
--guid or -g guidSpecify the client's guid. This parameter can be used multiple times to create ajob for more than one client.
--jobid or -j idSpecify the job ID. You need to specify job ID and client's guid when editing ordeleting a job, because the same job for multiple clients has the same job ID.
--deleteall or -A idOmit either the client's guid or the job ID in this delete operation. The missing pa-rameter will match all clients respective jobs.
SMT Tools and Configuration Files 49

--type or -t typeSpecify the job type. The type can be one of 'patchstatus', 'softwarepush', 'up-date', 'execute', 'reboot', 'wait', 'eject'. On the client, only 'patchstatus', 'software-push' and 'update' are enabled by default.
--description descriptionSpecify a job description.
--parent idSpecify the job ID of the parent job. Use it to describe a dependency. A job willnot be processed until its parent has successfully finished.
--name or -n nameSpecify a job name.
--persistentSpecify if a job is persistent. Non-persistent jobs are processed only once, whilepersistent jobs are processed again and again. Use --timelag to define thetime that elapses until the next run.
--finishedSearch option for finished jobs.
--targeted timeSpecify the earliest execution time of a job. Note that the job most likely will notrun exactly at that point in time, but probably some minutes or hours after. Thereason is that the client polls in a fixed interval for jobs.
--expires timeDefine when the job will no longer be executed anymore.
--timelag timeDefine the time interval for persistent jobs.
For a complete list of possible options and their explanation, see the manual page ofsmt-job command (man smt-job).
Examples
To list all finished jobs, enter the following:smt-job --list --finished
50 Subscription Management Tool Guide

To create a 'softwarepush' job that installs xterm and bash on client 12345 and67890, enter the following:smt-job --create -t softwarepush -P xterm -P bash -g 12345 -g 67890
To change the timing for a persistent job with job ID 42 and guid 12345 to run every 6hours, enter the following:smt-job --edit -j 42 -g 12345 --targeted 0000-00-00 --timelag 06:00:00
To delete all jobs with job ID 42, enter the following:smt-job --delete -jobid 42 --deleteall
7.1.2.4 smt-list-productsThe smt-list-products script lists all software products in the SMT database.The following options are available:
--used or -uShow only used products.
--catstat or -cShow whether all repositories needed for a product are locally mirrored.
7.1.2.5 smt-list-registrationsThe smt-list-registrations script lists all registrations. There are two op-tions available for this command.
--verbose or -vShow detailed information about the registered devices.
--format or -f formatFormat the output. Possible types of formats are asciitable and csv
7.1.2.6 smt-mirrorThe smt-mirror command performs the mirroring procedure and downloadsrepositories that are set to be mirrored.
You can run the smt-mirror with the following options:
--clean or -cRemove all files no longer mentioned in the metadata from the mirror. No mirror-ing occurs before cleanup.
SMT Tools and Configuration Files 51

--debug or -dEnable the debugging mode.
--deepverifyTurn on verifying of all package checksums.
--hardlink sizeSearch for duplicate files with a size greater than the size specified in kilobytes.Creates hard links for them.
--directory pathDefine the directory to work on. If you use this option, the default value config-ured in the smt.conf configuration file is ignored.
--dbreplfile fileDefine the path to the *.xml file to use as database replacement. You can createsuch a file with the sync-ncc command.
--logfile file or -L fileSpecify the path to a logfile.
7.1.2.7 smt-syncThe smt-sync or smt sync command gets data from the Novell Customer Centeror SUSE Customer Center and updates the local SMT database. It can also save Nov-ell Customer Center or SUSE Customer Center data to a directory instead of the SMTdatabase, or read Novell Customer Center or SUSE Customer Center data from such adirectory instead of downloading it from Novell Customer Center or SUSE CustomerCenter itself.
When using this command, it is automatically decided whether Novell Customer Cen-ter or SUSE Customer Center should be used. Then smt-ncc-sync or smt-scc-sync is called as appropriate.
7.1.2.8 smt-ncc-syncThe smt-ncc-sync or smt ncc-sync command gets data from the Novell Cus-tomer Center and updates the local SMT database. It can also save Novell CustomerCenter data to a directory instead of the SMT database, or read Novell Customer Cen-ter data from such a directory instead of downloading it from Novell Customer Centeritself.
52 Subscription Management Tool Guide

You can run the smt-ncc-sync with the following options:
--fromdir directoryRead Novell Customer Center data from a directory instead of downloading itfrom Novell Customer Center.
--todir directoryWrite Novell Customer Center data to the specified directory without updatingthe SMT database.
--createdbreplacementfileCreate a database replacement file for using smt-mirror without database.
--logfile file or -L fileSpecify the path to a log file.
--debugEnable debugging mode.
7.1.2.9 smt-scc-syncThe smt-ccc-sync or smt scc-sync command gets data from the SUSE Cus-tomer Center and updates the local SMT database. It can also save SUSE CustomerCenter data to a directory instead of the SMT database, or read SUSE Customer Cen-ter data from such a directory instead of downloading it from SUSE Customer Centeritself.
You can run the smt-scc-sync with the following options:
--fromdir directoryRead SUSE Customer Center data from a directory instead of downloading itfrom SUSE Customer Center.
--todir directoryWrite SUSE Customer Center data to the specified directory without updating theSMT database.
--createdbreplacementfileCreate a database replacement file for using smt-mirror without database.
--logfile file or -L fileSpecify the path to a log file.
SMT Tools and Configuration Files 53

--debugEnable debugging mode.
7.1.2.10 smt-registerThe smt-register or smt-register command registers all currently unregis-tered clients at the Novell Customer Center. It also registers all clients whose data haschanged since the last registration.
The following options are available:
--logfile file or -L fileSpecify the path to a log file.
--debugEnable debugging mode.
7.1.2.11 smt-reportThe smt-report or smt report command generates a subscription report basedon local calculation or Novell Customer Center registrations.
The following options are available:
--localForce the creation of a report based on a local calculation without accessing Nov-ell Customer Center data.
--nccForce the creation of a report based on Novell Customer Center data.
--nonccsyncDisable synchronizing with Novell Customer Center before creating the report.
--mail or -mActivate mailing the report to the addresses configured with the SMT Server andwritten in /etc/smt.conf. The report will be rendered as tables.
--attach or -aAppend the report to the e-mails in CSV format. This option should only be usedtogether with the --mail option.
54 Subscription Management Tool Guide

--quiet or -qSuppress output to STDOUT and runs smt-report in quiet mode.
--csv or -cThe report will be exported to multiple files in CSV format. The first line of each*.csv file consists of the column names, the data starts on line two. The --csvparameter should only be used together with the --file parameter. If the spec-ified filename contains .csv as extension, the report format will be CSV (as ifthe --csv parameter was used).
--pdf or -pThe report will be exported in PDF format. Use it only together with the -fileoption.
--xmlThe report will be exported in XML format. Use it only together with the -fileoption. For a detailed description of this XML format, see the manual page of thesmt-report command.
--file or -FExport the report to one or several files. By default, the report will be written to asingle file rendered as tables. Optionally, the filename or whole path may be spec-ified after the parameter: --file filename. If no filename is specified, adefault filename containing a timestamp is used. However, SMT will not check ifthe file or files already exist.
In CSV mode the report will be written to multiple files, therefore, the specifiedfilename will expand to [path/]filename-reportname.extensionfor every report.
--logfile filename or -L filenameSpecify path to a logfile.
--debugEnable debugging mode.
7.1.2.12 smt-reposYou can use smt-repos (or smt repositories) to list all available reposito-ries and for enabling, disabling, or deleting repositories. The following options areavailable:
SMT Tools and Configuration Files 55

--enable-mirror or -eEnable repository mirroring.
--enable-by-prod or -pEnable repository mirroring by giving product data in the following format:Product[,Version[,Architecture[,Release]]].
--disable-by-prod or -PDisable repository mirroring by giving product data in the following format:Product[,Version[,Architecture[,Release]]].
--enable-staging or -sEnable repository staging.
--disable-staging or -SDisable repository staging.
--disable-mirror or -dDisable repository mirroring.
--only-mirrorable or -mList only repositories that can be mirrored.
--only-enabled or -oList only enabled repositories.
--deleteList repositories and delete them from disk.
--namespace dirnameDelete the repository in the specified namespace.
--verbose or -vShow detailed repository information.
7.1.2.13 smt-setup-custom-reposThe smt-setup-custom-repos or smt setup-custom-repos script isa tool to set up custom repositories (repositories not present in NU) to be used withSMT. You can use this script to add a new repository to the SMT database or to deletea repository from the database. The script recognizes the following options:
56 Subscription Management Tool Guide

--productidID of a product the repository belongs to. If a repository should belong to multi-ple products, use this option multiple times to assign the repository to all relevantproducts.
--nameThe name of the custom repository.
--descriptionThe description of the custom repository.
--exturlThe URL where this repository can be mirrored from. Only HTTP and HTTPSprotocols are supported (no directory, file, or FTP).
--deleteRemove a custom repository with a given ID from the SMT database.
To set up a new repository, use the following command:smt-setup-custom-repos --productid Product_ID \--name Catalog_Name --exturl URL
For example:smt-setup-custom-repos --productid 434 \--name My_Catalog --exturl http://my.example.com/My_Catalog
To remove a configured repository, use the following command:smt-setup-custom-repos --delete Catalog_ID
For example:smt-setup-custom-repos --delete 1cf336d819e8e5904f4d4b05ee081971a0cc8afc
7.1.2.14 smt-stagingA patch is an update of a package or group of packages. The term update and patchare often interchangeable. With the smt-staging script, you can set up patch fil-ters for update repositories. It can also help you generate both testing repositories, orrepositories for the production environment.
The first argument of smt-staging is always the command. It must be followed bya repository. The repository can be specified by Name and Target from the ta-
SMT Tools and Configuration Files 57

ble scheme returned by the smt-repos command. Alternatively, it can be specifiedby its Repository ID, which is returned when running the commend smt-re-pos -v. The smt-staging script understands the following commands:
listupdatesList available patches and their allowed/forbidden status.
allow/forbidAllow or forbids specified patches.
createrepoGenerate both testing and production repository with allowed patches.
statusGive information about both testing and production snapshots, and patch counts.
listgroupsList staging groups.
There is always one group available with the name “default”. The default grouphas the path repo/full, repo/testing and repo. With creating a newgroup, new paths can be specified.
creategroupCreate a staging group. Required parameters are: group name, testing directoryname, and production directory name.
removegroupRemove a staging group. Required parameter is: group name.
The following options apply to any smt-staging command:
--logfile or -L file pathWrite log information to the specified file. If it does not exist, it is created.
--debug or -dTurn on the debugging output and log.
--verbose or -vTurn more detailed output on.
The following options apply to specific smt-staging commands:
58 Subscription Management Tool Guide

--patchSpecify a patch by its ID. You can get a list of available patches with the listu-pates command. This option can be used multiple times. Use it with the al-low, forbid, and listupdates commands. If used with listupdates,the command will print detailed information about the specified patches.
--categorySpecify the patch category. The following categories are available: 'security', 'rec-ommended' and 'optional'. Use it with the allow, forbid, and listupdatescommands.
--allAllow or forbid all patches in the allow or forbid commands.
--individuallyAllow or forbid multiple patches (e.g. by category) one by one, that is, as if the--patch option had been used on each of the patches.
--testingUse with the createrepo command to generate a repository for testing. Therepository will be generated from the full unfiltered local mirror of the remoterepository. It will be written into <MirrorTo>/repo/testing directory,where MirrorTo is the value taken from smt.conf.
--productionUse with the createrepo command to generate a repository for productionuse. The repository will be generated from the testing repository. It will be writteninto <MirrorTo>/repo directory, where MirrorTo is the value taken fromsmt.conf. If the testing repository does not exist, the production repository willbe generated from the full unfiltered local mirror of the remote repository.
--groupSpecify on which group the command should work on. The default for --groupis the name default.
--nohardlinkDuring the repository creation with the createrepo command, avoid creatinghard links instead of copying files. If not specified, hard links are created instead.
--nodescDo not print patch descriptions and summaries to save some screen space andmake the output more readable.
SMT Tools and Configuration Files 59

--sort-by-versionSort the listupdates table by patch version. The higher the version, the new-er the patch should be.
--sort-by-categorySort the listupdates table by patch category.
7.1.2.15 smt-supportThe smt-support command manages uploaded support data usually coming fromthe supportconfig tool. You can forward the data to SUSE, either selectively orin full. This command understands the following options:
--incoming or -i directorySpecify the directory where the supportconfig archives are uploaded. You can al-so set this option with the SMT_INCOMING environment variable. The defaultSMT_INCOMING directory is /var/spool/smt-support.
--list or -lList the uploaded supportconfig archives in the incoming directory.
--remove or -r archiveDelete the specified archive.
--empty or -RDelete all archives in the incoming directory.
--upload or -u archiveUpload the specified archive to SUSE. If you specify -s, -n, -c, -p, and -e op-tions, the archive is repackaged with contact information.
--uploadall or -UUpload all archives in the incoming directory to SUSE.
--srnum or -s SR numberAccept the Novell Service Request 11 digit number.
--name or -n nameEnter the first and last name of the contact, in quotes.
--company or -c companyEnter the company name.
60 Subscription Management Tool Guide

--storeid or -d idEnter the store ID, if applicable.
--terminalid or -t idEnter the terminal ID, if applicable.
--phone or -p phoneEnter the phone number of the contact person.
--email or -e emailEnter the email address of the contact.
7.1.3 rcsmt Init ScriptThe rcsmt script starts, restarts, or stops SMT services. If used without any sub-com-mands, it returns a help text. The rcsmt script can be used with the following sub-commands:
rcsmt startStart the SMT services.
rcsmt stopStop the SMT services.
rcsmt statusCheck the status of the SMT services. Checks whether httpd, MySQL, and cronare running.
rcsmt restartRestart the SMT services.
rcsmt try-restartCheck whether the SMT services are enabled and if so, restart them.
You can enable and disable SMT with the YaST SMT Server module.
7.2 SMT Configuration FilesThe main SMT configuration file is /etc/smt.conf. You can set most of theoptions with the YaST SMT Server module. Another important configuration fileis /etc/smt.d/smt-cron.conf, which contains parameters for commandslaunched as SMT scheduled jobs.
SMT Tools and Configuration Files 61

7.2.1 /etc/smt.confThe /etc/smt.conf file has several sections. The [NU] section contains theupdate credentials and URL. The [DB] section contains the configuration of theMySQL database for SMT. The [LOCAL] section includes other configuration data.The [REPORT] section contains the configuration of SMT reports. You can find theconfiguration for the smt-mirror-sle9 command in the YOU9-* sections.
WARNING
The /etc/smt.conf contains passwords in clear text and its defaultpermissions (640, root, wwwrun) make its content easily accessible withscripts running on the Apache server. Be careful with running other soft-ware on the SMT Apache server. The best policy is to use this server on-ly for SMT.
7.2.1.1 [NU] Section of /etc/smt.confThe following options are available in the [NU] section:
NUUrlURL of the update service. In most cases, it should contain the https://nu.novell.com/ URL.
NURegUrlURL of the update registration service. It is used by smt-sync. If this option ismissing, the URL from /etc/suseRegister.conf is used as a fallback.
NUUserNUUser should contain the username for update service. For information aboutgetting organization credentials, see Section 3.1, “Mirroring Credentials”. You canset this value with the SMT Server.
NUPassNUPass is the password for the user defined in NUUser. For information aboutgetting organization credentials, see Section 3.1, “Mirroring Credentials” You canset this value with the SMT Server.
ApiTypeApiType is the type of the service SMT uses, it can be either NCC for NovellCustomer Center or SCC for SUSE Customer Center.
62 Subscription Management Tool Guide

7.2.1.2 [DB] Section of /etc/smt.confThe three options defined in the [DB] section are used for configuring the database forSMT. Currently, only MySQL is supported by SMT.
configThe first parameter of the DBI->connect Perl method used for connection to theMySQL database. The value should be in the formdbi:mysql:database=smt;host=localhost
where smt is the name of the database and localhost is the hostname of thedatabase server.
userThe user for the database. The default value is smt.
passThe password for the database user. You can set the password with the YaST SMTServer module.
7.2.1.3 [LOCAL] Section of /etc/smt.confThe following options are available in the [LOCAL] section:
urlThe base URL of the SMT server which is used to construct URLs of the reposi-tories available on the server. This value should be set by YaST automatically dur-ing installation. The format of this option should be: https://server.do-main.tld/.
You can change the URL manually. For example, the administrator may choose touse the http:// scheme instead of https:// for performance reasons. An-other reason may be using an alias (configured with CNAME in DNS) instead ofthe hostname of the server, for example http://smt.domain.tld/ insteadof http://server1.domain.tld/.
nccEmailE-mail address used for registration at the Novell Customer Center. The SMT ad-ministrator can set this value with the YaST SMT Server module.
SMT Tools and Configuration Files 63

MirrorToDetermines the path to mirror to.
MirrorAllIf the MirrorAll option is set to true, the smt-sync script will set allrepositories that can be mirrored to be mirrored (DOMIRROR flag).
MirrorSRCIf the MirrorSRC option is set to true, source RPM packages are mirrored.
NOTE: Default Value Changed with SMT 11 SP2
With SMT 11 SP2, the preset default value was changed to false. Ifyou also want SMT to mirror source RPM packages on new installa-tions, set MirrorSRC to true.
Upgraded systems are not affected.
forwardRegistrationDetermine if the clients registered at SMT should be registered at Novell Cus-tomer Center, too. If the forwardRegistration option is set to true,client registrations will be forwarded to Novell Customer Center. If the for-wardRegistration option is set to false, no client registrations will besent to Novell Customer Center. forwardRegistration does not work withSUSE Customer Center yet.
rndRegisterSpecify a delay in seconds before registration of clients at Novell Customer Cen-ter. The value is a random number between 0 and 450, generated by the YaSTSMT Server module. The purpose of this random delay is to prevent a high loadon the Novell Customer Center server that would occur if all smt-register cronjobs connected at the same time.
HTTPProxyIf you do not want to use global proxy settings, specify the proxy to be used forHTTP connection here. Use the following form: http://proxy.exam-ple.com:3128.
If the proxy settings are not configured in /etc/smt.conf, the global proxysettings configured in /etc/syconfig/proxy are used. You can configurethe global proxy settings with the YaST Proxy module.
64 Subscription Management Tool Guide

The HTTPProxy also applies to the smt-mirror-sle9 script.
HTTPSProxyIf you do not want to use global proxy settings, specify the proxy to be usedfor HTTPS connection here. Use the form : http://proxy.exam-ple.com:3128.
If the proxy settings are not configured in /etc/smt.conf, the global proxysettings configured in /etc/syconfig/proxy are used. You can configurethe global proxy settings with the YaST Proxy module.
The HTTPSProxy also applies to the smt-mirror-sle9 script.
ProxyUserIf your proxy requires authentication, specify a user name and password here, us-ing the username:password format.
If the proxy settings are not configured in /etc/smt.conf, the global proxysettings configured in /etc/syconfig/proxy are used. You can configurethe global proxy settings with the YaST Proxy module.
TIP: Global User Authentication Setting
If you configure the global proxy settings with YaST, manually copy /root/.curlrc to the home directory of the smt and adjust the per-missions with the following commands as root:cp /root/.curlrc /var/lib/smt/chown smt:www /var/lib/smt/.curlrc
Neither the ProxyUser value nor the global proxy authentication settingsapply to the smt-mirror-sle9 script. For user authentication in smt-mirror-sle9 write the following in the $HOME/.wgetrc file: prox-y_user=username proxy_password=password.
requiredAuthTypeSpecify an authentication type to access the repository. There are three possibletypes:
• none - no authentication is required. This is the default value
• lazy - only username and password are checked. A valid user can accessall repositories.
SMT Tools and Configuration Files 65

• strict - checks also if the user has access to the repository.
smtUserSpecify a user name of a Unix user under which all smt commands will run.
signingKeyIDSpecify the ID of the GPG key to sign modified repositories. The user specifiedunder smtUser needs to have access to the key. If this option is not set, the mod-ified repositories will be unsigned.
7.2.1.4 [REST] Section of /etc/smt.confThe following options are available in the [REST] section:
enableRESTAdminAccessIf set to 1, turns administrative access to the SMT RESTService on. Default valueis 0.
RESTAdminUserSpecify the user name which the REST-Admin uses to login. Default value isRESTroot.
RESTAdminPasswordSpecify the password for the REST-Admin user. The option has no default value.An empty password is invalid.
7.2.1.5 [JOBQUEUE] Section of /etc/smt.confThe following options are available in the [JOBQUEUE] section:
maxFinishedJobAgeSpecify the maximum age of finished non-persistent jobs in days. Default value is8.
7.2.1.6 [REPORT] Section of /etc/smt.confThe following options are available in the [REPORT] section:
reportEmailA comma separated list of e-mail addresses to send SMT status reports to. Youcan set this list with the YaST SMT Server module.
66 Subscription Management Tool Guide

reportEmailFromFrom field of report e-mails. If not set, the default [email protected] will be used.
mailServerRelay mail server. If empty, e-mails are sent directly.
mailServerPortPort of the relay mail server set in mailServer.
mailServerUserUser name for authentication to the mail server set in mailServer.
mailServerPasswordPassword for authentication to the mail server set in mailServer.
7.2.1.7 smt-mirror-sle9 Sections of /etc/smt.confEach product to be mirrored by the smt-mirror-sle9 command has a separatepredefined YOU9-* section in the /etc/smt.conf configuration file. /etc/smt.conf is not configured via the SMT database like the smt-mirror com-mand, all configuration is contained in /etc/smt.conf.
mirror_prodA product to be mirrored. For example Novell-Linux-Desktop.
mirror_archsComma-separated list of architectures to be mirrored. For examplei386,x86_64. Remove any architectures that do not need to be mirrored.
mirror_versionThe version of the product to be mirrored, for example 9.
mirrorIf you want to mirror this product, set mirror to true.
credentialsIf you want to mirror this product, provide credentials in the user:passwordformat. Note that these credentials differ from the mirroring credentials used forSLES 10 and 11. You need to use the NCC login credentials here.
SMT Tools and Configuration Files 67

7.2.1.8 Example /etc/smt.confExample 7.1: smt.conf
[NU]NUUrl = https://nu.novell.com/NURegUrl = https://secure-www.novell.com/center/regsvc/NUUser = exampleuserNUPass = examplepasswordApiType = NCC
[DB]config = dbi:mysql:database=smt;host=localhostuser = smtpass = smt
[LOCAL]# Default should be http://server.domain.top/url = http://smt.example.com/# This email address is used for registration at NCCnccEmail = [email protected] = /srv/www/htdocsMirrorAll = falseMirrorSRC = falseforwardRegistration = truerndRegister = 127# The hook script that should be called before the smt-mirror script removes its lockmirror_preunlock_hook =# The hook script that should be called after the smt-mirror script removed its lockmirror_postunlock_hook =# specify proxy settings here, if you do not want to use the global proxy settings# If you leave these options empty the global options are used.## specify which proxy you want to use for HTTP connection# in the form http://proxy.example.com:3128HTTPProxy =# specify which proxy you want to use for HTTPS connection# in the form http://proxy.example.com:3128HTTPSProxy =# specify username and password if your proxy requires authentication# in the form username:passwordProxyUser =## require authentication to access the repository?# Three possible authtypes can be configured here# 1) none : no authentication required (default)# 2) lazy : check only username and password. A valid user has access to all repositories# 3) strict : check also if this user has access to the repository.
68 Subscription Management Tool Guide

#requiredAuthType = none## the smt commands should run with this unix user#smtUser = smt## ID of the GPG key to be used to sign modified (filtered) repositories.# The key must be accessible by the user who runs SMT, i.e. the user specified# in the 'smtUser' configuration option.## If empty, the modified repositories will be unsigned.#signingKeyID =## This string is send in HTTP requests as UserAgent.# If the key UserAgent does not exist, a default is used.# If UserAgent is empty, no UserAgent string is set.##UserAgent=# Organization credentials for this SMT server.# These are currently only used to get list of all available repositories# from https://your.smt.url/repo/repoindex.xml# Note: if authenticated as a client machine instead of these mirrorUser,# the above URL returns only repositories relevant for that client.mirrorUser =mirrorPassword =
[REST]# Enable administrative access to the SMT RESTService by setting enableRESTAdminAccess=1# default: 0enableRESTAdminAccess = 0# Define the username the REST-Admin uses for login# default: RESTrootRESTAdminUser = RESTroot# Define the password for the REST-Admin (note: empty password is invalid)# default: <empty>RESTAdminPassword =
[JOBQUEUE]# maximum age of finished (non-persistent) jobs in days# default: 8maxFinishedJobAge = 8# comma separated list of JobQueue status IDs that should be interpreted as successful# See smt-job --help for more information about possible Status IDs# Please note: An empty string will be interpreted as default (1,4).# default: 1,4# useful: 1,4,6jobStatusIsSuccess = 1,4
SMT Tools and Configuration Files 69

[REPORT]# comma separated list of eMail addresses where the status reports will be sent toreportEmail = [email protected]# from field of report mails - if empty it defaults to "root@<hostname>.<domainname>"reportEmailFrom =# relay mail server - leave empty if mail should be sent directlymailServer =mailServerPort =# mail server authentication - leave empty if not requiredmailServerUser =mailServerPassword =
[YOU9-SLES-SDK]mirror_prod = SLES-SDKmirror_archs = i386,ia64,ppc,s390,s390x,x86_64mirror_version = 9mirror = falsecredentials =
[YOU9-SUSE-CORE]mirror_prod = SUSE-COREmirror_archs = i386,ia64,ppc,s390,s390x,x86_64mirror_version = 9mirror = falsecredentials =
[YOU9-SUSE-SLES]mirror_prod = SUSE-SLESmirror_archs = i386,ia64,ppc,s390,s390x,x86_64mirror_version = 9mirror = falsecredentials =
7.2.2 /etc/smt.d/smt-cron.confThe /etc/smt.d/smt-cron.conf configuration file contains options of theSMT commands launched as SMT scheduled jobs set with YaST (see Section 2.5,“Setting the SMT Job Schedule with YaST”). Cron is used to launch these scheduledjobs. The cron table is located in the /etc/cron.d/novell.com-smt file.
NCC_SYNC_PARAMSContains parameters of the smt ncc-sync command, if called as a part of anSMT scheduled job via cron. The default value is "-L /var/log/smt/smt-ncc-sync.log --mail".
70 Subscription Management Tool Guide

MIRROR_PARAMSContains parameters of the smt mirror command, if called as a part of anSMT scheduled job via cron. The default value is "-L /var/log/smt/smt-mirror.log --mail" .
REGISTER_PARAMSContains parameters of the smt register command, if called as a part of anSMT scheduled job via cron. The default value is "-r -L /var/log/smt/smt-register.log --mail" .
REPORT_PARAMSContains parameters of the smt report command, if called as a part of anSMT scheduled job via cron. The default value is "--mail --attach -L /var/log/smt/smt-report.log" .
JOBQUEUECLEANUP_PARAMSContains parameters for smt jobqueue cleanup, if called as a part of an SMTscheduled job via cron. The default value is "--mail -L /var/log/smt/smt-jobqueuecleanup.log".
7.3 Server CertificatesFor communication between the SMT server and client machines, the encryptedHTTPS protocol is used, requiring a server certificate. If the certificate is not avail-able, or if clients are not configured to use the certificate, the communication betweenserver and clients will fail.
Every client must be able to verify the server certificate by trusting the CA (certificateauthority) certificate which signed the server certificate. Therefore, the SMT serv-er provides a copy of the CA at /srv/www/htdocs/smt.crt. This CA can bedownloaded from every client via the URL http://FQDN/smt.crt. The copy iscreated when YaST writes the SMT configuration. Whenever SMT is started with thercsmt init script, it checks the certificate. If a new CA certificate exists, it is copiedagain. Therefore, whenever the CA certificate is changed, restart SMT using the rc-smt restart command.
When the SMT Server module applies configuration changes, it checks for the exis-tence of the common server certificate. If the certificate does not exist, YaST asks
SMT Tools and Configuration Files 71

whether the certificate should be created. If the user confirms, the YaST CA Manage-ment module is started.
7.3.1 Certificate ExpirationThe common server certificate SMT uses is valid for one year. After that time, a newcertificate is needed. Either generate a new certificate using YaST CA Managementmodule or import a new certificate using the YaST Common Server Certificate mod-ule. Both options are described in the following sections.
As long as the same CA certificate is used, there is no need to update certificates atthe client machines. The generated CA certificate is valid for 10 years.
7.3.2 Creating a New Common ServerCertificateTo create a new common server certificate with YaST, proceed as follows:
1 Start YaST and select Security and Users > CA Management. Alternatively, startthe YaST CA Management module from a command line by entering yast2ca_mgm as root.
2 Select the required CA and click Enter CA.
3 Enter the password if entering a CA for the first time. YaST displays the CA keyinformation in the Description tab.
4 Click the Certificates tab (see Figure 7.1, “Certificates of a CA”) and select Add> Add Server Certificate.
72 Subscription Management Tool Guide

Figure 7.1: Certificates of a CA
5 Enter the fully qualified domain name of the server as Common Name. Add avalid e-mail address of the server administrator. Other fields, as Organization,Organizational Unit, Locality, and State are optional. Click Next to proceed.
IMPORTANT: Hostname in Server Certificate
The server certificate must contain the correct hostname. Ifthe client requests server https://some.hostname/, thensome.hostname must be part of the certificate. The hostnamemust either be used as the Common Name, see Step 5, or as theSubject Alternative Name, see Step 7: DNS:some.hostname andIP:<ipaddress>.
6 Enter a Password for the private key of the certificate and reenter it in the nextfield to verify it.
7 If you want to define a Subject Alternative Name, click Advanced Options, selectSubject Alternative Name from the list and click Add.
SMT Tools and Configuration Files 73

IMPORTANT: Subject Alternative Name
If Subject Alternative Name is present in the server certificate,than it needs contain the DNS entry. If Subject Alternative Name ispresent, the Common Name (CN) is not checked anymore.
8 If you want to keep the default values for the other options, like Key Length andValid Period, click Next. An overview of the certificate to be created is shown.
9 Click Create to generate the certificate.
10 To export the new certificate as the common server certificate, select it in theCertificates tab and select Export > Export as Common Server Certificate.
11 After having created a new certificate, restart SMT using the rcsmtrestart command. Restarting SMT ensures that the new certificate iscopied from /etc/ssl/certs/YaST-CA.pem to /srv/www/htdocs/smt.crt, the copy SMT uses. Restarting SMT also restarts the Webserver.
For detailed information about managing certification and further usage of the YaSTCA Management module and the Common Sever Certificate module, refer to the Se-curity Guide coming with the base system.
7.3.3 Importing a Common ServerCertificateYou can import an own common server certificate from a file. The certificate to beimported has to be in the PKCS12 format with CA chain. Common server certificatescan be imported with the YaST Common Server Certificate module.
To import an own certificate with YaST, proceed as follows:
1 Start YaST and select Security and Users > Common Server Certificate. Alternative-ly, start the YaST Common Server Certificate module from the command line byentering yast2 common_cert as root.
The description of the currently used common server certificate is shown in the di-alog that opens.
74 Subscription Management Tool Guide

2 Click Import and select the file containing the certificate to be imported. Specifythe certificate password in the Password field.
3 Press Next. If the certificate is successfully imported, close YaST with Finish.
4 After having created a new certificate, restart SMT using the rcsmt restartcommand. Restarting SMT ensures that the new certificate is copied from /etc/ssl/certs/YaST-CA.pem to /srv/www/htdocs/smt.crt, the copySMT uses. Restarting SMT also restarts the Web server.
7.3.4 Synchronizing Time Between SMTServer and ClientsThe synchronization of time between the SMT server and clients is highly recom-mended. Each server certificate has a validity period. If the client happens to be set toa time outside of this period, the certificate validation on the client side fails.
Therefore, it is advisable to keep the time on the server and clients synchronized.You can easily synchronize the time using NTP (network time protocol). Use yast2ntp-client to configure an NTP client. Find detailed information about NTP inthe Administration Guide.
SMT Tools and Configuration Files 75


Configuring Clients to UseSMT 8Any machine running SUSE Linux Enterprise 10 SP4 or 11 SP1 (or later) can be con-figured to register against SMT and download software updates from there, instead ofcommunicating directly with the Customer Center and the NU servers.
If your network includes an SMT server to provide a local update source, you needto equip the client with the server's URL. As client and server communicate via theHTTPS protocol during registration, you also need to make sure the client trusts theserver's certificate. In case you set up your SMT server to use the default server cer-tificate, the CA certificate will be available on the SMT server at http://FQDN/smt.crt . In this case you do not have to manually set the certificate: The registra-tion process will automatically download the CA certificate from there, unless config-ured otherwise. You must enter a path to the server's CA certificate if the certificatewas issued by an external certificate authority.
NOTE: Registering Against *.novell.com Subdomain
If you try to register against any *.novell.com subdomain, the certifi-cate will not be downloaded during registration for security reasons, andcertificate handling will not be done. In such a case, use a different do-main name or a plain IP address.
There are several ways to provide the registration information and to configure theclient machine to use SMT:
1. Provide the needed information via kernel parameters at boot time (Section 8.1,“Using Kernel Parameters to Access an SMT Server”).
Configuring Clients to Use SMT 77

2. Configure the clients using an AutoYaST profile (Section 8.2, “Configuring Clientswith AutoYaST Profile”).
3. Use the clientSetup4SMT.sh script (Section 8.3, “Configuring Clients withthe clientSetup4SMT.sh Script in SLE 11”). This script can be run on a client tomake it register against a specified SMT server.
4. In SUSE Linux Enterprise 11 you can now set the SMT server URL with the YaSTregistration module during installation (Section 8.4, “Configuring Clients withYaST”).
These methods are described in the following sections.
8.1 Using Kernel Parameters toAccess an SMT ServerAny client can be configured to use SMT by providing the following kernel parame-ters during machine boot: regurl and regcert. The first parameter is mandatory,the latter is optional.
WARNING: Beware of Typing Errors
Make sure the values you enter are correct. If regurl has not beenspecified correctly, the registration of the update source will fail.
If an invalid value for regcert has been entered, you will be promptedfor a local path to the certificate. In case regcert is not specified at all,it will default to http://FQDN/smt.crt with FQDN being the name ofthe SMT server.
regurlURL of the SMT server.
The URL needs to be in the following format: https://FQDN/cen-ter/regsvc/ with FQDN being the fully qualified hostname of the SMT serv-er. It must be identical to the FQDN of the server certificate used on the SMTserver. Example:regurl=https://smt.example.com/center/regsvc/
78 Subscription Management Tool Guide
regcertLocation of the SMT server's CA certificate. Specify one of the following loca-tions:
URLRemote location (http, https or ftp) from which the certificate can be down-loaded. Example:regcert=http://smt.example.com/smt.crt
FloppySpecifies a location on a floppy. The floppy has to be inserted at boot time—you will not be prompted to insert it if it is missing. The value has to startwith the string floppy, followed by the path to the certificate. Example:regcert=floppy/smt/smt-ca.crt
Local PathAbsolute path to the certificate on the local machine. Example:regcert=/data/inst/smt/smt-ca.cert
InteractiveUse ask to open a pop-up menu during installation where you can specify thepath to the certificate. Do not use this option with AutoYaST. Example:regcert=ask
Deactivate Certificate InstallationUse done if either the certificate will be installed by an add-on product, or ifyou are using a certificate issued by an official certificate authority. Example:regcert=done
WARNING: Change of SMT Server Certificate
If the SMT server gets a new certificate from a new and untrusted CA,the clients need to retrieve the new CA certificate file. This is done auto-matically with the registration process but only if a URL was used at in-stallation time to retrieve the certificate, or if the regcert parameter wasomitted and thus, the default URL is used. If the certificate was loadedusing any other method, such as floppy or local path, the CA certificatewill not be updated.
Configuring Clients to Use SMT 79

8.2 Configuring Clients withAutoYaST ProfileClients can be configured to register with SMT server via AutoYaST profile. For gen-eral information about creating AutoYaST profiles and preparing automatic installa-tion, refer to the AutoYaST Guide. In this section, only SMT specific configuration isdescribed.
To configure SMT specific data using AutoYaST, follow these steps:
1 As root, start YaST and select Miscellaneous > Autoinstallation to start the graphi-cal AutoYaST front-end.
From a command line, you can start the graphical AutoYaST front-end with theyast2 autoyast command.
2 Open an existing profile using File > Open, create a profile based on the currentsystem's configuration using Tools > Create Reference Profile, or just work with anempty profile.
3 In SLE 11, select Software > Novell Customer Center Configuration. An overviewof the current configuration is shown.
4 Click Configure.
5 Set the URL of the SMT Server and, optionally, the location of the SMT Certifi-cate. The possible values are the same as for the kernel parameters regurl andregcert (see Section 8.1, “Using Kernel Parameters to Access an SMT Server”).The only exception is that the ask value for regcert does not work in AutoY-aST, because it requires user interaction. If using it, the registration process will beskipped.
6 Perform all other configuration needed for the systems to be deployed.
7 Select File > Save As and enter a filename for the profile, such as autoinst.xml.
80 Subscription Management Tool Guide

8.3 Configuring Clients with theclientSetup4SMT.sh Script in SLE11In SLE 11, the /usr/share/doc/packages/smt/clientSetup4SMT.shscript is provided with SMT. This script allows you to configure a client machine touse an SMT server. It can also be used to reconfigure an existing client to use a differ-ent SMT server.
NOTE: Installation of wget
The script clientSetup4SMT.sh itself uses wget, so wget must beinstalled on the client.
To configure a client machine to use SMT with the clientSetup4SMT.sh script,follow these steps:
1 Copy the clientSetup4SMT.sh script from your SMT server to the client ma-chine. The script is available at <SMT_HOSTNAME>/repo/tools/clientSetup4SMT.sh and /srv/www/htdocs/repo/tools/clientSetup4SMT.sh. You can download it with a browser, using wget, or by anothermeans, such as with scp.
2 As root, execute the script on the client machine. The script can be executed intwo ways. In the first case, the script name is followed by the registration URL; forexample:./clientSetup4SMT.sh https://smt.example.com/center/regsvc/
In the second case, the script uses the --host option followed by the hostname ofthe SMT server, and --regcert followed by the URL of the SSL certificate; forexample:./clientSetup4SMT.sh --host smt.example.com \ --regcert http://smt.example.com/smt.crt
In this case, without any “namespace” specified, the client will be configured to usethe default production repositories. If --namespace groupname is specified,the client will use that staging group.
Configuring Clients to Use SMT 81

3 The script downloads the server's CA certificate. Accept it by pressing y.
4 The script performs all necessary modifications on the client. However, the regis-tration itself is not performed by the script.
5 The script downloads and asks to accept additional GPG keys to sign repositorieswith.
6 Perform a registration by executing suse_register or running yast2 in-st_suse_register module on the client.
The clientSetup4SMT.sh script works with SUSE Linux Enterprise 10 SP2 andlater SPs, and SLE 11 systems.
This script is also provided for download. You can get it by calling:
wget http://smt.example.com/repo/tools/clientSetup4SMT.sh
8.3.1 Problems Downloading GPG Keysfrom the ServerThe apache2-example-pages package includes a robots.txt file. The fileis installed into the Apache2 document root directory, and controls how clients canaccess files from the web server. If this package is installed on the server, clientSetup4SMT.sh fails to download the keys stored under /repo/keys.
You can solve this problem by either editing robots.txt, or uninstalling theapache2-example-pages package.
If you choose to edit the robots.txt file, add before the Disallow: / state-ment:Allow: /repo/keys
8.4 Configuring Clients with YaST
82 Subscription Management Tool Guide

8.4.1 Configuring Clients with YaST inSLE 11To configure a client to perform the registration against an SMT server use the YaSTregistration module (yast2 inst_suse_register).
Click Advanced > Local Registration Server and enter the name of the SMT server plusthe path to the registration internals (/center/regsvc/), e.g.:https://smt.example.com/center/regsvc/
After confirmation the certificate is loaded and the user is asked to accept it. Thencontinue.
WARNING: Staging Groups Registration
If a staging group is used, make sure that settings in /etc/suseRegister.conf are done accordingly. If not already done, modify the reg-ister= paramater and append &namespace=namespace. For moreinformation about staging groups, see Section 4.3, “Staging Reposito-ries”.
Alternatively, use the clientSetup4SMT.sh script (see Section 8.3,“Configuring Clients with the clientSetup4SMT.sh Script in SLE 11”).
8.5 Registering SLE11 ClientsAgainst SMT Test EnvironmentTo configure a client to register against the test environment instead of the productionenvironment, modify /etc/suseRegister.conf on the client machine by set-ting:register = command=register&namespace=testing
For more information about using SMT with a test environment, see Section 3.4, “Us-ing the Test Environment”.
Configuring Clients to Use SMT 83

8.6 Listing Accessible RepositoriesTo retrieve the accessible repositories for a client, download repo/repoindex.xml from the SMT server with the client's credentials. The credentials arestored in /etc/zypp/credentials.d/NCCCredentials on the client ma-chine. Using wget, the command for testing could be as follows:wget https://USER:[email protected]/repo/repoindex.xml
repoindex.xml returns the complete repository list as they come from the ven-dor. If a repository is marked for staging, repoindex.xml lists the repository inthe full namespace (repos/full/$RCE).
To get a list of all repositories available on the SMT server, use the credentials speci-fied in the [LOCAL] section of /etc/smt.conf on the server as mirrorUserand mirrorPassword.
8.7 How to Update Red HatEnterprise Linux with SMT 11SMT 11 enables customers that possess the required entitlements to mirror updates forRed Hat Enterprise Linux (RHEL). Refer to http://www.suse.com/products/expand-edsupport/ for details on SUSE Linux Enterprise Server Subscription with ExpandedSupport. This section discusses the actions required to configure the SMT server andclients (RHEL servers) for this solution.
NOTE: SUSE Linux Enterprise Server 10
Configuring RHEL client with Subscription Management Tool for SUSELinux Enterprise (SMT 1.0) running SUSE Linux Enterprise Server 10is slightly different. For more information, see How to update Red HatEnterprise Linux with SMT. [http://www.novell.com/support/search.do?usemicrosite=true&searchString=7001751]
84 Subscription Management Tool Guide

8.7.1 How to Prepare SMT server formirroring and publishing updates forRHEL1 Install SUSE Linux Enterprise Server (SLES) 11 with the SMT 11 add-on product
as per the documentation on the respective products.
2 During SMT setup, use organization credentials that have access to Novell-provid-ed RHEL update catalogs.
3 Verify that the organization credentials have access to download updates for theRed Hat products withsmt-repos -m | grep RES
4 Enable mirroring of the RHEL update catalog(s) for the desired architecture(s):smt-repos -e repo-name architecture
5 Mirror the updates and log verbose output:smt-mirror -d -L /var/log/smt/smt-mirror.log
The updates for RHEL will also be mirrored automatically as part of the defaultnightly SMT mirroring cron job. When the mirror process of the catalogs for yourRHEL products has completed, the updates are available viahttp://smt-server.your-domain.top/repo/$RCE/catalog-name/architecture/
6 To enable GPG checking of the repositories, the key used to sign the repositoriesneeds to be made available to the RHEL clients. This key is now available in theres-signingkeys package, which is included in the SMT 11 installation source.
• Install the res-signingkeys package with the commandzypper in -y res-signingkeys
• The installation of the package stores the key file as /srv/www/htdocs/repo/keys/res-signingkeys.key.
• Now the key is available to the clients and can be imported into their RPM data-base as described later.
Configuring Clients to Use SMT 85

8.7.2 How to Configure the YUM client onRHEL 5.2 to receive updates from SMT1 Import the repository signing key downloaded above into the local RPM database
withrpm --import http://smt-server.domain.top/repo/keys/res-signingkeys.key
2 Create a file in /etc/yum.repos.d/ and name it RES5.repo.
3 Edit the file and enter the repository data, and point to the catalog on the SMT serv-er as follows:[smt]name=SMT repositorybaseurl=http://smt-server.domain.top/repo/$RCE/catalog-name/architecture/enabled=1gpgcheck=1
Example of base URL:http://smt.mycompany.com/repo/$RCE/RES5/i386/
4 Save the file.
5 Disable standard Red Hat repositories by settingenabled=0
in the repository entries in other files in /etc/yum.repos.d/ (if any are en-abled).
Both YUM and the update notification applet should work correctly now and notifyof available updates when applicable. You may need to restart the applet.
8.7.3 How to Configure the UP2DATEclient on RHEL 3.9 and 4.7 to receiveupdates from SMT1 Import the repository signing key downloaded above into the local RPM database
with
86 Subscription Management Tool Guide

rpm --import http://smt-server.domain.top/repo/keys/res-signingkeys.key
2 Edit the file /etc/sysconfig/rhn/sources and make the followingchanges:
3 Comment out any lines starting with up2date.
Normally, there will be a line that says "up2date default".
4 Add an entry pointing to the SMT repository (all in one line):yum repo-name http://smt-server.domain.top/repo/$RCE/catalog-name/architecture/
where repo-name should be set to RES3 for 3.9 and RES4 for 4.7.
5 Save the file.
Both up2date and the update notification applet should work correctly now, pointingto the SMT repository and indicating updates when available. In case of trouble, try torestart the applet.
In order to ensure correct reporting of the Red Hat Enterprise systems in Novell Cus-tomer Center or SUSE Customer Center, they need to be be registered against yourSMT server. For this a special suseRegisterRES package is provided through theRES* catalogs and it should be installed, configured and executed as described below.
8.7.4 How to Register RHEL 5.2 againstSMT1 Install the suseRegisterRES package.
yum install suseRegisterRES
NOTE: Additional Packages
You may need to install perl-Crypt-SSLeay and perl-XML-Parser packages from the original RHEL media.
2 Copy the SMT certificate to the system:wget http://smt-server.domain.top/smt.crt
Configuring Clients to Use SMT 87

cat smt.crt >> /etc/pki/tls/cert.pem
3 Edit /etc/suseRegister.conf to point to SMT by changing the URL valuetourl = https://smt-server.domain.top/center/regsvc/
or (for SUSE Customer Center)url = https://smt-server.domain.top/connect/
4 Register the system:suse_register
8.7.5 How to Register RHEL 4.7 and RHEL3.9 against SMT1 Install the suseRegisterRES package:
up2date --get suseRegisterRESup2date --get perl-XML-Writerrpm -ivh /var/spool/up2date/suseRegisterRES*.rpm /var/spool/up2date/perl-XML-Writer-0*.rpm
NOTE: Additional Packages
You may need to install perl-Crypt-SSLeay and perl-XML-Parser packages from the original RHEL media.
2 Copy the SMT certificate to the system:wget http://smt-server.domain.top/smt.crt
cat smt.crt >> /usr/share/ssl/cert.pem
3 Edit /etc/suseRegister.conf to point to SMT by changing the URL valuetourl = https://smt-server.domain.top/center/regsvc/
or (for SUSE Customer Center)url = https://smt-server.domain.top/connect/
4 Register the system:
88 Subscription Management Tool Guide

suse_register
Configuring Clients to Use SMT 89


Backup of the SMT Server 9Creating backups of the SMT server regularly can help restore it quickly and reliablyin the case of the server failure.
There are three main areas to back up on the SMT server:
• Configuration files
• Package repositories
• The database
9.1 Configuration Files andRepositoriesThe SMT server configuration is stored in the /etc/smt.conf and /etc/smt.d/smt-cron.conf files.
Package repositories are stored under the /srv/www/htdocs/repo/ directory.As you can mirror the repositories on the restored server as well, backing them up isnecessary only if you are using repository staging (see Section 3.5, “Testing and Filter-ing Update Repositories with Staging”).
Use your preferred tool to back up the configuration and repository files.
Backup of the SMT Server 91

9.2 The DatabaseSMT uses the MariaDB database to store information about clients, registrations, ma-chine data, which catalogs are enabled for mirroring, or custom catalogs. Unlike theconfiguration files and repositories, the database information cannot be recoveredwithout a valid backup.
Standard way to back up the SMT database is to create a cron job that performs anSQL dump into a plain text file:mysqldump -u root -p smt_db_password smt > /backup_dir/smt-db-backup.sql
Then include the resulting file to your normal backup jobs.
92 Subscription Management Tool Guide

SMT REST API AThe SMT REST interface is meant for communication with SMT clients and inte-gration into other WebServices. The base URI for all the following REST calls ishttps://YOURSMTSERVER/=/1. The SMT server responds with XML data de-scribed for each call by an RNC snippet with comments.
Quick Reference
NOTE: API for authenticating smt clients.
Used internally in the smt-client package. Not intended for gener-al administrative use!
GET /jobs get list of all jobs for clientGET /job/@next get the next job for clientGET /job/<jobid> get job with jobid for client. Note: this marks the job as retrievedPUT /job/<jobid> update job having <jobid> using XML data. Note: updates only retrieved jobs
For backward compatibility reasons also available:GET /jobs/@next same as GET /job/@nextGET /jobs/<jobid> same as GET /job/<jobid>PUT /jobs/<jobid> same as PUT /job/<jobid>
API for general access (this needs authentication using credentials from the[REST] section of smt.conf).GET /client get data of all clientsGET /client/<GUID> get data of client with specified GUID

GET /client/<GUID>/jobs get client's job dataGET /client/<GUID>/patchstatus get client's patch statusGET /client/<GUID>/job/@next get client's next jobGET /client/<GUID>/job/<jobid> get specified client job dataGET /client/@all/jobs get job data of all clientsGET /client/@all/patchstatus get patch status of all clientsGET /repo get all repositories known to SMTGET /repo/<repoid> get details of repository with <repoid>GET /repo/<repoid>/patches get repository's patchesGET /patch/<patchid> get patch <patchid> detailsGET /product get list of all products known to SMTGET /product/<productid> get details of product with <productid>GET /product/<productid>/repos get list of product's repositories
For backward compatibility reasons, plural forms are also available; e.g.:GET /clients same as GET /clientGET /repos same as GET /repoGET /product same as GET /product
Detailed DescriptionAPI for authenticating clients:
GET /jobsGet list of all jobs for an authenticating client. When getting the jobs via thispath they will not be set to the status retrieved.
Example:<jobs> <job name="Patchstatus Job" created="2010-06-18 16:34:38" description="Patchstatus Job for Client 456" exitcode="" expires="" finished="" guid="456" guid_id="30" id="31" message="" parent_id="" persistent="1" retrieved="" status="0" stderr="" stdout="" targeted="" timelag="23:00:00" type="1" verbose="0"> <arguments></arguments> </job> <job name="Software Push" created="2010-06-18 16:37:59" description="Software Push: mmv, whois" exitcode="" expires="" finished="" guid="456" guid_id="30" id="32" message="" parent_id="" persistent="0" retrieved="" status="0" stderr="" stdout="" targeted="" timelag="" type="2" verbose="0"> <arguments> <packages> <package>mmv</package> <package>whois</package> </packages> </arguments> </job>
94 Subscription Management Tool Guide

<job name="Update Job" created="2010-06-18 16:38:39" description="Update Job" exitcode="" expires="" finished="" guid="456" guid_id="30" id="34" message="" parent_id="" persistent="0" retrieved="" status="0" stderr="" stdout="" targeted="" timelag="" type="3" verbose="0"> <arguments></arguments> </job> <job name="Execute" created="2010-06-18 17:40:10" description="Execute custom command" exitcode="0" expires="" finished="2010-06-18 17:40:14" guid="456" guid_id="30" id="41" message="execute successfully finished" parent_id="" persistent="0" retrieved="2010-06-18 17:40:14" status="1" stderr="man:x:13:62:Manual pages viewer:/var/cache/man:/bin/bash" stdout="" targeted="" timelag="" type="4" verbose="1"> <arguments command="grep man /etc/passwd" /> </job> <job name="Reboot" created="2010-06-18 16:40:28" description="Reboot now" exitcode="" expires="2011-06-12 15:15:15" finished="" guid="456" guid_id="30" id="37" message="" parent_id="" persistent="0" retrieved="" status="0" stderr="" stdout="" targeted="2010-06-12 15:15:15" timelag="" type="5" verbose="0"> <arguments></arguments> </job> <job name="Wait 5 sec. for exit 0." created="2010-06-18 16:40:59" description="Wait for 5 seconds and return with value 0." exitcode="" expires="" finished="" guid="456" guid_id="30" id="38" message="" parent_id="" persistent="0" retrieved="" status="0" stderr="" stdout="" targeted="" timelag="" type="7" verbose="0"> <arguments exitcode="0" waittime="5" /> </job> <job name="Eject job" created="2010-06-18 16:42:00" description="Job to eject the CD/DVD drawer" exitcode="" expires="" finished="" guid="456" guid_id="30" id="39" message="" parent_id="" persistent="0" retrieved="" status="0" stderr="" stdout="" targeted="" timelag="" type="8" verbose="0"> <arguments action="toggle" /> </job></jobs>
GET /jobs/@nextGet the next job for an authenticating client. The job will not be set to the re-trieved status.
Example:<job id="31" guid="456" type="patchstatus" verbose="false"> <arguments></arguments></job>
GET /jobs/<jobid>Get a job with the specified jobid for an authenticating client. The job will beset to the retrieved status.
SMT REST API 95

When the client retrieves a job, not all the metadata is part of the XML re-sponse. However, it can be the full set of metadata, as smt-client onlypicks the data that is relevant. But a job retrieval should only contain the min-imal set of data that is required to fulfill it.
RNC:start = element job { attribute id {xsd:integer}, # the job ID. A job id alone is not unique. # A job is only uniquely identified with # guid and id. The same jobs for multiple # clients have the same job id. attribute parent_id {xsd:integer}?, # ID of the job on which this job depends attribute guid {xsd:string}, attribute guid_id {xsd:integer}?, # internal database ID of the client # (for compatibility reasons, if third # party application talks to SMT REST # service). attribute type { # job type ID string. Must be unique and # equal to the name of the Perl module on # the client. "softwarepush", "patchstatus", "<custom>" # add your own job types }, attribute name {xsd:string}, # short custom name of the job, user-defined attribute description {xsd:string}, # custom description of what the job does attribute created {xsd:string}, # time stamp of creation attribute expires {xsd:string}, # expiration time stamp; the job expires # if not retrieved by then attribute finished {xsd:string}, # time stamp of job completion attribute retrieved {xsd:string}, # time stamp of retrieval of the job attribute persistent {xsd:boolean}?, # defines whether the job is a persistent # (repetitive) job attribute verbose {xsd:boolean}, # if true, output of job commands is # attached to the result
96 Subscription Management Tool Guide

attribute exitcode {xsd:integer}, # the last exit code of the system command # executed to complete the job attribute message {xsd:string}, # custom human-readable message the client # sends back as a result attribute status { # logical status of the job 0, # not yet worked on: The job may be already retrieved but no # result was sent back yet. 1, # success: The job was retrieved, processed and the client sent # back a success response. 2, # failed: The job was retrieved, processed and the client sent # back a failure response. 3}, # denied by client: The job was retrieved but could not be # processed as the client denied to process this job type # (a client needs to allow all job types that should be processed, # any other will be denied). attribute stderr {text}, # standard error output of jobs's system # commands (filled if verbose) attribute stdout {text}, # standard output of jobs's system # commands (filled if verbose) attribute targeted {xsd:string}, # time stamp when this job will be # delivered at the earliest attribute timelag {xsd:string}?, # interval time of a persistent job in # the format "HH:MM:SS" (HH can be # bigger than 23) element-arguments # job-type-specific XML data}
Example (minimal job definition for a 'softwarepush' job):<job id="32" guid="456" type="softwarepush" verbose="false"> <arguments> <packages> <package>mmv</package> <package>whois</package> </packages> </arguments></job>
PUT /job/<jobid>Update a job for an authenticating client using XML data.
SMT REST API 97

A client can only send job results for jobs properly retrieved previously. Thejobs will be set to status done (with an exception of persistent jobs, in whichcase a new target time will be computed).
Examples:
• Example for a successful patchstatus job:<job id="31" guid="abc123" exitcode="0" message="0:0:0:0 # PackageManager=0 Security=0 Recommended=0 Optional=0" status="1" stderr="" stdout="" />
• Example for a failed softwarepush:<job id="32" guid="abc123" exitcode="104" message="softwarepush failed" status="2" stderr="" stdout="" />
• Example for a successful update:<job id="34" guid="abc123" exitcode="0" message="update successfully finished" status="1" stderr="" stdout="" />
• Example for a successful reboot job:<job id="37" guid="abc123" exitcode="0" message="reboot triggered" status="1" stderr="" stdout="" />
• Execute for a successful wait job:<job id="38" guid="abc123" exitcode="0" message="wait successfully finished" status="1" stderr="" stdout="" />
• Example for a successful eject job:<job id="39" guid="abc123" exitcode="0" message="eject successfully finished" status="1" stderr="" stdout="" />
• Example for a successful execute job:<job id="41" guid="abc123" exitcode="0" message="execute successfully finished" status="1" stderr="man:x:13:62:Manual pages viewer:/var/cache/man:/bin/bash" stdout="" />
API for general access:
GET /repo/<repoid>Returns detailed information about the specified repository. The <repoid>can be obtained using the /repos or /products/<productid>/re-pos/ call.
98 Subscription Management Tool Guide

RNC:start = element repo { # repository attribute id {xsd:integer}, # SMT ID of the repository attribute name {xsd:string}, # repository's Unix name attribute target {xsd:string}, # repository's target product attribute type {"nu" | "yum" | "zypp" | "pum"}, # type of repository element description {xsd:string}, # description of the repository element localpath {xsd:string}, # path to local SMT mirror of the # repository element url {xsd:anyURI}, # original URL of the repository element mirrored { attribute date {xsd:integer} # timestamp of the last successful # mirror (empty if not mirrored yet) }}
Example:<repo name="SLES10-SP2-Updates" id="226" target="sles-10-i586" type="nu"> <description>SLES10-SP2-Updates for sles-10-i586</description> <localpath>/local/htdocs/repo/$RCE/SLES10-SP2-Updates/sles-10-i586</localpath> <mirrored date="1283523440"/> <url>https://nu.novell.com/repo/$RCE/SLES10-SP2-Updates/sles-10-i586/</url></repo>
GET /repo/<repoid>/patchesReturns a list of all patches in the specified software repository. The repoidcan be obtained using the /repos or /products/<productid>/re-pos/ call.
RNC:start = element patches { element patch { attribute id {xsd:integer}, # SMT ID of the patch attribute name {xsd:string}, # patch's Unix name attribute version {xsd:integer} # patch's version number attribute category { # patch importance category "security", "recommended",
SMT REST API 99

"optional", "mandatory"} }*}
Example:<patches> <patch name="slesp2-krb5" category="security" id="1471" version="6775"/> <patch name="slesp2-heartbeat" category="recommended" id="1524" version="5857"/> <patch name="slesp2-curl" category="security" id="1409" version="6402"/> ...</patches>
GET /reposReturns a list of all software repositories known to SMT. Those which arecurrently mirrored on SMT have non-empty mirror time stamp in the mir-rored attribute.
RNC:start = element repos { element repo { attribute id {xsd:integer}, # SMT ID of the repository attribute name {xsd:string}, # repository's Unix name attribute target {xsd:string}, # repository's target product attribute mirrored {xsd:integer} # time stamp of the last successful mirror # (empty if not mirrored yet) }*}
Example:<repos> <repo name="SLE10-SDK-Updates" id="1" mirrored="" target="sles-10-x86_64"/> <repo name="SLE10-SDK-SP3-Pool" id="2" mirrored="" target="sles-10-ppc"/> <repo name="SLES10-SP2-Updates" id="226" mirrored="1283523440" target="sles-10-i586"/> ...</repo>
GET /patch/<patchid>Returns detailed information about the specified patch. The patchid can beobtained via the /repo/<repoid>/patches call.
RNC:
100 Subscription Management Tool Guide

start = element patch { attribute id {xsd:integer}, # SMT ID of the patch attribute name {xsd:string}, # patch's Unix name attribute version {xsd:integer}, # patch's version number attribute category { # patch importance category "security", "recommended", "optional", "mandatory"}, element title {xsd:string}, # title of the patch element description {text}, # description of issues fixed by the patch element issued { attribute date {xsd:integer} # patch release time stamp }, element packages { # packages which need update as part # of this patch element package { # individual RPM package data attribute name {xsd:string}, # package name attribute epoch {xsd:integer}, # epoch number attribute version {xsd:string}, # version string attribute release {xsd:string}, # release string attribute arch {xsd:string}, # architecture string element origlocation {xsd:anyURI}, # URL of the RPM package in the # original repository element smtlocation {xsd:anyURI} # URL of the RPM package at the SMT server }* }, element references { # references to issues fixed by this # patch element reference { # individual reference details attribute id, # ID number of the issue (bugzilla # or CVE number) attribute title {xsd:string}, # issue title attribute type {"bugzilla","cve"}, # type of the issue attribute href {xsd:anyURI} # URL of the issue in its issue # tracking system }* }}
Example:<patch name="slesp2-krb5" category="security" id="1471" version="6775"> <description>
SMT REST API 101

Specially crafted AES and RC4 packets could allow unauthenticated remote attackers to trigger an integer overflow leads to heap memory corruption (CVE-2009-4212). This has been fixed. Specially crafted AES and RC4 packets could allow unauthenticated remote attackers to trigger an integer overflow leads to heap memory corruption (CVE-2009-4212). </description> <issued date="1263343020"/> <packages> <package name="krb5" arch="i586" epoch="" release="19.43.2" version="1.4.3"> <origlocation>https://nu.novell.com/repo/$RCE/SLES10-SP2-Updates/sles-10-i586/rpm/i586/krb5-1.4.3-19.43.2.i586.rpm</origlocation> <smtlocation>http://kompost.suse.cz/repo/$RCE/SLES10-SP2-Updates/sles-10-i586/rpm/i586/krb5-1.4.3-19.43.2.i586.rpm</smtlocation> </package> <package name="krb5-apps-servers" arch="i586" epoch="" release="19.43.2" version="1.4.3"> <origlocation>https://nu.novell.com/repo/$RCE/SLES10-SP2-Updates/sles-10-i586/rpm/i586/krb5-apps-servers-1.4.3-19.43.2.i586.rpm</origlocation> <smtlocation>http://kompost.suse.cz/repo/$RCE/SLES10-SP2-Updates/sles-10-i586/rpm/i586/krb5-apps-servers-1.4.3-19.43.2.i586.rpm</smtlocation> </package> ... </packages> <references> <reference id="535943" href="https://bugzilla.novell.com/show_bug.cgi?id=535943" title="bug number 535943" type="bugzilla"/> <reference id="CVE-2009-4212" href="http://cve.mitre.org/cgi-bin/cvename.cgi?name=CVE-2009-4212" title="CVE-2009-4212" type="cve"/> </references> <title>Security update for Kerberos 5</title></patch>
GET /productsReturns list of all products known to SMT.
RNC:start element products { element product { attribute id {xsd:integer}, # SMT ID of the product attribute name {xsd:string}, # Unix name of the product attribute version {xsd:string}, # version string attribute rel {xsd:string}, # release string
102 Subscription Management Tool Guide

attribute arch {xsd:string}, # target machine architecture string attribute uiname {xsd:string} # name of the product to be # displayed to users }*}
Example:<products> <product name="SUSE_SLED" arch="x86_64" id="1824" rel="" uiname="SUSE Linux Enterprise Desktop 11 SP1" version="11.1"/> <product name="SUSE_SLES" arch="i686" id="1825" rel="" uiname="SUSE Linux Enterprise Server 11 SP1" version="11.1"/> <product name="sle-hae" arch="i686" id="1880" rel="" uiname="SUSE Linux Enterprise High Availability Extension 11 SP1" version="11.1"/> <product name="SUSE-Linux-Enterprise-Thin-Client" arch="" id="940" rel="SP1" uiname="SUSE Linux Enterprise 10 Thin Client SP1" version="10"/> ...</products>
GET /product/<productid>Returns information about the specified product. The productid can be ob-tained from data returned by /products call.
RNC:start = element product { attribute id {xsd:integer}, # SMT ID of the product attribute name {xsd:string}, # Unix name of the product attribute version {xsd:string}, # version string attribute rel {xsd:string}, # release string attribute arch {xsd:string}, # target machine architecture string attribute uiname {xsd:string} # name of the product to be displayed # to users}
Example:<product name="SUSE_SLED" arch="x86_64" id="1824" rel="" uiname="SUSE Linux Enterprise Server 11 SP1" version="11.1"/>
GET /product/<productid>/reposReturns the list of all software repositories for the specified product. The pro-ductid can be obtained from the data returned by /products call.
RNC:
SMT REST API 103

See the /repos call.
Example:<repos> <repo name="SLED11-SP1-Updates" id="143" mirrored="" target="sle-11-x86_64"/> <repo name="SLE11-SP1-Debuginfo-Pool" id="400" mirrored="" target="sle-11-x86_64"/> <repo name="SLED11-Extras" id="417" mirrored="" target="sle-11-x86_64"/> <repo name="SLED11-SP1-Pool" id="215" mirrored="" target="sle-11-x86_64"/> <repo name="nVidia-Driver-SLE11-SP1" id="469" mirrored="" target=""/> <repo name="ATI-Driver-SLE11-SP1" id="411" mirrored="" target=""/> <repo name="SLE11-SP1-Debuginfo-Updates" id="6" mirrored="" target="sle-11-x86_64"/></repos>
104 Subscription Management Tool Guide