student instructions for class registration
TRANSCRIPT

Updated 3/2019
Prairie View A&M University Academic Advising Services
Student Instructions for Class Registration
Step 1: Go to www.pvamu.edu
Step 2: Click on PV Place.
Step 3: Click on Login to PVPlace.
Step 4: Login with your Username and Password.

Updated 3/2019
Step 5: Click on Click here for Panthertracks.
Step 6: Click on Student Tab (located near the top of the page).
Step 7: Click on Student Account (located under Student and Financial Aid).

Updated 3/2019
Step 8: Click on View Holds (located under Student Account).
Step 9: Check your Hold Status. (Pay attention to the from date) • Balance Due- Contact Treasury Services (Must get balance below $200)• Balance Due<200- Will not affect registration but take care of it• TSI Hold- Contact Academic Advisor• Tuition Rate- Choose your Tuition plan before registration• Health Center- Turn in your Meningitis Vaccination• Housing/Housing Transcript- Contact University College/Village (Will
not affect registration)• 6 State Drops Remaining- Is not a Hold and will not affect registration

Updated 3/2019
Step 10: Click on Student Tab (located near the top of the page).
Step 11: Click on Registration (located under Student and Financial Aid).
Step 12: If you have Course Registration Numbers (CRNs), click on Add or Drop Classes, follow Steps 13-18 and then skip to Step 24.
If you do not have CRNs click on Look Up Classes, follow Steps 13-16 and then skip to Step 19.
Updated 3/2019
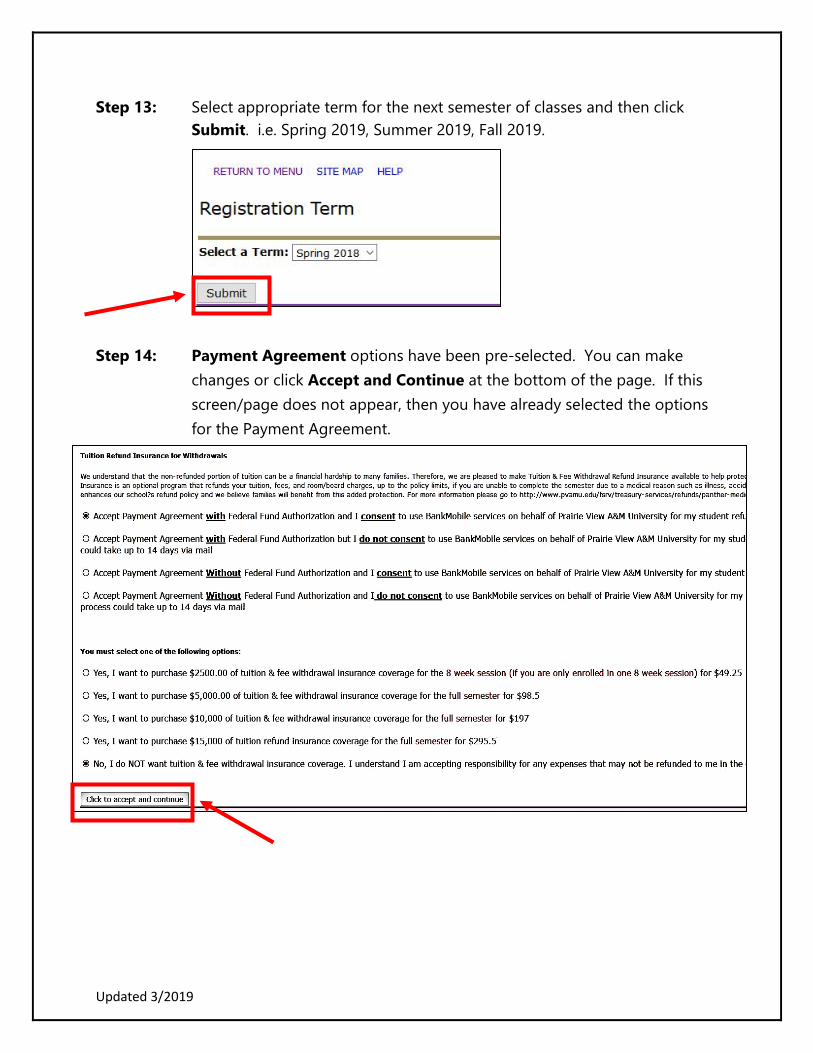
Step 13: Select appropriate term for the next semester of classes and then click Submit. i.e. Spring 2019, Summer 2019, Fall 2019.
Step 14: Payment Agreement options have been pre-selected. You can make changes or click Accept and Continue at the bottom of the page. If this screen/page does not appear, then you have already selected the options for the Payment Agreement.

Updated 3/2019
Step 15: Click Continue on the Verify Address Screen. You can change your address later, if needed.
Step 16: Select appropriate term for the next semester of classes and then click Submit. i.e. Spring 2018, Summer 2018, Fall 2018.
Step 17: Type your Alternate Pin Number in the box and click Submit.

Updated 3/2019
Step 18: Enter each CRN into their own box and click Submit Changes.
Step 19: Select the Subject and then click Course Search. (There are lists of class subjects to choose. Select the appropriate ones you need for your schedule).

Updated 3/2019
Step 20: Select the class based on the Course Number and Title and then click View Sections.
Step 21: Select your Class Day/Time/Professor by clicking on the open box. Scroll down and click on Register. If you see the letter “C”, that means that the class is closed/not available.
If the Registration Process has not started for you, you will see Student Restrictions (SR) instead of boxes.

Updated 3/2019
Step 22: Type your Alternate Pin Number in the box and click Submit.
Step 23: Repeat steps 19-21 in order to continue registration for other classes.
Step 24: Write down the CRN, Subject and Course Number, Days, Time, and Credit/Course Hours on the Registration Form, if applicable.
Step 25: After your schedule is complete, print the Student Detailed Schedule.
RECOMMENDATION: If you have not downloaded the PV Mobile App, go to the Play Store for Android Phones or to the App Store for iPhones and download the application. You will have access to your schedule and other information from PV on your mobile device.
Congratulations, you have completed the class registration process!