strategies for writing standard #8 - litinaction home · note taking. two recommended instructional...
TRANSCRIPT

ISBE Content Area Specialists – Writing Strategies
Strategies for
Writing Standard #8
Two Column Notes
Quick Writes
Summarizing and Note Taking
Instructional Writing Time
Routine Writing Toolbox
6th – 12th Grades History/SS and Science & Technical Subjects
Developed By:
Illinois State Board of Education English Language Arts Content
Specialists
Illinois State Board of Education
www.isbe.net 100 N. 1st Street • Springfield, IL 62777
100 W. Randolph, Suite 14-300 • Chicago, IL 60601

ISBE ELA Content Specialists – Writing Strategies
Two – Column Notes Targeted Standards: WHST.6-8.10 - Write routinely over extended time frames (time for research, reflection, and revision) and shorter time frames (a single sitting or a day or two) for a range of discipline specific tasks, purposes, and audiences. WHST.9-10.10 - Write routinely over extended time frames (time for research, reflection, and revision) and shorter time frames (a single sitting or a day or two) for a range of discipline specific tasks, purposes, and audiences. WHST.11-2.10 - Write routinely over extended time frames (time for research, reflection, and revision) and shorter time frames (a single sitting or a day or two) for a range of discipline specific tasks, purposes, and audiences.
A two-column note taking strategy can be used with a variety of sources; lecture, text, video. A note taking strategy appears to be writing in a shorter time frame, but note taking is necessary for writing in extended time frames such as research. This strategy helps students organize their thinking about specific content. The two-column note-taking method requires active reading. In order to actively read, processing must occur for the notes to be taken. See resources below for examples of different templates of two column notes. Procedure:
1. Model the two-column procedure with students. 2. Assign a short selection to be read. 3. Using a projector or SMART board, construct your own notes on the selection and share
them with your students. 4. Discuss the decisions you made, thinking aloud about the decisions you made in
constructing the notes. Variation: Make two column notes in a group setting, again using a projector. This allows the students to see an outline take shape as they participate in its construction. Activities such as this can be repeated numerous times with the double benefit of teaching about note taking and providing a springboard for discussion of the content.
Attachment/Resources: Video and Article: How to Take Two-Column Notes
http://www.ascd.org/ascd-express/vol9/903-video.aspx Blank Template:
http://goms.rocklinusd.org/subsites/Scott-Victor/documents/Reading%20and%20Literature/Two%20Column%20Note%20Taking%20Strategy%20Blank.pdf
Samples of Two-Column Notes
http://www.asdk12.org/MiddleLink/HighFive/TwoColumn/TwoColumn_examples.pdf
http://www.keystoliteracy.com/wp-content/pdfs/5b-wkshp-templates/Two-Column%20Notes%20Template%20Vocab.pdf
http://www.norwellschools.org/Page/4477
Reference/Research: Pauk, W. (1974) How to study in college. Boston, MA: Houghton Mifflin.

ISBE ELA Content Specialists – Writing Strategies
Quick Writes Targeted Standards: WHST.6-8.10 - Write routinely over extended time frames (time for research, reflection, and revision) and shorter time frames (a single sitting or a day or two) for a range of discipline specific tasks, purposes, and audiences. WHST.9-10.10 - Write routinely over extended time frames (time for research, reflection, and revision) and shorter time frames (a single sitting or a day or two) for a range of discipline specific tasks, purposes, and audiences. WHST.11-2.10 - Write routinely over extended time frames (time for research, reflection, and revision) and shorter time frames (a single sitting or a day or two) for a range of discipline specific tasks, purposes, and audiences.
A quick write is a powerful instructional strategy. It is a short, first draft piece of writing that helps students get words onto paper. Quick writes can take 3 minutes initially and increase to no more than 5-7 minutes, several times a week. This strategy can help students build stamina for longer, more complex writing. Procedure:
1. Model a quick write for students on a topic you have chosen. Share with the students the topic you have chosen (based on a text that has been read). Write so students can see what you are writing.
2. Explain to the students that once the timer is set, the writer can’t stop writing during the quick write. Set the timer for 3 minutes.
3. Begin writing but do not tell students what you are writing. They will stay engaged if they read as you write.
4. At least once, write “I can’t think of anything else to write, I can’t think of anything else…” Then continue with your quick write.
5. When the timer goes off, tell your students that you are allowed to finish the sentence you are writing. Finish the sentence.
6. Read aloud to students, crossing out and omitting I can’t think of anything else to write. 7. When it is time for the students to do this, give them 1 minute of think time before
starting. Turn the timer away from the students so they are not watching the clock. 8. Ask volunteers to share their quick writes.
Attachment/Resources: Websites on Quick Writes: http://wvde.state.wv.us/strategybank/QuickWrites.html
Reference/Research: Tompkins, G.E. (2002). Language arts content and teaching strategies. Upper Saddle River, NJ: Pearson Education.
1
Two recommended instructional practices from Writing to Read research are summarizing and note taking. This resource has been created to assist educators with the recommendation stating “Have Students Write about the Texts They Read”.
Summarizing and note taking are skills that help students promote greater comprehension. By asking the students to look at a given subject, then to analyze it and finally, put it in their own words allows for a better grasp of the material. Research shows to do this, students are required to substitute, delete, and keep some things while being aware of the basic structure of the information that is presented.
(Marzano, Classroom Instruction That Works)
Summaries • Benefit the reader because they offer a concise, general version of the original information. • Prove that students have understood the general point of a text. • Enables students to better comprehend the material.
Note Taking
• Provides a written record for review • Forces students to pay attention (as long as it is not copying notes) • Requires organization which involves active effort from the student • Requires condensing and rephrasing which aid understanding
Summarizing and Note Taking
“Writing to Read” research identifies summarizing and note taking as instructional practices
that increase reading comprehension.

2
Table of Contents
Have Students Write Summaries of a Text
Retelling, Types of Retelling, Retelling Yardstick, Retelling Drawing…………….…..4 Low Battery Retell, Storytelling Glove, Prop Retellings………………………………..…..5 Paper Bag Reports, Story Wheel……………………………………………………………………...6 Summary Purpose, Story Frames…………………………………………………………………..…7 Reciprocal Teaching, 5-Step Summary, GRASP, Summary Writing…………….….….8 The GIST, Get the GIST, Summarizing a Longer Text, Rule Based Strategy……..…9 Don’t Look Back, One-Sentence Paraphrase, One Word Summaries………………10 Refine and Reduce, Magnet Summaries…………………………………………………………11 Jigsaw Summary, Paragraph Shrinking, Shrinking Notes…………………………………12 Somebody-Wanted-But-So-Then Strategy……………………………………………………..13 Story Arc Strategy………………………………………………………………………………………….14 B.M.E., Nonfiction Summary Chart………………………………………………………………..15 Sticky Note Summarizing, Three Minute Pause………………………………………….….16 Stop and Jot………………………………………………………………………………………………..…17 Children's Books to Help You Teach the Summarizing Strategy……………………..18
Have Students Write Notes about a Text
Note Taking Methods, Note Taking Mentor Texts……………………………………………20 Note Taking in the Primary Classroom, Note Taking from a Read Aloud; Post Its: Little Notes for Big Discussions, Concept Mapping………………….…….21 Split Screen Notes; Read, Cover, Remember, Write………………………………...……...22 Cornell Notes…………………………………………………………………………………….……….…….23 Three Column Notes, Two Column Notes…………………….…..………….…………………..24 Quick Write; Free Write/Free Draw………………………………………...……………………....25 Log Notes………………………………………………………………………………………………..……….26 Sketch to Stretch………………………………………………………………………………….……….….27 Episodic Notes; Pairs Check……………………………………………………………………….……..28 Structured Note Taking; Power Notes…………………………………………………….…….….29 Summary Notes; Visualizing Note Taking Strategies………………………………………...30 Character Cards…………………………………………………………………………………………..……31 Vocabulary Picture Cards; Perform the Text……………………………………………….….…32 Recast the Text; Sketch noting or Visual Note Taking……………………………….…….…33 Annotation…………………………………………………………………………………………..…………...34 The Trash and Treasure Note Taking Technique……………………………….……………....35 Kinesthetic Note Taking Tool Kit; Chunking the Text………………………….…..….…36-37 References……………………………………………………………………………………………….….……38

3
Transforming a mental summary of text into writing requires additional thought about the essence of the material, and the permanence of writing creates an external record of this synopsis that can be readily critiqued and reworked. As a result, summary writing seems likely to improve comprehension of the material being summarized.
Writing to Read
A summary is a restatement of someone else's words in your own words. There are many different kinds of summaries, and they vary according to the degree to which you interpret or analyze the source. Some are pages long, while others are just one or two sentences. However, for all types of summary, the writer is responsible for generally stating, in his or her own words, the main information or argument of another writer. Students whom are capable of effectively summarizing what was learned are able to learn to synthesize information, a higher-order thinking skill which includes analyzing information, identifying key concepts, and defining extraneous information.
Marzano, Robert J. (2001). Classroom instruction that works. Alexandria, VA: Association for Supervision and Curriculum Development.
Have Students Write Summaries
of a Text

4
Retelling Retelling involves having students orally reconstruct a story that they have read. Retelling requires students to activate their knowledge of how stories work and apply it to the new reading. As part of retelling, students engage in ordering and summarizing information and in making inferences. The teacher can use retelling as a way to assess how well students comprehend a story, then use this information to help students develop a deeper understanding of what they have read. The teacher uses explicit instruction, explaining why retelling is useful, modeling the procedure, giving students opportunities to practice, and providing feedback. As students become better readers, the retellings should become more detailed.
Types of Retelling Simple retelling The student can:
• identify and retell the beginning, middle, and end of a story in order. • describe the setting. • identify the problem and the resolution of a problem.
More complete retelling The student can:
• identify and retell events and facts in a sequence. • make inferences to fill in missing information. • identify and retell causes of actions or events and their effects.
Most complete retelling The student can:
• identify and retell a sequence of actions or events. • make inferences to account for events or actions. • offer an evaluation of the story.
Retelling Yardstick Using a yardstick, teachers can note the beginning and the end of a story at each end of the yardstick. Place Velcro along the yardstick so students can take cut outs of the story and “stick them” in the correct order in which the event occurred in the story onto the yardstick. These cut outs should reflect the main events of the story. The students can retell a story by placing the cut outs along the yardstick, or the teacher can provide the yardstick with cut outs already placed on it so students who need that support can have it.
Retelling Drawing Give students a piece of paper that has been divided into four squares. Instruct students to draw a picture that tells what happened in the beginning of the story in the first box, a picture that tells what happened in the end in the last box, and then fill in the middle boxes with events from the middle of the story. Students can then use their illustrations to verbally retell the story to the teacher, a group of students, or an individual student. Grouping: small group, partner, or individual

5
Low-Battery Retell
After reading a story, list details/events from the story in sequential order. Tell students to pretend that they are talking to someone on their cell phone who needs to know about the story, but the battery is about to die any second. If they had to pick just a few things, from all the details/events listed in the story to hurry up and say before the phone died- what would be the most important things for them to let the other person on the phone know? Go through different options and discuss why some pieces of information would be more helpful than others for the other person to have as much of an understanding of the story possible.
Storytelling Glove
Using white garden gloves or food handler’s gloves, write storytelling elements on each finger of the glove: characters, setting, problem, events or plot, and solution. In the palm of the glove, place a heart titled the author’s message or lesson. Students wear the glove when retelling the story they have read. (Hoyt, 1999) Retell Checklist. Allow students to use the checklist to retell the events of a story to a partner, a volunteer, a parent, book buddy or other individual and use the checklist to personally reflect on their work. (Hoyt, 1999) http://www.teachertreasures.com/uploads/Story_gloves1.pdf
Prop Retellings
Visual prompts help children organize their thoughts when retelling a story. Props such as finger puppets and felt boards provide a concrete structure to frame the story. Make simple puppets by photocopying or drawing the main characters from a story and gluing them to craft sticks. You can also use these with a felt board—a small board covered in felt—using adhesive or Velcro. (Owocki, 1999)
6
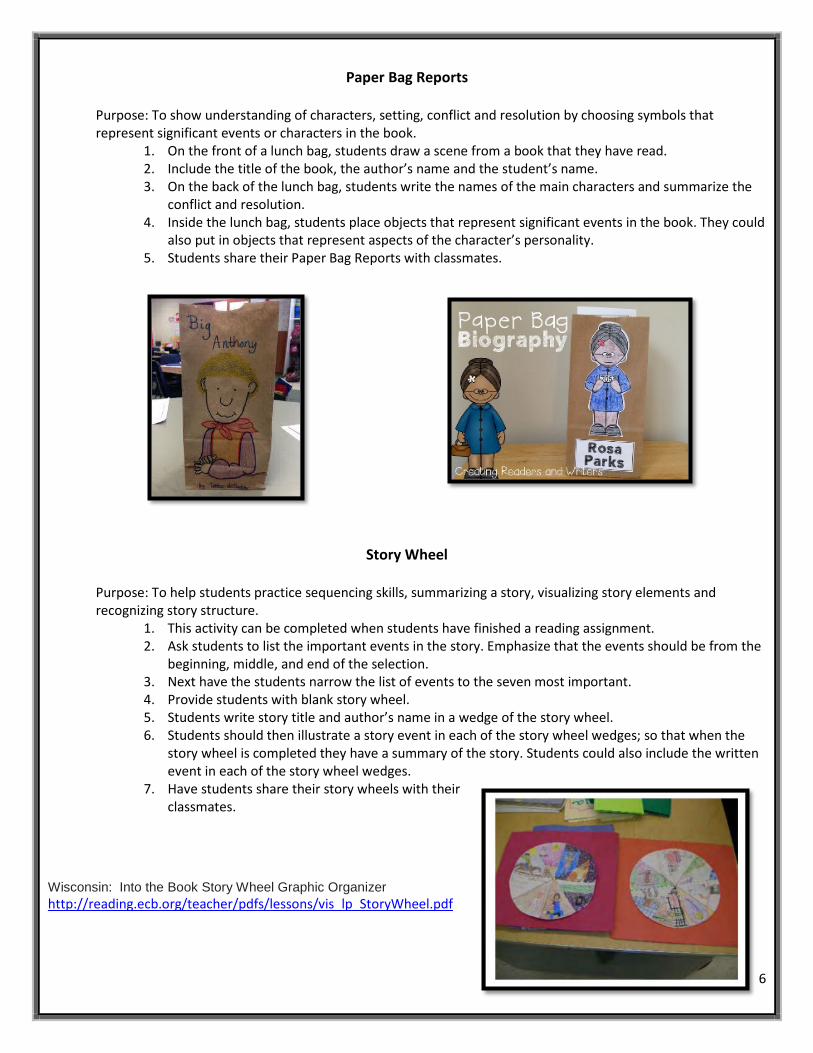
Paper Bag Reports
Purpose: To show understanding of characters, setting, conflict and resolution by choosing symbols that represent significant events or characters in the book.
1. On the front of a lunch bag, students draw a scene from a book that they have read. 2. Include the title of the book, the author’s name and the student’s name. 3. On the back of the lunch bag, students write the names of the main characters and summarize the
conflict and resolution. 4. Inside the lunch bag, students place objects that represent significant events in the book. They could
also put in objects that represent aspects of the character’s personality. 5. Students share their Paper Bag Reports with classmates.
Story Wheel
Purpose: To help students practice sequencing skills, summarizing a story, visualizing story elements and recognizing story structure.
1. This activity can be completed when students have finished a reading assignment. 2. Ask students to list the important events in the story. Emphasize that the events should be from the
beginning, middle, and end of the selection. 3. Next have the students narrow the list of events to the seven most important. 4. Provide students with blank story wheel. 5. Students write story title and author’s name in a wedge of the story wheel. 6. Students should then illustrate a story event in each of the story wheel wedges; so that when the
story wheel is completed they have a summary of the story. Students could also include the written event in each of the story wheel wedges.
7. Have students share their story wheels with their classmates.
Wisconsin: Into the Book Story Wheel Graphic Organizer
http://reading.ecb.org/teacher/pdfs/lessons/vis_lp_StoryWheel.pdf

7
Summary Purpose
To artistically and orally summarize a piece of literature.
1. Read a piece of text, and have students portray their text summaries through art projects such as creating a collage, timeline, mobile, poster, or cartoon strip.
Suggested teacher prompts: • What words from the story jump out at you to help make an artistic representation? • What was the focus of the reading selection? • Think of all the parts in the story and put them together as if you were going to tell another person about the story. • What details are most and least significant? • How can you use key ideas to condense the information in this story? • Which words helped you get the gist of the story? • What is important and essential to the text? • Tell me about some of the important ideas that struck you.
2. Have students present their artistic interpretations, along with an oral presentation, to the class. (Ellery, 2005)
Story Frames
Story frames are visual representations that focus students' attention on the structure of a story and on how the content of the story fits its structure.
Students use story frames as a way to activate their background knowledge of the elements of story structure and thus to organize and learn new information from a story. Simple story frames require students to provide basic information about the sequence of events in a story:
The problem in the story is ______. This is a problem because ______. The problem is solved when ______. In the end ______.
More complex frames might involve having students supply more detailed information by summarizing sequences of actions or events, or providing factual information to explain problems or motivations.
The procedure is introduced through explicit instruction, with the teacher first explaining why story frames are useful, then modeling when and where to use them, guiding students through practice opportunities, and providing corrective feedback along the way. Information retrieved from http://www.readingrockets.org/article/strategies-promote-comprehension

8
Reciprocal Teaching
Reciprocal Teaching is the name for a teaching procedure that is best described as a dialogue between the teacher and students. "Reciprocal" means simply that each person involved in the dialogue acts in response to the others. The dialogue focuses on a segment of a text the group is reading and is structured by the use of four comprehension strategies:
• asking questions, • clarifying difficult words and ideas, • summarizing what has been read, and • predicting what might come next.
The teacher first models and explains how to apply a comprehension strategy, then gradually turns over the activity to the students. As the students become more competent, the teacher requires their participation at increasingly more challenging levels.
Reciprocal Teaching provides students with opportunities to observe the value of applying strategies in their "real" reading. In addition, it allows the teacher to identify problems individual students might have in using strategies and to provide instruction that is geared to individual needs. (Fisher and Frey, 2004)
Additional Information: http://www.adlit.org/strategies/19765/ Reciprocal Teaching for the Primary Grades Video: ILA Video: The Fab Four by Lori Oczkus: Reciprocal Teaching https://vimeo.com/13516178 http://www.adlit.org/article/40008/ http://www.readingrockets.org/article/strategies-promote-comprehension
5-Step Summaries 1. Read only the subheadings of a chapter. 2. List the subheadings on paper. 3. Read the material. 4. Convert each subheading into a main-idea sentence. 5. For each main-idea sentence, add one to three sentences containing supporting details.
GRASP (Guided Reading and Summarizing Procedure)
This is a group summarizing strategy with five steps.
1. After the students have read a section of text, ask them to turn their books/text face down and to recall whatever they can from the material. Record their input in a list on the board/chart/screen.
2. Allow students to return to the text to find more information and make corrections. With student participation, rearrange the information into categories.
3. Help students write a topic sentence for each category and detail sentences that support it. 4. Engage students in revising the summary to make it more coherent. (Wormeli, 2005)
Summary Writing of Shorter Text
Students are directly taught rules for how to write a summary of material read. This can involve teaching them how to write a summary of a paragraph using the following operations:
1. identify or select the main information 2. delete trivial information 3. delete redundant information 4. write a short synopsis of the main and supporting information for each paragraph
(Rinehart, Stahl and Erickson, 1986)

9
The GIST
(Generating Interactions between Schemata and Text)
1. Students read a brief text 2. Students write a single-sentence summary of the information (20 words or less) 3. When students are proficient, the teacher provides more extensive texts that have been marked with
stopping points where students stop and write the GIST summaries they have been practicing 4. When the article is complete, the students combine the brief summaries and craft them into an overall
summary
Get the Gist: Nonfiction Read the article or section of the text. Fill in the 5 Ws and H. Who: What: When:’ Where: Why: How: Write a 20-word GIST summary based on the above information. ____________ ____________ ____________ ____________ ____________ ____________ ____________ ____________ ____________ ____________ ____________ ____________ ____________ ____________ ____________ ____________ ____________ ____________ ____________ ____________
Template: http://www.readwritethink.org/files/resources/lesson_images/lesson290/Template.pdf
(Schuder, Clewell, & Jackson, 1989)
Summarizing a Longer Text
1. Create a skeleton outline starting with a thesis statement. 2. Generate main idea subheadings for each section of the text. 3. Add 2 or 3 important details for each main idea. 4. Convert outline into a written summary.
(Taylor and Beach, 1984)
Rule-Based Strategy
The strategy focuses on the concept of requiring students to follow a set of rules or steps that leads them to produce an organized summary. Before assigning the students to work on the strategy independently, take the time to make the strategy “come alive” for the students. Demonstrate the steps with a model passage. Steps:
1. Select a content-related passage. Read with students or assign to students. 2. Require students to go through the passage and delete trivial or unnecessary material. 3. Tell students to delete redundant material. 4. Remind students to substitute superordinate terms for lists (for example, substitute flowers for
daisies, tulips, and roses). 5. Ask students to select or create a topic sentence.
(Marzano, Pickering, and Pollock, 2005)

10
Don’t Look Back
One way to help students pick out important details, is to ask them to record only the information they remember. Suggest to students that they put away their notes and simply write down what they recall without looking back. Frequently, the most important information—especially the information that seemed most interesting to the students—is what they are able to recall and record. Don’t Look Back helps convince students that this process works and gives them the confidence to rely on their memory and their comprehension of material studied. Steps:
1. Provide students with a reading selection. 2. Ask students to take notes of important details as they read. They can make notations on the
text, with sticky flags, or in their notebooks. 3. When students have finished, direct them to turn over the paper or put aside the material and
write what they remember. . .without looking back. 4. After they have listed the details they recall, ask students to create a paragraph using just the
information they remember. 5. Provide time for students to share and compare their paragraphs. This process of sharing helps
students review content while identifying additional important information that they may have missed in their summaries.
(Jones, 2006)
One-Sentence Paraphrase (1 SP)
This strategy encourages students to focus on learning rather than on specific details. 1 SP requires students to synthesize information and identify important learning. Steps:
1. Model the process prior to assigning students work on individual 1 SP lessons. 2. Select a section of text that includes several paragraphs. Consider placing the sections on an
overhead transparency or PowerPoint presentation so the class can work as a group on their first efforts.
3. Read the first paragraph with the class. Cover the paragraph. Ask students to write one sentence—and only one sentence—that reflects their understanding of the paragraph.
4. Share several sentences, looking for similarities and differences. 5. Read the next paragraph and continue the process. 6. After students feel comfortable with the process, have them work independently.
(Lawwill, 1999)
One-Word Summaries
One-Word Summaries get students in the habit of picking out important concepts and main ideas. After reading a lesson, students suggest one word that most clearly summarizes the lesson’s topic. Word choice is not what leads to learning in one-word summaries. Rather, student rationale for choosing certain words reinforces and even expands their learning. Steps:
1. Following a day’s lesson (or reading), ask students to write one word that best summarizes the topic.
2. After identifying the word, each student should write a brief explanation (a sentence or two) that explains the word choice.
3. Students share their word choices and explanations. 4. Encourage students to support or refute the word choices.
(Wormeli, 2005)

11
Refine and Reduce
Another way to get students to extract essential information is to decrease the amount of space you allow students to use in order to convey the information. Refine and Reduce allows students to begin by condensing material into several paragraphs but requires them to pare down the information as they rewrite. As a result, students must analyze and synthesize content. Steps:
1. After reading the material or completing a day’s lesson or even a unit, ask students to write a half-page summary explaining what they’ve learned or what they consider to be the most important information covered in the material.
2. Give students a set amount of time to write the summary or assign it as homework. 3. Ask student to review their half-page summary. As they review, students should Refine and
Reduce. Direct students to write two paragraphs. Make sure the students understand that the two paragraphs still need to contain the most important information or the heart of the material covered.
4. Again, direct students to Refine and Reduce. Suggest that they write only one paragraph. 5. Direct students to write one concise sentence that clearly conveys the material studied. 6. At any point, stop to allow students to share material. Especially at the end of the process,
give students time to discuss their one sentence summaries (Jones, 2006)
Magnet Summaries
Magnet Summaries help students expand on key terms or concepts from a reading. These “magnet” words help students organize information that becomes the basis for student created summaries.
1. The students read a passage and the teacher identifies magnet words from the passage. 2. The students write each magnet word in the center of an index card. 3. Details (words/phrases) for each magnet word are written around the index card. 4. Words/phrases are combined into a summary.
(Sejnost & Thiese. 2006)
Magnet Summary Example Paragraph A strong summary reduces information from a piece of text to get at the crucial details. Good summary writers are able to strip away the extra verbiage and go straight to the heart of the matter. These writers retain the main ideas and the key words and phrases. As a result, they record the gist of an article in a brief and concise manner.

12
Jigsaw Summary
Jigsaw groups (adapted from Aronson, 1978) provide students a way to build summarizing habits while also pushing them to communicate meaningful information with other students. Students in one group become experts on a portion of the text and the experts then teach text to students that did not read the text.
1. Divide the chosen text into three to five sections. Plan to have the same number of students in each group as there are text sections.
2. Prepare an Expert Sheet or study guide that will help students become experts as they summarize a section of text. The sheet may have questions (open-ended), a task, and/or a graphic to fill in, and so on.
3. Use a random number or other method to create home groups. Then assign each student a letter that corresponds to his or her expert group and the text that the group will study.
4. Have students with the same letters get together in expert groups and read silently their assigned section. Agree upon the major points to share back with your home group.
Paragraph Shrinking
The Paragraph Shrinking strategy allows each student to take turns reading, while pausing and connecting the main points of each paragraph to the rest of the text as a whole. Students provide each other with feedback as a way to monitor comprehension.
1. Each member of the teacher-assigned pair takes turns being "Coach" and "Player." These pairs are changed regularly. All students have the opportunity to be "coaches" and "players." Note: It is important for teachers to monitor and support students as they work together.
2. Each student reads aloud until the predetermined stopping point set by the teacher. After each paragraph in the text, students stop to summarize the main points of the reading and note how the particular passage fits into the overall structure of the text.
3. If a "Player" gives a wrong answer, the "Coach" asks the "Player" to skim the paragraph again and try again a second time. Students could be asked to state the main idea as well as noting how the passage connects to the passage before it.
Additional Information: http://www.readingrockets.org/strategies/paragraph_shrinking (Adapted from Fuchs & Fuchs, 2000)
Shrinking Notes
1. Have students fill a 3- x 5-inch sticky note or index card with important facts from the text/presentation/chart/graph, etc..
2. Narrow down those notes to the important notes that fit on a medium-size (approximately 3- x 3-inch) sticky note or card.
3. Narrow down those notes to the most important notes that will fit on a small (approximately 1- x 2-inch) sticky note or card.
Adapted from http://www.educationworld.com/a_lesson/03/lp322-02.shtml

13
Somebody-Wanted-But-So-Then Strategy
The strategy “Somebody-Wanted-But-So-Then” is used to help students understand plot elements such as conflicts and resolutions. It can be used as a “during reading” or “after reading” strategy. Student can complete a chart or graphic organizer that identifies the character, the goal of the character, what problems or conflicts that are being faced, and what the resolution of the conflict is.
1. Teacher selects a piece of text that has previously been read with the class or one with which the class is most familiar.
2. Teacher models the SWBST strategy on a chart of an overhead and uses the information to write a summary of the text.
3. Students analyze what makes it a summary and discuss as a whole group. Teacher begins a criteria chart that is posted for all to use.
4. Teacher then selects a piece of text to be read in a shared reading format. 5. Work together as a class to create a group summary, selecting and deleting
details. Compare the work to the criteria chart to check for correctness. 6. Leave the work posted so that students have a model to refer to for future
work.
Examples of Somebody-Wanted-But-So-Then
Somebody Wanted But So Then The Big Bad Wolf Pigs for dinner They hid in the brick
house. He went hungry. The pigs celebrated.
Anne Frank To hide from the Nazis
Someone turned her in She died in a concentration camp.
Her story was shared with the world.
Adolf Hitler To control all of Europe
The Allies fought against him
He killed himself when Germany was defeated.
The Allies won the war.
Christopher Columbus
To sail to India to buy spices
He ran into the Caribbean Islands
He claimed the area for Spain
Europeans began to settle the “New World”
Thomas Edison To invent the incandescent light bulb
His light bulb blackened (the Edison effect)
It later led to the electron tube
The electronics industry was born
Stephen Hawking To be a mathematician
His father wanted him to be a chemist
He combined science and math to study black holes in the universe.
He became one of the most respected physicists in the world.
(Macon, Bewell, and Vogt, 1991; Beer, 2003)
Additional Resources: http://vve.vviewisd.net/ourpages/auto/2014/2/26/56190135/Reading%20Strategy%20SWBST.pdf Adaptation: Somebody, Wanted, But, So, Then, Finally http://www.uen.org/utahstandardsacademy/elaelem/downloads/level2/2-3-3-SWBSTF.pdf

14
Story Arc Strategy
The Story Arc strategy focuses on summaries that maintain logical progression, and can also be used to emphasize how characters respond to situations and change over time. The Story Arc begins with a graphic organizer that students fill out inserting relevant details from the story. Then the students use that graphic organizer to actually create a summary of the story.
1. After reading aloud a short, narrative passage of text, the teacher models the Story Arc strategy using the arc graphic organizer. The teacher fills in the graphic organizer, and then works with the students to transfer the information from the graphic into a good summary.
2. The next day, after reading aloud a short, narrative passage of text, the teacher divides the students into small groups. The students work with chart paper to create a Story Arc graphic, and then to transfer the information from the graphic into a good summary. The students then present their summary to the class.
3. The next day, students are given simple leveled readers to read. Then they transfer the information from the short, narrative text into the graphic organizer, and finally into a summary.
Example of Story Arc Summary
Summary: Three little pigs decided to build houses. The first pig built his house of straw, the second built his house of sticks, and the third little pig built his house of bricks. A big, bad wolf came along, and he was hungry. He wanted to eat the little pigs. First he blew down the house of straw, and that pig ran to the house of sticks. Then the wolf blew down the house of sticks, and the two pigs ran to the house of bricks. The wolf tried to blow down the house of bricks, but it was too strong. The three little pigs were safe in the house of bricks. They danced around singing, “Who’s afraid of the Big Bad Wolf?
Characters & Setting Three little pigs and the Big Bad Wolf at the pig’s houses.
How does the story begin? The three little pigs decide to build their houses out of straw, sticks, and bricks.
What’s the Problem? The wolf is hungry and he wants to eat the pigs. He blows down the house of straw, and he blows down the house of sticks. Those pigs run and hide in the house of bricks.
What’s the Resolution? The wolf can’t blow down the house of bricks. It’s too strong. The pigs are safe in the house of bricks, and they are very happy.

15
B, M, E Strategy (Beginning, Middle, End)
The B, M, E strategy can help students generate a summary of a passage of text. In this case, teachers can modify the B, M, E to include the elements of the story like the Story Arc or Somebody-Wanted-But-So-Then. What was the setting? Who were the characters? What are they doing?
What was the problem? How was the problem solved? What lessons were learned? Beginning, Middle and End Elementary Video: https://www.youtube.com/watch?v=-E9V1D2OLkw
Nonfiction Summary Chart
Who/What
Is most important?
What
Is most important about them?
Where
Did this occur?
When
Did this occur?
Why
Is the subject important?
How
Did this occur?
Summary:
Beginning:
Middle:
End:
16
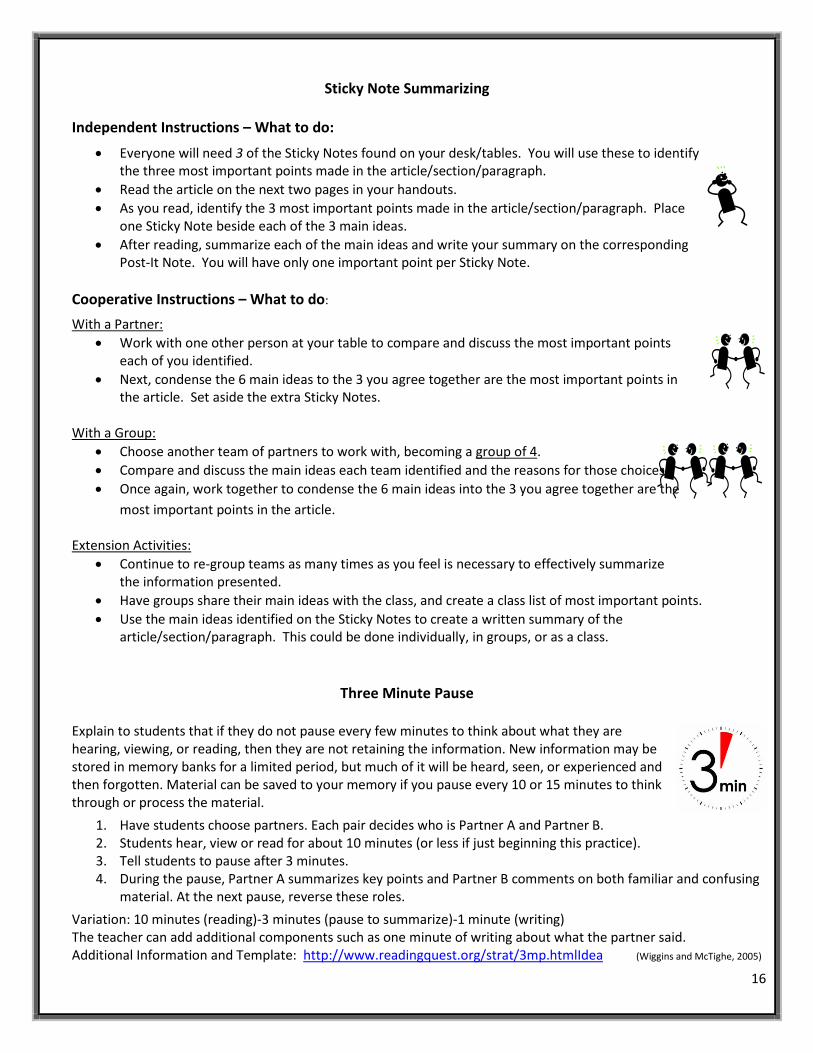
Sticky Note Summarizing
Independent Instructions – What to do:
• Everyone will need 3 of the Sticky Notes found on your desk/tables. You will use these to identify the three most important points made in the article/section/paragraph.
• Read the article on the next two pages in your handouts. • As you read, identify the 3 most important points made in the article/section/paragraph. Place
one Sticky Note beside each of the 3 main ideas. • After reading, summarize each of the main ideas and write your summary on the corresponding
Post-It Note. You will have only one important point per Sticky Note. Cooperative Instructions – What to do:
With a Partner: • Work with one other person at your table to compare and discuss the most important points
each of you identified. • Next, condense the 6 main ideas to the 3 you agree together are the most important points in
the article. Set aside the extra Sticky Notes. With a Group:
• Choose another team of partners to work with, becoming a group of 4. • Compare and discuss the main ideas each team identified and the reasons for those choices. • Once again, work together to condense the 6 main ideas into the 3 you agree together are the
most important points in the article. Extension Activities:
• Continue to re-group teams as many times as you feel is necessary to effectively summarize the information presented.
• Have groups share their main ideas with the class, and create a class list of most important points. • Use the main ideas identified on the Sticky Notes to create a written summary of the
article/section/paragraph. This could be done individually, in groups, or as a class.
Three Minute Pause
Explain to students that if they do not pause every few minutes to think about what they are hearing, viewing, or reading, then they are not retaining the information. New information may be stored in memory banks for a limited period, but much of it will be heard, seen, or experienced and then forgotten. Material can be saved to your memory if you pause every 10 or 15 minutes to think through or process the material.
1. Have students choose partners. Each pair decides who is Partner A and Partner B. 2. Students hear, view or read for about 10 minutes (or less if just beginning this practice). 3. Tell students to pause after 3 minutes. 4. During the pause, Partner A summarizes key points and Partner B comments on both familiar and confusing
material. At the next pause, reverse these roles.
Variation: 10 minutes (reading)-3 minutes (pause to summarize)-1 minute (writing) The teacher can add additional components such as one minute of writing about what the partner said. Additional Information and Template: http://www.readingquest.org/strat/3mp.htmlIdea (Wiggins and McTighe, 2005)

17
Stop and Jot
1. Stop: Ask students to draw a rectangle on the page where they are taking notes for the day. This will serve as their “stop box.”
2. Jot: At least once during a lesson, stop and ask an important question for students to respond to in their “stop box.”
3. Share: Reconvene and ask volunteers to share one or two responses with the whole class, or model your own response. These boxes also help students later by serving as a study tool, highlighting important information about the topic.
When to Use
Use Stop and Jot at any point in the lesson to provide processing time and note-taking assistance for students: • Before introducing new material to activate prior knowledge • Before a new lesson to help assess what students already know • Before a lesson to assist with planning instruction • During the middle of a lesson to provide opportunity for students to make sense of the material • During a lesson as a check for understanding • During a lesson to provide time for students to create a written summary statement of auditory material • After the lesson to provide closure, check understanding, and clarify any misunderstandings • After a lesson to clarify key ideas or critical pieces of information • After the lesson to allow students to make connections to previously learned material • After a lesson to allow students to find personal relevance
Variations
Jot-Pair-Share Similar to Think-Pair-Share, a student jots down his or her own thoughts, pairs with a partner to exchange ideas, and then partners share their ideas with the rest of the class.
Quick Jot Students are given between 60 to 90 seconds to respond to a given question or statement posed by the teacher.
Stop and Fill If it is important that key points or important words are noted as students listen to auditory materials or read written material as they work independently, a Stop and Jot sheet with blanks to be filled in will be the best way to capture key information.
Group Jot After completing the original Stop and Jot activity, ask students to compare their jots with a small group of students. Students discuss their Jots and add information to their notes based on this discussion. Students may also be asked to present a summary of their thoughts to the class.
Jot Survey Instead of drawing a Stop Box on their note taking paper, students write their Jots on sticky notes. Students then take their sticky note Jots and post them on posters around the room. Posters may be made for individual questions or topics based on the content being covered. The teacher then sends the students around the room in small groups to survey the jots written by their classmates making comments or additions to their notes.
Retrieved from http://www.theteachertoolkit.com/index.php/tool/stop-and-jot

18
Children's Books to Help You Teach the Summarizing Strategy
Bang, Molly. Common Ground: The Water, Earth and Air We Share A beautifully painted and thoughtful environmental message about the natural resources we all share and our urgent need to preserve them
Blake, Robert J. Togo Although he is small, Leonhard Seppala's sled dog Togo displays courage and leadership to save the residents of Nome, Alaska.
Cooper, Elisha. Ice Cream A lively, detailed exploration of how ice cream is made.
Fleming, Candace. Boxes for Katje After World War II there is little left in Katje's town of Olst in Holland. Her family, like most Dutch families, must patch their old worn clothing and go without everyday things like soap and milk. Postman Kleinhoonte pedals his bicycle down Katje's street to deliver a mysterious box—a box from America!
Fleming, Denise. Buster Buster's owner brought home a big box. The adorable pointy-nosed red dog hoped there would be juicy steaks or fancy cheeses in the box. But inside was something Buster did not want. And that something was a cat named Betty.
Davie, H., Goldin, A. Ducks Don't Get Wet Why don't ducks get wet? Ducks dip and dive, but they stay dry because they spread oil over their feathers to make them waterproof. Learn more inside the book and get to know different kinds of ducks.
Haas, Jessie. Runaway Radish Radish is a feisty pony--and the best teacher Judy has ever had. He teaches her how to ride, and how to go fast and far, and even how to fall off. But most of all, he teaches her to be patient. And when Judy outgrows him, he teaches Nina all the same things, and most of all, how to be brave.
Harjo, Joy. The Good Luck Cat Some cats are good luck. You pet them and good things happen. Woogie is one of those cats. But as Woogie gets into one mishap after another, everyone starts to worry. Can a good luck cat's good luck run out?
Markle, Sandra. Creepy, Crawly Baby Bugs This book compares how different insects begin life, grow into adulthood, and go off on their own.
Muth, Jon J. The Three Questions Nikolai knows that he wants to be the best person he can be, but often he is unsure if he is doing the right thing. So he goes to ask Leo, the wise turtle.
Willey, Margaret. Clever Beatrice What happens when a very little girl makes a bet with a very LARGE giant? What happens when a very little girl makes a bet with a very LARGE giant?

19
The act of taking written notes about text material should enhance comprehension. This writing practice involves sifting through a text to determine what is most relevant and transforming and reducing the substance of these ideas into written phrases or key words. Intentionally or unintentionally, note takers organize the abstracted material in some way, connecting one idea to another, while blending new information with their own knowledge, resulting in new understandings of texts. Writing to Read
Without proper instruction in note taking the students may just write down words or phrases word for word, without having student’s analysis or a good effect. Successful note takers summarize the meaning, which they are much more likely to retain this information later on. The students also have an advantage from using their notes as a credential of what they are learning. It is also a great way to study for an exam or test. Teachers should provide time for their students to review and refine their notes especially when it comes time to prepare for and exam, write a research paper, or the other summative assessments of learning. (Marzano Pickering, 2005)
Have Students Write Notes About
a Text

20
Note Taking Note taking can be done as a whole group, small group, or individual activity. Students need to have note taking skills modeled and opportunities for practice with the skill in a whole group or small groups. After multiple practicing opportunities, most students will be able to take notes independently. Poster/Sticky Note Large/Small Group Note Taking
• Before reading text aloud, teacher provides a purpose for listening. Fiction: Characters, plot, etc… Nonfiction: Penguins: what they eat, where they live, etc…
• Teacher reads aloud text. • Teacher gives note card to write a note or draw a picture and place in appropriate
area on poster. Note Taking Comic Strips
• Fold or divide paper into sections. • Have students draw a picture and write a brief caption in each section. • Helps them learn to visualize and write in their own words.
Pocket Notes
• Write topic/title on a file folder. • Attach library card pockets. • Label each card with a sub-topic. Include a pocket that is labeled “Other
Interesting Facts”. • Take notes on index cards and place in pocket.
Note Taking Mentor Texts
Read one of the following books aloud. Each features notes as a part of the plot:
• Bunny Cakes by Rosemary Wells In this warmly engaging read aloud, Max (an emergent writer) and his sister, Ruby, write grocery lists. In the hilarious escapade, Max learns how to communicate on paper and then learns the key lesson that notes must be readable to the recipient!
• Lilly's Purple Plastic Purse by Kevin Henkes Lily is unable to contain her excitement about her new purple plastic purse. Wise Mr. Slinger resolves the issue with a timely, well-worded note.
• Maggie and the Pirate by Ezra Jack Keats This simple, poignant story engages listeners with the tale of the disappearance of Maggie's
pet story unfolds, a more complicated and unusual motivation for note writing is revealed—to gain cricket. Left in the cricket's place is an ominous note: "The Pirate Was Here!" As the suspenseful attention.
1. Introduce and share the book as you would any read aloud. Encourage student predictions, questions and response to the story.
2. The next day, reread the book, or at least the section about writing notes. Discuss why the character wrote the notes and what effect the notes had.
3. Have the students help you copy the featured note onto chart paper and leave it prominently posted to be reread together and individually.
4. Repeat the process with the other books, if desired.

21
Note Taking in the Primary Classroom
Note taking begins in the primary grades. Young students can be taught note taking as a way to remember something they have heard, observed, or learned. For example, while watching a video on butterflies, pause the film to order to model writing down information you want to remember. Model invented spelling and use pictures for some ideas. In Kindergarten and first grade students, teachers should model note taking, but in grades two and three, students can do this activity on their own (as long as ample modeling has taken place). Notes can be taken during a video, interviewing a guest speaker, going on a field trip. The most important aspect of note taking is that students see the value of recording and remembering information for specific purposes. Those purposes may vary from classroom to classroom but should focus on helping students understand information.
(Bright, 2002)
Note Taking from a Read Aloud It is a challenge to teach students how to use the text as a reference and to cite without teaching them how to copy word for word. The following are two ideas. 1. Begin by teaching students to highlight only one or two words and then insert them into their own
sentence. For example, if you're reading a story about Storms, they could highlight the words, "Boom! Crash!" and then write a sentence using those words such as, "The boy was scared when the storm went "Boom! Crash!"
2. While reading a text, stop and write down a word on chart paper and illustrate the word. Do this several times throughout the reading of the text. Then have students reference the poster at their writing table to choose a word or words when they write their own sentences. They are not required to copy a sentence or even finish a sentence frame only use any word from the poster to write about what they learned.
Post Its: Little Notes for Big Discussions
1. Tell students that this strategy is beneficial because sometimes when we are reading, we have a thought and then move on and forget the thought.
2. This strategy helps students to record their thinking so that when it is time to discuss the text, they have evidence or are able to remember what it was that they were thinking when they read.
3. Explain to students that a Post-It is a way of holding on to that thinking that can be placed right in the book.
4. This strategy helps students feel prepared for the discussion and gives them a record of something that they might be able to share with the whole group.
Idea retrieved from Teaching Channel Video: 1:41 https://www.teachingchannel.org/videos/enhance-student-note-taking
Concept Mapping Important concepts from the text are placed in a circle and then students show how the concepts link together using words and lines. One way of teaching concept mapping is to first present a model of an expert concept map for a particular reading. After discussing this map, students then practice completing other expert maps that are incomplete, moving from more to less complete maps, until they can create their own map for material read. (Chang, Chen, and Sung, 2002)

22
Split Screen Notes
This strategy gives students an organizer to record what they have learned visually as well as with words. Listening to or reading text twice will show students that rereading is important in order to comprehend the text fully. Procedure:
a. The teacher will read aloud or assign students to read an informational text silently. b. Students will record notes and draw visual representations of the text. c. The teacher will read aloud or assign students to read the informational text again. d. Students will continue to add drawings or notes to their organizer. e. Have the students meet in groups to discuss their drawings and notes. f. Students can use the organizer to write a summary or report about the topic.
Spiders Notes Drawings
Variation:
Simple Machines Source/Topic Notes Drawings
Lever Pulley
(Brownlie, 1990)
Read-Cover-Remember-Write
When students are conducting research, being able to take notes is a necessary skill. Teaching students to take notes and not just copy down words is vital to getting students to write their own research in their own words. Remind students that we need to be able to remember what we have read to become experts on a topic. One way to do this is to pause and think before jotting down ideas.
Procedure: 1. Choose a short segment of text. 2. Read aloud the segment, cover it up with your hand and pause to think aloud what you learned.
Tell students to not read more than their hand will cover at one time. 3. Jot down (chart paper, overhead, etc…) what you learned letting all students see your notes.
Emphasize to students that you can’t remember everything so… 4. Reread the segment to see what information may have been forgotten. 5. Remind students that notes do not require complete sentences, correct spelling, etc. as
the point is to quickly get their thinking down. 6. Follow steps #1 and #2 again.
Caution: Students may sometimes begin to ramble on and list every detail. Remind them to avoid writing complete sentences and smaller words/articles such as a, and or the. Some students may need the teacher to limit a note to a specific number of words. This strategy helps students avoid plagiarism.
(Hoyt, 2009)
23
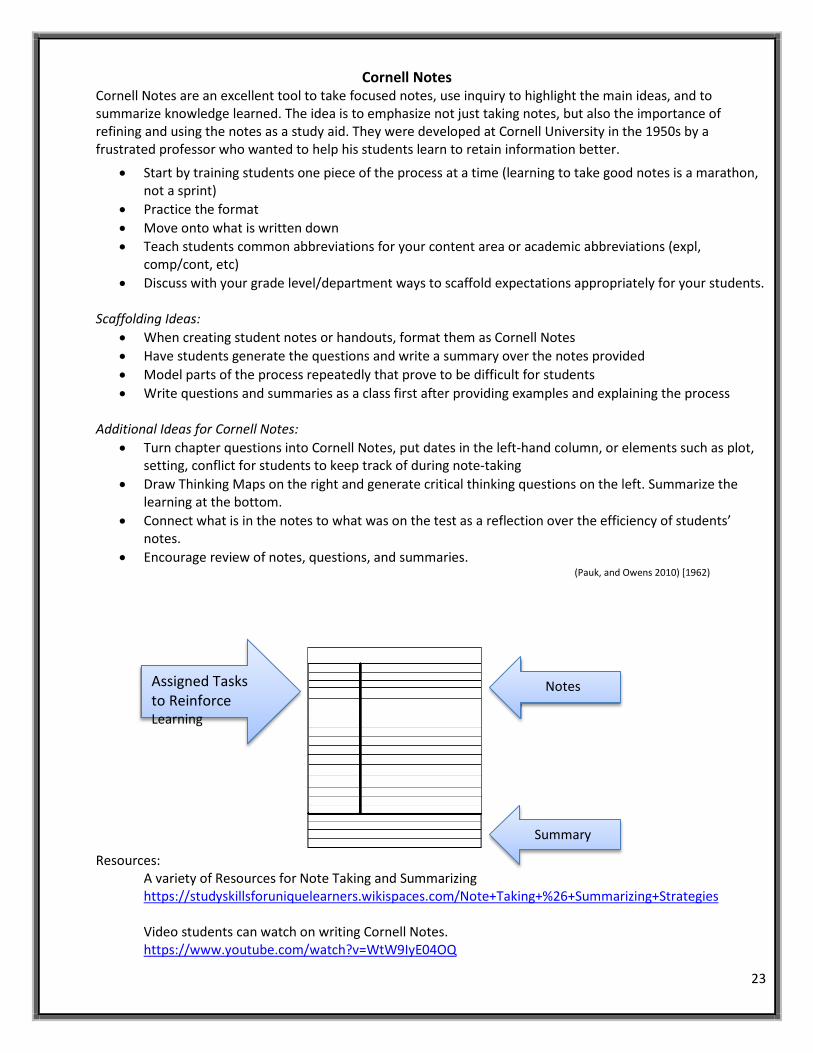
Cornell Notes
Cornell Notes are an excellent tool to take focused notes, use inquiry to highlight the main ideas, and to summarize knowledge learned. The idea is to emphasize not just taking notes, but also the importance of refining and using the notes as a study aid. They were developed at Cornell University in the 1950s by a frustrated professor who wanted to help his students learn to retain information better.
• Start by training students one piece of the process at a time (learning to take good notes is a marathon, not a sprint)
• Practice the format • Move onto what is written down • Teach students common abbreviations for your content area or academic abbreviations (expl,
comp/cont, etc) • Discuss with your grade level/department ways to scaffold expectations appropriately for your students.
Scaffolding Ideas:
• When creating student notes or handouts, format them as Cornell Notes • Have students generate the questions and write a summary over the notes provided • Model parts of the process repeatedly that prove to be difficult for students • Write questions and summaries as a class first after providing examples and explaining the process
Additional Ideas for Cornell Notes:
• Turn chapter questions into Cornell Notes, put dates in the left-hand column, or elements such as plot, setting, conflict for students to keep track of during note-taking
• Draw Thinking Maps on the right and generate critical thinking questions on the left. Summarize the learning at the bottom.
• Connect what is in the notes to what was on the test as a reflection over the efficiency of students’ notes.
• Encourage review of notes, questions, and summaries. (Pauk, and Owens 2010) [1962)
Resources: A variety of Resources for Note Taking and Summarizing
https://studyskillsforuniquelearners.wikispaces.com/Note+Taking+%26+Summarizing+Strategies
Video students can watch on writing Cornell Notes. https://www.youtube.com/watch?v=WtW9IyE04OQ
Summary
Notes Assigned Tasks to Reinforce Learning

24
Three Column Notes
An important element of reading comprehension is the ability to organize text. Organizing requires readers to focus on the major elements of a text and not only to decide what is important, but also what needs to be investigated further. Three-Column notes are an adaptation of the Cornell system. Information is grouped according to its type, and then arranged in columns. This reading strategy is designed to help students distinguish between details and evidence that support their claims and those that do not.
• In the first column, write the main subjects or topics from the text. • In the second column, write significant details you learned from reading the text, from research
or discussion. • In the third column, jot down opinions, observations, thoughts, etc.
For additional information http://www.readingquest.org/strat/column.html
Two-Column Note Taking
Many nonfiction texts are written with headings. These headings usually reflect the main idea, and the text supplies the details that flesh out the main idea. Modeling how to read a nonfiction article using a two-column note-taking technique can help students see this structure and determine the important ideas. 1. In modeling the technique, first read each heading and section to decide if the heading reflects the
main idea or if you need to restate it. Then write the main idea in the column headed "Heading" or "Main Idea."
2. Next, read the section and list the details that support or explain that topic or idea. Emphasize to students that support and explain are key words to keep in mind. Details that support or explain are the important details. List the important details in the "Notes" column. Start with well-organized material, and have the students practice this skill before moving on to more challenging materials.
Topic (or title of article or chapter): Ancient Rome Main Idea Notes (Important Details)
Building and Technology Excellent builders Roads—some Roman roads still around Bridges and aqueducts to carry water—some still around Plumbing—underground sewers Mills to grind grain
Farming Markets and Sellers
Direct quote and page number I visualize(or: The image I see in my mind—this is a good time to point out the similarity between the words image and imagination)
From The Kite Runner, p. 49 "I loved wintertime in Kabul. I loved it for the soft pattering of snow against my window at night, for the way fresh snow crunched under my black rubber boots, for the warmth of the cast-iron stove as the wind screeched through the yards, the streets."
I visualize a little boy looking out of his window as the snow is coming down. He is sitting there not saying anything but thinking about the way the snow would feel if he were out walking in it. I can feel the warmth of the cast-iron stove as I think about how it feels to come in out of the cold into a warm house. I can also think about the sound of the wind blowing outside.

25
Quick Writes
A quick write is a powerful instructional strategy. It is a short, first draft piece of writing that helps students get words onto paper. Quick writes can take 3 minutes initially and increase to no more than 5-7 minutes, several times a week. This strategy can help students build stamina for longer, more complex writing. Procedure:
1. Choose a topic that is based on a text that has been read and share the topic with the students. Using a projector, whiteboard, or smart board, model the quick write for students.
2. Explain to the students that once the timer is set, the writer can’t stop writing during the quick write.
3. Set a timer for 3 minutes. 4. Begin writing but do not tell students what you are writing. They will stay engaged if they
read as you write. 5. At least once, write “I can’t think of anything else to write, I can’t think of anything else…”
then continue with your quick write. This will help students understand that writing is to continue even if they have difficulty thinking of something to write.
6. When the timer goes off, tell your students that you are allowed to finish the sentence you are writing. Finish the sentence.
7. Read aloud to students, crossing out and omitting “I can’t think of anything else to write”. 8. When it is time for the students to do this, give them 1 minute of think time before
starting. Turn the timer away from the students so they are not watching the clock. 9. Ask volunteers to share their quick writes.
(Tompkins, 2002)
Freewrite/Freedraw (Variation of Quick Write) Freewrite/Freedraw is a strategy to give students processing time to inspire new ideas. Students often need time to process information they are learning about or reading about, and this strategy provides that time. In addition, talking about what has been learned can also inspire additional ideas. Procedure:
1. Give students a blank piece of paper. 2. Ask students to write/draw everything they can about the topic. Give students one to three
minutes to do this. 3. When time is up, students are to turn to a partner and describe their drawing or read their writing. 4. Ask students to discuss with a partner one new thing to write or draw about the topic. 5. Provide time for students an opportunity to then add additional information to their original work. 6. This strategy is particularly helpful for students who benefit from talking about what they have
learned in order to produce additional information. (Adapted from Owocki, 2013)

26
Log Notes Keeping a reading log allows students to easily track what they have read, how much they read, and any information they would like to remember. When students incorporate additional components, the record becomes a journal where they respond in a variety of ways to their reading. Procedure:
1. The teacher ensures that students have a place to keep their log or journal entries, such as a notebook, binder, or notepad. 2. Students are encouraged to write or draw thoughts, personal reflections, questions, and descriptions about what they read or heard. 3. Teachers may provide a prompt to give students a purpose for writing/drawing their entries.
Adapted from and additional ideas: http://www.scholastic.com/teachers/top_teaching/2009/11/readers-notebook

27
Sketch-to-Stretch Sketch-to-Stretch is an instructional strategy where students draw quick sketches to stretch their thinking and understanding of concepts. This technique can be used in a variety of ways. Procedure:
1. Read or listen to a text or chunk of text. 2. Tell students to think about what they read. Think about questions and ideas they have about
the text. 3. Students should sketch those ideas.
Variations: • As a pre-reading activity, Sketch-to-Stretch is a strategy that can help students connect • with prior knowledge. Students sketch ideas that show what they know about a topic
featured in an upcoming selection. • Invite students to write captions (words, phrases, or sentences) for sketches. • When students work in small groups, Sketch-to-Stretch can be used to illustrate a series of
events. For example, each person in a group sketches a different phase in the life cycle of a monarch butterfly.
• Put all the sketches in a booklet or on display so that students can examine all of them for new insights.
• If a text has few, none, or very poor illustrations, it may not be necessary to tell the readers to put away their texts before sketching. In fact leaving the text open in such cases encourages readers to reread as they devise their sketches.
• With content materials, give readers copies of a passage minus the pictures, drawings, graphs. Then ask them to sketch. Readers can then compare their sketches with one another and the author.
(Harste, and Burke, 1988)

28
Episodic Notes Students can use this strategy as a note-taking method for analyzing how a particular piece of text fits into the overall structure of a text. It asks them to identify distinct scenes or moments in the text and then explain how the scene fits into the overall structure and how it helps to develop the theme, setting or plot.
Purpose: Identify most important moments • Determine the most crucial stages, scenes, or moments in the story or process. • Students may need a stopping point provided in the text, video, read aloud, where they should
draw and right. When students become proficient with this strategy, stopping points may not have to be given by the teacher. Students will sense a natural stopping point.
• Draw in the box what happens and what you “see” in the text. Be as specific as possible. • Students can “title” the stage they have drawn next to “caption”. Underneath caption, students
can describe their drawing. • Remind students that the drawings are not works of art, but a quick sketch to capture the action
and important details of the moment. • Explain (in the notes section) what is happening and why it is important.
What You “See” in the Text
Caption
Caption
Caption
Adapted from Jim Burke’s Episodic Note from Tools for Thought: www.englishcompanion.com Online Episodic Notes Template: http://www.englishcompanion.com/pdfDocs/toolepisodicnotes.pdf
Pairs Check
Students can exchange their notes after they are completed. Each student will then discuss one another’s answers, agreeing, disagreeing, adding to, or changing their answers according to the discussion. Each pair must decide upon one set of answers and evidence to be submitted to the teacher.
(Eggen and Kauchak, 2006)

29
Structured Note Taking Structured Note Taking is a strategy that helps students become more effective note takers. Using graphic organizers specific to a particular text (see notes and link below), structured notes assist students in understanding the content of the reading. Teachers can acquaint them with the signal or cue words (see link below) that authors utilize in writing each of the structures. Structured notes are really helpful when students are faced with interpreting complex text structures. The notes give students a reading guide to use as they navigate through difficult text, and act as a model of how students should organize their ideas as they are reading. Steps for Structured Notetaking 1. Select a section of text and determine the organizational pattern used to convey information in the text.
Common organizational patterns are listed below. 2. Next, create a graphic organizer that follows this pattern, complete with focusing questions, and
distribute it as a study guide. (Graphic organizer templates are offered below.) 3. Instruct students to read the chapter and take notes by recording the appropriate information in the
graphic organizer sections. Cause/Effect Definition/Example Proposition/Support/Listing Comparison/Contrast Problem/Solution Concept/definition
Graphic organizers are available at: http://www.adlit.org/article/39906/ (Sejnost & Thiese, 2010)
Power Notes Power Notes is similar to outlining but is much simpler for students because key features are assigned numbers and it is not necessary that two be the same in order to create an entry.
• Power Notes is a strategy that teaches students an efficient form of organizing information
from an assigned text. This technique provides students a systematic way to look for relationships within material they are reading.
• Explain to students that Power Notes help visually display the differences between main ideas and supportive information in outline form.
• Clarify that main ideas or categories are assigned a power 1 rating. Details and examples are assigned power 2s, 3s, or 4s.
• Remind students that Power Notes gives students an opportunity to organize ideas and evaluate their writing. Power Notes can be integrated into a number of activities to help students perceive how information is related.
Power Notes are written using the following format: Power 1 = Main Idea of the information. Power 2 = Detail or supportive information for Power 1 above. Power 3 = Detail or supportive information for Power 2 above. Power 4 = Detail or supportive information for Power 3 above.
Strategy Guide for Power Notes can be found at: http://www.readwritethink.org/professional-development/strategy-guides/power-notes-30759.html

30
Summary Notes
This strategy allows students to take notes during all three phases of reading: Before, During & After. Before
1. Determine your purpose. 2. Preview the document. 3. Prepare to take notes.
During 4. Take notes to help you answer these questions:
• Who is involved? • What events, ideas, or people does the author emphasize? • What are the causes? • What are the consequences or implications?
5. Establish criteria to determine what is important enough to include in the summary. 6. Evaluate information as you read to determine if it meets your criteria for importance.
After 7. Write your summary, which should: Identify the title, author, and topic in the first sentence. State the main idea in the second sentence. Be shorter than the original article Begin with a sentence that states the topic (see sample). Include a second sentence that states the author’s main idea. Include 3–5 sentences in which you explain—in your own words—the author’s point of
view. Include one or two interesting quotations or details. Maintain the author’s meaning Organize the ideas in the order in which they appear in the article. Use transitions such as “according to” and the author’s name to show that you are
summarizing someone else’s ideas. Include enough information so that someone who has not read the article will
understand the ideas.
Visualizing Note Taking Strategies Draw the Text Using the actual words from the text as your guidelines, translate the text into a drawing to help you see what it looks like, what is happening.
Sensory Notes Create a page with columns for the different senses (e.g., sounds, smells, etc.). As you read, write down any sensory details the text includes. When finished reading the selection, use those details to write a description of the scene that will show you understand what you read and help you see what it looks like and thus better visualize what you read. Students can also use this list of details to analyze the author’s style. Sample Chart:http://www.englishcompanion.com/pdfDocs/toolsensorynotes.pdf

31
Character Cards
Taking notes about a character of a novel or story can help a student remember the character mentioned as well using a tangible item to add notes about the character as the story/novel/read aloud unfolds. Students can use the created cards to help them recall and keep track of the character while reading (or listening). The front of the card should have a stick figure drawn on it labeled with the character’s name. The student may draw props or clothing on the character to help them recall and identify specific details about the character they have uncovered while reading/listening. The back of the card can be used for students to place notes or key pieces of evidence (with page numbers) found in the text.
Character Card: Can be used with Reading Standard #3 RL.K.3 - With prompting and support, identify characters, settings, and major events in a story. RL.1.3 - Describe characters, settings, and major events in a story, using key details RL.2.3 - Describe how characters in a story respond to major events and challenges. RL.3.3 - Describe characters in a story (e.g., their traits, motivations, or feelings) and explain how their actions contribute to the sequence of events RL.4.3 - Describe in depth a character, setting, or event in a story or drama, drawing on specific details in the text (e.g., a character's thoughts, words, or actions). RL.5.3 - Compare and contrast two or more characters, settings, or events in a story or drama, drawing on specific details in the text (e.g., how characters interact). RL.6.3 - Describe how a particular story's or drama's plot unfolds in a series of episodes as well as how the characters respond or change as the plot moves toward a resolution. RL.7.3 - Analyze how particular elements of a story or drama interact (e.g., how setting shapes the characters or plot). RL.8.3 - Analyze how particular lines of dialogue or incidents in a story or drama propel the action, reveal aspects of a character, or provoke a decision. RL.9-10.3 - Analyze how complex characters (e.g., those with multiple or conflicting motivations) develop over the course of a text, interact with other characters, and advance the plot or develop the theme. RL.11-12.3 - Analyze how complex characters (e.g., those with multiple or conflicting motivations) develop over the course of a text, interact with other characters, and advance the plot or develop the theme.
Add name, props and /or clothing, etc…
Add notes, quotes, page #’s, question prompts, etc…

32
Vocabulary Picture Cards
Vocabulary picture cards are note taking devices for students to keep track of the vocabulary used in the text they are reading and/or listening to. Students must create the cards themselves and draw an image that defines the word. Students can use the cards as a reference when they encounter the vocabulary term.
The vocabulary picture cards may be created • before reading/listening. (Words that must be pre taught as students cannot figure out the
word by context.) • during reading/listening. (These vocabulary picture cards may be completed by the
students as they use context clues to determine their meaning. Tell students that they can determine the meaning of the word by reading the words/sentences before and after the unknown word.
Students can also add important words/phrases/images as they are reading. It is important that students create their own description with the image. As students continue reading/listening, they can add page numbers and/or sentences on the back of the card where the word was used again in the text.
Perform the Text Whether role playing a scene or creating a tableau to represent a moment, students create a physical, visible performance that corresponds with the text. Student can also take notes or draw pictures of the performed text and then write a summary.

33
Student Generated
Recast the Text
Recasting a written text into a movie script or even a poem can sometimes help you better understand it by thinking about it and working with it in a different, more visual genre.
Adapted from Jim Burke’s Visualizing Strategies: Reading Is Seeing; [email protected]
Sketchnoting or Visual Notetaking
Sketchnoting or visual notetaking is creating a personal visual story as one is listening to a speaker, watching a video or reading a text.
When reading together: • Stop at predetermined places and briefly discuss how you could visualize that part
of the story or passage. • This provides an opportunity to gauge comprehension. But it’s also an opportunity
to incorporate discussion etiquette, build on others’ ideas, and draw conclusions. • Begin with student directed sketches. • The teacher draws, but elicits input from students. Talk about the best way to encapsulate an event, a
feeling, or other point of focus. • Let students see the teacher make mistakes or draw imperfectly. This gives students the permission to
do the same.
Caution: This can be difficult for some students as it requires constructing a "big picture". Some students will be ready to sketch independently, so offer opportunities to do so after a group discussion. A one-minute time limit discourages perfection while encouraging an immediate and reflexive response. It’s crucial to let students know that craft matters far less than concept. Emphasize the essence of the sketch over artistic detail and, if you add an oral component, focus on the act of summarizing over perfect grammar.
Scaffolding Option:
Invite those who are struggling to copy your sketches. The act of copying may not be creative but it allows students the benefits of processing time and helps them gain confidence.
Video: Sketcho Frenzy: The Basics of Visual Note-taking https://www.youtube.com/watch?v=gY9KdRfNN9w Digital Tools for Sketchnoting or Visual Notetaking http://showwithmedia.com/visual-notetaking/ Education Week: Visual Notetaking in the Classroom http://www.edweek.org/tm/articles/2013/09/23/ctq_pillars.html
Student Generated
Assigned Text

34
Annotation Annotation is a powerful reading tool. Annotating means writing your ideas, thoughts and questions as you read. Students can annotate a text to leave tracks of their thinking so they can learn, understand and remember what they read. During the reading process, the reader marks the text at appropriate points, using symbols and/or words that serve as visual cues and help keep the reader focused on the text. Students can be encouraged to write questions, comments or to integrate “text codes”. Some codes could include:
• ? = question, • * = important information, • ?? = confusion, • L = new learning, • R = this reminds me, etc…
Students are encouraged to reread their annotated versions to add additional insights from the 1st read. If students are reading a text from a book, sticky notes could be used to record their thinking. Larger sticky notes can be cut down to tabs for codes as noted above. For a sample lesson plan from Read Write Think for grades 9-12, click here. (Brown, 2007)
Collaborative Annotation http://www.greececsd.org/district.cfm?subpage=937
Thinking Notes: Teaching Channel – Grades 9-12 https://www.teachingchannel.org/videos/student-annotated-reading-strategy
Annotation Bookmarks

35
The Trash and Treasure Note-taking Technique
Relate note-taking to a pirate’s treasure map (show one if necessary). The map itself is like the article or chapter of a book containing information about the topic. The X on the map, which marks the exact location of the buried treasure, is the section of the text containing needed information, or an “answer” for specific questions defined in the task. A pirate must dig for the treasure chest, tossing aside dirt, weeds, and rocks (trash).
A researcher must dig to find words that help answer the questions (treasure words). He or she must “toss aside” unnecessary sentences, phrases, and words (trash words). Of course, these words are not trash to the original source, only to the researcher because they do not answer the questions defined in the task. Demonstrate this concept using an article or section of text. The students should each have a copy of the text so they can follow along and practice the technique.
1. Show a prepared question, including the underlined keywords and list of related words. 2. Scan the text until the appropriate heading is located. 3. Place a slash at the end of the first sentence and read it. Ask “Does this sentence answer the question?” 4. If the answer is no, tell the students that that sentence is “trash” to them. Go on to the next sentence,
placing a slash at the end. 5. If the answer is yes, underline the first phrase and ask if that phrase answers the question. If the
answer is no, underline the next phrase and repeat the question. 6. If the answer is yes, read that phrase word by-word, asking which words are needed to answer the
question these are treasure words. Circle those words, then write them in the appropriate place on the organizer the students are using. Those that do not answer the question are trash words. Continue phrase by phrase and word by word until coming to the end of the sentence. Count the words in the sentence and then count the treasure words. Students are very impressed when you say, “The sentence has 17 words and I only needed to write four of them. I don't know about you, but I would rather write four than 17!”
7. Demonstrate the process again, allowing the students to practice, using copies of the article. Allow students to independently practice a few times before they begin their own research. The teacher should monitor each student's work, re-teaching as necessary. Once students understand the concept of “trash-n-treasure” words, they begin to write fewer and fewer unnecessary words. Third, fourth, and fifth graders can begin to understand the concept of not copying every word, but mastery should not be required. www.big6.com (Eisenberg and Berkowitz. 1990)
Youtube Video: Trash and Treasure Note Taking Strategy https://www.youtube.com/watch?v=78YIrYqEmnQ

36
Kinesthetic Note-Taking Toolkit
Where to Begin • Model, model, model how and why to use the tools in the basket. • Have the entire class practice each tool in the basket. • Provide baskets of tools close to students desks/tables so they can
have quick access to the tools when needed. Teacher may need to assign certain tools for certain students who need them.
• Tools are not needed for students who comprehend and understand the text, but they should be taught how to use them so when text is tough, they have a possible tool.
A sticky note can be used to write or draw a main idea, summary, ask a question, or note what is confusing by each paragraph, section, table, chart, graph, picture, map or even groups of sentences. Sticky notes can also be placed on a piece of notebook paper and turned in like a regular assignment.
Index cards can be used as note taking cards to
identify key vocabulary words with a visual and student friendly description identify characters and keep track of them while reading fold into the number of chunks assigned by the teacher to take notes about
Highlighting is a helpful tool that must be taught so students can highlight purposefully. 1. Read through the selection first. 2. Reread and begin to highlight main ideas and their supporting details. 3. Highlight only the facts which are important or the key vocabulary not the entire sentence. 4. After highlighting, look at what they have highlighted and summarize what they read. 5. Take what was highlighted and write a summary paragraph.
Teachers may wish to have students use various colors of highlighters to identify main ideas from details (e.g., use orange to represent main ideas and yellow to represent supporting details). When students need to have a place to “keep their thinking” while reading, have them tear a piece of adding machine tape the length of the book they are reading, line it up next to the text and draw a line under each chunk. Students should write a summary, list the main idea or gist of the chunk, draw the main gist of the chunk or ask questions above the line. A crayon can be used to underline -- or a highlighting marker to highlight -- information that supports a topic. The highlighted text provides a visual representation of the "notes" students might write. When students complete their highlighting, have them use the most important highlighted information to write in their own words a summary or paragraph on their assigned topic or theme.
Sticky Notes
Index Cards
Highlighters
Crayon Highlighting
Adding Machine Tape

37
Craft sticks can be used to help students stay focused on the part of the text they are reading. Place the craft stick under the words being read and move along as reading.
Students will use the cards/bookmarks as a guide for the symbols they can use to annotate a text to leave tracks of their thinking.
A “golden line” is a line of text that is especially meaningful, surprising, helpful or thought provoking. The line can be from a piece of student writing, textbook, novel, short story, play, movie, or primary source document, etc. As students read or write, they seek to find their own “golden line”. Once found, the golden line then provides an anchor for more writing and/or discussion.
• As students read their textbook, have them place a sticky note on their “golden line” explaining why they chose it. Put students into small groups to discuss their lines.
• Have students choose their “golden line”, write it on a piece of paper and then illustrate it. • Have students post their “golden lines” on an educational, password protected threaded
conversation site like Nicenet.org. Then have them respond to each other’s postings.
Chunking the Text for Note Taking
When faced with a full page of text, reading it can quickly become overwhelming for many students. Consider the reading level of the students and determine the appropriate length of chunked text to use with each student. Depending on students’ reading level, the lengths of chunks can vary.
• A struggling reader may work with phrases, rather than sentences • Determine the appropriate length of chunks for each group of students. • Model how to chunk text using a simple text. • Guide students through the practice and evaluate their level of understanding prior to allowing
them to chunk text on their own. • Allow time (3-5 minutes) for students to chunk the text (if it is not already done for them).
Students can work alone or with a partner and scaffolding teacher support when necessary. • Provide students ample time to read their chunks (using the reading/decoding strategies) and
paraphrase and rewrite the chunks in their own words. • A stronger reader can often work with longer chunks. Students can rewrite “chunks” in their own
words. Breaking up the text into smaller sections (or chunks) makes the page more manageable for students. Students need to process the new information and can only handle so much content before they begin processing it.
Below are some ways to chunk the text so students can use different strategies to process it. • Draw a horizontal line between paragraphs to divide the page into smaller sections. Sticky notes
or “wiki stix” can be used to divide sections in a textbook. • At the beginning of the year, group the paragraphs into chunks before you hand out the assignment.
In the directions you will say, “Chunk paragraphs, 1-3, 4-5, 6-8.” This can be differentiated by providing a different assignment to a student who needs the chunks to be smaller.
• The teacher must be careful to look over the paragraphs/sections to see where a natural chunk occurs. It is important to understand there is no right or wrong way to chunk a text, as long as you can justify why you grouped certain paragraphs together.
• Gradually throughout the year, teachers should increase the size of the chunk. When slowing increasing the size, students get acclimated to the size and do not realize they are reading a larger size chunk. This helps increase students ability to read longer passages.
Craft Sticks
Annotation Card/Bookmark

38
References
• Beer, K. (2003). When kids can’t read what teachers can do: A guide for teachers 6-12. Portsmouth, NH: Heinemann.
• Bright, R. (2002). Write from the start: Writers workshop for the primary grades. Winnipeg: Portage & Main Press.
• Brownlie, F., & Close, S. (1990). Tomorrow's classroom today: strategies for creating active readers, writers, and thinkers. Portsmouth, NH: Heinemann.
• Chang, K.E., Chen, I., and Sung, Y.T. (2002). The effect of concept mapping to enhance text comprehension and summarization. Journal of Experimental Education, 71, 5-23.
• Ellery, V. (2005). Creating strategic readers. Newark, Delaware: International Reading Association • Eggen, P., & Kauchak, D. (2006). Strategies and models for teachers. (5th ed.). Boston, MA: Pearson Education • Eisenberg, M. B. & Berkowitz, R. E. (1990). Information problem-solving: The big six skills approach to library and
information skills instruction. Norwood, NJ: Ablex. • Fisher, D., and Frey, N. (2004). Improving adolescent literacy: Strategies at work. New Jersey: Pearson Prentice
Hall. • Fuchs, D., Fuchs, L., & Burish, P. (2000). Peer-assisted learning strategies: An evidence-based practice to promote
reading achievement. Learning Disabilities Research and Practice, 15(2), 85-91. • Harste, J., and Burke, C. (1988). Creating classrooms for authors. Portsmouth, NH: Heinemann Publishers. • Hoyt, L. (2009). Revisit, reflect, retell: Time-tested strategies for teaching reading comprehension (Updated ed.).
Portsmouth, NH: Heinemann. • Lawwill, K. (1999). Using writing-to-learn strategies: Promoting peer collaboration among high school science
teachers. Diss. Virginia Polytechnic Institute and State University, Blacksburg, VA, 29-30. • Macon, J., Bewell, D., and Vogt, M. (1991). Responses to Literature. Newark, DE: IRA. • Marzano, R., & Pickering, D. (2005). Classroom instruction that works: Research-based strategies for increasing
student achievement. Upper Saddle River, N.J.: Pearson/Merrill Prentice Hall. • Owocki, G. (1999). Literacy through play. Portsmouth, NH: Heinemann. • Owocki, G. (2013). The common core writing book, K-5: lessons for a range of tasks, purposes, and audiences.
Portsmouth, NH: Heinemann. • Pauk, W. (1974). How to study in college. Boston, MA: Houghton Mifflin • Rinehart, S.D., Stahl, S. A., & Erickson, L. G. (1986). Some effects of summarization training on reading and
studying. Reading Research Quarterly, 21, 422-438. • Scheinkman, N. (2004). Picturing a story. Teaching Pre K-8, (34)6, 58-59. • Schuder, T., Clewell, S., & Jackson, N. (1989). "Getting the gist of expository text." Children’s comprehension of
text, Newark: International Reading Association pp. 224-243. • Sejnost, R., and Thiese, S.M. (2006). Reading and writing across content areas. Thousand Oaks, CA: Corwin. • Sejnost, R.L. & Thiese, S.M. (2010). Building content literacy. Thousand Oaks, CA: Corwin Press. • Taylor, B. M., & Beach, R. W. (1984). The effects of text structure instruction on middle-grade students'
comprehension and production of expository text. Reading Research Quarterly, 19, 134-146. • Tompkins, G. (2002). Language arts content and teaching strategies. Upper Saddle River, NJ: Pearson Education • Wiggins, G., & McTighe, J. (2005). Understanding by design (Expanded 2nd ed.). Alexandria, VA: Association for
Supervision and Curriculum Development. • Wormeli, R. (2005). Summarization in any subject: 50 techniques to improve student learning. Alexandria, VA:
Association for Supervision and Curriculum Development. • Jones, R., (2001). “Summarizing.” ReadingQuest.org: Making Sense in Social Studies. Curry School of Education,
University of Virginia, Charlottesville, VA. 7 Nov. 2001.

ISBE Foundation Services: Writing to Read, 2016
Schools should specify when (a) explicit writing instruction will occur, and (b) when students will practice writing. It is critical that writing instruction and student engagement in writing practice occur across the curriculum.
Unfortunately, students often spend very little time in school participating in explicit instruction of having varied opportunities to practice their writing.
A national survey (Gilbert & Gra-ham, 2010) indicates that prima-ry grade students spend only 20 to 30 minutes per day actually writing, and very little time is de-voted to teaching students how to write (e.g., to use the writing process).
In the intermediate grades, stu-dents spend approximately 25 minutes per day writing and about 15 additional minutes are spent directly teaching writing.
At the secondary level, many students spend little time writing in any of their academic subjects, including English (Applebee & Langer, 2006).
Specific guidelines are not pro-vided for the amount of time re-quired for explicit writing instruc-tion, or how much time each day students should spend engaged in the writing process, but there is consensus among experts that schools should substantially in-crease the amount of time devot-ed to writing instruction and the amount of time students actually spend writing.
What Does Teaching Writing Involve?
Overall, writing involves the inte-gration of several skills. Effective written communication includes the clear expression of ideas and requires time to develop in stu-dents.
Writing requires a very different type of engagement than learning mathematics or how to read with comprehension. Therefore, writ-ing requires the consistency of dedicated time each school day.
WRITING TO READ RECOMMENDATION #3:
HOW MUCH TIME?
INSTRUCTIONAL WRITING
TIME
What Do the Experts Say?
The National Commission on
Writing, recommends that the
amount of time students write
in school each day should at
least be doubled, that writing
assignments should be as-
signed across the curriculum,
and that students should
spend significantly more out-
of-school time writing
(National Commission on
Writing, 2006). The Commis-
sion states that this change
alone ―will do more to im-
prove student performance
than anything else states or
local leaders can do (p. 31).
It is important not to assume that writing is the flip side of reading and that if students are good read-ers, they must also be good writers. Good readers do not necessarily have all the skills necessary to become good writers just because they have been given some application and practice. Though re-search has found a strong association between reading and writing proficiency, improvements can’t be expected by simply combining reading and writing together or by replacing one with the other. Alt-hough proficient reading is an important component to becoming a successful writer, many students learn to read and comprehend difficult academicmaterial but still struggle to write coherent texts of their own (Fitzgerald & Shanahan, 2000). Therefore, students must receive instruction in both reading and writing so that writing development will be influenced by reading instruction and reading development will be influenced by writing instruction.

ISBE Foundation Services: Writing to Read, 2016
Elementary-level instructional time should focus on founda-tional aspects of writing, including basic skills like spelling and handwriting. Instruction on the me-chanics of writing should be integrated with instruction on higher-level skills and other grade-specific standards outlined in the K-12 Illi-nois Writing Standards. For example, a writing lesson might include an instructional warm-up with
instruction focused on handwriting, spelling, or mechanics
(transcription skills) followed by instruction focused on composition and the writing process.
explicitly teach a writing strategy for summarization, and then assign the students a writing assignment to summarize findings about a science unit they just completed. In a mathematics class, students might first learn to complete a multi-step calculation then write a paragraph sequencing
Writing instruction should also be integrated into the content areas. Writing, like reading, has a discipline-specific aspect. Students who learn to write effectively about history, for example, require writing instruction and practice during history class. In an elementary science class, the teacher might
the steps to solve the problem. Limitless opportunities exist to teach and practice writing in content-area classes.
Writing Instructional Time: Elementary
Content Writing
Effective Use of Time
and related student writing activities starting in first grade. As writing demands become more complex, the amount of time for writing instruc-tion should increase.
Teachers must set aside a time for writing instruc-tion and practice, includ-ing writing that requires deep engagement with text – text students dis-cuss, read, and consider
as they learn to express their own ideas and communicate effectively through their own writing.
To ensure students’ pro-ductive use of time throughout the school day, teachers should increase the amount of time each day they de-vote to teaching writing skills and processes. Long-time writing expert and researcher Don-ald Graves suggests that elementary grade teachers should spend at least 35-40 minutes on daily writing instruction
Occasionally
devoting short
blocks of time
to writing
instruction (or
incidentally
when students
appear to need
it) while
teaching other
content such
as reading will
not provide the
time
necessary for
students to
become
effective
writers.
(National
Commission on
Writing)
Page 2 INSTRUCTIONAL WRITING TIME
Limitless opportunities exist to teach and practice writing in
content area classes.

ISBE Foundation Services: Writing to Read, 2016
The K-12 Illinois Standards for Writing include writing standards for history/social studies, science, and technical subjects. These stand-ards are listed across content areas in grade level bands for students in grades 6-12.
Incorporating writing across the curriculum increases the opportunity for both writing instruction and practice opportuni-ties. It also acknowledges
that effective writing can occur in different ways, with different struc-tures, and with different production procedures depending
upon the context, audience, and purpose for which written communication is produced.
be enhanced by teachers who focus on helping their students develop strategies for reading and writing within their respective content areas. A written report for a science experiment, for example, will differ in process and form from a multi-paragraph essay prepared for an English class. Writing to advertise a product in a business
The research is clear: discipline-based instruction in reading and writing enhances student achievement in all subjects (National Com-mission on Writing, 1993). Reading and writing in science is not the same as reading and writing in social studies or a technical subject like drafting. This means that student achievement can
class requires a different approach from writing a persuasive piece on a contemporary issue in a social studies class. Learning to write across the curriculum helps students employ a life-long need to understand how audience, purpose, and type of writing task influence the written prod-uct.
Writing Instructional Time: Secondary
Content Writing
Effective Use of Time
of daily writing instruction related to hypothesis test-ing and the scientific method while a social studies/history class might devote a daily 20-mintues to argument-writing related to current or historical events.
For schools to double the amount of time for writing instruction and practice at the secondary level, writ-ing instruction cannot be
confined to the English classroom, but should occur across the curricu-lum in all content areas.
Secondary students should spend at least one hour engaged in writing-specific tasks each day(Graves, 1994). The one hour daily recommen-dation can be distributed across secondary classes if subject- area classes deliberately schedule and coordinate how writing time is fo-cused across classes. For example, a science class might include 15-minutes
College
instructors
estimate that
50% of high
school graduates
are not prepared
for college-level
writing (Achieve,
Inc., 2005).
Recent reports by
the National
Commission on
Writing (2004,
2005) reveal that
the majority of
both public and
private employers
say that writing
proficiency has
now become
critical in the
workplace and
that it directly
affects hiring and
promotion
decisions.
Page 3 INSTRUCTIONAL WRITING TIME
History and writing are insep-arable. How would we know about history if it wasn’t documented? (Marius & Page, 2010)

ISBE Foundation Services: Writing to Read, 2016
References
Applebee, A. N., & Langer, J. A. (2006). The state of writing instruction in America‘s schools: What existing data tell us. Albany, NY: Center on English Learning & Achievement University of Albany.
Englert, C. S., Hiebert, E. H., & Stewart, S. R. (1998). Young writers’ use of text structure in expository text generation. Journal of Educational Psychology, 80(2), 143-151.
Fitzgerald, J. & Shanahan, T. (2000). Reading and writing relations and their development. Educational Psy-chologist, 35(1), 39-50.
Gilbert, J, & Graham, S. (2010). Teaching writing to elementary students in grades 4-6: A national survey. Ele-mentary School Journal, 110(4), 494-518.
Graham, S., & Hebert, M. (2010). Writing to read: Evidence for how writing can improve reading. A Carnegie
Corporation time to act report. Washington, DC: Alliance for Excellent Education.
Marius, R., & Page, M. (2010). A short guide to writing about history. New York: Pearson Longman.
National Commission on Writing for America’s Families, Schools and Colleges (2003). The Neglected ―R‖: The Need for a Writing Revolution. College Entrance Examination Board.
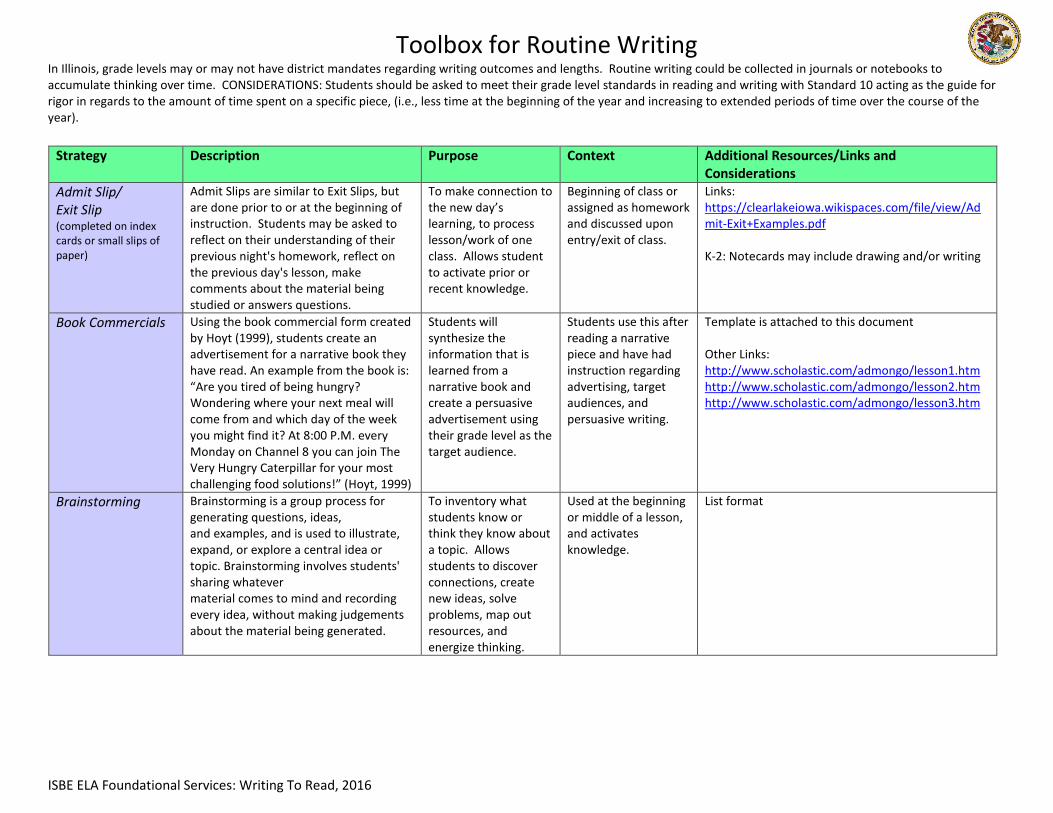
Toolbox for Routine Writing In Illinois, grade levels may or may not have district mandates regarding writing outcomes and lengths. Routine writing could be collected in journals or notebooks to accumulate thinking over time. CONSIDERATIONS: Students should be asked to meet their grade level standards in reading and writing with Standard 10 acting as the guide for rigor in regards to the amount of time spent on a specific piece, (i.e., less time at the beginning of the year and increasing to extended periods of time over the course of the year).
ISBE ELA Foundational Services: Writing To Read, 2016
Strategy Description Purpose Context Additional Resources/Links and Considerations
Admit Slip/ Exit Slip (completed on index cards or small slips of paper)
Admit Slips are similar to Exit Slips, but are done prior to or at the beginning of instruction. Students may be asked to reflect on their understanding of their previous night's homework, reflect on the previous day's lesson, make comments about the material being studied or answers questions.
To make connection to the new day’s learning, to process lesson/work of one class. Allows student to activate prior or recent knowledge.
Beginning of class or assigned as homework and discussed upon entry/exit of class.
Links: https://clearlakeiowa.wikispaces.com/file/view/Admit-Exit+Examples.pdf K-2: Notecards may include drawing and/or writing
Book Commercials Using the book commercial form created by Hoyt (1999), students create an advertisement for a narrative book they have read. An example from the book is: “Are you tired of being hungry? Wondering where your next meal will come from and which day of the week you might find it? At 8:00 P.M. every Monday on Channel 8 you can join The Very Hungry Caterpillar for your most challenging food solutions!” (Hoyt, 1999)
Students will synthesize the information that is learned from a narrative book and create a persuasive advertisement using their grade level as the target audience.
Students use this after reading a narrative piece and have had instruction regarding advertising, target audiences, and persuasive writing.
Template is attached to this document Other Links: http://www.scholastic.com/admongo/lesson1.htm http://www.scholastic.com/admongo/lesson2.htm http://www.scholastic.com/admongo/lesson3.htm
Brainstorming Brainstorming is a group process for generating questions, ideas, and examples, and is used to illustrate, expand, or explore a central idea or topic. Brainstorming involves students' sharing whatever material comes to mind and recording every idea, without making judgements about the material being generated.
To inventory what students know or think they know about a topic. Allows students to discover connections, create new ideas, solve problems, map out resources, and energize thinking.
Used at the beginning or middle of a lesson, and activates knowledge.
List format

Toolbox for Routine Writing In Illinois, grade levels may or may not have district mandates regarding writing outcomes and lengths. Routine writing could be collected in journals or notebooks to accumulate thinking over time. CONSIDERATIONS: Students should be asked to meet their grade level standards in reading and writing with Standard 10 acting as the guide for rigor in regards to the amount of time spent on a specific piece, (i.e., less time at the beginning of the year and increasing to extended periods of time over the course of the year).
ISBE ELA Foundational Services: Writing To Read, 2016
Strategy Description Purpose Context Additional Resources/Links and Considerations
Carouseling (Type of Brainstorming used in any discipline)
Carousel brainstorming requires groups of students to share ideas on chart paper and respond to 3-4 prompts concurrently. Students move from sheet to sheet and add their contributions. Students see patterns as well as other’s thinking. A variation of this strategy is called graffiti — particularly if it has students producing images as well as words.
To review what students have learned by thinking about subtopics within a broader topic; to stimulate discussion
Used at beginning as new content is introduced or at the end to facilitate a review of content.
Links: http://www.learnnc.org/lp/pages/1989?ref=search List or note form (K-2 may include drawing and/or writing)
CER (Claim, Evidence, Reasoning) * Also called Focus and Elaboration
The students write down an idea but use evidence from the text to explain their thinking.
Use it to begin argument work, to pose theories in their reading, to synthesize thinking about a text, and use inferring skills
This strategy is an introduction to argument; it allows issues and claims about a topic to surface
Link: http://www.edutopia.org/blog/science-inquiry-claim-evidence-reasoning-eric-brunsell One sentence to support each (Claim, Evidence, Reasoning) based on grade level standards and should build toward paragraph structure in older grades.
Different Same Different
Attributes from two different texts are compared and contrasted using three-columns (different-same-different). The students compare and contrast the attributes of two stories such as characters, settings, subjects or topics, events, etc by taking notes underneath the columns. The students share their notes with the class, and may extend the activity by putting their information into paragraph form.
Template Structure: Different Same Different
Drawings/ Illustrations
Quick drawings, sketches, diagrams and illustrations are used to share ideas, events, experiments, or even math processes.
This helps students to visualize learning and information; allows students

Toolbox for Routine Writing In Illinois, grade levels may or may not have district mandates regarding writing outcomes and lengths. Routine writing could be collected in journals or notebooks to accumulate thinking over time. CONSIDERATIONS: Students should be asked to meet their grade level standards in reading and writing with Standard 10 acting as the guide for rigor in regards to the amount of time spent on a specific piece, (i.e., less time at the beginning of the year and increasing to extended periods of time over the course of the year).
ISBE ELA Foundational Services: Writing To Read, 2016
Strategy Description Purpose Context Additional Resources/Links and Considerations
EXPLORE: Examples, Purpose Language, Organizational Features, Relate, Evaluate
EXPLORE writing is a tool students can use to respond to different types of text in writing. This organizer is used to write a response to the text.
This graphic organizer helps students take notes and organize ideas.
Useful in a variety of classes including the content areas.
Template Link: http://www.deltaetc.com/uploads/1/0/3/6/10363529/explore.pdf https://books.google.com/books?isbn=1571107711 Click on link, click again, and scroll to description
Fan Fiction Students become very familiar with a story or tale. After reading, students rewrite the text based on four categories: in-canon writing, alternate universe stories, cross-overs, and self-insert. The basic premise is to place themselves into a text and rewrite the story with their inserted character and respond to events. An adapted chart by Lankshear and Knobel (2006) explains the categories. (Lankshear & Knobel, 2006)
Fan Fiction allows students to apply critical thinking to support narrative elements, specifically setting.
This strategy should be used after reading a narrative story and instruction regarding narrative elements has been given.
Adapted Fan Fiction Template: Attached to this document (categories are described)
Flow Chart Retellings
The student begins by drawing the first box and writing the first event inside. S/He then connects the next box with an arrow and writes the second key event inside, continuing to add boxes until the retelling is complete. Adding boxes one at a time helps the child consider what information is important enough to add and the order in which events occurred.
This helps students to organize sequential information and consolidate information in a structure.
This strategy can be used for both fiction and nonfiction texts and it supports retellings of key ideas and details.
Flowchart Maker Link: http://www.softschools.com/teacher_resources/flow_chart_maker/

Toolbox for Routine Writing In Illinois, grade levels may or may not have district mandates regarding writing outcomes and lengths. Routine writing could be collected in journals or notebooks to accumulate thinking over time. CONSIDERATIONS: Students should be asked to meet their grade level standards in reading and writing with Standard 10 acting as the guide for rigor in regards to the amount of time spent on a specific piece, (i.e., less time at the beginning of the year and increasing to extended periods of time over the course of the year).
ISBE ELA Foundational Services: Writing To Read, 2016
Strategy Description Purpose Context Additional Resources/Links and Considerations
GIST: Generating Interactions Between Schemata and Texts
Have the students predict the gist, or main point, of the text by scanning the page to get a feel for what it will be about. Record predictions about the topic on the board. Read the first paragraph to the class. Ask students to write a summary of the first sentence in 15 words or less. Write the class summary on the board. Read the second paragraph and ask students to write a summary of the first two summaries in 15 words or less. Write the group summary on the board asking students to take all of what has been read so far and create a 15 word summary from the 2 previous 15 word summaries.
GIST teaches students to use prediction as a comprehension aid when reading expository text. This strategy was created to help students write well organized summaries.
The ability to predict what a passage will be about is often based on prior knowledge. Tapping this background knowledge can effectively increase the students’ comprehension of the text to be read.
Link: http://fcit.usf.edu/FCAT8R/home/references/additional-reading-strategies/gist-strategy.html http://www.readwritethink.org/files/resources/lesson_images/lesson290/Template.pdf
Identifying Theme Two Column Chart
Students create a T-chart with "Theme" on the left side and "Evidence from the Text" on the right side. As the story is read, students should note the theme on the left side, and must provide evidence from the story that supports it on the right side.
This strategy allows students to discover theme. The theme is revealed by the way characters change in a story, conflicts in the story, and statements made by the narrator or characters.
Theme is the central idea or message and usually inferred. Understanding theme involves understanding plot, characters, and setting.
Most Interesting Character Debate
Students read an historical fiction story and then select or are assigned a character to defend as the most (your choice here: interesting, important, meanest…). In a group, using explicit details and examples from the text, students prepare a defense of their character. Groups then debate, using their information, as to who is the most interesting (or whatever).
This strategy allows students to incorporate narrative structure with argumentative writing.
Students learn to synthesize material read and create an argument piece.

Toolbox for Routine Writing In Illinois, grade levels may or may not have district mandates regarding writing outcomes and lengths. Routine writing could be collected in journals or notebooks to accumulate thinking over time. CONSIDERATIONS: Students should be asked to meet their grade level standards in reading and writing with Standard 10 acting as the guide for rigor in regards to the amount of time spent on a specific piece, (i.e., less time at the beginning of the year and increasing to extended periods of time over the course of the year).
ISBE ELA Foundational Services: Writing To Read, 2016
Strategy Description Purpose Context Additional Resources/Links and Considerations
One Sentence Paraphrase (1SP)
Select a section of text that includes several paragraphs. Read the first paragraph with the class. Cover the paragraph. Ask students to write one sentence—and only one sentence—that reflects their understanding of the paragraph. Share several sentences, looking for similarities and differences. Read the next paragraph and continue the process. After students feel comfortable with the process, have them work independently. (Lawwill, 1999)
Allows students to summarize material read and transform it to their own words.
Any content area can utilize this strategy to synthesize information and identify the most important learning.
Plot Conflict Examination
Students explore picture books to identify the characteristics of four types of conflict: character vs. character, character vs. self, character vs. nature, and character vs. society. Next, students write about conflict in their own lives and look for similarities among all the conflicts shared by the class, ultimately classifying each conflict into one of the four types. Finally, after investigating the compare and contrast format, students conclude with a compare and contrast essay that focuses on two conflicts— one from their own experience and one from a picture book or story that they have read. (Daniels, 2003)
This strategy assists students with comparing and contrasting and the element of conflict in plot development.
Use this strategy to build stamina and fluency of the writing process.
Full lesson idea: http://www.readwritethink.org/classroom-resources/lesson-plans/examining-plot-conflict-through-802.html
Power Writing Power Writing should be used to build writing fluency and stamina by having students generate as many words as they can on a given topic in a set period of time.
When combined with instruction, this strategy builds proficiency and writing volume.
Use this strategy to build stamina and fluency of the writing process.
Attached is a summary of a writing blog adapted from Ryan McCarty.

Toolbox for Routine Writing In Illinois, grade levels may or may not have district mandates regarding writing outcomes and lengths. Routine writing could be collected in journals or notebooks to accumulate thinking over time. CONSIDERATIONS: Students should be asked to meet their grade level standards in reading and writing with Standard 10 acting as the guide for rigor in regards to the amount of time spent on a specific piece, (i.e., less time at the beginning of the year and increasing to extended periods of time over the course of the year).
ISBE ELA Foundational Services: Writing To Read, 2016
Strategy Description Purpose Context Additional Resources/Links and Considerations
Quick Write/ Quick Draw
The teacher selects a topic related to the text being studied and defines the purpose for the Quick Write / Quick Draw. S/He draws a T-chart. On the right side of the organizer, students respond to a question or prompt related to the text by writing down whatever comes to their minds without organizing it too much or worrying about grammar. On the left side of the graphic organizer students are to draw an illustration of the topic.
Gives students the opportunity to reflect on what they have learned. This strategy can help students build stamina for longer, more complex writing.
The idea is for students to write as much as they can during a timed period. The amount of time depends on the age of student as well as the prompt and the standards being addressed.
Links: http://www.readwritethink.org/files/resources/lesson_images/lesson1053/quick_write_draw.pdf http://www.monroe.k12.ky.us/userfiles/1029/file/QuickWriteQuickDraw.pdf Variations: • Summarize what was learned or applied • Explain content concepts or vocabulary • Pose a question that addresses a key point
in the reading selection Reading Response Journals
Reading response journals are informal, written communications between two or more people about something one person has read about. These journals can include personal reactions to, questions about, and reflections on what has been read. Students can respond to what they've read, or, to what has been read to them. Even kindergarten and first grade students can respond to a story using illustrations, scribbles, random letters, and invented spellings.
Journals provide learners with an opportunity to record their personal thoughts, emotions, ideas, questions, reflections, connections, and new learning on what they hear, view, read, write, discuss and think.
Response journals can be implemented at all levels. Response journals can be used with any genre of literature (poetry, short stories, media text, novel studies) and in different content areas that use expository text.
Link for prompts: http://sbo.nn.k12.va.us/library/docs/reader_response_journal_prompts_form.pdf
Retellings
After reading a story and discussing the main events, young students draw pictures on a small piece of paper that show the main events in the book. Write captions for each picture. Have the students put the pictures in the order in which they occurred in the story. Older students write their thoughts in event sequence using descriptive details and effective technique according to standards. .
To capture the key ideas and details in a text.
After students have read material and can summarize key ideas and details in a text.
Link: http://www.readingrockets.org/article/strategies-promote-comprehension Variation using illustrations: K-2 use pictures on yardsticks, timelines, or place ideas in a mystery bag or can and students sequence as pull out. Older students may use comic strips).

Toolbox for Routine Writing In Illinois, grade levels may or may not have district mandates regarding writing outcomes and lengths. Routine writing could be collected in journals or notebooks to accumulate thinking over time. CONSIDERATIONS: Students should be asked to meet their grade level standards in reading and writing with Standard 10 acting as the guide for rigor in regards to the amount of time spent on a specific piece, (i.e., less time at the beginning of the year and increasing to extended periods of time over the course of the year).
ISBE ELA Foundational Services: Writing To Read, 2016
Strategy Description Purpose Context Additional Resources/Links and Considerations
Story Maps Story maps are graphic organizers that allow students to organize their understanding of a story. Templates are filled in and then can be used to summarize a story that has been heard, plan out a new story, or focus on specific elements of narrative writing.
This technique uses visual representations to help students organize important elements of a story to determine theme.
Story Maps are used for teaching students to work with story structure for better comprehension.
Template links: http://www.readingrockets.org/strategies/story_maps http://www.adlit.org/strategies/22736/ Sample: scroll for Alice in Wonderland Example http://tccl.rit.albany.edu/knilt/index.php/Unit_2:Graphic_Organizers
Summary Frames Allow students to answer the summary frame questions based on the structure of the reading they have done. These frames list the main elements of the type of text the teacher has selected. For example, a narrative story’s elements would include the setting, main characters, problem, steps to solve the problem and solution. Students can also end the summary frame with a reason the author may have written the text and what the intended purpose of the text would be. See template link for variety of summary frames.
Summary frames are a series of questions that emphasize the important elements within a text pattern. Students answer the questions, then write summaries based on their responses.
For use with all types of text structures and all grade levels. Throughout the answer to these questions, stress the importance for students to support their answers with evidence from the text.
Template Link: http://writingfix.com/PDFs/RICA_PDFS/summarizing/Summary_Frames.pdf (Scroll for variety of samples and text structures)
Three Column Comparison Chart
The teacher lists specific main events down the middle of a three column chart from a story the class has read. On the left side of the chart list certain characters. The student fills in how those characters responded to the event that is listed in the center. On the right side of the chart, the student reacts to the text and writes their own thoughts to the event in the middle. This could be how the student would react to the event or what they believe the character’s reaction should have been. (Adapted from Marzano, Pickering, & Pollock, 2001)
This strategy distinguishes the point of view of characters from that of the students.
Template Link: https://www.eduplace.com/ss/socsci/books/content/gfxorganizers/graph_3-col.pdf

Toolbox for Routine Writing In Illinois, grade levels may or may not have district mandates regarding writing outcomes and lengths. Routine writing could be collected in journals or notebooks to accumulate thinking over time. CONSIDERATIONS: Students should be asked to meet their grade level standards in reading and writing with Standard 10 acting as the guide for rigor in regards to the amount of time spent on a specific piece, (i.e., less time at the beginning of the year and increasing to extended periods of time over the course of the year).
ISBE ELA Foundational Services: Writing To Read, 2016
Strategy Description Purpose Context Additional Resources/Links and Considerations
Two Column Notes Assign a short selection to be read. List key ideas on the left and questions or details on the right. Using a template, construct your own notes on the selection and share them with your students. Discuss the decisions about certain things noted such as: •What part of text was confusing? •Were illustrations used instead of notes? •Did any sections foster other questions?
This strategy helps students pull the main ideas out of what they read and organize the information effectively. In a way , it is very much like outlining without all of the strict rules of formatting,
Template: http://goms.rocklinusd.org/subsites/Scott-Victor/documents/Reading%20and%20Literature/Two%20Column%20Note%20Taking%20Strategy%20Blank.pdf Samples: http://www.asdk12.org/MiddleLink/HighFive/TwoColumn/TwoColumn_examples.pdf

Toolbox for Routine Writing In Illinois, grade levels may or may not have district mandates regarding writing outcomes and lengths. Routine writing could be collected in journals or notebooks to accumulate thinking over time. CONSIDERATIONS: Students should be asked to meet their grade level standards in reading and writing with Standard 10 acting as the guide for rigor in regards to the amount of time spent on a specific piece, (i.e., less time at the beginning of the year and increasing to extended periods of time over the course of the year).
ISBE ELA Foundational Services: Writing To Read, 2016
Book Commercial Form (Hoyt, 1999)
Name of copywriter for this ad ____________________________________Date_______________________
Media to be used: Radio, television, magazine ad, newspaper ad, other_______________________________
The Book to Be Advertised___________________________________________________________________
Important Characters_______________________________________________________________________
Important Points__________________________________________________________________________
________________________________________________________________________________________
Art for the Ad
My opening question:_____________________________________________________________________
Details for the middle:____________________________________________________________________
An ending that will sell this book!____________________________________________________________
_______________________________________________________________________________________
_______________________________________________________________________________________
_______________________________________________________________________________________
Toolbox for Routine Writing In Illinois, grade levels may or may not have district mandates regarding writing outcomes and lengths. Routine writing could be collected in journals or notebooks to accumulate thinking over time. CONSIDERATIONS: Students should be asked to meet their grade level standards in reading and writing with Standard 10 acting as the guide for rigor in regards to the amount of time spent on a specific piece, (i.e., less time at the beginning of the year and increasing to extended periods of time over the course of the year).
ISBE ELA Foundational Services: Writing To Read, 2016
“If you can read everything your students write,
you’re not assigning enough
writing”- Doug Fisher.
Teachers tend to think about building fluency in terms of reading, but now more than ever, teachers should be helping their students build writing fluency as well. Readers who don’t read fluently devote much of their cognitive energy to decoding individual words and phrases, making it difficult for them to focus on the meaning of what they read. Similarly, students lacking writing fluency devote lots of cognitive energy to forming individual words or basic sentence structures, making it harder for them to focus on conveying their thoughts and feelings effectively.
CCSS Writing Anchor Standard 10 addresses the importance of students writing routinely over extended and shorter time frames for a range of tasks, purposes, and audiences. The PARCC assessment requires students to type at length on demand, constructing a response to a prompt that requires them to read and synthesize multiple documents including videos, articles, and graphs. They’re also often argument prompts.
Many teachers are nervous about these tasks, not just because they are cognitively demanding, but because they worry students won’t write fluently enough to succeed. Students may struggle to generate ideas about an unfamiliar topic, to organize their response, or to generate an entire essay quickly (and with minimal errors). They’ll have to do this without the usual scaffolding or encouragement.
In a recent PD, literacy expert Doug Fisher recommended a simple instructional routine to help address these concerns called Power Writing. Research shows that when combined with instruction, writing proficiency increases when writing volume increases. Power Writing should be used regularly to build writing fluency and stamina by having students generate as many words as they can on a given topic in a set period of time. While similar strategies exist, this approach is versatile and useful as a formative assessment of both writing and content knowledge.
Procedure Step 1: Give students an important vocabulary term or question and write it on the board.
Step 2: Instruct students to write (or type) “as much as they can, as well as they can” for 60 seconds. Have them always write in the same place (writer’s notebook, science notebook, etc. depending on class).
Step 3: At the end of 60 seconds, tell them “pencils up” and ask them to count the overall number of words and tally it in the margin. Have students circle the errors they noticed while rereading their writing.
Step 4: Have students repeat this procedure two more times, giving them a new related vocabulary word or relevant question each time.
Step 5: For each session have them graph the highest number of words they wrote in any one minute period. Have them set goals for the numbers of words they will write in any one-minute period next time.
Step 6: At least once a week, have them choose a previously written entry to revise and extend into a more formal explanatory or argumentative piece for homework.
Power Writing
Toolbox for Routine Writing In Illinois, grade levels may or may not have district mandates regarding writing outcomes and lengths. Routine writing could be collected in journals or notebooks to accumulate thinking over time. CONSIDERATIONS: Students should be asked to meet their grade level standards in reading and writing with Standard 10 acting as the guide for rigor in regards to the amount of time spent on a specific piece, (i.e., less time at the beginning of the year and increasing to extended periods of time over the course of the year).
ISBE ELA Foundational Services: Writing To Read, 2016
Q&A What should I do with the student errors? Pay attention to errors students DON’T circle. Not circling it means they don’t realize it’s an error and need to be taught that skill. Skim the notebooks each week and look for patterns in errors to address in minilessons. How much should I expect students to write per minute? According to Doug Fisher, by the end of fourth grade, good writers can get as high as 40 words per minute. In 9th grade and beyond, many students remain the 40-45 word range, because they are using longer words and conveying more complex ideas. The important thing is growth, not hard and fast norms. Should I subtract errors from their total? I wouldn’t, particularly when you are starting out, as students may be worried about making errors and slow down. As time goes by, you can subtract for errors involving skills that have been extensively taught if you wish. What if students get wise and start writing shorter words to get a higher total? There is always someone trying to outsmart the system! As in reading fluency, emphasize that speed is only one component. The quality of writing and thinking also matters. If you require students to periodically revise their entries, they’ll realize that writing short, choppy words means more revision work in the long run. Can I use this to give students practice with particular skills? Yes. For instance, you can require a particular sentence structure or usage issue such as their, there and they’re you’ve been teaching. Your prompt can target generating a particular text structure, such as compare and contrast. You can also differentiate by adjusting the prompt for more capable writers, adding audience or genre elements. Just take these additional layers into account when judging growth as they may slow students down. Do I have to read everything students write? Absolutely not! Tell students they’re not writing for you to read it, they’re writing because writing is thinking. Skim entries once a week for patterns in errors. Target particular entries to read for a formative assessment of content knowledge. Should I have students share their number of words or their entries? Sure, but keep the emphasis on growth. You can also have students pick their favorite entry and read it to their partner, or pick an entry to revise together. Now get your students writing! The most important thing is to get students writing. What do you do to build writing fluency and stamina in your classroom? Have you tried this or a similar routine? Share your ideas and experiences in the comment section below! Learn more about the Power Writing strategy in Scaffolded Writing Instruction: Teaching Writing Within a Gradual Release Framework (Fisher & Frey, 2007)
This article is adapted from Ryan McCarty’s Blog on Teaching Channel https://www.teachingchannel.org/blog/ausl/2013/12/15/building-writing-fluency-a-simple-routine-for-any-classroom/

Toolbox for Routine Writing In Illinois, grade levels may or may not have district mandates regarding writing outcomes and lengths. Routine writing could be collected in journals or notebooks to accumulate thinking over time. CONSIDERATIONS: Students should be asked to meet their grade level standards in reading and writing with Standard 10 acting as the guide for rigor in regards to the amount of time spent on a specific piece, (i.e., less time at the beginning of the year and increasing to extended periods of time over the course of the year).
ISBE ELA Foundational Services: Writing To Read, 2016