steps taken to implement adfs - people hr · implementing adfs _____ page 3 1. introduction people...
TRANSCRIPT
Implementing ADFS
Version 1.0
Last updated: 10th Nov 2017
Author: Sukhjinder Singh

ImplementingADFS
______________________________________________________
Page2
Table of Contents
INTRODUCTION..............................................................................................................................3
SETUPONADFS..............................................................................................................................4
SETUPONPEOPLEHR....................................................................................................................11

ImplementingADFS
______________________________________________________
Page3
1. Introduction People HR supports Single Sign-on (SSO) authentication in conjunction with identity provided by Active Directory Federation Services (ADFS).
Please note all your users in your active directory will need to have an email address attribute.

ImplementingADFS
______________________________________________________
Page4
2. Setup ADFS The steps below are for ADFS v3.0:
On the ADFS server, open the ADFS Management tool
1. Right click on Relying Party Trust and click ‘Add Relying Party Trust’
2. On the welcome screen, click 'Start'
3. Select the option for ‘Enter data about the relying party manually’ and click 'Next'

ImplementingADFS
______________________________________________________
Page5
4. Enter a Display name and any notes you may want to add, then click 'Next'
5. Make sure ADFS profile is selected, then click 'Next'

ImplementingADFS
______________________________________________________
Page6
6. Under the Configure Certificate section, add a certificate if required, otherwise just click 'Next' to continue
7. Under the section to Configure URL, tick the option to ‘Enable support for the SAML 2.0 WebSSO protocol'
ImplementingADFS
______________________________________________________
Page7
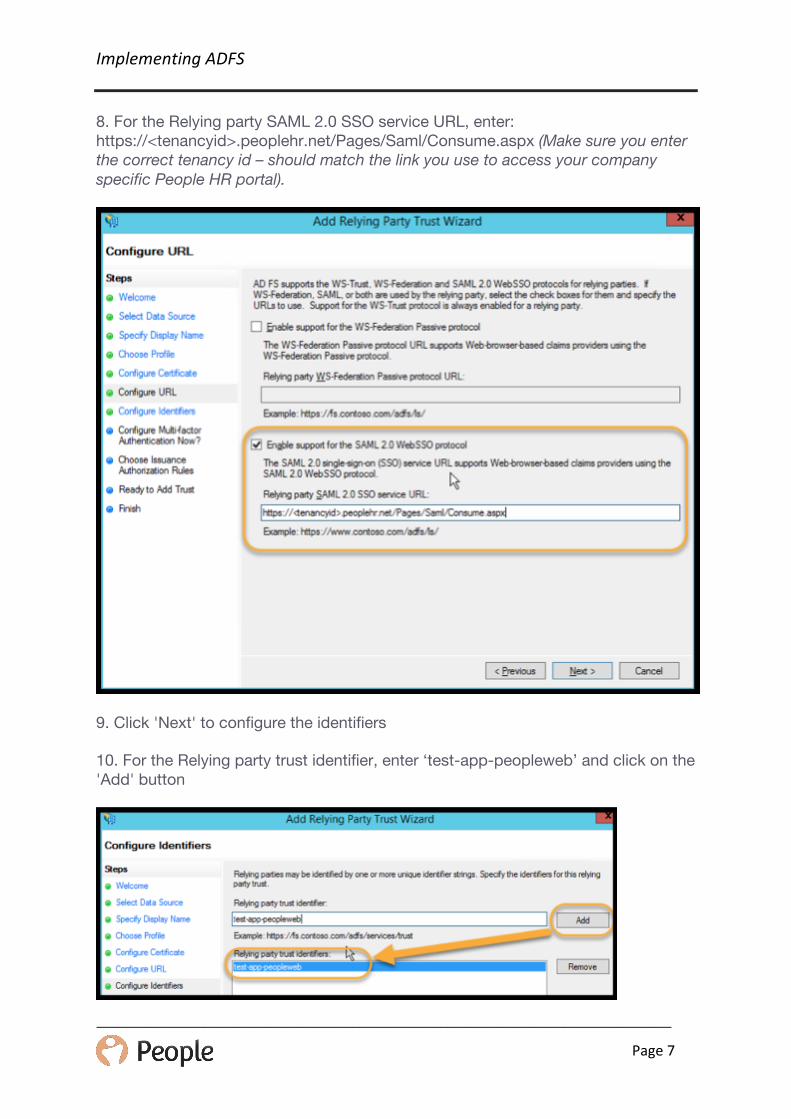
8. For the Relying party SAML 2.0 SSO service URL, enter: https://<tenancyid>.peoplehr.net/Pages/Saml/Consume.aspx (Make sure you enter the correct tenancy id – should match the link you use to access your company specific People HR portal).
9. Click 'Next' to configure the identifiers
10. For the Relying party trust identifier, enter ‘test-app-peopleweb’ and click on the 'Add' button

ImplementingADFS
______________________________________________________
Page8
11. Click 'Next'
12. Ensure ‘I do not want to configure multi-factor authentication settings for this relying party trust at this time’ is selected and click 'Next'
13. Under Choose Issuance Authorisation Rules, ensure ‘Permit all users to access this relying party’ is selected, and click 'Next'
14. Under ready to Add Trust, click 'Next' and then Finish to complete the initial setup.
ImplementingADFS
______________________________________________________
Page9
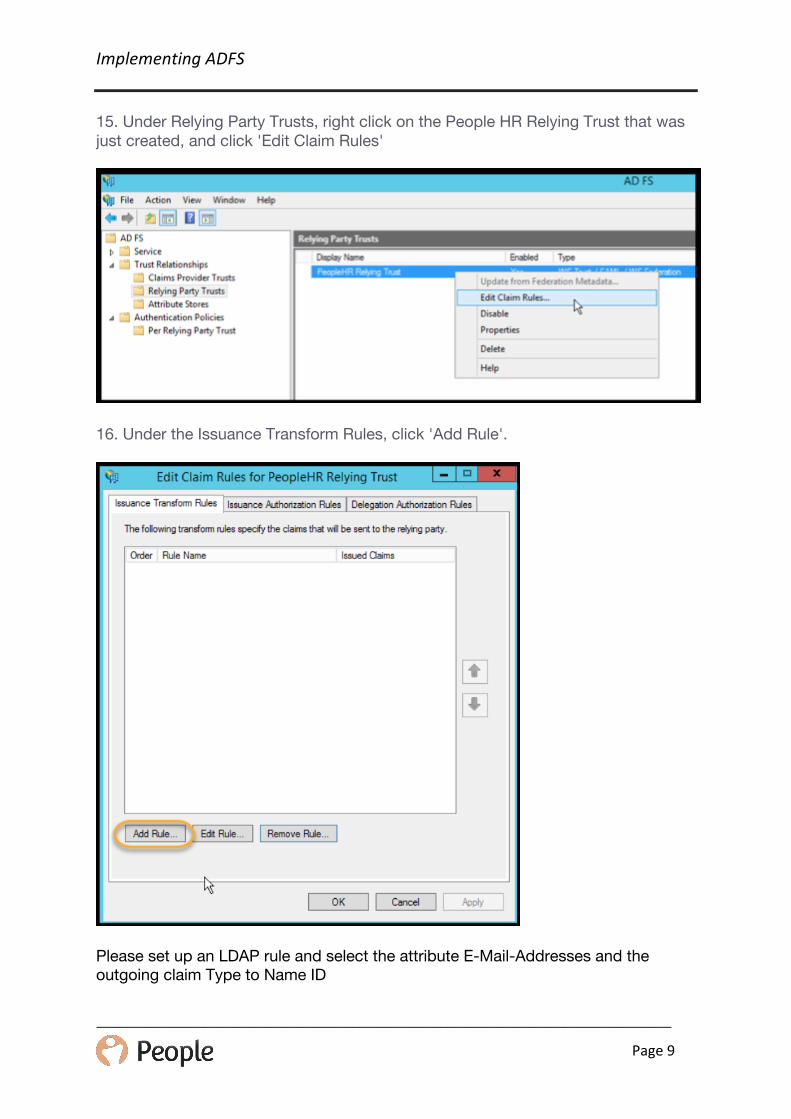
15. Under Relying Party Trusts, right click on the People HR Relying Trust that was just created, and click 'Edit Claim Rules'
16. Under the Issuance Transform Rules, click 'Add Rule'.
Please set up an LDAP rule and select the attribute E-Mail-Addresses and the outgoing claim Type to Name ID
ImplementingADFS
______________________________________________________
Page10
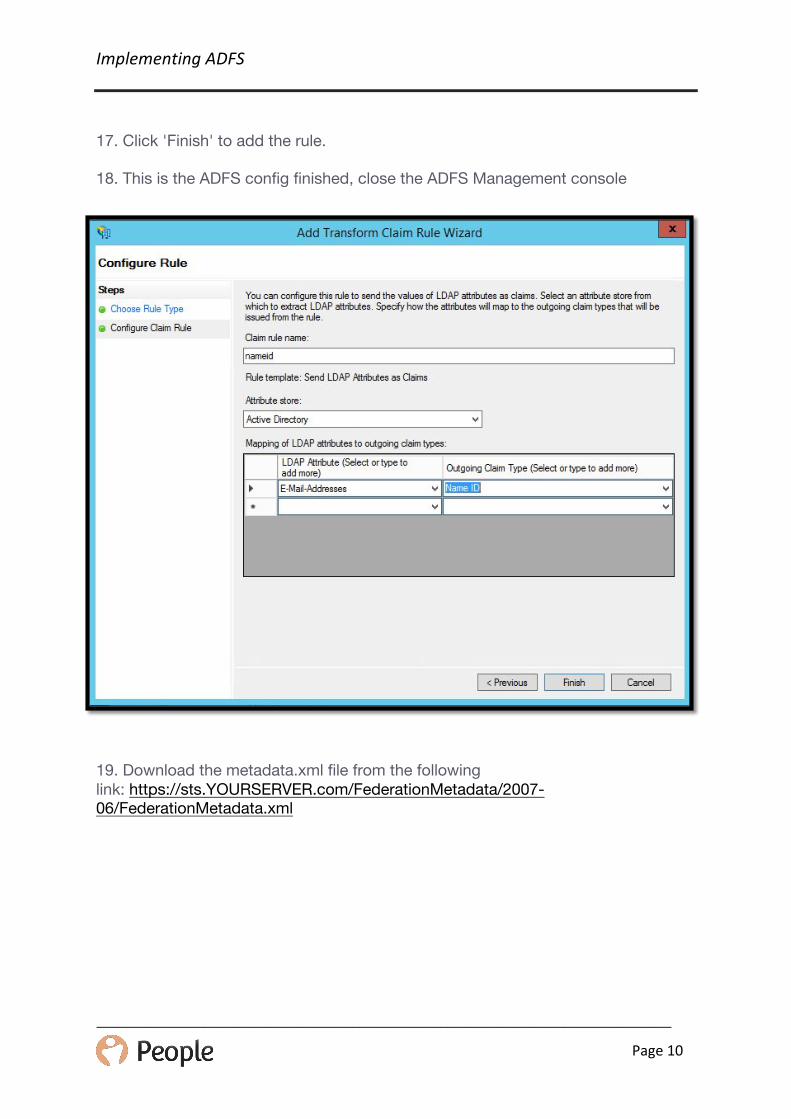
17. Click 'Finish' to add the rule.
18. This is the ADFS config finished, close the ADFS Management console
19. Download the metadata.xml file from the following link: https://sts.YOURSERVER.com/FederationMetadata/2007-06/FederationMetadata.xml
ImplementingADFS
______________________________________________________
Page11
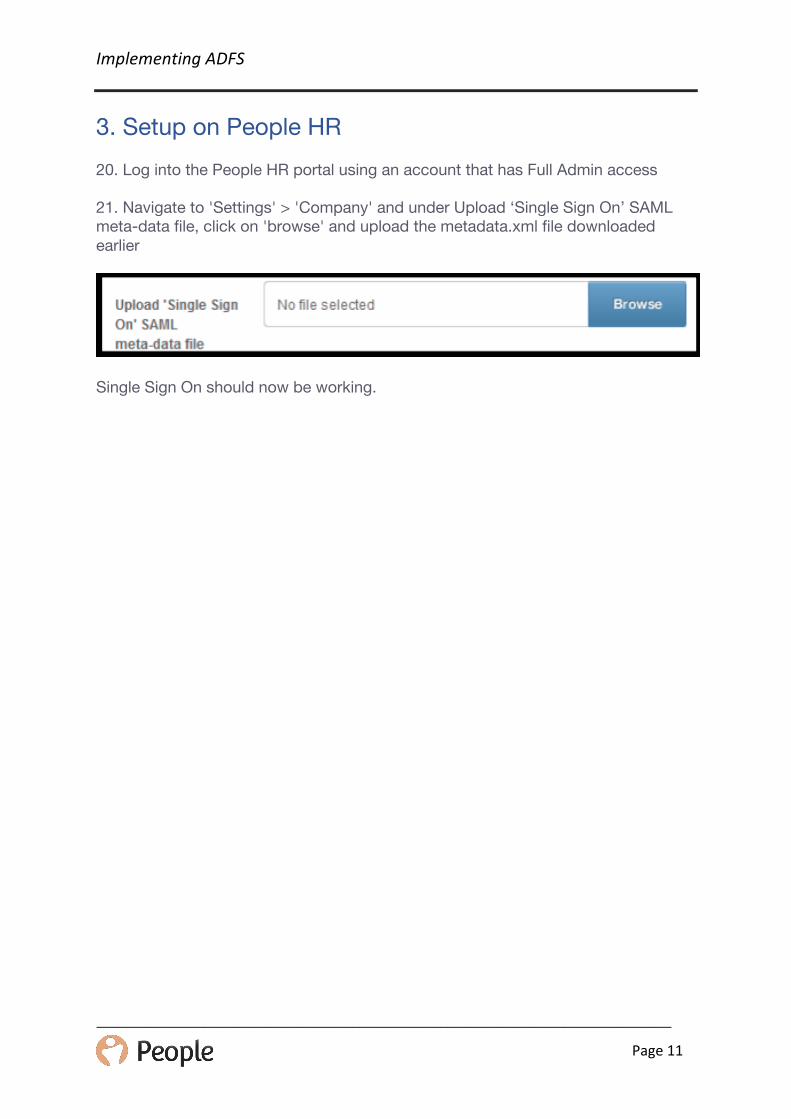
3. Setup on People HR 20. Log into the People HR portal using an account that has Full Admin access
21. Navigate to 'Settings' > 'Company' and under Upload ‘Single Sign On’ SAML meta-data file, click on 'browse' and upload the metadata.xml file downloaded earlier
Single Sign On should now be working.