stem explorations that glow! - minipcr
TRANSCRIPT

P51™ @homeSTEM EXPLORATIONS THAT GLOW!-KT-1100-01
P5
1 @
ho
me ©
20
20
min
iPC
R b
io
P./2
The P51™ is a handheld, blue-light fluorescence viewer
designed to enable students to explore scientific
phenomena in new and innovative ways.
In 1952, an X-ray image of the DNA double helix was
made under the direction of Dr. Rosalind Franklin.
That important image, known as Photo 51,
led scientists to the discovery of DNA’s molecular
structure. The P51TM fluorescence viewer honors
Dr. Franklin’s pioneering work, and provides students
and scientists alike with a way to visualize important
molecules and biological processes.
The P51™ fluorescence viewer has been widely
adopted by science classrooms and is even being
used in cutting edge biology research. Now with
@home from miniPCR bio™, you can make STEM
glow right at home! What will you discover?
P51™ @home
The P51™ fluorescenceviewer

P5
1 @
ho
me ©
20
20
min
iPC
R b
io
P./3
Welcome to the world of fluorescence-Fluorescence is a tool used widely in science and technology. But it is also a fascinating phenomenon in its own right. In this set of activities, using simple tools and everyday, easily
accessible materials, you can explore the world of fluorescence.
Overview of activities -Highlighter highlightsEver wonder how some highlighters can appear so bright? Find the answer here, and in the process, learn about fluorescence
excitation and emission.
Crimson chlorophyllChlorophyll is one of the most important molecules for supporting life on Earth. Use fluorescence to investigate
its energy transfer properties.
Home-glowin’Fluorescence is not limited to highlighters and chlorophyll. Discover fluorescence in common household items. Then, design
a simple experiment based on your observations.
Included in kit0.2 ml tubes 40
1.7 ml tubes 5
Transfer pipettes 10
Plastic grinder 1
Fluorescein solution 1.2 ml
9V battery 1
P51TM fluorescence viewer 1
P51™ @home
P./4
Introduction -What is fluorescence?
If you’ve ever seen a color described as fluorescent, you probably have noticed that it looks brighter than all the colors around it. That’s often because it is. When you see most colors under regular light, you are seeing specific wavelengths of light reflecting back to you. For example, a red color will absorb most wavelengths of light, but will reflect the red wavelengths that you see.
Fluorescence works differently. Fluorescent molecules absorb light energy from specific wavelengths of light and then release some of that energy back out as light of a different color with a longer wavelength. The fluorescent molecules you will look at
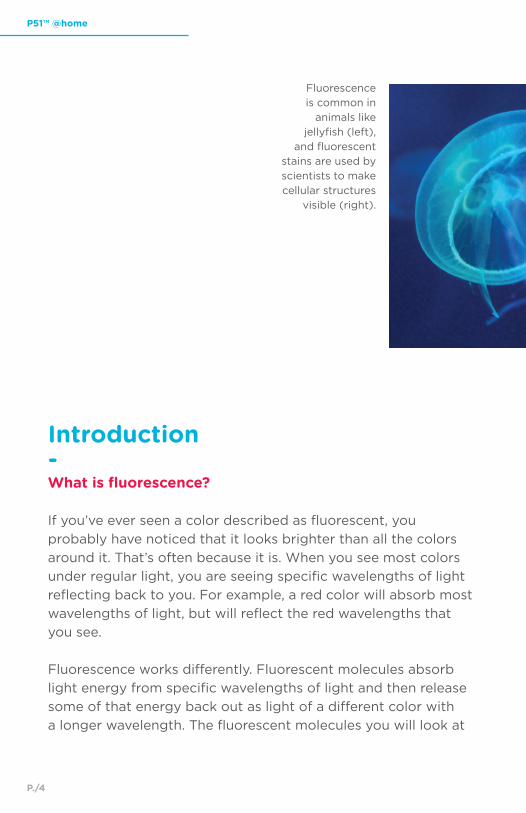
Fluorescence is common in
animals like jellyfish (left),
and fluorescent stains are used by scientists to make cellular structures
visible (right).

P5
1 @
ho
me ©
20
20
min
iPC
R b
io
P./5
in these activities are excited by blue wavelengths of light and then emit green, yellow, or red light. Because these molecules are emitting light rather than simply reflecting it, they appear to glow.
As you will see in today’s activities, fluorescence is everywhere. For example, many molecules found in nature fluoresce. Some organisms, like jellyfish and sea anemones, have evolved to use fluorescence to their advantage, possibly to attract prey. Scientists have harnessed such molecules to visualize structures and processes that are otherwise undetectable. Now, it's your turn to investigate the world of fluorescent molecules!

P51™ @home
P./6
Highlighterhighlights-
P51™ @home
P5
1 @
ho
me ©
20
20
min
iPC
R b
io
P./7
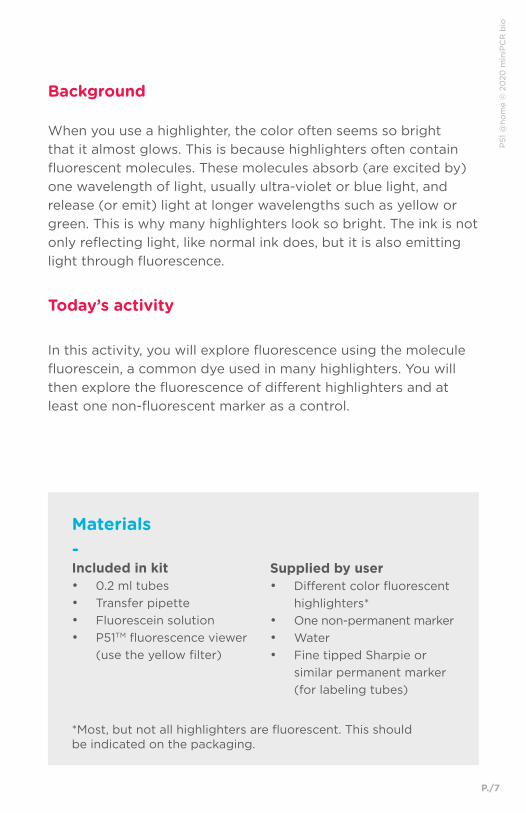
Background
When you use a highlighter, the color often seems so bright that it almost glows. This is because highlighters often contain fluorescent molecules. These molecules absorb (are excited by) one wavelength of light, usually ultra-violet or blue light, and release (or emit) light at longer wavelengths such as yellow or green. This is why many highlighters look so bright. The ink is not only reflecting light, like normal ink does, but it is also emitting light through fluorescence.
Today’s activity
In this activity, you will explore fluorescence using the molecule fluorescein, a common dye used in many highlighters. You will then explore the fluorescence of different highlighters and at least one non-fluorescent marker as a control.
Materials-Included in kit• 0.2 ml tubes • Transfer pipette• Fluorescein solution• P51TM fluorescence viewer
(use the yellow filter)
Supplied by user• Different color fluorescent
highlighters* • One non-permanent marker• Water• Fine tipped Sharpie or
similar permanent marker (for labeling tubes)
*Most, but not all highlighters are fluorescent. This should be indicated on the packaging.

P51™ @home
P./8
Excitation and emission of fluorescein
The figure below shows the excitation and emission spectraof the molecule fluorescein. Excitation refers to how easily a wavelength is absorbed by a molecule. Emission refers to the wavelengths of light that are let off by the molecule—this is the light that you see. The P51™ fluorescence viewer uses blue light (470 nm) for excitation, close to the peak wavelength for exciting fluorescein. Fluorescein emits wavelengths between about 500 nm and 600 nm—mostly green to yellow light.

P5
1 @
ho
me ©
20
20
min
iPC
R b
io
P./9
Procedure
Observe fluorescein:
1. Label a 0.2 ml tube “F” for fluorescein.2. Use a transfer pipette to add some fluorescein to the
tube. A couple of drops should be enough; there is no need to fill the tube more than halfway.
3. Place the tube in the P51™ fluorescence viewer and turn it on.
4. Record your observations in the table on the next page.
Observe highlighters:
For each highlighter or marker you wish to observe, follow these steps:
5. Label a 0.2 ml tube to indicate the color of the highlighter or marker.
6. Press the tip of the highlighter or marker against the inside wall of the tube and rotate the tube to coat the inside of the tube with ink.
7. Use a transfer pipette to add water to the tube. A couple of drops should be enough; there is no need to fill the tube more than halfway.
8. Close the cap; then shake the tube vigorously or flick with your finger repeatedly to mix.
9. Record your observations in the table on the next page.
P51™ @home
P./10
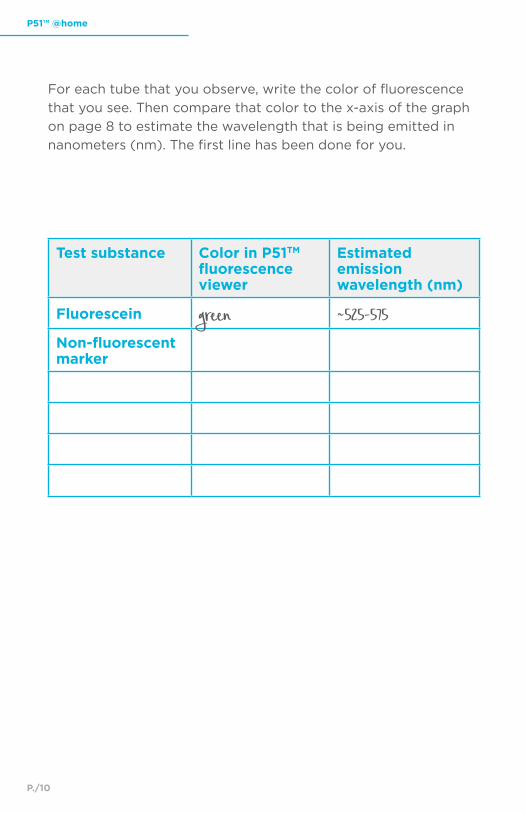
Test substance Color in P51TM fluorescence viewer
Estimated emission wavelength (nm)
Fluorescein green ~525-575Non-fluorescent marker
For each tube that you observe, write the color of fluorescence that you see. Then compare that color to the x-axis of the graph on page 8 to estimate the wavelength that is being emitted in nanometers (nm). The first line has been done for you.
P5
1 @
ho
me ©
20
20
min
iPC
R b
io
P./11
Questions
1. You tried one marker that was not fluorescent alongside the fluorescent highlighters. This non-fluorescent marker serves as a control. Why is it important to include a non-fluorescent marker along with the highlighters?
2. Did the color of the highlighter match the color of the fluorescence that you saw?
3. Did all your highlighters fluoresce?
Go further
Suggested explorations
• Try mixing dyes and observe the results.• Try putting a small piece of paper that you have colored with
highlighter in a tube. How does that compare to your other tubes?
• How hard is it to make the dye from your non-fluorescent marker fluoresce? Is it possible to make it glow by adding one of your other highlighter ink extractions? By adding fluorescein?
• Can you find a substance that dims or completely eliminates the fluorescence of one of your fluorescent dyes?

P51™ @home
P./12
Crimsonchlorophyll-
P51™ @home

P5
1 @
ho
me ©
20
20
min
iPC
R b
io
P./13
Background
Photosynthesis is the process by which plants use solar energy to make their own food. The first step is for plants to capture solar energy using a green pigment called chlorophyll. In an intact leaf, chlorophyll captures solar energy and quickly passes the energy on to other molecules in the chloroplast membrane. This solar energy is ultimately used by the plant to convert atmospheric CO2 into sugars through a series of energy transfers and chemical reactions. Isolated chlorophyll will still absorb light energy, but it cannot stably store this energy. Some of the absorbed energy is released as heat, and some is released as light of a different wavelength. Molecules like chlorophyll that absorb energy from certain wavelengths of light and then emit some of that energy as different wavelengths of light are referred to as fluorescent.
Today’s activity First, you will grind a leaf to release some of the chlorophyll. Then you will compare this isolated chlorophyll to chlorophyll in an intact leaf.
Materials-Included in kit: • 0.2 ml plastic tubes • 1.7 ml plastic tube • Plastic grinder • Transfer pipettes • P51TM fluorescence
viewer (use the orange
filter)
Supplied by user:• Baby spinach leaf*• 100% acetone (available
from a drugstore as nail polish remover—the solution should be clear)
• Fine-tipped Sharpie or similar permanent marker (for labeling tubes)
*Any green leaf should work, but baby spinach works particularly well

P51™ @home
P./14
Procedure
Extract chlorophyll:
1. Tear a small piece (approximately 1 cm x 1 cm) of baby spinach and place it in a 1.7 ml plastic tube.
2. Use a transfer pipette to add approximately 0.5 ml acetone to the tube. The tube has volume markings on the side that you can use to measure the volume.
3. Use the grinder to smash the leaf until the solution is green. When done, the solution should look green but ideally not be too cloudy from debris.
4. Let the contents of the tube sit for one minute to allow larger solid pieces to settle.
pipette leafextract from top
leaf debris
E S L
5. Label 0.2 ml tubes “E,” “S,” and “L.”6. Add samples to tubes.
7. Place each tube in the P51TM fluorescence viewer and turn it on.
8. Record your observations in the table on the right.
a. Use a transfer pipette to add your leaf extract to the tube labeled “E.” Pick up solution from the top layer, avoiding solids as much as possible. A couple of drops should be enough; there is no need to fill the tube more than halfway.
b. Use a transfer pipette to add acetone to the tube labeled “S.” A couple of drops should be enough; there is no need to fill the tube more than halfway.
c. Place a small piece of spinach in the tube labeled “L.”
Observe chlorophyll fluorescence:

P5
1 @
ho
me ©
20
20
min
iPC
R b
io
P./15
Tube Color in ambient light
Color in P51™ fluorescence viewer
Leaf extract (E)
Solvent only (S)
Leaf only (L)
Questions
1. Chlorophyll can absorb light energy, but it can’t store it. How this energy is released depends on whether or not the chlorophyll is inside a leaf cell.
2. Based on your answer to question 1, why would it be bad for the plant if chlorophyll in an intact leaf released a lot of fluorescent light?
Go further Not all leaves are green. You’ve now observed the green pigment chlorophyll from baby spinach. Try this experiment with different leaves. Some suggestions: orange or red leaves collectedin the fall, red or purple leaves from a Japanese maple tree, purple vs. green cabbage.
- How is the energy released when chlorophyll is in an intact leaf?
- How is the energy released when chlorophyll is isolated?

P51™ @home
P./16
Home-glowin’-
P51™ @home

P5
1 @
ho
me ©
20
20
min
iPC
R b
io
P./17
Background
Milk, petroleum jelly, ketchup, vitamin B. This list might seem random, but each of these household substances is fluorescent. Fluorescent molecules absorb energy from certain wavelengths of light and then emit that energy as different wavelengths of light. Many molecules are naturally fluorescent, but we don’t notice because we don’t view the molecules under the right lighting conditions.
Today’s activity
You will use the P51TM fluorescence viewer to test household items for fluorescence. The P51TM fluorescence viewer has a powerful blue light to excite fluorescent molecules and a filter which allows you to more easily see the emitted fluorescent light. Open your eyes to the fluorescent world around you!
Materials-Included in kit: • 0.2 ml plastic tubes • 1.7 ml plastic tube• Plastic grinder• Transfer pipettes • P51TM fluorescence
viewer (use the orange filter)
Supplied by user:• Household substances
to test• Fine tipped Sharpie
or similar permanent marker (for labeling tubes)
• Toothpicks• Isopropyl alcohol
or acetone (optional)
P51™ @home
P./18
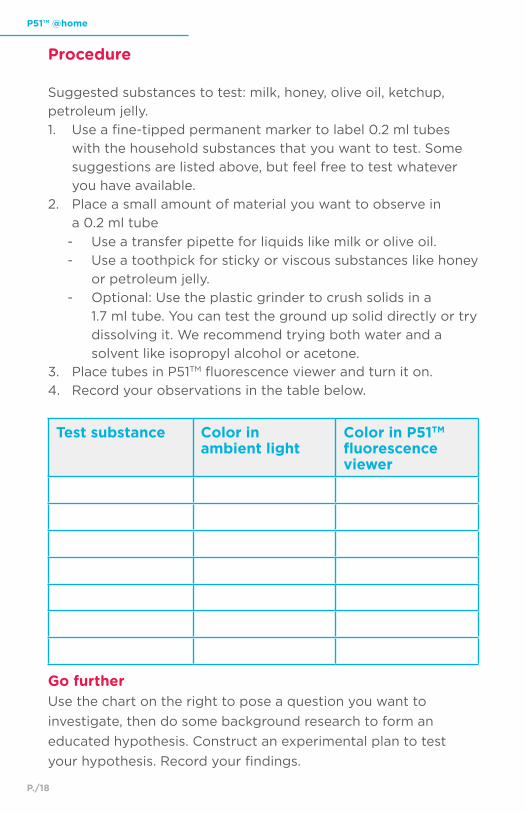
Go further Use the chart on the right to pose a question you want to
investigate, then do some background research to form an
educated hypothesis. Construct an experimental plan to test
your hypothesis. Record your findings.
Procedure
Suggested substances to test: milk, honey, olive oil, ketchup, petroleum jelly. 1. Use a fine-tipped permanent marker to label 0.2 ml tubes
with the household substances that you want to test. Some suggestions are listed above, but feel free to test whatever you have available.
2. Place a small amount of material you want to observe in a 0.2 ml tube
3. Place tubes in P51TM fluorescence viewer and turn it on.4. Record your observations in the table below.
Test substance Color in ambient light
Color in P51TM
fluorescence viewer
- Use a transfer pipette for liquids like milk or olive oil. - Use a toothpick for sticky or viscous substances like honey
or petroleum jelly. - Optional: Use the plastic grinder to crush solids in a
1.7 ml tube. You can test the ground up solid directly or try dissolving it. We recommend trying both water and a solvent like isopropyl alcohol or acetone.
P5
1 @
ho
me ©
20
20
min
iPC
R b
io
P./19
EXPERIMENTAL FRAMING
EXPERIMENTAL PLAN
EXPERIMENTAL RESULTS
Question for investigation:
Materials: Procedure:
Observations:
Conclusions:
Hypothesis:
Notes from background research:
Suggested explorations
• The red fluorescence of some olive oils is due to chlorophyll in the oil. Will different types of olive oil or other cooking oils differ in their fluorescence?
• Do dairy-free milk substitutes fluoresce like real milk does?

P51 @home ©2020 miniPCR bio www.minipcr.com