solaris1010/09installation guide:customjumpstartand
TRANSCRIPT

Solaris 10 10/09 InstallationGuide: Custom JumpStart andAdvanced Installations
Sun Microsystems, Inc.4150 Network CircleSanta Clara, CA 95054U.S.A.
Part No: 821–0437–10October 2009
Copyright 2009 Sun Microsystems, Inc. 4150 Network Circle, Santa Clara, CA 95054 U.S.A. All rights reserved.
Sun Microsystems, Inc. has intellectual property rights relating to technology embodied in the product that is described in this document. In particular, and withoutlimitation, these intellectual property rights may include one or more U.S. patents or pending patent applications in the U.S. and in other countries.
U.S. Government Rights – Commercial software. Government users are subject to the Sun Microsystems, Inc. standard license agreement and applicable provisionsof the FAR and its supplements.
This distribution may include materials developed by third parties.
Parts of the product may be derived from Berkeley BSD systems, licensed from the University of California. UNIX is a registered trademark in the U.S. and othercountries, exclusively licensed through X/Open Company, Ltd.
Sun, Sun Microsystems, the Sun logo, the Solaris logo, the Java Coffee Cup logo, docs.sun.com, Java, and Solaris are trademarks or registered trademarks of SunMicrosystems, Inc. or its subsidiaries in the U.S. and other countries. All SPARC trademarks are used under license and are trademarks or registered trademarks ofSPARC International, Inc. in the U.S. and other countries. Products bearing SPARC trademarks are based upon an architecture developed by Sun Microsystems, Inc.
The OPEN LOOK and SunTM Graphical User Interface was developed by Sun Microsystems, Inc. for its users and licensees. Sun acknowledges the pioneering effortsof Xerox in researching and developing the concept of visual or graphical user interfaces for the computer industry. Sun holds a non-exclusive license from Xerox tothe Xerox Graphical User Interface, which license also covers Sun's licensees who implement OPEN LOOK GUIs and otherwise comply with Sun's written licenseagreements.
Products covered by and information contained in this publication are controlled by U.S. Export Control laws and may be subject to the export or import laws inother countries. Nuclear, missile, chemical or biological weapons or nuclear maritime end uses or end users, whether direct or indirect, are strictly prohibited. Exportor reexport to countries subject to U.S. embargo or to entities identified on U.S. export exclusion lists, including, but not limited to, the denied persons and speciallydesignated nationals lists is strictly prohibited.
DOCUMENTATION IS PROVIDED “AS IS” AND ALL EXPRESS OR IMPLIED CONDITIONS, REPRESENTATIONS AND WARRANTIES, INCLUDING ANYIMPLIED WARRANTY OF MERCHANTABILITY, FITNESS FOR A PARTICULAR PURPOSE OR NON-INFRINGEMENT, ARE DISCLAIMED, EXCEPT TOTHE EXTENT THAT SUCH DISCLAIMERS ARE HELD TO BE LEGALLY INVALID.
Copyright 2009 Sun Microsystems, Inc. 4150 Network Circle, Santa Clara, CA 95054 U.S.A. Tous droits réservés.
Sun Microsystems, Inc. détient les droits de propriété intellectuelle relatifs à la technologie incorporée dans le produit qui est décrit dans ce document. En particulier,et ce sans limitation, ces droits de propriété intellectuelle peuvent inclure un ou plusieurs brevets américains ou des applications de brevet en attente aux Etats-Uniset dans d'autres pays.
Cette distribution peut comprendre des composants développés par des tierces personnes.
Certaines composants de ce produit peuvent être dérivées du logiciel Berkeley BSD, licenciés par l'Université de Californie. UNIX est une marque déposée auxEtats-Unis et dans d'autres pays; elle est licenciée exclusivement par X/Open Company, Ltd.
Sun, Sun Microsystems, le logo Sun, le logo Solaris, le logo Java Coffee Cup, docs.sun.com, Java et Solaris sont des marques de fabrique ou des marques déposées deSun Microsystems, Inc., ou ses filiales, aux Etats-Unis et dans d'autres pays. Toutes les marques SPARC sont utilisées sous licence et sont des marques de fabrique oudes marques déposées de SPARC International, Inc. aux Etats-Unis et dans d'autres pays. Les produits portant les marques SPARC sont basés sur une architecturedéveloppée par Sun Microsystems, Inc.
L'interface d'utilisation graphique OPEN LOOK et Sun a été développée par Sun Microsystems, Inc. pour ses utilisateurs et licenciés. Sun reconnaît les efforts depionniers de Xerox pour la recherche et le développement du concept des interfaces d'utilisation visuelle ou graphique pour l'industrie de l'informatique. Sun détientune licence non exclusive de Xerox sur l'interface d'utilisation graphique Xerox, cette licence couvrant également les licenciés de Sun qui mettent en place l'interfaced'utilisation graphique OPEN LOOK et qui, en outre, se conforment aux licences écrites de Sun.
Les produits qui font l'objet de cette publication et les informations qu'il contient sont régis par la legislation américaine en matière de contrôle des exportations etpeuvent être soumis au droit d'autres pays dans le domaine des exportations et importations. Les utilisations finales, ou utilisateurs finaux, pour des armes nucléaires,des missiles, des armes chimiques ou biologiques ou pour le nucléaire maritime, directement ou indirectement, sont strictement interdites. Les exportations ouréexportations vers des pays sous embargo des Etats-Unis, ou vers des entités figurant sur les listes d'exclusion d'exportation américaines, y compris, mais de manièrenon exclusive, la liste de personnes qui font objet d'un ordre de ne pas participer, d'une façon directe ou indirecte, aux exportations des produits ou des services quisont régis par la legislation américaine en matière de contrôle des exportations et la liste de ressortissants spécifiquement designés, sont rigoureusement interdites.
LA DOCUMENTATION EST FOURNIE "EN L'ETAT" ET TOUTES AUTRES CONDITIONS, DECLARATIONS ET GARANTIES EXPRESSES OU TACITESSONT FORMELLEMENT EXCLUES, DANS LA MESURE AUTORISEE PAR LA LOI APPLICABLE, Y COMPRIS NOTAMMENT TOUTE GARANTIEIMPLICITE RELATIVE A LA QUALITE MARCHANDE, A L'APTITUDE A UNE UTILISATION PARTICULIERE OU A L'ABSENCE DE CONTREFACON.
090820@22749

Contents
Preface .....................................................................................................................................................9
Part I Using Custom JumpStart ................................................................................................................... 13
1 Where to Find Solaris Installation Planning Information ............................................................ 15Where to Find Planning and System Requirement Information .................................................. 15
2 Custom JumpStart (Overview) ..........................................................................................................17Custom JumpStart Introduction ....................................................................................................... 17
Custom JumpStart Example Scenario ....................................................................................... 17How the JumpStart Program Installs Solaris Software .................................................................... 18
3 Preparing Custom JumpStart Installations (Tasks) ....................................................................... 23Task Map: Preparing Custom JumpStart Installations ................................................................... 23Creating a Profile Server for Networked Systems ............................................................................ 25
▼ To Create a JumpStart Directory on a Server ............................................................................ 25Allowing All Systems Access to the Profile Server ................................................................... 27
Creating a Profile Diskette for Standalone Systems ........................................................................ 29▼ SPARC: To Create a Profile Diskette .......................................................................................... 29▼ x86: To Create a Profile Diskette With GRUB .......................................................................... 31
Creating the rules File ....................................................................................................................... 33Syntax of the rules File ............................................................................................................... 33
▼ To Create a rules File ................................................................................................................. 34rules File Example ...................................................................................................................... 35
Creating a Profile ................................................................................................................................. 36Syntax of Profiles .......................................................................................................................... 37
▼ To Create a Profile ........................................................................................................................ 37
3

Profile Examples ........................................................................................................................... 38Testing a Profile ................................................................................................................................... 49
▼ To Create a Temporary Solaris Environment to Test a Profile ............................................... 50▼ To Test a Profile ............................................................................................................................ 51
Profile Test Examples .................................................................................................................. 53Validating the rules File .................................................................................................................... 54
▼ To Validate the rules File ........................................................................................................... 54
4 Using Optional Custom JumpStart Features (Tasks) ..................................................................... 57Creating Begin Scripts ........................................................................................................................ 57
Important Information About Begin Scripts ............................................................................ 58Creating Derived Profiles With a Begin Script ......................................................................... 58
Creating Finish Scripts ........................................................................................................................ 59Important Information About Finish Scripts ........................................................................... 60
▼ To Add Files With a Finish Script .............................................................................................. 60Adding Packages or Patches With a Finish Script .................................................................... 61Customizing the Root Environment With a Finish Script ...................................................... 63Setting a System's Root Password With a Finish Script ........................................................... 64Non-Interactive Installations With Finish Scripts ................................................................... 65
Creating a Compressed Configuration File ...................................................................................... 66▼ To Create a Compressed Configuration File ............................................................................ 66
Compressed Configuration File Example ................................................................................. 67Creating Disk Configuration Files ..................................................................................................... 67
▼ SPARC: To Create a Disk Configuration File ........................................................................... 67SPARC: Disk Configuration File Example ................................................................................ 68
▼ x86: To Create a Disk Configuration File .................................................................................. 69x86: Disk Configuration File Example ....................................................................................... 70
Using a Site-Specific Installation Program ....................................................................................... 73
5 Creating Custom Rule and Probe Keywords (Tasks) ...................................................................... 75Probe Keywords ................................................................................................................................... 75Creating a custom_probes File .......................................................................................................... 76
Syntax of the custom_probes File .............................................................................................. 76Syntax of Function Names in custom_probes .......................................................................... 76
▼ To Create a custom_probes File ................................................................................................. 77
Contents
Solaris 10 10/09 Installation Guide: Custom JumpStart and Advanced Installations • October 20094

Examples of a custom_probes File and Keyword .................................................................... 77Validating the custom_probes File ................................................................................................... 78
▼ To Validate the custom_probes File .......................................................................................... 79
6 Performing a Custom JumpStart Installation (Tasks) ................................................................... 81Limitations for a JumpStart Installation ........................................................................................... 81SPARC: Task Map: Setting Up a System for a Custom JumpStart Installation ............................ 83SPARC: Performing a Custom JumpStart Installation .................................................................... 84
▼ To Prepare to Install a Solaris Flash Archive With a Custom JumpStart Installation .......... 84▼ SPARC: To Perform an Installation or Upgrade With the Custom JumpStart Program .... 86
SPARC: Command Reference for the boot Command ........................................................... 87x86: Task Map: Setting Up a System for a Custom JumpStart Installation ................................... 89x86: Performing a Custom JumpStart Installation .......................................................................... 90
▼ x86: To Perform an Installation or Upgrade With the Custom JumpStart Program and WithGRUB ............................................................................................................................................ 90x86: Performing a Custom JumpStart Installation by Editing the GRUB BootCommand ..................................................................................................................................... 92x86: Command Reference for Booting the System .................................................................. 94
7 Installing With Custom JumpStart (Examples) ............................................................................... 97Sample Site Setup ................................................................................................................................. 97Create an Install Server ....................................................................................................................... 99x86: Create a Boot Server for Marketing Systems .......................................................................... 100Create a JumpStart Directory ........................................................................................................... 101Share the JumpStart Directory ......................................................................................................... 101SPARC: Create the Engineering Group's Profile ........................................................................... 102x86: Create the Marketing Group's Profile ..................................................................................... 102Update the rules File ........................................................................................................................ 103Validate the rules File ...................................................................................................................... 103SPARC: Set Up Engineering Systems to Install From the Network ............................................. 104x86: Set Up Marketing Systems to Install From the Network ....................................................... 104SPARC: Boot the Engineering Systems and Install Solaris Software ........................................... 105x86: Boot the Marketing Systems and Install Solaris Software ..................................................... 106
Contents
5

8 Custom JumpStart (Reference) .......................................................................................................107Rule Keywords and Values ............................................................................................................... 107Profile Keywords and Values ........................................................................................................... 111
Profile Keywords Quick Reference .......................................................................................... 112Profile Keyword Descriptions and Examples ......................................................................... 113
Custom JumpStart Environment Variables ................................................................................... 155Probe Keywords and Values ............................................................................................................. 157
9 Installing a ZFS Root Pool With JumpStart ................................................................................... 159What's New in the Solaris 10 10/09 Release .................................................................................... 159JumpStart Installation for a ZFS Root (/) File System (Overview and Planning) ...................... 160
Limitations for a JumpStart installation for a ZFS Root Pool ............................................... 160JumpStart Profile Examples for a ZFS Root Pool ........................................................................... 161JumpStart Keywords for a ZFS Root (/) File System (Reference) ................................................ 165
bootenv Profile Keyword (ZFS and UFS) ............................................................................... 166install_type Keyword (ZFS and UFS) ................................................................................. 166pool Profile Keyword (ZFS Only) ............................................................................................ 167root_device Profile Keyword (ZFS and UFS) ....................................................................... 168
Additional Resources ........................................................................................................................ 169
Part II Appendixes .........................................................................................................................................171
A Troubleshooting (Tasks) ...................................................................................................................173Problems With Setting Up Network Installations ......................................................................... 173Problems With Booting a System .................................................................................................... 174
Booting From Media, Error Messages ..................................................................................... 174Booting From Media, General Problems ................................................................................ 175Booting From the Network, Error Messages .......................................................................... 176Booting From the Network, General Problems ...................................................................... 179
Initial Installation of the Solaris OS ................................................................................................. 179▼ x86: To Check IDE Disk for Bad Blocks .................................................................................. 180
Upgrading the Solaris OS ................................................................................................................. 182Upgrading, Error Messages ...................................................................................................... 182Upgrading, General Problems .................................................................................................. 183
Contents
Solaris 10 10/09 Installation Guide: Custom JumpStart and Advanced Installations • October 20096

▼ To Continue Upgrading After a Failed Upgrade ................................................................... 185x86: Problems With Solaris Live Upgrade When You Use GRUB ....................................... 185
▼ System Panics When Upgrading With Solaris Live Upgrade Running Veritas VxVm ..... 187x86: Service Partition Not Created by Default on Systems With No Existing ServicePartition ...................................................................................................................................... 189
▼ To Install Software From a Network Installation Image or From the Solaris OperatingSystem DVD ............................................................................................................................... 189
▼ To Install From the Solaris Software - 1 CD or From a Network Installation Image ......... 190
B Additional SVR4 Packaging Requirements (Reference) ............................................................. 191Preventing Modification of the Current OS ................................................................................... 191
Using Absolute Paths ................................................................................................................. 191Using the pkgadd -R Command ............................................................................................... 192Differences Between $PKG_INSTALL_ROOT and $BASEDIR Overview ................................... 192Guidelines for Writing Scripts .................................................................................................. 193Maintaining Diskless Client Compatibility ............................................................................ 193Verifying Packages ..................................................................................................................... 194
Preventing User Interaction When Installing or Upgrading ....................................................... 195Setting Package Parameters For Zones ........................................................................................... 196For Background Information ........................................................................................................... 199
Glossary .............................................................................................................................................. 201
Index ................................................................................................................................................... 213
Contents
7

8

Preface
This book describes how to install and upgrade the SolarisTM Operating System (OS) on bothnetworked and nonnetworked SPARC® and x86 architecture based systems. This book coversusing the custom JumpStart installation method and the creation of RAID-1 volumes duringinstallation.
This book does not include instructions about how to set up system hardware or otherperipherals.
Note – This Solaris release supports systems that use the SPARC and x86 families of processorarchitectures: UltraSPARC®, SPARC64, AMD64, Pentium, and Xeon EM64T. The supportedsystems appear in the Solaris OS: Hardware Compatibility Lists at http://www.sun.com/bigadmin/hcl. This document cites any implementation differences between the platformtypes.
In this document these x86 related terms mean the following:
■ “x86” refers to the larger family of 64-bit and 32-bit x86 compatible products.■ “x64” points out specific 64-bit information about AMD64 or EM64T systems.■ “32-bit x86” points out specific 32-bit information about x86 based systems.
For supported systems, see the Solaris OS: Hardware Compatibility Lists.
Who Should Use This BookThis book is intended for system administrators responsible for installing the Solaris OS. Thisbook provides both of the following types of information.
■ Advanced Solaris installation information for enterprise system administrators whomanage multiple Solaris machines in a networked environment
■ Basic Solaris installation information for system administrators who perform infrequentSolaris installations or upgrades
9

Related BooksTable P–1 lists documentation for system administrators.
TABLE P–1 Are You a System Administrator Who is Installing Solaris?
Description Information
Do you need system requirements or high-level planning information?Or want a high-level overview of Solaris ZFSTM installations, booting,Solaris Zones partitioning technology, or creating RAID-1 volumes?
Solaris 10 10/09 Installation Guide: Planning for Installationand Upgrade
Do you need to install a single system from DVD or CD media? TheSolaris installation program steps you through an installation.
Solaris 10 10/09 Installation Guide: Basic Installations
Do you need to upgrade or patch your system with almost nodowntime? Save system downtime when upgrading by using SolarisLive Upgrade.
Solaris 10 10/09 Installation Guide: Solaris Live Upgrade andUpgrade Planning
Do you need to install a secure installation over the network or Internet?Use WAN boot to install a remote client. Or, do you need to install overthe network from a network installation image? The Solaris installationprogram steps you through an installation.
Solaris 10 10/09 Installation Guide: Network-BasedInstallations
Do you need to install or patch multiple systems quickly? Use SolarisFlashTM software to create a Solaris Flash archive and install a copy ofthe OS on clone systems.
Solaris 10 10/09 Installation Guide: Solaris Flash Archives(Creation and Installation)
Do you need to back up your system? Chapter 23, “Backing Up and Restoring UFS File Systems(Overview),” in System Administration Guide: Devices andFile Systems
Do you need troubleshooting information, a list of known problems, ora list of patches for this release?
Solaris Release Notes
Do you need to verify that your system works on Solaris? SPARC: Solaris Sun Hardware Platform Guide
Do you need to check on which packages have been added, removed, orchanged in this release?
Solaris Package List
Do you need to verify that your system and devices work with SolarisSPARC and x86 based systems and other third-party vendors.
Solaris Hardware Compatibility List for x86 Platforms
Documentation, Support, and TrainingThe Sun web site provides information about the following additional resources:
■ Documentation (http://www.sun.com/documentation/)■ Support (http://www.sun.com/support/)■ Training (http://www.sun.com/training/)
Preface
Solaris 10 10/09 Installation Guide: Custom JumpStart and Advanced Installations • October 200910

Sun Welcomes Your CommentsSun is interested in improving its documentation and welcomes your comments andsuggestions. To share your comments, go to http://docs.sun.com and click Feedback.
Typographic ConventionsThe following table describes the typographic conventions that are used in this book.
TABLE P–2 Typographic Conventions
Typeface Meaning Example
AaBbCc123 The names of commands, files, and directories,and onscreen computer output
Edit your .login file.
Use ls -a to list all files.
machine_name% you have mail.
AaBbCc123 What you type, contrasted with onscreencomputer output
machine_name% su
Password:
aabbcc123 Placeholder: replace with a real name or value The command to remove a file is rmfilename.
AaBbCc123 Book titles, new terms, and terms to beemphasized
Read Chapter 6 in the User's Guide.
A cache is a copy that is storedlocally.
Do not save the file.
Note: Some emphasized itemsappear bold online.
Shell Prompts in Command ExamplesThe following table shows the default UNIX® system prompt and superuser prompt for the Cshell, Bourne shell, and Korn shell.
TABLE P–3 Shell Prompts
Shell Prompt
C shell machine_name%
C shell for superuser machine_name#
Preface
11

TABLE P–3 Shell Prompts (Continued)Shell Prompt
Bourne shell and Korn shell $
Bourne shell and Korn shell for superuser #
Preface
Solaris 10 10/09 Installation Guide: Custom JumpStart and Advanced Installations • October 200912

Using Custom JumpStartThis part provides instructions for creating, preparing, and performing custom JumpStartinstallations.
P A R T I
13

14

Where to Find Solaris Installation PlanningInformation
This book provides information on how to use the automated JumpStart installation programto install the Solaris operating system. This book provides all you need to know about installingwith the JumpStart program, but a planning book in our collection of installationdocumentation might be useful to read before you begin preparing for a JumpStart installation.The following references provide useful information before you install your system.
Where to Find Planning and System Requirement InformationThe Solaris 10 10/09 Installation Guide: Planning For Installation and Upgrade provides systemrequirements and high-level planning information, such as planning guidelines for file systems,and upgrade planning and much more. This section provides an overview of the chapters forthis book.
Chapter Descriptions From the Planning Guide Reference
This chapter describes new features in the Solaris installation programs. Chapter 2, “What’s New in Solaris Installation,” inSolaris 10 10/09 Installation Guide: Planning forInstallation and Upgrade
This chapter provides you with information about decisions you need to makebefore you install or upgrade the Solaris OS. Examples are deciding when to use anetwork installation image or DVD media and descriptions of all the Solarisinstallation programs.
Chapter 3, “Solaris Installation and Upgrade(Roadmap),” in Solaris 10 10/09 Installation Guide:Planning for Installation and Upgrade
This chapter describes system requirements to install or upgrade to the SolarisOS. General guidelines for planning the disk space and default swap spaceallocation are also provided. Upgrade limitations are also described.
Chapter 4, “System Requirements, Guidelines, andUpgrade (Planning),” in Solaris 10 10/09Installation Guide: Planning for Installation andUpgrade
1C H A P T E R 1
15

Chapter Descriptions From the Planning Guide Reference
This chapter contains checklists to help you gather all of the information that youneed to install or upgrade your system. This information is useful, for example, ifyou are performing an interactive installation. You'll have all the information inthe checklist that you'll need to do an interactive installation.
Chapter 5, “Gathering Information BeforeInstallation or Upgrade (Planning),” inSolaris 10 10/09 Installation Guide: Planning forInstallation and Upgrade
These chapters provide overviews of several technologies that relate to a SolarisOS installation or upgrade. Guidelines and requirements related to thesetechnologies are also included. These chapters include information about ZFSinstallations, booting, Solaris Zones partitioning technology, and RAID-1volumes that can be created at installation.
Part II, “Understanding Installations That Relateto ZFS, Booting, Solaris Zones, and RAID-1Volumes,” in Solaris 10 10/09 Installation Guide:Planning for Installation and Upgrade
Where to Find Planning and System Requirement Information
Solaris 10 10/09 Installation Guide: Custom JumpStart and Advanced Installations • October 200916

Custom JumpStart (Overview)
This chapter provides an introduction and overview to the custom JumpStart installationprocess.
Note – If you are installing a Solaris ZFSTM root pool, see Chapter 9, “Installing a ZFS Root PoolWith JumpStart,” for limitations and profile examples.
■ “Custom JumpStart Introduction” on page 17■ “How the JumpStart Program Installs Solaris Software” on page 18
Custom JumpStart IntroductionThe custom JumpStart installation method is a command–line interface that enables you toautomatically install or upgrade several systems, based on profiles that you create. The profilesdefine specific software installation requirements. You can also incorporate shell scripts toinclude preinstallation and postinstallation tasks. You choose which profile and scripts to usefor installation or upgrade. The custom JumpStart installation method installs or upgrades thesystem, based on the profile and scripts that you select. Also, you can use a sysidcfg file tospecify configuration information so that the custom JumpStart installation is completelyhands-off.
Custom JumpStart Example ScenarioThe custom JumpStart process can be described by using an example scenario. In this examplescenario, the systems need to be set up with the following parameters:■ Install Solaris on 100 new systems.■ Seventy of the systems are SPARC based systems that are owned by the engineering group
and need to be installed as standalone systems with the Solaris OS software group fordevelopers.
2C H A P T E R 2
17

■ The remaining 30 systems are x86 based, owned by the marketing group and need to beinstalled as standalone systems with the Solaris OS software group for end users.
First, the system administrator must create a rules file and a profile for each group of systems.The rules file is a text file that contains a rule for each group of systems or single systems onwhich you want to install the Solaris software. Each rule distinguishes a group of systems thatare based on one or more system attributes. Each rule also links each group to a profile.
A profile is a text file that defines how the Solaris software is to be installed on each system in thegroup. Both the rules file and profile must be located in a JumpStart directory.
For the example scenario, the system administrator creates a rules file that contains twodifferent rules, one for the engineering group and another for the marketing group. For eachrule, the system's network number is used to distinguish the engineering group from themarketing group.
Each rule also contains a link to an appropriate profile. For example, in the rule for theengineering group, a link is added to the profile, eng_profile, which was created for theengineering group. In the rule for the marketing group, a link is added to the profile,market_profile, which was created for the marketing group.
You can save the rules file and the profiles on a diskette or on a server.
■ A profile diskette is required when you want to perform custom JumpStart installations onnonnetworked, standalone systems.
■ A profile server is used when you want to perform custom JumpStart installations onnetworked systems that have access to a server.
After creating the rules file and profiles, validate the files with the check script. If the checkscript runs successfully, the rules.ok file is created. The rules.ok is a generated version of therules file that the JumpStart program uses to install the Solaris software.
How the JumpStart Program Installs Solaris SoftwareAfter you validate the rules file and the profiles, you can begin a custom JumpStart installation.The JumpStart program reads the rules.ok file. Then, the JumpStart program searches for thefirst rule with defined system attributes that match the system on which the JumpStart programis attempting to install the Solaris software. If a match occurs, the JumpStart program uses theprofile that is specified in the rule to install the Solaris software on the system.
Figure 2–1 illustrates how a custom JumpStart installation works on a standalone,nonnetworked system. The system administrator initiates the custom JumpStart installation onPete's system. The JumpStart program accesses the rules files on the diskette in the system'sdiskette drive. The JumpStart program matches rule 2 to the system. rule 2 specifies that theJumpStart program use Pete’s profile to install the Solaris software. The JumpStart program
How the JumpStart Program Installs Solaris Software
Solaris 10 10/09 Installation Guide: Custom JumpStart and Advanced Installations • October 200918

reads Pete’s profile and installs the Solaris software, based on the instructions that thesystem administrator specified in Pete’s profile.
Figure 2–2 illustrates how a custom JumpStart installation works with more than one system ona network. Previously, the system administrator set up different profiles and saved the profiles
rules.ok File
rule 1 rule 2 rule 3
Engineering Group’s Profile
Marketing Group’s Profile
Pete’s Profile
JumpStart Directory
Pete's System
FIGURE 2–1 How a Custom JumpStart Installation Works: nonnetworked Example
How the JumpStart Program Installs Solaris Software
Chapter 2 • Custom JumpStart (Overview) 19

on a single server. The system administrator initiates the custom JumpStart installation on oneof the engineering systems. The JumpStart program accesses the rules files in the JumpStart/directory on the server. The JumpStart program matches the engineering system to rule 1.rule 1 specifies that the JumpStart program use Engineering Group’s Profile to install theSolaris software. The JumpStart program reads Engineering Group’s Profile and installs theSolaris software, based on the instructions that the system administrator specified inEngineering Group’s Profile.
Figure 2–3 describes the order in which the JumpStart program searches for custom JumpStartfiles.
rules.ok File
rule 1 rule 2 rule 3
Engineering Group’s Profile
Marketing Group’s Profile
Pete’s Profile
JumpStart Directory
Engineering’s Systems
Marketing’s Systems
Pete’s System
FIGURE 2–2 How a Custom JumpStart Installation Works: Networked Example
How the JumpStart Program Installs Solaris Software
Solaris 10 10/09 Installation Guide: Custom JumpStart and Advanced Installations • October 200920

END
The system proceeds with a custom JumpStart installation. The profile specified in the matched rule is used to install the system.
Does the system find a diskette in the system’s diskette drive?
Does the system find a rules.ok file on a designated server?
Does the system match any rules in the rules.ok file?
The system mounts the diskette.
Does the system find a rules.ok file on the diskette?
BEGIN
END
The system proceeds with an alternate installation program.
Yes
Yes
Yes
Yes
No
No
No
No
FIGURE 2–3 What Happens During a Custom JumpStart Installation
How the JumpStart Program Installs Solaris Software
Chapter 2 • Custom JumpStart (Overview) 21

22

Preparing Custom JumpStart Installations(Tasks)
This chapter provides step-by-step instructions about how to prepare the systems at your sitefrom which and on which you intend to install the Solaris software by using the customJumpStart installation method.
Note – If you are installing a Solaris ZFS root pool, see Chapter 9, “Installing a ZFS Root PoolWith JumpStart,” for limitations and profile examples.
■ “Task Map: Preparing Custom JumpStart Installations” on page 23■ “Creating a Profile Server for Networked Systems” on page 25■ “Creating a Profile Diskette for Standalone Systems” on page 29■ “Creating the rules File” on page 33■ “Creating a Profile” on page 36■ “Testing a Profile” on page 49■ “Validating the rules File” on page 54
Task Map: Preparing Custom JumpStart InstallationsTABLE 3–1 Task Map: Preparing Custom JumpStart Installations
Task Description For Instructions
Decide how to upgrade the system if aprevious version of the Solaris software isinstalled on the system.
If a previous release of Solaris is installedon the system, you need to determine howto upgrade the system. Ensure that youknow what to do before and after youupgrade a system. Planning helps you tocreate your profiles, begin scripts, andfinish scripts.
“Upgrade Planning” in Solaris 10 10/09Installation Guide: Planning for Installationand Upgrade
3C H A P T E R 3
23

TABLE 3–1 Task Map: Preparing Custom JumpStart Installations (Continued)Task Description For Instructions
Create a JumpStart directory. On a server
If you want to perform custom JumpStartinstallations on systems that are connectedto a network, you must create a profileserver. The profile server contains aJumpStart directory for the customJumpStart files.
“Creating a Profile Server for NetworkedSystems” on page 25
On a diskette
If you want to perform custom JumpStartinstallations on systems that are notconnected to a network, you must create aprofile diskette. A profile diskette containsthe custom JumpStart files.
“Creating a Profile Diskette for StandaloneSystems” on page 29
Add rules to the rules file. After you decide how you want each groupof systems or single systems to be installed,create a rule for each group that you wantto install. Each rule distinguishes a group,based on one or more system attributes.The rule links each group to a profile.
“Creating the rules File” on page 33
Create a profile for every rule. A profile is a text file that defines how toinstall the Solaris software, for example,which software group to install on asystem. Every rule specifies a profile todefine how a system is to be installed withthe Solaris software when the rule ismatched. You usually create a differentprofile for every rule. However, the sameprofile can be used in more than one rule.
“Creating a Profile” on page 36
(Optional) Test the profiles. After you create a profile, use thepfinstall(1M) command to test theprofile before you use the profile to installor upgrade a system.
“Testing a Profile” on page 49
Validate the rules file. The rules.ok file is a generated version ofthe rules file that the JumpStart programuses to match the system to be installedwith a profile. You must use the checkscript to validate the rules file.
“Validating the rules File” on page 54
Task Map: Preparing Custom JumpStart Installations
Solaris 10 10/09 Installation Guide: Custom JumpStart and Advanced Installations • October 200924
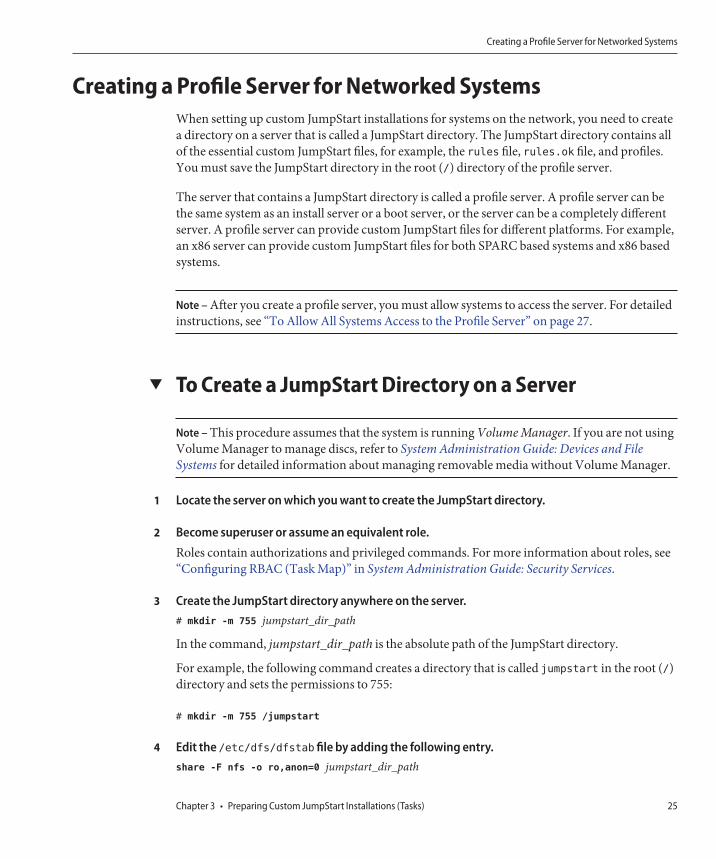
Creating a Profile Server for Networked SystemsWhen setting up custom JumpStart installations for systems on the network, you need to createa directory on a server that is called a JumpStart directory. The JumpStart directory contains allof the essential custom JumpStart files, for example, the rules file, rules.ok file, and profiles.You must save the JumpStart directory in the root (/) directory of the profile server.
The server that contains a JumpStart directory is called a profile server. A profile server can bethe same system as an install server or a boot server, or the server can be a completely differentserver. A profile server can provide custom JumpStart files for different platforms. For example,an x86 server can provide custom JumpStart files for both SPARC based systems and x86 basedsystems.
Note – After you create a profile server, you must allow systems to access the server. For detailedinstructions, see “To Allow All Systems Access to the Profile Server” on page 27.
▼ To Create a JumpStart Directory on a Server
Note – This procedure assumes that the system is running Volume Manager. If you are not usingVolume Manager to manage discs, refer to System Administration Guide: Devices and FileSystems for detailed information about managing removable media without Volume Manager.
Locate the server on which you want to create the JumpStart directory.
Become superuser or assume an equivalent role.
Roles contain authorizations and privileged commands. For more information about roles, see“Configuring RBAC (Task Map)” in System Administration Guide: Security Services.
Create the JumpStart directory anywhere on the server.# mkdir -m 755 jumpstart_dir_path
In the command, jumpstart_dir_path is the absolute path of the JumpStart directory.
For example, the following command creates a directory that is called jumpstart in the root (/)directory and sets the permissions to 755:
# mkdir -m 755 /jumpstart
Edit the /etc/dfs/dfstab file by adding the following entry.share -F nfs -o ro,anon=0 jumpstart_dir_path
1
2
3
4
Creating a Profile Server for Networked Systems
Chapter 3 • Preparing Custom JumpStart Installations (Tasks) 25

For example, the following entry shares the /jumpstart directory:
share -F nfs -o ro,anon=0 /jumpstart
Type shareall and press Enter.
Determine if you want to copy examples of custom JumpStart files to your JumpStart directory.
■ If no, go to Step 9.■ If yes, use the following decision table to determine what to do next.
Example Locations Instructions
The Solaris Operating System DVDor the Solaris Software - 1 CD foryour platform
Insert the Solaris Operating System DVD or the Solaris Software - 1 CDinto the server's CD-ROM drive.
Volume Manager automatically mounts the CD or DVD.
An image of the Solaris OperatingSystem DVD or the Solaris Software- 1 CD for your platform on a localdisk
Change directory to the location of the Solaris Operating System DVDor the Solaris Software - 1 image. For example, type the followingcommand:
cd /export/install
Copy the example custom JumpStart files into the JumpStart directory on the profile server.# cp -r media_path/Solaris_10/Misc/jumpstart_sample/* jumpstart_dir_path
media_path The path to the CD, DVD, or image on the local disk
jumpstart_dir_path The path on the profile server where you are placing the examplecustom JumpStart files
For example, the following command copies the jumpstart_sample directory into the/jumpstart directory on the profile server:
cp -r /cdrom/cdrom0/Solaris_10/Misc/jumpstart_sample/* /jumpstart
Update the example JumpStart files so that the files work in your environment.
Ensure that rootowns the JumpStart directory and that the permissions are set to 755.
Allow systems on the network to access the profile server.For detailed instructions, see “To Allow All Systems Access to the Profile Server” on page 27.
5
6
7
8
9
10
Creating a Profile Server for Networked Systems
Solaris 10 10/09 Installation Guide: Custom JumpStart and Advanced Installations • October 200926

Allowing All Systems Access to the Profile ServerWhen you create a profile server, you must ensure that systems can access the JumpStartdirectory on the profile server during a custom JumpStart installation. Use one of the followingways to ensure access.
Command or File Providing Access Instructions
add_install_client
commandEach time that you add a system for networkinstallation, use the -c option with theadd_install_client command to specify the profileserver.
Note – If you are not using NFS, then you must useanother means to provide access.■ For SPARC based systems, use the boot command■ For x86 based systems, edit the GRUB menu
■ For DVD media, see “Adding Systems toBe Installed From the Network With aDVD Image” in Solaris 10 10/09Installation Guide: Network-BasedInstallations
■ For CD media, see “Adding Systems to BeInstalled From the Network With a CDImage” in Solaris 10 10/09 InstallationGuide: Network-Based Installations
Specify the location of theJumpStart directory whenyou boot the system
■ For SPARC based systems, use the boot commandto boot the system. Specify the location of theJumpStart directory on the profile server when youboot the system. You must compress the customJumpStart configuration files into one file. Then,save the compressed configuration file on anHTTP or HTTPS server.
■ “Creating a Compressed ConfigurationFile” on page 66
■ Step 5 in “SPARC: To Perform anInstallation or Upgrade With the CustomJumpStart Program” on page 86
■ For x86 based systems, specify the location of theJumpStart directory on the profile server when youboot the system by editing the boot entry on theGRUB menu. You must compress the customJumpStart configuration files into one file. Then,save the compressed configuration file on anHTTP or HTTPS server.When you edit the GRUB menu entry, specify thelocation of the compressed file.
■ “Creating a Compressed ConfigurationFile” on page 66
■ “x86: Performing a Custom JumpStartInstallation by Editing the GRUB BootCommand” on page 92
/etc/bootparams file Add a wildcard in the /etc/bootparams file. “To Allow All Systems Access to the ProfileServer” on page 27
▼ To Allow All Systems Access to the Profile ServerUse the following procedure only if you store network installation information in the followingplaces:
■ In the /etc/bootparams file.
Creating a Profile Server for Networked Systems
Chapter 3 • Preparing Custom JumpStart Installations (Tasks) 27

■ In the naming service bootparams database. To update the bootparams database, add theentry that is shown in Step 3.
If you use the following procedure, the systems must be of the same type, such as all SPARCsystems.
Do not use this procedure under the following conditions:
■ If you save the JumpStart directory on a diskette.■ If you specify the location of the profile server when you boot the system. If you have
systems of different architectures, you must specify the location of the profile server whenyou boot the system
If you have the above conditions, use the SPARC boot command or use the x86 GRUB menu.
Note – You also can store network installation information on a DHCP server.
■ For SPARC based systems, you use the add_install_client command and the -d optionto specify that the custom JumpStart program use the DHCP server. Or you use the bootcommand with the dhcp option to specify that the custom JumpStart program use theDHCP server. For instructions about using this option, see “SPARC: Command Referencefor the boot Command” on page 87.
■ For x86 based systems, you use dhcp in one of the following ways:■ If you use an install server, use the add_install_client command and the -d option to
specify that the custom JumpStart program use the DHCP server with PXE.■ You can edit the GRUB entry on the GRUB menu and add the dhcp option. For
instructions about editing the GRUB entry, see “x86: Performing a Custom JumpStartInstallation by Editing the GRUB Boot Command” on page 92
On the installation or boot server, log in as superuser.
Use a text editor to open /etc/bootparams.
Add this entry.* install_config=server:jumpstart_dir_path
* A wildcard character that specifies that all systems have access
server The host name of the profile server where the JumpStart directory islocated
jumpstart_dir_path The absolute path of the JumpStart directory
1
2
3
Creating a Profile Server for Networked Systems
Solaris 10 10/09 Installation Guide: Custom JumpStart and Advanced Installations • October 200928

For example, the following entry enables all systems to access the /jumpstart directory on theprofile server that is named sherlock:
* install_config=sherlock:/jumpstart
Caution – Use of this procedure might produce the following error message when an installationclient is booted:
WARNING: getfile: RPC failed: error 5: (RPC Timed out).
“Booting From the Network, Error Messages” on page 176 contains details about this errormessage.
All systems can now access the profile server.
Creating a Profile Diskette for Standalone SystemsA diskette that contains a JumpStart directory is called a profile diskette. A system that is notconnected to the network does not have access to a profile server. As a result, you must create aJumpStart directory on a diskette if a system is not connected to a network. The system onwhich you create a profile diskette must have a diskette drive.
The JumpStart directory contains all of the essential custom JumpStart files, for example, therules file, rules.ok file, and profiles. You must save the JumpStart directory in the root (/)directory of the profile diskette.
See one of the following procedures:
■ “SPARC: To Create a Profile Diskette” on page 29■ “x86: To Create a Profile Diskette With GRUB” on page 31
▼ SPARC: To Create a Profile Diskette
Note – This procedure assumes that the system is running Volume Manager. If you are not usingVolume Manager to manage diskettes, CDs, and DVDs, refer to System Administration Guide:Devices and File Systems for detailed information about managing removable media withoutVolume Manager.
Locate a SPARC based system to which a diskette drive is attached.1
Creating a Profile Diskette for Standalone Systems
Chapter 3 • Preparing Custom JumpStart Installations (Tasks) 29

Become superuser or assume an equivalent role.Roles contain authorizations and privileged commands. For more information about roles, see“Configuring RBAC (Task Map)” in System Administration Guide: Security Services.
Insert a blank diskette or a diskette that can be overwritten in the diskette drive.
Mount the diskette.# volcheck
Determine if the diskette contains a UNIX file system (UFS).Examine the contents of the file /etc/mnttab on the system for an entry such as the following:/vol/dev/diskette0/scrap /floppy/scrap ufs suid,rw,largefiles,dev=1740008 927147040
■ If the entry exists, go to Step 7.■ If the entry does not exist, go to the next step.
Create a UFS on the diskette.# newfs /vol/dev/aliases/floppy0
Determine if you want to copy examples of custom JumpStart files to your JumpStart directory.
■ If no, go to Step 10.■ If yes, use the following decision table to determine what to do next.
Example Locations Instructions
The Solaris Operating System forSPARC Platforms DVD or theSolaris Software for SPARCPlatforms - 1 CD
Insert the Solaris Operating System for SPARC Platforms DVD or theSolaris Software for SPARC Platforms - 1 CD into the server's CD-ROMdrive.
Volume Manager automatically mounts the CD or DVD.
An image of the Solaris OperatingSystem for SPARC Platforms DVDor the Solaris Software for SPARCPlatforms - 1 CD on a local disk
Change the directory to the location of the Solaris Operating System forSPARC Platforms DVD or the Solaris Software for SPARC Platforms - 1CD image. For example, type the following command:
cd /export/install
Copy the example custom JumpStart files into the JumpStart directory on the profile diskette.# cp -r media_path/Solaris_10/Misc/jumpstart_sample/* jumpstart_dir_path
media_path The path to the CD, DVD, or image on the local disk
jumpstart_dir_path The path to the profile diskette where you want to place the examplecustom JumpStart files
2
3
4
5
6
7
8
Creating a Profile Diskette for Standalone Systems
Solaris 10 10/09 Installation Guide: Custom JumpStart and Advanced Installations • October 200930
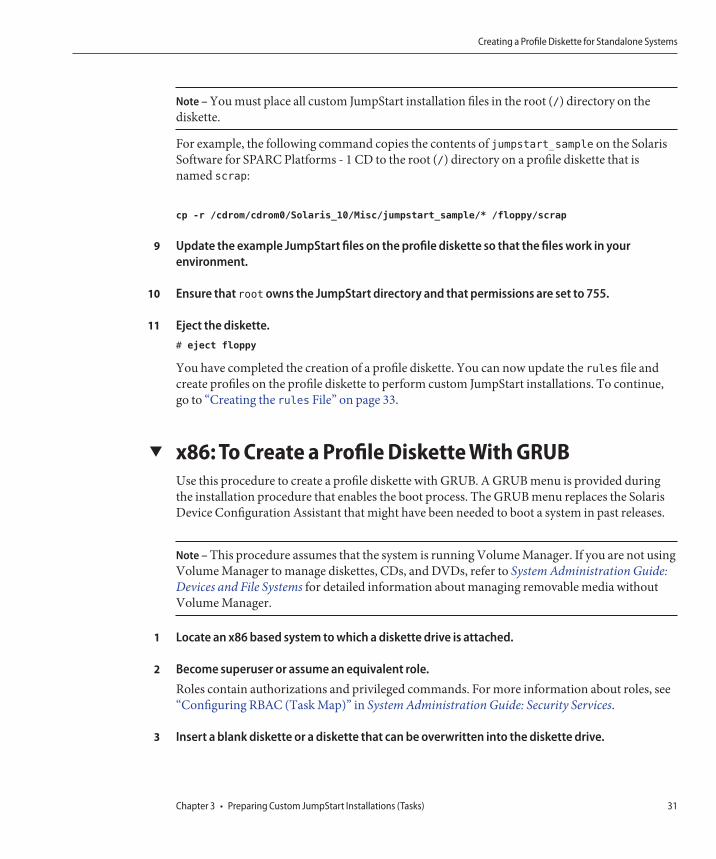
Note – You must place all custom JumpStart installation files in the root (/) directory on thediskette.
For example, the following command copies the contents of jumpstart_sample on the SolarisSoftware for SPARC Platforms - 1 CD to the root (/) directory on a profile diskette that isnamed scrap:
cp -r /cdrom/cdrom0/Solaris_10/Misc/jumpstart_sample/* /floppy/scrap
Update the example JumpStart files on the profile diskette so that the files work in yourenvironment.
Ensure that rootowns the JumpStart directory and that permissions are set to 755.
Eject the diskette.# eject floppy
You have completed the creation of a profile diskette. You can now update the rules file andcreate profiles on the profile diskette to perform custom JumpStart installations. To continue,go to “Creating the rules File” on page 33.
▼ x86: To Create a Profile Diskette With GRUBUse this procedure to create a profile diskette with GRUB. A GRUB menu is provided duringthe installation procedure that enables the boot process. The GRUB menu replaces the SolarisDevice Configuration Assistant that might have been needed to boot a system in past releases.
Note – This procedure assumes that the system is running Volume Manager. If you are not usingVolume Manager to manage diskettes, CDs, and DVDs, refer to System Administration Guide:Devices and File Systems for detailed information about managing removable media withoutVolume Manager.
Locate an x86 based system to which a diskette drive is attached.
Become superuser or assume an equivalent role.Roles contain authorizations and privileged commands. For more information about roles, see“Configuring RBAC (Task Map)” in System Administration Guide: Security Services.
Insert a blank diskette or a diskette that can be overwritten into the diskette drive.
9
10
11
1
2
3
Creating a Profile Diskette for Standalone Systems
Chapter 3 • Preparing Custom JumpStart Installations (Tasks) 31

Mount the diskette.# volcheck
Determine if you want to copy examples of custom JumpStart files to your JumpStart directory.
■ If no, go to Step 8.■ If yes, use the following decision table to determine what to do next.
Example Locations Instructions
The Solaris Operating System forx86 Platforms DVD or the SolarisSoftware for x86 Platforms - 1 CD
Insert the Solaris Operating System for x86 Platforms DVD or theSolaris Software for x86 Platforms - 1 CD into the server's CD-ROMdrive.
Volume Manager automatically mounts the DVD or CD.
An image of the Solaris OperatingSystem for x86 Platforms DVD orthe Solaris Software for x86Platforms - 1 CD on a local disk
Change directory to the location of the Solaris Operating System for x86Platforms DVD or the Solaris Software for x86 Platforms - 1 CD image.For example, type the following:
cd /export/install
Copy the example custom JumpStart files into the JumpStart directory on the profile diskette.# cp -r media_path/Solaris_10/Misc/jumpstart_sample/* jumpstart_dir_path
media_path The path to the CD, DVD, or image on the local disk
jumpstart_dir_path The path to the profile diskette where you want to place the examplecustom JumpStart files
Note – You must place all custom JumpStart installation files in the root (/) directory on theprofile diskette.
For example, the following command copies the contents of jumpstart_sample on the SolarisSoftware for x86 Platforms - 1 CD to the root (/) directory on a profile diskette that is namedscrap:
cp -r /cdrom/cdrom0/Solaris_10/Misc/jumpstart_sample/* /floppy/scrap
Update the example JumpStart files on the profile diskette so that the files work in yourenvironment.
Ensure that rootowns the JumpStart directory and that permissions are set to 755.
4
5
6
7
8
Creating a Profile Diskette for Standalone Systems
Solaris 10 10/09 Installation Guide: Custom JumpStart and Advanced Installations • October 200932

Eject the diskette by clicking Eject Disk in the File Manager window or by typing eject floppy
on the command line.
In the Removable Media Manager dialog box, click OK.
Manually eject the diskette.
You have completed the creation of a profile diskette. Now you can update the rules file andcreate profiles on the profile diskette to perform custom JumpStart installations. To continue,go to “Creating the rules File” on page 33.
Creating the rules FileThe rules file is a text file that contains a rule for each group of systems on which you want toinstall the Solaris OS. Each rule distinguishes a group of systems that are based on one or moresystem attributes. Each rule also links each group to a profile. A profile is a text file that defineshow the Solaris software is to be installed on each system in the group. For example, thefollowing rule specifies that the JumpStart program use the information in the basic_profprofile to install any system with the sun4u platform group.
karch sun4u - basic_prof -
The rules file is used to create the rules.ok file, which is required for custom JumpStartinstallations.
Note – If you set up the JumpStart directory by using the procedures in “Creating a ProfileDiskette for Standalone Systems” on page 29 or “Creating a Profile Server for NetworkedSystems” on page 25, an example rules file is already located in the JumpStart directory. Thesample rules file contains documentation and some example rules. If you use the sample rulesfile, ensure that you comment out the example rules you do not intend to use.
Syntax of the rules FileThe rules file must have the following attributes:
■ The file must be assigned the name rules.■ The file must contain at least one rule.
The rules file can contain any of the following:
■ Commented text
9
10
11
See Also
Creating the rules File
Chapter 3 • Preparing Custom JumpStart Installations (Tasks) 33

Any text that is included after the # symbol on a line is treated by JumpStart as commentedtext. If a line begins with the # symbol, the entire line is treated as a comment.
■ One or more blank lines■ One or more multiline rules
To continue a single rule onto a new line, include a backslash character (\) just beforepressing Return.
▼ To Create a rules FileUse a text editor to create a text file that is named rules. Or, open the sample rulesfile in theJumpStart directory that you created.
Add a rule in the rulesfile for each group of systems on which you want to install the Solarissoftware.For a list of rules file keywords and values, see “Rule Keywords and Values” on page 107.
A rule within a rules file must adhere to the following syntax:!rule_keyword rule_value && !rule_keyword rule_value ... begin profile finish
! A symbol that is used before a keyword to indicate negation.
rule_keyword A predefined lexical unit or word that describes a general system attribute,such as host name, hostname, or memory size, memsize. rule_keyword is usedwith the rule value to match a system with the same attribute to a profile. Forthe list of rule keywords, see “Rule Keywords and Values” on page 107.
rule_value A value that provides the specific system attribute for the corresponding rulekeyword. Rule values are described in “Rule Keywords and Values” onpage 107.
&& A symbol you must use to join rule keyword and rule value pairs in the samerule (a logical AND). During a custom JumpStart installation, a system mustmatch every pair in the rule before the rule matches.
begin The name of an optional Bourne shell script that can be executed before theinstallation begins. If no begin script exists, you must type a minus sign (-) inthis field. All begin scripts must be located in the JumpStart directory.
Information about how to create begin scripts is presented in “Creating BeginScripts” on page 57.
profile The name of a text file that defines how the Solaris software is to be installedon the system when a system matches the rule. The information in a profile
1
2
Creating the rules File
Solaris 10 10/09 Installation Guide: Custom JumpStart and Advanced Installations • October 200934
consists of profile keywords and their corresponding profile values. Allprofiles must be located in the JumpStart directory.
Note – Optional ways to use the profile field are described in “Using aSite-Specific Installation Program” on page 73 and “Creating DerivedProfiles With a Begin Script” on page 58.
finish The name of an optional Bourne shell script that can be executed after theinstallation is completed. If no finish script exists, you must type a minus sign(-) in this field. All finish scripts must be located in the JumpStart directory.
Information about how to create finish scripts is presented in “CreatingFinish Scripts” on page 59.
At the minimum, each rule must contain the following:
■ A keyword, a value, and a corresponding profile■ A minus sign (-) in the begin and finish fields if no begin or finish scripts are specified
Save the rulesfile in the JumpStart directory.
Ensure that rootowns the rulesfile and that the permissions are set to 644.
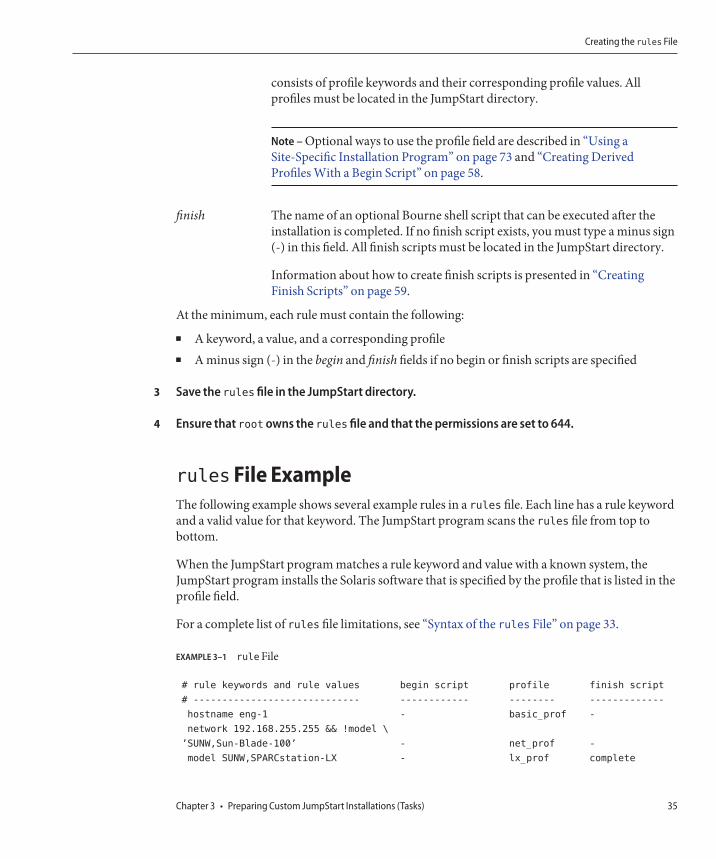
rules File ExampleThe following example shows several example rules in a rules file. Each line has a rule keywordand a valid value for that keyword. The JumpStart program scans the rules file from top tobottom.
When the JumpStart program matches a rule keyword and value with a known system, theJumpStart program installs the Solaris software that is specified by the profile that is listed in theprofile field.
For a complete list of rules file limitations, see “Syntax of the rules File” on page 33.
EXAMPLE 3–1 ruleFile
# rule keywords and rule values begin script profile finish script
# ----------------------------- ------------ -------- -------------
hostname eng-1 - basic_prof -
network 192.168.255.255 && !model \
’SUNW,Sun-Blade-100’ - net_prof -
model SUNW,SPARCstation-LX - lx_prof complete
3
4
Creating the rules File
Chapter 3 • Preparing Custom JumpStart Installations (Tasks) 35

EXAMPLE 3–1 ruleFile (Continued)
network 192.168.2.0 && karch i86pc setup x86_prof done
memsize 64-128 && arch i386 - prog_prof -
any - - generic_prof -
The following list describes some of the keywords and values from this example.
hostname The rule matches if the system's host name is eng-1. The basic_prof profile isused to install the Solaris software on the system that matches the rule.
network The rule matches if the system is on subnet 192.168.255.255 and if the system isnot a Sun Blade TM 100 (SUNW,Sun-Blade-100). The net_prof profile is used toinstall the Solaris software on systems that match this rule. This rule also providesan example of continuing a single rule onto a new line by using the backslashcharacter (\).
model The rule matches if the system is a SPARCstation LX. The lx_prof profile and thecomplete finish script are used to install the Solaris software on systems thatmatch this rule.
network The rule matches if the system is on subnet 192.168.2.0 and is an x86 basedsystem. The setup begin script, the x864u_prof profile, and the done finish scriptare used to install the Solaris software on systems that match the rule.
memsize The rule matches if the system has between 64 and 128 Mbytes of memory and isan x86 based system. The prog_prof profile is used to install the Solaris softwareon systems that match the rule.
any The rule matches any system that did not match the previous rules. Thegeneric_prof profile is used to install the Solaris software on systems that matchthe rule. If any is used, it should always be the last rule in the rules file.
Creating a ProfileA profile is a text file that defines how to install the Solaris software on a system. A profiledefines elements of the installation, for example, the software group to install. Every rulespecifies a profile that defines how a system is to be installed. You can create different profilesfor every rule or the same profile can be used in more than one rule.
A profile consists of one or more profile keywords and their values. Each profile keyword is acommand that controls one aspect of how the JumpStart program is to install the Solarissoftware on a system. For example, the following profile keyword and value specify that theJumpStart program install the system as a server:
system_type server
Creating a Profile
Solaris 10 10/09 Installation Guide: Custom JumpStart and Advanced Installations • October 200936

Note – Sample profiles are already located in the JumpStart directory if you created theJumpStart directory by using either of these procedures:
■ “Creating a Profile Server for Networked Systems” on page 25■ “Creating a Profile Diskette for Standalone Systems” on page 29
Syntax of ProfilesA profile must contain the following:
■ The install_type profile keyword as the first entry■ One keyword per line■ The root_device keyword if the systems that are being upgraded by the profile contain
more than one root (/) file system that can be upgraded
A profile can contain the following:
■ Commented textAny text that is included after the # symbol on a line is treated by the JumpStart program ascommented text. If a line begins with the # symbol, the entire line is treated as a comment.
■ One or more blank lines
▼ To Create a ProfileUse a text editor to create a text file. Name the file descriptively. Or, open a sample profile in theJumpStart directory that you created.
Note – Ensure that the name of the profile reflects how you intend to use the profile to install theSolaris software on a system. For example, you might name the profiles basic_install,eng_profile, or user_profile.
Add profile keywords and values to the profile.For a list of profile keywords and values, see “Profile Keywords and Values” on page 111.
Note – Profile keywords and their values are case sensitive.
Save the profile in the JumpStart directory.
1
2
3
Creating a Profile
Chapter 3 • Preparing Custom JumpStart Installations (Tasks) 37

Ensure that rootowns the profile and that the permissions are set to 644.
Test the profile (optional).“Testing a Profile” on page 49 contains information about testing profiles.
Profile ExamplesThe following examples of profiles show how to use different profile keywords and profilevalues to control how the Solaris software is installed on a system. “Profile Keywords andValues” on page 111 contains a description of profile keywords and values.
Note – If you are installing a Solaris ZFSTM root pool, see Chapter 9, “Installing a ZFS Root PoolWith JumpStart,” for limitations and profile examples.
EXAMPLE 3–2 Mounting Remote File Systems and Adding and Deleting Packages
# profile keywords profile values
# ----------------- -----------------
install_type initial_install
system_type standalone
partitioning default
filesys any 512 swap # specify size of /swap
cluster SUNWCprog
package SUNWman delete
cluster SUNWCacc
The following list describes some of the keywords and values from this example.
install_type The install_type keyword is required in every profile.
system_type The system_type keyword defines that the system is to be installed as astandalone system.
partitioning The file system slices are determined by the software to be installed with thevalue default. The size of swap is set to 512 Mbytes and is installed on anydisk, value any.
cluster The Developer Solaris Software Group, SUNWCprog, is installed on thesystem.
package If the standard man pages are mounted from the file server, s_ref, on thenetwork, the man page packages are not to be installed on the system. Thepackages that contain the System Accounting utilities are selected to beinstalled on the system.
4
5
Creating a Profile
Solaris 10 10/09 Installation Guide: Custom JumpStart and Advanced Installations • October 200938

EXAMPLE 3–3 Mounting Remote File Systems and Adding a Third-Party Package
# profile keywords profile values
# ----------------- -----------------
install_type initial_install
system_type standalone
partitioning default
filesys any 512 swap # specify size of /swap
cluster SUNWCprog
cluster SUNWCacc
package apache_server \
http://package.central/packages/apache timeout 5
The following list describes some of the keywords and values from this example.
install_type The install_type keyword is required in every profile.
system_type The system_type keyword defines that the system is to be installed as astandalone system.
partitioning The file system slices are determined by the software to be installed with thevalue default. The size of swap is set to 512 Mbytes and is installed on anydisk, value any.
cluster The Developer Solaris Software Group, SUNWCprog, is installed on thesystem.
package A third-party package is installed on the system located on an HTTP server.
EXAMPLE 3–4 Specifying Where to Install File Systems
# profile keywords profile values
# ---------------- -------------------
install_type initial_install
system_type standalone
partitioning explicit
filesys c0t0d0s0 auto /
filesys c0t3d0s1 auto swap
filesys any auto usr
cluster SUNWCall
The following list describes some of the keywords and values from this example.
partitioning The file system slices are determined by the filesys keywords, valueexplicit. The size of root (/) is based on the selected software, value auto,and is installed on c0t0d0s0. The size of swap is set to the necessary size and
Creating a Profile
Chapter 3 • Preparing Custom JumpStart Installations (Tasks) 39

EXAMPLE 3–4 Specifying Where to Install File Systems (Continued)
is installed on c0t3d0s1. usr is based on the selected software and theinstallation program determines where usr is installed, based on the valueany.
cluster The Entire Solaris Software Group, SUNWCall, is installed on the system.
EXAMPLE 3–5 Upgrading and Installing Patches
# profile keywords profile values
# ---------------- -------------------
install_type upgrade
root_device c0t3d0s2
backup_media remote_filesystem timber:/export/scratch
package SUNWbcp delete
package SUNWxwman add
cluster SUNWCacc add
patch patch_list nfs://patch_master/Solaris_10/patches \
retry 5
locale de
The following list describes some of the keywords and values from this example.
install_type The profile upgrades a system by reallocating disk space. In this example,disk space must be reallocated because some file systems on the system didnot have enough space for the upgrade.
root_device The root file system on c0t3d0s2 is upgraded.
backup_media A remote system that is named timber is to be used to back up data duringthe disk space reallocation. For more backup-media keyword values, see“backup_media Profile Keyword” on page 119.
package The binary compatibility package, SUNWbcp, is not installed on the systemafter the upgrade.
package The code ensures that the X Window System man pages and the SystemAccounting Utilities are to be installed if they are not already installed on thesystem. All packages already on the system are automatically upgraded.
patch A list of patches that are installed with the upgrade. The patch list is locatedon an NFS server named patch_master under the directoriesSolaris_10/patches. In case of a mount failure, the NFS mount is tried fivetimes.
locale The German localization packages are to be installed on the system.
Creating a Profile
Solaris 10 10/09 Installation Guide: Custom JumpStart and Advanced Installations • October 200940

EXAMPLE 3–6 Reallocating Disk Space for an Upgrade
# profile keywords profile values
# ---------------- -------------------
install_type upgrade
root_device c0t3d0s2
backup_media remote_filesystem timber:/export/scratch
layout_constraint c0t3d0s2 changeable 100
layout_constraint c0t3d0s4 changeable
layout_constraint c0t3d0s5 movable
package SUNWbcp delete
package SUNWxwman add
cluster SUNWCacc add
locale de
The following list describes some of the keywords and values from this example.
install_type The profile upgrades a system by reallocating disk space. In thisexample, disk space must be reallocated because some file systems onthe system did not have enough space for the upgrade.
root_device The root file system on c0t3d0s2 is upgraded.
backup_media A remote system that is named timber is to be used to back up dataduring the disk space reallocation. For more backup-media keywordvalues, see “backup_media Profile Keyword” on page 119.
layout_constraint The layout_constraint keywords designate that auto-layout canperform the following when auto-layout attempts to reallocate diskspace for the upgrade.■ Change slices 2 and 4. The slices can be moved to another location
and the size can be changed.■ Move slice 5. The slice can be moved to another location but its size
cannot change.
package The binary compatibility package, SUNWbcp, is not installed on thesystem after the upgrade.
package The code ensures that the X Window System man pages and theSystem Accounting Utilities are to be installed if they are not alreadyinstalled on the system. All packages already on the system areautomatically upgraded.
locale The German localization packages are to be installed on the system.
Creating a Profile
Chapter 3 • Preparing Custom JumpStart Installations (Tasks) 41

EXAMPLE 3–7 Retrieving a Solaris Flash Archive From an HTTP Server
In the following example, the profile indicates that the custom JumpStart program retrieves theSolaris Flash archive from an HTTP server.
# profile keywords profile values
# ---------------- -------------------
install_type flash_install
archive_location http://192.168.255.255/flasharchive/solarisarchive
partitioning explicit
filesys c0t1d0s0 4000 /
filesys c0t1d0s1 512 swap
filesys c0t1d0s7 free /export/home
The following list describes some of the keywords and values from this example.
install_type The profile installs a Solaris Flash archive on the clone system. All filesare overwritten as in an initial installation.
archive_location The Solaris Flash archive is retrieved from an HTTP server.
partitioning The file system slices are determined by the filesys keywords, valueexplicit. The size of root (/) is based on the size of the Solaris Flasharchive. The root file system is installed on c0t1d0s0. The size of swap isset to the necessary size and is installed on c0t1d0s1. /export/home isbased on the remaining disk space. /export/home is installed onc0t1d0s7.
EXAMPLE 3–8 Retrieving a Solaris Flash Archive From a Secure HTTP Server
In the following example, the profile indicates that the custom JumpStart program retrieves theSolaris Flash archive from a secure HTTP server.
# profile keywords profile values
# ---------------- -------------------
install_type flash_install
archive_location https://192.168.255.255/solarisupdate.flar
partitioning explicit
filesys c0t1d0s0 4000 /
filesys c0t1d0s1 512 swap
filesys c0t1d0s7 free /export/home
The following list describes some of the keywords and values from this example.
install_type The profile installs a Solaris Flash archive on the clone system. All filesare overwritten as in an initial installation.
Creating a Profile
Solaris 10 10/09 Installation Guide: Custom JumpStart and Advanced Installations • October 200942

EXAMPLE 3–8 Retrieving a Solaris Flash Archive From a Secure HTTP Server (Continued)
archive_location The compressed Solaris Flash archive is retrieved from a secure HTTPserver.
partitioning The file system slices are determined by the filesys keywords, valueexplicit. The size of root (/) is based on the size of the Solaris Flasharchive. The size of swap is set to the necessary size and is installed onc0t1d0s1. /export/home is based on the remaining disk space./export/home is installed on c0t1d0s7.
EXAMPLE 3–9 Retrieving a Solaris Flash Archive and Installing a Third-Party Package
In the following example, the profile indicates that the custom JumpStart program retrieves theSolaris Flash archive from an HTTP server.
# profile keywords profile values
# ---------------- -------------------
install_type flash_install
archive_location http://192.168.255.255/flasharchive/solarisarchive
partitioning explicit
filesys c0t1d0s0 4000 /
filesys c0t1d0s1 512 swap
filesys c0t1d0s7 free /export/home
package SUNWnew http://192.168.254.255/Solaris_10 timeout 5
The following list describes some of the keywords and values from this example.
install_type The profile installs a Solaris Flash archive on the clone system. All filesare overwritten as in an initial installation.
archive_location The Solaris Flash archive is retrieved from an HTTP server.
partitioning The file system slices are determined by the filesys keywords, valueexplicit. The size of root (/) is based on the size of the Solaris Flasharchive. The root file system is installed on c0t1d0s0. The size of swap isset to the necessary size and is installed on c0t1d0s1. /export/home isbased on the remaining disk space. /export/home is installed onc0t1d0s7.
package The SUNWnew package is added from the Solaris_10 directory fromthe HTTP server 192.168.254.255.
Creating a Profile
Chapter 3 • Preparing Custom JumpStart Installations (Tasks) 43

EXAMPLE 3–10 Retrieving a Solaris Flash Differential Archive From an NFS Server
In the following example, the profile indicates that the custom JumpStart program retrieves theSolaris Flash archive from an NFS server. The flash_update keyword indicates that this is adifferential archive. A differential archive installs only the differences between two systemimages.
# profile keywords profile values
# ---------------- -------------------
install_type flash_update
archive_location nfs installserver:/export/solaris/flasharchive \
/solarisdiffarchive
no_master_check
The following list describes some of the keywords and values from this example.
install_type The profile installs a Solaris Flash differential archive on the clonesystem. Only files that are specified by the archive are installed.
archive_location The Solaris Flash archive is retrieved from an NFS server.
no_master_check The clone system is not checked for a valid system image. A validsystem image would have been built from the original master system.
EXAMPLE 3–11 Creating an Empty Boot Environment
In the following example, the profile indicates that the custom JumpStart program creates anempty boot environment. An empty boot environment contains no file systems and no copyfrom the current boot environment occurs. The boot environment can be populated later with aSolaris Flash archive and then activated.
# profile keywords profile values
# ---------------- -------------------
install_type initial_install
system_type standalone
partitioning explicit
filesys c0t0d0s0 auto /
filesys c0t3d0s1 auto swap
filesys any auto usr
cluster SUNWCall
bootenv createbe bename second_BE \
filesystem /:/dev/dsk/c0t1d0s0:ufs \
filesystem -:/dev/dsk/c0t1d0s0:swap \
filesystem /export:shared:ufs
The following list describes some of the keywords and values from this example.
Creating a Profile
Solaris 10 10/09 Installation Guide: Custom JumpStart and Advanced Installations • October 200944

EXAMPLE 3–11 Creating an Empty Boot Environment (Continued)
partitioning The file system slices are determined by the filesys keywords, valueexplicit. The size of root (/) is based on the selected software, valueauto, and is installed on c0t0d0s0. The size of swap is set to thenecessary size and is installed on c0t3d0s1. usr is based on the selectedsoftware and the installation program determines where usr isinstalled, based on the value any.
cluster The Entire Solaris Software Group, SUNWCall, is installed on the system.
bootenv createbe An empty, inactive boot environment is set up on disk c0t1d0. Filesystems for root (/), swap, and /export are created, but left empty. Thissecond boot environment can be installed with a Solaris Flash archive ata later time. The new boot environment can then be activated tobecome the current boot environment.
For keyword values and background about using this keyword, see thefollowing references:■ For descriptions of keyword values, see “Profile Keywords and
Values” on page 111.■ For background about using Solaris Live Upgrade that creates,
upgrades, and activates inactive boot environments, see Chapter 2,“Solaris Live Upgrade (Overview),” in Solaris 10 10/09 InstallationGuide: Solaris Live Upgrade and Upgrade Planning.
■ For background about using a Solaris Flash archive, see Chapter 1,“Solaris Flash (Overview),” in Solaris 10 10/09 Installation Guide:Solaris Flash Archives (Creation and Installation).
EXAMPLE 3–12 Creating RAID-1 Volumes When Installing a Solaris Flash Archive
In the following example, the profile indicates that the custom JumpStart program uses SolarisVolume Manager technology to create RAID-1 volumes (mirrors) for the root (/), swap, /usrand /export/home file systems. A Solaris Flash archive is installed on the boot environment.
# profile keywords profile values
# ---------------- -------------------
install_type flash_install
arhcive_location nfs server:/export/home/export/flash.s10.SUNWCall
partitioning explicit
filesys mirror:d10 c0t0d0s0 c0t1d0s0 4096 /
filesys mirror c0t0d0s1 2048 swap
filesys mirror:d30 c0t0d0s3 c0t1d0s3 4096 /usr
filesys mirror:d40 c0t0d0s4 c0t1d0s4 4096 /usr
Creating a Profile
Chapter 3 • Preparing Custom JumpStart Installations (Tasks) 45

EXAMPLE 3–12 Creating RAID-1 Volumes When Installing a Solaris Flash Archive (Continued)
filesys mirror:d50 c0t0d0s5 c0t1d0s5 free /export/home
metadb c0t1d0s7 size 8192 count 3
The following list describes some of the keywords and values from this example.
install_type The profile installs a Solaris Flash archive on the clone system. All filesare overwritten as in an initial installation.
archive_location The Solaris Flash archive is retrieved from an NFS server.
partitioning The file system slices are determined by the filesys keywords, valueexplicit.
filesys The root (/) file system is created and mirrored on the slices c0t0d0s0and c0t1d0s0. The size of the root (/) file system is set to 4096 Mbytes.The RAID-1 volume that mirrors c0t0d0s0 and c0t1d0s0 is namedd10.
filesys The swap file system is created and mirrored on the slice c0t0d0s1, andis sized at 2048 Mbytes. The custom JumpStart program assigns a nameto the mirror.
filesys The /usr file system is created and mirrored on the slices c0t1d0s3 andc0t0d0s3. The size of the /usr file system is set to 4096 Mbytes. TheRAID-1 volume is named d30.
filesys The /usr file system is created and mirrored on the slices c0t1d0s4 andc0t0d0s4. The size of the /usr file system is set to 4096 Mbytes. TheRAID-1 volume is named d40.
metadb Three state database replicas (metadbs) are installed on slice c0t1d0s7,and are sized at 8192 blocks (4 Mbytes).
■ For overview information about how to create mirrored file systems during yourinstallation, see Chapter 9, “Creating RAID-1 Volumes (Mirrors) During Installation(Overview),” in Solaris 10 10/09 Installation Guide: Planning for Installation and Upgrade.
■ For guidelines and requirements of creating mirrored file systems, see Chapter 10, “CreatingRAID-1 Volumes (Mirrors) During Installation (Planning),” in Solaris 10 10/09 InstallationGuide: Planning for Installation and Upgrade.
■ For descriptions of keyword values, see “filesys Profile Keyword (Creating RAID-1Volumes)” on page 133 and “metadb Profile Keyword (Creating State Database Replicas)” onpage 140.
Creating a Profile
Solaris 10 10/09 Installation Guide: Custom JumpStart and Advanced Installations • October 200946
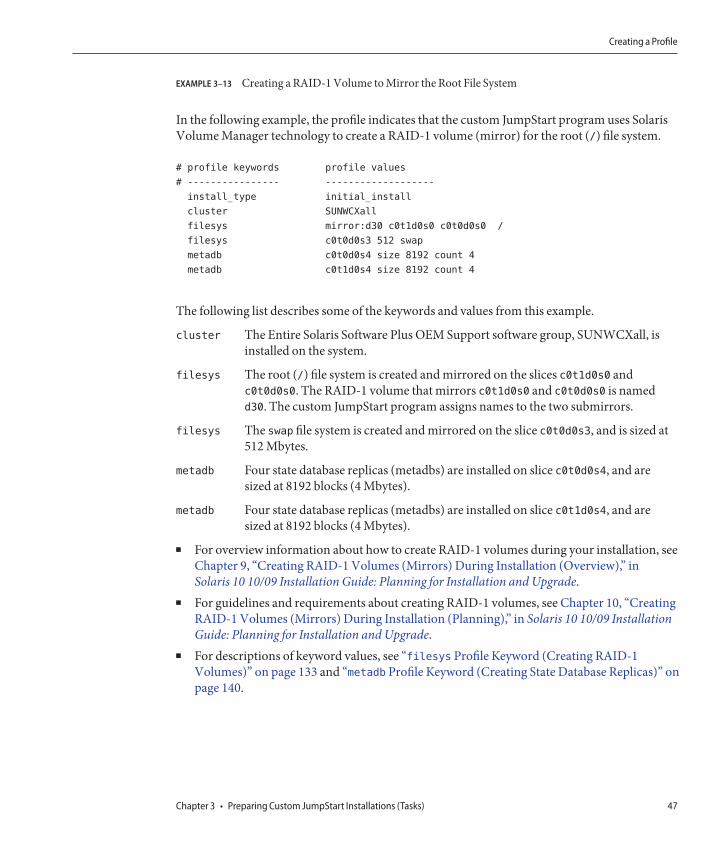
EXAMPLE 3–13 Creating a RAID-1 Volume to Mirror the Root File System
In the following example, the profile indicates that the custom JumpStart program uses SolarisVolume Manager technology to create a RAID-1 volume (mirror) for the root (/) file system.
# profile keywords profile values
# ---------------- -------------------
install_type initial_install
cluster SUNWCXall
filesys mirror:d30 c0t1d0s0 c0t0d0s0 /
filesys c0t0d0s3 512 swap
metadb c0t0d0s4 size 8192 count 4
metadb c0t1d0s4 size 8192 count 4
The following list describes some of the keywords and values from this example.
cluster The Entire Solaris Software Plus OEM Support software group, SUNWCXall, isinstalled on the system.
filesys The root (/) file system is created and mirrored on the slices c0t1d0s0 andc0t0d0s0. The RAID-1 volume that mirrors c0t1d0s0 and c0t0d0s0 is namedd30. The custom JumpStart program assigns names to the two submirrors.
filesys The swap file system is created and mirrored on the slice c0t0d0s3, and is sized at512 Mbytes.
metadb Four state database replicas (metadbs) are installed on slice c0t0d0s4, and aresized at 8192 blocks (4 Mbytes).
metadb Four state database replicas (metadbs) are installed on slice c0t1d0s4, and aresized at 8192 blocks (4 Mbytes).
■ For overview information about how to create RAID-1 volumes during your installation, seeChapter 9, “Creating RAID-1 Volumes (Mirrors) During Installation (Overview),” inSolaris 10 10/09 Installation Guide: Planning for Installation and Upgrade.
■ For guidelines and requirements about creating RAID-1 volumes, see Chapter 10, “CreatingRAID-1 Volumes (Mirrors) During Installation (Planning),” in Solaris 10 10/09 InstallationGuide: Planning for Installation and Upgrade.
■ For descriptions of keyword values, see “filesys Profile Keyword (Creating RAID-1Volumes)” on page 133 and “metadb Profile Keyword (Creating State Database Replicas)” onpage 140.
Creating a Profile
Chapter 3 • Preparing Custom JumpStart Installations (Tasks) 47

EXAMPLE 3–14 Creating RAID-1 Volumes to Mirror Multiple File Systems
In the following example, the profile indicates that the custom JumpStart program uses SolarisVolume Manager technology to create RAID-1 volumes (mirrors) for the root (/), swap, and/usr file systems.
# profile keywords profile values
# ---------------- -------------------
install_type initial_install
cluster SUNWCXall
filesys mirror:d100 c0t1d0s0 c0t0d0s0 200 /
filesys c0t1d0s5 500 /var
filesys c0t0d0s5 500
filesys mirror c0t0d0s1 512 swap
metadb c0t0d0s3 size 8192 count 5
filesys mirror c0t1d0s4 c0t0d0s4 2000 /usr
filesys c0t1d0s7 free /export/home
filesys c0t0d0s7 free
The following list describes some of the keywords and values from this example.
cluster The Entire Solaris Software Plus OEM Support software group, SUNWCXall, isinstalled on the system.
filesys The root (/) file system is created and mirrored on the slices c0t1d0s0 andc0t0d0s0. The size of the root (/) file system is set to 200 Mbytes. The RAID-1volume that mirrors c0t1d0s0 and c0t0d0s0 is named d100.
filesys The /var file system is installed on the slice c0t1d0s5 and is sized at 500 Mbytes.The root (/) file system is created and mirrored on the slices c0t1d0s0 andc0t0d0s0. The size of the root (/) file system is set to 200 Mbytes. The RAID-1volume that mirrors c0t1d0s0 and c0t0d0s0 is named d100.
filesys The swap file system is created and mirrored on the slice c0t0d0s1, and is sized at512 Mbytes. The custom JumpStart program assigns a name to the mirror.
metadb Five state database replicas (metadbs) are installed on slice c0t0d0s3, and are sizedat 8192 blocks (4 Mbytes).
filesys The /usr file system is created and mirrored on the slices c0t1d0s4 and c0t0d0s4.The size of the /usr file system is set to 2000 Mbytes. The custom JumpStartprogram assigns a name to the mirror.
■ For overview information about how to create mirrored file systems during yourinstallation, see Chapter 9, “Creating RAID-1 Volumes (Mirrors) During Installation(Overview),” in Solaris 10 10/09 Installation Guide: Planning for Installation and Upgrade.
Creating a Profile
Solaris 10 10/09 Installation Guide: Custom JumpStart and Advanced Installations • October 200948

EXAMPLE 3–14 Creating RAID-1 Volumes to Mirror Multiple File Systems (Continued)
■ For guidelines and requirements of creating mirrored file systems, see Chapter 10, “CreatingRAID-1 Volumes (Mirrors) During Installation (Planning),” in Solaris 10 10/09 InstallationGuide: Planning for Installation and Upgrade.
■ For descriptions of keyword values, see “filesys Profile Keyword (Creating RAID-1Volumes)” on page 133 and “metadb Profile Keyword (Creating State Database Replicas)” onpage 140.
EXAMPLE 3–15 x86: Using the fdiskKeyword
# profile keywords profile values
# ---------------- -------------------
install_type initial_install
system_type standalone
fdisk c0t0d0 0x04 delete
fdisk c0t0d0 solaris maxfree
cluster SUNWCall
cluster SUNWCacc delete
The following list describes some of the keywords and values from this example.
fdisk All fdisk partitions of type DOSOS16 (04 hexadecimal) are deleted from thec0t0d0 disk.
fdisk A Solaris fdisk partition is created on the largest contiguous free space on thec0t0d0 disk.
cluster The Entire Distribution software group, SUNWCall, is installed on the system.
cluster The system accounting utilities, SUNWCacc, are not to be installed on the system.
Testing a ProfileAfter you create a profile, use the pfinstall(1M) command to test the profile. Test the profilebefore you use the profile to install or upgrade a system. Testing a profile is especially usefulwhen you are creating upgrade profiles that reallocate disk space.
By looking at the installation output that is generated by pfinstall, you can quickly determineif a profile works as you intended. For example, use the profile to determine if a system hasenough disk space to upgrade to a new release of the Solaris software before you perform theupgrade on that system.
pfinstall enables you to test a profile against the following:
Testing a Profile
Chapter 3 • Preparing Custom JumpStart Installations (Tasks) 49
■ The system's disk configuration where pfinstall is being run.■ Other disk configurations. You use a disk configuration file that represents a structure of a
disk, for example, a disk's bytes/sector, flags, and slices. Creating disk configuration files isdescribed in “Creating Disk Configuration Files” on page 67 and “x86: To Create a DiskConfiguration File” on page 69.
Note – You cannot use a disk configuration file to test a profile you intend to use to upgrade asystem. Instead, you must test the profile against the system's actual disk configuration andthe software that is currently installed on that system.
▼ To Create a Temporary Solaris Environment to Test aProfileTo test a profile for a particular Solaris release successfully and accurately, you must test aprofile within the Solaris environment of the same release. For example, if you want to test aSolaris initial installation profile, run the pfinstall command on a system that is running theSolaris OS.
You need to create a temporary installation environment if you are testing a profile under oneof the following conditions:
■ You want to test a Solaris 10 10/09 upgrade profile on a system that is running a previousversion of the Solaris software.
■ You do not have a Solaris 10 10/09 system installed yet to test Solaris 10 10/09 initialinstallation profiles.
Boot a system from an image of one of the following:For SPARC based systems:
■ Solaris Operating System for SPARC Platforms DVD■ Solaris Software for SPARC Platforms - 1 CD
For x86 based systems:
■ Solaris Operating System for x86 Platforms DVD■ Solaris Software for x86 Platforms - 1 CD
Note – If you want to test an upgrade profile, boot the system that you are upgrading.
Respond to the system identification questions.
1
2
Testing a Profile
Solaris 10 10/09 Installation Guide: Custom JumpStart and Advanced Installations • October 200950

To exit from the installation program, type ! at the following prompt.The Solaris installation program will assist you in installing software for Solaris.
<Press ENTER to continue> {"!" exits}
Execute the pfinstall command from the shell. For details about using the pfinstallcommand, see Step 7 in “To Test a Profile”on page 51.
▼ To Test a Profile
x86 only – If you are using the locale keyword, the pfinstall -D command fails to test theprofile. For a workaround, see the error message “could not select locale,” in the section,“Upgrading the Solaris OS” on page 182.
Locate a system on which to test the profile that is the same type of platform, SPARC or x86, forwhich the profile was created.If you are testing an upgrade profile, you must test the profile on the actual system that youintend to upgrade.
Use the following decision table to determine what to do next.
Test Scenario Instructions
Test an initial installation profile and have a systemthat is running the Solaris 10 10/09 software.
Become superuser on the system and go to Step 5.
Test an upgrade profile, or you do not have a systemthat is running Solaris 10 10/09 to test an initialinstallation profile.
Create a temporary Solaris 10 10/09 environment totest the profile. For details, see “To Create aTemporary Solaris Environment to Test a Profile” onpage 50. Then, go to Step 3.
Create a temporary mount point.# mkdir /tmp/mnt
Mount the directory that contains the profile or profiles that you want to test.
Mount Scenario Typing Instructions
Mount a remote NFS file system for systems on thenetwork.
mount -F nfs server_name:path /tmp/mnt
SPARC: Mount a UFS-formatted diskette. mount -F ufs /dev/diskette /tmp/mnt
3
4
1
2
3
4
Testing a Profile
Chapter 3 • Preparing Custom JumpStart Installations (Tasks) 51

Mount Scenario Typing Instructions
Mount a PCFS-formatted diskette. mount -F pcfs /dev/diskette /tmp/mnt
To test the profile with a specific system memory size, set SYS_MEMSIZE to the specific memorysize in Mbytes.# SYS_MEMSIZE=memory_size# export SYS_MEMSIZE
Did you mount a directory in Step 4?
■ If yes, change the directory to /tmp/mnt.
# cd /tmp/mnt
■ If no, change the directory to where the profile is located, which is usually the JumpStartdirectory.
# cd jumpstart_dir_path
Test the profile with the pfinstall(1M) command.# /usr/sbin/install.d/pfinstall -D:-d disk_config_file -c path profile
Caution – You must include the -d or -D option. If you do not include one of these options,pfinstall uses the profile you specify to install the Solaris software. All of the data on thesystem is overwritten.
-D pfinstall uses the current system's disk configuration to test theprofile. You must use the -D option to test an upgrade profile.
-d disk_config_file pfinstall uses the disk configuration file, disk_config_file, to test theprofile. If disk_config_file is not located in the directory wherepfinstall is run, you must specify the path.
For instructions about how to create a disk configuration file, see“Creating Disk Configuration Files” on page 67.
Note – You cannot use the -d disk_config_file option with an upgradeprofile, install_type upgrade. You must always test an upgrade profileagainst a system's disk configuration, that is, you must use the -D option.
5
6
7
Testing a Profile
Solaris 10 10/09 Installation Guide: Custom JumpStart and Advanced Installations • October 200952

-c path The path to the Solaris software image. You use this option, for example,if the system is using Volume Manager to mount the Solaris Software - 1CD for your platform.
Note – The -c option is not required if you booted from a SolarisOperating System DVD or a Solaris Software - 1 CD image for yourplatform. The DVD or CD image is mounted on /cdrom as part of thebooting process.
profile The name of the profile to test. If profile is not in the directory wherepfinstall is being run, you must specify the path.
Profile Test ExamplesThe following example shows how to use pfinstall to test a profile that is named basic_prof.The profile is tested against the disk configuration on a system on which the Solaris 10 10/09software is installed. The basic_prof profile is located in the /jumpstart directory, and thepath to the Solaris Operating System DVD image is specified because Volume Manager is beingused.
EXAMPLE 3–16 Profile Test Using a Solaris 10 10/09 System
# cd /jumpstart
# /usr/sbin/install.d/pfinstall -D -c /cdrom/pathname basic_prof
The following example shows how to use pfinstall to test the profile that is namedbasic_prof on a Solaris 10 10/09 system. The test is performed against the 535_test diskconfiguration file. The test checks for 64 Mbytes of system memory. This example uses a SolarisSoftware for SPARC Platforms - 1 CD or Solaris Software for x86 Platforms - 1 CD image that islocated in the /export/install directory.
EXAMPLE 3–17 Profile Test Using a Disk Configuration File
# SYS_MEMSIZE=64
# export SYS_MEMSIZE
# /usr/sbin/install.d/pfinstall -d 535_test -c /export/install basic_prof
Testing a Profile
Chapter 3 • Preparing Custom JumpStart Installations (Tasks) 53

Validating the rules FileBefore you can use a profile and rules file, you must run the check script to validate that thefiles are set up correctly. If all rules and profiles are correctly set up, the rules.ok file is created,which is required by the custom JumpStart installation software to match a system to a profile.
Table 3–2 describes what the check script does.
TABLE 3–2 What Happens When You Use the check Script
Stage Description
1 The rules file is checked for syntax.
check verifies that the rule keywords are legitimate and that the begin, class, and finish fields arespecified for each rule. The begin and finish fields can consist of a minus sign (-) instead of a filename.
2 If no errors are found in the rules file, each profile that is specified in the rules is checked forsyntax.
3 If no errors are found, check creates the rules.ok file from the rules file, removes all commentsand blank lines, retains all rules, and adds the following comment line at the end:
# version=2 checksum=num
▼ To Validate the rules FileEnsure that the check script is located in the JumpStart directory.
Note – The check script is in the Solaris_10/Misc/jumpstart_sample directory on the SolarisOperating System DVD or on the Solaris Software - 1 CD.
Change the directory to the JumpStart directory.
Run the check script to validate the rulesfile:$ ./check -p path -r file_name
-p path Validates the rules by using the check script from the Solaris software imageinstead of the check script from the system you are using. path is the image ona local disk or a mounted Solaris Operating System DVD or a Solaris Software- 1 CD.
Use this option to run the most recent version of check if your system isrunning a previous version of Solaris.
1
2
3
Validating the rules File
Solaris 10 10/09 Installation Guide: Custom JumpStart and Advanced Installations • October 200954

-r file_name Specifies a rules file other than the one that is named rules. Using this option,you can test the validity of a rule before you integrate the rule into the rulesfile.
As the check script runs, the script reports the checking of the validity of the rules file and eachprofile. If no errors are encountered, the script reports the following information.
The custom JumpStart configuration is ok
Ensure that rootowns the rules.okfile and that the permissions are set to 644.
After you validate the rules file, you can learn more about optional custom JumpStart featuresin Chapter 4, “Using Optional Custom JumpStart Features (Tasks).” You can learn aboutperforming custom JumpStart installations in Chapter 6, “Performing a Custom JumpStartInstallation (Tasks).”
4
See Also
Validating the rules File
Chapter 3 • Preparing Custom JumpStart Installations (Tasks) 55

56

Using Optional Custom JumpStart Features(Tasks)
This chapter describes the optional features that are available to create additional customJumpStart installation tools.
Note – If you are installing a Solaris ZFS root pool, see Chapter 9, “Installing a ZFS Root PoolWith JumpStart,” for limitations and profile examples.
■ “Creating Begin Scripts” on page 57■ “Creating Finish Scripts” on page 59■ “Creating a Compressed Configuration File” on page 66■ “Creating Disk Configuration Files” on page 67■ “Using a Site-Specific Installation Program” on page 73
Note – Instructions in this chapter are valid for either a SPARC server or an x86 server that isbeing used to provide custom JumpStart files, called a profile server. A profile server can providecustom JumpStart files for different platform types. For example, a SPARC server can providecustom JumpStart files for both SPARC based systems and x86 based systems.
Creating Begin ScriptsA begin script is a user-defined Bourne shell script that you specify in the rules file. A beginscript performs tasks before the Solaris software is installed on a system. You can use beginscripts only when using custom JumpStart to install the Solaris software.
Use a begin script to perform one of the following tasks:
■ Creating derived profiles■ Backing up files before upgrading
4C H A P T E R 4
57

Important Information About Begin Scripts■ Do not specify something in the script that would prevent the mounting of file systems onto
/a during an initial or upgrade installation. If the JumpStart program cannot mount the filesystems onto /a, an error occurs and installation fails.
■ During the installation, output from the begin script is deposited in /tmp/begin.log. Afterthe installation is completed, the log file is redirected to/var/sadm/system/logs/begin.log.
■ Ensure that root owns the begin script and that the permissions are set to 644.■ You can use custom JumpStart environment variables in your begin scripts. For a list of
environment variables, see “Custom JumpStart Environment Variables” on page 155.■ Save begin scripts in the JumpStart directory.
Note – For the Solaris 10 release, a sample JumpStart script, set_nfs4_domain, was provided onmedia to prevent being prompted during a JumpStart installation. This script suppressed theNFSv4 prompt during installation. This script is no longer required. Starting with the Solaris10 5/09 release, use the sysidcfg keyword, nfs4_domain that suppresses being prompted. Theset_nfs4_domain script no longer works to suppress a prompt.
If you have non-global zones installed and the new nfs4_domain keyword exists in thesysidcfg file, the first boot of a non-global zone sets the domain. Otherwise, the Solarisinteractive installation program comes up and you are prompted to provide a domain namebefore the boot process completes.
See “nfs4_domain Keyword” in Solaris 10 10/09 Installation Guide: Network-Based Installations
Creating Derived Profiles With a Begin ScriptA derived profile is a profile that is dynamically created by a begin script during a customJumpStart installation. Derived profiles are needed when you cannot set up the rules file tomatch specific systems to a profile. For example, you might need to use derived profiles foridentical system models that have different hardware components, such as systems that containdifferent frame buffers.
To set up a rule to use a derived profile, you must perform the following tasks:
■ Set the profile field to an equal sign (=) instead of a profile.■ Set the begin field to a begin script that creates a derived profile that depends on the system
on which you intend to install Solaris.
When a system matches a rule with the profile field equal to an equal sign (=), the begin scriptcreates the derived profile that is used to install the Solaris software on the system.
Creating Begin Scripts
Solaris 10 10/09 Installation Guide: Custom JumpStart and Advanced Installations • October 200958

The following is an example of a begin script that creates the same derived profile every time.You can write a begin script to create different derived profiles that depend on the evaluation ofrules.
EXAMPLE 4–1 Begin Script That Creates a Derived Profile
#!/bin/sh
echo "install_type initial_install" > ${SI_PROFILE}
echo "system_type standalone" >> ${SI_PROFILE}
echo "partitioning default" >> ${SI_PROFILE}
echo "cluster SUNWCprog" >> ${SI_PROFILE}
echo "package SUNWman delete" >> ${SI_PROFILE}
echo "package SUNWolman delete" >> ${SI_PROFILE}
echo "package SUNWxwman delete" >> ${SI_PROFILE}
In the example, the begin script must use the SI_PROFILE environment variable for the name ofthe derived profile, which is set to /tmp/install.input by default.
Note – If a begin script is used to create a derived profile, ensure the script does not have anyerrors. A derived profile is not verified by the check script because derived profiles are notcreated until the execution of the begin script.
Creating Finish ScriptsA finish script is a user-defined Bourne shell script that you specify in the rules file. A finishscript performs tasks after the Solaris software is installed on a system, but before the systemreboots. You can use finish scripts only when using custom JumpStart to install Solaris.
Tasks that you can perform with a finish script include the following:
■ Adding files■ Adding individual packages or patches in addition to the ones that are installed in a
particular software group■ Customizing the root environment■ Setting the system's root password■ Installing additional software
Creating Finish Scripts
Chapter 4 • Using Optional Custom JumpStart Features (Tasks) 59

Important Information About Finish Scripts■ The Solaris installation program mounts the system's file systems on /a. The file systems
remain mounted on /a until the system reboots. You can use the finish script to add, change,or remove files from the newly installed file system hierarchy by modifying the file systemsthat are respective to /a.
■ During the installation, output from the finish script is deposited in /tmp/finish.log.After the installation is completed, the log file is redirected to/var/sadm/system/logs/finish.log.
■ Ensure that root owns the finish script and that the permissions are set to 644.■ You can use custom JumpStart environment variables in your finish scripts. For a list of
environment variables, see “Custom JumpStart Environment Variables” on page 155.■ Save finish scripts in the JumpStart directory.
▼ To Add Files With a Finish ScriptThrough a finish script, you can add files from the JumpStart directory to an already installedsystem. You can add the files because the JumpStart directory is mounted on the directory thatis specified by the SI_CONFIG_DIR variable. The directory is set to /tmp/install_config bydefault.
Note – You can also replace files by copying files from the JumpStart directory to already existingfiles on the installed system.
Copy all of the files that you are adding to the installed system to the JumpStart directory.
Insert the following line in the finish script for each file that you want to be copied to the newlyinstalled file system hierarchy:cp ${SI_CONFIG_DIR}/file_name /a/path_name
Adding a File With a Finish Script
For example, assume you have a special application, site_prog, developed for all users at yoursite. If you place a copy of site_prog into the JumpStart directory, the following line in a finishscript copies site_prog from the JumpStart directory into a system's /usr/bin directory:
cp ${SI_CONFIG_DIR}/site_prog /a/usr/bin
1
2
Example 4–2
Creating Finish Scripts
Solaris 10 10/09 Installation Guide: Custom JumpStart and Advanced Installations • October 200960

Adding Packages or Patches With a Finish ScriptYou can create a finish script to automatically add packages or patches after the Solaris softwareis installed on a system. By adding packages with a finish script, you reduce time and ensureconsistency in which packages and patches are installed on different systems at your site.
When you use the pkgadd(1M) or patchadd(1M) commands in finish scripts, use the -R optionto specify /a as the root path.
■ Example 4–3 shows an example of a finish script that adds packages.■ Example 4–4 shows an example of a finish script that adds patches.
EXAMPLE 4–3 Adding Packages With a Finish Script
#!/bin/sh
BASE=/a
MNT=/a/mnt
ADMIN_FILE=/a/tmp/admin
mkdir ${MNT}
mount -f nfs sherlock:/export/package ${MNT}
cat >${ADMIN_FILE} <<DONT_ASK
mail=root
instance=overwrite
partial=nocheck
runlevel=nocheck
idepend=nocheck
rdepend=nocheck
space=ask
setuid=nocheck
conflict=nocheck
action=nocheck
basedir=default
DONT_ASK
/usr/sbin/pkgadd -a ${ADMIN_FILE} -d ${MNT} -R ${BASE} SUNWxyz
umount ${MNT}
rmdir ${MNT}
The following describes some commands for this example.
■ The following command mounts a directory on a server that contains the package to install.
mount -f nfs sherlock:/export/package ${MNT}
Creating Finish Scripts
Chapter 4 • Using Optional Custom JumpStart Features (Tasks) 61

EXAMPLE 4–3 Adding Packages With a Finish Script (Continued)
■ The following command creates a temporary package administration file, admin, to forcethe pkgadd(1M) command not to perform checks or prompt for questions when installing apackage. Use the temporary package administration file to maintain a hands-off installationwhen you are adding packages.
cat >${ADMIN_FILE} <<DONT_ASK
■ The following pkgadd command adds the package by using the -a option, specifying thepackage administration file, and the -R option, specifying the root path.
/usr/sbin/pkgadd -a ${ADMIN_FILE} -d ${MNT} -R ${BASE} SUNWxyz
EXAMPLE 4–4 Adding Patches With a Finish Script
#!/bin/sh
########
#
# USER-CONFIGURABLE OPTIONS
#
########
# The location of the patches to add to the system after it’s installed.
# The OS rev (5.x) and the architecture (‘mach‘) will be added to the
# root. For example, /foo on a 8 SPARC would turn into /foo/5.8/sparc
LUPATCHHOST=ins3525-svr
LUPATCHPATHROOT=/export/solaris/patchdb
#########
#
# NO USER-SERVICEABLE PARTS PAST THIS POINT
#
#########
BASEDIR=/a
# Figure out the source and target OS versions
echo Determining OS revisions...
SRCREV=‘uname -r‘echo Source $SRCREV
LUPATCHPATH=$LUPATCHPATHROOT/$SRCREV/‘mach‘
#
# Add the patches needed
#
Creating Finish Scripts
Solaris 10 10/09 Installation Guide: Custom JumpStart and Advanced Installations • October 200962

EXAMPLE 4–4 Adding Patches With a Finish Script (Continued)
echo Adding OS patches
mount $LUPATCHHOST:$LUPATCHPATH /mnt >/dev/null 2>&1
if [ $? = 0 ] ; then
for patch in ‘cat /mnt/*Recommended/patch_order‘ ; do
(cd /mnt/*Recommended/$patch ; echo yes | patchadd -u -d -R $BASEDIR .)
done
cd /tmp
umount /mnt
else
echo "No patches found"if
Note – In the past, the chroot(1M) command was used with the pkgadd and patchadd
commands in the finish script environment. In rare instances, some packages or patches do notwork with the -R option. You must create a dummy /etc/mnttab file in the /a root path beforeissuing the chroot command.
To create a dummy /etc/mnttab file, add the following line to your finish script:
cp /etc/mnttab /a/etc/mnttab
Customizing the Root Environment With a FinishScriptYou can also use finish scripts to customize files that are already installed on a system. Forexample, the finish script in Example 4–5 customizes the root environment by appendinginformation to the .cshrc file in the root (/) directory.
EXAMPLE 4–5 Customizing the Root Environment With a Finish Script
#!/bin/sh
#
# Customize root’s environment
#
echo "***adding customizations in /.cshrc"test -f a/.cshrc || {
cat >> a/.cshrc <<EOF
set history=100 savehist=200 filec ignoreeof prompt="\$user@‘uname -n‘> "alias cp cp -i
alias mv mv -i
alias rm rm -i
Creating Finish Scripts
Chapter 4 • Using Optional Custom JumpStart Features (Tasks) 63

EXAMPLE 4–5 Customizing the Root Environment With a Finish Script (Continued)
alias ls ls -FC
alias h history
alias c clear
unset autologout
EOF
}
Setting a System's Root Password With a Finish ScriptAfter the Solaris software is installed on a system, the system reboots. Before the boot process iscompleted, the system prompts for the root password. Until someone types a password, thesystem cannot finish booting.
A finish script that is named set_root_pw is saved in the auto_install_sample directory. Thefinish script shows how to set the root password automatically, without prompting.set_root_pw is shown in Example 4–6.
Note – If you set the system's root password with a finish script, users might attempt to discoverthe root password from the encrypted password in your finish script. Ensure that you safeguardagainst users who might try to determine the root password.
EXAMPLE 4–6 Setting the System's Root Password With a Finish Script
#!/bin/sh
#
# @(#)set_root_pw 1.4 93/12/23 SMI
#
# This is an example Bourne shell script to be run after installation.
# It sets the system’s root password to the entry defined in PASSWD.
# The encrypted password is obtained from an existing root password entry
# in /etc/shadow from an installed machine.
echo "setting password for root"
# set the root password
PASSWD=dKO5IBkSF42lw
#create a temporary input file
cp /a/etc/shadow /a/etc/shadow.orig
mv /a/etc/shadow /a/etc/shadow.orig
nawk -F: ’{
if ( $1 == "root" )
Creating Finish Scripts
Solaris 10 10/09 Installation Guide: Custom JumpStart and Advanced Installations • October 200964

EXAMPLE 4–6 Setting the System's Root Password With a Finish Script (Continued)
printf"%s:%s:%s:%s:%s:%s:%s:%s:%s\n",$1,passwd,$3,$4,$5,$6,$7,$8,$9else
printf"%s:%s:%s:%s:%s:%s:%s:%s:%s\n",$1,$2,$3,$4,$5,$6,$7,$8,$9}’ passwd="$PASSWD" /a/etc/shadow.orig > /a/etc/shadow
#remove the temporary file
rm -f /a/etc/shadow.orig
# set the flag so sysidroot won’t prompt for the root password
sed -e ’s/0 # root/1 # root/’ ${SI_SYS_STATE} > /tmp/state.$$
mv /tmp/state.$$ ${SI_SYS_STATE}
The following describes some of the commands in this example.
■ The following command sets the variable PASSWD to an encrypted root password that isobtained from an existing entry in a system's /etc/shadow file.
#create a temporary input file
■ The following command creates a temporary input file of /a/etc/shadow.
cp /a/etc/shadow /a/etc/shadow.orig
■ The following command changes the root entry in the /etc/shadow file for the newlyinstalled system by using $PASSWD as the password field.
if ( $1 == "root" )
■ The following command removes the temporary /a/etc/shadow file.
rm -f /a/etc/shadow.orig
■ The following command changes the entry from 0 to a 1 in the state file so that the user isnot prompted for the root password. The state file is accessed by using the variableSI_SYS_STATE, which has a value currently of /a/etc/.sysIDtool.state. To avoidproblems with your scripts if this value changes, always reference this file by using$SI_SYS_STATE. The sed command that is shown here contains a tab character after the 0and after the 1.
sed -e ’s/0 # root/1 # root/’ ${SI_SYS_STATE} > /tmp/state.$$
Non-Interactive Installations With Finish ScriptsYou can use finish scripts to install additional software after the Solaris OS is installed. TheSolaris installation program prompts you to enter information during the installation. Tomaintain a hands-off installation, you can run the Solaris installation program with the-nodisplay or -noconsole options.
Creating Finish Scripts
Chapter 4 • Using Optional Custom JumpStart Features (Tasks) 65

TABLE 4–1 Solaris Installation Options
Option Description
-nodisplay Runs the installer without a graphic user interface. Use the defaultproduct installation unless the installation was modified by the-locales option.
-noconsole Runs the installation without any interactive text console device. Usefulwhen paired with -nodisplay for UNIX script use.
For more information, see the man page installer(1M).
Creating a Compressed Configuration FileInstead of using the add_install_client command to specify the location of the customJumpStart configuration files, you can specify the location of the files when you boot the system.However, you can only specify the name of one file. As a result, you must compress all of thecustom JumpStart configuration files into one file.
■ For SPARC based systems, you specify the location of the file in the boot command■ For x86 based systems, you specify the location of the files by editing the GRUB entry in the
GRUB menu
The compressed configuration file can be one of the following types:
■ tar
■ Compressed tar
■ zip
■ bzip tar
▼ To Create a Compressed Configuration FileChange the directory to the JumpStart directory on the profile server.# cd jumpstart_dir_path
Use a compression tool to compress the custom JumpStart configuration files into one file.
Note – The compressed configuration file cannot contain relative paths. The custom JumpStartconfiguration files must be in the same directory as the compressed file.
The compressed configuration file must contain the following files:
■ Profile
1
2
Creating a Compressed Configuration File
Solaris 10 10/09 Installation Guide: Custom JumpStart and Advanced Installations • October 200966

■ rules
■ rules.ok
You can also include the sysidcfg file in the compressed configuration file.
Save the compressed configuration file on an NFS server, an HTTP server, or on a local hard disk.
Compressed Configuration File ExampleThe following example shows how to use the tar command to create a compressedconfiguration file that is named config.tar. The custom JumpStart configuration files arelocated in the /jumpstart directory.
EXAMPLE 4–7 Creating a Compressed Configuration File
# cd /jumpstart
# tar -cvf config.tar *
a profile 1K
a rules 1K
a rules.ok 1K
a sysidcfg 1K
Creating Disk Configuration FilesThis section describes how to create single-disk and multiple-disk configuration files. Diskconfiguration files enable you to use pfinstall(1M) from a single system to test profiles againstdifferent disk configurations.
▼ SPARC: To Create a Disk Configuration FileLocate a SPARC based system with a disk you want to test.
Become superuser or assume an equivalent role.Roles contain authorizations and privileged commands. For more information about roles, see“Configuring RBAC (Task Map)” in System Administration Guide: Security Services.
Create a single–disk configuration file by redirecting the output of the prtvtoc(1M) commandto a file.# prtvtoc /dev/rdsk/device_name >disk_config_file
/dev/rdsk/device_name The device name of the system's disk. device_name must be in theform cwtxdys2 or cxdys2.
3
1
2
3
Creating Disk Configuration Files
Chapter 4 • Using Optional Custom JumpStart Features (Tasks) 67

disk_config_file The name of the disk configuration file.
Determine if you are testing the installation of Solaris software on multiple disks.
■ If no, stop. You are finished.■ If yes, concatenate the single–disk configuration files and save the output in a new file.
# cat disk_file1 disk_file2 >multi_disk_config
The new file becomes the multiple-disk configuration file, as in the following example.
# cat 104_disk2 104_disk3 104_disk5 >multi_disk_test
Determine if the target numbers in the disk device names are unique in the multiple-diskconfiguration file that you created in the previous step.
■ If yes, stop. You are finished.■ If no, open the file with a text editor and make the target numbers unique in the disk device
names.For example, assume that the file contains the same target number, t0, for different diskdevice names, as shown here.
* /dev/rdsk/c0t0d0s2 partition map
...
* /dev/rdsk/c0t0d0s2 partition map
Change the second target number to t2, as shown here:
* /dev/rdsk/c0t0d0s2 partition map
...
* /dev/rdsk/c0t2d0s2 partition map
SPARC: Disk Configuration File ExampleThe following example shows how to create a single–disk configuration file, 104_test, on aSPARC based system with a 104-Mbyte disk.
EXAMPLE 4–8 SPARC: Creating a Disk Configuration File
You redirect the output of the prtvtoc command to a single–disk configuration file that isnamed 104_test:
# prtvtoc /dev/rdsk/c0t3d0s2 >104_test
4
5
Creating Disk Configuration Files
Solaris 10 10/09 Installation Guide: Custom JumpStart and Advanced Installations • October 200968

EXAMPLE 4–8 SPARC: Creating a Disk Configuration File (Continued)
The contents of the 104_test file resemble the following:
* /dev/rdsk/c0t3d0s2 partition map
*
* Dimensions:
* 512 bytes/sector
* 72 sectors/track
* 14 tracks/cylinder
* 1008 sectors/cylinder
* 2038 cylinders* 2036 accessible cylinders
* Flags:
* 1: unmountable
* 10: read-only
*
* First Sector Last
* Partition Tag Flags Sector Count Sector Mount Directory
1 2 00 0 164304 164303 /
2 5 00 0 2052288 2052287
3 0 00 164304 823536 987839 /disk2/b298
5 0 00 987840 614880 1602719 /install/298/sparc/work
7 0 00 1602720 449568 2052287 /space
You have created disk configuration files for a SPARC based system. “Testing a Profile” onpage 49 contains information about using disk configuration files to test profiles.
▼ x86: To Create a Disk Configuration FileLocate an x86 based system that contains a disk that you are testing.
Become superuser or assume an equivalent role.Roles contain authorizations and privileged commands. For more information about roles, see“Configuring RBAC (Task Map)” in System Administration Guide: Security Services.
Create part of the single-disk configuration file by saving the output of the fdisk(1M)command in a file.# fdisk -R -W disk_config_file -h /dev/rdsk/device_name
disk_config_file The name of a disk configuration file.
/dev/rdsk/device_name The device name of the fdisk layout of the entire disk.device_name must be in the form cwtxdys0 or cxdys0.
1
2
3
Creating Disk Configuration Files
Chapter 4 • Using Optional Custom JumpStart Features (Tasks) 69

Append the output of the prtvtoc(1M) command to the disk configuration file:# prtvtoc /dev/rdsk/device_name >>disk_config
/dev/rdsk/device_name The device name of the system's disk. device_name must be in theform cwtxdys2 or cxdys2.
disk_config The name of the disk configuration file.
Determine if you are testing the installation of Solaris software on multiple disks.
■ If no, stop. You are finished.■ If yes, concatenate the single-disk configuration files and save the output in a new file.
# cat disk_file1 disk_file2 >multi_disk_config
The new file becomes the multiple-disk configuration file, as in the following example.
# cat 104_disk2 104_disk3 104_disk5 >multi_disk_test
Determine if the target numbers in the disk device names are unique in the multiple-diskconfiguration file that you created in the previous step.
■ If yes, stop. You are finished.■ If no, open the file with a text editor and make the target numbers unique.
For example, the file might contain the same target number, t0, for different disk devicenames as shown here:
* /dev/rdsk/c0t0d0s2 partition map
...
* /dev/rdsk/c0t0d0s2 partition map
Change the second target number to t2, as shown here:
* /dev/rdsk/c0t0d0s2 partition map
...
* /dev/rdsk/c0t2d0s2 partition map
x86: Disk Configuration File ExampleThe following example shows how to create a single-disk configuration file, 500_test, on anx86 based system that contains a 500-Mbyte disk.
4
5
6
Creating Disk Configuration Files
Solaris 10 10/09 Installation Guide: Custom JumpStart and Advanced Installations • October 200970

EXAMPLE 4–9 x86: Creating a Disk Configuration File
First, you save the output of the fdisk command to a file that is named 500_test:
# fdisk -R -W 500_test -h /dev/rdsk/c0t0d0p0
The 500_test file looks like the following:
* /dev/rdsk/c0t0d0p0 default fdisk table
* Dimensions:
* 512 bytes/sector
* 94 sectors/track
* 15 tracks/cylinder
* 1455 cylinders
*
* HBA Dimensions:
* 512 bytes/sector
* 94 sectors/track
* 15 tracks/cylinder
* 1455 cylinders
*
* systid:
* 1: DOSOS12
* 2: PCIXOS
* 4: DOSOS16
* 5: EXTDOS
* 6: DOSBIG
* 86: DOSDATA
* 98: OTHEROS
* 99: UNIXOS
* 130: SUNIXOS
*
* Id Act Bhead Bsect Bcyl Ehead Esect Ecyl Rsect Numsect
130 128 44 3 0 46 30 1001 1410 2050140
Second, you append the output of the prtvtoc command to the 500_test file:
# prtvtoc /dev/rdsk/c0t0d0s2 >>500_test
The 500_test file is now a complete disk configuration file:
* /dev/rdsk/c0t0d0p0 default fdisk table
* Dimensions:
* 512 bytes/sector
* 94 sectors/track
* 15 tracks/cylinder
* 1455 cylinders
*
Creating Disk Configuration Files
Chapter 4 • Using Optional Custom JumpStart Features (Tasks) 71

EXAMPLE 4–9 x86: Creating a Disk Configuration File (Continued)
* HBA Dimensions:
* 512 bytes/sector
* 94 sectors/track
* 15 tracks/cylinder
* 1455 cylinders
*
* systid:
* 1: DOSOS12
* 2: PCIXOS
* 4: DOSOS16
* 5: EXTDOS
* 6: DOSBIG
* 86: DOSDATA
* 98: OTHEROS
* 99: UNIXOS
* 130: SUNIXOS
*
* Id Act Bhead Bsect Bcyl Ehead Esec Ecyl Rsect Numsect
130 128 44 3 0 46 30 1001 1410 2050140
* /dev/rdsk/c0t0d0s2 partition map
*
* Dimensions:
* 512 bytes/sector
* 94 sectors/track
* 15 tracks/cylinder
* 1110 sectors/cylinder
* 1454 cylinders
* 1452 accessible cylinders
*
* Flags:
* 1: unmountable
* 10: read-only
* First Sector Last
* Partition Tag Flags Sector Count Sector Mount Directory
2 5 01 1410 2045910 2047319
7 6 00 4230 2043090 2047319 /space
8 1 01 0 1410 1409
9 9 01 1410 2820 422987
You have created disk configuration files for an x86 based system. “Testing a Profile” on page 49contains information about using disk configuration files to test profiles.
Creating Disk Configuration Files
Solaris 10 10/09 Installation Guide: Custom JumpStart and Advanced Installations • October 200972
Using a Site-Specific Installation ProgramYou can also use begin and finish scripts to create your own installation program to installSolaris software.
When you specify a minus sign (-) in the profile field, begin and finish scripts control howSolaris software is installed on a system instead of the profile and the Solaris installationprogram.
For example, if the following rule matches a system, the x_install.beg begin script and thex_install.fin finish script install Solaris software on the system that is named clover:
hostname clover x_install.beg - x_install.fin
Using a Site-Specific Installation Program
Chapter 4 • Using Optional Custom JumpStart Features (Tasks) 73

74

Creating Custom Rule and Probe Keywords(Tasks)
This chapter provides information and procedures for creating your own custom rule andprobe keywords.
Note – If you are installing a Solaris ZFS root pool, see Chapter 9, “Installing a ZFS Root PoolWith JumpStart,” for limitations and profile examples.
■ “Probe Keywords” on page 75■ “Creating a custom_probes File” on page 76■ “Validating the custom_probes File” on page 78
Probe KeywordsTo understand what a probe keyword is, you first need to recall what a rule keyword is. A rulekeyword is a predefined lexical unit or word that describes a general system attribute, such ashost name, hostname, or memory size, memsize. Rule keywords and the values that areassociated with them enable you to match a system that has the same attribute to a profile. Thismatch of a system's attributes defines how the Solaris software is to be installed on each systemin the group.
Custom JumpStart environment variables, which you use in begin and finish scripts, are set ondemand. For example, information about which operating system is already installed on asystem is only available in SI_INSTALLED after the installed rule keyword is used.
In some situations, you might need to extract the same information in a begin or finish scriptfor a purpose other than to match a system and run a profile. Probe keywords provide thesolution. Probe keywords extract attribute information and remove the need for you to set up amatching condition and run a profile.
For a list of probe keywords and values, see “Probe Keywords and Values” on page 157.
5C H A P T E R 5
75

Creating a custom_probes FileThe rule and probe keywords that are described in “Rule Keywords and Values” on page 107 and“Probe Keywords and Values” on page 157 might not be precise enough for your needs. You candefine your own custom rule or probe keywords by creating a custom_probes file.
The custom_probes file is a Bourne shell script that contains two types of functions. You mustsave the custom_probes file in the same JumpStart directory where you saved the rules file.The two types of functions that you can define in a custom_probes file are as follows:■ Probe – Gathers the information you want or does the actual work and sets a corresponding
SI_ environment variable that you define. Probe functions become probe keywords.■ Comparison – Calls a corresponding probe function, compares the output of the probe
function, and returns 0 if the keyword matches or 1 if the keyword does not match.Comparison functions become rule keywords.
Syntax of the custom_probes FileThe custom_probes file can contain any valid Bourne shell command, variable, or algorithm.
Note – You can define probe and comparison functions that require a single argument in thecustom_probes file. When you use the corresponding custom probe keyword in the rules file,the argument after the keyword is interpreted (as $1).
When you use the corresponding custom rule keyword in the rules file, the arguments areinterpreted in sequence. The sequence starts after the keyword and ends before the next && orbegin script, whichever comes first.
The custom_probes file must meet the following requirements:
■ Have the name custom_probes■ Have root as its owner■ Be executable and have permissions set to 755■ Contain at least one probe function and one corresponding comparison function
To improve clarity and organization, define all probe functions first, at the top of the file,followed by all comparison functions.
Syntax of Function Names in custom_probes
The name of a probe function must begin with probe_. The name of a comparison functionmust begin with cmp_.
Creating a custom_probes File
Solaris 10 10/09 Installation Guide: Custom JumpStart and Advanced Installations • October 200976

Functions that begin with probe_ define new probe keywords. For example, the functionprobe_tcx defines the new probe keyword tcx. Functions that begin with cmp_ define new rulekeywords. For example, cmp_tcx defines the new rule keyword tcx.
▼ To Create a custom_probes FileUse a text editor to create a Bourne shell script text file. Name the file custom_probes.
In the custom_probes text file, define your probe and comparison functions.
Note – You can define probe and comparison functions that require arguments in thecustom_probes file. When you use the corresponding custom probe keyword in the rules file,the arguments after the keyword are interpreted in sequence (as $1, $2, and so on).
When you use the corresponding custom rule keyword in the rules file, the arguments areinterpreted in sequence. The sequence starts after the keyword and ends before the next && orbegin script, whichever comes first.
Save the custom_probes file in the JumpStart directory next to the rulesfile.
Ensure that rootowns the rulesfile and that the permissions are set to 644.
Examples of a custom_probes File and KeywordYou can find additional examples of probe and comparison functions in the followingdirectories:
■ /usr/sbin/install.d/chkprobe on a system that has the Solaris software installed■ /Solaris_10/Tools/Boot/usr/sbin/install.d/chkprobe on the Solaris Operating
System DVD or on the Solaris Software - 1 CD
The following custom_probes file contains a probe and comparison function that tests for thepresence of a TCX graphics card.
EXAMPLE 5–1 custom_probes File
#!/bin/sh
#
# custom_probe script to test for the presence of a TCX graphics card.
#
#
1
2
3
4
Creating a custom_probes File
Chapter 5 • Creating Custom Rule and Probe Keywords (Tasks) 77

EXAMPLE 5–1 custom_probes File (Continued)
# PROBE FUNCTIONS
#
probe_tcx() {
SI_TCX=‘modinfo | grep tcx | nawk ’{print $6}’‘export SI_TCX
}
#
# COMPARISON FUNCTIONS
#
cmp_tcx() {
probe_tcx
if [ "X${SI_TCX}" = "X${1}" ]; then
return 0
else
return 1
if
}
The following example rules file shows the use of the probe keyword that is defined in thepreceding example, tcx. If a TCX graphics card is installed and found in a system, profile_tcxis run. Otherwise, profile is run.
Note – Always place probe keywords at or near the beginning of the rules file. This placementensures that the keywords are read and run before other rule keywords that might rely on theprobe keywords.
EXAMPLE 5–2 Custom Probe Keyword Used in a rules File
probe tcx
tcx tcx - profile_tcx -
any any - profile -
Validating the custom_probes FileBefore you can use a profile, rules, and custom_probes file, you must run the check script tovalidate that the files are set up correctly. If all profiles, rules, and probe and comparisonfunctions are correctly set up, the rules.ok and custom_probes.ok files are created. Table 5–1describes what the check script does.
Validating the custom_probes File
Solaris 10 10/09 Installation Guide: Custom JumpStart and Advanced Installations • October 200978

TABLE 5–1 What Happens When You Use the check Script
Stage Description
1 check searches for a custom_probes file.
2 If the file exists, check creates the custom_probes.ok file from the custom_probes file, removesall comments and blank lines, and retains all Bourne shell commands, variables, and algorithms.Then, check adds the following comment line at the end:
# version=2 checksum=num
▼ To Validate the custom_probes FileVerify that the check script is located in the JumpStart directory.
Note – The check script is in the Solaris_10/Misc/jumpstart_sample directory on the SolarisOperating System DVD or on the Solaris Software - 1 CD.
Change to the JumpStart directory.
Run the check script to validate the rules and custom_probes files.$ ./check -p path -r file_name
-p path Validates the custom_probes file by using the check script from the Solarissoftware image for your platform instead of the check script from the systemyou are using. path is the image on a local disk or a mounted Solaris OperatingSystem DVD or Solaris Software - 1 CD.
Use this option to run the most recent version of check if your system isrunning a previous version of Solaris.
-r file_name Specifies a file name other than the one that is named custom_probes. Byusing the -r option, you can test the validity of a set of functions beforeintegrating the functions into the custom_probes file.
As the check script runs, the script reports the validity of the rules and custom_probes filesand each profile. If no errors are encountered, the script reports: “The custom JumpStartconfiguration is ok” and creates the rules.ok and custom_probes.ok files in the JumpStartdirectory.
Determine if the custom_probes.ok file is executable.
■ If yes, go to Step 5.■ If no, type the following command.
1
2
3
4
Validating the custom_probes File
Chapter 5 • Creating Custom Rule and Probe Keywords (Tasks) 79

# chmod +x custom_probes
Ensure that rootowns the custom_probes.ok file and that the permissions are set to 755.5
Validating the custom_probes File
Solaris 10 10/09 Installation Guide: Custom JumpStart and Advanced Installations • October 200980

Performing a Custom JumpStart Installation(Tasks)
This chapter describes how to perform a custom JumpStart installation on a SPARC based or anx86 based system. You need to follow these procedures on the system on which you intend toinstall the Solaris software.
Note – If you are installing a Solaris ZFS root pool, see Chapter 9, “Installing a ZFS Root PoolWith JumpStart,” for limitations and profile examples.
■ “SPARC: To Perform an Installation or Upgrade With the Custom JumpStart Program” onpage 86
■ “x86: To Perform an Installation or Upgrade With the Custom JumpStart Program and WithGRUB” on page 90
Limitations for a JumpStart InstallationA number of issues might cause problems during a JumpStart installation. Review the tablebelow for specific information.
Note – Starting with the Solaris 10 10/09 release, you can set up a JumpStart profile to identify aflash archive of a ZFS root pool. See “What's New in the Solaris 10 10/09 Release” on page 159.See “What's New in the Solaris 10 10/09 Release” on page 159.
6C H A P T E R 6
81

TABLE 6–1 JumpStart Installation Limitations
Issue Description For More Information
The sample JumpStart scriptis no longer required tosuppress the NFSv4 prompt
For the Solaris 10 release, a sample JumpStart script,set_nfs4_domain, was provided on media to prevent beingprompted during a JumpStart installation. This scriptsuppressed the NFSv4 prompt during installation. Thisscript is no longer required. Starting with the Solaris 108/07 release, use the sysidcfg keyword, nfs4_domain thatsuppresses being prompted. The set_nfs4_domain scriptno longer works to suppress a prompt.
If you have non-global zones installed and the newnfs4_domain keyword exists in the sysidcfg file, the firstboot of a non-global zone sets the domain. Otherwise, theSolaris interactive installation program is displayed and youare prompted to provide a domain name before the bootprocess completes.
“nfs4_domain Keyword” inSolaris 10 10/09 Installation Guide:Network-Based Installations
Selecting a keyboardlanguage in the sysidcfg fileprevents a prompt
If your keyboard is not self-identifying and you want toprevent being prompted during your JumpStartinstallation, select the keyboard language in your sysidcfgfile. For JumpStart installations, the default is for the U.S.English language. To select another language and itscorresponding keyboard layout, set the keyboard keywordin your sysidcfg file.
■ “sysidcfg File Keywords” inSolaris 10 10/09 Installation Guide:Network-Based Installations
■ For man pages, see:
■ sysidtool(1M)■ sysidcfg(4)
If you have non-globalzones, use Solaris LiveUpgrade to upgrade
You can upgrade a system that has non-global zonesinstalled with JumpStart, but Solaris Live Upgrade is therecommended program to upgrade. JumpStart mightrequire extensive upgrade time, because the time requiredto complete the upgrade increases linearly with the numberof installed non-global zones.
Solaris 10 10/09 Installation Guide:Solaris Live Upgrade and UpgradePlanning
A Solaris Flash archivecannot contain non-globalzones
If you use a Solaris Flash archive to install, an archive thatcontains non-global zones is not properly installed on yoursystem.
For general information about creatingnon-global zones, see SystemAdministration Guide: SolarisContainers-Resource Management andSolaris Zones.
SPARC: Additionalhardware requirements
Refer to your hardware documentation for any additionalrequirements for your platform that might be required tocomplete a JumpStart installation.
Limitations for a JumpStart Installation
Solaris 10 10/09 Installation Guide: Custom JumpStart and Advanced Installations • October 200982

SPARC: Task Map: Setting Up a System for a Custom JumpStartInstallation
TABLE 6–2 Task Map: Setting Up a System for a Custom JumpStart Installation
Task Description For Instructions
Check if the system is supported. Check the hardwaredocumentation for system supportin the Solaris environment.
Solaris Sun Hardware PlatformGuide at http://docs.sun.com
Check if the system has enoughdisk space for the Solaris software.
Verify that you have plannedenough space to install the Solarissoftware on your system.
Chapter 4, “System Requirements,Guidelines, and Upgrade(Planning),” in Solaris 10 10/09Installation Guide: Planning forInstallation and Upgrade
(Optional) Set system parameters. You can preconfigure systeminformation to avoid beingprompted for the informationduring the installation or upgrade.
Chapter 2, “Preconfiguring SystemConfiguration Information(Tasks),” in Solaris 10 10/09Installation Guide: Network-BasedInstallations
Prepare the system for customJumpStart installation.
Create and validate a rules file andprofile files.
Chapter 3, “Preparing CustomJumpStart Installations (Tasks)”
(Optional) Prepare optionalcustom JumpStart features.
If you are using begin scripts, finishscripts, or other optional features,prepare the scripts or files.
Chapter 4, “Using OptionalCustom JumpStart Features(Tasks),” and Chapter 5, “CreatingCustom Rule and Probe Keywords(Tasks)”
(Optional) Prepare to install theSolaris software from the network.
To install a system from a remoteSolaris Operating System DVD orSolaris Software for SPARCPlatforms CD image, you need toset up the system to boot and installfrom an install server or a bootserver.
Chapter 5, “Installing From theNetwork With DVD Media(Tasks),” in Solaris 10 10/09Installation Guide: Network-BasedInstallations
Chapter 6, “Installing From theNetwork With CD Media (Tasks),”in Solaris 10 10/09 InstallationGuide: Network-Based Installations
(Optional) Prepare for a SolarisFlash archive installation.
Set up specifics for a Solaris Flasharchive installation.
“To Prepare to Install a SolarisFlash Archive With a CustomJumpStart Installation” on page 84
SPARC: Task Map: Setting Up a System for a Custom JumpStart Installation
Chapter 6 • Performing a Custom JumpStart Installation (Tasks) 83

TABLE 6–2 Task Map: Setting Up a System for a Custom JumpStart Installation (Continued)Task Description For Instructions
Perform an installation or upgrade. Boot the system to initiate theinstallation or upgrade.
“SPARC: To Perform anInstallation or Upgrade With theCustom JumpStart Program” onpage 86
SPARC: Performing a Custom JumpStart InstallationDuring a custom JumpStart installation, the JumpStart program attempts to match the systemthat is being installed to the rules in the rules.ok file. The JumpStart program reads the rulesfrom the first rule through the last. A match occurs when the system that is being installedmatches all the system attributes that are defined in the rule. When a system matches a rule, theJumpStart program stops reading the rules.ok file and begins to install the system, based onthe matched rule's profile.
▼ To Prepare to Install a Solaris Flash Archive With aCustom JumpStart InstallationYou can install a full archive for an initial installation or if you have already installed an archive,a differential archive for an update. You can use the custom JumpStart installation method oruse Solaris Live Upgrade to install an archive on an inactive boot environment. This procedureprovides the instructions to install an archive with custom JumpStart.
■ For an overview of a full or differential archive, see Chapter 1, “Solaris Flash (Overview),” inSolaris 10 10/09 Installation Guide: Solaris Flash Archives (Creation and Installation).
■ For procedures about installing an archive on an inactive boot environment by using SolarisLive Upgrade, see “To Install a Solaris Flash Archive With a Profile” in Solaris 10 10/09Installation Guide: Solaris Live Upgrade and Upgrade Planning.
Review the following limitations.
Description Example
Caution: When using the archive_locationkeyword to install a Solaris Flash archive, the archiveand the installation media must contain identicaloperating system versions.
For example, if the archive is a Solaris 10 10/09operating system and you are using DVD media, thenyou must use Solaris 10 10/09 DVD media to installthe archive. If the operating systems versions do notmatch, the installation on the clone system fails.
1
SPARC: Performing a Custom JumpStart Installation
Solaris 10 10/09 Installation Guide: Custom JumpStart and Advanced Installations • October 200984

Description Example
Caution – A Solaris Flash archive cannot be properlycreated when a non-global zone is installed. TheSolaris Flash feature is not compatible with the SolarisZones partitioning technology. If you create a SolarisFlash archive, the resulting archive is not installedproperly when the archive is deployed under theseconditions:■ The archive is created in a non-global zone■ The archive is created in a global zone that has
non-global zones installed
On the install server, create the custom JumpStart rulesfile.For detailed instructions about creating custom JumpStart files, refer to Chapter 3, “PreparingCustom JumpStart Installations (Tasks).”
On the install server, create the custom JumpStart profile file.For examples of Solaris Flash archive profiles, see “Profile Examples” on page 38.
From the existing list of custom JumpStart keywords in Table 8–2, the only keywords validwhen you install a Solaris Flash archive are the following:
Keyword Initial Installation Differential Archive
(required)archive_location X X
fdisk (x86 only) X X
filesys
Note – You cannot set the filesyskeyword to the value auto.
X
forced_deployment X
(required) install_type X X
local_customization X X
no_content_check X
no_master_check X
package X
root_device X X
a. Set the value of the keyword install_type to one of the following types.
■ For a full archive installation, set the value to flash_install.
2
3
SPARC: Performing a Custom JumpStart Installation
Chapter 6 • Performing a Custom JumpStart Installation (Tasks) 85

■ For a differential archive installation, set the value to flash_update.
b. Add the path to the Solaris Flash archive by using the archive_location keyword.For details about the archive_location keyword, refer to “archive_location Keyword”on page 113.
c. Specify the file system configuration.The Solaris Flash archive extraction process does not support auto-layout of partitions.
d. (Optional) If you want to install additional packages at the same time you install an archive,use the package keyword. For more information, see “package Profile Keyword (UFS andZFS)”on page 142.
e. (Optional) If you want to install an additional Solaris Flash archive on the clone system, addone archive_location line for each archive that you want to install.
On the install server, add the clients that you are installing with the Solaris Flash archive.For detailed instructions, refer to the following:■ “Adding Systems to Be Installed From the Network With a DVD Image” in Solaris 10 10/09
Installation Guide: Network-Based Installations■ “Adding Systems to Be Installed From the Network With a CD Image” in Solaris 10 10/09
Installation Guide: Network-Based Installations
Perform the custom JumpStart installation on the clone systems.For detailed instructions, refer to “SPARC: To Perform an Installation or Upgrade With theCustom JumpStart Program” on page 86.
▼ SPARC: To Perform an Installation or Upgrade With theCustom JumpStart Program
If the system is part of a network, ensure that an Ethernet connector or similar network adapteris attached to your system.
If you are installing a system that is connected through a tip(1) line, ensure that your windowdisplay is at least 80 columns wide and 24 rows long.To determine the current dimensions of your tip window, use the stty(1) command.
If you are using the system's DVD-ROM or CD-ROM drive to install the Solaris software, insert theSolaris Operating System for SPARC Platforms DVD or the Solaris Software for SPARC Platforms -1 CD in the drive.
4
5
1
2
3
SPARC: Performing a Custom JumpStart Installation
Solaris 10 10/09 Installation Guide: Custom JumpStart and Advanced Installations • October 200986
If you are using a profile diskette, insert the profile diskette in the system's diskette drive.
Boot the system.
■ If the system is new, out–of–the–box, turn on the system.■ If you want to install or upgrade an existing system, shut down the system. At the ok prompt,
type the appropriate options for the boot command. The syntax of the boot command is thefollowing.
ok boot [cd–dvd|net] - install [url|ask] options
For example, if you type the following command, the OS is installed over the network byusing a JumpStart profile.
ok boot net - install http://131.141.2.32/jumpstart/config.tar
For a description of the boot command options, see the following table.
SPARC only – The system checks hardware and system components and your SPARC basedsystem boots. Booting lasts several minutes.
If you did not preconfigure system information in the sysidcfgfile, when prompted, answerthe questions about system configuration.
Follow the instructions on the screen to install the software.
When the JumpStart program finishes installing the Solaris software, the system rebootsautomatically.
After the installation is finished, installation logs are saved in a file. You can find the installationlogs in the following directories:
■ /var/sadm/system/logs
■ /var/sadm/install/logs
SPARC: Command Reference for the bootCommandThe syntax of the boot command is the following.
ok boot [cd–dvd|net] - install [url|ask] options
The following table describes the command-line options for the boot command that areappropriate for a JumpStart installation.
4
5
6
7
SPARC: Performing a Custom JumpStart Installation
Chapter 6 • Performing a Custom JumpStart Installation (Tasks) 87

Option Description
[cd–dvd|net] Specifies to boot from a CD or a DVD or to boot from an install server on the network.■ cd-dvd - Use cdrom to boot from a CD or a DVD.■ net - Specifies to boot from an install server on the network.
[url| ask] Specifies the location of the custom JumpStart files or prompts you for the location.■ url – Specifies the path to the files. You can specify a URL for files that are located in an HTTP or HTTPS
server:HTTP server
http://server_name:IP_address/jumpstart_dir_path/compressed_config_file&proxy_info
■ If you placed a sysidcfg file in the compressed configuration file, you must specify the IP address ofthe server that contains the file, as in the following example:
http://131.141.2.32/jumpstart/config.tar
■ If you saved the compressed configuration file on an HTTP server that is behind a firewall, you mustuse a proxy specifier during boot. You do not need to specify an IP address for the server thatcontains the file. You must specify an IP address for the proxy server, as in the following example:
http://www.shadow.com/jumpstart/
config.tar&proxy=131.141.6.151
■ ask – Specifies that the installation program prompt you to type the location of the compressedconfiguration file. The prompt happens after the system boots and connects to the network. If you usethis option, you are not able to do a completely hands off JumpStart installation.If you bypass the prompt by pressing Return, the Solaris installation program interactively configuresthe network parameters. The installation program then prompts you for the location of the compressedconfiguration file.
options ■ dhcp – Specifies to use a DHCP server to obtain network installation information that is needed to bootthe system. This option is not needed for a JumpStart installation. If you do not specify to use a DHCPserver by typing dhcp, the system uses the /etc/bootparams file or the naming service bootparamsdatabase. For example, you would not specify dhcp if you wanted keep a static IP address.
■ The options nowin and text do not apply to a JumpStart installation. These options are useful with aninteractive installation. For more information, see “To Install or Upgrade With the Solaris InstallationProgram” in Solaris 10 10/09 Installation Guide: Basic Installations.
SPARC: Performing a Custom JumpStart Installation
Solaris 10 10/09 Installation Guide: Custom JumpStart and Advanced Installations • October 200988

x86: Task Map: Setting Up a System for a Custom JumpStartInstallation
TABLE 6–3 x86: Task Map: Setting Up a System for a Custom JumpStart Installation
Task Description For Instructions
Determine if you need to preservean existing operating system anduser data.
If the existing operating system onthe system uses the entire disk, youmust preserve the existingoperating system so it can co-existwith the Solaris 10 10/09 software.This decision determines how tospecify the fdisk(1M) keyword inthe system's profile.
“x86: fdisk Profile Keyword (UFSand ZFS)” on page 127
Check if the system is supported. Check the hardwaredocumentation for system supportin the Solaris environment.
Hardware manufacturer'sdocumentation
Check if the system has enoughdisk space for the Solaris software.
Verify that you have plannedenough space to install the Solarissoftware on your system.
Chapter 4, “System Requirements,Guidelines, and Upgrade(Planning),” in Solaris 10 10/09Installation Guide: Planning forInstallation and Upgrade
(Optional) Set system parameters. You can preconfigure systeminformation to avoid beingprompted for the informationduring the installation or upgrade.
Chapter 2, “Preconfiguring SystemConfiguration Information(Tasks),” in Solaris 10 10/09Installation Guide: Network-BasedInstallations
Prepare the system for customJumpStart installation.
Create and validate a rules file andprofile files.
Chapter 3, “Preparing CustomJumpStart Installations (Tasks)”
(Optional) Prepare optionalcustom JumpStart features.
If you are using begin scripts, finishscripts, or other optional features,prepare the scripts or files.
Chapter 4, “Using OptionalCustom JumpStart Features(Tasks),” and Chapter 5, “CreatingCustom Rule and Probe Keywords(Tasks)”
(Optional) Prepare to install theSolaris software from the network.
To install a system from a remoteSolaris Operating System for x86Platforms DVD or Solaris SoftwareFor x86 Platforms CD image, youneed to set up the system to bootand install from an install server ora boot server.
Chapter 6, “Installing From theNetwork With CD Media (Tasks),”in Solaris 10 10/09 InstallationGuide: Network-Based Installations
x86: Task Map: Setting Up a System for a Custom JumpStart Installation
Chapter 6 • Performing a Custom JumpStart Installation (Tasks) 89

TABLE 6–3 x86: Task Map: Setting Up a System for a Custom JumpStart Installation (Continued)Task Description For Instructions
(Optional) Prepare for a SolarisFlash archive installation.
Set up specifics for a Solaris Flasharchive installation.
“To Prepare to Install a SolarisFlash Archive With a CustomJumpStart Installation” on page 84
Perform an installation or upgrade. Boot the system to initiate theinstallation or upgrade.
“x86: To Perform an Installation orUpgrade With the CustomJumpStart Program and WithGRUB” on page 90
x86: Performing a Custom JumpStart InstallationDuring a custom JumpStart installation, the JumpStart program attempts to match the systemthat is being installed to the rules in the rules.ok file. The JumpStart program reads the rulesfrom the first rule through the last rule. A match occurs when the system that is being installedmatches all of the system attributes that are defined in the rule. As soon as a system matches arule, the JumpStart program stops reading the rules.ok file and begins to install the system,based on the matched rule's profile.
You can install a Solaris Flash archive with custom JumpStart. For instructions, see “To Prepareto Install a Solaris Flash Archive With a Custom JumpStart Installation” on page 84.
Choose one of the following procedures:
■ For a standard custom JumpStart procedure, see “x86: To Perform an Installation orUpgrade With the Custom JumpStart Program and With GRUB” on page 90.
■ To perform a custom JumpStart by editing the GRUB command, see “x86: Performing aCustom JumpStart Installation by Editing the GRUB Boot Command” on page 92.
▼ x86: To Perform an Installation or Upgrade With theCustom JumpStart Program and With GRUBUse this procedure to install the Solaris OS for an x86 based system with the GRUB menu.
If the system is part of a network, ensure that an Ethernet connector or similar network adapteris attached to your system.
If you want to install a system that is connected through a tip(1) line, ensure that your windowdisplay is at least 80 columns wide and 24 rows long.To determine the current dimensions of your tip window, use the stty(1) command.
1
2
x86: Performing a Custom JumpStart Installation
Solaris 10 10/09 Installation Guide: Custom JumpStart and Advanced Installations • October 200990

Decide if you want to use a profile diskette.A profile diskette is no longer used to boot the system but, a diskette can be prepared thatincludes only the JumpStart directory. The diskette can then be used situations such asperforming a JumpStart installation and booting off the CD-ROM.
■ If you are using a profile diskette, insert the profile diskette into the system's diskette drive.■ If you are not using a profile diskette, continue with step Step 4.
Decide how to boot the system.
■ If you boot from the Solaris Operating System DVD or the Solaris Software - 1 CD, insert thedisc. Your system's BIOS must support booting from a DVD or CD.
■ If you boot from the network, use Preboot Execution Environment (PXE) network boot.The system must support PXE. Enable the system to use PXE by using the system's BIOSsetup tool or the network adapter's configuration setup tool.
(Optional) If you are booting from a DVD or CD, change the boot setting in your system's BIOSand set to boot from DVD or CD media. See your hardware documentation for instructions.
If the system is off, turn the system on. If the system is on, reboot the system.The GRUB menu is displayed. This menu provides a list of boot entries.GNU GRUB version 0.95 (631K lower / 2095488K upper memory)
+-------------------------------------------------------------------+
|Solaris 10 10/09 image_directory |
|Solaris Serial Console ttya |
|Solaris Serial Console ttyb (for lx50, v60x and v65x |
+-------------------------------------------------------------------+
Use the ^ and v keys to select which entry is highlighted. Press
enter to boot the selected OS, ’e’ to edit the commands before
booting, or ’c’ for a command-line.
The image_directory is the name of the directory where the installation image is located. Thepath to the JumpStart files was defined with the add_install_client command and the -coption.
Note – Instead of booting from the GRUB entry now, you can edit the boot entry. After editingthe GRUB entry, you then perform the JumpStart installation. For instructions about how toedit the GRUB entry and a list of installation options, see “x86: Performing a Custom JumpStartInstallation by Editing the GRUB Boot Command” on page 92.
At the prompt, perform one of the following instructions:Select the type of installation you want to perform:
1 Solaris Interactive
3
4
5
6
7
x86: Performing a Custom JumpStart Installation
Chapter 6 • Performing a Custom JumpStart Installation (Tasks) 91
2 Custom JumpStart
3 Solaris Interactive Text (Desktop session)
4 Solaris Interactive Text (Console session)
5. Apply driver updates
6. Single User Shell
Enter the number of your choice.
Please make a selection (1-6).
To select the custom JumpStart method, type 2 and press Enter.
The JumpStart installation begins.
Note –
■ If you do not make a selection within 30 seconds, the Solaris interactive installation programbegins. You can stop the timer by typing any key at the command line.
■ If you select items 1, 3, or 4, you install with an interactive installation. For informationabout interactive installations, see Solaris 10 10/09 Installation Guide: Basic Installations.
■ If you select item 5, you install driver updates.■ If you select item 6, you can perform maintenance tasks.
If you did not preconfigure system information in the sysidcfgfile, when prompted, answerthe questions about system configuration.
Follow the instructions on the screen to install the software.
When the JumpStart program finishes installing the Solaris software, the system rebootsautomatically. Also, the GRUB menu.lst file is automatically updated. Then the instance ofSolaris that you have installed appears in the next use of the GRUB menu.
After the installation is finished, installation logs are saved in a file. You can find the installationlogs in the following directories:
■ /var/sadm/system/logs
■ /var/sadm/install/logs
x86: Performing a Custom JumpStart Installation byEditing the GRUB Boot CommandIn some circumstances such as for debugging purposes, you might want to modify the GRUBboot command. The following procedure describes the steps to edit the GRUB boot commandbefore performing the custom JumpStart installation.
8
9
x86: Performing a Custom JumpStart Installation
Solaris 10 10/09 Installation Guide: Custom JumpStart and Advanced Installations • October 200992

▼ x86: To Modify the GRUB Boot Command
To begin the installation, proceed with Step 1 through Step 5 in the preceding procedure, “x86:To Perform an Installation or Upgrade With the Custom JumpStart Program and With GRUB”onpage 90.
If the system is off, turn the system on. If the system is on, reboot the system.
The GRUB menu is displayed. This menu provides a list of boot entries. The entry that isprovided is the Solaris instance to be installed.GNU GRUB version 0.95 (631K lower / 2095488K upper memory)
+-------------------------------------------------------------------+
|Solaris 10 10/09 image_directory |
|Solaris Serial Console ttya |
|Solaris Serial Console ttyb (lx50, v60x and v68) |
+-------------------------------------------------------------------+
Use the ^ and v keys to select which entry is highlighted. Press
enter to boot the selected OS, ’e’ to edit the commands before
booting, or ’c’ for a command-line.
The image_directory is the name of the directory where the installation image is located.
Note –
■ If you used the NFS to set the path to the JumpStart directory with the add_install_clientcommand and the -c option, then you do not need to include the path in the boot entry.
■ If you are not using NFS, then you must note the path to the compressed configuration filethat contains the JumpStart directory.
To stop the booting process and use the menu entry editor, type e.
The GRUB edit menu is displayed.kernel /I86PC.Solaris_11-8/multiboot kernel/unix -B console=ttyb,\
install_media=131.141.2.32:/export/mary/v11 \
module /I86PC.Solaris_11-8/x86.new
Use the arrow keys to select the boot entry.
To edit the selected command, type e.
A command that is similar to the following example displays.grub edit>kernel /I86PC.Solaris_11-8/multiboot kernel/unix -B \
console=ttyb,install_media=131.141.2.32:/export/mary/_\
module /I86PC.Solaris_11-8/x86.new
1
2
3
4
5
x86: Performing a Custom JumpStart Installation
Chapter 6 • Performing a Custom JumpStart Installation (Tasks) 93

Edit the command by typing the options that you need.
The syntax for a JumpStart installation is the following.grub edit>kernel /I86PC.Solaris_11-image_directory/multiboot kernel/unix/ \
- install [url|ask] options -B install_media=media_type
For a description of JumpStart options, see “x86: Command Reference for Booting the System”on page 94.
In the following example, the OS is installed over the network with a custom JumpStart profile.
kernel /I86PC.Solaris_11-8/multiboot kernel/unix/ - install \
-B install_media=131.141.2.32:/export/mary/v11 \
module /I86PC.Solaris_11-8/x86.new
To accept the edits, press Enter.
Your changes are saved and the GRUB main menu is displayed.
Note – Pressing the Escape key returns you to the GRUB main menu without saving yourchanges.
To begin the installation, type b.
x86: Command Reference for Booting the SystemThe following table describes the command-line options for the GRUB menu boot command.The options listed are appropriate for a JumpStart installation.
The syntax of the boot command is the following.
kernel /I86PC.Solaris_11-image_directory/multiboot kernel/unix/ - install \
[url|ask] options -B install_media=media_type
TABLE 6–4 GRUB Menu Boot Command Reference
Option Description
- install Performs a custom JumpStart installation.
In the following example, the system boots from DVD media and the following options were used:■ - install performs a custom JumpStart■ file://jumpstart/config.tar finds the JumpStart profile on the local disk
kernel /I86pc.Solaris_11.8/multiboot - install file://jumpstart/config.tar \
-B install_media=dvdrom module /I86Solaris_11.8/x86.new
6
7
8
x86: Performing a Custom JumpStart Installation
Solaris 10 10/09 Installation Guide: Custom JumpStart and Advanced Installations • October 200994

TABLE 6–4 GRUB Menu Boot Command Reference (Continued)Option Description
[url| ask] Specifies the location of the custom JumpStart files or prompts you for the location.■ url – Specifies the path to the files. You can specify a URL for files that are located on an HTTP or
HTTPS server:The syntax for an HTTP server is the following:
http://server_name:IP_address/jumpstart_dir_path/compressed_config_file&proxy_info
■ If you placed a sysidcfg file in the compressed configuration file, you must specify the IP address ofthe server that contains the file, as in the following example:
kernel /I86pc.Solaris_11.8/multiboot install \
http://192.168.2.1/jumpstart/config.tar \
-B install_media=192.168.2.1/export/Solaris_11.8/boot \
module /I86PC.Solaris_11.8/x86.new
■ If you saved the compressed configuration file on an HTTP server that is behind a firewall, you mustuse a proxy specifier during boot. You do not need to specify an IP address for the server thatcontains the file. You must specify an IP address for the proxy server, as in the following example:
kernel /I86pc.Solaris_11.8/multiboot install \
http://www.shadow.com/jumpstart/config.tar&proxy=131.141.6.151 \
-B install_media=192.168.2.1/export/Solaris_11.8/boot \
module /I86PC.Solaris_11.8/x86.new
■ ask – Specifies that the installation program prompt you to type the location of the compressedconfiguration file. You are prompted after the system boots and connects to the network. If you use thisoption, you are not able to do a completely hands off JumpStart installation.If you bypass the prompt by pressing Return, the Solaris installation program interactively configuresthe network parameters. The installation program then prompts you for the location of the compressedconfiguration file.The following example performs a custom JumpStart and boots from DVD media. You are prompted totype the location of the configuration file after the system connects to the network.
kernal /boot/multiboot kernel/unix install ask -B \
install_media=192.168.2.1:export/sol_11_x86/boot module \
/I86PC.Solaris_11.8_
x86: Performing a Custom JumpStart Installation
Chapter 6 • Performing a Custom JumpStart Installation (Tasks) 95
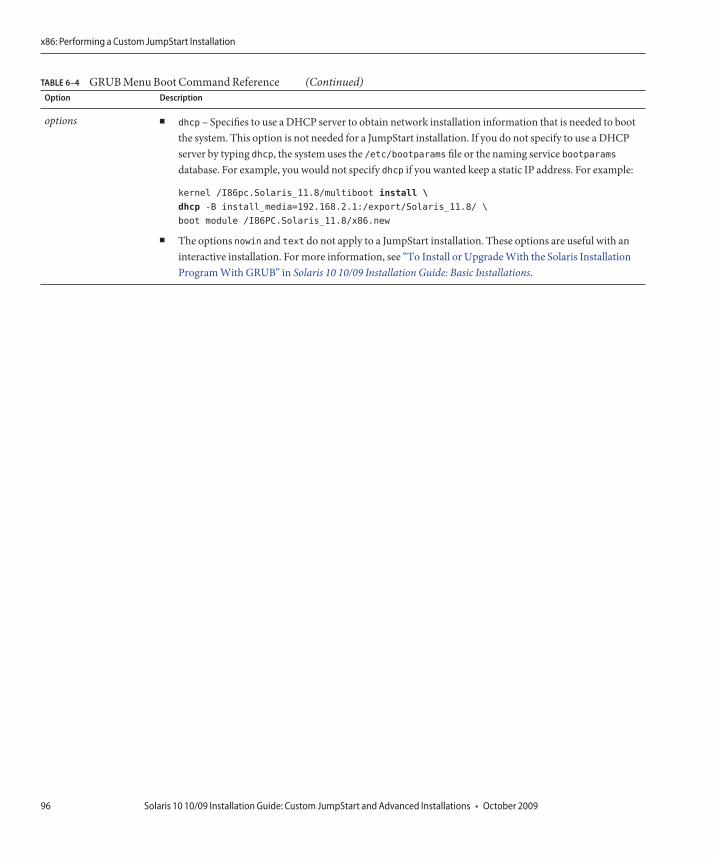
TABLE 6–4 GRUB Menu Boot Command Reference (Continued)Option Description
options ■ dhcp – Specifies to use a DHCP server to obtain network installation information that is needed to bootthe system. This option is not needed for a JumpStart installation. If you do not specify to use a DHCPserver by typing dhcp, the system uses the /etc/bootparams file or the naming service bootparamsdatabase. For example, you would not specify dhcp if you wanted keep a static IP address. For example:
kernel /I86pc.Solaris_11.8/multiboot install \
dhcp -B install_media=192.168.2.1:/export/Solaris_11.8/ \
boot module /I86PC.Solaris_11.8/x86.new
■ The options nowin and text do not apply to a JumpStart installation. These options are useful with aninteractive installation. For more information, see “To Install or Upgrade With the Solaris InstallationProgram With GRUB” in Solaris 10 10/09 Installation Guide: Basic Installations.
x86: Performing a Custom JumpStart Installation
Solaris 10 10/09 Installation Guide: Custom JumpStart and Advanced Installations • October 200996

Installing With Custom JumpStart (Examples)
This chapter provides an example of setting up and installing Solaris software on both SPARCbased and x86 based systems by using a custom JumpStart installation.
Note – If you are installing a Solaris ZFS root pool, see Chapter 9, “Installing a ZFS Root PoolWith JumpStart,” for limitations and profile examples.
■ “Sample Site Setup” on page 97■ “Create an Install Server” on page 99■ “x86: Create a Boot Server for Marketing Systems” on page 100■ “Create a JumpStart Directory” on page 101■ “Share the JumpStart Directory” on page 101■ “SPARC: Create the Engineering Group's Profile” on page 102■ “x86: Create the Marketing Group's Profile” on page 102■ “Update the rules File” on page 103■ “Validate the rules File” on page 103■ “SPARC: Set Up Engineering Systems to Install From the Network” on page 104■ “x86: Set Up Marketing Systems to Install From the Network” on page 104■ “SPARC: Boot the Engineering Systems and Install Solaris Software” on page 105■ “x86: Boot the Marketing Systems and Install Solaris Software” on page 106
Sample Site SetupFigure 7–1 shows the site setup for this example.
7C H A P T E R 7
97

At this sample site, the conditions are as follows:
■ SPARC: The engineering group is located on its own subnet. This group usesSPARCstationTM systems for software development.
■ x86: The marketing group is located on its own subnet. This group uses x86 based systemsfor running word processors, spreadsheets, and other office productivity tools.
■ The site uses NIS. The Ethernet addresses, IP addresses, and host names of the systems arepreconfigured in the NIS maps. The subnet mask, date and time, and geographic region forthe site are also preconfigured in the NIS maps.
Note – The peripheral devices for the marketing systems are preconfigured in the sysidcfgfile.
■ Both the engineering and marketing systems are to be installed with Solaris 10 10/09software from the network.
server-1(install/boot server)
Engineering Subnet
server-2(boot server)
Marketing Subnet
FIGURE 7–1 Sample Site Setup
Sample Site Setup
Solaris 10 10/09 Installation Guide: Custom JumpStart and Advanced Installations • October 200998

Create an Install ServerBecause the groups need to install Solaris 10 10/09 software from the network, you makeserver-1 an install server for both groups. You use the setup_install_server(1M) commandto copy the images to the server-1 local disk (in the /export/install directory). Copy theimages from the either of the following media.
■ Solaris Software CDs and the Solaris Languages CDs■ Solaris Operating System DVD
You must copy the image from the disc to an empty directory, in these examples the sparc_10directory and the x86_10 directory.
EXAMPLE 7–1 SPARC: Copying the Solaris 10 10/09 CDs
Insert the Solaris Software for SPARC Platforms - 1 CD in the CD-ROM drive that is attached toserver-1 and type the following commands:
server-1# mkdir -p /export/install/sparc_10
server-1# cd /CD_mount_point/Solaris_10/Toolsserver-1# ./setup_install_server /export/install/sparc_10
Insert the Solaris Software for SPARC Platforms - 2 CD in the CD-ROM drive that is attached toserver-1 and type the following commands:
server-1# cd /CD_mount_point/Solaris_10/Toolsserver-1# ./add_to_install_server /export/install/sparc_10
Repeat the previous command for each Solaris Software you want to install.
Insert the first SPARC: Solaris Languages for SPARC Platforms CD in the CD-ROM drive that isattached to server-1 and type the following commands:
server-1# cd /CD_mount_point/Solaris_10/Toolsserver-1# ./add_to_install_server /export/install/sparc_10
Repeat the previous command for each SPARC: Solaris Languages for SPARC Platforms CD.
EXAMPLE 7–2 x86: Copying the Solaris 10 10/09 CDs
Insert the Solaris Software for x86 Platforms - 1 CD in the CD-ROM drive that is attached toserver-1 and type the following commands:
server-1# mkdir -p /export/install/x86_10
server-1# cd /CD_mount_point/Solaris_10/Toolsserver-1# ./setup_install_server /export/install/x86_10
Create an Install Server
Chapter 7 • Installing With Custom JumpStart (Examples) 99

EXAMPLE 7–2 x86: Copying the Solaris 10 10/09 CDs (Continued)
Insert the Solaris Software for x86 Platforms - 2 CD in the CD-ROM drive that is attached toserver-1 and type the following commands:
server-1# cd /CD_mount_point/Solaris_10/Toolsserver-1# ./add_to_install_server /export/install/x86_10
Repeat the previous command for each Solaris Software you want to install.
Insert the first Solaris Languages for x86 Platforms CD in the CD-ROM drive that is attached toserver-1 and type the following commands:
server-1# cd /CD_mount_point/Solaris_10/Toolsserver-1# ./add_to_install_server /export/install/x86_10
Repeat the previous command for each Solaris Languages for x86 Platforms CD.
EXAMPLE 7–3 SPARC: Copying the Solaris 10 10/09 DVD
Insert the Solaris Operating System for SPARC Platforms DVD in the DVD-ROM drive that isattached to server-1 and type the following commands:
server-1# mkdir -p /export/install/sparc_10
server-1# cd /DVD_mount_point/Solaris_10/Toolsserver-1# ./setup_install_server /export/install/sparc_10
EXAMPLE 7–4 x86: Copying the Solaris Operating System for x86 Platforms DVD
Insert the Solaris Operating System for x86 Platforms DVD in the DVD-ROM drive that isattached to server-1 and type the following commands:
server-1# mkdir -p /export/install/x86_10
server-1# cd /DVD_mount_point/Solaris_10/Toolsserver-1# ./setup_install_server /export/install/x86_10
x86: Create a Boot Server for Marketing SystemsSystems cannot boot from an install server on a different subnet, so you make server-2 a bootserver on the marketing group's subnet. You use the setup_install_server(1M) command tocopy the boot software from the Solaris Operating System for x86 Platforms DVD or the SolarisSoftware for x86 Platforms - 1 CD. The boot software is copied to the server-2 local disk in the/export/boot directory.
Choose the media and install the boot software to local disk.
x86: Create a Boot Server for Marketing Systems
Solaris 10 10/09 Installation Guide: Custom JumpStart and Advanced Installations • October 2009100

■ If you insert the Solaris Software for x86 Platforms - 1 CD in the CD-ROM drive that isattached to server-2, type the following command:
server-2# cd /CD_mount_point/Solaris_10/Toolsserver-2# ./setup_install_server -b /export/boot
■ If you insert the Solaris Operating System for x86 Platforms DVD in the DVD-ROM drivethat is attached to server-2, type the following command:
server-2# cd /DVD_mount_point/Solaris_10/Toolsserver-2# ./setup_install_server -b /export/boot
In the setup_install_server command, -b specifies that setup_install_server is to copythe boot information to the directory that is named /export/boot.
Create a JumpStart DirectoryNow that you have the install server and boot server set up, you create a JumpStart directory onserver-1. You can use any system on the network. This directory holds files that are requiredfor a custom JumpStart installation of Solaris software. You set up this directory by copying thesample directory from the Solaris Operating System DVD image or from the Solaris Software -1 CD image that has been copied to /export/install:
server-1# mkdir /jumpstart
server-1# cp -r /export/install/sparc_10/Solaris_10/Misc/jumpstart_sample /jumpstart
Share the JumpStart DirectoryTo make the rules file and profiles accessible to systems on the network, you share the/jumpstart directory. To enable the sharing of a directory, you add the following line to the/etc/dfs/dfstab file:
share -F nfs -o ro,anon=0 /jumpstart
Then, at the command line, you type the shareall command:
server-1# shareall
Share the JumpStart Directory
Chapter 7 • Installing With Custom JumpStart (Examples) 101

SPARC: Create the Engineering Group's ProfileFor the engineering systems, you create a file that is named eng_prof in the /jumpstartdirectory. The eng_prof file contains the following entries, which define the Solaris 10 10/09software to be installed on systems in the engineering group:
install_type initial_install
system_type standalone
partitioning default
cluster SUNWCprog
filesys any 512 swap
The previous example profile specifies the following installation information.
install_type The installation is to be treated as an initial installation, as opposed to anupgrade.
system_type The engineering systems are standalone systems.
partitioning The JumpStart software uses default disk partitioning for installing Solarissoftware on the engineering systems.
cluster The Developer System Support software group is to be installed.
filesys Each system in the engineering group is to have 512 Mbytes of swap space.
x86: Create the Marketing Group's ProfileFor the marketing systems, you create a file that is named marketing_prof in the /jumpstartdirectory. The marketing_prof file contains the following entries, which define the Solaris 1010/09 software to be installed on systems in the marketing group:
install_type initial_install
system_type standalone
partitioning default
cluster SUNWCuser
package SUNWaudio
The previous example profile specifies the following installation information.
install_type The installation is to be treated as an initial installation, as opposed to anupgrade.
system_type The marketing systems are standalone systems.
partitioning The JumpStart software is to use default disk partitioning for installingSolaris on the marketing systems.
SPARC: Create the Engineering Group's Profile
Solaris 10 10/09 Installation Guide: Custom JumpStart and Advanced Installations • October 2009102

cluster The End User Solaris Software Group is to be installed.
package The audio demo software package is to be added to each system.
Update the rules FileNow you must add rules to the rules file. The Solaris installation program uses the rules toselect the correct installation (profile) for each system during a custom JumpStart installation.
At this site, each department is located on its own subnet and has its own network address. Theengineering department is located on subnet 255.222.43.0. The marketing department islocated on 255.222.44.0. You can use this information to control how the engineering andmarketing systems are installed with the Solaris 10 10/09 software. In the /jumpstart directory,you edit the rules file, delete all of the example rules, and add the following lines to the file:
network 255.222.43.0 - eng_prof -
network 255.222.44.0 - marketing_prof -
Basically, these rules state that systems on the 255.222.43.0 network are to be installed with theSolaris 10 10/09 software by using the eng_prof profile. The systems on the 255.222.44.0network are to be installed with the Solaris 10 10/09 software by using the marketing_profprofile.
Note – You can use the sample rules to use a network address to identify the systems to beinstalled with the Solaris 10 10/09 software by using eng_prof and marketing_prof,respectively. You can also use host names, memory size, or model type as the rule keyword.Table 8–1 contains a complete list of keywords you can use in a rules file.
Validate the rules FileAfter the rules and profiles are set up, you run the check script to verify that the files arecorrect:
server-1# cd /jumpstart
server-1# ./check
If the check script does not find any errors, the script creates the rules.ok file.
Validate the rules File
Chapter 7 • Installing With Custom JumpStart (Examples) 103

SPARC: Set Up Engineering Systems to Install From theNetwork
After setting up the /jumpstart directory and files, you use the add_install_clientcommand on the install server, server-1, to set up the engineering systems to install the Solarissoftware from the install server. server-1 is also the boot server for the engineering group'ssubnet.
server-1# cd /export/install/sparc_10/Solaris_10/Tools
server-1# ./add_install_client -c server-1:/jumpstart host-eng1 sun4u
server-1# ./add_install_client -c server-1:/jumpstart host-eng2 sun4u
In the add_install_client command, the options that are used have the following meanings:
-c Specifies the server (server-1) and path (/jumpstart) to the JumpStartdirectory. Use this option if you are using NFS.
Note – If you are not using NFS, you specify the path to the JumpStart directory byusing the following commands:
■ For SPARC based systems, specify the path in the boot command■ For x86 based systems, specify the path by editing the GRUB menu entry
host-eng1 The name of a system in the engineering group.
host-eng2 The name of another system in the engineering group.
sun4u Specifies the platform group of the systems that use server-1 as an install server.The platform group is for Ultra 5 systems.
x86: Set Up Marketing Systems to Install From the NetworkNext, you use the add_install_client command on the boot server (server-2). Thiscommand sets up the marketing systems to boot from the boot server and install the Solarissoftware from the install server (server-1):
server-2# cd /marketing/boot-dir/Solaris_10/Tools
server-2# ./add_install_client -s server-1:/export/install/x86_10 \
-c server-1:/jumpstart host-mkt1 i86pc
server-2# ./add_install_client -s server-1:/export/install/x86_10 \
-c server-1:/jumpstart host-mkt2 i86pc
server-2# ./add_install_client -d -s server-1:/export/install/x86_10 \
-c server-1:/jumpstart SUNW.i86pc i86pc
SPARC: Set Up Engineering Systems to Install From the Network
Solaris 10 10/09 Installation Guide: Custom JumpStart and Advanced Installations • October 2009104

server-2# ./add_install_client -c server-1:/jumpstart host-mkt1 sun4u
server-2# ./add_install_client -c server-1:/jumpstart host-mkt2 sun4u
In the add_install_client command, the options that are used have the following meanings:
-d Specifies that the client is to use DHCP to obtain the network installparameters. This option is required for clients to use PXE network boot toboot from the network. -d is optional for network boot clients that do not usePXE network boot.
-s Specifies the install server (server-1) and the path to the Solaris software(/export/install/x86_10).
-c Specifies the server (server-1) and path (/jumpstart) to the JumpStartdirectory. Use this option if you are using NFS.
Note – If you are not using NFS, you specify the path to the JumpStartdirectory by using the following commands:
■ For SPARC based systems, specify the path in the boot command■ For x86 based systems, specify the path by editing the GRUB menu entry
host-mkt1 The name of a system in the marketing group.
host-mkt2 The name of another system in the marketing group.
sun4u Specifies the platform group of the systems that use server-1 as an installserver. The platform group is for Ultra 5 systems.
SUNW.i86pc The DHCP class name for all Solaris x86 clients. If you want to configure allSolaris x86 DHCP clients with a single command, use this class name.
i86pc Specifies the platform group of the systems that use this boot server. Theplatform name represents x86 based systems.
SPARC: Boot the Engineering Systems and Install SolarisSoftware
After setting up the servers and files, you can boot the engineering systems by using thefollowing boot command at the ok (PROM) prompt of each system:
ok boot net - install
The Solaris OS is automatically installed on the engineering group's systems.
SPARC: Boot the Engineering Systems and Install Solaris Software
Chapter 7 • Installing With Custom JumpStart (Examples) 105

x86: Boot the Marketing Systems and Install Solaris SoftwareYou can boot the system from one of the following:
■ Solaris Software for x86 Platforms - 1 CD■ Solaris Operating System for x86 Platforms DVD■ The network by using PXE network boot
Solaris software is automatically installed on the marketing group's systems.
x86: Boot the Marketing Systems and Install Solaris Software
Solaris 10 10/09 Installation Guide: Custom JumpStart and Advanced Installations • October 2009106

Custom JumpStart (Reference)
This chapter lists keywords and values that you can use in the rules file, profiles, and begin andfinish scripts.
Note – If you are installing a Solaris ZFS root pool, see Chapter 9, “Installing a ZFS Root PoolWith JumpStart,” for limitations and profile examples. Also, for a list of ZFS-specific keywordsand keywords that can be used within a profile, see Table 8–2.
■ “Rule Keywords and Values” on page 107■ “Profile Keywords and Values” on page 111■ “Custom JumpStart Environment Variables” on page 155■ “Probe Keywords and Values” on page 157
Rule Keywords and ValuesTable 8–1 describes the keywords and values that you can use in the rules file. For detailedinstructions to create a rules file, see “Creating the rules File” on page 33.
TABLE 8–1 Descriptions of Rule Keywords and Values
Keyword Value Matches
any minus sign (-) Anything. The any keyword always succeeds.
arch processor_type
Valid values for processor_type are the following:■ SPARC: sparc■ x86: i386
A system's processor type.
The uname -p command reports the system'sprocessor type.
8C H A P T E R 8
107

TABLE 8–1 Descriptions of Rule Keywords and Values (Continued)Keyword Value Matches
disksize actual_disk_name size_range
actual_disk_name – A disk name in the form cxtydz, suchas c0t3d0 or c0d0, or the special word rootdisk. Ifrootdisk is used, the disk to be matched is determined inthe following order:■ SPARC: The disk that contains the preinstalled boot
image, which is a new SPARC based system with factoryJumpStart installed
■ The c0t3d0s0 disk, if the disk exists
■ The first available disk that is searched in kernel probeorder
size_range – The size of the disk, which must be specified asa range of Mbytes (x-x).
Note – When calculating size_range, remember that a Mbyteequals 1,048,576 bytes. A disk might be advertised as a“535–Mbyte” disk, but the disk might contain only 510million bytes of disk space. The JumpStart program viewsthe “535–Mbyte” disk as a 510–Mbyte disk because535,000,000 / 1,048,576 = 510. A “535–Mbyte” disk doesnot match a size_range equal to 530–550.
The name and size of a system's disk in Mbytes.
Example:
disksize c0t3d0 250-300
In the example, the JumpStart program attemptsto match a system disk that is named c0t3d0. Thedisk can hold between 250 and 300 Mbytes ofinformation.
Example:
disksize rootdisk 750-1000
In the example, the JumpStart program attemptsto match a disk in the following order:1. A system disk that contains a preinstalled boot
image
2. The c0t3d0s0 disk, if the disk exists
3. The first available disk that can hold between750 Mbytes and 1 Gbyte of information
domainname actual_domain_name A system's domain name, which controls how anaming service determines information.
If you have a system already installed, thedomainname command reports the system'sdomain name.
hostaddress actual_IP_address A system's IP address.
hostname actual_host_name A system's host name.
If you have a system that is already installed, theuname -n command reports the system's hostname.
Rule Keywords and Values
Solaris 10 10/09 Installation Guide: Custom JumpStart and Advanced Installations • October 2009108

TABLE 8–1 Descriptions of Rule Keywords and Values (Continued)Keyword Value Matches
installed slice version
slice – A disk slice name in the form cwtxdysz, such asc0t3d0s5, or the special words any or rootdisk. If any isused, the JumpStart program attempts to match all of thesystem's disks in kernel probe order. If rootdisk is used,the disk to be matched is determined in the following order:■ SPARC: The disk that contains the preinstalled boot
image, which is a new SPARC based system with factoryJumpStart installed
■ The c0t3d0s0 disk, if the disk exists
■ The first available disk that is searched in kernel probeorder
version – A version name or the special words any orupgrade. If any is used, any Solaris or SunOS release ismatched. If upgrade is used, any Solaris release that issupported and can be upgraded is matched.
If the JumpStart program finds a Solaris release but isunable to determine the version, the version that is returnedis SystemV.
A disk that has a root (/) file system thatcorresponds to a particular version of Solarissoftware.
Example:
installed c0t3d0s1 Solaris 10
In the example, the JumpStart program attemptsto match a system that has a Solaris root (/) filesystem on c0t3d0s1.
karch actual_platform_group
Valid values are sun4u, i86pc, and prep. A list of systemsand their corresponding platform group is presented in theSolaris Sun Hardware Platform Guide athttp://docs.sun.com.
A system's platform group.
If you have a system that is already installed, thearch -k command or the uname -m commandreports the system's platform group.
memsize physical_mem
The value must be a range of Mbytes, x-x, or a single Mbytevalue.
A system's physical memory size in Mbytes.
Example:
memsize 64-128
The example tries to match a system with aphysical memory size between 64 and 128 Mbytes.
If you have a system that is already installed, theoutput of the prtconf command, line 2, reportsthe system's physical memory size.
Rule Keywords and Values
Chapter 8 • Custom JumpStart (Reference) 109

TABLE 8–1 Descriptions of Rule Keywords and Values (Continued)Keyword Value Matches
model actual_platform_name A system's platform name. See the Solaris SunHardware Platform Guide athttp://docs.sun.com for a list of valid platformnames.
To find the platform name of an installed system,use the uname -i command or the output of theprtconf command, line 5.
Note – If the actual_platform_name containsspaces, you must replace spaces with underscores(_).
Example:
SUNW,Sun_4_50
network network_num A system's network number, which the JumpStartprogram determines by performing a logical ANDbetween the system's IP address and the subnetmask.
Example:
network 192.168.2.0
The example tries to match a system with a192.168.2.8 IP address, if the subnet mask is255.255.255.0.
osname Solaris_x A version of Solaris software that is alreadyinstalled on a system.
Example:
osname Solaris 10
In the example, the JumpStart program attemptsto match a system with the Solaris 10 10/09 OSalready installed.
Rule Keywords and Values
Solaris 10 10/09 Installation Guide: Custom JumpStart and Advanced Installations • October 2009110

TABLE 8–1 Descriptions of Rule Keywords and Values (Continued)Keyword Value Matches
probe probe_keyword A valid probe keyword or a valid custom probekeyword.
Example:
probe disks
The example returns the size of a system's disks inMbytes and in kernel probe order, for example,c0t3d0s1, c0t4d0s0, on a SPARC based system.The JumpStart program sets the SI_DISKLIST,SI_DISKSIZES, SI_NUMDISKS, and SI_TOTALDISK
environment variables.
Note – The probe keyword is unique in that thekeyword does not attempt to match an attributeand run a profile. The probe keyword returns avalue. Consequently, you cannot specify beginscripts, profiles, and finish scripts with the proberule keyword.
Probe keywords are described in Chapter 5,“Creating Custom Rule and Probe Keywords(Tasks).”
totaldisk size_range
The value must be specified as a range of Mbytes (x-x).
Note – When calculating size_range, remember that oneMbyte equals 1,048,576 bytes. A disk might be advertised asa “535–Mbyte” disk, but the disk might have only 510million bytes of disk space. The JumpStart program viewsthe “535–Mbyte” disk as a 510–Mbyte disk because535,000,000 / 1,048,576 = 510. A “535–Mbyte” disk doesnot match a size_range equal to 530–550.
The total disk space on a system in Mbytes. Thetotal disk space includes all the operational disksthat are attached to a system.
Example:
totaldisk 300-500
In the example, the JumpStart program tries tomatch a system with a total disk space between 300and 500 Mbytes.
Profile Keywords and ValuesThis section describes the profile keywords and values that you can use in a profile. For detailedinstructions to create a profile, see “Creating a Profile” on page 36. These keywords are forinstalling UFS and ZFS file systems. If the keyword can be used in a ZFS profile, the term “ZFS”is noted.
Profile Keywords and Values
Chapter 8 • Custom JumpStart (Reference) 111

Profile Keywords Quick ReferenceTable 8–2 provides a quick way to determine which keywords you can use, based on yourinstallation scenario. Unless otherwise noted in the keyword descriptions, the keyword can onlybe used with the initial installation option. Also, these keywords are for a UFS file system unlessnoted that the keyword can be used in a ZFS root pool profile.
TABLE 8–2 Profile Keywords Overview
Installation Scenarios
Profile KeywordStandalone System(Nonnetworked)
StandaloneSystem(Networked) orServer OS Server Upgrade
Upgrade With DiskSpace Reallocation
Can be Used for aZFS Root Pool
archive_location (installingSolaris Flash archives)
X X
backup_media X
boot_device (UFS and ZFS) X X X X
bootenv (UFS and ZFS) X X X X
client_arch X
client_root X
client_swap X
cluster (adding softwaregroups) (UFS and ZFS)
X X X X
cluster (adding or deletingclusters) (UFS and ZFS)
X X X X X X
dontuse (UFS and ZFS) X X X X
fdisk (x86 only) (UFS andZFS)
X X X X
filesys (mounting remotefile systems) (UFS and ZFS)
X X X
filesys (creating local filesystems)
X X X
filesys (creating mirroredfile systems)
X X X
forced_deployment
(installing Solaris Flashdifferential archives)
X X
Profile Keywords and Values
Solaris 10 10/09 Installation Guide: Custom JumpStart and Advanced Installations • October 2009112

TABLE 8–2 Profile Keywords Overview (Continued)Installation Scenarios
Profile KeywordStandalone System(Nonnetworked)
StandaloneSystem(Networked) orServer OS Server Upgrade
Upgrade With DiskSpace Reallocation
Can be Used for aZFS Root Pool
geo (UFS and ZFS) X X X X X X
install_type (UFS and ZFS) X X X X X X
layout_constraint X
local_customization
(installing Solaris Flasharchives)
X X
locale (UFS and ZFS) X X X X X X
metadb (creating statedatabase replicas)
X X X
no_master_check (installingSolaris Flash differentialarchives)
X X
no_content_check (installingSolaris Flash differentialarchives)
X X
num_clients X
package (UFS and ZFS) X X X X X X
partitioning X X X
patch X X X X X
pool (ZFS root pools only) X X X X
root_device (UFS and ZFS) X X X X X X
system_type X X X
usedisk (UFS and ZFS) X X X X
Profile Keyword Descriptions and Examples
archive_locationKeywordarchive_location retrieval_type location
Profile Keywords and Values
Chapter 8 • Custom JumpStart (Reference) 113

retrieval_type The values of retrieval_type and location depend on where the Solaris Flasharchive is stored. The following sections contain the values you can use forretrieval_type and location and examples of how to use thearchive_location keyword.■ “Archive Stored on an NFS Server” on page 114■ “Archive Stored on an HTTP or HTTPS Server” on page 115■ “Archive Stored on an FTP Server” on page 116■ “Archive Stored on a Local Tape” on page 117■ “Archive Stored on a Local Device” on page 118■ “Archive Stored on a Local File” on page 119
location Specifics for locations are noted in the following sections.
Caution – Solaris Flash archive cannot be properly created when a non-global zone is installed.The Solaris Flash feature is not compatible with the Solaris Zones partitioning technology. Ifyou create a Solaris Flash archive, the resulting archive is not installed properly when thearchive is deployed under these conditions:
■ The archive is created in a non-global zone■ The archive is created in a global zone that has non-global zones installed
Archive Stored on an NFS Server
If the archive is stored on an NFS server, use the following syntax for the archive_locationkeyword.
archive_location nfs server_name:/path/filename retry n
server_name The name of the server where you stored the archive.
path The location of the archive to be retrieved from the specified server. If the pathcontains $HOST, the Solaris Flash installation utilities replace $HOST withthe name of the clone system that you are installing.
filename The name of the Solaris Flash archive file.
retry n An optional keyword. n is the maximum number of times the Solaris Flashutilities attempt to mount the archive.
EXAMPLE 8–1 Archive Stored on an NFS Server
archive_location nfs golden:/archives/usrarchive
archive_location nfs://golden/archives/usrarchive
Profile Keywords and Values
Solaris 10 10/09 Installation Guide: Custom JumpStart and Advanced Installations • October 2009114
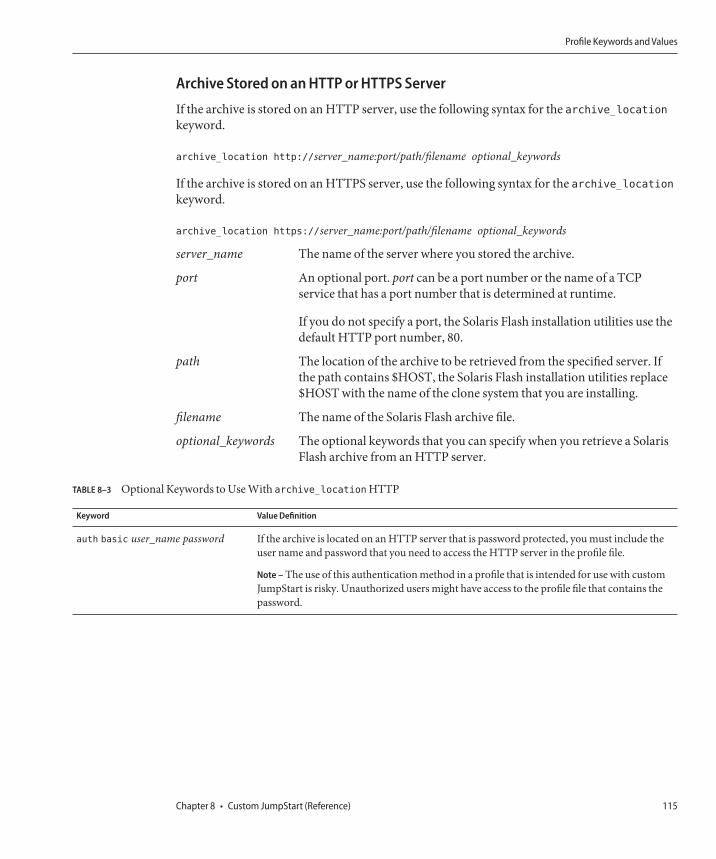
Archive Stored on an HTTP or HTTPS Server
If the archive is stored on an HTTP server, use the following syntax for the archive_locationkeyword.
archive_location http://server_name:port/path/filename optional_keywords
If the archive is stored on an HTTPS server, use the following syntax for the archive_locationkeyword.
archive_location https://server_name:port/path/filename optional_keywords
server_name The name of the server where you stored the archive.
port An optional port. port can be a port number or the name of a TCPservice that has a port number that is determined at runtime.
If you do not specify a port, the Solaris Flash installation utilities use thedefault HTTP port number, 80.
path The location of the archive to be retrieved from the specified server. Ifthe path contains $HOST, the Solaris Flash installation utilities replace$HOST with the name of the clone system that you are installing.
filename The name of the Solaris Flash archive file.
optional_keywords The optional keywords that you can specify when you retrieve a SolarisFlash archive from an HTTP server.
TABLE 8–3 Optional Keywords to Use With archive_locationHTTP
Keyword Value Definition
auth basic user_name password If the archive is located on an HTTP server that is password protected, you must include theuser name and password that you need to access the HTTP server in the profile file.
Note – The use of this authentication method in a profile that is intended for use with customJumpStart is risky. Unauthorized users might have access to the profile file that contains thepassword.
Profile Keywords and Values
Chapter 8 • Custom JumpStart (Reference) 115

TABLE 8–3 Optional Keywords to Use With archive_locationHTTP (Continued)Keyword Value Definition
timeout min The timeout keyword enables you to specify, in minutes, the maximum length of time that isallowed to pass without receipt of data from the HTTP server. If a timeout occurs, theconnection is closed, reopened, and resumed. If you specify a timeout value of 0 (zero), theconnection is not reopened.■ If a timeout reconnection occurs, the Solaris Flash installation utilities attempt to resume
the installation at the last known position in the archive. If the Solaris Flash installationutilities cannot resume the installation at the last known position, the retrieval restartsfrom the beginning of the archive and the data that was retrieved prior to the timeout isdiscarded.
■ If a timeout reconnection occurs while a package is being installed, the package is retriedfrom the beginning of the package and the data that was retrieved prior to the timeout isdiscarded.
proxy host:port The proxy keyword enables you to specify a proxy host and proxy port. You can use a proxyhost to retrieve a Solaris Flash archive from the other side of a firewall. You must supply aproxy port when you specify the proxy keyword.
EXAMPLE 8–2 Archive Stored on a HTTP or HTTPS Server
archive_location http://silver/archives/usrarchive.flar timeout 5
Example of the auth basic user_name password keyword:
archive_location http://silver/archives/usrarchive.flar timeout 5 user1 secret
Archive Stored on an FTP Server
If the archive is stored on an FTP server, use the following syntax for the archive_locationkeyword.
archive_location ftp://user_name:password@server_name:port/path/filename optional_keywords
user_name:password The user name and password that you need to access the FTP server inthe profile file.
server_name The name of the server where you stored the archive.
port A is an optional port. port can be a port number or the name of a TCPservice that has a port number that is determined at runtime.
If you do not specify a port, the Solaris Flash installation utilities usethe default FTP port number, 21.
Profile Keywords and Values
Solaris 10 10/09 Installation Guide: Custom JumpStart and Advanced Installations • October 2009116

path The location of the archive to be retrieved from the specified server. Ifthe path contains $HOST, the Solaris Flash installation utilitiesreplace $HOST with the name of the clone system that you areinstalling.
filename The name of the Solaris Flash archive file.
optional_keywords The optional keywords that you can specify when you retrieve aSolaris Flash archive from an FTP server.
TABLE 8–4 Optional Keywords to Use With archive_location FTP
Keyword Value Definition
timeout min The timeout keyword enables you to specify, in minutes, the maximum length of time that isallowed to pass without receipt of data from the HTTP server. If a timeout occurs, theconnection is closed, reopened, and resumed. If you specify a timeout value of 0 (zero), theconnection is not reopened.■ If a timeout reconnection occurs, the Solaris Flash installation utilities attempt to resume
the installation at the last known position in the archive. If the Solaris Flash installationutilities cannot resume the installation at the last known position, the retrieval restartsfrom the beginning of the archive and the data that was retrieved prior to the timeout isdiscarded.
■ If a timeout reconnection occurs while a package is being installed, the package is retriedfrom the beginning of the package and the data that was retrieved prior to the timeout isdiscarded.
proxy host:port The proxy keyword enables you to specify a proxy host and proxy port. You can use a proxyhost to retrieve a Solaris Flash archive from the other side of a firewall. You must supply aproxy port when you specify the proxy keyword.
EXAMPLE 8–3 Archive Stored on an FTP Server
archive_location ftp://user1:secret@silver/archives/usrarchive.flar timeout 5
Archive Stored on a Local Tape
If the archive is stored on a tape, use the following syntax for the archive_location keyword.
archive_location local_tape device position
device The name of the tape drive where you stored the Solaris Flash archive. If the devicename is a canonical path, the Solaris Flash installation utilities retrieve the archivefrom the path to the device node. If you supply a device name that is not a canonicalpath, the Solaris Flash installation utilities add /dev/rmt/ to the path.
Profile Keywords and Values
Chapter 8 • Custom JumpStart (Reference) 117

position Designates the place on the tape drive where you saved the archive. If you do notsupply a position, the Solaris Flash installation utilities retrieve the archive from thecurrent position on the tape drive. By specifying a position, you can place a beginscript or a sysidcfg file on the tape drive before the archive.
EXAMPLE 8–4 Archive Stored on a Local Tape
archive_location local_tape /dev/rmt/0n 5
archive_location local_tape 0n 5
Archive Stored on a Local Device
You can retrieve a Solaris Flash archive from a local device if you stored the Solaris Flash archiveon a file system-oriented, random-access device, such as a diskette or a DVD. Use the followingsyntax for the archive_location keyword.
Note – You can retrieve an archive from stream-oriented devices, such as tape, by using thesyntax for local tape.
archive_location local_device device path/filename file_system_type
device The name of the drive where you stored the Solaris Flash archive. If thedevice name is a canonical path, the device is mounted directly. If yousupply a device name that is not a canonical path, the Solaris Flashinstallation utilities add /dev/dsk/ to the path.
path The path to the Solaris Flash archive, relative to the root of the file systemon the device you specified. If the path contains $HOST, the Solaris Flashinstallation utilities replace $HOST with the name of the clone system thatyou are installing.
filename The name of the Solaris Flash archive file.
file_system_type Specifies the type of file system on the device. If you do not supply a filesystem type, the Solaris Flash installation utilities attempt to mount a UFSfile system. If the UFS mount fails, the Solaris Flash installation utilitiesattempt to mount an HSFS file system.
EXAMPLE 8–5 Archive Stored on a Local Device
To retrieve an archive from a local hard drive that is formatted as a UFS file system, use thefollowing command:
archive_location local_device c0t0d0s0 /archives/$HOST
Profile Keywords and Values
Solaris 10 10/09 Installation Guide: Custom JumpStart and Advanced Installations • October 2009118

EXAMPLE 8–5 Archive Stored on a Local Device (Continued)
To retrieve an archive from a local CD-ROM that has an HSFS file system, use the followingcommand:
archive_location local_device c0t0d0s0 /archives/usrarchive
Archive Stored on a Local File
You can retrieve an archive that you stored in the miniroot from which you booted the clonesystem as a local file. When you perform a custom JumpStart installation, you boot the systemfrom a DVD, CD, or an NFS-based miniroot. The installation software is loaded and run fromthis miniroot. Therefore, a Solaris Flash archive that you stored in the DVD, CD, or NFS-basedminiroot is accessible as a local file. Use the following syntax for the archive_locationkeyword.
archive_location local_file path/filename
path The location of the archive. The path must be accessible to the system as a local filewhile the system is booted from the Solaris Software - 1 CD or from the SolarisOperating System DVD. The system cannot access /net or any otherautomounted directory when it is booted from the Solaris Software - 1 CD or fromthe Solaris Operating System DVD.
filename The name of the Solaris Flash archive file.
EXAMPLE 8–6 Archive Stored on a Local File
archive_location local_file /archives/usrarchive
backup_mediaProfile Keywordbackup_media type path
You can use backup_media only with the upgrade option when disk space reallocation isrequired.
backup_media defines the media that is to be used to back up file systems if space needs to bereallocated during an upgrade because of insufficient space. If multiple tapes or diskettes arerequired for the backup, you are prompted to insert tapes or diskettes during the upgrade.
Profile Keywords and Values
Chapter 8 • Custom JumpStart (Reference) 119

Valid type Value Valid path Value Specification
local_tape /dev/rmt/n A local tape drive on the system that is being upgraded.path must be the character (raw) device path for the tapedrive. n is the number of the tape drive.
local_diskette /dev/rdisketten A local diskette drive on the system that is beingupgraded. path must be the character (raw) device pathfor the diskette drive. n is the number of the diskettedrive.
Diskettes that you use for the backup must be formatted.
local_filesystem /dev/dsk/cwtxdysz
/file_system
A local file system on the system that is being upgraded.You cannot specify a local file system that is beingchanged by the upgrade. path can be a block device pathfor a disk slice. For example, the tx in/dev/dsk/cwtxdysz might not be needed. Or, path canbe the absolute path to a file system that is mounted bythe /etc/vfstab file.
remote_filesystem host:/file_system An NFS file system on a remote system. path mustinclude the name or IP address of the remote system,host, and the absolute path to the NFS file system,file_system. The NFS file system must have read/writeaccess.
remote_system user@host:/directory A directory on a remote system that can be reached by aremote shell, rsh. The system that is being upgradedmust have access to the remote system through theremote system's .rhosts file. path must include thename of the remote system host and the absolute path tothe directory directory. If a user login ID user is notspecified, root is used by default.
EXAMPLE 8–7 backup_mediaProfile Keyword
backup_media local_tape /dev/rmt/0
backup_media local_diskette /dev/rdiskette1
backup_media local_filesystem /dev/dsk/c0t3d0s4
backup_media local_filesystem /export
backup_media remote_filesystem system1:/export/temp
backup_media remote_system user1@system1:/export/temp
Profile Keywords and Values
Solaris 10 10/09 Installation Guide: Custom JumpStart and Advanced Installations • October 2009120

boot_deviceProfile Keyword (UFS and ZFS)
Note – The boot_device keyword can be used when you install either a UFS file system or a ZFSroot pool. The usage for this keyword is the same in both UFS and ZFS installations.
■ For a complete list of keywords that can be used in a UFS or ZFS installation, see Table 8–2■ For information on performing a ZFS installation, see Chapter 9, “Installing a ZFS Root Pool
With JumpStart”
boot_device device eeprom
boot_device designates the device where the JumpStart program is to install the root (/) filesystem and the system's boot device. boot_device must match any filesys keywords thatspecify the root (/) file system and the root_device keyword.
If you do not specify the boot_device keyword in a profile, the following boot_device keywordis specified by default during the installation:
boot_device any update
device Use one of the following values.
SPARC: cwtxdysz or cxdysz The disk slice where the JumpStart program placesthe root (/) file system, for example, c0t0d0s0.
x86: cwtxdy or cxdy The disk where the JumpStart program places theroot (/) file system, for example, c0d0.
existing The JumpStart program places the root (/) filesystem on the system's existing boot device.
any The JumpStart program chooses where to place theroot (/) file system. The JumpStart programattempts to use the system's existing boot device.The JumpStart program might choose a differentboot device if necessary.
eeprom Choose to update or preserve the system's EEPROM.
The eeprom value enables you to update the system's EEPROM if you change thesystem's current boot device. By updating the system's EEPROM, the system canautomatically boot from the new boot device.
Note – x86: You must specify the preserve value.
Profile Keywords and Values
Chapter 8 • Custom JumpStart (Reference) 121

update The JumpStart program updates the system's EEPROM to the specifiedboot device so that the installed system automatically boots from it.
preserve The boot device value in the system's EEPROM is not changed. If youspecify a new boot device without changing the system's EEPROM,you need to change the system's EEPROM manually so it canautomatically boot from the new boot device.
EXAMPLE 8–8 boot_deviceProfile Keyword
boot_device c0t0d0s2 update
bootenvProfile Keyword (UFS and ZFS)
Note – The bootenv keyword can be used for either a UFS file system or a ZFS root poolinstallation. The usage is different for a ZFS installation.
■ For a complete list of keywords that can be used in a UFS or ZFS installation, see Table 8–2■ For a description of how the bootenv keyword can be used when installing a ZFS root pool,
see “JumpStart Keywords for a ZFS Root (/) File System (Reference)” on page 165
bootenv createbe bename new_BE_name filesystem mountpoint:device:fs_options[filesystem...]
bootenv createbe keyword enables you to quickly create an empty-and-inactive bootenvironment at the same time you are installing the Solaris OS. At the least, you must create theroot (/) file system. The slices are reserved for the file systems specified, but no file systems arecopied. The boot environment is named, but not actually created until installed with a SolarisFlash archive. When the empty boot environment is installed with an archive, file systems areinstalled on the reserved slices. The following lists the values for bename and filesystem.
bename new_BE_namebename specifies the name of the new boot environment to be created. new_BE_name can beno longer than 30 characters, can contain only alphanumeric characters, and can contain nomultibyte characters. The name must be unique on the system.
filesystem mountpoint:device:fs_optionsfilesystem determines the type and number of file systems that are to be created in the newboot environment. At least one slice that contains the root (/) file system must be defined.File systems can be on the same disk or spread across multiple disks.■ mountpoint can be any valid mount point or – (hyphen), indicating a swap slice.
Profile Keywords and Values
Solaris 10 10/09 Installation Guide: Custom JumpStart and Advanced Installations • October 2009122

■ device must be available when the operating system that is being installed is first booted.The device has no relation to JumpStart special storage devices such as free. The devicecannot be a Solaris Volume Manager volume or Veritas Volume Manager volume. deviceis the name of a disk device, of the form /dev/dsk/cwtxdysz.
■ fs_options can be one of the following:■ ufs, which indicates a UFS file system.■ swap, which indicates a swap file system. The swap mount point must be a – (hyphen).
For a profile example and background about using this keyword, see the following references:
For an example of a profile Example 3–11
For background about using Solaris Live Upgrade thatcreates, upgrades, and activates inactive bootenvironments
Chapter 2, “Solaris Live Upgrade (Overview),” inSolaris 10 10/09 Installation Guide: Solaris LiveUpgrade and Upgrade Planning
For background about using a Solaris Flash archive Chapter 1, “Solaris Flash (Overview),” inSolaris 10 10/09 Installation Guide: Solaris FlashArchives (Creation and Installation)
client_archProfile Keywordclient_arch karch_value ...
client_arch specifies that the operating system server is to support a different platform groupthan the server uses. If you do not specify client_arch in the profile, any diskless client thatuses the operating system server must contain the same platform group as the server. You mustspecify each platform group that you want the operating system server to support.
Valid values for karch_value are sun4u and i86pc. For a detailed list of platform names andvarious systems, see Solaris Sun Hardware Platform Guide at http://docs.sun.com.
Note – You can use client_arch only when system_type is specified as server.
client_rootProfile Keywordclient_root root_size
client_root defines the amount of root space, root_size in Mbytes, to allocate for each client. Ifyou do not specify client_root in a server's profile, the installation software allocates 15Mbytes of root space per client. The size of the client root area is used in combination with thenum_clients keyword to determine how much space to reserve for the /export/root filesystem.
Profile Keywords and Values
Chapter 8 • Custom JumpStart (Reference) 123

Note – You can use client_root only when system_type is specified as server.
client_swapProfile Keywordclient_swap swap_size
client_swap defines the amount of swap space, swap_size in Mbytes, to allocate for eachdiskless client. If you do not specify client_swap in the profile, 32 Mbytes of swap space isallocated by default.
Note – You can use client_swap only when system_type is specified as server.
EXAMPLE 8–9 client_swapProfile Keyword
The following example specifies that each diskless client is to have a swap space of 64 Mbytes.
client_swap 64
How the Size of swap Is Determined
If a profile does not specify the size of swap, the JumpStart program determines the size of theswap space, based on the system's physical memory. Table 8–5 shows how the size of swap isdetermined during a custom JumpStart installation.
TABLE 8–5 Determining swap Size
Physical Memory (in Mbytes) Swap Space (in Mbytes)
16–64 32
64–128 64
128–512 128
Greater than 512 256
The JumpStart program makes the size of swap no more than 20 percent of the disk where swapis located. The allocation is different if the disk contains free space after laying out the other filesystems. If free space exists, the JumpStart program allocates the free space to swap, and ifpossible, allocates the amount that is shown in Table 8–5.
Note – Physical memory plus swap space must total a minimum of 32 Mbytes.
Profile Keywords and Values
Solaris 10 10/09 Installation Guide: Custom JumpStart and Advanced Installations • October 2009124

clusterProfile Keyword (Adding Software Groups) (UFS and ZFS)
Note – The cluster keyword can be used when you install either a UFS file system or a ZFS rootpool. The usage for this keyword is the same in both UFS and ZFS installations.
■ For a complete list of keywords that can be used in a UFS or ZFS installation, see Table 8–2■ For a description of how the cluster keyword can be used in a profile for an installation of a
ZFS root pool, see “JumpStart Profile Examples for a ZFS Root Pool” on page 161
cluster group_name
cluster designates the software group to add to the system.
A software group is a metacluster that contains a collection of clusters and packages. Thesoftware group is installed by using the cluster keyword and group_name variable. This clusterkeyword can only be installed in an initial installation. This cluster keyword refers tometaclusters found in the clustertoc(4) file.
A cluster is a collection of packages that is named SUNWname. A cluster is installed by usingthe cluster keyword and cluster_name variable. A cluster can be added or removed from asoftware group (metacluster) in an initial install or an upgrade.
The group_name for each software group is listed in the following table.
Software Group group_name
Reduced Network Support Software Group SUNWCrnet
Core System Support Software Group SUNWCreq
End User Solaris Software Group SUNWCuser
Developer Solaris Software Group SUNWCprog
Entire Solaris Software Group SUNWCall
Entire Solaris Software Group Plus OEMSupport
SUNWCXall
The following limitations apply:
■ You can specify only one software group in a profile.■ The software group must be specified before other cluster and package entries.■ If you do not specify a software group with cluster in the profile, the end–user software
group, SUNWCuser, is installed on the system.
Profile Keywords and Values
Chapter 8 • Custom JumpStart (Reference) 125

For more information about software groups, see “Disk Space Recommendations for SoftwareGroups” in Solaris 10 10/09 Installation Guide: Planning for Installation and Upgrade.
clusterProfile Keyword (Adding or Deleting Clusters) (UFS and ZFS)cluster cluster_name add_delete_switch
Note – The cluster keyword can be used when you install either a UFS file system or a ZFS rootpool. The usage for this keyword is the same in both UFS and ZFS installations.
■ For a complete list of keywords that can be used in a UFS or ZFS installation, see Table 8–2■ For a description of how the cluster keyword can be used in a profile for an installation of a
ZFS root pool, see “JumpStart Profile Examples for a ZFS Root Pool” on page 161
cluster designates whether a cluster is to be added or deleted from the software group that is tobe installed on the system.
cluster_name The name of the cluster that must be in the form SUNWCname.
add_delete_switch An optional keyword that indicates whether to add or delete the clusterthat is specified. Use the value add or delete. If you do not specify add ordelete, add is used by default.
When you use cluster during an upgrade, the following conditions apply:
■ All clusters that are already on the system are automatically upgraded.■ If you specify cluster_name add, and cluster_name is not installed on the system, the cluster
is installed.■ If you specify cluster_name delete, and cluster_name is installed on the system, the package
is deleted before the upgrade begins.
Note – A software group is a metacluster that contains a collection of clusters and packages. Thesoftware group is installed by using the cluster keyword and group_name variable. This clusterkeyword can only be installed in an initial installation. This cluster keyword refers tometaclusters found in the clustertoc(4) file.
A cluster is collection of packages. Clusters can be grouped together to form a software group(metacluster). A cluster name is always in the form of SUNW<name>. A cluster is installed byusing the cluster keyword and cluster_name variable. A cluster can be added or removed froma software group (metacluster) in an initial install or an upgrade.
Profile Keywords and Values
Solaris 10 10/09 Installation Guide: Custom JumpStart and Advanced Installations • October 2009126

dontuseProfile Keyword (UFS and ZFS)
Note – The dontuse keyword can be used when you install either a UFS file system or a ZFS rootpool. The usage for this keyword is the same in both UFS and ZFS installations.
■ For a complete list of keywords that can be used in a UFS or ZFS installation, see Table 8–2■ For information on performing a ZFS installation, see Chapter 9, “Installing a ZFS Root Pool
With JumpStart”
dontuse disk_name ...
By default, the JumpStart program uses all of the operational disks on the system whenpartitioning default is specified. dontuse designates one or more disks that you do not wantthe JumpStart program to use. disk_name must be specified in the form cxtydzor cydz, forexample, c0t0d0.
Note – You cannot specify the dontuse keyword and the usedisk keyword in the same profile.
x86: fdiskProfile Keyword (UFS and ZFS)
Note – The fdisk keyword can be used when you install either a UFS file system or a ZFS rootpool. The usage for this keyword is the same in both UFS and ZFS installations.
■ For a complete list of keywords that can be used in a UFS or ZFS installation, see Table 8–2■ For information on performing a ZFS installation, see Chapter 9, “Installing a ZFS Root Pool
With JumpStart”
fdisk disk_name type size
fdisk defines how the fdisk partitions are set up on an x86 based system. You can specifyfdisk more than once. When fdisk partitions an x86 based system, the following occurs:
■ All fdisk partitions on the disk are preserved unless you delete the partitions with the fdiskkeyword by assigning size the value of delete or 0. Also, all existing fdisk partitions aredeleted when size is set to all.
■ A Solaris fdisk partition that contains a root (/) file system is always designated as theactive partition on the disk.
Note – The system boots from the active partition by default.
Profile Keywords and Values
Chapter 8 • Custom JumpStart (Reference) 127

■ If the fdisk keyword is not specified in a profile, the following fdisk keyword is used bydefault during the installation.
fdisk all solaris maxfree
■ fdisk entries are processed in the order in which the entries are listed in the profile.
disk_name Use the following values to specify where the fdisk partition is to be created ordeleted:■ cxtydz or cydz – A specific disk, for example, c0t3d0.■ rootdisk – The variable that contains the value of the system's root disk,
which is where the installation takes place. The root disk is determined bythe JumpStart program as described in “How the System's Root Disk IsDetermined” on page 154.
■ all – All the selected disks.
type Use the following values to specify the type of fdisk partition that is to becreated or deleted on the specified disk:■ solaris – A Solaris fdisk partition (SUNIXOS fdisk type).■ dosprimary – An alias for primary DOS fdisk partitions, not for fdisk
partitions that are extended or reserved for data DOS. When you deletefdisk partitions by assigning size the value delete, dosprimary is an aliasfor the DOSHUGE, DOSOS12, and DOSOS16 fdisk types. When youcreate an fdisk partition, dosprimary is an alias for the DOSHUGE fdisk
partition.■ DDD – An integer fdisk partition. DDD is an integer between 1 and 255
inclusive.
Note – You can specify this value only if size is delete.
■ 0xHH – A hexadecimal fdisk partition. HH is a hexadecimal numberbetween 01 and FF.
Note – You can specify this value only if size is delete.
The following table shows the integer and hexadecimal numbers for some of thefdisk types.
Profile Keywords and Values
Solaris 10 10/09 Installation Guide: Custom JumpStart and Advanced Installations • October 2009128

fdisk Type DDD HH
DOSOS12 1 01
PCIXOS 2 02
DOSOS16 4 04
EXTDOS 5 05
DOSHUGE 6 06
DOSDATA 86 56
OTHEROS 98 62
UNIXOS 99 63
size Use one of the following values:■ DDD – An fdisk partition of size DDD in Mbytes is created on the specified
disk. DDD must be an integer, and the JumpStart program automaticallyrounds the number up to the nearest cylinder boundary. Specifying a valueof 0 is the same as specifying delete.
■ all – An fdisk partition is created on the entire disk. All existing fdiskpartitions are deleted.
x86 only – The all value can be specified only if type is solaris.
■ maxfree – An fdisk partition is created in the largest contiguous free spaceon the specified disk. If an fdisk partition of the specified type already existson the disk, the existing fdisk partition is used. A new fdisk partition is notcreated on the disk.
x86 only – The disk must contain at least one unused fdisk partition. Also,the disk must have free space or the installation fails. The maxfree value canbe specified only if type is solaris or dosprimary.
■ delete – All fdisk partitions of the specified type are deleted on thespecified disk.
Profile Keywords and Values
Chapter 8 • Custom JumpStart (Reference) 129

filesysProfile Keyword (Mounting Remote File Systems) (UFS andZFS)
Note – The filesys keyword can be used when you install either a UFS file system or a ZFS rootpool. The usage for this keyword is the same in both UFS and ZFS installations.
■ For a complete list of keywords that can be used in a UFS or ZFS installation, see Table 8–2■ For information on performing a ZFS installation, see Chapter 9, “Installing a ZFS Root Pool
With JumpStart”
filesys server:path server_address mount_pt_name mount_options
By using filesys with the listed values, the JumpStart program sets up the installed system toautomatically mount remote file systems when the system boots. You can specify filesys morethan once.
server The name of the server where the remote file system is located, followed by acolon.
path The remote file system's mount-point name. For example, /usr or/export/home
server_address The IP address of the server that is specified in server:path. If a namingservice is not running on the network, the server_address value can be usedto populate the /etc/hosts file with the server's host name and IP address. Ifyou are not specifying the server's IP address, you must specify a minus sign(-). For example, if you have a naming service that is running on thenetwork, you do not need to specify the server's IP address.
mount_pt_name The name of the mount point on which the remote file system is to bemounted.
mount_options One or more mount options, which is the same as the -o option of themount(1M) command. The mount options are added to the /etc/vfstabentry for the specified mount_pt_name.
Note – If you need to specify more than one mount option, the mountoptions must be separated by commas and no spaces (ro,quota forexample).
EXAMPLE 8–10 filsysProfile Keyword
filesys sherlock:/export/home/user2 - /home
Profile Keywords and Values
Solaris 10 10/09 Installation Guide: Custom JumpStart and Advanced Installations • October 2009130

filesysProfile Keyword (Creating Local File Systems)filesys slice size file_system optional_parameters
By using filesys with the values that are listed, the JumpStart program creates local filesystems during the installation. You can specify filesys more than once.
slice Use one of the following values:
any The JumpStart program places the file systemon any disk.
Note – You cannot specify anywhen size isexisting, all, free, start:size, or ignore.
cwtxdysz or cxdysz The disk slice where the JumpStart programplaces the file system, for example, c0t0d0s0or c0d0s0.
rootdisk.sn The variable that contains the value for thesystem's root disk, which is determined bythe JumpStart program as described in “Howthe System's Root Disk Is Determined” onpage 154. The sn suffix indicates a specificslice on the disk.
Note – The root disk is determined by theJumpStart program and determines wherethe OS is to be installed. The rules file uses aprobe keyword "rootdisk,” but this keywordis used differently than the "rootdisk"keyword used in the JumpStart profile. Youcannot set the place of installation by usingthe probe keyword “rootdisk” in the rulesfile. The probe keyword, rootdisk,determines where to boot from during theinstallation. See Table 8–10.
size Use one of the following values:
num The size of the file system is set to num in Mbytes.
existing The current size of the existing file system is used.
Profile Keywords and Values
Chapter 8 • Custom JumpStart (Reference) 131

Note – When you use the existing value, you can changethe name of an existing slice by specifying file_system as adifferent mount_pt_name.
auto The size of the file system is automatically determined,depending on the software that is selected.
all The specified slice uses the entire disk for the file system.When you specify the all value, no other file systems canbe placed on the specified disk.
free The remaining unused space on the disk is used for thefile system.
Note – If free is used as the value to filesys, the filesysentry must be the last entry in a profile.
start:size The file system is explicitly partitioned. start is thecylinder where the slice begins. size is the number ofcylinders for the slice.
file_system The file_system value is optional and used when slice is specified as anyor cwtxdysz. If file_system is not specified, unnamed is set by default. Ifunnamed is set, you cannot specify the optional_parameters value. Useone of the following values:
mount_pt_name The file system's mount-point name, forexample, /var.
swap The specified slice is used as swap.
overlap The specified slice is defined as a representationof a disk region. The VTOC value isV_BACKUP. By default, slice 2 is an overlap slicethat is a representation of the whole disk.
Note – You can specify overlap only when size isexisting, all, or start:size.
unnamed The specified slice is defined as a raw slice, so slicedoes not have a mount-point name. If you do notspecify file_system, unnamed is used by default.
Profile Keywords and Values
Solaris 10 10/09 Installation Guide: Custom JumpStart and Advanced Installations • October 2009132

ignore The specified slice is not used or recognized bythe JumpStart program. You can use this optionto specify that you want a file system to beignored on a disk during installation. TheJumpStart program creates a new file system onthe same disk with the same name. You can useignore only when partitioning existing isspecified.
optional_parameters Use one of the following values:
preserve The file system on the specified slice is preserved.
Note – preserve can be specified only when size isexisting and slice is cwtxdysz.
mount_options One or more mount options, which is the same asthe -o option of the mount(1M) command. Themount options are added to the /etc/vfstabentry for the specified mount_pt_name.
Note – If you need to specify more than one mountoption, the mount options must be separated bycommas and no space (ro,quota, for example).
filesysProfile Keyword (Creating RAID-1 Volumes)filesys mirror[:name]slice [slice] size file_system optional_parameters
By using the filesys mirror keywords with the values that are listed, the JumpStart programcreates the RAID-1 and RAID-0 volumes that are necessary to create a mirrored file system.You can specify filesys mirror more than once to create RAID-1 volumes (mirrors) fordifferent file systems.
Note – The filesys mirror keyword is only supported for initial installations.
name This optional keyword enables you to name the RAID-1 volume(mirror). Mirror names must start with the letter “d”, followed by anumber between 0 and 127, for example, d100. If you do not specify amirror name, the custom JumpStart program assigns a mirror namefor you. For guidelines about how to name mirrors, see “RAID
Profile Keywords and Values
Chapter 8 • Custom JumpStart (Reference) 133

Volume Name Requirements and Guidelines for Custom JumpStartand Solaris Live Upgrade” in Solaris 10 10/09 Installation Guide:Planning for Installation and Upgrade.
slice This value specifies the disk slice where the custom JumpStartprogram places the file system you want to duplicate. The slice valuemust follow the format cwtxdysz, for example c0t0d0s0 or c0t0d0s5.The custom JumpStart program creates a RAID-0 volume (single-sliceconcatenation) on the slice, and creates a RAID-1 volume to mirrorthe concatenation. You can specify up to two slices for two RAID-0volumes.
size This value specifies the size, in Mbytes, of the file system.
file_system This value specifies the file system that you are duplicating. Thecustom JumpStart program creates the RAID-1 volume from the slicesthat are specified and mounts the RAID-1 volume on the specified filesystem. In addition to critical file systems, such as root (/), /usr, and/var, you can also specify swap as the file system.■ If file_system is not specified, unnamed is set by default.■ If unnamed is set, you cannot specify the optional_parameters
value. Use one of the following values:
mount_pt_name Specifies the file system's mount-point name,for example, /var.
swap Defines the slice to be used as swap.
overlap Defines the slice as a representation of a diskregion. The VTOC value is V_BACKUP. Bydefault, slice 2 is an overlap slice that is arepresentation of the whole disk. You canspecify overlap only when size is one of thefollowing values:■ existing
■ all
■ start:size.
unnamed Defines the slices as a raw slice. Therefore,the slice does not have a mount-point name.If you do not specify file_system, unnamed isused by default.
ignore Specifies that the slice is not to be used orrecognized by the JumpStart program. Youcan use this option to specify that you want a
Profile Keywords and Values
Solaris 10 10/09 Installation Guide: Custom JumpStart and Advanced Installations • October 2009134

file system to be ignored on a disk duringinstallation. The JumpStart program createsa new file system on the same disk with thesame name. You can use ignore only whenthe partitioning Keyword and theexisting value is specified.
optional_parameters One or more mount options, which is the same as the -o option of themount(1M) command. The mount options are added to the/etc/vfstab entry for the specified file_system. If you need to specifymore than one mount option, the mount options must be separated bycommas and no spaces, for example, ro,quota.
Note – If unnamed is set for the file_system value, you cannot specify theoptional_parameters value. See file_system for the values that can beset.
For more information about creating mirrored file systems during your installation, seeChapter 9, “Creating RAID-1 Volumes (Mirrors) During Installation (Overview),” inSolaris 10 10/09 Installation Guide: Planning for Installation and Upgrade.
forced_deploymentProfile Keyword (Installing Solaris FlashDifferential Archives)forced_deployment
forced_deployment forces the installation of a Solaris Flash differential archive onto a clonesystem that is different than the software expects.
Caution – If you use forced_deployment, all new files are deleted to bring the clone system to theexpected state. If you are not certain that you want files deleted, use the default, which protectsnew files by stopping the installation.
geoProfile Keyword (UFS and ZFS)
Note – The geo keyword can be used when you install either a UFS file system or a ZFS root pool.The usage for this keyword is the same in both UFS and ZFS installations.
■ For a complete list of keywords that can be used in a UFS or ZFS installation, see Table 8–2■ For information on performing a ZFS installation, see Chapter 9, “Installing a ZFS Root Pool
With JumpStart”
Profile Keywords and Values
Chapter 8 • Custom JumpStart (Reference) 135

geo region
geo designates the regional locale or locales that you want to install on a system or to add whenupgrading a system. region designates a geographical area that contains the locales that youwant to install. Values you can specify for region are listed in the following table.
Value Description
N_Africa Northern Africa, including Egypt
C_America Central America, including Costa Rica, El Salvador, Guatemala, Mexico,Nicaragua, Panama
N_America North America, including Canada, United States
S_America South America, including Argentina, Bolivia, Brazil, Chile, Colombia, Ecuador,Paraguay, Peru, Uruguay, Venezuela
Asia Asia, including Japan, Republic of Korea, People's Republic of China, Taiwan,Thailand
Ausi Australasia, including Australia, New Zealand
C_Europe Central Europe, including Austria, Czech Republic, Germany, Hungary, Poland,Slovakia, Switzerland
E_Europe Eastern Europe, including Albania, Bosnia, Bulgaria, Croatia, Estonia, Latvia,Lithuania, Macedonia, Romania, Russia, Serbia, Slovenia, Turkey
N_Europe Northern Europe, including Denmark, Finland, Iceland, Norway, Sweden
S_Europe Southern Europe, including Greece, Italy, Portugal, Spain
W_Europe Western Europe, including Belgium, France, Great Britain, Ireland, Netherlands
M_East Middle East, including Israel
A complete list of the component locale values that compose each regional locale that is listedpreviously is presented in International Language Environments Guide.
Note – You can specify a geo keyword for each locale you need to add to a system.
Profile Keywords and Values
Solaris 10 10/09 Installation Guide: Custom JumpStart and Advanced Installations • October 2009136

install_typeProfile Keyword (UFS and ZFS)
Note – The install_type keyword can be used for either a UFS file system or a ZFS root poolinstallation. The usage is limited for a ZFS installation. You can only use the intial_installoption for a ZFS installation.
■ If you want to migrate your UFS file system to a ZFS root pool or upgrade a ZFS root pool,you must use Solaris Live Upgrade. See Chapter 11, “Solaris Live Upgrade and ZFS(Overview),” in Solaris 10 10/09 Installation Guide: Solaris Live Upgrade and UpgradePlanning.
■ For a complete list of keywords that can be used in a UFS or ZFS installation, see Table 8–2■ For a description of how the install_type keyword can be used when installing a ZFS root
pool, see “JumpStart Keywords for a ZFS Root (/) File System (Reference)” on page 165.
install_type initial_upgrade_flash_switch
install_type defines whether to erase and install a new Solaris OS on a system, upgrade theexisting Solaris OS on a system, or install a Solaris Flash archive on the system.
Note – You must specify install_type in a profile, and install_type must be the first profilekeyword in every profile.
You must use one of the following options for the initial_upgrade_flash_switch:
initial_install Specifies to perform an initial installation of the Solaris OS
upgrade Specifies to perform an upgrade of the Solaris OS
flash_install Specifies to install a Solaris Flash archive that overwrites all files
flash_update Specifies to install a Solaris Flash differential archive that overwrites onlythe files that are specified
Note – Some profile keywords can only be used with the initial_install option. Some profilekeywords can only be used with the upgrade option. Some profile keywords can only be usedwith the flash_install option.
layout_constraintProfile Keywordlayout_constraint slice constraint minimum_size
layout_constraint designates the constraint auto-layout has on a file system if auto-layoutneeds to reallocate space during an upgrade because of space problems.
Profile Keywords and Values
Chapter 8 • Custom JumpStart (Reference) 137
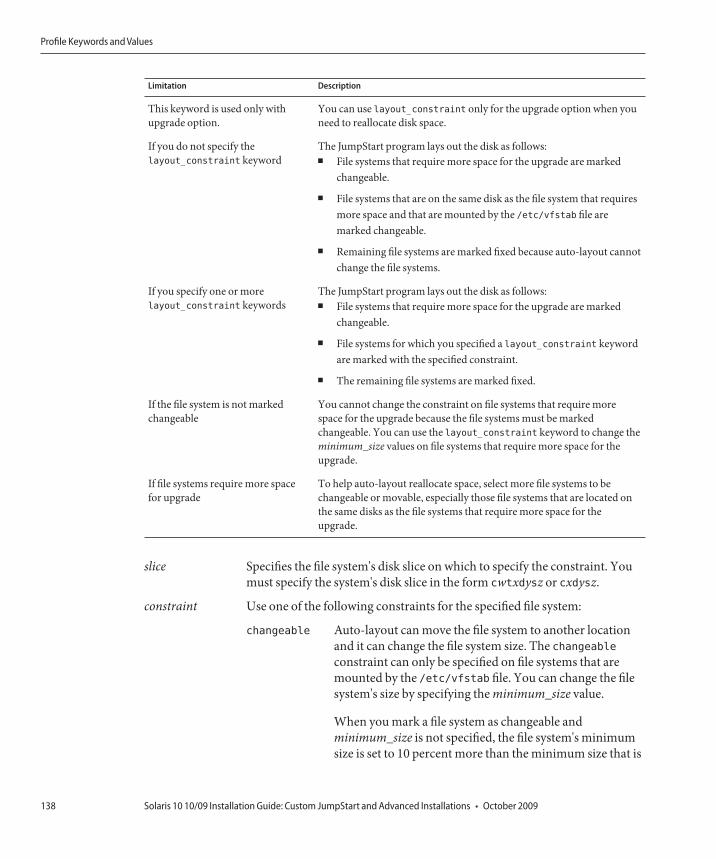
Limitation Description
This keyword is used only withupgrade option.
You can use layout_constraint only for the upgrade option when youneed to reallocate disk space.
If you do not specify thelayout_constraint keyword
The JumpStart program lays out the disk as follows:■ File systems that require more space for the upgrade are marked
changeable.
■ File systems that are on the same disk as the file system that requiresmore space and that are mounted by the /etc/vfstab file aremarked changeable.
■ Remaining file systems are marked fixed because auto-layout cannotchange the file systems.
If you specify one or morelayout_constraint keywords
The JumpStart program lays out the disk as follows:■ File systems that require more space for the upgrade are marked
changeable.
■ File systems for which you specified a layout_constraint keywordare marked with the specified constraint.
■ The remaining file systems are marked fixed.
If the file system is not markedchangeable
You cannot change the constraint on file systems that require morespace for the upgrade because the file systems must be markedchangeable. You can use the layout_constraint keyword to change theminimum_size values on file systems that require more space for theupgrade.
If file systems require more spacefor upgrade
To help auto-layout reallocate space, select more file systems to bechangeable or movable, especially those file systems that are located onthe same disks as the file systems that require more space for theupgrade.
slice Specifies the file system's disk slice on which to specify the constraint. Youmust specify the system's disk slice in the form cwtxdysz or cxdysz.
constraint Use one of the following constraints for the specified file system:
changeable Auto-layout can move the file system to another locationand it can change the file system size. The changeableconstraint can only be specified on file systems that aremounted by the /etc/vfstab file. You can change the filesystem's size by specifying the minimum_size value.
When you mark a file system as changeable andminimum_size is not specified, the file system's minimumsize is set to 10 percent more than the minimum size that is
Profile Keywords and Values
Solaris 10 10/09 Installation Guide: Custom JumpStart and Advanced Installations • October 2009138

required. For example, if the minimum size for a file systemis 100 Mbytes, the changed size is 110 Mbytes. Ifminimum_size is specified, any free space that remains,original size minus minimum size, is used for other filesystems.
movable Auto-layout can move the file system to another slice onthe same disk or different disk. The file system size remainsthe same.
available Auto-layout can use all of the space on the file system toreallocate space. All of the data in the file system is lost. Theavailable constraint can only be specified on file systemsthat are not mounted by the /etc/vfstab file.
collapse Auto-layout moves and collapses the specified file systeminto the parent file system. You can use the collapseoption to reduce the number of file systems on a system aspart of the upgrade. For example, if a system has the /usrand /usr/share file systems, collapsing the /usr/share filesystem moves the file system into /usr, the parent filesystem. You can specify the collapse constraint only onfile systems that are mounted by the /etc/vfstab file.
minimum_size Specifies the size of the file system after auto-layout reallocates space. Theminimum_size option enables you to change the size of a file system. Thesize of the file system might be larger if unallocated space is added to the filesystem. But, the size is never less than the value you specify. Theminimum_size value is optional. Use this value only if you have marked afile system as changeable and the minimum size cannot be less than what thefile system needs for the existing file system contents.
EXAMPLE 8–11 layout_constraintProfile Keyword
layout_constraint c0t3d0s1 changeable 200
layout_constraint c0t3d0s4 movable
layout_constraint c0t3d1s3 available
layout_constraint c0t2d0s1 collapse
local_customizationProfile Keyword (Installing Solaris FlashArchives)local_customization local_directory
Profile Keywords and Values
Chapter 8 • Custom JumpStart (Reference) 139

Before you install a Solaris Flash archive on a clone system, you can create custom scripts topreserve local configurations on the clone system. The local_customization keyworddesignates the directory where you have stored these scripts. local_directory is the path to thescript on the clone system.
For information about predeployment and postdeployment scripts, see “CreatingCustomization Scripts” in Solaris 10 10/09 Installation Guide: Solaris Flash Archives (Creationand Installation).
localeProfile Keyword (UFS and ZFS)
Note – The locale keyword can be used when you install either a UFS file system or a ZFS rootpool. The usage for this keyword is the same in both UFS and ZFS installations.
■ For a complete list of keywords that can be used in a UFS or ZFS installation, see Table 8–2■ For information on performing a ZFS installation, see Chapter 9, “Installing a ZFS Root Pool
With JumpStart”
locale locale_name
Note – You can use locale with both the initial installation and upgrade options.
locale designates the locale packages you want to install or add when upgrading for thespecified locale_name. The locale_name values are the same as those values that are used for the$LANG environment variable. International Language Environments Guide contains a list of validlocale values.
When you use the locale keyword, consider the following:
■ If you have preconfigured a default locale, the locale is automatically installed. The Englishlanguage packages are installed by default.
■ You can specify a locale keyword for each locale you need to add to a system.
metadbProfile Keyword (Creating State Database Replicas)metadb slice [size size-in-blocks] [count number-of-replicas]
The metadb keyword enables you to create Solaris Volume Manager state database replicas(mediates) during your custom JumpStart installation. You can use the metadb keywordmultiple times in your profile file to create state database replicas on different disk slices.
Profile Keywords and Values
Solaris 10 10/09 Installation Guide: Custom JumpStart and Advanced Installations • October 2009140
slice You must specify the disk slice on which you want the customJumpStart program to place the state database replica. The slicevalue must follow the format cwtxdysz.
size size-in-blocks The size optional keyword enables you to specify the size, inblocks, of the state database replica to be created. If you do notspecify a size value, the custom JumpStart program uses adefault size of 8192 blocks for the state database replica.
count number-of-replicas You can specify the number of state database replicas you arecreating by setting the optional count keyword value in yourprofile. If you do not specify a count value, the custom JumpStartprogram creates three state database replicas by default.
For more information about creating Solaris Volume Manager state database replicas duringyour installation, see “State Database Replicas Guidelines and Requirements” inSolaris 10 10/09 Installation Guide: Planning for Installation and Upgrade.
no_content_checkProfile Keyword (Installing Solaris Flash Archives)no_content_check
When installing a clone system with a Solaris Flash differential archive, you can use theno_content_check keyword to ignore file-by-file validation. File-by-file validation ensures thatthe clone system is a duplicate of the master system. Avoid using this keyword unless you aresure the clone system is a duplicate of the original master system.
Caution – If you use no_content_check, all new files are deleted to bring the clone system to theexpected state. If you are not certain that you want files deleted, use the default, which protectsnew files by stopping the installation.
For information about installing Solaris Flash differential archives, see “To Prepare to Install aSolaris Flash Archive With a Custom JumpStart Installation” on page 84.
no_master_checkProfile Keyword (Installing Solaris Flash Archives)no_master_check
When installing a clone system with a Solaris Flash differential archive, you can use theno_master_check keyword to ignore checking the clone system to make sure it was built fromthe original master system. Avoid using this keyword unless you are sure the clone system is aduplicate of the original master system.
For information about installing Solaris Flash differential archives, see “To Prepare to Install aSolaris Flash Archive With a Custom JumpStart Installation” on page 84.
Profile Keywords and Values
Chapter 8 • Custom JumpStart (Reference) 141

num_clientsProfile Keywordnum_clients client_num
When a server is installed, space is allocated for each diskless client's root (/) and swap filesystems. num_clients defines the number of diskless clients, client_num, that a server supports.If you do not specify num_clients in the profile, five diskless clients are allocated by default.
Note – You can use num_clients only when system_type is specified as server.
packageProfile Keyword (UFS and ZFS)
Note – The package keyword can be used when you install either a UFS file system or a ZFS rootpool. The usage for this keyword is the same in both UFS and ZFS installations.
■ For a complete list of keywords that can be used in a UFS or ZFS installation, see Table 8–2■ For information on performing a ZFS installation, see Chapter 9, “Installing a ZFS Root Pool
With JumpStart”
package package_name [add [retrieval_type location]| delete]
You can use package with both the initial installation and upgrade options. The packagekeyword enables you to do the following:
■ Add a package to the software group from the Solaris distribution that is to be installed.■ Add a package to the software group from outside the distribution that is being installed.■ Exclude or remove a package from the software group that is to be installed or upgraded.■ Add a package from outside the distribution that is being installed when installing a Solaris
Flash archive.
package_name Specifies the package name in the form SUNWname. To viewdetailed information about packages and their names, on aninstalled system, use the pkginfo -l command.
add | delete Specifies to add or remove the specified package. If you do notspecify add or delete, add is used by default.
Note – You can add more than one package by adding anotherpackage entry to the profile and omitting the location. The locationof the previous package is used for all subsequent packages if thelocation is left blank.
Profile Keywords and Values
Solaris 10 10/09 Installation Guide: Custom JumpStart and Advanced Installations • October 2009142

[retrieval_type location] Specifies the addition of a package or packages that are locatedoutside the Solaris distribution that is being installed. The values ofretrieval_type and location depend on where the package is stored.The following sections contain the values you can use forretrieval_type and location and examples of how to use thepackage_name keyword.
Packages Stored on an NFS Server
If the package is stored on an NFS server, use one of the following syntaxes for the packagekeyword.
package package_name add nfs server_name:/path [retry n]package package_name add nfs://server_name:/path [retry n]
package_name Specifies the package name in the form SUNWname. To view detailedinformation about packages and their names, on an installed system, use thepkginfo -l command.
server_name Specifies the name of the server where you stored the package.
path Specifies the location of the package directory on the specified server. If thepath contains $HOST, $HOST is replaced with the name of the host systemthat you are installing.
retry n Is an optional keyword. n is the maximum number of times the installationprocess attempts to mount the directory.
EXAMPLE 8–12 Adding a Package by Using NFS
In this example, the package profile keyword adds the SUNWnew package from the NFSlocation nfs://golden/packages/Solaris_10/. If a mount fails, the NFS mount is tried fivetimes.
package SUNWnew add nfs golden:/packages/Solaris_10 retry 5
Packages Stored on an HTTP Server
If the package is stored on an HTTP server, use one of the following syntaxes for the packagekeyword.
package package_name add http://server_name[:port] path optional_keywordspackage package_name add http server_name[:port] path optional_keywords
package_name Specifies the package name in the form SUNWname. To view detailedinformation about packages and their names, on an installed system, usethe pkginfo -l command.
Profile Keywords and Values
Chapter 8 • Custom JumpStart (Reference) 143

server_name Specifies the name of the server where you stored the package.
port Specifies an optional port. port can be a port number or the name of aTCP service that has a port number that is determined at runtime.
If you do not specify a port, the default HTTP port number 80 is used.
path Specifies the location of the package to be retrieved from the specifiedserver. When using an HTTP server, the package must be in packagedatastream format.
optional_keywords Specifies the optional keywords to use when you retrieve a package froman HTTP server.
TABLE 8–6 Optional packageKeywords to Use With HTTP
Keyword Value Definition
timeout min The timeout keyword enables you to specify, in minutes, the maximum length of time that isallowed to pass without receipt of data from the HTTP server. If a timeout occurs, theconnection is closed, reopened, and resumed. If you specify a timeout value of 0 (zero), theconnection is not reopened.
If a timeout reconnection occurs, the package is retried from the beginning of the packageand the data that was retrieved prior to the timeout is discarded.
proxy host:port The proxy keyword enables you to specify a proxy host and proxy port. You can use a proxyhost to retrieve a Solaris package from the other side of a firewall. You must supply a proxyport when you specify the proxy keyword.
EXAMPLE 8–13 Adding a Package by Using HTTP
In this example, the package profile keyword adds all the packages listed in the Solaris 10directory from the HTTP location http://package.central/Solaris_10. If five minutes passand no data is received, the package data is retrieved again. Previous package data is discarded.Either of the following formats can be used.
package SUNWnew add http package.central/Solaris_10 timeout 5
package SUNWnew add http://package.central/Solaris_10 timeout 5
EXAMPLE 8–14 Adding a Package by Using HTTP with a Proxy Port
In this example, the package profile keyword adds all the packages listed in the Solaris_10directory from the HTTP location http://package.central/Solaris_10. The package isretrieved across a firewall by using the proxy keyword.
package SUNWnew add http://package.central/Solaris_10 proxy webcache.east:8080
Profile Keywords and Values
Solaris 10 10/09 Installation Guide: Custom JumpStart and Advanced Installations • October 2009144

Packages Stored on a Local Device
You can retrieve a Solaris package from a local device if you stored the package on a filesystem-oriented, random-access device, such as a diskette or a DVD-ROM. Use the followingsyntax for the package keyword.
package package_name add local_device device path file_system_type
package_name Specifies the package name in the form SUNWname. To view detailedinformation about packages and their names, on an installed system, usethe pkginfo -l command.
device Specifies the name of the drive where the Solaris package resides. If thedevice name is a canonical path, the device is mounted directly. If yousupply a device name that is not a canonical path, the installation utilityadds /dev/dsk/ to the path.
path Specifies the path to the Solaris package, relative to the root (/) file systemon the device you specified.
file_system_type Specifies the type of file system on the device. If you do not supply a filesystem type, the installation utility attempts to mount a UFS file system. Ifthe UFS mount fails, the installation utility attempts to mount an HSFS filesystem.
EXAMPLE 8–15 Adding a Package by Using a Local Device With a UFS File System
In this example, the package profile keyword adds the SUNWnew package from the directory/Solaris_10/Product from the local device c0t6d0s0. This is a UFS file system.
package SUNWnew add local_device c0t6d0s0 /Solaris_10/Product ufs
EXAMPLE 8–16 Adding a Package by Using a Local Device From an HSFS File System
In this example, the package profile keyword adds the SUNWnew package from the directory/Solaris_10/Product from the local device c0t6d0s0. This is an HSFS file system.
package SUNWnew add local_device c0t6d0s0 /Solaris_10/Product hsfs
Packages Stored on a Local File
A package can be installed from the miniroot from which you booted the system. When youperform a custom JumpStart installation, you boot the system from a DVD, CD, or anNFS-based miniroot. The installation software is loaded and run from this miniroot. Therefore,a package that you stored in the DVD, CD, or NFS-based miniroot is accessible as a local file.Use the following syntax for the package keyword.
Profile Keywords and Values
Chapter 8 • Custom JumpStart (Reference) 145

package package_name add local_file path
package_name Specifies the package name in the form SUNWname. To view detailedinformation about packages and their names, on an installed system, use thepkginfo -l command.
path Specifies the location of the package. The path must be accessible to thesystem as a local file while the system is booted from the Solaris Software - 1CD or from the Solaris Operating System DVD. The system cannot access/net when it is booted from the Solaris Software - 1 CD or from the SolarisOperating System DVD.
EXAMPLE 8–17 Adding a Package by Using a Local File
In this example, the package profile keyword adds the SUNWnew package from the/Solaris_10/Product directory.
package SUNWnew add local_file /Solaris_10/Product
Limitations When Using the packageKeyword
Note these limitations when using the package keyword:
■ Some packages are required and cannot be deleted.■ You cannot individually add or delete localization packages by using the package profile
keyword. To add localization packages, use the locale profile keyword.■ Packages cannot be retrieved from an FTP server location or local backup, such as tape.■ Packages within the Solaris distribution being installed cannot be added from alternate
locations. If a package from the Solaris distribution is specified, the package cannot befollowed by an alternative location in order to maintain consistency with the resultinginstalled system.
■ In order to install without manual intervention, the package must be installable by using thepkgadd command. The same admin file must be used to install the software group packagesand the package that resides in another location.■ If the retrieval_type is HTTP, then the package must be in stream format.■ If the retrieval_type is NFS server, local device, or local file, then the package should
follow standard packaging format with the directory name being the same as the packagebeing installed.
■ If a package is being added from a separate location and a package depends on anotherpackage that is not currently installed, the package is not installed. An error message islogged into the install or upgrade log file.
■ If the package is being installed with a Solaris Flash archive, follow these guidelines.■ Any package installed must be compatible with the archive.
Profile Keywords and Values
Solaris 10 10/09 Installation Guide: Custom JumpStart and Advanced Installations • October 2009146

■ If a package is present in the archive, the JumpStart overwrites the existing package.
Upgrade Behavior When Using the packageKeyword
When you use package for an upgrade, the JumpStart program performs the following actions:
■ All packages already on the system are automatically upgraded.■ If you specify package_name add and package_name is not installed on the system, the
package is installed.■ If you specify package_name delete and package_name is installed on the system, the
package is deleted before the upgrade begins.■ If you specify package_name delete and package_name is not installed on the system, the
package is not installed if the package is part of a cluster that is designated to be installed.
partitioningProfile Keywordpartitioning type
partitioning defines how the disks are divided into slices for file systems during theinstallation.
If you do not specify partitioning in the profile, the default type of partitioning is used bydefault.
type Use one of the following values:
default The JumpStart program selects the disks and creates the file systems onwhich to install the specified software, except for any file systems that arespecified by the filesys keywords. rootdisk is selected first. TheJumpStart program uses additional disks if the specified software doesnot fit on rootdisk.
existing The JumpStart program uses the existing file systems on the system'sdisks. All file systems except /, /usr, /usr/openwin, /opt, and /var arepreserved. The JumpStart program uses the last mount-point field fromthe file system superblock to determine which file-system mount pointthe slice represents.
Note – When you use both the filesys and partitioning existing
profile keywords, you must set size size to existing.
Profile Keywords and Values
Chapter 8 • Custom JumpStart (Reference) 147

explicit The JumpStart program uses the disks and creates the file systems thatare specified by the filesys keywords. If you specify only the root (/)file system with the filesys keyword, all of the Solaris software isinstalled in the root (/) file system.
Note – If you use the explicit profile value, you must use the filesyskeyword to specify the disks to use and file systems to create.
patchProfile Keywordpatch patch_id_list | patch_file patch_location optional_keywords]
patch_id_list Specifies the patch ID numbers that are to be installed. The list should bea list of comma-separated Solaris patch IDs. The patches are installed inthe order specified in the list. Do not add a space after the comma, forexample: 112467-01,112765-02.
patch_file A file with a list of patches that is found in the patch_location. Thepatches are installed in the order specified in the file.
patch_location Specifies the location where the patches reside. The locations allowedare the following:■ NFS server■ HTTP server■ Local device■ Local file
optional_keywords Optional keywords depend on where patches are stored. The followingsections describe the possible locations and optional keywords.
Patches Stored on an NFS Server
If the patch is stored on an NFS server, use one of the following syntaxes for the patch keyword.
patch patch_id_list | patch_file nfs server_name:/patch_directory [retry n]patch patch_id_list | patch_file nfs://server_name/patch_director [retry n]
patch_id_list Specifies the patch ID numbers that are to be installed. The list should be alist of comma-separated Solaris patch IDs. The patches are installed in theorder specified in the list.
patch_file A file with a list of patches that is found in the patch_location. The patchesare installed in the order specified in the file.
server_name Specifies the name of the server where you stored the patches.
Profile Keywords and Values
Solaris 10 10/09 Installation Guide: Custom JumpStart and Advanced Installations • October 2009148

patch_directory Specifies the location of the patch directory on the specified server. Thepatches must be in standard patch format.
retry n Is an optional keyword. n is the maximum number of times the installutility attempts to mount the directory.
EXAMPLE 8–18 Adding a Patch With an Ordered List by Using NFS
In this example, the patch profile keyword adds all the patches listed in the patch file from theNFS patch directory nfs://patch_master/Solaris/v10/patches. Patches are installed in theorder listed in the patch. If a mount fails, the NFS mount is tried five times.
patch patch_file nfs://patch_master/Solaris/v10/patches retry 5
EXAMPLE 8–19 Adding a Patch by Using NFS
In this example, the patch profile keyword adds the patches 112467–01 and 112765–02 fromthe patch directory /Solaris/v10/patches on the server patch_master.
patch 112467-01,112765-02 nfs patch_master:/Solaris/v10/patches
Patches Stored on an HTTP Server
If the patch is stored on an HTTP server, use one of the following syntaxes for the patchkeyword.
patch patch_id_list | patch_file http://server_name [:port] patch_directory optional_http_keywords
patch patch_id_list | patch_file http server_name [:port] patch_directory optional_http_keywords
patch_id_list Specifies the patch ID numbers that are to be installed. The list should bea list of comma-separated Solaris patch IDs. The patches are installed inthe order specified in the list. Do not add a space after the comma, forexample: 112467-01,112765-02.
patch_file A file with a list of patches that is found in the patch_location. Thepatches are installed in the order specified in the file.
server_name Specifies the name of the server where you stored the patch.
port Specifies an optional port. port can be a port number or the name of aTCP service that has a port number that is determined at runtime.
If you do not specify a port, the default HTTP port number 80 is used.
Profile Keywords and Values
Chapter 8 • Custom JumpStart (Reference) 149

patch_directory Specifies the location of the patch directory to be retrieved from thespecified server. When using an HTTP server, the patch must be in JARformat.
optional_keywords Specifies the optional keywords to use when you retrieve a patch froman HTTP server.
TABLE 8–7 Optional patchKeywords to Use With HTTP
Keyword Value Definition
timeout min The timeout keyword enables you to specify, in minutes, the maximum length of time that isallowed to pass without receipt of data from the HTTP server. If a timeout occurs, theconnection is closed, reopened, and resumed. If you specify a timeout value of 0 (zero), theconnection is not reopened.
If a timeout reconnection occurs, the package is retried from the beginning of the packageand the data that was retrieved prior to the timeout is discarded.
proxy host:port The proxy keyword enables you to specify a proxy host and proxy port. You can use a proxyhost to retrieve a Solaris package from the other side of a firewall. You must supply a proxyport when you specify the proxy keyword.
EXAMPLE 8–20 Adding a Patch With an Ordered List by Using HTTP
In this example, the patch profile keyword adds all the patches listed in the patch_file filefrom the HTTP location http://patch.central/Solaris/v10/patches. The patches areinstalled in the order specified in the file the patch file. If five minutes pass and no data isreceived, the patch data is retrieved again. Previous patch data is discarded.
patch patch_file http://patch.central/Solaris/v10/patches timeout 5
EXAMPLE 8–21 Adding a Patch by Using HTTP
In this example, the patch profile keyword entry adds the patches 112467–01 and 112765–02from the patch location http://patch_master/Solaris/v10/patches.
patch 112467-01,112765-02 http://patch.central/Solaris/v10/patches
Patches Stored on a Local Device
You can retrieve a Solaris package from a local device if you stored the package on a filesystem-oriented, random-access device, such as a diskette or a DVD-ROM. Use the followingsyntax for the patch keyword.
patch patch_id_list | patch_file local_device \
device path file_system_type
Profile Keywords and Values
Solaris 10 10/09 Installation Guide: Custom JumpStart and Advanced Installations • October 2009150

patch_id_list Specifies the patch ID numbers that are to be installed. The list should be alist of comma-separated Solaris patch IDs. The patches are installed in theorder specified in the list. Do not add a space after the comma, for example:112467-01,112765-02.
patch_file A file with a list of patches that is found in the patch_location. The patchesare installed in the order specified in the file.
device Specifies the name of the drive where the Solaris package resides. If thedevice name is a canonical path, the device is mounted directly. If yousupply a device name that is not a canonical path, the installation utilityadds /dev/dsk/ to the path.
path Specifies the path to the Solaris patch, relative to the root (/) file system onthe device you specified.
file_system_type Specifies the type of file system on the device. If you do not supply a filesystem type, the installation utility attempts to mount a UFS file system. Ifthe UFS mount fails, the installation utility attempts to mount an HSFS filesystem.
EXAMPLE 8–22 Adding a Patch With an Ordered List by Using a Local Device
In this example, the patch profile keyword adds all the patches listed in the patch_file filefrom the directory /Solaris_10/patches from the local device c0t6d0s0. The patch filedetermines the order of patches to be installed.
patch patch_file c0t6d0s0 /Solaris_10/patches
EXAMPLE 8–23 Adding a Patch by Using a Local Device
In this example, the patch profile keyword adds the patches 112467–01 and 112765–02 fromthe patch directory /Solaris_10/patches from local device c0t6d0s0.
patch 112467-01,112765-02 local_device c0t6d0s0 /Solaris_10/patches
Patches Stored on a Local File
A patch can be installed from the miniroot from which you booted the system. When youperform a custom JumpStart installation, you boot the system from a DVD, CD, or anNFS-based miniroot. The installation software is loaded and run from this miniroot. Therefore,a patch that you stored in the DVD, CD, or NFS-based miniroot is accessible as a local file. Usethe following syntax for the patch keyword.
patch patch_id_list | patch_file local_file patch _directory
Profile Keywords and Values
Chapter 8 • Custom JumpStart (Reference) 151
patch_id_list Specifies the patch ID numbers that are to be installed. The list should be alist of comma-separated Solaris patch IDs. The patches are installed in theorder specified in the list. Do not add a space after the comma, for example:112467-01,112765-02.
patch_file A file with a list of patches that is found in the patch_location. The patchesare installed in the order specified in the file.
patch_directory Specifies the location of the patch directory. The patch directory must beaccessible to the system as a local file while the system is booted from theSolaris Software - 1 CD or from the Solaris Operating System DVD. Thesystem cannot access /net when it is booted from the Solaris Software - 1CD or from the Solaris Operating System DVD.
EXAMPLE 8–24 Adding a Patch With an Ordered List by Using a Local File
In this example, the patch profile keyword adds all the patches that are listed in the patch_filefile from the /Solaris_10/patches directory. The patch file determines the order of patches tobe installed.
patch patch_cal_file /Solaris_10/patches
EXAMPLE 8–25 Adding a Patch by Using a Local File
In this example, the patch profile keyword adds the patches 112467–01 and 112765–02 fromthe patch directory /Solaris_10/patches.
patch 112467-01,112765-02 local_file /Solaris_10/patches
Limitations When Using the patchKeyword
Note the following limitations when using the patch keyword:
■ Patches cannot be retrieved from FTP locations or local backup, such as tape.■ Signed patches cannot be added.■ Patches must be installable with the patchadd command.■ If a patch depends on a patch that is not currently installed, the patch is not installed. An
error message is logged into the installation or upgrade log file.■ You must determine the correct order of the patches for a correct installation of the patches.
Profile Keywords and Values
Solaris 10 10/09 Installation Guide: Custom JumpStart and Advanced Installations • October 2009152

poolProfile Keyword (ZFS Only)The pool keyword defines the installation of a ZFS root pool. The pool is installed with asoftware group specified with the cluster keyword. The poolsize, swapsize, dumpsize, andvdevlist options are needed for creating a new root pool.
For a complete description of the pool keyword and other keywords that can be used for a ZFSroot pool, see “pool Profile Keyword (ZFS Only)” on page 167.
root_deviceProfile Keyword (UFS and ZFS)
Note – The root_device keyword can be used when you install either a UFS file system or a ZFSroot pool. The usage for this keyword is the limited to a single system for ZFS installations.
■ For a complete list of keywords that can be used in a UFS or ZFS installation, see Table 8–2■ For a description of how the root_device keyword can be used when installing a ZFS root
pool, see “JumpStart Keywords for a ZFS Root (/) File System (Reference)” on page 165
root_device slice
root_device designates the system's root disk. “How the System's Root Disk Is Determined” onpage 154 contains additional information.
Note – The root disk is determined by the JumpStart program and determines where the OS is tobe installed. The rules file uses a probe keyword “rootdisk,” but this keyword is used differentlythan the “rootdisk” keyword used in the JumpStart profile. You cannot set the place ofinstallation by using the probe keyword “rootdisk” in the rules file. The probe keyword,rootdisk, determines where to boot from during the installation. See Table 8–10.
When you are upgrading a system, root_device designates the root (/) file system and the filesystems that are mounted by its /etc/vfstab file to be upgraded. You must specifyroot_device if more than one root (/) file system can be upgraded on a system. You mustspecify slice in the form cwtxdysz or cxdysz.
When you use the root_device keyword, consider the following:
■ If you specify root_device on a system with only one disk, the root_device and the diskmust match. Also, any filesys keywords that specify the root (/) file system must matchroot_device.
■ If you are upgrading a RAID-1 volume (mirror), the value that is specified for root_deviceshould be one side of the mirror. The other side of the mirror is automatically upgraded.
Profile Keywords and Values
Chapter 8 • Custom JumpStart (Reference) 153

EXAMPLE 8–26 root_deviceProfile Keyword
root_device c0t0d0s2
How the System's Root Disk Is Determined
A system's root disk is the disk on the system that contains the root (/) file system. In a profile,you can use the rootdisk variable in place of a disk name, which the JumpStart program sets tothe system's root disk. Table 8–8 describes how the JumpStart program determines the system'sroot disk for the installation.
Note – The JumpStart program only determines a system's root disk size during an initialinstallation. You cannot change a system's root disk during an upgrade.
TABLE 8–8 How JumpStart Determines a System's Root Disk (Initial Installation)
Stage Action
1 If the root_device keyword is specified in the profile, the JumpStart program sets rootdisk to theroot device.
2 If rootdisk is not set and the boot_device keyword is specified in the profile, the JumpStartprogram sets rootdisk to the boot device.
3 If rootdisk is not set and a filesys cwtxdysz size / entry is specified in the profile, the JumpStartprogram sets rootdisk to the disk that is specified in the entry.
4 If rootdisk is not set and a rootdisk.sn entry is specified in the profile, the JumpStart programsearches the system's disks in kernel probe order for an existing root file system on the specifiedslice. If a disk is found, the JumpStart program sets rootdisk to the found disk.
5 If rootdisk is not set and partitioning existing is specified in the profile, the JumpStartprogram searches the system's disks in kernel probe order for an existing root file system. If a rootfile system is not found or more than one is found, an error occurs. If a root file system is found, theJumpStart program sets rootdisk to the found disk.
6 If rootdisk is not set, the JumpStart program sets rootdisk to the disk where the root (/) filesystem is installed.
system_typeProfile Keywordsystem_type type_switch
system_type defines the type of system on which the Solaris OS is to be installed.
type_switch represents the option standalone or server, which you use to indicate the type ofsystem on which the Solaris software is to be installed. If you do not specify system_type in aprofile, standalone is used by default.
Profile Keywords and Values
Solaris 10 10/09 Installation Guide: Custom JumpStart and Advanced Installations • October 2009154

usediskProfile Keyword (UFS and ZFS)
Note – The usedisk keyword can be used when you install either a UFS file system or a ZFS rootpool. The usage for this keyword is the same in both UFS and ZFS installations.
■ For a complete list of keywords that can be used in a UFS or ZFS installation, see Table 8–2■ For information on performing a ZFS installation, see Chapter 9, “Installing a ZFS Root Pool
With JumpStart”
usedisk disk_name ...
By default, the JumpStart program uses all of the operational disks on the system when youspecify partitioning default. The usedisk profile keyword designates one or more disks thatyou want the JumpStart program to use. You must specify disk_name in the form cxtydz orcydz, for example, c0t0d0 or c0d0s0.
If you specify usedisk in a profile, the JumpStart program uses only the disks that you specifyafter the usedisk keyword.
Note – You cannot specify the usedisk keyword and the dontuse keyword in the same profile.
Custom JumpStart Environment VariablesYou can use environment variables in your begin and finish scripts. For example, a begin scriptmight extract the disk size, SI_DISKSIZES, and install or not install particular packages on asystem, based on the actual disk size the script extracts.
Information that is gathered about a system is stored in these environment variables, which aregenerally set or not, depending on the rule keywords and values you use in the rules file.
For example, information about which operating system is already installed on a system is onlyavailable in SI_INSTALLED after the installed keyword is used.
Table 8–9 describes these variables and their values.
TABLE 8–9 Installation Environment Variables
Environment Variable Value
SI_ARCH The hardware architecture of the install client. The SI_ARCH variable is set when the archkeyword is used in the rules file.
Custom JumpStart Environment Variables
Chapter 8 • Custom JumpStart (Reference) 155

TABLE 8–9 Installation Environment Variables (Continued)Environment Variable Value
SI_BEGIN The name of the begin script, if one is used.
SI_CLASS The name of the profile that is used to install the install client.
SI_DISKLIST A comma-separated list of disk names on the install client. The SI_DISKLIST variable is setwhen the disksize keyword is used and matched in the rules file. The SI_DISKLIST andSI_NUMDISKS variables are used to determine the physical disk to use for the rootdisk.rootdisk is described in “How the System's Root Disk Is Determined” on page 154.
SI_DISKSIZES A comma-separated list of disk sizes on the install client. The SI_DISKSIZES variable is setwhen the disksize keyword is used and matched in the rules file.
SI_DOMAINNAME The domain name. The SI_DOMAINNAME variable is set when the dommainname keyword is usedand matched in the rules file.
SI_FINISH The name of the finish script, if one is used.
SI_HOSTADDRESS The install client's IP address.
SI_HOSTNAME The install client's host name. The SI_HOSTNAME variable is set when the hostname keyword isused and matched in the rules file.
SI_INSTALLED The device name of a disk with a specific operating system on the disk, for example, Solaris,SunOS, or System V. The SI_INSTALLED variable is set when the installed keyword is usedand matched in the rules file. SI_INST_OS and SI_INST_VER are used to determine the valueof SI_INSTALLED.
SI_INST_OS The name of the operating system. SI_INST_OS and SI_INST_VER are used to determine thevalue of SI_INSTALLED.
SI_INST_VER The version of the operating system. SI_INST_OS and SI_INST_VER are used to determine thevalue of SI_INSTALLED.
SI_KARCH The install client's kernel architecture. The SI_KARCH variable is set when the karch keywordis used and matched in the rules file.
SI_MEMSIZE The amount of physical memory on the install client. The SI_MEMSIZE variable is set when thememsize keyword is used and matched in the rules file.
SI_MODEL The install client's model name. The SI_MODEL variable is set when the model keyword is usedand matched in the rules file.
SI_NETWORK The install client's network number. The SI_NETWORK variable is set when the networkkeyword is used and matched in the rules file.
SI_NUMDISKS The number of disks on an install client. The SI_NUMDISKS variable is set when the disksizekeyword is used and matched in the rules file. The SI_NUMDISKS and SI_DISKLIST variablesare used to determine the physical disk to use for the rootdisk. rootdisk is described in“How the System's Root Disk Is Determined” on page 154.
Custom JumpStart Environment Variables
Solaris 10 10/09 Installation Guide: Custom JumpStart and Advanced Installations • October 2009156

TABLE 8–9 Installation Environment Variables (Continued)Environment Variable Value
SI_OSNAME The operating system release on the Solaris software image. For example, you can use theSI_OSNAME variable in a script if you are installing the Solaris software on systems that arebased on the version of the operating system on the Solaris Operating System DVD or theSolaris Software - 1 CD image.
SI_ROOTDISK The device name of the disk that is represented by the logical name rootdisk. TheSI_ROOTDISK variable is set when the disksize or the installed keyword is set to rootdisk
in the rules file. The SI_ROOTDISK variable sets the device to boot from during theinstallation.
Note – You cannot set the place of installation by using the probe keyword “rootdisk” in therules file. For information on the “rootdisk” variable that is set in a JumpStart profile, see“How the System's Root Disk Is Determined” on page 154.
SI_ROOTDISKSIZE The size of the disk that is represented by the logical name rootdisk. The SI_ROOTDISKSIZEvariable is set when the disksize or the installed keyword is set to rootdisk in the rulesfile.
SI_TOTALDISK The total amount of disk space on the install client. The SI_TOTALDISK variable is set whenthe totaldisk keyword is used and matched in the rules file.
Probe Keywords and ValuesTable 8–10 describes each rule keyword and its equivalent probe keyword.
Note – Always place probe keywords at or near the beginning of the rules file.
TABLE 8–10 Descriptions of Probe Keywords
Rule KeywordEquivalent ProbeKeyword Description of Probe Keyword
any None
arch arch Determines the kernel architecture, i386 or SPARC, and sets SI_ARCH.
disksize disks Returns the size of a system's disks in Mbytes in kernel probe order, c0t3d0s0, c0t3d0s1,c0t4d0s0. disksize sets SI_DISKLIST, SI_DISKSIZES, SI_NUMDISKS, and SI_TOTALDISK.
domainname domainname Returns a system's NIS or NIS+ domain name or blank and sets SI_DOMAINNAME. Thedomainname keyword returns the output of domainname(1M).
hostaddress hostaddress Returns a system's IP address, the first address that is listed in the output of ifconfig(1M)-a that is not lo0, and sets SI_HOSTADDRESS.
hostname hostname Returns a system's host name that is the output from uname(1) -n and sets SI_HOSTNAME.
Probe Keywords and Values
Chapter 8 • Custom JumpStart (Reference) 157

TABLE 8–10 Descriptions of Probe Keywords (Continued)
Rule KeywordEquivalent ProbeKeyword Description of Probe Keyword
installed installed Returns the version name of the Solaris OS that is installed on a system and setsSI_ROOTDISK and SI_INSTALLED.
If the JumpStart program finds a Solaris release but is unable to determine the version, theversion that is returned is SystemV.
karch karch Returns a system's platform group, for example i86pc or sun4u, and sets SI_KARCH. For alist of platform names, see Solaris Sun Hardware Platform Guide at http://docs.sun.com.
memsize memsize Returns the size of physical memory on a system in Mbytes and sets SI_MEMSIZE.
model model Returns a system's platform name and sets SI_MODEL. For a list of platform names, see theSolaris Sun Hardware Platform Guide at http://docs.sun.com.
network network Returns a system's network number, which the JumpStart program determines byperforming a logical AND between the system's IP address and the subnet mask. Thesystem's IP address and the subnet mask are extracted from the first address that is listed inthe output of ifconfig(1M) -a that is not lo0. The network keyword sets SI_NETWORK.
osname osname Returns the version and operating system name of the Solaris OS that is found on a CD andsets SI_OSNAME.
If the JumpStart program finds a Solaris release but is unable to determine the version, theversion that is returned is SystemV.
rootdisk Returns the name and size in Mbytes of a system's root disk and sets SI_ROOTDISK.
totaldisk totaldisk Returns the total disk space on a system (in Mbytes) and sets SI_TOTALDISK. The total diskspace includes all of the operational disks that are attached to a system.
Probe Keywords and Values
Solaris 10 10/09 Installation Guide: Custom JumpStart and Advanced Installations • October 2009158

Installing a ZFS Root Pool With JumpStart
This chapter provides the information necessary for performing a JumpStart installation forZFS root pool. The following sections provides planning information, profile examples, andprofile keyword descriptions.
■ “JumpStart Installation for a ZFS Root (/) File System (Overview and Planning)” on page 160■ “JumpStart Profile Examples for a ZFS Root Pool” on page 161■ “JumpStart Keywords for a ZFS Root (/) File System (Reference)” on page 165
What's New in the Solaris 10 10/09 ReleaseStarting with the Solaris 10 10/09 release, you can set up a JumpStart profile to identify a flasharchive of a ZFS root pool.
A Flash archive can be created on a system that is running a UFS root file system or a ZFS rootfile system. A Flash archive of a ZFS root pool contains the entire pool hierarchy, except for theswap and dump volumes, and any excluded datasets. The swap and dump volumes are createdwhen the Flash archive is installed.
You can use the Flash archive installation method as follows:
■ Generate a Flash archive that can be used to install and boot a system with a ZFS root filesystem.
■ Perform a JumpStart installation of a system by using a ZFS Flash archive.
Note – Creating a ZFS Flash archive backs up an entire root pool, not individual bootenvironments. Individual datasets within the pool can be excluded by using the flarcreateand flar command's -D option.
For detailed instructions and limitations, see “Installing a ZFS Root File System (Flash ArchiveInstallation)” in Solaris ZFS Administration Guide.
9C H A P T E R 9
159

JumpStart Installation for a ZFS Root (/) File System(Overview and Planning)
This chapter provides the information for you to create a JumpStart profile to install a ZFS rootpool.
Note – If you want to install a UFS root (/) file system, all existing profile keywords work as inprevious Solaris releases. For a list of UFS profile keywords, see Chapter 8, “Custom JumpStart(Reference).”
A ZFS specific profile must contain the pool keyword. The pool keyword installs a new rootpool and a new boot environment is created by default. You can provide the name of the bootenvironment and you can create a separate /var dataset with existing bootenv installbe
keywords and the new bename and dataset options. Some keywords that are allowed in aUFS-specific profile are not allowed in a ZFS specific profile, such as those specifying thecreation of UFS mount points.
For overall ZFS planning information, see Chapter 6, “ZFS Root File System Installation(Planning),” in Solaris 10 10/09 Installation Guide: Planning for Installation and Upgrade.
Limitations for a JumpStart installation for a ZFS RootPoolKeep the following issues in mind before considering a JumpStart installation of a bootable ZFSroot pool.
JumpStart Installation for a ZFS Root (/) File System (Overview and Planning)
Solaris 10 10/09 Installation Guide: Custom JumpStart and Advanced Installations • October 2009160

TABLE 9–1 JumpStart Limitations for ZFS Root Pools
Limitation Description For More Information
For a JumpStartinstallation, you cannotuse an existing ZFSstorage pool to create abootable ZFS root pool.
You must create a new ZFS storage pool with syntaxsimilar to the following:
pool rpool 20G 4G 4G c0t0d0s0
The complete pool keyword line is required because youcannot use an existing pool. The bootenv keyword line isoptional. If you do not use bootenv, a default bootenvironment is created for you. For example:
install_type initial_install
cluster SUNWCall
pool rpool 20G 4g 4g any
bootenv installbe bename newBE
“pool Profile Keyword(ZFS Only)” onpage 167
You cannot create a poolwith whole disks.
You must create your pool with disk slices rather thanwhole disks.
If in the profile you create a pool with whole disks, such asc0t0d0, the installation fails. You will receive an errormessage similar to the following.
Invalid disk name (c0t0d0)
Some keywords that areallowed in a UFS specificprofile are not allowedin a ZFS specific profile,such as those specifyingthe creation of UFSmount points.
“Profile KeywordsQuick Reference” onpage 112
You cannot upgradewith JumpStart. Youmust use Solaris LiveUpgrade
With Solaris Live Upgrade, you can create a copy of thecurrently running system. This copy can be upgraded andthen activated to become the currently running system.
Chapter 11, “SolarisLive Upgrade and ZFS(Overview),” inSolaris 10 10/09Installation Guide:Solaris Live Upgradeand Upgrade Planning
JumpStart Profile Examples for a ZFS Root PoolThis section provides examples of ZFS specific JumpStart profiles.
JumpStart Profile Examples for a ZFS Root Pool
Chapter 9 • Installing a ZFS Root Pool With JumpStart 161

Note – For the ZFS root pool to be upgradeable and bootable, you must create your pool withdisk slices rather than whole disks. If in the profile you create a pool with whole disks, such asc0t0d0, you will receive an error message similar to the following.
Invalid disk name (c0t0d0)
EXAMPLE 9–1 Installing a Mirrored ZFS Root Pool
install_type initial_install
cluster SUNWCall
pool newpool auto auto auto mirror c0t0d0s0 c0t1d0s0
bootenv installbe bename solaris10_6
The following list describes some of the keywords and values from this example.
install_type initial_install The install_type keyword is required in every profile.The initial_install keyword performs an initialinstallation that installs a new Solaris OS in a new ZFSroot pool.
cluster The Entire Distribution software group, SUNWCall, isinstalled on the system. For more information aboutsoftware groups, see “Disk Space Recommendations forSoftware Groups” in Solaris 10 10/09 Installation Guide:Planning for Installation and Upgrade.
pool The pool keyword defines the characteristics of the newZFS root pool.
newpool Defines the name of the root pool.
auto Specifies the size of the disks automatically.The size is determined by the size of thespecified disks.
auto The swap area is automatically sized withthe auto keyword. The default size is 1/2 thesize of physical memory, but no less than512 Mbytes and no greater than 2 Gbytes.You can set the size outside this range byusing the size option.
auto The dump device is automatically sized.
mirror The mirrored configuration of disks has themirror keyword and disk slices specified asc0t0d0s0 and c0t1d0s0.
JumpStart Profile Examples for a ZFS Root Pool
Solaris 10 10/09 Installation Guide: Custom JumpStart and Advanced Installations • October 2009162

EXAMPLE 9–1 Installing a Mirrored ZFS Root Pool (Continued)
bootenv installbe changes the characteristics of the default bootenvironment that is created during the installation.
bename Names the new boot environmentsolaris10_6.
EXAMPLE 9–2 Customizing the Disk Size For a ZFS Root Pool
install_type initial_install
cluster SUNWCall
pool newpool 80g 2g 2g mirror any any
bootenv installbe bename solaris10_6
The following list describes some of the keywords and values from this example.
install_type initial_install The install_type keyword is required in every profile.The initial_install keyword performs an initialinstallation that installs a new Solaris OS in a new ZFSroot pool.
cluster The Entire Distribution software group, SUNWCall, isinstalled on the system. For more information aboutsoftware groups, see “Disk Space Recommendations forSoftware Groups” in Solaris 10 10/09 Installation Guide:Planning for Installation and Upgrade.
pool The pool keyword defines the characteristics of the newZFS root pool.
newpool Specifies the name of the root pool.
80g Specifies the size of the disk slice.
2g The swap area and dump volumes are2-Gbytes.
mirror The mirrored configuration of disks has themirror keyword and disk slices specified asc0t0d0s0 and c0t1d0s0.
The any options in the mirroredconfiguration finds any two availabledevices that are large enough to create a80-Gbyte pool. If two such devices are notavailable, the install fails.
JumpStart Profile Examples for a ZFS Root Pool
Chapter 9 • Installing a ZFS Root Pool With JumpStart 163

EXAMPLE 9–2 Customizing the Disk Size For a ZFS Root Pool (Continued)
bootenv installbe changes the characteristics of the default bootenvironment that is created during the installation.
bename Names the new boot environmentsolaris10_6.
EXAMPLE 9–3 Specifying Where to Install the OS
install_type initial_install
cluster SUNWCall
root_device c0t0d0s0
pool nrpool auto auto auto rootdisk.s0
bootenv installbe bename bnv dataset /var
The following list describes some of the keywords and values from this example.
install_type initial_install The install_type keyword is required in every profile.The initial_install keyword performs an initialinstallation that installs a new Solaris OS in a new ZFSroot pool.
cluster The Entire Distribution software group, SUNWCall, isinstalled on the system. For more information aboutsoftware groups, see “Disk Space Recommendations forSoftware Groups” in Solaris 10 10/09 Installation Guide:Planning for Installation and Upgrade.
root_device Specifies the disk slice where the OS is to be installed. Thec0t0d0s0 defines the specific disk and slice for the OS.
pool The pool keyword defines the characteristics of the newZFS root pool.
nrpool Defines the name of the root pool.
auto Specifies the size of the disksautomatically. The size is determinedby the size of the specified disks.
auto The swap area is automatically sizedwith the auto keyword. The defaultsize is 1/2 the size of physical memory,but no less than 512 Mbytes and nogreater than 2 Gbytes. You can set thesize outside this range by using thesize option.
JumpStart Profile Examples for a ZFS Root Pool
Solaris 10 10/09 Installation Guide: Custom JumpStart and Advanced Installations • October 2009164

EXAMPLE 9–3 Specifying Where to Install the OS (Continued)
auto The dump device is automaticallysized.
rootdisk.s0 The device used to create the root poolis specified as slice 0.
bootenv installbe changes the characteristics of the default bootenvironment that is created during the installation.
bename Names the new boot environment bnv.
dataset Creates a /var dataset that is separate fromthe ROOT dataset. /var is the only value fordataset.
JumpStart Keywords for a ZFS Root (/) File System (Reference)This section provides descriptions of some of the ZFS specific keywords that you can use in aJumpStart profile. The usage of the keywords in this section is either different from their usagein a UFS profile or used only in a ZFS profile.
■ For a quick reference of both UFS and ZFS profile keywords, see “Profile Keywords QuickReference” on page 112.
■ The following list of keywords can be used in a ZFS profile. The usage is the same for bothUFS and ZFS profiles. For descriptions of these keywords, see “Profile KeywordDescriptions and Examples” on page 113.■ boot_device■ cluster■ dontuse■ fdisk■ filesys (mounting remote file systems)■ geo■ locale■ package■ usedisk
JumpStart Keywords for a ZFS Root (/) File System (Reference)
Chapter 9 • Installing a ZFS Root Pool With JumpStart 165

bootenvProfile Keyword (ZFS and UFS)The bootenv keyword identifies boot environment characteristics. A boot environment iscreated by default during installation with the pool keyword. If you use the bootenv keywordwith the installbe option, you can name the new boot environment and create a /var datasetwithin the boot environment.
This keyword can be used in a profile for installing a UFS file system or a ZFS root pool.
■ In a UFS file system, this keyword is used for creating an empty boot environment for thefuture installation of a Solaris Flash archive. For the complete description of the bootenvkeyword for UFS, see “bootenv Profile Keyword (UFS and ZFS)” on page 122.
■ For a ZFS root pool, the bootenv keyword changes the characteristics of the default bootenvironment that is created at install time. This boot environment is a copy of the root filesystem that you are installing.The bootenv keyword can be used with the installbe, bename and dataset options. Theseoptions name the boot environment and create a separate /var dataset.
bootenv installbe bename new-BE-name [dataset mount-point]
installbe Changes the characteristics of the default boot environment that iscreated during the installation.
bename Specifies the name of the new boot environment to be created,new_BE_name. The name can be no longer than 30 characters, cancontain only alphanumeric characters, and can contain no multibytecharacters. The name must be unique on the system.
dataset mount-point Use the optional dataset keyword to identify a /var dataset that isseparate from the ROOT dataset. The mount-point value is limited to/var. For example, a bootenv syntax line for separate /var datasetwould be similar to the following:
bootenv installbe bename zfsroot dataset /var
For more information about upgrading and activating a boot environment, see Chapter 11,“Solaris Live Upgrade and ZFS (Overview),” in Solaris 10 10/09 Installation Guide: Solaris LiveUpgrade and Upgrade Planning.
install_typeKeyword (ZFS and UFS)The install_type keyword is required in every profile. For a UFS installation, Several optionsare available. The only option available for a ZFS installation is the initial_install keyword.This option installs a new Solaris OS on a system. The profile syntax is the following:
JumpStart Keywords for a ZFS Root (/) File System (Reference)
Solaris 10 10/09 Installation Guide: Custom JumpStart and Advanced Installations • October 2009166

install_type initial_install
Note – The following UFS options are not available for a ZFS installation.
■ upgrade - You must use Solaris Live Upgrade to upgrade ZFS root pool. See Chapter 11,“Solaris Live Upgrade and ZFS (Overview),” in Solaris 10 10/09 Installation Guide: SolarisLive Upgrade and Upgrade Planning.
■ flash_install - A Solaris Flash archive cannot be installed.■ flash_update - A Solaris Flash archive cannot be installed.
poolProfile Keyword (ZFS Only)The pool keyword defines the new root pool to be created. The pool is then installed with asoftware group specified with the cluster keyword. The poolsize, swapsize, dumpsize, andvdevlist options are needed for creating a new root pool.
pool poolname poolsize swapsize dumpsize vdevlist
poolname Specifies the name of the new pool to be created. A new pool is created with thespecified size and with the specified devices, vdevlist.
poolsize Size of the new pool to be created. If you denote the amount of space, the size isassumed to be in Mbytes, unless specified by g (Gbytes). You can also use theauto option.
auto Allocates the largest possible pool size given the constraints, such as sizeof the disks and preserved slices.
Note – The meaning of auto for the poolsize keyword is different fromthe filesys keyword use of auto in a UFS file system. In ZFS, the size ofthe disk is checked to verify that the minimum size can beaccommodated. If the minimize size is available, the largest possiblepool size is allocated given the constraints, such as size of the disks andpreserved slices.
swapsize Size of the swap volume (zvol) to be created within a new root pool. The optionsare either auto or size.
auto The swap area is automatically sized. The default size is 1/2 the size ofphysical memory, but no less than 512 Mbytes and no greater than 2Gbytes. You can set the size outside this range by using the size option.
JumpStart Keywords for a ZFS Root (/) File System (Reference)
Chapter 9 • Installing a ZFS Root Pool With JumpStart 167

size Can be used to specify an amount. Size is assumed to be in Mbytes,unless specified by g (Gbytes).
dumpsize Size of the dump volume to be created within a new pool.
auto Uses the default swap size.
size Can be used to specify an amount. Size is assumed to be in Mbytes,unless specified by g (Gbytes).
vdevlist One or more devices used to create the pool.
Devices in the vdevlist must be slices for the root pool. vdevlist can be either asingle-device-name in the form cwtxdysz or mirror or any option.
Note – The format of the vdevlist is the same as the format of the zpool createcommand.
single-device-name A disk slice in the form or cwtxdysz, such asc0t0d0s0.
mirror [device-names|any] Specifies the mirroring of the disk.
At this time, only mirrored configurations aresupported when multiple devices are specified.You can mirror as many as disks you like, but thesize of the pool created is determined by thesmallest of the specified disks. For moreinformation about creating mirrored storagepools, see “Mirrored Storage Pool Configuration”in Solaris ZFS Administration Guide.■ device-names lists the devices to be mirrored.
The names are in the form of cwtxdysz, forexample c0t0d0s0 and c0t0d1s5.
■ The any option enables the installer to choosethe devices.
any Enables the installer to select a suitable device.
root_deviceProfile Keyword (ZFS and UFS)root_device cwtxdysz
JumpStart Keywords for a ZFS Root (/) File System (Reference)
Solaris 10 10/09 Installation Guide: Custom JumpStart and Advanced Installations • October 2009168

root_device specifies the device to be used for the root pool. The root_device keyworddetermines where the operating system is installed. This keyword is used the same in both ZFSand a UFS file system with some limitations. For the ZFS root pool, the root device is limited toa single system. This keyword is not useful for mirrored pools.
cwtxdysz Identifies the root disk where the operating system is installed.
Additional ResourcesFor additional information about the topics included in this chapter, see the resources listed inTable 9–2.
TABLE 9–2 Additional Resources
Resource Location
For ZFS information, including overview, planning,and step-by-step instructions
Solaris ZFS Administration Guide
For a list of all JumpStart keywords Chapter 8, “Custom JumpStart (Reference)”
For information about using Solaris Live Upgrade tomigrate from UFS to ZFS or create a new bootenvironment in a ZFS root pool
Chapter 11, “Solaris Live Upgrade and ZFS(Overview),” in Solaris 10 10/09 Installation Guide:Solaris Live Upgrade and Upgrade Planning
Additional Resources
Chapter 9 • Installing a ZFS Root Pool With JumpStart 169

170

AppendixesThis part contains troubleshooting and reference information.
P A R T I I
171

172

Troubleshooting (Tasks)
This chapter contains a list of specific error messages and general problems you mightencounter when installing Solaris 10 10/09 software. The chapter also explains how to fix theproblems. Start by using this list of sections to determine where in the installation process theproblem occurred.
■ “Problems With Setting Up Network Installations” on page 173■ “Problems With Booting a System” on page 174■ “Initial Installation of the Solaris OS” on page 179■ “Upgrading the Solaris OS” on page 182
Note – When you see the phrase “bootable media,” this means the Solaris installation programand JumpStart installation method.
Problems With Setting Up Network InstallationsUnknown client “host_name”
Cause: The host_name argument in the add_install_client command is not a host in thenaming service.
Solution: Add the host host_name to the naming service and execute theadd_install_client command again.
Error: <system name> does not exist in the NIS ethers map
Add it, and rerun the add_install_client command
Description: When you run the add_install_client command, the command fails with theabove error.
Cause: The client you are adding to the install server does not exist in the server's/etc/ethers file.
AA P P E N D I X A
173

Solution: Add the needed information to the /etc/ethers file on the install server and runthe add_install_client command again.
1. Become superuser or assume an equivalent role.2. On the client, find the ethers address.
# ifconfig -a grep ethers
ether 8:0:20:b3:39:1d
3. On the install server, open the /etc/ethers file in an editor. Add the address to the list.4. On the client, run add_install_client again as in this example.
# ./add_install_client bluegill sun4u
Problems With Booting a System
Booting From Media, Error Messages
le0: No carrier - transceiver cable problem
Cause: The system is not connected to the network.
Solution: If this is a nonnetworked system, ignore this message. If this is a networked system,ensure that the Ethernet cabling is attached securely.
The file just loaded does not appear to be executable
Cause: The system cannot find the proper media for booting.
Solution: Verify that the system has been set up properly to install the Solaris 10 10/09software from the network from an install server. The following are examples of checks youcan make.
■ If you copied the images of the Solaris Operating System DVD or the Solaris SoftwareCDs to the install server, ensure that you specified the correct platform group for thesystem when you set it up.
■ If you are using DVD or CD media, ensure that the Solaris Operating System DVD orSolaris Software - 1 CD is mounted and accessible on the install server.
boot: cannot open <filename> (SPARC based systems only)
Cause: This error occurs when you override the location of the boot -file by explicitlysetting it.
Problems With Booting a System
Solaris 10 10/09 Installation Guide: Custom JumpStart and Advanced Installations • October 2009174

Note – filename is a variable for the name of the file affected.
Solution: Follow these instructions:■ Reset the boot -file in the PROM to “ “ (blank).■ Ensure that the diag-switch is set to off and to true.
Can’t boot from file/device
Cause: The installation media cannot find the bootable media.
Solution: Ensure that the following conditions are met:■ The DVD-ROM or CD-ROM drive is installed properly and turned on.■ Solaris Operating System DVD or the Solaris Software - 1 CD is inserted into the drive.■ The disc is free of damage or dirt.
WARNING: clock gained xxx days -- CHECK AND RESET DATE! (SPARC based systems
only)
Description: This is an informational message.
Solution: Ignore the message and continue with the installation.
Not a UFS file system (x86 based systems only)
Cause: When Solaris 10 10/09 software was installed (either through the Solaris installationprogram or custom JumpStart), no boot disk was selected. You now must edit the BIOS toboot the system.
Solution: Select the BIOS to boot. See your BIOS documentation for instructions.
Booting From Media, General Problems
The system does not boot.
Description: When initially setting up a custom JumpStart server, you might encounter bootproblems that do not return an error message. To verify information about the system andhow the system is booting, run the boot command with the -v option. When you use the -voption, the boot command displays verbose debugging information about the screen.
Note – If this flag is not given, the messages are still printed, but the output is directed to thesystem log file. For more information, see syslogd(1M).
Solution: For SPARC based systems, at the ok prompt, type the following command.
Problems With Booting a System
Appendix A • Troubleshooting (Tasks) 175
ok boot net -v - install
Boot from DVD media fails on systems with Toshiba SD-M 1401 DVD-ROM
Description: If your system has a Toshiba SD-M1401 DVD-ROM with firmware revision1007, the system cannot boot from the Solaris Operating System DVD.
Solution: Apply patch 111649–03, or later version, to update the Toshiba SD-M1401DVD-ROM drive's firmware. The patch 111649–03 is available at sunsolve.sun.com.
The system hangs or panics when nonmemory PC cards are inserted. (x86 based
systems only)
Cause: Nonmemory PC cards cannot use the same memory resources that are used by otherdevices.
Solution: To correct this problem, see the instructions for your PC card and check for theaddress range.
The system hangs before displaying the system prompt. (x86 based systems only)
Solution: You have hardware that is not supported. Check your hardware manufacturer'sdocumentation.
Booting From the Network, Error Messages
WARNING: getfile: RPC failed: error 5 (RPC Timed out).
Description: This error occurs when you have two or more servers on a network respondingto an install client's boot request. The install client connects to the wrong boot server, andthe installation hangs. The following specific reasons might cause this error to occur:
Cause: Reason 1:/etc/bootparams files might exist on different servers with an entry for thisinstall client.
Solution: Reason 1: Ensure that servers on the network do not have multiple/etc/bootparams entries for the install client. If they do have multiple entries, removeduplicate client entries in the /etc/bootparams file on all install servers and boot serversexcept the one you want the install client to use.
Cause: Reason 2: Multiple /tftpboot or /rplboot directory entries might exist for this installclient.
Solution: Reason 2: Ensure that servers on the network do not have multiple /tftpboot or/rplboot directory entries for the install client. If they do have multiple entries, removeduplicate client entries from the /tftpboot or /rplboot directories on all install servers andboot servers except the one you want the install client to use.
Problems With Booting a System
Solaris 10 10/09 Installation Guide: Custom JumpStart and Advanced Installations • October 2009176

Cause: Reason 3: An install client entry might exist in the /etc/bootparams file on a serverand an entry in another /etc/bootparams file that enables all systems to access the profileserver. Such an entry resembles the following:
* install_config=profile_server:path
A line that resembles the previous entry in the NIS or NIS+ bootparams table can also causethis error.
Solution: Reason 3: If a wildcard entry is in the naming service bootparams map or table (forexample, * install_config=), delete it and add it to the /etc/bootparams file on the bootserver.
No network boot server. Unable to install the system. See installation
instructions. (SPARC based systems only)
Cause: This error occurs on a system that you are attempting to install from the network. Thesystem is not set up correctly.
Solution: Ensure that you correctly set up the system to install from the network. See “AddingSystems to Be Installed From the Network With a CD Image” in Solaris 10 10/09 InstallationGuide: Network-Based Installations.
prom_panic: Could not mount file system (SPARC based systems only)
Cause: This error occurs when you are installing Solaris from a network, but the bootsoftware cannot locate the following:■ Solaris Operating System DVD, either the DVD or a copy of the DVD image on the
install server■ Solaris Software - 1 CD image, either the Solaris Software - 1 CD or a copy of the CD
image on the install server
Solution: Ensure that the installation software is mounted and shared.■ If you are installing Solaris from the install server's DVD-ROM or CD-ROM drive,
ensure that the Solaris Operating System DVD or Solaris Software - 1 CD is inserted inthe CD-ROM drive, is mounted, and is shared in the /etc/dfs/dfstab file.
■ If installing from a copy of the Solaris Operating System DVD image or Solaris Software- 1 CD image on the install server's disk, ensure that the directory path to the copy isshared in the /etc/dfs/dfstab file.
Timeout waiting for ARP/RARP packet...(SPARC based systems only)
Cause: Reason 1: The client is trying to boot from the network, but it cannot find a systemthat knows about the client.
Solution: Reason 1: Verify the system's host name is in the NIS or NIS+ naming service. Also,verify the bootparams search order in the boot server's /etc/nsswitch.conf file.
Problems With Booting a System
Appendix A • Troubleshooting (Tasks) 177

For example, the following line in the /etc/nsswitch.conf file indicates that JumpStart orthe Solaris installation program first looks in the NIS maps for bootparams information. Ifthe program does not find any information, the installer looks in the boot server's/etc/bootparams file.
bootparams: nis files
Cause: Reason 2: The client's Ethernet address is not correct.
Solution: Reason 2: Verify that the client's Ethernet address in the install server's/etc/ethers file is correct.
Cause: Reason 3: In a custom JumpStart installation, the add_install_client commandspecifies the platform group that uses a specified server as an install server. If the wrongarchitecture value is used when using the add_install_client, this problem occurs. Forexample, the machine you want to install is a sun4u, but you used i86pc instead.
Solution: Reason 3: Rerun add_install_client with the correct architecture value.
ip: joining multicasts failed on tr0 - will use link layer broadcasts for
multicast (x86 based systems only)
Cause: This error message is displayed when you boot a system with a token ring card.Ethernet multicast and token ring multicast do not work the same way. The driver returnsthis error message because an invalid multicast address was provided to it.
Solution: Ignore this error message. If multicast does not work, IP uses layer broadcastsinstead and does not cause the installation to fail.
Requesting Internet address for Ethernet_Address (x86 based systems only)
Cause: The client is trying to boot from the network, but it cannot find a system that knowsabout the client.
Solution: Verify the system's host name is listed in the naming service. If the system's hostname is listed in the NIS or NIS+ naming service, and the system continues to print thiserror message, try rebooting.
RPC: Timed out No bootparams (whoami) server responding; still trying... (x86
based systems only)
Cause: The client is trying to boot from the network, but it cannot find a system with an entryin the /etc/bootparams file on the install server.
Solution: Use add_install_client on the install server. Using this command adds theproper entry in the /etc/bootparams file, enabling the client to boot from the network.
Still trying to find a RPL server... (x86 based systems only)
Cause: The system is trying to boot from the network, but the server is not set up to boot thissystem.
Problems With Booting a System
Solaris 10 10/09 Installation Guide: Custom JumpStart and Advanced Installations • October 2009178

Solution: On the install server, execute add_install_client for the system to be installed.The add_install_client command sets up an /rplboot directory, which contains thenecessary network boot program.
CLIENT MAC ADDR: FF FF FF FF FF FF (network installations with DHCP only)
Cause: The DHCP server is not configured correctly. This error might occur if the options ormacros are not correctly defined in the DHCP Manager software.
Solution: In the DHCP Manager software, verify that the options and macros are correctlydefined. Confirm that the Router option is defined, and that the value of the Router option iscorrect for the subnet you are using for the network installation.
Booting From the Network, General Problems
The system boots from the network, but from a system other than the specified
install server.
Cause: An /etc/bootparams and perhaps an /etc/ethers entry exist on another system forthe client.
Solution: On the name server, update the /etc/bootparams entry for the system that is beinginstalled. The entry should conform to the following syntax:
install_system root=boot_server:path install=install_server:path
Also, ensure that only one bootparams entry is on the subnet for the install client.
The system does not boot from the network (network installations with DHCP only).
Cause: The DHCP server is not configured correctly. This error might occur if the system isnot configured as an installation client on the DHCP server.
Solution: In the DHCP manager software, verify that installation options and macros aredefined for the client system. For more information, see “Preconfiguring SystemConfiguration Information With the DHCP Service (Tasks)” in Solaris 10 10/09 InstallationGuide: Network-Based Installations.
Initial Installation of the Solaris OSInitial installation fails
Solution: If the Solaris installation fails, you must restart the installation. To restart theinstallation, boot the system from the Solaris Operating System DVD, the Solaris Software -1 CD, or from the network.
Initial Installation of the Solaris OS
Appendix A • Troubleshooting (Tasks) 179

You cannot uninstall the Solaris software after the software has been partially installed. Youmust restore your system from a backup or begin the Solaris installation process again.
/cdrom/cdrom0/SUNWxxxx/reloc.cpio: Broken pipe
Description: This error message is informational and does not affect the installation. Thecondition occurs when a write on a pipe does not have a reading process.
Solution: Ignore the message and continue with the installation.
WARNING: CHANGE DEFAULT BOOT DEVICE (x86 based systems only)
Cause: This is an informational message. The default boot device set in the system's BIOSmight be set to a device that requires you to use the Solaris Device Configuration Assistantto boot the system.
Solution: Continue with the installation and, if necessary, change the system's default bootdevice specified in the BIOS after you install the Solaris software to a device that does notrequire the Solaris Device Configuration Assistant.
x86 only – If you are using the locale keyword to test a custom JumpStart profile for an initialinstallation, the pfinstall -D command fails to test the profile. For a workaround, see the errormessage “could not select locale,” in the section, “Upgrading the Solaris OS” on page 182.
▼ x86: To Check IDE Disk for Bad BlocksIDE disk drives do not automatically map out bad blocks like other drives supported by Solarissoftware. Before installing Solaris on an IDE disk, you might want to perform a surface analysison the disk. To perform surface analysis on an IDE disk, follow this procedure.
Become superuser or assume an equivalent role.Roles contain authorizations and privileged commands. For more information about roles, see“Configuring RBAC (Task Map)” in System Administration Guide: Security Services.
Boot to the installation media.
When you are prompted to select an installation type, select option 6, Single user shell.
Start the format(1M) program.# format
Specify the IDE disk drive on which you want to perform a surface analysis.# cxdy
cx Is the controller number
1
2
3
4
5
Initial Installation of the Solaris OS
Solaris 10 10/09 Installation Guide: Custom JumpStart and Advanced Installations • October 2009180

dy Is the device number
Determine if you have an fdiskpartition.
■ If a Solaris fdisk partition already exists, proceed to Step 7.■ If a Solaris fdisk partition does not exist, use the fdisk command to create a Solaris
partition on the disk.
format> fdisk
To begin the surface analysis, type:format> analyze
Determine the current settings, type:analyze> config
(Optional) To change settings, type:analyze> setup
To find bad blocks, type:analyze> type_of_surface_analysis
type_of_surface_analysis Is read, write, or compare
If format finds bad blocks, it remaps them.
To exit the analysis, type:analyze> quit
Determine if you want to specify blocks to remap.
■ If no, go to Step 13.■ If yes, type:
format> repair
To exit the format program, type:quit
Restart the media in multiuser mode by typing the following command.# exit
6
7
8
9
10
11
12
13
14
Initial Installation of the Solaris OS
Appendix A • Troubleshooting (Tasks) 181

Upgrading the Solaris OS
Upgrading, Error Messages
No upgradable disks
Cause: A swap entry in the /etc/vfstab file is causing the upgrade to fail.
Solution: Comment out the following lines in the /etc/vfstab file:
■ All swap files and slices on disks not being upgraded■ Swap files that are no longer present■ Any unused swap slices
usr/bin/bzcat not found
Cause: Solaris Live Upgrade fails because of needing a patch cluster.
Solution: A patch is needed to install Solaris Live Upgrade. Ensure that you have the mostrecently updated patch list by consulting http://sunsolve.sun.com. Search for the info doc72099 on the SunSolve web site.
Upgradeable Solaris root devices were found, however, no suitable partitions to
hold the Solaris install software were found. Upgrading using the Solaris
Installer is not possible. It might be possible to upgrade using the Solaris
Software 1 CDROM. (x86 based systems only)
Cause: You cannot upgrade with the Solaris Software - 1 CD because you do not have enoughspace.
Solution: To upgrade, you can either create a swap slice that is larger than or equal to 512Mbytes or use another method of upgrading such as the Solaris installation program fromSolaris Operating System DVD, a net installation image, or JumpStart.
ERROR: Could not select locale (x86 based systems only)
Cause: When you test your JumpStart profile by using the pfinstall -D command, the dryrun test fails under the following conditions:
■ The profile contains the locale keyword.■ You're testing a release that contains GRUB software. Starting with the Solaris 10 1/06
release, the GRUB boot loader facilitates booting different operating systems installedon your system with the GRUB menu.
With the introduction of GRUB software, the miniroot is compressed. The software can nolonger find the list of locales from the compressed miniroot. The miniroot is the smallestpossible Solaris root (/) file system and is found on the Solaris installation media.
Upgrading the Solaris OS
Solaris 10 10/09 Installation Guide: Custom JumpStart and Advanced Installations • October 2009182

Solution: Perform the following steps. Use the following values.
■ MEDIA_DIR is /cdrom/cdrom0/■ MINIROOT_DIR is $MEDIA_DIR/Solaris_10/Tools/Boot■ MINIROOT_ARCHIVE is $MEDIA_DIR/boot/x86.miniroot■ TEMP_FILE_NAME is /tmp/test
1. Become superuser or assume an equivalent role.Roles contain authorizations and privileged commands. For more information aboutroles, see “Configuring RBAC (Task Map)” in System Administration Guide: SecurityServices.
2. Uncompress the miniroot archive.
# /usr/bin/gzcat $MINIROOT_ARCHIVE > $TEMP_FILE_NAME
3. Create the miniroot device by using the lofiadm command.
# LOFI_DEVICE=/usr/sbin/lofiadm -a $TEMP_FILE_NAME
# echo $LOFI_DEVICE
/dev/lofi/1
4. Mount the miniroot with the lofi command under the Miniroot directory.
# /usr/sbin/mount -F ufs $LOFI_DEVICE $MINIROOT_DIR
5. Test the profile.
# /usr/sbin/install.d/pfinstall -D -c $MEDIA_DIR $path-to-jumpstart_profile
6. After the testing is completed, unmount the lofi device.
# umount $LOFI_DEVICE
7. Delete the lofi device.
# lofiadm -d $TEMP_FILE_NAME
Upgrading, General Problems
The upgrade option is not presented even though there is a version of Solaris
software that’s upgradable on the system.
Cause: Reason 1: The /var/sadm directory is a symlink or it is mounted from another filesystem.
Solution: Reason 1: Move the /var/sadm directory into the root (/) or /var file system.
Cause: Reason 2: The /var/sadm/softinfo/INST_RELEASE file is missing.
Upgrading the Solaris OS
Appendix A • Troubleshooting (Tasks) 183

Solution: Reason 2: Create a new INST_RELEASE file by using the following template:
OS=Solaris
VERSION=xREV=0
x Is the version of Solaris software on the system
Cause: Reason 3: SUNWusr is missing from /var/sadm/softinfo.
Solution: Solution 3: You need to do an initial installation. The Solaris software is notupgradable.
Couldn’t shut down or initialize the md driver
Solution: Follow these instructions:
■ If the file system is not a RAID-1 volume, comment out in the vsftab file.■ If the file system is a RAID-1 volume, break the mirror and reinstall. For information
about unmirroring, see “Removing RAID-1 Volumes (Unmirroring)” in Solaris VolumeManager Administration Guide.
The upgrade fails because the Solaris installation program cannot mount a file
system.
Cause: During an upgrade, the script attempts to mount all the file systems that are listed inthe system's /etc/vfstab file on the root (/) file system that is being upgraded. If theinstallation script cannot mount a file system, it fails and exits.
Solution: Ensure that all file systems in the system's /etc/vfstab file can be mounted.Comment out any file systems in the /etc/vfstab file that cannot be mounted or that mightcause the problem so that the Solaris installation program does not try to mount themduring the upgrade. Any system-based file systems that contain software to be upgraded (forexample, /usr) cannot be commented out.
The upgrade fails
Description: The system does not have enough space for the upgrade.
Cause: Check “Upgrading With Disk Space Reallocation” in Solaris 10 10/09 InstallationGuide: Planning for Installation and Upgrade for the space problem and see if you can fix itwithout using auto-layout to reallocate space.
Problems upgrading RAID–1 volume root (/) file systems
Solution: If you have problems upgrading when using Solaris Volume Manager RAID-1volumes that are the root (/) file system, see Chapter 25, “Troubleshooting Solaris VolumeManager (Tasks),” in Solaris Volume Manager Administration Guide.
Upgrading the Solaris OS
Solaris 10 10/09 Installation Guide: Custom JumpStart and Advanced Installations • October 2009184

▼ To Continue Upgrading After a Failed UpgradeThe upgrade fails and the system cannot be soft-booted. The failure is for reasons beyond yourcontrol, such as a power failure or a network connection failure.
Reboot the system from the Solaris Operating System DVD, the Solaris Software - 1 CD, or fromthe network.
Choose the upgrade option for installation.The Solaris installation program determines if the system has been partially upgraded andcontinues the upgrade.
x86: Problems With Solaris Live Upgrade When YouUse GRUBThe following errors can occur when you use Solaris Live Upgrade and the GRUB boot loaderon an x86 based system.
ERROR: The media product tools installation directory path-to-installation-directorydoes not exist.
ERROR: The media dirctory does not contain an operating system upgrade image.
Description: The error messages are seen when using the luupgrade command to upgrade anew boot environment.
Cause: An older version of Solaris Live Upgrade is being used. The Solaris Live Upgradepackages you have installed on your system are incompatible with the media and the releaseon that media.
Solution: Always use the Solaris Live Upgrade packages from the release you are upgradingto.
Example: In the following example, the error message indicates that the Solaris Live Upgradepackages on the system are not the same version as on the media.
# luupgrade -u -n s10u1 -s /mnt
Validating the contents of the media </mnt>.
The media is a standard Solaris media.
ERROR: The media product tools installation directory
</mnt/Solaris_10/Tools/Boot/usr/sbin/install.d/install_config> does
not exist.
ERROR: The media </mnt> does not contain an operating system upgrade
image.
1
2
Upgrading the Solaris OS
Appendix A • Troubleshooting (Tasks) 185

ERROR: Cannot find or is not executable: </sbin/biosdev>.
ERROR: One or more patches required by Solaris Live Upgrade has not been
installed.
Cause: One or more patches required by Solaris Live Upgrade are not installed on yoursystem. Beware that this error message does not catch all missing patches.
Solution: Before using Solaris Live Upgrade, always install all the required patches. Ensurethat you have the most recently updated patch list by consulting http://sunsolve.sun.com.Search for the info doc 72099 on the SunSolve web site.
ERROR: Device mapping command </sbin/biosdev> failed. Please reboot and try
again.
Cause: Reason 1: Solaris Live Upgrade is unable to map devices because of previousadministrative tasks.
Solution: Reason 1: Reboot the system and try Solaris Live Upgrade again
Cause: Reason 2: If you reboot your system and get the same error message, you have two ormore identical disks. The device mapping command is unable to distinguish between them.
Solution: Reason 2: Create a new dummy fdisk partition on one of the disks. See thefdisk(1M) man page. Then reboot the system.
Cannot delete the boot environment that contains the GRUB menu
Cause: Solaris Live Upgrade imposes the restriction that a boot environment cannot bedeleted if the boot environment contains the GRUB menu.
Solution: Use lumake(1M) or luupgrade(1M) commands to reuse that boot environment.
The file system containing the GRUB menu was accidentally remade. However, the
disk has the same slices as before. For example, the disk was not re-sliced.
Cause: The file system that contains the GRUB menu is critical to keeping the systembootable. Solaris Live Upgrade commands do not destroy the GRUB menu. But, if youaccidentally remake or otherwise destroy the file system containing the GRUB menu with acommand other than a Solaris Live Upgrade command, the recovery software attempts toreinstall the GRUB menu. The recovery software puts the GRUB menu back in the same filesystem at the next reboot. For example, you might have used the newfs or mkfs commandson the file system and accidentally destroyed the GRUB menu. To restore the GRUB menucorrectly, the slice must adhere to the following conditions:
■ Contain a mountable file system■ Remain a part of the same Solaris Live Upgrade boot environment where the slice
resided previously
Before rebooting the system, make any necessary corrective actions on the slice.
Upgrading the Solaris OS
Solaris 10 10/09 Installation Guide: Custom JumpStart and Advanced Installations • October 2009186

Solution: Reboot the system. A backup copy of the GRUB menu is automatically installed.
The GRUB menu’s menu.lst file was accidentally deleted.
Solution: Reboot the system. A backup copy of the GRUB menu is automatically installed.
▼ System Panics When Upgrading With Solaris LiveUpgrade Running Veritas VxVmWhen you use Solaris Live Upgrade while upgrading and running Veritas VxVM, the systempanics on reboot unless you upgrade by using the following procedure. The problem occurs ifpackages do not conform to Solaris advanced packaging guidelines.
Become superuser or assume an equivalent role.Roles contain authorizations and privileged commands. For more information about roles, see“Configuring RBAC (Task Map)” in System Administration Guide: Security Services.
Create an inactive boot environment. See “Creating a New Boot Environment”inSolaris 10 10/09 Installation Guide: Solaris Live Upgrade and Upgrade Planning.
Before upgrading the inactive boot environment, you must disable the existing Veritas softwareon the inactive boot environment.
a. Mount the inactive boot environment.# lumount inactive_boot_environment_name mount_point
For example:
# lumount solaris8 /mnt
b. Change to the directory that contains the vfstab, for example:# cd /mnt/etc
c. Make a copy of the inactive boot environment's vfstabfile, for example:# cp vfstab vfstab.501
d. In the copied vfstab, comment out all Veritas file system entries, for example:# sed ’/vx\/dsk/s/^/#/g’ < vfstab > vfstab.novxfs
The first character of each line is changed to #, which makes the line a comment line. Notethat this comment line is different than the system file-comment lines.
1
2
3
Upgrading the Solaris OS
Appendix A • Troubleshooting (Tasks) 187

e. Copy the changed vfstabfile, for example:# cp vfstab.novxfs vfstab
f. Change directories to the inactive boot environment's system file, for example:# cd /mnt/etc
g. Make a copy of the inactive boot environment's system file, for example:# cp system system.501
h. Comment out all“forceload:”entries that include drv/vx.# sed ’/forceload: drv\/vx/s/^/*/’ <system> system.novxfs
The first character of each line is changed to *, which makes the line a command line. Notethat this comment line is different than the vfstab file comment lines.
i. Create the Veritas install-dbfile, for example:# touch vx/reconfig.d/state.d/install-db
j. Unmount the inactive boot environment.# luumount inactive_boot_environment_name
Upgrade the inactive boot environment. See Chapter 5,“Upgrading With Solaris Live Upgrade(Tasks),” in Solaris 10 10/09 Installation Guide: Solaris Live Upgrade and Upgrade Planning.
Activate the inactive boot environment. See “Activating a Boot Environment”in Solaris 10 10/09Installation Guide: Solaris Live Upgrade and Upgrade Planning.
Shut down the system.# init 0
Boot the inactive boot environment in single-user mode:OK boot -s
Several messages and error messages that contain “vxvm” or “VXVM” are displayed that can beignored. The inactive boot environment becomes active.
Upgrade Veritas.
a. Remove the Veritas VRTSvmsa package from the system, for example:# pkgrm VRTSvmsa
b. Change directories to the Veritas packages.# cd /location_of_Veritas_software
4
5
6
7
8
Upgrading the Solaris OS
Solaris 10 10/09 Installation Guide: Custom JumpStart and Advanced Installations • October 2009188

c. Add the latest Veritas packages to the system:# pkgadd -d ‘pwd‘ VRTSvxvm VRTSvmsa VRTSvmdoc VRTSvmman VRTSvmdev
Restore the original vfstab and system files:# cp /etc/vfstab.original /etc/vfstab
# cp /etc/system.original /etc/system
Reboot the system.# init 6
x86: Service Partition Not Created by Default onSystems With No Existing Service PartitionIf you install the Solaris 10 10/09 OS on a system that does not currently include a service ordiagnostic partition, the installation program might not create a service partition by default. Ifyou want to include a service partition on the same disk as the Solaris partition, you mustre-create the service partition before you install the Solaris 10 10/09 OS.
If you installed the Solaris 8 2/02 OS on a system with a service partition, the installationprogram might not have preserved the service partition. If you did not manually edit the fdiskboot partition layout to preserve the service partition, the installation program deleted theservice partition during the installation.
Note – If you did not specifically preserve the service partition when you installed the Solaris 82/02 OS, you might not be able to re-create the service partition and upgrade to the Solaris 1010/09 OS.
If you want to include a service partition on the disk that contains the Solaris partition, chooseone of the following workarounds.
▼ To Install Software From a Network Installation Imageor From the Solaris Operating System DVDTo install the software from a net installation image or from the Solaris Operating System DVDover the network, follow these steps.
Delete the contents of the disk.
9
10
1
Upgrading the Solaris OS
Appendix A • Troubleshooting (Tasks) 189

Before you install, create the service partition by using the diagnostics CD for your system.For information about how to create the service partition, see your hardware documentation.
Boot the system from the network.The Customize fdisk Partitions screen is displayed.
To load the default boot disk partition layout, click Default.The installation program preserves the service partition and creates the Solaris partition.
▼ To Install From the Solaris Software - 1 CD or From aNetwork Installation ImageTo use the Solaris installation program to install from the Solaris Software - 1 CD or from anetwork installation image on a boot server, follow these steps.
Delete the contents of the disk.
Before you install, create the service partition by using the diagnostics CD for your system.For information about how to create the service partition, see your hardware documentation.
The installation program prompts you to choose a method for creating the Solaris partition.
Boot the system.
Select the Use rest of disk for Solaris partition option.The installation program preserves the service partition and creates the Solaris partition.
Complete the installation.
2
3
4
1
2
3
4
5
6
Upgrading the Solaris OS
Solaris 10 10/09 Installation Guide: Custom JumpStart and Advanced Installations • October 2009190

Additional SVR4 Packaging Requirements(Reference)
This appendix is for system administrators who install or remove packages, especiallythird-party packages. Following these packaging requirements enables the following:
■ Avoids modifying the currently running system so you can upgrade with Solaris LiveUpgrade and create and maintain non-global zones and diskless clients
■ Prevents a package from being interactive to automate installations when using installationprograms such as custom JumpStart
This chapter contains the following sections:
■ “Preventing Modification of the Current OS” on page 191.■ “Preventing User Interaction When Installing or Upgrading” on page 195.■ “Setting Package Parameters For Zones” on page 196
Preventing Modification of the Current OSFollowing the requirements in this section keeps the currently running OS unaltered.
Using Absolute PathsFor an installation of an operating system to be successful, packages must recognize andcorrectly respect alternate root (/) file systems, such as a Solaris Live Upgrade inactive bootenvironment.
Packages can include absolute paths in their pkgmap file (package map). If these files exist, theyare written relative to the -R option of the pkgadd command. Packages that contain bothabsolute and relative (relocatable) paths can be installed to an alternative root (/) file system aswell. $PKG_INSTALL_ROOT is prepended to both absolute and relocatable files so all paths areresolved properly when being installed by pkgadd.
BA P P E N D I X B
191

Using the pkgadd -RCommandPackages being installed by using the pkgadd -R option or being removed using the pkgrm -Roption must not alter the currently running system. This feature is used by custom JumpStart,Solaris Live Upgrade, non-global zones and diskless client.
Any procedure scripts that are included in the packages being installed with the pkgaddcommand -R option or being removed by using the pkgrm command -R option must not alterthe currently running system. Any installation scripts that you provide must reference anydirectory or file that is prefixed with the $PKG_INSTALL_ROOT variable. The package must writeall directories and files with the $PKG_INSTALL_ROOT prefix. The package must not removedirectories without a $PKG_INSTALL_ROOT prefix.
Table B–1 provides examples of script syntax.
TABLE B–1 Examples of Installation Script Syntax
Script Type Correct Syntax Incorrect Syntax
Bourne shell “if”statement fragments
if [ -f ${PKG_INSTALL_ROOT}\
/etc/myproduct.conf ] ; then
if [ -f /etc/myproduct.conf ] ; \
then
Removing a file /bin/rm -f ${PKG_INSTALL_ROOT}\
/etc/myproduct.conf
/bin/rm -f /etc/myproduct.conf
Changing a file echo "test=no" > ${PKG_INSTALL_ROOT}\
/etc/myproduct.conf
echo "test=no" > \
/etc/myproduct.conf
Differences Between $PKG_INSTALL_ROOT and$BASEDIROverview$PKG_INSTALL_ROOT is the location of the root (/) file system of the machine to which you areadding the package. The location is set to the -R argument of the pkgadd command. Forexample, if the following command is invoked, then $PKG_INSTALL_ROOT becomes /a duringthe installation of the package.
# pkgadd -R /a SUNWvxvm
$BASEDIR points to the relocatable base directory into which relocatable package objects areinstalled. Only relocatable objects are installed here. Nonrelocatable objects (those that haveabsolute paths in the pkgmap file) are always installed relative to the inactive boot environment,but not relative to the $BASEDIR in effect. If a package has no relocatable objects, then thepackage is said to be an absolute package (or nonrelocatable), and $BASEDIR is undefined andnot available to package procedure scripts.
For example, suppose a package's pkgmap file has two entries:
Preventing Modification of the Current OS
Solaris 10 10/09 Installation Guide: Custom JumpStart and Advanced Installations • October 2009192

1 f none sbin/ls 0555 root sys 3541 12322 1002918510
1 f none /sbin/ls2 0555 root sys 3541 12322 2342423332
The pkginfo file has a specification for $BASEDIR:
BASEDIR=/opt
If this package is installed with the following command, then ls is installed in /a/opt/sbin/ls,but ls2 is installed as /a/sbin/ls2.
# pkgadd -R /a SUNWtest
Guidelines for Writing ScriptsYour package procedure scripts must be independent of the currently running OS to preventmodifying the OS. Procedure scripts define actions that occur at particular points duringpackage installation and removal. Four procedure scripts can be created with these predefinednames: preinstall, postinstall, preremove, and postremove.
TABLE B–2 Guidelines For Creating Scripts
GuidelinesAffects SolarisLive Upgrade
Affectsnon-globalzones
Scripts must be written in Bourne shell (/bin/sh). Bourne shell is the interpreter that is used by thepkgadd command to execute the procedure scripts.
X X
Scripts must not start or stop any processes or depend on the output of commands such as ps or truss,which are operating system dependent and report information about the currently running system.
X X
Scripts are free to use other standard UNIX commands such as expr, cp, and ls and other commandsthat facilitate shell scripting.
X X
Any commands that a script invokes must be available in all supported releases, since a package mustrun on all of those releases. Therefore, you cannot use commands that were added or removed after theSolaris 8 release.
To verify that a specific command or option is supported in a Solaris 8, 9, or 10 release, see the specificversion of Solaris Reference Manual AnswerBook on http://docs.sun.com.
X
Maintaining Diskless Client CompatibilityPackages must not execute commands delivered by the package itself. This is to maintaindiskless client compatibility and avoids running commands that might require shared librariesthat are not installed yet.
Preventing Modification of the Current OS
Appendix B • Additional SVR4 Packaging Requirements (Reference) 193

Verifying PackagesAll packages must pass pkgchk validation. After a package is created and before it is installed, itmust be checked with the following command.
# pkgchk -d dir_name pkg_name
dir_name Specifies the name of the directory where the package resides
pkg_name Specifies the name of the package
EXAMPLE B–1 Testing a Package
After a package is created, it must be tested by installing it in an alternate root (/) file systemlocation by using the -R dir_name option to pkgadd. After the package is installed, it must bechecked for correctness by using pkgchk, as in this example.
# pkgadd -d . -R /a SUNWvxvm
# pkgchk -R /a SUNWvxvm
No errors should be displayed.
EXAMPLE B–2 Testing a Package on /export/SUNWvxvm
If a package exists at /export/SUNWvxvm, then you would issue the following command.
# pkgchk -d /export SUNWvxvm
No errors should be displayed.
Other commands can check the package when you are creating, modifying, and deleting files.The following commands are some examples.
■ For example, the dircmp or fssnap commands can be used to verify that packages behaveproperly.
■ Also, the ps command can be used for testing daemon compliance by making sure daemonsare not stopped or started by the package.
■ The truss, pkgadd -v, and pkgrm commands can test runtime package installationcompliance, but might not work in all situations. In the following example, the trusscommand strips out all read-only, non-$TEMPDIR access and shows only non-read-onlyaccess to paths that do not lie within the specified inactive boot environment.
# TEMPDIR=/a; export TEMPDIR
# truss -t open /usr/sbin/pkgadd -R ${TEMPDIR} SUNWvxvm \
Preventing Modification of the Current OS
Solaris 10 10/09 Installation Guide: Custom JumpStart and Advanced Installations • October 2009194

2>&1 > /dev/null | grep -v O_RDONLY | grep -v \
’open("’${TEMPDIR}
Preventing User Interaction When Installing or UpgradingPackages must be added or removed without the user being prompted for information whenusing the following standard Solaris utilities.
■ The custom JumpStart program■ Solaris Live Upgrade■ Solaris installation program program■ Solaris Zones
To test a package to ensure that it will install with no user interaction, a new administration filecan be set up with the pkgadd command -a option. The -a option defines an installationadministration file to be used in place of the default administration file. Using the default filemight result in the user being prompted for more information. You can create anadministration file that indicates to pkgadd that it should bypass these checks and install thepackage without user confirmation. For details, see the man page admin(4) or pkgadd(1M).
The following examples show how the pkgadd command uses the administration file.
■ If no administration file is provided, pkgadd uses /var/sadm/install/admin/default.Using this file might result in user interaction.
# pkgadd
■ If a relative administration file is provided on the command line, pkgadd looks in/var/sadm/install/admin for the file name and uses it. In this example, the relativeadministration file is named nocheck and pkgadd looks for/var/sadm/install/admin/nocheck.
# pkgadd -a nocheck
■ If an absolute file is provided pkgadd uses it. In this example, pkgadd looks in /tmp for thenocheck administration file.
# pkgadd -a /tmp/nocheck
EXAMPLE B–3 Installation Administration File
The following is an example of an installation administration file that requires very little userinteraction with the pkgadd utility. Unless the package requires more space than is available onthe system, the pkgadd utility uses this file and installs the package without prompting the userfor more information.
Preventing User Interaction When Installing or Upgrading
Appendix B • Additional SVR4 Packaging Requirements (Reference) 195

EXAMPLE B–3 Installation Administration File (Continued)
mail=
instance=overwrite
partial=nocheck
runlevel=nocheck
idepend=nocheck
space=ask
setuid=nocheck
confiict=nocheck
action=nocheck
basedir=default
Setting Package Parameters For ZonesPackages have parameters that control how their content is distributed and made visible on asystem with non-global zones installed. The SUNW_PKG_ALLZONES, SUNW_PKG_HOLLOW, andSUNW_PKG_THISZONE package parameters define the characteristics of packages on a system withzones installed. These parameters must be set so that packages can be administered in a systemwith non-global zones.
The following table lists the four valid combinations for setting package parameters. If youchoose setting combinations that are not listed in the following table, those settings are invalidand result in the package failing to install.
Note – Ensure that you have set all three package parameters. You can leave all three packageparameters blank. The package tools interpret a missing zone package parameter as if thesetting were “false,” but not setting the parameters is strongly discouraged. By setting all threepackage parameters, you specify the exact behavior the package tools should exhibit wheninstalling or removing the package.
Setting Package Parameters For Zones
Solaris 10 10/09 Installation Guide: Custom JumpStart and Advanced Installations • October 2009196

TABLE B–3 Valid Package Parameter Settings For Zones
SUNW_PKG_ALLZONES
SettingSUNW_PKG_HOLLOW
SettingSUNW_PKG_THISZONE
Setting Package Description
false false false This is the default setting for packages that do notspecify values for all the zone package parameters.
A package with these settings can be installed in eitherthe global zone or a non-global zone.■ If the pkgadd command is run in the global zone,
the package is installed in the global zone and in allnon-global zones.
■ If the pkgadd command is run in a non-global zone,the package is installed in the non-global zone only.
In both cases, the entire contents of the package isvisible in all zones where the package is installed.
false false true A package with these settings can be installed in eitherthe global zone or a non-global zone. If new non-globalzones are created after the installation, the package isnot propagated to these new non-global zones.■ If the pkgadd command is run in the global zone,
the package is installed in the global zone only.
■ If the pkgadd command is run in a non-global zone,the package is installed in the non-global zone only.
In both cases, the entire contents of the package isvisible in the zone where the package is installed.
true false false A package with these settings can be installed in theglobal zone only. When the pkgadd command is run,the package is installed in the global zone and in allnon-global zones. The entire contents of the package isvisible in all zones.
Note – Any attempt to install the package in a non-globalzone fails.
Setting Package Parameters For Zones
Appendix B • Additional SVR4 Packaging Requirements (Reference) 197

TABLE B–3 Valid Package Parameter Settings For Zones (Continued)SUNW_PKG_ALLZONES
SettingSUNW_PKG_HOLLOW
SettingSUNW_PKG_THISZONE
Setting Package Description
true true false A package with these settings can only be installed inthe global zone, by the global administrator. When thepkgadd command is run, the contents of the package isfully installed in the global zone. If a package has thepackage parameters set to these values, the packagecontent itself is not delivered on any non-global zone.Only the package installation information necessary tomake the package appear to be installed is installed onall non-global zones. This enables the installation ofother packages to be installed that depend on thispackage. For more information on “hollow” packages,see Chapter 24, “About Packages and Patches on aSolaris System With Zones Installed (Overview),” inSystem Administration Guide: SolarisContainers-Resource Management and Solaris Zones.
For package dependency checking purposes, thepackage appears to be installed in all zones.■ In the global zone, the entire contents of the
package is visible.
■ In whole root non-global zones, the entire contentsof the package is not visible.
■ When a non-global zone inherits a file system fromthe global zone, a package installed in this filesystem is visible in a non-global zone. All other filesdelivered by the package are not visible within thenon-global zone.For example, a sparse root non-global zone sharescertain directories with the global zone. Thesedirectories are read-only. Sparse root non-globalzones share the /platform file system amongothers. Another example is packages that deliverfiles relevant only to booting hardware.
Note – Any attempt to install the package in a non-globalzone fails.
Description For More Information
For more details on packages and zones Chapter 24, “About Packages and Patches on a SolarisSystem With Zones Installed (Overview),” in SystemAdministration Guide: Solaris Containers-ResourceManagement and Solaris Zones
Setting Package Parameters For Zones
Solaris 10 10/09 Installation Guide: Custom JumpStart and Advanced Installations • October 2009198

Description For More Information
For an overview of sparse and whole root zones Chapter 16, “Introduction to Solaris Zones,” in SystemAdministration Guide: Solaris Containers-ResourceManagement and Solaris Zones
For information about package characteristics andparameters
pkginfo(4)
For information about displaying package parametervalues
pkgparam(1)
For Background InformationThe following references provide background information about packaging requirements andspecific command syntax.
For more specific informationabout packaging requirements anddefinitions of terminology
Chapter 6, “Advanced Techniques for Creating Packages,” in ApplicationPackaging Developer’s Guide
For basic information about addingand removing packages and theinstallation administration file
Chapter 19, “Managing Software (Overview),” in System AdministrationGuide: Basic Administration
For detailed information aboutspecific commands that arereferenced in this appendix, seethese man pages
dircmp(1), fssnap(1M), ps(1), or truss(1) pkgadd(1M), pkgchk(1M),or pkgrm(1M)
For an overview of Solaris LiveUpgrade
Chapter 2, “Solaris Live Upgrade (Overview),” in Solaris 10 10/09Installation Guide: Solaris Live Upgrade and Upgrade Planning
For an overview of customJumpStart
Chapter 2, “Custom JumpStart (Overview)”
For an overview of Solaris Zones Chapter 16, “Introduction to Solaris Zones,” in System AdministrationGuide: Solaris Containers-Resource Management and Solaris Zones
For Background Information
Appendix B • Additional SVR4 Packaging Requirements (Reference) 199

200

Glossary
3DES ([Triple DES] Triple-Data Encryption Standard). A symmetric-key encryption method that provides a keylength of 168 bits.
AES (Advanced Encryption Standard) A symmetric 128-bit block data encryption technique. The U.S.government adopted the Rijndael variant of the algorithm as its encryption standard in October 2000. AESreplaces DES encryption as the government standard.
archive A file that contains a collection of files that were copied from a master system. The file also containsidentification information about the archive, such as a name and the date that you created the archive.After you install an archive on a system, the system contains the exact configuration of the master system.
An archive could be a differential archive, which is a Solaris Flash archive that contains only the differencesbetween two system images, an unchanged master image and an updated master image. The differentialarchive contains files to be retained, modified, or deleted from the clone system. A differential updatechanges only the files specified and is restricted to systems that contain software consistent with theunchanged master image.
arrow keys One of the four directional keys on the numeric keypad.
begin script A user-defined Bourne shell script, specified within the rules file, that performs tasks before the Solarissoftware is installed on the system. You can use begin scripts only with custom JumpStart installations.
boot To load the system software into memory and start it.
boot archive x86 only: A boot archive is a collection of critical files that is used to boot the Solaris OS. These files areneeded during system startup before the root (/) file system is mounted. Two boot archives are maintainedon a system:■ The boot archive that is used to boot the Solaris OS on a system. This boot archive is sometimes called the
primary boot archive.
■ The boot archive that is used for recovery when the primary boot archive is damaged. This boot archivestarts the system without mounting the root (/) file system. On the GRUB menu, this boot archive is calledfailsafe. The archive's essential purpose is to regenerate the primary boot archive, which is usually used toboot the system.
boot environment A collection of mandatory file systems (disk slices and mount points) that are critical to the operation ofthe Solaris OS. These disk slices might be on the same disk or distributed across multiple disks.
201

The active boot environment is the one that is currently booted. Exactly one active boot environment canbe booted. An inactive boot environment is not currently booted, but can be in a state of waiting foractivation on the next reboot.
boot loader x86 only: The boot loader is the first software program that runs after you turn on a system. This programbegins the booting process.
boot server A server system that provides client systems on the same network subnet with the programs andinformation that they need to start. A boot server is required to install over the network if the install serveris on a different subnet than the systems on which Solaris software is to be installed.
bootlog-cgi
programThe CGI program that enables a web server to collect and store remote client-booting and installationconsole messages during a WAN boot installation.
certificateauthority
(CA) A trusted third-party organization or company that issues digital certificates that are used to createdigital signatures and public-private key pairs. The CA guarantees that the individual who is granted theunique certificate is who she or he claims to be.
certstore file A file that contains a digital certificate for a specific client system. During an SSL negotiation, the clientmight be asked to provide the certificate file to the server. The server uses this file to verify the identity ofthe client.
CGI (Common Gateway Interface) An interface by which external programs communicate with the HTTPserver. Programs that are written to use CGI are called CGI programs or CGI scripts. CGI programshandle forms or parse output the server does not normally handle or parse.
checksum The result of adding a group of data items that are used for checking the group. The data items can beeither numerals or other character strings that are treated as numerals during the checksum calculation.The checksum value verifies that communication between two devices is successful.
client In the client-server model for communications, the client is a process that remotely accesses resources of acompute server, such as compute power and large memory capacity.
clone system A system that you install by using a Solaris Flash archive. The clone system has the same installationconfiguration as the master system.
cluster A logical collection of packages (software modules). The Solaris software is divided into software groups,which are each composed of clusters and packages.
command line A string of characters that begins with a command, often followed by arguments, including options, filenames, and other expressions, and terminated by the end-of-line character.
concatenation A RAID-0 volume. If slices are concatenated, the data is written to the first available slice until that slice isfull. When that slice is full, the data is written to the next slice, serially. A concatenation provides no dataredundancy unless it is contained in a mirror. See also RAID-0 volume.
Core SoftwareGroup
A software group that contains the minimum software that is required to boot and run the Solaris OS on asystem. Core includes some networking software and the drivers that are required to run the CommonDesktop Environment (CDE) desktop. Core does not include the CDE software.
boot loader
Solaris 10 10/09 Installation Guide: Custom JumpStart and Advanced Installations • October 2009202

critical file systems File systems that are required by the Solaris OS. When you use Solaris Live Upgrade, these file systems areseparate mount points in the vfstab file of the active and inactive boot environments. Example filesystems are root (/), /usr, /var, and /opt. These file systems are always copied from the source to theinactive boot environment.
custom JumpStart A type of installation in which the Solaris software is automatically installed on a system that is based on auser-defined profile. You can create customized profiles for different types of users and systems. A customJumpStart installation is a JumpStart installation you create.
custom probes file A file, which must be located in the same JumpStart directory as the rules file, that is a Bourne shell scriptthat contains two types of functions: probe and comparison. Probe functions gather the information youwant or do the actual work and set a corresponding SI_ environment variable you define. Probe functionsbecome probe keywords. Comparison functions call a corresponding probe function, compare the outputof the probe function, and return 0 if the keyword matches or 1 if the keyword doesn't match. Comparisonfunctions become rule keywords. See also rules file.
dataset A generic name for the following ZFS entities: clones, file systems, snapshots, or volumes.
decryption The process of converting coded data to plain text. See also encryption.
derived profile A profile that is dynamically created by a begin script during a custom JumpStart installation.
DES (Data Encryption Standard) A symmetric-key encryption method that was developed in 1975 andstandardized by ANSI in 1981 as ANSI X.3.92. DES uses a 56-bit key.
Developer SolarisSoftware Group
A software group that contains the End User Solaris Software Group plus the libraries, include files, manpages, and programming tools for developing software.
DHCP (Dynamic Host Configuration Protocol) An application-layer protocol. Enables individual computers, orclients, on a TCP/IP network to extract an IP address and other network configuration information from adesignated and centrally maintained DHCP server or servers. This facility reduces the overhead ofmaintaining and administering a large IP network.
differential archive A Solaris Flash archive that contains only the differences between two system images, an unchangedmaster image and an updated master image. The differential archive contains files to be retained,modified, or deleted from the clone system. A differential update changes only the files that are specifiedand is restricted to systems that contain software consistent with the unchanged master image.
digital certificate A nontransferable, nonforgeable, digital file issued from a third party that both communicating partiesalready trust.
disc An optical disc, as opposed to a magnetic disk, which recognizes the common spelling that is used in thecompact disc (CD) market. For example, a CD-ROM or DVD-ROM is an optical disc.
disk A round platter, or set of platters, of a magnetized medium that is organized into concentric tracks andsectors for storing data such as files. See also disc.
disk configurationfile
A file that represents a structure of a disk (for example, bytes/sector, flags, slices). Disk configuration filesenable you to use the pfinstall command from a single system to test profiles on different–size disks.
diskless client A client on a network that relies on a server for all of its disk storage.
diskless client
203
document rootdirectory
The root of a hierarchy on a web server machine that contains the files, images, and data you want topresent to users who are accessing the web server.
domain A part of the Internet naming hierarchy. A domain represents a group of systems on a local network thatshare administrative files.
domain name The name that is assigned to a group of systems on a local network that share administrative files. Thedomain name is required for the Network Information Service (NIS) database to work properly. A domainname consists of a sequence of component names that are separated by periods (for example:tundra.mpk.ca.us). As you read a domain name from left to right, the component names identify moregeneral (and usually remote) areas of administrative authority.
encryption The process of protecting information from unauthorized use by making the information unintelligible.Encryption is based on a code, called a key, which is used to decrypt the information. See also decryption.
End User SolarisSoftware Group
A software group that contains the Core Software Group plus the recommended software for an end user,including the Common Desktop Environment (CDE) and DeskSet software.
Entire SolarisSoftware Group
A software group that contains the entire Solaris release.
Entire SolarisSoftware GroupPlus OEM Support
A software group that contains the entire Solaris release plus additional hardware support for OEMs. Thissoftware group is recommended when installing Solaris software on SPARC based servers.
/etc directory A directory that contains critical system configuration files and maintenance commands.
/etc/netboot
directoryThe directory on a WAN boot server that contains the client configuration information and security datathat are required for a WAN boot installation.
/export file system A file system on an OS server that is shared with other systems on a network. For example, the /export filesystem can contain the root (/) file system and swap space for diskless clients and the home directories forusers on the network. Diskless clients rely on the /export file system on an OS server to boot and run.
failsafe bootarchive
x86 only: A boot archive that is used for recovery when the primary boot archive is damaged. This bootarchive starts the system without mounting the root (/) file system. This boot archive is called failsafe onthe GRUB menu. The archive's essential purpose is to regenerate the primary boot archive, which isusually used to boot the system. See boot archive.
fallback A reversion to the environment that ran previously. Use fallback when you are activating an environmentand the boot environment that is designated for booting fails or shows some undesirable behavior.
fdisk partition A logical partition of a disk drive that is dedicated to a particular operating system on x86 based systems.To install the Solaris software, you must set up at least one Solaris fdisk partition on an x86 based system.x86 based systems allow up to four different fdisk partitions on a disk. These partitions can be used tohold individual operating systems. Each operating system must be located on a unique fdisk partition. Asystem can only have one Solaris fdisk partition per disk.
file server A server that provides the software and file storage for systems on a network.
file system In the SunOSTM operating system, a tree-structured network of files and directories that you can access.
document root directory
Solaris 10 10/09 Installation Guide: Custom JumpStart and Advanced Installations • October 2009204

finish script A user-defined Bourne shell script, specified within the rules file, that performs tasks after the Solarissoftware is installed on the system but before the system reboots. You use finish scripts with customJumpStart installations.
format To put data into a structure or divide a disk into sectors for receiving data.
function key One of the 10 or more keyboard keys that are labeled F1, F2, F3, and so on that are mapped to particulartasks.
global zone In Solaris Zones, the global zone is both the default zone for the system and the zone used for system-wideadministrative control. The global zone is the only zone from which a non-global zone can be configured,installed, managed, or uninstalled. Administration of the system infrastructure, such as physical devices,routing, or dynamic reconfiguration (DR), is only possible in the global zone. Appropriately privilegedprocesses running in the global zone can access objects associated with other zones. See also Solaris Zonesand non-global zone.
GRUB x86 only: GNU GRand Unified Bootloader (GRUB) is an open source boot loader with a simple menuinterface. The menu displays a list of operating systems that are installed on a system. GRUB enables youto easily boot these various operating systems, such as the Solaris OS, Linux, or Microsoft Windows.
GRUB edit menu x86 only: A boot menu that is a submenu of the GRUB main menu. GRUB commands are displayed onthis menu. These commands can be edited to change boot behavior.
GRUB main menu x86 only: A boot menu that lists the operating systems that are installed on a system. From this menu, youcan easily boot an operating system without modifying the BIOS or fdisk partition settings.
hard link A directory entry that references a file on disk. More than one such directory entry can reference the samephysical file.
hash A number that is produced by taking some input and generating a number that is significantly shorterthan the input. The same output value is always generated for identical inputs. Hash functions can be usedin table search algorithms, in error detection, and in tamper detection. When used for tamper detection,hash functions are chosen such that it is difficult to find two inputs that yield the same hash result. MD5and SHA-1 are examples of one-way hash functions. For example, a message digest takes a variable-lengthinput such as a disk file and reduces it to a small value.
hashing The process of changing a string of characters into a value or key that represents the original string.
HMAC Keyed hashing method for message authentication. HMAC is used with an iterative cryptographic hashfunction, such as MD5 or SHA-1, in combination with a secret shared key. The cryptographic strength ofHMAC depends on the properties of the underlying hash function.
host name The name by which a system is known to other systems on a network. This name must be unique amongall the systems within a particular domain (usually, this means within any single organization). A hostname can be any combination of letters, numbers, and minus signs (-), but it cannot begin or end with aminus sign.
HTTP (Hypertext Transfer Protocol) (n.) The Internet protocol that fetches hypertext objects from remote hosts.This protocol is based on TCP/IP.
HTTPS A secure version of HTTP, implemented by using the Secure Sockets Layer (SSL).
HTTPS
205

initial installation An installation that overwrites the currently running software or initializes a blank disk.
An initial installation of the Solaris OS overwrites the system's disk or disks with the new version of theSolaris OS. If your system is not running the Solaris OS, you must perform an initial installation. If yoursystem is running an upgradable version of the Solaris OS, an initial installation overwrites the disk anddoes not preserve the OS or local modifications.
install server A server that provides the Solaris DVD or CD images from which other systems on a network can installSolaris (also called a media server). You can create an install server by copying the Solaris DVD or CDimages to the server's hard disk.
IPv6 IPv6 is a version (version 6) of Internet Protocol (IP) that is designed to be an evolutionary step from thecurrent version, IPv4 (version 4). Deploying IPv6, by using defined transition mechanisms, does notdisrupt current operations. In addition, IPv6 provides a platform for new Internet functionality.
job A user-defined task to be completed by a computer system.
JumpStartdirectory
When you use a profile diskette for custom JumpStart installations, the JumpStart directory is the rootdirectory on the diskette that contains all the essential custom JumpStart files. When you use a profileserver for custom JumpStart installations, the JumpStart directory is a directory on the server that containsall the essential custom JumpStart files.
JumpStartinstallation
A type of installation in which the Solaris software is automatically installed on a system by using thefactory-installed JumpStart software.
Kerberos A network authentication protocol that uses strong, secret-key cryptography to enable a client and serverto identify themselves to each other over an insecure network connection.
key The code for encrypting or decrypting data. See also encryption.
keystore file A file that contains keys shared by a client and server. During a WAN boot installation, the client systemuses the keys to verify the integrity of, or decrypt the data and files transmitted from, the server.
LAN (local area network) A group of computer systems in close proximity that can communicate by way ofsome connecting hardware and software.
LDAP (Lightweight Directory Access Protocol) A standard, extensible directory access protocol that is used byLDAP naming service clients and servers to communicate with each other.
locale A geographic or political region or community that shares the same language, customs, or culturalconventions (English for the U.S. is en_US, and English for the U.K. is en_UK).
logical device A group of physical slices on one or more disks that appear to the system as a single device. A logical deviceis called a volume in Solaris Volume Manager. A volume is functionally identical to a physical disk for thepurposes of an application or file system.
manifest section A section of a Solaris Flash archive that is used to validate a clone system. The manifest section lists the fileson a system to be retained, added to, or deleted from the clone system. This section is informational only.The section lists the files in an internal format and cannot be used for scripting.
master system A system that you use to create a Solaris Flash archive. The system configuration is saved in the archive.
initial installation
Solaris 10 10/09 Installation Guide: Custom JumpStart and Advanced Installations • October 2009206

MD5 (Message Digest 5) An iterative cryptographic hash function that is used for message authentication,including digital signatures. The function was developed in 1991 by Rivest.
media server See install server.
menu.lst file x86 only: A file that lists all the operating systems that are installed on a system. The contents of this filedictate the list of operating systems that is displayed on the GRUB menu. From the GRUB menu, you caneasily boot an operating system without modifying the BIOS or fdisk partition settings.
metadevice See volume.
miniroot A minimal, bootable root (/) file system that is included in Solaris installation media. A miniroot consistsof the Solaris software that is required to install and upgrade systems. On x86 based systems, the minirootis copied to the system to be used as the failsafe boot archive. See failsafe boot archive.
mirror See RAID-1 volume.
mount The process of accessing a directory from a disk that is attached to a machine that is making the mountrequest or a remote disk on a network. To mount a file system, you need a mount point on the local systemand the name of the file system to be mounted (for example, /usr).
mount point A workstation directory to which you mount a file system that exists on a remote machine.
name server A server that provides a naming service to systems on a network.
naming service A distributed network database that contains key system information about all the systems on a networkso that the systems can communicate with each other. With a naming service, the system information canbe maintained, managed, and accessed on a network-wide basis. Without a naming service, each systemhas to maintain its own copy of the system information in the local /etc files. Sun supports the followingnaming services: LDAP, NIS, and NIS+.
networkinstallation
A way to install software over the network from a system with a CD-ROM or DVD-ROM drive to a systemwithout a CD-ROM or DVD-ROM drive. Network installations require a name server and an install server.
networked systems A group of systems (called hosts) that are connected through hardware and software so that they cancommunicate and share information. Referred to as a local area network (LAN). One or more servers areusually needed when systems are networked.
NIS The SunOS 4.0 (minimum) Network Information Service. A distributed network database that containskey information about the systems and the users on the network. The NIS database is stored on the masterserver and all the slave servers.
NIS+ The SunOS 5.0 (minimum) Network Information Service. NIS+ replaces NIS, the SunOS 4.0 (minimum)Network Information Service.
non-global zone A virtualized operating system environment created within a single instance of the Solaris OperatingSystem. One or more applications can run in a non-global zone without interacting with the rest of thesystem. Non-global zones are also called zones. See also Solaris Zones and global zone.
nonnetworkedsystems
Systems that are not connected to a network or do not rely on other systems.
nonnetworked systems
207

/opt file system A file system that contains the mount points for third-party and unbundled software.
OS server A system that provides services to systems on a network. To serve diskless clients, an OS server must havedisk space set aside for each diskless client's root (/) file system and swap space (/export/root,/export/swap).
package A collection of software that is grouped into a single entity for modular installation. The Solaris software isdivided into software groups, which are each composed of clusters and packages.
panel A container for organizing the contents of a window, a dialog box, or applet. The panel might collect andconfirm user input. Panels might be used by wizards and follow an ordered sequence to fulfill a designatedtask.
patch analyzer A script that you can run manually or as part of the Solaris installation program. The patch analyzerperforms an analysis on your system to determine which (if any) patches will be removed by upgrading toa Solaris update.
platform group A vendor-defined grouping of hardware platforms for the purpose of distributing specific software.Examples of valid platform groups are i86pc and sun4u.
platform name The output of the uname -i command. For example, the platform name for the Ultra 60 isSUNW,Ultra-60.
pool A logical group of devices describing the layout and physical characteristics of the available ZFS storage.Space for datasets is allocated from a pool.
PowerManagement
Software that automatically saves the state of a system and turns it off after it is idle for 30 minutes. Whenyou install the Solaris software on a system that complies with Version 2 of the U.S. EnvironmentalProtection Agency's Energy Star guidelines, the Power Management software is installed by default. Asun4u SPARC based system is an example of a system that has Power Management installed by default.After a subsequent reboot, you are prompted to enable or disable the Power Management software.
Energy Star guidelines require that systems or monitors automatically enter a “sleep state” (consume 30watts or less) after the system or monitor becomes inactive.
primary bootarchive
A boot archive that is used to boot the Solaris OS on a system. This boot archive is sometimes called theprimary boot archive. See boot archive.
private key The decryption key used in public-key encryption.
probe keyword A syntactical element that extracts attribute information about a system when using the custom JumpStartmethod to install. A probe keyword does not require you to set up a matching condition and run a profileas required for a rule. See also rule.
profile A text file that defines how to install the Solaris software when using the custom JumpStart method. Forexample, a profile defines which software group to install. Every rule specifies a profile that defines how asystem is to be installed when the rule is matched. You usually create a different profile for every rule.However, the same profile can be used in more than one rule. See also rules file.
profile diskette A diskette that contains all the essential custom JumpStart files in its root directory (JumpStart directory).
profile server A server that contains all the essential custom JumpStart files in a JumpStart directory.
/opt file system
Solaris 10 10/09 Installation Guide: Custom JumpStart and Advanced Installations • October 2009208

public key The encryption key used in public-key encryption.
public-keycryptography
A cryptographic system that uses two keys: a public key known to everyone, and a private key known onlyto the recipient of the message.
RAID-0 volume A class of volume that can be a stripe or a concatenation. These components are also called submirrors. Astripe or concatenation is the basic building block for mirrors.
RAID-1 volume A class of volume that replicates data by maintaining multiple copies. A RAID-1 volume is composed ofone or more RAID-0 volumes called submirrors. A RAID-1 volume is sometimes called a mirror.
RAID-Z storagepool
A virtual device that stores data and parity on multiple disks that can be used as a ZFS storage pool.RAID-Z is similar to RAID-5.
Reduced NetworkSupport SoftwareGroup
A software group that contains the minimum code that is required to boot and run a Solaris system withlimited network service support. The Reduced Networking Software Group provides a multiusertext-based console and system administration utilities. This software group also enables the system torecognize network interfaces, but does not activate network services.
root The top level of a hierarchy of items. Root is the one item from which all other items are descended. Seeroot directory or root (/) file system.
root (/) file system The top-level file system from which all other file systems stem. The root (/) file system is the base onwhich all other file systems are mounted, and is never unmounted. The root (/) file system contains thedirectories and files critical for system operation, such as the kernel, device drivers, and the programs thatare used to start (boot) a system.
root directory The top-level directory from which all other directories stem.
rule A series of values that assigns one or more system attributes to a profile. A rule is used in a customJumpStart installation.
rules file A text file that contains a rule for each group of systems or single systems that you want to installautomatically. Each rule distinguishes a group of systems, based on one or more system attributes. Therules file links each group to a profile, which is a text file that defines how the Solaris software is to beinstalled on each system in the group. A rules file is used in a custom JumpStart installation. See alsoprofile.
rules.ok file A generated version of the rules file. The rules.ok file is required by the custom JumpStart installationsoftware to match a system to a profile. You must use the check script to create the rules.ok file.
Secure SocketsLayer
(SSL) A software library establishing a secure connection between two parties (client and server) used toimplement HTTPS, the secure version of HTTP.
server A network device that manages resources and supplies services to a client.
SHA1 (Secure Hashing Algorithm) The algorithm that operates on any input length less than 264 to produce amessage digest.
SHA1
209

shareable filesystems
File systems that are user-defined files such as /export/home and /swap. These file systems are sharedbetween the active and inactive boot environment when you use Solaris Live Upgrade. Shareable filesystems contain the same mount point in the vfstab file in both the active and inactive bootenvironments. Updating shared files in the active boot environment also updates data in the inactive bootenvironment. Shareable file systems are shared by default, but you can specify a destination slice, and thenthe file systems are copied.
slice The unit into which the disk space is divided by the software.
snapshot A read-only image of a ZFS file system or volume at a given point in time.
software group A logical grouping of the Solaris software (clusters and packages). During a Solaris installation, you caninstall one of the following software groups: Core, End User Solaris Software, Developer Solaris Software,or Entire Solaris Software, and for SPARC systems only, Entire Solaris Software Group Plus OEM Support.
Solaris DVD or CDimages
The Solaris software that is installed on a system, which you can access on the Solaris DVDs or CDs or aninstall server's hard disk to which you have copied the Solaris DVD or CD images.
Solaris Flash A Solaris installation feature that enables you to create an archive of the files on a system, called the mastersystem. You can then use the archive to install other systems, making the other systems identical in theirconfiguration to the master system. See also archive.
Solaris installationprogram
A graphical user interface (GUI) or command-line interface (CLI) installation program that uses wizardpanels to guide you step-by-step through installing the Solaris software and third-party software.
Solaris LiveUpgrade
An upgrade method that enables a duplicate boot environment to be upgraded while the active bootenvironment is still running, thus eliminating downtime of the production environment.
Solaris Zones A software partitioning technology used to virtualize operating system services and provide an isolatedand secure environment for running applications. When you create a non-global zone, you produce anapplication execution environment in which processes are isolated from all other zones. This isolationprevents processes that are running in a zone from monitoring or affecting processes that are running inany other zones. See also global zone and non-global zone.
standalone A computer that does not require support from any other machine.
state database A database that stores information about the state of your Solaris Volume Manager configuration. Thestate database is a collection of multiple, replicated database copies. Each copy is referred to as a statedatabase replica. The state database tracks the location and status of all known state database replicas.
state databasereplica
A copy of a state database. The replica ensures that the data in the database is valid.
submirror See RAID-0 volume.
subnet A working scheme that divides a single logical network into smaller physical networks to simplify routing.
subnet mask A bit mask that is used to select bits from an Internet address for subnet addressing. The mask is 32 bitslong and selects the network portion of the Internet address and 1 or more bits of the local portion.
superuser A special user who has privileges to perform all administrative tasks on the system. The superuser has theability to read and write to any file, run all programs, and send kill signals to any process.
shareable file systems
Solaris 10 10/09 Installation Guide: Custom JumpStart and Advanced Installations • October 2009210

swap space A slice or file that temporarily holds the contents of a memory area till it can be reloaded in memory. Alsocalled the /swap or swap volume.
sysidcfg file A file in which you specify a set of special system configuration keywords that preconfigure a system.
systemconfiguration file
(system.conf) A text file in which you specify the locations of the sysidcfg file and the custom JumpStartfiles you want to use in a WAN boot installation.
time zone Any of the 24 longitudinal divisions of the earth's surface for which a standard time is kept.
truststore file A file that contains one or more digital certificates. During a WAN boot installation, the client systemverifies the identity of the server that is trying to perform the installation by consulting the data in thetruststore file.
unmount The process of removing access to a directory on a disk that is attached to a machine or to a remote disk ona network.
update An installation, or to perform an installation, on a system that changes software that is of the same type.Unlike an upgrade, an update might downgrade the system. Unlike an initial installation, software of thesame type that is being installed must be present before an update can occur.
upgrade An installation that merges files with existing files and preserves modifications where possible.
An upgrade of the Solaris OS merges the new version of the Solaris OS with the existing files on thesystem's disk or disks. An upgrade saves as many modifications as possible that you have made to theprevious version of the Solaris OS.
upgrade option An option that is presented by the Solaris installation program . The upgrade procedure merges the newversion of Solaris with existing files on your disk or disks. An upgrade also saves as many localmodifications as possible since the last time Solaris was installed.
URL (Uniform Resource Locator) The addressing system used by the server and the client to requestdocuments. A URL is often called a location. The format of a URL is protocol://machine:port/document.
A sample URL is http://www.example.com/index.html.
/usr file system A file system on a standalone system or server that contains many of the standard UNIX programs.Sharing the large /usr file system with a server rather than maintaining a local copy minimizes the overalldisk space that is required to install and run the Solaris software on a system.
utility A standard program, usually furnished at no charge with the purchase of a computer, that does thecomputer's housekeeping.
/var file system A file system or directory (on standalone systems) that contains system files that are likely to change orgrow over the life of the system. These files include system logs, vi files, mail files, and UUCP files.
virtual device A logical device in a ZFS pool, which can be a physical device, a file, or a collection of devices.
volume A group of physical slices or other volumes that appear to the system as a single logical device. A volume isfunctionally identical to a physical disk for the purposes of an application or file system.
In some command-line utilities, a volume is called a metadevice. Volume is also called pseudo device orvirtual device in standard UNIX terms.
volume
211

Volume Manager A program that provides a mechanism to administer and obtain access to the data on DVD-ROMs,CD-ROMs, and diskettes.
WAN (wide area network) A network that connects multiple local area networks (LANs) or systems at differentgeographical sites by using telephone, fiber-optic, or satellite links.
WAN bootinstallation
A type of installation that enables you to boot and install software over a wide area network (WAN) byusing HTTP or HTTPS. The WAN boot installation method enables you to transmit an encrypted SolarisFlash archive over a public network and perform a custom JumpStart installation on a remote client.
WAN bootminiroot
A miniroot that has been modified to perform a WAN boot installation. The WAN boot miniroot containsa subset of the software in the Solaris miniroot. See also miniroot.
WAN boot server A web server that provides the configuration and security files that are used during a WAN bootinstallation.
wanboot-cgi
programThe CGI program that retrieves and transmits the data and files that are used in a WAN boot installation.
wanboot.conf file A text file in which you specify the configuration information and security settings that are required toperform a WAN boot installation.
wanboot program The second-level boot program that loads the WAN boot miniroot, client configuration files, andinstallation files that are required to perform a WAN boot installation. For WAN boot installations, thewanboot binary performs tasks similar to the ufsboot or inetboot second-level boot programs.
ZFS A file system using storage pools to manage physical storage.
zone See non-global zone
Volume Manager
Solaris 10 10/09 Installation Guide: Custom JumpStart and Advanced Installations • October 2009212

Index
Numbers and Symbols#
in profiles, 37in rules files, 34
&& (ampersands) rule field, 34(/) file systems
value set by JumpStart, 154= (equal sign) in profile field, 58! (exclamation mark) rule field, 34
Aadd_install_client command, JumpStart directory
access, 27adding
clusters when upgrading, 126packages and patches with a finish script, 61packages from software groups, 142rules to rules file, 34
alternative installation programs, 73ampersands (&&) rule field, 34AND rule field, 34any
probe keyword, description and values, 158rule keyword, description and values, 107, 157
arch probe keyword, 157arch rule keyword, 107, 157archive
JumpStart profile example, 42, 43, 44keywords, custom JumpStart, 113-119
archive_location keyword, 113-119
auto_install_sample directorycheck script, 54, 79copying files to JumpStart directory, 26, 30, 32set_root_pw finish script, 64
B-b option of setup_install_server command, 101backslash in rules files, 34backup_media keyword, 119-120begin.log file, 58begin rule field, description, 34begin scripts
creating derived profiles with, 58, 59overview, 57permissions, 58rule field, 34site-specific installation programs, 73
boot: cannot open /kernel/unix message, 174boot_device keyword, 121bootenv createbe keyword, 122booting
creating a profile diskette, 31installing with GRUB, 90, 92with GRUB, command reference, 94
bootparams fileenabling JumpStart directory access, 28updating, 179
Bourne shell scripts in rule fields, 34
213

C-c option
add_install_client command, 104, 105pfinstall command, 52
Can't boot from file/device message, 174CHANGE DEFAULT BOOT DEVICE message, 180changing directories
image of Solaris SPARC software on local disk, 30to image of Solaris software on local disk, 26to image of Solaris x86 based software on local
disk, 32to JumpStart directory, 54, 79
check scriptcustom_probes file validation, 78, 79custom_probes.ok file creation, 79derived profiles and, 59rules file validation, 54, 55, 79rules.ok file creation, 54testing rules, 54, 79
client_arch keyword, 123CLIENT MAC ADDR error message, 179client_root profile keyword, 123clock gained xxx days message, 174cluster profile keyword
description and values, 125-126, 126examples, 38
commentsin profiles, 37in rules files, 34
configuring, creating disk configuration files, 67copying
JumpStart directory files, 60JumpStart installation files, 26, 30, 32
Core Solaris Software Group, 125-126CPUs (processors)
probe keywords, 157rule keywords, 107, 157
creatingcustom_probes.ok file, 78, 79disk configuration files, 67JumpStart directory, on server, 25local file systems, 131-133profiles
derived, 58
creating, profiles (Continued)description, 36
RAID-1 volumes, 133-135rules file, 33rules.ok file, 54, 78UFS, 30
.cshrc file, 63custom JumpStart installation, 81
booting and installing, 81description, 20examples, 97, 106
booting and installing, 105check script, 103eng_profile creation, 102engineering systems setup, 104JumpStart directory, 101marketing_profile creation, 102marketing systems setup, 100, 104networked, 19nonnetworked, 18RAID-1 volume profiles, 45, 47rules file editing, 103site setup, 97, 98Solaris Flash profile, 42, 43, 44standalone system, 18WAN boot installation profile, 42
optional features, 57begin scripts, 57, 59finish scripts, 59, 64overview, 57site-specific installation programs, 73
overview, 20preparing, 20, 55profile keywords, 112tip line connection requirements, 86, 90
custom_probes filenaming, 76requirements, 76testing custom_probes, 79validating by using check, 78, 79
custom_probes.ok filecreating, 78, 79description, 78
Index
Solaris 10 10/09 Installation Guide: Custom JumpStart and Advanced Installations • October 2009214
Ddefaults
derived profile name, 59partitioning
designating disks, 155excluding disks, 127
software group installed, 125deleting, clusters when upgrading, 126derived profiles, 58, 59Developer Solaris Software Group, 125-126
profile example, 38dfstab file, 25, 101directories
changingto image of Solaris software on local disk, 26to image of Solaris SPARC software on local
disk, 30to image of Solaris x86 based software on local
disk, 32to JumpStart directory, 54, 79
JumpStartadding files, 61copying files, 60copying installation files, 26, 30, 32creating directory, 101creating for systems, 29permissions, 25, 29rules file example, 33sharing directory, 25, 101
disk configuration filescreating
SPARC based systems, 67x86 based systems, 69
description, 50, 67diskettes
JumpStart directory access, 27x86: JumpStart directory, 29
diskless clientsplatforms, 123swap space, 124
disks probe keyword, description and values, 157disksize rule keyword, description and values, 108, 157display
tip line connection requirements, 86, 90
domainname probe keyword, 157domainname rule keyword, 108, 157domains
probe keyword, 157rule keyword, 108, 157
dontuse profile keyword, 127, 155
EEnd User Solaris Software Group, 125-126eng_profile example, 102Entire Solaris Software Group, 125-126Entire Solaris Software Group Plus OEM
Support, 125-126equal sign (=) in profile field, 58/etc/bootparams file
enabling JumpStart directory access, 28, 179/etc/dfs/dfstab file, 25, 101/etc/mnttab file, 30exclamation mark (!) rule field, 34
Ffailed upgrade, rebooting problems, 184fdisk command, 69fdisk profile keyword
description and values, 127-129example, 38
files and file systemsbegin script output, 58copying
JumpStart directory files using finish scripts, 60JumpStart installation files, 26, 30, 32
creatinglocal file systems, 131-133RAID-1 volumes, 133-135
finish script output, 60mounting remote file systems, 130UFS creation, 30
filesys keyword, 131-133, 133-135filesys profile keyword
description and values, 130examples, 38
Index
215

finish.log file, 60finish rule field, description, 35finish scripts
adding packages and patches, 61customizing the root environment, 63rule field, 35setting the system's root password, 64
Ggeo keyword, 136getfile: RPC failed: error 5: RPC Timed out message, 29GRUB based booting
command reference, 94creating a profile diskette, 31installing, 90, 92
Hhard disks
mounting, 130partitioning
designating for partitioning default, 155examples, 38excluding for partitioning default, 127profile keyword, 147
rootdisk values, 154size
probe keywords, 157, 158root space, 123rule keywords, 108, 111, 157, 158
swap spacediskless client, 124maximum size, 124profile examples, 20, 38
hostaddress probe keyword, 157hostaddress rule keyword, 108, 157hostname probe keyword, description and values, 157hostname rule keyword
description and values, 108, 157example, 107-111
Iinstall_config command, 28, 29install_type keyword, 137install_type profile keyword
examples, 38requirement, 37, 38testing profiles, 53
installed probe keyword, description and values, 158installed rule keyword, description and values, 109,
158IP addresses
probe keyword, 157rule keyword, 108, 157
JJumpStart directory
adding files with finish scripts, 61copying files
installation files, 26, 30, 32using finish scripts, 60
creatingdiskette for SPARC based systems, 29diskette for x86 based systems, 29, 31example, 101server, 25
permissions, 25, 29rules file example, 33sharing, 25, 101
Kkarch probe keyword, 158karch rule keyword, 109, 158keywords
probe, 75Solaris Flash archives, custom JumpStart, 113-119
Llayout_constraint keyword, 137-139
Index
Solaris 10 10/09 Installation Guide: Custom JumpStart and Advanced Installations • October 2009216

le0: No carrier - transceiver cable problemmessage, 174
limitations for ZFS, 160locale keyword, 140log files
begin script output, 58finish script output, 60
logical AND rule field, 34
Mmarketing_profile example, 102matching
derived profiles, 58order for rules, 35, 84, 90rootdisk values, 154
memoryprobe keyword, 158rule keyword, 109, 158swap space size and, 124
memsize probe keyword, description and values, 158memsize rule keyword, description and values, 109,
158metadb profile keyword, 140-141microprocessors
probe keywords, 157rule keywords, 107, 157
mnttab file, 30model probe keyword, description and values, 158model rule keyword, description and values, 110, 158mounting
begin script caution, 58by Solaris installation, 60remote file systems, 130
multiple lines in rules files, 34
Nnames/naming
custom_probes file, 76derived profile names, 59host name, 108, 157rules file, 33, 34
names/naming (Continued)system model names, 110, 158
network installation, custom JumpStart installation,example, 19
network number, 110, 158network probe keyword, description and values, 158network rule keyword, description and values, 110, 158No carrier - transceiver cable problem message, 174no_master_check keyword, 141noneuclidean profile keyword, 142Not a UFS filesystem message, 174
Oosname probe keyword, 158osname rule keyword, 110, 158output files
begin script log, 58finish script log, 60
P-p option of check script, 54, 79packages
addingwith a finish script, 61with chroot, 63
administration file, 57requirements when using custom JumpStart, 191Solaris Live Upgrade
requirements, 191partitioning
examples, 38excluding disks, 127fdisk partitions, 38, 127-129profile keyword, 147, 155
partitioning keyword, 147password, root, 64patches
addingwith a finish script, 61with chroot, 63
paths, check script, 54, 79
Index
217

permissionsbegin scripts, 58finish scripts, 60JumpStart directory, 25, 29
pfinstall command, 49platforms
diskless client, 123matching system attributes and profiles, 35, 84, 90probe keywords, 158rule keywords, 109, 158system model names, 110, 158
preparing for installation, with custom JumpStart, 20,55
probe keywordsarch, 157disks, 157domainname, 157hostaddress, 157hostname, 157installed, 158karch, 158memsize, 158model, 158network, 158osname, 158rootdisk, 158totaldisk, 158
probe rule keyword, description and values, 111processors
probe keywords, 157rule keywords, 107, 157
profile keywords, 112, 155archive_location, 113-119backup_media, 119-120boot_device, 121bootenv createbe, 122bootenv installbe for ZFS, 166case sensitivity, 112client_arch, 123client_root, 123client_swap, 124cluster
description and values, 125-126, 126examples, 38
profile keywords (Continued)creating state database replicas (meatball), 140-141dontuse
description and values, 127usedisk and, 155
fdisk
description and values, 127-129example, 38
filesysdescription and values, 130examples, 38local file systems, 131-133RAID-1 volumes, 133-135remote file systems, 130
forced_deployment, description and values, 135geo
description and values, 136install_type
description and values, 137examples, 38for ZFS, 166requirement, 37, 38
layout_constraint, description and values, 137-139local_customization, description and values, 140locale, description and values, 140metadb
description and values, 140-141examples, 38
no_master_check, description and values, 141noneuclidean, 142partitioning
description and values, 147designating disks, 155examples, 38excluding disks, 127
pool for ZFS, 167quick reference, 112root_device, 153root_device for ZFS, 169system_type
description and values, 154examples, 38
usedisk, description and values, 155
Index
Solaris 10 10/09 Installation Guide: Custom JumpStart and Advanced Installations • October 2009218

profilescomments in, 37creating, 36derived profiles, 58, 59description, 36examples, 38
eng_profile, 102marketing_profile, 102Solaris Flash, 42, 43, 44WAN boot installation, 42ZFS, 161
matching systems to, 35, 84, 90naming, 37requirements, 33, 37rule field, 34testing, 53
prtvtoc commandSPARC: creating disk configuration file, 67x86: disk configuration file creation, 70
R-r option of check script, 54, 79Reduced Network Support Software Group, 125-126release of Solaris software
installed probe keyword, 158installed rule keyword, 109, 158osname probe keyword, 158osname rule keyword, 110, 158
remote file systems, mounting, 130requirements
custom_probes file, 76profiles, 33, 37
root (/) file systems, package requirements for aninactive boot environment, 191
root (/) file systems, profile example, 20root_device keyword, 153root environment, customizing with a finish script, 63root password, setting with a finish script, 64rootdisk
definition, 154slice value for filesys, 131value set by JumpStart, 154
RPC failed: error 5: RPC Timed out message, 29
RPC Timed out message, 29, 178rule_keyword rule field, 34rule keywords, 107
any, description and values, 107, 157arch, 107, 157disksize, description and values, 108, 157domainname, 108, 157hostaddress, 108, 157hostname, 107-111, 157installed, description and values, 109, 158karch, 109, 158memsize, 109, 158model, 110, 158network, 110, 158osname, 110, 158probe, 111totaldisk, 111, 158
rule_value rule field, 34rules
derived profiles, 58, 59examples, 35field descriptions, 34, 35matching order, 35, 84, 90multiple line rules, 34rootdisk matching rules, 154syntax, 34testing validity, 54, 79
rules fileadding rules, 34comments in, 34creating, 33custom JumpStart example, 103description, 33example, 33multiple line rules, 34naming, 33, 34syntax, 34testing rules, 54validating by using check, 55
custom JumpStart example, 103derived profiles and, 59
rules.ok filecreating, 54description, 54
Index
219

rules.ok file, matching order for rules, 35rules.ok file
matching order for rules, 84, 90
S-s option of add_install_client command, 105scripts
begin scripts, 57, 59, 73Bourne shell scripts in rule fields, 34finish scripts, 59, 64, 73
security, root password, 64servers
JumpStart directory creation, 25root space, 123
set_root_pw finish script, 64share command
sharing JumpStart directory, 25, 101shareall command, 26, 101sharing JumpStart directory, 25, 101SI_PROFILE environment variable, 59site-specific installation programs, 73size
hard diskprobe keywords, 157, 158root space, 123rule keywords, 108, 111, 157, 158
memory, 109, 158swap space
diskless client, 124maximum size, 124profile examples, 20
tip line connection display dimensions, 86, 90slices
probe keyword, 158profile examples, 38rule keyword, 109, 158
software groupsfor profiles, 125-126profile examples, 38upgrading, 126
Solaris softwaregroups, 125-126
profile examples, 38
Solaris software, groups (Continued)upgrading, 126
release or versioninstalled probe keyword, 158installed rule keyword, 109, 158osname probe keyword, 158osname rule keyword, 110, 158
standalone systemscustom JumpStart installation example, 18profile examples, 38
starting, check script, 54, 55stty command, 86, 90SUNWCall group, 125-126SUNWCprog group, 125-126SUNWCreq group, 125-126SUNWCrnet group, 125-126SUNWCuser group, 125-126SUNWCXall group, 125-126swap file systems
diskless client swap space, 124memory size and, 124profile examples, 20size determination, 124
system_type profile keyworddescription and values, 154examples, 38
Ttesting
profiles, 49, 53validating custom_probes files
testing custom_probes, 79using check, 78
validating rules filescustom JumpStart example, 103derived profiles and, 59testing rules, 54using check, 54, 55, 79
timed out RPC error, 178tip line connection display requirements, 90, 91tip line connection requirements, 86token ring card, booting error with, 178totaldisk probe keyword, 158
Index
Solaris 10 10/09 Installation Guide: Custom JumpStart and Advanced Installations • October 2009220

totaldisk rule keyword, 111, 158transceiver cable problem message, 174troubleshooting
booting from network with DHCP, 179booting from wrong server, 179general installation problems
booting from the network with DHCP, 179booting the system, 179
UUFS, 30Unknown client error message, 173upgrade
custom JumpStart installation, 81failed upgrade, 184profile keywords, 126, 137, 147
usedisk profile keyword, description and values, 155
Vvalidating
custom_probes filetesting, 79using check, 79
rules filescustom JumpStart example, 103derived profiles and, 59testing rules, 54using check, 54, 55, 79
/var/sadm/system/logs/begin.log file, 58/var/sadm/system/logs/finish.log file, 60variables
SI_PROFILE, 59SYS_MEMSIZE, 52
version of Solaris softwareinstalled probe keyword, 158installed rule keyword, 109, 158osname probe keyword, 158osname rule keyword, 110, 158
volcheck command, 30, 32
WWARNING: CHANGE DEFAULT BOOT
DEVICE, 180WARNING: clock gained xxx days message, 174wrapping lines in rules files, 34
ZZFS
keywords, description, 165limitations, 160overview and planning, 160profile examples, 161profile keywords
quick reference, 112
Index
221

222