software versioning with bitbucket and eclipse
TRANSCRIPT
p. 1
Software Versioning with Bitbucket and Eclipse
Huseyin Ergin
p. 2
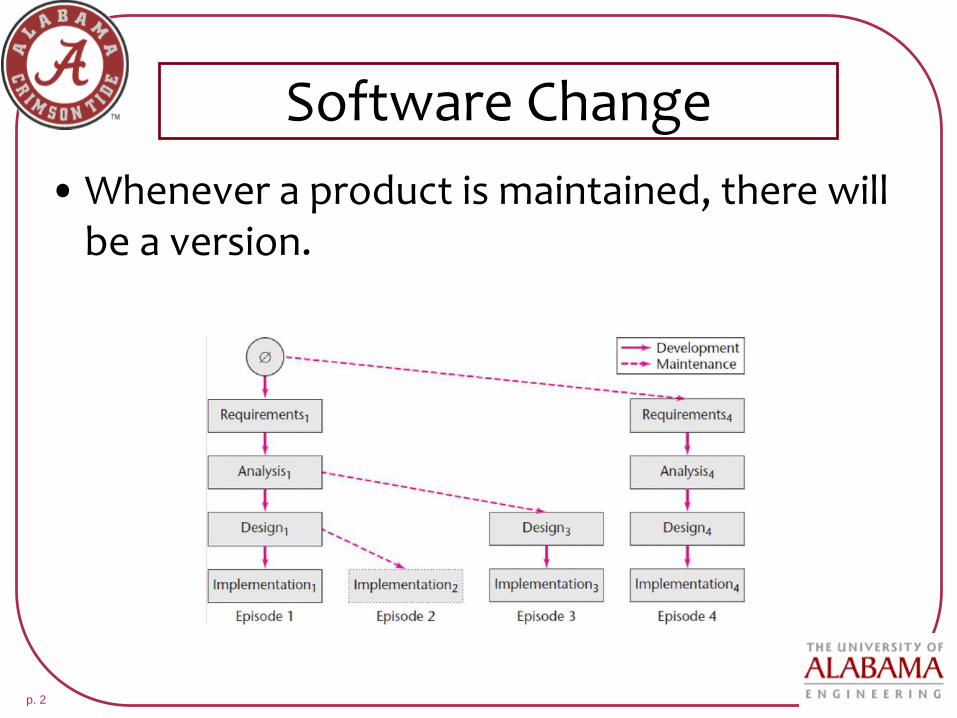
Software Change
• Whenever a product is maintained, there will be a version.
p. 3
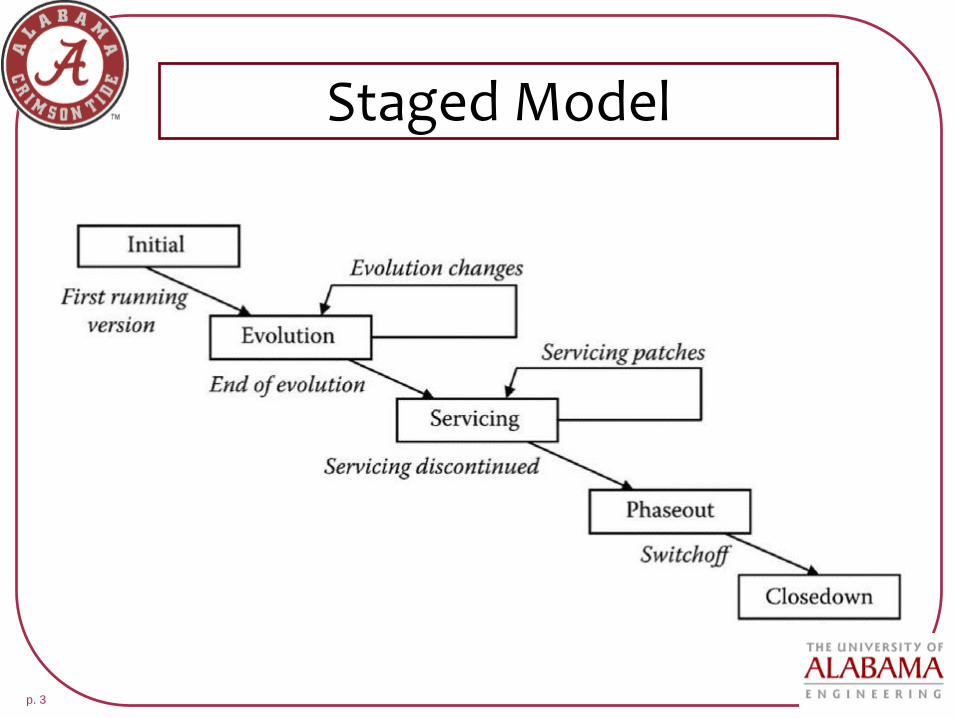
Staged Model

p. 4
Versioned Staged Model
• Used with software that has a large user base
• Evolution is the backbone of this process
– Evolution produces versions
– Versions are serviced, phased-out, closed down

p. 5
Versioned Staged Model

p. 6
Firefox Version History
p. 7
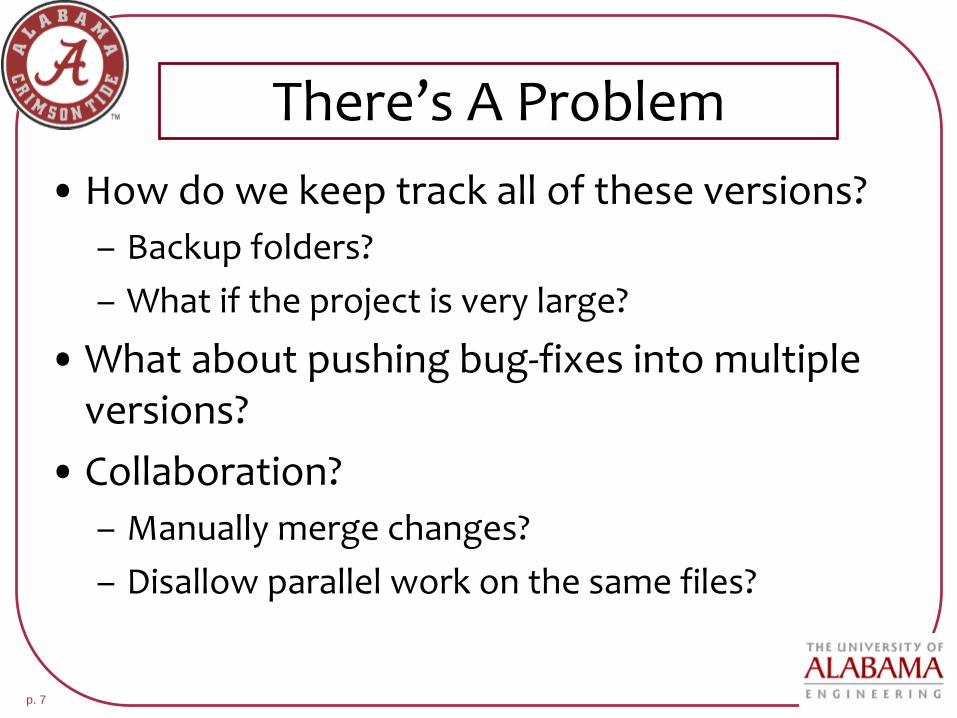
There’s A Problem
• How do we keep track all of these versions?
– Backup folders?
– What if the project is very large?
• What about pushing bug-fixes into multiple versions?
• Collaboration?
– Manually merge changes?
– Disallow parallel work on the same files?
p. 8
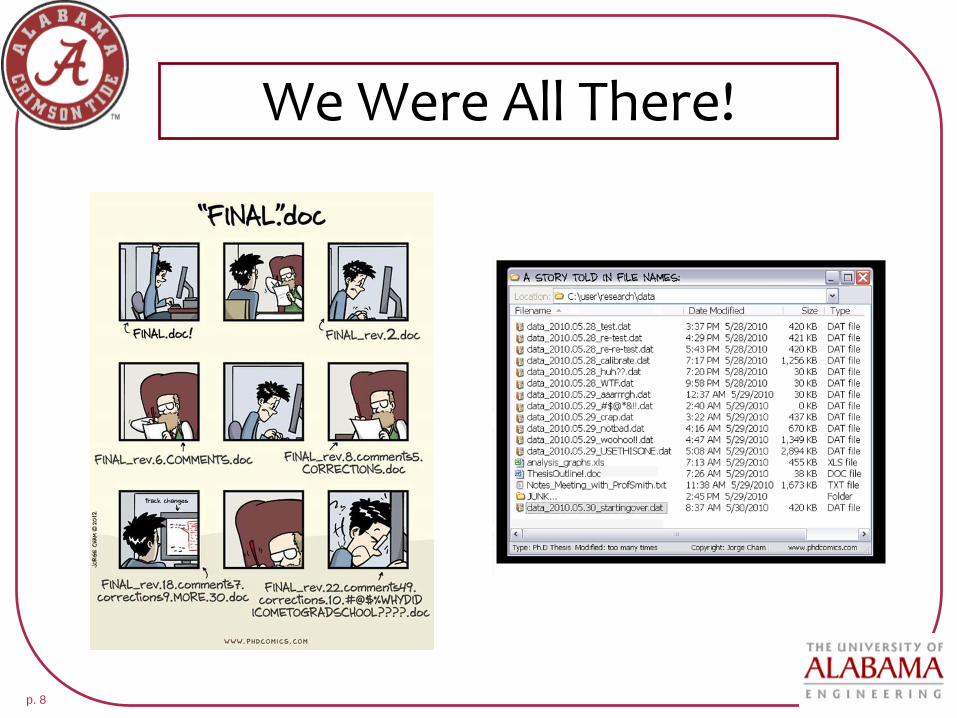
We Were All There!

p. 9
Solution: Version Control
• Project tracking– Who did what
– When were artifacts created/removed
– Provides complete evolution
• Collaboration– Easy sharing
– Guarantee of synchronization
• Protection– Data loss
– Bad/undesired code

p. 10
What Gets Versioned?
• Text
– Truly versioned
– Differences between versions can be shown and documented
– Line by line tracking
• Binary (non-text)
– Each version must be completely stored
– No line by line granularity
p. 11
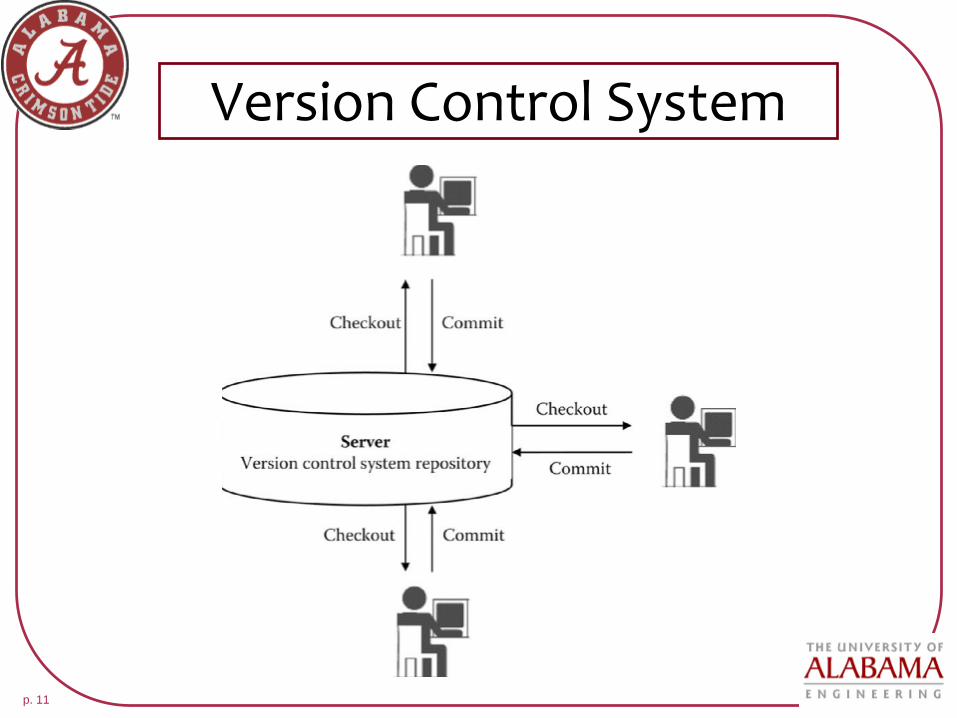
Version Control System

p. 12
Repository a.k.a “repo”
• Stores all data associated with a project
• Centralized
– Canonical copy is stored on the server
– Easy to tell if you’re up to date
• Decentralized
– No repo holds the official copy
– Quick setup time
p. 13
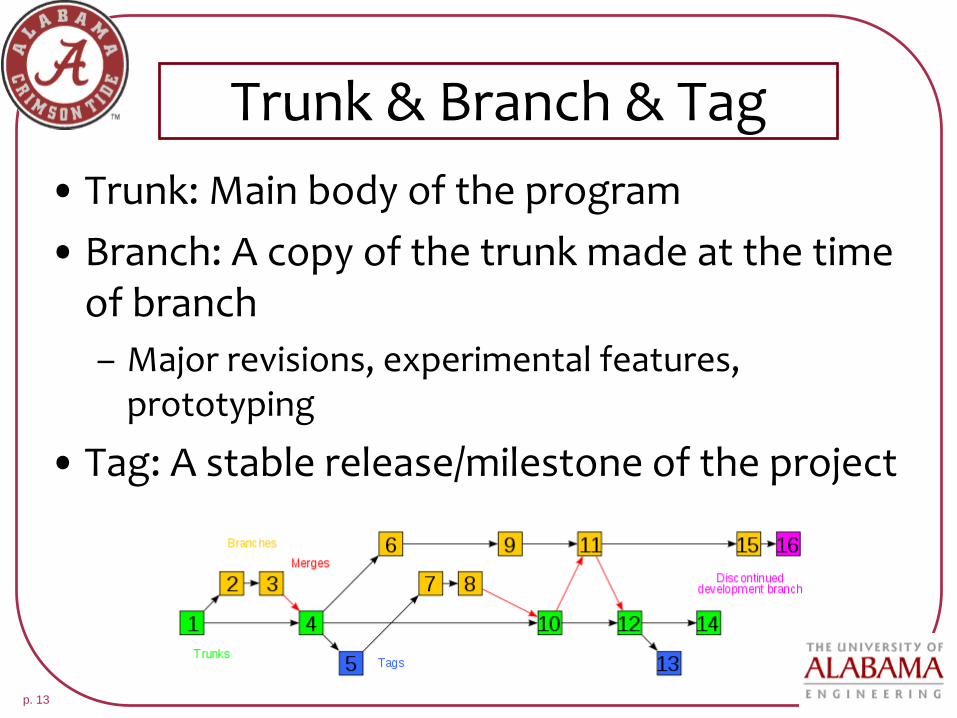
Trunk & Branch & Tag
• Trunk: Main body of the program
• Branch: A copy of the trunk made at the time of branch
– Major revisions, experimental features, prototyping
• Tag: A stable release/milestone of the project

p. 14
Diff & Merge• Diff produces a patch file that identifies what
changes the programmer made in the file.– Comparison of the new and existing file
• Merge takes original file and patch file– Merges the changes in the old file, thus creates a new
file
p. 15
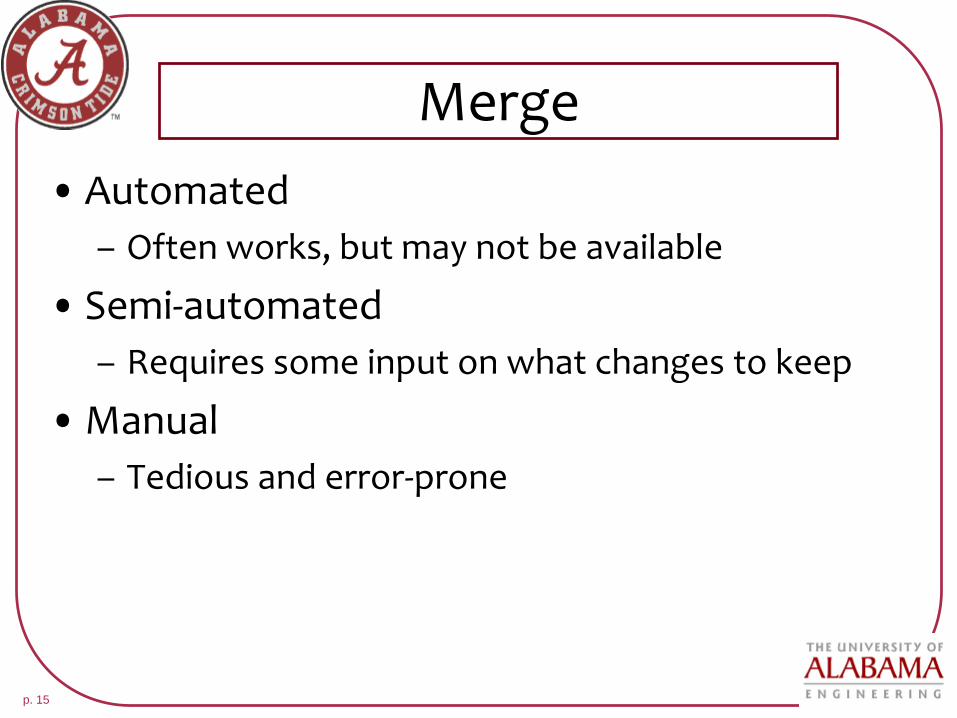
Merge
• Automated
– Often works, but may not be available
• Semi-automated
– Requires some input on what changes to keep
• Manual
– Tedious and error-prone
p. 16
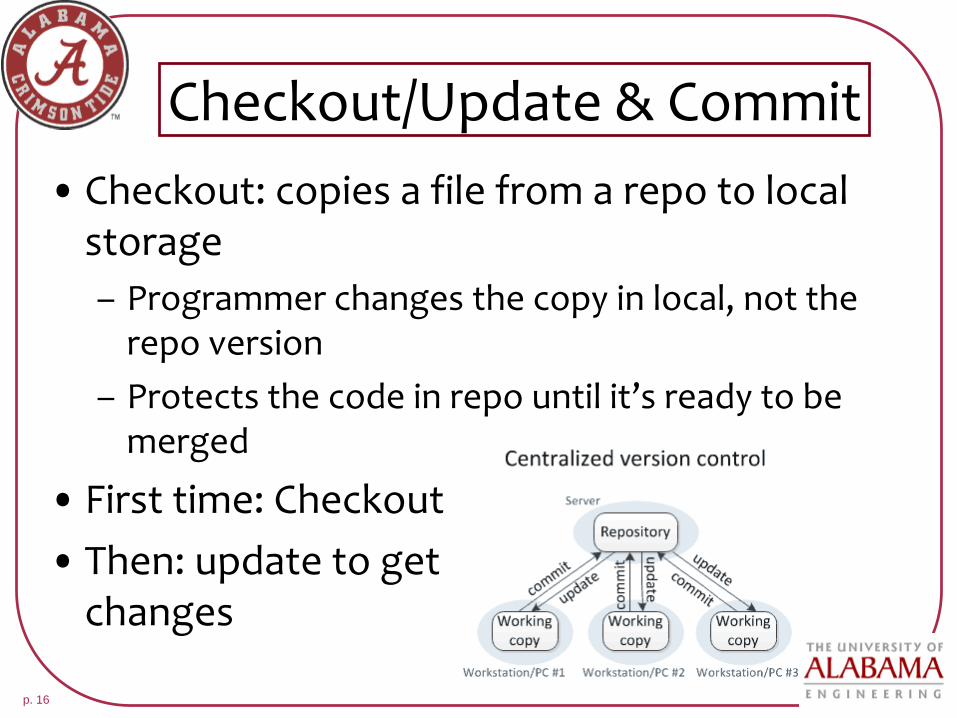
Checkout/Update & Commit
• Checkout: copies a file from a repo to local storage
– Programmer changes the copy in local, not the repo version
– Protects the code in repo until it’s ready to be merged
• First time: Checkout
• Then: update to getchanges
p. 17
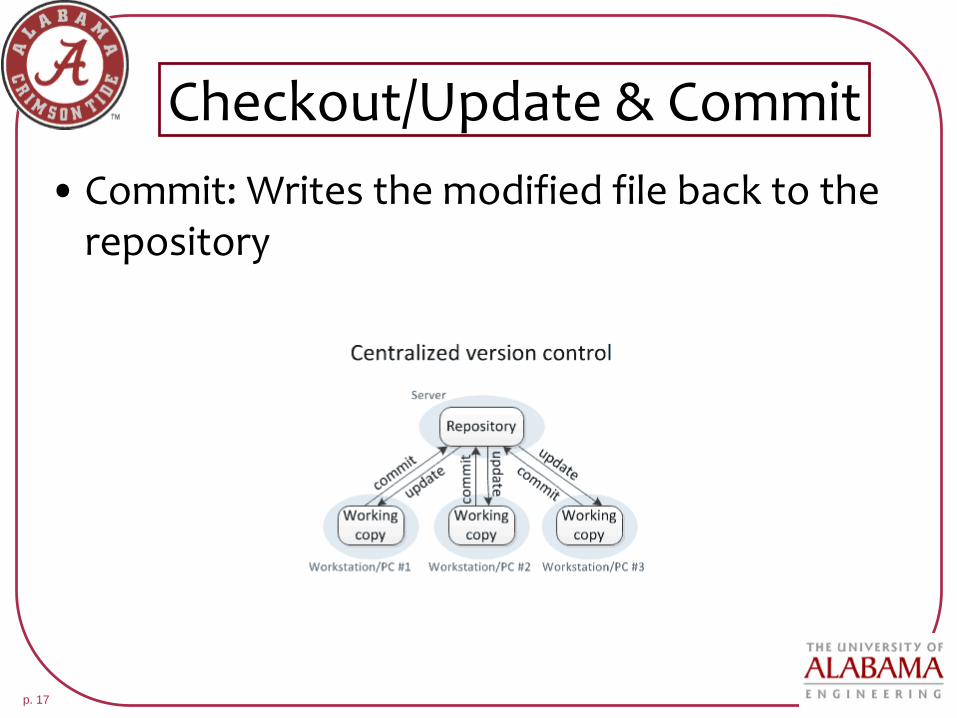
Checkout/Update & Commit
• Commit: Writes the modified file back to the repository
p. 18
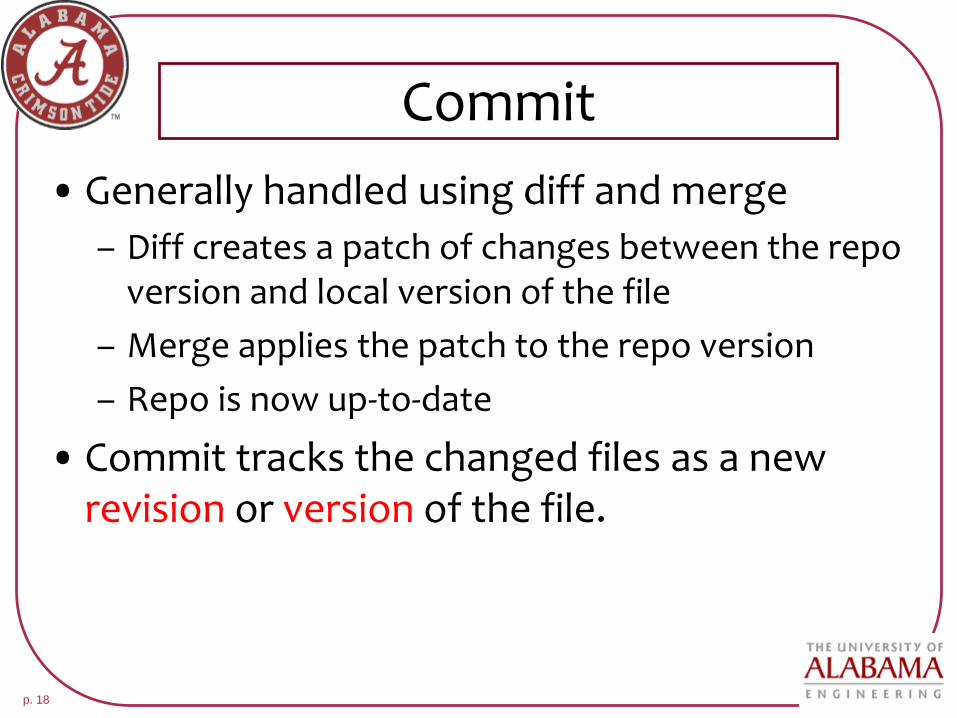
Commit
• Generally handled using diff and merge
– Diff creates a patch of changes between the repo version and local version of the file
– Merge applies the patch to the repo version
– Repo is now up-to-date
• Commit tracks the changed files as a new revision or version of the file.

p. 19
Lock
• Prevents the marked file(s) from being committed to
– Useful when:
•making critical updates
•merging may be difficult
•Exclusive access is required
p. 20
Conflict
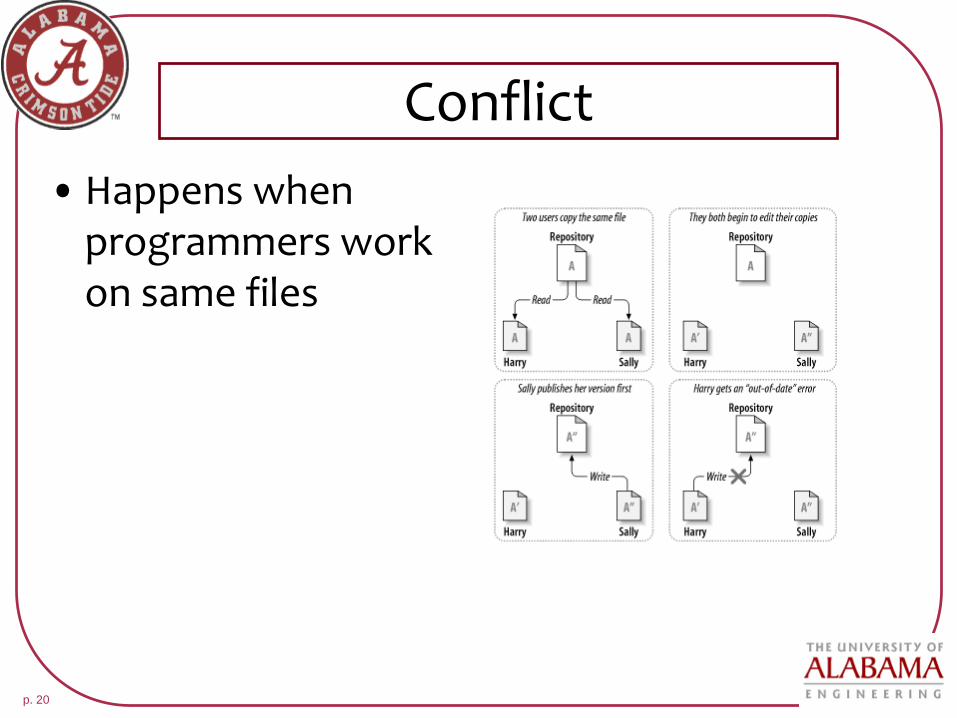
• Happens when programmers work on same files

p. 21
Resolution of Conflict
• Options:– Merge files using semi-autonomous or manual
tools
– Clobber the upcoming changes
– Lose your own change, get the new file and make your changes again
• A BETTER PRACTICE: Always try to work on separate files– Separate source codes into files
– Virtual Paradigm Projects into different files

p. 22
VCSs in the Wild
• Centralized Decentralized
– Subversion --GIT
p. 23
Subversion
• Mature VCS, released in 2000
• Native support for binaries (previously CVS didn’t support)
• Easy to use
• Have to be connected to server to commit

p. 24
GIT
• New, 2005
• Distributed
• Repo everywhere
• NOT have to be connected to server to commit
• We use GIT for this semester
p. 25
GIT HANDS-ON

p. 26
GIT Terminology• Clone
– Same as checkout but also creating a repo for your local computer (distributed, remember?)
• Fetch– Check if anything changed in remote repo
• Stage (or Add)– Approve changes to be committed
• Commit– Same meaning but only commits to local repo
• Push– Applies the local commits to remote repo
• Pull– Same as update, gets the changes from main repo to local repo
p. 27
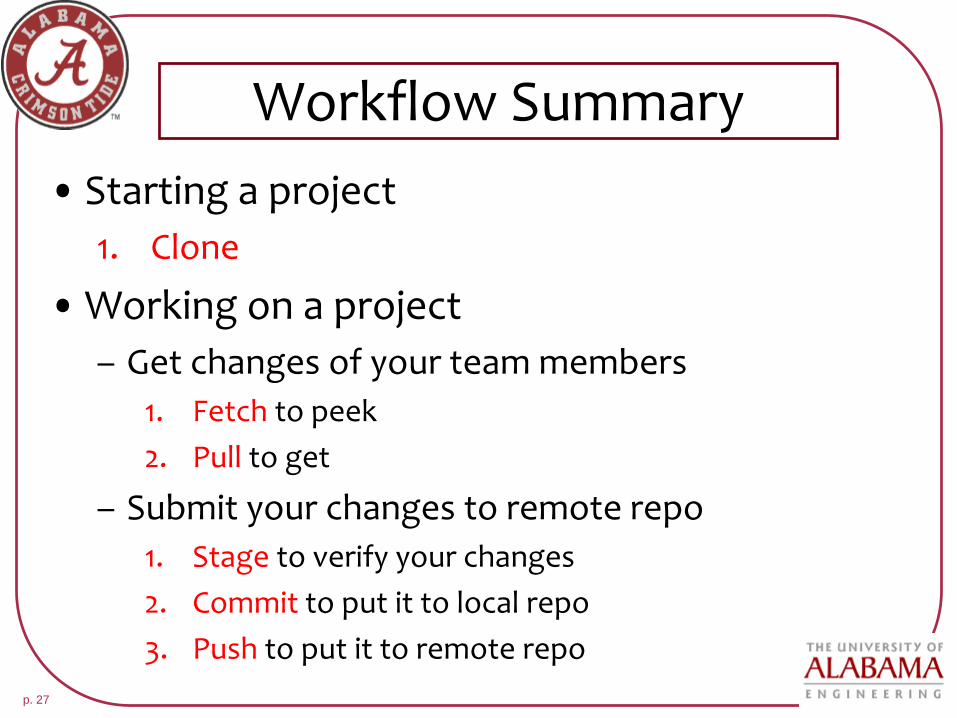
Workflow Summary
• Starting a project
1. Clone
• Working on a project
– Get changes of your team members
1. Fetch to peek
2. Pull to get
– Submit your changes to remote repo
1. Stage to verify your changes
2. Commit to put it to local repo
3. Push to put it to remote repo
p. 28
Tools
• Eclipse has already support for GIT
– http://www.eclipse.org/downloads/packages/eclipse-ide-java-developers/marsr
• Bitbucket account
p. 29
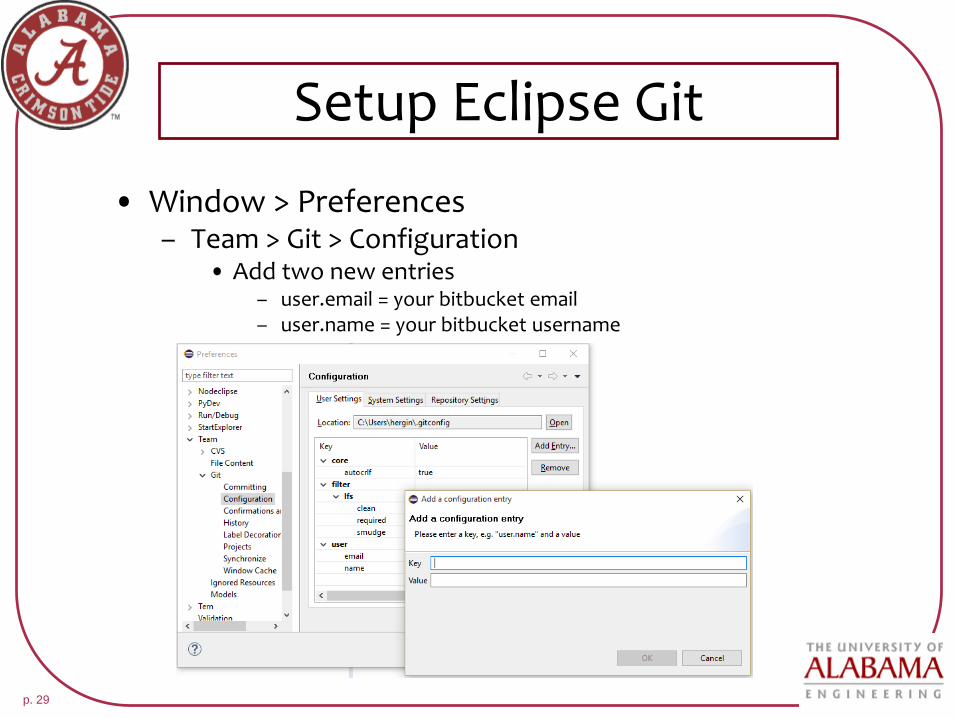
Setup Eclipse Git
• Window > Preferences– Team > Git > Configuration
• Add two new entries– user.email = your bitbucket email– user.name = your bitbucket username

p. 30
Clone
• File > Import > next

p. 31
Clone – cont’d
• Clone URI > next
p. 32
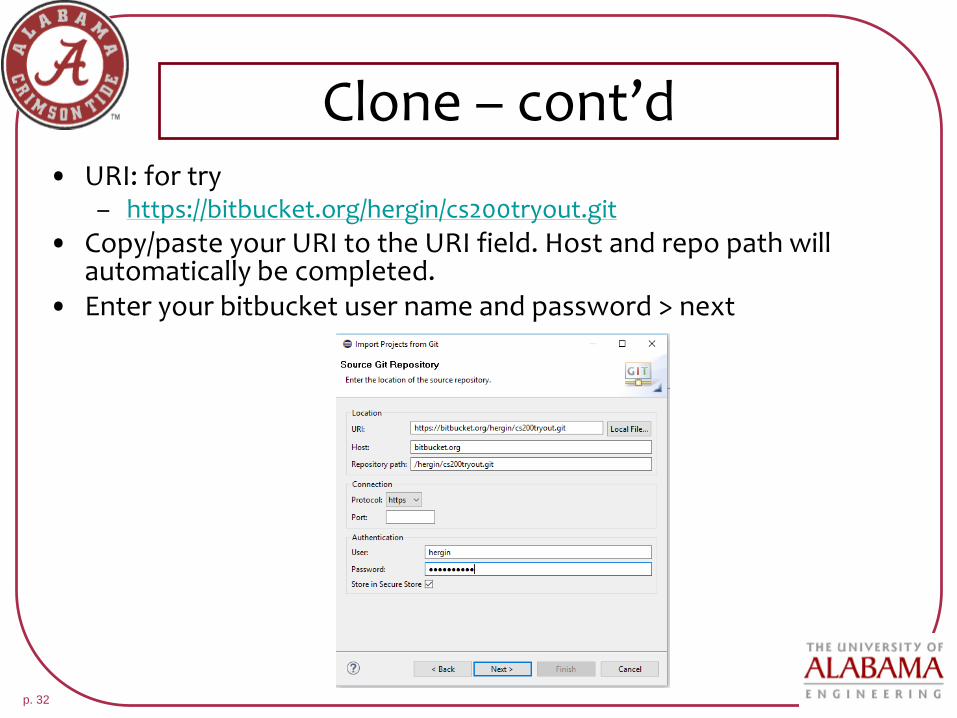
Clone – cont’d• URI: for try
– https://bitbucket.org/hergin/cs200tryout.git
• Copy/paste your URI to the URI field. Host and repo path will automatically be completed.
• Enter your bitbucket user name and password > next
p. 33
Clone – cont’d
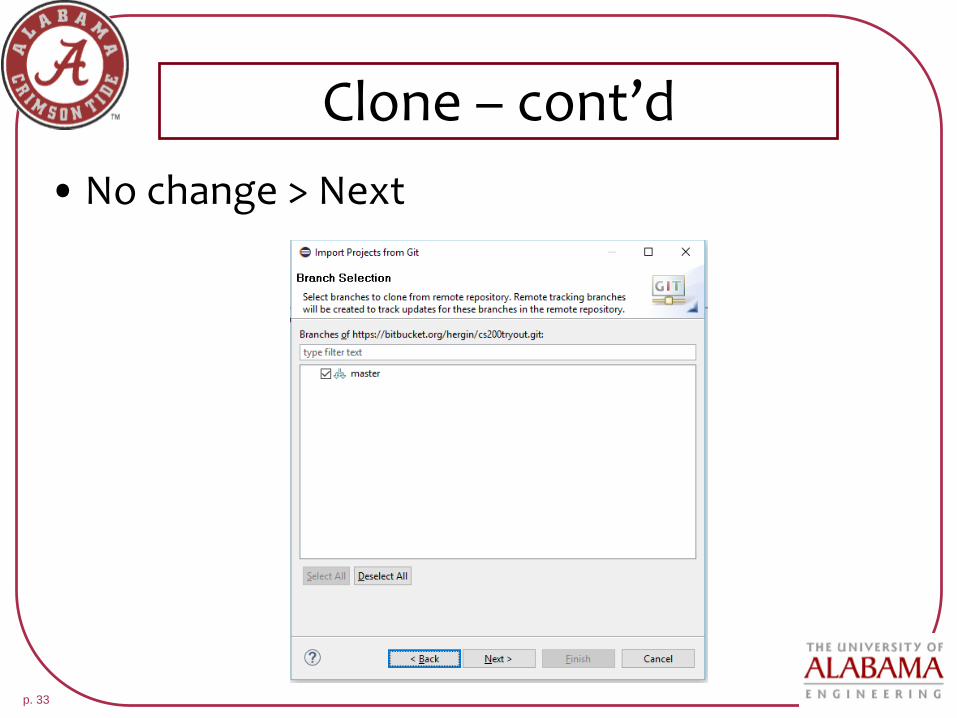
• No change > Next

p. 34
Clone – cont’d
• If you want, you can set a directory for your local repo > Next
p. 35
Clone – cont’d
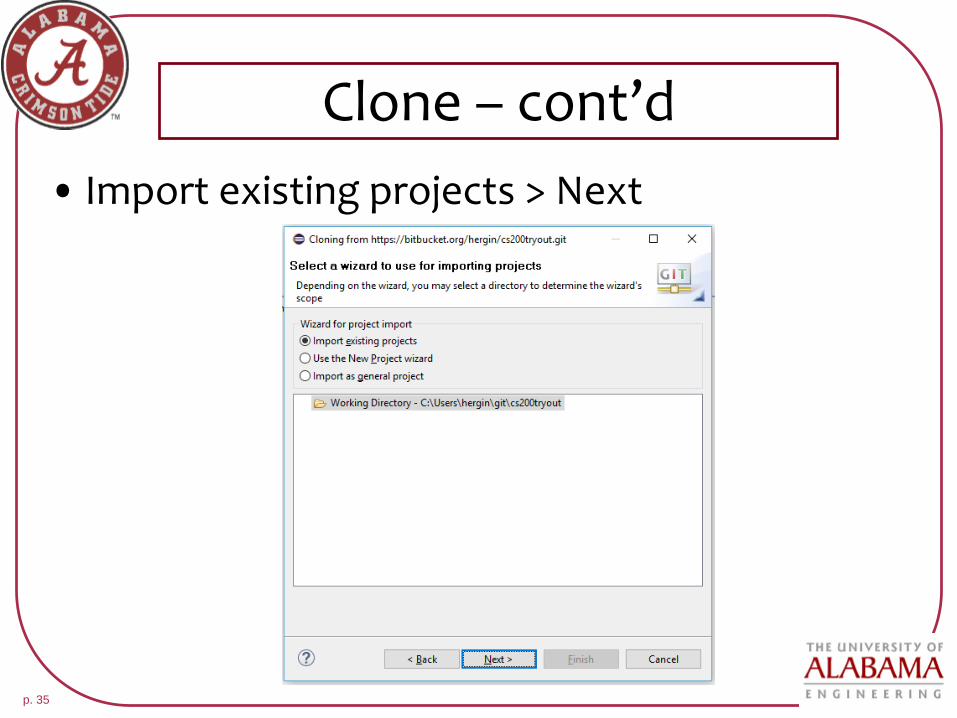
• Import existing projects > Next
p. 36
Clone – cont’d
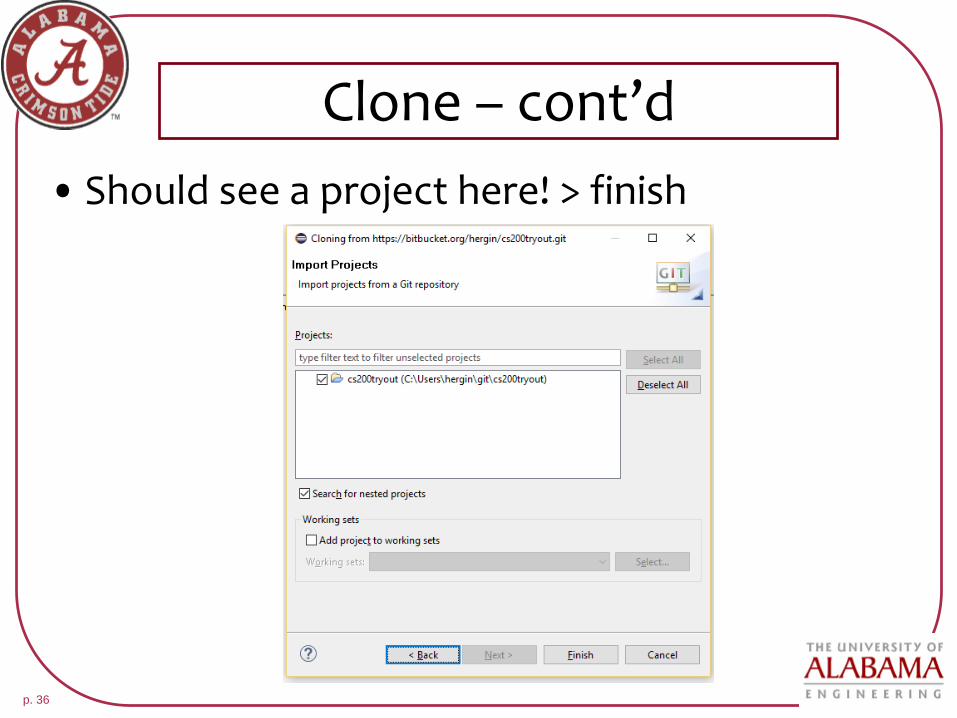
• Should see a project here! > finish
p. 37
Clone – cont’d
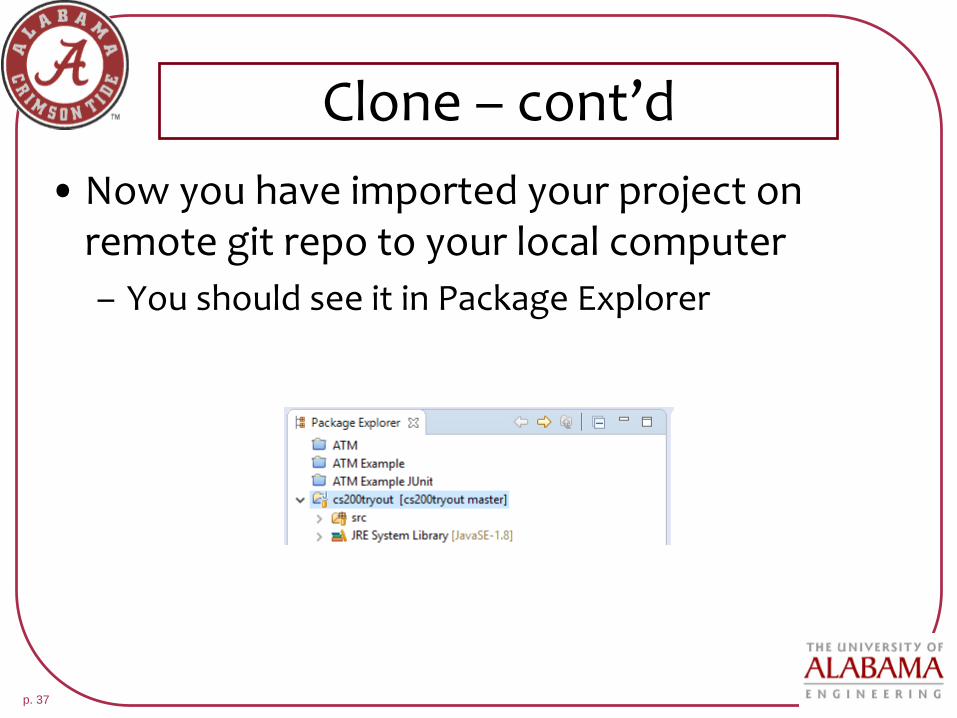
• Now you have imported your project on remote git repo to your local computer
– You should see it in Package Explorer

p. 38
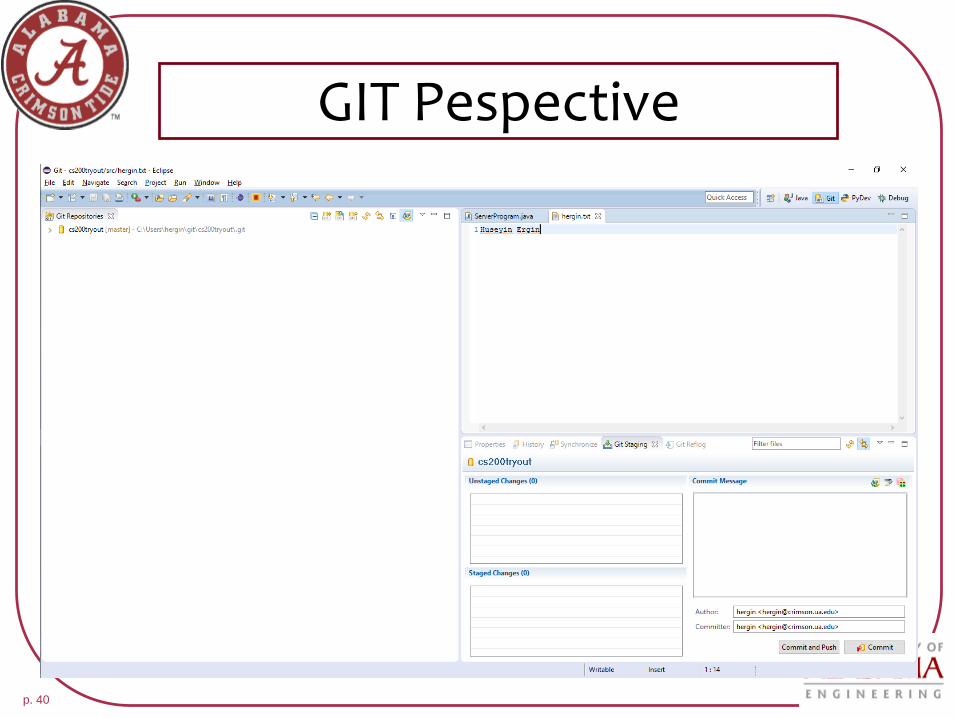
GIT Perspective
• Many git commands can easily be handled using git perspective in eclipse
• Windows > Open Perspective > Other
– Git > ok

p. 39
Change Between Perspectives
• Easily change between Java development perspective and Git perspective on top-right of Eclipse
• Or the same menu as in previous slide
p. 40
GIT Pespective
p. 41
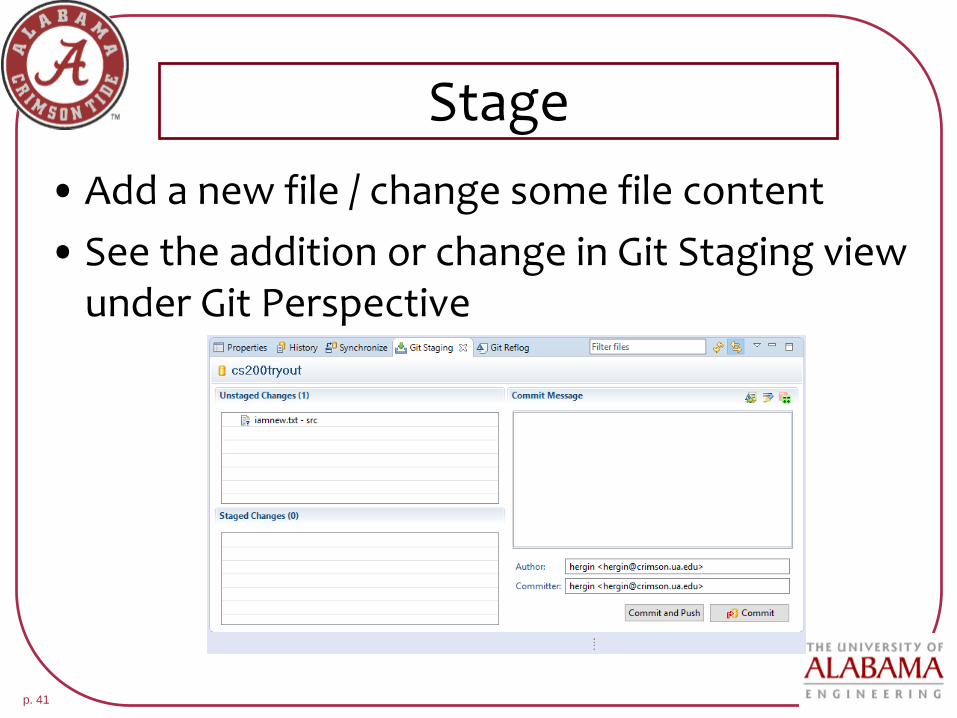
Stage
• Add a new file / change some file content
• See the addition or change in Git Staging view under Git Perspective
p. 42
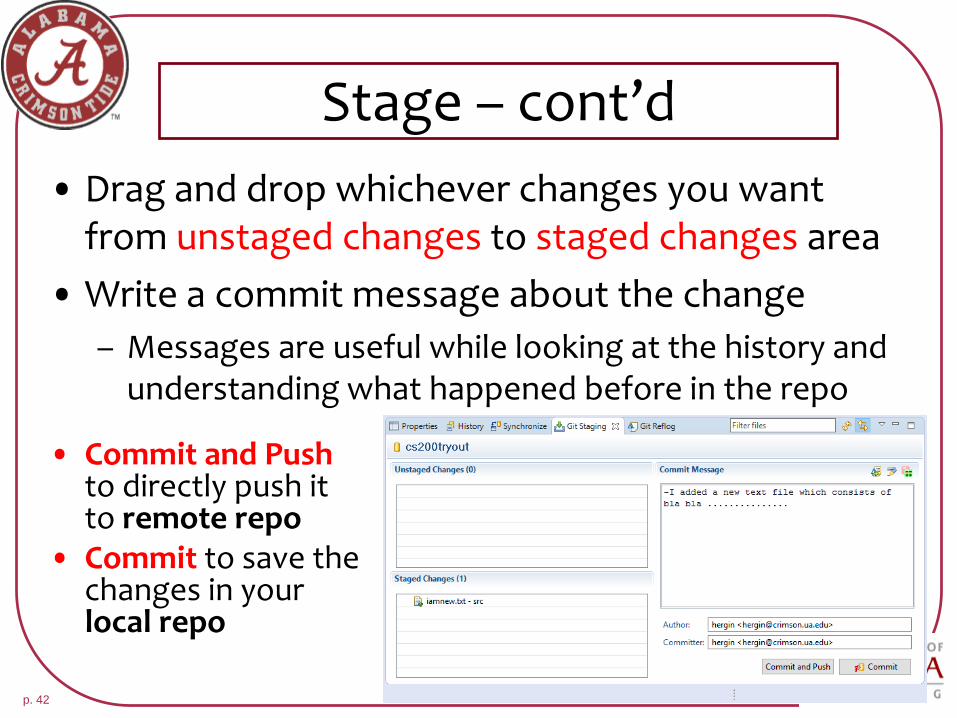
Stage – cont’d
• Drag and drop whichever changes you want from unstaged changes to staged changes area
• Write a commit message about the change
– Messages are useful while looking at the history and understanding what happened before in the repo
• Commit and Push to directly push it to remote repo
• Commit to save the changes in your local repo
p. 43
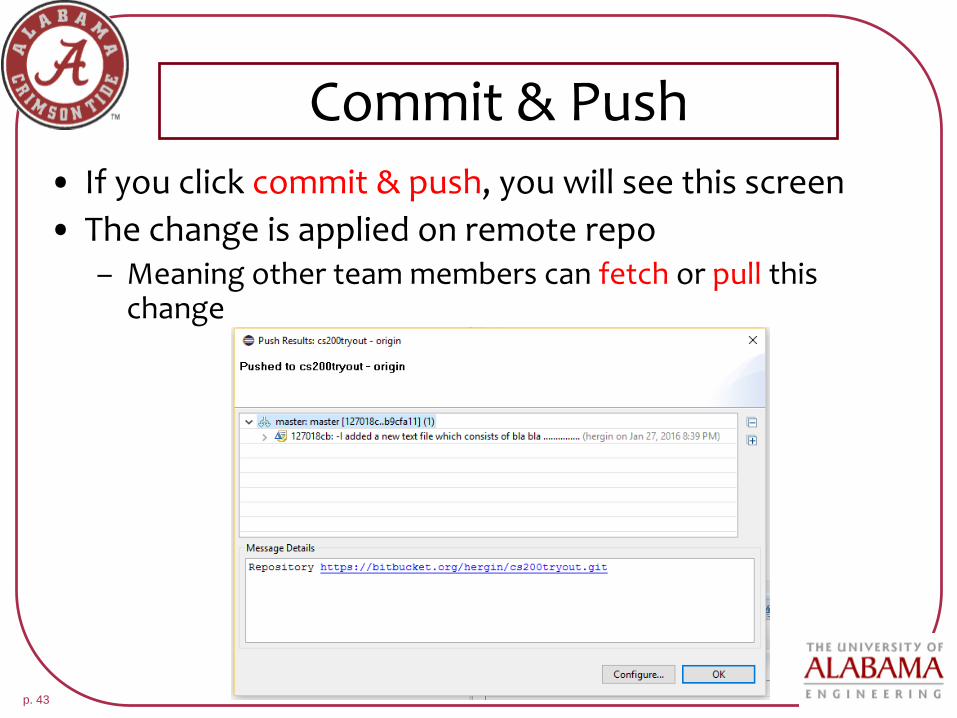
Commit & Push• If you click commit & push, you will see this screen
• The change is applied on remote repo– Meaning other team members can fetch or pull this
change

p. 44
Commit
• If you clicked just commit
– You will not see a confirmation popup
– But you will see an up arrow just at the end of the project name
•Meaning you have “commited” but “not pushed” changes
p. 45
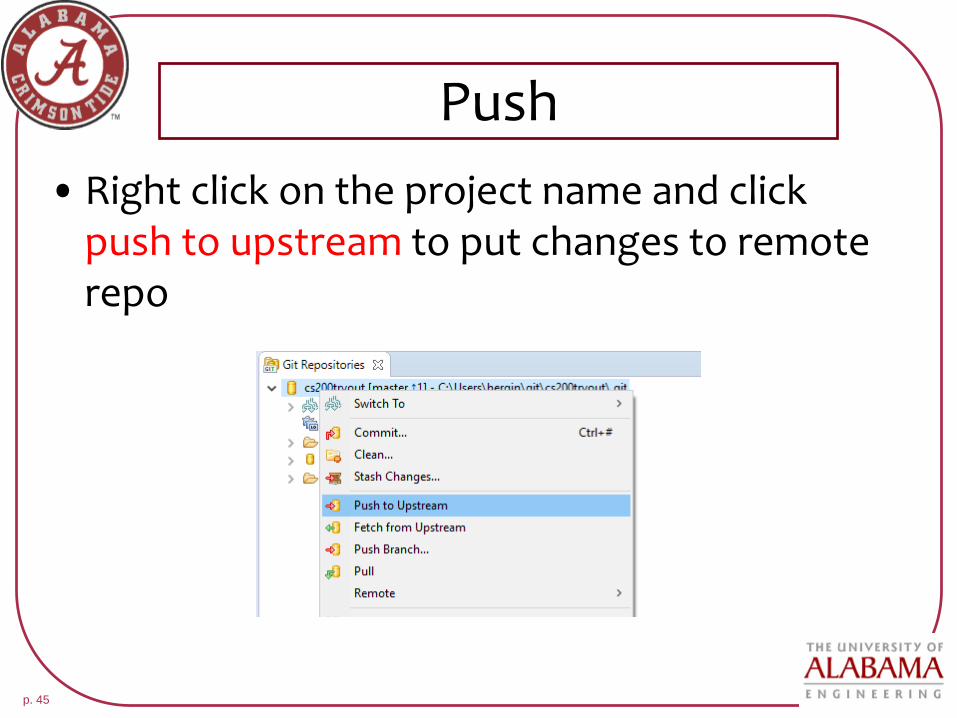
Push
• Right click on the project name and clickpush to upstream to put changes to remote repo

p. 46
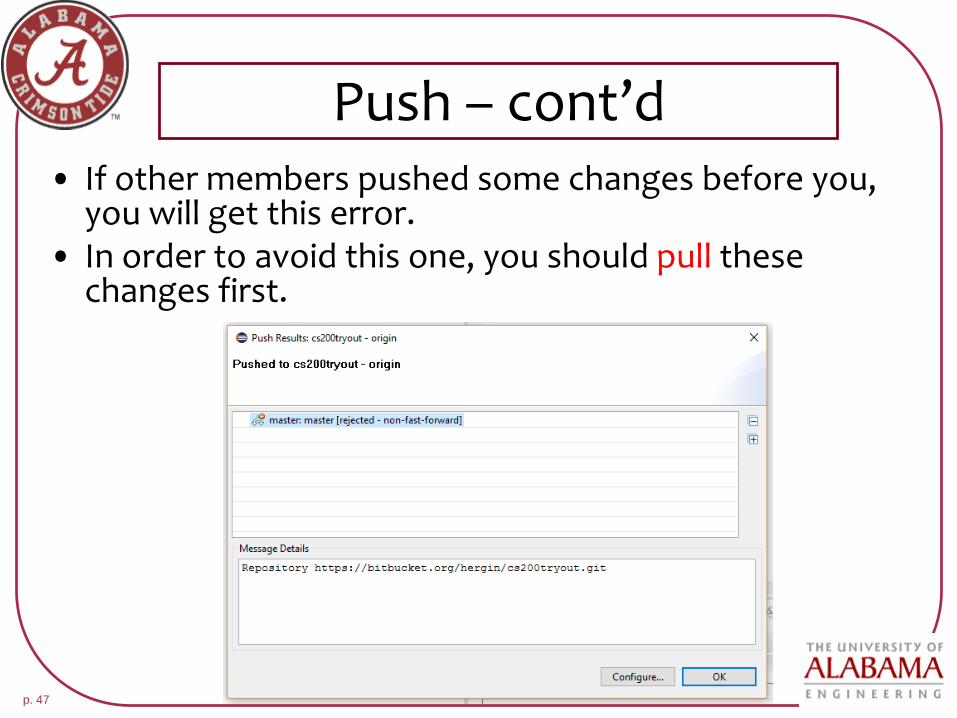
Push – cont’d
• If push is successful, you will see this popup
p. 47
Push – cont’d• If other members pushed some changes before you,
you will get this error.• In order to avoid this one, you should pull these
changes first.

p. 48
Fetch
• Right click on project name > Fetch from Upstream
– To see other’s changes (Peeking only)

p. 49
Fetch – cont’d
• If anything is added, you will see this popup
– And another number with down arrow in project name

p. 50
Pull
• In order to get the changes you just fetched, right click on project name and click Pull

p. 51
Pull – cont’d
• You should see this confirmation popup
p. 52
Conflicts
• You will always end up with conflicts!
• If you don’t work on the same file, GIT handles the conflicts for you while you pullthe changes
p. 53
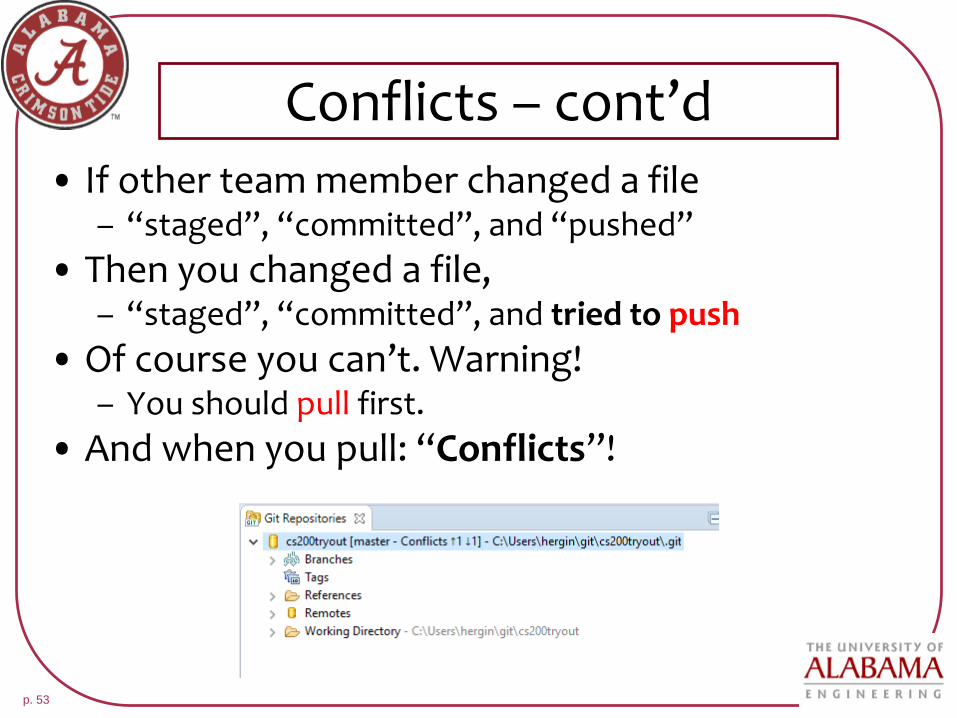
Conflicts – cont’d• If other team member changed a file
– “staged”, “committed”, and “pushed”
• Then you changed a file,– “staged”, “committed”, and tried to push
• Of course you can’t. Warning!– You should pull first.
• And when you pull: “Conflicts”!
p. 54
Conflicts – cont’d
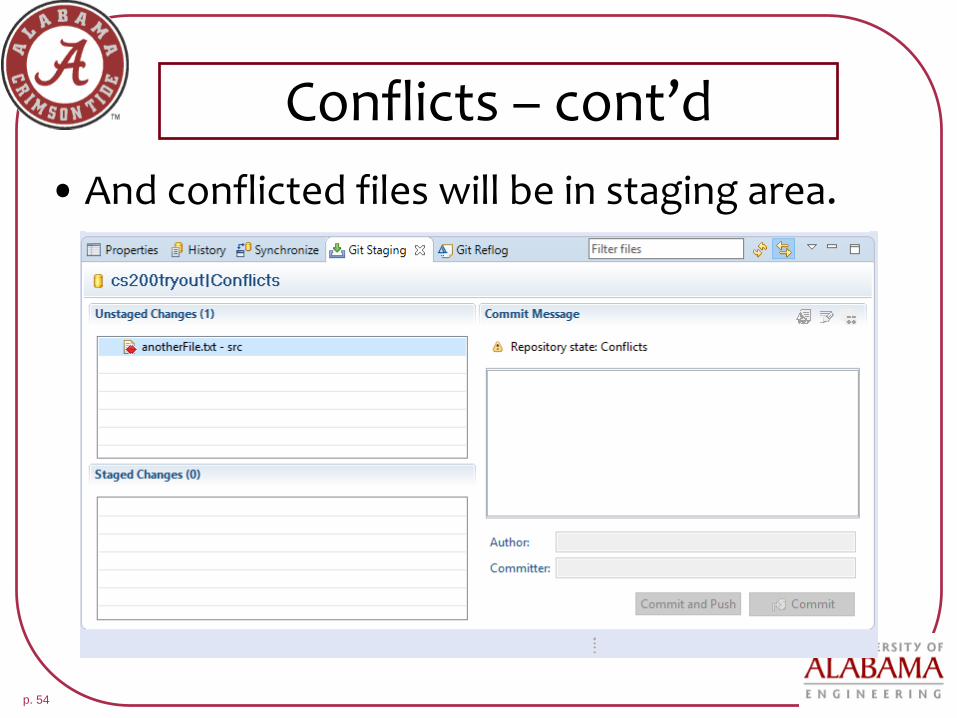
• And conflicted files will be in staging area.
p. 55
Conflicts – cont’d
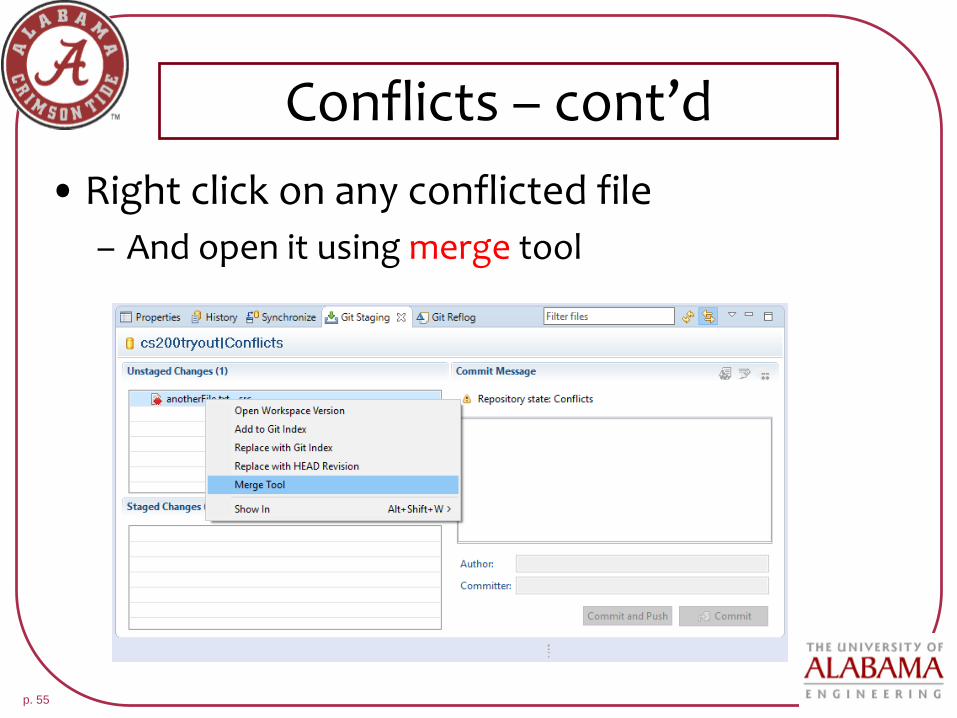
• Right click on any conflicted file
– And open it using merge tool
p. 56
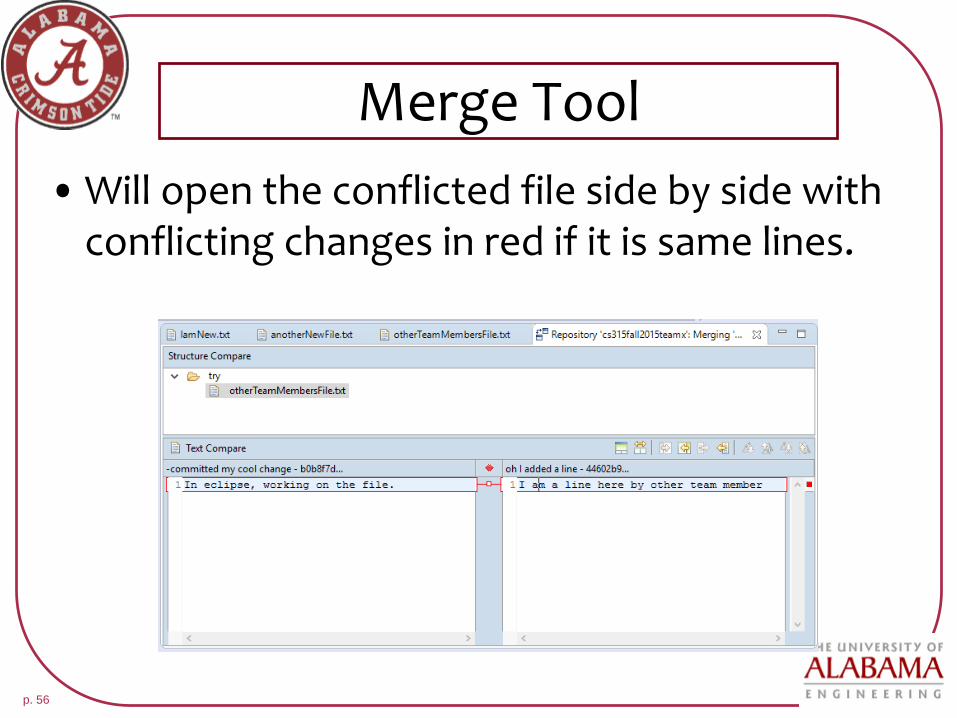
Merge Tool
• Will open the conflicted file side by side with conflicting changes in red if it is same lines.

p. 57
Merge Tool
• Or it will just show the differences in the files

p. 58
Merge Tool – cont’d
• You can get the remote change to your local copy.
p. 59
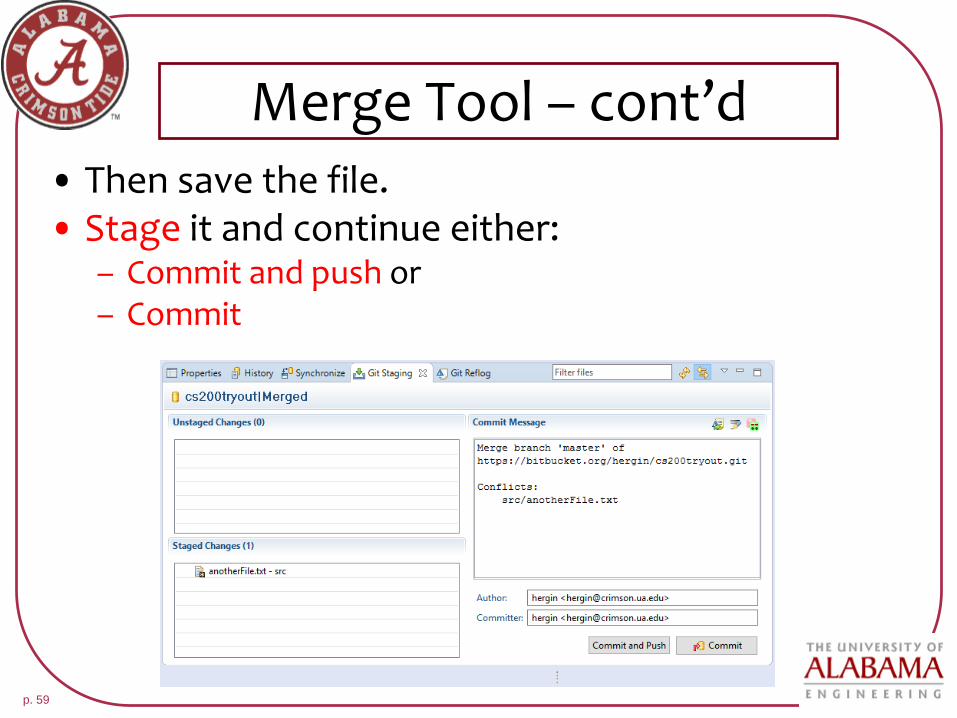
Merge Tool – cont’d• Then save the file.• Stage it and continue either:
– Commit and push or– Commit

p. 60
Conflicts – cont’d
• If you solve all conflicts using merge tool and stage them.
– Your project name will reflect this as “Merged”:
– Now you can push.
p. 61
Conflicts – Final Remarks• Best strategy:
– Try to avoid conflicts instead of solving them later because merging is tedious and error-prone task.
– Every now and then, before working on a project, pull first and keep synchronized with the remote repo.
– Push frequently!
• The best way is to work on separate files.• Keep in mind: conflict management is easier in
text files.– Binary files are not possible to merge, so you either
choose to keep the remote copy or your copy.
p. 62
Conclusion
• All these features are available via command line.
• There are other tools, but we will stick with eclipse’s own git manager.
• All your commits and source codes are available online under your team’s repo.