smart cid - hewlett packard enterprise converged system 900 for sap hana suse linux enterprise...
TRANSCRIPT

Smart CIDHP ConvergedSystems
1
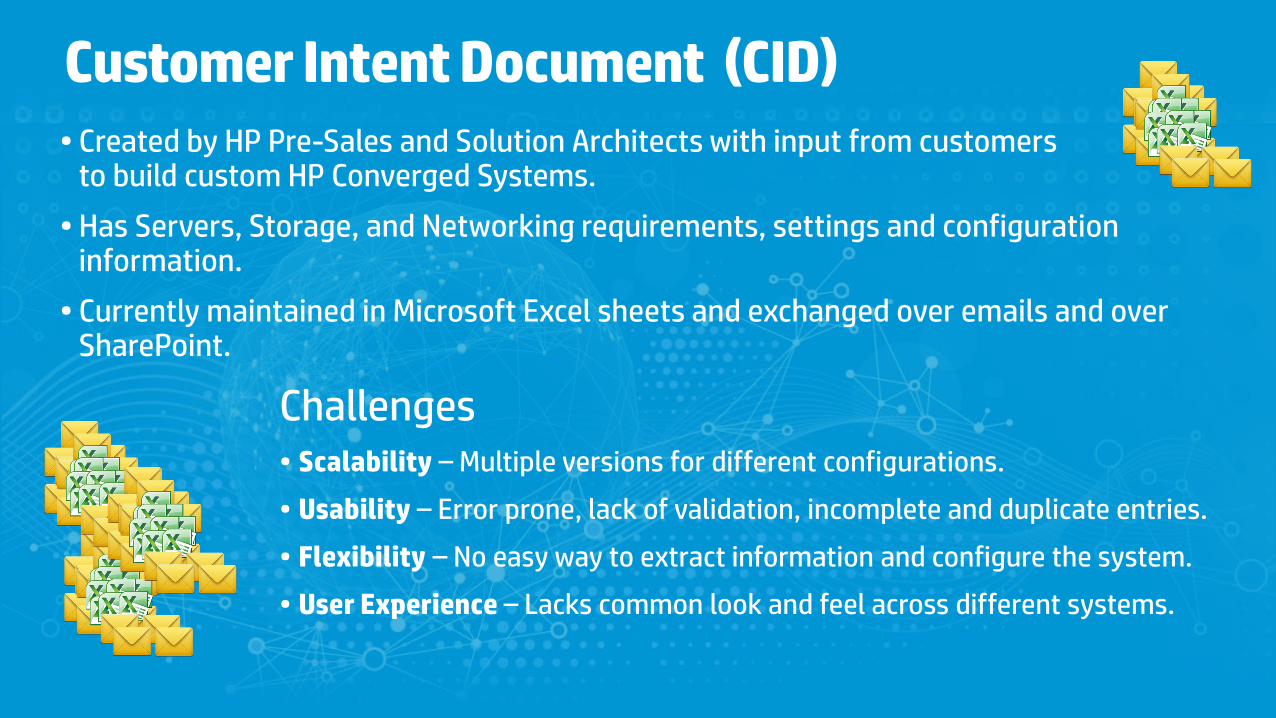
Customer Intent Document (CID)• Created by HP Pre-Sales and Solution Architects with input from customers
to build custom HP Converged Systems.
• Has Servers, Storage, and Networking requirements, settings and configuration information.
• Currently maintained in Microsoft Excel sheets and exchanged over emails and over SharePoint.
Challenges• Scalability – Multiple versions for different configurations.
• Usability – Error prone, lack of validation, incomplete and duplicate entries.
• Flexibility – No easy way to extract information and configure the system.
• User Experience – Lacks common look and feel across different systems.
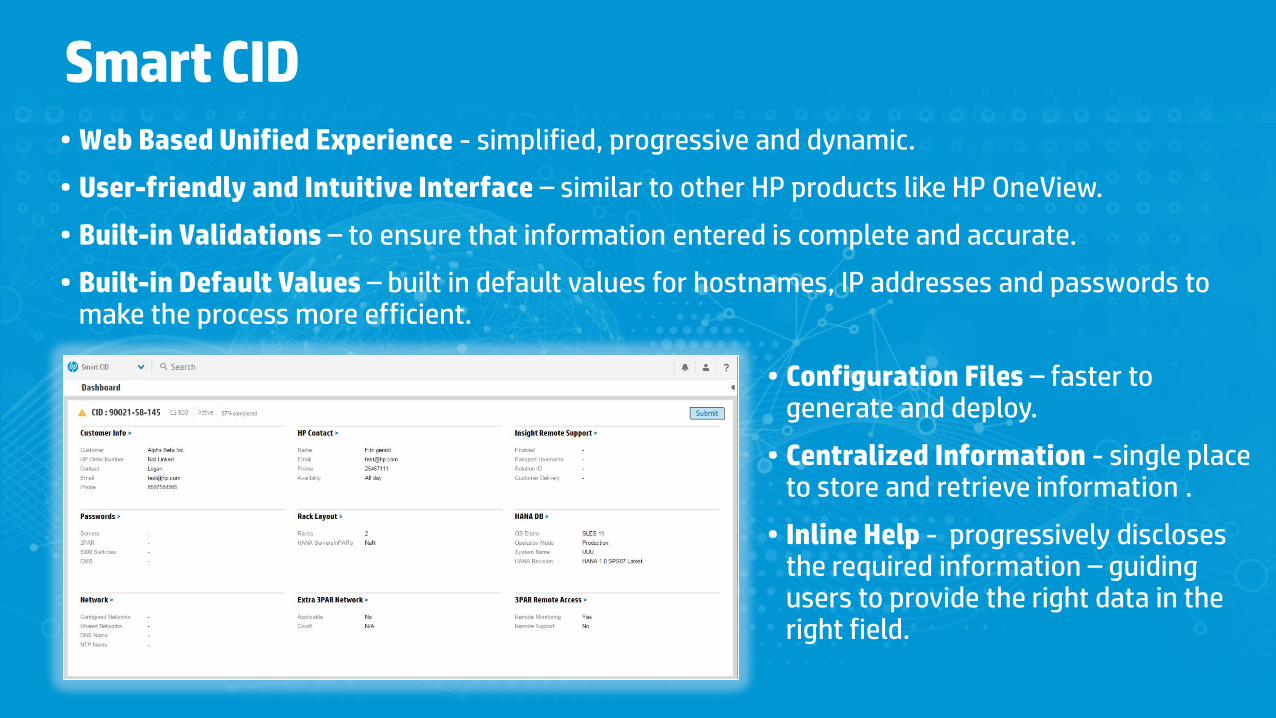
Smart CID• Web Based Unified Experience - simplified, progressive and dynamic.
• User-friendly and Intuitive Interface – similar to other HP products like HP OneView.
• Built-in Validations – to ensure that information entered is complete and accurate.
• Built-in Default Values – built in default values for hostnames, IP addresses and passwords to make the process more efficient.
• Configuration Files – faster to generate and deploy.
• Centralized Information - single place to store and retrieve information .
• Inline Help - progressively discloses the required information – guiding users to provide the right data in the right field.
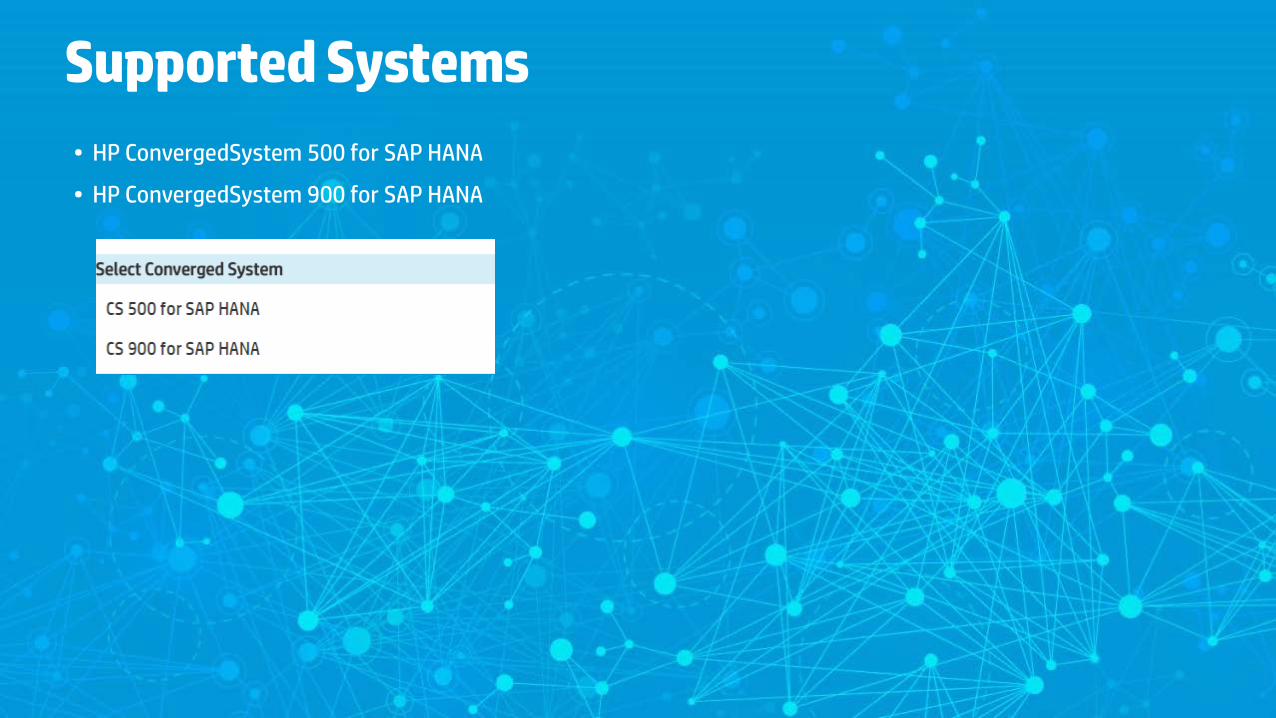
Supported Systems• HP ConvergedSystem 500 for SAP HANA
• HP ConvergedSystem 900 for SAP HANA
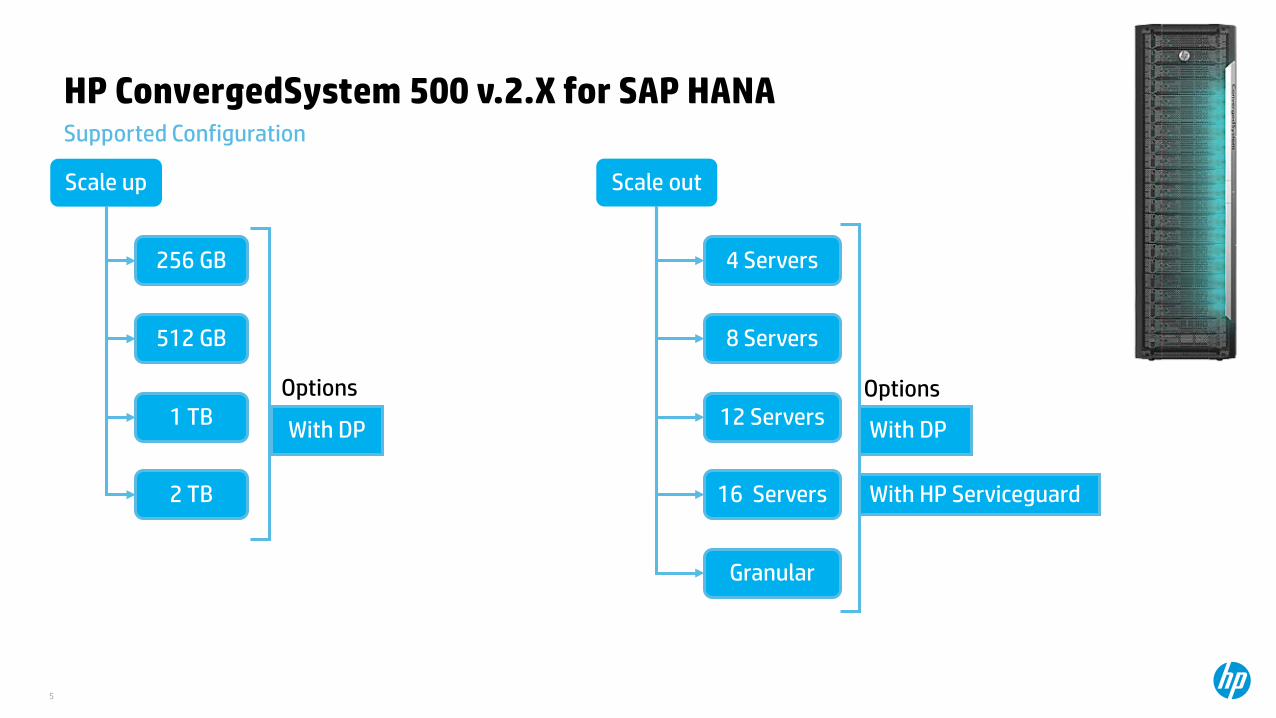
HP ConvergedSystem 500 v.2.X for SAP HANA
5
Scale up
256 GB
512 GB
1 TB
2 TB
With DP
Scale out
4 Servers
8 Servers
12 Servers
16 Servers
With DP
Options Options
With HP Serviceguard
Supported Configuration
Granular
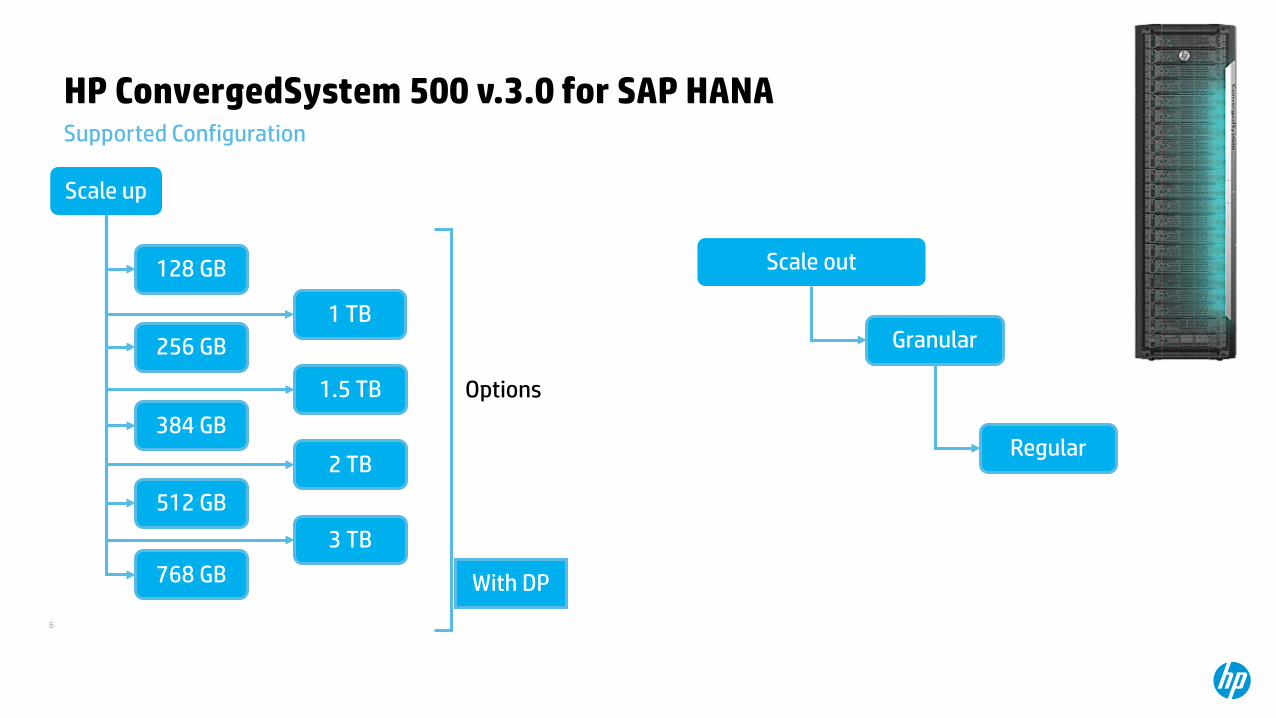
HP ConvergedSystem 500 v.3.0 for SAP HANA
6
Scale up
128 GB
256 GB
384 GB
512 GB
With DP
Options
Scale out
Granular
Supported Configuration
Regular
768 GB
1.5 TB
2 TB
3 TB
1 TB
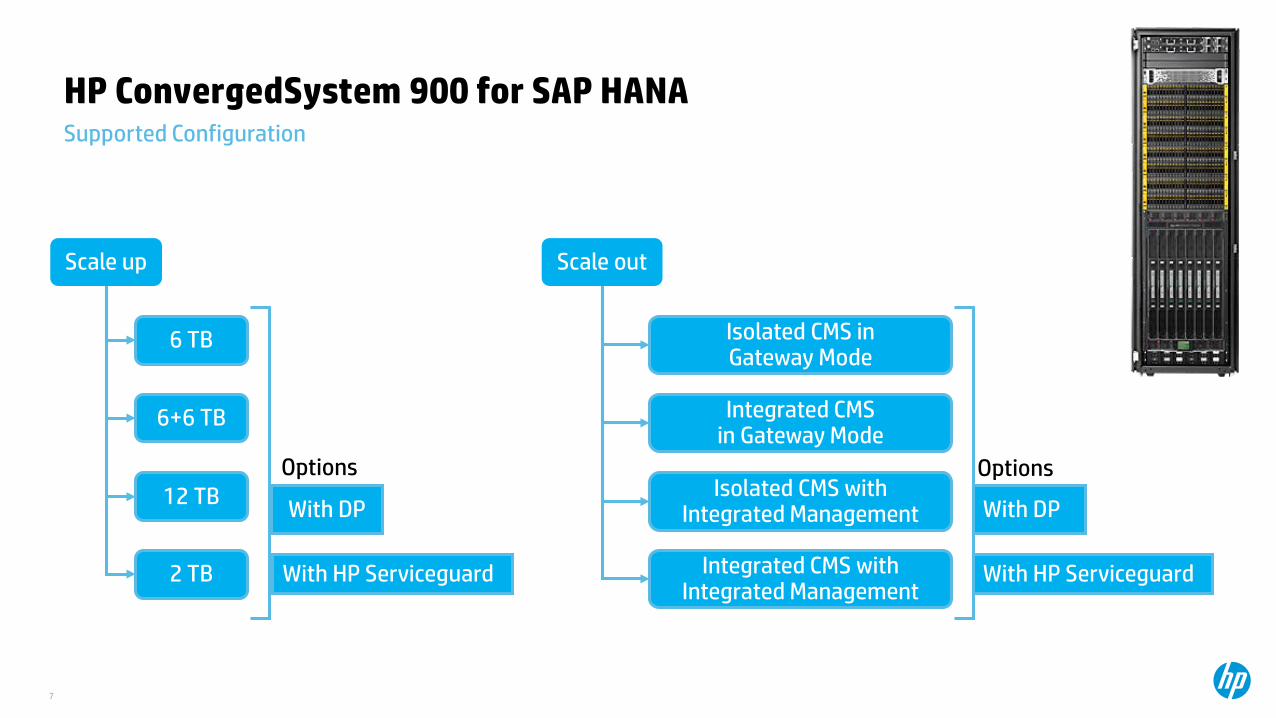
HP ConvergedSystem 900 for SAP HANA
7
Scale up
6 TB
6+6 TB
12 TB
2 TB
With DP
Scale out
Isolated CMS in Gateway Mode
Integrated CMS in Gateway Mode
Isolated CMS with Integrated Management
Integrated CMS with Integrated Management
With DP
Options Options
With HP Serviceguard
Supported Configuration
With HP Serviceguard
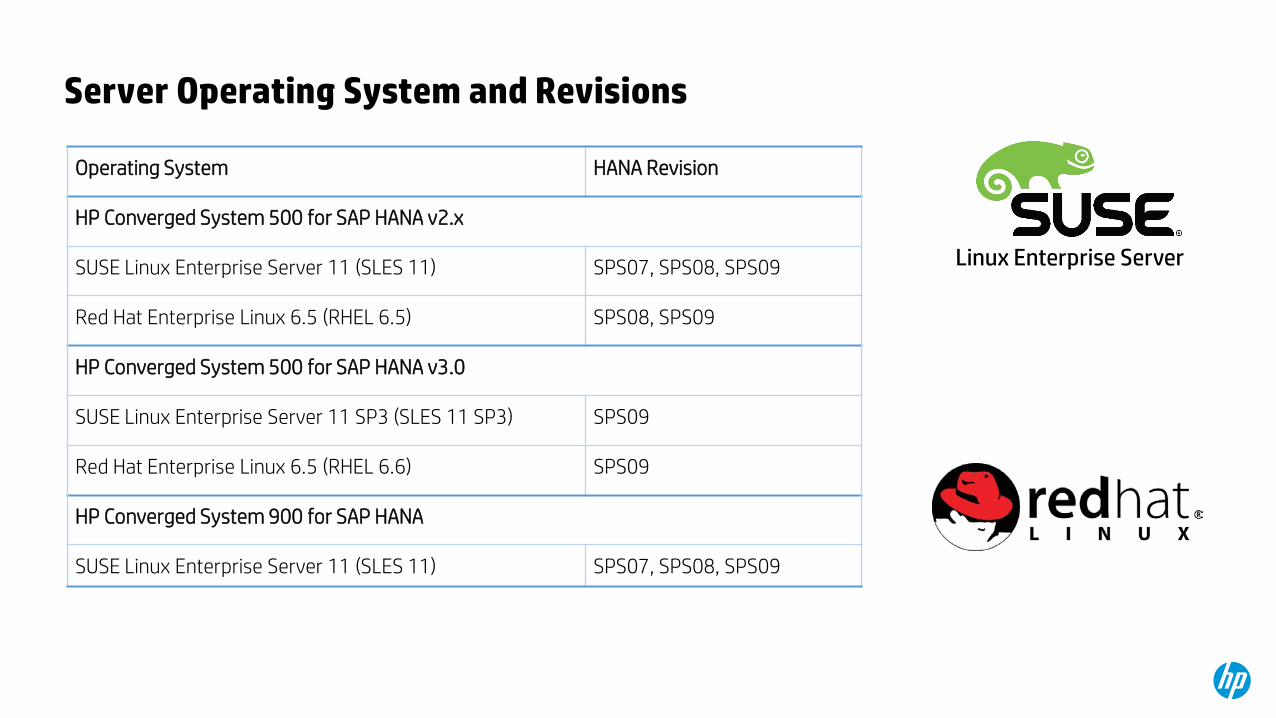
Server Operating System and Revisions
Linux Enterprise Server
Operating System HANA Revision
HP Converged System 500 for SAP HANA v2.x
SUSE Linux Enterprise Server 11 (SLES 11) SPS07, SPS08, SPS09
Red Hat Enterprise Linux 6.5 (RHEL 6.5) SPS08, SPS09
HP Converged System 500 for SAP HANA v3.0
SUSE Linux Enterprise Server 11 SP3 (SLES 11 SP3) SPS09
Red Hat Enterprise Linux 6.5 (RHEL 6.6) SPS09
HP Converged System 900 for SAP HANA
SUSE Linux Enterprise Server 11 (SLES 11) SPS07, SPS08, SPS09
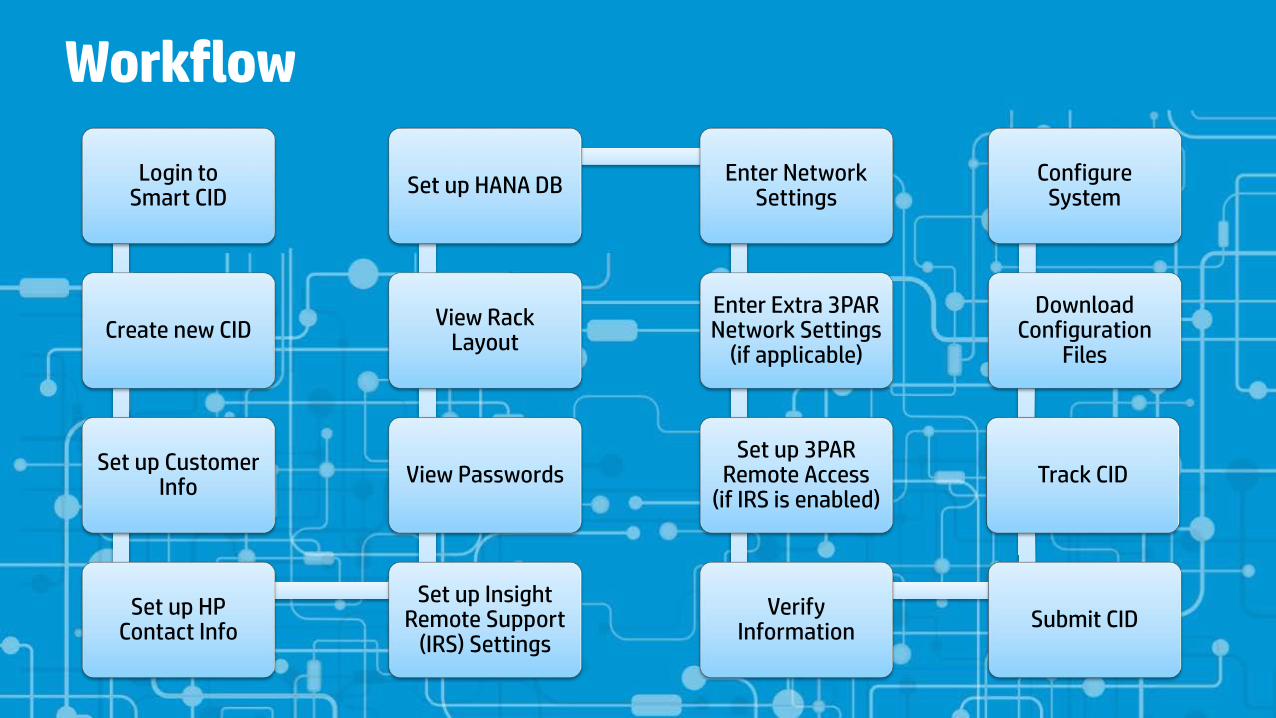
Workflow
Login to Smart CID
Create new CID
Set up Customer Info
Set up HP Contact Info
Set up Insight Remote Support
(IRS) Settings
View Passwords
View Rack Layout
Set up HANA DB Enter Network Settings
Enter Extra 3PAR Network Settings
(if applicable)
Set up 3PAR Remote Access
(if IRS is enabled)
Verify Information Submit CID
Track CID
Download Configuration
Files
Configure System
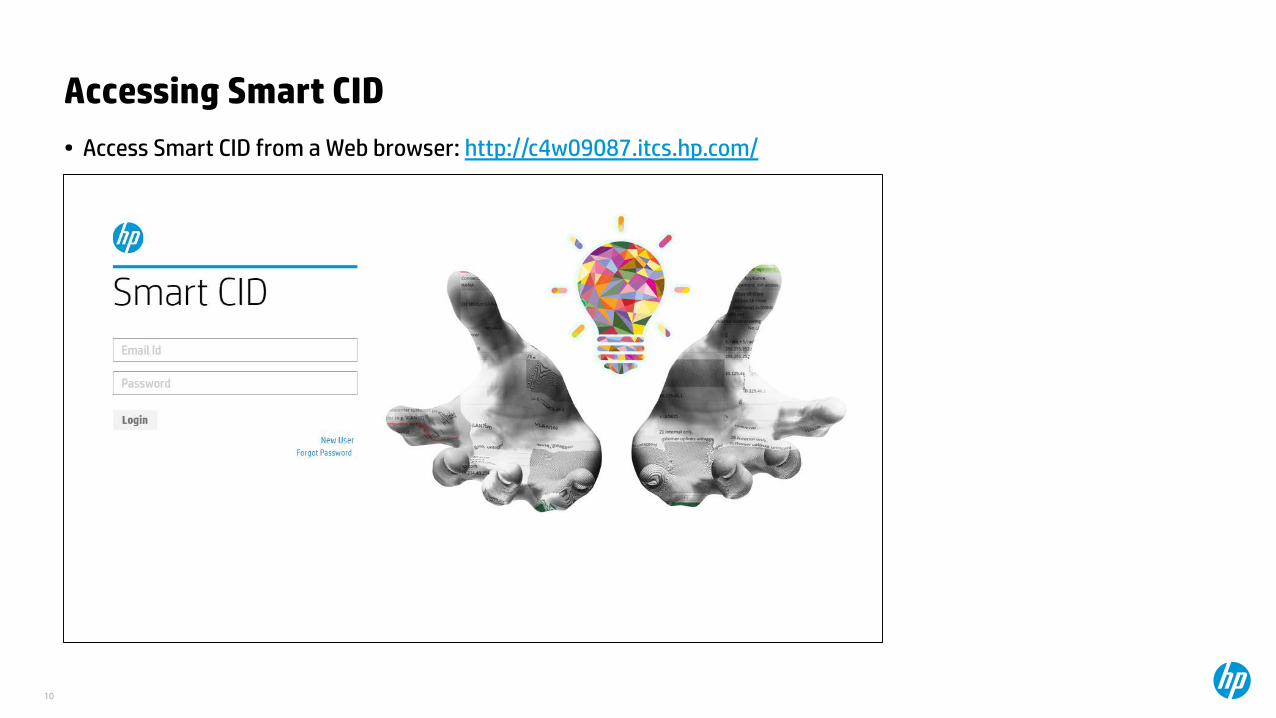
Accessing Smart CID• Access Smart CID from a Web browser: http://c4w09087.itcs.hp.com/
10
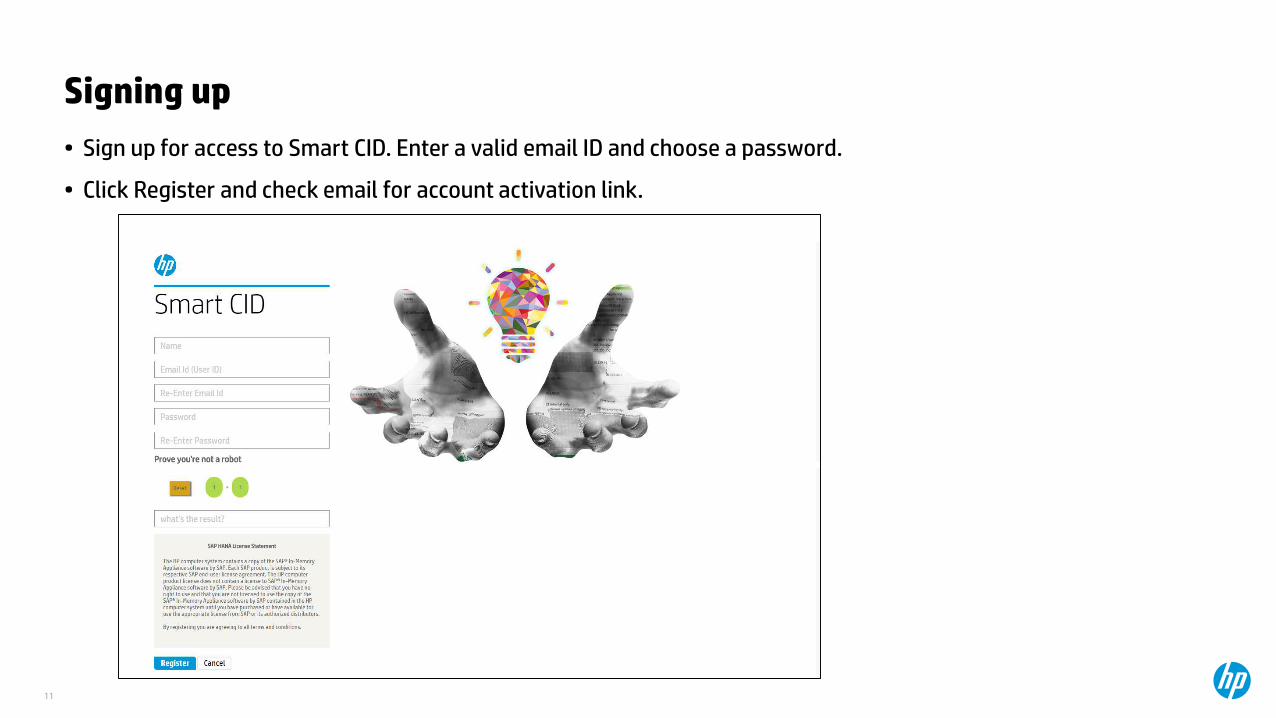
Signing up
11
• Sign up for access to Smart CID. Enter a valid email ID and choose a password.
• Click Register and check email for account activation link.
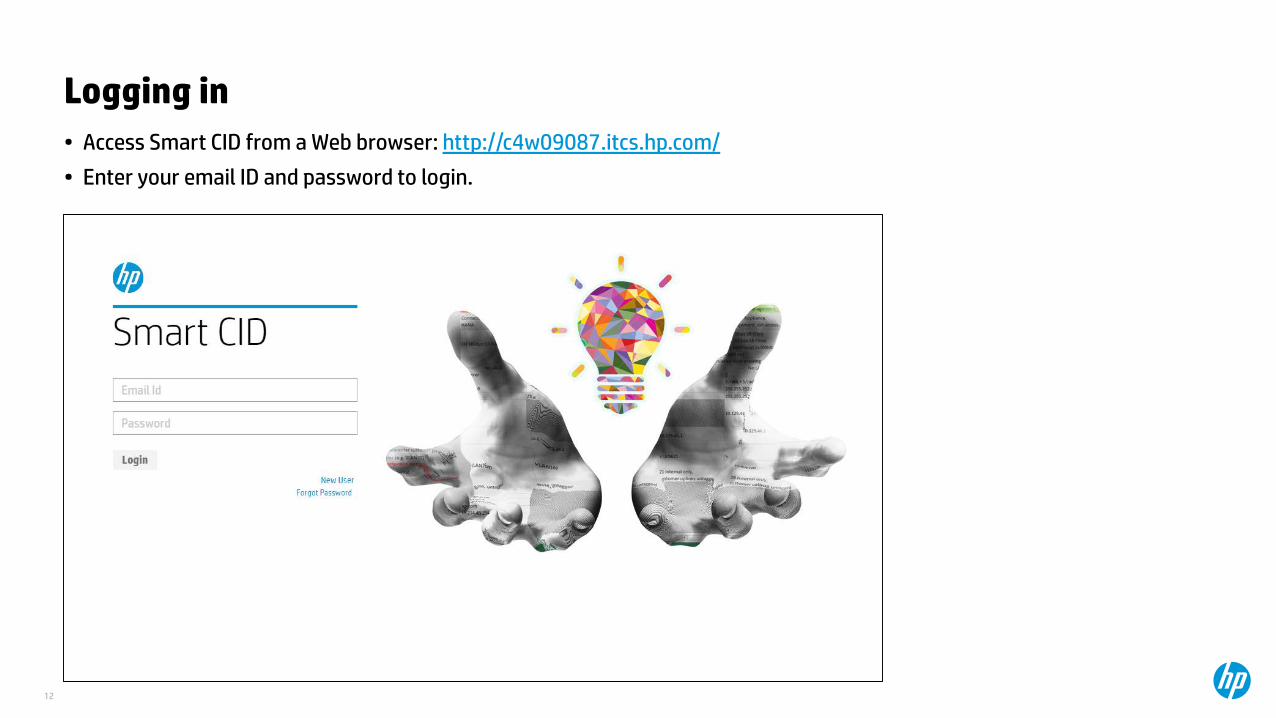
Logging in• Access Smart CID from a Web browser: http://c4w09087.itcs.hp.com/
• Enter your email ID and password to login.
12
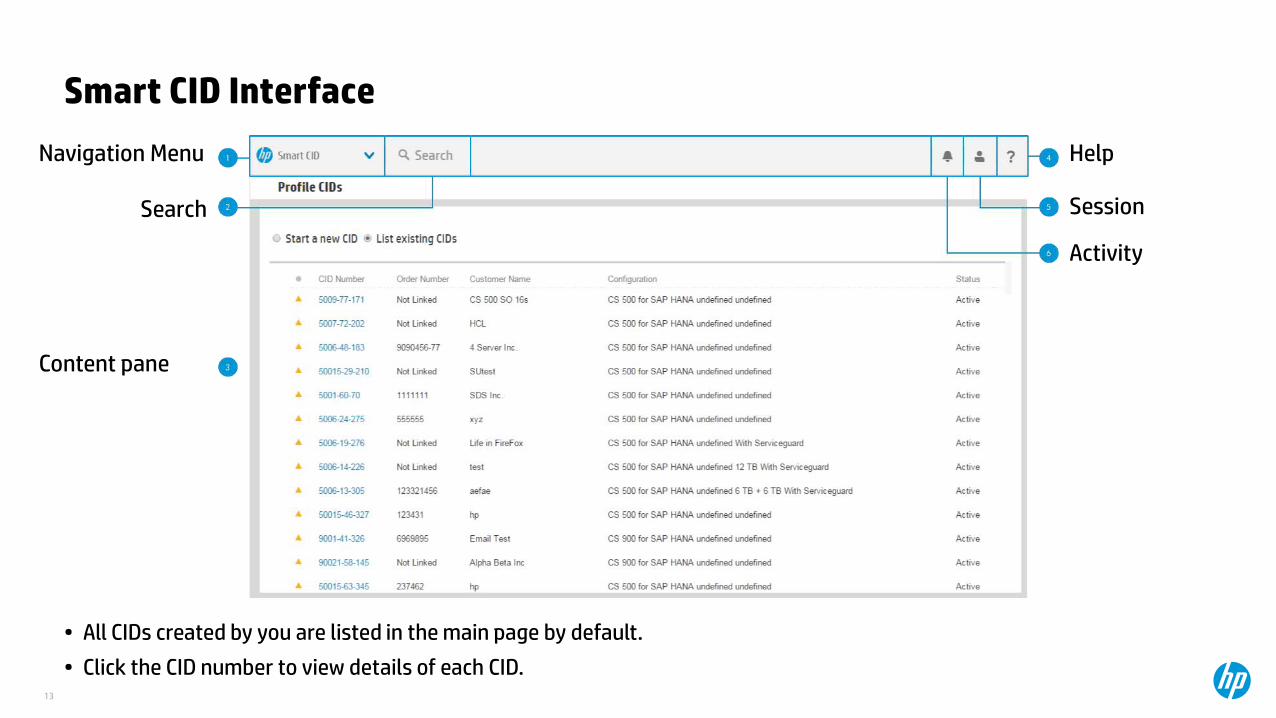
Smart CID Interface
13
Navigation Menu
Search
Content pane
Help
Session
Activity
• All CIDs created by you are listed in the main page by default.
• Click the CID number to view details of each CID.
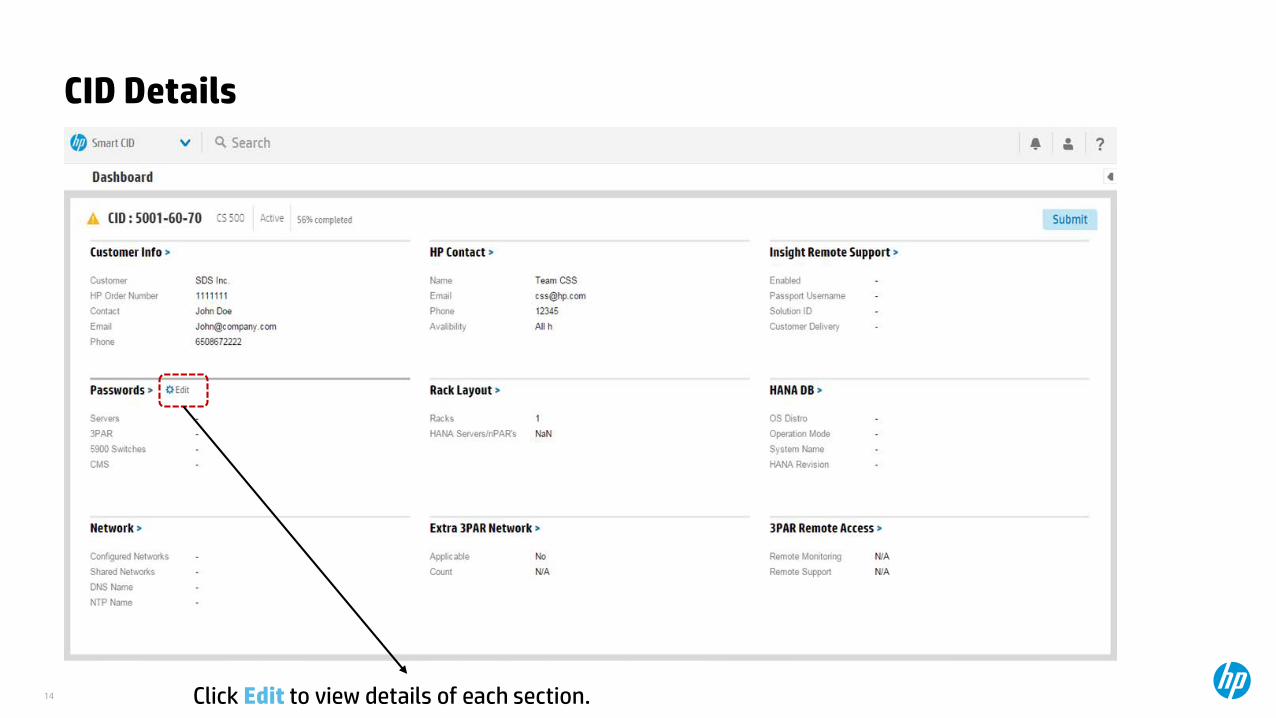
CID Details
14 Click Edit to view details of each section.
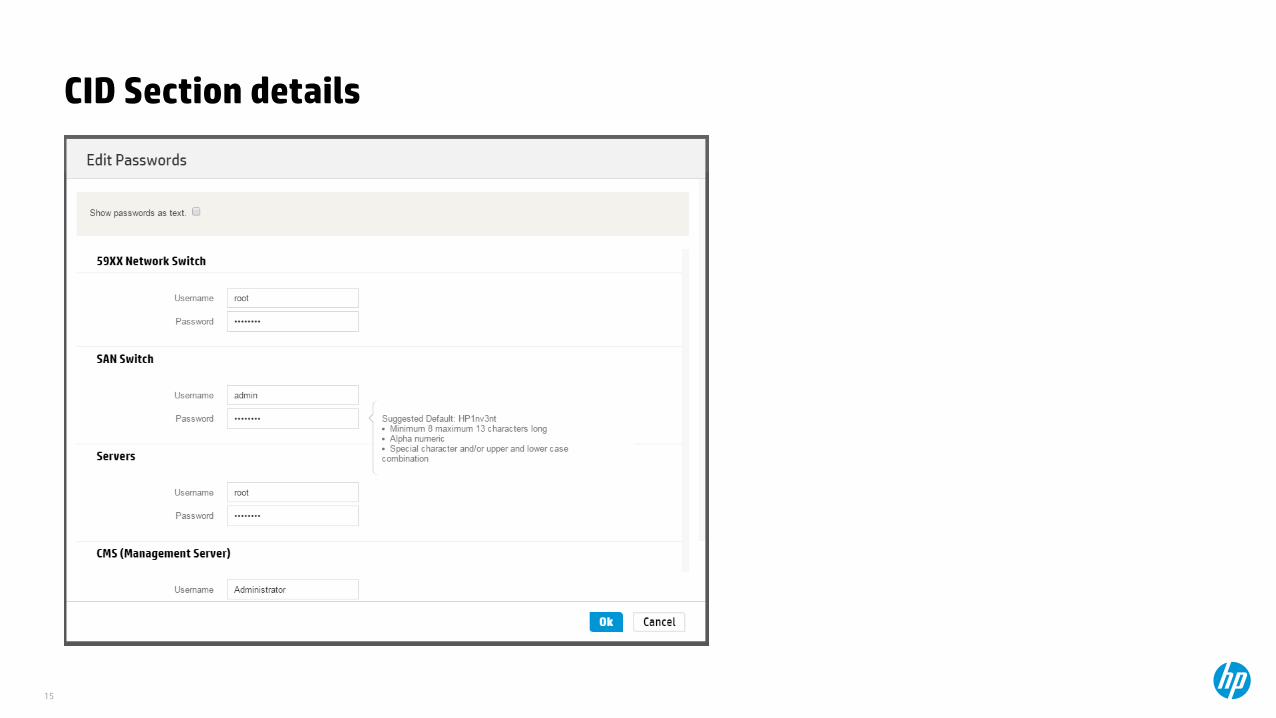
CID Section details
15

Creating a new CID
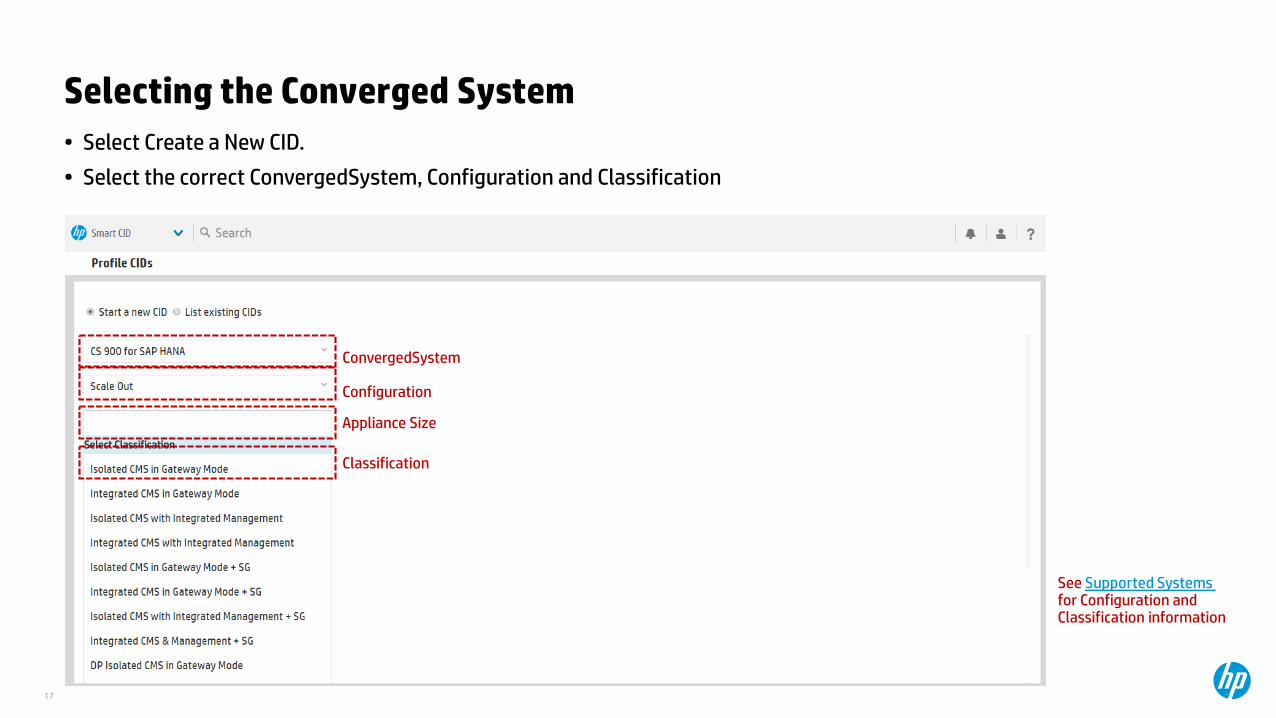
Selecting the Converged System• Select Create a New CID.
• Select the correct ConvergedSystem, Configuration and Classification
17
ConvergedSystem
Configuration
Appliance Size
See Supported Systems for Configuration and Classification information
Classification

HP Order No. or SAP No.• Enter an HP order number or and SAP number (optional).
• Click Start to create a new CID. A new CID number is created.
18
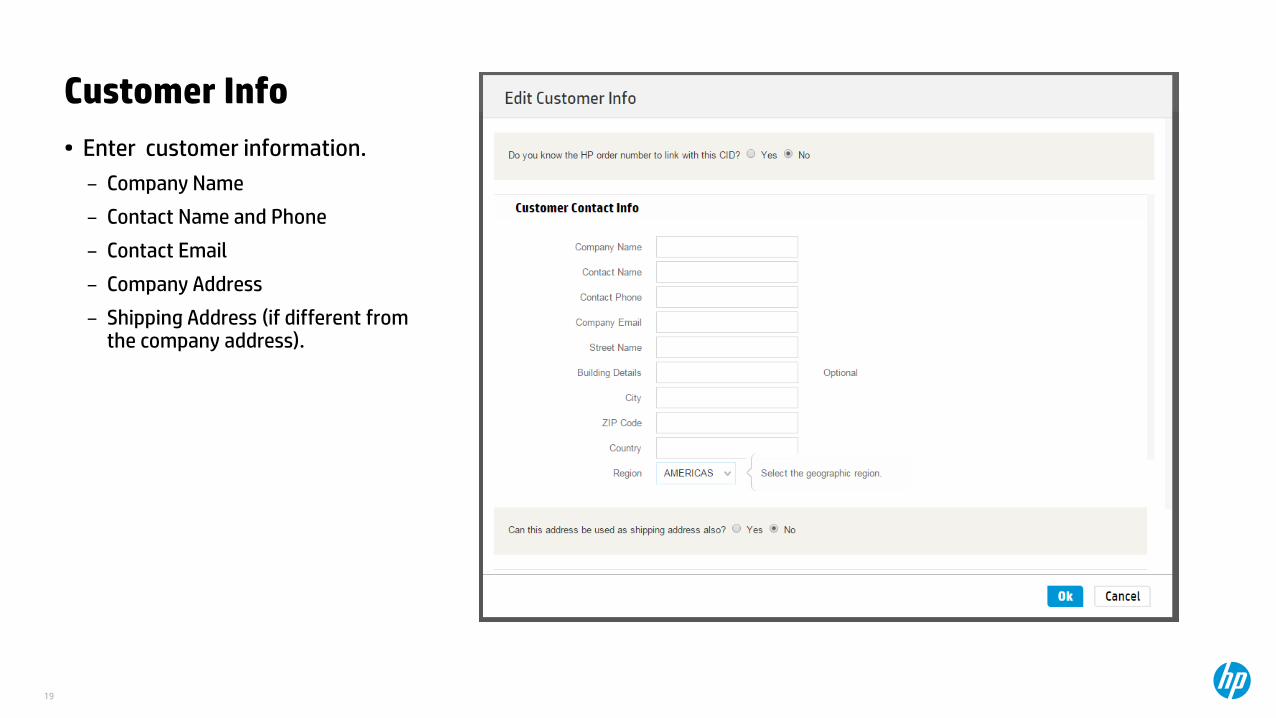
Customer Info• Enter customer information.
– Company Name
– Contact Name and Phone
– Contact Email
– Company Address
– Shipping Address (if different from the company address).
19
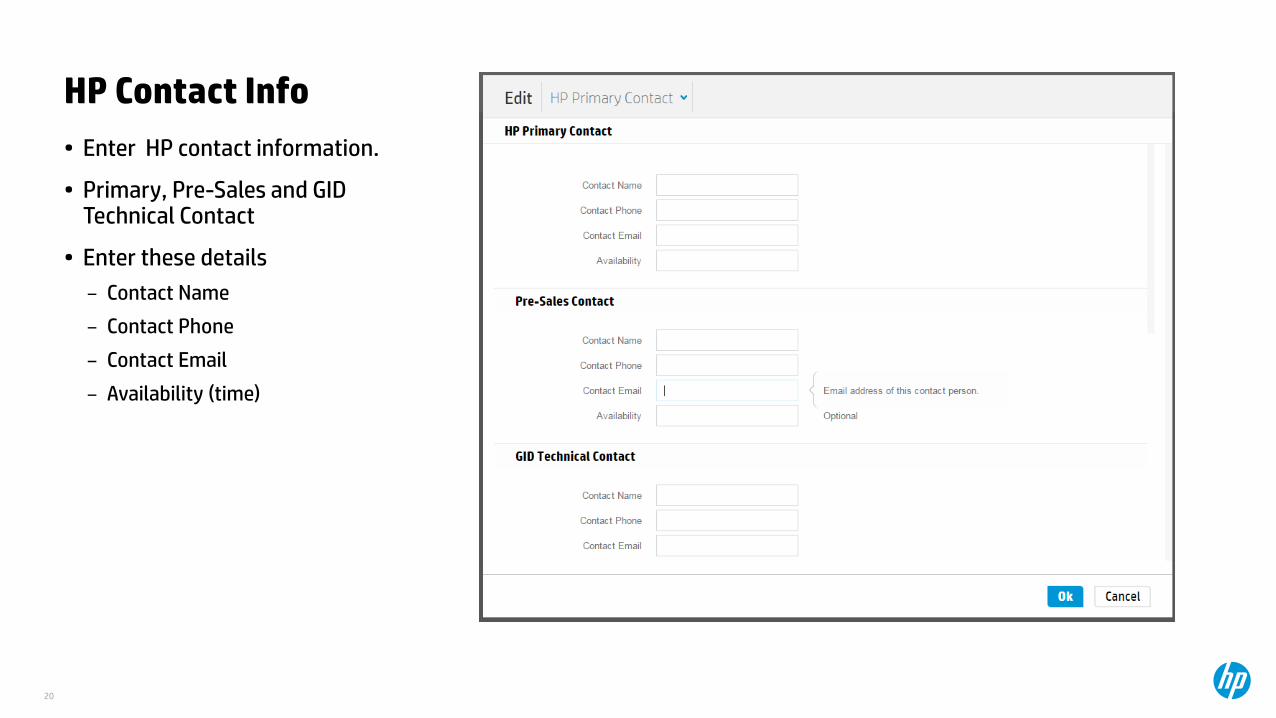
HP Contact Info• Enter HP contact information.
• Primary, Pre-Sales and GID Technical Contact
• Enter these details
– Contact Name
– Contact Phone
– Contact Email
– Availability (time)
20
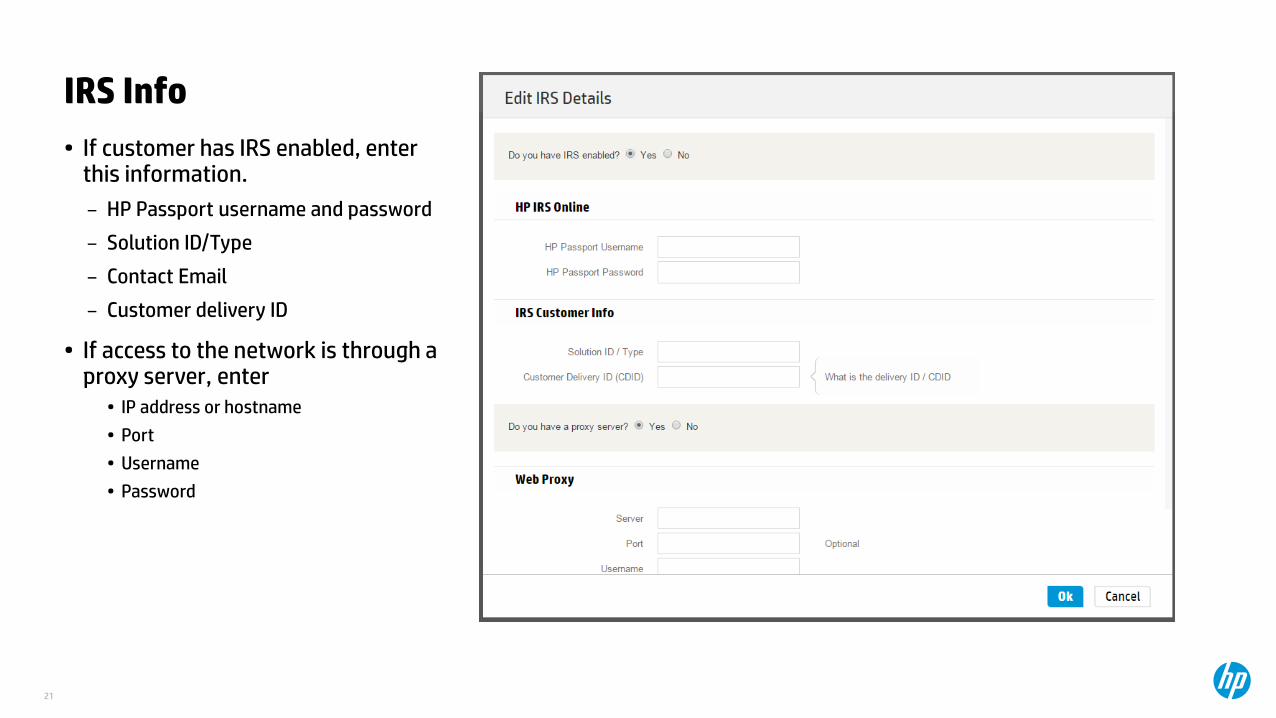
IRS Info• If customer has IRS enabled, enter
this information.
– HP Passport username and password
– Solution ID/Type
– Contact Email
– Customer delivery ID
• If access to the network is through a proxy server, enter
• IP address or hostname
• Port
• Username
• Password
21
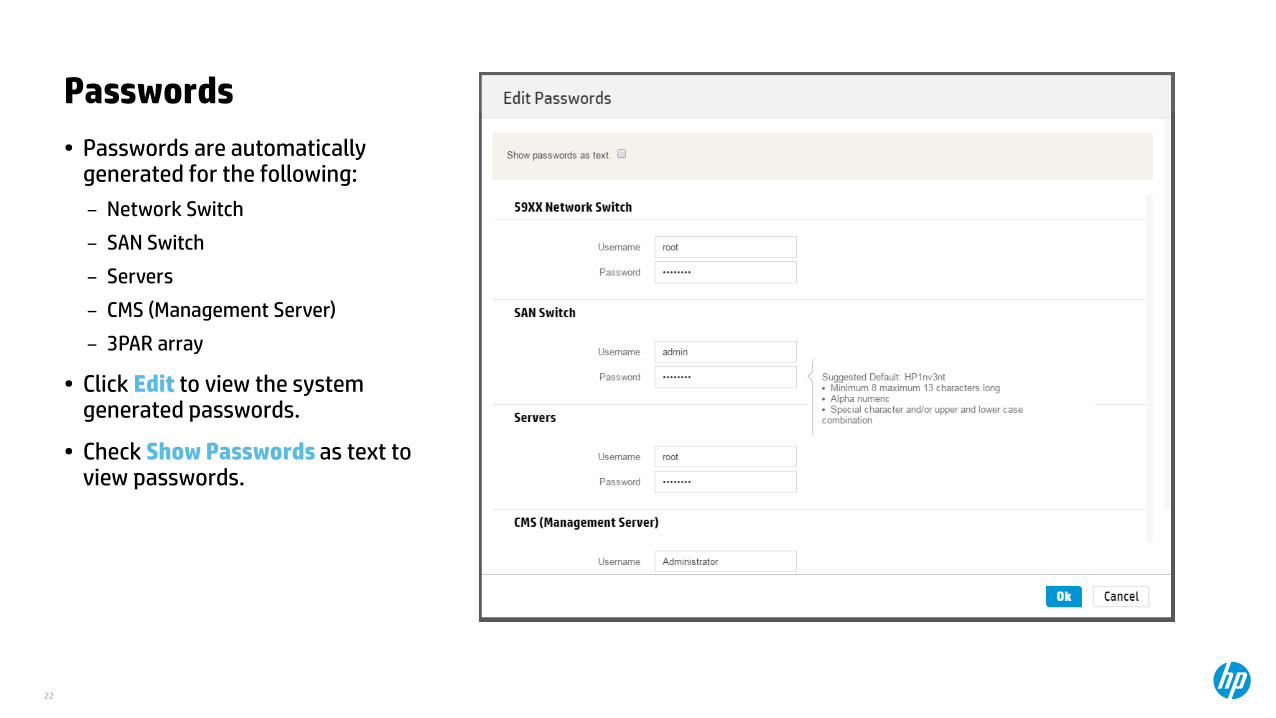
Passwords• Passwords are automatically
generated for the following:
– Network Switch
– SAN Switch
– Servers
– CMS (Management Server)
– 3PAR array
• Click Edit to view the system generated passwords.
• Check Show Passwords as text to view passwords.
22
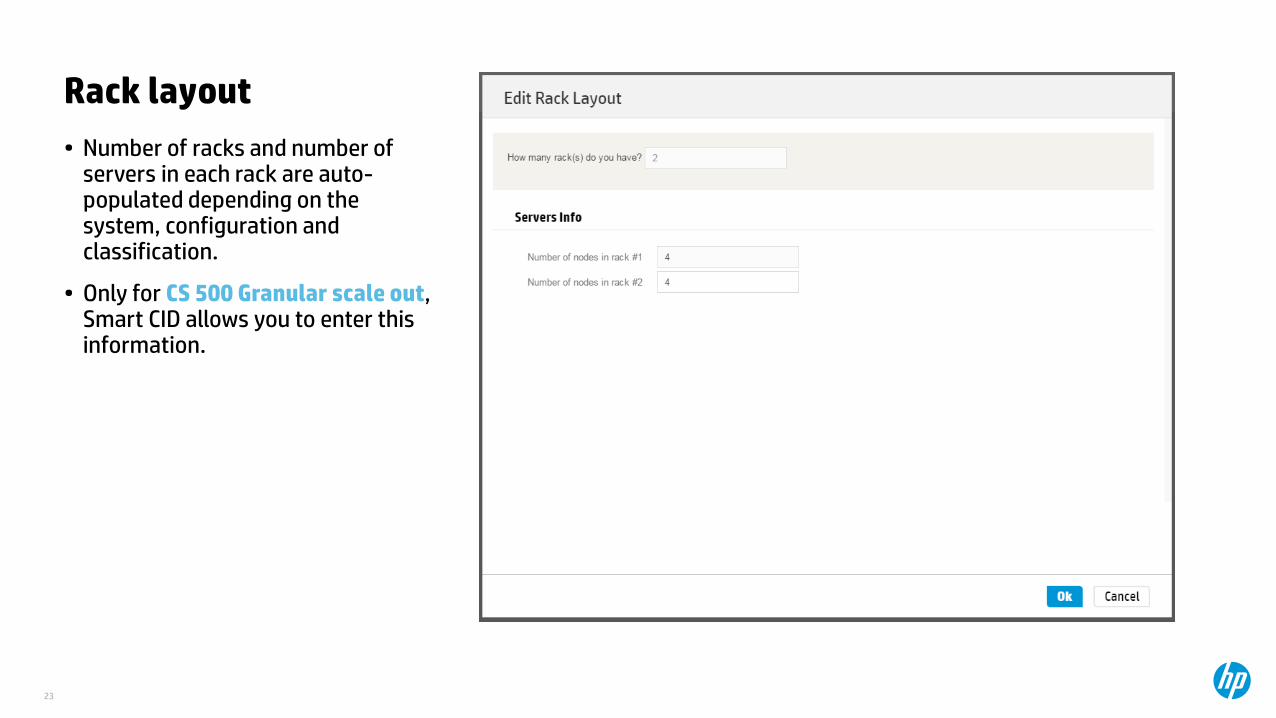
Rack layout• Number of racks and number of
servers in each rack are auto-populated depending on the system, configuration and classification.
• Only for CS 500 Granular scale out, Smart CID allows you to enter this information.
23
HANA DB
2424
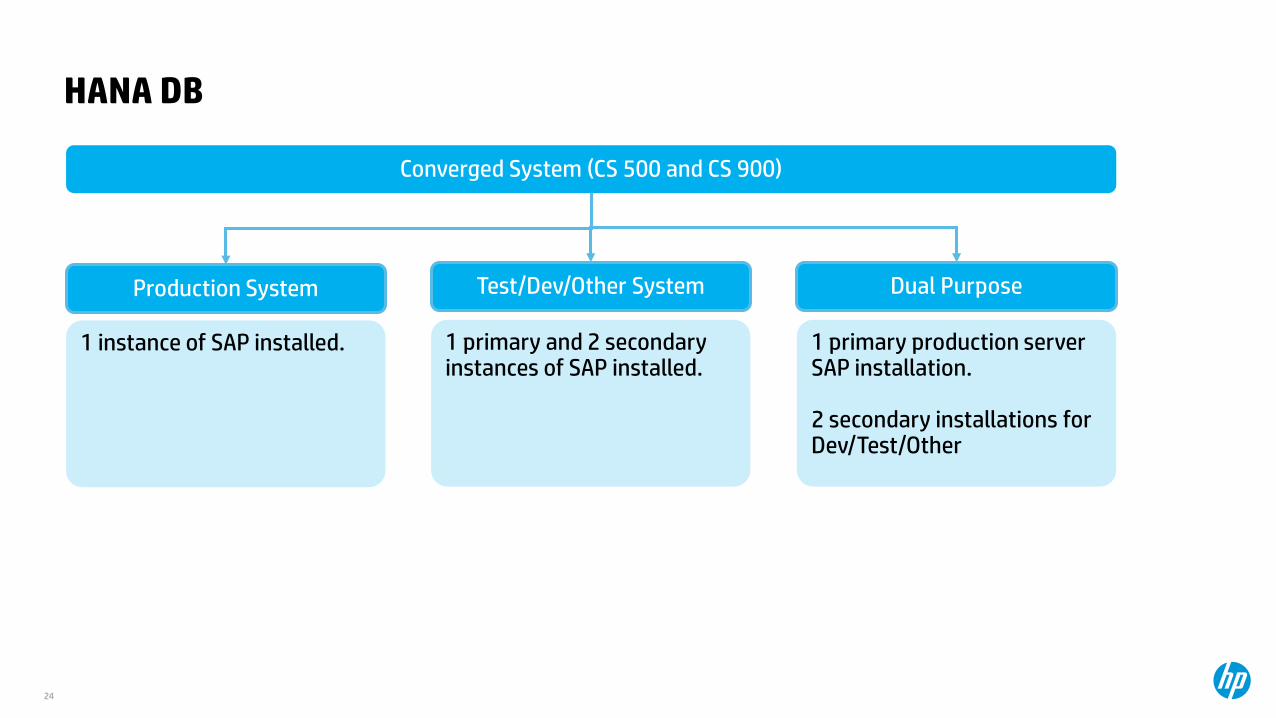
Converged System (CS 500 and CS 900)
Production System Test/Dev/Other System Dual Purpose
1 instance of SAP installed. 1 primary and 2 secondary instances of SAP installed.
1 primary production server SAP installation.
2 secondary installations for Dev/Test/Other
HANA DB
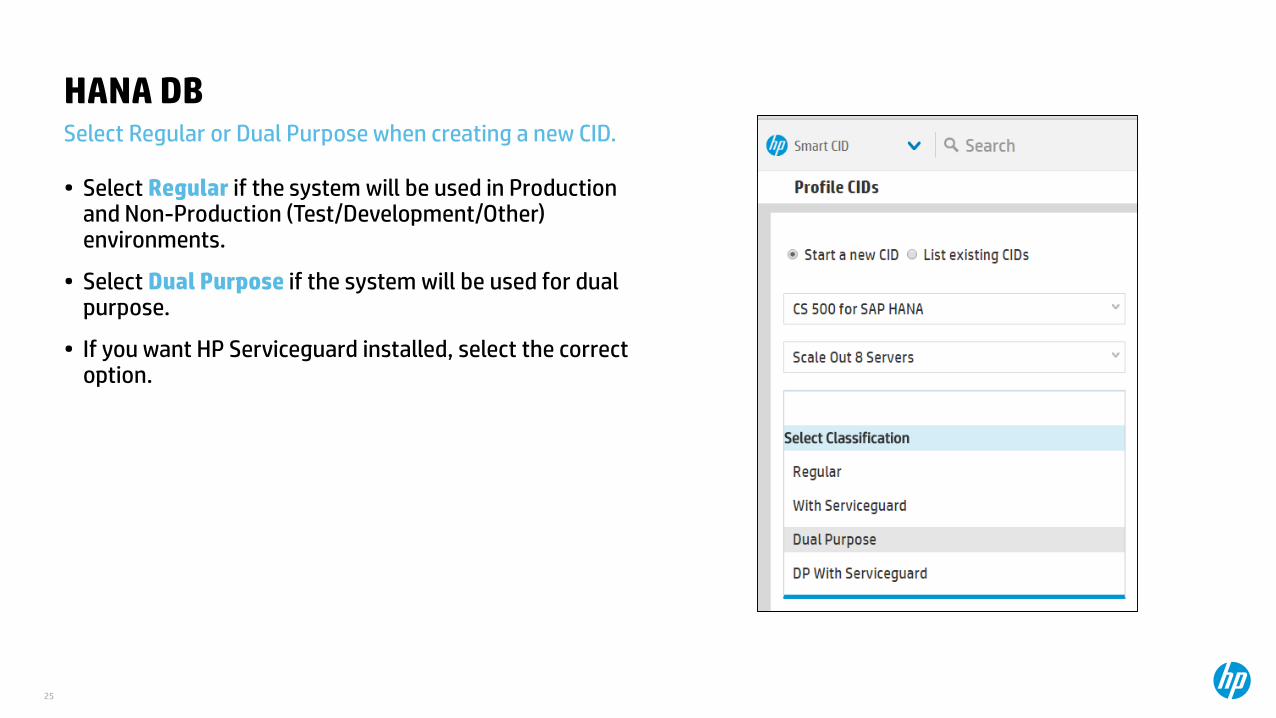
• Select Regular if the system will be used in Production and Non-Production (Test/Development/Other) environments.
• Select Dual Purpose if the system will be used for dual purpose.
• If you want HP Serviceguard installed, select the correct option.
25
Select Regular or Dual Purpose when creating a new CID.
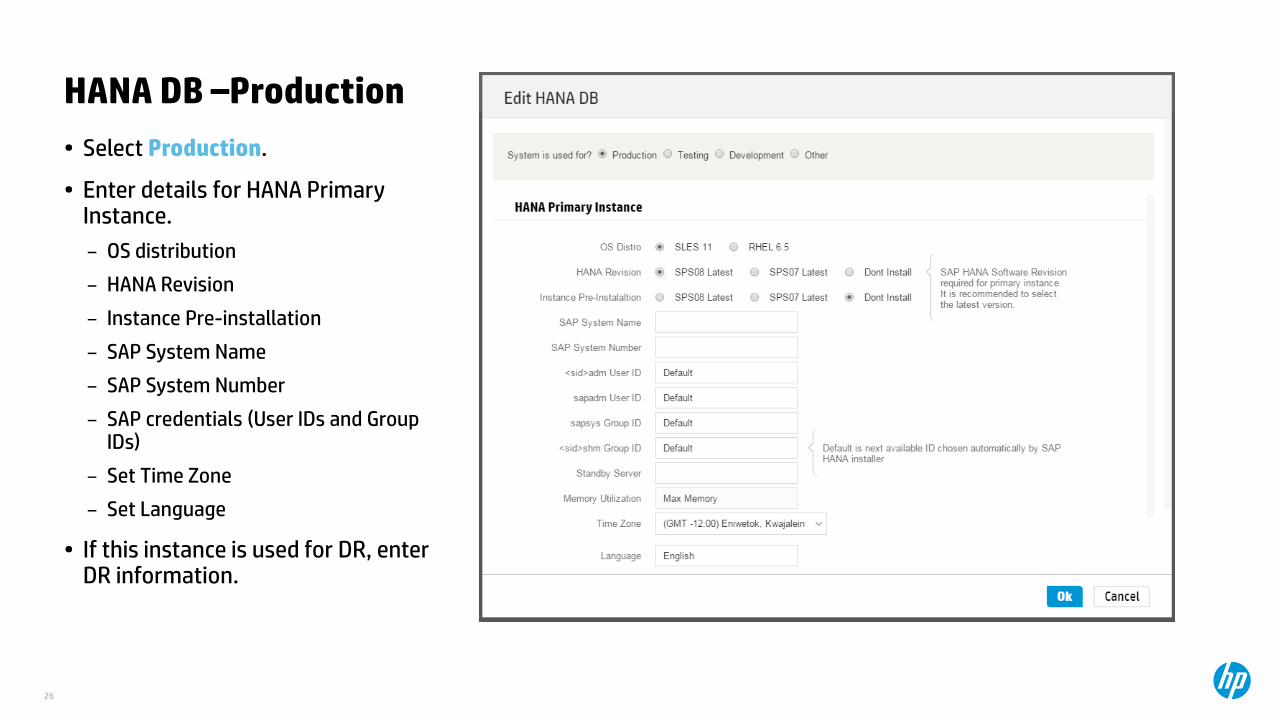
HANA DB –Production• Select Production.
• Enter details for HANA Primary Instance.
– OS distribution
– HANA Revision
– Instance Pre-installation
– SAP System Name
– SAP System Number
– SAP credentials (User IDs and Group IDs)
– Set Time Zone
– Set Language
• If this instance is used for DR, enter DR information.
26
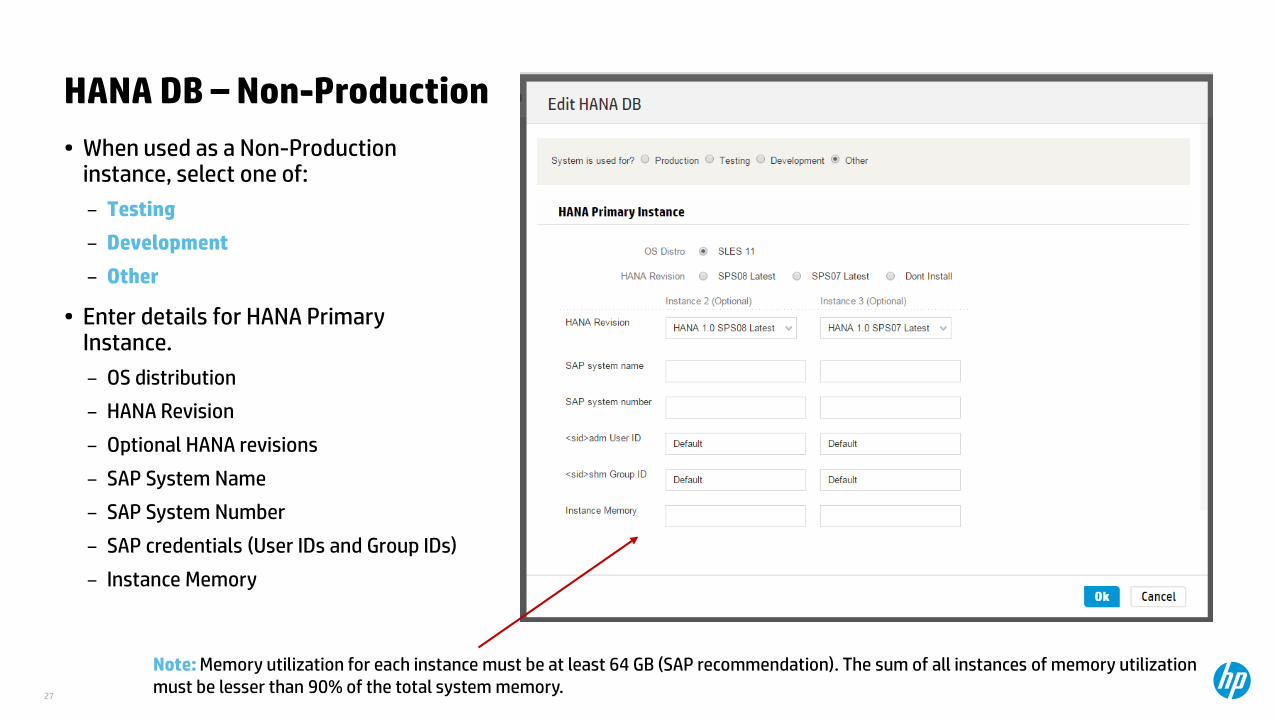
HANA DB – Non-Production• When used as a Non-Production
instance, select one of:
– Testing
– Development
– Other
• Enter details for HANA Primary Instance.
– OS distribution
– HANA Revision
– Optional HANA revisions
– SAP System Name
– SAP System Number
– SAP credentials (User IDs and Group IDs)
– Instance Memory
27
Note: Memory utilization for each instance must be at least 64 GB (SAP recommendation). The sum of all instances of memory utilization must be lesser than 90% of the total system memory.
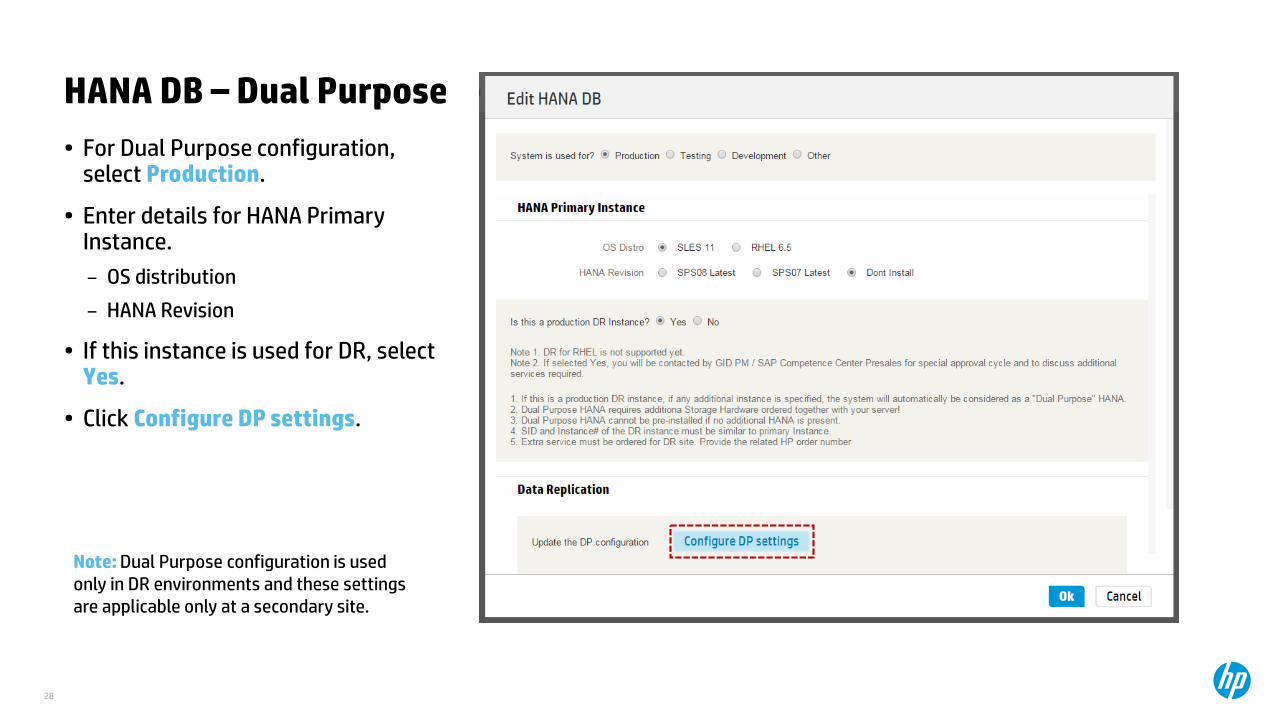
HANA DB – Dual Purpose• For Dual Purpose configuration,
select Production.
• Enter details for HANA Primary Instance.
– OS distribution
– HANA Revision
• If this instance is used for DR, select Yes.
• Click Configure DP settings.
28
Note: Dual Purpose configuration is used only in DR environments and these settings are applicable only at a secondary site.
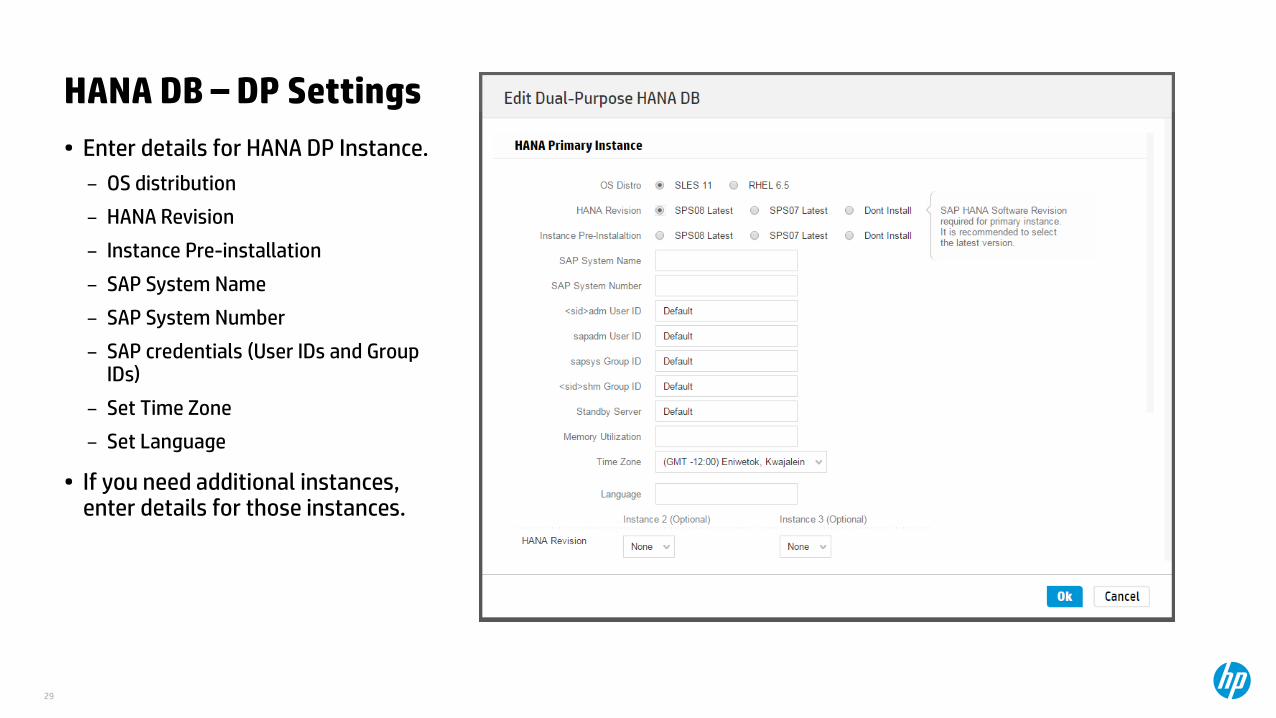
HANA DB – DP Settings• Enter details for HANA DP Instance.
– OS distribution
– HANA Revision
– Instance Pre-installation
– SAP System Name
– SAP System Number
– SAP credentials (User IDs and Group IDs)
– Set Time Zone
– Set Language
• If you need additional instances, enter details for those instances.
29
Configuring Network
30
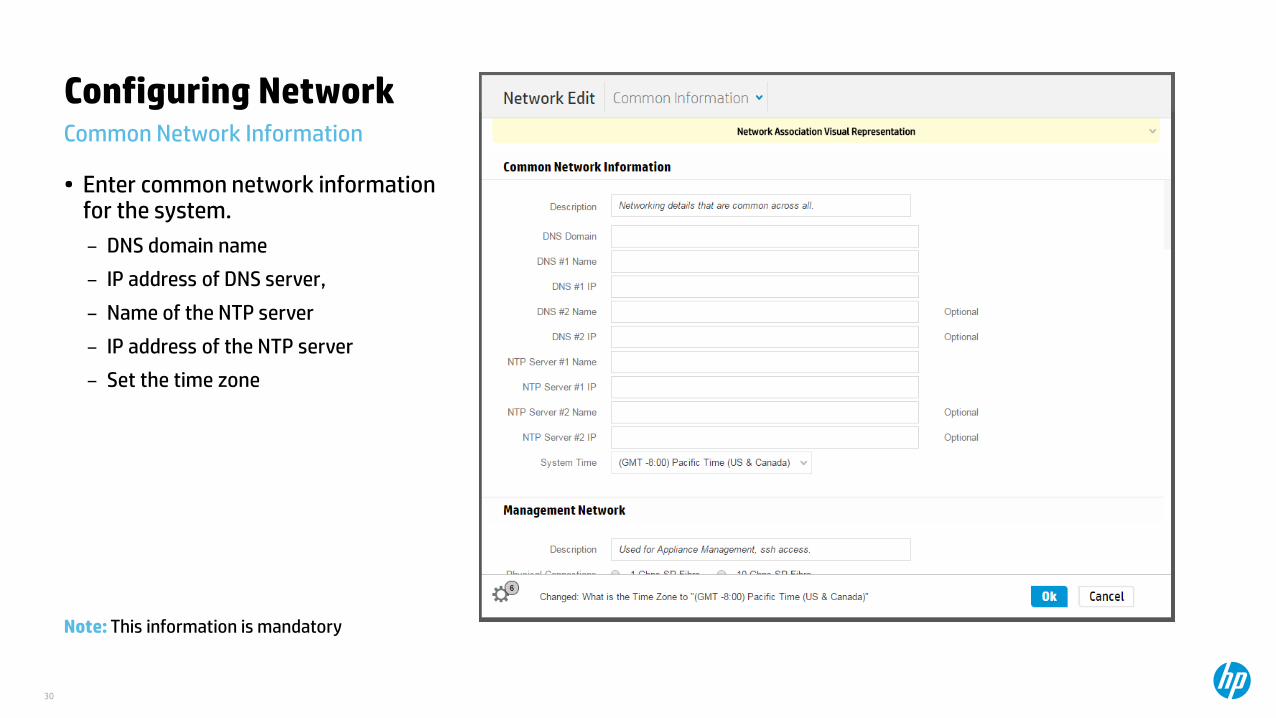
Common Network Information
• Enter common network information for the system.
– DNS domain name
– IP address of DNS server,
– Name of the NTP server
– IP address of the NTP server
– Set the time zone
Note: This information is mandatory
Configuring Network
31
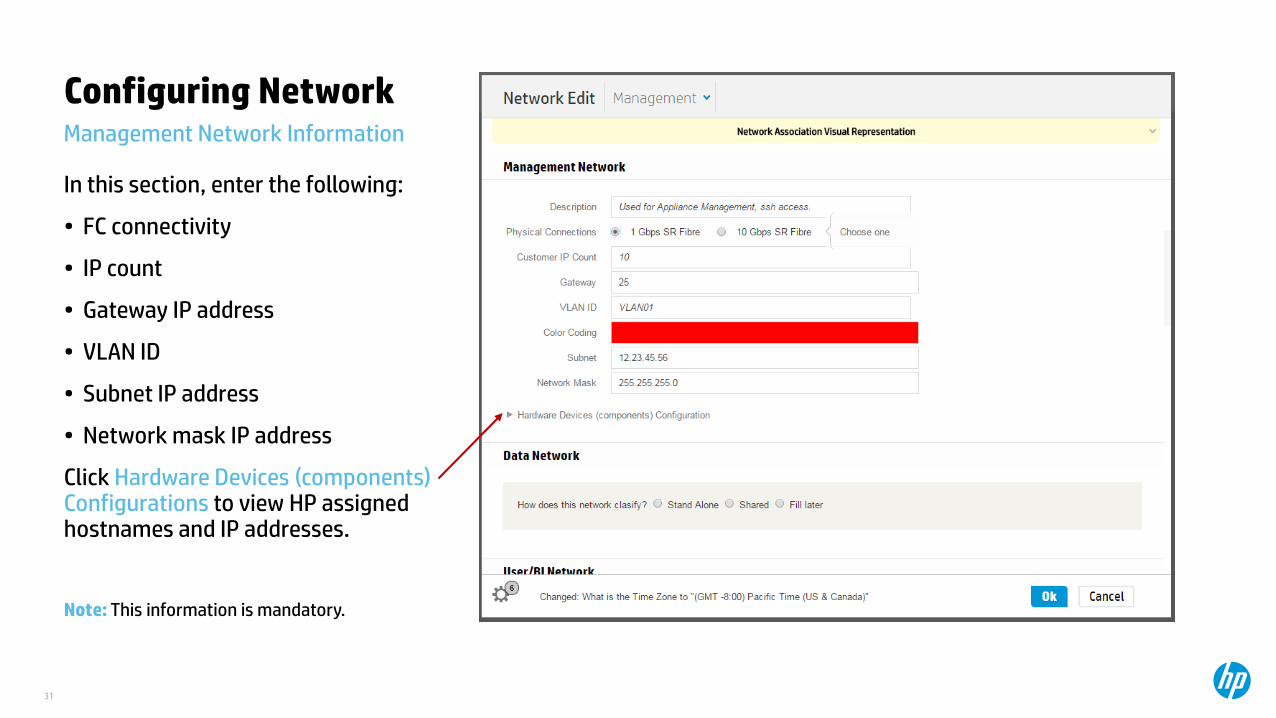
Management Network Information
In this section, enter the following:
• FC connectivity
• IP count
• Gateway IP address
• VLAN ID
• Subnet IP address
• Network mask IP address
Click Hardware Devices (components) Configurations to view HP assigned hostnames and IP addresses.
Note: This information is mandatory.
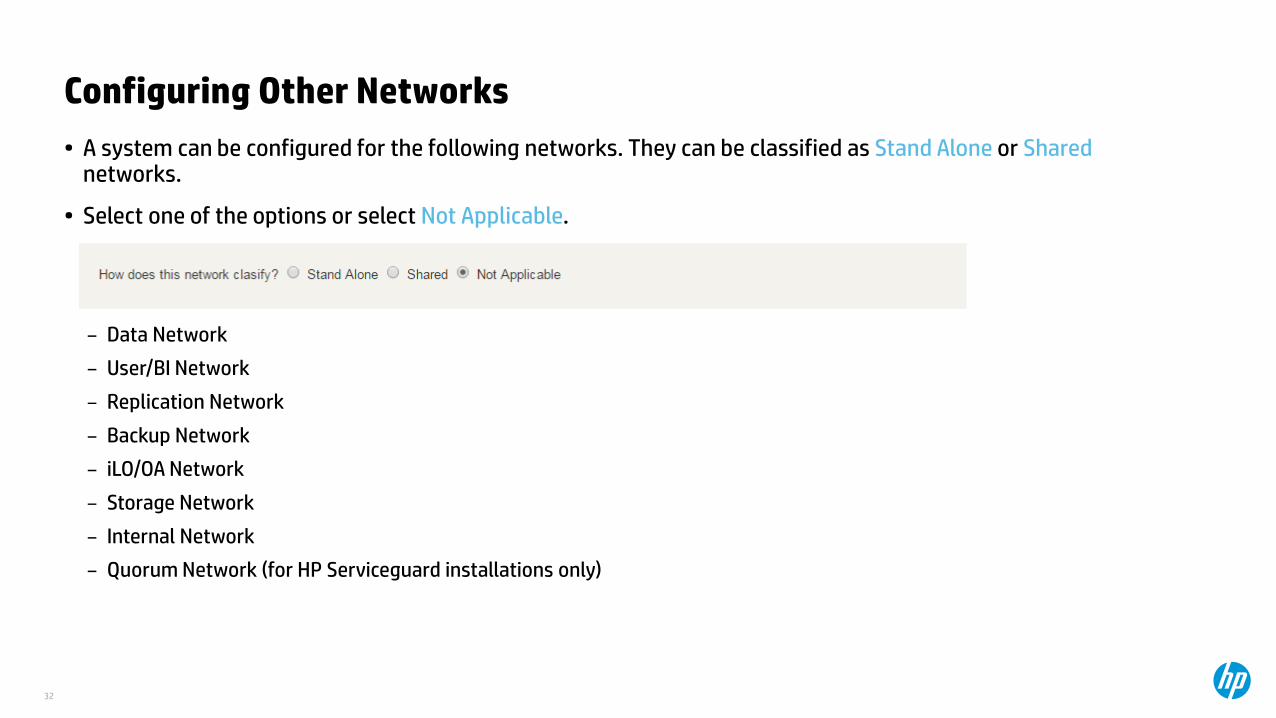
Configuring Other Networks
32
• A system can be configured for the following networks. They can be classified as Stand Alone or Sharednetworks.
• Select one of the options or select Not Applicable.
– Data Network
– User/BI Network
– Replication Network
– Backup Network
– iLO/OA Network
– Storage Network
– Internal Network
– Quorum Network (for HP Serviceguard installations only)

Stand Alone
33
When classifying as Stand Alone, enter the following:
• FC connectivity
• IP count
• Gateway IP address
• VLAN ID
• Subnet IP address
• Network mask IP address
Click Hardware Devices (components) Configurations to view HP assigned hostnames and IP addresses.
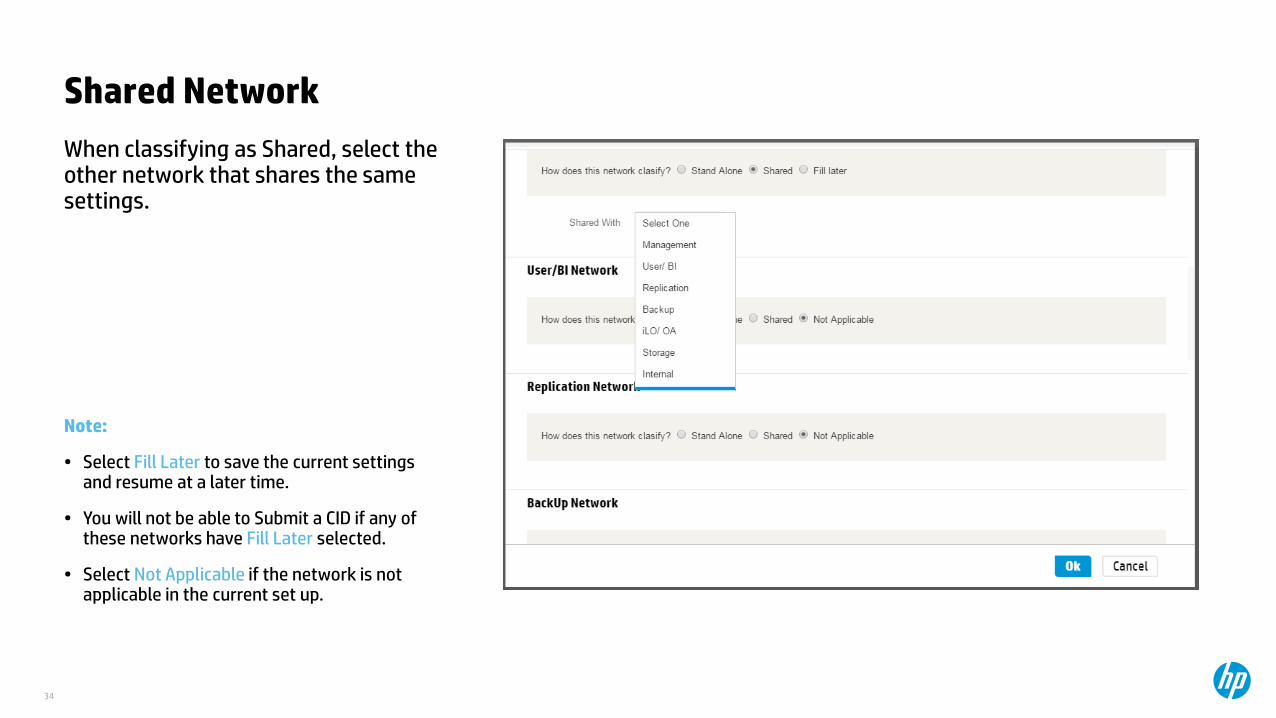
Shared Network
34
When classifying as Shared, select the other network that shares the same settings.
Note:
• Select Fill Later to save the current settings and resume at a later time.
• You will not be able to Submit a CID if any of these networks have Fill Later selected.
• Select Not Applicable if the network is not applicable in the current set up.

Extra 3PAR Network
35
Common Network Information
• Used for solutions like DR with software replication and Dual Purpose.
• Enter the service processor host names and IP addresses for:
– Management Network
– OA or iLO Network
• Enter the controller node hostname and IP address.
• If you have a second 3PAR, select Applicable and enter details for the second 3PAR.
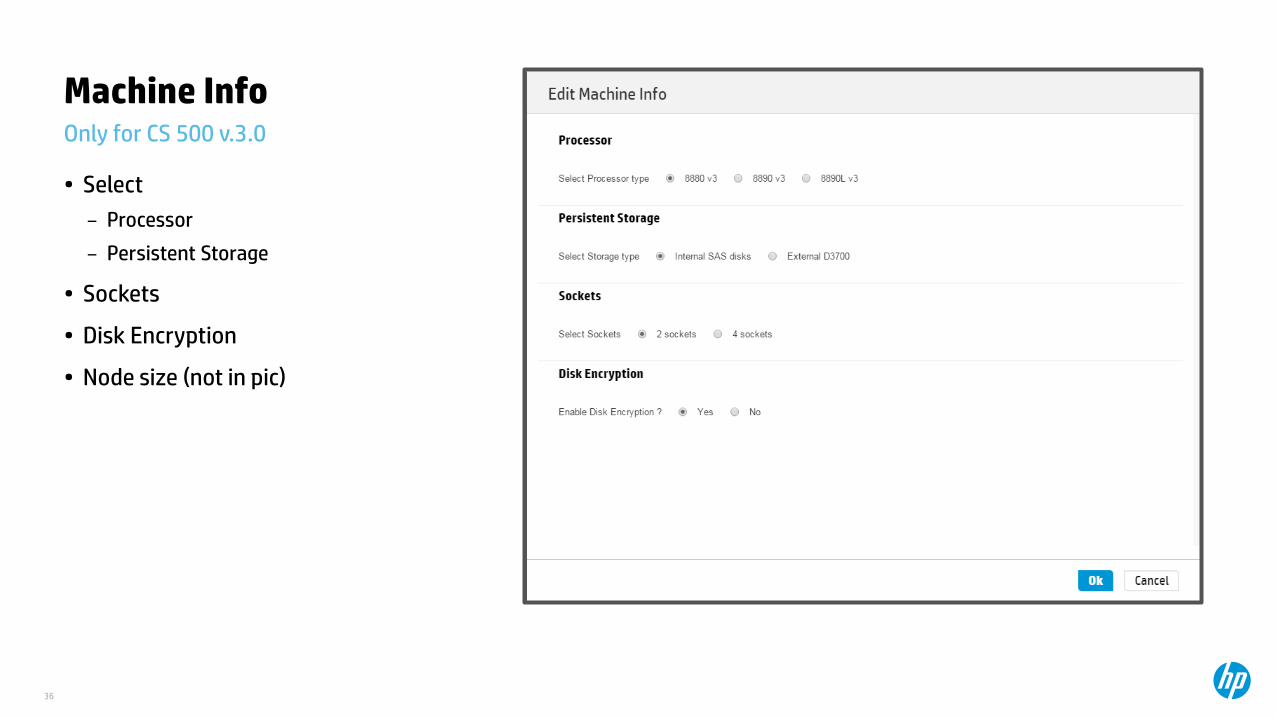
Machine Info
36
Only for CS 500 v.3.0
• Select
– Processor
– Persistent Storage
• Sockets
• Disk Encryption
• Node size (not in pic)
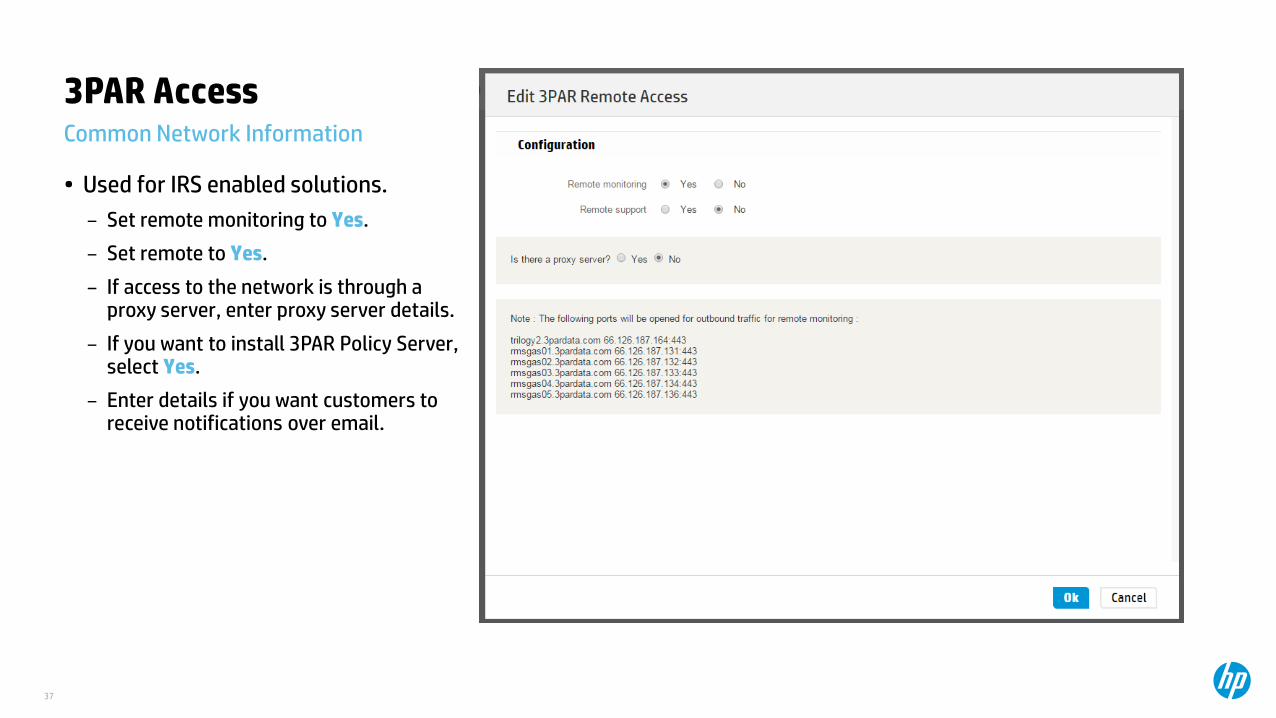
3PAR Access
37
Common Network Information
• Used for IRS enabled solutions.
– Set remote monitoring to Yes.
– Set remote to Yes.
– If access to the network is through a proxy server, enter proxy server details.
– If you want to install 3PAR Policy Server, select Yes.
– Enter details if you want customers to receive notifications over email.
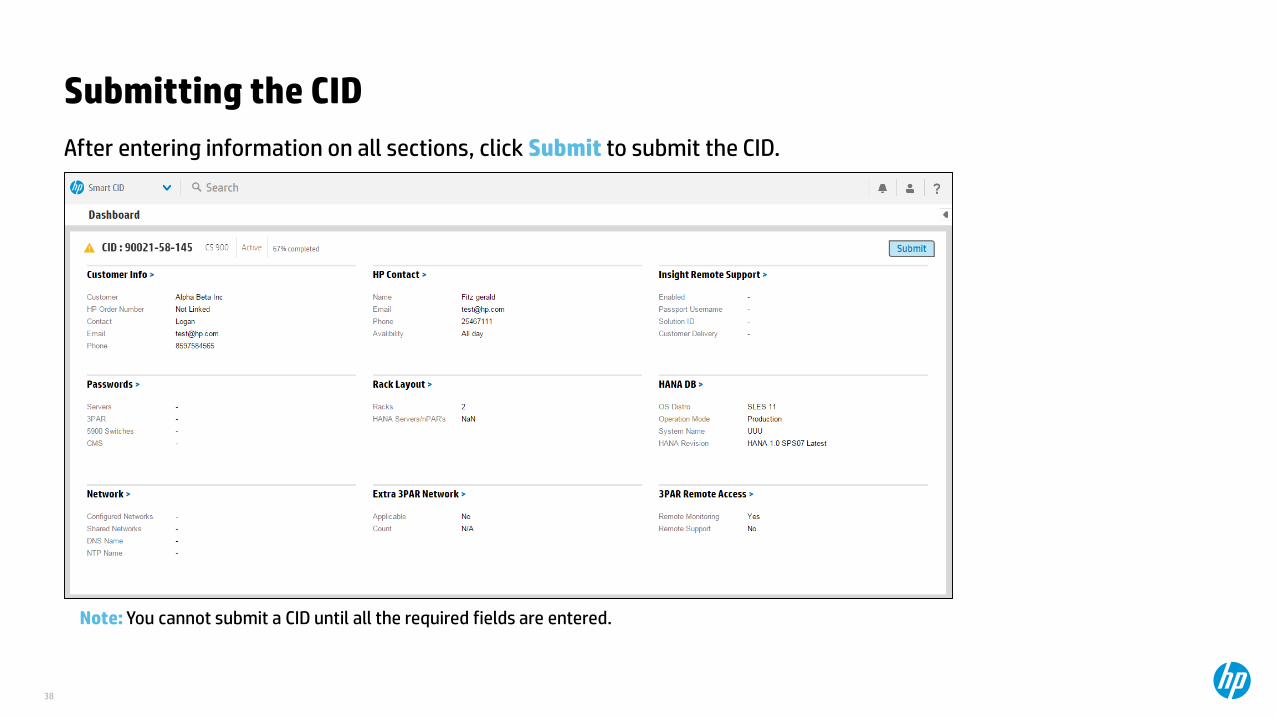
Submitting the CIDAfter entering information on all sections, click Submit to submit the CID.
38
Note: You cannot submit a CID until all the required fields are entered.
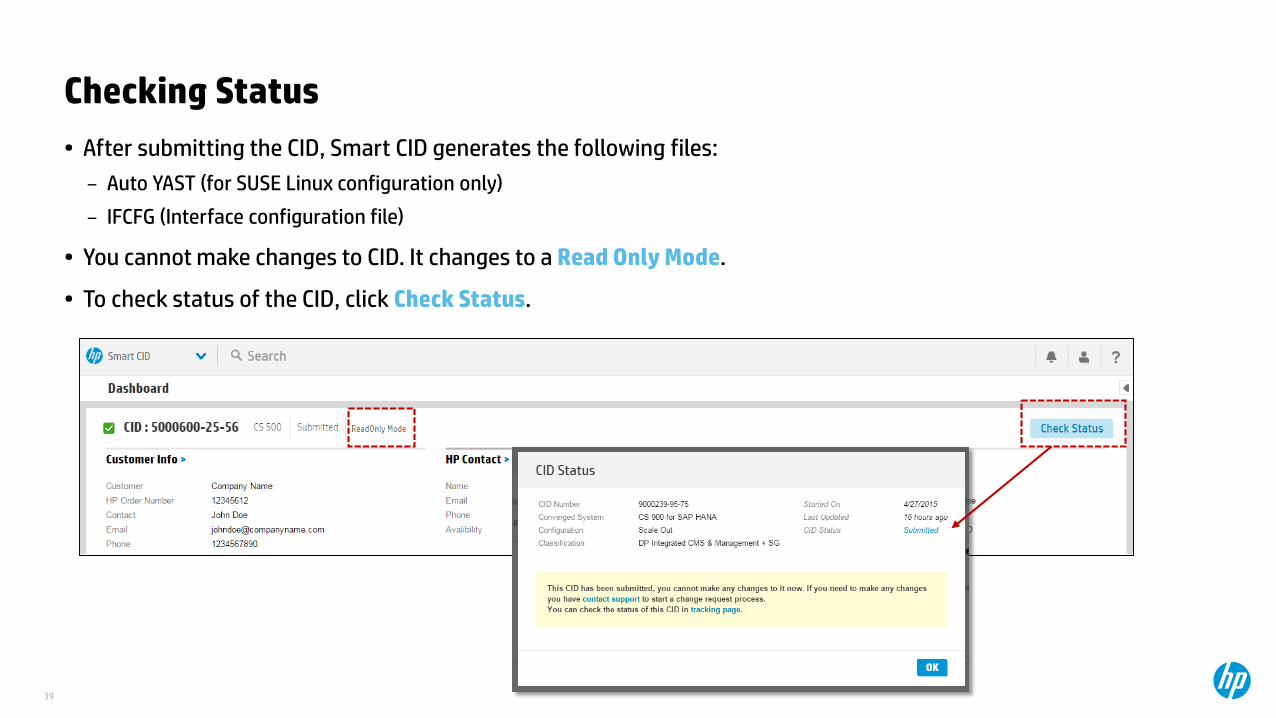
Checking Status• After submitting the CID, Smart CID generates the following files:
– Auto YAST (for SUSE Linux configuration only)
– IFCFG (Interface configuration file)
• You cannot make changes to CID. It changes to a Read Only Mode.
• To check status of the CID, click Check Status.
39
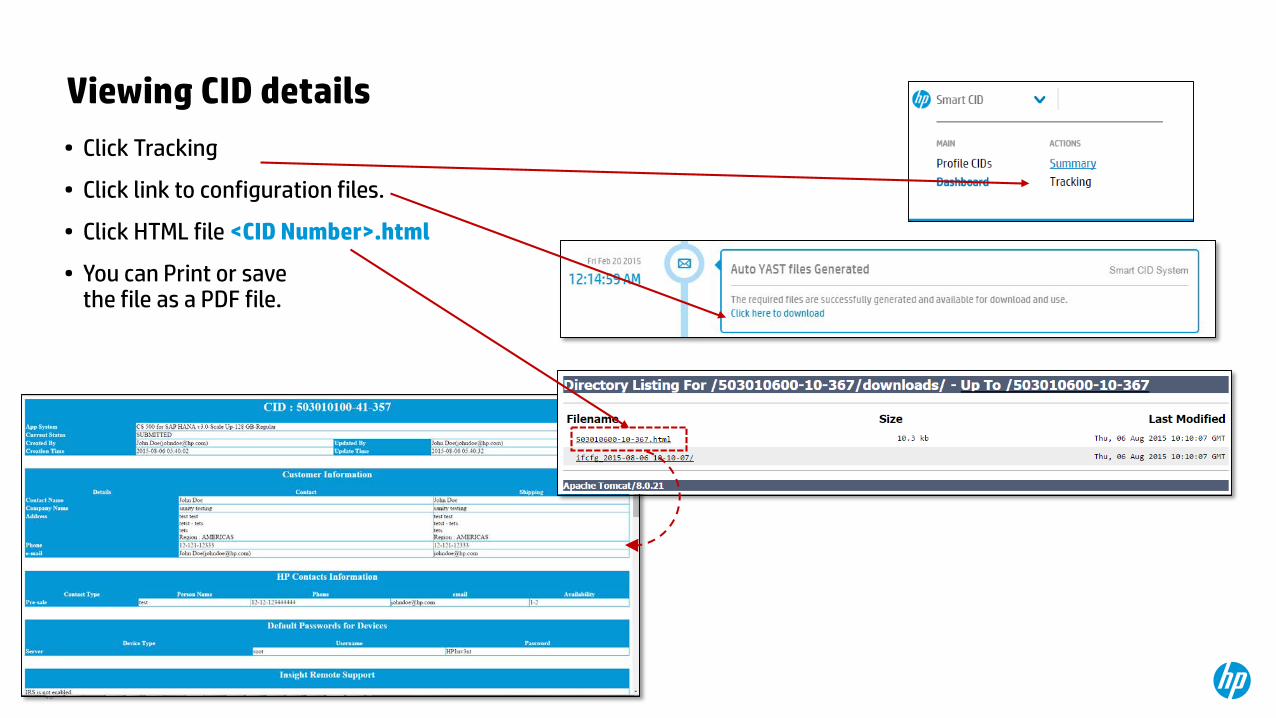
Viewing CID details• Click Tracking
• Click link to configuration files.
• Click HTML file <CID Number>.html
• You can Print or save the file as a PDF file.
40
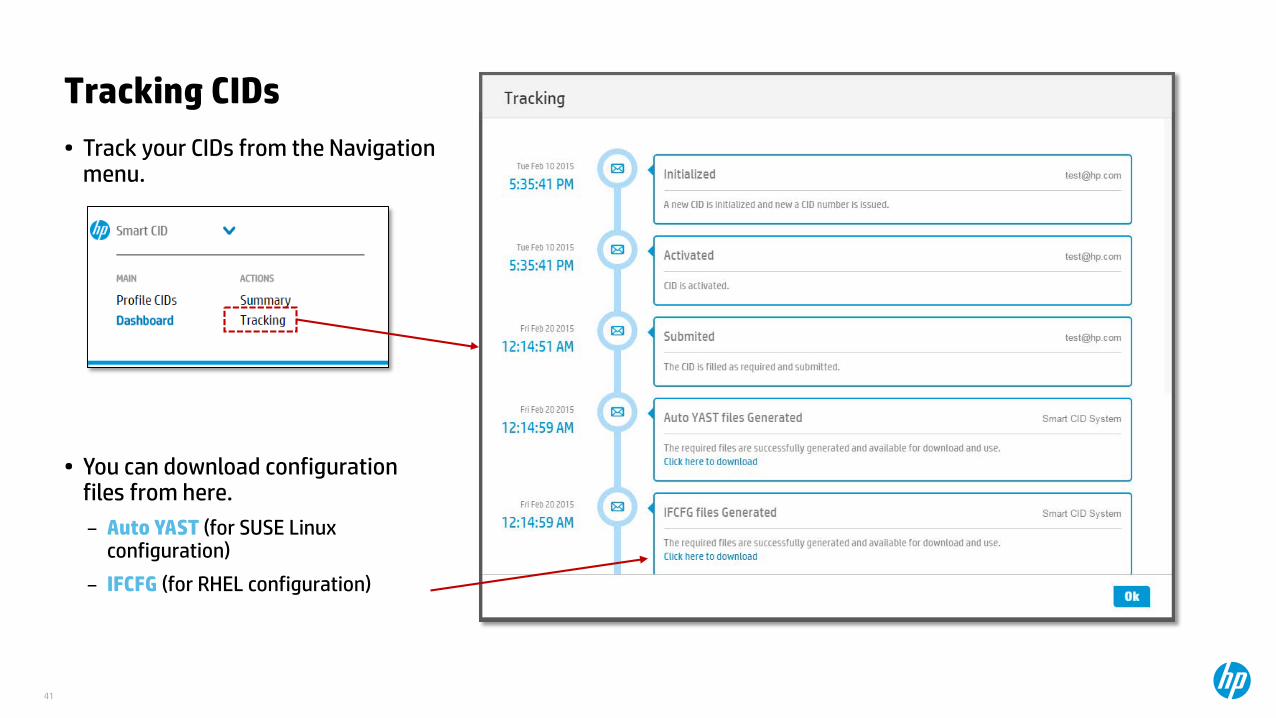
Tracking CIDs• Track your CIDs from the Navigation
menu.
• You can download configuration files from here.
– Auto YAST (for SUSE Linux configuration)
– IFCFG (for RHEL configuration)
41

Configuration Files• Download files to your computer and
copy them to the system to configure.
• For Scale Out systems multiple files are created. Copy each file to each server and configure.
• You can also download a master zip file from the configuration folder.
42
Auto YAST (for SUSE Linux configuration)
IFCFG (for RHEL configuration)
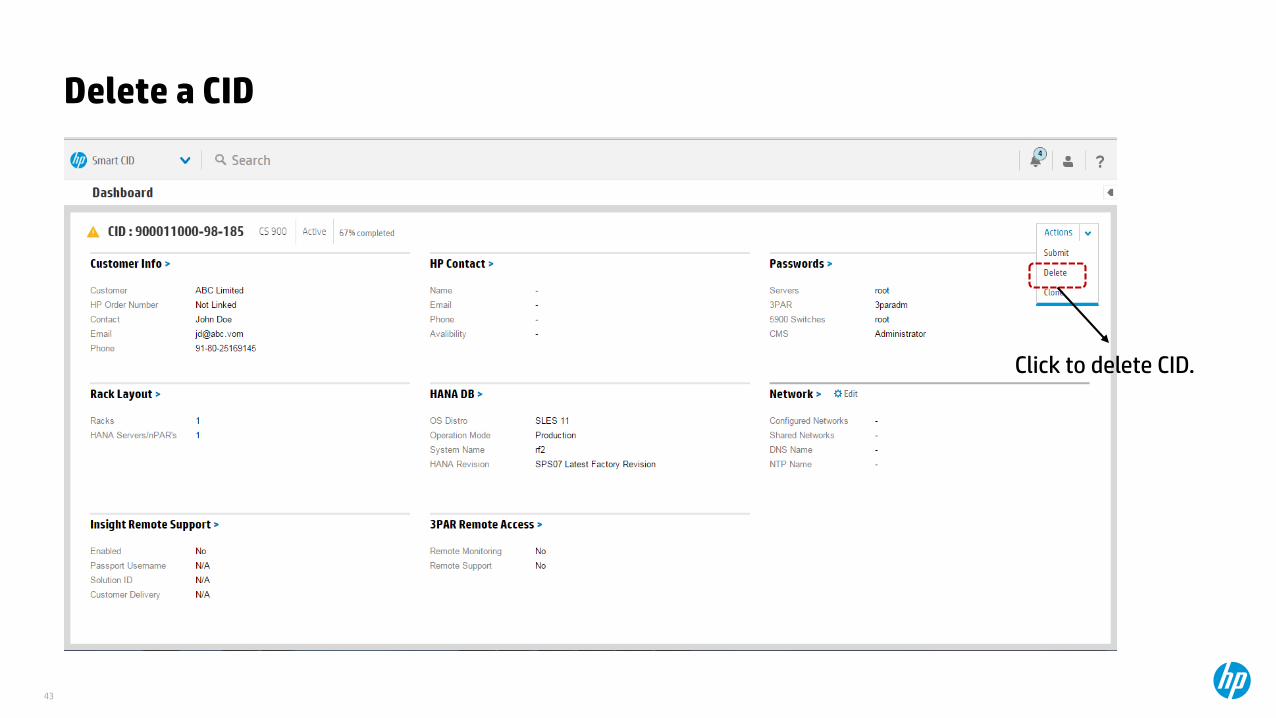
Delete a CID
43
Click to delete CID.
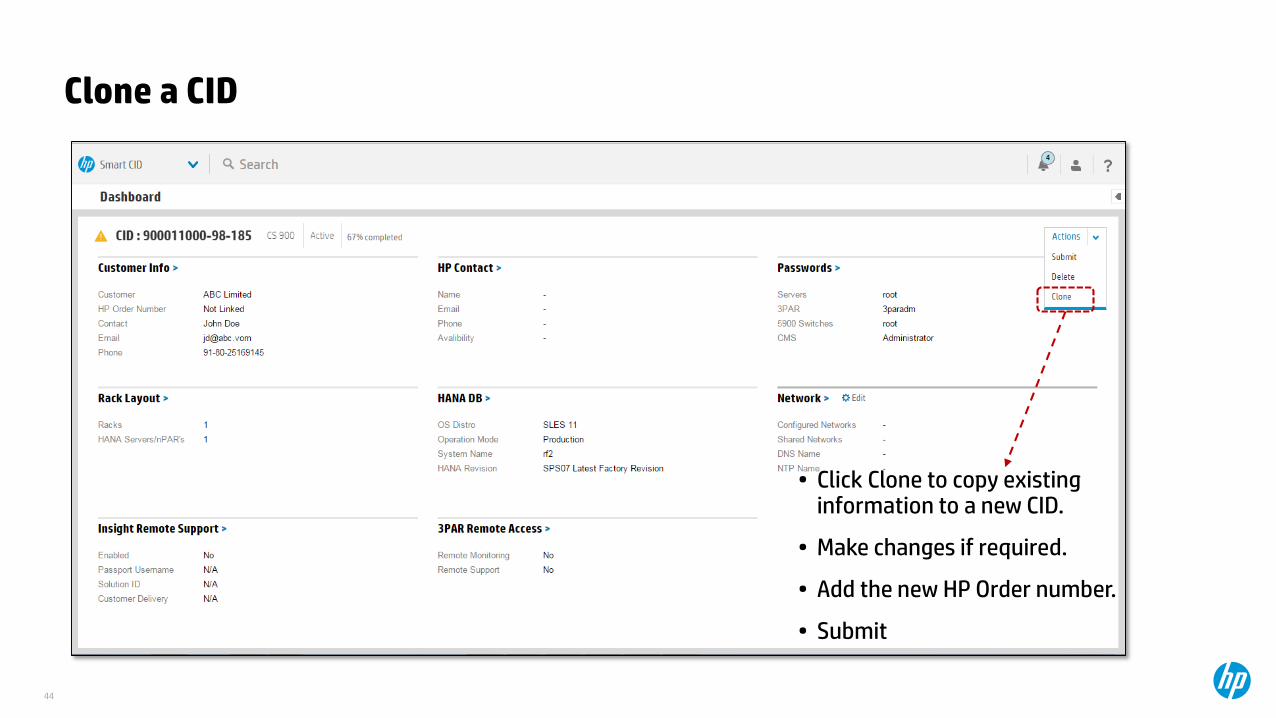
Clone a CID
44
• Click Clone to copy existing information to a new CID.
• Make changes if required.
• Add the new HP Order number.
• Submit
Thank you
HP Converged Systems
45