single sign-on - cisco sign-on • singlesign-on, page 1 • singlesign-onflow, page 3 •...
TRANSCRIPT
Single Sign-On
• Single Sign-On, page 1
• Single Sign-On Flow, page 3
• Single Sign-On Installation, page 4
• Installation Task Flow for Cisco Identity Service, page 4
• Configure an Identity Provider (IdP), page 16
• Set up the System Inventory for Single Sign-On, page 21
• Configure the Cisco Identity Service, page 24
• Register Components and Set Single Sign-On Mode, page 26
• Migration Considerations Before Enabling Single Sign-On, page 27
• Migrate Agents and Supervisors to Single Sign-On Accounts, page 29
• Single Sign-On Migration and the Configuration Manager, page 30
• Related Documentation, page 32
Single Sign-OnSingle sign-on (SSO) is an authentication and authorization process. (Authentication proves you are the useryou say that you are, and authorization verifies that you are allowed to do what you are trying to do.) SSOallows users to sign in to one application and then securely access other authorized applications without aprompt to resupply user credentials. SSO permits Cisco supervisors or agents to sign on only once with ausername and password to gain access to all of their Cisco browser-based applications and services within asingle browser instance. By using SSO, Cisco administrators can manage all users from a common userdirectory and enforce password policies for all users consistently.
SSO is an optional feature whose implementation requires you to enable the HTTPS protocol across theenterprise solution.
You can choose from three different single sign-on modes when making a decision about implementing singlesign-on:
• SSO - Enable all agents and supervisors in the deployment for SSO.
Cisco Unified Contact Center Enterprise Features Guide, Release 11.5(1) 1

• Hybrid - Enable agents and supervisors selectively in the deployment for SSO. This mode allows youto phase in the migration of agents from a non-SSO deployment to an SSO deployment and enable SSOfor local PGs. The mode is also useful if you have third-party applications that don't support SSO, andsome agents and supervisors must be SSO-disabled to log into those applications.
• Non-SSO - Continue to use existing Active Directory-based and local authentication, without SSO.
SSO uses Security AssertionMarkup Language (SAML) to exchange authentication and authorization detailsbetween an identity provider (IdP) and an identity service (IdS). The IdP authenticates based on user credentials,and the IdS provides authorization between the IdP and applications. The IdP issues SAML assertions, whichare packages of security information transferred from the IdP to the service provider for user authentication.Each assertion is an XML document that contains trusted statements about a subject including, for example,username and privileges. SAML assertions are digitally signed to ensure their authenticity.
The IdS generates an authentication request (also known as a SAML request) and directs it to the IdP. SAMLdoes not specify the method of authentication at the IdP. It may use a username and password or other formof authentication, including multifactor authentication. A directory service such as LDAP or AD that allowsa user to sign in with a username and a password is a typical source of authentication tokens at an IdP.
Prerequisites
The Identity Provider must support Security Assertion Markup Language (SAML) 2.0. See the CompatibilityMatrix for your contact center solution at http://docwiki.cisco.com/wiki/Compatibility_Matrixes_for_Contact_Center_Solutions for details.
Contact Center Enterprise Reference Design Support for Single Sign-OnUnified CCE supports single sign-on for the following reference designs:
• 2000 Agents
• 4000 Agents
• 12000 Agents (maximum of 4000 active SSO agents)
• Contact Director (Maximum of 8000 active agents, 4000 on each of two target Unified CCE deploymentinstances. Each target system must include a dedicated Cisco IdS deployment.)
Deployment Options for Cisco Identity ServiceUnified CCECisco Identity Service deployment is either coresident or standalone. In a coresident deployment,Cisco Unified Intelligence Center, Live Data, and Cisco Identity Service (IdS) are installed on the same VMserver. In a standalone deployment, Unified Intelligence Center, Live Data, and Cisco Identity Service (IdS)are installed on separate VM servers.
Unified CCEReference Design
Cisco IdS coresident with Unified Intelligence Center and Live Data on a single VMserver.
2000 agent
Standalone IdS VM server4000 agent
Cisco Unified Contact Center Enterprise Features Guide, Release 11.5(1)2
Single Sign-OnContact Center Enterprise Reference Design Support for Single Sign-On
Unified CCEReference Design
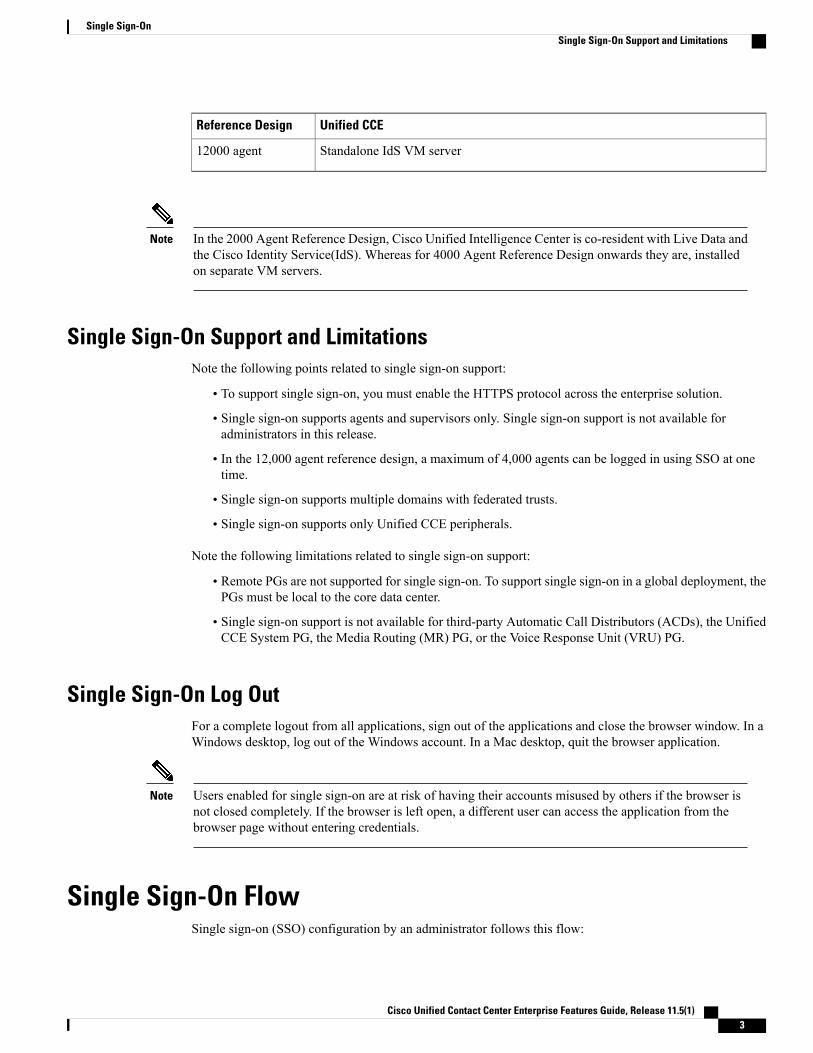
Standalone IdS VM server12000 agent
In the 2000 Agent Reference Design, Cisco Unified Intelligence Center is co-resident with Live Data andthe Cisco Identity Service(IdS). Whereas for 4000 Agent Reference Design onwards they are, installedon separate VM servers.
Note
Single Sign-On Support and LimitationsNote the following points related to single sign-on support:
• To support single sign-on, you must enable the HTTPS protocol across the enterprise solution.
• Single sign-on supports agents and supervisors only. Single sign-on support is not available foradministrators in this release.
• In the 12,000 agent reference design, a maximum of 4,000 agents can be logged in using SSO at onetime.
• Single sign-on supports multiple domains with federated trusts.
• Single sign-on supports only Unified CCE peripherals.
Note the following limitations related to single sign-on support:
• Remote PGs are not supported for single sign-on. To support single sign-on in a global deployment, thePGs must be local to the core data center.
• Single sign-on support is not available for third-party Automatic Call Distributors (ACDs), the UnifiedCCE System PG, the Media Routing (MR) PG, or the Voice Response Unit (VRU) PG.
Single Sign-On Log OutFor a complete logout from all applications, sign out of the applications and close the browser window. In aWindows desktop, log out of the Windows account. In a Mac desktop, quit the browser application.
Users enabled for single sign-on are at risk of having their accounts misused by others if the browser isnot closed completely. If the browser is left open, a different user can access the application from thebrowser page without entering credentials.
Note
Single Sign-On FlowSingle sign-on (SSO) configuration by an administrator follows this flow:
Cisco Unified Contact Center Enterprise Features Guide, Release 11.5(1) 3
Single Sign-OnSingle Sign-On Support and Limitations

1 Install Release 11.0(1).
2 Install Release 11.5(1).
3 Install the Cisco Identity Service (Cisco IdS).
4 Install and configure the Identity Provider (IdP).
5 Configure System Inventory.
6 Configure the Cisco IdS.
7 Register and test SSO-compatible components with the Cisco IdS.
8 Choose the SSO mode.
9 Enable multiple users at once for SSO by using the SSO migration tool, or enable users one at time byusing the configuration tools.
Related Topics
Install Cisco Identity Service Standalone Deployment, on page 5Configure the Cisco Identity Service, on page 24Configure an Identity Provider (IdP), on page 16Set up the System Inventory for Single Sign-On, on page 21Register Components and Set Single Sign-On Mode, on page 26Set the Single Sign-On Mode for the SystemMigrate Agents and Supervisors to Single Sign-On Accounts, on page 29Single Sign-On Migration and the Configuration Manager, on page 30
Single Sign-On InstallationSingle Sign-On is included with Release 11.5. Complete the installation or upgrade procedure inCisco UnifiedContact Center Enterprise Installation and Upgrade Guide at http://www.cisco.com/c/en/us/support/customer-collaboration/unified-contact-center-enterprise/products-installation-guides-list.html.
Installation Task Flow for Cisco Identity ServiceYou can install Cisco Identity Service as a standalone or coresident deployment.
SeeTask
Install Cisco Identity Service StandaloneDeployment, on page 5
or
Install Coresident Deployment (CiscoUnified Intelligence Center with Live Dataand IdS), on page 11
Install Cisco Identity Service Standalone Deployment (4000,8000, 12000 Agent Deployment)
or
Install Coresident Deployment (2000 Agent Deployment)
Cisco Unified Contact Center Enterprise Features Guide, Release 11.5(1)4
Single Sign-OnSingle Sign-On Installation

Install Cisco Identity Service Standalone DeploymentFollow this sequence of tasks to install the Cisco Identity Service (Cisco IdS) standalone deployment.
TaskSequence
Set Deployment Type in Unified CCE Administration Configuration, on page 51
Verify that you created a separate virtual machine for the IdS publisher node and the IdSsubscriber node. See Set Up Virtual Machines, on page 5.
2
Install IdS publisher node. See Install Publishers/Primary Nodes of VOS-Based ContactCenter Applications, on page 7
3
Set IdS subscriber node. See Set IdS Subscriber Node, on page 84
Install IdS subscriber node. See Install Subscribers/Secondary Nodes of VOS-Based ContactCenter Applications, on page 10
5
Upgrade VMware Tools. See Install VMware Tools, on page 116
Set Deployment Type in Unified CCE Administration ConfigurationBefore you install or upgrade IdS you must set the deployment type.
Procedure
Step 1 Navigate to Unified CCE Administration > System > Deployment.Step 2 Select your deployment from the drop-down menu and click Next.
Set Up Virtual Machines
Verify Datastores
Before you install the VMs, verify that the datastore is in place. The type of datastore depends on the type ofserver on which you deploy the VMs. For example, UCS-B servers use a SAN datastore and UCS-C serversuse DAS datastores.
For more information, see the VMware documentation.
Cisco Unified Contact Center Enterprise Features Guide, Release 11.5(1) 5
Single Sign-OnInstall Cisco Identity Service Standalone Deployment

Download Unified CCE OVA Files
The Unified CCE Open Virtualization Format (OVA) files define the basic structure of the correspondingVMs that are created. The structure definition includes the CPU, RAM, disk space, reservation for CPU, andreservation for memory.
Before You Begin
You must have a valid service contract associated with your Cisco.com profile.
Procedure
Step 1 Go to the Unified CCE Download Software page on Cisco.com.Step 2 Click Download to download and save the appropriate OVA file to your local hard drive. When you create
VMs, you select the OVA required for the application.
Create Virtual Machines from OVA Files
To create virtual machines (VMs) from the OVA files, complete the following procedure.
Procedure
Step 1 Select the Host in the vSphere client.Step 2 Choose File > Deploy OVF Template.Step 3 Browse to the location on your local drive where you stored the OVA. Click Open to select the file. Click
Next.Step 4 Click Next at the OVF Template Details page.Step 5 Enter the virtual machine name. It cannot contain spaces or special characters. Enter a maximum of 32
characters. Click Next.Step 6 On the Name and Location page, enter a name of your choice in the Name field. Click Next.
After the VM is created, you cannot renameit.
Important
Step 7 On the Deployment Configuration page, select the applicable configuration from the drop-down list. ClickNext.
Step 8 Choose a data store on which to deploy the new virtual machine. Click Next.Some deployments require two datastores.
Note
Step 9 On the Disk Format page, choose Thick provisioned Eager Zeroed format for the virtual disk format.Click Next.
Thick provisioned Lazy Zero is also supported, butThin provisioned is not supported.Note
Step 10 Confirm that the Network Mapping page is correct:a) Public network adapter to Public networkb) Private network adapter to Private network
Cisco Unified Contact Center Enterprise Features Guide, Release 11.5(1)6
Single Sign-OnInstall Cisco Identity Service Standalone Deployment

For some deployments, only one network interface isavailable.
Note
Step 11 Click Finish.Step 12 At the Successfully Completed message, click Close.
ECE requires a second virtual hard drive on its VM. The OVA creates one virtual hard drive. Create asecond hard drive of an appropriate size for your solution requirements.
Note
Procedure
PurposeCommand or Action
Step 1
Install Publishers/Primary Nodes of VOS-Based Contact Center Applications
Before You Begin
DNS Configuration is mandatory for installation of Cisco Unified Communications Manager, Cisco UnifiedIntelligence Center, and Cisco Finesse. To configure DNS, add the VMs to the forward and reverse lookupsof the DNS.
If the deployment uses host files in addition to DNS, use FQDNs in the host file. Live Data and singlesign-on (SSO) require FQDNs in order to work properly.
Note
Procedure
Step 1 Mount the ISO image for the software to the virtual machine.Step 2 Select the virtual machine and power it on.Step 3 Follow the Install wizard, making selections as follows:
a) In the Disk Found screen, click OK to begin the verification of the media integrity.b) In the Success screen, select OK.c) In the Product Deployment Selection screen:
• For the Progger (Lab only) or 2000 agent reference design, choose the coresident deployment optionCiscoUnified IntelligenceCenter with Live Data and IdS, and then selectOK. TheCiscoUnifiedIntelligence Center with Live Data and IdS option installs Cisco Unified Intelligence Center withLive Data and Cisco Identity Service (IdS) on the same server.
• For all other deployments, select one of the standalone install options. For example, select CiscoUnified Intelligence Center, Live Data, or Cisco Identity Service (IdS). Then select OK.
Cisco Unified Contact Center Enterprise Features Guide, Release 11.5(1) 7
Single Sign-OnInstall Cisco Identity Service Standalone Deployment
d) In the Proceed with Install screen, select Yes.e) In the Platform Installation Wizard screen, select Proceed.f) In the Apply Patch screen, select No.g) In the Basic Install screen, select Continue.h) In theTimezone Configuration screen, use the down arrow to choose the local time zone that most closely
matches where your server is located. Select OK.i) In the Auto Negotiation Configuration screen, select Continue.j) In theMTUConfiguration screen, selectNo to keep the default setting forMaximumTransmission Units.k) In the DHCP Configuration screen, select No.l) In the Static Network Configuration screen, enter static configuration values. Select OK.m) In the DNS Client Configuration screen, enter your DNS client configuration. Select OK.n) In the Administrator Login Configuration screen, enter the Platform administration username. Enter
and confirm the password for the administrator. Select OK.o) In theCertificate Information screen, enter data to create your Certificate Signing Request: Organization,
Unit, Location, State, and Country. Select OK.p) In the First Node Configuration screen, select Yes.q) In the Network Time Protocol Client Configuration screen, enter a valid NTP server IP address and
select OK.r) In the Security Configuration screen, enter the security password and select OK.s) In the SMTP Host Configuration screen, select No.t) In the Application User Configuration screen, enter the application username. Enter, and confirm the
application user password. Select OK.u) In the Platform Configuration Confirmation screen, select OK. The installation begins and can run
unattended.
• There is a reboot in the middle of the installation.
• The installation ends at a sign-in prompt.
Step 4 Unmount the ISO image.
Set IdS Subscriber NodeYoumust provide the publisher node the address of the subscriber node. You do this with the set ids subscribercommand.
Procedure
Step 1 Log in to your publisher IdS node.Step 2 Run the following command to set the subscriber node:
set ids subscriber name
Cisco Unified Contact Center Enterprise Features Guide, Release 11.5(1)8
Single Sign-OnInstall Cisco Identity Service Standalone Deployment

name
Specifies the hostname or ip address of the IdS subscriber node address.
Identity Service CLI CommandsYou can use these Cisco IdS CLI commands only in an IdS standalone deployment. You run these commandson the IdS publisher node.
set ids subscriber
Required Minimum Privilege Level: Advanced
Use this command to set the single sign-on Identity Service (IdS) subscriber node address .
Command Syntax
set ids subscriber name
name
Specifies the hostname or ip address of the IdS subscriber node address.
unset ids subscriber
Required Minimum Privilege Level: Advanced
Use this command to unset IdS subscriber node configuration.
unset ids subscriber
There are no required parameters.
show ids subscriber
Required Minimum Privilege Level: Ordinary
Use this command to show IdS subscriber node information.
show ids subscriber
There are no required parameters.
Cisco Unified Contact Center Enterprise Features Guide, Release 11.5(1) 9
Single Sign-OnInstall Cisco Identity Service Standalone Deployment

Install Subscribers/Secondary Nodes of VOS-Based Contact Center Applications
Before You Begin
DNS Configuration is mandatory for installation of Cisco Unified Communications Manager, Cisco UnifiedIntelligence Center, and Cisco Finesse. To configure DNS, add the VMs to the forward and reverse lookupsof the DNS.
If the deployment uses host files in addition to DNS, use FQDNs in the host file. Live Data and singlesign-on (SSO) require FQDNs in order to work properly.
Note
Before you install the subscriber/secondary nodes, youmust install the publisher/primary nodes and configurethe clusters.
Procedure
Step 1 Mount the ISO image for the software to the virtual machine.Step 2 Select the virtual machine and power it on.Step 3 Follow the Install wizard, making selections as follows:
a) In the Disk Found screen, click OK to begin the verification of the media integrity.b) In the Success screen, select OK.c) In the Product Deployment Selection screen:
• For the Progger (Lab only) or 2000 agent reference design, choose the coresident deployment optionCiscoUnified IntelligenceCenter with Live Data and IdS, and then selectOK. TheCiscoUnifiedIntelligence Center with Live Data and IdS option installs Cisco Unified Intelligence Center, LiveData, and Cisco Identity Service (IdS) on the same server.
• For all other deployments, select one of the standalone install options. For example, select CiscoUnified Intelligence Center, Live Data, or Cisco Identity Service (IdS). Then select OK.
d) In the Proceed with Install screen, select Yes.e) In the Platform Installation Wizard screen, select Proceed.f) In the Apply Patch screen, select No.g) In the Basic Install screen, select Continue.h) In theTimezone Configuration screen, use the down arrow to choose the local time zone that most closely
matches where your server is located. Select OK.i) In the Auto Negotiation Configuration screen, select Continue.j) In theMTUConfiguration screen, selectNo to keep the default setting forMaximumTransmission Units.k) In the DHCP Configuration screen, select No.l) In the Static Network Configuration screen, enter static configuration values. Select OK.m) In the DNS Client Configuration screen, enter your DNS client configuration. Select OK.n) In the Administrator Login Configuration screen, enter the Platform administration username. Enter
and confirm the password for the administrator. Select OK.o) In theCertificate Information screen, enter data to create your Certificate Signing Request: Organization,
Unit, Location, State, and Country. Select OK.p) In the First Node Configuration screen, select No.
Cisco Unified Contact Center Enterprise Features Guide, Release 11.5(1)10
Single Sign-OnInstall Cisco Identity Service Standalone Deployment

q) In the warning screen, select OK.r) In the Network Connectivity Test Configuration screen, select No.s) In the First Node Access Configuration screen, enter the host name and IP address of the first node.
Enter and confirm the security password. Select OK.t) In the SMTP Host Configuration screen, select No.u) In the Platform Configuration Confirmation screen, select OK. The installation begins and can run
unattended.
• There is a reboot in the middle of the installation.
• The installation ends at a sign-in prompt.
Step 4 Unmount the ISO image.
Install VMware ToolsTo install or upgrade VMware Tools using VOS, for both nodes of Live Data, perform the following steps:
1 Ensure that your virtual machine is powered on.
2 Right-click the VM menu. Select Guest > Install / Upgrade VMware tools
3 Choose the interactive tools update and press OK.
4 Open the console and log in at the command prompt.
5 Enter the command utils vmtools refresh and confirm.
The server automatically reboots twice.
6 After reboot, check the Summary tab for the VM to verify that the VMware Tools version is current. Ifit is not current, reboot the VM and check the version again.
The process takes a few minutes. After the process is complete, the tools are listed as Running (Current) onthe VM's Summary tab in vSphere.
Install Coresident Deployment (Cisco Unified Intelligence Center with LiveData and IdS)
Follow this sequence of tasks to install the coresident deployment (Cisco Unified Intelligence Center withLive Data and IdS).
TaskSequence
Set Deployment Type in Unified CCE Administration Configuration, on page 121
Install IdS publisher node. See Install Publishers/Primary Nodes of VOS-Based ContactCenter Applications, on page 12
2
Cisco Unified Contact Center Enterprise Features Guide, Release 11.5(1) 11
Single Sign-OnInstall Coresident Deployment (Cisco Unified Intelligence Center with Live Data and IdS)

TaskSequence
Install IdS subscriber node. See Install Subscribers/Secondary Nodes of VOS-Based ContactCenter Applications, on page 13
3
Add Coresident (Cisco Unified Intelligence Center with Live Data and IdS) Machine Typeto the System Inventory, on page 15
4
Upgrade VMware Tools. See Install VMware Tools, on page 155
Set Deployment Type in Unified CCE Administration ConfigurationBefore you install or upgrade IdS you must set the deployment type.
Procedure
Step 1 Navigate to Unified CCE Administration > System > Deployment.Step 2 Select your deployment from the drop-down menu and click Next.
Install Publishers/Primary Nodes of VOS-Based Contact Center Applications
Before You Begin
DNS Configuration is mandatory for installation of Cisco Unified Communications Manager, Cisco UnifiedIntelligence Center, and Cisco Finesse. To configure DNS, add the VMs to the forward and reverse lookupsof the DNS.
If the deployment uses host files in addition to DNS, use FQDNs in the host file. Live Data and singlesign-on (SSO) require FQDNs in order to work properly.
Note
Procedure
Step 1 Mount the ISO image for the software to the virtual machine.Step 2 Select the virtual machine and power it on.Step 3 Follow the Install wizard, making selections as follows:
a) In the Disk Found screen, click OK to begin the verification of the media integrity.b) In the Success screen, select OK.c) In the Product Deployment Selection screen:
• For the Progger (Lab only) or 2000 agent reference design, choose the coresident deployment optionCiscoUnified IntelligenceCenter with Live Data and IdS, and then selectOK. TheCiscoUnified
Cisco Unified Contact Center Enterprise Features Guide, Release 11.5(1)12
Single Sign-OnInstall Coresident Deployment (Cisco Unified Intelligence Center with Live Data and IdS)

Intelligence Center with Live Data and IdS option installs Cisco Unified Intelligence Center withLive Data and Cisco Identity Service (IdS) on the same server.
• For all other deployments, select one of the standalone install options. For example, select CiscoUnified Intelligence Center, Live Data, or Cisco Identity Service (IdS). Then select OK.
d) In the Proceed with Install screen, select Yes.e) In the Platform Installation Wizard screen, select Proceed.f) In the Apply Patch screen, select No.g) In the Basic Install screen, select Continue.h) In theTimezone Configuration screen, use the down arrow to choose the local time zone that most closely
matches where your server is located. Select OK.i) In the Auto Negotiation Configuration screen, select Continue.j) In theMTUConfiguration screen, selectNo to keep the default setting forMaximumTransmission Units.k) In the DHCP Configuration screen, select No.l) In the Static Network Configuration screen, enter static configuration values. Select OK.m) In the DNS Client Configuration screen, enter your DNS client configuration. Select OK.n) In the Administrator Login Configuration screen, enter the Platform administration username. Enter
and confirm the password for the administrator. Select OK.o) In theCertificate Information screen, enter data to create your Certificate Signing Request: Organization,
Unit, Location, State, and Country. Select OK.p) In the First Node Configuration screen, select Yes.q) In the Network Time Protocol Client Configuration screen, enter a valid NTP server IP address and
select OK.r) In the Security Configuration screen, enter the security password and select OK.s) In the SMTP Host Configuration screen, select No.t) In the Application User Configuration screen, enter the application username. Enter, and confirm the
application user password. Select OK.u) In the Platform Configuration Confirmation screen, select OK. The installation begins and can run
unattended.
• There is a reboot in the middle of the installation.
• The installation ends at a sign-in prompt.
Step 4 Unmount the ISO image.
Install Subscribers/Secondary Nodes of VOS-Based Contact Center Applications
Before You Begin
DNS Configuration is mandatory for installation of Cisco Unified Communications Manager, Cisco UnifiedIntelligence Center, and Cisco Finesse. To configure DNS, add the VMs to the forward and reverse lookupsof the DNS.
Cisco Unified Contact Center Enterprise Features Guide, Release 11.5(1) 13
Single Sign-OnInstall Coresident Deployment (Cisco Unified Intelligence Center with Live Data and IdS)

If the deployment uses host files in addition to DNS, use FQDNs in the host file. Live Data and singlesign-on (SSO) require FQDNs in order to work properly.
Note
Before you install the subscriber/secondary nodes, youmust install the publisher/primary nodes and configurethe clusters.
Procedure
Step 1 Mount the ISO image for the software to the virtual machine.Step 2 Select the virtual machine and power it on.Step 3 Follow the Install wizard, making selections as follows:
a) In the Disk Found screen, click OK to begin the verification of the media integrity.b) In the Success screen, select OK.c) In the Product Deployment Selection screen:
• For the Progger (Lab only) or 2000 agent reference design, choose the coresident deployment optionCiscoUnified IntelligenceCenter with Live Data and IdS, and then selectOK. TheCiscoUnifiedIntelligence Center with Live Data and IdS option installs Cisco Unified Intelligence Center, LiveData, and Cisco Identity Service (IdS) on the same server.
• For all other deployments, select one of the standalone install options. For example, select CiscoUnified Intelligence Center, Live Data, or Cisco Identity Service (IdS). Then select OK.
d) In the Proceed with Install screen, select Yes.e) In the Platform Installation Wizard screen, select Proceed.f) In the Apply Patch screen, select No.g) In the Basic Install screen, select Continue.h) In theTimezone Configuration screen, use the down arrow to choose the local time zone that most closely
matches where your server is located. Select OK.i) In the Auto Negotiation Configuration screen, select Continue.j) In theMTUConfiguration screen, selectNo to keep the default setting forMaximumTransmission Units.k) In the DHCP Configuration screen, select No.l) In the Static Network Configuration screen, enter static configuration values. Select OK.m) In the DNS Client Configuration screen, enter your DNS client configuration. Select OK.n) In the Administrator Login Configuration screen, enter the Platform administration username. Enter
and confirm the password for the administrator. Select OK.o) In theCertificate Information screen, enter data to create your Certificate Signing Request: Organization,
Unit, Location, State, and Country. Select OK.p) In the First Node Configuration screen, select No.q) In the warning screen, select OK.r) In the Network Connectivity Test Configuration screen, select No.s) In the First Node Access Configuration screen, enter the host name and IP address of the first node.
Enter and confirm the security password. Select OK.t) In the SMTP Host Configuration screen, select No.u) In the Platform Configuration Confirmation screen, select OK. The installation begins and can run
unattended.
Cisco Unified Contact Center Enterprise Features Guide, Release 11.5(1)14
Single Sign-OnInstall Coresident Deployment (Cisco Unified Intelligence Center with Live Data and IdS)

• There is a reboot in the middle of the installation.
• The installation ends at a sign-in prompt.
Step 4 Unmount the ISO image.
Add Coresident (Cisco Unified Intelligence Center with Live Data and IdS) Machine Type tothe System Inventory
Procedure
Step 1 In Unified CCE Administration, navigate to System > Deployment.Step 2 Add the new machine to the System Inventory:
a) Click Add.The Add Machine popup window opens.
b) From the Type drop-down menu, select the following machine type:CUIC_LD_IdS Publisher, for the coresident Unified Intelligence Center, Live Data, and Identity Servicemachine available in the 2000 agent reference design.
c) In the Hostname field, enter the FQDN, hostname, or IP address of the machine.The system attempts to convert the value you enter to FQDN.
d) Enter the machine's Administration credentials.e) Click Save.The machine and its related Subscriber or Secondary machine are added to the System Inventory.
What to Do Next
If you remove a component from your deployment, delete it from your System Inventory. If you add thecomponent again, or add more components, add those components to the System Inventory.
Install VMware ToolsTo install or upgrade using VOS, for Cisco Unified Communications Manager:
1 Ensure that your virtual machine is powered on.
2 Right-click the VM menu. Select Guest > Install / Upgrade VMware tools
3 Choose the interactive tools update and press OK.
4 Open the console and log in at the command prompt.
5 Enter the command utils vmtools refresh and confirm.
The server automatically reboots twice.
Cisco Unified Contact Center Enterprise Features Guide, Release 11.5(1) 15
Single Sign-OnInstall Coresident Deployment (Cisco Unified Intelligence Center with Live Data and IdS)

6 After reboot, check the Summary tab for the VM to verify that the VMware Tools version is current. Ifit is not current, reboot the VM and check the version again.
The process takes a few minutes. After the process is complete, the tools are listed as Running (Current) onthe VM's Summary tab in vSphere.
Configure an Identity Provider (IdP)To support SSO for the contact center solution, youmust configure an Identity Provider (IdP) that is compliantwith the Security Assertion Markup Language 2.0 (SAML v2) Oasis standard. The IdP stores user profilesand provides authentication services to the contact center solution.
For a current list of supported Identity Provider products and versions, refer to the Compatibility Matrix foryour contact center solution at http://docwiki.cisco.com/wiki/Compatibility_Matrixes_for_Contact_Center_Solutions.
This section provides sample configuration information for Microsoft AD FS.
Follow this sequence of tasks to configure the Identity Provider.
TaskSequence
Install and Configure Active Directory Federation Services, on page 161
Set Authentication Type. See Authentication Types, on page 17.2
Establish Trust Relationship, on page 173
Enable Signed SAML Assertions, on page 204
Optionally Customize the AD FS Sign-In Page in Windows Server 2012 R2 to Allow UserID, on page 20
5
Install and Configure Active Directory Federation ServicesFollowMicrosoft instructions and recommendations to install Microsoft Active Directory Federation Services(AD FS).
For example, seeActive Directory Federation Services Overview at https://technet.microsoft.com/en-us/library/hh831502(v=ws.11).aspx
• For AD FS 2.0, see AD FS Content Map at http://aka.ms/adfscontentmap.
• For AD FS inWindows Server 2012 R2, see ADFS Technical Reference at https://technet.microsoft.com/en-us/library/dn303410(v=ws.11).aspx.
The certificate trust between the IdP and the Cisco Identity Service (Cisco IdS) requires SHA-1. (Certificatetrust between Cisco IdS and the application browsers uses SHA-256.)
Note
Cisco Unified Contact Center Enterprise Features Guide, Release 11.5(1)16
Single Sign-OnConfigure an Identity Provider (IdP)

Authentication TypesCisco Identity Service requires the Identity Provider to provide form-based authentication.
In AD FS, be sure that the default Authentication Type is set to Forms. See theMicrosoft AD FS documentationfor details.
Establish Trust Relationship
Before You Begin
To enable applications to use Cisco Identity Service (Cisco IdS) for Single Sign-On, perform the metadataexchange between the Cisco IdS and the Identity Provider (IdP).
• Download the SAML SP Metadata file, sp.xml, on the Cisco IdS publisher primary node.
1 Open Identity Service Management by doing either of the following:
• Open the Identity Service Management window: https://<Cisco IdS serveraddress>:8553/idsadmin.
• In Unified CCE Administration, navigate to System > Single Sign-On and click IdentityService Management.
2 On the Settings > IdS Trust tab, download the SAML SP Metadata file, sp.xml.
• Download the Identity Provider Metadata file, federationmetadata.xml, from the IdP.
1 Download the Identity Provider Metadata file from the IdP at the location:
https://<ADFSServerFQDN>/federationmetadata/2007-06/federationmetadata.xml.
2 On the Identity Service Management page, upload the Identity Provider Metadata file that wasdownloaded in the previous step.
Cisco Unified Contact Center Enterprise Features Guide, Release 11.5(1) 17
Single Sign-OnInstall and Configure Active Directory Federation Services

Procedure
Step 1 In AD FS, be sure that the default Authentication Type is set to Forms. (Cisco Identity Service requires theIdentity Provider to provide form-based authentication.) See the Microsoft AD FS documentation for details.
Step 2 In AD FS server click, Start -> All Programs -> Administrative Tools -> AD FS Management.Step 3 Right-click AD FS -> Trust Relationships -> Relying Party Trust.Step 4 From the menu, choose Add Relying Party Trust to launch the Add Relying Party Trust Wizard.Step 5 In the Select Data Source step, choose the option Import data about the relying party from a file.Step 6 Browse to the sp.xml file that you downloaded from Cisco Identity Server and complete the import to
establish the relying party trust.Step 7 Select the step Specify Display Name, and add a significant name you can use to identify the Relying Party
Trust.Step 8 In AD FS in Windows Server 2012 R, in the Step Configure Multi-factor Authentication Now, select the
option I do not want to configure multi-factor authentication settings for the relying party at this time.This step does not appear in AD FS 2.0 or 2.1. Continue with the next step.
Step 9 In the Step Choose Issuance Authorization Rules, select the option Permit all users to access this relyingparty and click Next.
Step 10 Click Next again to finish adding the relying party.Step 11 Right-click on the Relying Party Trust and click Properties. Select the Identifiers tab.Step 12 On the Identifiers tab, Set Display name to the name you specified when creating the Relying Party Trust,
and set theRelying party identifier to the fully qualified hostname of the Cisco Identity Server from whichsp.xml was downloaded.
Step 13 Still in Properties, select the Advanced tab.Step 14 Select secure hash algorithm as SHA-1 and then click OK.
In the following steps, you configure two claim rules to specify the claims that are sent from AD FSto Cisco Identity Service as part of a successful SAML assertion:
Note
• A claim rule with the following custom claims, as AttributeStatements, in the assertion:
◦uid - Identifies the authenticated user in the claim sent to the applications.
◦user_principal - Identifies the authentication realm of the user in the assertion sent toCisco Identity Service.
• A second claim rule that is a NameID custom claim rule specifying the fully qualified domainname of the AD FS server and the Cisco IdS server.
Follow the steps to configure these rules.
Step 15 In Relying Party Trusts, right-click on the Relying Party Trust you created, and click Edit Claim Rules.Step 16 Follow these steps to add a rule with Send LDAP Attributes as Claims as the Claim rule template.
a) In the Issuance Transform Rules tab, click Add Rule.b) In the Step Choose Rule Type, select the claim rule template Send LDAP Attributes as Claims and
click Next.c) In the Configure Claim Rule step, in the Claim rule name field, enter NameID.d) Set the Attribute store drop-down to Active Directory.
Cisco Unified Contact Center Enterprise Features Guide, Release 11.5(1)18
Single Sign-OnInstall and Configure Active Directory Federation Services

e) Set the tableMapping of LDAP attributes to outgoing claim types to the appropriateLDAPAttributesand the corresponding Outgoing Claim Type for the type of user identifier you are using:
•When the identifier is stored as a SAM-Account-Name attribute:
1 Select anLDAPAttributeof SAM-Account-Name, and set the correspondingOutgoing ClaimType to uid (lowercase).
2 Select a second LDAP Attribute ofUser-Principal-Name and set the correspondingOutgoingClaim Type to user_principal (lowercase).
•When the identifier is a UPN:
1 Select anLDAPAttributeofUser-Principal-Name, and set the correspondingOutgoing ClaimType to uid (lowercase).
2 Select a second LDAP Attribute ofUser-Principal-Name and set the correspondingOutgoingClaim Type to user_principal (lowercase).
Step 17 Follow these steps to add a second rule with the template custom claim rule.a) Select Add Rule on the Edit Claim Rules window.b) Select Send Claims Using Custom Rule.c) Set the name of rule to the fully qualified domain name (FQDN) of the Cisco Identity Server publisher
(primary) node.d) Add the following rule text:
c:[Type == "http://schemas.microsoft.com/ws/2008/06/identity/claims/windowsaccountname"]=>issue(Type = "http://schemas.xmlsoap.org/ws/2005/05/identity/claims/nameidentifier",Issuer = c.Issuer, OriginalIssuer = c.OriginalIssuer, Value = c.Value, ValueType =c.ValueType,Properties["http://schemas.xmlsoap.org/ws/2005/05/identity/claimproperties/format"] ="urn:oasis:names:tc:SAML:2.0:nameid-format:transient",Properties["http://schemas.xmlsoap.org/ws/2005/05/identity/claimproperties/namequalifier"]="http://<AD FS Server FQDN>/adfs/services/trust",
Properties["http://schemas.xmlsoap.org/ws/2005/05/identity/claimproperties/spnamequalifier"]="<fully qualified domain name of Cisco IdS>");
e) Edit the script as follows:
• Replace <AD FS Server FQDN> to match exactly (including case) the AD FS server FQDN (fullyqualified domain name.)
• Replace <fully qualified domain name of Cisco IdS> to match exactly (including case) the CiscoIdentity Server FQDN.
Step 18 Click OK.
Cisco Unified Contact Center Enterprise Features Guide, Release 11.5(1) 19
Single Sign-OnInstall and Configure Active Directory Federation Services

Enable Signed SAML AssertionsEnable Signed SAML Assertions for the Relying Party Trust (Cisco Identity Service).
Procedure
Step 1 Click Start and type powershell in the Search field to display the Windows Powershell icon.Step 2 Right-click on the Windows Powershell program icon and select Run as administrator
All PowerShell commands in this procedure must be run in Administratormode.
Note
Step 3 Run the command, Set-ADFSRelyingPartyTrust -TargetName <Relying Party Trust Display Name>-SamlResponseSignature "MessageAndAssertion".
Set <Relying Party Trust Display Name> to exactly match (including case) the Identifier tab of theRelying Party Trust properties.
Note
Optionally Customize the AD FS Sign-In Page in Windows Server 2012 R2 to Allow User IDBy default, the sign-in page presented to SSO users by AD FS inWindows Server 2012 R2 requires a usernamethat is a UPN. Usually this is an email format, for example, [email protected]. If your contact center solutionis in a single domain, you can modify the sign-in page to allow your users to provide a simple User ID thatdoes not include a domain name as part of the user name.
There are several methods you can use to customize the AD FS sign-in page. Look in the Microsoft AD FSin Windows Server 2012 R2 documentation for details and procedures to configure alternate login IDs andcustomize the AD FS sign-in pages.
The following procedure is an example of one solution.
Procedure
Step 1 In the AD FS Relying Party Trust, change the NameID claim rule to map the chosen LDAP attribute to uid.Step 2 Click the Windows Start control and type powershell in the Search field to display the Windows Powershell
icon.Step 3 Right-click on the Windows Powershell program icon and select Run as administrator
All PowerShell commands in this procedure must be run in Administrator mode.
Step 4 To allow sign-ins to AD FS using the sAMAccountName, run the following Powershell command:Set-AdfsClaimsProviderTrust -TargetIdentifier "AD AUTHORITY" -AlternateLoginID sAMAccountName
-LookupForests myDomain.com
In the LookupForests parameter, replace myDomain.com with the forest DNS that your users belong to.
Step 5 Run the following commands to export a theme:mkdir C:\themeExport-AdfsWebTheme –Name default –DirectoryPath c:\theme
Cisco Unified Contact Center Enterprise Features Guide, Release 11.5(1)20
Single Sign-OnInstall and Configure Active Directory Federation Services

Step 6 Edit onload.js in C:\theme\script and add the following code at the bottom of the file. This code changesthe theme so that the AD FS sign-in page does not require a domain name or an ampersand, "@", in theusername.// Update the placeholder text to not include the domainvar userNameInput = document.getElementById("userNameInput");if (userNameInput) {userNameInput.setAttribute("placeholder", "Username");}// Override submitLoginRequest to not have the "@" checkLogin.submitLoginRequest = function () {var u = new InputUtil();var e = new LoginErrors();var userName = document.getElementById(Login.userNameInput);var password = document.getElementById(Login.passwordInput);if (!userName.value) {u.setError(userName, e.userNameFormatError);return false;}if (!password.value) {u.setError(password, e.passwordEmpty);return false;}document.forms['loginForm'].submit();return false;};
Step 7 In Windows PowerShell, run the following commands to update the theme and make it active:Set-AdfsWebTheme -TargetName custom -AdditionalFileResource
@{Uri=’/adfs/portal/script/onload.js’;path="c:\theme\script\onload.js"}
Set-AdfsWebConfig -ActiveThemeName custom
Set up the System Inventory for Single Sign-OnSet up the System Inventory before configuring the Cisco Identity Service (Cisco IdS) and the componentsfor single sign-on.
By default, the System Inventory displays a list of all of the AWs, Routers, and Peripheral Gateways in thedeployment. Select the Principal AW to manage registering the components with the Cisco IdS and enablingthem for SSO. Add the remaining SSO-capable machines to the System Inventory, and select the default CiscoIdS for each of the SSO-capable machines.
Procedure
Step 1 In Unified CCE Administration, navigate to System > Deployment.Step 2 Set the Principal AW:
a) Click the AW that you want to be the Principal AW.
Cisco Unified Contact Center Enterprise Features Guide, Release 11.5(1) 21
Single Sign-OnSet up the System Inventory for Single Sign-On

If the AW is coresident with the Router, you can set the Principal AW on theRouter.
You can only specify one Principal AW for each Unified CCE system.
Note
The Edit AW popup window opens.b) Check the Principal AW check box on the General tab.c) Enter the Unified CCE Diagnostic Framework Service domain, username, and password.
These credentials must be for a domain user who is a member of the Config security group for the instance.These credentials must be valid on all CCE components in your deployment (Routers, PGs, AWs, and soon).
d) Click Save.
Step 3 Add the SSO-capable machines to the System Inventory:a) Click New.
The Add Machine popup window opens.b) From the Type drop-down list, select one of the following types of machines:
• Finesse Primary
• CUIC, LD, IdS Publisher, for the coresident Unified Intelligence Center, Live Data, and Cisco IdSmachine available in the 2000 agent or Progger (Lab only) reference design
• Unified Intelligence Center Publisher, if you are using a standalone Unified Intelligence Center
• Identity Service Primary, if you are using a standalone Cisco IdS
c) In the Hostname field, enter the FQDN, IP address, or hostname of the machine.If you do not enter the FQDN, the system converts the value you enter toFQDN.
Note
d) Enter the machine's Administration credentials.e) Click Save.
The machine and its related Subscriber or Secondary machine are added to the System Inventory.f) Repeat this procedure to add all of the SSO-capable machines in the deployment.
Step 4 Select the default Identity Service for each of the following machines:
• All Unified CCE AW servers
• Finesse Primary and Secondary
• Unified Intelligence Center Publisher and Subscriber
Cisco Unified Contact Center Enterprise Features Guide, Release 11.5(1)22
Single Sign-OnSet up the System Inventory for Single Sign-On

If you are using a coresident CUIC, LD, Ids Publisher and Subscriber, you do not need to set thedefault Cisco IdS for those machines.
In a standalone deployment, select the Cisco IdS that is deployed on the same Data Center Side (Aor B) as the machine you are configuring. For example, in the Reference Deployment:
Note
• Select the Identity Service Publisher (IdS A) for AW-HDS-DDS 1, AW-HDS 3, Finesse 1 Pub,Finesse 2 Pub, CUIC Pub, and CUIC Sub 1.
• Select the Identity Service Subscriber (Ids B) for AW-HDS-DDS 2, AW-HDS 4, Finesse 1Sub, Finesse 2 Sub, CUIC Sub 2, and CUIC Sub 3.
For details on the Reference Deployment, see Solution Design Guide for Cisco Unified ContactCenter Enterprise at http://www.cisco.com/c/en/us/support/customer-collaboration/unified-contact-center-enterprise/products-implementation-design-guides-list.html.
a) Click a machine to open the Edit Machine popup window.b) Click the Search icon next toDefault Identity Service to open the Select Identity Service popup window.c) Enter the machine name for the Cisco IdS in the Search field and choose the Cisco IdS from the list.d) Click Save.
What to Do Next
Be sure to update the System Inventory if you change your deployment:
• If you add or remove contact center solution components from your deployment, make the correspondingchanges in the System Inventory.
• If you add or remove Cisco Identity Service machines or coresident CUIC-LD-IdS machines, updatethe System Inventory appropriately and reconfigure the Cisco IdS. Re-associate the components with adefault Cisco IdS.
Reset Live Data Streaming Data Source After Upgrade and MigrationIf you upgrade from Packaged CCE 11.0 to 11.5(1), and then switch from Packaged CCE to a Unified CCE:4000 Agents Rogger deployment in which Unified Intelligence Center is installed coresident with Live Dataand Cisco IdS, you must reset the Live Data Streaming Data Source.
In this situation, when you set up the coresident machine in the system inventory, the system generates a newusername and password for the Live Data API service that does not match the existing credentials for the LiveData Streaming Data Source. As a result, the Live Data Streaming Data Source is no longer online.
Perform the following procedure to reset the Live Data Streaming Data Source:
• After you add the coresident CUIC, LD, IdS machine to the system inventory, access the Live Data CLIand run the following command:set live-data cuic-datasource
Cisco Unified Contact Center Enterprise Features Guide, Release 11.5(1) 23
Single Sign-OnReset Live Data Streaming Data Source After Upgrade and Migration

For more information about Live Data CLI, see the Live Data CLI Commands section of the Cisco UnifiedContact Center Enterprise Installation and Upgrade Guide at http://www.cisco.com/c/en/us/support/customer-collaboration/unified-contact-center-enterprise/products-installation-guides-list.html.
Note
Configure the Cisco Identity ServiceThe Cisco Identity Service (Cisco IdS) provides authorization between the Identity Provider (IdP) andapplications.
When you configure the Cisco IdS, you set up a metadata exchange between the Cisco IdS and the IdP. Thisexchange establishes a trust relationship that then allows applications to use the Cisco IdS for single sign-on.You establish the trust relationship by downloading a metadata file from the Cisco IdS and uploading it tothe IdP. You can then select settings related to security, identify clients of the Cisco IdS service, and set loglevels and, if desired, enable Syslog format.
If you are working with a Cisco IdS cluster, perform these steps on the Cisco IdS primary publisher node.
Be sure that the Principal AW is configured and functional before using the System > Single Sign-Ontool in Unified CCE Administration.
Note
Procedure
Step 1 In Unified CCE Administration, navigate to System > Single Sign-On.Use a log in name in the format username@FQDN to log in to the Unified CCEAdministration.Note
Step 2 Click Identity Service Management.The Cisco Identity Service Management window opens:
https://<Cisco IdS server address>:8553/idsadmin
Step 3 Enter your user name, and then click Next.Step 4 Enter your password, and then click Sign In.
The Cisco Identity Service Management page opens, showing the Nodes, Settings, and Clients icons in theleft pane.
Step 5 Click Nodes.TheNodes page opens to the overall Node level view and identifies which nodes are in service. The page alsoprovides the SAMLCertificate Expiry details for each node, indicating when the certificate is due to expire.The node Status options areNot Configured, In Service, Partial Service, andOut of Service. Click a status
Cisco Unified Contact Center Enterprise Features Guide, Release 11.5(1)24
Single Sign-OnConfigure the Cisco Identity Service

to see more information. The star to the right of one of the Node names identifies the node that is the primarypublisher.
Step 6 Click Settings.Step 7 Click IdS Trust.Step 8 To begin the Cisco IdS trust relationship setup between the Cisco IdS and the IdP, clickDownloadMetadata
File to download the file from the Cisco IdS Server.Step 9 Click Next.Step 10 To upload the trusted metadata file from your IdP, browse to locate the file.
The Upload IdP Metadata page opens and includes the path to the IdP. When the file upload finishes, youreceive a notification message. The metadata exchange is now complete, and the trust relationship is in place.
Step 11 Click Next.The Test SSO Setup page opens.
Step 12 Click Test SSO Setup.A message appears telling you that the Cisco IdS configuration has succeeded.
Step 13 Click Settings.Step 14 Click Security.Step 15 Click Tokens.
Enter the duration for the following settings:
• Refresh Token Expiry -- The default value is 10 hours. The minimum value is 2 hours. The maximumis 24 hours.
• Authorization Code Expiry -- The default value is 1 minute, which is also the minimum. Themaximumis 10 minutes.
• Access Token Expiry -- The default value is 60minutes. Theminimum value is 5minutes. Themaximumis 120 minutes.
Step 16 Set the Encrypt Token (optional); the default setting is On.Step 17 Click Save.Step 18 Click Keys and Certificates.
The Generate Keys and SAML Certificate page opens and allows you to:
• Regenerate the Encryption/Signature key by clicking Regenerate. A message appears to say that theToken Registration is successful and advises you to restart the system to complete the configuration.
• Regenerate the SAML Certificate by clicking Regenerate. A message appears to say that the SAMLcertificate regeneration is successful.
Step 19 Click Save.Step 20 Click Clients.
The Clients page identifies the existing Cisco IdS clients, providing the client name, the client ID, and aredirect URL. To search for a particular client, click the Search icon above the list of names and type theclient's name.
Step 21 To add a client:a) Click Add Client.b) Enter the client's name.c) Enter the Redirect URL. To add more than one URL, click the plus icon.
Cisco Unified Contact Center Enterprise Features Guide, Release 11.5(1) 25
Single Sign-OnConfigure the Cisco Identity Service

d) Click Add (or click Clear and then click the X to close the page without adding the client).
Step 22 To edit or delete a client, highlight the client row and click the ellipses under Actions. Then:
• Click Edit to edit the client's name, ID, or redirect URL. On the Edit Client page, make changes andclick Save (or click Clear and then click the X to close the page without saving edits).
• Click Delete to delete the client.
Step 23 Click Settings.Step 24 From the Settings page, click Troubleshooting to perform some optional troubleshooting.Step 25 Set the local log level by choosing from Error,Warning, Info (the default), Debug, or Trace.Step 26 To receive errors in Syslog format, enter the name of the Remote Syslog Server in the Host (Optional) field.Step 27 Click Save.
You can now:
• Register components with the Cisco IdS.
• Enable (or disable) SSO for the entire deployment.
Related Topics
Configure the Identity Provider in Your EnvironmentRegister Components and Set Single Sign-On Mode, on page 26Set the Single Sign-On Mode for the System
Register Components and Set Single Sign-On ModeIf you add any SSO-compatible machines to the System Inventory after you register components with theCisco IdS, those machines are registered automatically.
Before You Begin
• Configure the Cisco Identity Service (Cisco IdS)
• Disable popup blockers. This is necessary to see all test results correctly.
• If you are using Internet Explorer, verify that it is not in Compatibility Mode and that you are using theAW's fully qualified domain name to access CCE Administration (for example,https://<FQDN>.com/cceadmin).
Procedure
Step 1 In Unified CCE Administration, navigate to System > Single Sign-On.Step 2 Click the Register button to register all SSO-compatible components with the Cisco IdS.
The component status table displays the registration status of each component.
Cisco Unified Contact Center Enterprise Features Guide, Release 11.5(1)26
Single Sign-OnRegister Components and Set Single Sign-On Mode

If a component fails to register, correct the error and click Retry.
Step 3 Click the Test button. When the new browser tab opens, you may be prompted to accept a certificate. In orderfor the page to load, accept any certificates. Then, when presented with a log in dialog, log in as a user withSSO credentials.The test process verifies that each component has been configured correctly to reach the Identity Provider,and that the Cisco IdS successfully generates access tokens. Each component that you are setting up for SSOis tested.
The component status table displays the status of testing each component.
If a test is unsuccessful, correct the error, and then click Test again.
Test results are not saved. If you refresh the page, run the test again before enabling SSO.
Step 4 Select the SSO mode for the system from the Set Mode drop-down menu:
• Non-SSO: This mode disables SSO for all agents and supervisors. Users log in using existing ActiveDirectory-based local authentication.
• Hybrid: This mode allows you to enable agents and supervisors selectively for SSO.
• SSO: This mode enables SSO for all agents and supervisors.
The component status table displays the status of setting the SSO mode on each component.
If the SSO mode fails to be set on a component, correct the error, and then select the mode again.
Migration Considerations Before Enabling Single Sign-On
Administrator User and Single Sign-On in Unified Intelligence CenterDuring installation, Cisco Unified Intelligence Center creates an administrator user. This user is not enabledfor SSO, as the user is known only to Unified Intelligence Center.
When you enable SSO, this administrator user is no longer able to log in to the Unified Intelligence Centerand perform administrative tasks. These tasks include configuring datasources and setting permissions forother users, for example. To avoid this situation, perform the following steps before enabling SSO.
1 Create a new SSO user who has the same roles and permissions as those of the administrator user.
2 Log in to the CLI.
3 Run the following command:
utils cuic user make-admin username
in which the user name is the complete name of the new user, including the authenticator prefix as shown onthe Unified Intelligence Center User List page.
The command, when executed, provides all the roles to the new user and copies all permissions from theadministrator user to this new user.
Cisco Unified Contact Center Enterprise Features Guide, Release 11.5(1) 27
Single Sign-OnMigration Considerations Before Enabling Single Sign-On

Note • The administrator's group memberships are not copied to the new user by this CLI command andmust be manually updated. The new user, now a Security Administrator, can set up the groupmemberships.
• For any entity (for example, reports or report definitions), if this new user’s permissions providehigher privileges than the administrator, the privileges are left intact. The privileges are not overwrittenby the execution of this CLI command.
Browser Settings and Single Sign-OnIf you have enabled single sign-on and are using Chrome or Firefox, verify that the browser options are setas shown in the following table. These settings specify that you do not want a new session of the browser toreopen tabs from a previous session. No changes are required for Internet Explorer.
Browser options to verify when using SSOBrowser
1 Open a Chrome browser session.
2 Click the Customize and control GoogleChrome icon.
3 Click Settings.
4 In the On startup section of the Settings page,verify that the Open the New Tab page optionis selected.
Chrome
1 Open a Firefox browser session.
2 Click the Open menu icon.
3 Click Options.
4 In the Startup section of theGeneral page, verifythat either the home page or a blank page is chosenin theWhen Firefox starts drop-down list.
Firefox
Cisco Unified Contact Center Enterprise Features Guide, Release 11.5(1)28
Single Sign-OnBrowser Settings and Single Sign-On

Migrate Agents and Supervisors to Single Sign-On Accounts
Be aware that this release does not provide support for disabling SSO once it is enabled.
Customers electing global hybrid mode to incrementally add SSO-enabled users may subsequently moveto global enablement, or global enablement may be configured directly. However, the transition of hybridmode to global off, of per-agent disablement while in hybrid mode, or of switching global on to globaloff is not supported at this time.
Customers who attempt to disable SSO after enabling it may experience user account inconsistencies,such as cleared (pre-SSO) passwords, invalid passwords, and Cisco Unified Intelligence Center reportingissues for supervisor accounts introduced after SSO was enabled. For this reason, be sure to back upLogger databases using the Microsoft SQL Server Backup and Restore utility.
Contact the Cisco TAC for questions or assistance.
Important
If you are enabling SSO in an existing deployment, you can set the SSO state to hybrid to support a mix ofSSO and non-SSO users. In hybrid mode, you can enable agents and supervisors selectively for SSO makingit possible for you to transition your system to SSO in phases.
Use the procedures in this section to migrate groups of agents and supervisors to SSO accounts using the SSOMigration content file in the Unified CCE Administration Bulk Jobs tool. You use the Administration BulkJobs tool to download a content file containing records for agents and supervisors who have not migrated toSSO accounts. You modify the content file locally to specify SSO usernames for the existing agents andsupervisors. Using the Administration Bulk Jobs tool again, you upload the content file to update the agentsand supervisors usernames; the users are also automatically enabled for SSO.
The content file returns the first 12,000 agents and supervisors who have not been migrated to SSO accounts.After you run the bulk job to update users from that group of records, you can download the SSO Migrationcontent file again to update additional agent and supervisor records.
If you do not want to migrate a user, delete the row for that user.
While the Finesse agent is logged in, changing the login name prevents the agent from answering orplacing calls. In this situation, the agent can still change between ready and not_ready state. This affectsall active agents, independent of whether SSO is enabled or disabled. Should you need to modify a loginname, do so only after the corresponding agent is logged out. Note too that SSO migration (moving anon-SSO agent to be SSO-enabled, by either hybrid mode or global SSO mode) should not be done whenthe agent is logged in.
Important
Procedure
Step 1 In Unified CCE Administration, navigate toManage > Bulk Jobs.Step 2 Download the SSO Migration bulk job content file.
a) Click Templates.The Download Templates popup window opens.
b) Click the Download icon for the SSO Migration template.
Cisco Unified Contact Center Enterprise Features Guide, Release 11.5(1) 29
Single Sign-OnMigrate Agents and Supervisors to Single Sign-On Accounts

c) Click OK to close the Download Templates popup window.
Step 3 Enter the SSO usernames in the SSO Migration content file.a) Open the template in Microsoft Excel. Update the newUserName field for the agents and supervisors
whom you want to migrate to SSO accounts.The content file for the SSO migration bulk job contains these fields:
DescriptionRequired?Field
The user's non-SSO username.YesuserName
The user's first name.NofirstName
The user's last name.NolastName
The user's new SSO username. Enter up to 255 ASCII characters.
If you want to enable a user for SSO, but keep the current username,leave newUserName blank, or copy the value of userName intonewUserName.
NonewUserName
b) Save the populated file locally.
Step 4 Create a bulk job to update the usernames in the database.a) Click New to open the New Bulk Job window.b) Enter an optional Description for the job.c) In the Content File field, browse to the SSO Migration content file you completed.
The content file is validated before the bulk job is created.
d) Click Save.The new bulk job appears in the list of bulk jobs. Optionally, click the bulk job to review the details andstatus for the bulk job. You can also download the log file for a bulk job.
When the bulk job completes, the agents and supervisors are enabled for SSO and their usernames areupdated. You can open an individual user's record in the Agent Explorer in Configuration Manager to seethe changes.
Step 5 Repeat this procedure, if needed, to migrate additional agents and supervisors to SSO usernames.
What to Do Next
After all of the agents and supervisors in your deployment are migrated to SSO accounts, you can enable SSOglobally in your deployment.
Single Sign-On Migration and the Configuration ManagerWhen the global SSO-enabled setting is Hybrid, you can use several of the existing Unified CCEConfigurationManager tools to either:
• Enable (or disable) users individually for single sign-on
Cisco Unified Contact Center Enterprise Features Guide, Release 11.5(1)30
Single Sign-OnSingle Sign-On Migration and the Configuration Manager

• Prevent changes to system configuration information access
New functionality specific tosingle sign-on
General descriptionTool
Includes anEnable single sign-on(SSO) option. Check the check boxto require a selected agent to signin with SSO authentication.Uncheck the check box to requireUnified CCE authentication.
The check box is disabledwhen the globalSSO-enabled setting isenabled or disabled.
Note
Allows you to view, and (if youhave maintenance privileges)define, delete, or edit agent records,routes, peripheral targets, labels,and their relationships. You canalso designate an agent as asupervisor.
Agent Explorer (in Explorer Tools)
Allows you to view or change theperson's SSO status. If the globalSSO setting is hybrid, the person'sSSO enabled setting is either:
• Yes if the person uses SSOauthentication
• No if the person usesnon-SSO authentication.
(If global SSO is enabled, theperson's SSO setting is ignored. Allagents use SSO authentication.
If global SSO is disabled, theperson's SSO setting is ignored. Allagents use non-SSOauthentication.)
In Import or Export files,the Person SSO Enabledsetting is recorded in thefile as a number: Yes = 1,No = 0.
Note
Allow you to insert and updatemultiple configuration records in asingle transaction from a singlescreen.
Person Bulk Insert and Person BulkEdit (in Bulk Configuration Tools)
Includes anEnable single sign-on(SSO) option. Check the check boxto require an agent associated witha selected Person to sign in withSSO authentication. Uncheck thecheck box to require Unified CCEauthentication.
The check box is disabledwhen the globalSSO-enabled setting isenabled or disabled.
Note
Allows you to list the personscurrently defined in the database,to define new persons, and to view,edit, or delete the records ofexisting persons.
Person List (in List Tools)
Cisco Unified Contact Center Enterprise Features Guide, Release 11.5(1) 31
Single Sign-OnSingle Sign-On Migration and the Configuration Manager

New functionality specific tosingle sign-on
General descriptionTool
Prevents changes to ConfigurationSecurity Group membership orsystem information read-onlyaccess for SSO-enabledsupervisors.
Allows you to list the userscurrently defined, associate newusers with their Active Directoryaccount, and view, edit, or deletethe records of existing(nonsupervisor) users.
User List (in List Tools)
For more information, see the Explorer Tools online help, the Bulk Configuration Tools online help, or theList Tools online help.
Related DocumentationRefer to the following documents and other resources for more details about single sign-on.
For these detailsLocated hereSee this information
Design considerations andguidelines for deploying theCisco Unified CCE System.
http://www.cisco.com/c/en/us/support/customer-collaboration/unified-contact-center-enterprise/products-implementation-design-guides-list.html
Solution Design Guide forCisco Unified Contact CenterEnterprise
How to monitor and manageUnified Contact CenterEnterprise (Unified CCE) andCisco Unified IntelligentContact ManagementEnterprise (Unified ICM).
http://www.cisco.com/c/en/us/support/customer-collaboration/unified-contact-center-enterprise/products-installation-and-configuration-guides-list.html
Serviceability Guide for CiscoUnified ICM/Contact CenterEnterprise
New features and changes forthis release of the UnifiedCCE solution.
http://www.cisco.com/c/en/us/support/customer-collaboration/unified-contact-center-enterprise/products-release-notes-list.html
Release Notes for CiscoUnified Contact CenterEnterprise Solutions
Information about deployingUnified CCE (includingsingle sign-on) on VMware.
http://docwiki.cisco.com/wiki/Virtualization_for_Unified_CCE
Virtualization for UnifiedCCE DocWiki
Unified CCE Release 11.5(1)requirements.
http://docwiki.cisco.com/wiki/Compatibility_Matrix_for_Unified_CCE
Unified CCE SolutionCompatibility Matrix
Changes to support singlesign-on.
Online helpConfiguration Manager:
• Explorer Tools
• List Tools
Cisco Unified Contact Center Enterprise Features Guide, Release 11.5(1)32
Single Sign-OnRelated Documentation

For these detailsLocated hereSee this information
Changes to support singlesign-on.
Online helpUnified CCE AdministrationSingle Sign-On Tool
Information related to addingSSO-compatible componentsto the inventory.
This guide.System Inventory Tool
Cisco Unified Contact Center Enterprise Features Guide, Release 11.5(1) 33
Single Sign-OnRelated Documentation

Cisco Unified Contact Center Enterprise Features Guide, Release 11.5(1)34
Single Sign-OnRelated Documentation