sepia sepia 1)image > adjustments > desaturate to remove color 2)image > adjustments >...
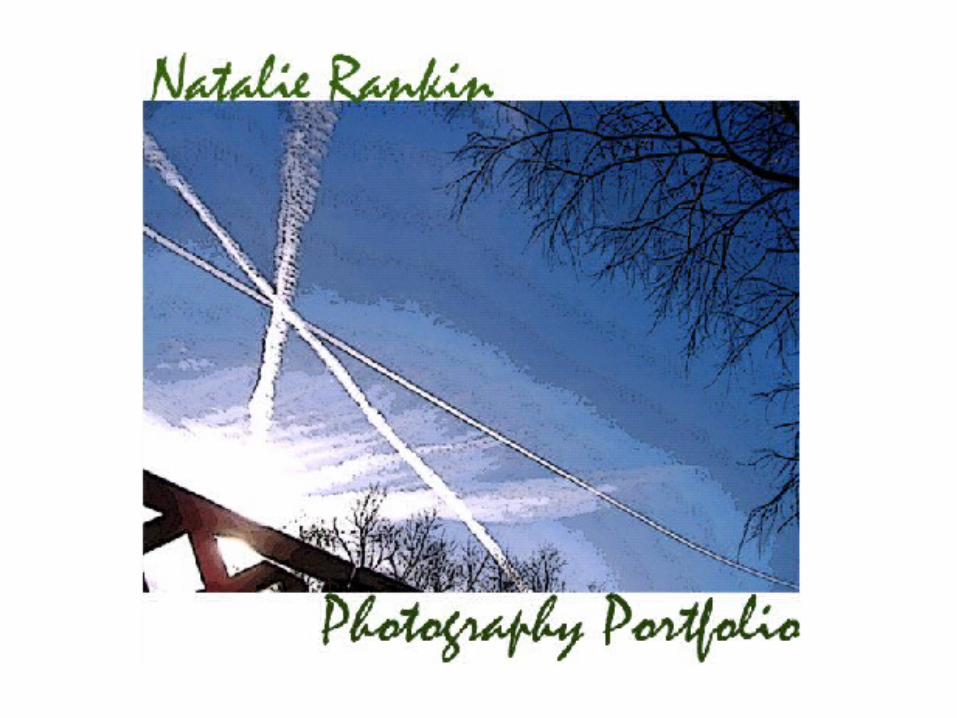
TRANSCRIPT
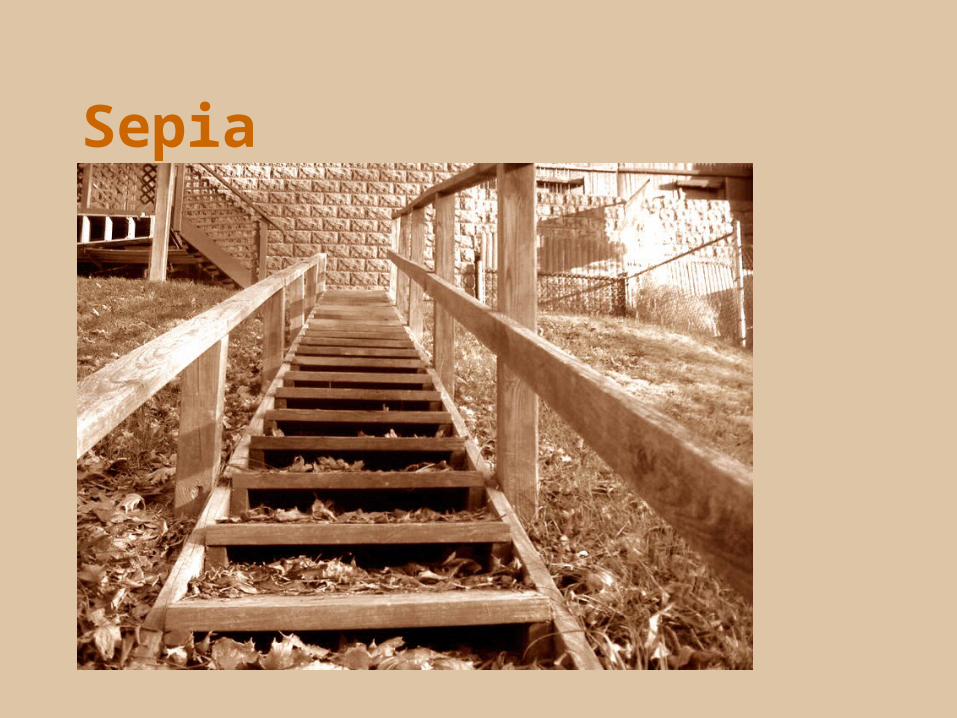
Sepia

Sepia
1) Image > Adjustments > Desaturateto remove color
2) Image > Adjustments > Color Balance
3) Move sliders (adding mostly red and yellow)
to make photo sepia-toned.
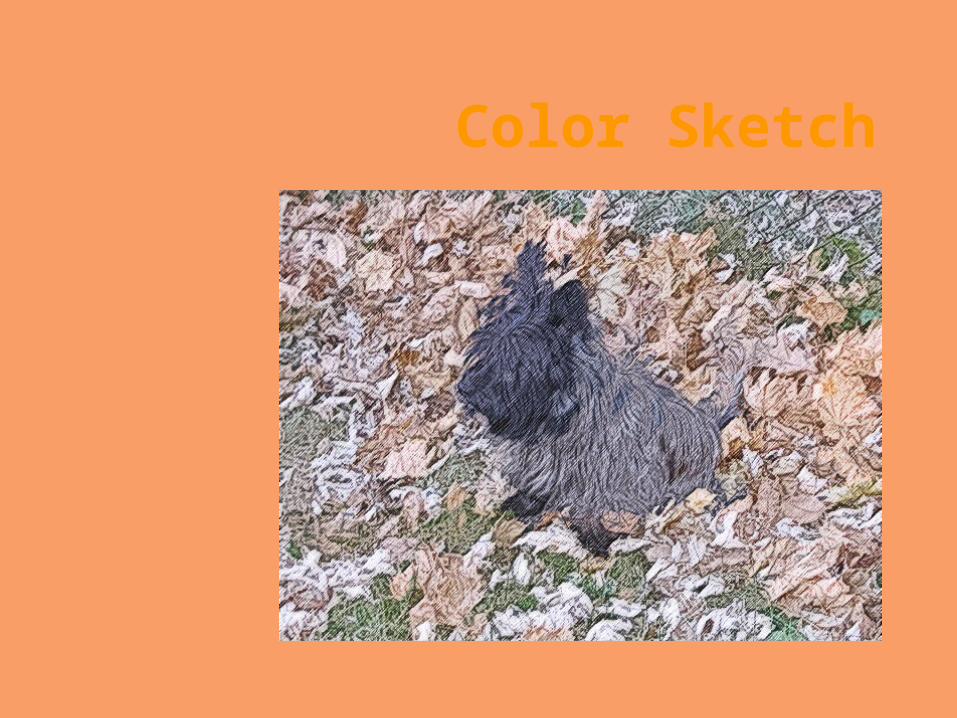
Color Sketch

Color Sketch
1) Duplicate background layer2) Image > Adjustments > Desaturate, to remove color
3) Filter > Other > High Pass, 2.0 pixels4) Image > Adjustments > Levels, move sliders to make
contour of photo5) Change top layer’s opacity to 50%, and blending mode
to Overlay6) On bottom layer, Filter > Artistic > Cutout
7) To add texture, Filter > Noise > Add noise; amount:5%, distribution: Gaussian, monochromatic: checked
8) Filter > Blur > Motion Blur; angle: 45°, distance: 10px9) Filter > Sharpen > Sharpen
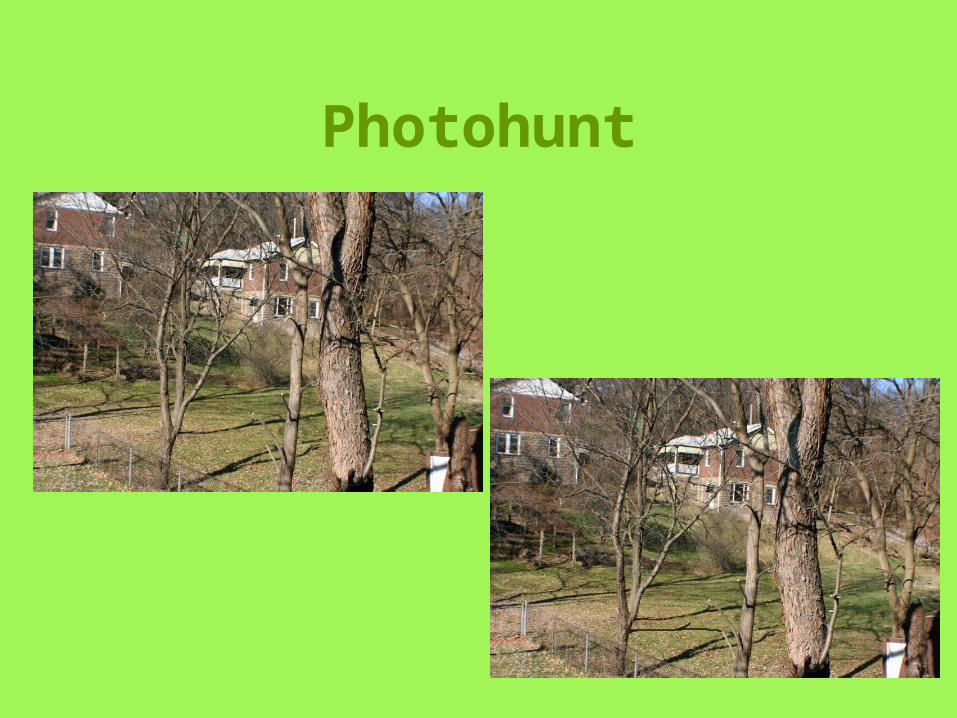
Photohunt

Photohunt
1) Use blur tool on the fence pole.2) Use burn tool on the little tree.
3) Draw an extra shadow using the paintbrush tool.
4) Make the chimney a different color using the paintbrush tool.
5) Use the dodge tool on the big tree.

Color Contrast
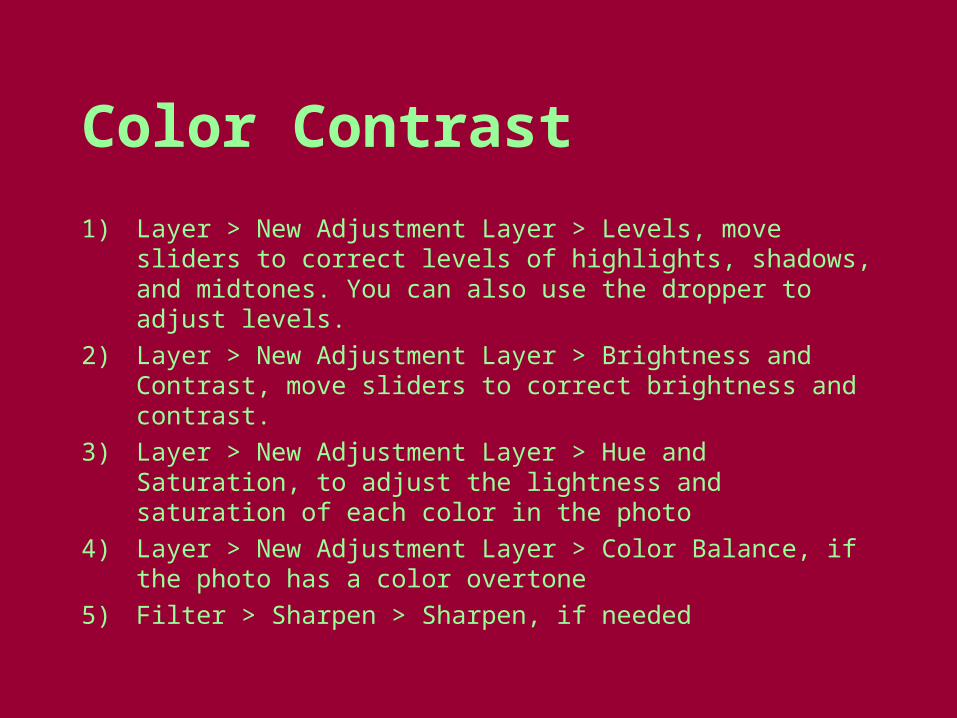
Color Contrast
1) Layer > New Adjustment Layer > Levels, move sliders to correct levels of highlights, shadows, and midtones. You can also use the dropper to adjust levels.
2) Layer > New Adjustment Layer > Brightness and Contrast, move sliders to correct brightness and contrast.
3) Layer > New Adjustment Layer > Hue and Saturation, to adjust the lightness and saturation of each color in the photo
4) Layer > New Adjustment Layer > Color Balance, if the photo has a color overtone
5) Filter > Sharpen > Sharpen, if needed

Vignette

Vignette
1) Make selection using elliptical marquee tool.2) While selected, right click > feather.
3) Choose to feather 15 pixels.4) Right click > Select Inverse, then delete the
part that is now selected.

Still Motion
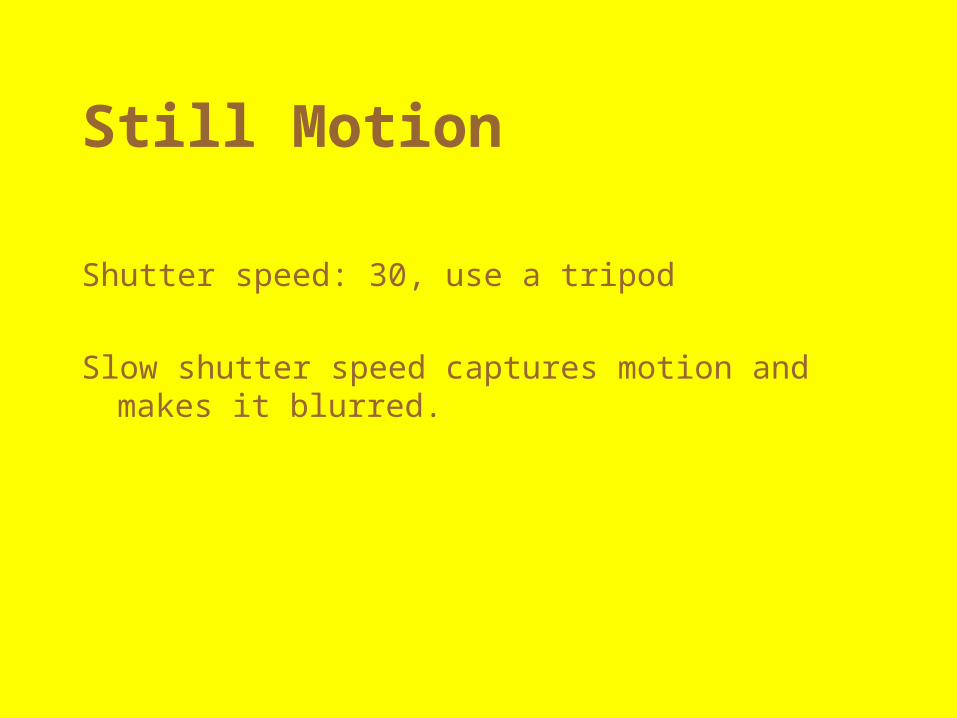
Still Motion
Shutter speed: 30, use a tripod
Slow shutter speed captures motion and makes it blurred.

Night Photo
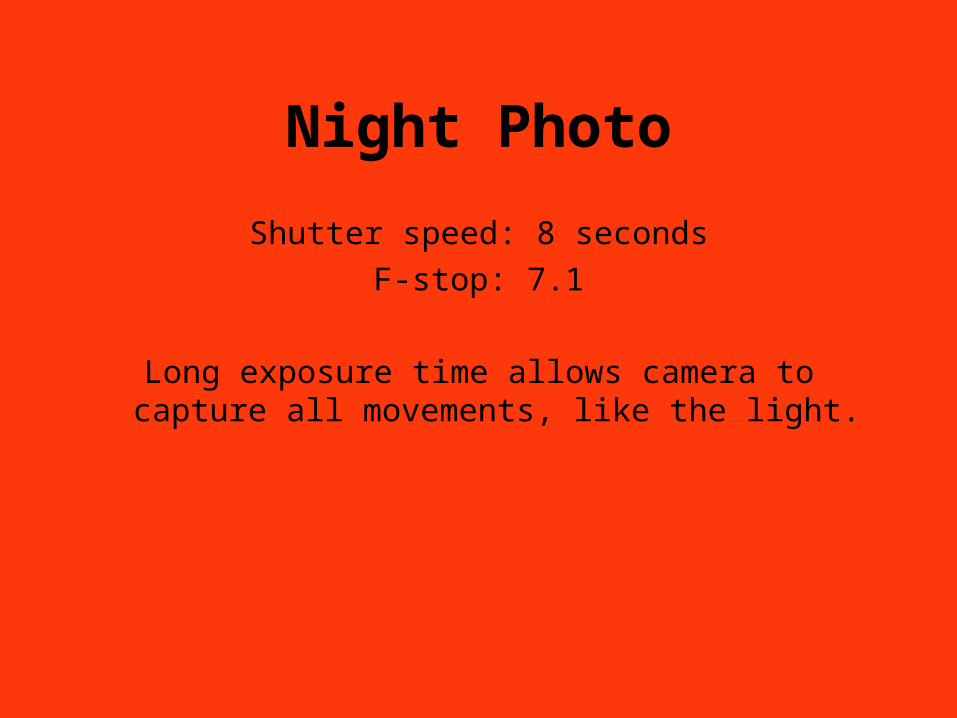
Night Photo
Shutter speed: 8 secondsF-stop: 7.1
Long exposure time allows camera to capture all movements, like the light.

Old Color Tutorial
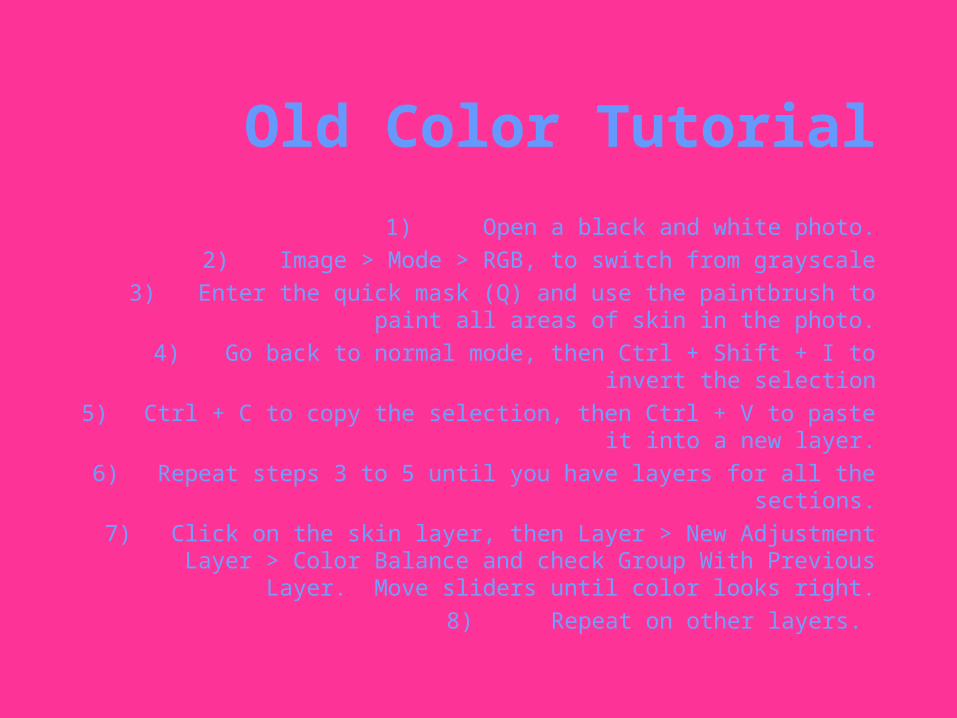
Old Color Tutorial
1) Open a black and white photo.2) Image > Mode > RGB, to switch from grayscale
3) Enter the quick mask (Q) and use the paintbrush to paint all areas of skin in the photo.
4) Go back to normal mode, then Ctrl + Shift + I to invert the selection
5) Ctrl + C to copy the selection, then Ctrl + V to paste it into a new layer.
6) Repeat steps 3 to 5 until you have layers for all the sections.7) Click on the skin layer, then Layer > New Adjustment Layer
> Color Balance and check Group With Previous Layer. Move sliders until color looks right.
8) Repeat on other layers.

Selective Color

Selective Color
1) Image > Adjustments > Hue/Saturation2) Select which colors you want to discard (for
this photo, green and yellow) on the drop-down menu, then move the saturation slider to -100.

Panorama
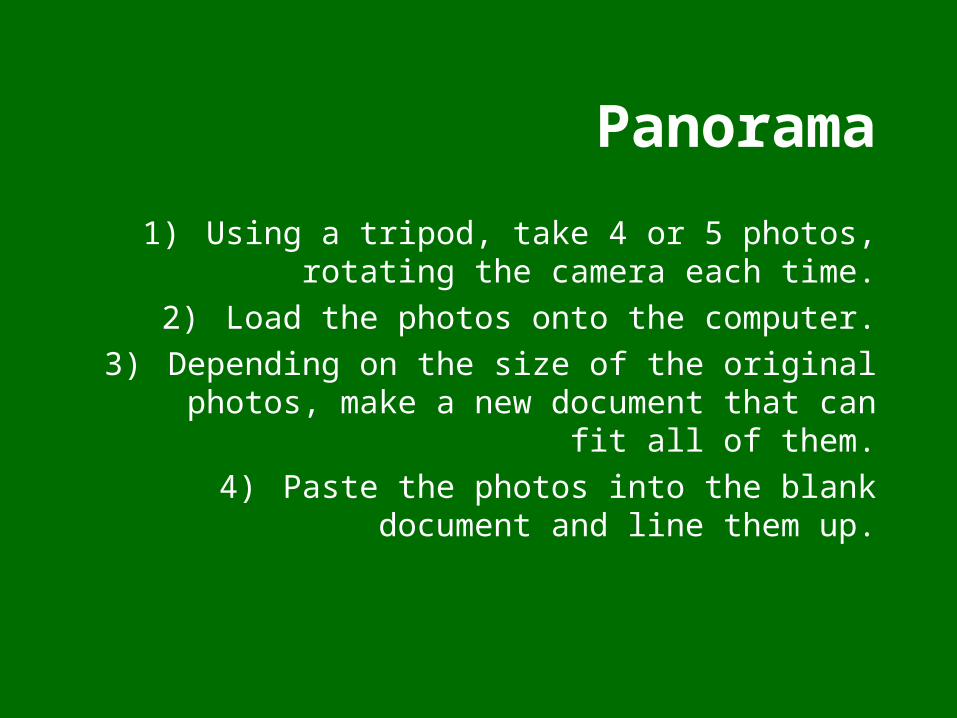
Panorama
1) Using a tripod, take 4 or 5 photos, rotating the camera each time.
2) Load the photos onto the computer.3) Depending on the size of the original photos,
make a new document that can fit all of them.
4) Paste the photos into the blank document and line them up.

Photogram

Photogram
1) Place a piece of film paper under the enlarger.
2) Arrange the object(s) on the film.3) Turn on the enlarger (exposure time: 6-8
seconds, F-Stop: 4.5)4) Develop the photo (developer-1:30,
stopbath-:30, fixer-5:00, rinse-5:00)
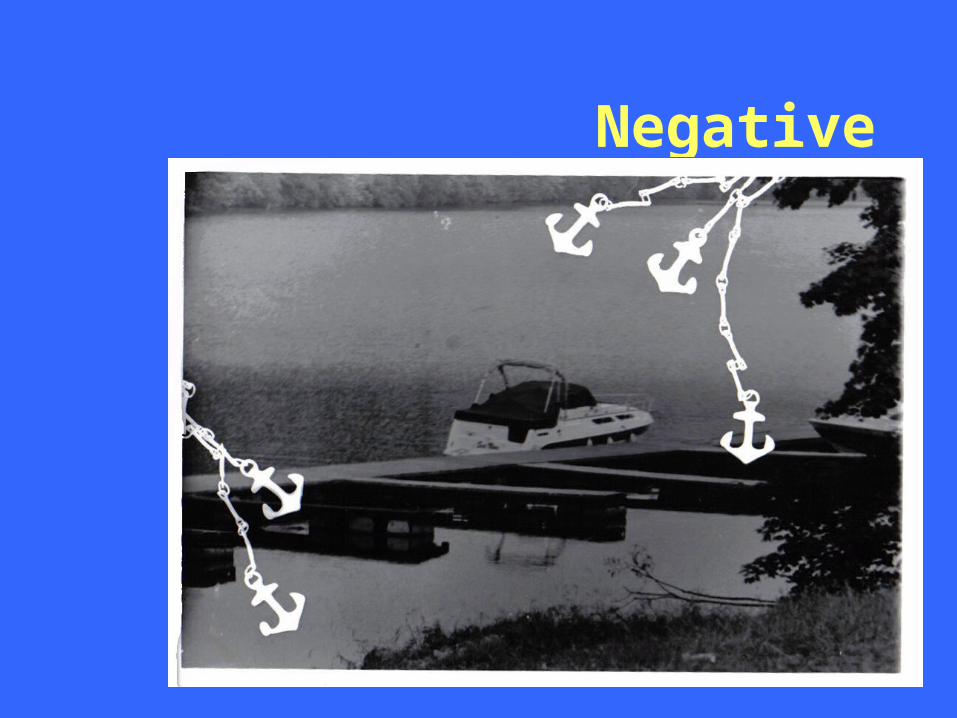
Negative
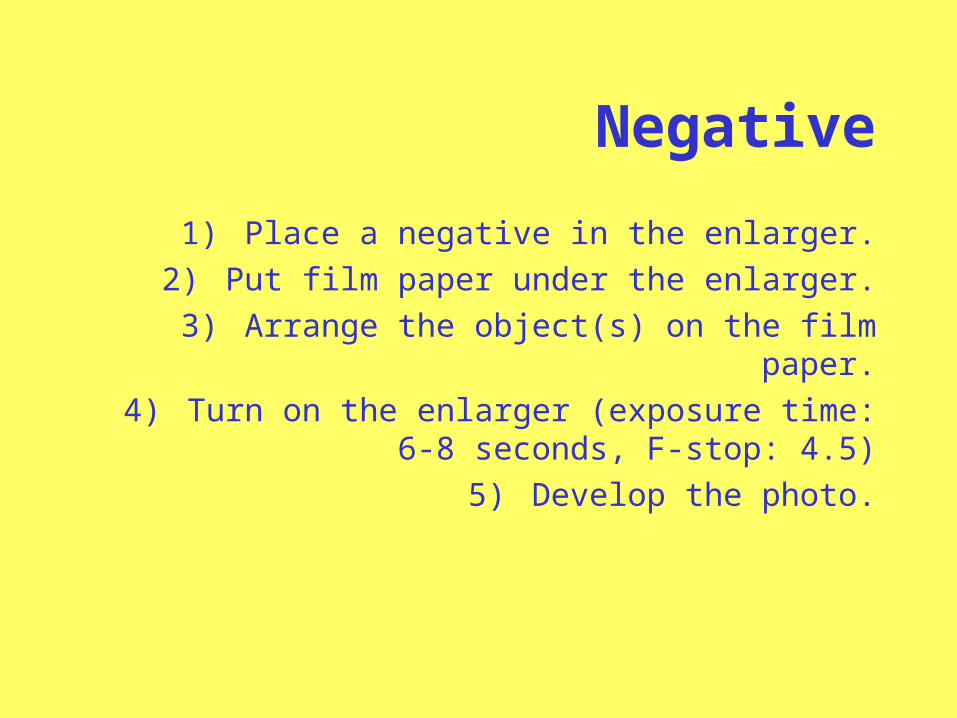
Negative
1) Place a negative in the enlarger.2) Put film paper under the enlarger.
3) Arrange the object(s) on the film paper.4) Turn on the enlarger (exposure time: 6-8
seconds, F-stop: 4.5)5) Develop the photo.